1
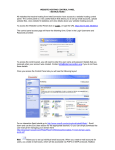
Application Note: eWarp Pro user Guide
Document: G-0903-1
Issued date: 2013-09-03
V2.0
------------------------------------------------------------------------------------------------------------------------------------------------
How to use eWarpPro in GeoBox
Quick operation summary
System connection:
1. Open software package and check “Read Me” first. Install eWarp Pro into PC. Replace “SecurityDongle.dll”
file with new one attached in software package.
2. Plug in [USB Dongle] protection key.
3. Connect PC with GeoBox through RS232 and HDMI video output port (don’t use analog output port).
4. Set PC output to GeoBox and GeoBox output to projector with the same resolution as projector native
resolution (i.e. 1024x768).
GeoBox setting:
5. GeoBox setting: RS232 communication port set to link with eWarpPro through OSD menu.
Run eWarp Pro in PC:
6. Run [Router Manager] and select correct COM port to verify RS232 connection between PC with GeoBox.
7. Open [eWarp Pro] main software, click connecting icon to connect PC with GeoBox.
8. Set the number of [Curved Surface] and [Grid Setting]. Propose to set Row=16, Column=22 for XGA
projectors (each grid is about 50x50 pixels)
9. Set the same [Input Grid Resolution] and [Output Grid Resolution] as projector native resolution.
Start [Design Grid]: (only use eWarp Grid pattern but not pattern from GeoBox)
10. Set [Step Size] to 1 (or 0.5) pixel for quicker adjustment.
11. Use PC Mouse to select the adjusting points (Green Dot) and keyboard to do step by step horizontal and
vertical adjustment.
12. [4 Corner] to draw 4 corners to the positions that user wants.
13. Use [CS Type 2] to adjust the edge of the image to the border of the screen.
14. For [Edge Blend], it is recommended to overlap 5-6 grids (for XGA resolution) between two projectors (about
250-300 pixels). For full HD, the overlap pixels are recommended to be 400-600 pixels.
15. For Edge Blending operation, to align the grid from adjacent projectors to overlap together.
16. Use Menu under [None] to fine tune the grid patterns, then click [Save] to exit from grid design window.
Generate Warp:
17. Select the grid file (.txt) created by user and click [Generate Warp]
18. Another [.twf] will be created
19. Rename [.twf] file to the name of [UserMap1, UserMap2 or UserMap3] (same name as that in GeoBox)
under [Browse Warp Files].
20. Click [Warp Operation] to refresh the rename file into UserMap1/2/3.twf file.
21. Select UserMap file and click [Download Warp] to load warp map into GeoBox.
22. User can see the changes of the image on the screen and can use OSD menu in Geobox under [Anyplace]
to see the result. The Warp Map stored in GeoBox will not be deleted while user doing system reset.
Final check and review
23. If the result is not the same as user expects, user can set more grid nodes in [Curved Surface] & [Grid
settings], select [grid xx.txt] file and use [Edit Grid] to open [Design Grid] window for further modification.
24. Follow the same steps in items 17-21 to create UserMap file and download to GeoBox.
1
Application Note: eWarp Pro user Guide
Document: G-0903-1
Issued date: 2013-09-03
V2.0
-----------------------------------------------------------------------------------------------------------------------------------------------Important note:
1. When run eWarp Pro, user can’t apply [4 Corner] adjustment under [Anyplace] menu during the above
operation procedures. Otherwise the image created by eWarp Pro will not follow the grid position showed
above. User should also set the same input/output resolution among PC—GeoBox—Projector as the same
native resolution as projector. Otherwise, user will get wrong result.
2. Under eWarpPro directory, user can find 4 Directories (Grids, Profiles, Temp and Warps). In Windows 8, it is
possible Warps directory is missing during the installation stage. In this case, user needs to create a [Warps]
under eWarpPro directory as showed below. It is for the store of Warp files created by eWarpPro software.
.
3. Please pay attention that Windows User Account Control and Privacy setting may affect the use of eWarpPro
and some functions may be missing. If USB to RS232 device driver is not correctly installed and without USB
Dongle key, eWarpPro can’t be used.
4. It is possible for the system hung-up during operation. In this case, user may need to boot up PC system
again to let it working properly.
Introduction
eWarpPro is a PC tool that can create Warp Map for geometry correction in GeoBox. This function can only be
applied to GeoBox models integrated with eWarpPro function. User can create desired Warp Map in PC and port
into GeoBox. Then user can implement this Warp Map without PC connection. GeoBox itself can handle smooth
or regular curve display. eWarpPro is required only in the case of irregular or sophisticated curve display. When
eWarp function is selected, all other functions related to geometry adjustment and warp will be disabled.
PC software installation
1. A software called DTK-eWarpPro-VNS shall be installed in the PC. It is compatible with Win 7 OS.
2. After software installation, user can see three major items: RouterManager, FileManager and eWarpPro.
3. RouterManager is for the setting of the connection between GeoBox and PC.
4. FileManager is for edit, delete or rename of the text files for warp parameters.
5. eWarpPro is the major software tool to create the warp parameters for GeoBox to execute sophisticated
curve display
System connection
1. To connect GeoBox with PC through RS232 cable that we provide. For edge blending, two PC is
required—each PC will connect with one G-104 for detailed image alignment.
2. Please use USB to RS232 adapter inside the package to connect PC USB port with GeoBox RS232 port.
User may need to install the driver provided in the software package before using this adapter
2
Application Note: eWarp Pro user Guide
Document: G-0903-1
Issued date: 2013-09-03
V2.0
-----------------------------------------------------------------------------------------------------------------------------------------------3. It may have compatibility issue if user uses another USB to RS232 adapter.
4. The output of PC shall be connected with GeoBox through digital output port (HDMI or DisplayPort) so that
user can see real time result on the screen. If connected with VGA port, it is possible to have some image
position shift after finishing eWarp Pro operation.
5. To set PC output with clone display in both PC and GeoBox with full image to the screen. If not full screen
image is selected, the grid pattern in eWarp will not cover the full screen and will affect the alignment
process.
6. To set PC output and GeoBox output at a resolution same as projector native resolution.
7. Select full screen aspect ratio in GeoBox by [Image Properties] [Scaling] menu.
8. To set projector aspect ratio so that full screen eWarp pattern will cover full screen.
(For geometry adjustment)
(For projector edge blending)
(Note: single PC can do edge blending by Freeze eWarp pattern on the first projector)
GeoBox Settings
Set GeoBox in eWarpPro mode through OSD menu:
1. G-104, G-202:
[Options] [Setting] [RS232] [eWarp Pro]
2. G-502:
[Options]
[Setting]
[RS232]
[eWarp Pro A] or
[eWarp Pro B]
1. Please set the output resolution of PC and GeoBox with the same native resolution of the projectors.
Wrong settings will cause incorrect result of eWarp.
2. Please use [Info] hot key on front panel or remote control to check if the setting is correct or not.
-- [Output mode]: GeoBox output resolution to projector -- [Input Mode]: PC output resolution to GeoBox
3
Application Note: eWarp Pro user Guide
Document: G-0903-1
Issued date: 2013-09-03
V2.0
------------------------------------------------------------------------------------------------------------------------------------------------
RouterManager—Communication between GeoBox and PC
If it is the first time for user to use eWarp Pro software, user needs to follow below procedure to connect
GeoBox with PC through “RouterManager ”.
1. Make sure the right connection between GeoBox and PC then run [RouterManager].
2. Select [Boards In System] and [Add Board].
3. Set the Board (GeoBox) to COM port through procedures in below.
A. Select [Boards In System] and click [Add board]
B. Follow steps # 1, 2, 3, 4, 5, 6 in below to connect Board to PC. If the connection port in USB or COM
has been changed, user may need to run RouterManager again to make GeoBox linked with PC.
C. Select [DTK Protocol router] and click [Start]
4
Application Note: eWarp Pro user Guide
Document: G-0903-1
Issued date: 2013-09-03
V2.0
------------------------------------------------------------------------------------------------------------------------------------------------
FileManager
[File Manager] is to delete and rename the Text file for eWarp parameters. Usually, it is not necessary for
user to open this tool because user can rename the text file during run [eWarpPro software] unless users need
to edit or clear all the eWarp parameter text files from GeoBox completely. Please refer to [File Manager User
Manual] for more details.
During the operation in FileManager, user needs to Connect to [Board] (GeoBox) via click on [Connect] as
showed below.
After the connection, user can browse the file and delete or rename the files. The file name shall be the
same as UserMap1, UserMap2 or UserMap3. Otherwise, GeoBox will not recognize and it can’t work.
eWarpPro—Create WarpMap for GeoBox
Before execute eWarpPro, user needs to connect GeoBox RS232 port with PC via USB to RS232 adapter
and make sure to set [eWarp] function in GeoBox as described in previous section. If the same connection
5
Application Note: eWarp Pro user Guide
Document: G-0903-1
Issued date: 2013-09-03
V2.0
-----------------------------------------------------------------------------------------------------------------------------------------------had been verified and executed through [Router Manager] before, user can run [eWarpPro] and click
connection symbol as showed below in yellow mark to connect GeoBox with PC directly. If the connection
failed, then user needs to run [Router Manager] to check if new connection is required. Please see more
details in [eWarp Pro User Manual].
Please open [eWarpPro] in the PC from Windows [Start] menu as show.
After open [eWarpPro], user will see below window.
1.
Click [Connection] symbol at top let corner of the window as showed
in yellow.
2.
Then user will see pop-up windows. Click [Connect to Board]
3.
If the connection fails, it will show message and user needs to check
if GeoBox setting is in [eWarp] mode and open [RouterManager] to check
the connection status.
4. If the connection is successful, then user will see some message at the bottom left of the window similar
to below:
1. General Settings--[Advanced Settings] for Grid Design
a. Under [General Setting], user can click [Advance Settings] to do further setting.
b. The [Grid Checking Control] number is the checking rule for the grid point checking mechanism.
Currently, the value is always set to “7”.
c.
[MxN Curved Surface] will determine the adjusting points in eWarp operation. With bigger number,
user can have more accurate adjustment points but the time for the adjustment will increase. The
maximum [Curved Surface] number is 33x33 in both Row and Column.
6
Application Note: eWarp Pro user Guide
Document: G-0903-1
Issued date: 2013-09-03
V2.0
------------------------------------------------------------------------------------------------------------------------------------------------
d. We suggest to set “16” for Rows and “22’ for Cols. In this case, user can estimate the size for each
grid will be about 50x50 pixels when the projector native resolution is 1024x768. Internal grid
pattern size in GeoBox is 50x50 pixels. The number of the grids can be a reference for video wall
and edge blending settings.
2. [Grid Operation]
a. [Default setting] will work for most of the application case. Usually it is not necessary to change
except [Grid Settings], [Input Grid Resolution] and [Output Grid Resolution]
b. [Grid Settings]
[Name]: user can set a name for the output “.txt” file. It shall be renamed again in next step.
7
Application Note: eWarp Pro user Guide
Document: G-0903-1
Issued date: 2013-09-03
V2.0
-----------------------------------------------------------------------------------------------------------------------------------------------To set grid numbers in both Rows and Columns based on user’s requirement. Usually, it can
be set at the same numbers as [Curved Surface] number (i.e. “16” for ROW and “22” for
Columns in XGA resolution). This number will show the grid pattern during eWarp
adjustment. Higher number will give more detailed grid pattern.
c.
[Input Grid Resolution] and [Output Grid Resolution]
The input and output resolution shall be set the same value as projector native resolution no
matter what kind of input resolution from video source to GeoBox. If input and output resolution is
set to different resolution, the eWarp parameters will not work on GeoBox.
d. Click [Design Grid] to get into next display window with grid patterns on the whole screen.
This is Grid pattern for two projector edge
blending. User needs to adjust the grids
in overlap area (brighter area at the
center) to match together through [Grid
Designer] describe in below.
User can select different [Warp Application] according to user’s requirements.
Note: Before grid adjustment, user can’t use [4 Corner] or other geometry adjustment functions under
[Anyplace] menu. Otherwise the warp result from eWarpPro will not follow the grid patterns.
None: User can have two selections: [Move Single Point] and [Move Row/Column Points]
Keystone: It is for keystone application.
4 Corner: 4 Corner position alignment.
CS Type 1: 9 point geometry adjustment.
CS Type 2: For curve edge application. The numbers of curve nodes for the adjustment are based on
the setting numbers of [Rows] and [Columns] in [Grid Settings].
CS Type 3: It will show the grid nodes based on the setting in both [General Settings] & [Grid
Operations] sections simultaneously. User can adjust each node to meet user’s
requirements.
8
Application Note: eWarp Pro user Guide
Document: G-0903-1
Issued date: 2013-09-03
V2.0
-----------------------------------------------------------------------------------------------------------------------------------------------Note:
1. To set [Step Size] “1” for quicker moving in each adjustment. During the fine-tune stage, user
can set it to “0.5” to get more precise pixel position alignment
2. User can use Mouse to select the adjusting point and use direction keys in PC keyboard for
accurate position adjustment.
3. User can combine all the above operations to align the image (eWarp grid pattern).
4. In the case of edge blending on curve corner of the video wall, below are the processes that we
recommend:
a. To use [4 Corner] to draw four corners of the images into the preset corner positions of the
image.
b. To use [CS Type 2] to adjustment each top and bottom adjusting points (in Green color) of the
image to let the edges of the image match the screen borders.
c. To use [None] and select [Move Row/Column Points] to adjust the grid size of the image in
each row and column. To select [Move Single Point] for fine-tuning in each individual point.
d. Fine-tuning:
i. User can use [CS Type 2] for the pixel adjustment in the whole line, and use [Move Single
Point] to readjust individual unaligned pixel.
ii. Click [Resample] button to get 33x33 grad pattern for final confirmation of the image
position. Click [Undo] to return to original grid pattern.
iii. If some point is not at the required positions, then user can use [Move Single Point] to align
it again until all the position is in the expected locations.
There is a warning message showed in the screen if the adjustment violates the rule of the warping
operation. The grid will show in RED color.
Other command in [Grid Designer]:
Resample: will increase the grid numbers to 33x33 (Max.) for further grid fine-tune and checking.
Exit (Save): After final grid adjustment, user needs to click [Exit] button and save the settings to warp
map file for further file conversion.
Note: If user wants to change the grid pattern number, user can click [Exit(Save)] and exit from Grid
Designer, then sets different Grid Pattern number and Curved Surface number and use [Edit] function
under [Warp Operations] menu to call back previous grid file for further adjustment.
9
Application Note: eWarp Pro user Guide
Document: G-0903-1
Issued date: 2013-09-03
V2.0
------------------------------------------------------------------------------------------------------------------------------------------------
Below is the grid pattern in [CS Type2]. User can adjust each green point and change the pixels in the whole
Row or Column proportionally. In some special case, if the green grid is outside the image and can’t be seen,
user can switch to other operation like [CS Type3] then return to [CS Type2]. User will see green grid again
and do further adjustment.
Below is the grid pattern in [CS Type3] with Grid Setting # (5x5) and [Curved Surface] # (10x10). User can
only adjust the GREEN points.
10
Application Note: eWarp Pro user Guide
Document: G-0903-1
Issued date: 2013-09-03
V2.0
-----------------------------------------------------------------------------------------------------------------------------------------------3. Warp Operations
a. After open [Warp Operation], use will see above window.
b. User can select unnecessary file and delete it via [Delete Grid] at right hand side command. User
can delete all the example files with affect the system.
c.
To select the file name
that user create in [Grid Operations], then click [Generate Warp]
to
convert .txt warp map file into .TWF file to be used in GeoBox. If any violation in warp generation
rule, warning message will appear and user can clip [Edit Grid] and back to Grid Pattern for further
modification.
d. It is possible the eWarp will hang up and restart again. In this case, user needs to press yellow
connection button to connect PC with GeoBox again.
e. After .TWF file has been created, it will be showed in [Warp Files]
f.
User needs to rename [.TWF] to the same name as that in GeoBox. Otherwise, it can’t be applied
in GeoBox. Please clip [Browse Warp Files]
to show [.TWF] file
and clip right button in
Mouse to rename the file to [UserMap1, UserMap2 or UserMap3]. User can delete unnecessary
files inside the windows.
11
Application Note: eWarp Pro user Guide
Document: G-0903-1
Issued date: 2013-09-03
V2.0
------------------------------------------------------------------------------------------------------------------------------------------------
g. After rename the file, user can return to main screen. User needs to click [Warp Operation]
again to refresh the display to get new file name
h. Select this new file (UserMap1.twf)
on the screen.
and click [Download Warp]
to upload warp map file into
GeoBox.
i.
After upload warp map file to GeoBox, GeoBox will change the display immediately based on the
warp map. User can click [Disable Warp] and [Active Warp] to test the final result.
j.
It is possible to get wrong display or system hung up after upload Warp Map file into GeoBox. In
this case, user may need to reset or turn off GeoBox to run it again. If the Reset still can’t solve the
issue, user can turn off GeoBox, then press [Menu] + [Pattern] key simultaneously and turn on
GeoBox again, it will clean all the new settings and back to factory default settings. Once it works, it
will not affect the stability and reliability for long term use.
k.
User needs to test and be familiar with the phenomenon of the [Grid Design].
l.
After upload of Warp Map to GeoBox, user can disconnect PC from GeoBox and use OSD menu in
GeoBox to access to UserMap1-3 to see the result.
12
Application Note: eWarp Pro user Guide
Document: G-0903-1
Issued date: 2013-09-03
V2.0
-----------------------------------------------------------------------------------------------------------------------------------------------4. Final editing
a. If the result is not as expected. User needs to return to [Warp Operation] to edit the warp pattern.
b. Click [Disable Warp] button to return to original unwrapped display.
c.
To set more grid nodes in [Curved Surface] and [Grid Settings]. Click [Edit Grid] to return to [Design
Grid] window for further adjustment based on new grid nodes.
d. If necessary, to select [Resample] to see more detailed grid pattern and use [Move Single Point] to
do fine tune of the position for each grid.
e. After finish the re-alignment, save and Exit grid pattern window and create Warp Map again.
f.
Then go through the same procedures to rename the twf file to UserMap1-3 and download to
GeoBox for further use.
13