1
5. Tape power cord to discharge line with electrician’s tape. This
will protect the cord from damage and will prevent the pump’s
being pulled from the sump by its power cord.
6. TEST THE PUMP AFTER ALL CONNECTIONS HAVE BEEN
MADE. Run water into sump. Do not attempt to operated the
pump without water; this will damage the seals and bearings
and could result in permanent damage to the pump. Fill sump
to normal “on” level and allow pump to remove water to the
normal “off” level (see Figure 2).
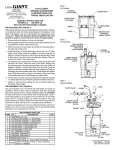
Figure 2.
7. Place cover over sump. This cover will prevent solid debris
from filling the pit, prevent odors, and guard against accidental
injury.
WARNING: Always disconnect the electical power before touching
the pump or discharge when water is present in the sump. Failure
to do so can result in hazardous electrical shock.
TROUBLESHOOTING INFORMATION • INFORMATION SUR LA RELÈVE DES DÉRANGEMENTS
• INFORMACION DE INVESTIGACION DE AVERIAS
PROBLEM • FONCTIONNEMENT DÉFECTEUX
• PROBLEMA
Pump will not shut off.
PROBABLE CAUSES • CAUSES PROBABLES
• CAUSAS PROBABLES
Diaphragm switch.
Replace switch.
Weak of hardened rubber diaphragm.
Replace rubber diaphragm.
Plugged vent tube.
Clear vent tube of any obstruction.
Dirt or sediment lodged between retainer ring and
NOTE: Before troubleshooting automatic rubber diaphragm causing contacts to remain closed.
control, check to see that pump operates
on manual control. To do this, create slight
vacuum on breather tube (near plug), Pump is air locked.
then close off tube with thumb, plug into
wall outlet. If pump works, proceed to
check switch; if not, fault is in pump or Liquid inflow matches pump capacity.
power supply.
Defective switch.
Pump runs, but does not discharge
liquid.
Pump does not deliver rated capacity.
Pump cycles continually.
CORRECTIVE ACTIONS • SOLUTIONS • SOLUCION
Clean area around rubber diaphragm.
Shut power off for approximately 1 minute, then restart.
Repeat several times to clear air from pump. If system includes
a check valve, a 3/16" hole should be drilled in discharge
pipe approximately 2" above discharge connections.
Larger pump required.
Disconnect switch, check w/ohmmeter. Open-infinitive
resistance, closed zero.
Loose connection in level control wiring.
Check control wiring.
Check valve installed backwards.
Check flow indicating arrow on check valve body to ensure
it is installed properly.
Check valve stuck or plugged.
Remove check valve and inspect for proper operation.
Lift too high for pump.
Check rating table.
Inlet to impeller plugged.
Pull pump and clean.
Pump is air locked.
(See corrective action above).
Lift too high for pump.
Check rated pump performance.
Low voltage, speed to slow.
Check for proper supply voltage to make certain it corresponds to nameplate voltage.
Impeller or discharge pipe is clogged.
Pull pump and clean. Check pipe for scale or corrosion.
Impeller wear due to abrasives.
Replace worn impeller.
No check valve in long discharge pipe allowing
liquid to drain back into sump.
Install a check valve in discharge line.
Check valve leaking.
Inspect check valve for correct operation.
Sump pit too small for inflow.
Install a larger sump pit.