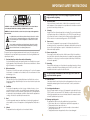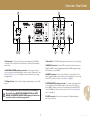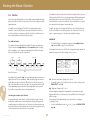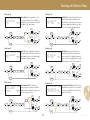
1
PedalPro Owner’s Manual TM firmware rev. 5.22 OMPP003A - Rev.2.0 - EN EU — Copyright © 2012 Vintage Revolution B.V. Introduction 1.1 MESSAGE TO THE USERS 1.2 Thank you from all of us at Vintage Revolution for purchasing the PedalPro – a multi-effect platform we hope will prove to be the best investment of your musical career. SUMMARY OF FEATURES • 14 analogue effects that can be used simultaneously and in any number of configurations without any sound degradation. • Fast and silent preset change. Change preset in 120ms, no clicks, no booms. Our objective in designing the PedalPro was simple: to eliminate compromise. No more knobs and sliders. No more DSPs. We wanted a complete solution that seamlessly integrated digital and analogue technology, thereby giving users access to the rich, unbeatable sound of pure analogue effects, and the world of usability brought about by digital technology. • Control of your analogue effects in real-time with an expression pedal. • An analogue effect chain that is reconfigurable bringing unprecedented flexibility. And with the PedalPro – that’s exactly what you’ll find. PedalPro is the world’s first digitally-controlled analogue multi-effect device. No less than 14 classic analogue effects are integrated into this user-friendly platform, each entirely controlled, stored and recalled via a central digital interface. • No sound degradation or the noise typical of multi-effect rigs due to no DSPs, buffers or signal losses; the implementation of a super accurate circuit layout; and the selection of the best components on the market. • True analogue, relay bypass available for every single effect or the whole of the PedalPro. Not only does PedalPro allow you to control your analogue effects with a precision never before possible, it pioneers new features and capabilities never-before-seen in either digital or analogue effects. • Pre and post loops that allow for the inclusion of external effects and a MIDI out connection that allows to transmit MIDI program change messages and MIDI CC11 (expression). We believe that this device will exceed even your wildest expectations. And – it’s even easy to use. We have deliberately designed the PedalPro so that you could, if need be, learn the ropes just by using it. But this easy-to-use guide will take away any remaining guesswork, while ensuring you are aware of all its amazing capabilities. • Storage of up to 500 presets – complete machine configurations – and 18 favourites, for easy jumping between sets. • Preset manager software that enables you to completely manage, rename, and even email an unlimited number of presets from your computer. Enjoy your purchase. From the team at VR • Access to effects’ parameters never before accessible. • Designed as a completely upgradeable unit upon which you can simply build and add features via USB or VR firmware upgrades. 1 Rev. 2.0 - EN EU - fw 5.22 2 IMPORTANT SAFETY INSTRUCTIONS To reduce the risk of fire or electric shock, unplug the apparatus when there is high probability of lightning. 7. Racks and stands Only use with a rack, stand, bracket or table that is recommended for use with audio equipment. If the equipment is on a portable rack it should be moved with great care to avoid injury from tip-over. 8. Cleaning Unplug the unit from the mains supply before cleaning. The case should normally only require a wipe with a soft, damp, lint-free cloth. DO NOT use paint thinners or other chemical solvents for cleaning, which will destroy prints and paintwork. DO NOT use alcohol or household cleaning products. DO NOT USE WATER. 9. Power sources Only connect the apparatus to a power supply of the type described in the operating instructions or as marked on the apparatus, and install the unit near the power outlet (socket). Appliance coupler is considered as disconnect device. It shall remain readily operable.. CAUTION: To reduce the risk of electric shock, do not remove cover or back. No user serviceable parts inside. Refer servicing to qualified service personnel. WARNING: To reduce the risk of fire or electric shock, do not expose this apparatus to rain or moisture. The lightning flash symbol within an equilateral triangle is intended to alert the user to the presence of uninsulated ‘dangerous voltage’ within the product’s enclosure that may be of sufficient magnitude to constitute a risk of electric shock to persons. The exclamation point within an equilateral triangle is intended to alert the user to the presence of important operating and maintenance (servicing) instructions in the literature accompanying the product. This product has been designed and manufactured to meet strict safety and quality standards. It is very important that you are aware of the following installation and operation precautions: 1. 2. 3. 4. 10. Power-cord protection Power supply cords should be routed so that they are not likely to be walked on, bent, stretched or pinched by items placed upon or against them, paying particular attention to cords, plugs, convenience receptacles and the point where they exit from the apparatus. Read and keep these instructions and heed all warnings You should read all the safety and operating instructions carefully before operating this apparatus. Retain this manual for future reference and adhere to all warnings in the manual or on the apparatus. 11. Grounding Ensure that the safety purpose of the polarised or grounding-type plugs of the apparatus is not defeated. If the provided plug does not fit into your outlet, contact a qualified electrician to replace the obsolete outlet. Water and moisture The presence of electricity near water can be dangerous. Do not use the apparatus near water – for example next to a bathtub, a sink, in a wet basement or near a swimming pool, etc. The apparatus MUST BE EARTHED. Use a three wire type power cord like the one provided with the apparatus. Object or liquid entry Take care that objects do not fall and liquids are not spilled into the enclosure through any openings. Liquid filled objects such as vases should not be placed on the apparatus. 12. Abnormal smell If an abnormal smell or smoke is detected from the apparatus, turn the power off immediately and unplug the unit from the wall outlet. Contact your dealer immediately. Ventilation Do not place the apparatus on a bed, sofa, rug or similar soft surface, or in an enclosed bookcase or cabinet, since ventilation may be impeded. A minimum distance of 50 mm (2 inches) around the top and the bottom of the apparatus is recommended to provide adequate ventilation. Always install the apparatus according to the instruction provided by the manufacturer. 5. Heat Locate the apparatus away from naked flames or heat producing equipment such as radiators, stoves or other appliances (including amplifiers) that produce heat. 6. Climate The apparatus has been designed for use in moderate climates. 13. Servicing and maintenance None of the parts inside the enclosure of this apparatus is serviceable by the user. DO NOT open the enclosure and DO NOT attempt to modify the internal circuitry. All servicing and maintenance beyond what described in this manual should be referred to qualified service personnel. 2 14. Damage requiring service The apparatus should be serviced by qualified service personnel when: • Objects have fallen onto, or liquid has been spilled into the apparatus, or • The apparatus has been exposed to rain, or • The apparatus does not appear to operate normally or shows a marked change in performance, or • The apparatus has been dropped and/or the enclosure damaged. 3 Rev. 2.0 - EN EU - fw 5.22 Working CE & RoHS with Compliance Presets - Warranty Before Getting Started 4.1 3.1 DECLARATION OF CONFORMITY This electronic format manual makes easy work of exploring the expansive features of the PedalPro. Electronic manuals make it easier to search for specific information, browse the contents, access new or revised editions and, thanks to contextual links, immediately access any related information either within the manual, or on our website (hyperlinks to an internet website* are followed by the symbol ). They are also, obviously, better for the environment and mean no bulky paper manuals gathering dust in your studio. For updates to the manual or latest versions, add-ons and manuals of related products, check the Vintage Revolution website . Vintage Revolution B.V., The Netherlands, declares that the following product: PedalPro digitally-controlled analogue multieffect, mod. PP003A conforms to the following Product Specifications: Safety: EMC: ABOUT THIS MANUAL EN 60065 / IEC 60065 EN 55103-1, EN 55103-2 The product complies with the requirements of the Low Voltage Directive 73/23/EEC and the EMC Directive 89/336/EEC as amended by Directive 93/68/EEC. 4.2 BOX CONTENT The following items should be included in your PedalPro package: • • • • • The PedalProTM digitally-controlled analogue multi-effect. USB flash drive containing: Owner’s Manual, PedalManager Software Suite for Mac OS X, factory preset list. Power cord. USB cable. Registration card (you can also register your PedalPro online at www.vintage-revolution.com ). 4.3 3.2 3-4 RoHS COMPLIANCE SHIPPING, STORING AND TRANSPORTING This device has been manufactured in compliance with Directive 2002/95/ EC on the Restriction of the Use of certain Hazardous Substances in Electrical and Electronic Equipment (RoHS). Great care was taken in the manufacturing and packaging of your PedalPro. Everything should be included and in perfect working order. Should any parts be missing however, please contact the dealer from whom you purchased your PedalPro. They will facilitate the resolution of your issue as quickly as possible. 3.3DISPOSAL Damaged units should never be sent directly to us. Please inform the dealer from whom you acquired your PedalPro of the damage, as well as the transportation company that delivered it to you. You must follow the steps above in order to retain the validity of your warranty. This marking indicates that this product must not be disposed with other household waste throughout the EU. To dispose of your product, please use your local return and collection system, or contact the retailer where the product was purchased or Vintage Revolution B.V. Rev. 2.0 - EN EU - fw 5.22 To ensure the optimal protection of your PedalPro during transportation or use, we recommend using a suitable case such as a flight case. Always use the original packaging when storing, shipping or returning your unit. 4 * Accessing a website via a hyperlink requires an internet connection. Working Table of with Contents Presets 5 TABLE OF CONTENTS 1 INTRODUCTION 1.1Message To The Users 1.2Summary Of Features p.2 p.2 p.2 2 IMPORTANT SAFETY INSTRUCTION p.3 3 CE & ROHS COMPLIANCE 3.1Declaration Of Conformity 3.2RoHS Compliance 3.3Disposal p.4 p.4 p.4 p.4 4 BEFORE YOU GET STARTED 4.1About This Manual 4.2Box Content 4.3Shipping, Storing and Transporting p.4 p.4 p.4 p.4 5 TABLE OF CONTENTS p.5 6 GETTING TO KNOW YOUR PEDALPRO™ FrontPanel Rear Panel p.6 p.6 p.7 7 SETUP GUIDE 7.1Mounting the Unit 7.2Connecting to the Main 7.3Connecting Your Instrument 7.4Connecting to Amps / Mixers 7.5Connecting the Pedalino™ Foot Controller 7.6Connecting External Effects (Loops) p.8 p.8 p.8 p.8 p.8 p.9 p.10 8 SIGNAL FLOW p.11 9 HOW TO USE THE PEDALPRO 9.1Working with Presets 9.1.1 Saving a Preset 9.1.2 Recalling a Preset 9.1.3 Exploring a Preset 9.1.4 Editing a Preset 9.1.5 Erasing a Preset 9.1.6 Initialising Your Presets 9.1.7 Restoring the Default Preset List p.12 p.12 p.12 p.13 p.13 p.14 p.15 p.15 p.15 5 9.2 Working with Favourite Presets 9.2.1 Adding/Replacing a Preset from the Favourite List 9.2.2 Recalling a Favourite Preset 9.2.3 Editing a Favourite Preset 9.2.4 Deleting a Favourite Preset 9.3 Working with PedalPro’s Effects 9.3.1 Compressor 9.3.2 Distortion 9.3.3 Boost (Pre-amp) 9.3.4 Noise Gate 9.3.5 Tremolo/Panner 9.3.6 Phaser 9.3.7 Filters ROUTING OPTIONS - AN OVERVIEW 9.3.8 Volume Control 9.4 Post Effects POST EFFECTS ROUTING OPTIONS 9.4.1 Chorus, Vibe, Flanger 9.4.2 Delay and Detuner 9.4.3 AUX Connections (Post-loop) AUX LOOPS ROUTING OPTIONS - AN OVERVIEW p.16 p.16 p.16 p.16 p.16 p.17 p.18 p.20 p.22 p.23 p.23 p.26 p.28 p.28 p.36 p.37 p.37 p.38 p.41 p.43 p.44 10ADDITIONAL FEATURES 10.1 Additional features 10.2 ADES™ Settings ADES - AN IN-DEPTH LOOK 10.2.1 Expression Control 10.2.2 Tap Tempo Mode 10.2.3 Virtual Board Mode 10.3 MIDI Out p.47 p.47 p.47 p.48 p.48 p.50 p.51 p.52 11 WORKING WITH PRESETS ON YOUR COMPUTER p.53 12 INSTALLING A NEW FIRMWARE p.54 13TECHNICAL SPECS p.55 14FULL MENU OVERVIEW p.60 APPENDIX A - MODULATING WAVEFORMS p.62 5 Rev. 2.0 - EN EU - fw 5.22 Overview - Front Panel 1 2 3 3a 3b 4 3c 5 7 6 8 3d È1/4 Play: 00 0Ç Compsol o Co mp Dist Ngte Trem OFF ON ( 10a 9 10b 10c 10 10d 11 12 13 14 1. Bypass key – Press it to completely bypass the PedalPro in your sound chain. The button will light up to indicate that the machine is bypassed. This is a true analogue relay bypass, just like every bypass in the PedalPro. EXIT/(USB) for 2 seconds to enter the USB communication mode. 2. Display - Shows presets names, effects parameters, machine configurations and other info. 9. Soft Mute key – Press the Soft Mute key before switching guitar. The button will light up to indicate that the output is muted and you can now change the guitar – or the external effects - connected to the PedalPro. No more pops and booms! 8. Power switch - Turns the power on and off. 3. Arrow keys – Use the four arrow keys [3a to 3d] to move between different areas of a menu page. The LEFT and RIGHT arrow keys [3a and 3d] are also used to toggle between the full preset list and the favourite preset list. The UP and DOWN arrow keys [3b and 3c] can be used to scroll the preset lists. 10. Multifunction keys – Multifunction keys [10a to 10d] are soft-programmable. Their functions vary with the menu page and the operating status of the unit. In effect menus, the multifunction keys BYPASS EFFECT 1 [10a] and BYPASS EFFECT 2 [10c] are used to switch on/bypass effects, while the two PARAM. SWITCH keys [10b, 10d] are used to control some of the effects’ parameters as explained below. 4. Selection dial – Use the selection dial to scroll preset lists or change the value of effect parameters. Spin it faster to jump quickly through the range of available values; slow it down to set the precise value of the parameter. 6 ) 5. EDIT/SAVE - Press the EDIT/SAVE key to access the value of effects’ parameters (Edit mode). After you have created/modified a preset, press the EDIT/ SAVE key to save the preset (Save mode). 11, 12. Page - and Page + – Use <-> and <+> keys to move between menu pages. 13. ADES connector - Connect here Pedalino™ Foot Controller and other peripherals using VR’s ‘Advanced music DEScriptor’ protocol. 6. ENTER/LOAD - Use this key to load a preset from the list or to confirm the preset’s name when creating/modifying presets 14. USB connector - Connect your computer to the PedalPro using this connector in order to manage presets, upgrade the firmware or use the sophisticated possibilities of the PedalManager software. 7. EXIT/(USB) - Press EXIT/(USB) to exit from the Edit mode. When navigating menus, press EXIT/(USB) to go one level up in the menu structure. Hold the Rev. 2.0 - EN EU - fw 5.22 6 Overview - Rear Panel 15 16 16a 16b 16c 16d FUSE IN 20a 17 18 19 20b 20 15. Power input - Connect only the power chord supply with the PedalPro to this input. The other end of the chord must be connected to an earthed main socket. 21a 21b 21 22 18. Fuse holder - T1 AH 250V. Always replace with a fuse of the correct value. 16. AUX SEND & RETURN post-loop connectors - These connectors allow you to post-loops two external pedals or one stereo effect. Please refer to the section on AUX Connections, on page 43, for more information on routings and signal levels. 17. Voltage Selector - Select the AC voltage corresponding to your local AC power. Check carefully that the switch is in the position corresponding to the local AC power BEFORE FIRST POWERING THE UNIT and AFTER MOVING TO A DIFFERENT COUNTRY. SEVERE damages to the unit can ensue if the switch in set in the wrong position! 19. MIDI OUT connector - Connect MIDI-controlled units here and use your PedalPro as MIDI controller, integrating external units MIDI program change into the presets of your PedalPro. 20. OUTPUT connectors - Use mono jack cables to connect these 1/4” outputs into guitar amplifiers, inputs of mixers or recording device. For mono rigs use the LEFT connector only (see ‘Setup Guide’ on page 8). 21. EXTERNAL EFFECT pre-loop connectors - To connect an external effect (i.e. a stompbox) into the PedalPro effects chain, connect the SEND connector [21b] to the input connector of the external effect and the RETURN connector [21a] to its output connector (see section ‘Connecting external effects’ on page 10). 22. INPUT connector - Connect your instrument to this high-impedance mono input connector. 7 6 Rev. 2.0 - EN EU - fw 5.22 Setup Guide 7.1 MOUNTING THE UNIT 7.3 In a 19” rack • • The PedalPro is a standard 2U 19” module. Find a suitable space in your rack and use the mounting screws provided. CONNECTING YOUR INSTRUMENT Connect your instrument to the input jack [22] on the rear panel. If you connect your guitar or another instrument when the PedalPro is on, first turn your amplifier(s) off, or press the Soft Mute key 9. The yellow light on the Soft Mute key 9 indicates that the processor is now muted. You should also do this when switching instruments. On a flat surface You can also rest your PedalPro on a flat, dry, solid surface of sufficient size. Avoid resting your PedalPro on the floor – its mechanical and electrical components may not withstand shocks from inadvertently kicking or stepping on it. 7.4 CONNECTING AMPS / MIXERS Mono set-up Avoid overheating the unit by ensuring good ventilation. Make sure that cooling apertures on the top and bottom panels are unobstructed. Avoid installing the PedalPro directly above or below heat-radiating devices, such as power amplifiers and tube gear. The diagram below shows you how to connect the PedalPro to a mono power amplifier, a mixer using a mono input, or a mono amp/speaker rig. External pedal (optional) ← 7.2 CONNECTING TO THE MAIN EXT. EFFECT RETURN IN • Use the power cord supplied to connect your PedalPro to the main. Plug one end of the cord into power connector 15 and the other end into an earthed main socket. Rev. 2.0 - EN EU - fw 5.22 EXT. EFFECT SEND OUTPUT LEFT (mono) OFF ON È1/4 Play: 00 0ÇPu rePhas er Co mp Dist Ngte Trem OFF ON ( ) TM ADES PedalProTM The machine should have come to you with the switch already set for the voltage currently in use in your country. Please check whether this is the case by inspecting the position of switch 17 on the back panel. Use only VR supplied power cords. Vintage Revolution cannot be held responsible in the case of ensuing malfunctioning or failure. 7 ← no expr . pedal 000ÓPurePhaser PedalinoTM foot controller (optional) • 8 Connect a single mono instrument cable between the OUTPUT LEFT (mono) connector [20a] of the PedalPro and the input of your amplifier. Setup Guide 7.5 Stereo set-up The diagram on the next page shows you how to connect the PedalPro to a stereo amplifier, to a mixer using a stereo input, or to a stereo amp/speaker. CONNECTING PEDALINO™ FOOT CONTROLLER Pedalino™ Foot Controller* is the revolutionary foot controller that operates the PedalPro, and is designed specifically for operating your PedalPro while playing live. OFF • ON External pedal (optional) ← ← OUTPUT RIGHT EXT. EFFECT RETURN IN EXT. EFFECT SEND OUTPUT LEFT (mono) The display of the PedalPro will now show: OFF ON È1/4 Play: 00 0ÇPu rePhas er Co mp Dist Ngte Trem Before switching on the Pedalino™ Foot Controller, connect the Pedalino to the PedalPro via the ADES™ cable (supplied with the Pedalino) on ADES connector [13] on the front panel of the PedalPro. OFF ON ( ) TM PedalProTM ADES * A D E S ON * PedalinoTM foot controller (optional) • For more information on how to operate the PedalPro via the Pedalino Foot Controller, please see the Pedalino Owner’s Manual (available on Vintage Revolution’s website ). Connect a single mono instrument cable between the OUTPUT LEFT (mono) jack [20a] of the PedalPro and the input of one amplifier, and another mono instrument cable between the OUTPUT RIGHT jack [20b] and the input of the second amplifier. Connecting your amplifier/s and the PedalPro to different grounded AC outlets may result in a hum ground loop. To avoid HUM ground loops, connect your gear properly to AC mains: make sure that the PedalPro power chord plug, as well as any amplifier and external effect power chord plugs are plugged into the same grounded AC outlet. It’s important to check that the AC source is properly rated to handle this amount of gear or you could overload it. In situations where your amplifiers and PedalPro must be connected to different sockets, you may need an audio isolation transformer. 7 9 * Pedalino Foot Controller is included when purchasing a PedalPro System. Rev. 2.0 - EN EU - fw 5.22 Setup Guide 7.6 CONNECTING EXTERNAL EFFECTS (LOOPS) PedalPro features PedalPro features pre and post loops that allow you to include external effects in your rig. By connecting to the EXT. EFFECT SEND [21b] and RETURN [21a] jacks, you will place your external pedal in the pre-loop as indicated in Fig. 8-1. See chapter 8, ‘Signal Flow’, or the section ‘Routing Options - An Overview’, on page 28, for details on where the external effects is located in the effect chain. • To connect an external pedal in the pre-loop of your PedalPro loop, use a TRS or a TS cable to connect the EXT. EFFECT SEND jack [21b] to your external effect’s Input, and another one to connect the effect’s Output to EXT. EFFECT RETURN jack [21a]. • To enter the external loop page, press the multifunction key [10d], labelled ‘Ext’, on page 2 of the main menu. The display of the PedalPro will now show: Ext_effec t ÇÂ È1/2 Aux type:No_loops_on Ext_effect – External effect loop. Indicates whether the external loop is switched on [ ] or off ( ). Á • 7 Â To switch the external effect loop on or off and thus add or remove it from your effects chain, press the BYPASS EFFECT 1 key [10a]. To explore the additional features of the post-loop connections, please refer to the section ‘AUX Connections (Post-loop)’, on page 43. Rev. 2.0 - EN EU - fw 5.22 10 Signal Flow 8. SIGNAL FLOW Swappable analogue effects - A world first on the left, and right channels, or on the same channel. Post effect blocks include Chorus, Flanger, Delay and a post-loop section. For more information and routing options, please refer to chapter 9.4 ‘Post Effects’, on page 37. While PedalPro’s effects are arranged with the goal of maximising the pleasure you can get out of your machine – only you can decide on the right order for your effects. Few examples of this revolutionary feature of your PedalPro are shown below. For the first time ever in any analogue multi-effect processor, PedalPro allows you to reposition some effects in the chain. PedalPro’s filters can be positioned at the end of the chain, before the distortion, cascaded or in parallel, post effects L envelope detector IN volume control filter F1 phaser noise gate Please see the filters routing section, on page 28, for more information and for a complete overview of the effect chain configurations (or ‘Route types’) available. post effects L OUTPUT LEFT (mono) filter F1 envelope detector LEFT buffer compressor external pedal pre-amp distortion panner/ tremolo IN post effects R RIGHT volume control noise gate distortion panner/ tremolo volume control noise gate volume control noise gate post effects R OUTPUT RIGHT envelope detector Fig. 8-3. Example 3. Effect chain configuration: Route type 04. post effects L envelope detector volume control phaser noise gate post effects L OUTPUT LEFT (mono) envelope detector LEFT compressor pre-amp noise gate RIGHT Fig. 8-1. Example 1. Effect chain configuration: Route type 01. buffer external pedal OUTPUT RIGHT envelope detector IN compressor volume control filter F2 LEFT buffer + phaser OUTPUT LEFT (mono) filter F2 external pedal pre-amp distortion panner/ tremolo RIGHT IN post effects R volume control noise gate phaser LEFT buffer compressor filter F1 external pedal pre-amp distortion panner/ tremolo RIGHT OUTPUT RIGHT filter F2 envelope detector envelope detector Fig. 8-2. Example 2. Effect chain configuration: Route type 06. Fig. 8-4. Example 4. Effect chain configuration: Route type 08. 11 OUTPUT LEFT (mono) post effects R volume control noise gate OUTPUT RIGHT 8 Rev. 2.0 - EN EU - fw 5.22 How to Use Your PedalPro: Presets 9.1 WORKING WITH PRESETS 9.1.1 Saving a preset PedalPro is a breakthrough in analogue multi-effects not just because it is practically the first, but because of how it allows you to store your sounds. Once you are happy with the sound you’ve created and want to store it for future use, you’re ready to save it as a preset. Sounds are stored as presets – of which the PedalPro has the capacity to store no less than 500 complete machine configurations. 18 can be stored as favourite presets, for quick access to the sounds you use most often. Via a USB connection, an unlimited number of presets can be stored, saved, transferred, and even emailed using the preset library software on your computer. • Save p rote c tÇ Á New name : AutoWah Positi on: 006 Cur r ent Disto r tion What you can store in a preset In a word: everything – all the parameters of every effect on your PedalPro. The entire configuration of your machine can be stored in one preset. Even two MIDI program change messages of a MIDI effect connected to the PedalPro can be stored in a preset. • The effects chain, including which effects are active and which are bypassed, and the position of the swappable effects in the chain. Presets 000 to 199 were created by VR and come pre-installed in your PedalPro. To protect these presets from being accidentally overwritten, Save protection is turned on by default – indicated by the symbol . With Save protection on, PedalPro will NOT allow you to assign a new preset to those numbered between 000 and 199. • The settings of all the effects’ parameters. • • The status (active/bypassed) of pre and post loops. • An virtual board (if it has been associated). If you want to overwrite one of the presets 000 to 199, turn off ‘Save protection’ by pressing the multifunction key 10a. Once the protection is off, your newly-created preset can overwrite the factory preset. The ‘Save protection’ switch has no effect on presets 200 to 499 and these presets can be overwritten at any time. • Two MIDI programme change messages. • • The parameter associated with the external expression pedal (not included with your machine) connected to the Pedalino™ Foot Controller. You now have the option of editing the preset name. To do this, use the selection dial [4] to scroll through the available characters, and the LEFT and RIGHT arrow keys [3a, 3d] to move to the previous or following character of the name. Restoring your factory settings • PedalPro comes preloaded with 500 presets. All are user-editable and available for you to experiment with and/or replace with your own sounds. Should you want to re-set or re-load the original factory presets, you will find them available on the USB drive that comes with your PedalPro. You can also change the preset number in order to move it to a specific location. Press the DOWN arrow key [3c] to move to the preset number (‘Position’). Change the number using the selection dial [4]. The third line of the screen shows you the current position of the preset selected. • Press SAVE [5] to save your newly-created preset in the position you have chosen. • Press ENTER [6] to confirm. A preset holds the following information: 9 Press EDIT/SAVE [5]. The screen will show the current preset location and the name of the current preset. Á See the section ‘Restoring your default preset list’, on page 15. Rev. 2.0 - EN EU - fw 5.22 12 How to Use Your Working PedalPro: with Presets In Play Mode TIPS & TRICKS - VR SPECIAL CHARACTERS When in Play Mode the screen will look like this: A set of VR-designed special characters can be added to the name of the preset you have just saved to remind you of the particular features of that preset. È1/4 Play: 00 0ÇPu rePhas er Co mp Dist Ngte Trem These must be added when you are assigning the name of the preset, and can be found by scrolling to the end of the alphabetical letters used to name your preset. SYMBOL Ä Ã Æ � MEANING SINGLE COIL – indicates that this is a preset to be used with your single coil guitar. DUAL COIL – indicates that this is a preset to be used with your dual coil guitar. • Press Page - [11] or Page + [12] to scroll through the four pages of the main menu. • Using the appropriate multifunction key [10], select one of the effects, and enter the effect’s menu. You will now see the settings for the effect of the preset you are currently playing. See the section ‘Working with PedalPro’s effects’, on page 17, for more details on the effects’ parameters. • Some of the effects, for instance the filters, have more than one page of settings. This is indicated on the top right corner of the screen. To access the different pages of the effects’ settings, scroll through the pages using Page - [11] or Page + [12]. • To exit the effect’s menu pages, simply press EXIT [7] and you will return to the main menu. STEREO PRESET – indicates that the effect chain of this preset has a stereo output. EXPRESSION PEDAL - indicates that this preset has a parameter associated to the expression pedal connected to the Pedalino™ Foot Controller. 9.1.2 Recalling/loading a preset • • To recall and load a preset, scroll through the preset list using the UP and DOWN arrow keys [3b, 3c]. You can also scroll through the list using the selection dial [4]. In List Mode You can also explore the parameters of any preset, without actually loading it. To do this, start from Play Mode and scroll through the preset list (List Mode) using the selection dial [4]. When in List Mode, the screen will look like this: Press ENTER [6] to load the preset. 9.1.3 Exploring a preset È 1/4 Li s tÇ Co m p This feature allows you to explore the current settings of the different effects in a preset. You can do this either in Play Mode, i.e., when the effect has been loaded, or in List Mode i.e., when simply scrolling through the list of presets. 13 9 4 9 9-C r yBa b y W dÖ 0 0 1 - P u rePh a s er 0 0 2- V i ntTr e m Di st Ng t e Tr em Rev. 2.0 - EN EU - fw 5.22 How to Use Your PedalPro: Presets • Use the selection dial [4] or the UP and DOWN arrow keys [3b, 3c] to scroll through the presets until you find the preset you want to explore (the preset will be pointed at by the arrow next to the word ‘List’ on the screen). • Use the selection dial [4] to modify the values of the parameters (indicated by the blinking cursor). Move between parameters using the arrow keys [3]. The sounds produced by your PedalPro will change in real time as you modify each parameter. • Press Page - [11] or Page + [12] to move through the four pages of the main menu until the effect you want to explore appears on the bottom line of the screen. • • Press the multifunction key [10] corresponding to the effect’s configuration page(s). The settings for that effect in the preset will now be visible. See the section ‘Working with single effects’ for an explanation of all the effects parameters. Turn the effect’s features on or off simply by pressing the appropriate multifunction key [10]. Please refer to the section ‘Working with PedalPro’s effects’, on page 17, for a detailed explanation of the features of each effect and how to access them. • Once you are happy with how the effect sounds, press EXIT [7] to exit from the parameters page and return to the list of presets. • The preset list will now look like this: To exit the effect’s menu pages, simply press EXIT [7]. You will return to the main menu. È 1/4 Edi t: 0 0 0* P u rePh a s er C o m p Di st Ng t e Tr em 9.1.4 Editing a preset Parameter or switch? Before editing your presets it’s important to first understand the difference between two PedalPro functions: the switch and the parameter. The header ‘Edit’ and the asterisk ( ) after the preset’s number indicate that * the PedalPro configuration for the loaded preset has been modified, but not yet saved in a preset. A switch is indicated with the symbol placed after the function or effect name. This indicates that the function can be directly switched on ( ) or off ( ) using one of the multifunction keys 10, without entering into Edit Mode. Ç Á Â You will also note that, for as long as the asterisk is present, you are not able to scroll through the list of presets using either the selection dial [4] or the UP and DOWN arrow keys [3b, 3c]. You are also not able to connect the Pedalino™ Foot Controller. These functionalities will remain locked until the modifications to the preset are either saved or discarded. A parameter is indicated with the symbol . This indicates that it can only be adjusted by entering into Edit Mode. : 9 • To edit a preset you must first load it, i.e., enter Play Mode. • Press Page - [11] or Page + [12] to scroll through the four pages of the main menu, until you see the page where the effect you want to edit is indicated on the bottom line of the display. • Press the multifunction key [10] corresponding to the effect you want to modify to enter the effect’s menu. • To change the parameters of that effect, press EDIT [5]. You are now in Edit Mode. Rev. 2.0 - EN EU - fw 5.22 14 • To save changes to the preset, press SAVE [5] and confirm ‘yes’ by pressing ENTER [6]. • To discard the changes, press EXIT [7] again and return to Play Mode. How to Use Your PedalPro: Presets 9.1.5 Erasing a preset 9.1.6 Initialising your presets • To erase a preset from the PedalPro memory and free that memory space, first load the preset. You have the option to completely erase PedalPro’s preset memory. • Press the Page - [11] or Page + [12] to go to page 4/4 of the main menu. • Press the multifunction key [10d], labelled ‘Erase’ on the display. WARNING: THIS PROCEDURE DELETES ALL EXISTING PRESETS IN YOUR PedalPro AND CANNOT BE UNDONE. Make sure you have first stored any presets you want to keep in your computer using the PedalManager software. This procedure will also reset the settings on page 2 of the MIDI menu. È4/4 Play: 00 0Ç Pu rePhas er ADES MID I E rase • Switch off the PedalPro and wait until the display backlight is off. • Now switch on the PedalPro while pressing the BYPASS key [1] on the unit, keeping it pressed until the ‘Initialise’ message appears on the display (it takes about 5 seconds). You will see the following confirmation screen: I ni t i a l i s e S u r e ? Ente r = Y es >> E rase preset < < 00 0-Pu rePhas er ? S ure? Enter =Yes • • Press ENTER [6] to confirm that you wish to delete the preset, or press EXIT [7] to cancel the action. You can also erase a preset simply by saving a new preset in the same location. See the section ‘Saving a preset’, on page 12. • Press ENTER [6] to confirm, and wait until the process is complete. • To interrupt the procedure simply switch off the PedalPro, or press EXIT [7]. 9.1.7 Restoring the default preset list The USB flash drive included with your PedalPro contains a file called ‘presets. vrf’. This file contains the factory presets that came preloaded in your PedalPro. Presets can also be erased using your computer and the PedalManager software that came with your PedalPro. Please refer to the software help file for more information. • 15 9 To restore the default factory presets of your PedalPro, locate the file in the USB drive, and upload it to your PedalPro using VR PedalManager software included. Please refer to section 12 on page 54 of this manual, or to the PedalManager User Manual for more information. * in the directory ‘Default’ of the USB drive, or download it from VR website . Rev. 2.0 - EN EU - fw 5.22 How to Use Your PedalPro: Favourite Presets 9.2 WORKING WITH FAVOURITE PRESETS PedalPro allows you to select up to 18 onboard presets as part of a favourite presets list. This list ensures you have quick and easy access to your preferred presets or those you need for a certain gig. Use the selection dial [4] to select the preset you want to add to your favourite list (in the example shown, preset ‘001-PhsCircle’ will be saved in the favourite preset memory position 02). • Press EXIT [7] twice to exit and then press SAVE [5] to store your new favourite preset list. 9.2.2 Recalling/loading a favourite preset 9.2.1 Adding/replacing a preset from the favourite list To recall and load a favourite preset, you must first be in Play Mode. To add or replace a preset in your favourite list you must first be in Play Mode. • Press the RIGHT arrow key [3d] to enter the favourite list and therefore Favourite List Mode. Press the RIGHT arrow key [3d] to enter the favourite list and therefore Favourite List Mode. • Scroll through the favourites list with the UP and DOWN arrow keys [3b, 3c], or using the selection dial [4]. • Press the ENTER [6] to load the selected favourite preset. • >> Favou r i te List << Fav : 1 2ÇVintTrem • QUICK TIP: Your favourites list can be accessed directly via the Pedalino Foot Controller using the button on the Pedalino labelled ‘Favourites’ (See Pedalino Owner’s Manual) 9.2.3 Editing a favourite preset Press EDIT [5]. The screen will change to Edit Favourite Mode. The cursor will blink under the number next to the ‘Fav memory’ indicator. The sound of a favourite preset cannot be edited directly when playing in Favourite List Mode. >> Ed i t f a v o u r i t e < < Fav m e m o r y : 0 2 P r s e t : 00 1 -Ph s C i r c l e 9 • • Use the selection dial [4] to choose which of the eighteen favourite presets memory positions you want to modify/replace. The number of the memory position selected is indicated by the ‘Fav memory’ indicator. • Press the DOWN arrow key [3c]. The cursor will now blink to indicate which of the 500 presets in the PedalPro main memory will be saved in the favourite preset memory position you have selected. Rev. 2.0 - EN EU - fw 5.22 • Return to Play Mode by pressing the LEFT arrow key [3a] – and exiting Favourites List Mode. You will notice that the same preset selected under the Favourites List Mode is now selected in Play Mode (note: the preset number Play Mode may be different from its number in Favourite Mode, but the preset is actually the same). • Follow the instructions in the section ‘Editing a preset’, on page 14, to edit your preset and save it. The changes are automatically carried over to the preset in your favourite list. 9.2.4 Deleting a favourite preset • 16 Simply replace the link with another preset as described in the section ‘Adding/replacing a preset from the favourite presets list’, on page 16. How to Use Your PedalPro: Favourite Presets 9.3 WORKING WITH PEDALPRO’S EFFECTS È3/4 Play: 00 0Ç Pu rePhaser ChFl Dly PedalPro has ten top onboard analogue effects, each with various parameters that can be modified to alter the sound you produce. Many of these parameters have never before been accessible in analogue effects. The first three pages of PedalPro’s main menu give you access to the configuration pages of all fourteen on-board analogue effects and of pre- and post loops. Chorus, Flanger and Delay can be accessed on page 3/4 of the main menu. È 1/4 Pl ay: 0 0 0Ç P u reP h a s er C o m p Di st Ng t e Tr e m È4/4 Play: 00 0Ç Pu rePhaser ADES MID I E rase Compressor, Distortion and Pre-amp, Noise Gate, Tremolo/Panner are on page 1/4 (1 of 4) the main menu. Finally, additional features of your PedalPro, such as the MIDI controls and the ADES™ settings for communication with VR’s range of controllers, can be accessed on page 4/4 of the main menu. For more details see the section ‘Additional Features’. È2/4 Play: 00 0Ç Pu rePhaser Phasr Fltr Levl Ext 9 Phaser, Filters, Volume controls, and External effect (loops) controls are on page 2/4 of the main menu. 17 Rev. 2.0 - EN EU - fw 5.22 Working with Effects: Compressor 9.3.1Compressor PARAMETERS A compressor is used to control the dynamic range of a signal. Using an ‘envelope detector’, the compressor detects the signal level of the input signal. Then, by automatically reducing the gain when the level of the input signal is higher (louder) than a certain threshold, the compressor ensures that the dynamic range of the compressed signal is lower than the dynamic range of the input signal. • The diagram below shows you the screen of the Compressor configuration page: Compr essor ÇÁ È1/1 Type : tubegen Sens: 088. 2 Out:049. 4 Attc k : 03ms Rels: 0. 1 s Three different compressor types PedalPro has three different Compressors (compressor types): tubegen, varymu and limiter, and two different compression modes: limiter mode and tube compression mode. When the Compressor is operating in limiter mode, a hard knee compression ensures a long sustain, rendering the output dynamic range extremely small. This mode is great for a long solo sustain and will produce a sound similar to a MXR dyna comp* compressor, VOX 1903*, or Keeley Compressor*. Compressor – Compressor effect switch. Range: on ( ), off ( ) Á • When the Compressor is operating in tube compression mode, the soft knee gently controls the sound peak while the low-medium level sound passes through. This is great for the rhythm phrase. You can use the Tubegen compressor type to produce a sweet peak control, or the Variable Mu®* compressor for more sustain on the medium volume notes, typical of a Variable Mu® tube compressor. Â To switch the Compressor on or off and thus add or remove it from your effects chain, press the BYPASS EFFECT 1 key [10a]. Type – Compressor type. Range: tubegen, vary-mu, limiter The parameter Type indicates the compressor type used. This can be set to either ‘limiter’ to operate in Limiter Mode, or to ‘tubegen’ or ‘vary-mu’ to operate in tube compression mode, with either a sweet peak control (‘tubegen’) or more sustain on the medium volume notes (‘vary-mu’). The vary-mu compressor type is designed for medium-strong compression – up to 1:4 - 1:30. The Tubegen compressor type is designed for light-medium compression 1:3 - 1:22. • To change the compressor model, press EDIT [5] when in the Compressor configuration page, and use the arrow keys [3] until the cursor blinks under the compressor type name. PedalPro’s compression curves • Use the selection dial [4] to select between the limiter, tubegen and vary-mu compressors. Compression curve comparison: PedalPro vs Vari Mu* 20 30 PedalPro Vari Mu tube compressor 15 Sens – Sensitivity. Range: 0-100% Vout [dB] 15 0 10 -5 5 -50 -45 -40 -35 -30 -25 Vin [dBm] -20 -15 -10 -5 0 -60 -55 -50 -45 -40 -35 -30 -25 -20 -15 -10 -5 Vin [dBm] *All trademarks are property of their respective owners and used for reference only. Rev. 2.0 - EN EU - fw 5.22 This parameter sets the desired amount of compression. dyna comp PedalPro 20 5 -10 -55 Limiter perfomances: PedalPro vs MXR dyna comp compressor* 25 10 Vout [dB] 9 To enter the Compressor configuration page, press the multifunction key [10a] labelled ‘Comp’ on page 1 of the main menu. 18 • To change the value of Sens, press EDIT [5] when in the Compressor configuration page, and use the arrow keys [3] to position the blinking cursor next to the Sens value. • Use the selection dial [4] to set the desired amount of sensitivity. Working with Effects: Compressor Out – Output Level. Range: 0-100%, in increments of approximately 0.4% Preventing loud peaks (tube compression) The Output Level is the output volume level of the compressor, and acts as a make-up. To prevent loud peaks due to excessive pick striking or to control the amplification distortion of a filter with a high resonance (Q), start with the following setting: Adjust this level according to the Sensitivity selected. In practice, a high level of compression (a high Sensitivity) prefers a lower Output Level, and a low level of compression (a low Sensitivity) prefers a higher Output Level. • • • To change the compressor Output Level, press EDIT [5] when in the Compressor configuration page, and use the arrow keys [3] to position the blinking cursor on the Out value. These settings will produce a compression of 1:12. If necessary, increase or decrease the sensitivity (Sens) until you obtain the desired compression level. Adjust the output level (Out) to regulate the output volume. Use the selection dial [4] to set the desired amount of Output Level. Attck – Attack time. Range: 3ms, 8ms, 13ms, 22ms, 31ms, 40ms, 57ms, 83ms. Attack determines how quickly the compressor intervenes on the sound. • • Embellishing (tube compression) To change the value in milliseconds of the Attack, press EDIT [5] when in the Compressor configuration page, and use the arrow keys [3] to position the blinking cursor on the Attck value. If you are playing arpeggios either with your pick or your finger and you want to embellish them by producing a smoother, more fluid effect, start with the following settings: Use the selection dial [4] to set the desired amount of Attack. • Rels – Release time. Range: 0.1s, 0.2s, 0.3s, 0.5s, 0.7s 0.8s, 1s, 1.8s The Release determines how quickly the compressor releases the control of the dynamic after the sound signal level has been compressed (reduced). • • To change the value in seconds of the Release, press EDIT [5] when in the Compressor configuration page, and use the arrow keys [3] to position the blinking cursor on the Rels value. Long Sustain (limiter) Use the selection dial [4] to set the desired amount of release. If you need a long sustain during your solo, start with the following settings: • • Type: limiter; Sens: 60.0; Out: 30.0; Attck: 3ms; Rels: 1.8s. Adjust the level of compression, by acting on the sensitivity (Sens) according to the solo phrase you are going to perform. Remember, when the sensitivity increases, the compression becomes very aggressive especially when you are playing multiple strings. In this case, you may want to increase the Attack time (Attck) until you get the desired sustain, with a reasonable gain reduction. Select one of the three compression types according to the amount of compression you want to achieve. • Type: vary-mu; Sens: 40.0; Out: 50.0; Attck: 13ms; Rels:1s. Increase or decrease the sensitivity level according to your guitar. If you prefer a faster-responding compressor, reduce the release time (Rels). TIPS & TRICKS - COMPRESSOR • Type: tubegen; Sens: 18.0; Out: 30.0; Attck: 3ms; Rels: 0.1s. For light-medium compression use the ‘tubegen’ compressor that produces compression from 1:3 to 1:22. For medium-strong compression that gives a medium amount of sustain, use the ‘vary-mu’ tube compressor that produces compression from 1:4 to 1:30. For strong compression (or limiter) that provides long sustains, use the ‘limiter’ compressor that produces compression from 1:12 to 1:40. 9 Adjust the output level according to the sound you want to produce. Use the output volume (Out) within a range of 30-70% if you don’t need a gain boost in front of the distortion. 19 Rev. 2.0 - EN EU - fw 5.22 Working with Effects: Distortion 9.3.2Distortion The PedalPro makes it possible, for the first time, to bypass the Boost (pre-amplifier) and drive the Distortion by only the guitar signal. With the guitar signal pumped directly into the heart of the Distortion circuit, the result is a soft blues-style distortion, free of noise and with crystal-clear definition – an effect tailor-made for the blues player’s musical repertoire. Just about every existing distortion on the market uses pre-amplifiers with high gains, and a distortion section that produces distortion according to the input signal amplitude. In PedalPro, we do it differently. The Distortion is implemented using the saturation of low-noise FETs instead of op-amps and diodes. The result is a smoother, tube-like second-harmonic distortion that is rich and full of punch, with a clearly-defined sound that is totally noise free. PedalPro also allows you to bypass the Distortion, or both the Distortion and the Boost. The Distortion can also be driven by the output level of the Compressor – again allowing you to avoid the pre-amplification stage. PARAMETERS Two additional features • Two additional features distinguish the PedalPro Distortion from existing distortions. These are the bright switch and the low-pass filters. With the bright switch engaged, you can create a screaming distortion. With the low-pass filters, you can alter the amount of high tones. boost on brgt on off off IN gain bright To enter the Distortion configuration page, press the multifunction key [10b] labelled ‘Dist’ on page 1 of the main menu. The diagram below shows you the Distortion configuration page (greyed-out parameters are part of the Boost settings, see next section). LP filter selector distortion tone control programm. low-pass filter (LP) volume control Di stÇÁ Br gtÇÁ È1/1 Tone[ %] : 055. 2 LP: 0 OutD[ %] : 061. 5 Boo st Ç Â G[ dB]: -01 . 5 OUT off Fig. 9-1. The Distortion dist on The bright switch (parameter ‘Brgt’) excites middle and high tones before the signal is distorted. The tone parameter (‘Tone’) blends the high tone with the low+middle tones after the distortion. When the tone is 50%, the amount of high tones and middle-low tones is the same. The low-pass filter selector (‘LP’) is a programmable low-pass filter that is placed right after the tone control. This last filter is used mainly to remove the high frequency. 9 Dist – Distortion effect switch. Range: on ( ), off ( ) Á • Â To add ( ) or remove ( ) the Distortion from your effect chain, press the BYPASS EFFECT 1 key [10a]. Brgt – Brightness. Range: on ( ), off ( ) Á Â When the brightness parameter is engaged, the sound passes through a high-pass filter with a cut-off frequency of around 800 Hz before entering the distortion stage. Introducing the new blues-effect distortion In standard distortions, even when it’s possible to adjust the gain of the preamplification, additional noise and unwanted op-amp processing are unavoidable stages of the distortion process. The blues sound has never been as warm and clear as it should have been due to these unnecessary electronics – inherent problems with every distortion on the market. Rev. 2.0 - EN EU - fw 5.22 Á Â This emphasises the middle and high tones of the distortion, creating a ‘screaming’ sound. • 20 To switch the Brightness mode on ( ) or off ( ), press the PARAM. SWITCH key [10b]. Á Â Working with Effects: Distortion Tone[%] – Tone. Range: 0-100% • TIPS & TRICKS - DISTORTION To change the tone, press EDIT [5] when in the Distortion configuration page, and use the arrow keys [3] to position the blinking cursor on the Tone[%] parameter. Adjust the value with the selection dial [4]. It’s generally considered best practice to search for the right sound starting from a “neutral” distortion point (which will also depend on your pickups and amplifier). LP – Low-pass filter selector. Range: 0, 1, 2 The low-pass filter enables you to filter the output of the Distortion. You have the choice of between three different low-pass filters for a brighter sound at one end, or a fatter sound at the other. Choose the LP level according to your pick-ups, your amplifier speaker/cabinet, and the sound you want to produce. • Start with the following parameter configuration: Brgt: (on); Tone[%]: 50.1; LP: 1. • Adjust the Brgt, Tone, and LP parameters to find the sound you are looking for. Á Keep in mind that the low-pass filters (LP) allow you to alter the amount of high tones in your distortion without changing the amount of bass and middle frequency content. To change the low-pass filter, press EDIT [5] when in the Distortion configuration page, and use the arrow keys [3] to position the blinking cursor next to LP. Adjust the value with the selection dial [4]. OutD[%] – Output Distortion. Range: 0-100% The Output Distortion parameter sets the amount of distortion applied. • • To change the amount of distortion, press EDIT [5] when in the Distortion configuration page, and use the arrow keys [3] to position the blinking cursor next to OutD. Adjust the value with the selection dial [4]. • For a bright sound with plenty of high tones, set the low-pass filters to LP: 1. • For a sound that is less bright with stronger middle tones, set the lowpass filters to LP: 2. If you want a deeper, fatter sound (i.e., more low frequencies) without changing the amount of mid tones disengage the Brgt switch (Brgt: , off). Â In the PedalPro, the amount of distortion is defined by the gain of the Preamplifier or Boost (see the Boost section). • To counter a very loud pick-up and produce a gentler blues overdrive sound, use negative gain values. To do this, engage the Boost and set the gain to a negative value. • A similar effect can be achieved by reducing the input level via the Compressor output level, while leaving the Boost off. 9 21 Rev. 2.0 - EN EU - fw 5.22 Working with Effects: Pre-amplifier (Boost) 9.3.3 Boost (Pre-amp) TIPS & TRICKS - BOOST (PRE-AMP) PedalPro has an ultra low-noise and low-distortion Boost (pre-amp). You can use it together with the Distortion as a distortion gain, on its own, or in combination with the other effects to really boost your sound. One great use for the stand-alone Boost is to use it to overdrive your tube amplifier. • Á PARAMETERS Please note: the Boost parameters are on the same page as the parameters of the Distortion. • • To enter the Boost configuration page, press the multifunction key [10b] labelled ‘Dist’ on page 1 of the main menu. The screenshot below highlights the relevant parts of the Boost configuration page (greyed-out parameters are part of the Distortion settings, see 9.3.2): Di stÇÁ Br gtÇÁ È1/1 Tone[ %] : 045. 4 LP: 0 OutD[ %] : 067. 4 Boo st Ç Á G[ dB]: +1 1 . 5 Boost – Boost effect switch. Range: on ( ), off ( ) Á • Á Â Â To add ( ) or remove ( ) the Boost (pre-amp) from your effect chain, press the BYPASS EFFECT 2 key [10c]. G[dB] – Boost gain. Range: -06 dB to + 25 dB The Boost gain can be set in decibels (dB). 9 • Rev. 2.0 - EN EU - fw 5.22 To produce a rich, warm, tube blues distortion, activate the Boost (set the Boost parameter to ) and adjust the amount of gain by acting on the G[dB] parameter. Turn off all other effects when in this configuration. The quality of the distortion will also depend on your amplifier as well as your cabinet. To change the boost (pre-amp) gain, press EDIT [5] when in the Boost/ Distortion configuration page, and use the arrow keys [3] to position the blinking cursor on G[dB]. Adjust the value with the selection dial [4]. 22 Keep in mind that while the Boost does not distort on its own, it will at some point saturate your tube amplifier, and thus distort your sound. Working with Effects: Noise Gate 9.3.4 Noise Gate NoiseLv[%] – Noise level. Range: 0-100% PedalPro’s optical Noise Gate is distortion-free with amazing transparency and the option to set the amount of gating. Super-precise and unobtrusive, it intervenes only when you want it to and just as much, or as little, as you need it to. The Noise level (NoiseLv) defines the percentage of noise allowed. If NoiseLv is set to 50.0%, the level of noise will be reduced by about 50%. As you’ll see in practice, this feature allows you to always set your Noise Gate at the right noise attenuation without destroying the attack of your sound. • One of its stand-out characteristics is that, despite the Noise Gate section being placed at the end of the sound chain (see figures in chapter 8 or in section 9.3.7), it is controlled by an envelope detector placed after the input buffer of the PedalPro. This means it is driven only by the signal of your guitar, not by the other effects in the chain, gating the signal at just the right moment. You can also alter the amount of attenuation you want, for a gentle noise gate with a low-noise attenuation. Release[%] – Release delay. Range: 0-100% The Release parameter sets the amount of delay before the Noise Gate intervenes at the defined threshold. • PARAMETERS • To enter the Noise Gate configuration page, press the multifunction key [10b] labelled ‘Ngte’ on page 1 of the main menu.. • È1/1 Noi seGateÇÁ Sustain Ç Á NoiseLv[ %] : 049. 4 Release[ %] : 009. 8 Á • To avoid the Noise Gate affecting the natural decay of your sustained note, engage the Sustain switch in presets that you use to play solos and licks. In this configuration, the Noise Gate is very sensitive to the smallest signal from your pick-ups – the sound will pass through the gate as soon as you touch the strings. • To lengthen the time between your last played note and the moment the Noise Gate is triggered, increase the Release value. This is particularly useful when you are using the Noise Gate in combination with delay and distortion. In order to hear the delay effect you need to give the delayed sound time to pass through the Noise Gates after you’ve played it. Â Â Sustain – Sustain switch. Range: on ( ), off ( ) Â Use the Sustain to prevent the Noise Gate from cutting the natural decay of long notes. The Sustain switch essentially decreases the sound threshold at which the Noise Gate intervenes. While this switch does not directly add sustain to your sound, it is very useful when playing sustained notes with your Noise Gate switched on. • Á(on); Sustain: Â(off); NoiseLv[%]: 050.0; Release[%]: 000.0 This configuration reduces the amount of noise to half its value. Decrease the NoiseLv[%] till the audible noise level is acceptable or totally inaudible. To add ( ) or remove ( ) the stereo Noise Gate from your effect chain, press the BYPASS EFFECT 1 key [10a]. Á One of the best ways to use the Noise Gate is to start by dialling in the following settings: NoiseGate: NoiseGate – Stereo Noise Gate effect switch. Range: on ( ), off ( ) Á To change the Release threshold, press EDIT [5] and use the arrow keys [3] to position the blinking cursor on Release[%]. Adjust the value with the selection dial [4]. TIPS & TRICKS - NOISE GATE The screenshot below shows you the Noise Gate configuration page: • To change the Noise Level threshold, press EDIT [5] and use the arrow keys [3] to position the blinking cursor on NoiseLv[%]. Adjust the value with the selection dial [4]. 9 To switch the Sustain on ( ) or off ( ), press the PARAM. SWITCH key [10b]. Á Â 23 Rev. 2.0 - EN EU - fw 5.22 Working with Effects: Tremolo / Panner 9.3.5 Tremolo / Panner Tempo – Speed of the modulator. Range 3 BPM (20 s) - 550 BPM (9.16 Hz) • The PedalPro’s ultra-low noise Tremolo/Panner has an incredible number of modulating waveforms from which you can choose. These include the classic sine, triangle, and square waves, as well as some exclusive, VR-designed waveforms such as ‘vintage’, which produces the same tremolo as a vintage Fender amplifier. Wv – Modulating waveform. Range: sine, trig, trap, rect, pcal, shlf, vntg. The tremolo / panner modulating waveform parameter allows you to select from among the available modulating waveforms. All the classic waveforms are included, along with some exclusive, VR-designed waveforms. Available waveforms include: sine, triangle, trapeze, rectangle, pcal (phaser calibrated curve), shlf (shelf), vntg (vintage) (see Appendix A, at the end of this manual, for more details on the modulating waves). Vary the modulating waveform, tempo, depth and phase of your Tremolo/Panner to produce the widest range of tremolo or panning effects ever possible QUICK TIP: To hear the effect of the Panner you need to set the switch Trem/Pan to . Make sure you have two amplifiers connected, one on the Left Output (20a) of the PedalPro, the other on the Right Output (20b). • Pa To change or select a modulating waveform, press EDIT [5], and use the arrow keys [3] to position the blinking cursor next to Wv. Adjust the value with the selection dial [4]. Depth – Depth of the modulation. Range: 0-100% PARAMETERS • To change the Tempo of the modulating waveform, press EDIT [5], and use the arrow keys [3] to position the blinking cursor next to Tempo. Adjust the value with the selection dial [4]. The depth parameter controls the depth of the tremolo/panner effect. To enter the Tremolo/Panner configuration page, press the multifunction key [10d] labelled ‘Trem’ on page 1 of the main menu. • The screenshot below shows you the Tremolo/Panner configuration page: To alter the depth of the Tremolo or Panner effect, press EDIT [5], and use the arrow keys [3] to position the blinking cursor next to Depth. Adjust the value with the selection dial [4]. Ph – Phase of the modulator. Range: 0°, 90°, 180°, 270° This parameter controls the phase of the modulating waveform. It is used to control the relative phase among effects that offer the possibility of selecting the Phase of the Modulator (Ph), e.g., the Tremolo/Panner, Phaser, Auto Filters, Chorus. È1/1 Tr em ol oÇÁ Trem/PanÇ Tr Fo otC: Á Tempo: 050. 4 Wv : r ec t Dept h: 026. 2 Ph: 000Ì 9 • FootC – Foot Controller enabler switch. Range: on ( ), off ( ) Á Tremolo – Tremolo/Panner effect switch. Range: on ( ), off ( ) Á To alter the phase of the Tremolo or Panner effect, press EDIT [5], and use the arrow keys [3] to position the blinking cursor next to Ph. Adjust the value with the selection dial [4]. Â Â Trem/Pan – Effect selector. Range: Tremolo ( FootC is a powerful control that can transform your tremolo into a high-quality volume stereo control pedal. To utilise this option, you need VR’s state-ofthe-art foot controller, the Pedalino™ Foot Controller, expressly designed to work with the PedalPro, with an expression pedal connected to it. • • • Rev. 2.0 - EN EU - fw 5.22 Á Â To add ( ) or remove ( ) the Tremolo / Panner from your effect chain, press the BYPASS EFFECT 1 key [10a]. Tr), Panner ( Pa) To switch between the Tremolo ( Tr) and the Panner ( Pa) effect press the PARAM. SWITCH key [10b]. 24 Á Â To turn the FootC (Foot Controller) parameter on ( ) or off ( ), press the PARAM. SWITCH key [10d]. Working with Effects: Tremolo / Panner • • On the ADES page, set the expression control to ‘Trem_dep’. The depth of the Tremolo can now be controlled using the expression pedal connected to your Pedalino™ Foot Controller. This feature is handy for situations such as when playing with the attack of the guitar sound in order to produce a violin-like sound. QUICK TIP: Phase of the modulating waveforms The effect of the parameter Ph is audible only when more than one effect featuring this parameter (Tremolo/Panner, Filters, Phaser, and optional Chorus and Flanger) are simultaneously active. When your Tremolo / Panner effect is configured in Panner mode, a moving sound image can be created by operating the Panner with an expression pedal (manual panner). By altering this parameter, you can set and keep constant the relative phase difference across the modulating waveforms of the effects. This makes sense only when all running modulators are synchronised. To do this, you must ensure that the Tempo parameter is set to the same value across all the running modulators. See the Pedalino Owner’s Manual for more information on this feature or Vintage Revolution’s website . To check out the effect of the Ph parameter, enable at least two effects using time-modulating waveforms, for instance the Tremolo and the Phaser. Switch both effects on ( ) and set them to the same Tempo using the appropriate selectors (see the section Tempo under each effect). TIPS & TRICKS - TREMOLO / PANNER • When using the Tremolo/Panner as a modulator, make sure the Tremolo switch is set to (ON) and FootC is set to (OFF), to ensure that the waveform generator is active. Á • Á Â Using the Ph parameter you can now set the phase difference between the two – or more – waves. Start by setting both phases to 0° and experiment by changing one of the phases to 90°, 180° and 270°. The waveform vntg (Vintage) will produce the same tremolo as a vintage Fender amplifier. Setting the value of Depth to 50.0% on the analogue Tremolo of the PedalPro corresponds to setting the intensity potentiometer of your vintage Fender amplifier to a value of 10. • The parameter Ph (phase of the modulating waveform) does not produce any effect if you are using the Tremolo/Panner on its own. If you use the Tremolo/Panner in combination with any other modulators (phaser, auto filters, etc) refer to the QUICK TIP box ‘Phase of the modulating waveforms’. • If you want to use the Tremolo/Panner as a volume control, set the FootC swtich to (ON). Make sure that the Trem/Pan selector is set to (Tremolo). Note: the Ph parameter will NOT produce any audible difference if you are only using one effect. Á Tr 9 25 Rev. 2.0 - EN EU - fw 5.22 Working with Effects: Phaser 9.3.6Phaser • A phaser is an effect that uses a comb-like filter to create a series of notches in its frequency response. These are then usually time-modulated or swept across a range of frequencies. Tempo – Speed of the modulator. Range 3 BPM (20 s) - 550 BPM (9.16 Hz) • The Phaser in the PedalPro is implemented using six custom-made optical resistors and produces a sound just like the shimmering tones typical of the 70’s (and similar to the Morley Pro-Phaser*). The Phaser has many modulating waveforms from which you can choose. All the classic waveforms are included, along with some exclusive VR-designed waveforms. Available waveforms include: sine, triangle, trapeze, rectangle, pcal (phaser calibrated curve, linear phase sweep), shlf (shelf), vntg (vintage). (see Appendix A for more details on the modulating waves). The phase and the Phaser’s modulating waveforms is completely under your control, and can be synchronised with any other phase-controlled effect. • PARAMETERS To enter the Phaser configuration page, press the multifunction key [10a] labelled ‘Phasr’ on page 2 of the main menu. The depth parameter controls the depth of the phaser effect. • È1/1 Pha se r ÇÁ Man ua l : 01 2. 1 Tempo : 072. 0 Wv : sine Depth : 066. 2 Ph: 09 0 Ì 9 Á The phase of the modulator controls the phase of the modulating waveform. It is used to control the relative phase among effects that offer the possibility of selecting the Phase of the Modulator (Ph), e.g., Tremolo/Panner, Phaser, Auto Filters, Chorus. (For more details refer to the QUICK TIP box ‘Phase of the modulating waveforms’, on page 25). • Â Â To add ( ) or remove ( ) the analogue Phaser from your effect chain, press the BYPASS EFFECT 1 key [10a]. Manual – Manual phase shift selection. Range: 0-100% When you set the Depth parameter (see below) to 0, the amount of phase shift then depends on the level assigned to the Manual parameter. *All trademarks are property of their respective owners and used for reference only. Rev. 2.0 - EN EU - fw 5.22 To alter the depth of the Tremolo or Panner effect, press EDIT [5], and use the arrow keys [3] to position the blinking cursor next to Depth. Adjust the value with the selection dial [4]. Ph – Phase of the modulator. Range: 0°, 90°, 180°, 270° Phaser – Phaser effect switch. Range: on ( ), off ( ) • To change or select a modulating waveform, press EDIT [5], and use the arrow keys [3] to position the blinking cursor next to Wv. Adjust the value with the selection dial [4]. Depth – Depth of the modulation. Range: 0-100% The screenshot below shows you the screen of the Phaser configuration page: Á To change the Tempo of the modulating waveform, press EDIT [5], and use the arrow keys [3] to position the blinking cursor next to Tempo. Adjust the value with the selection dial [4]. Wv – Modulating waveform. Range: sine, trig, trap, rect, pcal, shlf, vntg But the PedalPro Phaser outperforms any classic vintage equivalent. PedalPro uses six OP275 operational amplifiers that allow for a far greater transparency, an ultra-low noise output, and an incredible modulator flexibility. • To change the amount of manual phase shift to the signal, press EDIT [5], and use the arrow keys [3] to position the blinking cursor next to Manual. Adjust the value with the selection dial [4]. 26 To alter the phase of the Tremolo or Panner effect, press EDIT [5], and use the arrow keys [3] to position the blinking cursor next to Ph. Adjust the value with the selection dial [4]. Working with Effects: Phaser TIPS & TRICKS - PHASER • When you assign the value 0 to Depth, the amount of phase shift depends on the Manual level (manual phasing). By adjusting the value of the Manual parameter, you can then: ›› Produce nice distortion tones by combining the manual Phaser with the Distortion. In the Phaser configuration page, keep the value of Depth to 0 in this combination, and experiment with applying different values on the Manual parameter. ›› Control your phase shift using an expression pedal connected to the Pedalino™ Foot Controller. Set the expression pedal to control the manual phaser (i.e., assign the Phas_man parameter to the expression pedal*). The manual adjustment of the phase shift in real time will produce interesting sounds in stereo configuration. • To produce a classic vintage phaser effect, assign the value 0 to Manual. The effect will also vary according to the Depth settings and the modulating waveform (Wv) you have selected. • To produce a medium/fast phaser - e.g., with a Tempo greater than 120 BPM - and with a low depth (less than 60%), use a combination of Manual level and Depth. The Phaser will produce time varying phase shift, according to the Depth and the Manual settings. When working using this configuration, set the level of Depth to between 30 and 60 and adjust the Manual level according to the effect you want to create. • Which waveform (Wv) form should you use? It depends on the effect you want to create. For a shimmering, slow-sweeping deep phaser, use ‘pcal’ (linear phase sweep) or ‘trig’ (triangle), setting the parameter Tempo to a low value. For a Leslie effect (vibrato), use ‘sine’ and a level of Tempo greater than 170. For an arpeggiator, use a ‘shlf’ (shelf) or ‘rect’ (Rectangle) and moderate Tempo. • The parameter Ph (phase of the modulating waveform) does not produce any effect if you are using the Phaser on its own. For use of the Phaser in combination with any other modulators (tremolo, panner, auto filters, etc) refer to the QUICK TIP box ‘Phase of the modulating waveforms’. *For more information, please download the Pedalino Owner’s Manual from VR website . 9 27 Rev. 2.0 - EN EU - fw 5.22 Working with Effects: Filters 9.3.7Filters ROUTING OPTIONS - AN OVERVIEW The PedalPro is fitted with two different filters: Filter 1, referred to as ‘F1’ in the on-screen configuration menu, and Filter 2, referred to as ‘F2’. Both are configurable via six different screens on your PedalPro. This section introduces the nine routing options for the analogue effects of your PedalPro. These can be selected by adjusting the parameter Route type on page 1/6 of the Filters configuration menu (see the section on the ‘parameters of the filters’ on page 30). In the screenshots below, FL indicates the filter configuration of the left channel, FR that of the right channel. Filter 1 is an inductor filter that produces a sound similar to a classic Crybaby, but with additional features and possibilities. Route type: 00 Filter 2 is a matched-pair transistor based filter, with a wide range of sound capabilities. F i l te r r o u t i ng È1 /6 Rout e t ype : 00 FL=Â FR=Â Nine routing possibilities A programmable hardware analogue configuration means that both Filters can be physically connected, disconnected and moved to different points in your effect chain, depending on the sounds you want to produce. The result is no less than nine different routing possibilities (see next page). Both filters bypassed: In this configuration, both filters are true bypassed (OFF): the parameters on pages 2 to 6 of the filters’ configuration menu will not produce any change to the output sound. post effects L envelope detector IN phaser compressor external pedal pre-amp distortion panner/ tremolo noise gate post effects R OUTPUT RIGHT envelope detector Route type: 01 F i l te r r o u t i ng È1 /6 Rout e t ype : 01 FL= F1 FR=Â Parameters never available before The Filters can be configured independently of each other and in every configuration the frequency sweep range of each Filter is individually controllable. Control the resonance (parameter Q), the phase, the envelope function, and other parameters you’ve never had access to before. When playing in Manual Mode, the filter frequency can be controlled in real time using an expression pedal* to produce a sound very similar to a Crybaby. Mono F1: filter F1 is positioned on the left channel after the Distortion, Tremolo and Phaser cascade. The filter F2 and the right channel are bypassed. post effects L envelope detector IN phaser filter F1 volume control noise gate volume control noise gate buffer compressor external pedal pre-amp distortion panner/ tremolo post effects R RIGHT 28 OUTPUT LEFT (mono) LEFT envelope detector *Optional Pedalino™ Foot Controller required. volume control OUTPUT LEFT (mono) RIGHT You have the option to use both Filters in stereo configuration or (dual) mono configuration, or completely independently. Both Filters can be used in Manual, Auto or Envelope Modes. Envelope Mode can work in ‘positive’ or ‘negative’ mode, further multiplying the number of sounds you can produce. Filter 2 has an additional feature that allows you to configure it as a low-pass filter or a band-pass filter. Rev. 2.0 - EN EU - fw 5.22 noise gate LEFT buffer Filter Modes 9 volume control OUTPUT RIGHT Working with Effects: Filters Route type: 02 Route type: 05 F i l te r r o u t i ng È1 /6 Rout e t ype : 02 FL= F1 FR= F2 Stereo filters: This configuration is used to produce a stereo effect, with filter F1 assigned to the left channel, and filter F2 assigned to the right channel. F i l te r r o ut i ng È1 /6 Rout e t ype : 0 5 FL= F1 ->di s t FR= Â Pre Filter F1: F1 is placed just after the Compressor. When used in combination with the Distortion, it produces the same sound as if you plugged your Wah into your distortion – a sound widely used by musicians. post effects L envelope detector IN phaser post effects L volume control filter F1 noise gate OUTPUT LEFT (mono) envelope detector phaser LEFT buffer compressor external pedal pre-amp distortion panner/ tremolo IN post effects R compressor external pedal filter F1 pre-amp distortion panner/ tremolo noise gate OUTPUT RIGHT envelope detector OUTPUT RIGHT Route type: 06 F i l te r r o u t i ng È1 /6 Rout e t ype : 03 FL= F2 FR= F2 Mono F2: In this configuration, the filter F2 is placed at the end of the chain. The output signal is then sent to the left and right channels for further processing F i l te r r o ut i ng È1 /6 Rout e t ype : 0 6 FL= F2- >di s t FR= Â Pre F2 Filter: Same as route type 05 but uses F2. Because F2 has no inductor and very low noise, this configuration is perfect for solo distortion, providing a more clearlydefined distortion than the Route type 05 post effects L envelope detector phaser post effects L volume control filter F2 noise gate OUTPUT LEFT (mono) envelope detector phaser volume control noise gate volume control noise gate OUTPUT LEFT (mono) LEFT buffer compressor external pedal pre-amp distortion panner/ tremolo IN post effects R LEFT buffer compressor external pedal filter F2 RIGHT volume control noise gate panner/ tremolo post effects R OUTPUT RIGHT envelope detector Fi l ter r outi ng È1/6 Route type: 04 FL=F1+F2 FR=F2 post effects L envelope detector pre-amp distortion panner/ tremolo volume control + phaser LEFT external pedal Route type: 07 Post formant F1+F2: F1 and F2 are processing the left channel in parallel, before being combined. The right channel is processed only by F2. filter F1 compressor distortion RIGHT Route type: 04 buffer pre-amp OUTPUT RIGHT envelope detector IN noise gate envelope detector Route type: 03 IN volume control OUTPUT LEFT (mono) post effects R RIGHT volume control noise gate LEFT buffer RIGHT filter F2 volume control noise gate F i l te r r o ut i ng È1 /6 Rout e t ype : 07 FL= F1 +F 2 ->d i st FR= Â post effects L OUTPUT LEFT (mono) envelope detector filter F2 IN post effects R RIGHT volume control noise gate Pre formant F1+F2 filters: F1 and F2 in parallel after the Compressor. This is frequently used in combination with the Distortion and/or the Phaser. phaser filter F1 buffer OUTPUT RIGHT filter F2 envelope detector noise gate volume control noise gate OUTPUT LEFT (mono) LEFT + compressor volume control 9 external pedal pre-amp distortion panner/ tremolo RIGHT post effects R OUTPUT RIGHT envelope detector 29 Rev. 2.0 - EN EU - fw 5.22 Working with Effects: Filters Route type: 08 PARAMETERS F i l te r r o u t i ng È1 /6 Rout e t ype : 08 FL= F1 - >d i st FR= F2 Pre F1 and post F2: This configuration is used for cascading the F1 and F2. The output of the cascade is available at the output of right channel. Because of the number of different parameters and filter options available, the configuration of PedalPro’s two Filters is spread over six menu pages, as follows: Page 1/6 (Routing) defines the position of the filter(s) in the effect chain. post effects L envelope detector volume control phaser noise gate Page 2/6 (Configuration) defines the general control parameter of both filters, F1 and F2. OUTPUT LEFT (mono) LEFT IN buffer compressor filter F1 external pedal pre-amp distortion panner/ tremolo RIGHT Page 3/6 (Auto F1) defines the parameters of filter F1, when F1 is in auto mode (e.g., auto wah, vowel generator). post effects R volume control filter F2 noise gate OUTPUT RIGHT Page 4/6 (Auto F2) defines the parameters of filter F2, when F2 is in auto mode (e.g., auto wah, vowel generator). envelope detector Page 5/6 (Envelope) defines the settings for both Filters when used in envelope mode. Route type: 09 F i l te r r o u t i ng È1 /6 Rout e t ype : 09 FL= Â FR= F2 Post F2 on right channel: This layout is used to achieve a stereo effect in which there is no filter on the left channel, while the right channel is coloured by the filter F2. Page 6/6 (Manual) defines the settings for both F1 and F2 when used in manual mode. It is important to note that, while the menus are divided into sections related to specific sound application, you are NOT required to use the filters F1 and F2 in the same mode (e.g., you can use F1 in envelope mode and F2 in auto mode, or in any one of the other possible combinations). post effects L envelope detector IN volume control phaser noise gate OUTPUT LEFT (mono) LEFT buffer compressor external pedal pre-amp distortion panner/ tremolo post effects R • To enter the Filters configuration pages, press the multifunction key [10b] labelled ‘Fltr’ on page 2 of the main menu. • To scroll through the six pages of the Filters configuration menu, press Page - [11] or Page + [12]. RIGHT filter F2 volume control noise gate OUTPUT RIGHT envelope detector Please note: Regardless of the filter sound you want to produce, you MUST set the parameters on pages 1 and 2 of the Filter configuration menu BEFORE working on the parameters in the dedicated menu page of the filter mode selected (pages 3 to 6). 9 Rev. 2.0 - EN EU - fw 5.22 30 Working with Effects: Filters PAGE 1/6 - ROUTINGS signal from your guitar becomes louder than the threshold, the sweeping action begins. In this way, you can control exactly when the filter starts to sweep and when it stops, using your guitar. This menu allows you to select from the nine different routing possibilities, i.e., the nine different configurations of the PedalPro effects chain, whereby the F1 filter and the F2 filter are physically connected at different points of the chain (See section ‘Routing Options - An Overview’, on page 28, for details). • To engage HSync simply press the PARAM. SWITCH key [10b]. QUICK TIP: HSync With HSync engaged, if you assign the adjustable threshold parameter (Fsync_th) to an expression pedal* via the ADES page you can control the number of wah/vowel cycles that you are going to produce and these cycles are always synchronised with your strumming action. F i l te r r o u t i ng È1 /6 Rout e t ype : 00 FL=Â FR=Â If you set the correct Tempo parameter in the filter configuration page 3/6 (for F1) or 4/6 (for F2), the filter sweeping action will also be synchronised with your drummer (or your drum machine). Route type – Effect chain routing selector. Range: 00 to 09 • To change the Route type, press EDIT [5]; the cursor will blink next to the route type number. Adjust the value with the selection dial [4]. Q1 – Resonance factor of filter F1. Range: 1 to 18, increments of 0.5 Q2 – Resonance factor of filter F2. Range: 1 to 16, increments of 0.5 PAGE 2/6 - FILTER MODE CONFIGURATION The resonance factor (aka Q) characterises a filter’s bandwidth relative to its centre frequency. Essentially, the higher the resonance Q, the more the filter will emphasise the frequencies around its centre frequency. Page 2 is the main configuration page for your two filters, F1 and F2. The settings for F1 are on the left-hand side of the screen, and the settings for F2 are on the right. • Fi l ter mai n È2/6 HSyncÇÂ F2typeÇÏÑ Q2: 01 . 5 Q1: 05 . 0 F1 Md: env+ F2Md : auto ÏÑ) or Band-pass (ÐÑ) F2type – F2 filter type selector. Range: Low-pass ( The F2 Filter has an additional feature that allows you to select between two filter types: a low-pass filter and a band-pass filter • To select between the two possible settings for F2type, press PARAM. SWITCH key [10d]. F1Md & F2Md – F1 and F2 mode selector. Range: auto, manual (manl), envelope positive (env+), envelope negative (env-) HSync – HumanSync™ switch. Range: on ( ), off ( ) Á To change the Q of F1 (Q1) or F2 (Q2), press EDIT [5]. Use the arrow keys [3] to position the blinking cursor next to Q1 or Q2. Adjust the value with the selection dial [4]. Â With HSync engaged, the auto filters (that is, when filter F1 and/or filter F2 are set to auto mode) will sweep according to the settings on pages 3/6 (F1) and 4/6 (F2) – if the level of the signal from your guitar is above an adjustable threshold. 9 You can choose to independently configure F1 and F2 in one of four modes: 1. auto = auto mode (for example, auto Wah). If this option is selected for either F1 or F2, or both, the parameters of page 3/6 and page 4/6 will define F1 and/or F2 modulator settings. If the signal is below the threshold, the filter sweep will be paused. Once the 31 *Optional Pedalino™ Foot Controller required. Rev. 2.0 - EN EU - fw 5.22 Working with Effects: Filters 2. env+ = envelope positive mode (for example, touch wah). In this configuration, the filter will move according to the settings of page 5/6, and the filter frequency shift will increase proportionally to the playing strength. For more detail, see page 5/6 of the Filter configuration menu. This parameter selects the waveform assigned to the individual modulator of each filter. You can choose from among the following possibilities (see ‘Appendix A’ on page 62 for more details on the modulating waveforms): QUICK TIP - Wah: If you set F1Md to env+ , the filter F1 will produce the sound of an envelope wah (touch wah). 3. env- = envelope negative mode. In this configuration, the Filter will move according to the settings of page 5/6 and the filter frequency shift will decrease proportionally to the playing strength. For more detail, see page 5/6 of the Filter configuration menu. 4. manual = manual mode (for example, Crybaby, Vox) or fixed mode. See page 6/6 for the settings of this page. • 1. 2. 3. 4. 5. 6. 7. 8. sine = sinusoidal trig = triangle trap = trapezoidal rect = symmetric square waveform expo = exponential shl1 = shelf waveform 1 shl2 = shelf waveform 2 shl3 = shelf waveform 3 • To change or select a modulating waveform for F1, press EDIT [5]. Use the arrow keys [3] to position the blinking cursor next to WaveF1. Adjust the value with the selection dial [4]. Tempo – Speed of the F1 modulator. Range 3 BPM (20 s) - 550 BPM (9.16 Hz) • To change the Filter Mode settings of F1 (F1Md) or F2 (F2Md), press EDIT [5]. Use the arrow keys [3] to position the blinking cursor next to F1Md or F2Md. Adjust the value with the selection dial [4]. To change the Tempo of the F1 modulating waveform, press EDIT [5]. Use the arrow keys [3] to position the blinking cursor next to Temp. Adjust the value with the selection dial [4]. Ph – Phase of the F1 modulator. Range: 0°, 90°, 180°, 270° Parameter Ph controls the phase of the modulating waveform. It is used to control the relative phase of effects such as the Tremolo/Panner, Phaser, Filters (in auto mode), and Chorus, when used simultaneously. (For more details refer to the QUICK TIP box ‘Phase of the modulating waveforms’, on page 25). PAGE 3/6 - AUTO MODE MODULATION SETTINGS FOR F1 This page is used to configure filter F1 when auto mode is selected for F1 (F1Md set to auto on page 2/6). • To alter the phase of the F1 modulator, press EDIT [5]. Use the arrow keys [3] to position the blinking cursor next to Ph. Adjust the value with the selection dial [4]. Fmin1[Hz] – F1 minimum frequency. Range: 370 Hz to 1968 Hz Fmax1[Hz] – F1 maximum frequency. Range: 370 Hz to 1968 Hz È3/6 WaveF1 : sine Tempo: 076. 4 Ph: 000Ì Fmin1 [Hz] : 0 470 Fmax1 [Hz] : 0 890 9 These values define the frequency range swept by filter F1 in auto mode. • Please note: PedalPro will NOT allow you to set Fmax1 smaller than Fmin1. WaveF1 – Filter F1 modulating waveform. Range: sine, trig, trap, rect, expo, shl1, shl2, shl3. Rev. 2.0 - EN EU - fw 5.22 To change the value of Fmin1 or Fmax1, press EDIT [5]. Use the arrow keys [3] to position the blinking cursor next to Fmin1 or Fmax1. Adjust the value with the selection dial [4]. 32 Working with Effects: Filters PAGE 4/6 - AUTO MODE MODULATION SETTINGS FOR F2 refer to the QUICK TIP box ‘Phase of the modulating waveforms’, on page 25). • This page is used to configure filter F2 when auto mode is selected for F2 (F2Md set to auto on page 2/6). To alter the phase of the F2 modulator, press EDIT [5]. Use the arrow keys [3] to position the blinking cursor next to Ph. Adjust the value with the selection dial [4]. Fmin2 – F2 minimum frequency. Range: 150 Hz to 2697 Hz Fmax2 – F2 maximum frequency. Range: 370 Hz to 2697 Hz È4/6 WaveF2: r ec t Tempo: 100. 0 Ph: 000Ì Fmin2[Hz] : 0 1 50 Fmax1 [Hz] : 1 300 These values define the frequency range swept by filter F2 in auto mode • WaveF2 – Filter F2 modulating waveform. Range: sine, trig, trap, rect, expo, shl1, shl2, shl3. Please note: PedalPro will NOT allow you to set Fmax2 smaller than Fmin2. This is the waveform assigned to the individual modulator of each filter. You can choose from among the following possibilities (see Appendix A, on page 62, for more details on the modulating waveforms): 1. 2. 3. 4. 5. 6. 7. 8. sine = sinusoidal trig = triangle trap = trapezoidal rect = symmetric square waveform expo = exponential shl1 = shelf waveform 1 shl2 = shelf waveform 2 shl3 = shelf waveform 3 • To change or select a modulating waveform for F2, press EDIT [5]. Use the arrow keys [3] to position the blinking cursor next to WaveF2. Adjust the value with the selection dial [4]. PAGE 5/6 - ENVELOPE MODE MODULATION SETTINGS FOR F1 AND F2 This page is used to configure Filters F1 and F2 when in envelope mode (F1Md and/or F2Md set to env+ or env- on page 2/6). Fst r 1 [ Hz] : 0370 È5/6 Sens1: 020. 0 Fx: l i nr Fstr 2[Hz ] : 0 1 50 Sens2: 075. 6 Fx: exp+ Fstr1[Hz] – Start frequency, filter F1. Range: 370 Hz to 1968 Hz Tempo – Speed of the F2 modulator. Range 3 BPM (20 s) - 550 BPM (9.16 Hz) • To change the value of Fmin2 or Fmax2, press EDIT [5]. Use the arrow keys [3] to position the blinking cursor next to Fmin2 or Fmax2. Adjust the value with the selection dial [4]. Sets the start frequency of the modulator sweep of filter F1 in envelope mode To change the Tempo of the F2 modulating waveform, press EDIT [5]. Use the arrow keys [3] to position the blinking cursor next to Tempo. Adjust the value with the selection dial [4]. • Ph – Phase of the F2 modulator. Range: 0°, 90°, 180°, 270° To change the value of the starting frequency of the modulator of F1, press EDIT [5]. Use the arrow keys [3] to position the blinking cursor next to Fstr1. Adjust the value with the selection dial [4]. 9 Sens1 – Sensitivity of filter F1. Range: 0-100% Parameter Ph controls the phase of the modulating waveform. It is used to control the relative phase of effects such as the Tremolo/Panner, Phaser, Filters (in auto mode), and Chorus, when used simultaneously. (For more details This parameter defines how much the force you put into your strumming action will affect the displacement of filter F1. 33 Rev. 2.0 - EN EU - fw 5.22 Working with Effects: Filters • To change the value of the sensitivity of F1, press EDIT [5]. Use the arrow keys [3] to position the blinking cursor next to Sens1. Adjust the value with the selection dial [4]. PAGE 6/6 - MANUAL MODE OR FIXED MODE SETTINGS FOR F1 AND F2 On this page you can configure filters F1 and F2 when in manual mode (F1Md and/or F2Md set to manu on page 2/6). Fx – Displacement function, F1. Range: linear (lnr), positive exponential (exp+), negative exponential (exp-). Man ual fi lters È6/6 F1[Hz]: 370 Q1: 05. 0 F2[Hz]: 1 50 Q2: 01 . 5 The parameter Fx - on the second line of the display on page 5/6 - defines the trajectory of the displacement of F1 as a function of your strumming force. • To select or modify the displacement function for F1, press EDIT [5]. Use the arrow keys [3] to position the blinking cursor next to Fx on the second line of page 5/6. Adjust the value with the selection dial [4]. Fstr2[Hz] – Start frequency, F2. Range: 150 Hz to 2697 Hz F1[Hz} – Enhanced frequency, F1. Range: 370 Hz to 1968 Hz Sets the start frequency of the modulator sweep of filter F2 in envelope mode This is the frequency at which filter F1 produces the maximum output level. • • To change the value of the starting frequency of the modulator of F2, press EDIT [5]. Use the arrow keys [3] to position the blinking cursor next to Fstr2. Adjust the value with the selection dial [4]. To change the value of enhanced frequency of F1, press EDIT [5]. Use the arrow keys [3] to position the blinking cursor next to F1[Hz]. Adjust the value with the selection dial [4]. Sens2 – Sensitivity of filter F2. Range: 0-100% Q1 – Resonance factor, filter F1. Range: 1 to 18 dB This parameter defines how much your strumming action will affect the displacement of filter F2. The resonance factor characterises a filter’s bandwidth relative to its centre frequency. Essentially, the higher the resonance Q, the more the filter will emphasise the frequencies around its centre frequency. For user’s convenience, Q1 and Q2 can be edited on either page 2/6 or page 6/6 and the values across the two pages will be kept in sync. • To change the value of the sensitivity of F2, press EDIT [5]. Use the arrow keys [3] to position the blinking cursor next to Sens2. Adjust the value with the selection dial [4]. • Fx – Displacement function, F2. Range: linear (lnr), positive exponential (exp+), negative exponential (exp-). The parameter FX - on the fourth line of the display on page 5/6 - defines the trajectory of the displacement of F2 as a function of your strumming force. • 9 To change the Q of filter F1 (Q1), press EDIT [5]. Use the arrow keys [3] to position the blinking cursor next to Q1. Adjust the value with the selection dial [4]. F2[Hz} – Enhanced frequency, F2. Range: 150 Hz to 2697 Hs This is the frequency at which filter F2 produces the maximum output level. To select or modify the displacement function for F2, press EDIT [5]. Use the arrow keys [3] to position the blinking cursor next to Fx on the fourth line of page 5/6. Adjust the value with the selection dial [4]. • To change the value of enhanced frequency of F2, press EDIT [5]. Use the arrow keys [3] to position the blinking cursor next to F2[Hz]. Adjust the value with the selection dial [4]. Q2 – Resonance factor, filter F2. Range: 1 to 16 • Rev. 2.0 - EN EU - fw 5.22 34 To change the Q of filter F2 (Q2), press EDIT [5]. Use the arrow keys [3] to position the blinking cursor next to Q2. Adjust the value with the selection dial [4]. Working with Effects: Filters TIPS & TRICKS - FILTERS ›› Because the Filters of your PedalPro can work in so many different ways, you may need some time before you will be completely familiar with all the sound possibilities they offer and discover the many, many different sounds they can produce. If the mode of a filter is set to auto, adjust the parameters on pages 2 and 3 (for F1), or 2 and 4 (for F2) of the filter configuration menu. ›› If the mode of F1, F2, or both is set to envelope (e.g., env+ or env), adjust the parameters on pages 2 and 5. ›› If the mode of F1, F2, or both is set to manual, adjust the parameters on pages 2 and 6 of the filter configuration menu. We recommend the approaches explained below when determining the sound you want to produce and how to do it. • What sound do I want to create? 1. Decide which filter to use: F1, F2, or combination (see also the chapter ‘Routing Options - An Overview’ on page 28). • For the classic Wah sound, use filter F1. • For a deeper Wah sound, use filter F2. • To generate vowels, use both filters. If you want to control one of the filter’s parameters with an expression pedal, assign that parameter to the expression pedal, as described in the section ‘ADES™ Link’ [please note: optional Pedalino™ Foot Controller is required]. Finally, a good approach for learning how to master the numerous creative options offered by your PedalPro is also to take a default factory preset and learn about the different parameters by experimenting with its settings. 2. Decide which filter(s) mode to use: • For a CryBaby-like sound produced by either one of the two filters, use the manual mode. • For an auto-Wah using either one of the two filters, use auto mode. • For Vowel Sounds produced by both filters, use auto mode. • To set either one of the two filters, or both of them, as an envelop filter or envelope vowel, select env+ or env- (envelope modes). In an envelope filter, the force you put into your strumming action will directly influence the frequency displacement (sweeping action) of the filter. 9 How do I create this sound? • Choose your routing configuration by switching on the filters and choosing between the different routing options on page 1/6 of the filter configuration menu. • Adjust the ranges of the parameters according to the mode of the filter: 35 Rev. 2.0 - EN EU - fw 5.22 Working with Effects: Volume Controls 9.3.8 Volume Controls QUICK TIP: By assigning one of ADES parameters Volume#0 to Volume#3 (see Expression parameter table) to an expression pedal connected to the Pedalino™ Foot Controller*, you can adjust the stereo volume level of your sound while you play. PedalPro™ has stereo, channel-independent Volume Controls (also known as Expression Controls or Level Controls) that give you tight, precise control of what goes into your amplifiers. PARAMETERS • To enter the Volume configuration page, press the multifunction key [10c] labelled ‘Levl’ on page 2 of the main menu. Level _c ntÇÁ È1/1 LvL: 040. 0 LvR: 069. 0 Level_cnt – Volume controls effect switch. Range: on ( ), off ( ) Á • Á Â Â To enable ( ) or disable ( ) the analogue Volume Controls for the left and right channel in your effect chain, press the BYPASS EFFECT 2 key [10c]. LvL – Volume control, left channel. Range: 0-100% This parameter controls the total output level on the left channel. • To change the total output level of PedalPro’s left channel, press EDIT [5]. Use the arrow keys [3] to position the blinking cursor next to LvL. Adjust the value with the selection dial [4]. LvR – Volume control, right channel. Range: 0-100% 9 This parameter controls the total output level on the right channel. • To change the total output level of PedalPro’s right left channel, press EDIT [5]. Use the arrow keys [3] to position the blinking cursor next to LvR. Adjust the value with the selection dial [4]. *Pedalino™ Foot Controller required. Pedalino is included when purchasing a PedalPro System. Rev. 2.0 - EN EU - fw 5.22 36 Post Effects 9.4 POST EFFECTS POST EFFECTS ROUTING OPTIONS The following routing configurations are available for the effects of the expansion board. The routing can be changed by accessing the Delay configuration menu (see section below). The post effects include all the BBD based effects like chorus, flanger and delay and post loops (AUX SEND/RETURN). All post effects are entirely analogue and designed using the most advanced analogue components, ensuring an unbeatable sound quality. Plus, with an expression pedal connected to the Pedalino™ Foot Controller, you can control - while you play - fundamental parameters including the Wet/Dry ratio, the Delay time, the Delay feedback delay, the Flanger feedback and many more (see the special section ‘ADES - An In-depth Look’, on page 48). post effects L LEFT chorus / flanger or chorus&vibe delay aux left = For those who need to add an external stereo digital effect or two extra analogue pedals at the end of the effect chain (just before volume control and noise gate) the PedalPro features a set of stereo AUX send/return connectors. If you use a digital external processor, the internal preamplifiers and mixers will allow to match the signal dynamic of your external effect up to +7dBu and to benefit of a full analog path of your unprocessed signal. In this way, with the mixing ratio under your control, the analogue quality and harmonic richness of your sound is always preserved. post effects R aux right RIGHT Fig. 9-2. Post effects with the delay on the left channel. post effects L LEFT chorus / flanger or chorus&vibe aux left = The post effects include the following effects/modules: 1. Chorus; 2. Flanger; 3. Chorus and Vibe; 4. Delay with left/right routing options; 5. De-tuner for modulating the delay; 6. Auxiliary (AUX) mixer, providing additional loop options. post effects R delay RIGHT aux right Fig. 9-3. Post effects with the delay on the right channel. Working with your post effects The Chorus, Flanger and Delay configuration menus are accessible from page 3 of the main menu, where two options are available: ‘ChFl’ and ‘Dly’. post effects L envelope detector IN phaser filter F1 volume control noise gate volume control noise gate OUTPUT LEFT (mono) È3/4 Play: 00 0Ç Pu rePhaser ChFl Dly LEFT buffer compressor external pedal pre-amp distortion panner/ tremolo post effects R RIGHT filter F2 OUTPUT RIGHT envelope detector 9 The post effects of your PedalPro are at the end of the PedalPro’s effect chain, just before stereo volume controls and noise gates. 37 Rev. 2.0 - EN EU - fw 5.22 Post Effects 9.4.1 Chorus, Vibe, Flanger PAGE 1/4 - MODULATION TYPE This menu allows you to select the modulation type. PARAMETERS • To enter the Chorus, Vibe and Flanger configuration pages, press the multifunction key [10a] labelled ‘ChFl’ on page 3 of the main menu. Mod ul a tion Type: chor us Owing to the large number of available parameters, the configuration of the analogue Chorus, Vibe and Flanger is spread over four menu pages as follows: Page 1/4 (Modulation) defines the modulation type. È 1/4 Type – Modulation type selector. Range: none, chorus, ch&vib, flanger Page 2/4 (Chorus) defines the settings for the Chorus. • Page 3/4 (Vibe) defines the settings for the Vibe. To change the modulation type, press EDIT [5]. The cursor will immediately blink next to the modulation type. Adjust the value with the selection dial [4]. Page 4/4 (Flanger) defines the settings for the Flanger. • To scroll through the four pages of the Chorus. Vibe and Flanger configuration menu, press Page - [11] or Page + [12]. PAGE 2/4 - CHORUS CONFIGURATION To use the Chorus of the Expansion Board, set the parameter Type on page 1/4 to either ‘chorus’ or ‘ ch&vibe’. Adjust the Chorus settings on page 2/4. The scheme of the Chorus (with Vibe) and of the Flanger circuits below will help you to understand the parameters of the analogue Chorus and Flanger. Cho r us BrgtÇ Á È2/4 Tempo: 020. 0 Ph: 000Ì I nput: 030. 1 Wv: tr i g Depth: 041 . 5 Wt: 070. 1 standard low-pass boost detune + bright low-pass IN vibe OUT wet/dry Fig. 9-4. The Chorus with Vibe 9 + detune Brgt – Bright selector. Range: on ( pass) Á, Bright Low-pass), off (Â, Standard Low- odd harmonics IN • even harmonics + Â wet/dry Tempo – Speed of the Chorus modulator. Range: 3 BPM (20 sec) - 550 BPM (9.16 Hz) regen • Fig. 9-5. The Flanger Rev. 2.0 - EN EU - fw 5.22 Press the PARAM. SWITCH key [10d] to select the low-pass filter type, bright ( ) or standard/off ( ). Á OUT 38 To change the Tempo of the modulating waveform, press EDIT [5]. Use the arrow keys [3] to position the blinking cursor next to Tempo. Adjust Post Effects the value with the selection dial [4]. TIPS & TRICKS - CHORUS Input – Range: 0-100%. • The Input parameter defines the input gain of the analogue Chorus effect. • • Start by using an input gain of 100% (set Input:100.0). If you normally use the chorus on its own, input 100% works well with both single and double coil pickups. If you usually combine your chorus with other effects, slightly reduce the input gain. To alter the depth of the Chorus effect, press EDIT [5]. Use the arrow keys [3] to position the blinking cursor next to Depth. Adjust the value with the selection dial [4]. • By setting a Tempo of between 25 and 40 BPM, Depth: 100.0 (or 100%) and Wv: trig, a sweet slow chorus sound will be produced like that of a Boss CE-1*. • To produce a Vibrato sound, increase the speed (parameter Tempo) starting from 85 BPM and reduce the value of Depth. Use a sine waveform (set Wv: sine) Ph – Phase of the Chorus modulator. Range: 0°, 90°, 180°, 270° The phase of the modulator controls the phase of the modulating waveform. It is used to control the relative phase among effects that offer the possibility of selecting the Phase of the Modulator (Ph), such as the Tremolo/Panner, Phaser, Auto Filters, etc. This parameter is particularly useful when the Chorus is used in combination with the Vibe, as it gives you the option to synchronise their tempos. • To alter the phase of the Chorus modulator, press EDIT [5]. Use the arrow keys [3] to position the blinking cursor next to Ph. Adjust the value with the selection dial [4]. PAGE 3/4 - VIBE CONFIGURATION This completely new effect is produced by amplitude-modulating the amount of detuned signal produced by the chorus, before it is mixed with the dry signal. Wv – Modulating waveform. Range: sine, trig, trap, rect, expo, shl1, shl2 The chorus modulating waveform parameter allows you to select from among the available modulating waveforms. All the classic waveforms are included, along with some exclusive, VR-designed waveforms. Available waveforms include: sine, triangle, trapeze, rectangle, and shlf (shelf) (see Appendix A for more details on the modulating waveforms). • This effect sounds greatly enhances either a fast chorus (for a ‘Lesley’ sound) or a very slow chorus (below 40 BPM). Select modulation Type: ch&vib on page 1/4 and use the settings for the Vibe on page 3/4 in combination with the Chorus settings on page 2/4. To change or select a modulating waveform, press EDIT [5]. Use the arrow keys [3] to position the blinking cursor next to Wv. Adjust the value with the selection dial [4]. Vi b e È3/4 Á BoostÇ Tempo: 055. 0 Ph: 1 80Ì Depth: 032. 1 Wv: si ne Wt – Wet/dry ratio control. Range: 0-100% The Wet parameter allows you to control the ratio between Chorus signal (wet) and input signal (dry) in the Chorus output signal. • Â Á To alter the input gain of the Chorus, press EDIT [5]. Use the arrow keys [3] to position the blinking cursor next to Input. Adjust the value with the selection dial [4]. Depth – Depth of the Chorus modulation. Range: 0-100% • Set Bright: (standard/off) for a more natural chorus sound (similar to the Boss CE-1*). Use Bright: (bright low-pass/on) if you are looking for a sound with plenty of high and middle tones. 9 To alter the wet/dry ratio of the Chorus, press EDIT [5]. Use the arrow keys [3] to position the blinking cursor next to Wt. Adjust the value with the selection dial [4]. 39 *All trademarks are property of their respective owners and used for reference only. Rev. 2.0 - EN EU - fw 5.22 Post Effects PAGE 4/4 - FLANGER CONFIGURATION Boost – Range: on ( ), off ( ) Á • Â Press the PARAM. SWITCH key [10b] to turn the Boost on ( ) or off ( ). Á Â To add the Flanger of the Expansion Board to your effect chain, set the parameter Type on page 1/4 to either ‘flanger’. Adjust the Flanger settings on page 4/4. Tempo – Speed of the Vibe modulator. Range: 3 BPM (20 sec) - 550 BPM (9.16 Hz) • To change the Tempo of the Vibe modulating waveform, press EDIT [5]. Use the arrow keys [3] to position the blinking cursor next to Tempo. Adjust the value with the selection dial [4]. Fl a nger Har mÇ Á È4/4 Tempo: 150. 3 Wv: r ec t Regen: 050. 1 Mn: 030. 5 Depth: 068. 2 Wt: 030. 1 Depth – Depth of the Vibe modulation. Range: 0-100% • To alter the depth of the Vibe effect, press EDIT [5]. Use the arrow keys [3] to position the blinking cursor next to Depth. Adjust the value with the selection dial [4]. Ph – Phase of the Vibe modulator. Range: 0°, 90°, 180°, 270° Harm – Harmonics selector Range: even harmonics ( ), odd harmonics ( ) The phase of the modulator controls the phase of the modulating waveform. It is used to control the relative phase among effects that offer the possibility of selecting the Phase of the Modulator (Ph), e.g., the Tremolo/Panner, Phaser, Auto Filters. This parameter is particularly useful when the Vibe is used in combination with the Chorus, as it gives you the option to synchronise their tempos. This switch allows you to select whether to use even or odd harmonics to create the flanging effect (see Tips&Tricks box in this page). • Á • Á Tempo – Speed of the Flanger modulator. Range: 3 BPM (20 sec) - 550 BPM (9.16 Hz) To change the phase of the Vibe modulator, press EDIT [5]. Use the arrow keys [3] to position the blinking cursor next to Ph. Adjust the value with the selection dial [4]. • To adjust the Tempo (speed) of the Flanger modulating waveform, press EDIT [5]. Use the arrow keys [3] to position the blinking cursor next to Tempo. Adjust the value with the selection dial [4]. Regen – Flanger feedback control. Range: 0-100% The modulating waveform parameter allows you to select from among the available modulating waveforms. All the classic waveforms are included, along with some exclusive, VR-designed waveforms. Available waveforms include: sine, triangle, trapeze, rectangle, and shlf (shelf) (see Appendix A for more details on the modulating waves). 9 Press the PARAM. SWITCH key [10d] to select the even harmonics ( ) or the odd harmonics off ( ). Â Wv – Modulating waveform. Range: sine, trig, trap, rect, expo, shl1, shl2 • Â The Regen parameter controls the amount of signal that is fed back into the Flanger effect. • To change or select a modulating waveform for the Vibe, press EDIT [5]. Use the arrow keys [3] to position the blinking cursor next to Wv. Adjust the value with the selection dial [4]. To change the Regen level of the Flanger, press EDIT [5]. Use the arrow keys [3] to position the blinking cursor next to Regen. Adjust the value with the selection dial [4]. Depth – Depth of the Flanger modulation. Range: 0-100% • To alter the depth of the Flanger, press EDIT [5]. Use the arrow keys [3] to position the blinking cursor next to Depth. Adjust the value with the selection dial [4]. Wv – Modulating waveform. Range: sine, trig, trap, rect, expo, shl1, shl2 The modulating waveform parameter allows you to select from among the Rev. 2.0 - EN EU - fw 5.22 40 Post Effects 9.4.2 Delay and Detuner available modulating waveforms for the Flanger. All the classic waveforms are included, along with some exclusive, VR-designed waveforms. Available waveforms include: sine, triangle, trapeze, rectangle, and shlf (shelf) (see Appendix A for more details on the modulating waves). • PARAMETERS Because of the number of parameters that can be accessed and adjusted, the configuration of the analogue Delay and Detuner is spread over three menu pages as follows: To change or select a modulating waveform for the Flanger, press EDIT [5]. Use the arrow keys [3] to position the blinking cursor next to Wv. Adjust the value with the selection dial [4]. Page 1/3 (Routing) defines the Delay routing and range. Mn (Manual) – Flanger delay manual adjustment. Range: 0-100% Page 2/3 (Delay) defines the settings for the Delay. The Manual parameter allows you to controls the amount of delay applied to the flanged signal. • Page 3/3 (Detuner) defines the settings for the Detuner. To vary the amount of delay of the Flanger, press EDIT [5]. Use the arrow keys [3] to position the blinking cursor next to Mn. Adjust the value with the selection dial [4]. The scheme of the Delay circuit below will help you to understand how to control the parameters of the analogue Delay and Detuner of your PedalPro. The Expansion board provides you with three different analogue circuits for delaying your signal according to the type of sound you are after. A dedicated circuit for each delay range will provide a noiseless delay and amazing sound definition. Wt – Wet/dry ratio control. Range: 0-100% The Wet parameter allows you to control the ratio between flanged signal (wet) and input signal (dry) that goes into the Flanger output signal (see Fig. 9-5, on page 38). • To alter the wet/dry ratio of the Flanger effect, press EDIT [5]. Use the arrow keys [3] to position the blinking cursor next to Wt. Adjust the value with the selection dial [4]. • To enter the Delay and Detuner configuration pages, press the multifunction key [10a] labelled ‘Dly’ on page 3 of the main menu. • To scroll through the three pages of the Delay and Detuner configuration menu, press Page - [11] or Page + [12]. TIPS & TRICKS - FLANGER • • • • IN A high Mn (Manual) value in combination with small amount of Depth will produce a sound with a higher frequency content. input level + delay BBD 1 delay BBD 2 delay BBD 3 OUT output Ç Á) produce a jet-like sound. Odd harmonics (Harm Ç Â) produce a watery sound. Even harmonics (Harm wet/dry feedback Fig. 9-6. The Delay When using a highly rhythmic modulating waveform (for instance, when Wv is set to ‘rect’ or one of the ‘shlf’ waveforms) use a small Depth value (below 40%) and find the sweet spot by adjusting the Mn parameter. 41 9 Rev. 2.0 - EN EU - fw 5.22 Post Effects PAGE 1/3 - DELAY ROUTING AND RANGE PAGE 2/3 - DELAY CONFIGURATION The menu on this page allows you to position (or route) your delay on either the left or right channel. If you use the PedalPro in a mono configuration, select ‘left’ to insert the Delay in your effect chain (see Fig. 9-2 and Fig. 9-3, on page 37). This is the configuration page for the parameters of the Delay. Del ay È2/3 Time: 400. 7 ms I np: 050. 5 O ut: 075. 2 Wet: 045. 0 F bk: 01 0. 1 È1/3 D el a y Routing: l eft Range: 23-099ms Time – Amount of delay applied. Range: 23-99 ms (short), 40-409 ms (medium), 61-614 ms (long) Routing – Routing selector. Range: none, left, right • • To change the routing, press EDIT [5]. Use the arrow keys [3] to position the blinking cursor next to Routing. Adjust the value with the selection dial [4]. When ‘none’ is selected, the Delay effect is deactivated. Inp – Input signal level selector. Range: 0-100% Range – Available delay range. Range: 23-99 ms (short), 40-409 ms (medium), 61-614 ms (long) • 9 To change the amount of delay, press EDIT [5]. Use the arrow keys [3] to position the blinking cursor next to Time. Adjust the value with the selection dial [4]. The Inp (input) parameter controls the level of the signal at the input of the Delay effect. To set the available delay range, press EDIT [5]. Use the arrow keys [3] to position the blinking cursor next to Range. Adjust the value with the selection dial [4]. • To adjust the input signal level, press EDIT [5]. Use the arrow keys [3] to position the blinking cursor next to Inp. Adjust the value with the selection dial [4]. TIPS & TRICKS - DELAY Wet – Wet/dry ratio control. Range: 0-100% • The Wet parameter allows you to control the ratio between delayed signal (wet) and input signal (dry) in the Delay output signal. • • • Rev. 2.0 - EN EU - fw 5.22 For short delays (doubling echo, slapback, reverberation emulator) set the Range parameter to ‘short’; this gives you access to an analogue delay with an adjustable range of 23-99 ms. • For medium delays (slapback and infinite loops) set the Range to ‘medium’; you can select your analogue delay from a range of 40-409ms. To alter the wet/dry ratio of the Delay, press EDIT [5]. Use the arrow keys [3] to position the blinking cursor next to Wet. Adjust the value with the selection dial [4].. Out – Delay output level. Range: 0-100% For long delays (infinite loops, small phrase loops) set Range to ‘long’; this produces an analogue delay with a range between 61-614 ms. The Out parameter controls the output level of the analogue Delay effect.. • Finally, adjust the amount of delay applied, within the range that you have just selected, on page 2/3 of the Delay configuration menu (parameter Tempo). 42 To adjust the output level of the Delay, press EDIT [5]. Use the arrow keys [3] to position the blinking cursor next to Out. Adjust the value with the selection dial [4]. Post Effects 9.4.3 AUX Connections (Post-loop) Fbk – Feedback control. Range: 0-100% The Fbk parameter controls the amount of delayed signal that is fed back into the Delay effect. • On page 2 of the main menu the user can access the configuration for the external effects loop (pre-loop, see section 7.6, on page 10) or the AUX loop (post-loop). To change the feedback level of the Delay, press EDIT [5]. Use the arrow keys [3] to position the blinking cursor next to Fbk. Adjust the value with the selection dial [4]. The AUX SEND and AUX RETURN [16a to 16d] jack connectors can be used for connecting either up to two external stomp box pedals (see Fig. 9-8, Fig. 9-9, and Fig. 9-10) or a DSP effect unit (see Fig. 9-11) at the end of the audio chain before the Noise gate and the Volume controls. PAGE 3/3 - DETUNER CONFIGURATION Like in the pre-loop, the post-loop connections are controlled by internal relays that electrically connect and disconnect the external effects to your post-loops according to the Aux type parameter which is part of your sound preset definition. Therefore in one sound preset your external effect may be part of your sound effect chain, while in an other sound preset your external effect is true bypassed. By modulating the clock of the BBD delay stages, you can produce a shimmering delay that simulates vintage tape delays. To use this feature you must first configure the Delay using the parameters on page 1/3 and page 2/3, and then activate and adjust the Detuner on page 3/3. D et un e r Ç Á Speed: 020. 0 Depth: 01 8. 8 È3/3 ACCESSING POST LOOP OPTIONS • È2/4 Play: 00 0Ç Pu rePhaser Phasr Fltr Levl Ext Detuner – Range: on ( ), off ( ) • Á Â When on this page, press the BYPASS EFFECT 1 key [10a] to switch the Delay Detuner on (Á) or off (Â). Speed – Speed of the Detuner. Range: 0-100% • To change the speed of the Detuner, press EDIT [5]. Use the arrow keys [3] to position the blinking cursor next to Speed. Adjust the value with the selection dial [4]. Page 1/2 (Ext. effects, AUX type) activates and selects the post-loop routing. Page 2/2 (AUX mixer) defines the settings for the auxiliary mixer*. Depth – Depth of the Detuner modulation. Range: 0-100% • On page 2 of the main menu, press the multifunction key [10d] labelled ‘Ext’. To alter the depth of the Detuner effect, press EDIT [5]. Use the arrow keys [3] to position the blinking cursor next to Depth. Adjust the value with the selection dial [4]. • 43 To switch between the two pages of the External Effects and AUX Mixer loops configuration menu, press Page - [11] or Page + [12]. 9 * Aux_type on page 1/2 must be set to ‘Aux + Mixer’ in order to activate the auxiliary mixer. Rev. 2.0 - EN EU - fw 5.22 Post Effects PAGE 1/2 - AUX TYPE AUX LOOPS ROUTING OPTIONS - AN OVERVIEW On this page you can select which loops are enabled - and their position in the effects’ chain - as well as the routing of the post-loop(s) connected to the auxiliary jack connectors AUX SEND and AUX RETURN [16a to 16d]. This figures below show the AUX loop (post-loop) routing options. These can be selected by adjusting the parameter Aux type on page 1/2 of the External effects configuration menu. SEND Ext_effec t ÇÂ È1/2 Aux type: Loop_L>OutL AUX LEFT SEND ► RETURN RETURN LEFT CHANNEL = SEND AUX RIGHT SEND ► RETURN RIGHT CHANNEL RETURN Fig. 9-7. Aux type: none Aux Type – Auxiliary loops routings. Range: none (all off), LoopL>OutL, LoopR>OutR, LoopL&R>Out, Aux + Mixer external effect(s) in LEFT CHANNEL The main difference with the loop between the EXT. EFFECT jacks is that the AUX SEND and RETURN jacks are positioned at the end of the effect chain, just before the output level control and the Noise Gate (see section 9.4). This makes the AUX loops ideal for connecting reverberation effects and other modulation effects. The routing options are shown in the next page. • AUX RETURN LEFT AUX SEND LEFT The Aux type parameter allows you to decide how to route the post loop(s) connected between the AUX SEND jacks [16a and 16b] and the AUX RETURN jacks [16c and 16d]. The diagrams in the next page of this manual will present an overview of the different routing options that can be selected. out RIGHT CHANNEL Fig. 9-8. Aux type: LoopL > OutL LEFT CHANNEL To set the available delay range, press EDIT (5). The cursor will blink directly next to AUX type. Adjust the value with the selection dial [4]. AUX RETURN RIGHT AUX SEND RIGHT RIGHT CHANNEL in out external effect(s) Fig. 9-9. Aux type: LoopR > OutR 9 external effect(s) external effect(s) AUX RETURN LEFT AUX SEND LEFT LEFT CHANNEL in out RIGHT CHANNEL Fig. 9-10. Aux type: LoopL&R > Out Rev. 2.0 - EN EU - fw 5.22 44 AUX RETURN RIGHT AUX SEND RIGHT in out Post Effects dry L LEFT CHANNEL gain L AUX SEND LEFT in L in R RIGHT CHANNEL external stereo effect AUX RETURN LEFT Aux mi xer È2/2 GsL: 030. 1 GsR: 030. 1 WtL: 050. 5 WtR: 025. 0 DrL: 015. 2 DrR: 01 0. 1 + wet L out L out R gain R GsL – Gain level, send left channel. Range: 0-100%. wet R AUX SEND RIGHT AUX RETURN RIGHT The GsL (Gain send left) parameter controls the level of gain applied to the signal sent to the external effect via the AUX SEND LEFT jack [16a]. + • dry R Fig. 9-11. Aux type: Aux + Mixer To adjust the amount of gain on the left send channel, press EDIT [5]. Use the arrow keys [3] to position the blinking cursor next to GsL. Adjust the value with the selection dial [4]. GsR – Gain level, send right channel. Range: 0-100%. When the Aux type is set to be one of the following configurations: ‘LoopL>OutL’, ‘LoopR>OutR’, ‘LoopL&R>Out’, then the AUX SEND/RETURN jacks [16a to 16d] operate at instrument level. The GsL (Gain send right) parameter controls the level of gain applied to the signal sent to the external effect via the AUX SEND RIGHT jack [16b]. • If Aux type is set to ‘AUX+ Mixer’ the AUX SEND/RETURN jacks [16a to 16d] operate at up to +7dBu (line level). To accommodate DSP units operating at standard +4dBu the send signal levels can be individually adjusted using parameters GsL, GsR (gain send level Left/Right ). Using the parameter WtL and WtR (Wet Left/Right) the return signal levels are individually readjusted to instrument level and mixed with the analog signals by means of the DrL, DrR (Dry level Left/Right) parameters. GsL, GsR, WtL, WtR, DrL, DrR and Aux type parameters are part of your preset definition and therefore are saved in the preset (see next section). To adjust the amount of gain on the right send channel, press EDIT [5]. Use the arrow keys [3] to position the blinking cursor next to GsR. Adjust the value with the selection dial [4]. DrL – Dry level, left channel. Range: 0-100%. The DrL (Dry left) parameter controls the amount of dry signal that is bypassing the external effect on the left channel. • To adjust the amount of dry signal on the left channel, press EDIT [5]. Use the arrow keys [3] to position the blinking cursor next to DrL. Adjust the value with the selection dial [4]. When Aux type is selected to ‘none’ all the effects connected to the AUX SEND/RETURN jacks [16a to 16d] are true bypassed. DrR – Dry level, right channel. Range: 0-100%. PAGE 2/2 - AUX MIXER • When the loop routing parameter Aux type on page 1/2 is set to ‘Aux + Mixer’, you can adjust on this page the settings of the auxiliary mixer, so as to change how the sound of your PedalPro is blended with that of your external (stereo) effect. Fig. 9-11 should help identifying the AUX mixer’s parameters and their effect on the sound chain. WtL – Wet level, left return channel. Range: 0-100%. The DrR (Dry right) parameter controls the amount of dry signal that is bypassing the external effect on the right channel. To adjust the amount of dry signal on the right channel, press EDIT [5]. Use the arrow keys [3] to position the blinking cursor next to DrR. Adjust the value with the selection dial [4]. 9 The WtL (Wet left) parameter controls the amount of wet signal coming from the external effect into the left channel, via the AUX RETURN LEFT jack [16c]. 45 Rev. 2.0 - EN EU - fw 5.22 Post Effects • To adjust the amount of wet signal on the left channel, press EDIT [5]. Use the arrow keys [3] to position the blinking cursor next to WtL. Adjust the value with the selection dial [4]. WtR – Wet level, right return channel. Range: 0-100%. The WtR (Wet right) parameter controls the amount of wet signal coming from the external effect into the right channel, via the AUX RETURN RIGHT jack [16d]. • To adjust the amount of wet signal on the right channel, press EDIT [5]. Use the arrow keys [3] to position the blinking cursor next to WtR. Adjust the value with the selection dial [4]. TIPS & TRICKS - AUX MIXER • If your external effect is a digital effect, do not use its internal mixer to mix the signal coming from the PedalPro (the “dry” signal) and the digitally-processed signal. Use instead the high quality AUX Mixer to mix the dry signal with the wet signal coming from your external digital effects. In this way the dry signal will bypass the digital effect conserving the crystal clear characteristic typical of the PedalPro • Remember that the parameters on the Ext/AUX loops menu pages 1/2 and 2/2, including the AUX Mixer parameters, are preset parameters and not global parameters. That is, they can be saved as part of a preset and they can be defined differently on different presets. This enables you to use your external effects either in combination with the PedalPro effects, or on their own by simply creating a preset in which all PedalPro’s on-board effects are bypassed and only the Ext and/or AUX loops are activated. • You may keep your external effects always on. For each preset, the PedalPro will bypass them or activate them according to the preset parameters defined on Ext/AUX loops menu pages 1/2 and 2/2. 9 Rev. 2.0 - EN EU - fw 5.22 46 Additional Features: ADES ™ 10.1 ADDITIONAL FEATURES parameters of PedalPro’s effects to an external expression pedal connected to your Pedalino Foot Controller. See the Pedalino Owner’s Manual for information on how to connect an expression pedal to the Pedalino Foot Controller. Page 4 of the main menu gives you access to additional features and configuration options of your PedalPro: the ADES™settings link, the MIDI out configuration page, and the possibility of erasing an existing preset (see page 15 for details on erasing an existing preset from PedalPro’s memory) . By assigning a parameter of an effect to an expression pedal, you can then sweep through the predefined range of that parameter in real-time, fluidly modifying your sounds while you play. Unlike a MIDI CC, however, there’s no convoluted programming process needed to achieve a smooth sound control. Once you have selected your parameter, you are ready to play. The ADES protocol offers a much higher resolution than the MIDI protocol, so you don’t get the unpleasant, uneven sound control variation typical of a MIDI CC. È4/4 Play: 00 0Ç Pu rePhaser ADES MID I E rase Tap Tempo - Menu ADES 10.2 ADES™ SETTINGS Pedalino Foot Controller brings you exclusive access to another great feature of your PedalPro* – the Tap Tempo Mode. Expression Parameter Control, Tap Tempo & Virtual Board* The Tap Tempo Mode allows you to tap in the rhythm with the Expression Pedal making it easy to synchronize a rhythmic effect to the beat of your song. The tapped tempo does not only control PedalPro’s analogue delay, but also the other time-based effects. The Tap Tempo function can be included and saved as part of each preset, while the Master Tap Tempo feature instantly synchronises all effects that have Tap Tempo enabled. Common tempo subdivisions are also implemented extending rhythmical possibilities. PedalPro’s software architecture brings you three additional features for each preset: the Expression Parameter Control, the Tap Tempo Mode and the Virtual Board Mode*. These features are the result of a new communication protocol between effects and controllers, designed by Vintage Revolution, called the ADES protocol. See the special section ‘ADES - An In-depth Look’ on page 48 for more information. Virtual Board - Menu ADES With the new Virtual Board feature you will be able to tranform the Pedalino footcontroller into a regular pedalboard-type setup, so that individual effects, or combinations of effects within a preset can be switched on or off by foot. This feature gives you complete control of your effects set-up when playing live. To use the Expression Parameter Control, the Tap Tempo Mode and the Virtual Board Mode, the Pedalino foot controller must be connected to your PedalPro. Without the Pedalino, any changes made to this page will have any effect. 10 Expression Parameter Control – Menu ADES Like with the MIDI CC (continuous controller), the Expression Parameter Control located in the menu of the PedalPro allows you to assign one of the * Requires Pedalino™ Foot Controller. 47 Rev. 2.0 - EN EU - fw 5.22 Additional Features: ADES ™ CONFIGURING ADES SETTINGS • To go to page 4 of the main menu, use Page - and Page + keys [11 and 12]. • To enter the ADES configuration page, press the multifunc ion key [10a] ADES - AN IN-DEPTH LOOK PedalPro and Pedalino communicate using a specific protocol designed by VR called ADES (Advanced effect DEScriptor). The ADES protocol is a bidirectional data protocol used for controlling the effects’ parameters. labelled ‘ADES’ on page 4 of the main menu. • Why a new protocol? To scroll through the three pages of the Expression Control, the Tap Tempo Mode and the Virtual Board Mode, press Page - [11] or Page + [12]. The MIDI protocol was designed in the 70’s for simple one-way data communication. For our purposes at VR, we needed a more flexible, bidirectional data communication protocol that would allow for the control of effects’ parameters with different resolutions, while also using fewer data packets, and maintaining opto-isolation between the PedalPro and Pedalino. 10.2.1 EXPRESSION CONTROL PAGE 1/3 ADES MENU ADE S controls È1/3 ExprCt rl : 27Ç Dis tTone What you can do with it It is the ADES protocol that makes it possible for you to control, in real-time, the parameters of PedalPro’s effects using your Pedalino with an expression pedal attached. ADES also makes it possible for you to enjoy the control brought about by the Tap Tempo Mode and the Virtual Board Mode. ExprCtrl – Selects the real-time controllable Expression Parameter. Range: see table on page 49. This is the parameter of one of the PedalPro’s analogue effects that is controlled by the expression pedal connected to the Pedalino™ Foot Controller. • To change the parameter associated with to the expression pedal, press EDIT [5]. Use the arrow keys [3] to position the blinking cursor next to ExprCtrl. Adjust the value with the selection dial [4]. The effect’s parameters that you can control, and their ranges, are listed in the grid on the next page. Parameters with user-defined ranges are located at the end of the table. • After selecting the parameter, exit the ADES configuration page by pressing EXIT [7], and save the Preset. No need for programming • Use the ADES ON/OFF switch on your Pedalino Foot Controller to reconnect the PedalPro to the Pedalino. • Load this preset using your Pedalino Foot Contoller (see the Pedalino Owner’s Manual for details on how to do this). You are now ready to start using your new Expression Parameter Control setup. 10 Rev. 2.0 - EN EU - fw 5.22 Like with the MIDI CC (continuous controller), the Expression Parameter Control assignment located in the menu of the PedalPro allows you to assign one of the parameters of PedalPro’s effects to your expression pedal. However unlike a MIDI CC, there’s no convoluted programming needed in order to achieve a smooth sound control. Once you have selected it, you are ready to play. When the ADES connection between PedalPro and Pedalino is active, the controls in the PedalPro are not available. Before assigning or changing an expression control to the expression pedal or configuring other ADES settings in the PedalPro, you must first DISCONNECT the Pedalino from the PedalPro by pressing the ADES ON/OFF switch on your Pedalino. The ADES protocol also offers a much higher resolution, allowing you to avoid the unpleasant uneven sound control variation typical of a MIDI CC. 48 Additional Features: ADES ™ Parameter name Description Range Unit Parameter name Description Range 0 --none-- None parameter assigned 34 Ch_tempo Chorus, tempo 1 CryClass Crybaby classic, centre frequency 370 1968 Hz 35 Vibe_dep Vibe, depth 0 100 % 2 CryMedRn Crybaby, midrange 370 1405 Hz 36 Flng_reg Flanger, regen 0 100 % 3 CryNarrw Crybaby, narrow range 204 1377 Hz 37 Flng_dep Flanger, depth 0 100 % 4 F1_maxim Auto filter F1, max frequency 370 1968 Hz 38 Flng_man Flanger, manual 0 100 % 5 F1_start Envelope filter F1, start frequency 370 1166 Hz 39 Flng_wet Flanger, wet/dry ratio 0 100 % 6 F1_sensi Envelope filter F1, sensitivity 6.2 68.8 % 40 Fl_tempo Flanger, tempo 7 Q1_filtr Filter Q1, Q (Quality) factor 41 Dely_wet Delay, wet/dry ratio 0 50 % 8 F1_tempo Auto filter F1, tempo 80 42 Dely_fbk Delay, feedback 0 100 % 0 18.4 % 1 18 240 BPM 40 Unit 28 320 BPM 160 BPM 9 F2_HiRng Filter F2, high range 946 2055 Hz 43 Detu_dep Detuner, depth 10 F2_LoRng Filter F2, low range 204 1375 Hz 44 Dly_time Delay, time 11 F2_Narrw Manual filter F2, narrow range 565 1567 Hz 45 FS_tempo Stereo filters, tempo 12 F2_maxim Auto filter F2, maximum frequency 334 2695 Hz 46 Fsynch_th Filters, HumanSynch (HSynch) threshold 0 13 F2_start Envelope filter F2, start frequency 232 1420 Hz 47 Vw i-yoh Auto vowel filters F1+F2 (F1 is displayed) 370 14 F2_sensi Envelope filter F2, sensitivity 6.2 68.8 % 48 Vw i-yah Auto vowel filters F1+F2 (F1 is displayed) 370 885 Hz 15 Q2_filtr Filter F2, Q (quality) factor 49 Vw oo-wa Auto vowel filters F1+F2 (F1 is displayed) 425 1115 Hz 16 F2_tempo Auto filter F2, tempo 80 240 BPM 50 F1_user@ Filter F1, manual range user def user def Hz 17 Phas_dep Phaser, depth 20 100 % 51 F2_user@ Filter F2, manual range user def user def Hz 18 Phas_man Phaser, manual 0 100 % 52 F_tempo@ Stereo filters, tempo user def user def BPM 19 Ph_tempo Phaser, tempo 28 20 Trem_dep Tremolo or panner, depth 21 TremSpec 22 Tr_tempo 23 BoostGnD Preamp, boost gain: distortion range 24 BoostGnO Preamp: boost gain: overdrive range 25 Cmp_sens Compressor, sensitivity 26 Cmp_Attk Compressor, attack 27 DistTone Distortion, tone 28 Volume#0 29 Volume#1 30 31 1 16 100 43 ms 80 240 BPM 100 % 723 Hz 160 BPM 53 Tre_dep@ Tremolo or panner, depth user def user def % 0 100 % 54 TrTempo@ Tremolo or panner, tempo user def user def BPM Special tremolo or panner, depth 35.2 90.1 % 55 PhTempo@ Phaser, tempo user def user def BPM Tremolo or panner, tempo 100 300 BPM 56 ChrsWet@ Chorus, wet/dry ratio user def user def % 8 25 dB 57 ChTempo@ Chorus, tempo user def user def BPM -6 8 dB 58 FlngWet@ Flanger, wet/dry ratio user def user def % 59 FlngReg@ Flanger, regen user def user def % 60 FlTempo@ Flanger, tempo user def user def BPM 0 83 100 % 3 ms 23.8 65 % 61 Dly_inp@ Delay input signal level user def user def % Stereo output level, wide range 1.5 100 % 62 Dly_out@ Delay, output signal level user def user def % Stereo output level, middle range 9.8 100 % 63 Dly_fbk@ Delay, feedback user def user def % Volume#2 Stereo output level, narrow range 18.4 100 % 64 DlyTime@ Delay, time user def user def ms Volume#3 Stereo output level, ultra narrow range 37.2 100 % 65 BoostGn@ Preamp, boost gain user def user def dB 32 Chrs_dep Chorus, depth 0 100 % 66 Volume#@ Stereo output level user def user def % 33 Chrs_wet Chorus, wet/dry ratio 0 100 % 67 AuxWtLR@ Wet signal from the external effect user def user def % 68 MIDICC11 MIDI expression via ADES Out 0 127 49 10 Rev. 2.0 - EN EU - fw 5.22 Additional Features: ADES ™ 10.2.2 TAP TEMPO PAGE 2/3 ADES MENU Delay division - This parameter allows you to subdivide only the Delay tempo according to the main tempo set with the Tap Tempo. You can subdivide the Delay tempo in 1/4 note, 1/8 note or .1/8 note (.1/8note = 3/16 note). Tap Tempo È2/3 Assign:master Division:1/4 Delay division:1/4 Assign – This parameter offers five different possibilities which allow you to assign the Tap Tempo to a group of time-based effects or to a specific effect or none, within the Preset you are editing: Master, Delay, Tremolo, Filters, none. When the parameter Assign is set on Master, all the time based effects which are in your Preset will be synchronized at the same speed of your Tap Tempo. When the parameter Assign is set on Delay, Tremolo or Filters, only the chosen effect will be synchronized at the same speed of your Tap Tempo while the other time-based effects will continue to work at the tempo you set manually. 10 To change the Assign parameter, press EDIT [5]. Use the arrow keys [3] to position the blinking cursor next to Assign. Adjust the value with the selection dial [4]. • After selecting the parameter, exit the ADES configuration page by pressing EXIT [7] and save the Preset or continue setting the other parameters. • Consult the Pedalino’s user Manual page 24 (Using the Tap Tempo) to operate with the Tap Tempo Mode. Division – This parameter allows you to subdivide the tempo of all your timebased effects (except the Delay), according to the main tempo set with the Tap Tempo. You can subdivide the Effects tempo in 1/4 note, 1/8 note or .1/8 note (.1/8note = 3/16 note). • To change the Division parameter, press EDIT [5]. Use the arrow keys [3] to position the blinking cursor next to Division. Adjust the value with the selection dial [4]. • After selecting the parameter, exit the ADES configuration page by pressing EXIT [7] and save the Preset or continue setting the other parameters. Rev. 2.0 - EN EU - fw 5.22 To change the Delay division parameter, press EDIT [5]. Use the arrow keys [3] to position the blinking cursor next to Delay division. Adjust the value with the selection dial [4]. • After selecting the parameter, exit the ADES configuration page by pressing EXIT [7], and save the Preset. • Use the ADES ON/OFF switch on your Pedalino Foot Controller to reconnect the PedalPro to the Pedalino. • Load this preset using your Pedalino Foot Contoller (see the Pedalino Owner’s Manual for details on how to do this). • Consult the Pedalino’s user Manual page 24 (Setting Tap Tempo) to operate with the Tap Tempo Mode. When the ADES connection between PedalPro and Pedalino is active, the controls in the PedalPro are not available. Before assigning or changing the Tap Tempo parameters or configuring other ADES settings in the PedalPro, you must first DISCONNECT the Pedalino from the PedalPro by pressing the ADES ON/OFF switch on your Pedalino. When the parameter Assign is set on none your Preset will not be affected by the Tap Tempo. • • 50 Additional Features: ADES ™ 10.2.3 VIRTUAL BOARD MODE PAGE 3/3 ADES MENU The Virtual Board feature turns the Pedalino into a fully functional pedalboard with a huge range of possibilities. Effects and combinations of effects within a single preset can be turned On or Off separately, and you can instantly switch between four different functions for the expression pedal: Tap Tempo, Wah. a user defined parameter and Volume. Each preset can be assigned to anyone of the four available virtual board (Rock, Blus, Fusn, Funk). Each virtual board applies global changes on a preset and is editable remotly from the Pedalino (see Pedalino users manual pag 13-16). Assign virtual board Virtual board Type:00ÇRock È3/3 Type – This parameter allows you to assign to the Preset you are editing, one of the four Virtual Board: Rock, Blus, Fusn, Funk. To change the Type parameter, press EDIT [5]. Select the Virtual Board with the selection dial [4]. • After selecting the Virtual Board, exit the ADES configuration page by pressing EXIT [7] and Save the Preset. 10 51 Rev. 2.0 - EN EU - fw 5.22 Additional Features: MIDI Tuner 10.3 MIDI OUT On page 2/2 of the MIDI configuration menu, you can configure on which MIDI OUT channels the program changes will be sent. The default value assigned to the parameters is OFF represented by the symbol ( ). Â PedalPro allows you send up to two MIDI program changes to two different MIDI channels. If you intend to use this features, make sure that the MIDI OUT connector [19] of the PedalPro is connected to the MIDI in of your external device via a MIDI cable. You can configure the MIDI program changes to be sent on PedalPro’s MIDI OUT channel in the MIDI configuration page. • To access the MIDI OUT configuration page, press the multifunction key [10b], labelled ‘MIDI’, on page 4 of the main menu. • To switch between the two pages of the MIDI OUT configuration menu, press Page - [11] or Page + [12]. M I D IOUT c hannel È2/2 CC11 & PC hg1 -> Â Send PChg2 -> Â Please note: the parameters configured in the MIDI OUT page (2/2) are GLOBAL parameters. The settings defined in the MIDI OUT page will affect ALL the presets, not only the preset you are creating. On page 1/2 of the MIDI configuration menu, you can select the program change numbers: M I D IOUT c hannel È2/2 CC11 & PChg1 -> ch: 01 Send PChg2 -> ch: 05 M I DI Pr gChan ge È1/2 MIDI P Chg1 : 024 MIDI P Chg2: 001 CC11&PChg1 - Selects on which MIDI channel the MIDICC11 (expression) and program change 1 are sent. MIDI Program Change • By associating the ADES parameter (see page 48) the MIDICC11 to the expression pedal connected to the Pedalino Foot Controller, the PedalPro sends MIDI continuous controller message 11 (expression) on the specific midi channel according to the status of the expression pedal status. In this way the expression pedal controls one of the parameters of your external device. PedalPro allows you to send two different program changes to you external MIDI device. The program changes are saved in each preset. Therefore, when you recall a preset, the external MIDI device will be reconfigured according to the MIDI program changes included in that preset. MIDI PChg1 (MIDI Program Change 1) – Range: 0-127. 10 • • To change the MIDI Program Change 1, press EDIT [5]. Use the arrow keys [3] to position the blinking cursor next to MIDI PCHg1. Adjust the value with the selection dial [4]. MIDI PChg2 (MIDI Program Change 2) – Range: 0-127. • Rev. 2.0 - EN EU - fw 5.22 To change the specific MIDI channel on which you want to send program change 1 and MIDICC11, press EDIT [5], when in the MIDI configuration page 2/2. Use the arrow keys [3] to position the blinking cursor next to ch (on the third line of the display). Adjust the value with the selection dial [4]. Send PChg2 - Selects on which MIDI channel program change 2 is sent. To change the MIDI Program Change 2, press EDIT [5]. Use the arrow keys [3] to position the blinking cursor next to MIDI PCHg2. Adjust the value with the selection dial [4]. • 52 To change the specific MIDI channel on which you want to send program change 2, press EDIT [5], when in the MIDI configuration page 2/2. Use the arrow keys [3] to position the blinking cursor next to ch (on the fourth line of the display). Adjust the value with the selection dial [4]. PedalManager Software 11. WORKING WITH PRESETS ON YOUR COMPUTER Once you’ve finished working with the PedalManager and are ready to exit the USB terminal mode, simply switch off the PedalPro. PedalPro not only stores 500 presets in its internal memory, it can be connected to your computer via a USB port and accessed using the PedalManager software. VR’s PedalManager software is available for Windows™ and Mac OS X, and gives you access to advanced preset management options. You can manage an unlimited number of presets directly from your computer. Organise, reorder, select favourite, re-name, archive, share over the internet, categorise, and upload your presets all via a user-friendly interface. You can also store your presets on the USB flash drive bundled with your PedalPro, and carry them with you. You then simply choose the 500 presets and 18 favourite presets you want to use, and download them directly onto your PedalPro. Using the PedalManager for Windows™ or Mac OS X The PedalManager software can be found on the USB flash drive that came with the unit. It is also available as a free download, together with its upgrades and new releases, on the VR website . • To run the PedalManager, copy it into any directory on your computer. There is no need to perform any installation and no drivers are needed. For your convenience, you might want to create a short-cut on an accessible location in your computer (eg. the desktop). • Connect the PedalPro to your computer using the USB cable supplied. • Start the PedalManager by double-clicking on the programme icon found in the directory where you copied the software, or on the short-cut you have created. • Turn on the PedalPro. Press the EXIT (USB) key [7] for two seconds. The PedalPro is now in USB Remote Terminal mode. On your computer screen, the PedalManager will show that a PedalPro has been detected and is connected. You are now ready to start managing your presets via the PedalManager. 11 Please see the PedalManager user manual for a detailed explanation on how to use the software and its features. * Please check the VR website for system requirements and the latest PedalManager release. 53 Rev. 2.0 - EN EU - fw 5.22 Firmware Upgrades 12. INSTALLING A NEW FIRMWARE Besides managing your presets collection, VR’s PedalManager software also allows you to flash a new firmware onto your PedalPro. New firmware releases will be made available on the VR website and a notification email will also be sent to registered users. • Serial - this is the 8-digit serial number unique to your PedalPro (assigned by VR). • USB - this field shows the status of the USB connection with your PC/Mac computer. • KEY - this field shows whether or not your PedalPro can receive a firmware upgrade. Before the upgrade can take place, the PedalPro must be unlocked by supplying the 30-digit Firmware Unlock Key in the appropriate field of the PedalManager software. You will receive your 30-digit key together with your new firmware. Moreover, when you purchase an expansion firmware package for your PedalPro, you will receive via email a new firmware tailored to your machine. Please follow the instructions below to install the new firmware on your unit. • Connect the PedalPro to your PC/Mac using the USB cable supplied. DO NOT switch on your PedalPro yet; • Start the PedalManager by double-clicking on the programme icon to be found in the directory where you downloaded or copied the software, or on the short-cut you’ve created on your desktop. The PedalManager software does not need to be installed and can be run from any location in your PC/Mac (portable application); • With the PedalPro switched OFF, press and hold the down the down arrow key [3c] and switch on the PedalPro (while still holding the down arrow 3c). • The PedalPro is now in ‘Firmware Upgrade’ mode (shown as ‘FW upgrade’ on the PedalPro’s display). Your computer should immediately recognise that a new device has been connected. On your computer screen, the PedalManager will show that a PedalPro has been detected and is connected in FW upgrade mode. Meanwhile, the PedalPro will show the screen below. The communication between the computer and the PedalPro can now take place. 12 How to perform a firmware upgrade On the Firmware tab of the PedalManager click on ‘Load Device Firmware File’ and browse to find the file with the new firmware in the location where you stored it in your computer. • Copy the Firmware Unlock Key you have received from VR with your new firmware in the ‘Firmware Unlock Key’ pop-up window. The PedalManager communicates with the PedalPro and checks whether the file contains the correct firmware for your PedalPro. If the check is successful, a confirmation message will appear on your computer screen. FW upgr ade tool V2. 4 Ser i al: 0000000 USB=OK KEY=OK FW upgr ade tool V2. 4 Ser i al: 0000000 USB=OK KEY=?? This screen shows the following important information about your PedalPro: Rev. 2.0 - EN EU - fw 5.22 • 54 • On the PedalManager, click on ‘Write Firmware’ and wait for the confirmation that the upgrade has been successful. • Repeat the procedure if you need to upload more than one firmware (the exact procedure depends on the type of firmware upgrade will be included in the firmware package you have received). • Switch your PedalPro off, disconnect the USB cable and switch on the PedalPro. Technical Specs 13. TECHNICAL SPECS Specs Noise performance ANALOGUE INPUT Connector Neutrik ® 1/4” jack, unbalanced Impedance 1 MOhm Typical noise level @1kHz < -102 dBV (input shorted, preset ‘SustComp’ loaded) ANALOGUE OUTPUT Technology Connectors 2 x Neutrik ® 1/4” jack, unbalanced Impedance 510 Ohm Typical noise level @1kHz < -110 dBV (input shorted, preset ‘VarymuComp’ loaded); Ultra low-noise matched-pair transistors PRE-AMPLIFIER Parameters Ext. Effects Gain Connectors 2 x Neutrik ® 1/4” jack, unbalanced Specs Output impedance (SEND) < 600 Ohm Noise 0 dB to 25 dB, resolution 1 dB -110 dBV @ 25 dB gain -118 dBV @ 15 dB gain AUX Connectors 2 x Neutrik ® 1/4” jack, unbalanced Impedance AUX SEND 640 Ohm Impedance AUX RETURN 1 MOhm (with all effects in PedalPro bypassed) -120 dBV @ 9 dB gain Distortion 0.0005% Technology THAT®1512 (High performance audio amplifier) and opto-resistors DISTORTION CONTROL CONNECTIONS USB USB 2.0, type B ADES™ (Advanced effect Descriptor) 5-pin DIN 180°, bi-directional MIDI Out 5-pin DIN 180° Parameters COMPRESSOR / LIMITER Output level (distortion level) 0-100%, resolution 0.39% Tone control 0-100%, resolution 0.39% Bright switch ON/OFF Low-pass filter 0=7.5 kHz, 1=4.8 kHz, 2=3 kHz Specs Parameters Compressor Types Tubegen (general purpose tube compressor), Vary-mu, Limiter Threshold Levels 0-100%, resolution 0.39% Output Levels 0-100%, resolution 0.39% Attack Time 3 ms, 8 ms, 13 ms, 22 ms, 31 ms, 40 ms, 57 ms, 83 ms Release Time 0.1 s, 0.2 s, 0.3 s, 0.5 s, 0.7 s, 0.8 s, 1 s, 1.8 s Noise –104 dBV @ Out 100%, tone 50%, gain 21 dB –90 dBV @ Out 100%, total gain 46 dB Technology Low noise JFET and digital potentiometer 13 TREMOLO / PANNER Parameters Modulating waveform 55 sine, trig, trap, rect, pcal, shlf, vntg Rev. 2.0 - EN EU - fw 5.22 Technical Specs Modulation speed range (Tempo) 3 BPM (20 s) to 550 BPM (9.16 Hz) Phase control of modulating waveform 4 values: 0°, 90°, 180°, 270° Depth 0-100%, resolution 0.39% 30 Hz to 20 kHz Noise -108 dBV (input shorted) Technology Ultra low noise matched pair transistors Parameters Modulating waveform sine, trig, trap, rect, pcal, shlf, vntg. Modulation speed range (Tempo) 3 BPM (20 s) to 550 BPM (9.16 Hz) Phase control of modulating waveform 4 values: 0°, 90°, 180°, 270° Depth 0-100%, resolution 0.39% 370 Hz – 1968 Hz, resolution 1.56 Hz Q (resonance) 1 to 18, resolution 0.5 Start cut-off frequency 370 Hz – 1968 Hz, resolution 1.56 Hz Sensitivity 0-100%, resolution 0.39% Transfer curves available linear, positive exponential, negative exponential Q (resonance) 1 to 18, resolution 0.5 Bandwidth 10 Hz to 20 kHz Noise -115 dBV (input shorted) Phase shift > 360° Technology Opto resistor Inductor (Red Fasel Inductor) Filter modes Auto, Positive Envelope, Negative Envelope, Fixed frequency (manual mode) sine, trig, rect, trap, expo, shl1, shl2, shl3 Modulation speed range (Tempo) 3 BPM (20 s) - 550 BPM (9.16 Hz) Phase control of modulating waveform* 4 values: 0°, 90°, 180°, 270° Q (resonance) 1 to 18, resolution 0.5 Bandwidth 10 Hz to 20 kHz Noise Typical noise level < -100 dBV (filter settings Frequency = 1968Hz, Q = 18) Filter design OTA transistor matched pair Filter type Low-pass / band-pass (selectable) Filter modes Auto, Positive Envelope, Negative Envelope, Fixed frequency (manual mode) Parameters in Auto mode Parameters in Auto mode Modulating waveform 370 Hz – 1968 Hz, resolution 1.56 Hz FILTER 2 FILTER 1 Filter design Fixed cut-off frequency Specs Specs Rev. 2.0 - EN EU - fw 5.22 Maximum cut-off frequency Parameters in configuration Fixed Frequency mode PHASER 13 370 Hz – 1968 Hz, resolution 1.56 Hz Parameters in Envelope mode (Positive and Negative) Specs Bandwidth Minimum cut-off frequency Modulating waveform sine, trig, rect, trap, expo, shl1, shl2, shl3 Modulation speed range (Tempo) 3 BPM (20 s) - 550 BPM (9.16 Hz) Phase control of modulating waveform 4 values: 0°, 90°, 180°, 270° Minimum cut-off frequency 150 Hz – 2.697 kHz, resolution 2.48 Hz Maximum cut-off frequency 150 Hz – 2.697 kHz, resolution 2.48 Hz Q (resonance) 1 to 16, resolution 0.5 Parameters in Envelope mode (Positive and Negative) Start cut-off frequency 56 150 Hz – 2697 Hz, resolution 2.48 Hz Technical Specs Sensitivity 0-100%, resolution 0.39% Phase control of modulating waveform 4 values: 0°, 90°, 180°, 270° Transfer curves available linear, positive exponential, negative exponential Q (resonance) 1 to 16, resolution 0.5 Harmonics switch ON / OFF Manual 0-100%, resolution 0.39% Parameters in Fixed Frequency mode Depth 0-100%, resolution 0.39% Fixed cut-off frequency 150 Hz – 2697 Hz, resolution 2.48 Hz Wet 0-100%, resolution 0.39% Q (resonance) 1 to 16, resolution 0.5 Regen 0-100%, resolution 0.39% Technology 1 BBD (Bucket Brigade Delay) Specs Bandwidth 10 Hz to 20 kHz Noise -109 dBV (input shorted) @ filter type = lowpass, cut off freq 1 kHz, Q = 0; -102 dBV (input shorted) @ filter type = lowpass, cut off freq 1 kHz, Q = 8; -94dBV (input shorted) @ filter type = lowpass, cut off freq 1 kHz, Q = 15. Technology CHORUS & VIBE Parameters Matched pair transistors and opto-resistors CHORUS Parameters Modulating waveform sine, trig, rect, trap, expo, shl1, shl2, shl3 Modulation speed range (Temp) 3 BPM (20 s) to 550 BPM (9.16 Hz) Phase control of modulating waveform 4 values: 0°, 90°, 180°, 270° Bright switch ON / OFF Input 0-100%, resolution 0.39% Depth 0-100%, resolution 0.39% Wet Technology Modulating waveform sine, trig, rect, trap, expo, shl1, shl2, shl3 Modulation speed range (Temp) 3 BPM (20 s) to 550 BPM (9.16 Hz) Phase control of modulating waveform 4 values: 0°, 90°, 180°, 270° Boost switch ON / OFF Depth 0-100%, resolution 0.39% Technology Optoresistor and BBD (Bucket Brigade Delay) DELAY Parameters Routing none, left, right Range 3 selectable: 23-99 ms, 40-409 ms, 60-614 ms Modulation speed range (Temp) 97 BPM (23.7 ms) to 2531 BPM (614.3 ms) 0-100%, resolution 0.39% 1 BBD (Bucket Brigade Delay) Time Delay time in ms within the selected range Input 0-100%, resolution 0.39% Output 0-100%, resolution 0.39% Wet 0-100%, resolution 0.39% Feedback 0-100%, resolution 0.39% Technology 3 BBDs (Bucket Brigade Delays) FLANGER Parameters Modulating waveform Sine, trig, rect, trap, expo, shl1, shl2, shl3 Modulation speed range (Temp) 3 BPM (20 s) to 550 BPM (9.16 Hz) 57 13 Rev. 2.0 - EN EU - fw 5.22 Technical Specs EMC & SAFETY DETUNER & DELAY Parameters Complies with EN 55103-1 and 55103-2 Certified to IEC 60065 / EN 60065 Speed 0-100%, resolution 0.39% MISC Depth 0-100%, resolution 0.39% Chassis Front: Painted Aluminium Other parts galvanised, painted steel AUX & MIXER Display 20 x 4 character STN Positive LCD display Parameters Dimensions 482.6 mm x 291.6 mm x 88 mm (19” x 11.5” x 3.5”) Aux type None, Loop_L>OutL, Loop_R>OutR, LoopL&R>OutL, Aux + Mixer Weight 5.78 Kg (12.96 lb.) Gain Send Left (GsL), Gain Send Right (GsR) 0-100%, resolution 0.39% Supply voltages 100 to 240 VAC, 50 to 60 Hz (manual select) Power consumption <30W Wet Left (WtL), Wet Right (WtR) 0-100%, resolution 0.39% Warranty parts and labour According to EU regulations Dry Left (DrL), Dry Right (DrR) 0-100%, resolution 0.39% RoHS / WEEE Fully compliant Technology Ultra low-noise opamp Warranty Parts and Labor According to EU regulations NOISE GATE (L, R) SPECIFICATIONS SUBJECT TO CHANGE AND IMPROVEMENT WITHOUT NOTICE. Parameters Noise Level 0-100%, resolution 0.39% Release Level 0-100%, resolution 0.39% Specs 13 Bandwidth 10 Hz to 20 kHz Noise -120 dBv (configuration: threshold 100%) Attenuation > 50 dB after 5 s Technology Opto-resistor and digital potentiometer VOLUME CONTROL (L, R) Parameters Output level 0-100%, resolution 0.39% Specs Bandwidth 10 Hz to 20 kHz Noise -124 dBV, input shorted Technology Digital potentiometer Rev. 2.0 - EN EU - fw 5.22 58 Technical Specs 13 59 Rev. 2.0 - EN EU - fw 5.22 Menu Overview 14. FULL MENU OVERVIEW È1/4 Play: 00 0ÇPu rePhas er Comp Dist Ngte Trem È2/4 Play: 00 0Ç Pu rePhaser Phasr Fltr Levl Ext Press Page - [11] or Page + [12] Press multifunction keys [10a] to [10d] Compr essor ÇÁ È1/1 Type : tubegen Sens: 088. 2 Out:049. 4 Attc k : 03ms Rels: 0. 1 s Di stÇÁ Br gtÇÁ È1/1 Tone[ %] : 045. 4 LP: 0 OutD[ %] : 067. 4 Boo st Ç Á G[ dB]: +1 1 . 5 È1/1 Noi seGateÇÁ Sustain Ç Á NoiseLv[ %] : 049. 4 Release[ %] : 009. 8 È1/1 Tr em ol oÇÁ Trem/PanÇ Tr Fo otC: Á Tempo: 050. 4 Wv : r ec t Dept h: 026. 2 Ph: 000Ì È1/1 Fi l ter r outi ng È1/6 Level _c ntÇÁ È1/1 Ext_effec t ÇÁ Pha se r ÇÁ LvL: 040. 0 LvR: 069. 0 Route type: 04 Man ua l : 01 2. 1 Tempo : 072. 0 Wv : sine FL=F1+F2 FR=F2 Depth : 066. 2 Ph: 09 0 Ì Compressor - p.18 Distortion - p.20 Noise Gate - p.23 Tremolo / Panner - p.24 Phaser - p.26 Filters - p.28 Volume control - p.36 È1/2 Loops - p.10 Boost (Pre-amp) - p.22 Fi l ter mai n È2/6 HSyncÇÂ F2typeÇÏÑ Q1: 05 . 0 Q2: 01 . 5 F1 Md: env+ F2Md : auto Ext_effec t ÇÂ È1/2 Aux type: Loop_L>OutL Loops extended* p.43 È3/6 WaveF1 : sine Tempo: 076. 4 Ph: 000Ì Fmin1 [Hz] : 0 470 Fmax1 [Hz] : 0 890 Press Page - [11] or Page + [12] È4/6 WaveF2: r ec t Tempo: 100. 0 Ph: 000Ì Fmin2[Hz] : 0 1 50 Fmax1 [Hz] : 1 300 14 Fst r 1 [ Hz] : 0370 È5/6 Sens1: 020. 0 Fx: l i nr Fstr 2[Hz ] : 0 1 50 Sens2: 075. 6 Fx: exp+ Man ual fi lters È6/6 F1[Hz]: 370 Q1: 05. 0 F2[Hz]: 1 50 Q2: 01 . 5 Rev. 2.0 - EN EU - fw 5.22 60 Aux mi xer È2/2 GsL: 030. 1 GsR: 030. 1 WtL: 050. 5 WtR: 025. 0 DrL: 015. 2 DrR: 01 0. 1 Menu Overview È3/4 Play: 00 0Ç Compsol o ChFl Dly È4/4 Play: 00 0Ç Pu rePhas er ADES MID I E rase Press Page - [11] or Page + [12] Press multifunction keys [10a] to [10d] Mod ul a tion Type: chor us ADE S controls È1/3 M I DI Pr gChan ge È1/2 ExprCt rl : 27Ç Dis tTone MIDI P Chg1 : 024 MIDI P Chg2: 001 È 1/4 Del ay È1/3 Routing: l eft Range: 23-099ms Chorus/Vibe/Flanger selector - p.38 Delay routing p.42 ADES Link - p.47 MIDI OUT - p.52 Cho r us BrgtÇ Á È2/4 Tempo: 020. 0 Ph: 000Ì I nput: 030. 1 Wv: tr i g Depth: 041 . 5 Wt: 070. 1 Del ay È2/3 Time: 400. 7 ms I np: 050. 5 O ut: 075. 2 Wet: 045. 0 F bk: 01 0. 1 Tap Tempo È2/3 M I D IOUT c hannel È2/2 Assign:master Division:1/4 CC11 &PC hg1 -> ch: 01 Send PChg2 -> ch: 05 Delay division:1/4 Chorus - p.38 Delay - p.42 >> E rase preset < < 00 0-Pu rePhas er ? S ure? Enter =Yes Erase preset - p.15 Press Page - [11] or Page + [12] Vi b e È3/4 Det uner Ç Á BoostÇ Á Speed: 020. 0 Tempo: 055. 0 Ph: 1 80Ì Depth: 01 8. 8 Depth: 032. 1 Wv: si ne Vibe - p.39 È3/3 Virtual board Type:00ÇRock1 È 3/3 Detuner - p.43 Fl a nger Har mÇ Á È4/4 Tempo: 150. 3 Wv: r ec t Regen: 050. 1 Mn: 030. 5 Depth: 068. 2 Wt: 030. 1 Flanger - p.40 14 61 Rev. 2.0 - EN EU - fw 5.22 Appendix A. MODULATING WAVEFORMS 4. rect (rectangle) - Tremolo, Panner, Phaser, Filters, Chorus*, Vibe*, Flanger*. 100 Amplitude [Depth, %] The following diagrams show models of the modulating waveforms available on PedalPro’s analogue effects. The parameters amplitude (Depth), period (Tempo), and relative phase (Ph; see ‘Phase of the modulating waveforms’ on p.25) of these model waveforms can be adjusted on the effect’s configuration pages. In the examples below Depth=100%, Tempo=235 BPM). 80 60 40 20 0 1. sine (sinusoid) - Tremolo, Panner, Phaser, Filters, Chorus*, Vibe*, Flanger*. 0 50 100 150 200 250 Time [Tempo, ms] 5. pcal (phase calibrated) - Tremolo, Panner, Phaser, Filters 80 100 60 Amplitude [Depth, %] Amplitude [Depth, %] 100 40 20 0 0 50 100 150 200 250 Time [Tempo, ms] 80 60 40 20 0 0 2. trig (triangle) - Tremolo, Panner, Phaser, Filters, Chorus*, Vibe*, Flanger*. Amplitude [Depth, %] Amplitude [Depth, %] 200 250 200 250 100 80 60 40 20 0 50 100 150 200 250 80 60 40 20 0 Time [Tempo, ms] 0 50 100 150 Time [Tempo, ms] 3. trap (trapeze) - Tremolo, Panner, Phaser, Filters, Chorus*, Vibe*, Flanger*. 7. vntg (vintage Fender tremolo) - Tremolo, Panner, Phaser 100 100 80 Amplitude [Depth, %] Amplitude [Depth, %] 150 6. shlf (shelf function) - Tremolo, Panner, Phaser 0 60 40 20 0 0 50 100 150 200 80 60 40 20 0 250 0 Time [Tempo, ms] Rev. 2.0 - EN EU - fw 5.22 100 Time [Tempo, ms] 100 A 50 50 100 150 Time [Tempo, ms] 62 200 250 Appendix 8. shl1 (filter shelf waveform 1) - Filters, Chorus*, Vibe*, Flanger*. Amplitude [Depth, %] 100 80 60 40 20 0 0 50 100 150 200 250 Time [Tempo, ms] 9. shl2 (filter shelf waveform 2) - Filters, Chorus*, Vibe*, Flanger*. Amplitude [Depth, %] 100 80 60 40 20 0 0 50 100 150 200 250 200 250 Time [Tempo, ms] 10. shl3 (filter shelf waveform 3) - Filters Amplitude [Depth, %] 100 80 60 40 20 0 0 50 100 150 Time [Tempo, ms] 11. expo (filter exponential waveform) - Filters, Chorus*, Vibe*, Flanger*. A Amplitude [Depth, %] 100 80 60 40 20 0 0 50 100 150 200 250 Time [Tempo, ms] 63 Rev. 2.0 - EN EU - fw 5.22