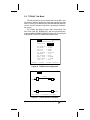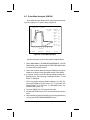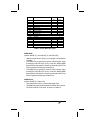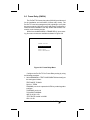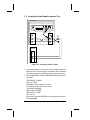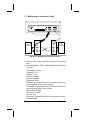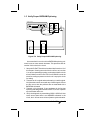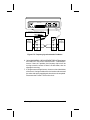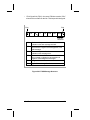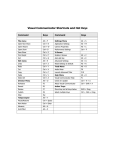
1
® E stablished 1981 Advanced Test Equipment Rentals www.atecorp.com 800-404-ATEC (2832) SUNRISE TELECOM I N C O R P O R A T E D SunSet T10 ™ User’s Manual SS150M Version 2.20 MAN-10450-US001 Rev.B Ò Sunrise Telecom... A Step Ahead 302 Enzo Drive San Jose, CA 95138 Tel: 1-408-363-8000 Fax: 1-408-363-8313 1 Copyright 2002 Sunrise Telecom Incorporated. This device uses software either developed by Sunrise or licensed by Sunrise from third parties. The software is confidential and proprietary. The software is protected by copyright and contains trade secrets of Sunrise or Sunrise's licensors. The purchaser of this device agrees that it has received a license solely to use the software as embedded in the device, and the purchaser is prohibited from copying, reverse engineering, decompiling, or disassembling the software. 2 SunSet T10 Rev. B SunSet T10 Table of Contents Chapter 1 Initial Setup ........................................................ 13 1.0 Unpacking the Test Set ................................................... 13 2.0 Check Out Procedure ..................................................... 16 Chapter 2 Product Description .......................................... 27 1.0 Keypad Functions ........................................................... 28 1.1 Orange Labels ................................................................ 29 1.2 White Label Keys ............................................................ 30 2.0 LEDs .............................................................................. 33 3.0 Connector Panel ............................................................. 36 3.1 Using the Battery & AC Charger ..................................... 37 3.2 Printing from the Serial Port ........................................... 38 3.2.1 Serial Port Settings ..................................................... 38 3.2.2 Configuring for Printing ................................................ 38 3.2.3 Printing to a Parallel Printer ......................................... 41 4.0 Additional Controls ......................................................... 42 5.0 Remote Control (SW100) ................................................ 43 Chapter 3 Menu Descriptions ............................................. 47 1.0 Introduction ..................................................................... 48 2.0 Test Configuration Menu ................................................. 48 2.1 T1SINGL Test Mode ....................................................... 49 2.2 T1DUAL Test Mode ......................................................... 56 2.3 T1 - MUX Test Configuration ........................................... 65 2.4 Datacom Operation Menus ............................................. 69 2.4.1 Datacom Test Configuration ......................................... 69 3 Chapter 3 Menu Descriptions, con’t 3.0 LPBK & Span Control ..................................................... 72 3.1 CSU & NI Control ........................................................... 73 3.1.1 Basic Loopback Procedure .......................................... 75 3.1.2 Select a User Loopback Code ..................................... 75 3.1.3 View a User Loopback Code. ....................................... 76 3.1.4 Program a User Loopback Code .................................. 76 3.1.5 Correcting a Mistake While Entering the Label ............ 77 3.1.6 Deleting a User Loopback Code ................................... 77 3.2 Teltrend Office Repeater (SW 184) ................................. 78 3.3 Teltrend Line Repeater (SW 184) .................................... 81 3.4 Westell Office Repeater (SW 184) .................................. 83 3.5 Westell Line RPTR (SW 184) .......................................... 86 3.6 Westell NIU/PM & MSS (SW 184) .................................. 88 3.6.1 RTRV/VIEW All PM RPT ............................................. 89 3.6.2 Retrieve PM Report ..................................................... 91 3.6.3 Reset PM Counters ..................................................... 91 3.6.4 Retrieve NIU Header .................................................... 91 3.6.5 Set NIU Time & Date ................................................... 91 3.6.6 MSS Switch Control .................................................... 92 3.6.7 MSS Ramp Access ..................................................... 94 3.7 Teltrend MSS Switch Control (SW 184) .......................... 96 3.8 HDSL Span Control ........................................................ 98 4.0 Send Test Pattern ......................................................... 100 4.1 Sending a USER Test Pattern ....................................... 101 4.2 Viewing a User Test Pattern .......................................... 101 4.3 Programming User-Defined Patterns ............................. 101 4.4 Correcting a Mistake in the Label ................................. 102 4.5 Correcting a Mistake in the Pattern .............................. 103 4.6 Editing a User Test Pattern ........................................... 103 4.7 Deleting a User Test Pattern ......................................... 103 5.0 Measurement Results ................................................... 104 5.1 Measurement Result Screens ...................................... 107 5.1.1 Measurement Results Summary Screens ................. 108 5.1.2 Line/BPV Screen ....................................................... 113 5.1.3 Signal Screen ............................................................ 115 4 SunSet T10 Rev. B Chapter 3 Menu Descriptions, con’t 5.1.4 Frame Screen ........................................................... 118 5.1.5 ESF CRC-6 Screen ................................................... 121 5.1.6 Logical Screen ........................................................... 123 5.1.7 Frequency Screen...................................................... 125 5.2 Datacom Measurement Results.................................... 127 5.3 T1-MUX Mode Measurement Results ........................... 129 6.0 Other Measurements .................................................... 130 6.1 View Received Data ...................................................... 130 6.2 Propagation Delay ........................................................ 133 6.3 Quick Test - I and II ...................................................... 135 6.4 Bridge Tap Detect ......................................................... 140 6.5 Pulse Mask Analysis (SW190) ..................................... 141 6.6 DDS Measurements (SW188) ....................................... 143 6.6.1 Configuration & Send Pattern .................................... 144 6.6.2 Loop Back Access .................................................... 146 6.6.3 Measurement Results ................................................ 148 6.6.4 Send/Receive DDS Control Codes ............................. 149 6.7 ISDN Primary Rate Menus (SW186) ............................. 151 6.7.1 ISDN Configuration .................................................... 152 6.7.2 Start Link/ Call Setup ................................................ 155 6.7.2.1 Sequential Call (SW186) ......................................... 157 6.7.2.2 Sequential BERT Test ............................................. 160 6.7.2.3 Placing a Call ......................................................... 163 6.7.2.4 Viewing Call Information ......................................... 166 6.7.2.5 Performing a BERT test .......................................... 167 6.7.2.6 Receiving a Call ...................................................... 168 6.7.3 Backup D Channel Test ............................................. 169 6.7.4 Setup Filter ................................................................ 172 6.7.5 Start Tracer ................................................................ 173 6.7.6 View/Print Tracer ........................................................ 174 6.7.7 Other Parameters ...................................................... 177 6.8 SS7 Analysis (Option SW189) ...................................... 180 6.8.1 Configuration ............................................................. 181 6.8.2 MSU Monitor ............................................................. 183 6.8.2.1 Setup Filter ............................................................. 183 6.8.2.1.1 TUP filtering fields ............................................... 185 6.8.2.1.2 Filtering fields for ISUP ........................................ 187 6.8.2.1.3 Filtering fields for SCCP ...................................... 189 6.8.2.1.4 Layer 3 Filtering fields for SNM ............................ 193 5 Chapter 3 Menu Descriptions, con’t 6.8.2.1.5 Layer 3 Filtering items for SNT ............................ 194 6.8.2.1.6 Layer 2 Filtering items ......................................... 195 6.8.2.2 Start Tracer ............................................................. 196 6.8.2.3 View/Print Tracer ..................................................... 197 6.8.3 SU Analysis ............................................................... 204 6.9 GSM VOICE/TRAU/BERT Menus (SW191) .................. 206 6.9.1 GSM Monitor ............................................................. 207 6.9.2 VOICE/TRAU XMT .................................................... 209 6.9.3 16k BERT .................................................................. 211 6.10 Switched 56 Testing (SW187) ..................................... 213 6.10.1 Test Configuration .................................................... 214 6.10.2 SW56 Call Setup ..................................................... 216 6.10.3 Measurement Results .............................................. 218 6.10.4 TELEOS Call Monitor .............................................. 219 7.0 VF Channel Access ...................................................... 220 7.1 VF Measurements ........................................................ 221 7.2 View Supervision .......................................................... 225 7.3 Dial/Supervision Setup ................................................. 226 7.4 Place/Receive Calls ..................................................... 229 7.5 DTMF/MF/DP Analysis ................................................. 232 7.6 Noise Analysis (SW 183) .............................................. 235 7.7 MF Tracer ..................................................................... 236 7.7.1 MF Tracer .................................................................. 236 7.7.2 MF View / Print Tracer ............................................... 238 7.8 Signaling Analysis ......................................................... 239 8.0 GR-303 Monitor (SW193) .............................................. 241 8.1 Monitor TMC/ CSC ......................................................... 241 8.1.1 Configuration ............................................................... 242 8.1.2 TMC Filter .................................................................. 243 8.1.2.1 Pre and Post Filtering ............................................. 246 8.1.3 Start Tracer ................................................................ 247 8.1.4 View / Print Buffer ...................................................... 249 8.1.5 TMC Statistics ........................................................... 254 8.1.6 Send Messages ......................................................... 255 8.2 EOC Verification ............................................................ 259 8.2.1 EOC Setup ................................................................ 259 8.2.2 EOC Statistics .......................................................... 262 6 SunSet T10 Rev. B Chapter 3 Menu Descriptions, con’t 9.0 Frame Relay (SW194) ................................................... 264 9.1 Frame Relay Configuration ............................................ 266 9.2 LMI Analysis ................................................................ 268 9.3 PING Test ..................................................................... 271 9.4 PING Response ............................................................ 274 10.0 Other Features ............................................................ 275 10.1 System Configuration ................................................. 275 10.1.1 System Profiles ....................................................... 276 10.1.1.1 Enter a New System Profile .................................. 276 10.1.1.2 Invoke a Stored System Profile ............................ 277 10.1.1.3 View an Existing Profile ........................................ 277 10.1.1.4 Activate the Default Profile ................................... 277 10.1.1.5 Delete a Profile ..................................................... 277 10.1.1.6 Modify an Existing Profile ..................................... 277 10.1.2 General Configuration ............................................... 278 10.1.3 Erase NV RAM ........................................................ 281 10.1.4 Full Self Test ............................................................ 281 10.1.5 Version/Option .......................................................... 282 10.2 Measurement Configuration ........................................ 283 10.3 Error Injection ............................................................. 285 10.3.1 Programming a Burst of 10 Errors ........................... 286 10.3.2 Programming a 1e-06 Bit Error Rate ........................ 287 10.4 Other Parameters ....................................................... 288 10.5 View Test Record ........................................................ 291 10.6 Print Records .............................................................. 292 10.7 Load Samples ............................................................. 292 11.0 Data Link Control ........................................................ 293 11.1 Data Link Control - SLC-96 ......................................... 293 11.1.1 Monitor Data Link ..................................................... 294 11.1.2 Send Message ......................................................... 295 11.1.3 View Data Link ......................................................... 297 11.2 Data Link Control - ESF .............................................. 298 11.2.1 Monitor T1.403 PRM ................................................ 299 11.2.2 Monitor T1.403 NPRM ............................................. 302 11.2.3 Monitor T1.403 BOM ................................................ 303 11.2.4 Send T1.403 PRM ................................................... 304 11.2.5 Send T1.403 BOM ................................................... 305 7 Chapter 3 Menu Descriptions, con’t 11.2.6 RTRV 54016 PM CNTR ........................................... 307 11.2.7 Print 54016 Results ................................................. 307 12.0 CSU/NI Emulation (SW181) ........................................ 308 12.1 CSU/NI Emulation, T1 SINGL Mode ........................... 308 12.2 CSU/NI Emulation, T1 DUAL Mode ............................. 310 Chapter 4 Applications ..................................................... 313 1.0 Basic Applications ........................................................ 313 1.1 Connecting the Cords ................................................... 314 1.2 Accepting a New Span/Loopback Test .......................... 315 1.3 Monitoring an In-service Circuit .................................... 317 1.4 Stressing a T1 Line ....................................................... 319 1.4.1 Using SEND TEST PATTERN.................................... 319 1.4.2 Using Bridge Tap Detect ............................................ 319 1.5 Verify Proper B8ZS/AMI Optioning ............................... 320 1.6 Checking for Frame Slips & Frequency Sync ............... 322 1.7 Measuring Signal Level ................................................. 324 1.8 Running a Timed Test ................................................... 326 1.9 Checking DSX Wiring ................................................... 327 1.10 Observing Network Codes or Channel Data ................ 329 1.11 Determining Round Trip Circuit Delay ......................... 332 1.12 Determine Distance to Loopback ................................ 334 1.13 Basic Dialing Procedure ............................................. 336 1.14 Entering & Editing Speed Dialing Numbers ................. 337 1.15 Monitor a Voice Frequency Channel ............................ 339 1.16 Simple Talk/Listen ...................................................... 341 1.17 Sending a Tone ........................................................... 343 2.0 Advanced Applications ................................................. 345 2.1 Fractional T1 Testing ...................................................... 345 2.1.1 FT1 Circuit Acceptance Test Procedure .................... 347 8 SunSet T10 Rev. B Chapter 4 Applications, con’t 2.2 SLC-96 Testing ............................................................. 349 2.2.1 SLC-96 Data Link Monitoring ..................................... 351 2.2.2 Out-of-service SLC-96 Testing .................................... 353 2.3 In-Service Hitless Dual Drop & Insert THRU Testing .... 355 2.4 Advanced Talk/ Listen................................................... 358 2.5 Testing SUPERTRUNK VF DS-0 ................................... 362 3.0 Datacom Applications ................................................... 364 3.1 Point to Point Datacom Testing ..................................... 364 3.2 Fault Location with Remote & Local Loopbacks ........... 367 3.3 Emulating a Terminal Multiplex ..................................... 370 3.4 Emulating an Add/Drop Multiplexer ............................... 373 4.0 ISDN Applications ........................................................ 378 4.1 ISDN PRI Call Setup .................................................... 378 4.2 ISDN PRI Monitoring .................................................... 380 4.3 ISDN PRI Data Call Setup ............................................ 383 4.4 Emulate a ISDN Network Terminal or PBX ................... 385 4.5 46B+2D Call Setup ....................................................... 386 4.6 47B+D Call Setup ......................................................... 388 4.7 Receiving Two Simultaneous B-Channel Calls .............. 390 5.0 SS7 Applications .......................................................... 392 6.0 GSM Voice/TRAU/BERT Testing .................................. 396 6.1 16K BER Testing .......................................................... 396 6.2 Monitoring Network Traffic & Voice Quality ................... 398 6.3 Transmitting a GSM Encoded Voice Message .............. 400 7.0 Installing a Frame Relay Circuit .................................... 401 7.1 PING Test ..................................................................... 401 Chapter 5 Reference ......................................................... 405 1.0 Abbreviations ................................................................ 405 9 Chapter 5 Reference, con’t 2.0 Standard Test Patterns ................................................. 411 2.1 DDS Pattern Notes ....................................................... 415 3.0 Frame Relay Technology ............................................... 416 3.1 Frame Relay Structure .................................................. 416 3.1.1 DLCIs ........................................................................ 417 3.1.2 Link Management (LMI) ............................................. 419 4.0 HDSL Technology Overview .......................................... 421 5.0 GR-303 Technology Overview ....................................... 422 5.1 TMC and Hybrid Signaling ............................................. 424 5.2 CSC and Out-of-Band signaling .................................... 426 5.3 Embedded Operations Channel .................................... 428 5.4 TMC/CSC Cause Values ............................................... 429 6.0 GSM TRAU Technology Overview ................................ 430 6.1 GSM Network Architecture ........................................... 430 6.2 TRAU Frames ............................................................... 432 6.2.1 TRAU Frame .............................................................. 433 7.0 T1 Technology ............................................................... 434 7.1 T1 Transmission ............................................................ 434 7.1.1 T1 Usage ................................................................... 434 7.1.2 T1 Services ............................................................... 434 7.1.3 DS1 Network Elements ............................................. 435 7.1.4 DS1 Standards .......................................................... 437 7.1.5 DS1 Signal ................................................................ 437 7.1.6 T1 Framing ................................................................. 438 7.1.7 PCM .......................................................................... 440 7.1.8 Switching ................................................................... 441 7.1.9 Synchronization ......................................................... 442 7.1.10 Supervision .............................................................. 443 7.1.11 Addressing ............................................................... 443 7.1.12 AIS and Yellow Alarms ............................................. 444 7.1.13 Loopbacks ............................................................... 445 7.1.14 End-to-End Performance Monitoring ........................ 446 7.2 Troubleshooting and Fault Sectionalization ................... 447 7.2.1 Fault Sectionalization ................................................ 449 10 SunSet T10 Rev. B Chapter 5 Reference, con’t 7.2.2 Bipolar Violations and Loss of Signal ........................ 450 7.2.3 Frame Bit, Bit, CRC-6, and C-Bit Parity Errors .......... 450 7.2.4 AIS and Yellow Alarm ................................................ 451 7.2.5 FEBE or ESF PRM Errors ......................................... 452 8.0 SS7 Technology Overview ............................................ 453 8.1 SS7 Network Architecture ............................................ 453 8.2 SS7 Protocol ................................................................. 455 8.3 SS7 Messages ............................................................. 457 8.4 ISUP Message Example .............................................. 460 Chapter 6 Troubleshooting & Customer Information ..... 461 1.0 Troubleshooting ............................................................. 461 2.0 Calibration..................................................................... 464 3.0 Customer Information ................................................... 466 3.1 Customer Service ......................................................... 466 3.2 Express Limited Warranty ............................................. 467 Index .................................................................................... 469 11 Warnings! • T1 span lines contain high voltage. These voltages may appear on the tip and ring of the bantam jacks used to connect the signal to the SunSet T10. • Insert or remove software cartridges only with the power switched off. Otherwise, damage could result to the software cartridge. • Use only the SunSet charger for your SunSet T10. Use only the printer charger for the printer. Improper use of any charger may damage your test set, the printer, or the chargers and will invalidate your warranty. • When bringing the SunSet in from extreme cold to a warm environment allow the SunSet to warm up and allow any condensation to evaporate before use. Condensation may interfere with the operation of the SunSet and may result in damage. • Do not immerse the SunSet in water and do not expose the SunSet to rain. • Using the supplied equipment in a manner not specified by Sunrise Telecom may impair the protection provided by the equipment. 12 SunSet T10 Rev. B Chapter 1 Initial Setup 1.0 Unpacking the Test Set Use the following procedures for unpacking and testing a new SunSet T10: 1. Remove the packing list from the shipping container. 2. Remove the SunSet T10 and accessories from the shipping container. 3. Inspect all items and immediately report any damage to both the carrier and Sunrise Telecom. 4. Verify that all parts specified on the packing list were received. 5. Complete the Warranty Registration Card and return it immediately to Sunrise Telecom. Note: Sunrise Telecom must receive the Warranty Registration Card in order to provide updated software releases. 6. Ensure the software cartridge is fully seated in its slot. Refer to Figures 1 and 2. SUNRISE TELECOM Software Card 2 mb INSERT HERE SunSet T10 SS150 Serial Number QP SunSet T10 SS150 Tested To Comply With FCC Standards FOR HOME OR OFFICE USE 22 Great Oaks Blvd San Jose, CA 95119 Tel: 1- 408-363-8000 Fax: 1- 408-363-8313 [email protected] Figure 1 Cartridge Installation Ch.1 Initial Set-up 13 A. Figure 2 shows the cartridge after installation. Be sure that the top of the cartridge is in line with the top of the ejector button to the left. Make sure that the software card is pushed in flush with the top of the ejector button SUNRISE TELECOM SunSet T10 SS150 QP Serial Number Software Card 2 mb SunSet T10 SS150 Tested To Comply With FCC Standards FOR HOME OR OFFICE USE 22 Great Oaks Blvd San Jose, CA 95119 Tel: 1-408-363-8000 Fax: 1- 408-363-8313 [email protected] INSERT HERE Figure 2 Cartridge After Installation 7. Plug the AC Battery Charger into an appropriate AC wall outlet: 110V/60 Hz for the SS128-B. 8. To install the instrument stand, refer to Figure 3 and the following procedure. Note: Do not install the instrument stand if the protective jacket is used. A. Remove the two center screws from the rear of the SunSet T10. Save these screws if the instrument stand is to be removed at a later date. B. Remove the two bottom screws from the rear of the SunSet T10. These screws are slightly longer than the ones removed in step A. Save both of these screws for step E. C. Fit the instrument stand onto the back of the SunSet T10. D. Use the two long screws, provided with the instrument stand, to attach the instrument stand onto the SunSet T10 at the two bottom screw positions. 14 SunSet T10 Rev. B E. Use the screws saved from step B to attach the instrument stand onto the SunSet T10 at the two center screw positions. SUNRISE TELECOM SUNRISE TELECOM SunSet T10 SunSet T10 SS150 SS150 QP Serial Number QP Serial Number Software Card 2 mb Software Card 2 mb SunSet T10 SS150 Tested To Comply With FCC Standards SunSet T10 SS150 Tested To Comply With FCC Standards FOR HOME OR OFFICE USE FOR HOME OR OFFICE USE 22 Great Oaks Blvd San Jose, CA 95119 Tel: 1-408-363-8000 Fax: 1- 408-363-8313 [email protected] 22 Great Oaks Blvd San Jose, CA 95119 Tel: 1-408-363-8000 Fax: 1- 408-363-8313 [email protected] INSERT HERE INSERT HERE Bottom Screw Center Screw Bottom Screw Center Screw Bottom Screw Bottom Screw SunSet Before Stand Installation 1" Screw 1" Screw SunSet After Stand Installation Figure 3 Instrument Stand Installation 9. Switch the SunSet T10 on and verify that it passes the SELF TEST. If the SunSet T10 does not turn on immediately, it may need to charge for up to 5 minutes before it can operate. 10.Charge the SunSet T10 for at least one hour before its first use, or leave the AC Battery Charger plugged in while operating the SunSet T10. Notes: • When ordering software upgrades, specify the serial number of the SunSet T10 into which the new cartridge will be installed. • Each software cartridge is mated to a single SunSet T10. If the SunSet T10 does not start properly, verify that the serial number printed on the software cartridge matches the serial number on the back of the SunSet T10. Ch.1 Initial Set-up 15 2.0 Check Out Procedure 1. Plug in the supplied AC charger. WARNING! Use only the SunSet charger for the SunSet T10. Use only the printer charger for the printer. Improper use of any charger may damage the SunSet T10, printer, or chargers and will invalidate the warranty. 2. Using a single bantam cord, plug one end of the cord into the LINE 1 RX jack and the other end into the LINE 1 TX jack. The SunSet T10 will receive the signal transmitted on LINE 1. 3. Press the POWER key on the keypad to turn the SunSet T10 on. Observe the SELF TEST. Verify that it displays a “NO ERRORS” message. 4. Observe the software logo screen that appears immediately after the “SELF TEST COMPLETE” message. Verify the serial and version numbers. To observe this screen again, turn off the SunSet T10 and then turn it back on. 5. Press the LIGHT key on the keypad to turn on the backlight. A. Adjust the screen contrast by using the control thumb wheel on the left side of the SunSet T10. 6. After the SunSet logo screen appears, the SunSet T10 MAIN MENU screen will automatically appear. A. Select TEST CONFIGURATION by using the up/down arrow keys on the keypad. Press the ENTER key on the keypad once TEST CONFIGURATION is highlighted. Configure as follows. TEST MODE: T1SINGL RxLVL-1: TERM FRAMING: ESF Tx CODING: B8ZS Tx SOURCE: NORMAL XMT CLK: INTERN TEST RATE: Nx64K LBO 1: 0 dB Notes: • If the cursor will not move, check the SHIFT indicator at the upper left hand corner of the screen. To turn it off press the SHIFT key on the keypad and the word “SHIFT” will disappear. • Throughout this manual the > symbol is used. This means to select the indicated item and press the ENTER key on the keypad. 16 SunSet T10 Rev. B B. After entering Nx64K for TEST RATE, the T10 TIME SLOT screen appears. The AUTO key can be used to configure the received fractional T1 circuit or it can be done manually. For now, press the ENTER key on the keypad to return to the TEST CONFIGURATION screen. 7. Press the GRAPHIC key on the keypad and refer to Figure 4. 08:21:36 MEAS LINE 2 Rx TISINGL INST LINE 1 Tx DROP Rx DISABLED Tx FRAMING Tx CODING PATRN XMT TEST RATE TERM : ESF : B8ZS : QRSS RCV: QRSS - 64 kbps Figure 4 T1SINGL • • • • • For LINE 1 and LINE 2, Rx is the SunSet T10s receiver. Tx is the transmitter. Notice that LINE 2 is disabled. This means that LINE 2’s transmitter and receiver are disabled. Observe the LEDs on the SunSet T10. If the ERRORS LED is red, the TEST CONFIGURATION screen is most likely setup for BRIDGE or DSXMON instead of TERM. PULSES, B8ZS, PAT SYNC and ESF LEDs should be green. If any are red, check the TEST CONFIGURATION screen and cable setup. 8. Press the ESCAPE key on the keypad to return to the TEST CONFIGURATION screen. A. Select TEST RATE and press the 1.544M (F1) F-key. B. Press the GRAPHIC key on the keypad and notice the changes. Refer to Figure 5. Ch.1 Initial Set-up 17 08:21:36 MEAS LINE 2 Rx TISINGL LINE 1 Tx T DISABLED Tx FRAMING Tx CODING PATRN XMT TEST RATE R : : : - Rx TERM ESF B8ZS QRSS RCV: QRSS 1544kbps Figure 5 T1SINGL, Test Rate 1.544 kbps • • • • • For LINE 1, Rx is the SunSet T10s receiver. For LINE 1, Tx is the transmitter. LINE 2 is disabled. This means that LINE 2’s transmitter and receiver are disabled. If the ERRORS LED is red, TEST CONFIGURATION is most likely setup for BRIDGE or DSXMON instead of TERM. PULSES, PAT SYNC and ESF LEDs should be green. If any are red, check the TEST CONFIGURATION screen and cable setup. C. Press the ESCAPE key on the keypad until the MAIN MENU is displayed. 9. Select LPBK & SPAN CONTROL > CSU & NI CONTROL and configure in the order shown. TYPE: IN-BAND CODE: NI MODE: LOOP-UP Note: Pressing the LOOP-UP (F1) F-key starts this function: highlight MODE and then press ENTER. A. After “PRE-EXISTING LOOP ONLY! hit ENTER to continue” is displayed, press the ENTER key on the keypad. If the ENTER key is not pressed immediately, the loop-up will be aborted. B. Press the ESCAPE key on the keypad twice to return to LPBK & SPAN CONTROL. If other choices are available within LPBK & SPAN CONTROL, select them and observe their functions. 18 SunSet T10 Rev. B C. When finished, press the ESCAPE key on the keypad untill the MAIN MENU is displayed. 10.Select SEND TEST PATTERN. • • Observe all of the available stress patterns. The SunSet T10 will synchronize only on the pattern it is sending. Displayed is a USER (F1) F-key. This allows the creation of 10 user patterns up to 2048 bits each. A. Select the FOX test pattern. The SENDING line displays the FOX pattern. B. Press the ESCAPE key on the keypad to return to the MAIN MENU. 11.Select MEASUREMENT RESULTS and refer to Figure 6. 08:21:36 MEAS ET- 000:01:53 RT- CONTINU FRM-ESF TxCd-B8ZS CNFG-TERM RCV- FOX XMT- FOX NO ERRORS NO ERRORS FREQ: 1544000 PAGE-UP PAGE-DN Lpp : 0.1 dB STOP more Figure 6 Measurement Results - NO ERRORS A. B. C. D. “NO ERRORS” should be displayed as shown in Figure 6. Verify that FREQ is 1544000 +/-1 Verify that the Lpp is “0 dB” +/- 1.0 Press the ERR INJ key on the keypad and observe the measurement counts. There should be 1 BPV and 1 BIT error shown in the LINE 1-SUMMARY screen. E. Pull out the bantam cable on the SunSet T10, wait a few seconds, and put it back in. F. The UAS (unavailable second) counter continues to count for 10 seconds after the cable is plugged back in and then decreases by 10. Ch.1 Initial Set-up 19 G. The ERRORS and BIT ERROR LEDs flash red. Press the HISTORY key on the keypad to clear the flashing LEDs. H. Press the PAGE-DN (F2) F-key to observe the other measurements. There are seven available screens. I. Press the ESCAPE key on the keypad to return to the MAIN MENU. 12.Select OTHER MEASUREMENTS > VIEW RECEIVED DATA. A. Press the PAUSE (F3) F-key. B. Press the PAGE-DN (F2) F-key to observe the FOX message in the ASCII column. Displayed is the binary and hex protocol. This data is presented by timeslot number within consecutive frames. C. Verify that 60 screens are available. D. Press the ESCAPE key on the keypad to return to the OTHER MEASUREMENTS menu. 13.Select PROPAGATION DELAY. A. Verify that RND TRIP DELAY is 0 or 1 UI. B. Press the ESCAPE key on the keypad to return to the OTHER MEASUREMENTS menu. 14.Select QUICK TEST-I. A. Select TICKET and press the TOGGLE (F3) F-key to access the character grid. B. Press the SELECT (F4) F-key to choose the letter A. C. Move the cursor to B; it begins flashing and press the SELECT (F4) F-key to choose it. D. Move the cursor to C; it begins flashing and press the SELECT (F4) F-key to choose it. E. Press the TOGGLE (F3) F-key to escape out of the character grid. F. Verify that the letter C is no longer flashing and the ticket line displays ABC. 15.Select LOOPBACK and choose NI. A. Observe the patterns and the times for this test. B. Press the ENTER key on the keypad to begin the test. C. Observe the pre-existing loopback message. D. Press the ESCAPE key on the keypad to abort the test. Observe the results. • 20 The PAGE-DN F-key is available if the test finishes at least one of the test patterns. SunSet T10 Rev. B E. Press the ESCAPE key on the keypad to return to the OTHER MEASUREMENTS menu. 16.Select BRIDGE TAP DETECT A. Wait 30 seconds until the first pattern is finished and then press the PAGE-DN (F2) F-key to view the test summary. • A perfect score is: BIT errors: 0 ES (Errored Seconds): 0 AS (Available Seconds): 30 B. Press the ESCAPE key on the keypad to return to the OTHER MEASUREMENTS menu. 17.If ordered, select PULSE MASK ANALYSIS. A. Select START NEW ANALYSIS. B. Observe the pulse shape. C. Press the T1.403 (F1) F-key and verify that T1.403 PASS is displayed. D. Press the ESCAPE key on the keypad until the MAIN MENU is reached. 18.Select VF CHANNEL ACCESS. Observe that the “PAT SYNC” LED turns off. A. Select VF MEASUREMENTS. B. Use the NEXT (F1) and PREV (F2) F-keys along with the arrow keys on the keypad to set Tx-1 and Rx-1 T/S to 01. C. Adjust the volume by pressing the VOL UP key on the keypad until something is heard. D. Talk into the microphone, located below the keypad. You should hear your voice through the speaker located on the LED panel. • INSERT TYPE must be set for TALK in order to hear your voice through the speaker. E. Continue to configure VF MEASUREMENTS as follows: INSERT TYPE: TONE, a tone will sound after selecting TONE (reduce volume as needed). TONE FREQ Hz: 1004 TONE LVL dBm: 0 dBm • If optioned for LEVEL/FREQUENCY, verify the RxFRQ/LVL is 1004 Hz +/- 2 and 00.0 dBm +/- 0.3. Ch.1 Initial Set-up 21 F. Select Tx-1 A/B/C/D and press the OFFHOOK (F2) F-key. Verify that the Rx-1 A/B/C/D bits are all 1s. Press the ONHOOK (F1) F-key and verify that the Rx-1 A/B/C/D bits are all 0s. G. Set INSERT TYPE to TALK. H. Press the ESCAPE key on the keypad to return to the VF CHANNEL ACCESS menu. 19.Select PLACE/RECEIVE CALLS A. Select METHOD and press the DTMF (F2) F-key. B. Select NUMBER and press the SHIFT key on the keypad. Observe the SHIFT lock indicator on the display. C. Enter the number 4083638000 by using the keypad. D. Press the SHIFT key again to remove the SHIFT indicator. E. Press the ENTER key on the keypad to dial the number and verify that the dialing can be heard. F. Press the ESCAPE key on the keypad to return to the VF CHANNEL ACCESS menu. 20.Select VIEW SUPERVISION. Note that the speaker turns off. A. Verify the signaling of all columns are 0000 except for 1111 in column 1, row 1. B. Press the ESCAPE key on the keypad to return to the VF CHANNEL ACCESS menu. 21.Select and note the DIAL/SPRVIS Setup menu. A. Press the ESCAPE key on the keypad to return to the MAIN MENU. 22.Select OTHER FEATURES > SYSTEM CONFIG > VERSION/ OPTION to view the ordered options. Press the PAGE DN (F2) F-key if the options take more than one screen. A. Press the ESCAPE key on the keypad to return to the SYSTEM CONFIG menu. 23.Select FULL SELF TEST and verify that there are no errors. • If the SunSet T10 lost PAT SYNC during the self-test, press the RESYNC key on the keypad. A. Press the ESCAPE key on the keypad to return to the SYSTEM CONFIG menu. 22 SunSet T10 Rev. B 24.Select ERASE NV RAM. This will reset the SunSet T10s nonvolatile RAM and erase all programmed patterns and profiles. A. Follow the on screen instructions. B. Turn off the SunSet T10 for 5 seconds when the procedure is complete, then turn it back on to reload the default settings. 25.Select TEST CONFIGURATION A. Configure as shown in step 6A. B. Press the ESCAPE key on the keypad to return to the MAIN MENU. 26.Select OTHER FEATURES > SYSTEM CONFIG > SYSTEM PROFILES. A. Press the VIEW (F1) F-key to view screen 1 and press the PAGE-DN (F2) F-key to view the other available screens. • SYSTEM PROFILES can store and recall up to 10 instrument configurations. B. Press the ESCAPE key on the keypad until the OTHER FEATURES menu is displayed. 27.Select MEAS CONFIGURATION > ERROR INJECTION A. Note the available options. B. Press the ESCAPE key on the keypad to return to the MAIN MENU. 28.Select OTHER PARAMETERS. A. Note the available options. B. Press the ESCAPE key on the keypad to return to the MAIN MENU. 29.Select DATA LINK CONTROL. A. Note the ESF datalink functions. • Displays SLC-96® functions, if the SunSet T10 is SLC-96® framed. B. Press the ESCAPE key on the keypad to return to the MAIN MENU. 30.Select CSU/NI EMULATION. A. Press the LLPBK-1 (F2) F-key. B. Verify the loopback graphic. C. Press the ESCAPE key on the keypad to return to the MAIN MENU. Ch.1 Initial Set-up 23 31.If a Sunrise printer was ordered, connect the supplied charger to the printer and a power outlet. A. Connect the printer to the SunSet T10 using the Sunrise Telecom mini DIN 8 to RS-232C printer cable. B. Turn on the printer and press the SHIFT key on the SunSet T10 keypad. C. Press the PRN SCRN key on the keypad to print out the current screen. D. Press the SHIFT key again to remove the SHIFT indicator. 32.If Remote Control was ordered, check out it’s operation by connectting the SunSet T10 to a PC with Microsoft HyperTerminal or other VT100 emulation software. Start by: A. Plugging the Sunrise SS122B null modem adapter DB9(F) into the PC’s COM port 1. B. Plug the Sunrise SS115B printer cable into the SS122B. C. Plug the other end of the SunSet SS115B printer cable into the SunSet T10s serial port. D. Configure Microsoft HyperTerminal as follows: • Connect tab Connect using: Direct to COM1 • Configure button Bits per second: 9600 Data bits: 8 bits Parity: none Stop bits: 1 Flow control: Xon/Xoff • Setting tab Use defaults. Emulation: VT100 H. On the PC, type logon. The HyperTerminal window should display the remote control. I. On the PC press Q for ESCAPE. Press ENTER for enter. • • • • 24 U, W, and other commands are displayed at the left of the screen. The LEDs are displayed as a table of current and history conditions. The menus and graphics duplicate the SunSet T10. A local user and a remote user can work on a problem together. The display of objects and graphs (i.e. configurations shown in Figures 4 and 5) are not supported in VT100 emulation. SunSet T10 Rev. B 33.The check out procedure is now complete. If there are any questions, or if any of the verification steps failed, please contact Customer Service at: Sunrise Telecom Inc. 302 Enzo Drive San Jose, CA 95138 USA Toll Free: 1-800-701-5208, 24 hours per day, 7 days a week. Fax: 1-408-363-8313 Internet: http://www.sunrisetelecom.com E-Mail: [email protected] Ch.1 Initial Set-up 25 26 SunSet T10 Rev. B Chapter 2 Product Description This chapter describes the general features of the SunSet T10. It explains the LEDs, keypad functions, and the connector panel. Shown in Figure 7 is the front view of the SunSet T10. 1 2 PULSES SF YEL/IDLE POWER B8ZS ESF AIS LOW BATT ERRORS SLC-96 PAT SYNC PULSES SF BIT ERROR B8ZS ESF YEL/IDLE ERRORS SLC-96 AIS SunSet T10 12:34:41 MEAS VIEW RECEIVED DATA PAGE : 01 T/S BINARY HEX ASCII 01 11011111 DF ( ) 02 11000010 C4 (#) 03 01000010 42 B (B) 04 00011110 1E (X) 05 01100101 65 e ( ) 06 00101110 2E (t) 07 11010100 D4 (+) 08 11000101 C5 ( ) PAGE-UP PAGE-DN F1 RESUME F2 STORE F3 F4 SUNRISE TELECOM F1 F2 F3 F4 A RESYNC B LIGHT C GRAPHIC D ERR INJ E AUTO 1 VOL UP 2 VOL D N HISTORY F 4 5 6 7 8 S H I FT ESCAPE POWER PRN SCRN 3 9 ENTER 0 Figure 7 SunSet T10 Front View Ch.2 Product Description 27 1.0 Keypad Functions F1 F2 F3 F4 A B C D RESYNC LIGHT GRAPHIC ERR INJ E 1 2 3 AUTO VOL UP VOL DN HISTORY F 4 5 6 7 8 SHIFT POWER PRN SCRN 9 ENTER ESCAPE 0 Figure 8 SunSet T10 Keypad SunSet T10 keys can have two distinct meanings: • • 28 The White Label above the key indicates what function will be performed if the key is pressed by itself (i.e. ERR INJ or HISTORY). The Orange Label below the key indicates what function will be performed if the SHIFT function is activated (i.e. numbers or PRINT). SunSet T10 Rev. B 1.1 Orange Label Keys Shift Key Function To activate the shift function: 1. Press and release the orange SHIFT key. Do not press the SHIFT key simultaneously with other keys. At this point, the SHIFT indicator will appear in the upper left-hand corner of the screen. 2. Then press the desired key marked in orange. The SunSet T10 will then perform the function indicated on the orange label. 3. Press the SHIFT key again to release the shift. Note that the SHIFT indicator is now gone. Note: Check the shift indicator if the keys are not behaving as expected. If the shift indicator at the upper left-hand corner of the screen indicates the wrong shift status, press the SHIFT key. A, B, C, D, E, F Use these keys to enter DTMF tones (A-D), special MF tones, letters in labels, and hexadecimal numbers. 0 through 9 Use these keys to enter user test patterns, user loopback patterns, numbers in LABELS, and telephone numbers. PRN SCRN Press PRN SCRN to print the current screen to the SS118 High Capacity Thermal Printer. The image is converted to bitmap format so that any screen (menu, pulse mask, graphic) can be printed. • • This screen will not print to ASCII devices. When the PRINT F-key is present, the output is generally formatted in ASCII characters and can be used by common printers and computers. Ch.2 Product Description 29 1.2 White Label Keys F1–F4 Use these keys to select choices at the bottom of the LCD display. If more than four F-key options are available, a “more” indicator will appear in the F4 position. Pressing the “more” (F4) F- key will display the other available keys. • • In most instances, when the desired F-key is pressed, the cursor will advance to the next display line automatically. If the settings of a previous line need to be changed, press the Up Arrow key on the keypad, then select the option using the appropriate F-key. At the bottom of the screen are options associated with a particular setup parameter within that screen. Changing the position of the cursor within that screen, the available F-key options will also change. RESYNC The RESYNC key re-synchronizes on the transmit pattern and restarts the in-progress measurement. • • • If the transmit pattern is not found, the measurement begins in a live mode with the PATSYNC light off. If the transmit pattern is found, then the PATSYNC LED turns green and bit measurements are made. Bit measurements are discontinued during some operations like ISDN PRI Call Setup and VF Channel Access. LIGHT Use the LIGHT key to turn on and off the display backlight. Turning the backlight off can extend the run time of the battery. • • The backlight timer can be set in OTHER FEATURES > SYSTEM CONFIG > GENERAL CONFIG. If the timer is set, the backlight will automatically turn itself off after the specified amount of time has passed. The default is for a continuous backlight. GRAPHIC The graphic key presents a picture of the current circuit configuration. The graphic can be invoked during basic menus and basic operations such as Test Configuration, Send Test Pattern, Measurement Results, and LPBK & Span Control. Use the GRAPHIC key upon completing TEST CONFIGURATION to confirm the settings. 30 SunSet T10 Rev. B Graphics are also included as a basic part of several advanced features such as CSU/NI emulation, looping repeater menus, DATACOM, and PULSE MASK ANALYSIS. In these advanced menus, additional graphics are not available if the GRAPHIC key is pressed. ERR INJ Use the ERR INJ (error injection) key to inject errors on the SunSet T10s transmitted signal. Errors will be injected according to the configuration in OTHER FEATURES > ERROR INJECTION. • • • When the ERR INJ key is pressed and the error injection MODE is set for RATE, errors will be injected at the specified rate and type selected in the OTHER FEATURES > ERROR INJECTION menu. An error inject indicator will be at the top of the display to the right of the MEAS indicator and will display the type of error. The types of errors are BPV, LOGIC, LOG+BPV, and FRAME. AUTO The AUTO key automatically synchronizes framing and test patterns. It also: • • • • • restarts the test in progress and clears any history indicators. changes the transmit pattern to the received pattern. updates the framing in the TEST CONFIGURATION screen. updates the test pattern in the SEND TEST PATTERN and MEASUREMENT RESULTS screens. Note that other operations cannot be performed while the SunSet T10 is searching for the framing and pattern. VOL UP & VOL DN To adjust the speaker volume when using VF Channel Access use the VOL UP and VOL DN keys. Upon pressing these keys, a volume indicator will appear at the top right corner of the screen. HISTORY Use the HISTORY key to turn off flashing LEDs. LEDs flash to indicate an error or alarm that has occurred, but is no longer present. Ch.2 Product Description 31 ENTER The ENTER key performs two functions: 1. When a menu item is highlighted and the ENTER key is pressed, the screen displays the new screen indicated by the menu choice. 2. The ENTER key is also used in a few screens to invoke an operation after the user is finished entering all data in a given screen. Pressing the ENTER key causes the SunSet T10 to carry out those specified inputs. This happens in just a few cases, like DTMFdialing and manual A/B (/C/D) bit entry. • • • In almost all of the high usage functions, it is not necessary to press the ENTER key to invoke the operation. If the operation does not seem to be occurring, press the ENTER key. When the ENTER key is used to invoke the operation, the ESCAPE key may need to be pressed to return to the previous menu once the operation is completed. ESCAPE This key has two functions: 1. It moves back toward the MAIN MENU, one screen at a time. 2. It is used to abort an unwanted action. , , , Cursor Keys The cursor keys move the highlighted cursor in the indicated direction. 32 SunSet T10 Rev. B 2.0 LEDs 1 2 PULSES SF YEL/IDLE POWER B8ZS ESF AIS LOW BATT ERRORS SLC-96 PAT SYNC PULSES SF BIT ERROR B8ZS ESF YEL/IDLE ERRORS SLC-96 AIS SunSet T10 Figure 9 LED Panel The LEDs (light emitting diodes) indicate the status of the received signal. An LED lights continuously when the condition for that LED occurs on the received signal. • • After an alarm (red LED) condition ends; the LED will begin to blink. This blinking provides a history in case no one was present when the condition occurred. Pressing the HISTORY key at anytime clears the flashing LEDs. Note: As various operations are performed on the SunSet T10, the LEDs automatically stop flashing. BIT ERROR The Bit Error LED lights if a Bit Error has been detected. This LED refers to the line selected (L1-Rx or L2-Rx) as Rx/DROP in the TEST CONFIGURATION screen. PAT SYNC The pattern synchronization LED lights green if the SunSet T10 receives the same pattern it transmits. Select this pattern in the SEND TEST PATTERN menu. View the transmit and receive pattern in the MEASUREMENT RESULTS and GRAPHIC screens. The PAT SYNC LED will not light if there is no pattern synchronization. When synchronization occurs, the pattern synchroCh.2 Product Description 33 nization LED turns green. Once the LED turns green, if pattern synchronization is lost, the LED turns red. When pattern synchronization returns, the LED turns green again. POWER When switched on, the POWER LED lights green and indicates an adequate battery charge. LOW BATT The LOW BATT LED lights red when the SunSet T10s power battery has dropped to a low level. • The SunSet T10 will shut itself down approximately 10 minutes after the LOW BATT LED lights. The auto shut down helps protect the battery from a damaging total discharge. Plugging in the AC Battery Charger will allow use of the SunSet T10 indefinitely. However, to use the SunSet T10 for an extended period, it is advisable to plug the AC Battery Charger in before starting a test. • If the charger is plugged in while a measurement is in process and the battery is low, the SunSet T10 may reset itself. In this case, the current measurement results would be lost. 1 and 2 LED Groups The following LEDs provide the same functions for both Lines 1 and 2. In T1 SINGL mode, Line 2’s LEDs are off. These LEDs are off in Datacom mode. PULSES This LED shows whether the SunSet T10 is receiving a T1 signal or not. If a signal is detected, this LED is green; if a loss of signal is detected, the LED is red. B8ZS This LED shows that B8ZS line coding is present on the received T1 signal. During severe BPV error conditions on an AMI line, the B8ZS light may also be on. • • B8ZS coding can only be observed on a line if at least 8 consecutive data zeroes are transmitted on the line. An AIS signal or other high ones-density signal can make it impossible to determine whether the line is optioned correctly for AMI or B8ZS. 34 SunSet T10 Rev. B ERRORS If any error occurs, this LED lights red. This could be a framing bit, bit, CRC-6, or other error. SF, ESF, SLC-96 These LEDs show whether the framing found on the received signal matches the framing selected in the TEST CONFIGURATION screen. If the framing matches, the appropriate framing LED will be green. If the framing does not match, then the framing LED selected in the TEST CONFIGURATION screen will be red. Used on “A DS1” with the SLC-96® system is SLC-96® framing. The B and D DS1s use SF framing. The C DS1 will show SLC-96® framing in mode II. Although the SunSet T10 will recognize an SLC-96® signal from an SLC system, it may not recognize SLC-96® framing from another test set. For the SunSet T10 to recognize SLC-96® framing, the other test set must include valid SLC-96® frame flags in its SLC-96® framing. YEL ALM This LED lights if the SunSet T10 detects a yellow alarm. An SF yellow alarm occurs when bit 2 is set to zero in all channels. An ESF yellow alarm is a data link message of 00000000 11111111. AIS This LED lights red if the SunSet T10 detects an all ones signal without framing on its active receive jack. Ch.2 Product Description 35 3.0 Connector Panel The connector panel shown in Figure 10 is located on the right side of the SunSet T10. SERIAL PORT MULTI PORT TX LINE 2 RX TX LINE 1 NimH 15V RX + Figure 10 SunSet T10 Connector Panel Line 1 Use these jacks for both T1SINGL and T1DUAL access modes. Line 2 Use these jacks when T1DUAL is selected in the TEST CONFIGURATION screen. Also, use the Line 2 Rx jack as the reference frequency input in T1SINGL mode. SERIAL PORT Use this port for sending information to the printer and for the optional remote control. MULTI PORT This port is provided for Datacom testing. NimH 15V The SS104 Cigarette Lighter Charger and the SS128-B Battery Charger plug into the DC jack. • • Plugging the charger in enables the SunSet T10 to operate off a discharged battery. The battery will charge during operation while the SunSet T10 is running on the charger. 36 SunSet T10 Rev. B 3.1 Using the Battery & AC Charger NOTICE! Use only the charger supplied with the SunSet T10. Use of other chargers will void the warranty. Designed to provide power for portable testing, the battery uses a custom-designed charger. This charger is powerful enough to run the SunSet T10 continuously while keeping the battery charged. The charger features fast-charge, which recharges a battery quickly. This fast charging is non-damaging to the battery. When the charger recognizes that the battery is nearly fully charged, it converts to trickle-charging mode. This completes the charging process for maximum battery output. The trickle-charging mode is also non-damaging to the battery over extended periods. However, to get maximum life from the battery, remove it from the charger when it is fully charged. Here are some tips for getting the best performance out of the battery: • • • • • • If not needed, turn the screen backlight off. Switch the power off on the SunSet T10 when it is not in use. Use the cigarette lighter battery charger when driving. This will help keep the battery charged when AC power is not available. If running an extended test and uncertain if the battery will last, plug the charger in at the beginning of the test so that the SunSet T10 will run indefinitely. Plugging the charger in while the battery is low during a test may cause the SunSet T10s processor to reset and drop the current test. Recharge the battery between uses, even if the time available for a recharge is short. The AC battery charger is a special twostage design that charges the battery to approximately 80% of its capacity in just a few hours. The battery will fully charge overnight. If the LED is on continuously, then the charger is in high-output mode and is either fast charging the SunSet T10 or powering it during normal operation. When the LED blinks regularly, the charger is in trickle-charge mode. When the LED barely flickers at all, the battery is fully charged. Ch.2 Product Description 37 3.2 Printing from the Serial Port The SunSet T10 is equipped with a standard serial port for printing and remote control operations. 3.2.1 Serial Port Settings The Serial Port can be configured for baud rate, parity, stop bit, bits/character and carriage return/line feed. These settings are configured in MAIN MENU > OTHER FEATURES > SYSTEM CONFIG > GENERAL CONFIG. In general, the SunSet T10s serial port settings will need to match the settings of the printer or remote control. 3.2.2 Configuring for Printing An optional SS118 High Capacity Thermal Printer is available with the SunSet T10. This printer uses the 8-bit serial RS-232C port located at the top of the SunSet T10, The SS118 uses thermal paper; it has no ink cartridge or ribbon that needs replacing. Many other serial printers are available to the user; however, not all of these printers will operate correctly with the SunSet T10. In addition to the optional SS118 printer, the TTC PR40A printer will work, although it requires an optional SS122C Null Modem Adapter. Use this information to setup the SunSet T10 with another printer. However, Sunrise Telecom does not warrant the operation of the SunSet T10 with any printer other than the one supplied by Sunrise Telecom. Pin to Pin Connections DIN 8-Pin EIA-232-C D-Sub 6 3 1 Pin # 2 3 4 5 6 7 8 7 8 1 13 14 25 5 4 2 Description DSR TX RX GND CTS RTS DTR Pin # 6 2 3 7 5 4 20 Description DSR TXD RXD GND CTS RTS DTR Figure 11 Printer Cable Pin Assignments 38 SunSet T10 Rev. B To use the SS122C Null Modem Adaptor with other brands of printers, refer to Figure 12. PIN-TO-PIN CONNECTIONS DB-25 FEMALE DB-25 MALE Pin # Function Pin # Function 7 5 3 2 SG CTS RD TD 7 20 2 3 SG DTR TD RD 20 7 5 7 3 2 3 2 Figure 12 SS122C Null Modem Pin Assignments To begin printing, follow this procedure: 1. Connect the Sunrise Telecom DIN-8 to RS232C Printer Cable (SS115) to the serial port at the top of the SunSet T10. 2. If using a Sunrise Telecom printer, skip this step. Otherwise, connect the Sunrise Telecom Null Modem Adapter (SS122C) to the free end of the Printer Cable. Note that the adapter ends are labeled “Test Set Cord” and “Printer, Terminal”. 3. Confirm that the SunSet T10s serial port settings match those of the printer. Refer to the instructions that came with the printer on how to check or change the switch settings. If using the Sunrise Telecom thermal printer, refer to Table 1 for the correct switch settings. If using the SS118 printer, refer to Figure 13. Ch.2 Product Description 39 DIP SWITCH 1 POSITION DIP SWITCH SETTING 1 OFF 2 ON 3 ON 4 OFF 5 ON 6 7 8 OFF ON ON PRINTING DENSITY POSITION DIP SWITCH SETTING PARAMETERS 1 ON 2 ON 3 ON 4 5 6 7 8 ON ON ON OFF OFF INTERNATIONAL CHARACTER SET DIP SWITCH SETTING PARAMETERS PARAMETERS INPUT PRINTING SPEED AUTO LOADING AUTO LINE FEED SETTING COMMAND PARAMETER SETTING SERIAL HIGH ON OFF ENABLE 100% DIP SWITCH 2 PRINTING COLUMNS USER FONT BACK-UP CHARACTER SELECT ZERO PARAMETER SETTING 40 ON NORMAL NORMAL ENGLISH DIP SWITCH 3 POSITION 1 ON 2 ON 3 ON 4 5 6 7 8 ON OFF ON ON ON DATA LENGTH PARITY SETTING PARITY CONDITION BUSY CONTROL BAUD RATE SELECT PARAMETER SETTING 8 BITS NO ODD H/W BUSY 9600 bps Table 1 Switch Settings for SS118B, C & D Printers SS118 Thermal Printer Switch Settings SERIAL CR 80 COL 7-BIT NONE EVEN ODD PARALLEL CR+LF 40 COL 8-BIT PARITY 1200 2400 BAUD RATE 9600 Figure 13 Switch Settings for SS118 Printer 40 SunSet T10 Rev. B 3.2.3 Printing to a Parallel Printer SF PULSES 1 B8ZS ESF ERRORS YEL/IDLE POWER AIS LOW BATT PAT SYNC SLC-96 SF BIT ERROR B8ZS ESF YEL/IDLE ERRORS SLC-96 PULSES 2 AIS SunSet T10 12:34:41 MEAS VIEW RECEIVED DATA PAGE : 01 T/S BINARY HEX ASCII 01 11011111 DF ( ) 02 11000010 C4 (#) 03 01000010 42 B (B) 04 00011110 1E (X) 05 01100101 65 e ( ) 06 00101110 2E (t) 07 11010100 D4 (+) 08 11000101 C5 ( ) PAGE-UP PAGE-DN F1 RESUME F2 STORE F3 F4 SUNRISE TELECOM F1 F2 F3 F4 A RESYNC B LIGHT C GRAPHIC D ERR INJ E AUTO 1 VOL UP 2 VOL D N HISTORY F 4 S H I FT 7 POWER PRN SCRN 5 8 ESCAPE 3 6 9 ENTER 0 DIN RS232 Cable To T10 Serial Port Black Box Serial Parallel Converter Centronix Male-Male Parallel Cable To Printer Parallel Port Figure 14 Printing to a Parallel Printer In addition to printing out results on the SS118 series printer, any parallel printer can be used, i.e. HP or Epson. Refer to Figure 14 and use the following procedure: 1. Connect the Sunrise Telecom DIN-8 to RS232C Printer Cable (SS115) to the serial port at the top of the SunSet T10. Connect the other end to a serial to parallel converter. The Black Box PI 115A is recommended. Order the converter through Sunrise Telecom. 2. Configure the Black Box PI 115A converter: • • • Set the Black Box for DCE, since the SunSet T10 is set for DTE Make sure that the Black Box is set for the Serial > Parallel Direction Check that the converter’s DIP settings correspond to those of the SunSet T10s serial port. Configure the SunSet T10s serial port settings in MAIN MENU > OTHER FEATURES, > GENERAL CONFIG. The SunSet T10s default settings are: BAUD RATE: 9600 PARITY: NONE STOP BIT: 1-BIT BITS/ CHAR: 8-BIT CR/LF INSRT: CR+LF Note: The converter must supply its own power (or receive power from the parallel port). The SunSet T10 will not supply any power through the serial port. 3. Connect the Centronix cable (Black box #BC 001 01) to the Parallel connector on the Black Box converter and to the Ch.2 Product Description 41 Parallel Port of the printer. The Centronix cable is a male-male parallel connector. 4. Use this printer whenever a PRINT F-key option is available, as in the MEASUREMENT RESULTS or a VIEW/PRINT TRACER screen. Press the PRINT F-Key and the results will print out. Notes: • The PRINT SCREEN key does not work with a parallel printer. • Parallel printers are not able to handle the SunSet T10s graphics; the HISTOGRAM ANALYSIS and PULSE MASK ANALYSIS results will not print, even though the PRINT F-Key is available. 4.0 Additional Controls Contrast Control This control adjusts the contrast of the LCD screen. It is located on the left-hand side of the SunSet T10. 42 SunSet T10 Rev. B 5.0 Remote Control (SW100) 1 2 PULSES SF B8ZS ESF YEL/IDLE POWER AIS LOW BATT ERRORS SLC-96 PULSES SF BIT ERROR B8ZS ESF YEL/IDLE ERRORS Remote Site Host Location PAT SYNC SLC-96 AIS SunSet T10 12:34:41 MEAS VIEW RECEIVED DATA PAGE : 01 T/S BINARY HEX ASCII 01 11011111 DF ( ) 02 11000010 C4 (#) 03 01000010 42 B (B) 04 00011110 1E (X) 05 01100101 65 e ( ) 06 00101110 2E (t) 07 11010100 D4 (+) 08 11000101 C5 ( ) PAGE-UP PAGE-DN F1 RESUME F2 STORE F3 F4 SUNRISE TELECOM F2 F3 A RESYNC F1 B LIGHT C GRAPHIC D ERR INJ E AUTO 1 VOL UP 2 VOL D N HISTORY F 4 5 6 SHIFT 7 POWER PRN SCRN 8 ESCAPE RS232 cable To T10 Serial Port logon Modem F4 Telephone Line PSTN 3 Modem 9 ENTER 0 Figure 15 Remote Control Typical Layout Controlling the SunSet T10 through the optional remote control is similar to controlling the SunSet T10 directly. Remote control allows a remote user and a local user to use the SunSet T10 together at the same time. This simultaneous-usage feature can help a team of people fix a problem. Refer to Figure 11 for a diagram of the pin-to-pin assignments of the DIN to EIA-232-C cable supplied by Sunrise Telecom. Refer to Figure 12 for the pin-to-pin assignments of the Sunrise Telecom Null Modem Adapter. A breakout box, null modem, patch-box and other RS-232C communications tools maybe needed to set up serial communications. Configure the SunSet T10 as a DTE. A modified null modem cable is required to connect directly to a terminal. To modify, connect pin 20 (DTR) of the modem or terminal to pin 5 (CTS) of the SunSet T10 DB25 connector. Pin 5 of the SunSet T10 DB25 connector must show green on the breakout box in order for the remote control to work. To begin remote operation, follow this procedure: 1. Connect the Sunrise Telecom DIN-8 to RS232C Printer Cable (SS115) to the SunSet T10. 2. Connect the Sunrise Telecom Null Modem Adapter (SS122B) to the free end of the Printer Cable. The ends are labeled “Test Set Cord” and “Printer Terminal”. 3. Connect the null modem adapter to a gender changer. Normally this will be a female-to-female conversion. 4. Connect the gender changer to the cable, which connects to a computer or terminal. Ch.2 Product Description 43 5. Confirm that the SunSet T10s serial port settings correspond to those of the communications software or terminal. The SunSet T10s default settings are: BAUD RATE: 9600 PARITY: NONE STOP BIT: 1-BIT BITS/CHAR: 8-BIT CR/LF INSRT: CR+LF 6. To configure the SunSet T10s serial port settings, use this lettered procedure: A. Select MAIN MENU > OTHER FEATURES > SYSTEM CONFIG > GENERAL CONFIG B. Select BAUD RATE. Four options are available: 1200 (F1), 2400 (F2), and 9600 (F3). These settings determine the rate at which the SunSet T10 transmits data to the computer or terminal. This setting must match the setting on the target computer or terminal, otherwise random characters will appear on the remote screen. C. Select PARITY. Three options are available: NONE (F1), EVEN (F2), and ODD (F3). This setting must match the setting on the target computer or terminal. D. Select STOP BIT. Two options are available: 1-BIT (F1) and 2-BIT (F2). This setting must match the setting on the target computer or terminal. The normal configuration is 1-BIT. E. Select BITS/CHAR. Two options are available: 7-BIT (F1) and 8-BIT (F2). This setting must match the setting on the target computer or terminal. The normal configuration is 8-BIT. 7. Plug a modem into the serial port. A 9600-baud error-correcting modem is highly recommended. Some functions such as VF MEASUREMENTS will only work properly if a 9600-baud modem is used. Refer to Figures 11 and 12 for cable pin-out. A breakout box, appropriate tools, and training will be needed to make sure the SunSet T10 is appropriately connected to the modem the first time it is setup. 8. Plug the modem into the telephone network. 9. Setup a terminal to dial up the modem and commence communications. Any terminal or personal computer with VT100 terminal emulation software will work. 10. Call up the far modem with this terminal. 44 SunSet T10 Rev. B 11. Establish communication with the far modem; log on to the SunSet T10 by typing in on the computer or terminal: logon Notes: • The graphic may be distorted if logging into the SunSet T10 while it is in the graphic mode. Press the return key on the computer or terminal and then P (for graphic) to clear the distortion. • Do not press the return/enter key after typing the letters. The SunSet T10 will automatically repaint the screen with the MAIN MENU and other information. • If a mistake is made while typing logon, retype it. 12. Use the SunSet T10 just as if it would be used locally. The same menus will be displayed. There will be a prompt on the screen to show which keys to press to move the cursor (the terminal cursor keys will probably also work), to inject errors, and so on. Refresh means that pressing the s key causes the screen to refresh. Press the enter key on the terminal to simulate pressing the ENTER key on the SunSet T10. 13. When finished, type in: logoff and press enter on the computer or terminal’s keyboard. 14. Terminate the phone connection by hanging up the near end modem. A variety of asynchronous communications, in addition to modems, can be used over a public switched telephone network. Direct local connection, dedicated line, and packet are other communication alternatives. Provided in remote control is access to most of the SunSet T10s capabilities. However, there are a few differences, such as the following: • • • • The MEASUREMENT RESULTS screen is updated about once every five seconds instead of once each second. Do not use the local print commands during a remote control session because both the printer and the remote control use the same printer port. For instance, a local user presses the PRNT SCRN key on the keypad while a remote user is logged on. This causes the remote user to log off. The pulse mask feature is supported for pass/fail report and pulse statistics; however, the bit-mapped pulse graph is not drawn on the remote terminal screen. Talk/listen is not supported for remote operation. Ch.2 Product Description 45 46 SunSet T10 Rev. B Chapter 3 Menu Descriptions SunSet T10 MAIN MENU VF CHANNEL ACCESS TEST CONFIGURATION sec. 2.0 VF MEASUREMENTS sec. 7.1 LPBK & SPAN CONTROL sec. 3.0 LPBK & SPAN CONTROL VIEW SUPERVISION sec. 7.2 SEND TEST PATTERN sec. 4.0 CSU & NI CONTROL sec. 3.1 DIAL/SPRVIS SETUP sec. 7.3 MEASUREMENT RESULTS sec. 5.0 TELTREND OFFICE RPTR (SW 184) sec. 3.2 PLACE RECEIVE CALLS sec. 7.4 OTHER MEASUREMENTS sec. 6.0 TELTREND LINE RPTR (SW 184) sec. 3.3 DTMF/MF/DP ANALYSIS sec. 7.5 VF CHANNEL ACCESS sec. 7.0 WESTELL OFFICE RPTR (SW 184) sec. 3.4 NOISE ANALYSIS (SW 183) sec. 7.6 GR-303 MONITOR (SW 193) sec. 8.0 WESTELL LINE RPTR (SW 184) sec. 3.5 MF TRACER sec. 7.7 FRAME RELAY (SW 194) sec. 9.0 WESTELL NIU/PM & MSS (SW 184) sec. 3.6 SIGNALING ANALYSIS sec. 7.8 OTHER FEATURES sec. 10.0 TELTREND MSS (SW 184) sec. 3.7 GR-303 MONITOR (SW 193) DATA LINK CONTROL sec. 11.0 HDSL SPAN CONTROL sec. 3.8 MONITOR TMC/CSC sec. 8.1 CSU/NI EMULATION sec. 12.0 EOC VERIFICATION sec. 8.2 OTHER FEATURES VIEW RECEIVED DATA sec. 6.1 DATA LINK CONTROL ESF sec. 11.2 SYSTEM CONFIG sec. 10.1 PROPAGATION DELAY sec. 6.2 MONITOR T1.403 PRM sec. 11.2.1 MEAS CONFIGURATION sec. 10.2 QUICK TEST I sec. 6.3 MONITOR T1.403 NPRM sec. 11.2.2 ERROR INJECTION sec. 10.3 QUICK TEST II sec. 6.3 MONITOR T1.403 BOM sec. 11.2.3 OTHER PARAMETERS sec. 10.4 BRIDGE TAP DETECT sec. 6.4 SEND T1.403 PRM sec. 11.2.4 VIEW TEST RECORD sec. 10.5 PULSE MASK ANALYSIS (SW 190) sec. 6.5 SEND T1.403 BOM sec. 11.2.5 PRINT RECORDS sec. 10.6 DDS MEASUREMENTS (SW 188) sec. 6.6 RTRV 54016 PM CNTR sec. 11.2.6 LOAD SAMPLES sec. 10.7 ISDN PRIMARY RATE (SW 186) sec. 6.7 PRINT 54016 RESULTS sec. 11.2.7 FRAME RELAY (SW 194) SS7 ANALYSIS (SW 189) sec. 6.8 DATA LINK CONTROL SLC96 sec. 11.1 CONFIGURATION sec. 9.9 GSM VOICE/TRAU/BERT (SW 191) sec. 6.9 MONITOR DATA LINK sec. 11.1.1 LMI ANALYSIS sec. 9.2 SWITCHED 56 TESTING (SW 187) sec. 6.10 SEND MESSAGE sec. 11.1.2 PING TEST sec. 9.3 VIEW DATA LINK sec. 11.1.3 PING RESPONSE sec. 9.4 OTHER MEASUREMENTS Note: Some menu items are offered only as software options and may not appear on your SunSet T10. Parentheses (containing the SW option number) indicate such menu items. Figure 16 SunSet T10 Menu Tree Ch.3 Menu Descriptions 47 1.0 Introduction The SunSet T10 uses a menu driven format. Before entering a menu item, it must be selected (highlighted) by using the arrow keys on the keypad. A selected item is easily recognized because the surrounding area is black while the text is white. After selecting the item, execute the selection by pressing the ENTER key on the keypad. In a few specific cases, the simple action of selecting an item will execute the selection. Note: The > symbol means to select the indicated item and press the ENTER key on the keypad. Figure 16, SunSet T10 Menu Tree shows the location of major menu items. Refer to the subsection listed in the menu tree for a complete menu description. Some menu items are offered only with certain software options. Parentheses (containing the software option number) indicate such menu items. 2.0 Test Configuration Menu Before connecting the SunSet T10 to a circuit, it must be configured for the type of circuit to be tested. This is done in the TEST CONFIGURATION screen. To access this screen, select MAIN MENU > TEST CONFIGURATION. The F-keys show the available options for each setup parameter within TEST CONFIGURATION. In the TEST CONFIGURATION screen, as each F-key is pressed, the SunSet T10 immediately alters its configuration to reflect the new settings. Notes: • In order to avoid configuration mistakes, use the GRAPHIC key • on the keypad to confirm any changes to TEST CONFIGURATION. Graphics are not available for DATACOM. The SunSet T10 can be configured to automatically detect incoming framing and test patterns by pressing the AUTO key on the keypad. The first selection in TEST CONFIGURATION is TEST MODE. Four mode choices are available: T1SINGL, T1DUAL, T1-MUX, and DATACOM. The Test Configuration menu differs for each mode selected. 48 SunSet T10 Rev. B 2.1 T1SINGL Test Mode Select T1SINGL Test Mode for common T1 Line testing applications: loopback testing, frequency/slip measurements, and simple talk/listen operations. This is the simplest T1 mode and disables the LEDs for Line 2. Refer to Figure 17 for the T1SINGL Configuration screen. 08:21:36 MEAS TEST CONFIGURATION TEST MODE : T1SINGL RxLVL-1 FRAMING Tx CODING Tx SOURCE XMT CLOCK TEST RATE LBO 1 T1SINGL T1DUAL : : : : : : : TERM ESF B8ZS NORMAL INTERN 1.544M 0dB T1-MUX DATACOM Figure 17 T1 SINGL Test Configuration Screen Figure 18 displays the graphic associated with the configuration in Figure 17. 08:21:36 MEAS LINE 2 Rx TISINGL LINE 1 Tx T DISABLED Tx FRAMING Tx CODING PATRN XMT TEST RATE R : : : - Rx TERM ESF B8ZS QRSS RCV: QRSS 1544kbps Figure 18 T1 SINGL Graphic Ch.3 Menu Descriptions 49 The following items are contained within the T1 SINGL Test Configuration screen. RxLVL-1 Options: TERM (F1), BRIDGE (F2), DSXMON (F3) RxLVL-1 configures the LINE 1 1.544 Mbps receiver. This setting lets the SunSet T10 electrically decode a 1.544 Mbps signal under a wide range of resistive or cable losses. It also determines which electrical load the SunSet T10 will place on the circuit. There is no effect on the transmitter. In a 1.544 Mbps circuit, there must be a receiver that applies the low impedance (100 Ω) termination. There should never be two or more receivers applying a low impedance termination. Warning! If uncertain as to which option to choose, select BRIDGE. This will protect the 1.544 Mbps signal. TERM: Use this mode when the SunSet T10 will send and receive a T1 signal. It requires that the circuit be disrupted for testing. The received signal is terminated by the SunSet T10 and is not obtained through a MONITOR jack. The received signal can have up to 36 dB of cable transmission loss (this is a different kind of loss than the 20 dB of resistive loss provided by a DSX MON jack). Note: When plugging the SunSet T10 into a DSX MON jack in the TERM mode, the BPV LED will probably light. Use DSXMON mode instead. BRIDGE: The BRIDGE monitor is similar to the DSXMON monitor. However, in BRIDGE the SunSet T10 taps into a live, in-service, terminated DS1 signal with up to 36 dB cable loss. The SunSet T10 applies isolation resistors to protect the circuit from a hit. Select BRIDGE before clipping onto a live circuit. This will put the isolation resistors in place to ensure that the SunSet T10 does not place a hit on the circuit. Notes: • If BRIDGE mode is used on a DSXMON jack, there will be a 40 dB resistive isolation and the SunSet T10 will likely report loss of signal. In some cases, it may not be clear if the monitor jack being used provides a bridged access or a 20 dB isolation monitor access. In this case, try BRIDGE mode first to see if this works, then try DSXMON if it does not. • If BRIDGE mode is selected for a 3V signal from an OUT jack, then the BPV light will probably come on. Use TERM mode instead. 50 SunSet T10 Rev. B DSX MON: Used when a monitor measurement is made. The signal is from the MON jack of a DSX, DS1 plug-in card, CSU, or NI. The DSX has isolated the MON signal from the live signal with a high impedance circuit and the transmitter is sending the selected test pattern. Notes: • The DSX monitor jack protects the live signal from any possible disruptions caused by the testing process. It allows the technician to observe the line and check for problems while the customer is using it. • If DSXMON mode is selected when receiving a 3V signal, then the red BPV LED will turn on. This often happens if DSX MON is selected when the SunSet T10 is plugged into an OUT jack. In this case, select TERM mode instead of DSXMON mode. • In some cases, it may not be clear if the monitor jack provides a bridged access or a 20 dB isolated monitor access. In this case, try BRIDGE mode first to see if this works; if it does not, try DSXMON mode. • Use DSXMON mode if using the SunSet T10 with another test set that is already configured for auto framing. • Use DSXMON mode if the SunSet T10 will control the framing on the T1 line. • Use DSXMON mode if the SunSet T10 will provide a signal to itself without first passing through network equipment which will force a specific framing. FRAMING Options: UNFRAME (F1), SF-D4 (F2), ESF (F3), SLC-96 (F4) Chose a specific framing type when: • • • • • the circuit uses a specific type of framing. there is no T1 signal available when plugging the SunSet T10 into the circuit. using the SunSet T10 with another test set that is configured for auto framing. the SunSet T10 will control the framing on the T1 line. the SunSet T10 will provide a signal to itself without first passing through network equipment which will force a specific framing. Refer to Chapter 5, Reference, for specific details on each framing type. Ch.3 Menu Descriptions 51 UNFRAME: Select for no framing. SF-D4: This is the simplest framing consisting of 12 grouped frames. ESF: Extended Super Frame consists of 24 grouped frames. SLC-96®: Introduced by AT&T and later standardized by Bellcore. Note: If the framing on the received signal does not match the framing specified in the FRAMING menu, the SunSet T10 will show a frame loss. If the received framing changes during the middle of a test, the SunSet T10 will also show frame loss, even in the AUTO mode. Tx CODING Options: AMI (F1), B8ZS (F2) AMI (Alternate Mark Inversion): This requires the terminal transmitting data to have at least a 12.5% average 1’s density and a maximum of 15 consecutive zeroes. B8ZS (Bipolar 8-Zero Substitution): This uses a bipolar violation substitution which guarantees the 12.5% average with a maximum number of 7 consecutive zeroes. B8ZS coding is preferred, because it reduces transmission problems caused in AMI. Note: The B8ZS LED will be green only if 8 consecutive data zeroes are observed on the line. An AIS signal or other highdensity ones pattern will make it impossible for the SunSet T10 to determine whether the line is optioned for AMI or B8ZS. Tx SOURCE Options: THRU (F1), NORMAL (F2) THRU: This allows the signal received on the Rx jack to be transmitted out of the Tx jack for Line 1. The SunSet T10 will insert a signal on one or more channels on LINE 1. The channels and corresponding AB bits on that line that are not being used will be passed through the SunSet T10 unchanged from Rx to Tx. NORMAL: Use NORMAL for out-of-service bit error rate testing. In this case, a test pattern is transmitted on LINE 1 Tx. During Nx64, NX56, or VF Channel Access testing, idle code is inserted on the unused channels. Note: For NORMAL, a highlighted T is shown in the graphic screen. The T represents that the SunSet T10 is transmitting its own pattern. For THRU, there is no “T,” since the SunSet T10 is not generating its own pattern. 52 SunSet T10 Rev. B XMT CLOCK Options: L1-RX (F1), L2-RX (F2), INTERN (F3) XMT CLOCK determines the timing source for the signal transmitted out Line 1. Note: When THRU is chosen as the transmit source, XMT CLK is forced to L1-Rx. Use L1-Rx if: • plugging into a switch or other synchronous element, which requires the SunSet T10 to be slave timed. • placing a voice or data call into a switch or DCS (digital crossconnect system). This ensures that the signal will not slip and cause repetitive slips or stuffs, which destroy circuit integrity. Note: Using L1-Rx in the wrong application, such as loopback testing, may cause a loss of signal. Use L2-Rx if: • an external DS1 signal is needed to supply the L2-Rx jack in order to synchronize the signal coming out L1-Tx. • a reference clock is required for measuring frequency synchronization and clock slips. Note: The L2 receiver jack maybe used in T1SINGL Mode, but the receiver level of this jack cannot be controlled. Use INTERN for most applications such as: • • • • loopback testing. simple talk/listen. point-to-point testing. anytime the SunSet T10 is to provide an independent signal. Note: If unsure of the correct XMT CLOCK setting, choose INTERN. TEST RATE Options: 1.544M (F1), Nx56K (F2), Nx64K (F3) 1.544M: Used for normal T1 and DS1 testing. Nx56K: Use where the fractional circuit is any number (1-24) of 56 kbps channels within the DS1. In this case, the SunSet T10 will transmit a 1 in the eighth (least significant) bit of each fractional T1 channel. Ch.3 Menu Descriptions 53 Nx64K: Use for fractional T1 testing where the fractional circuit is any number (1-24) of 64 kbps channels within the DS1. If any one of the fractional settings is selected, the screen shown in Figure 19 is displayed. Note: If 1.544 was selected, the Fractional T1 screen is not needed. Move the cursor off TEST RATE or press the ESCAPE key on the keypad to return to the MAIN MENU. Pressing the ENTER key on the keypad while the cursor is on TEST RATE will automatically bring up the T10 Time Slot screen. MEAS 11:41:45 T10 TIME SLOT 01 09 17 02 10 18 03 11 19 RECEIVE 04 05 12 13 20 21 06 14 22 07 15 23 08 16 24 01 09 17 02 10 18 03 11 19 TRANSMIT 04 05 06 12 13 14 20 21 22 07 15 23 08 16 24 AUTO SELECT UN-SEL CLR-ALL Figure 19 SunSet T10 Time Slot Screen There are two options for selecting the desired combination of Fractional T1 channels: 1 Press the AUTO (F1) F-key and the SunSet T10 will automatically configure for all active fractional T1 channels. The SunSet T10 performs this AUTO configuration by searching for the 7F or FF idle codes (as selected in OTHER FEATURES > OTHER PARAMETERS) on any unused channels. 2 To manually select the exact channels to test, use the following procedure. A. Use the arrow keys on the keypad to move the flashing cursor to the desired timeslot and press the SELECT (F2) F-key. B. As the RECEIVE timeslots are selected, the SunSet T10 will fill in the corresponding TRANSMIT timeslots. 54 SunSet T10 Rev. B C. If the TRANSMIT timeslots need to be configured differently, use the down arrow key on the keypad to access these numbers and set up the selections manually. D. If the wrong timeslot is selected, press the UN-SEL (F3) Fkey or press the CLR-ALL (F4) F-key to deselect everything and start over again. E. Press the ESCAPE key on the keypad when finished. LB0 1 Options: 0dB (F1), -7.5dB (F2), -15dB (F3), -22.5dB (F4) LBO 1 refers to line build out for line 1. Use LBO to stress test a line by attenuating the dB to a chosen level. Use 0 dB: • • • when plugging the SunSet T10 in at the front panel jack of a DSX (CSU or NI equipment direction), channel bank, or other 3V test point. when there is 132 feet or less of cabling between the SunSet T10 and the DSX. under most conditions. Use -7.5, -15, and -22.5 dB: • • • • when transmitting toward the T1 span from a central office or customer premises and a 7.5 dB, 15 dB, or 22.5 dB attenuator is not in series with the SunSet T10. when the signal should be transmitted at a lower level to prevent near end crosstalk problems. when the signal should be attenuated so that it arrives at the next repeater at approximately -31 dB dsx level. when testing the sensitivity of the network element’s receiver to which the SunSet T10 is transmitting. Ch.3 Menu Descriptions 55 2.2 T1DUAL Test Mode T1DUAL provides for the use of both LINE 1 and LINE 2. Use this mode to perform applications such as full duplex drop and insert, in-service VF channel access, ISDN PRI 46B+2D call setup/ receive, and SS7. Shown in Figure 20 is an example configuration screen. For T1DUAL, the LEDs for Lines 1 and 2 are activated. The PAT SYNC LED, BIT ERROR LED, and the logical/frequency screens in MEASUREMENT RESULTS refer to the Line selected as RX/DROP in the TEST CONFIGURATION screen. 08:21:36 MEAS TEST CONFIGURATION TEST MODE : T1DUAL Tx/INSERT Rx/DROP RxLVL-1 RxLVL-2 Tx SOURCE FRAMING Tx CODING XMT CLOCK TEST RATE LBO 1&2 T1SINGL T1DUAL : : : : : : : : : : L1-Tx L1-Rx TERM TERM TESTPAT ESF B8ZS INTERN 1.544M 0dB T1-MUX DATACOM Figure 20 T1DUAL Test Configuration 08:21:36 MEAS TERM Rx Tx LINE 1 LINE 2 R T Tx Rx TERM TEST RATE - 1544kbps RCV:QRSS Figure 21 T1DUAL Graphic Test Mode 56 SunSet T10 Rev. B Figure 21 displays the graphic associated with the configuration of Figure 20. Access this graphic screen by pressing the GRAPHIC key on the keypad. The following setup parameters are associated with T1DUAL mode: Tx/INSERT Options: L1-Tx (F1), L2-Tx (F2) Tx/INSERT determines the line on which the SunSet T10 will transmit a test pattern or insert the dropped signal. This determines where the 1.544M test pattern, Nx64Kbps test pattern, Nx64Kbps multiplexed signal, Nx56Kbps test pattern, Nx56Kbps multiplexed signal, or voice frequency channel will be inserted. For example, if configuring Tx/INSERT for L2-Tx while talking on the SunSet T10, then your voice will be inserted on Line 2. Rx/DROP Options: L1-Rx (F1), L2-Rx (F2) Rx/DROP determines the line on which the SunSet T10 will receive the test signal. This configures which receiver is used for measuring bit error rate, 1.544Mbps frequency, voice channel frequency, voice channel level, or voice channel Rx A/B/C/D. For example, to perform a bit error rate test on the received signal from Line 1, then select Rx/DROP = L1-Rx. The PAT SYNC and BIT ERROR LED refer to the Rx/DROP line. RxLVL-1 & 2 Options: TERM (F1), BRIDGE (F2), DSXMON (F3) Warning! If uncertain as to which option to choose, select BRIDGE. This will protect the 1.544Mbps signal. RxLVL-1 and RXLVL-2 configure the two 1.544M receivers. These settings let the SunSet T10 electrically decode a 1.544 Mbps signal under a wide range of resistive or cable losses. They also determine which electrical load the SunSet T10 will place on the circuit. There is no effect on the transmitter. In a 1.544 Mbps circuit, there must be a receiver that applies the low impedance (100 Ω) termination. There should never be two or more receivers applying a low impedance termination. TERM: Use TERM when the SunSet T10 will send and receive a T1 signal. The circuit will be disrupted for testing. The received signal is terminated by the SunSet T10 and is not obtained through a MONITOR jack. The received signal can have up to 36 dB of cable transmission loss. This is a different kind of loss than the 20 dB of resistive loss provided by a DSX MON jack. Ch.3 Menu Descriptions 57 Note: If plugging the SunSet T10 in a DSX MON jack in the TERM mode, the BPV LED will probably come on. Use DSXMON mode instead. BRIDGE: The BRIDGE monitor is similar to the DSXMON monitor. However, in BRIDGE, the SunSet T10 taps into a live, inservice, terminated DS1 signal with up to a 36 dB cable loss. The SunSet T10 applies isolation resistors to protect the circuit from a hit. Select BRIDGE before clipping onto the live circuit. This will put the isolation resistors in place and ensure that the SunSet T10 does not place a hit on the circuit. Notes: • When using BRIDGE mode on a DSXMON jack, there is a 40 dB resistive loss and the SunSet T10 will likely report loss of signal. In some cases, it may not be clear if the monitor jack used provides a bridged access or a 20 dB isolation monitor access. In this case, try BRIDGE first to see if this works and then try DSXMON if it does not. • When using BRIDGE mode for a 3V signal from an OUT jack, the BPV light will probably come on. Use the TERM mode instead. DSX MON: Use this access mode when making a monitor measurement. The provided signal is from the MON jack of a DSX, DS1 plug-in card, CSU, or NI. The DSX has isolated the MON signal from the live signal with a high impedance circuit and the transmitter is sending the selected test pattern. Notes: • The DSX monitor jack protects the live signal from any possible disruptions caused by the testing process. It allows the technician to observe the line and check for problems while the customer is actually using it. • If operating the SunSet T10 in DSXMON mode while receiving a 3V signal, the BPVLED will light red. (The SunSet T10 is plugged into an out jack.) In this case, select TERM instead of DSXMON. • In some cases, it may not be clear if the monitor jack provides a bridged access or a 20 dB isolated monitor access. In this case, try BRIDGE mode first to see if this works; if it does not, select DSXMON mode. 58 SunSet T10 Rev. B Tx SOURCE Options: THRU (F1), TESTPAT (F2) THRU: Use THRU for full duplex drop and insert testing on an inservice line. In this case, the signal received on the Rx jack will pass through the SunSet T10 and be transmitted out the Tx jack for Lines 1 and 2. The SunSet T10 will be inserting a signal on one or more channels on the line chosen in Tx/INSERT. The channels and corresponding AB bits on that line that are not being used will be passed through the SunSet T10 unchanged from Rx to Tx. TESTPAT: Use TESTPAT for out-of-service bit error rate testing. In this case, a test pattern is transmitted on the selected Tx/INSERT jack. Idle code is inserted on the unused channels during Nx64, NX56, or VF Channel Access testing. On the line not selected, the channels and A/B (/C/D) bits are passed unchanged from Rx to Tx. FRAMING Options: UNFRAME (F1), SF-D4 (F2), ESF (F3), SLC-96 (F4) Chose a specific framing type when: • • • • • the circuit is provisioned for a specific type of framing. there is no T1 signal available when the SunSet T10 is plugged in. the SunSet T10 will be used with another test set that is already configured for auto framing. the SunSet T10 will control the framing that is put on the T1 line. the SunSet T10 will provide a signal to itself without first passing through network equipment that forces a specific framing. Refer to Chapter 5, Reference, for specific details on each framing type. UNFRAME: Select for no framing. SF-D4: This is the simplest framing consisting of 12 grouped frames. ESF: Extended Super Frame consists of 24 grouped frames. SLC-96®: Introduced by AT&T and later standardized by Bellcore. Note: If the framing on the received signal does not match the framing specified in the FRAMING menu, the SunSet T10 will show a frame loss. If the received framing changes during the middle of a test, the SunSet T10 will also show frame loss, even in the AUTO mode. Ch.3 Menu Descriptions 59 CODING Options: AMI (F1), B8ZS (F2) AMI (Alternate Mark Inversion): This requires that the terminal transmitting data have at least a 12.5% average 1’s density and a maximum of 15 consecutive zeroes. B8ZS (Bipolar 8-Zero Substitution): This uses a bipolar violation substitution which guarantees the 12.5% average with a maximum number of 7 consecutive zeroes. B8ZS coding is preferred, because it reduces transmission problems caused in AMI. Note: The B8ZS LED will be green only if 8 consecutive data zeroes are observed on the line. An AIS signal or other highdensity ones pattern will make it impossible for the SunSet T10 to determine line coding. XMT CLOCK Options: L1-Rx (F1), L2-Rx (F2), INTERN (F3) The XMT CLOCK determines the timing source for the transmitted signal (the line selected as Tx/INSERT). The other Tx signal uses the timing recovered from its Rx signal. For instance, when TxINSERT=L1-Tx and XMTCLK=INTERN, the L1- Tx signal uses the internal timing of the SunSet T10. The L2- Tx signal uses the recovered timing from L2- Rx. When TxSource is set for THRU, the XMT CLOCK selection defaults to the Tx/Insert setting. There are four different timing scenarios possible from the three F-Key options: Loop/Slave timing, Slave-to-Slave timing, External timing, and Internal/Master timing. For Loop or Slave timing choose the same line for Tx/INSERT and XMTCLK. For instance, if Tx/INST = L1- Rx, then XMT CLOCK should be L1-Rx. In this case, the exchange or network element is configured to be a master timing source in relation to the SunSet T10. Loop/Slave timing is required when transmitting toward an exchange or other network element that requires synchronous signals. Figure 22 provides a graphic illustration of Loop/Slave timing. SLAVE SF PULSES 1 B8ZS ESF ERRORS 2 YEL/IDLE POWER AIS LOW BATT MASTER PAT SYNC SLC-96 SF BIT ERROR B8ZS ESF YEL/IDLE ERRORS SLC-96 PULSES AIS SunSet T10 12:34:41 MEAS VIEW RECEIVED DATA PAGE : 01 T/S BINARY HEX ASCII 01 11011111 DF ( ) 02 11000010 C4 (#) 03 01000010 42 B (B) 04 00011110 1E (X) 05 01100101 65 e ( ) 06 00101110 2E (t) 07 11010100 D4 (+) 08 11000101 C5 ( ) PAGE-UP PAGE-DN F1 RESUME F2 STORE F3 F4 L1-Rx L1-Tx Exchange or other Timing Source SUNRISE TELECOM F2 F3 A RESYNC F1 B LIGHT C GRAPHIC D ERR INJ E AUTO 1 VOL UP 2 VOL D N HISTORY F 4 5 S H I FT 7 POWER PRN SCRN 8 ESCAPE F4 3 6 9 ENTER 0 T10 TEST CONFIGURATION Tx/INSERT: L1-Tx Tx SOURCE: TESTPAT XMT CLK: L1-Rx Figure 22 Loop or Slave Timing 60 SunSet T10 Rev. B Note: For DROP/INSERT testing, TxSOURCE must be set to THRU. XMT CLOCK will automatically be set for the same line as the Rx/DROP side. If using Loop timing and the timing source is also using loop timing, there is no real clock source and the transmit signal may die. This is known as Slave-to-Slave timing, since there is no master timing source. Figure 23 depicts Slave-to-Slave timing. SLAVE 1 2 PULSES SF B8ZS ESF YEL/IDLE POWER AIS LOW BATT ERRORS SLC-96 PULSES SF BIT ERROR B8ZS ESF YEL/IDLE ERRORS SLAVE PAT SYNC SLC-96 AIS SunSet T10 12:34:41 MEAS VIEW RECEIVED DATA PAGE : 01 T/S BINARY HEX ASCII 01 11011111 DF ( ) 02 11000010 C4 (#) 03 01000010 42 B (B) 04 00011110 1E (X) 05 01100101 65 e ( ) 06 00101110 2E (t) 07 11010100 D4 (+) 08 11000101 C5 ( ) PAGE-UP PAGE-DN F1 RESUME F2 STORE F3 F4 L1-Rx 1/0 MUX L1-Tx SUNRISE TELECOM F2 F3 A RESYNC F1 B LIGHT C GRAPHIC D ERR INJ E AUTO 1 VOL UP 2 VOL D N HISTORY F 4 5 S H I FT 7 POWER PRN SCRN F4 T10 TEST CONFIGURATION Tx/INSERT: L1-Tx Tx SOURCE: TESTPAT XMT CLK: L1-Rx 3 6 9 8 ESCAPE ENTER 0 Figure 23 Slave-to-Slave Timing External timing uses an external clock source to time the Tx/ INSERT signal. Set the XMT CLOCK to the opposite line of the Rx/DROP selection. For instance, if Rx/DROP = L2-Rx, XMT CLOCK should be L1-Rx. Figure 24 demonstrates external timing. SLAVE SF PULSES 1 B8ZS ESF ERRORS YEL/IDLE POWER AIS LOW BATT PAT SYNC SLC-96 SF BIT ERROR B8ZS ESF YEL/IDLE ERRORS SLC-96 PULSES 2 AIS SunSet T10 12:34:41 MEAS VIEW RECEIVED DATA PAGE : 01 T/S BINARY HEX ASCII 01 11011111 DF ( ) 02 11000010 C4 (#) 03 01000010 42 B (B) 04 00011110 1E (X) 05 01100101 65 e ( ) 06 00101110 2E (t) 07 11010100 D4 (+) 08 11000101 C5 ( ) PAGE-UP PAGE-DN F1 RESUME F2 STORE F3 F4 SUNRISE TELECOM F2 F3 A RESYNC B LIGHT C GRAPHIC D ERR INJ E AUTO F1 1 VOL UP 2 VOL D N HISTORY F 4 5 S H I FT 7 POWER PRN SCRN 8 ESCAPE L1-Rx SLAVE L2-Rx 1X0 MUX L2-Tx F4 3 6 9 ENTER 0 MASTER Exchange or other Timing Source T10 TEST CONFIGURATION Tx/INSERT: L2-Tx Rx/DROP: L2-Rx Tx SOURCE: TESTPAT XMT CLK: L1-Rx Figure 24 External Timing Internal, or Master, timing is used in loopback testing where synchronization is not required. An internal clock provides a timing source, but the source is not synchronized to the network. The SunSet T10 uses a Stratum 3 clock for its internal timing. Figure 25 depicts Internal Timing. Ch.3 Menu Descriptions 61 MASTER SF PULSES 1 2 YEL/IDLE POWER AIS LOW BATT B8ZS ESF ERRORS SLC-96 PAT SYNC PULSES SF BIT ERROR ESF YEL/IDLE B8ZS ERRORS SLC-96 L1-Rx AIS SunSet T10 12:34:41 MEAS VIEW RECEIVED DATA PAGE : 01 T/S BINARY HEX ASCII 01 11011111 DF ( ) 02 11000010 C4 (#) 03 01000010 42 B (B) 04 00011110 1E (X) 05 01100101 65 e ( ) 06 00101110 2E (t) 07 11010100 D4 (+) 08 11000101 C5 ( ) PAGE-UP PAGE-DN F1 RESUME F2 F4 F1 F2 F3 F4 A RESYNC B LIGHT C GRAPHIC D ERR INJ E AUTO 1 VOL UP 2 VOL D N HISTORY F 4 T10 TEST CONFIGURATION Tx/INSERT: L1-Tx Rx/DROP: L1-Rx Tx SOURCE: TESTPAT A XMT CLK: INTERN 3 5 7 POWER PRN SCRN 6 9 8 ESCAPE ENTER 0 SLAVE MASTER YEL/IDLE POWER B8ZS ESF AIS LOW BATT ERRORS SLC-96 SF PAT SYNC PULSES 1 PULSES 2 B8ZS ERRORS SF BIT ERROR ESF YEL/IDLE SLC-96 PAGE-UP PAGE-DN RESUME F2 STORE F3 F4 SUNRISE TELECOM F1 F2 F3 F4 A RESYNC B LIGHT C GRAPHIC D ERR INJ 1 VOL UP 2 VOL D N HISTORY 4 5 7 8 E AUTO F S H I FT ESCAPE POWER Loop Back AIS SunSet T10 12:34:41 MEAS VIEW RECEIVED DATA PAGE : 01 T/S BINARY HEX ASCII 01 11011111 DF ( ) 02 11000010 C4 (#) 03 01000010 42 B (B) 04 00011110 1E (X) 05 01100101 65 e ( ) 06 00101110 2E (t) 07 11010100 D4 (+) 08 11000101 C5 ( ) F1 1/0 MUX L1-Tx STORE F3 SUNRISE TELECOM S H I FT SLAVE PRN SCRN 3 6 9 ENTER 0 L1-Rx L1-Tx T10 TEST CONFIGURATION Tx/INSERT: L1-Tx Rx/DROP: L1-Rx Tx SOURCE: TESTPAT B XMT CLK: INTERN Figure 25 Internal Timing TEST RATE Options: 1.544M (F1), Nx56K (F2), Nx64K (F3) 1.544M: Used for normal T1 and DS1 testing. Nx56K: Use where the fractional circuit is any number (1-24) of 56 kbps channels within the DS1. In this case, the SunSet T10 will transmit a 1 in the eighth (least significant) bit of each fractional T1 channel. Nx64K: Use for fractional T1 testing where the fractional circuit is any number (1-24) of 64 kbps channels within the DS1. If choosing one of the fractional settings, the screen shown in Figure 26 appears. Note: If 1.544 is selected, the Fractional T1 screen is not needed. Move the cursor off TEST RATE or press the ESCAPE key on the keypad to return to the MAIN MENU. Pressing the ENTER key on the keypad while the cursor is on TEST RATE will automatically bring up the T10 Time Slot screen. 62 SunSet T10 Rev. B MEAS 11:41:45 T10 TIME SLOT 01 09 17 02 10 18 03 11 19 RECEIVE 04 05 12 13 20 21 06 14 22 07 15 23 08 16 24 01 09 17 02 10 18 03 11 19 TRANSMIT 04 05 06 12 13 14 20 21 22 07 15 23 08 16 24 AUTO SELECT UN-SEL CLR-ALL Figure 26 T10 Time Slot Screen There are two options for selecting the desired combination of Fractional T1 channels: 1 Press the AUTO (F1) F-key and the SunSet T10 will automatically configure itself for all active fractional T1 channels. The SunSet T10 performs this AUTO configuration by searching for the 7F or FF idle codes (as selected in OTHER FEATURES > OTHER PARAMETERS) on any unused channels. 2 Manually select the exact channels to be tested using the following procedure. A. Use the arrow keys on the keypad to move the flashing cursor to the desired timeslot and press the SELECT (F2) F-key. B. As the RECEIVE timeslots are selected, the SunSet T10 will fill in the corresponding TRANSMIT timeslots. C. If the TRANSMIT timeslots are to be configured differently, use the down arrow key on the keypad to access these timeslots and set up the selections manually. D. If the wrong timeslot is selected, press the UN-SEL (F3) Fkey or press the CLR-ALL (F4) F-key to deselect everything and start over again. E. Press the ESCAPE key on the keypad when finished. Ch.3 Menu Descriptions 63 LBO 1&2 Options: 0dB (F1), -7.5dB (F2), -15dB (F3), -22.5dB (F4) LBO 1 & 2 stands for line build out for line 1 and line 2. Use LBO to stress test a line by attenuating the dB to a chosen level. Use 0 dB: • • • when plugging the SunSet T10 in at the front panel jack of a DSX (CSU or NI equipment direction), channel bank, or other 3V test point. when there is 132 feet or less of cabling between the SunSet T10 and the DSX. under most conditions. Use -7.5, -15, and -22.5 dB: • • • • 64 when transmitting toward the T1 span from a central office or customer premises and a 7.5 dB, 15 dB, or 22.5 dB attenuator is not in series with the SunSet T10. when the signal should be transmitted at a lower level to prevent near end crosstalk problems. when the signal should be attenuated so that it arrives at the next repeater at approximately -31 dB dsx level. when testing the sensitivity of the network elements’s receiver to which the SunSet T10 is transmitting. SunSet T10 Rev. B 2.3 T1 - MUX Test Configuration T1-MUX provides for a multiplexing capability between the T1 line and multiport datacom signals. Use this mode to perform a synchronous Nx64K test through both a Datacom connector and a 1.544 Mbps connector at the same time. Refer to Figure 27. MEAS 21:10:05 TEST CONFIGURATION TEST MODE : T1-MUX T1 Tx/INST: Rx/DROP: FRAMING: CODING : RxLVL-1: RxLVL-2: XMTCLK : LBO 1&2: V.35 L1-Tx L1-Rx ESF B8ZS TERM TERM L1-Rx 0 db RS449 DATACOM TYPE : V.35 TxSRC: T1DRP MODE : DCE MUX BERT : V.35 T1INS: PATRN T1T/S: Nx64K X.21 RS232 Figure 27 T1 - MUX Mode Configuration The T1-MUX Configuration screen is divided into three sections. The T1 column at left provides the setup parameters for the 1.544Mbps T1 transmit and receive jacks. The Datacom section at top of the right column configures the multiport. The MUX settings at the bottom of the right column determine the SunSet T10s multiplexing operation. T1 Column If necessary, refer to sections 2.1 and 2.2, T1 Test Configuration descriptions, for details of each T1 setup option. Tx/INSERT Options: L1-Tx (F1), L2-Tx (F2) Select the 1.544 Mbps line 1 (either L1-Tx or L2-Tx) for the test signal insertion using the appropriate F-key. This is where the Nx64 kbps multiplexed signal is inserted. For example, if the SunSet T10 inserts the received V.35 signal on L2-Tx, the inserted signal is on line 2. Ch.3 Menu Descriptions 65 Rx/DROP Options: L1-Rx (F1), L2-Rx (F2) Select the 1.544 Mbps line (either L1-Rx or L2-Rx) to use for dropping an Nx64 kbps signal to the multiport. This selection also configures 1.544 Mbps line frequency and determines the VIEW RECEIVED DATA selection. For example, choose Rx/DROP as L1-Rx to drop a 64 kbps signal to V.35 from Line 1. FRAMING Options: SF-D4 (F2), ESF (F3), SLC-96 (F4) Choose the desired framing type by pressing the appropriate F-key. CODING Options: AMI (F1), B8ZS (F2) Choose the desired coding type by pressing the appropriate F-key. RxLVL-1 & RxLVL-2 Options: TERM (F1), BRIDGE (F2), DSXMON (F3) RxLVL-1 and RXLVL-2 configure the two 1.544M receivers. These settings let the SunSet T10 electrically decode a 1.544 Mbps signal under a wide range of resistive or cable losses. They also determine which electrical load the SunSet T10 will place on the circuit. TERM: This terminates the received signal and has no effect on the transmitter. BRIDGE: The SunSet T10 applies high impedance resistors to the circuit under test; this isolation will protect the signal from disruption. DSXMON: Choose DSXMON when plugging the SunSet T10 into a DSX monitor jack that has isolated the monitor signal from the live signal with a high impedance circuit. XMTCLK T1-MUX Mode uses a loop-timing clock. For loop timing, chose the same line for Tx/INSERT and XMTCLK. Therefore, XMTCLK is forced automatically to the Tx/INSERT choice. LBO 1&2 Options: 0dB (F1), -7.5dB (F2), -15dB (F3), -22.5dB (F4) Choose the desired line build out for both lines 1 and 2. Set this to 0 dB under most conditions. The T1 Test Configuration Menu descriptions in sections 2.1 and 2.2 provide information on selecting the proper dB level. 66 SunSet T10 Rev. B DATACOM Column The Datacom settings configure the multiport. The multiport automatically configures for DCE. Press the right arrow key on the keypad to move the cursor over to the right side of the screen. TYPE Options: V.35 (F1), RS449 (F2), X.21 (F3), RS232 (F4) TYPE determines the electrical interface at the multiport. Tx SRC Options: PATRN (F1), T1DRP (F2) Tx Source sets the transmit source for the multiport. Set TxSRC to either PATRN or T1DRP and choose PATRN (F1) to send a test pattern out the multiport. Choose T1DRP (F2) to send the dropped NX64 kbps signal out the multiport. MODE For T1-MUX Mode, DCE is automatically set. MUX Section The MUX settings define the multiplexing configuration for the SunSet T10. BERT Options: T1DRP (F1), (F2) is the Datacom TYPE selected above, i.e. RS232 BERT determines which direction of the multiplexed circuit is bit error tested. T1DRP means that the Nx64 kbps signal dropped from the 1.544 Mbps signal is bit error tested. V.35 means the signal received coming from the low speed side is tested. T1INS Options: LOOP (F1), DATACOM TYPE, i.e. RS232 (F2), PATRN (F3). T1 Insert determines which signal is inserted into the 1.544 Mbps line. T1 Insert can change only if TxSRC = T1DRP. LOOP: All 24 channels will be looped through from 1.544 Mbps receive to 1.544 Mbps transmit; nothing will be inserted. DATACOM TYPE: This means that the low speed Nx64 kbps signal will be inserted on the 1.544 Mbps transmit. PATRN: This means that a test pattern will be inserted on the 1.544 Mbps transmit signal. Ch.3 Menu Descriptions 67 Note: When setting TxSRC (Datacom transmit source) for PATRN (pattern), T1INS is set for the Datacom type (F2); there is no option to change this. In this case, the SunSet T10 is transmitting the pattern out the multiport and inserting the received multiport low speed signal onto the T1 line. T1T/S Options: Nx64K (F1) T1 T/S allows selection of which Nx64 kbps T1 timeslots to insert to and drop from the multiplexed signal. Press Nx64K (F1) to enter the T10 Time Slot screen. Refer to section 2.1 Test Rate for details on selecting timeslots. For RS232, only one time slot is allowed. 68 SunSet T10 Rev. B 2.4 Datacom Operation Menus Datacom testing allows the SunSet T10 to send and receive signals with other data communication equipment. Datacom uses a standard interface in order for two equipment elements to communicate with each other. The standard protocols available are: V.35, RS449, X.21, and RS232. Testing of only the low speed synchronous or asynchronous signal on the multiport is possible. A graphic diagram of the SunSet T10s configuration is not provided in the Datacom Mode. 2.4.1 Datacom Test Configuration To use the SunSet T10 for Datacom testing, set up as follows. 1. Select MAIN MENU > TEST CONFIGURATION 2. Select TEST MODE and press the DATACOM (F4) F-key. 3. A screen similar to the one shown in Figure 28 appears. MEAS 21:10:05 TEST CONFIGURATION TEST MODE : DATACOM TYPE : MODE : TEST RATE: REF CLOCK: RS449 DCE 02x64k INTERN press Nx64K (F3) to change test rate. 48k Nx56k Nx64k more Figure 28 Datacom Configuration Menu TYPE Options: V.35 (F1), RS449 (F2), X.21 (F3), RS232 (F4) TYPE determines the electrical interface at the multiport. Ch.3 Menu Descriptions 69 MODE Options if TYPE is V.35, RS449, or X.21: DTE (F1), DCE (F2) DTE: Select DTE if the SunSet T10 emulates data terminal equipment and will plug into DCE equipment. DCE: Select DCE if the SunSet T10 emulates data circuit equipment and will plug into DTE equipment. Options if TYPE is RS232: DTE-SYN (F1), DCE-SYN (F2), DTEASY (F3), DCE-ASY (F4) RS232 supports both synchronous and asynchronous transmission. DTE-SYN: Select if the SunSet T10 emulates data terminal equipment-synchronous and will plug into DCE-SYN equipment. DCE-SYN: Select if the SunSet T10 emulates data circuit equipment-synchronous and will plug into DTE-SYN equipment. DTE-ASY: Select if the SunSet T10 emulates data terminal equipment-asynchronous and will plug into DCE-ASY equipment. DCE-ASY: Select if the SunSet T10 emulates data circuit equipment-asynchronous and will plug into DTE-ASY equipment. TEST RATE Options: 300 (F1), 600 (F2), 1200 (F3), 2400 (more, F1), 4800 (more, F2), 9600 (more, F3), 14.4k (more, F1), 19.2k (more, F2), 38.4k (more, F3), 48k (more, F1), Nx56k (more, F2), Nx64k (more, F3) Choose the desired test rate for the Datacom circuit testing. For Nx56k and Nx64k, select channels (1-24) by pressing the corresponding F-key until the desired channel is selected. Note for RS232, there is only one 64K or 56K channel. REF CLOCK Options: INTERN (F1), RECEIVE (F2) The reference clock allows selecting the SunSet T10s internal clock or external timing received at the multiport for the transmit signal source. INTERN: When selected, the SunSet T10 is the master timing source on the circuit. RECEIVE: When selected the SunSet T10 is the slave to the device to which it is sending signals. On a synchronous circuit; one end should be the master timing source and the other end should be the slave. 70 SunSet T10 Rev. B Notes: • For X.21; DTE is automatically configured for Receive and DCE for Intern; therefore, the reference clock for X.21 cannot be changed. • The REF CLOCK selection applies only to synchronous transmission modes. If Type is RS232; mode must be either DCE-SYN or DTE-SYN in order to change the REF CLOCK. The next three items apply only to asynchronous datacom transmission (RS232 DTE-ASY or RS232 DCE-ASY): BIT/CHAR Options: 6 (F1), 7 (F2), 8 (F3) This selects how many bits used for each character of information. Both DTE and DCE should have the same number of bits per character. STOP BITS Options: 1 (F1), 2 (F2) This selects how many stop bits used for each character of information. PARITY Options: EVEN (F1), ODD (F2), NONE (F3) This selects the parity bits used for each character of information. Parity is a method of checking the accuracy of transmitted or stored data. A bit is added to the data as an accuracy check. The receiving element checks the parity bit and indicates an error if the total number of ones does not add up to the correct total. EVEN: The total number of ones (including the parity bit) is even. ODD: The total number of ones (including the parity bit) is odd. NONE: Signifies no parity. Ch.3 Menu Descriptions 71 3.0 LPBK & Span Control The Loopback & Span Control screen can operate many kinds of loopback devices on a T1 line. With the circuit looped back, it is possible to measure the transmission performance on the transmission path between the SunSet T10 and the loopback device. Displayed in Figure 29 are the various options. 21:10:05 LPBK & SPAN CONTROL CSU & NI CONTROL TELTREND OFFICE RPTR TELTREND LINE RPTR WESTELL OFFICE RPTR WESTELL LINE RPTR WESTELL NIU/PM & MSS TELTREND MSS HDSL SPAN CONTROL Figure 29 Loopback and Span Control Menu Before proceeding, find out if the line to be tested has one or more loopback devices installed. If so; find out what type of loopback it is and how it operates. 72 SunSet T10 Rev. B 3.1 CSU & NI Control Use the CSU & NI Control screen to loop up/down a CSU or NI. 21:10:05 CSU & NI CONTROL MODE : LOOP-UP TYPE : IN-BAND CODE : NI LOOP-UP LOOP-DN Figure 30 CSU and NI Control The following items appear in the CSU and NI Control screen. MODE Options: LOOP-UP (F1), LOOP-DN (F2) Note: Select this item last! Pressing the F1 or F2 F-keys causes the SunSet T10 to begin the specified procedure; therefore, if needed change either of the two settings below MODE first. LOOP-UP: Use to loop up the circuit before testing. LOOP-DN: Use to restore the circuit to normal once testing is complete. TYPE Options: IN-BAND (F1), ESF-DL (F2) This determines the type of sent loopback code. Sent in the ESF framing data link are ESF-DL codes; therefore, ESF framing must be used to select ESF-DL. IN-BAND is the most common type deployed in networks. INBAND can be transmitted with any type of framing. However, some loopback devices will not respond to IN-BAND loopback codes when transmitted with ESF framing. When in doubt, select IN-BAND when using SF framing and ESF-DL when using ESF framing. Ch.3 Menu Descriptions 73 CODE This determines which loopback code will be sent. This code needs to be same as that of the equipment being looped back. Select a user code by pressing the USER (F4) F-key. Options: The available options depend upon the type of loopback selected in TYPE (see Figure 30). In-Band Codes: CSU (F1), NI (F2), 100000 (F3), USER (F4) NI: This code is used for an industry-standard network interface unit (smart jack) if it is set to respond to in-band loopback codes. This loopback regenerates only the signal and should pass both BPVs and bit errors. The telephone company generally installs this unit at the customer premises. CSU: Use this code for looping the customer-owned CSU. 100000: Use this code with a type of NIU (smart jack) that is installed in some parts of the country, particularly New England. The transmitted in-band codes for each loopback are in Table 2. Command CSU Loop Up CSU Loop Down NI Loop Up NI Loop Down 100000 Inband Codes 10000 100 11000 11100 100000 Table 2 In-band Codes ESF-DL Codes: LINE (F1), PAYLOAD (F2), NETWORK (F3), USER (F4) LINE: This code operates a line loopback at a CSU. This loopback regenerates only the signal. Bit errors and BPVs should pass through this loopback. PAYLOAD: This code operates a payload loopback at a CSU. In this loopback, the 192-channel bits pass through, but the framing bits and line code are regenerated. Only bit errors will pass through this loopback. NETWORK: This code operates an NIU (smart jack) loopback. This loopback regenerates only the signal and should pass both BPVs and bit errors. Shown in Table 3 are the transmitted ESF-DL codes for each loopback. 74 SunSet T10 Rev. B Command Line Loop Up Line Loop Down Payload Loop Up Payload Loop Down Network Loop Up Network Loop Down ESF-DL Codes 11111111 01110000 11111111 00011100 11111111 00101000 11111111 01001100 11111111 01001000 11111111 00100100 Table 3 ESF-DL Codes 3.1.1 Basic Loopback Procedure 1. Select MAIN MENU > LPBK & SPAN CONTROL > CSU & NI CONTROL A. If TYPE and CODE are correct, proceed to step 4. 2. TYPE: Select TYPE and choose either IN-BAND (F1) or ESFDL (F2). 3. CODE: Select CODE and choose the code depending upon the equipment to be looped back. 4. MODE: Select LOOP-UP (F1) to loop the circuit up before testing. Select LOOP-DN (F2) to restore the circuit to normal once testing is complete. 5. Once the loopback operation is finished, an appropriate message will appear on screen. 6. Press the ESCAPE key on the keypad three times to return to the MAIN MENU. 3.1.2 Select a User Loopback Code 1. In the CSU & NI CONTROL menu, select CODE and press the USER (F4) F-key. Be sure to press the USER (F4) F-key even if the USER item is already displayed as the selected CODE entry. This allows access to the USER LOOPBACK CODE screen. 2. Select the desired loopback code and press the ENTER key on the keypad. 3. Press the ENTER key on the keypad to begin the loopback operation and proceed to step 4 of the Basic Loopback Procedure. Ch.3 Menu Descriptions 75 3.1.3 View a User Loopback Code 1. In the CSU & NI CONTROL menu; select CODE and press the USER (F4) F-key. Be sure to press the USER (F4) F-key even if the USER item is already displayed as the selected CODE entry. This allows access to the USER LOOPBACK CODE screen. 2. Select the desired loopback code and press the VIEW (F1) Fkey. The selected pattern will be displayed. 3. When finished, press the ESCAPE key on the keypad to return to the USER LOOPBACK CODE menu. 3.1.4 Program a User Loopback Code 1. In the CSU & NI CONTROL menu; select CODE and press the USER (F4) F-key. 2. Select a blank position on the user pattern list. Press the CREATE (F1) F-key. Displayed is the USER LOOPBACK CODE screen. 3. Press the TOGGLE (F3) F-key. The letter A will begin to flash on and off within the character grid. A. Use the arrow keys on the keypad to move the flashing indicator to the desired character. B. Press the SELECT (F4) F-key. The desired character will appear next to the LABEL line. Repeat this process until the desired LABEL name is complete. 4. When the LABEL is complete, press the TOGGLE (F3) F-key to move out of the character grid. A. Press the down arrow key on the keypad to move to the CODE line. B. Press the SHIFT key on the keypad. Using the keypad numbers, enter up to 32 1s and 0s to make up the desired pattern. Press SHIFT when completed. 5. Press the ENTER key to return to the USER LOOPBACK CODE menu. The new code is displayed. 76 SunSet T10 Rev. B 3.1.5 Correcting a Mistake While Entering the Label 1. Start from step 3 of Program a User Loopback Code procedure while in the character grid. A letter within the grid should be flashing. 2. Press the TOGGLE (F3) F-key to move out of the character grid. Press the left arrow key on the keypad until the cursor is over the incorrect character. 3. Press the DELETE (F2) F-key to remove the selected character. Repeat as necessary. 3.1.6 Deleting a User Loopback Code 1. From the CSU & NI CONTROL menu, select CODE and press the USER (F4) F-key. Be sure to press the USER (F4) F-key even if the USER item is already displayed as the selected CODE entry. This allows access to the USER LOOPBACK CODE screen. 2. Select the desired code and press the DELETE (F3) F-key. Repeat as necessary 3. Press the ESCAPE key on the keypad to return to the CSU & NI CONTROL screen. Ch.3 Menu Descriptions 77 3.2 Teltrend Office Repeater (SW 184) Teltrend provides a variety of office repeaters that are supported by the SunSet T10. Refer to Teltrend documentation for detailed information on the operations of these various repeaters. Figure 31 shows the Teltrend Office Repeater screen. 21:10:05 TELTREND OFFICE RPTR TIME-001:50 T STATUS R Span ARMED SPAN CTRL:ARM-INB RPTR No. :01 ARM-DL UNARMDL TOUTDIS more Figure 31 Teltrend Office Repeater Figure 31 shows several aspects of the repeater control session. The items to the right of the diagram are not configured in this screen, but they provide information on the repeater control session. They are: TIME Time begins counting up from 000:00 (mmm: ss) as soon as the span is armed. This indicates of how much time is remaining until the repeater automatically drops its loopback. This usually occurs because of the repeater’s time-out circuitry. STATUS The Status bar displays the current looping status of the span. Span The Span control line, shown ARMED in Figure 31, shows what span control function is currently under process or has been completed. 78 SunSet T10 Rev. B Configured in this screen are the items appearing below the diagram in Figure 31. They are: SPAN CTRL The exact options available depend upon the FRAMING selected in the TEST CONFIGURATION screen. ESF framing: ARM-DL (F1), UNARMDL (F2), TOUTDIS (F3), LPBkQRY (more, F1), POWR-DN (more, F2), LOOP-UP (more, F1), LOOP-DN (more, F2), DUAL-LB (more, F3), UNBLOCK (more, F1), CLR-FT1 (more, F2), ARM-INB, (more, F3). SF-D4 framing: ARM-INB (F1), TOUTDIS (F3), LPBkQRY (more, F1), POWR-DN (more, F2), UNIVLDN (more, F3), LOOP-UP (more, F1), LOOP-DN (more F2), DUAL-LB (more, F3), UNBLOCK (more, F1), CLR-FT1 (more, F2). ARMDL/INB: This arms the office repeater and the other repeaters on the span. In most cases, ARMDL and ARM-INB have the same function. Arming is required before the repeaters will actually loop up. UNARMDL: This unarms the data link. TOUTDIS: Time out disable will turn off the automatic time-out of the repeaters on the span. If selected; be sure to loop down all the repeaters on the span when finished. LPBkQRY: Loopback query will query all repeaters on the span to see which one is actually looped back. If found the repeater number will be displayed in the graphic. Otherwise, LPBK will be displayed in either the looped or unlooped mode. POWR-DN: Power down tells the office repeater to cut the power to the span. The power will remain cut until you choose another function or escape to the MAIN MENU. Powering down the span resets all the repeaters. Make sure to arm the office repeater before selecting POWR-DN. UNIVLDN: This sends the NIU in-band loop down code to drop one Teltrend or NIU at a time. LOOP-UP: This will loop up the office repeater. Arm the repeater before using this function. If the office repeater is an E-type, choose office RPTR number 1 through 3 in RPTR NO. Do this before pressing the LOOP-UP F-key. However, if the E-type repeater is configured for fractional T1 blocking, only repeater number 1 can be looped up. After the loop up is successful, a displayed message will show the fractional configuration of the office repeater. Ch.3 Menu Descriptions 79 LOOP-DN: This will loop down the office repeater. However, it will not loop down an E-type office repeater when it is in NIU emulation mode. DUAL-LB: This will loop back an E-type office repeater in both directions, when DUAL-LB is configured for NIU mode and has already been looped up using the ARM-INB F-key. UNBLOCK: This will unblock the office repeater to allow the NIU loop up code to pass through the customer premises toward the DSX. This function is necessary when testing from the customer premises and looping back an NIU that is on the other end of the circuit. 1. Send the NIU loop up code (ARM-INB). Sending the UNBLOCK code will temporarily inhibit the NIU blocking feature of the office repeater. 2. Send the NIU code (ARM-INB) again and the far end NIU will loop up. CLR-FT1: Clear FT1 is used to temporarily re-configure an E-type office repeater in the fractional mode to through mode. This allows troubleshooting the span using 1.544 Mbps testing. 1. Press the ARM-INB F-key to arm the E-type repeater. This also loops back the NIU. Pattern synchronization will not occur, because the central office repeater is still blocking the unused channels. 2. Press the CLR-FT1 (more, F2) F-key. Pattern synchronization with no errors is now achieved. 3. When finished, press the UNIVLDN (more, F3) F-key. This will drop the NIU loop and return the office repeater to its fractional blocking mode. RPTR NO This specifies which repeater will be looped up. Press the SHIFT key on the keypad to use the keypad numbers to enter the desired repeater number. 80 SunSet T10 Rev. B 3.3 Teltrend Line Repeater (SW 184) Figure 32 displays several aspects of the repeater control session. 21:10:05 TELTREND LINE RPTR TIME-001:50 T STATUS R Span ARMED SPAN CTRL:ARM-INB RPTR No. :01 ARM-DL UNARMDL TOUTDIS more Figure 32 Teltrend Line Repeater The items to the right of the diagram in Figure 32 provide information on the repeater control session and cannot be configured within this screen, they are: TIME Time begins counting up from 000:00 (mmm: ss) as soon as the span is armed. This indicates how much time is remaining until the repeater automatically drops its loopback. This usually occurs because of the repeater’s time-out circuitry. STATUS The Status bar displays the current looping status of the span. SPAN CTRL The Span control line, shown ARMED in Figure 32, displays which span control function is currently under process or has been completed. Configure the items appearing below the diagram in Figure 32. Those items are: Ch.3 Menu Descriptions 81 SPAN CTRL The exact options available depend upon the FRAMING selected in the TEST CONFIGURATION screen. ESF Framing: ARM-DL (F1), UNARMDL (F2), TOUTDIS (F3), LPBkQRY (more, F1), PWLPQRY (more, F2), PWCUTTH (more, F3), UNIVLDN (more, F1), LOOP-UP (more, F1), LOOP-DN (more, F2) SF-D4 Framing: ARM-INB (F1), TOUTDIS (F3), LPBkQRY (more, F1), PWLPQRY (more, F2), PWCUTTH (more, F3), UNIVLDN (more, F1), LOOP-UP (more, F1), LOOP-DN (more, F2) ARM-DL/INB: This arms the office repeater and line repeaters on the span. In most cases, ARM-INB and ARM-DL have the same function. UNARMDL: This unarms the data link. TOUTDIS: Time out disable will turn off the automatic time-out of the repeaters on the span. If pressed, be sure to loop down all the repeaters on the span when finished. LPBkQRY: Loopback query will query all the repeaters on the span to see which one is actually looped back. If found the repeater number will be displayed in the graphic. Otherwise, LPBK will be displayed in either the looped or the unlooped mode. PWLPQRY: Power loop query will query all repeaters on the span to see which one is looping the span simplex power. A message will appear if the power loop query finds a repeater in the power loop. PWCUTTH: Power cut through will tell the repeater, which has looped the span power, to attempt to cut that power through the other repeaters on the span. UNIVLDN: This causes the SunSet T10 to transmit the universal loop down code to loop down any looped repeaters. LOOP-UP: This key loops up the specified line repeater. Arm the repeater before using this function. Enter the RPTR number before selecting the LOOP-UP command. Note: Arming is required before the repeaters will actually loop up. LOOP-DN: Loop Down loops down any line repeater; it does not loop down the NIU. RPTR NO Press the SHIFT key on the keypad and use the keypad numbers to enter the desired repeater number. 82 SunSet T10 Rev. B 3.4 Westell Office Repeater (SW 184) 21:10:05 WESTELL OFFICE RPTR TIME-001:50 T STATUS R Span ARMED SPAN CTRL:ARM-INB RPTR No. :01 RPTR TYPE:31xx-56 ARM-DL UNARMDL TOUTDIS more Figure 33 Westell Office Repeater Westell repeaters are looped back similarly to the Teltrend, but there are a few important differences in using Westell repeaters: • • • The Westell central office and line repeater F-key menus also include SEQLPBK (sequential loopback). This allows stepping quickly through the loopbacks on a line. To use this feature, arm the span and then press the SEQLPBK F-key and observe which repeater loops up. The repeater’s address does not need to be entered. This feature is useful for tracking down misaddressed repeaters. To attempt a span power down with the Westell office repeater, it must first be looped up. The Westell central office repeater menus do not have fractional T1 blocking or the NIU-mode commands of the Teltrend. This screen shown in Figure 33 depicts several aspects of the repeater control session. The items to the right of the diagram in Figure 33 provide information on the repeater control session and cannot be configured within this screen, they are: Ch.3 Menu Descriptions 83 TIME Time begins counting up from 000:00 (mmm: ss) as soon as the span is armed. This indicates of how much time is remaining until the repeater automatically drops its loopback. This usually occurs because of the repeater’s time-out circuitry. STATUS The Status bar displays the current looping status of the span. SPAN The Span Control line, shown ARMED in Figure 33, displays which span control function is currently under process or complete. Configured in this screen are the items appearing below the diagram in Figure 33. They are: SPAN CTRL The exact options available depend upon the FRAMING selected in the TEST CONFIGURATION screen. ESF Framing: ARM-DL (F1), UNARMDL (F2), TOUTDIS (F3), LPBkQRY (more, F1), POWR-DN (more, F2), LOOP-UP (more, F1), LOOP-DN (more, F2), SEQLPBK (more, F3). SF-D4 Framing: ARM-INB (F1), TOUTDIS (F3), LPBkQRY (more, F1), POWR-DN (more, F2), UNIVLDN (more, F3), LOOP-UP (more, F1), LOOP-DN (more, F2), SEQLPBK (more, F3). ARM-DL/INB: This key arms the office repeater and line repeaters on the span. In most cases, ARM-INB and ARM-DL have the same function. UNARMDL: This unarms the data link. TOUTDIS: Time out disable will turn off the automatic time-out of the repeaters on the span. If pressed, be sure to loop down all the repeaters on the span when finished. LPBkQRY: Loopback query will query all the repeaters on the span to see which one is actually looped back and if found, a repeater number will be displayed in the graphic. Otherwise, LPBK will display either the looped or the unlooped mode. POWR-DN: Power down commands the office repeater to cut power to the span. The power will remain cut until another function is chosen or the MAIN MENU is accessed. Powering down the span resets all the repeaters. Arm the office repeater before selecting POWR-DN. 84 SunSet T10 Rev. B UNIVLDN: This causes the SunSet T10 to transmit the universal loop down code to loop down any looped repeaters. Pressing the LOOP-UP (more, F1) F-key loops up the specified line repeater. Arm the repeater and enter the RPTR number before using this function. LOOP-UP: This key will loop up a specified line repeater. Arm the repeater and enter the RPTR number before using this function. LOOP-DN: This key will loop down any line repeater; it will not loop down an NIU. SEQLPBK: Sequential loopback allows the user to quickly step through the loopbacks on the line. This feature is useful for tracking down misaddressed repeaters. Arm the span before using this option. Note: Arming is required before the repeaters will actually loop up. RPTR NO Press the SHIFT key on the keypad then use the keypad numbers to enter the desired repeater number. This specifies which repeater will be looped up. RPTR TYPE Options: 31xx-56 (F1), 31xx-80 (F2) This item determines the type of Westell Repeater. Ch.3 Menu Descriptions 85 3.5 Westell Line RPTR (SW 184) The Westell Line Repeater screen shows several aspects of the repeater control session. Refer to Figure 34. 21:10:05 WESTELL LINE RPTR TIME-001:50 T STATUS R Span ARMED SPAN CTRL:ARM-INB RPTR No. :01 RPTR TYPE:31xx-56 ARM-DL UNARMDL TOUTDIS more Figure 34 Westell Line Repeater The items to the right of the diagram in Figure 34 provide information on the repeater control session and cannot be configured within this screen. They are: TIME Time begins counting up from 000:00 (mmm: ss) as soon as the span is armed. This indicates how much time is remaining until the repeater automatically drops its loopback. This usually occurs because of the repeater’s time-out circuitry. STATUS The Status bar displays the current looping status of the span. SPAN The Span Control line, here displaying ARMED in Figure 34, displays what span control function is currently under process or complete. Configured in this screen are the items appearing below the diagram in Figure 34. They are: SPAN CTRL The available options depend upon the FRAMING selected in the TEST CONFIGURATION screen. 86 SunSet T10 Rev. B ESF Framing: ARM-DL (F1), UNARMDL (F2), TOUTDIS (F3), LPBkQRY (more, F1), PWR-QRY (more, F2), LOOP-UP (more, F1), LOOP-DN (more, F2), SEQLPBK (more, F3). SF-D4 Framing: ARM-INB (F1), TOUTDIS (F3), LPBkQRY (more, F1), PWR-QRY (more, F2), UNIVLDN (more, F3), LOOP-UP (more, F1), LOOP-DN (more, F2), SEQLPBK (more, F3). ARM-DL/INB: This arms the office repeater and the line repeaters on the span. In most cases, ARM-INB and ARM-DL have the same function. UNARMDL: This unarms the data link. TOUTDIS: Time out disable will turn off the automatic time-out of the repeaters on the span. If selected, be sure to loop down all the repeaters on the span when finished. LPBkQRY: Loopback query will query all the repeaters on the span to see which one is actually looped back and if found, a repeater number will be displayed in the graphic. Otherwise, LPBK will display either the looped or the unlooped mode. PWR-QRY: Power query will query all repeaters on the span to see which one is looping the span simplex power. A message will appear if the power loop query finds a repeater in the power loop. UNIVLDN: This causes the SunSet T10 to transmit the universal loop down code to loop-down any looped repeaters. LOOP-UP: This key will loop up a specified line repeater. Arm the repeater and enter the RPTR number before using this function. LOOP-DN: This key will loop down any line repeater; it will not loop down an NIU. SEQLPBK: Sequential Loopback allows the user to quickly step through the loopbacks on the line. This feature is useful for tracking down misaddressed repeaters. Arm the span before using this option. Note: Arming is required before the repeaters will actually loop up. RPTR NO Press the SHIFT key on the keypad and use the keypad numbers to enter the desired repeater number. This specifies which repeater will be looped up. RPTR TYPE Options: 31xx-56 (F1), 31xx-80 (F2) This item determines the type of Westell Repeater. Ch.3 Menu Descriptions 87 3.6 Westell NIU/PM & MSS (SW 184) Use the Westell NIU/PM & MSS menu when using the Westell Performance Monitoring NIU, Maintenance Switch, or Ramp features. 21:10:05 WESTELL NIU/PM & MSS RTRV/VIEW ALL PM RPT RETRIEVE PM REPORT RESET PM COUNTERS RETRIEVE NIU HEADER SET NIU TIME & DATE MSS SWITCH CONTROL MSS RAMP ACCESS Figure 35 Westell NIU/PM & MSS Menu The Westell Performance Monitoring NIU is a smart jack which constantly measures the performance of the received signals from both network and customer equipment. Use the SunSet T10 to poll the smart jack to provide information when troubleshooting the network. The Westell Maintenance Switch is a 1xN protection device that is used for manually restoring service to HICAP lines upon failure. With the Maintenance Switch Ramp Access function, use the SunSet T10 to non-intrusively poll the performance monitoring information from the NIU through the protection line. All of these functions require the NIU to be looped back before beginning. The SunSet T10 takes care of this function automatically upon entering this menu. Further, the SunSet T10 will automatically switch itself into the required ESF mode. The following procedure is for using the Westell Performance Monitoring NIU, Maintenance Switch, and Ramp features: 1. Plug into the DS1 line to be tested. This will be the customer’s circuit if just using the PM NIU feature, or it will be the maintenance spare if using the RAMP or Maintenance Switch. Make sure the SunSet T10 is configured for SINGLE, TERM, and ESF. 2. Select MAIN MENU > LPBK & SPAN CONTROL MENU > WESTELL NIU/PM & MSS and refer to Figure 35. Note: The SunSet T10 will proceed only if it is able to verify that a loopback is established. 88 SunSet T10 Rev. B 3.6.1 RTRV/VIEW All PM RPT 21:10:05 RTRV/VIEW ALL PM RPT LAST REPORT IS AVAILABLE SELECT OPTION : SCRVIEW SCRVIEW PRINT RMTDUMP DELETE Figure 36 Retrieve View All PM Reports This command retrieves all the performance information from the NIU. Refer to Figure 36 and use the following procedure: 1. Select RTRV/VIEW ALL PM RPT. 2. If this operation was performed after the NVRAM was erased, skip to step 3. The SunSet T10 will then retrieve the data. This will take several minutes to complete. The operation is complete when “Retrieving data ...” changes to “All PM reports retrieved.” A. Press the ENTER key on the keypad to return to the WESTELL NIU/PM & MSS menu. B. Press the ENTER key on the keypad to re-enter the RTRV/ VIEW ALL PM RPT menu. 3. A screen will appear asking whether to Enable Printing. Enter either YES (F1) or No (F2). 4. Press the SCRVIEW (F1) F-key to view the performance data printed on the screen. A. Press the PAGE-UP (F1) or PAGE-DN (F2) F-keys to view all the data. B. If a displayed STAT message is unknown, press the STATUS (F3) F-key to get an interpretation of the STAT code. C. Press the ESCAPE key on the keypad to get out of the STATUS interpretation screen and back to the performance results. Ch.3 Menu Descriptions 89 5. To poll the NIU again, press the DELETE (F4) F-key to clear the performance history that the SunSet T10 has gathered. Note: If the results are not to be printed, then delete those results when entering this menu in order to retrieve current results. The following are definitions of the displayed data. PM PERIOD: This is the month-day-hour of the period observed. ACCUM PRD: This is the period of time that the data was collected, either 1 hour or 1 day. DIRECT: This is the measured direction. AZ is from the central office to the customer premises. ZA is from the customer premises to the central office. CVL: coding violation-line (BPV) CVP: coding violation-path (CRC-6 or SF error) ESL: errored second-line ESP: errored second-path SESL: severely errored second-line SESP: severely errored second-path UASL: unavailable second-line UASP: unavailable second-path PDVS: pulse density violation second B8ZS: a second in which a B8ZS was observed MSEC: number of measured seconds STAT: coded status message 90 SunSet T10 Rev. B 3.6.2 Retrieve PM Report This menu item allows retrieval of performance information from a single period. 1. Refer to the previous procedure and definitions in section 3.6.1. Specify the month, date, hour and direction of transmission that is to be polled. 2. Press the SHIFT key on the keypad to display the SHIFT indicator and type in the desired numbers for the day, date, and hour. 3. Press the SHIFT key on the keypad again to enter the accumulation period and direction using the F-keys. 4. When all the numbers and entries are as desired, press the ENTER key on the keypad to retrieve and view the data. 3.6.3 Reset PM Counters Occasionally, the data at the NIU may become corrupted. This command allows resetting all of the NIU performance registers to zero. 1. When the warning message is displayed press the ENTER key on the keypad. All counters will reset to zero. 3.6.4 Retrieve NIU Header This command displays the date and time set at the PM NIU. 3.6.5 Set NIU Time & Date This command allows setting the NIU time and date in yearmonth-day and hour-minute-second format. Note: Setting NIU time and date will cause all the registers to be reset to N/A (not available). Retrieve the available performance information before resetting the time and date. Ch.3 Menu Descriptions 91 3.6.6 MSS Switch Control This command sends the control sequence to initiate the maintenance switch. Refer to Figure 37. 21:10:05 MSS SWITCH CONTROL ACTION : SWITCH LINE : 01 SWITCH RELEASE Figure 37 MSS Switch Control Configure the following items in the MSS Switch Control screen: ACTION Options: SWITCH (F1), RELEASE (F2) SWITCH: Select if connected to the maintenance switch and ready to switch a circuit over to the spare. RELEASE: Select if connected to the customer’s span and the customer is using the maintenance span. LINE Specify a line number if selecting SWITCH. Press the SHIFT key on the keypad and use the keypad numbers to enter the desired numbers. Use the following procedure to initiate the maintenance switch: 1. Confirm an established loopback is at the maintenance switch. A. Press the ERR INJ key on the keypad and verify that those errors are returning. If not, press the ESCAPE key on the keypad and select LPBK & SPAN CONTROL > WESTELL NIU/PM & MSS, this will automatically loop up the T1 Maintenance Switch card, or NIU. 92 SunSet T10 Rev. B 2. Select MSS SWITCH CONTROL. 3. SWITCH (F1) the line if connected to the maintenance switch and ready to switch the circuit to the spare. Or, RELEASE (F2) the line if connected to the customer’s span and the customer is using the maintenance span. 4. If selecting RELEASE, go to step 5. Otherwise, choose which line to switch to the maintenance spare. A. Press the SHIFT key on the keypad to display the SHIFT indicator, and enter the desired numbers using the keypad. B. Press the SHIFT key on the keypad and press the ENTER key on the keypad to begin the operation. C. If the control sequence is successful, a message will be received indicating to go ahead and press the ENTER key on the keypad to activate the 10 second timer at the maintenance switch. D. Connect the customer’s span to the maintenance spare for the duration of the switch. 5. If selecting RELEASE (in step 3), there is no need to specify which line to release. The line is automatically selected. A. Press the ENTER key on the keypad and the control sequence will start. When the maintenance switch is ready, reposition the cables on the span, and then press the ENTER key again to release the protection switch. Notes: • A loopback must be in place to perform the switch or release commands. If going directly from a switch to a release, the SunSet T10 at the switch will connect into the control unit, and then at the release into the NIU. • The CCU will automatically loop up when entering into the Teltrend MSS menu. However, when plugging into the NIU to perform the release command, exit from the Teltrend MSS menu and re-enter it (as in step 1) to reestablish a loopback at the NIU. Consult the Westell Maintenance Switch System practices manual for more information on the operation of the switch. Ch.3 Menu Descriptions 93 3.6.7 MSS Ramp Access This command sends the necessary control codes to retrieve the performance information from the desired NIU. The advantage of this form of information retrieval is that the line remains in service while the information is polled. Figure 38 shows the MSS Ramp Access screen. 21:10:05 MSS RAMP ACCESS ACTION : ACTIVAT LINE : 01 ACTIVAT DEACTIV Figure 38 MSS Ramp Access Configure the following items in the MSS Ramp Access screen: ACTION Options: ACTIVAT (F1), DEACTIV (F2) • Select ACTIVAT to activate this command and retrieve the performance information from the NIU. • Select DEACTIV when you are finished viewing the data. LINE Press the SHIFT key on the keypad and use the keypad numbers to enter the desired number. Use the following procedure to send the control codes to retrieve the performance information: 1. Select MSS RAMP ACCESS. 2. Press the ACTIVAT (F1) F-key. 3. Choose the line to read the RAMP. A. Press the SHIFT key on the keypad to display the SHIFT indicator on the screen. 94 SunSet T10 Rev. B B. Enter the number of the line to read using the numbers on the keypad. C. Press the ENTER key on the keypad. 4. When the “RAMP control has completed” message is shown, press the ESCAPE key on the keypad until WESTELL NIU/PM & MSS is reached. 5. Select RTRV/VIEW ALL PM REPORT. A. Press the DELETE (F4) F-key. B. Retrieve the performance monitoring data as described in the “RTRV VIEW ALL PM RPT” procedure. C. View and print the data as desired. 6. When finished, press the ESCAPE key on the keypad until MSS RAMP ACCESS appears. 7. Select DEACTVAT(F2) and press the ENTER key on the keypad. When the control sequences finish, the procedure is completed. Ch.3 Menu Descriptions 95 3.7 Teltrend MSS Switch Control (SW 184) 21:10:05 MSS SWITCH CONTROL ACTION : SWITCH LINE : 01 SWITCH RELEASE Figure 39 Teltrend MSS Switch Control Configure the following items in the Teltrend MSS Switch Control screen: ACTION Options: SWITCH (F1), RELEASE (F2) SWITCH: Select SWITCH if connected to the maintenance switch and are ready to switch the circuit over to the spare. RELEASE: Select RELEASE if connected to the customer’s span and the customer is using the maintenance span. LINE This specifies the position of the line to switch or release. Press the SHIFT key on the keypad and use the keypad numbers to enter the desired numbers. Use the following procedure to initiate the maintenance switch: 1. Upon entering TELTREND MSS, the SunSet T10 will attempt to loop up the CCU (maintenance switch common control unit). 2. Confirm that an established loopback is at the maintenance switch by pressing the ERR INJ key on the keypad; the LED display panel indicates any received errors. 3. If a successful loopback is not established, escape to LPBK & SPAN CONTROL > TELTREND MSS CONTROL. The 96 SunSet T10 Rev. B SunSet T10 will automatically attempt to loop up the CCU or NIU. 4. Select TELTREND MSS CONTROL. 5. If connected to the maintenance switch, and ready to switch the circuit over to the spare, press the SWITCH (F1) F-key A. Press the RELEASE (F2) F-key if connected to the customer’s span and the customer is using the maintenance span. B. Press the SHIFT key on the keypad and enter the position of the LINE to switch or release. C. Press the ENTER key on the keypad to start the control sequence. 6. If choosing SWITCH, the SunSet T10 will indicate that it is sending the switch code; then it will attempt to verify the switch. A. Once this operation has succeeded, a message will be displayed for the user to press the ENTER key on the keypad to switch the line. B. After pressing the ENTER key, connect the customer’s span to the maintenance spare for the duration of the switch. 7. If choosing RELEASE in step 5, reposition the cables on the span. A. Press the ENTER key on the keypad and wait until the control sequence has been executed. Once executed, the switch is released. Notes: • A loopback must be in place to perform the switch or release commands. To use the switch function, plug into the control unit. To use release, first plug into the NIU. • The CCU will automatically loop up when accessing the Teltrend MSS menu. However, when plugging into the NIU to perform the release command, exit from the Teltrend MSS menu and re-enter it (as in step 2) to re-establish a loopback at the NIU. Consult the Teltrend Maintenance Switch System Practices manual for extensive information on the operation of the switch. Ch.3 Menu Descriptions 97 3.8 HDSL Span Control To test HDSL spans with the SunSet T10. 1. Select MAIN MENU > LPBK & SPAN CONTROL > HDSL SPAN CONTROL and the screen depicted in Figure 40 appears. 21:10:05 HDSL SPAN CONTROL HTU HTU NIU -C -R T TIME-000:47 STATUS Span ARMED R COMMAND: LOOP-UP EQUIPMT: HTU-C LOOP-UP LOOP-DN TOUTDIS more Figure 40 HDSL Span Control The HDSL Span Control screen contains a graphic that updates according to circuit status. To send commands, use the Fkey options for the COMMAND line. Found in this screen are the following features: Screen Graphic • The box at the far left represents the SunSet T10. The “T” indicates the L1-Tx signal; “R” indicates L1-Rx signal. • The network labeled boxes are: HTU-C, HTU-R, and NIU. When looping up a network element, the graphic updates. For example, Figure 40 shows a loopback at the NIU. • TIME: Indicates the amount of time that has elapsed since arming the span. • STATUS: Indicates the span’s status. This reports either “Span IDLE” or “Span ARMED.” COMMAND Options: ARM-INB (F1), UNARMIN (F2), LOOP-UP (more, F1), LOOP-DN (more, F2), TOUTDIS (more, F3), ARM-DL (more, F1), UNARMDL (more, F2) ARM-INB: Arm in-band sends an in-band arming code. Arm most equipment before responding to loopback commands. UNARMIN: Un Arm in-band sends an in-band disarming code. 98 SunSet T10 Rev. B LOOP-UP/LOOP-DN: These F-keys send a loop command for the specific network equipment specified in EQUIPMENT. TOUTDIS: Time out disable will disable the automatic time-out of the span equipment. If selected, be sure to loop down all of the repeaters on the span when finished. ARM-DL: Arm data link sends an arming command in the Datalink. This arms the equipment on the span. Arm most equipment before responding to loopback commands. This option is available only with ESF-DL framing. UNARMDL: Un arm data link sends a disarming command in the Datalink. This option is available only with ESF-DL framing. EQUIPMENT Options: HTU-C (F1), HTU-R (F2), HRE (F3), HLU (F1), HRU (F2) EQUIPMENT specifies which particular equipment will be looped up/down when sending a LOOP-UP or LOOP-DN command. HTU-C and HLU: These functions refer to the HDSL transceiver at the central office. There is no difference in the code transmitted for HTU-C/HLU. This command invokes a loopback of the DS1 signal at the HTU-C/HLU toward the network. This loopback does not involve the 2B1Q HDSL span. HTU-R and HRU: These functions refer to the remote HDSL unit. There is no difference in the code transmitted for HTU-R/HRU. This command invokes a loopback of the DS1 signal at the HTUR/HRU toward the network. This is a far end loopback and involves the 2B1Q HDSL span. HRE: This is an HDSL range extender, which can appear mid-span. Notes: • Sending a loopback command loops the DS1 signal towards the network. • Arm the HDSL equipment before responding to loopback commands. Send an ARM-DL (ESF) or ARM-INB (SF) and then send the loop-up command. • The arming command uses the same sequence as the standard NIU loop up code. An arming command will loop the far end NIU, if an NIU is present and if it responds to loopback commands. Alternatively, if the NIU loopback feature is enabled for the HDSL span, the arming sequence will activate the NIU loopback in the HTU-R. • In some cases, the HTU-R can be configured to react to smartjack loopback commands, in which case the loop could be from the HTU-R instead of an NIU. Ch.3 Menu Descriptions 99 4.0 Send Test Pattern Access the SEND TEST PATTERN screen from the MAIN MENU. Refer to Figure 41. 21:10:05 MEAS SEND TEST PATTERN QRSS 1-8 1-16 3-24 T1-1 T1-5 DDS-3 55DLY FOX ALL 1 ALL 0 T1-2 T1-6 DDS-4 2e23 2e20 2e15 ALT10 T1-3 DDS-1 DDS-6 2047 511 127 63 T1-4 DDS-2 SENDING : 2e23 USER Figure 41 Send Test Pattern Menu Use the following procedure to select and send a test pattern: 1. Select MAIN MENU > SEND TEST PATTERN, and use the arrow keys on the keypad to select the desired pattern. You can also select USER (F1). Note: The SunSet T10 transmits a new test pattern each time a pattern is highlighted with the cursor. For a description of the Test Patterns, refer to Chapter 5, Reference. USER This selection allows a user-defined pattern with a maximum length of 2048 binary characters or 512 hexadecimal characters. Ten such patterns may be stored in the USER TEST PATTERN screen. The SunSet T10 offers two pre-programmed user-patterns which are stored in slots 9 and 10 of the USER TEST PATTERN screen. Slot 9 is an IDLE signal, also known as Customer Disconnect Indicator, CDI. The IDLE pattern is 17 (HEX) or 0001 0111 (BINARY). Slot 10 is the YELLOW pattern. This pattern is BF (HEX) or 1011 1111 (BINARY). 100 SunSet T10 Rev. B 4.1 Sending a USER Test Pattern 1. Select MAIN MENU > SEND TEST PATTERN and press the USER (F1) F-key. The USER TEST PATTERN screen appears. 2. The SunSet T10 will display a list of USER patterns. Use the up/ down arrow keys on the keypad to select the desired pattern. Press the ENTER key on the keypad to transmit the selected pattern. A. The SunSet T10 offers two pre-programmed, user-defined patterns. Line 9 contains the IDLE pattern and line 10 the YELLOW pattern. 4.2 Viewing a User Test Pattern 1. From step 1 of Sending a USER Test Pattern, select the desired test pattern and press the VIEW (F1) F-key. 2. The selected pattern will be displayed on the screen in hex, binary, and ASCII. 3. When finished viewing, press the ESCAPE key on the keypad to return to the USER TEST PATTERN screen. 4.3 Programming User-Defined Patterns 1. From step 1 of Sending a USER Test Pattern, select a blank position. Press the CREATE (F1) F-key. 2. Press the TOGGLE (F3) F-key. The letter A will begin to flash within the character grid. 3. Use the arrow keys on the keypad to select the desired character. Press the SELECT (F4) F-key. The character selected will appear on the LABEL line. Continue until the label is completed. 4. Press the TOGGLE (F3) F-key to escape out of the character grid and back to the LABEL line. 5. Press the down arrow key on the keypad to select FORMAT. Choose either BINARY (F1) or HEX (F2). The binary input is often simpler for entering short patterns. • • BINARY mode, valid entries are ‘1’ and ‘0’. HEX mode, valid entries are: ‘0, 1, 2, 3, 4, 5, 6, 7, 8, 9, A, B, C, D, E, and F.’ 6. Press the down arrow key on the keypad to move to the pattern entry area. Ch.3 Menu Descriptions 101 A. Press the SHIFT key on the keypad to display the SHIFT indicator. B. Using the keypad, enter up to 2048 binary characters or 512 hexadecimal characters to create the desired pattern. C. Press the SHIFT key on the keypad and the SHIFT indicator no longer appears on screen. 7. Press the ENTER key on the keypad to store the pattern and return to USER TEST PATTERN. Displayed within this screen is the new code A. Select the new pattern and press the ENTER key on the keypad to transmit it. 4.4 Correcting a Mistake in the Label 1. From step 2 of Programming User-Defined Patterns, press the TOGGLE (F3) F-key to exit the character grid and return to the LABEL line. 2. Press the left arrow key on the keypad to select the unwanted character. 3. Press the DELETE (F2) F-key to remove the character, repeat as necessary. 4. When the characters are removed, move the cursor to the right of the last character. If the LABEL is now correct, press the ENTER key on the keypad. 5. If more characters are needed for the label, press the TOGGLE (F3) F-key to return to the character grid. 6. Move the cursor to the desired character and press the SELECT (F4) F-key. Repeat until the LABEL is complete. 7. Press the ENTER key on the keypad to record the new LABEL, and return to USER TEST PATTERN. Alternatively, press the TOGGLE (F3) F-key to return to the LABEL line and continue entering or editing the pattern. 102 SunSet T10 Rev. B 4.5 Correcting a Mistake in the Pattern 1. From step 6 of the Programming User-Defined Patterns procedure, the wrong digit is entered. A. Press the SHIFT key on the keypad to remove the SHIFT indicator and use the arrow keys on the keypad to select the incorrect digit B. Press the SHIFT key on the keypad to display the SHIFT indicator. 2. Enter the correct digit. A. Press the SHIFT key on the keypad to remove the SHIFT indicator. B. Using the arrow keys on the keypad move the cursor to the end of the line. C. Press the SHIFT key on the keypad to display the SHIFT indicator. D. Enter in the rest of the digits. 4.6 Editing a User Test Pattern 1. From the SEND TEST PATTERN menu, press the USER (F1) F-key to move into the USER TEST PATTERN screen. 2. Select the code to edit and press the EDIT (F2) F-key. 3. Using the procedure in Correcting a Mistake in the Label, edit the code's label 4. Press the ENTER key on the keypad to store the pattern. 4.7 Deleting a User Test Pattern 1. From the SEND TEST PATTERN screen, press the USER (F1) F-key to enter the USER TEST PATTERN screen. 2. Select the test pattern to delete and press the DELETE (F3) Fkey. Ch.3 Menu Descriptions 103 5.0 Measurement Results Measurement Results allows viewing of the accumulated measurement results. You may also restart the measurement process. Points to remember: • • • The SunSet T10 continuously performs measurements on received signals. You do not need to access MEASUREMENT RESULTS in order to compile measurement results. Each time the test configuration is changed, measurements restart. A key concept for Measurement Result screens is availability. A circuit is available for use only when the bit error rate is low enough so that the signal can get through and be understood. • • A circuit is unavailable at the beginning of 10 consecutive severely errored seconds. When the circuit is unavailable, errors, errored seconds, and severely errored seconds are not accumulated. For example, start injecting errors continuously from the SunSet T10 at a 1x10⁻³ error rate. Displayed for the first 9 seconds are increasing bit errors, errored seconds, and severely errored seconds. At the tenth second, all the counts will decrease back to the values they had before the start of error injection, and the unavailable counter will increase by 10. Once a circuit is unavailable, it becomes available only after 10 consecutive seconds without severe errors. Now turn off severe error injection, and insert 1 or 2 errors during the next 5 seconds. The unavailable second counter will continue to increase for the first 9 seconds, while the error counter stays the same. Then at the tenth second, the unavailable second counter decreases by 10, and the error counter increases by the amount of errors that were injected. While unavailable seconds are being counted, other measurements, such as AS, BPV, BPVR, BIT, BER, FEB, CRC, ES, SES and %EFS are frozen. Once unavailable seconds are no longer counted, these measurements resume. It may take the SunSet T10 one to three seconds to gain frame synch, pattern synch, coding synch, and to stop declaring any severe errors when the signal transitions from an unavailable state to an available state. To find out the exact number of seconds that contained a loss of signal condition, refer to the LOSS measurement result. 104 SunSet T10 Rev. B The actual Measurement Results screen and the displayed values depend upon the TEST MODE selected in the TEST CONFIGURATION screen. Figures 42 and 43 show sample Measurement Results screens for T1SINGL and T1DUAL. 21:10:05 MEAS ET- 000:37:50 RT- CONTINU FRM-ESF TxCd-B8ZS CNFG-TERM RCV-QRSS XMT-QRSS LINE 1 - SUMMARY BPV BIT FBE ES %ES SES UAS : : : : : : : 1 1 0 1 00.079 0 1 PAGE-UP PAGE-DN BPVR: BER : CRC : EFS : %EFS: Lpp : FREQ: 1.2e-09 1.2e-09 0 1380 99.859 -0.2 dB 1544000 STOP more Figure 42 T1 Single, Line 1 Summary Screen 21:10:05 MEAS ET- 000:07:42 RT- CONTINU FRM-ESF TxCd-B8ZS CNFG-TERM RCV-QRSS XMT-QRSS SUMMARY -LINE 1-LINE 2ES : SES : UAS : EFS : %EFS: Lpp : FREQ: BIT : 0 0 2 454 99.550 0.3 dB 1544000 0 PAGE-UP PAGE-DN ES : SES : UAS : EFS : %EFS: STOP 0 0 0 456 100 more Figure 43 T1 Dual Summary Screen The following function keys are common to all MEASUREMENT RESULTS screens. Ch.3 Menu Descriptions 105 PAGE-UP (F1), PAGE-DN (F2): Use these F-keys to scroll through the MEASUREMENT RESULTS screens. STOP/RESTART (F3): Pressing the STOP F-key causes the SunSet T10 to stop the test. Pressing the RESTART F-key restarts the measurement process and resets the elapsed time to zero. HOLDSCR/CONTINU (more, F1): Hold screen allows observation of the measurement screen. The measurement count is still proceeding, but the counts are updated only in memory. When finished viewing the screen, press the CONTINU F-key to update the screen. PRN-SAV (more, F2): Press this F-key to print the currently displayed results or save them in VIEW TEST RECORD. In addition to measurement data, the screen displays the following data in the upper portion of the measurement screens: Current Time: The current time is displayed in the upper righthand corner of the screen. ET: Elapsed time is the time that has passed since the test was started, or: • • • • since switching on the SunSet T10. since configuring the SunSet T10 in the TEST CONFIGURATION screen. since restarting the test using the RESTART (F3) F-key. since pressing the AUTO key on the keypad. Note: In the LOGICAL results screens LET replaces ET. LET refers to logical elapsed time. LET starts counting after achieving PAT SYNC. RT: This is the remaining time of the test. The test runs continuously by default, until stopped by the user. For this reason, CONTINU (continuous) is displayed in the RT field. However, a specific run time can be entered from MAIN MENU > OTHER FEATURES > MEAS CONFIGURATION. For a run time you can enter up to 999 hours and 59 minutes. FRM: transmitted framing TxCd: transmitted line coding CNFG: test mode configuration RCV: received test pattern XMT: transmitted test pattern 106 SunSet T10 Rev. B 5.1 Measurement Result Screens T1 SINGL Measurement Results can contain up to seven screens of results. Access the pages using the PAGE-UP and PAGE-DN F-keys. These screens are: 1. 2. 3. 4. 5. 6. 7. Line 1 Summary or No Errors Line 1 Line Line 1 Signal Line 1 Frame Line 1 ESF CRC-6* Line 1 Logical Line 1 Frequency T1 Dual Measurement Results can contain up to eleven screens of results. These screens are: 1. Line 1& 2 Summary or No Errors 2. Line 1 Line 3. Line 2 Line 4. Line 1 Signal 5. Line 2 Signal 6. Line 1 Frame 7. Line 2 Frame 8. Line 1 ESF CRC-6* 9. Line 2 ESF CRC-6* 10.Line 1 or 2 Logical 11.Line 1 or 2 Frequency *Note: The ESF CRC-6 screens appear only if ESF framing has been selected in the TEST CONFIGURATION screen. For most results, there are pages for both Line 1 and Line 2. However, the Logical and Frequency screens refer to whichever line was selected as Rx/DROP in the TEST CONFIGURATION screen. Ch.3 Menu Descriptions 107 5.1.1 Measurement Results Summary Screens The summary screens contain the most significant measurement results. The screens contain measurement results for errored seconds, severely errored seconds, unavailable seconds, and bit errors. If there are no errors in the signal, the SunSet T10 displays the No Errors Screen in place of the Summary screen. Refer to Figures 44, 45, and 46. 21:10:05 MEAS ET- 000:37:50 RT- CONTINU FRM-ESF TxCd-B8ZS CNFG-TERM RCV-QRSS XMT-QRSS LINE 1 - SUMMARY BPV BIT FBE ES %ES SES UAS : : : : : : : 1 1 0 1 00.079 0 1 PAGE-UP PAGE-DN BPVR: BER : CRC : EFS : %EFS: Lpp : FREQ: 1.2e-09 1.2e-09 0 1380 99.859 -0.2 dB 1544000 STOP more Figure 44 T1 Single, Line 1 Summary Screen 21:10:05 MEAS ET- 000:07:42 RT- CONTINU FRM-ESF TxCd-B8ZS CNFG-TERM RCV-QRSS XMT-QRSS SUMMARY -LINE 1-LINE 2ES : SES : UAS : EFS : %EFS: Lpp : FREQ: BIT : 0 0 2 454 99.550 0.3 dB 1544000 0 PAGE-UP PAGE-DN ES : SES : UAS : EFS : %EFS: STOP 0 0 0 456 100 more Figure 45 T1 Dual Summary Screen 108 SunSet T10 Rev. B MEAS 21:10:05 ET- 000:37:50 RT- CONTINU FRM-ESF TxCd-B8ZS CNFG-TERM RCV-QRSS XMT-QRSS NO ERRORS NO ERRORS FREQ: 1544000 PAGE-UP PAGE-DN Lpp : 0.3 STOP dB more Figure 46 No Errors Screen These are the SUMMARY definitions. BPV: This is a count of the number of bipolar violations that occurred since the start of the test. Usage: This measurement detects problems with the line to which the SunSet T10 is connected. BPVs are local, because any multiplexers, radio or fiber transmission links, switches, digital cross-connects, or other line-terminating devices will remove them as the signal passes through those devices. BPVs only pass through copper and regenerative repeaters. This measurement is also useful where the transmitted framing or data is unknown. Finally, many telephone companies use a given number of BPV counts as the maximum acceptable for a span. BPVR: This is the average bipolar violation error rate since the beginning of the test. Usage: Sometimes used instead of a count when the measurement is conducted for a longer period, 10-3 is a typical maintenance limit for voice transmission and 10-6 is a common acceptance limit for voice transmission. Many data customers require 10-9 or better. BIT: This is a count of the number of bit errors that have occurred since the beginning of the test. BIT displays N/A when the SunSet T10 cannot synchronize on a pattern. Usage: This is similar to BPV with the following differences. First, the SunSet T10 is measuring a known pattern. Hence, the Ch.3 Menu Descriptions 109 measurement covers transmission performance over the entire service, not just the local span or section. As a result, this is the preferred measurement for out-of-service testing and service acceptance tests. The measurement is often performed in conjunction with a loopback device at the far end. BER: This is the average bit error rate since the beginning of the test. BER displays N/A when the SunSet T10 cannot synchronize on a pattern. Usage: BER is used instead of a count when testing for a longer period. 10-3 is a typical maintenance limit for voice transmission and 10-6 is a common acceptance limit for voice transmission. Many data customers require 10-9 or better. FBE: This is a count of the number of framing bit errors that have occurred since the beginning of the test. FBE displays N/A when the SunSet T10 cannot synchronize on a pattern. Usage: Used for in-service testing on SF-D4 circuits where the customer is transmitting an unknown data stream. The advantage of this measurement is that the framing stays intact as it passes through various network elements (except fractional T1 circuits); hence, it depicts the overall transmission quality from the far end of the circuit to the SunSet T10. A drawback with this measurement is that it only measures 1 out of every 193 bits, and so it gives only a sampling of the true transmission performance. Another drawback with this measurement is that it cannot measure the quality of transmission on the two outgoing directions from the SunSet T10 to the end of the circuit. It can only measure the quality on the two incoming directions of transmission. CRC: This is the number of CRC-6 errors that have occurred since the beginning of the test. CRC displays N/A when the SunSet T10 cannot synchronize on an ESF signal. Usage: CRC is a valuable complement to the BPV measurement. BPVs identify errored in-service transmission in the local part of the T1 path, and CRCs identify errored in-service transmission on the entire path from the origination point to the SunSet T10. If the number of BPV errors is about the same or a little bit less than the CRC errors, then there is a problem on the local span. However, if there are no BPV errors but many CRC errors, then the problem is on the other side of the multiplexers or other line-terminating equipment. 110 SunSet T10 Rev. B Note: For in-service testing, both CRC and BPV give information about errors on the incoming signals but not on the outgoing signals. To test the line with these measurements, take the line out of service and initiate a far end loopback. ES: This is the number of errored seconds that have occurred since the beginning of the test. An errored second is any second with at least one BPV, bit error, FBE, or CRC-6 error. There is no count of ES during unavailable seconds. Usage: Errored seconds are a key tariff parameter for T1 services. Acceptance limits rate the number of errored seconds in a 5 minute, 15 minute, or 24 hour period. 7 errored seconds in 5 minutes and 20 errored seconds in 15 minutes are common acceptance limits, and 60 errored seconds in 5 minutes is a common immediate action limit. Some organizations accept no errors on a turn-up test. The measurement is attractive because it takes out the effects of burstiness on service performance and it measures the quality of service as the user actually experiences it. EFS: This is a count of error free seconds since the beginning of the test. %ES: This is a count of the percentage of errored seconds (as defined in ES). This percentage is calculated by the formula, %ES=ES/ASx100. %EFS: This is a count of percentage of error free seconds since the beginning of the test. Usage: %EFS is used for evaluating T1 services. Data customers typically expect this number to be anywhere from 95% to 99.5% or higher. %EFS and %AS are the two most significant parameters in gauging the quality of T1 service delivered to the customer. SES: This is the number of severely errored seconds that have occurred since the beginning of the test. An SES is a second with a 10-3 error rate, where error rate is measured from bit errors, BPV errors, framing bit errors, and CRC-6 errors. An out of frame error will also generate a SES. There is no count of SES during unavailable seconds. Usage: This measurement is sometimes used in combination with ES to describe overall in-service transmission performance. During an SES, the customer is likely to be experiencing trouble with the service but may still be able to use the service, such as PCM voice transmission. Ch.3 Menu Descriptions 111 Lpp: Level peak-to-peak is the peak-to-peak level of negative and positive pulses received by the SunSet T10. Usage: Use to confirm that the signal is at the proper level. For example, at a DSX, the level should be 0 dB at the out jack, and about -20 dB at the monitor jack. At the customer premises, the received signal should be no lower than -15 dB, and the transmit signal should be about 0 dB. At a repeater, the input signals should be between -7.5 and -35 dB, and the output signals should be about 0 dB. UAS: This is a count of all the unavailable seconds since the beginning of the test. Note that T1 service is not available during a UAS. UAS is any second with a loss of signal, loss of frame, loss of pattern, or alarm indication signal. A UAS also occurs at the onset of 10 consecutive SESs. Once a UAS is declared, the following seconds are counted unavailable until declared available again. Service becomes available at the onset of 10 consecutive available non-severely errored seconds. Usage: UASs are not permitted in any number in a 15-minute or 1 hour test. Telephone companies typically guarantee 3 hours maximum outage time per year with T1 service. FREQ: This is the frequency of the signal as measured against the frequency of a reference clock. When measuring just one signal the reference is the SunSet T10s internal clock. The internal reference clock of the SunSet T10 has a stratum 3 accuracy. When both Rx jacks have signals plugged in, XMT CLOCK defaults to the received signal from the line selected in Tx/INSERT in the TEST CONFIGURATION screen. 112 SunSet T10 Rev. B 5.1.2 Line/BPV Screen Calculated from bipolar violation occurrences are the LINE screen measurements. Use these screens to perform an in-service test on an unframed signal. Figure 47 shows the LINE 1 LINE screen. 21:10:05 MEAS ET- 000:37:50 RT- CONTINU FRM-ESF TxCd-B8ZS CNFG-TERM RCV-QRSS XMT-QRSS LINE 1 BPV : BER : ES : SES : AS : UAS : DGRM: 11 9.9e-09 5 0 723 0 0 PAGE-UP PAGE-DN - LINE CURBER: %ES : %SES : %AS : %UAS : %DGRM : 0.0e-07 00.692 00.000 100 00.000 00.000 STOP more Figure 47 BPV Line 1 Line Screen Defined as follows are the measurements in Figure 47. BPV: This is the number of bipolar violations that have occurred since the beginning of the test. BER: This is the bipolar violation error rate measured since the beginning of the test. Usage: Use BER instead of a count when the measurement is conducted for a longer period. 10-3 is a typical maintenance limit for voice transmission and 10-6 is a common acceptance limit for voice transmission. Many data customers require 10-9 or better. CURBER: This is the current bipolar violation bit error rate measured during the previous averaging interval. The interval is for one second. Usage: CURBER is useful conducting long-term measurements. In this case, a single period of high errors can skew the average error rate high. It is then useful to know if the errors are still occurring. Ch.3 Menu Descriptions 113 ES: Errored seconds is a count of seconds with at least one bipolar violation since the beginning of the test. There is no count during BPV UASs. %ES: This is a percentage of BPV ESs that has occurred since the beginning of the test. There is no count during BPV UASs. SES: Severely errored seconds is a count of seconds with at least a 10-3 bipolar violation error rate since the beginning of the test. There is no count during BPV UASs. %SES: This is the percentage of BPV SESs that have occurred since the beginning of the test. AS: This is the number of available seconds that have occurred since the beginning of the test. A BPV AS is any second that is not a BPV UAS. %AS: This is a percentage of available BPV seconds that have occurred since the beginning of the test. UAS: This is the count of bipolar violation unavailable seconds since the beginning of the test. A UAS is counted if there is a loss of signal or at the onset of 10 consecutive BPV SESs. BPV UAS continues counting until the onset of 10 consecutive available non-SESs. %UAS: This is a percentage of BPV UASs that have occurred since the beginning of the test. DGRM: This is the number of BPV degraded minutes since the beginning of the test. A BPV DGRM is 60 consecutive non-severely errored seconds during which at least 92 BPVs occurred. %DGRM: This is a percentage of BPV DGRMs that have occurred since the beginning of the test. 114 SunSet T10 Rev. B 5.1.3 Signal Screen The SIGNAL screen presents all measurements based on the actual T1 signal. Use this screen if concerned with the T1 signal. Several measurements are useful in just about any application. Shown in Figure 48 is the LINE 1 SIGNAL screen. 21:10:05 MEAS ET- 000:37:50 RT- CONTINU FRM-ESF TxCd-B8ZS CNFG-TERM RCV-QRSS XMT-QRSS LINE 1 - SIGNAL AS : UAS : LOSS: LDNS: EXZS: AISS: %AS : %UAS: 2270 0 0 0 0 0 100 00.000 PAGE-UP PAGE-DN FREQ +LVL -LVL Lpp +LVL -LVL Lpp SMPX : : : : : : : : STOP 1544000 2.93 V 2.92 V 5.85 V -0.2 dB -0.2 dB -0.2 dB 0. mA more Figure 48 Line 1 Signal Screen Defined as follows are the measurements in Figure 48. AS: Signal available seconds is the number of seconds during which signal was not lost. UAS: Signal unavailable seconds is the number of seconds during which signal was lost. %UAS: Signal percent unavailable seconds is the percentage of seconds during which LOS was detected since the beginning of the test. Usage: A quick way to see a percentage of time in which there was no signal on the line. LOSS: Signal loss of signal seconds is a count of the number of seconds for which signal has been lost during the test. Usage: This measurement can provide clues as to the nature of an out-of-service condition. For example, a break in the line causes a loss of signal at the SunSet T10 if there are no line terminating elements in between the break and the SunSet T10. However, if there is a line terminating element, then the same break in the line will cause an AISS. Ch.3 Menu Descriptions 115 LDNS: Signal low density seconds is a count of the number of seconds when the 8(n + 1) rule is broken. Usage: This measurement can give an indication as to whether the customer is transmitting illegal strings of data or if B8ZS encoding equipment is working properly. For example, if line code is set for B8ZS at the SunSet T10, but the SunSet T10 is receiving LDNS counts, then a transmitter is not correctly sending the B8ZS code. Or, if testing an AMI line and getting excessive LDNS counts, this indicates that the customer is sending an unusual signal and perhaps that customer should be switched to a B8ZS line. EXZS: Excess zero seconds is a count of the number of seconds in which excessively long strings of zeroes are detected. For AMI coding, this is 16 or more consecutive zeroes; for B8ZS this is 8 or more consecutive zeroes. This measurement is different from LDNS in that it looks for individual strings of zeroes rather than an average ones density over a large number of bits. Usage: Refer to the usage for LDNS. AISS: Alarm indication signal is a count of the number of seconds in which AIS was detected. Usage: This measurement can provide clues as to the nature of an out-of-service condition. For example, a break in the line will cause a loss of signal at the SunSet T10 if there are no lineterminating elements between the break and the SunSet T10. However, if there is a line-terminating element, the same break will cause an AISS. +LVL: Positive level is the level of positive pulses received by the SunSet T10. Usage: The +LVL and -LVL measurements are useful for finding faults with the last repeater or transmitter that is generating the signal to the SunSet T10. If the value of the positive pulses is more than 1 dB different from the value of the negative pulse, this could cause problems. The level at a DSX should be approximately 3 volts. The level at a repeater should be between -10 dB and -35 dB. Level and simplex current measurements are only from L1-Rx. -LVL: Negative level is the level of negative pulses received by the SunSet T10. Usage: Refer to +LVL 116 SunSet T10 Rev. B Lpp: This is the peak-to-peak level of negative and positive pulses received by the SunSet T10. Usage: The Lpp measurement saves time by adding the +LVL and -LVL values to calculate Lpp. FREQ: This is the frequency of the signal as measured against the frequency of a reference clock. When measuring just one signal, the reference is the SunSet T10s internal clock. The internal reference clock of the SunSet T10 has a stratum 3 accuracy. When both Rx jacks have signals plugged in, XMT CLOCK defaults to the received signal from the line selected in Tx/INSERT in the TEST CONFIGURATION screen. SMPX: This is the simplex DC current flowing from L1-Rx tip and ring through the SunSet T10 to L2-Tx tip and ring. Usage: Use this measurement to verify proper simplex current flowing on a T1 span. The result should generally be 60 mA. WARNING! Unplug the SunSet T10 immediately if the current measurement exceeds 150 mA, as this may damage the SunSet T10s simplex current measuring circuit. Ch.3 Menu Descriptions 117 5.1.4 Frame Screen The FRAME screen reports all related framing measurements of the tested line. These measurements are reported regardless of the type of framing on the line. An unframed signal will not have measurements reported in this screen. Usage: The FRAME screen is particularly useful for D4 signals where CRC-6 errors are not available. Figure 49 shows the LINE 1 FRAME screen. 21:10:05 MEAS ET- 000:37:50 RT- CONTINU FRM-ESF TxCd-B8ZS CNFG-TERM RCV-QRSS XMT-QRSS LINE 1 - FRAME FBE : FBER: OOFS: YELS: ES : SES : AS : UAS : 5 9.8e-06 0 0 2 0 2270 0 PAGE-UP PAGE-DN FSLIP : CUFBER: COFA : LOFS : %ES : %SES : %AS : %UAS : STOP NO L2 0.0e-04 0 0 01.563 00.000 100 00.000 more Figure 49 Line 1 Frame Screen FBE: This is a count of framing bit errors that have occurred since the beginning of the test. Usage: This is used for in-service testing on SF-D4 circuits, where the customer is transmitting an unknown data stream. The advantage of this measurement is that the framing stays intact as it passes through various network elements (except fractional T1 circuits); hence, it depicts the overall transmission quality from the far end of the circuit to the SunSet T10. A limitation with this measurement is that it only measures one out of every 193 bits, and so it gives only a sampling of the true transmission performance. Another drawback is that it cannot measure the quality of transmission on the two outgoing directions of transmission. FBE can measure the quality only on the two incoming directions of transmission. FSLIP: This is a count of line frame slips that have occurred since the beginning of the test. A frame slip occurs each time the phase of the line under test has deviated from the phase of the reference clock by 193 bits. 118 SunSet T10 Rev. B Usage: FSLIPs are useful for finding frequency synchronization problems in the network. Frequency synchronization can be the source of problems for channelized HICAP services that carry data and face a switch or a 1x0 digital cross-connect system. FBER: This is the framing bit error rate measured since the beginning of the test. Usage: Refer to the usage of FBE. This rate is a way of summarizing the information that is independent of the actual measurement period. CUFBER: This is the current framing bit error rate. Usage: This measurement is useful for determining if the circuit recently had major error problems. However, the limitation of this measurement is that the 1-second averaging interval is so short that it is not useful for finding error rates below 10-4. OOFS: This is a count of out-of-frame seconds that have occurred since the beginning of the test. Note that the conditions for out-of-frame may be adjusted in the MEASUREMENT PARAMETERS screen. An out-of-frame condition occurs when either 2in-4 or 2-in-5 framing bits have been in error. OOFS starts counting when an out-of-frame condition occurs. OOFS continues to increment until framing has reestablished, or until 3 consecutive seconds have been out-of-frame. In this case, LOF is declared, OOFS is decremented by 3, and LOFS is incremented by 3. Once an out-of-frame condition occurs, the SunSet T10 begins searching for a new framing position. The outof-frame condition ends when framing has been reestablished. If the framing remains in the original position, then no further action takes place. If the framing moves to a new position, then a COFA (change of frame alignment) is declared. Usage: A large OOFS count is an indication of significant transmission problems. COFA: This is a count of changes of frame alignment that have occurred since the beginning of the test. Refer to OOFS for the conditions that result in the declaration of a COFA. YELS: This is the count of yellow alarm seconds since the beginning of the test. A yellow alarm takes different forms depending on the framing of the signal. For an SF signal, a zero in bit 2 for all channels indicates YELS. For an ESF signal, the yellow alarm is 0000000011111111 in the facility data link. The T1 path-terminating device will send a yellow alarm on its outgoing signal in response to loss of frame on its incoming sigCh.3 Menu Descriptions 119 nal. Thus, the yellow alarm indicates that the other side of the T1 line has failed somewhere before the end of the circuit. Usage: YELS is the only end-to-end service indicator that is available for in-service testing for D4, SLC-96®, and some ESF circuits. Use YELS to sectionize a fault. For example, if the signal on side A reaches the SunSet T10 without error, but the signal on side B shows a YELS, then side A must be failing somewhere downstream from the SunSet T10. LOFS: This is the count of loss of frame seconds since the beginning of the test. LOFS occur at the onset of 3 consecutive OOFSs. They count up until the onset of 10 consecutive nonSESs. Usage: Used often on extended tests where sporadic intermittency problems are experienced. ES: This is the count of frame errored seconds since the beginning of the test during which at least one framing bit error has occurred. There is no count during a frame unavailable second. %ES: This is the percentage of frame errored seconds that have occurred since the beginning of the test. SES: This is a count of frame severely errored seconds since the beginning of the test during which at least four framing bit errors have occurred, or at least one out-of-frame has occurred. There is no count during a frame unavailable second. %SES: This is the percentage of frame severely errored seconds since the beginning of the test. AS: This is a count of the frame available seconds since the beginning of the test. A frame available second is any frame errorfree second, frame errored second, or frame severely errored second. %AS: This is the percentage of frame available seconds since the beginning of the test. UAS: A line 1 frame unavailable second occurs at the onset of 3 consecutive OOFSs or 10 consecutive SESs. UASs continue counting until the onset of 10 consecutive frame error-free seconds or frame errored seconds. %UAS: This is the percentage of frame unavailable seconds since the beginning of the test. 120 SunSet T10 Rev. B 5.1.5 ESF CRC-6 Screen The ESF CRC-6 screen displays all of the results derived from the CRC-6 (cyclic redundancy check code-6) bits within the ESF signal. They appear only with an ESF signal. Shown in Figure 50 is the LINE 1-ESF CRC-6 screen. 21:10:05 MEAS ET- 000:37:50 RT- CONTINU FRM-ESF TxCd-B8ZS CNFG-TERM RCV-QRSS XMT-QRSS LINE 1 - ESF CRC-6 CRC CER ES SES AS UAS : : : : : : 0 0.0e-05 2 0 2270 0 PAGE-UP PAGE-DN CURCER: %ES : %SES : %AS : %UAS : STOP 0.0e-03 00.000 00.000 100 00.000 more Figure 50 Line 1 - ESF CRC-6 Screen Defined as follows are the measurements in Figure 50. CRC: This is a count of ESF CRC-6 block errors that have occurred since the beginning of the test. Each CRC-6 block error indicates that there is at least 1 bit error within an extended super frame. An extended super frame consists of 24 frames. Each frame contains 193 bits. CER: This is the ESF CRC-6 block error rate since the beginning of the test. CURCER: This is the current ESF CRC-6 error rate since the beginning of the test. ES: This is a count of ESF CRC-6 seconds since the beginning of the test that contain at least one ESF CRC-6 bit error. There is no count during a CRC-6 unavailable second Ch.3 Menu Descriptions 121 %ES: This is a percentage of ESF CRC-6 Errored Seconds since the beginning of the test. SES: ESF CRC-6 severely errored seconds is a count of seconds with at least 320 CRC-6 errors since the beginning of the test. There is no count during a CRC-6 unavailable second. %SES: This is a percentage of ESF CRC-6 severely errored seconds since the beginning of the test. AS: ESF CRC-6 available seconds is a count of the CRC-6 errorfree seconds, CRC-6 errored seconds, and CRC-6 severely errored seconds since the beginning of the test. %AS: This is a percentage of ESF CRC-6 available seconds since the beginning of the test. UAS: This is a count of ESF CRC-6 unavailable seconds since the beginning of the test. CRC-6 UASs are counted at the onset of 10 consecutive CRC-6 severely errored seconds or immediately on LOF or LOS. CRC-6 UAS continues counting until the onset of 10 CRC-6 error-free or CRC-6 errored seconds. %UAS: This is a percentage of ESF CRC-6 unavailable seconds since the beginning of the test. 122 SunSet T10 Rev. B 5.1.6 Logical Screen The LOGICAL screen reports all of the parameters measured from a known test pattern. Reported results are available if synchronized with a pattern Usage: Most users will refer only to bit error rate and bit error count displayed on the Summary screen. However, the bit slip measurement offered on this screen is a useful means of detecting this unusual circuit impairment. Refer to Figure 51. 21:10:05 MEAS LET-000:37:50 RT- CONTINU FRM-ESF TxCd-B8ZS CNFG-TERM RCV-QRSS XMT-QRSS BIT : BER : ES : SES : AS : UAS : DGRM: SYLS: LINE 1 - LOGICAL 10 BTSLP : 0 9.7e-09 CURBER: 0.0e-07 3 %ES : 00.412 0 %SES : 00.000 2270 %AS : 100 0 %UAS : 00.000 0 %DGRM : 00.000 0 %SYLS : 00.000 PAGE-UP PAGE-DN STOP more Figure 51 Line 1 Logical Screen LET: In this screen LET replaces ET. Logical Elapsed Time starts counting after achieving PAT SYNC. BIT: This is a count of line 1 logical bit errors since the beginning of the test. BTSLP: This is a count of line 1 logical bit slips that have occurred since the beginning of the test. A bit slip occurs when the synchronized pattern either loses a bit or has an extra bit stuffed into it. Usage: BTSLP can be useful for finding frequency slip problems that are symptomatic of a network element that periodically drops or stuffs a bit. BER: Line 1 logical bit error rate since the beginning of the test. CURBER: Line 1 logical current bit error rate during the last averaging interval of one second. Ch.3 Menu Descriptions 123 ES: This is a count of line 1 logical bit errored seconds that have occurred since the beginning of the test. A bit errored second is a second with at least 1 bit error. There is no count during bit unavailable seconds. %ES: This is a percentage of line 1 logical bit errored seconds that have occurred since the beginning of the test. SES: This is a count of line 1 logical bit severely errored seconds that have occurred since the beginning of the test. A bit severely errored second is a second with at least 1,544 bit errors (10-3 error rate). There is no count during bit unavailable seconds. %SES: This is a percentage of line 1 logical bit severely errored seconds that have occurred since the beginning of the test. AS: This is a count of line 1 logical bit available seconds that have occurred since the beginning of the test. A bit available second is any bit error-free, bit errored, or bit severely errored second. %AS: This is a percentage of line 1 logical bit available seconds since the beginning of the test. UAS: This is a count of line 1 logical bit unavailable seconds since the beginning of the test. A bit unavailable second is a second during which the test pattern has lost synchronization. UASs start counting at the onset of 10 consecutive bit severely errored seconds. UASs continue counting until the onset of 10 bit non-severely errored seconds. %UAS: This is a percentage of line 1 logical bit unavailable seconds since the beginning of the test. DGRM: This is a count of line 1 logical bit degraded minutes that have occurred since the beginning of the test. A bit degraded minute is 60 non-severely errored seconds during which at least 92 errors occurred. 124 SunSet T10 Rev. B 5.1.7 Frequency Screen Figure 52 shows a LINE 1 FREQUENCY screen. T1SINGL and T1DUAL modes use the same screen. MEAS 21:10:05 RT- CONTINU ET- 000:O4:23 TxCd-B8Z8 CNFG-TERM FRM- ESF XMT-QRSS RCV- QRSS LINE 1 - FREQUENCY 0 NEG RCV/Hz: MAX/Hz: MIN/Hz: FSLIP : 1544000 1544000 1544000 0 PAGE-UP PAGE-DN POS REFCLCK: CLKSLIP: +WANDER: -WANDER: STOP L2-RX 0 0 0 more Figure 52 Frequency Screen Defined as follows are the measurements in Figure 52. RCV/Hz: Current frequency measured during the last second in Hertz. MAX/Hz: Maximum frequency measured in Hertz since the beginning of the test. MIN/Hz: Minimum received frequency in Hertz since the beginning of the test. FSLIP: This is a count of frame slips that have occurred since the beginning of the test. A frame slip occurs each time the phase of the line under test has deviated from the phase of the reference clock by 193 bits. This value represents the total number of frame slips; 1 frame slip =193 bit slips. REFCLCK: This is the reference clock. When no reference signal is present, the SunSet T10 uses its internal clock as a reference. In this case, the screen will still display the Min/Max/Avg frequency of the received signal, but it will not display any clock slip or wander information. Ch.3 Menu Descriptions 125 CLKSLIP: Clock Slip is the net value of the negative and positive wander. +WANDER: Maximum positive phase difference between the measured frequency and the reference frequency since the beginning of the test. A signal whose frequency is wandering, i.e. whose frequency alternately goes faster and then slower than the reference frequency will show both positive and negative wander. -WANDER: Maximum negative phase difference between the measured frequency and the reference frequency since the beginning of the test. 126 SunSet T10 Rev. B 5.2 Datacom Measurement Results The measurement results for Datacom Mode are on one screen, the DATACOM-BIT ERROR screen. Refer to Figure 53. MEAS ET- 000:02:44 TYPE- X.21 RATE- 48k Hz RCV- ALT10 BIT ES SES EFS AS UAS DGRM- DATACOM0 0 0 164 164 0 0 HOLDSCR PRN-SAV 21:10:05 RT- CONTINU MODE- DTE RxHz- 48000 XMT - ALT10 BIT ERROR RATE - 0.0e-07 %ES - 00.000 %SES - 00.000 %EFS - 100 %AS - 100 %UAS - 00.000 %DGRM - 00.000 STOP Figure 53 Datacom Bit Error Screen Defined as follows are the measurements in Figure 53. BIT: This is a count of the number of bit errors that have occurred since the beginning of the test. There is no count during unavailable seconds. RATE: This is the total number of bit errors divided by the total number of bits during available time since the beginning of the test. ES: This is a count of the number of bit errored seconds that have occurred since the beginning of the test. ES is any second with at least one bit error. There is no count during an unavailable second. %ES: This is a percentage of bit errored seconds since the beginning of the test. SES: This is a count of severely bit errored seconds since the beginning of the test. SES is a second with a 10-3 bit error rate. There is no count during an unavailable second. Ch.3 Menu Descriptions 127 %SES: This is a percentage of severely bit errored seconds since the beginning of the test. EFS: This is a count of number of bit error free seconds since the beginning of the test. %EFS: This is a percentage of bit error free seconds since the beginning of the test. AS: This is a count of bit available seconds since the beginning of the test. Bit available seconds equals the length of the total test time minus any UAS. %AS: This is a percentage of bit available seconds since the beginning of the test. UAS: This is a count of bit unavailable seconds since the beginning of the test. Bit UAS begins at the onset of 10 consecutive severely bit errored seconds and ends at the onset of 10 consecutive non-severely bit errored seconds. Loss of signal, loss of frame, and loss of pattern synchronization will also cause a bit UAS. %UAS: This is a percentage of bit unavailable seconds since the beginning of the test. DGRM: This is a count of the bit degraded minutes that have occurred since the beginning of the test. A bit degraded minute is 60 non-severely errored seconds with at least 92 errors. %DGRM: This is a percentage of bit degraded minutes that have occurred since the beginning of the test. 128 SunSet T10 Rev. B 5.3 T1-MUX Mode Measurement Results The measurement results presented for T1-MUX mode depend upon the BERT side selected in the TEST CONFIGURATION screen. The first nine screens are the same for both sides. They are: 1. 2. 3. 4. 5. 6. 7. 8. 9. Line 1 & Line 2 Summary Line 1 Line Line 2 Line Line 1 Signal Line 2 Signal Line 1 Frame Line 2 Frame Line 1 ESF Line 2 ESF If MUX BERT: T1DRP was selected and therefore, looking at the signal dropped from the T1 side. Line Frequency and Line Logical screens appear at pages ten and eleven. If Line Rx/DROP was selected, these screens will present information for Line 1. Line 2 is shown if Rx/DROP= L2-Rx. If MUX BERT was selected: Datacom type (i.e. X.21, RS232), a Datacom Bit Error screen will appear at page ten in place of Line Frequency and Logical. If you have already reviewed the measurement results sections for T1SINGL, DUAL, and Datacom modes, the screen titles above should be familiar. If not, refer to section 5.0 Measurement Results Menu, for sample screens and definitions of all the Line result pages. Refer to section 5.2 Datacom Measurement Results for a sample screen and definitions for the Datacom Bit Error screen. Ch.3 Menu Descriptions 129 6.0 Other Measurements MEAS 21:10:05 OTHER MEASUREMENTS VIEW RECEIVED DATA PROPAGATION DELAY QUICK TEST I QUICK TEST II BRIDGE TAP DETECT PULSE MASK ANALYSIS DDS MEASUREMENTS ISDN PRIMARY RATE SS#7 ANALYSIS GSM VOICE/TRAU/BERT SWITCHED 56 TESTING Figure 54 Other Measurements Menu Many of the OTHER MEASUREMENTS menu items are software options and may not be present in your SunSet T10. 6.1 View Received Data MEAS 21:10:05 VIEW RECEIVED DATA PAGE : 01 T/S BINARY 01 01100010 02 11110010 03 00011010 04 00000100 05 11111111 06 11111111 07 11111111 08 11111111 PAGE-UP PAGE-DN HEX 62 F2 1A 04 FF FF FF FF ASCII b (F) (O) (X) ( ) ( ) ( ) ( ) ( ) RESUME STORE Figure 55 View Received Data 130 SunSet T10 Rev. B VIEW RECEIVED DATA displays the patterns (in binary, HEX, and ACSII) received on all 24 time slots. Refer to Figure 55, View Received Data for a typical screen display. Note: VIEW RECEIVED DATA is not available in Datacom Mode. To view the data, use the following procedure: 1. Select MAIN MENU > OTHER FEATURES > VIEW RECEIVED DATA. 2. View the live presentation of the T1 data. In Figure 55, Time slots 1–4 are selected in the Nx64K Select Time slot screen (in TEST CONFIGURATION). Therefore, the live pattern, which happens to be FOX, can be seen in time slots 1–4, while the IDLE pattern (FF) is seen in the other time slots. • The IDLE pattern can be determined in OTHER FEATURES > OTHER PARAMETERS. 3. Press PAUSE (F3) to trap the current data on the T1 line. 4. Press either PAGE-UP (F1) or PAGE-DN (F2) to view more data. Note the PAGE number in the upper left-hand portion of the screen. 60 screens (20 T1 frames) of data are available. 5. When finished, press the ESCAPE key twice to return to the MAIN MENU. Defined as follows are the items in Figure 55. PAGE: Indicates the displayed page number of the available 60 screens. T/S: Specifies the current Time Slot. BINARY: This column shows the binary data actually received on the line. Each line represents the 8-bit time slot. HEX: This column shows the hexadecimal representation of the 8 bits transmitted in each time slot. ASCII: Displays the received ASCII representation of the 8-bit binary framing word. The character displayed to the left of the parentheses represents the 8-bit framing words translated in their current order. The character displayed within the parentheses represents the 8 bits translated in reverse order. Ch.3 Menu Descriptions 131 The following F-Keys are available in this screen: PAGE-UP (F1), PAGE-DN (F2): Allows access to the 60 pages of data. PAUSE/RESUME (F3): Pause traps the current data on the T1 line to easily observe the pattern. Resume continues the live presentation of data. STORE (F4): This saves the current received pattern in the USER TEST PATTERN screen. Pressing the STORE (F4) F-key, a message will appear at the bottom of the screen giving the label of the received pattern. View this pattern at any time by using the following procedure: 1. 2. 3. 4. Select MAIN MENU > SEND TEST PATTERN. Press the USER (F1) F-key. Select the desired label and press the VIEW (F1) F-key. The pattern can be deleted, edited, or the label can be edited. For more details on these procedures, refer to Section 4.6, Editing a User Test Pattern. Note: In order to store a pattern there must be an empty space in the User Test Pattern screen. 132 SunSet T10 Rev. B 6.2 Propagation Delay 21:10:05 PROPAGATION DELAY RND TRIP DELAY: 334 RND TRIP TIME : 216 ONE WAY DIST : 84 UI uS kFT (ASSUMING 500 ft PER U.I.) RESTART Figure 56 Propagation Delay Use PROPAGATION DELAY only in T1 SINGL/T1DUAL modes. The PROPAGATION DELAY screen shown in Figure 56 displays the propagation delay on a looped back signal. Use this procedure to measure propagation delay: 1. From the MAIN MENU, enter the TEST CONFIGURATION screen. Configure as follows: TEST MODE: T1 SINGL or T1DUAL TEST RATE: 1.544M Press the ESCAPE key to return to the MAIN MENU when finished. 2. Select LPBK & SPAN CONTROL > CSU & NI CONTROL. Loop up the SunSet T10 following the procedure in section 3.1.1, Basic Loopback Procedure. 3. From MAIN MENU > OTHER MEASUREMENTS > PROPAGATION DELAY. View the propagation delay. Refer to the following comments for an explanation. 4. When finished, press the ESCAPE key to return to the MAIN MENU. During measurement, the SunSet T10 measures the number of unit intervals that it takes for the signal to return. A unit interval is the amount of time it takes to transmit one bit (647 µS for a T1 signal). Ch.3 Menu Descriptions 133 This number is translated into an exact number of microseconds of round trip delay and into an equivalent number of kilofeet. Note that the exact number of kilofeet to the loopback will depend on several items such as number of regenerators, gauge of cable, type of transmission media, existence of any transmission devices with appreciable delay, etc. In the absence of equipment with dejittering circuits or other sources of significant delay, the kilofeet measurement is generally accurate to about +/- 1000 feet, and +/- 10%. It is suitable for determining where a looped repeater is located. 134 SunSet T10 Rev. B 6.3 Quick Test - I and II 21:10:05 QUICK TEST - I TICKET : 1234567890 LOOPBAK : NONE PRINT : YES TEST PATTERN 1.3-24 2.ALL 1 3.QRSS 4.QRSS 5.NONE CSU NI DURATION 05 min 05 min 15 min 15 min 00 min NONE Figure 57 Quick Test - I 21:10:05 QUICK TEST - II TICKET : 1234567890 LOOPBAK : NONE PRINT : YES TEST PATTERN 1.1-8 2.ALL 1 3.QRSS 4.QRSS 5.NONE CSU NI DURATION 05 min 05 min 15 min 15 min 00 min NONE Figure 58 Quick Test - II Quick tests save about a half-hour each time a new HICAP service needs to be accepted. In a Quick Test, the SunSet T10 sends out five patterns. The patterns and their durations may be changed or the default settings can be used. Quick Test I and Quick Test II are similar, but the patterns and durations are different. Because of the default patterns and durations supplied, use Quick Test I for AMI lines (3-24 pattern) Ch.3 Menu Descriptions 135 and Quick Test II for B8ZS lines (1-8 pattern). Alternately you can set up the two tests to your needs. Note: Unlike Measurement Results, Quick Test will not run in the background. The test will stop after escaping out of the Quick Test. Use this procedure to run a Quick Test or adjust the default settings: 1. Before using Quick Test, configure the line interface in the TEST CONFIGURATION screen to the following settings: TEST MODE: T1SINGL RxLVL-1: TERM FRAMING: per the line specification Tx CODING: per the line specification Tx SOURCE: NORMAL XMT CLOCK: INTERN TEST RATE: 1.544M LBO 1: as appropriate for the test access point Note: T1 Dual Mode does not support Quick Test. 2. Plug the cords into the appropriate jacks on the SunSet T10 as specified in the TEST CONFIGURATION screen, and also into the IN and OUT jacks on the DSX. 3. Select MAIN MENU > OTHER MEASUREMENTS, then select either QUICK TEST-I or QUICK TEST-II. The screen depicted in Figure 59 appears. 21:10:05 QUICK TEST - I TICKET : LOOPBAK : CSU PRINT : NONE A H O V INSERT B I P W C J Q X DELETE D K R Y E L S Z F M T - G N U / TOGGLE SELECT Figure 59 Ticket Label Entry 136 SunSet T10 Rev. B 4. At TICKET enter a name with the following procedure. A. Press the TOGGLE (F3) F-key to enter the character grid. B. The letter A will flash. Select the desired character and press the SELECT (F4) F-key. C. To enter numbers, use the SHIFT key and the number keypad. Press SHIFT when finished with the number keypad. • If an incorrect character for the TICKET is entered, press the TOGGLE F-key and select the incorrect character using the arrow keys on the keypad. Press the DELETE key (F2) F-key to remove the character. Note that the DELETE key can only be used when the cursor is out of the character grid. D. When finished deleting letters, move the cursor back to the end of the TICKET line, press the TOGGLE (F3) F-key to return to the character grid, and enter any additional characters. E. Repeat steps B and C until the TICKET line is complete. The line can contain maximum of ten characters. F. When finished, press the TOGGLE (F3) F-key to escape the character grid and return to the TICKET line. 5. At LOOPBACK, choose CSU (F1), NI (F2), or NONE (F3). The SunSet T10 will attempt to automatically loop back the far-end based on its settings. 6. At PRINT, choose YES (F1) or NONE (F2). A. If YES is chosen, connect the printer to the serial port; if a printer is not connected, the data cannot be retrieved for latter printing. B. If NONE is chosen, the results can only be viewed while in the QUICK TEST screen. Escaping out erases the results. 7. If you wish to use the default test patterns and their durations, press the ENTER key on the keypad to start the test and go to step 9. If you wish to change these defaults, continue with the following steps. 8. Select the first TEST PATTERN. Select a new TEST PATTERN by using one of the following F-keys. NONE (F1), QRS (F2), ALL 1 (F3), 1-8 (more, F1), 1-16 (more, F2), 3-24 (more, F3), 55DLY (more, F1), ALT10 (more, F2), ALL 0 (more F3) After selecting the TEST PATTERN by pressing the corresponding F-key, the cursor moves to the DURATION field. Ch.3 Menu Descriptions 137 9. If necessary, change the DURATION using this procedure. A. Press the SHIFT key on the keypad so that the SHIFT indicator is in the upper left-hand corner of the screen. B. Enter in any number between 00 and 99 minutes. The cursor will automatically advance to the next line. Do not press the ENTER key on the keypad. C. For the other patterns and durations, repeat steps 7 and 8. 10. When the QUICK TEST is configured, press the ENTER key on the keypad to begin testing. A SUMMARY screen is displayed during the test (see Figure 60). This screen shows elapsed time (ET), remaining time (RT), framing (FRM), transmitted code (TxCd), and configuration (CNFG) for each of the five stages of the test. Refer to section 5 of this chapter for measurement definitions. 21:10:05 ET- 000:00:50 RT- 000:04:10 FRM-ESF TxCd-AMI CNFG-TERM RCV-QRSS XMT- QRSS LINE 1 - SUMMARY BPV BIT FBE ES %ES SES UAS : : : : : : : 0 0 0 0 00.000 0 0 BPVR: BER : CRC : EFS : %EFS: Lpp : FREQ: 0.0e-09 0.0e-09 0 50 100 0.2 dB 1544000 Figure 60 Quick Test Summary 11. When the QUICK TEST has finished, a TEST RESULTS screen appears (see Figure 61). If printing was enabled and the printer is connected, the results will be printed. 138 SunSet T10 Rev. B 21:10:05 QUICK TEST - 1 TEST RESULTS TICKET -SUNRISE101 LOOP TEST TEST TEST TEST LOOP UP PAT 1 PAT 2 PAT 3 PAT 4 DOWN - N/A NO ERRORS NO ERRORS NO ERRORS NO ERRORS N/A PAGE-UP PAGE-DN Figure 61 Quick Test Results 12. Press the PAGE-DN (F2) F-key to view the test results from each transmitted pattern. These screens are similar to the screen shown in Figure 60, except for the addition of the PAGEUP (F1) and PAGE-DN (F2) F-keys. 13. Press the ESCAPE key on the keypad when finished to return to the OTHER MEASUREMENTS menu screen. Note: The results are not stored. Once the ESCAPE key is pressed the results of the Quick Test are lost. Ch.3 Menu Descriptions 139 6.4 Bridge Tap Detect The bridge tap detect test sends 21 different patterns through a looped up span. Each pattern is transmitted one at a time for 30 seconds. For perfect performance, there will be 0 errors, 0 errored seconds, and 30 available seconds. If there is a loss of signal or other unavailable service condition, then there will be less than 30 available seconds. Note that a declared ES (errored second) occurs when there are one or more errors during an AS (available second). Per ANSI and Bellcore standards, an ES is not counted during an UAS (unavailable second). To run this test, use the following procedure: 1. A loopback must be in place on the circuit to be tested. Confirm that the SunSet T10 is properly configured in the TEST CONFIGURATION screen. 2. Select MAIN MENU > OTHER MEASUREMENTS > BRIDGE TAP DETECT. The testing will begin immediately. 3. To observe the progress of the test, refer to either the LINE 1 or LINE 2-LOGICAL screen. Use the PAGE-DN (F2) F-key to see the summary results. There are 21 patterns in all. Each listed pattern is in the order sent. IN PROG means that the 30second measurement for that test pattern is still in progress. 4. When finished, press the ESCAPE key on the keypad to return to the MAIN MENU. Note: Only a few of the results are stored in the summary listing. The information listed includes the pattern number (1 to 21), the pattern name, the number of bit errors detected, the number of errored seconds detected, and the number of available seconds detected. Table 4 lists the transmitted patterns. # 1 2 3 4 5 6 7 8 9 10 11 12 13 14 15 16 17 18 19 20 21 N am e A LL 1 1-in-2 1-in-4 1-in-6 1-in-7 1-in-8 2-in-10 2-in-11 2-in-12 2-in-13 2-in-14 2-in-15 2-in-16 3-in-18 3-in-19 3-in20 3-in-21 3-in-22 3-in-23 3-in-24 QRSS P attern 11111… 010101… 0100… 010000… 0100000… 01000000… 1100000000… 11000000000… 110000000000… 1100000000000… 11000000000000… 110000000000000… 1100000000000000… 11010000000000000… 110010000000000000… 1100010000000000000… 01000100000000000001… 010001000000000000010… 0100010000000000000100… 01000100000000000000100… Q uasi R andom Table 4 Bridge Tab Test Patterns 140 SunSet T10 Rev. B 6.5 Pulse Mask Analysis (SW190) Pulse Mask Analysis allows for the measurement and viewing of the quality of a T1 pulse. Refer to Figure 62. Pattern : QRSS 1 21:10:05 T1.403 PASS 0 3 2 1 0 1 2 3 4 5 6 100nS T1.403 CB-119 PRINT Width 360 ns Rise 50 ns Fall 37 ns Over S0 % Undr S1 % Level -1.2 dB more Figure 62 Pulse Mask Analysis Use this procedure for performing a pulse shape analysis: 1. Select MAIN MENU > OTHER MEASUREMENTS > PULSE MASK ANALYSIS, and select either START NEW ANALYSIS, or VIEW LAST PULSE SHAPE. 3. After a few seconds, the pulse shape is displayed. Key pulse statistics are shown in the right-hand margin of the display. 4. If required, choose one of the industry standard masks for a pass/fail report. After selecting, a message similar to “T1.403 PASS” is displayed. • The F-key options for the available masks are: T1.403 (F1), CB-119 (F2), PRINT (F3), 62411 (more, F1), T1.102 (more, F2), PRINT (more, F3), G.703 (more, F1), NO-MASK (more, F2), and RESTART (more, F3). 5. Press the PRINT (F3) F-key to print the mask. 6. Press the RESTART (more, F3) F-key to do another measurement. 6. When finished, press the ESCAPE key on the keypad twice to return to the OTHER MEASUREMENTS menu. Ch.3 Menu Descriptions 141 Screen Definitions • • • The center line is the actual captured pulse. The inner and outer lines are the specified pulse mask upper and lower limits As long as the captured pulse falls within the inner and outer lines, it passes for quality. PASS or FAIL is shown on-screen The following are the pulse statistics shown in the right-hand margin of the display. • • • • • • Width: Pulse width in ns. Rise: Pulse rise time in ns Fall: Pulse fall time in ns. Over S: Pulse over shoot, as a percentage. Undr S: Pulse under shoot, as a percentage. Level: Pulse signal level, in dB. 142 SunSet T10 Rev. B 6.6 DDS Measurements (SW188) DDS Measurements enables the SunSet T10 to test and maintain DDS (Digital Data System) networks by performing basic DDS loopbacks and measurements. The SunSet T10s testing capabilities include: • • • • support for 2.4, 4.8, 9.6, 19.2, 56, and 64 kbps data rates. support for interleaved and latching loopbacks of various types. providing bit error and bit error rate measurements. sending and receiving special network control codes. From the MAIN MENU > OTHER MEASUREMENTS > DDS MEASUREMENTS. The screen shown in Figure 63 appears. 21:10:05 DDS MEASUREMENTS CONFIG & SEND PATT LOOP BACK ACCESS MEASUREMENT RESULTS SEND/RCV CTRL CODES Figure 63 DDS Measurements Menu Ch.3 Menu Descriptions 143 6.6.1 Configuration & Send Pattern 1. From the DDS MEASUREMENTS menu, select CONFIG & SEND PATT and configure the TEST CONFIGURATION screen as required. 21:10:05 TEST CONFIGURATION Tx T/S Rx T/S TEST RATE SEND PATT USER PATT NEXT : : : : : 01 01 9600 511 00000000 PREV Figure 64 DDS Configuration & Send Pattern Screen The DDS Configuration & Send Pattern Screen contains the following setup items: Tx T/S Options: 1–24 Use the F-Keys, NEXT (F1) and PREV (F2), to select Tx time slot and where the DDS control codes will be transmitted. Rx T/S Options: 1–24 Use the F-Keys, NEXT (F1) and PREV (F2), to select Rx time slot and where the DDS control codes will be received. TEST RATE Options: 2400 (F1), 4800 (F2), 9600 (F3), 19.2k (more, F1), 56k (more, F2), 64k (more, F3) Press the appropriate F-Key to specify the test rate. 144 SunSet T10 Rev. B SEND PATT Options: 2047 (F1), 511 (F2), 127 (F3), 63 (more, F1), 1111 (more, F2), 0000 (more, F3), DDS-1 (more, F1), DDS-2 (more, F2), DDS3 (more, F3), DDS-4 (more, F1), DDS-6 (more, F3), USER (more, F1), 0101 (more, F2) Select the test pattern to send. If sending a USER-defined test pattern, use the following procedure: A. B. C. D. At the SEND PATT line, press the USER (more F1) F-key. Select USER PATT. Press the SHIFT key on the keypad Use the number keys on the keypad to define the transmitted 8-bit test pattern. E. Press the SHIFT key on the keypad when the pattern is complete. F. The pattern specified in the USER PATT line is active only if USER appears on the SEND PATT line above it. 2. When finished, press the ESCAPE key to return to the DDS MEASUREMENTS menu. Ch.3 Menu Descriptions 145 6.6.2 Loop Back Access 1. From the DDS MEASUREMENTS menu, select LOOPBACK ACCESS. Configure the LOOPBACK ACCESS screen as required. 21:10:05 LOOP BACK ACCESS MODE : TYPE : DEV NO: CODE : USER : LATCH LOOP-UP LATCH N/A CSU 00000000 NON-LAT Figure 65 DDS Loop Back Access Screen MODE Options: LOOP-UP (F1), LOOP-DN (F2) Select this item last! Pressing one of the F-Keys here will automatically begin its respective procedure. After setting all of the other items, press the LOOP-UP (F1) F-key to loop up or the LOOP-DN (F2) F-key to loop down. TYPE Options: LATCH (F1), NON-LAT (F2) NON-LAT: This refers to the traditional loopback testing for the CSU, DSU, or OCU. This loopback type requires the continuous transmission of loopback control bytes in the test data. LATCH: For Latched loopback, it is not necessary to continue to send the loopback code. A latched loopback will remain activated until receiving a release code. 146 SunSet T10 Rev. B DEV NO Options: 1–8 Use the F-Keys, NEXT (F1) and PREV (F2), to select a device number from 1–8. This item applies only to the DS0-DP Code. For all other codes, this line will remain N/A. CODE Options: For LATCH- CSU (F1), DSU (F2), OCU (F3), USER (more, F1), DSO-DP (more, F2) For NON-LAT- CSU (F1), DSU (F2), OCU (F3), USER (more, F1) Specify the loop up/down code for a specific equipment type to be looped up/down. The F-Keys available will depend upon the TYPE selected. The following codes are available: • • • • CSU- Channel Service Unit DSU- Data Service Unit OCU-Office Channel Unit DSO-DP- DS0 Dataport To transmit a user loopback code, use the following procedure: A. Press the USER (more, F1) F-key. B. Select the USER loop back code. C. Enter an 8-bit loop back code by first pressing the SHIFT key on the keypad. D. Enter the 0/1 values directly from the keypad. E. Press the SHIFT key on the keypad when finished. F. The entered USER pattern will have no effect unless “USER” was specified for the CODE. Ch.3 Menu Descriptions 147 6.6.3 Measurement Results 21:10:05 ELAP TIME- 000:01:23 FRME- SF-D4 CODE- AMI RATE- 56k PATT- 2047 RESULTS BIT UAS : 0002 : 0 BER : 1.04e-07 %UAS : 00.000 RESTART Figure 66 DDS Measurement Results All results relate to the total elapsed time of the test (ELAP TIME). If necessary, use the RESTART (F1) F-key to restart the measurements. The following are the items found in Figure 66. ELAP TIME: Elapsed Time is the total amount of time that has passed since the beginning of the measurement process (hhh: mm: ss). FRME: Displays is the type of transmitted framing. CODE: Displays the type of transmitted line coding. RATE: Displays the test rate as specified in the CONFIG & SEND PATT menu. PATT: Displays the transmitted test pattern, as specified in the CONFIG & SEND PATT menu. BIT: Displays the total number of bit errors since the beginning of the test. BER: Displays the bit error rate since the beginning of the test. UAS: Displays the total number of unavailable seconds since the beginning of the test. %UAS: Displays the percentage of unavailable seconds since the beginning of the test. 148 SunSet T10 Rev. B 6.6.4 Send/Receive DDS Control Codes This screen facilitates transmission of DDS control codes to the far-end; it also displays the received codes. Refer to Figure 67. 21:10:05 SENS/RCV CONTROL CODE SEND MESG : (1) 0011010 RECEIVE CODE : 10011010 MESG : MUX-OOS ABNORML MUX-OOS C IDLE more Figure 67 Send/Receive Control Code Transmitting Codes The SEND MESG line displays the transmitted code. To change this code, press the F-key of choice. Shown in Table 5, these F-keys list the 9 programmed codes available. To enter a USER code: 1. Press the SHIFT key on the keypad. 2. Enter the binary digits (1 or 0) from the keypad. 3. When competed, press the SHIFT and then ENTER keys on the keypad to send the USER code. F-key Control b1……b8 Description Code F1 ABNORMAL 10011110 Abnormal Station Condition F2 MUX- 00S 10011010 Mux out of Sync F3 C IDLE 11111110 Control Idle Code more F1 D IDLE 11111111 Data Idle Code more, F2 MAP0 10010011 Map 0 Confirmation Code (line side) more, F3 MAP1 11101101 Map 1 Confirmation Code (drop side) more, F1 T-ALERT 11101100 Test Alert more, F2 TEST 10011100 Test Code more, F3 UMC 10011000 Unassigned Mux Channel Note: The least significant digit, b1, is always 1 and cannot be changed. Therefore, it appears in parentheses on the SEND MESG line. Table 5 DDS Control Codes Ch.3 Menu Descriptions 149 Other DDS codes can be sent using the previously described procedure. The following DDS codes may be of interest: • • • • • Block: 10001010 Far End Voice (FEV): 11011010 MJU Alert (MA): 11110010 Release: 11111000 Transition in Progress (TIP): 10111010 Receiving Codes The RECEIVE portion of the screen displays the DDS code received from the far-end. The SunSet T10 will display the received digits. If these bits correspond to one of the 9 programmed codes shown in Table 4, the message will be displayed in the lower portion of the screen. 150 SunSet T10 Rev. B 6.7 ISDN Primary Rate Menus (SW186) ISDN Primary Rate provides a comprehensive analysis of the ISDN protocol based on the CCITT Q.931 standard. The ISDN PRIMARY RATE menu, shown in Figure 68, is accessed from MAIN MENU > OTHER MEASUREMENTS > ISDN PRIMARY RATE. 21:10:05 ISDN PRIMARY RATE CONFIGURATION START LINK/CALL SETUP BACKUP D CHNL TEST SETUP FILTER START TRACER VIEW/PRINT TRACER OTHER PARAMETERS Figure 68 ISDN Primary Rate Menu Ch.3 Menu Descriptions 151 6.7.1 ISDN Configuration CONFIGURATION configures EMULATION TYPE, STANDARD PROTOCOL, TEST PATTERN (for data calls) and USER PATTERN for ISDN analysis. Refer to Figure 69. 21:10:05 CONFIGURATION EMULATE TYPE Q.931 STD TEST PATTERN USER PATTERN TE : : : : TE NTI 2047 00110011 NT Figure 69 ISDN Configuration 1 2 PULSES SF B8ZS ESF YEL/IDLE POWER AIS LOW BATT ERRORS SLC-96 PULSES SF BIT ERROR B8ZS ESF YEL/IDLE ERRORS SLC-96 PAT SYNC AIS SunSet T10 12:34:41 MEAS VIEW RECEIVED DATA PAGE : 01 T/S BINARY HEX ASCII 01 11011111 DF ( ) 02 11000010 C4 (#) 03 01000010 42 B (B) 04 00011110 1E (X) 05 01100101 65 e ( ) 06 00101110 2E (t) 07 11010100 D4 (+) 08 11000101 C5 ( ) PAGE-UP PAGE-DN F1 RESUME F2 STORE F3 F4 CO SUNRISE TELECOM F1 F2 F3 F4 A RESYNC B LIGHT C GRAPHIC D ERR INJ E AUTO 1 VOL UP 2 VOL D N 3 4 5 7 8 F S H I FT ESCAPE POWER PRN SCRN HISTORY 6 9 ENTER 0 Emulate Type: TE SF PULSES 1 2 YEL/IDLE POWER AIS LOW BATT B8ZS ESF ERRORS SLC-96 PULSES SF BIT ERROR ESF YEL/IDLE B8ZS ERRORS SLC-96 PAT SYNC AIS SunSet T10 12:34:41 MEAS VIEW RECEIVED DATA PAGE : 01 T/S BINARY HEX ASCII 01 11011111 DF ( ) 02 11000010 C4 (#) 03 01000010 42 B (B) 04 00011110 1E (X) 05 01100101 65 e ( ) 06 00101110 2E (t) 07 11010100 D4 (+) 08 11000101 C5 ( ) PBX PAGE-UP PAGE-DN F1 Customer Premises RESUME F2 STORE F3 F4 SUNRISE TELECOM F1 Emulate Type: NT F2 F3 A RESYNC B LIGHT C GRAPHIC D ERR INJ E AUTO 1 VOL UP 2 VOL D N HISTORY F 4 5 6 S H I FT 7 8 9 POWER PRN SCRN ESCAPE F4 3 ENTER 0 Figure 70 Emulate Type 152 SunSet T10 Rev. B EMULATE TYPE Options: TE (F1), NT (F2) This configures the emulation mode for the SunSet T10. Figure 70 displays the two uses. • • TE: Terminating Equipment used when the SunSet T10 is emulating customer equipment. TE uses the received signal to clock the transmitter. NT: Network Terminal is used when the SunSet T10 is emulating an ISDN switch, such as a DMS-100 or 5ESS. NT uses the SunSet T10’s internal clock. Note: When plugging the SunSet T10 into an ISDN PRI network element (i.e. PBX) and configured for TE, there is no clock. When selecting ISDN PRIMARY RATE, the clocking is determined by the EMULATE TYPE setting. After escaping out of the ISDN PRIMARY RATE menu, the SunSet T10s transmit clock reverts to the TEST CONFIGURATION XMT clock setting. Q.931 STD Options: AT&T (F1), NTI (F2), NATNL-2 (F3), ETSI (F4) The Q.931 specification indicates which type of ISDN switch is to be tested. Try each type if the type of switch is unknown. • • • • AT&T relates to the 5ESS switch. NTI relates to the Northern Telecom DMS-100 switch. NATNL-2 is the National 2 standard. ETSI is the ETSI standard. TEST PATTERN Options: 2047 (F1), 511 (F2), 127 (F3), 63 (more, F1), 1111 (more, F2), 0000 (more, F3), USER (more, F1) Select the test pattern to be transmitted on the B channel during data calls. • • Select a pattern by pressing the corresponding F-Key. If using a USER pattern, press the USER (more, F1) F-key and then enter the binary digits using the SHIFT key and keypad numbers. To send a USER pattern. 1. Press the USER (more, F1) F-key. 2. Change the user pattern by pressing the SHIFT key on the keypad and then enter either a 1 or 0 to change the bit settings. 3. The INSERT (F1) F-key may be used to insert a bit, or the DELETE (F2) F-key may be used to delete the length of the user Ch.3 Menu Descriptions 153 pattern by one bit. The length of the user pattern may be up to one byte long. 4. After escaping from the CONFIGURATION screen, the specified values become the configuration for the ISDN Analysis. 154 SunSet T10 Rev. B 6.7.2 Start Link/ Call Setup Use the CALL SETUP screen to place a voice/data call, receive a voice/data call, or see more information about the call. Upon entering this screen, the SunSet T10 will automatically start the Layer 2 link. The SunSet T10 displays “USE LINE 1 ONLY FOR CALL SETUP!”. This is followed by the screen shown in Figure 71. In the START LINK screen, an indicator appears at the top of the screen. This indicator shows status of the D-channel and the Layer 2 link. READY indicates that the D-channel is operational and the SunSet T10 can send and receive calls. NOT READY indicates the SunSet T10 is not yet able to place or receive calls. Note: Make sure that the settings in the ISDN PRIMARY RATE, CONFIGURATION, and OTHER PARAMETERS screens are correct before entering START LINK/CALL SETUP. READY 21:10:05 CALL SETUP SEND L1 SABME SEND L1 UA LINE 1 RECEIVED MESSAGE Layer 2 mess UA SAP:0 TEI:0 SEQTEST CALL more Figure 71 Call Setup Screen Figure 71 displays layer 2 ISDN messages. This screen will show the SEND and RECEIVED messages on the line. In Figure 71, the SunSet T10 has sent an SABME and a UA message, and has received a UA message on Line 1. These are Layer 2 messages and are defined as: • • SABME: Set asynchronous balanced mode extended UA: Unnumbered acknowledgment Ch.3 Menu Descriptions 155 Make sure that either a UA or RR, and a Receive Ready, has been received before placing a call. • To stop ISDN messages: 1. Press the more (F4) F-key. 2. Press the STOP (F1) F-key. Pressing STOP removes all connections to the D channel and the layer 2 messages will stop. • • To see the previous or next messages press the NEXT (F2) or PREV (F3) F-keys. To restart the messages press the RESTART (F1) F-key. 156 SunSet T10 Rev. B 6.7.2.1 Sequential Call (SW186) Sequential Call is an automated stress test. In the Sequential Call test, the SunSet T10 places a call on all 23 B-channels sequentially. 1. From the MAIN MENU select OTHER MEASUREMENTS > ISDN PRIMARY RATE > START LINK/CALL SETUP and press the SEQTEST (F2) F-key. The sequential call setup screen as shown in Figure 72 appears. READY 21:10:05 SEQUENTIAL CALL HOLD TIME(S) MY PHONE NUMBER SELF CALL CALL TYPE DIAL NUMBER : 3638313 * # :10 :3638000 :OFF :DATA-56 call Figure 72 Sequential Call Setup Configure the following setup items. Press the call (F3) F-key when you are ready to make your call. HOLD TIME Options: 0–255 seconds Hold Time determines how long the SunSet T10 will hold each call before releasing. Choose from 0–255 seconds. Use the Fkeys or the SHIFT key with the keypad to enter in the hold time. NEXT (F1): Advances by one second. PREV (F2): Decrements by one second Ch.3 Menu Descriptions 157 MY PHONE NUMBER Use the SHIFT key and keypad to enter the phone number. (F1): Enters in the star symbol. *# (F2): Enters in the pound symbol. SELF CALL Options: OFF (F1), ON (F2), call (F3) Determine if the SunSet T10 will place a self call. ON: This places a self-call during the test. In this case, the SunSet T10 will call the number entered in CALLER NUMBER. OFF: If not needed, select OFF. In this case, the SunSet T10 will call the number entered as DIAL NUMBER. Refer to DIAL NUMBER for the procedure. CALL TYPE Options: VOICE (F1), DATA-56 (F2), DATA-64 (F3) and 3.1k-AUD (F4) Determine the type of call to place. • • • • VOICE: Select to place voice calls during the test. DATA-56: Select to place data calls at a 56 kbps rate. DATA-64: Select to place data calls at a 64 kbps rate. 3.1k-AUD: Select to use the 3.1 kHz audio bearer service for voice (analog) data. DIAL NUMBER If a self-call is not needed, this will be the number called. To enter a number, use this procedure. 1. Press the SHIFT key on the keypad, the SHIFT indicator will appear. 2. Enter the numbers directly from the keypad, if a mistake is made: A. Press the SHIFT key on the keypad to remove the SHIFT indicator. B. Use the arrow keys on the keypad to select the incorrect entry. C. Press the SHIFT key on the keypad and enter the correct number directly from the keypad. 3. Use the F-keys to enter the “*” and “#” symbols. 4. Press the SHIFT key on the keypad to remove the SHIFT indicator. 5. When finished configuring these items, press the CALL (F3) Fkey to begin the Sequential Call test. 158 SunSet T10 Rev. B A Sequential Call Results screen appears showing the status of each B channel. Refer to Figure 73. READY 21:10:05 SEQUENTIAL CALL 1 4 7 10 13 16 19 22 PASS PASS PASS PASS PASS 2 5 8 11 14 17 20 23 PASS PASS PASS PASS ACTIVE 3 6 9 12 15 18 21 24 PASS PASS PASS PASS D STOP Figure 73 Sequential Call Results Shown on this screen are all 23 B channels. Each channel may display one of the following status messages: PASS: A call has been successfully connected and released. FAIL: A call was attempted on the channel, but was not successful. ACTIVE: The call is still in progress for this channel. Notes: • Channel 24 is marked as the D-channel. • A blank indicates that a call has not yet been attempted for that channel. Ch.3 Menu Descriptions 159 6.7.2.2 Sequential BERT Test For data calls, the SunSet T10 runs a BERT test on each channel and provides results. Figure 74 is an example of a live display. READY CH: 1 CONNECT ET - 000:00:14 Tx B#- 1 PATT - 2047 BIT ES SES EFS UAS AS 21:10:05 LINE - 1 Rx B - 1 RATE - 56K RESULTS : 3 BER : 1 %ES : 0 %SES : 13 %EFS : 0 %UAS : 14 %AS : : : : : : 3.8e-06 07.143 00.000 92.857 00.000 100 PAUSE Figure 74 BERT Test The BERT Test screen provides a running account of the test for the data call. The features in this screen are: CH: Channel displays the B channel currently used and the call status. It has two possible states: CONNECT: the call has successfully connected. FAIL: the call did not connect. ET: Elapsed time is the amount of time since the call connected. TxB# & RxB#: Displays which B channel is currently used. PATT: Displays the current test pattern in use. RATE: Displays the current line rate of the data call, either 56 k or 64 k. The following RESULTS are provided: BIT: Bit error count BER: Bit error rate 160 SunSet T10 Rev. B ES: Errored Seconds SES: Severely Errored Seconds EFS: Error Free Seconds UAS: Unavailable Seconds AS: Available Seconds When the sequential BERT test is finished, the screen displays a summary of all 23 data calls as shown in Figure 75 READY 21:10:05 SEQUENTIAL BERT RESULTS Bch 1 2 3 4 5 6 7 8 PAGE-UP STATUS BIT PASS 3 PASS 0 PASS 0 PASS 0 PASS 0 17 USER BUSY PASS 0 17 USER BUSY PAGE-DN ES 1 0 0 0 0 UAS 0 0 0 0 0 0 0 PRINT Figure 75 Sequential BERT Results For each B channel, the following information is provided. STATUS: Pass indicates that the call successfully connected. If the call did not connect, the cause value number and decode are provided. In Figure 75 the calls for B channels 6 and 8 have failed and the release message contained cause value 17, User Busy. For successful calls, the summary screen provides the BIT, ES, and UAS as defined earlier in this section. The following table lists the possible Q.931 cause values. Ch.3 Menu Descriptions 161 C lass : N o rm al E v en t C aus e No. C la s s V alue 1 00 0 00 01 2 00 0 00 10 3 00 0 00 11 6 00 0 01 10 7 00 0 01 11 16 00 1 00 00 17 00 1 00 01 18 00 1 00 10 19 00 1 00 11 21 00 1 01 01 22 00 1 01 10 26 00 1 10 10 27 00 1 10 11 28 00 1 11 00 29 00 1 11 01 30 00 1 11 10 31 00 1 11 11 C aus e N am e U nalloc a ted num b er N o rou te to s pec ified tra ns it n etw ork N o rou te to d estina tio n C han ne l U n ac c eptab le C all aw arde d & being d elive re d in a e s tablis he d c h ann el N orm a l C a ll C lea ring U s er B usy N o u se r re s pon ding N o a ns w er from us e r (us e r a lerted) C all R e jected N um ber c ha ng ed N on-s ele cted us er c lea ring D es tina tion out of order Inv a lid nu m b er form at (a ddre ss in c om plete ) F ac ility R e jec ted R es po ns e to S T A T U S E N Q U IR Y N orm a l, unsp ec ified C lass : R e so u rce U n a vailab le C aus e C aus e N am e No. C la s s V alue 34 01 0 00 10 N o c ircu it/c ha nne l av a ila ble 38 01 0 01 10 N etw ork ou t o f orde r 41 01 0 10 01 T em pora ry F ailure 42 01 0 10 10 S w itc hing eq uipm en t c on gestio n 43 01 0 10 11 A cc ess in form ation disc arde d 44 01 0 11 00 R equ es te d c ircuit N ot A v ailab le 47 01 0 11 11 R es ou rc e s un av ailab le , u ns pec ified C lass : S erv ice C aus e No. C la s s 50 01 1 54 01 1 57 01 1 58 01 1 63 01 1 o r O p tio n N o t A va ilab le C lass : S erv ice C aus e N o. C las s 65 1 00 66 1 00 70 1 00 79 1 00 o r O p tio n N o t Im p le m en ted V alue 00 10 01 10 10 01 10 10 11 11 V alue 00 01 00 10 01 10 11 11 C lass : In v alid M e ssa g e C aus e N o. C las s V alue 81 1 01 00 01 82 1 01 00 10 83 1 01 00 11 84 1 01 01 00 85 1 01 01 01 86 1 01 01 10 88 1 01 10 00 91 1 01 10 11 95 1 01 11 11 C lass : P ro to co l E rro r C aus e N o. C las s V alue 96 1 10 00 00 97 1 10 00 01 98 1 10 00 10 99 100 101 102 111 1 10 1 10 1 10 1 10 1 10 00 11 01 00 01 01 01 10 11 11 C aus e N am e R equ es te d fa c ility n ot s ubsc ribed Inc o m in g c alls ba rre d B e arer c apa bility no t au tho riz e d B e arer c apa bility no t pres e ntly a v ailable S e rv ic e o r optio n n ot av ailable , uns pe cifie d C aus e N am e B e arer c apa bility no t im plem e nte d C han ne l ty pe not im plem e nte d O nly res tric ted dig ital info rm ation b eare r c a pab ility is a va ila ble S e rv ic e o r optio n n ot im plem ented , un s pecifie d C aus e N am e Inv a lid c all refere nc e va lue Ide ntifie d c ha nn el do es n ot e x ist A s u s pen de d c all e xists, but th is ca ll id entity does no t C all id en tity in u s e N o c all s usp en ded C all hav ing th e req ue sted ca ll id entity has be en cle ared Inc o m p atible de stinatio n Inv a lid transit netw o rk s election Inv a lid m ess ag e, u ns pe c ifie d C aus e N am e M a nd ato ry in form ation elem en t is m iss ing M e ss ag e ty p e no n-existe nt o r not im p le m e nte d M e ss ag e no t c om p atible w ith c all s tate o r m ess a ge ty pe no nex isten t o r n ot im ple m e nted Inform a tion elem en t no n-existen t o r n ot im plem ented Inv a lid info rm atio n e le m e nt c o nte nts M e ss ag e inc o m p atible w ith c all sta te R ec ov e ry o n tim er e xp iry P roto c ol error, uns pe c ifie d C lass : In te rn e tw o rkin g C aus e C aus e N am e N o. C las s V alue 127 1 11 11 11 Interw o rk ing , u ns pec ifie d Table 6 Q.931 Cause Values 162 SunSet T10 Rev. B 6.7.2.3 Placing a Call Press the call (F3) F-key to set up a call and then place it. Refer to Figure 76. READY 21:10:05 START LINK/CALL SETUP CALLED No. : 3638000 CALLER No. : 7771111 B CHANNEL #: 4 NSF CODE : NONE NSF TYPE : SERVICE CALL TYPE : VOICE NEXT PREV call Figure 76 Start Link/Call Setup To configure the call setup, review the following: CALLED No. The SunSet T10 will prompt for a CALLED No. This is the number to dial to place the call. The number is entered directly from the keypad. To do so: 1. Press the SHIFT key on the keypad, the SHIFT indicator will appear. 2. Enter the numbers directly from the keypad, if a mistake is made: A. Press the SHIFT key on the keypad to remove the SHIFT indicator. B. Use the arrow keys on the keypad to select the incorrect entry. C. Press the SHIFT key on the keypad, the SHIFT indicator will appear. D. Enter the correct number directly from the keypad. 3. When finished, press the SHIFT key on the keypad to remove the SHIFT indicator. Ch.3 Menu Descriptions 163 CALLER No. Specifying a “CALLER No.” is optional. This is the telephone number that the ISDN switch uses to identify the caller on the network. If a number is not needed, press the NONE (F4) F-key. To enter a number, use the same procedure as in CALLED No. B CHANNEL Options: 1–24, except for the selected D-channel in the in the OTHER PARAMETERS screen. • • • • Channel 24, used normally as the D-channel. Specify the B channel to place the call. Use the NEXT (F1) or PREV (F2) F-keys to change the channel number. If placing a 46B + 2D call or a 47B + D call, the B CHNL LINE must be specified. This selection specifies the PRI line used to place the call. Press the Line 1 (F1) or Line 2 (F2) F-keys. NSF CODE Options: 0–31 Specify the NSF (Network Specific Facilities) CODE using the NONE (F1) or NEXT (F2) F-keys. • • • If an NSF CODE is to be entered, it can range from 0–31. This code specifies the invoked network facilities. Normally, for the TE mode, NSF is set to NONE. For NT mode, NSF is set to 2. To view NSF options as specified by either AT&T or Northern Telecom, press the TABLE (F3) F-key. This table gives the NSF CODE for certain options. NSF TYPE Options: SERVICE (F1), FEATURE (F2), TABLE (F4) Specify the NSF type; this can be either FEATURE (F2) or SERVICE (F1). • To view the NSF Type options as specified by either AT&T or Northern Telecom, press the TABLE (F3) F-key. This table gives the NSF Type and Code options. 164 SunSet T10 Rev. B CALL TYPE Options: VOICE (F1), DATA-56 (F2), DATA-64 (more, F1), Nx56K (more, F2), 3.1k-AUD (more, F1) Call Type determines what type of call is placed. Select CALL TYPE and press the ENTER key on the keypad. Select the corresponding F-Key: VOICE: Allows the user to place a voice call. DATA-56: Selects a 56 kbps data rate DATA- 64: Selects a 64 kbps data rate. Nx64: Refers to the multirate ISDN PRI with 64K for each channel. For Nx64, select the 64k channels using the SELECT (F2) Fkey. The AUTO (F1) F-key may be used to automatically configure onto active, received Nx64 channels. 3.1k-AUD: Selects the 3.1 kHz audio bearer service for voice (analog) data. Press the call (F4) F-key or the ENTER key on the keypad to begin the call. Disconnecting If satisfied with the call after it has connected with the switch, press the DISK (F2) F-key to disconnect and release the line. Ch.3 Menu Descriptions 165 6.7.2.4 Viewing Call Information When a data/voice call is successfully placed or received, press the INFO (F1) F-key to see information about the call. Refer to Figure 77. 21:10:05 CALL No: CREF No: Bch CFG: BEARER : CLED ID: 1 DIR - SEND OUT 1 TERM CHANNEL: 1 DATA-56 363-8000 Figure 77 ISDN INFO Screen CALL NO.: Displays the called number. CREF NO.: Call reference number identifies the active cells affected by the message. DIR: Shows the direction of the call. Displays either SEND OUT, for placing a call, or RECEIVE, for receiving a call. Bch CFG: Displays the B channel configuration, TERM or LOOP. BEARER: Displays the type of call, VOICE, DATA-56, or DATA-64. CHANNEL: Displays the B channel used to make or receive the call. CLED ID: Displays the called ID. 166 SunSet T10 Rev. B 6.7.2.5 Performing a BERT Test After successfully placing a data call, the BER (more, F2) Fkey is available. Pressing this F-key displays the BER measurement screen. This screen presents the measurement parameters specified in G.821. Only DATA- 64, DATA-56, and NX64 CALL TYPEs in the CALL mode can give BER measurements. Refer to Figure 78. Note: When viewing BER measurements, verify that both the PAT SYNC LED and the appropriate framing LED are green. These two LEDs signify that the patterns and framing match for the transmitting and receiving patterns. 21:10:05 ET - 000:00:40 TX B#- 1 RX B#- 1 PATT - 2047 RATE - 56K RESULTS BIT ES SES EFS UAS AS : : : : : : 13 4 4 341 0 435 BER %ES %SES %EFS %UAS %AS : : : : : : 1.4e-06 02.345 00.000 98.349 00.000 1000 RESTART HOLDSCR Figure 78 ISDN BER Measurements The following F-keys are available in this screen. RESTART (F1): This restarts the measurements clearing all results and resetting the elapsed time to 00:00. HOLDSCR/CONTINU (F2): This freezes the measurement screen to allow viewing of the results. The SunSet T10 will continue to take measurements in the background, but the measurements are not be updated until the CONTINU F-key is pressed. Ch.3 Menu Descriptions 167 6.7.2.6 Receiving a Call The READY indicator must be displayed to receive a call in the Start Link/Call Setup screen. When there is an incoming voice or data call, the SunSet T10 will ring and the screen shown in Figure 79 will appear. READY 21:10:05 CALL SETUP RECEIVE A CALL LINE 1 RECEIVED MESSAGE SETUP MESSAGE CREF No.: 549 BEARER : VOICE CHANNEL: 1 CLER ID : 4083631331 TYPE-2 NPI-1 CLED ID : 4083638000 TYPE-4 NPI-1 REJECT ACC-TERM ACC-LOOP Figure 79 Receiving a Call Screen To accept a call, press the ACC-TERM (F2) F-key. To reject it, press the REJECT (F1) F-key. If a second call should come in while still connected to the first call, the SunSet T10 will ring. This call can be accepted or rejected. For accepting, there are two options available: ACC-TERM (F2): Press ACC-TERM to accept the call in the terminated mode. For voice calls, this means that talking and listening on the other side of the call is possible. For data calls, a pattern is transmitted, as selected in the ISDN CONFIGURATION screen. Errors may be inserted to the other side using the ERR INJ key on the keypad. ACC-LOOP (F3): In this mode only, the incoming voice is heard. For data calls, one can only receive data; inserting errors is not possible. 168 SunSet T10 Rev. B 6.7.3 Backup D Channel Test 21:10:05 BACKUP D CHNL TEST SEND L1 SABME SEND L2 SABME RECEIVED MESSAGE L-STAT DISC CALL Figure 80 Backup D Channel Status Screen The SunSet T10 automatically configures to 46B+D+D upon entering the Backup D Channel Test. In this state, the information is transferred on 46 B channels on both Lines 1 and 2. One D channel controls transmission, the other acts as a backup and is activated when the first D channel is no longer in service. Notes: • The SunSet T10 must be in T1 DUAL mode to use the Backup D Channel Test. • Emulation Mode must be set to TE to access the Backup D Channel Test. This feature checks the backup D channel service. It shows the status for both Lines 1 and 2. In Figure 80, the F-keys provide three options: CALL (F3) accesses the Call Setup screen, which allows a call to be placed. DISC (F2) disconnects and releases the line. When satisfied with the call after it has connected with the switch, press the DISC F-key. L-STAT (F1): Pressing this F-key displays the status for both Line 1 and Line 2. There are two F-keys available in the L-STAT screen (see Figure 81): • DROP-L1 (F1), DROP-L2 (F2): These F-keys temporary disconnect the selected line. When disconnected, the F-key toggles to EST-L1 or EST-L2. Ch.3 Menu Descriptions 169 21:10:05 LINE 1 : D-CHANNEL No - 24 INTERFACE ID - 0 In Service LINE 2 : D-CHANNEL No - 24 INTERFACE ID - 0 Stand By DROP-L1 DROP-L2 Figure 81 L-STAT Screen The following fields are displayed for each line in Figure 81: D-CHANNEL No.: Displays the D-channel number. The D-channel numbers for each line are set in the OTHER PARAMETERS screen. INTERFACE ID: Displays the Interface ID configured for the line. Configure both line interface IDs in the OTHER PARAMETERS screen. Status line: Depending on the status of the D-channel, one of the following messages are displayed: • • • • MOOS (Manual out of service): In this state, the D-channel is not available. The D-channel may be moved to an available state only by manual intervention on the near end. Out of Service: In this state, the D-channel is not available and the maintenance entity will periodically attempt to move the channel to an in-service state. In service: In this state, the D-channel is available for transfer of call control and other Layer 3 messages. Stand by: In this state, only Layer 2 messages are established. Service is not yet available for the transfer of Layer 3 messages. If the other line’s D-channel is unavailable, then this Dchannel will move to In-service. 170 SunSet T10 Rev. B Depending on the status of the particular line, one of the following messages is displayed: • • SIG LOSS: Signal loss indicates that the line has lost signal. FRM LOSS: Frame loss indicates that the line has lost framing. Press the ESCAPE key on the keypad to return to the BACKUP D CHNL TEST status screen. Ch.3 Menu Descriptions 171 6.7.4 Setup Filter 21:10:05 D CHANNEL FILTER FILTER TYPE : CALLREF NUMBER : CALLREF CALLED# CALLER# NONE Figure 82 D Channel Filter Setup Screen There are four parameters for filtering ISDN messages. After selecting the particular parameter, enter the numeric value in the NUMBER field. The parameters are: CALLREF (F1): Call reference number identifies which active call a message belongs to. The call reference number is established with setup message and is used on all following messages for that call. This value should be entered in decimal format. CALLED# (F2): Called Number is the destination number of the transaction. This value should be entered in octet format. CALLER# (F3): Caller number is the originating number of the transaction. This value should be entered in octet format. NONE (F4): This provides no filtering elements. This allows the SunSet T10 to capture all ISDN messages. If either CALL REF, CALLER #, or CALLED # was selected, select NUMBER and enter the desired number using the SHIFT key and number keys on the keypad. If a mistake is made while entering, press the SHIFT key on the keypad and select the incorrect number. Then press the SHIFT key again and enter the correct number. Note that any entered numbers to the right will be erased with this typeover. 172 SunSet T10 Rev. B 6.7.5 Start Tracer BUFFR No.387 21:10:05 CURRENT No.83 RECEIVED-MESSAGE LINE 1 95-01-01 02:33:54.04 SETUP MESSAGE: CREF No:1 BEARER :DATA-64 CHANNEL:2 CALLER#:EMPTY TYPENPICALLED#:1112222 TYPE- 4 NPI- 1 RESTART PAUSE HEX Figure 83 Start Tracer Screen for ISDN Start Tracer begins the tracing of ISDN messages in accordance with the filtering parameters in Setup Filter. The following items appear in this screen. BUFFR No.: Total number of messages stored in the buffer. CURRENT No.: Current message number. The following items can appear in this screen. RECEIVED MESSAGE: always includes received message date and time stamp. It can include SETUP MESSAGE, CREF number., BEARER type and other call related items. Three F- keys are available in this screen. RESTART (F1): This will empty the existing buffer and restart the tracing process. PAUSE/RESUME (F2): PAUSE stops the tracing process, but does not empty the buffer. No tracing is performed while the SunSet T10 is in pause. RESUME will continue the tracing. DECODE/ HEX (F3): DECODE will decode the ISDN messages in detail. HEX will display the messages in hexadecimal format. Ch.3 Menu Descriptions 173 6.7.6 View/Print Tracer View/Print Tracer allows viewing and printing of specific data captured by the SunSet T10. Refer to Figure 84. 21:10:05 VIEW/PRINT TRACER TOTAL RECORD-74 VIEW FROM : 1 VIEW TO : 74 CLR-ALL PRINT VIEW Figure 84 ISDN View/Print Tracer Screen Three function keys are available within this screen: CLR-ALL (F1): This erases the contents of the view/print buffer. Press the CLR-ALL F-key, and follow the on-screen instructions. PRINT (F2): Press the PRINT F-key to print the contents of the buffer. VIEW (F3): VIEW displays the contents of the buffer, as specified by the VIEW FROM and VIEW TO settings. Configure these settings, then press the VIEW F-key. The received messages will be shown individually on-screen. A sample screen is shown in Figure 85. 174 SunSet T10 Rev. B 21:10:05 RECEIVE MESG NO.11 RECEIVED LINE 1 95-01-01 02 01 06 A9 83 97 MESSAGE PAGE-UP PAGE-DN 01: 13: 51. 18 04 08 01 00 46 18 03 79 01 80 10 22 DECODE Figure 85 ISDN HEX View Screen The ISDN, HEX View screen displays one message. To view the other pages of messages, press the PAGE-UP (F1) or PAGEDN (F2) F-keys. The message shown in Figure 85 is in hexadecimal code. The DECODE (F3) F-key, will decode the hexadecimal digits. Figure 86 displays the decoded version of Figure 85’s hexadecimal message. If an informational element is present an InfoElm (F4) F-key appears. Refer to the D Channel Information Element Decoding section and Figure 87. 21:10:05 RECEIVE MESG NO.11 RECEIVED MESSAGE LINE 1 RESTART CREF NO: 0 CHANNEL NO: 23 PAGE-UP PAGE-DN HEX Figure 86 ISDN VIEW Message Screen - Decode View Ch.3 Menu Descriptions 175 The decoded view displays a RESTART message with a call reference number 0. In this screen, the HEX (F3) F-key allows the option of showing the message in hexadecimal format. If an informational element is present an InfoElm F-key appears. Refer to the D Channel Information Element Decoding section and Figure 87. D Channel Information Element Decoding The SunSet T10 provides D channel decoding of the information elements contained in each message. If the message contains an information element, the InfoElm (F4) F-key appears. Pressing this F-key brings up a screen similar to the one shown in Figure 87. 21:10:05 INFORMATION ELEMENT AT&T Info Element Protocol BEARER CAPABILITY - 04h CODING STANDARD: 0h CCITT Standardized coding INFO TRANSFER CAP:00h Speech TRANSFER MODE:0h Circuit mode INFO TRANSFER RATE:10h 64 kbit/s USER INFO LAYER 1 PROTOCOL:02h PAGE-UP PAGE-DN RETURN Figure 87 Information Element The Information Element screen displays the decoded elements. Press the RETURN (F4) F-key to return to the normal summary screen. If more than one page is available, the PAGEUP (F1) and PAGE-DN (F2) F-keys appear. Use them to scroll through the various pages. Press the ESCAPE key on the keypad when finished viewing. 176 SunSet T10 Rev. B 6.7.7 Other Parameters The OTHER PARAMETERS menu allows setup of additional specifications for ISDN analysis. Refer to Figure 88. 21:10:05 OTHER PARAMETERS Line 1 D chnl :24 L2 Bkup D chnl :24 Layer 2 SAPI :0 Layer 2 TEI :0 L1 INTERFACE ID:0 L2 INTERFACE ID:0 47B+D CONFIG :DISABLE NEXT PREV Figure 88 ISDN Other Parameters Line 1 D chnl Options: 1–24 This specifies the Line 1 D channel for ISDN 23B+D, 46B+2D, and 47B+D. • Use the F-Keys, NEXT (F1) or PREV (F2), to select a D channel. L2Bkup D chnl Options: 1–24 This specifies the backup D channel for Line 2 for 46B+2D. In 46B + 2D, one D channel is active at a time; the other channel is in standby mode and can become active if the first D channel should go out of service. View the status of the B channels in the Backup D Channel Test. • Use the F-Keys, NEXT (F1) or PREV (F2), to select a D channel. Ch.3 Menu Descriptions 177 The following items use these F-keys INC+10 (F1): Increment the selection by ten. INC+1 (F2): Increment the selection by one. DEC-10 (F3): Decrement the selection by ten. DEC-1 (F4): Decrement the selection by one. Layer 2 SAPI Options: 0–63 F-Keys: INC+10 (F1), INC+1 (F2), DEC-10 (F3), DEC-1 (F4) The Service Access Point Identifier identifies the point where Layer 2 services are provided to a Layer 3 entity. Select a number between 0–63 for the SAPI value. At this time, there are four assigned SAPI values: • • • • 0: Call Control Procedures 1: Packet Mode using Q.931 call procedures. 16: Packet communications conforming to X.25 Level 3 procedures. 63: Layer 2 management procedures. Notes: All other values are reserved for future use. A value of 0 is normally used. Layer 2 TEI Options: 0–127 F-Keys: INC+10 (F1), INC+1 (F2), DEC-10 (F3), DEC-1 (F4) The Terminal Endpoint Identifier identifies the terminal to which the message is intended. Select a value between 0–127. The values are grouped as follows: • 0–63: fixed TEI assignment • 64–126: automatic assignment • 127: group TEI for broadcast data link connection Note: A value of 0 is normally used. L1 INTRFACE ID Options: 0–127 F-Keys: INC+10 (F1), INC+1 (F2), DEC-10 (F3), DEC-1 (F4) Used to select the L1 INTRFACE ID number. Enter a value from 0–127. 178 SunSet T10 Rev. B L2 INTRFACE ID Options: 0–127 F-Keys: INC+10 (F1), INC+1 (F2), DEC-10 (F3), DEC-1 (F4) Used to select the L1 INTRFACE ID number. Enter a value from 0–127. 47B + D CONFIGURE Options: ENABLE (F1), DISABLE (F2) Select ENABLE (F1) to configure for a 47B+D ISDN emulation or DISABLE (F2) for 23B+D or 46B+2D ISDN emulation. Ch.3 Menu Descriptions 179 6.8 SS7 Analysis (Option SW189) The software option SW189, SS7 ANALYSIS can be accessed from the MAIN MENU > OTHER MEASUREMENTS > SS7 ANALYSIS. Refer to Figure 89. Note: The SunSet T10 must be in T1DUAL Mode to enter SS7 ANALYSIS. 21:10:05 SS7 ANALYSIS CONFIGURATION MSU MONITOR SU ANALYSIS Figure 89 SS7 Analysis Menu 180 SunSet T10 Rev. B 6.8.1 Configuration 21:10:05 CONFIGURATION Line 1 Rx T/S: Line 2 Rx T/S: SS7 VERSION : TRUNK RATE : DISPLAY INPUT: ANSI CCITT 1 1 ANSI 56k HEX CHINA24 CHINA14 Figure 90 SS7 Configuration The following items are present in the SS7 Configuration screen: Line 1 Rx T/S Options: 1–24 • Select the receive time slot for Line 1 by using the F-keys, NEXT (F1) and PREV (F2). Line 2 Rx T/S Options: 1–24 • Select the receive time slot for Line 2 by using the F-keys, NEXT (F1) and PREV (F2). SS7 VERSION Options: ANSI (F1), CCITT (F2), CHINA24 (F3), CHINA14 (F4) This line determines the SS7 protocol standard to be used during the analysis. TRUNK RATE Options: 56k (F1), 64k (F2) Select the appropriate Trunk Rate. Ch.3 Menu Descriptions 181 HEX INPUT Options: YES (F1), NO (F2) Choose to enter the OPC, DPC, and CIC codes in either decimal or hexadecimal in the SETUP FILTER screen. Select YES (F1) to enter these codes in hex, or NO (F2) for decimal entering. HEX INPUT also determines how the codes are displayed in the tracer. 182 SunSet T10 Rev. B 6.8.2 MSU Monitor MSUs (Message Signaling Units) are used by ISUP, TCAP, and TUP messages. They carry the content of the signaling message. There are three menu items within the MSU Monitor selection: • • • Setup Filter Start Tracer View/Print Tracer 6.8.2.1 Setup Filter The Setup Filter screen allows you to select different parameters for filtering SS7 messages. These parameters are used during SS7 trace procedures. Refer to Figure 91. SETUP FILTER LAYER 3 LINE 1 DPC: LINE 1 OPC: SI FIELD : CIC CODE : MESG TYPE : ADDR SGNL : ASSR NUMB : LAYER 2 BSN / BIB : FSN / FIB : FISU/LSSU : NONE 21:10:05 02-00-02 XX-XX-XX ISUP NONE 01 CALLED# 3638000 XX / X XX/X ON SCCP ISUP more Figure 91 Setup Filter The following filter screens use these F-keys. • • • • NONE (F1): Use to capture all message types. INC+1 (F2): Increment the selection by one. DEC-1 (F3): Decrement the selection by one. 1/10/50 (F4): Determines increment/decrement values for the F2 and F3 keys. Select the following filter items: Ch.3 Menu Descriptions 183 LINE 1 DPC Options: 00-00-00 to FF-FF-FF • Used to enter a Destination Point Code in hexadecimal form. The Destination Point Code indicates the signaling point for which the message is intended. Enter this code in decimal if selecting NO (F2) for HEX INPUT. LINE 1 OPC Options: 00-00-00 to FF-FF-FF • Use to enter an Originating Point Code in hexadecimal form. The Originating Point Code indicates the signaling point that is the source of the message. If selecting NO (F2) for HEX INPUT, enter the code in decimal. SI FIELD Options: NONE (F1), SCCP (F2), ISUP (F3), SNT (more, F1), SNM (more, F2), TUP (more, F3) Signaling handling functions to perform message distribution uses the Service Indicator Field. The SI Field indicates the user part to which the message belongs. This field further specifies the type of messages to filter. • • • • • SCCP: Use to search for messages belonging to the Signaling Connection Control Part. ISUP: Use to search for ISDN User Part messages. SNM: Use to search for Signaling Network Maintenance messages. SNT: Use to search for Signaling Network Testing messages. TUP: Use to search for messages belonging to the Telephone User Part. Since ANSI protocol does not use the Telephone User Part, TUP will not be an available option if ANSI was selected as the SS7 Version in the SS7 Configuration screen. Upon selecting a particular SI Field, more filtering choices will appear in the lower portion of the screen. They are described in the following sections. 184 SunSet T10 Rev. B 6.8.2.1.1 TUP Filtering Fields CIC CODE Options: NONE (F1), 000 to FFF F-keys, NONE (F1), INC+1 (F2), DEC-1 (F3), 1/10/50 (F4) • Use to enter a Circuit Identification Code in hexadecimal form. The CIC is used as a label for circuit-related messages. CICs identify the telephone circuit connecting the Destination Point and the Originating Point. For TUP, the least significant 4 bits of the CIC field are the SLS. Signaling Link Selection is used to perform load sharing when needed. HEAD CODE Options: NONE (F1), 00 to FF • The TUP Heading Code indicates the group to which the message belongs, as well as the name of the message. Table 7 lists the TUP Head codes. ADDR SGNL Options: NONE (F1), CALLED# (F2), CALLER# (F3) • • • Adder Signal allows for filtering of messages using address numbers. CALLED#: Use to look for a specific called number: the destination of the call. After pressing the CALLED # (F2) F- key, a new line, ADDR NUMB will appear. On this line enter the specific number by pressing the SHIFT key on the keypad, and then entering the desired number using the keypad number keys. CALLER#: Use to look for a specific caller number: the origin of the call. After pressing the CALLER # (F3) F-key, a new line, ADDR NUMB, will appear. On this line enter the specific number by pressing the SHIFT key on the keypad, and then entering the desired number using the keypad number keys. Ch.3 Menu Descriptions 185 Code TUP Heading ACB ACC ACM ADI ANC ANN ANU BLA BLO CBK CCF CCL CCR CFL CGC CHG CLF COT DPN EUM Access Barred Signal Automatic Congestion Control Information Message Address Complete Message Address Incomplete Signal Answer Signal, Charge Answer Signal, No charge Answer Signal, Unqualified Blocking-Acknowledgment Signal Blocking Signal Clear-back Signal Continuity Failure Signal Calling Party Clear Signal Continuity-Check-Request Signal Call Failure Signal Circuit-Group-Congestion Signal Charging Message Clear-Forward Signal Continuity Signal Digital Path Not Provided Signal Extended Unsuccessful Backward Set-up Information Message Forward Transfer Signal Circuit Group Reset Acknowledgment Message General Request Message Circuit Group Reset Message General Forward Set-upInformation Message Hardware Failure Oriented Group Unblocking Message Hardware Failure Oriented Group Unblocking Acknowledgment Message Initial Address Message withAdditional Infomation Initial Address Message Line-out-of-Service Signal Maintenance Oriented Group Blocking Acknowledgment Message Maintenance Oriented Group Blocking Message Maintenance Oriented Group Unblocking Message Misdialled Trunk Prefix Maintenance Oriented Group Unblocking Acknowledgment Message Release Guard Signal Reset-Circuit Signal Subsequent Address Message Subsequent Address Message with One Single Software Generated Group Blocking Acknowledgment Message Switching-Equipment Congestion Signal Software Generated Group Blocking Message Software Generated Group Unblocking Message Subscriber-Busy Signal Send Special Information Tone Signal Software Generated Group Unblocking Acknowledgment Unblocking-Acknowledgment Signal Unblocking Signal Unallocated Number Signal FOT GRA GRQ GRS GSM HGU HUA IAI IAM LOS MBA MGB MGU MPR MUA RLG RSC SAM SAO SBA SEC SGB SGU SSB SST SUA UBA UBL UNN Hex Code A5 1A 14 45 16 26 06 37 27 36 32 76 67 55 25 24 46 32 B5 F5 66 A8 13 98 12 78 88 21 11 85 28 18 38 C5 48 17 77 31 41 C8 15 B8 D8 65 95 E8 57 47 75 Table 7 TUP Heading Codes 186 SunSet T10 Rev. B 6.8.2.1.2 Filtering Fields for ISUP CIC CODE Options: ANSI protocol: NONE (F1), 0000 to 3FFF CCITT protocol: 000 to FFF, CHINA24, & CHINA14. • • • • Use to select a Circuit Identification Code. The CIC is used as a label for circuit-related messages. It identifies the telephone circuit among those interconnecting the Destination Point and the Originating Point. NONE: Use to capture all CICs. ANSI protocol uses 14 bits for CIC; ITU (CHINA14 & 24) uses 12 bits. Therefore, if ANSI was selected in the SS7 Configuration Screen, this field will be 4 hex digits long. For all other versions, this will be three hex digits long. MESG TYPE Options: NONE (F1), 00 to FF • Used to select a Message Type. Refer to Table 8. ADDR SGNL Options: NONE (F1), CALLED # (F2), CALLER # (F3) • • • Adder Signal allows filtering of messages by using address numbers. CALLED#: Use to search for a specific called number. Upon pressing the CALLED # (F2) F-key, a new line, ADDR NUMB appears. Enter the specific number by pressing the SHIFT key on the keypad, and using the number keys. CALLER#: Use to search for a specific caller number. Upon pressing the CALLER # (F3) F-key, a new line, ADDR NUMB appears. Enter the specific number by pressing the SHIFT key on the keypad, and using the number keys. Ch.3 Menu Descriptions 187 Code Message Type CCITT Only ACM ANM BLA BLO CCR CFN CGB CGBA CGU CGUA CMC CMR CMRJ CON COT CPG CQM CQR CRA CRG CRM CVR CVT DRS EXM FAA FAR FOT FRJ GRA GRS IAM INF INR LPA OLM PAM REL RES RLC RSC SAM SUS UBA UBL USIS USR Address Complete Message Answer Blocking Acknowledgment Blocking Continuity Check Request Confusion Circuit Group Blocking Circuit Group Blocking Acknowledgment Circuit Group Unblocking Circuit Group Unblocking Acknowledgment Call Modification Completed Call Modification Request Call Modification Reject Connect Continuity Call Progress Circuit Query Circuit Query Response Circuit Reservation Acknowledgment Charge Information Circuit Reservation Circuit Validation Response Circuit Validation Test Delayed Release Exit Facility Accepted Facility Request Forward Transfer Facility Reject Circuit Group Reset Acknowledgment Circuit Group Reset Initial Address Message Information Information Request Loop Back Acknowledgment Overload Pass Along Release Resume Release Complete Reset Circuit Subsequent Address Message Suspend Unblocking Acknowledgment Unblocking Signal Unequipped Circuit Identification Code User to User Information ANSI Only X X X X X X X X X X X X X X X X Code in HEX 06 09 15 13 11 2F 18 1A 19 1B 1D 1C 1E 07 05 2C 2A 2B E9 31 EA EB EC 27 ED 20 21 08 1F 17 29 01 04 03 29 30 28 0C 0E 10 12 02 0D 16 14 2E 2D Table 8 ISUP Message Types 188 SunSet T10 Rev. B 6.8.2.1.3 Filtering Fields for SCCP Selecting SCCP, the screen shown in Figure 92 appears. Note: Enter Layer 2 information before selecting SCCP. Follow this order because layer 2 information is not available if the SCCP F-key is used in the SI FIELD. 21:10:05 SCCP SETUP FILTER SLS CODE MESG TYPE ADDR SIGNL 4083638000 SUBSYS NO. SIG PT COD TCAP FILTR ORIG TRXID && DEST TRXID NONE INC+1 : NONE : 006 : CALLED# : : : = = 03 XXX XXX XXX ON XXXXXXXX XXXXXXXX DEC-1 1/10/50 Figure 92 SCCP Setup Filter Select the following filtering items: SLS CODE Options: 0 to F • The Signaling Link Selection Code is a 4 bit long code. It is used, where appropriate, in load sharing. MESG TYPE Options: 000 to 255 in decimal • Use to select a Message Type. The SCCP message types are shown in Table 9. Ch.3 Menu Descriptions 189 Codes SCCP Messages ANSI Only AK CC CR CREF DT1 DT2 EA ED ERR IT RLC RLSD RSC RSR UDT UDTS XUDT XUDTS Data Acknowledgment Connection Confirm Connection Request Connection Refused Data Form 1 Data Form 2 Expedited Data Acknowledgment Expedited Data Error Inactivity Test Release Complete Released Reset Confirm Reset Request Unitdata Unitdata Service Extended Unitdata Extended Unitdata Service X X Decimal Code 8 2 1 3 6 7 12 11 15 16 5 4 14 13 9 10 17 18 Table 9 SCCP Message Types ADDR SGNL Options: NONE (F1), CALLED # (F2), CALLER # (F3) • • • Address Signal allows filtering of messages using address numbers. CALLED#: Use to search for a specific called number. Upon pressing the CALLED # (F2) F-key, a new line, ADDR NUMB appears. Enter the specific number by pressing the SHIFT key on the keypad, and using the number keys. CALLER#: Use to search for a specific caller number. Upon pressing the CALLER # (F3) F-key, a new line, ADDR NUMB appears. Enter the specific number by pressing the SHIFT key on the keypad, and using the number keys. SUBSYS NO Options: NONE (F1), 000 to 255 • • Use subsystem number to select a Message Type. The SSN (subsystem number) identifies a SCCP user function. The SSN consists of one octet, as shown in Table 10. 190 SunSet T10 Rev. B Subsystem Number SSN not used or known SCCP Management Reserved ISDN User Part OMAP (Operations, Maintenance, and Administration Part) MAP (Mobile Application Part) Home Location Register Visited Location Register Mobile Switching Center Equipment Identification Register Authentication Center Spare Reserved for expansion Decimal Code 0 1 2 3 4 5 6 7 8 9 10 11-254 255 Table 10 Subsystem Numbers Notes: • Network specific SSNs should use the spare octets, 11 to 254 (decimal), in descending order (starting with 254). • To enter an SSN, an address signal must be specified. SIG PT COD Options: NONE (F1), 000 to 255 - 000 to 255 - 000 to 255 • • Use to enter a Signaling Point Code in decimal format. The Signaling Point Codes consists of three octets and are transmitted in the following order: Network Cluster Member, Network Cluster, and Network Identifier. TCAP FILTR Options: OFF (F1), ON (F2) • • • Filters the Transaction Capability Application Part. OFF: Press the OFF (F1) F-key to turn off the TCAP filter. ON: Press the ON (F2) F-key to use the TCAP filter. The following two filtering items appear: ORIG TRXID Options: OFF (F1), ON (F2) • • This field contains the Transaction ID assigned by the originator. It consists of four octets. To capture a specific Originating Transaction ID, press the ON (F2) F-key; then press the SHIFT key on the keypad and enter the numbers for all eight digits using the keypad. Enter the Originating Transaction ID in hexadecimal form (indicated by the “h” at the right of this field). Ch.3 Menu Descriptions 191 DEST TRXID Options: OFF (F1), ON (F2) • • This field contains the Transaction ID assigned by the responder. It consists of four octets. To capture a specific Destination Transaction ID, press the ON (F2) F-key; then press the SHIFT key on the keypad and enter the numbers for all eight digits using the keypad. Enter the Destination ID in hexadecimal form (indicated by the “h” at the right of this field). Note: There is an AND/OR option for the two filtering fields. To access this option: 1. Select the first digit of the DEST TRXID. 2. Move the cursor one spot to the left. 3. The AND (F1), and the + OR (F2) F-keys will appear. • • The AND (F1) F-key allows the SunSet T10 to capture only those messages containing both Transaction IDs. The OR (F2) F-key allows the SunSet T10 to capture any message with one of the Transaction IDs. 192 SunSet T10 Rev. B 6.8.2.1.4 Layer 3 Filtering Fields for SNM SLS CODE Options: NONE (F1); 0 to F • Used to select a Signaling Link Selection Code. HEAD CODE Options: NONE (F1), 00 to FF • Used to select a Heading Code. Refer to Table 11. Codes SNM Heading Codes CBA CBD CNP CNS COA COO CSS DLC ECA ECO LFU LIA LID LIN LLI LRI LUA LUN RCP RCR RCT RSP RSR TFA TFC TFP TFR TRA UPU Changeback Acknowledgment Signal Changeback Declaration Signal Connection-Not-Possible Signal Connection-Not-Successful Signal Changeover Acknowledgment Signal Changeover Order Signal Connection Successful Signal Signalling Data Link Connection Order Signal Emergency Changeover Acknowledgment Signal Emergency Changeover Order Signal Link Forced Uninhibit Message Link Inhibit Acknowledgment Message Link Inhibit Denied Message Link Inhibit Message Link Local Inhibit Test Signal Link Remote Inhibit Test Signal Link UninhibitAcknowledgment Link Uninhibit Message Signalling Route Set Test Cluster Prohibited Signal Signalling Route Set Test Cluster Restricted Signal Signalling Route Set Congestion Test Signal Signalling Route Set Test Prohibited Signal Signalling Route Set Test Restricted Signal Transfer Allowed Signal Transfer Controlled Signal Transfer Prohibited Signal Transfer Restricted Signal Traffic RestartAllowedSignal User Part Unavailable Signal HEX Codes 61 51 48 38 21 11 28 18 22 12 66 36 56 16 76 86 46 26 35 45 13 15 25 54 23 14 34 17 1A Table 11 SNM Heading Codes Ch.3 Menu Descriptions 193 6.8.2.1.5 Layer 3 Filtering Items for SNT SLS CODE Options: NONE (F1); 0 to F • Use to select a Signaling Link Selection Code. HEAD CODE Options: NONE (F1), 00 to FF • Use to select a Heading Code. Refer to Table 12. Code SNT Heading STLA SLTM Signaling Link Test Acknowledgment Signaling Link Test Message Hex Code 12 11 Table 12 SNT Heading Codes 194 SunSet T10 Rev. B 6.8.2.1.6 Layer 2 Filtering Items Layer 2 filtering options are at the bottom of the screen in Figure 91. These options remain the same for each SI FIELD. Layer 2, the Signaling Link Control Layer, defines the functions and procedures for transmitting signaling information over one individual data link. Layer 2, along with Layer 1, provides a signaling link for reliable transfer of signaling messages between two points. The Layer 2 filtering options are: BSN/BIB Options: BSN- NONE (F1), 00 to 7F; BIB- NONE (F1), 0 (F2), 1 (F3) Each message transmitted is numbered in sequence from 0 to 127. For backward signal units, this number takes the form of the BSN (Backward Sequence Number). When a backward message has been received correctly, the receiving terminal sends back the BSN and the BIB (Backward Indicator Bit) retains its value. If there is an error in this backward message, the receiving terminal rejects this message, sending back the BSN of the last correctly received signal, as well as an inverted BIB. FSN/FIB Options: FSN- NONE (F1), 00 to 7F; FIB- NONE (F1), 0 (F2), 1 (F3) Each transmitted number is numbered in a sequence from 0 to 127. For forward signal units, this number takes the form of the FSN (Forward Sequence Number). In a correctly received forward message, the receiving terminal sends back the FSN and the FIB (Forward Indicator Bit) retains its value. If there is an error in this message, the receiving terminal rejects the message, sending back the FSN of the last correctly received signal, as well as an inverted FIB. FISU/LSSU Options: ON (F1), OFF (F2) FISU, Fill-In Signal Unit, is an idle signal used for error surveillance. LSSU, Link Status Signal Unit, is used at start-up or when an error is found on the line. Note: FISU/LSSU can be turned ON (F1) only when one of the above filters (BSN, BIB, FSN, FIB) has been set to 0 or 1. If NONE has been selected for all these filters, then FISU/LSSU cannot be selected. Ch.3 Menu Descriptions 195 6.8.2.2 Start Tracer Access the START TRACER feature through the MSU MONITOR screen. This feature begins the tracing process based on the filter values specified in the SETUP FILTER screen. The tracer screen updates twice per second and can capture 50 messages per second. This screen has three function keys to choose from: • • • RESTART (F1): Causes the SunSet T10 to restart the trace process. PAUSE/ RESUME (F2): PAUSE freezes the display to allow observation of the data. Measurements are still occurring, but the counts are updated only in memory, and not on the display. RESUME will update all data to their current values. DECODE/HEX (F3): Displays the message contents for analysis. 196 SunSet T10 Rev. B 6.8.2.3 View/Print Tracer VIEW/PRINT TRACER allows viewing and printing of specific data captured by the SunSet T10. Refer to Figure 93. 21:10:05 VIEW/PRINT TRACER TOTAL RECORD- 402 VIEW FROM : 1 VIEW TO : 402 TURN THE FILTER ON CLR-ALL PRINT VIEW FLTR-ON Figure 93 View/Print Tracer To specify the records to view or print, use the following procedure. 1. Select VIEW FROM. 2. Press the SHIFT key on the keypad and enter the desired numbers from the keypad. 3. Press the SHIFT key to deactivate the SHIFT lock and select VIEW TO. 4. Press the SHIFT key and enter the desired numbers from the keypad. 5. Press the SHIFT key again to deactivate the SHIFT lock. 6. When satisfied with the settings, press the VIEW or PRINT F-keys. The four F-keys available in this screen are: CLR-ALL (F1): Erases the contents of the view/print buffer. Press the CLR-ALL F-key, and follow the on-screen instructions. PRINT (F2): Print the contents of the buffer. VIEW (F3): Displays the contents of the buffer, as specified by the VIEW FROM and VIEW TO settings. FLTR-ON/ FLTROFF (F4): Turns the filter assignments on or off. Turning the filter off displays all messages, while saving filter settings in the SETUP FILTER screen. Ch.3 Menu Descriptions 197 ANSI SCCP Message Example 21:10:05 RCV MESG NO.1 (ANSI) LINE 2 01-10-02 00:10:48.77 SCCP DPC: 194-000-000 FF 01 C7 CF 08 5B F0 06 04 01 01 PAGE-UP 2E 03 00 00 02 03 00 00 D0 11 F0 00 00 02 07 00 82 00 85 37 PAGE-DN 00 01 E8 01 17 6B 1F 15 F2 11 18 E2 ED 0A 01 00 1D 13 84 57 DECODE Figure 94 ANSI SCCP Message, Hex View The following information displayed in Figure 94. • • • • • • Message number, in this example the number of the message is 1. Receive line, in this example, the line receiving the message is line 2. The date and time of the message as received. In this example, the date is 01-10-02 and the time is 00:10:48.77. Service Indicator Field, in this example, it is SCCP. DPC, Destination Point Code, shown in decimal. The message is displayed in hexadecimal form. Three F-keys are available in this screen: PAGE-UP (F1): This F-key allows viewing other pages of data by showing the previous message. In Figure 94, pressing the PAGEUP F-key displays the last message. PAGE-DN (F2): This F-key allows viewing other pages of data by showing the next message. In Figure 94, pressing the PAGE-DN F-key displays message 2. DECODE (F3): Decodes the hexadecimal form and displays the decoded message contents. Figure 95 shows a decoded message. 198 SunSet T10 Rev. B 21:10:05 RCV MESG NO.1 LINE 2 01-10-02 (ANSI) 00:10:48.77 MSU- SCCP BSN:7F 1 FSN:42 1 SI :3 SSF:0 SLS:01 DPC: 194-000-000 OPC:139-024-000 mesg type 06h (DT1) DEST REF: 03 00 00 SEG/REAS: 82 DATA :1D C7 04 00 00 00 00 >> PAGE-UP PAGE-DN HEX L4deco Figure 95 ANSI SCCP Message, Decode View The following items appear in Figure 95: • • • • • Message number, in this example the number of the message is 1. Receive line, in this example, the line receiving the message is line 2. The date and time of the message as received. In this example, the date is 01-10-02 and the time is 00:10:48.77. MSU (Message Signaling Unit), in this example, it is SCCP. DPC (Destination Point Code) and the OPC (Originating Point Code), displayed in decimal form. View the following information: mesg type: Displays both the hexadecimal form (Figures 95 and 96), and the message type in parentheses. In Figure 95, the message type is DT1. DT1 is the Dataform 1 message and is sent by either end of a signaling connection to pass SCCP user data between two SCCP nodes. Referring to Figure 94, the hex code is 06 in the second row. Table 9 lists the different SCCP message types. DEST REF: The Destination Local Reference field is three octets long. This reference number is included in the SCCP message to allow the receiving node to identify the message with one particular connection session. It identifies a signaling connection in a node. SEG/RES: The Segmenting/Reassembling parameter field is included in the data to serve a segmenting/reassembling function. This is the “more data bit” (M-bit). In this octet, bits 2–8 are spare. Bit 1 is the More Data indication and coded as: Ch.3 Menu Descriptions 199 • • 0 = no more data 1 = more data In Figure 95, the SEG/RES has a value of 82. In binary code, this translates to 10000010. Since bit 1=0, this indicates no more data. DATA: This shows the rest of the data in hexadecimal form. The arrow sign at the right indicates that there is more data; press the HEX (F3) F-key to view all the data in hex form. Place the cursor on the DATA line, an L4dec (F4) F-key appears. This F-key will bring up the Layer 4 decoded information. This decodes several parts of the TCAP message. Refer to Figure 96. The F-keys available in Figure 95 are: PAGE-UP (F1): Allows viewing of the other pages of data by showing the previous message. Pressing the PAGE-UP F-key would display the last message. PAGE-DN (F2): Allows viewing of the other pages of data by showing the next message. Pressing the PAGE-DN F-key would display message 2. HEX (F3): This F-key displays the message in hexadecimal form. L4deco (F4): This F-key appears only when the cursor is placed on the DATA line. The L4 decode F-key decodes several parts of the TCAP (Layer 4) message. Figure 96 shows the Layer 4 Decode screen. 21:10:05 TCAP MESSAGE PACKAGE TYPE- QRY With PER ORIG TRX ID : 00000000h COMP TYPE : Invoke (Not Last) CompDec Figure 96 Layer 4 Decoded TCAP Message 200 SunSet T10 Rev. B Figure 96 contains the following information: PACKAGE TYPE: Describes what kind of TCAP interaction has taken place between two signaling nodes. Package Type is one octet long and is mandatory for all TCAP messages. Table 13 lists the package types. Package Type Identifiers H G F E D C B A Unidirectional Query with Permission Query without Permission Response Conversation with Permission Conversation without Permission Abort 1 1 1 1 1 1 1 1 1 1 1 1 1 1 1 1 1 1 1 1 0 0 0 0 0 0 0 1 0 0 0 0 0 0 0 0 0 0 1 1 1 1 0 1 1 0 0 1 1 1 0 1 0 1 0 0 HEX Code E1 E2 E3 E4 E5 E6 D6 Table 13 TCAP Package Type Identifiers The Package Type in Figure 96 is Query with Permission. In Figure 94, the hex message is E2 (the corresponding hex code) in the second row. Messages with these package types do the following: • • • • • • • Unidirectional - sends information in only one direction; no reply is expected. There is no interaction made with TCAP. Query with Permission - initiates a TCAP transaction; informs the TCAP node that it may end the TCAP transaction. Query without Permission - initiates a TCAP transaction, but informs the destination node that it may not end the transaction. Response - ends the TCAP transaction. Conversation with Permission - a continuation of a TCAP transaction; informs the destination node that it may end the TCAP transaction. Conversation without Permission - a continuation of a TCAP transaction, but informs the destination node that it may not end the TCAP transaction. Abort - informs the destination node that the originating node has terminated the TCAP transaction. ORIG TRX ID: The originator assigns the Transaction ID. It consists of 4 octets and is indicated by the “h” at right. Figure 94 shows the hexadecimal form. COMP TYPE: Table 14 lists the TCAP Component Types. Ch.3 Menu Descriptions 201 Component Type Identifiers Invoke (Last) Return Result (Last) Return Error Reject Invoke (Not Last) Return Result (Not Last) H G F E D C B A 1 1 1 1 1 1 1 1 1 1 1 1 1 1 1 1 1 1 0 0 0 0 0 0 1 1 1 1 1 1 0 0 0 1 1 1 0 1 1 0 0 1 1 0 1 0 1 0 HEX Code E9 EA EB EC ED EE Table 14 TCAP Component Type Identifiers In Figure 96 the ED HEX code is decoded under COMP TYPE. In Figure 94; ED is near the end of the third row. Invoke (Not Last) invokes an operation and indicates that further responding components are expected. The Component Types are defined as: Invoke (Last): Starts an operation and indicates that there are no further responding components. Return Result (Last): Retrieves the results of an invoked operation. This indicates that there are no further responding components. Return Error: Reports the unsuccessful completion of an operation. Reject: Reports the rejection of an incorrect package or component type. Invoke (Not Last): Starts an operation and indicates that further responding components are expected. Return result (Not Last): Retrieves the results of an invoked operation. This indicates that there are further responding components. Selecting the Component Type field, the CompDec (F4) Fkey appears. This F-key provides further decoding of the Component Type. Figure 97 shows a sample Component Decode screen. 202 SunSet T10 Rev. B SCROLL 21:10:05 Invoke (Not Last) CORRELATN ID: 00h OPERATION CODE - NATIONAL HGFEDCBA 10000101 H: Reply Required G-A: Operation Family Caller Interaction 01h: Operation Specifier Play Announcement LIST OF PARAMETERS Figure 97 Component Decode Screen Figure 97 contains the following information: CORRELATN ID: This must be included in a return result, and in an invoke component if the invoke component is responding to a previous invoke with an invoke ID. The correlation ID is identical to the invoke ID of the other component. OPERATION CODE: This identifier indicates the particular standard the Operation Code follows. In Figure 97, defined by the ANSI T1.114 standard, is the operation code NATIONAL. Defined within a network specific TCAP application is the Private Code Identifier. An operation specifier that divides the Operation Code follows Operation Family. Each is one octet long. Figure 97 shows the Operation Family (10000101). This represents the caller interaction family, as shown in Table 13. This family tells the exchange to interact with the caller as determined by the Operation Specifier. In Figure 97, the Operation Specifier is Play Announcement; this identifies the announcement played to the caller. Refer to ANSI T1.114.5 specification for the definitions of other Operation Families and specifiers. Appearing in Figure 97 is a SCROLL indicator. This indicates that more information is available. Use the up/down arrow keys on the keypad to move the cursor as needed to view other data. Ch.3 Menu Descriptions 203 6.8.3 SU Analysis 21:10:05 LINE 1 SU ANALYSIS LINE 2 FISU -0 FISU -0 LSSU -0 LSSU -0 MSU -0 MSU -0 TOTAL-0 TOTAL-0 MSU MESSAGES SNM -0 SNM -0 SNT -0 SNT -0 TUP -0 TUP -0 ISUP -0 ISUP -0 SCCP -0 SCCP -0 PAUSE RESTART STATIST Figure 98 SU Analysis, Count Screen The SU (Signaling Unit) ANALYSIS selection is in the SS7 ANALYSIS menu. This screen, seen in Figure 98, shows the (Statistics) type and number of SS7 messages. The Statist screen shown in Figure 99, displays additional information. The SunSet T10 captures all types of signaling units based on the specified filtering setup. First, the analysis breaks the messages into the three basic message types: FISUs, LSSUs, and MSUs. Then, it further divides the MSU messages into five types: SNM, SNT, TUP, ISUP, and SCCP. In the Statistics screen, FIB (Forward Indicator Bit) and BIB (Backward Indicator Bit) counts are also available. There are three function F-key options: PAUSE/RESUME (F1): Pause freezes the display so the data may be easily observed. Recorded in the background are the measurements. Pressing the RESUME F-key will update the screen. RESTART (F2): Causes the SunSet T10 to restart the trace process. 204 SunSet T10 Rev. B 21:10:05 LINE 1 SU ANALYSIS LINE 2 FISU%LSSU%MSU %- FISU%LSSU%MSU %- FIB BIB - PAUSE RETRANSMISSION FIB BIB - RESTART COUNT Figure 99 SU Analysis, Statist Screen STATIST/COUNT (F4): STATIST displays FISU%, LSSU%, and MSU% for both lines, as well as the count of FIB and BIB retransmission bits. After pressing the STATIST (F4) F-key this F-key toggles to COUNT, pressing this F-key returns to the original SU Analysis screen. Ch.3 Menu Descriptions 205 6.9 GSM VOICE/TRAU/BERT Menus (SW191) To enter the GSM VOICE/TRAU/BERT menus select MAIN MENU > OTHER MEASUREMENTS > GSM VOICE/TRAU/BERT. Refer to Figure 100. 21:10:05 GSM VOICE/TRAU/BERT GSM MONITOR VOICE/TRAU XMT 16k BERT Figure 100 GSM VOICE/TRAU/BERT Menu 206 SunSet T10 Rev. B 6.9.1 GSM Monitor The GSM Monitor screen allows you to: • • • view 24 time slots and 96 sub-channels for lines 1 and/or 2. view the activity on each subchannel. drop the 16 kbps GSM channel at a 16 kbps voice rate to the speaker. Indicates Speech Frame, Uplink Direction, on T/S 01-Subchannel 1 21:10:05 T/S GSM LINE 2 1 S--- ---- ---^ 7 ---- -S-- ---^ ^ 13 S--- ---- ---S ^ 19 ---- ---- ---- LINE 1 D & I ---- ---- --I---- --D- --S^ ---- ---- ---^ ---- -S----- JUMP PAUSE Press to Display Traffic on Line 1 Figure 101 GSM Monitor Screen Displayed within this screen are all 24-time slots. The top row contains time slots 1–6; the second row has 7–12, and so forth. Each time slot contains 4 sub-channels. Use this screen to monitor the traffic on each subchannel. The TRAU frames are decoded as follows: • • • • • O = Operations & Maintenance S = Speech Abis = 64 kbps Abis Signaling I = Idle (speech idle) - = Unknown Ch.3 Menu Descriptions 207 To monitor speech calls with the SunSet T10: 1. Select an “S” frame. 2. Press the D&I (F2) F-key; the speech will be played on the SunSet T10s speaker. The following F-Keys are available in this screen: LINE 1/LINE 2 (F1): When in T1DUAL Mode, use this F-key to determine the monitor line. D & I (F2): Drop and insert plays the 16 k speech channel on the SunSet T10s speaker. It will play the selected “S” frame. JUMP (F3): Use this F-key to move the cursor from channel to channel. The arrow keys on the keypad will move the cursor at one subchannel intervals. PAUSE/RESUME (F4): PAUSE freezes the live presentation of traffic. RESUME updates the screen and continues the live presentation. 208 SunSet T10 Rev. B 6.9.2 VOICE/TRAU XMT Use the Voice/TRAU XMT feature to: • transmit a prerecorded speech message on any subchannel. • observe the received C-bits. 21:10:05 VOICE & TRAU XMT LINE NUMBER: TIME SLOT : SUB CHANNEL: IDLE CODE : LINK DIRCTN: TIME ALGMNT: RCV CBITS PAUSE LINE 1 07 1 11111111 UPLINK DELAY 0 x500us : UPLINK DNLINK Figure 102 VOICE/TRAU XMT Screen Upon entering the screen shown in Figure 102, the SunSet T10 begins transmitting a 16k voice message on the selected time slot and subchannel. Provided in this screen are these settings. LINE NUMBER Options: LINE 1 (F1), LINE 2 (F2) Select either Line 1 or 2 to transmit a voice message. Note: Line 1 is fixed if in T1SINGL test mode. TIME SLOT Options: 1–24 Determines the time slot used for the transmitted message. INC+1 (F2) increments the time slot number by one. DEC-1 (F3) decrements the time slot number by one. Ch.3 Menu Descriptions 209 SUB CHANNEL Options: 1–4 Determines the 16k subchannel used for the transmit message. INC+1 (F2) F-key increments the subchannel number by one. DEC-1 (F3) F-key decrements the subchannel number by one. IDLE CODE Options: 7F-HEX (F2), FF-HEX (F3) Select the SunSet T10s idle code. LINK DIRCTN Options: UPLINK (F2), DOWNLINK (F3) Determine the link direction of the transmitted message. Figure 103 illustrates the directions. Uplink: Refers to the uplink direction from the customer up to the network (or BTS to BSC). Downlink: Refers to the downlink direction from the network down to the customer (or BSC to BTS). BTS Uplink BTS Downlink BCS Figure 103 Uplink/Downlink Directions TIME ALGMNT Options: Delay, from 1 to 39 x 500 ms; Advance, 1 x 250 ms Used to adjust the timing of the SunSet T10s transmit signal by either advancing or delaying the time. • • The default is no delay to the voice signal. To change the delay time use the F-keys. INC+1 (F2) increments the delay in steps of 500 µs. DEC-1 (F3) decrements the delay in steps of 500 µs. INC +10 (F4) increments the delay in steps of 10 x 500 µs. RCV CBITS Displays the received C-bits. 210 SunSet T10 Rev. B 6.9.3 16k BERT 16k BERT allows observation of the quality of transmission for a selected time slot subchannel. Running a BERT test at 16 kbps accomplishes this. Since this is a BERT test, verify in the TEST CONFIGURATION screen, that Tx SOURCE = NORMAL or TEST PAT. 21:10:05 GSM 16K BERT LINE NUMBER: TIME SLOT : SUB CHANNEL: PATTERN : LINE 1 02 2 2047 ELAPSED TIME: 000:08:37 ERROR: 0 RATE: 0.0e-06 ES : 0 EFS : 0 SES : 0 UAS : 0 LOSS : 0 STOP 2047 more PRINT Figure 104 GSM 16K BERT The following two F-keys are constant within this screen: STOP/RESUME (F1): Press the STOP (F1) F-key to stop the current measurement. Pressing the RESUME (F1) F-key causes a new measurement cycle to begin and resets the elapsed time to zero. PRINT (F4): This F-key sends the data to a connected printer. Configure the following items: LINE NUMBER Options: LINE 1 (F2), LINE 2 (F3) Line Number corresponds to the line used for the BERT test. This will be the line used for transmitting the test pattern and receiving the results. • This applies only to T1 Dual mode. TIME SLOT Options: 1–24 Select the time slot to use for the BERT test. Choose from 1– 24 using the F-keys. INC+1 (F2): increments the time slot number by one. DEC-1 (F3): decrements the time slot number by one. Ch.3 Menu Descriptions 211 SUB CHANNEL Options: 1–4 Select the 16k sub channel used for the BERT test. Change the selection using the following F-keys: INC+1 (F2): increments the sub channel number by one DEC-1 (F3): decrements the sub channel number by one PATTERN Options: 2047, ALL 1, ALL0, ALT10 Use the “more” (F3) F-key to choose the pattern. When the desired pattern appears, press the F2 key to begin transmitting the pattern. The following measurements are displayed in the lower portion of the screen shown in Figure 104: ELAPSED TIME: Elapsed time since the beginning of the test. This begins counting upon accessing the 16K BERT screen, or when the STOP/RESUME (F1) F-key is pressed. ERROR: The number of bit errors that have occurred since the start of the test. RATE: This the average bit error rate since the beginning of the test. ES: Number of errored seconds since the beginning of the test. EFS: The number of error-free seconds since the beginning of the test. SES: The number of severely errored seconds since the beginning of the test. A severely errored second contains a 10e-03 error rate. UAS: The number of unavailable seconds since the beginning of the test. An unavailable second begins after 10 consecutive SESs (Severely-Errored Seconds). UAS also occurs when there is a loss of signal. LOSS: Loss of synchronization seconds is the number of seconds with pattern loss since the beginning of the test. 212 SunSet T10 Rev. B 6.10 Switched 56 Testing (SW187) Switched 56 Testing is a 56 kbps digital transmission that stuffs 1s into the eight bit to gain the DS1 ones density required for AMI lines. Switched 56 Testing checks the operation of switched 56 services at a DS1 access point. This allows the technician to setup a call to a digital loopback, choose a test pattern, and verify BER (bit error rate) performance. It also allows the technician to observe a Teleos call setup in process, monitoring both directions in sequence. Select MAIN MENU > OTHER MEASUREMENTS > SWITCHED 56 TESTING. 21:10:05 SWITCHED 56 TESTING TEST CONFIGURATION SW56 CALL SET UP MEASUREMENT RESULTS TELEOS CALL MONITOR Figure 105 Switched 56 Testing Menu Ch.3 Menu Descriptions 213 6.10.1 Test Configuration 21:10:05 TEST CONFIGURATION XMT CHANNEL RCV CHANNEL TEST PATTERN USER PATTERN ON-HOOK AB OFF-HOOK AB : : : : : : 24 24 2047 00000000 0 0 1 1 2047 511 127 more Figure 106 SW56 Test Configuration Configure the following items for SW56 testing. XMT CHANNEL Options: 1–24 Determines the transmit channel. • • Use NEXT (F1) and PREV (F2) to increment or decrement the transmit channel. Upon changing the channel, the number will flash five times. The SunSet T10 will not actually begin transmitting on that channel until the flashing stops. RCV CHANNEL Options: 1–24 Determines the receive channel. • Use NEXT (F1) and PREV (F2) to increment or decrement the receive channel. TEST PATTERN Options: 2047 (F1), 511 (F2), 127 (F3), 63 (more, F1), 1111 (more, F2), 0000 (more, F3), DDS-1 (more, F1), DDS-2 (more, F2), DDS3 (more, F3), DDS-4 (more, F1), DDS-5 (more, F2), DDS-6 (more, F3), USER (more, F1), 0101 (more, F2) Select a pattern to transmit. Press USER (more F1) to send a user pattern on this line. 214 SunSet T10 Rev. B USER PATTERN To enter a User Pattern: 1. Press the SHIFT key on the keypad. 2. Enter the pattern using the 1 and 0 keys on the keypad. If a mistake is made: A. Press the SHIFT key on the keypad to turn off the SHIFT indicator. B. Use the arrow keys on the keypad to select the incorrect digit. C. Press the SHIFT key. D. Enter the number using the 1 and 0 keys. E. When the digits are correct, press the SHIFT key to turn off the SHIFT indicator. ON-HOOK A/B/C/D Use the SHIFT key and numbers on the keypad to enter the signaling bits for an ON-HOOK condition. For ESF framing, there are four bits; for SLC96 and SF framing, there are two bits. OFF-HOOK A/B/C/D Use the SHIFT key and numbers on the keypad to enter the signaling bits for an ON-HOOK condition. For ESF framing, there are four bits; for SLC96 and SF framing, there are two bits. When the settings are correct, press the ENTER key on the keypad. Ch.3 Menu Descriptions 215 6.10.2 SW56 Call Setup Use this screen to place a SW56 call. 21:10:05 SW56 CALL SET UP METHOD : MF NUMBER : 2124596543 Rx A/B - 0 0 Tx A/B : 0 0 A = KP C = ST1 E = ST3 B = ST D = ST2 F = PAUSE (,) MF DTMF DP Figure 107 SW56 Call Setup Screen METHOD Options: MF (F1), DTMF (F2), DP (F3) Use the F-keys to select the dial method: • • • MF, multi frequency DTMF, dual tone multi frequency DP, dial pulse NUMBER To enter the number to dial use the following procedure. 1.Press the SHIFT key on the keypad. 2.Use the keypad to enter the numbers to dial. Use the keypad letters A, B, etc. to enter the special MF tones. For MF and DP dialing a pause (,) for one second is entered with the “F” key on the keypad 3.If a mistake is made while entering the number: A. Press the SHIFT key on the keypad to remove the SHIFT indicator. B. Use the arrow keys on the keypad to select the digit to be changed. C. Press the SHIFT key and enter the number using the number keys on the keypad. 216 SunSet T10 Rev. B Note: All digits to the right will be erased. Enter a USER number either by entering the digits on this line and pressing the STORE (more, F2) F-key, or by pressing the USER (more, F1) F-key and then entering the digits. 4. Apply the appropriate supervision once the number is entered. A. Select one: ON-HOOK (F1), OFF-HOOK (F2), or WINK (F3). B. If a dial tone is expected, press the VOL UP key on the keypad until it can be heard. C. Dial the number by pressing the ENTER key on the keypad. Ch.3 Menu Descriptions 217 6.10.3 Measurement Results 21:10:05 ELAP TIME- 000:09:51 FRME- SF-D4 CODE- B8ZS RATE- 56K PATT- 2047 Rx A/B Tx A/B BIT UAS : 0 0 0 0 RESULTS : 0003 BER : 8.8e-08 : 0 %UAS : 00.000 RESTART 0N-HOOK OFFHOOK WINK Figure 108 Measurement Results Screen The following items appear in Figure 108. ELAP TIME: Elapsed time count starts counting after entering the Switched 56 Testing screen. FRME: Displays the transmitted framing type. CODE: Displays the transmitted coding type. RATE: This is the test rate. In Figure 108, the RATE is 56k. PATT: Displays the transmitted test pattern. RXA/B: This is the received signaling bits. A/B format for SF-D4 and SLC96, A/B/C/D format for ESF framing. TXA/B: Displays the transmitted signaling bits. To change them: 1. Press the appropriate F-key: ON-HOOK (F1), OFFHOOK (F2), or WINK (F3). 2. The actual bits sent for each condition can be set in the SW56 TEST CONFIGURATION screen. BIT: Count of bit errors during the elapsed time. BER: Rate of bit errors during elapsed time UAS: Number of unavailable seconds during elapsed time %UAS: Percentage of unavailable seconds during elapsed time. To restart the measurements press the RESTART (F1) F-Key. Press the ESCAPE key on the keypad when testing is complete. 218 SunSet T10 Rev. B 6.10.4 TELEOS Call Monitor This feature allows the technician to observe a Teleos call setup in process, monitoring both directions in sequence. Refer to Figure 109. 21:10:05 TELEOS CALL MONITOR CALLING SIDE : LINE 1 CALL DIGIT No: 01 press ENTER to start LINE 1 LINE 2 Figure 109 Teleos Call Monitor Setup Screen To set up the Teleos call monitor: 1. Select the CALLING SIDE. Choose either Line 1 (F1) or Line 2 (F2). 2. Select the CALL DIGIT No by using the NEXT (F1) and PREV (F2) F-keys; select a value between 1 and 40. 3. Press the ENTER key on the keypad to start monitoring. Ch.3 Menu Descriptions 219 7.0 VF Channel Access 21:10:05 VF CHANNEL ACCESS VF MEASUREMENTS VIEW SUPERVISION DIAL/SPRVIS SETUP PLACE/RECEIVE CALLS DTMF/MF/DP ANALYSIS NOISE ANALYSIS MF TRACER SIGNALING ANALYSIS Figure 110 VF Channel Access Menu Notes: • • VF CHANNEL ACCESS will not function properly if the SF, ESF, or SLC- 96 LED is not on. One of these three LEDs indicate that the framing found on the received signal matches the framing selected in the TEST CONFIGURATION menu. It is impossible to talk, listen, or perform other channelized functions in the absence of frame synchronization, since channels can be identified only within a framed signal. In VF CHANNEL ACCESS, when the TxSOURCE in the TEST CONFIGURATION screen is set to NORMAL/TESTPAT, an idle channel code and signaling will be inserted into channels that are not selected. The idle channel code is programmed from MAIN MENU > OTHER FEATURES > OTHER PARAMETERS > IDLE CHNL CODE. 220 SunSet T10 Rev. B 7.1 VF Measurements 21:10:05 VF MEASUREMENTS Tx-1 T/S : 04 Rx-1 T/S : 04 Rx-2 T/S : 01 INSERT TYPE : TONE TONE FREQ Hz : 1004 TONE LVL dBm : 0 dBm Tx-2 A/B : 1 1 LISTEN SIDE : L1-Rx Rx1/2 ABCD - 11/ 10 Rx-1 DATA - 11001010 Rx-1 FRQ/LVL - 1003 00.0 NEXT PREV Figure 111 VF Measurements Setup Screen The VF MEASUREMENTS setup screen determines: • • • • • the channel to test for receiving and transmitting. whether to talk, send a tone, or place a quiet termination on the transmit signal. In T1DUAL mode, the test channel can pass through unchanged. tone frequency and level. signaling bits to send. line, or lines used for listening. • • • received signaling bits. received 8 bit data. received frequency and level. The VF MEASUREMENTS menu also shows the: The following Voice Frequency features, as shown in Figure 111 should be configured in this screen: Tx-1 T/S / Tx-2 T/S Options: 1–24 Note: The VF Measurements Screen will display either Tx-1 T/S or Tx-2 T/S as the first field on the menu. The display will show Tx-1 T/S when: • • T1SINGL was selected under TEST CONFIGURATION, or T1DUAL was selected under TEST CONFIGURATION and the value for Tx / INSERT is set to L1-Tx (Line 1). The display will show Tx-2 T/S: Ch.3 Menu Descriptions 221 • • when you have selected T1DUAL under TEST CONFIGURATION and the value for Tx / INSERT is set to L2-Tx (Line 2). Use the F-keys, NEXT (F1) or PREV (F2), to select the time slot value to which you will insert signals via Line 1 (Tx-1) or Line 2 (Tx-2). Note: The SunSet T10 will begin insertion only after the selected time slot number has flashed five times. This momentary delay ensures that you do not insert data on each time slot that is displayed as you move to the correct selection. Rx-1 T/S Options:1–24 • Use this field to enter the received time slot value if: 1. T1SINGL was selected under TEST CONFIGURATION, or 2. T1DUAL was selected under TEST CONFIGURATION and the value for Rx / DROP is set to L1-Rx (Line 1). • • Use the F-keys, NEXT (F1) or PREV (F2), to select the time slot value from which you will drop signals via Line 1 (Tx-1). As the transmit time slot is changed, the receive time slot automatically changes. However, you can manually change the receive time slot if necessary. Rx-2 T/S Options:1–24 • Use this field to enter the received time slot value if: 1. T1DUAL was selected under TEST CONFIGURATION and the value for Rx / DROP is set to L2-Rx (Line 2). • • • If T1SINGL was selected under TEST CONFIGURATION, this field will read N/A. Use the F-keys, NEXT (F1) or PREV (F2), to select the time slot value from which you will drop signals via Line 2 (Tx-2). As the transmit time slot is changed, the receive time slot automatically changes. However, you can manually change the receive time slot if necessary. INSERT TYPE Options: TALK (F1), TONE (F2), QUIET (F3) Select the desired insert type. TALK: Use to talk on the transmit signal. The SunSet T10 will transmit speech from the microphone, located at the bottom of the SunSet T10. TONE: Use to insert a tone on the transmit signal. 222 SunSet T10 Rev. B QUIET: This places a quiet termination on the transmit signal. Note: If selecting TONE, use the next two settings to set the tone frequency and level. TONE FREQ Hz Options: 50 Hz–3950 Hz If selecting TONE as the INSERT TYPE, then select the tone frequency here. Change the frequency in two ways: • • Press the F-key corresponding to the desired frequency; five frequencies are available: 404, 1004, 1804, 2713, or 2804 Hz. Use the SHIFT and number keys on the keypad to enter the desired value. Select any value from 50–3950 Hz. If entering in a frequency with the keypad numbers, the ENTER key on the keypad will need to be pressed. Alternatively, move the cursor off the TONE FREQ line to start sending the new tone. TONE LVEL dBm Options: -60 to 3 dBm If selecting TONE as the INSERT TYPE, then select the tone level here. To change the tone level: 1. Press the SHIFT key on the keypad and enter the desired value from the keypad. Select any value from -60 to 3 dBm. 2. Press the SHIFT key on the keypad to release the SHIFT lock. 3. Press MINUS (F1) to select negative values. 4. To send the new tone level, press ENTER key on the keypad. Alternatively move the cursor off the TONE LVEL dBm line. 5. There are two F-key choices provided, 0 dBm (F1), and -13 dBm (F3). Tx-1 A/B/C/D Options: ON-HOOK (F1), OFF-HOOK (F2), FLASH/WINK (F3), SEND (F4) If desired, the signaling bits may be changed that are transmitted on the selected channel may be changed. • • • • If in T1SINGL mode, these bits are sent on line 1 If in T1 DUAL Mode, they are sent on the line that has been selected for Tx/INSERT in the TEST CONFIGURATION screen. For SF-D4 and SLC96 framing, these will be A/B bits. For ESF framing, these will be A/B/C/D bits. The exact bits sent for each condition will depend upon the supervision trunk chosen in Dial/SPRVIS SETUP. To manually change these bits use the following procedure. Ch.3 Menu Descriptions 223 1. Press the SHIFT key on the keypad, and use the 1 and 0 number keys to enter the bits. 2. Press the SHIFT key to release the SHIFT lock 3. Press the SEND (F4) F-key to send the A/B/C/D bits. LISTEN SIDE Options: L1-Rx (F1), L2-Rx (F2), BOTH (F3) This setting determines the listen line(s). Listening on Line 1, Line 2, or on both lines is possible. Note: For T1SINGL Mode, the Listen Side is automatically set for Line 1 and cannot be changed. The last three lines of the VF Configuration screen contain default values that can not be changed from this screen. (This is indicated by the hyphen separating the field name from the field value). Rx-1/Rx-2 A/B/C/D This displays the signaling system (CAS) bits associated with the selected channel. • • For T1 SINGL, only Rx-1 bits are displayed. For T1 DUAL, both Rx-1 and Rx-2 bits are displayed. Rx-1/Rx-2 DATA This shows the live 8 bit channel data as it is received. The display will show Rx-1 DATA when: • • T1 SINGL was selected under TEST CONFIGURATION, or T1 DUAL was selected under TEST CONFIGURATION and the value for Rx/DROP is set to L1-Rx (Line 1). The display will show Rx-2 DATA when: • T1 DUAL was selected under TEST CONFIGURATION and the value for Rx/DROP is set to L2-Rx (Line 2). Rx-1/Rx-2 FRQ/LVL This shows the frequency and level as it is received. The display will show Rx-1 FRQ/LVL when: • • T1 SINGL was selected under TEST CONFIGURATION, or T1 DUAL was selected under TEST CONFIGURATION and the value for Rx/DROP is set to L1-Rx (Line 1). The display will show Rx-2 FRQ/LVL when: • T1 DUAL was selected under TEST CONFIGURATION and the value for Rx/DROP is set to L2-Rx (Line 2). 224 SunSet T10 Rev. B 7.2 View Supervision T/S L 01 I 05 N 09 E 13 1 17 21 T/S L 01 I 05 N 09 E 13 2 17 21 ABCD 0000 0000 0000 0000 0000 0000 ABCD 0000 0000 0000 0000 0000 0000 ABCD 0000 0000 0000 0000 0000 0000 ABCD 0000 0000 0000 0000 0000 0000 ABCD 0000 0000 0000 0000 0000 1111 ABCD 0000 0000 0000 0000 0000 0000 21:10:05 ABCD 0000 0000 0000 0000 0000 0000 ABCD 0000 0000 0000 0000 0000 0000 Figure 112 View Line 1 & 2 CAS VIEW SUPERVISION allows viewing of the signaling bits for all 24 channels, for both Lines 1 and 2. The status on all channels can be observed at the same time. Shown on the first line in Figure 112 are time slots 1 through 4, shown on the second line are time slots 5 through 8, etc. Note: SF-D4 and SLC-96® framed signals will show A/B bit signaling information. ESF will show A/B/C/D signaling bit information; for every six frames, the least significant bit is “robbed” and used to transmit signaling information. Ch.3 Menu Descriptions 225 7.3 Dial/Supervision Setup 21:10:05 DIAL/SPRVIS SETUP DIAL PERIOD : 100ms SILENT PERIOD : 100ms TONE LEVEL dbm: -5 SUPERVISION TRUNK TYPE : E & M EQUIPMENT : N/A DIAL PULSE (10pps) %BREAK : 60 INTERDIGIT PRD: 500 BKWD SPRVISN : 1 0 IDLE SPRVISN : 0 0 E & M G-START L-START USER Figure 113 Dial/Supervision Setup The DIAL/SPRVIS setup screen provides additional parameters for VF procedures. In this screen, the on and off time for the DTMF, MF, and DP digits can be varied. The SunSet T10 can be set up to send appropriate signaling bits for E&M, loop start, and ground start trunks with FX0 or FXS line cards. 1. Select MAIN MENU > VF CHANNEL ACCESS > DIAL/ SPRVIS SETUP. Configure the following settings: DIAL PERIOD Options: 30 ms–999 ms • • • Dial Period specifies the period in milliseconds for DTMF and MF dialing. The default value is 100 ms To select any value between 30 and 999 ms, use the following procedure. 1. Press the SHIFT key on the keypad, the SHIFT indicator will appear. 2. Enter the desired value from the keypad. To select a value less than 100 ms, add a 0 first, for example: 50ms = 050. 3. Press the SHIFT key on the keypad to remove the SHIFT indicator. 226 SunSet T10 Rev. B SILENT PERIOD Options: 30 ms–999 ms • • • Silent Period specifies the period in milliseconds for DTMF and MF dialing. The default value is 100 ms. To select any value between 30 and 999 ms, use the following procedure. 1. Press the SHIFT key on the keypad, the SHIFT indicator will appear. 2. Enter the desired value from the keypad. To select a value less than 100 ms, add a 0 first, for example: 50ms = 050. 3. Press the SHIFT key on the keypad to remove the SHIFT indicator. TONE LEVEL dbm Options: -25 to -5 dbm Press the appropriate F-key, NEXT (F1) or PREV (F2), to select the desired tone level in 1 dB steps. Supervision Trunk Type Options: E&M (F1), G-START (F2), L-START (F3), USER (F4) • • • Select the appropriate trunk type. These trunk types will determine the exact signaling bits transmitted for each signaling condition. To use custom on/off-hook signaling bits: 1. Press USER (F4) F-key and the user SPRVIS selection screen will appear. 2. Press the SHIFT key on the keypad, the SHIFT indicator will appear. 3. Manually enter the OFF-HOOK / ON-HOOK signaling bits with the keypad numbers (1 and 0). 4. Press the SHIFT key on the keypad to remove the SHIFT indicator. EQUIPMENT Options: FXO (F1), FXS (F2). For E/M Trunk Type, this will be N/A. • If selecting either Ground-Start or Loop-Start trunk type, then select the equipment type on this line. Ch.3 Menu Descriptions 227 DIAL PULSE (10pps) • Dial pulse is set for 10 pps and may not be changed. % BREAK Options: 40%, 50%, 60% • • Percent break is the ratio of the break (on-hook) interval to the total pulse cycle interval. Use the F-keys, NEXT (F1) and PREV (F2), to select the desired percentage. INTERDIGIT PRD Options: 100–900 (hundred intervals only) • Use the F-keys, NEXT (F1) or PREV (F2), to select the interdigit period. BKWRD SPRVISN • • • In T1 Dual Mode, these bits are sent in the opposite direction of the inserted talk/tone. For example if inserting a tone on T/S 06, and Tx/INSERT is set to L1-Tx (Line 1), then the SunSet T10 will transmit the backward supervision bits on T/S 06 of Line 2. Use this procedure to set the backward supervision bits. 1. Press the SHIFT key on the keypad, the SHIFT indicator will appear. 2. Manually enter the backward supervision bits with the keypad numbers (1 and 0). 3. Press the SHIFT key on the keypad to remove the SHIFT indicator IDLE SPRVISN • • These bits are placed on idle channels. Use this procedure to set the idle supervision bits. 1. Press the SHIFT key on the keypad, the SHIFT indicator will appear. 2. Manually enter the four idle supervision bits with the keypad numbers (1 and 0). 3. Press the SHIFT key on the keypad to remove the SHIFT indicator. 228 SunSet T10 Rev. B 7.4 Place/Receive Calls 21:10:05 PLACE/RECEIVE CALLS METHOD TX AB NUMBER : DTMF : 0 1 ON-HOOK : 14542321 TX CHNL : 01 RX CHNL : 01 RX AB : 0 1 E = '*' MF OFFHOOK F = '#' DTMF DP Figure 114 Place/Receive Calls Menu The Place/Receive Calls menu configures a number of dialing functions. • • • • • • Place a DTMF, MF, or DP call. Receive a DTMF, MF, or DP call. Control the transmitted supervision and observe the received supervision. Speed dial a stored number. Record a number with a label for future dialing. Edit or delete speed dial numbers. The following selections are provided in the Place/Receive Calls Menu. METHOD Options: MF (F1), DTMF (F2), DP (F3) MF: Multi Frequency is an addressing technique used for interoffice signaling in a telephone network. It uses a group of frequencies in pairs to form a single address tone. MF supports the digits 0 through 9, as well as many other control codes. When selecting MF these control codes appear at the bottom of the screen. DTMF: Dual Tone Multi Frequency is the most commonly used addressing method on today’s phones. Like MF, it uses pairs of tones to send a digit. Unlike MF, it uses two separate groups of tones. DTMF supports 16 digits: 0 through 9, #, *, and A through D. DP: Dial Pulse is the oldest addressing technique. With pulse dialing, the phone goes on-hook and off-hook 10 times per second in order to dial a given number. To dial the number 7, the Ch.3 Menu Descriptions 229 SunSet T10 starts in the off-hook condition and then goes onhook/ off-hook seven times. This type of addressing is used in switched 56 services. TX AB Options: ON-HOOK (F1), OFFHOOK (F2), WINK/FLASH (F3) • • TX AB selects the transmit signaling bits. The exact supervision will depend on the supervision trunk type and equipment settings in the DIAL/ SPRVIS SETUP screen. OFF-HOOK: When in the OFF-HOOK state, you may select FLASH. FLASH transmits supervision bits creating a momentary on-hook state; the set automatically returns to off-hook. ON-HOOK: When in the ON-HOOK state, you may select WINK. WINK transmits supervision bits creating a momentary off-hook state; the set automatically returns to on-hook. NUMBER • To enter the digits to be dialed: 1. Press the SHIFT key on the keypad, the SHIFT indicator appears. 2. Enter the desired numbers and letters if applicable using the keypad. A. For DTMF and MF dialing, a legend appears at the bottom of the screen showing which keypad letters correspond to which control codes. 3. Press the SHIFT key on the keypad to remove the SHIFT indicator. Tx CHNL F-keys: NEXT (F1), PREV (F2), SCAN (F3) NEXT & PREV: Assigns the transmit channel. Use NEXT or PREV, to choose the desired transmit time slot for the T1 Line. Select from 1–24. • • If selecting T1 SINGL mode in the TEST CONFIGURATION screen, this line will be Line 1. If selecting T1 DUAL mode in the TEST CONFIGURATION screen, this will be the line selected for Tx/INSERT. Note: The SunSet T10 will begin insertion only after the selected time slot number has been flashed five times. This momentary delay ensures that you do not insert data on each time slot that is displayed as you move to the correct selection. 230 SunSet T10 Rev. B SCAN: The SunSet T10 is in receive mode. The SunSet T10 searches all time slots for an on-hook to off-hook transition. When it finds this transition, it locks on that time slot and waits for the digits. The SunSet T10 will notify the user with the message, “Incoming call on Channel 01” (as appropriate). The user may then accept or reject this call. Rx CHNL F-keys: NEXT (F1), PREV (F2), SCAN (F3) • • • Assigns the receive channel. If the transmit and receive channels are the same, changing the transmit (Tx) channel will automatically change the receive channel. If these channels to be different, select RxCHNL and use the F1 or F2 keys. Refer to TxCHNL for more details. Rx ABCD • Displays the received signaling bits; it is for viewing only. Ch.3 Menu Descriptions 231 7.5 DTMF/MF/DP Analysis 21:10:05 DTMF/MF/DP ANALYSIS DIAL TYPE : DTMF AUTO SCAN : YES TX SPRVSN : ON/WINK press ENTER to start ON/OFF ON/WINK N/A Figure 115 DTMF/MF/DP Analysis To enter DTMF/MF/DP ANALYSIS, select from the MAIN MENU > VF CHANNEL ACCESS > DTMF/MF/DP ANALYSIS. Configure the following items. DIAL TYPE Options: MF (F1), DTMF (F2), DP (F3) • Choose the dial type. AUTO SCAN Options: YES (F1), NO (F2) YES: Enable auto scan by selecting YES. When in scan mode, the SunSet T10 will rapidly scan all 24 receive channels for any channel that goes from the on-hook to off-hook state. When the SunSet T10 finds a channel going off-hook, the SunSet T10 will lock onto that channel and wait for digits to be transmitted. NO: If NO is selected, the transmit and receive time slots must be entered. In this mode, the SunSet T10 will analyze the selected receive channel only. 232 SunSet T10 Rev. B Tx SPRVN Options: Auto Scan: ON/OFF (F1), ON/WINK (F2), N/A (F3) 1 channel: ON/OFF (F1), ON/WINK (F2), MANUAL (F3) Transmit Supervision determines the reply to an off-hook. ON/OFF: Choose to start sending an on-hook while sending an off-hook in response to a received off-hook. ON/WINK: Choose to start sending an on-hook while sending a wink in response to a received off-hook. MANUAL: Choose to manually send on-hooks, off-hooks, winks, and flashes in response to an off-hook. N/A: For AUTO SCAN mode only. Returns to normal AUTO SCAN mode. No specification for Tx SPRVN. After completing the settings, press the ENTER key on the keypad to begin the analysis. Continue reading for more information on the analysis procedure. DTMF digit scanning is used as an example; an MF or DP analysis will provide different information. DTMF Analysis, an example 1. Configure the DTMF/MF/DP Analysis, as shown in Figure 115. When finished, press the ENTER key on the keypad. 2. If in the SCAN mode, a flashing “SCANNING” message on the CHANNEL line will be displayed. This message will continue to flash until the SunSet T10 finds a channel going from on to offhook. The SunSet T10 will then show which channel, as well as the Rx and Tx supervision bits, it has found. Refer to Figure 116. 3. The received digits are 4083638000. Refer to Figure 116. 4. To scan again, press the SCAN (F2) F-key and the SunSet T10 will start looking for another channel going off-hook. 5. Pressing the ANALYZE (F1) F-key will give a detailed analysis of each digit. Refer to Figures 116 and 117. Figure 117 displays information on the first three digits (4, 0, 8). Use the PAGE-DN (F2) F-key to view the other digits. The following information is provided for each digit: • • • • The High (H) and Low (L) frequencies in Hz and dBm. The interdigit period (INTD) in microseconds. Note that there is no INTD for the first digit. The dial period (PERD). The TWST (Twist), which is the difference in level between two frequencies. Ch.3 Menu Descriptions 233 21:10:05 DTMF/MF/DP ANALYSIS DIAL TYPE CHANNEL RX AB TX AB : : : : DTMF 01 OFFHOOK ON-HOOK RxDIGIT: 4083638000 ANALYZE SCAN Figure 116 DTMF / MF / DP Analysis Screen 1 21:10:05 DTMF/MF/DP ANALYSIS DIGIT-1 : 4 H/L Hz 1209/ 0767 dbm-6.4/-4.6 INTD:----ms PERD:0101ms TWST:+1.8 DIGIT-2 : 0 H/L Hz 1336/ 0944 dbm-6.4/-4.5 INTD:0099ms PERD:0101ms TWST:+1.9 DIGIT-2 : 8 H/L Hz 1336/ 0852 dbm-6.4/-4.6 INTD:0099ms PERD:0101ms TWST:+1.8 PAGE-UP PAGE-DN Figure 117 DTMF / MF / DP Analysis Screen 2 234 SunSet T10 Rev. B 7.6 Noise Analysis (SW 183) 21:10:05 NOISE MEASUREMENT MEASURE : 3K-FLAT RX CHNL : 18 RESULTS Signal to Noise: dB Noise C-Message: dBrnC Noise 3K-Flat : 71.6 dBrn Noise C-Notch : dBrn S/N C-MESG 3K-FLAT C-NOTCH Figure 118 Noise Analysis Menu Noise Analysis measures noise using the following four parameters: • • • • Signal-to-Noise Noise C-Message filter Noise 3K- Flat filter Noise C-Notch filter 1. Press an F-key to begin one of the four noise measurements: • • • • Signal-to-Noise (F1) C-Message (F2) 3 kHz flat (F3) C-Notch (F4) 2. After an F-key is pressed, the measurement will start. 3. To change the noise measurement at any time, press a different F-key. The previous measurement results are kept, but only the result for the current measurement type is updated. 4. When the noise analysis is completed, press the ESCAPE key on the keypad to return to VF CHANNEL ACCESS. Ch.3 Menu Descriptions 235 7.7 MF Tracer MF tracer analyzes ABCD bits and MF digits on both lines. MF tracer is not supported in the T1 SINGL test mode. Confirm that T1 DUAL is selected in the TEST CONFIGURATION screen. The MF tracer menu offers two options: • • MF TRACER: This function traces the received ABCD bits for both lines with time and date information. MF VIEW/PRINT TRACER: This function allows the user to view and print specific MF ABCD bits with time and date information. 7.7.1 MF Tracer 21:10:05 L1- RX CHANL : 21 L2- RX CHNL :18 LINE-1#01/ sec LINE-2#24/ sec ABCD = 00 / INIT ABCD= 00/ INIT ABCD = 11 / 00.000 MFR1 = KP/ 01.568 MFR1 = 1 / 01.768 MFR1 = ST1 / 01.968 MFR1 = 8 / 02.168 MFR1 = 6 / 02.368 MFR1 = ST2 / 02.568 MFR1 = ST1 / 02.768 ABCD= 11/05.587 STOP RESTART Figure 119 MF Tracer Screen MF TRACER traces the received ABCD bits and MF digits. MF TRACER may be used to time winks or other changes of state in the ABCD bits. Refer to Figure 119. In Figure 119, the SunSet T10 receives MF forward digits from Line 1 (on time slot 1). The initial signaling state is shown for both Lines 1 and 2. Both start on-hook (00: E&M signaling). Line 1 shows an off-hook signal (11), followed by the digits (00.000). The KP (beginning of pulsing) and ST (end of pulsing) codes represent control signals used in the MF system. 236 SunSet T10 Rev. B Notes: • Time records a 200 ms between digits; this is a combination of the dial period and the silent period • Shown in this screen are two F-keys: STOP (F1) and RESTART (F3). Pressing the RESTART F-key will erase any displayed results. Pressing the STOP F-key will stop the tracing for viewing. • After pressing the STOP (F1) F-key, a cursor appears at L1-Rx and L2-Rx . Change the received channels by pressing the Fkey and entering a number from 01 through 24. Ch.3 Menu Descriptions 237 7.7.2 MF View / Print Tracer F-keys: CLR-ALL (F1), PRINT (F2), VIEW (F3) • This second option in the MF Tracer Menu allows for viewing and printing of specific MF ABCD bits and digits. CLR-ALL: Clears all stored data. Upon pressing CLR-ALL, a warning message appears to prevent accidentally erasing the buffer contents. As the instructions indicate, press ENTER to continue (and erase) or ESCAPE to cancel (and keep the messages). PRINT: Allows printing of selected pages. VIEW: Allows viewing of selected pages of ABCD bits. Shown in Figure 120 is the MF View Tracer screen. Note: To view, or print a limited number of these pages, use the SHIFT key and keypad numbers to enter the desired numbers in the VIEW FROM and VIEW TO lines. 21:10:05 LINE 1 96-12-02 ST2/01.000 01:52:07 LINE 1 96-12-02 ST1/01.200 01:52:07 LINE 1 ABCD=00 96-12-02 /INIT 01:52:33 LINE 2 ABCD=00 96-12-02 /INIT 01:52:33 PAGE-UP PAGE-DN Figure 120 MF View Tracer Screen As shown in Figure 120, the screen displays the Line (1 or 2), the digit (or signaling bits) and the time. A date/time stamp is provided for each digit and initial signaling state. Use the PAGEUP (F1) and PAGE-DN (F2) F-keys to view the available screens. 238 SunSet T10 Rev. B 7.8 Signaling Analysis Supported in both T1SINGL and T1DUAL modes SIGNALING ANALYSIS analyzes the ABCD bits and timing at 1 ms resolution. SIGNALING ANALYSIS displays simultaneous ABCD changes at 3 ms resolution for both lines when the SunSet T10 is in the T1DUAL Mode. Figure 121 shows the AB-Bits screen after the STOP (F1) Fkey has been pressed. This screen shows the actual bits received on L1-Rx if running in T1SINGL mode. If in T1DUAL mode, another column will appear to the right of the L1-RX CHNL column displaying the bits from L2-Rx. A time stamp appears to the right of the bits; this represents the time since the beginning of the test. 21:10:05 L1-RXCHNL: 15 LINE-1#15/sec ABCD=0000/INIT ABCD=1111/00.000 ABCD=0000/38.156 ABCD=1111/41.036 ABCD=0000/45.356 ABCD=1111/45.815 ABCD=0000/50.438 ABCD=1111/52.496 ABCD=0000/52.757 ABCD=1111/56.999 PAGE-UP PAGE-DN RESTART DECODE Figure 121 Signaling Analysis, AB-Bits Options: STOP/PAGE-UP (F1), PAGE-DN (F2, appears after STOP is pressed), RESTART (F3), DECODE/AB-bits (F4) STOP: Stops the analysis to view the results. STOP is replaced by PAGE-UP. PAGE-DN: Appears after STOP is pressed. Use to page through the available screens. RESTART: Restarts the analysis. DECODE/AB bits: Toggles the display between the AB-Bits screen (Figure 121) and the DECODE screen (Figure 122). Ch.3 Menu Descriptions 239 Figure 122 shows the DECODE screen. DECODE displays the decoded state as defined by the signaling type selected in the DIAL/SPRVS SETUP screen. 21:10:05 L1-RXCHNL: 15 LINE-1#15/sec ABCD=ONHK/INIT ABCD=OFHK/00.000 ABCD=ONHK/38.156 ABCD=OFHK/41.036 ABCD=ONHK/45.356 ABCD=OFHK/45.815 ABCD=ONHK/50.438 ABCD=OFHK/52.496 ABCD=ONHK/52.757 ABCD=OFHK/56.999 PAGE-UP PAGE-DN RESTART AB-bits Figure 122 Signaling Analysis, DECODE You may select either screen while the SunSet T10 is receiving data, but decoded results only appear after pressing the STOP (F1) F-key. 240 SunSet T10 Rev. B 8.0 GR-303 Monitor (SW193) Software option SW193 provides monitoring and analysis features for the TMC/CSC and eoc channels. Select MAIN MENU > GR-303 ANALYSIS. Upon display, two options are available: • • Monitor TMC/CSC: Select to monitor the call management channel: TMC or CSC. EOC Verification: Select to monitor the eoc channel. 8.1 Monitor TMC/ CSC Selecting Monitor TMC/CSC displays a screen with six options. The following sections describe these options. 17:16:56 MONITOR TMC/CSC CONFIGURATION TMC FILTER START TRACER VIEW/PRINT BUFFER TMC STATISTICS SEND MESSAGES Figure 123 Monitor TMC/CSC Menu Ch.3 Menu Descriptions 241 8.1.1 Configuration 21:10:05 CONFIGURATION TIME SLOT : 24 - TX ONLY LINE 1 DIR : INTERVAL : MODE : COUNTS : INC+1 DEC-1 RDT->IDT 1 *100ms LOOP 1 1/10 Figure 124 TMC Configuration Screen The TMC configuration screen allows configuration of the SunSet T10 for monitoring of the TMC/CSC Time Slot. The TMC Time Slot can be changed if necessary (the default setting is Time Slot 24, as specified by GR-303-CORE). It also contains setup items to send TMC messages from the SunSet T10. Refer to Figure 124. TIME SLOT Options: 1–24 • • • Time slot determines which DS0 channel the SunSet T10 will monitor in TMC Start Tracer and TMC Statistics. The default channel is 24; this follows the GR-303-CORE specification. If required, a different channel maybe viewed. Press the INC+1 (F1) and DEC-1 (F2) F-keys to change the number. The 1/10 (F3) F-key adjusts the increment/decrement value of the F1 and F2 keys. All other settings pertain to the send message feature only. Ignore these settings for monitoring. Send Messages allows programming a sequence of TMC messages (layer 2 and 3) for transmission. 242 SunSet T10 Rev. B 8.1.2 TMC Filter 21:10:05 TMC FILTER CRC CHECK : OFF LAYER-2 MSG : REJECT LAYER-3 MSG : ON CALL REF DS1 NUMBER DS0 NUMBER CAUSE VALUE ALL : : : : 100 ALL ALL ALL INC+100 DEC-100 1/10/100 Figure 125 TMC Filter TMC Filter allows selective capturing of messages by layer, call reference, DS1/DS0 number, or cause value. The following settings are available: CRC Check Options: ON (F1), OFF (F2) • CRC check determines if the SunSet T10 will detect and report Layer 2 CRC errors. ON: Allows the SunSet T10 to capture invalid TMC messages and report them as a CRC ERROR. OFF: This is the SunSet T10s default setting. Layer-2 Msg Options: REJECT (F1), ALL (F2) REJECT: Select REJECT if interested only in call processing messages; Setup, Connect, and Release. The SunSet T10 will not capture any Layer 2 messages: RR, RNR, REJ, DM, SABME, UA, UI, DISC. ALL: Select to capture all Layer 2 messages. Ch.3 Menu Descriptions 243 Layer-3 Msg Options: REJECT (F1), ALL (F2), ON (F3) REJECT: If selected, the SunSet T10 does not capture or display any Layer 3 messages. ALL: Select to capture all Layer 3 messages. ON: Provides further Layer 3 filtering. After selecting ON, more filter choices become available, as shown in Figure 125. This allows for filtering of specific Layer 3 messages (i.e. ones containing a particular call reference value). Layer 3 Filter Settings The following settings are available if Layer 3 is ON. Call Ref Options: 1–2048 • • Allows the SunSet T10 to capture messages that contain a specific call reference number. A call reference number generally corresponds to the physical line termination port at the RDT, and thus, to a specific customer. If this is the case, the filter allows the SunSet T10 to capture messages belonging to a customer. ALL (F1): Captures all call reference numbers. INC+(F2) & DEC- (F3): Use the INC+ and DEC- F-keys to enter a specific call reference value. The SunSet T10 will now only capture messages containing the selected value. GR-303 specifies valid call reference values from 1–2048. 1/10/100 (F4): This key changes the increment/decrement value of the F2 and F3 keys. DS1 Number Options: 1–28 • The DS1 number feature allows the SunSet T10 to capture call control messages associated with a particular DS1 number. ALL (F1): Captures all DS1 numbers. INC+(F2) & DEC-(F3): Use the INC+ and DEC- F-keys to enter a specific call reference value. The SunSet T10 will now only capture messages containing this value. GR-303 specifies valid call reference values from 1–28. 1/10 (F4): Changes the increment/decrement value of the F2 and F3 keys. 244 SunSet T10 Rev. B DS0 Number Options: 1–24 • Allows the SunSet T10 to capture call control messages associated with a particular channel. Depending on the DS1 number setting, this will be either one channel on all DS1 lines or one channel on a particular DS1. ALL (F1): Captures all DS0 numbers. INC+ (F2) & DEC-(F3): Use the INC and DEC keys to enter a specific DS0 number. The SunSet T10 will capture messages only containing this DS0 number. GR-303 specifies valid DS0 values from 1–24. 1/10 (F4): This key changes the increment/decrement value of the F2 and F3 keys. CAUSE VALUE • Allows the SunSet T10 to capture messages containing a specific cause value. • Use this feature to monitor the GR-303 link and look for a protocol error (Invalid Information Content) or a release message saying channel unavailable. ALL (F1): Captures all cause values. SELECT (F2): To filter on a particular cause value: 1. Press the SELECT (F2) F-key. A Cause value screen is displayed showing all of the available cause value definitions. 2. Use the up/down arrow keys on the keypad to and press the ENTER key on the keypad to select the desired cause. Refer to Table 15. Code # 016 027 034 035 041 044 047 081 096 099 100 Cause Value Definitions Normal Clearing Destination Out of Service Channel Unavailable Destination Channel Unavailable Temporary Failure Line Unit Unavailable Ring Failure Invalid Call Reference Mandatory Element Missing Information Element Unimplemented Invalid Information Contents Table 15 Cause Values Ch.3 Menu Descriptions 245 8.1.2.1 Pre and Post Filtering The SunSet T10 provides for pre and post filters for GR-303 tracing. A pre-filter captures only specified messages in the buffer; it ignores the rest. A post-filter captures all messages in the buffer, then allows selective viewing of the messages. To configure the SunSet T10 for pre-filtering: 1. Select MAIN MENU > GR-303 MONITOR > MONITOR TMC/ CSC > START TRACER. 2. Press the more (F4) F-key, and press the FLTR-ON (F1) F-key. 3. A highlighted “FIL” indicator appears at the top of the screen. The SunSet T10 is now pre-filtering messages. It captures and stores only those messages matching the filter specified. 4. To disable the pre-filter, press the FLTR-OFF (F1) F-key; the FIL indicator disappears. To post-filter messages: Note: Make sure the Filter is off in the Start Tracer screen. 1. Select MAIN MENU > GR-303 MONITOR > MONITOR TMC/ CSC > START TRACER, and allow the SunSet T10 to capture messages. 2. After tracing the messages press the ESCAPE key on the keypad and select VIEW/PRINT TRACER. The FLTR-ON (F4) F-key turns on the post-filter. The SunSet T10 displays the total number of messages captured, and then the total number of messages matching the filter criteria. 3. To turn off the post-filter, press the FLTR-OFF (F4) F-key. 246 SunSet T10 Rev. B 8.1.3 Start Tracer 1. Select MAIN MENU > GR-303 MONITOR > MONITOR TMC/ CSC > START TRACER. 2. The live messages appear on the display and are stored in the buffer. Note: The Start Tracer screen must be displayed to capture messages. FIL BUFFR No.695 98-02-15 RDT<-IDT 21:10:05 CURRENT No.15 20:29:36 STATUS CALL REF 1948 CALL REF SUFFIX 0 Non-ISDN CAUSE 81 Invalid Call Reference CALL STATE 0 Null RESTART PAUSE HEX more Figure 126 Start Tracer Screen The following information is displayed on this screen: Buffer No: Total number of messages stored in the buffer. Current No: Total number of messages captured since entering the Start Tracer screen. Date and time stamp: Displays the capture time and date of the message. RDT<-IDT: Displays the direction of the message, whether it came from the RDT (Remote Digital Terminal) or IDT (Integrated Digital Terminal). Message Type and Information Element contents: Refer to section 8.1.4, View/Print Buffer for a description of message type and information element contents. Ch.3 Menu Descriptions 247 The following F-keys are within the Start Tracer screen: Options: RESTART (F1), PAUSE/RESUME (F2), HEX (F3), FLTRON/FLTR-OFF (more, F1), SCROLL (more, F2), CLR-ALL (more, F3) RESTART: Clears the current screen display and resets the current number to 0. RESTART does not erase any messages stored in the buffer. PAUSE: Stops the live capture mode. After pressing the F2 key, a PAUSE indicator appears at the top of the screen. When this indicator is present, the SunSet T10 is not capturing messages. Press the RESUME (F2) F-key to start capturing messages again. HEX: When a message is present, pressing the HEX F-key displays the message in hexadecimal format. FLTR-ON: This F-key sets a pre-filter. When the FLTR-ON (F1) Fkey is pressed, a FIL indicator appears at the top of the screen. When this is present, the SunSet T10 captures only those messages that match the TMC FILTER settings. To turn off the prefilter, press the FLTR-OFF (F1) F-key. SCROLL: Allows paging through the messages stored in the buffer. Upon pressing the SCROLL F-key, a SCR indicator appears at the top of the screen and two F-key options appear: PAGE-UP (F1) and PAGE-DN (F2). These allow viewing of all of the messages. Press the RETURN (F4) F-key to exit the scroll mode. Note that messages are captured and stored in scroll mode. CLR-ALL: Clears all messages stored in the buffer. Upon pressing CLR-ALL, a warning message appears to prevent accidentally erasing the buffer contents. As the instructions indicate, press the ENTER key to continue (and erase) or the ESCAPE key to cancel (and keep the messages). 248 SunSet T10 Rev. B 8.1.4 View / Print Buffer 21:10:05 VIEW/PRINT TRACER TOTAL RECORD-371 VIEW FROM : 1 VIEW TO : 371 POST FILTER IS OFF CLR-ALL PRINT VIEW FLTR-ON Figure 127 View / Print Tracer The View/Print Tracer screen allows viewing, or printing of all messages stored in the buffer. Figure 127 shows the initial screen. F-keys: CLR-ALL (F1), PRINT (F2), VIEW (F3), FLTR-ON (F4) CLR-ALL: Clears all messages stored in the buffer. Upon pressing a warning message appears, this prevents accidentally erasing the buffer contents. As the on screen instructions indicate, press the ENTER key to continue or the ESCAPE key to cancel. PRINT: The buffer contents are sent to the SunSet T10s serial port for printing. Only those messages specified by the VIEW FROM and VIEW TO settings are sent. They may be sent to a serial printer or PC set for terminal emulation. The print out contains a time and date stamp, full decode, and hexadecimal for each message. VIEW: Displays the messages as specified by the VIEW FROM and VIEW TO settings. FLTR-ON: Enables post-filtering. This allows viewing only those messages that match the filter parameters set in TMC FILTER. Upon pressing FLTR-ON, the following screen shown in Figure 128 is displayed. Ch.3 Menu Descriptions 249 VIEW/PRINT TRACER 17:16:56 TOTAL RECORD-371 QUALIFIED -32 VIEW FROM : 1 VIEW TO : 32 POST FLITER IS ON CLR-ALL PRINT VIEW FLTR-OFF Figure 128 View Tracer with Post-filter View Tracer with Post-filter displays the total messages captured in the buffer. The following information is displayed. QUALIFIED: Number of messages that match the filter settings specified in TMC FILTER. “No Match” is displayed, if no messages match the filter settings. The following F-keys are available within this screen. F-keys: CLR-ALL (F1), PRINT (F2), VIEW (F3), FLTR-OFF/FLTRON (F4) CLR-ALL: Clears all messages stored in the buffer. Upon pressing, a warning message appears; this prevents accidentally erasing the buffer contents. As the on screen instructions indicate, press the ENTER key to continue or the ESCAPE key to cancel. PRINT: Sends the buffer contents to the serial port for printing. It will send only those messages specified by the VIEW FROM and VIEW TO settings. The messages maybe printed to a serial printer or PC set for terminal emulation. The print out contains a time and date stamp, full decode, and hexadecimal for each message. VIEW: Displays the messages as specified by the VIEW FROM and VIEW TO settings. FLTR-OFF/FLTR-ON: Press FLTR-OFF to disable the post filter and view all messages in the buffer. Press FLTR-ON to enable the post-filter. This allows viewing only those messages that match the filter parameters set in TMC FILTER. 250 SunSet T10 Rev. B RECEIVE MESG NO.29 98-02-10 RDT<-IDT 21:10:05 20:09:41 RELEASE CALL REF 97 CALL REF SUFFIX 0 Non-ISDN DS1# 7 DS0# 14 CAUSE 16 Normal Clearing PAGE-UP PAGE-DN HEX Figure 129 Release Message Figure 129 provides a sample message as seen when the VIEW (F3) F-key is pressed in Figure 128. Found in that message is the following information: Date and time stamp (98-02-10, 20:09:41): Indicates the detection date and time of the message. Direction of the message (RDT<-IDT): Indicates whether the message originated from the IDT (Integrated Terminal) or RDT (Remote Terminal). Message Type(s): Setup: CSC and TMC Setup Acknowledge: CSC only Alerting: CSC only Call Proceeding: CSC only Notify: CSC only Information: TMC and CSC Connect: TMC and CSC Connect Acknowledge: TMC only Disconnect: TMC and CSC Release: TMC and CSC Release Complete: TMC and CSC Status: TMC and CSC Status Enquiry: TMC and CSC Ch.3 Menu Descriptions 251 CALL REF: Identifies the call (and customer) to which the message applies. Note that in many cases the CRV is associated with the LCA (Line Circuit Address), which is the physical location where the customer’s distribution pair is terminated. Therefore, CRV identifies the customer. CRV values can range from 1–2048. CALL REF SUFFIX: Identifies the particular call that applies to the message. The possible values are: Non-ISDN (or LT only supports one call at a time) B-channel 1 (ISDN BRI) B-channel 2 (ISDN BRI) DS1 #: Identifies the DS1 line used for the call. This number can range from 1–28. DS0 #: Identifies the DS0 channel used for the call. This number can range from 1–24. CAUSE: Displays diagnostic information to the RDT or IDT as to why the call failed. For a listing of the possible GR-303 cause values and their meanings, refer to Table 15, Cause Values, in section 8.1.2, TMC Filter. 21:10:05 RECEIVE MESG NO. 161 98-02-10 RDT->IDT 20:15:23 SETUP CALL REF 146 CALL REF SUFFIX 0 Non-ISDN DS1# -DS0# -- PAGE-UP PAGE-DN HEX INFO Figure 130 Setup Message The following F-Keys are available in Setup Message. 252 SunSet T10 Rev. B F-keys: PAGE-UP (F1), PAGE-DN (F2), HEX (F3), INFO (F4) PAGE-UP: Scrolls to the previous message. PAGE-DN: Scrolls to the next message. HEX: Displays the message in hexadecimal format. INFO: Displays a full decoding of any extra information elements contained in the message. The INFO F-key is not always displayed. Figure 129, Release Message, does not contain any other info elements, hence the INFO F-key is not present. The Setup Message screen shown in Figure 130 indicates extra information elements. Pressing the INFO F-key displays the decoded information elements. The message displayed in Figure 130 is a Setup message sent by the RDT. The CRV is 146. The dashes next to the DS1 and DS0 numbers indicate that this information is not specified in this message. This is because the call is initiated by the RDT. When the IDT responds with a Setup Acknowledgment (CSC) or Connect (TMC) message, it will specify which DS1 and DS0 to use for the call. Ch.3 Menu Descriptions 253 8.1.5 TMC Statistics 21:10:05 TMC STATSITICS DEST OUT OF SERV : CH UNAVAILABLE : DIST CH UNAVAIL : TEMP FAILURE : LINE UNIT UNAVAIL: RING FAILURE : INVALID CALL REF : MSG UNIMPLEMENTED: INFO UNIMPLEMENT : TOTAL TMC MSG : RESTART PAUSE LINE1 LINE2 0 4 0 0 0 0 3 0 0 567 0 0 0 1 0 0 3 0 0 603 % Figure 131 TMC Statistics The TMC statistics page provides a running count of any cause values found in disconnect, release, release complete, and status messages. This screen must be active for the results to accumulate. Provided are results for both lines 1 and 2. While in this screen, the messages are also stored in the View/ Print Buffer. Therefore, if more details are needed for a certain cause value, review through the messages in View/Print Buffer. Setting a post-filter for the particular cause value will simplify the process. The TMC filter also applies to the statistics screen. For example, if filtering on DS1 #5, only messages for DS1 #5 are recorded. Note: Recorded at the bottom of the screen is the total TMC message count. This counts all valid TMC messages. The following F-keys are available for the TMC Statistics screen. F-keys: Restart (F1), Pause/Resume (F2), %/Count (F3) Restart: This restarts the measurement and sets all counters to zero. Pause/Resume: Pause stops the measurement. All counters remain at the current value, but do not increase. Press the Resume (F2) F-key to return to live measurements. %/COUNT: Changes the results display to a percentage format. Press Count to return to a count display. 254 SunSet T10 Rev. B 8.1.6 Send Messages The SEND MESSAGES menu item allows sending messages from the SunSet T10 to another piece of test equipment. This has been included into this software option as a convenience item. It is not part of any standard test. Select MAIN MENU > GR-303 MONITOR > MONITOR TMC/ CSC > SEND MESSAGES and the following screen is displayed. 21:10:05 SEND MESSAGE MENU 1. 2. 3. 4. 5. 6. 7. 8. 9. 10. DETAIL 11. 12. 13. 14. 15. 16. 17. 18. 19. 20. HEX SEND more Figure 132 Send Message Menu This menu facilitates sending user-programmed messages. Up to 20 messages may be stored. To send a message use the following procedure: 1. Select one of the messages 2. Press the SEND (F3) F-key. The following F-keys are available within this menu. F-keys: DETAIL (F1), HEX (F2), SEND (F3), INSERT (more, F1), DELETE (more, F2) DETAIL: Displays the details of the selected message. If selecting no message, push this F-key to display the message composer. HEX: Displays the HEX form of the selected message. If selecting no message, push this F-key to display the message HEX editor. SEND: Transmits the selected message. Ch.3 Menu Descriptions 255 INSERT: At the selected message this F-Key inserts a blank line before the message. DELETE: Deletes the selected message from the Send Message Menu. To compose a new message, use the following procedure: 1. Select a empty message line from the SEND MESSAGE MENU and press the DETAIL (F1) F-key. 2. Displayed in to Figure 133 is the MESSAGE COMPOSER screen. 21:10:05 MESSAGE COMPOSER LINE LAYER2 TYPE SAPI TEI INFO : : : : 1 NONE 0 0 RR RNR more Figure 133 Message Composer 3. Four items are initially displayed. LINE 1: This is the transmitting line for the message. This is preset and cannot be changed LAYER 2 TYPE: Select from INFO (F1), RR (F2), RNR (F3), REJ (more, F1), SABME (more, F2), DM (more, F3), UI (more, F1), DISC (more, F2), UA (more, F3). Selecting any of the LAYER 2 TYPE moves the cursor to the next line, except for INFO. Press the INFO F-key and the following screen appears. Refer to Figure 134. 256 SunSet T10 Rev. B 21:10:05 MESSAGE COMPOSER LINE LAYER2 TYPE SAPI TEI LAYER3 TYPE CALL REF DS1 DS0 BEARER CAP SIGNAL INC+10 : : : : : : : : : : DEC+10 1 INFO 0 0 SETUP 1 1 1 64Kbs,Circuit 64 1/10 Figure 134 Message Composer with Layer 3 4. Make the following selections if selecting the INFO key from Figure 133. LAYER 3 TYPE: SETUP (F1), SET-ACK (F2), ALERTIN (F3), CALPROC (more, F1), NOTIFY (more, F2), CONNECT (more F3), CON-ACK (more, F1), DISC (more, F2), RELEASE (more, F3), RELCOMP (more, F1), STATUS (more F2), STA-ENQ (more, F3) INFO (more, F1) 5. Make the following selections if SETUP was selected for LAYER # TYPE. CALL REF: INC+1 (F1), DEC-1 (F2), 1/10/100 (F3). Use the 1/10/ 100 F-key to determine increment/decrement values for the F1 and F2 keys. DS1: NONE (F1), INC+1 (F2), DEC-1 (F3), 1/10 (F4). Use the 1/ 10 F-key to determine increment/decrement values for the F2 and F3 keys. DS0: NONE (F1), INC+1 (F2), DEC-1 (F3), 1/10 (F4). Use the 1/10 Fkey to determine increment/decrement values for the F2 and F3 keys. BEARER CAP: Fixed at 64kbs, Circuit. SIGNAL: NONE (F1), NEXT (F2), PREV (F3). Use the NEXT or PREV F-keys to select from 75, 74, 73, 72, 71, 70, 69, 68, 67, 66, 65, 64, or 15. Ch.3 Menu Descriptions 257 6. If not selecting SETUP in step 4, select CALL REF, DS1, and DS0 from step 5. 7. For all selections, select SAPI and TEI SAPI: INC+1 (F1), DEC-1 (F2), 1/10 (F3). Use the 1/10 F-key to determine increment/decrement values for the F1 and F2 keys. TEI: INC+1 (F1), DEC-1 (F2), 1/10 (F3). Use the 1/10 F-key to determine increment/decrement values for the F1 and F2 keys. 258 SunSet T10 Rev. B 8.2 EOC Verification The eoc verification menu contains two items. • • EOC SETUP EOC STATISTICS 8.2.1 EOC Setup The EOC SETUP screen allows configuring the SunSet T10 for monitoring the eoc channel. The eoc channel may be changed; the default setting is channel 12, as specified by GR-303-CORE. A filter may also be set to isolate a specific EOC datalink path. 21:10:05 EOC SETUP CHANNEL : 12 FILTER ON: RDT-IDT NONE SELECT MANUAL Figure 135 EOC Setup Screen Configure the following: CHANNEL Options: 1–24 • • Determines which DS0 the SunSet T10 will monitor in EOC Statistics. The default channel is 12; which follows the GR-303-CORE specification. If required, a different channel may be observed by using the F-keys. INC+ (F1) & DEC- (F2): Press the INC+ and DEC- keys to change the value. 1/10 (F3): The 1/10 key adjusts the increment/decrement value. Ch.3 Menu Descriptions 259 FILTER ON Options: NONE (F1), SELECT (F2), MANUAL (F3) • • Provides filtering when monitoring; the filter allows isolation of a particular eoc datalink path between the RDT and IDT (remote terminal and switch). Filtering is based on the SAPI/TEI values contained in the address field. Chapter 5, Reference provides definitions of all SAPI/TEI combinations, as defined in GR-303-CORE. NONE: The SunSet T10 will capture all valid EOC SAPI/TEI values based on Bellcore’s GR-303-CORE specification. MANUAL: Manually enter the specific SAPI and TEI values. Upon selecting MANUAL, the SAPI and TEI filter settings appear. Select any value by pressing INC+1 (F1) and DEC-1 (F2). Refer to the following table, SAPI/TEI Valid Combinations, for a list of valid SAPI/TEI combinations. SAPI 1 1 1 1 1 1 1 1 1 TEI 0 1 2 3 4 5 6 7 8-11 Data Link Function EOC Path Switching Operations RDT- Provisioning / Memory Administrative OS RDT- Maintenance / Surveillance OS RDT- Testing OS RDT-IDT RDT- Test System Controller 1 RDT- Test System Controller 2 RDT- Test System Controller 3 User Assignable Table 16 SAPI/TEI Valid Combinations SELECT: Allows filtering by link path. The SunSet T10 provides a listing of all Data-Link paths, as specified by their SAPI/TEI combination. Upon pressing SELECT (F2), the screen displays the EOC Filter Selection screen, as shown in Figure 136. 260 SunSet T10 Rev. B 21:10:05 EOC FILTER SELECTION EOC PATH SWITCH RDT-ADMIN OS RDT-MAINT OS RDT-TEST OS RDT-IDT RDT-TEST SYST 1 RDT-TEST SYST 2 RDT-TEST SYST 3 Figure 136 EOC Filter Selection EOC FILTER SELECTION • Use the up/down arrow keys to move the cursor to the desired selection. • Pressing the ENTER key on the keypad saves this selection and returns to the setup screen where the new selection is displayed in the FILTER ON field. • The SunSet T10 will now capture only the messages containing the particular SAPI/TEI values associated with the selection. Ch.3 Menu Descriptions 261 8.2.2 EOC Statistics Entering the EOC STATISTICS screen, the SunSet T10 begins capturing and recording eoc message information. The following results apply to all valid eoc messages (if Filter=None) or to eoc messages containing filtered SAPI/TEI. On exiting all counts are reset to zero. Two screens comprise EOC STATISTICS. Refer to Figure 137 for the first screen. 21:10:05 EOC STATISTICS ET: 000:32:12 TOTAL FR. ERRORED FR. DISCARD FR. RR RNR REJ SABME DM INFO FRAMES FRAMES FRAMES FRAMES FRAMES FRAMES PAGE-UP PAGE-DN LINE 1 57 0 0 32 0 4 2 0 19 % LINE 2 N/A STOP Figure 137 EOC Statistics, Page 1 The following information appears in the first EOC STATISTICS screen: ET: Elapsed time begins upon entering the EOC Statistics screen. ET will reset to zero after escaping. TOTAL FR: A continuous count of the number of eoc messages. ERRORED FR: Count of the number of eoc messages containing FCS (frame check sequence) errors. DISCARD FR: A count of the number of eoc messages that have been discarded because: • • • frames are either above or below the specified length. the total bit count is not divisible by 8. the message contains more than 6 consecutive ones. 262 SunSet T10 Rev. B The rest of the screen provides a running count of all valid EOC Layer 2 message types, which includes: • • • • • • RR: receiver ready RNR: receiver not ready REJ: reject (layer 2) SABME: set asynchronous balanced mode extended DM: disconnect mode INFO: information The following F-keys are available. F-keys: PAGE-UP (F1), PAGE-DN (F2), % / COUNT (F3), STOP/ START (F4) PAGE-UP and PAGE-DN: Use to scroll through the available pages of statistics. %/COUNT: When the user presses the % F-key, the screen shows all values in terms of percent (i.e. the percentage of errored frames out of the total eoc frames received). COUNT returns the results back to a count. STOP/START: This key stops the current measurement. The counters are frozen. To reset the counters, press the ESCAPE key on the keypad and return to EOC Statistics. START continues the current measurement. Pressing the PAGE-DN (F2) F-key provides the second EOC Statistics screen, as shown in Figure 138. This provides a running count of the various eoc datalink paths. These paths are determined by the SAPI/TEI values outlined in chapter 5, Reference. 21:10:05 EOC STATISTICS ET: 000:33:01 LINE-1 12 22 0 0 23 0 0 0 EOC PATH SWITCH RDT-ADMIN OS RDT-MAINT OS RDT-TEST OS RDT-IDT RDT-Test SYST 1 RDT-Test SYST 2 RDT-Test SYST 3 PAGE-UP PAGE-DN % LINE-2 N/A STOP Figure 138 EOC Statistics, Page 2 Ch.3 Menu Descriptions 263 9.0 Frame Relay (SW194) The SunSet T10s frame relay option (SW194) provides a tool for the installation and verification of frame relay circuits. The SunSet T10 uses link management (LMI) signaling to verify that the user to network (UNI) link is active and properly configured. A PING test takes installation one-step further and confirms connectivity to the Internet provider. Select from the MAIN MENU > FRAME RELAY, upon entering, four menu choices are available as shown in Figure 139. 21:10:05 FRAME RELAY CONFIGURATION LMI ANALYSIS PING TEST PING RESPONSE Figure 139 Frame Relay Menu Configure the SunSet T10 for Frame Relay testing by using the following procedure. 1. Select MAIN MENU > TEST CONFIGURATION and configure the settings as follows: TEST MODE: T1SINGL RxLVL-1: TERM FRAMING: per circuit or press the AUTO key on the keypad to configure. TxCODING: per circuit Tx SOURCE: NORMAL XMT CLOCK: L1-Rx *TEST RATE: Nx64K or Nx56K LBO 1: 0 dB 264 SunSet T10 Rev. B *Note: It is critical to select the proper test rate for the frame relay data. If the configured rate is unknown, press the AUTO (F1) Fkey. The SunSet T10 automatically configures to the active channels, showing them as highlighted. Press the ENTER key on the keypad to return to the TEST CONFIGURATION screen. Press the ENTER key on the keypad when completed. 4. Connect the SunSet T10 to the circuit using its Line 1 Rx and Tx jacks. Once connected, the PULSES and framing (e.g. ESF) LEDs should both be green. Flashing LEDs indicate a history condition. Press the HISTORY key on the keypad to clear. 5. Select MAIN MENU > MEASUREMENT RESULTS and confirm that there are no errors, valid frequency, and proper level. To restart the test, press the STOP (F3) F-key, then the RESTART (F3) F-key. After restart, a “NO ERRORS” message should appear on the summary screen. When finished, press the ESCAPE key on the keypad. 6. Select MAIN MENU > OTHER MEASUREMENTS > VIEW RECEIVED DATA. This screen shows the current idle and data channels. Idle channels display the circuit’s idle code of FF or 7F. Press the PAGE-DN (F2) F-key to scroll through all timeslots; the first screen shows timeslots 1–8, the next screen shows 9–17, and the next shows 18–24. This is a method of determining the test rate of the circuit, and verifying the SunSet T10s test configuration. When finished, press the ESCAPE key on the keypad to return to the MAIN MENU. Ch.3 Menu Descriptions 265 9.1 Frame Relay Configuration Select MAIN MENU > FRAME RELAY > CONFIGURATION and refer to Figure 140. 21:10:05 CONFIGURATION INTERFACE STANDARD DLCI LENGTH DLCI VALUE TIMER T391 N391 N392 N393 ANSI617 : : : : : : : : Q.933 UNI ANSI617 2 16 10 6 3 4 LMI AUTO Figure 140 Frame Relay Configuration Configure the following items: INTERFACE Option: UNI (F1) • • The SunSet T10 supports the UNI (User-to-Network) Interface, which specifies the interface between the user’s equipment and the network. The SunSet T10 is the user side of this interface. STANDARD Options: ANSI617 (F1), Q.933 (F2), LMI (F3), AUTO (F4) • • Select the proper protocol for the interface tested. If the protocol is unknown, press the AUTO (F4) F-key and the SunSet T10 will poll the switch to determine the proper protocol used. ANSI617: refers to ANSI standard T1.617 REV D. Q.933: refers to ITU standard T Q.933 REV A. LMI: refers to the LMI standard FRF1.1. 266 SunSet T10 Rev. B DLCI LENGTH Options: 2 (F1), 3 (F2), 4 (F3), AUTO (F4) • • Enter the number of octets for the DLCI length. If the DLCI length used on the interface is unknown, press the AUTO (F4) F-key. The SunSet T10 will poll the switch to determine the proper DLCI length. DLCI VALUE • Select the DLCI value to use for testing. • This DLCI value is only for PING testing (send and echo response). It is not for LMI analysis, as LMI uses the reserved DLCI value (0 or 1023) to carry signaling information. TIMER The last 4 settings (T391, N391, N392, N393) determine how often the full status enquiry/response is sent, how much time should elapse, and error thresholds. Use the default values unless a specific test is required to check these parameters. The default values are: T391: 10 N391: 6 N392: 3 N393: 4 After configuring these settings, press the ESCAPE key on the keypad to return to the FRAME RELAY screen. Ch.3 Menu Descriptions 267 9.2 LMI Analysis Link management interface signaling was developed to carry important status information between UNIs (user network links). LMI defines special management frames with a unique DLCI address passed between the network and local access device. Link management signaling confirms that the UNI is connected and active, and informs the user on the status of all virtual circuits at the interface. LMI reports on: • • • whether the interface is active; this is often called a “heartbeat” or “keep-alive” signal. all valid DLCIs defined at that interface. the status of each PVC (permanent virtual circuit): new, active, and inactive. This shows the addition/deletion of virtual circuits and the availability of new virtual circuits. To do the analysis, use the following procedure: 1. Select MAIN MENU > FRAME RELAY > LMI ANALYSIS 2. Upon accessing this screen, the SunSet T10 begins sending and responding to the link management signaling to check the status of the UNI. The SunSet T10 sends a status enquiry message per the T391 setting. The network must respond with a status message for each inquiry message. After sending and receiving the right number of inquires, per the N391 setting, the SunSet T10 sends a full status inquiry to the network. When the SunSet T10 receives a full status message from the network, it reports, OK. Note: Upon entering the screen, wait approximately 40 seconds (depending on parameters). If the SunSet T10 receives a proper response form the network, it reports OK. If the SunSet T10 does not receive a proper response from the network, it reports errors. Refer to Figure 141. 268 SunSet T10 Rev. B 21:10:05 LMI ANALYSIS ELAPSED TIME : 000:01:43 TIMEOUT ERRORS RESP. SEQ. NUM WRONG MESSAGES : : : OK LINK ERROR TOTAL : 0 LINK OK TOTAL : 16 PVC STOP Figure 141 LMI Analysis LMI Analysis displays the following information: ELAPSED TIME: This is the elapsed time of the test. The LMI Analysis restarts when accessing this screen, but the LMI link stays up. TIMEOUT ERRORS: This counter increments when a proper status or full status message is not received from the network. After sending the status inquiry message, the SunSet T10 waits for a response per the T391 setting before a declaring a timeout error. RESP SEQ NUM: Count of response sequence number errors, where the received frames are out of sequence. WRONG MESSAGES: Counts the number of frames containing an invalid message. LINK ERROR TOTAL: Total number of link errors. LINK OK TOTAL: Counts when receiving a proper status or full status message from the network. Upon starting the test, the SunSet T10 waits until receiving a full status message; this takes approximately 40 seconds depending on the parameters. After receiving a full status message, the SunSet T10 counts LINK OK every time it receives a status message. Ch.3 Menu Descriptions 269 Press the PVC (F1) F-key to view the DLCI activity on the PVC. Figure 142 reports all configured PVCs and gives a status for each (active or idle). 21:10:05 PVC STATUS 16 112 116 NEW PAGE-UP PAGE-DN PAGE:01/01 ACTIVE ACTIVE ACTIVE LMI Figure 142 PVC Status Screen The PVC Status screen displays: • • • • any recently activated or active DLCIs, each corresponding to individual PVCs. when a DLCI shifts from NEW to ACTIVE after receiving a full status report from the DCE. the DLCIs, automatically sorted by number. more than one page of new or active DLCIs. Use the PAGE-UP (F1) or PAGE-DN (F2) F-keys to scroll through the results. 270 SunSet T10 Rev. B 9.3 PING Test Every Internet device has its own IP (Internet Protocol) address. Multiple LAN segments are connected via a frame relay network. A common way to discover whether two remote LAN segments using the TCP-IP protocol are connected is to send a PING (Internet control message protocol) message from one segment to another. When receiving a PING message, Internet devices acknowledge the message by sending an echo message back. This test sends a PING message from a local to a destination IP address to verify continuity. Both users must be using TCP-IP protocol. A large difference between the maximum and minimum response times for each PING message indicates congestion in the network. Configure the SunSet T10 as follows: 21:10:05 PING CONFIGURATION LOCAL IP DEST. IP : 192.004.051.006 : 192.006.051.003 NLPID : TIMEOUT : No. OF PINGS: LMI MESSAGE : IP SNAPIP IP 3 1 ON START Figure 143 Ping Test Configuration Note: Before beginning, the proper DLCI value must be selected in FRAME RELAY > CONFIGURATION. LOCAL IP Enter the IP address of the local side that will send the PING. Use the following procedure to enter the number. 1. Press the SHIFT key on the keypad, the SHIFT indicator will appear. 2. Enter the numbers directly from the keypad. If a mistake is made: A. Press the SHIFT key on the keypad to remove the SHIFT indicator. Ch.3 Menu Descriptions 271 B. Use the arrow keys on the keypad to select the incorrect entry. C. Press the SHIFT key on the keypad; the SHIFT indicator appears. D. Enter the correct number directly from the keypad. DEST IP Enter the destination IP address to receive the PING. Use the following procedure to enter the number. 1. Press the SHIFT key on the keypad; the SHIFT indicator will appear. 2. Enter the numbers directly from the keypad. If a mistake is made, use the procedure described in LOCAL IP. NLPID Options: IP (F1), SNAPIP (F2) • • • • The NLPID (network level protocol identifier) identifies the protocol or encapsulation type used in the frame. IP: Internet protocol SNAPIP: Sub network access protocol-IP. Refer to Network Working Group document RFC 1490. TIMEOUT Options: 1–10 seconds F-Keys: INC+1 (F1), DEC-1 (F2) • • Determines how long (in seconds) the SunSet T10 will wait for a response before declaring a PING as unreachable. Use the INC+1 (F1) or DEC-1 (F2) F-keys to set this parameter. NO OF PINGS Options: 1–99 F-Keys: INC+1 (F1), DEC-1 (F2), 1/10 (F3) • • Determines how many PINGS are sent to the remote IP address during the test. Use the INC+1 (F1) or DEC-1 (F2) F-keys to set this parameter. The 1/10 (F3) key determines increment/decrement values for the F1 and F2 keys. LMI MESSAGE Options: ON (F1), OFF (F2) • This setting activates or deactivates LMI signaling. • ON activates LMI management and the SunSet T10 transmits status enquiry messages to the switch. Upon entering the FRAME RELAY menu, the SunSet T10 will begin sending LMI messages if this setting is ON. 272 SunSet T10 Rev. B When finished with configuration, press the START (F4) Fkey to begin the test. The SunSet T10 displays the PING TEST screen, as shown in Figure 144. With LMI activated, the SunSet T10 waits until it has received the proper number of responses to begin the test. When the SunSet T10 has received the proper number of status and full status messages, PVC STATUS changes from NOT READY, to READY and the SunSet T10 begins sending PING messages. 21:10:05 ST- 21:09:05 ET-000:01:00 LOCAL IP - 192.004.051.006 DEST IP - 192.006.051.003 PING TEST PVC STATUS : READY PINGS : 20 ROUNDTRIP TIME SENT : 8 STATUS : SENDING CUR: 220 ms RECEIVE: 7 AVG: 230 ms UNREACH: 0 MAX: 255 ms ERROR : 0 MIN: 215 ms RESTART Figure 144 PING Test-in Progress The RESTART (F4) F-key is available within the screen shown in Figure 144. This F-key restarts the test and resets ET to zero. Figure 144 displays the following results: PINGS: Number of PINGS to send during the test. SENT: Number of PINGS currently sent. STATUS: Current transmission status (i.e., sending a PING) RECEIVE: Number of echo PINGS received. UNREACH: Number of circuits not reached; or the number of PINGS not responded to. ERROR: Number of echo PINGS received containing an error. ROUND TRIP TIME: in milliseconds CUR: This is the round trip time of the current PING. AVG: Average round trip time of all PINGS MAX: Maximum round trip time of all PINGS MIN: Minimum round trip time of all PINGS Ch.3 Menu Descriptions 273 9.4 PING Response Enter the PING RESPONSE screen to respond to incoming PING messages. Configure the local IP setting in the PING CONFIGURATION screen. ECHO PING PR-ANSI617 21:10:05 ST- 21:09:05 ET-000:01:00 IP-110.001.001.10 ECHOED IPS NO: 1 TIME 09:57:26 PAGE-UP PAGE: 1/1 PING FROM 001.000.010 TOTAL 2 PAGE-DN PAUSE Figure 145 PING Response Screen The following F-keys are within the PING Response screen. PAGE-UP (F1)/PAGE-DN (F2): Allows the user to page up or down through the available information. PAUSE/START (F3): Pauses the ET clock and test. Starts the test without resetting the ET clock. Shown in Figure 145 are the following results: ECHOED IPS NO: Number of IP addresses which sent PINGS to the SunSet T10. PAGE: Lists the number of screens available, 1/1 in the sample figure. TIME: This is the timestamp of the most recent PING received from the IP address that sent the PING message. PING FROM: IP address that sent the PING. TOTAL: Total number of PINGs received from the associated IP address. 274 SunSet T10 Rev. B 10.0 Other Features MEAS 21:10:05 OTHER FEATURES SYSTEM CONFIG MEAS CONFIGURATION ERROR INJECTION OTHER PARAMETERS VIEW TEST RECORD PRINT RECORDS LOAD SAMPLES Figure 146 Other Features Menu 10.1 System Configuration MEAS 21:10:05 SYSTEM CONFIG SYSTEM PROFILES GENERAL CONFIG ERASE NV RAM FULL SELF TEST VERSION / OPTION Figure 147 System Configuration Menu Ch.3 Menu Descriptions 275 10.1.1 System Profiles A maximum of 10 system profiles can be stored in the SunSet T10. These profiles can save time while configuring the SunSet T10 for applications. The SunSet T10 can store the current configuration as a system profile. After naming a profile, it can be recalled at any time. Items that are stored in the profile are: • • • • • • • General configuration settings Test configuration Measurement configuration Dial/supervision setup Error injection Other parameters Send test pattern Note: The SYSTEM PROFILES menu does not operate like the user pattern menus. They may not be edited in the SYSTEM PROFILES menu. To modify a profile, use the modification procedure described in section 10.1.1.6. 10.1.1.1 Enter a New System Profile 1. Select MAIN MENU > OTHER FEATURES > SYSTEM CONFIG > SYSTEM PROFILES and press the STORE (F2) F-key. 2. Assign a LABEL to the profile by using the following procedure: A. Press the TOGGLE (F3) F-key to toggle to the character grid. The letter A will start to flash. B. Select the desired character with the arrow keys on the keypad and press the SELECT (F4) F-key. C. Repeat step 2A as necessary until compete. D. Press the TOGGLE (F3) F-key to leave the character grid. 3. Observe the file number under which the SunSet T10 will store the new profile. This number can be changed using the following procedure: A. Select the FILE No. line. B. Press the SHIFT key on the keypad to display the SHIFT indicator and then enter the desired number using the number keys. C. Press the SHIFT key on the keypad to remove the SHIFT indicator when finished. D. Press the ENTER key on the keypad to store the System Profile. 276 SunSet T10 Rev. B 10.1.1.2 Invoke a Stored System Profile 1. Select MAIN MENU > OTHER FEATURES > SYSTEM CONFIG > SYSTEM PROFILES and select the desired profile. 2. Press the ENTER key on the keypad to invoke the profile. 10.1.1.3 View an Existing Profile 1. Select MAIN MENU > OTHER FEATURES > SYSTEM CONFIG > SYSTEM PROFILES and select the desired profile. 2. Press the VIEW (F1) F-key. 3. Press the PAGE-DN (F2) F-key to view the screens contained in the profile. 10.1.1.4 Activate the Default Profile This procedure will return the SunSet T10s settings to its original default settings. 1. Select MAIN MENU > OTHER FEATURES > SYSTEM CONFIG > SYSTEM PROFILES and push the DEFAULT (F4) F-key. 2. Press the ENTER key on the keypad. The screen will return to SYSTEM CONFIG and the SunSet T10s configuration will revert to the defaults. 10.1.1.5 Delete a Profile 1. Select MAIN MENU > OTHER FEATURES > SYSTEM CONFIG > SYSTEM PROFILES and select the desired profile. 2. Press the DELETE (F2) F-key. 10.1.1.6 Modify an Existing Profile 1. Select MAIN MENU > OTHER FEATURES > SYSTEM CONFIG > SYSTEM PROFILES and select the desired profile. 2. Press the ENTER key on the keypad to invoke this profile. 3. Move to the other desired menus within the SunSet T10 to change the setup items. 4. Enter SYSTEM PROFILES and press the STORE (F2) F-key. 5. Give the profile a new name. Note that the new profile can have the same name as the old profile. The profiles are stored as file numbers. 6. Press the ENTER key on the keypad to return to SYSTEM PROFILES. 7. Select the old version of the profile and press the DELETE (F2) F-key. 8. Select the new profile and press the ENTER key on the keypad. Ch.3 Menu Descriptions 277 10.1.2 General Configuration MEAS 13:28:00 GENERAL CONFIG DATE (Y-M-D): 00-11-21 TIME (H:M:S): 13:28:00 BACK LIGHT : PRINTER BAUD RATE : PARITY : STOP BIT : BITS/CHAR : CR/LF INSRT: TIMED CONTINU 9600 NONE 1-BIT 8-BIT CR+LF CONTINU Figure 148 General Configuration Screen The following items are configured in the GENERAL CONFIGURATION screen. DATE (Y-M -D) To set the date: 1. Press the SHIFT key on the keypad to display the SHIFT indicator. 2. Using the keypad, enter the appropriate numbers for the year, month and, day. The SunSet T10 inserts the hyphens automatically; out of range numbers are rejected. 3. When finished, press the SHIFT key on the keypad to remove the SHIFT indicator. TIME (H :M :S) To set the time: 1. Press the SHIFT key on the keypad to display the SHIFT indicator. 2. Using the keypad, enter the appropriate numbers for the hour, minute, and, second. The SunSet T10 inserts the colons automatically; out of range numbers are rejected. 3. When finished, press the SHIFT key on the keypad to remove the SHIFT indicator. 278 SunSet T10 Rev. B BACK LIGHT Options: TIMED (F1), CONTINU (F2) TIMED: This timer controls how long the backlight will stay on. When selecting TIMED, the backlight will automatically turn itself off after the indicated number of minutes has elapsed. To set the timer: 1. Press the TIMED (F1) F-key. 2. Press the SHIFT key on the keypad to display the SHIFT indicator. 2. Using the keypad, enter in the number of minutes between 1 and 99. 3. When finished, press the SHIFT key on the keypad to remove the SHIFT indicator. CONTINU: Continuous is the default setting. Use the LIGHT key on the keypad to turn the light on and off. PRINTER The default settings work with the printer supplied by Sunrise Telecom. To use the SunSet T10 with another printer the BAUD RATE, PARITY, STOP BIT, BITS/CHAR, and CR/LF INSRT settings may need to be changed. • Sunrise Telecom does not warrant the operation of the SunSet T10 with any printers not supplied by Sunrise Telecom. BAUD RATE Options: 1200 (F1), 2400 (F2), 9600 (F3), 19.2K (F4) • • • The baud rate indicates the number of changes in tone per second. Default is 9600, which is for remote control operations. 1200 and 2400 will not support remote control features. PARITY Options: NONE (F1), EVEN (F2), ODD (F3) • • Parity is a method of checking the accuracy of transmitted or stored data. Parity is the sum total of all bits as either odd or even. A parity value is documented by adding an extra bit, known as a parity bit, to the data. This bit will be set to either 0 or 1 depending on what value is needed to pass the parity test. For example, if there is odd parity and the data is 10101010, the parity bit is 1. The total number is, including the parity bit, equals 5-an odd number. The receiving element checks the parity bit and indicates an error if the total number of ones does not add up to the correct total. Ch.3 Menu Descriptions 279 ODD: In odd parity, the total number of ones (including the added parity bit) is odd. EVEN: In even parity, the total number of ones (including the added parity bit) is even. NONE: This is the default setting, signifying no parity check. STOP BIT Options: 1-BIT (F1), 8-bit (F2) • In asynchronous transmission, the stop bit is the last transmitted character that permits the receiver to establish an idle condition before accepting another character. BITS/CHAR Options: 7-BIT (F1), 8-BIT (F2) • This determines the number of bits per character. CR/LF INSRT Options: CR (F1), CR+LF (F2) • Settings for printer carriage. CR: Selects carriage return CR+LF: Selects carriage return + line feed, which adds an extra line space after every line. 280 SunSet T10 Rev. B 10.1.3 Erase NV RAM ERASE NV (non volatile) RAM erases all the user-stored information entered into the SunSet T10. Always perform this operation after inserting a new software cartridge. Perform this operation as a last resort if the SunSet T10 is not performing properly. If this is the case, initiate ERASE NV RAM only after attempting to correct the problem: 1. Confirm the configuration for the application. 2. Turn the SunSet T10 off, wait 5 seconds, and then turn the SunSet T10 back on. 3. Perform a self-test, then repeat step 2 in this list. WARNING! Performing the NV RAM ERASE operation will erase all userstored information. Use the following procedure to perform ERASE NV RAM: 1. Select MAIN MENU > OTHER FEATURES > SYSTEM CONFIG > ERASE NV RAM and press the ENTER key on the keypad after the warning message is displayed. The SunSet T10 will display a working message. 2. When the SunSet T10 is finished, turn the power off for 5 seconds and then turn the power back on. 3. Re-configure the SunSet T10 for the operations it needs to perform. TEST CONFIGURATION, SEND TEST PATTERN, and all other areas of the SunSet T10 will revert to the default settings. 10.1.4 Full Self Test Use to perform a hardware self test on the SunSet T10. If it displays an error message after the self-test, please contact Sunrise Telecom Customer Service for assistance at the following: • • • • Voice Toll Free: 1-800-701-5208, available 24/7. Fax: 1-408-363-8313 E-Mail: [email protected] Shipping: contact Sunrise Telecom for instructions Ch.3 Menu Descriptions 281 10.1.5 Version/Option MEAS 13:28:00 Version 2.20 S/N 004589 OPTION: A: SW180 - Remote Control B: SW190 - Pulse Mask C: SW185 - MF/DTMF/DP D: SW183 - Noise Analysis E: SW189A- SS#7 Analysis F: SW186 - ISDN Analysis G: SS151 - DATACOM module H: DATACOM MODE I: SW189B- SS#7 TCAP Analy PAGE-UP PAGE-DN Figure 149 Version / Option Screen The Version/Option screen displays the following items. Version: software version that the SunSet T10 is currently using S/N: software serial number Note: The software serial number must match the hardware serial number on the back of the SunSet T10 in order for it to function. OPTION: This is a listing of all of the installed software options. There are two F-keys available. PAGE-UP (F1) and PAGE-DN (F2): Use to scroll through the available screens. Note: Depending on the number of options, PAGE-UP and PAGEDN may not be available. 282 SunSet T10 Rev. B 10.2 Measurement Configuration MEAS 13:28:00 MEAS CONFIGURATION MEAS DURATION: CONTINU PRINT PERIOD : LAST PRINT EVENT : DISABLE OUT OF FRAME : 2/4 TIMED CONTINU Figure 150 Measurement Configuration Several measurement configuration items may be adjusted. Refer to Figure 150. MEAS DURATION Options: TIMED (F1), CONTINU (F2) TIMED: A timed measurement will stop after the indicated amount of time has elapsed. This option is useful for making measurements of a specified length; 15 minute and 1 hour tests are common in the industry. When a timed test is in progress, the Remaining Time (RT) counter shows the remaining time before the end of the test. To enter a duration, use the following procedure. 1. Press the SHIFT key on the keypad to display the SHIFT indicator. 2. Using the keypad, enter the number between 1 min and 999 hr. 3. When finished, press the SHIFT key on the keypad to remove the SHIFT indicator. CONTINU: A continuous test will run indefinitely until the RESTART F-key is pressed, or until some other setting is changed within the SunSet T10 that restarts the test. Ch.3 Menu Descriptions 283 PRINT PERIOD Options: TIMED (F1), LAST (F2) TIMED: In this mode, test results are printed and saved to the buffer every 1 to 99 minutes. If TIMED is selected use the following procedure to enter a period. 1. Press the SHIFT key on the keypad to display the SHIFT indicator. 2. Using the keypad enter in the number between 1 and 99 minutes. 3. When finished, press the SHIFT key on the keypad to remove the SHIFT indicator. LAST: In this mode, the test results are printed at the end of a timed test or a continuous test that has ended due to a RESTART. PRINT EVENT Options: ENABLE (F1), DISABLE (F2) ENABLE: Select this mode to print out an error message every second that one or more errors occur. Printed with every message is the date and time. DISABLE: Disables the event error message printing function. OUT OF FRAME Options: 2/4 (F1), 2/5 (F2) • • • Determines the condition for declaring an OOF (out of frame) error. Use this so that all test and monitoring equipment reports an OOF under the same conditions. OOF errors are recorded in the MEASUREMENT RESULTS frame screen. 2/4: Counts an OOF every time there are two framing bits in error out of 4 framing bits. 2/5: Counts an OOF when there are 2 framing bit errors out of every 5 framing bits. 284 SunSet T10 Rev. B 10.3 Error Injection MEAS 13:28:00 ERROR INJECTION TYPE : LOGIC MODE : BURST COUNT : BPV LOGIC 1 LOG+BPV FRAME Figure 151 Error Injection Screen This screen configures the type of errors, and the number of errors to be sent when the ERRINJ key on the keypad is pressed. TYPE Options: BPV (F1), LOGIC (F2), LOG+BPV (F3), FRAME (F4) • Specifies the type of errors to be inserted. BPV: Bipolar violation LOGIC: Logic type error LOG+BPV: Bipolar violation with logic error FRAME: Frame type error MODE Options: RATE (F1), BURST (F2) • • Specifies the mode of error injection. The third line will vary depending upon the mode selected. For rate mode, this line will be RATE; for burst mode, this line will be COUNT. RATE: This mode inserts errors at a specified rate. When injecting errors at a rate, an ERRINJ message is displayed at the top of the screen. This message specifies the type of errors inserted. To stop injecting errors, press the ERRINJ key on the keypad again and verify that the error indicator no longer appears on the screen. BURST: This mode inserts a specified number of errors each time the ERRINJ key on the keypad is pressed. Ch.3 Menu Descriptions 285 COUNT Options: 1 to 9999 • For BURST MODE, choose the number of errors to be inserted each time the ERRINJ key on the keypad is pressed. Use this procedure: 1. Press the SHIFT key on the keypad to display the SHIFT indicator. 2. Using the keypad, enter in any number between 1 and 9999. The errors will be inserted in approximately 1 second or less, and will cause from 1 to 3 errored seconds. 3. When finished, press the SHIFT key on the keypad to remove the SHIFT indicator. RATE Options: 1e-3 to 9e-9 • For RATE MODE, choose the error RATE number and exponent. The errors are inserted at a continuous rate as specified. To start error injection, press the ERRINJ key on the keypad and the SunSet T10 will insert errors as specified. If the error injection is set for RATE mode, an ERINJ indicator will be displayed on screen. 10.3.1 Programming a Burst of 10 Errors 1. Select MAIN MENU > OTHER FEATURES > ERROR INJECTION. 2. Select TYPE and then press the LOGIC (F2) F-key. 3. The cursor automatically moves to MODE selection. Press the BURST (F2) F-key. 4. The cursor automatically moves to COUNT. A. Press the SHIFT key on the keypad to display the SHIFT indicator. B. Using the number keys on the keypad, press the 1 key followed by the 0 key. The COUNT should show 10. C. Press the SHIFT key on the keypad to remove the SHIFT indicator. 5. Press ENTER on the keypad. The SunSet T10 is programmed to inject 10 CODE errors each time the ERRINJ key on the keypad is pressed. 286 SunSet T10 Rev. B 10.3.2 Programming a 1e-06 Bit Error Rate 1. Select MAIN MENU > OTHER FEATURES > ERROR INJECTION. 2. At TYPE, press the LOGIC (F2) F-key. 3. The cursor automatically moves down to MODE selection. Press the RATE (F1) F-key. 4. The cursor automatically moves down to RATE. A. Press the SHIFT key on the keypad to display the SHIFT indicator. C. Use the keypad to enter the number. D. Press the ‘1’ key once; the multiplier position is showing ‘1’. The cursor moves to the exponent position. E. Press the ‘6’ key once; the ‘6’ is entered. F. Press the SHIFT key on the keypad to remove the SHIFT indicator. 5. Press the ENTER key on the keypad. The SunSet T10 is now programmed to inject bit errors at a rate of 1x10⁻⁶ each time the ERRINJ key on the keypad is pressed. Ch.3 Menu Descriptions 287 10.4 Other Parameters MEAS 13:28:00 OTHER PARAMETERS PATTERN INVERSION: IDLE CHNL CODE : AUDIBLE ERR BEEP : REMOTE CONTROL : PATTERN LOCK : CODE MISMATCH MSG: ENABLE 7F-HEX DISABLE ENABLE ENABLE ENABLE ENABLE DISABLE Figure 152 Other Parameters The OTHER PARAMETERS menu contains the following items: PATTERN INVERSION Options: ENABLE (F1), DISABLE (F2) • • When enabled, transmitted pattern inversion turns ones into zeros and zeros into ones. For instance, a 3-in-24 pattern turns into a 21-in-24 pattern and is then transmitted. In addition, the PAT SYNC LED will light only if the SunSet T10 receives the same inverted pattern as it transmits. IDLE CHANNEL CODE Options: 7F-HEX (F1), FF-HEX (F2) • • Use Idle code during VF channel access operations when the Tx Source is set to the TESTPAT mode. Use in fractional T1 testing to fill up unused channels. AUDIBLE ERROR BEEP Options: ENABLE (F1), DISABLE (F2) • When enabled, a beep will sound whenever the SunSet T10 receives an error (i.e. BPV, FBE) on the line. 288 SunSet T10 Rev. B REMOTE CONTROL (SW180) Options: ENABLE (F1), DISABLE (F2) • Refer to chapter 2, section 5, for more details on this option. PATTERN LOCK Options: ENABLE (F1), DISABLE (F2) • Pattern Lock determines how the SunSet T10 achieves pattern synchronization. ENABLE: When enabled, the SunSet T10 searches for and can only synchronize on its transmit pattern. Select the transmitted pattern in the SEND TEST PATTERN screen. When the AUTO key on the keypad is pressed, the SunSet T10 searches through all of the patterns and changes its’ transmit pattern to match the received pattern. DISABLED: When disabled, the SunSet T10 attempts to synchronize on any known test pattern, regardless of the SunSet T10s transmit pattern. When the AUTO key on the keypad is pressed, the SunSet T10 searches through all known patterns for synchronization and does not change its transmit pattern. Ch.3 Menu Descriptions 289 CODE MISMATCH MSG Options: ENABLE (F1), DISABLE (F2) • Provides a warning message when the SunSet T10s line coding is configured differently from the coding received. MEAS 21:10:05 LINE 1 CODING MISMATCH!! TX CODING : B8ZS RX CODING : AMI press ENTER to change Tx code press ESCAPE to ignore Figure 153 Coding Mismatch Message ENABLE: This enables the visual warning whenever a code mismatch occurs. • • When the SunSet T10s code is AMI, and the SunSet T10 detects B8ZS coding, the SunSet T10 will display a message similar to the one in Figure 153. When the SunSet T10s code is B8ZS, and the SunSet T10 detects AMI coding, as represented by a string of seven consecutive zero’s, the SunSet T10 will display the message as shown in Figure 153. When this message occurs, two options are available: • • Press the ENTER key on the keypad to change the SunSet T10s transmit coding to match the received coding. Press the ESCAPE key on the keypad to ignore the message and keep the same coding. In this case, the mismatch message is not displayed again until the AUTO key on the keypad is pressed or the SunSet T10 is turned off and then back on. DISABLE: This disables the visual warning. This is the SunSet T10s default condition. 290 SunSet T10 Rev. B 10.5 View Test Record MEAS 13:28:00 VIEW TEST RECORD TOTAL EVENT : 0 TOTAL RESULT: 21 EVENT RECORD VIEW FROM : VIEW TO : RESULT RECORD VIEW FROM : VIEW TO : ALL NONE 0 0 1 21 CLR-ALL Figure 154 View Test Record VIEW TEST RECORD allows viewing of stored results and events. The total event and total result numbers are shown in accordance with the events and results that are in memory. EVENT refers to an alarm or error; RESULT refers to all errors, measurements, etc. To view events; use the following procedure. 1. The cursor is automatically placed at VIEW FROM of the EVENT RECORD. • Press ALL (F1) to view all events • Press NONE (F2) to view no events • Press CLR-ALL (F3) to clear all events stored in memory. • To view specific events, press the SHIFT key on the keypad and enter the desired event range with the keypad numbers. 2. Press the ENTER key on the keypad to display all of the EVENT records that have been selected. 3. NEXT (F1) or PREV (F2) to view each event record. 4. Press the ESCAPE key on the keypad when finished. To view results: 1. Select VIEW FROM on the RESULT RECORD line. 2. The same three function keys as above, as well as the SHIFT key options, are available for the RESULT range. 3. Press the ENTER key on the keypad to display all of the RESULT records that have been selected. 4. PAGE-UP (F1) or PAGE-DN (F2) to view different screens of results. 5. Press the ESCAPE key on the keypad when finished. Ch.3 Menu Descriptions 291 10.6 Print Records PRINT RECORDS provides the ability to print the test results stored in the print buffer. Select either: • • • ALL (F1) to print all test records NONE (F2) to print none of the test records NEXT (F3) to select a particular test record to print out. 10.7 Load Samples LOAD SAMPLES loads five sample messages in the VIEW/ PRINT TRACER for SS7, ISDN, and MF TRACER. These messages will automatically clear and replace all messages currently stored in these buffers. 292 SunSet T10 Rev. B 11.0 Data Link Control DATA LINK CONTROL applies to ESF and SLC-96 framing. DATA LINK CONTROL is not available if UNFRAME or SF-D4 is selected as framing in the TEST CONFIGURATION screen. ESF and SLC-96 have different DATA LINK CONTROL menus, each with different screens and options. Section 11.1 pertains to SLC96 framing and Section 11.2 to ESF. 11.1 Data Link Control - SLC-96 MEAS 13:28:00 DATA LINK CONTROL SLC-96 MONITOR DATA LINK SEND MESSAGE VIEW DATA LINK Figure 155 Data Link Control SLC-96 Select SLC-96 framing in the TEST CONFIGURATION screen before proceeding. Select MAIN MENU > DATA LINK CONTROL and refer to Figure 155. All capabilities are in conformance with Bellcore’s standard TR-TSY-000008. WARNING! Using the SLC-96 send message capability can bring down an entire SLC system. Before proceeding, obtain proper training. Monitoring the SLC datalink from a MON jack should not disrupt service. Ch.3 Menu Descriptions 293 11.1.1 Monitor Data Link MEAS 13:28:00 DATA LINK MONITOR SLC-96 MODE : MAJOR : MINOR : POWER : A SHLF: B SHLF: C SHLF: D SHLF: PROTECT C BITS: WP1 A FELP: CLR ALM B-FELP: CLR CLR C-FELP: CLR CLR D-FELP: CLR CLR P-FELP: CLR CLR M1 : CLR CLR M2 : CLR CLR M3 : CLR LINE SW : IDLE 11111111111 HOLDSCR Figure 156 Monitor Data Link SLC-96 The DATA LINK MONITOR screen displays an English language translation of the information in the SLC data link. The following describes the items shown in Figure 156. MODE: There are three data link modes specified in TR-TSY000008, they are: • • NOTE and WP1B, which are 16-bit formats. WP1, which is a 13 bit format. MAJOR: Indicates a major alarm on the data link. MINOR: Indicates a minor alarm on the data link. POWER: Indicates a power alarm. A SHLF: Indicates an A-shelf alarm. B SHLF: Indicates a B-shelf alarm. C SHLF: Indicates a C-shelf alarm. D SHLF: Indicates a D-shelf alarm. PROTECT LINE SWITCH: Displays the switch-to-protection line switch message. C BITS: Indicates the eleven C-Bits. A-FELP: Indicates an A digroup far end loop. B-FELP: Indicates a B digroup far end loop. C-FELP: Indicates a C digroup far end loop. D-FELP: Indicates a D digroup far end loop. P-FELP: Indicates a Protection digroup far end loop. M-BITS: Indicates the three M bits. 294 SunSet T10 Rev. B 11.1.2 Send Message MEAS 13:28:00 SEND MESSAGE MODE : MAJOR : MINOR : POWER : A SHLF: B SHLF: C SHLF: D SHLF: C BITS: NOTE WP1 ALM A FELP: CLR B-FELP: CLR C-FELP: CLR D-FELP: CLR P-FELP: CLR S-BITS: CLR M-BITS: 11111111111 WP1 WP1B CLR CLR CLR CLR CLR 1111 111 SEND Figure 157 SLC-96 Send Message The SunSet T10 displays an English-language table of messages that can be sent on the SLC-96 data link. Before entering this menu, confirm that: 1. The TEST CONFIGURATION screen is set up as follows: TERM: SLC-96 Tx SOURCE: NORMAL for T1SINGL or TxSOURCE: TESTPAT for T1DUAL 2. The transmit and receive cords must plugged into the circuit and the SunSet T10. Refer to the applications chapter for diagrams on how to plug in the SunSet T10 into the circuit. The following items are within Figure 157. MODE: Determines which SLC-96 element the SunSet T10 will emulate as it sends the SLC-96 message. The three elements are NOTE, WP1, and WP1B. MAJOR, MINOR, POWER, A SHLF, B SHLF, C SHLF, D SHLF: These categories allow setting the desired alarm message. A-FELP, B-FELP, C-FELP, D-FELP, P-FELP: These categories allow setting a far end loop, or indicate the existence of a far end loop. Ch.3 Menu Descriptions 295 S-BITS, M-BITS, C-BITS: These categories allow direct entering of those SLC data link bits that are not otherwise defined. SEND: This F-key function allows sending the message at any time. Note: A message is not sent until the SEND F-key is pressed. This allows editing of the message. Once sent, the message will continue being sent until changed. ACTION: Select either SWITCH (F1) or RELEASE (F2) to carry out the desired action. LINE: Select the desired digroup (A–D) by pressing the appropriate F-key (F1–F4). When the settings are correct, press the ENTER key on the keypad to send the message. 296 SunSet T10 Rev. B 11.1.3 View Data Link MEAS 13:28:00 VIEW DATA LINK SLC-96 PAGE :01 DLF 001 002 003 004 005 006 007 008 C---------CsssM-MAAS--Ss 111111111110101110111111 111111111110101110111111 111111111110101110111111 111111111110101110011111 111111111110101110111111 111111111110101110111111 111111111110101110111111 111111111110101110111111 PAGE-UP PAGE-DN PAUSE Figure 158 View Data Link VIEW DATA LINK allows viewing of an active SLC-96 data link. The bits are arranged according to their place in the SLC-96 data link. This screen can be useful for those applications that do not follow TR-TSY-000008. Ch.3 Menu Descriptions 297 11.2 Data Link Control - ESF MEAS 13:28:00 DATA LINK CONTROL ESF MONITOR T1.403 PRM MONITOR T1.403 NPRM MONITOR T1.403 BOM SEND T1.403 PRM SEND T1.403 BOM RTRV 54016 PM CNTR PRINT 54016 RESULTS Figure 159 Data Link Control - ESF DATA LINK CONTROL ESF is provided when ESF framing is selected in the TEST CONFIGURATION screen. Select from MAIN MENU > DATA LINK CONTROL and refer to Figure 159. 298 SunSet T10 Rev. B 11.2.1 Monitor T1.403 PRM MEAS 13:28:00 DATA LINK MONITOR T1.403 PRM ELAPS TIME - 000:03:40 DETEC TIME - 000:01:21 CRC=1 - 0 C=<5 C=<10 - 0 C=<100C=<319- 0 C>320 SEFE - 0 FSBEE BPV - 0 SLIP PLBSEC- 0 YELsecR - 0 U1 U2 - 0 RESTART HOLDSCR 0 0 0 0 0 0 0 SPRM Figure 160 Monitor T1.403 PRM The MONITOR T1.403 PRM screen allows viewing of: • • • • • • the T1.403 performance report message, as reported on the ESF data link. real-time end-to-end performance information, when the circuit is in-service. how many seconds has elapsed since a payload loopback message has appeared. a count of yellow alarm second messages. the total elapsed time monitoring the data link. how much time it took to receive a valid T1.403 data link message. Options: RESTART (F1), HOLDSCR/CONTINU (F2), and SPRM / PRM (F4). RESTART: Restarts the measurement. HOLDSCR/CONTINU: Freezes the screen for observation. To update, press the CONTINU F-key. SPRM/PRM: Allows access to the supplementary performance report or the performance report messages. Refer to Figure 161. Ch.3 Menu Descriptions 299 The following items appear in the MONITOR T1.403 PRM screen: ELAPS TIME: Total amount of time that has passed since the start of data link monitoring. DETEC TIME: Total amount of time (during the elapsed time) that the SunSet T10 has detected valid data link messages. CRC-1: Number of seconds in which exactly 1 CRC-6 error was reported. C=<5: Number of seconds that 2 to 5 CRC-6 errors were reported. C=<10: Number of seconds that 6 to 10 CRC-6 errors were reported. C=<100: Number of seconds that 11 to 100 CRC-6 errors were reported. C=<319: Number of seconds that 101 to 319 CRC-6 errors were reported. C>320: Number of seconds that 320 or more CRC-6 errors were reported. SEFE: Number of severely errored framing events that were reported. FSBEE: Number of reported frame synchronization bit error events. BPV: Number of seconds during which at least one bipolar violation was reported. SLIP: Number of seconds during which at least one frame slip occurred. PLB sec: Number of seconds during which the device is looped back. YEL sec: Number of seconds during which at least one yellow alarm message was received. R: The R bit is the SPRM flag. This bit indicates if SPRMs are included in the PRM message. A count indicates the number of seconds during which SPRMs have been added. U1: The U1 bit carries information on the DS1 signal as received from the network side. The count records the number of times that the U1-bit has been set to logical 1, indicating an error condition from the network direction. These errors include, CRC, BPV, SLIP, Yellow, Frame Synchronization Bit Error, or Payload Loopback. 300 SunSet T10 Rev. B U2: The U2-bit carries information on the DS1 signal as received from the Customer Interface (CI) side. The count records the number of times that the U2-bit has been set to logical 1, indicating an error condition from the customer direction. These errors include, CRC, BPV, SLIP, Yellow, Frame Synchronization Bit Error, or Payload Loopback. Pressing the SPRM (F4) F-key displays a graphic of the SPRM information. Refer to Figure 161. MEAS 13:28:00 T1.403 SPRM DECODE 23 U1 CI CO U2 0 ELAPSED TIME: 000:00:25 SPRM FLAG : SPRM ADDED RESTART HOLDSCR PRM Figure 161 T1.403 SPRM Decode The U1 and U2 counts provide the reported number of times an error condition occurred from either the Central Office (CO) or Customer Interface (CI), respectively. Ch.3 Menu Descriptions 301 11.2.2 Monitor T1.403 NPRM NPRM information is contained within the MONITOR T1.403 NPRM Screen. Select MAIN MENU > DATA LINK CONTROL > MONITOR T1.403 NPRM. Refer to Figure 162. MEAS 13:28:00 MONITOR T1.403 NPRM ELAPS TIME - 000:32:21 DETEC TIME - 000:32:21 NEAR-END ERRORS CRC=1 - 0 C<=319- 0 SES - 0 FAR-END ERRORS CRC=1 - 21 C<=319- 0 SES - 0 PerAlert: 0 C<=100- 0 C>320 - 0 C<=100- 8 C>321 - 0 FrConv: 0 RESTART HOLDSCR Figure 162 Monitor T1.403 NPRM Screen The Monitor T1.403 NPRM Screen defines the CRC-6 error counts and SES counts as near-end and far-end errors. There are two available reports: Per Alert: Performance alert. The network provider may define a performance threshold. This PA-bit will increment whenever the near end or far-end count has exceeded the predefined threshold. Note that some network equipment may not support this feature. FrConv: The Frame Conversion field increments when the SF to ESF frame format conversion occurs. 302 SunSet T10 Rev. B 11.2.3 Monitor T1.403 BOM MEAS 13:28:00 VIEW DATA LINK T1.403 BOM RECEIVE STATUS: MESSAGE LAST MESSAGE: (left most bit received 1st) Current : 1st last: 2nd last: 3rd last: 4th last: 00000000001111111 11100011000011000 11000110001100010 10011011010001101 10010000000000011 Figure 163 Monitor T1.403 BOM The MONITOR T1.403 BOM screen displays the message that the SunSet T10 receives over the data link. The receive status line shows MESSAGE if the SunSet T10 is currently receiving a message on the data link. This is displayed under the LAST MESSAGE line. If the SunSet T10 is not receiving a message, the MESSAGE line will say IDLE, and the last message received is displayed under the LAST MESSAGE line. Ch.3 Menu Descriptions 303 11.2.4 Send T1.403 PRM MEAS 13:28:00 DATA LINK TRANSMIT T1.403 PRM ELAPS TIME - 000:32:21 CRC=1 C=<10 C=<319SEFE BPV PLBsec- 0 0 0 0 0 0 C=<5 C=<100C>320 FSBEE SLIP YELsec- 0 0 0 0 0 0 Figure 164 Data Link Transmit T1.403 PRM Configure the SunSet T10 to send the T1.403 performance report message by entering SEND T1.403. The SunSet T10 will broadcast the message on the currently selected TX jack according to the quality of the received signal. It does this on the currently selected received jack. The SunSet T10 will display a count of all the various errors recorded and transmitted since entering this menu. The SunSet T10 sends this message continuously until escaping from this menu. 304 SunSet T10 Rev. B 11.2.5 Send T1.403 BOM MEAS 13:28:00 DATA LINK SEND MESSAGE ESF - T1.403 MESSAGE - 1111111100101000 REPETITION - CONTINU YEL-ALM PLPK-UP PLPK-DN more Figure 165 Data Link Send Message Use SEND T1.403BOM to send data link, bit-oriented messages. In this screen, select a message and specify the number of repetitions. Use the following procedure: 1. Select the desired message. Do this by using the F-keys for predefined messages or by typing in the desired numbers. • To type in the message: A. Select the desired position and enter the 1s and 0s using the SHIFT key and numbers on the keypad. B. The cursor can be positioned only between the 10th and 15th bits of the message. The rest of the 16-bit message is fixed. The following are the predefined messages: • • • • • • • YEL-ALM sends the ESF datalink yellow alarm. PLPK-UP sends the CSU payload loop up command. PLPK-DN sends the CSU payload loop down command. LLPK-UP sends the CSU line loop up command. LLPK-DN sends the CSU line loop down command. NLPK-UP sends the NIU loop up command. NLPK-DN sends the NIU loop down command. 2. After selecting a message, select REPETITION. To send the message continuously, choose CONTINU (F2). A. To send the message for a certain number of repetitions, press the NUMBER (F1) F-key. Ch.3 Menu Descriptions 305 B. Press the SHIFT key on the keypad and enter in the number of repetitions between 01 and 99 using the keypad numbers. C. Press the SHIFT key again when finished. 3. Press the ENTER key on the keypad to send the pattern on the data link. The SunSet T10 will automatically exit from the SEND T1.403 BOM screen and start sending the desired message. • • If selected, CONTINU will send the message continuously while in the DATA LINK CONTROL ESF screen. Exiting the menu or moving into a sub-menu will cause the message to stop. Note for ESF NIU Loopbacks: This function can be used to loopback a far end NIU from the customer premises side of the near end NIU. Set the message to NLPK-UP; set the repetition to 7 times. Seven repetitions will allow the far end NIU to loop up without letting the signal last long enough to loop up the near end. 306 SunSet T10 Rev. B 11.2.6 RTRV 54016 PM CNTR The performance monitoring data in Pub. 54016 conforming CSU can be retrieved with this menu item. Select MAIN MENU > DATA LINK CONTROL > RTRV 54016 PM CNTR. Refer to Figure 166. Note: The line must be out of service to retrieve the information. 21:10:05 RTRV 54106 PM CNTR CSU STATUS: NONE CURRENT 15-minutes MEASURE TIME (sec) - 602 ES UAS BES SES CSS LOFC 0 584 0 0 0 0 PAST 24-hours VALID INTERVAL - 96 ES UAS BES SES CSS LOFC 0 1 0 0 0 0 PAGE-UP PAGE-DN Figure 166 Retrieve Counter The following items appear within this screen. PAGE-UP (F1) and PAGE-DN (F2): Use to view other pages of available information. ES: Count of errored seconds UAS: Count of unavailable seconds BES: Count of bit error seconds SES: Count of severely errored seconds CSS: Controlled Slip Seconds LOFC: Loss of frame count 11.2.7 Print 54016 Results Allows printing of 54016 PM results. Ch.3 Menu Descriptions 307 12.0 CSU/NI Emulation (SW181) The CSU/NI Emulation software option allows for full-duplex emulation of a CSU or NI. With this capability, use the SunSet T10 to emulate a CSU or NI. The emulation screen displays: • • • a pictorial explanation of the circuit status. measurement results. configuration commands to perform loopbacks. While in this mode, the SunSet T10 will respond to CSU and NI loop up/down codes. Use CSU/NI Emulation in T1 Single and T1 Dual modes. 12.1 CSU/NI Emulation, T1 SINGL Mode 13:28:00 NI R ET-000:00:30 L1 LOF LBKTBPV T AIS FBE OOF CRC6ES RMTCMD - NONE SES TYPE - NI UAS LOCCMD - UNLLB-1 RESET 000:00 0 0 0 0 0 0 0 LLPBK-1 PLPBK-1 Figure 167 CSU/NI Emulation, T1 SINGL 1. Before entering CSU/NI Emulation, configure the TEST CONFIGURATION screen as follows: • • TEST MODE: T1 SINGL RxLvL-1: TERM, BRIDGE, or DSXMON FRAMING: as appropriate for the circuit under test Cannot be AUTO framed. CODING: as appropriate to the circuit under test TX SOURCE: THRU, NORMAL LBO 1&2: as appropriate for the circuit under test TEST RATE: 1.544 M The CSU/NI Emulation screen is not available for fractional rates. 308 SunSet T10 Rev. B 2. Plug the cords into the SunSet T10 and circuit under test. Confirm that signal coming from the network is connected to the Line 1 jacks. The SunSet T10 will then respond to loopback codes from the network and display the CSU/NI Emulation screen. See Figure 167. 3. Setup the SunSet T10 for either NI emulation or CSU emulation. Do this by selecting TYPE and then by selecting CSU (F1) or NIU (F2). 4. Observe any circuit error counts and verify that the SunSet T10 is receiving a remote loopback command. Note that the framing of the remote loopback command must be the same as the framing selected in the TEST CONFIGURATION screen. 5. If desired, operate any of the local commands as follows: • • • RESET (F1) resets the SunSet T10 to a through mode. LLPBK-1 (F2) operates a line loopback from L1-Rx to L1-Tx. A line loopback regenerates the signal but does not reframe the signal. Hence, BPVs and frame errors will pass through the line loopback unchanged. Once invoked, the line loopback UNLLB1 replaces the LLPBK-1 command. In this case, pressing the UNLLB-1 (F2) F-key will undo the loopback. PLPBK-1 (F3) operates a payload loopback from L1-Rx to L1Tx. A payload loopback regenerates the signal, and also reframes and re-codes the signal. Hence, BPVs and frame errors are eliminated as they pass through the payload loopback. Once invoked, the payload loopback UNPLB-1 command replaces the PLPBK-1 command. In this case, pressing the UNPLB-1 (F3) F-key will undo the loopback. 6. When finished, press the ESCAPE key on the keypad to return to the MAIN MENU. This drops all loopbacks. Ch.3 Menu Descriptions 309 12.2 CSU/NI Emulation, T1 DUAL Mode 13:28:00 L1 CSU L1 R T L2 L2 RMTCMD - NONE TYPE - CSU LOCCMD - LPBK-1 RESET ET-000:00:30 LBKTBPV FBE OOF CRC6ES SES UAS - 000:00 0 0 0 0 0 0 0 ULPBK-1 ULPBK-2 Figure 168 CSU/NI Emulation, T1DUAL 1. Before entering CSU/NI Emulation screen, configure the TEST CONFIGURATION screen as follows: • • TEST MODE: T1DUAL TXINSERT: L1-Tx Rx/DROP: L1-Rx RXLVL 1 AND 2: TERM, BRIDGE, or DSXMON TXSOURCE: THRU or TESTPAT FRAMING: as appropriate for the circuit under test Cannot be AUTO framed. CODING: as appropriate for the circuit under test XMTCLK: L1-Rx or INTERN RATE: 1.544 M CSU/NI Emulation screen is not available for fractional rates. LBO 1 & 2: as appropriate for the line under test Note: If setting TXINSERT and Rx/DROP to Line 2, the following message is displayed, “Support L1-Tx/L1-Rx Only”. 2. Plug the cords into the SunSet T10 and circuit under test. Confirm that signal coming from the network is connected to the Line 1 jacks. The SunSet T10 will respond to loopback codes from the network and the CSU/NI Emulation screen will appear as shown in Figure 168. 310 SunSet T10 Rev. B 3. Setup the SunSet T10 for either NI emulation or CSU emulation. Do this by selecting TYPE and choose either CSU (F1) or NIU (F2). 4. Observe any circuit error counts and verify that the SunSet T10 is receiving a remote loopback command. Note that the framing of the remote loopback command must be the same as the framing selected in the TEST CONFIGURATION screen. 5. If desired, operate any of the local commands as follows: • • • RESET (F1) resets the SunSet T10 to a through mode. LLPBK-1 (F2) operates a line loopback from L1-Rx to L2-Tx. A line loopback regenerates the signal but does not reframe the signal. Hence, BPVs and frame errors will pass through the line loopback unchanged. Once invoked, the line loopback UNLLB-1 replaces the LLPBK-1 command. In this case, pressing the UNLLB-1 (F2) F-key will undo the loopback. LLPBK-2 (F3) operates a line loopback from L2-Rx to L1-Tx. A line loopback regenerates the signal but does not reframe the signal. Hence, BPVs and frame errors will pass through the line loopback unchanged. Once invoked, the payload loopback UNPLB-2 command replaces the PLPBK-2 command In this case, pressing the UNPLB-2 (F3) F-key will undo the loopback. 6. When finished, press the ESCAPE key on the keypad to return to the MAIN MENU. This drops all loopbacks Ch.3 Menu Descriptions 311 312 SunSet T10 Rev. B Chapter 4 Applications 1.0 Basic Applications WARNING! Plugging into a live T1 circuit may cause a loss in service for multiple customers. Proper training is required before proceeding. Hazardous voltage is present on T1 spans. When plugging in at a repeater housing, plug the cord into the SunSet T10 before plugging into the repeater extender or repeater housing. To perform a BRIDGE monitor access, select BRIDGE in the TEST CONFIGURATION screen before plugging into the circuit. This ensures that the isolation resistors are in place before the accessing the circuit. Ch.4 Applications 313 1.1 Connecting the Cords Figures, 169, 170, and 171 display various ways to plug the SunSet T10 into the circuit. MON OUT SERIAL PORT MULTI PORT TX LINE 2 RX TX LINE 1 NimH 15V RX + IN DSX Note: The MON jack may be from a DSX or other T1 network equipment. Figure 169 Plugging in-DSXMON Mode SERIAL PORT MULTI PORT TX LINE 2 RX TX LINE 1 NimH 15V RX + Figure 170 Plugging in-BRIDGE Mode MON OUT SERIALPORT MULTI PORT TX LINE2 RX TX LINE1 RX NimH15V + - IN DSX Figure 171 Plugging in-TERM Mode 314 SunSet T10 Rev. B 1.2 Accepting a New Span/Loopback Test Central Office SERIAL PORT MULTI PORT TX LINE 2 RX TX LINE 1 NimH 15V RX + MON Facility MON OUT OUT IN IN DSX DSX T1 Span Customer Premises CSU or NI Figure 172 Accepting a New T1 Span 1. Verify that the span is not in service. This acceptance test will disrupt service. Find out the type of loopback device installed at the end of the span, and the loopback codes that operate it. 2. Select MAIN MENU > TEST CONFIGURATION and configure as follows: TEST MODE: T1SINGL RxLVL-1: TERM FRAMING: as specified by the circuit Tx CODING: as specified by the circuit Tx SOURCE: NORMAL XMT CLOCK: INTERN TEST RATE: 1.544M LBO 1: 0 dB When done, press the ENTER key on the keypad to return to the MAIN MENU. Ch.4 Applications 315 3. Connect the SunSet T10 to the circuit as shown in Figure 172. Press the HISTORY key on the keypad to clear the blinking history LEDs. 4. Select LPBK & SPAN CONTROL > CSU & NI CONTROL • For SF framing, setup as follows: TYPE: IN-BAND CODE: NI or CSU, as appropriate. Note: Do not select the LOOP-UP entry until last. • For ESF framing, setup as follows: TYPE: ESF-DL CODE: NETWORK (NIU) or LINE (CSU), as appropriate. Note: Do not select the LOOP-UP entry until last. 5. Press the LOOP-UP F-key, a “LOOPING UP” message will be displayed followed by a “LOOP UP SUCCEEDED” message. 6. Press the ESCAPE key on the keypad to return to MAIN MENU. 7. Select MAIN MENU > SEND TEST PATTERN and select a pattern to send, then push the ENTER key on the keypad. 8. Select MEASUREMENT RESULTS. Verify that the span performs to requirements for the delivered service. 9. When done with MEASUREMENT RESULTS, press the ESCAPE key on the keypad to return to the MAIN MENU. 10. Select LPBK & SPAN CONTROL > CSU & NI CONTROL and set the MODE to LOOP-DN to release the loopback. Leave the other settings as they were. Verify that a LOOP DOWN SUCCEEDED message appears. 12. Disconnect the SunSet T10 from the circuit. 316 SunSet T10 Rev. B 1.3 Monitoring an In-service Circuit SERIAL PORT MULTI PORT MON T1 TERMINAL EQUIPMENT TX LINE 2 RX TX LINE 1 NimH 15V RX + MON OUT OUT IN IN DSX DSX T1 TERMINAL EQUIPMENT Figure 173 Monitoring an In-Service Circuit 1. This test may be performed while the span is carrying live traffic. 2. Select MAIN MENU > TEST CONFIGURATION and configure as follows: TEST MODE: T1DUAL TxINSERT: L1-Tx RxDROP: L1-Rx RxLVL-1: DSXMON RxLVL-2: DSXMON TxSOURCE: THRU FRAMING: as specified by the circuit, or press the AUTO key on the keypad to find the correct framing. Tx CODING: as specified by the circuit, or press the AUTO key on the keypad to find the correct coding. XMT CLOCK: INTERN TEST RATE: 1.544M LBO 1&2: 0dB When done, press the ENTER key on the keypad to return to the MAIN MENU. Ch.4 Applications 317 3. Connect the SunSet T10s Line 1 and 2 Rx jacks to the MON jacks as shown in Figure 173. Press the HISTORY key on the keypad to clear any blinking history lights. 4. Examine the LEDs and the GRAPHIC screen for information about the circuit under test. • • • • • The PULSES LED should be green. A red PULSES LED is an indication of severe problems. A valid framing type should be indicated in green (SF, ESF, or SLC-96). If one of the framing LEDs is red, this indicates severe problems. An active ERRORS LED indicates that the circuit is working but is experiencing problems. An active YEL LED indicates a problem on the other side of the circuit. An active AIS LED may indicate a trouble condition where a network element transmitting to the SunSet T10 has lost its incoming T1 signal and has replaced it with the AIS signal. A. If additional information is required, proceed to step 4; otherwise, disconnect the SunSet T10 from the circuit. 5. Make a basic measurement by selecting MEASUREMENT RESULTS. Verify that the span performs to requirements for the delivered service. 6. When finished, disconnect the SunSet T10 from the circuit. 318 SunSet T10 Rev. B 1.4 Stressing a T1 Line 1.4.1 Using SEND TEST PATTERN 1. Set up the span for testing as outlined in section 1.2 of this chapter. Proceed up to the point of performing measurements. 2. Before performing MEASUREMENT RESULTS, select a stress pattern for the line. A. Press the ESCAPE key on the keypad to reach the MAIN MENU. B. Select SEND TEST PATTERN. C. Select the desired stress pattern. The SunSet T10 will immediately begin transmitting the highlighted test pattern. 3. Once the pattern is sent, check if the BPV and/or ERRORS LEDs are on. If they are, the customer could be having a problem with the circuit. Try additional stress patterns as desired. QRSS is the original stress pattern and is used as the default stress pattern in the SunSet T10. Other stress patterns and their applications are listed in chapter 5. 4. When finished, release the loopback and disconnect the SunSet T10 from the circuit. 1.4.2 Using Bridge Tap Detect 1. Setup the span for testing as outlined in Section 1.2 of this chapter. Proceed up to the point of performing measurements. 2. Select MAIN MENU > OTHER MEASUREMENTS > BRIDGE TAP DETECT. • BRIDGE TAP DETECT is a collection of patterns that are known to show the presence of bridge taps. Observe the test in progress by looking at the RESULTS - LOGICAL screen and the BRIDGE TAP DETECT screen by pressing the PAGE-DN F-key. A performance score of 0 bit errors, 0 errored seconds, and 30 available seconds is ideal. 3. When finished, release the loopback and disconnect the SunSet T10 from the circuit. Ch.4 Applications 319 1.5 Verify Proper B8ZS/AMI Optioning CENTRAL OFFICE SERIAL PORT NETWORK EQUIPMENT MULTI PORT TX LINE 2 RX TX LINE 1 NimH 15V RX + MON MON OUT OUT IN IN DSX DSX T1 SPAN CUSTOMER PREMISES CSU OR NI Figure 174 Verify Proper B8ZS/ AMI Optioning A common fault in new circuits is a B8ZS/AMI optioning mismatch in one or more network elements. This procedure will determine if this exists in the circuit. 1. Setup the SunSet T10 and circuit as described in section 1.2 of this chapter. If testing one end of the circuit first, as in section 1, be sure to repeat the procedure on the other end of the circuit as well. Make sure the SunSet T10s line CODING is set to the same line coding as present on the circuit. Loop up the circuit for testing. 2. Transmit an all 1s signal and an alternating 1s and 0s signal. Verify that there are no errors with any of these signals. If there are any errors, then the problems are not associated with a B8ZS/AMI mismatch. 3. Transmit a 3-in-24 signal. If any equipment in the line has optioning that disagrees with the SunSet T10, a loss of pattern synchronization will occur. 4. Verify the diagnosis by transmitting QRSS. QRSS will also cause errors when there is an AMI/B8ZS mismatch in the circuit, but it will not cause a loss of pattern synchronization. 320 SunSet T10 Rev. B Note: Referring to the setups of section 1.2 of this chapter, the customer’s T1 terminating equipment is isolated from the circuit. Thus, if the customer’s equipment has the optioning problem, this procedure will not expose it while the circuit is looped up. If the circuit tests OK while looped up, but fails when looped down, check if the line code monitored in one direction is not the same as the line code monitored in the other direction. If it is not, then the customer’s equipment may be at fault. Perform a loop back from the central office to the network equipment (customer premises), as shown in Figure 174. If the problem still is not evident from the central office, then testing at the customer’s premises will be required. Ch.4 Applications 321 1.6 Checking for Frame Slips & Frequency Sync Frequency synchronization can be a problem when: • • • the customer purchases a channelized T1 circuit. the customer’s circuit passes through a synchronous network element such as a switch, PBX, or a digital cross-connect system (DCS). the T1 circuit passes through more than one carrier. Use this procedure to identify frequency synchronization problems: 1. Obtain a reference frequency source. This can be the other side of the customer’s circuit or a 1.544 Mbps reference signal that is traceable to a stratum 1 level clock. 2. This test may be performed while the span is carrying live customer traffic. 3. Select MAIN MENU > TEST CONFIGURATION and configure as follows TEST MODE: T1DUAL TxINSERT: L1-Tx RxDROP: L1-Rx RXLVL-1: TERM, if a 3V source with up to 36 dB loss. RXLVL-2: TERM, if a 3V source with up to 36 dB loss or DSXMON if a DSXMON signal is used. Tx SOURCE: TESTPAT FRAMING: As specified by the circuit Tx CODING: As specified by the circuit XMT CLOCK: L2-Rx TEST RATE: 1.544M LBO 1: 0 dB When done, press the ENTER key on the keypad to return to the MAIN MENU. 4. Connect the reference T1 signal to the LINE 2 jack on the side of the SunSet T10. Refer to Figure 175. 5. Plug the LINE 1 jack (side of SunSet T10) into the DSX MON jack or other MON jack of the circuit. Press the HISTORY key on the keypad to clear the blinking history LEDs. 322 SunSet T10 Rev. B SERIAL PORT MULTI PORT TX LINE 2 RX TX LINE 1 NimH 15V RX + T1 Reference Frequency Source (3V, -7 to +36dB cable loss or DSXMON) MON T1 TERMINAL EQUIPMENT MON OUT OUT IN IN DSX DSX T1 TERMINAL EQUIPMENT Figure 175 Frequency Synchronization Problems 6. Select MAIN MENU > MEASUREMENT RESULTS and press the PAGE-UP F-key once to view the LINE 1 - FREQUENCY screen. If there is a problem, the frequency slip bar will be moving across the screen. If there is no bar drawn, then no slippage is occurring. 7. If using an external signal source, be sure to check both sides of the circuit. If using one side of the circuit as the reference and the other side as the tested signal, then the test is completed. Disconnect the SunSet T10 from the circuit. Ch.4 Applications 323 1.7 Measuring Signal Level Signal level may be measured while performing one of the other tests, or by itself. At a DSX OUT jack, the level should be 2.7 to 3.3 volts. At repeater outputs, the voltage should be 2.4 to 3.3 volts. The loss at the repeater inputs should generally be 10 to 35 dB. The signal strength at the input of an office repeater bay CSU, or NI should be from 0 dB to -15 dB. If there is a signal on the OUT jack, use the setup shown in Figure 176 to measure the level. Otherwise, use the setup shown in Figure 172. 1. Determine the type of access mode to use. This measurement can use TERM, DSXMON, or BRIDGE modes. TERM and BRIDGE provide the most accurate results, but DSXMON may be the most convenient mode. TERM will disrupt service. BRIDGE is accurate, but the results can be degraded by a lowquality termination at the network element terminating the T1 line. A DSXMON measurement should generally show a result of about -20 dB. For this example, we will use TERM mode. Verify that the span is not in service. 2. Select MAIN MENU > TEST CONFIGURATION and configure as follows: TEST MODE: T1SINGL RxLVL-1: TERM FRAMING: as specified by the circuit Tx CODING: as specified by the circuit Tx SOURCE: NORMAL XMT CLOCK: INTERN TEST RATE: 1.544M LBO 1: 0 dB When done, press the ENTER key on the keypad to return to the MAIN MENU. 3. Connect the SunSet T10 to the circuit as shown in Figure 176. Press the HISTORY key on the keypad to clear the blinking LEDs. 4. Select MEASUREMENT RESULTS. Press the PAGE-DN (F2) F-key twice to access the LINE 1-SIGNAL screen. Read the signal level. Separate readings are given for the positive and negative signals for more accurate information on a faulty regenerator. 324 SunSet T10 Rev. B 5. When finished, disconnect the SunSet T10 from the circuit. SERIAL PORT MULTI PORT TX Equipment Facility MON MON OUT OUT IN IN DSX DSX LINE 2 RX TX LINE 1 NimH 15V RX + T1 Device with Suspect Signal Output Figure 176 Measuring Signal Level Ch.4 Applications 325 1.8 Running a Timed Test Many network tests require the use of an exact period such as 15 minutes, 1 hour, or 24 hours over which to conduct a test. To set the timer for one of these tests use the following procedure: 1. Use the desired procedure in this chapter from section 1.2 or 1.3 as the basis for the testing. 2. Select MAIN MENU > OTHER FEATURES > MEASUREMENT CONFIGURATION 3. Select MEAS DURATION, and press the TIMED (F1) F-key. 4. Press the SHIFT key on the keypad, the SHIFT indicator will appear. 5. Use the keypad to enter the desired number of hours and minutes. The format is (hhh:mm). 6. Press the SHIFT key on the keypad to remove the SHIFT indicator. 7. Press the ENTER key on the keypad when the setting is correct. 8. Press the ESCAPE key on the keypad to return to the MAIN MENU. 9. Proceed with the test procedure as outlined in section 1.2 or 1.3 of this chapter. When performing MEASUREMENT RESULTS, the test is timed. To determine how much time is remaining, observe the RT (Remaining Time) indicator in the upper righthand corner of the display. 326 SunSet T10 Rev. B 1.9 Checking DSX Wiring SERIAL PORT MULTI PORT TX LINE 2 RX TX LINE 1 NimH 15V RX + Equipment Facility MON MON IN OUT OUT IN OUT IN IN OUT DSX DSX T1 Equipment T1 Equipment Figure 177 Checking DSX Wiring An incorrectly wired DSX can be the source of a problem. Use the following procedure to verify proper wiring of the DSX: Note: If the DSX is very large, you may need two SunSet T10s or a long cord for this test. 1. Verify that the span is not in service. This test will disrupt service. 2. Select MAIN MENU > TEST CONFIGURATION and configure each SunSet T10 as follows: TEST MODE: T1SINGL RxLVL-1: TERM FRAMING: as specified by your design Tx CODING: as specified by your design Tx SOURCE: NORMAL XMT CLOCK: INTERN TEST RATE: 1.544M LBO 1: 0 dB When done, press the ENTER key on the keypad to return to the MAIN MENU. Ch.4 Applications 327 3. Connect the SunSet T10 to the circuit as shown in Figure 177 Use one SunSet T10 as shown in the diagram or two SunSet T10s if the two pieces of equipment are not located close to each other. Find a point on either side of the DSX to connect SunSet T10. Make sure that the circuit is open at each point so that the SunSet T10 is not bridge-tapped onto the existing circuit. Once connected to the circuit, press the HISTORY key on the keypad to clear the blinking LEDs. 4. Verify that the SunSet T10s PAT SYNC LED is green. The BIT ERROR and ERRORS LEDs are off. This indicates that the circuit is properly wired through the DSX. 5. Press the ERR INJ key on the keypad. Verify that the BIT ERROR and ERRORS LEDs turn on and then blink. This assumes that the SunSet T10 is configured to inject 1 BPV and 1 LOGIC error. This verifies that the SunSet T10 did not synchronize to a signal source on another circuit. 6. Repeat the procedure for the other direction of the circuit. 7. When finished, disconnect the SunSet T10 from the circuit. 328 SunSet T10 Rev. B 1.10 Observing Network Codes or Channel Data 21:10:05 PAGE T/S 001 002 003 004 005 006 007 008 VIEW RECEIVED DATA : 01 BINARY HEX ASCII 10111111 BF (FD) ( ) 11101111 EF (F7) ( ) 11111011 FB (DF) ( ) 11111110 FE (7F) ( ) 11111111 FF (FF) ( ) 10111111 BF (FD) ( ) 11101111 EF (F7) ( ) 11111011 FB (DF) ( ) PAGE-UP PAGE-DN RESUME Figure 178 Ten-Bit Pattern The SunSet T10’s display is useful for analyzing live circuit data. It also displays binary data, hexadecimal, and ASCII translations. Use this to decode T1 network control codes that are in use and to verify the contents of DDS channels. Sixty screens of data are stored at once. This allows scrolling through the information, and observing changes over time. The number of screens can also reveal whether a T1 network pattern is interleaved with the framing bit or is overwritten by the framing bit. Use this procedure: 1. If BRIDGE or DSXMON access modes are used this test may be performed while the span is carrying live customer traffic. If TERM mode is used the test must be performed out-of-service. 2. Select MAIN MENU > TEST CONFIGURATION and specify DSXMON or BRIDGE mode if the circuit is carrying live traffic. Specify the other settings as desired. To have frame alignment on the received signal, be sure to set the correct framing. 3. Connect the SunSet T10 to the circuit as shown in Figures 169 (DSXMON) or 170 (Bridge). Press the HISTORY key on the keypad to acknowledge the blinking LEDs. 4. Press the ESCAPE key on the keypad to access the MAIN MENU. 5. Select OTHER MEASUREMENTS > VIEW RECEIVED DATA. Ch.4 Applications 329 6. Review the displayed live data. When the codes of interest appear, press the PAUSE (F3) F-key to trap the 60 screens of data. Then press the PAGE-DN (F2) F-key to scroll through the data. The data is presented as it appears on the T1 bit stream. The data is broken out into timeslots. Use Table 17, Channel Numbering and Table 18, Channel Numbering - SLC-96 to convert from timeslot number to channel number: 7. Figure 178 shows an example of the ten-bit pattern, 1011 1111 1 8. When finished, disconnect the SunSet T10 from the circuit. T/S 1 2 3 4 5 6 7 8 9 10 11 12 13 14 15 16 17 18 19 20 21 22 23 24 Channel Numbering D3/D4 D1D 1 1 2 13 3 2 4 14 5 3 6 15 7 4 8 16 9 5 10 17 11 6 12 18 13 7 14 19 15 8 16 20 17 9 18 21 19 10 20 22 21 11 22 23 23 12 24 24 D2 12 13 1 17 5 21 9 15 3 19 7 23 11 14 2 18 6 22 10 16 4 20 8 24 Table 17 Channel Numbering 330 SunSet T10 Rev. B T/S 1 2 3 4 5 6 7 8 9 10 11 12 13 14 15 16 17 18 19 20 21 22 23 24 Channel Numbering - SLC-96 SHLF A SHLF B SHLF C 1 25 49 13 37 61 2 26 50 14 38 62 3 27 51 15 39 63 4 28 52 16 40 64 5 29 53 17 41 65 6 30 54 18 42 66 7 31 55 19 43 67 8 32 56 20 44 68 9 33 57 21 45 69 10 34 58 22 46 70 11 35 59 23 47 71 12 36 60 24 48 72 SHLF D 73 85 74 86 75 87 76 88 77 89 78 90 79 91 80 92 81 93 82 94 83 95 84 96 Table 18 Channel Numbering - SLC-96 Ch.4 Applications 331 1.11 Determining Round Trip Circuit Delay 1. Verify that the span is not in service. This test will disrupt service. 2. Select MAIN MENU > TEST CONFIGURATION and configure as follows: TEST MODE: T1SINGL RxLVL-1: TERM FRAMING: as specified by your design Tx CODING: as specified by your design Tx SOURCE: NORMAL XMT CLOCK: INTERN TEST RATE: 1.544M LBO 1: 0 dB When done, press the ENTER key on the keypad to return to the MAIN MENU. 3. Connect the SunSet T10 to the circuit as shown in Figure 172. Press the HISTORY key on the keypad to acknowledge the blinking LEDs. 4. Select LPBK & SPAN CONTROL > CSU & NI CONTROL • For SF framing, configure as follows: MODE: LOOP-UP (Do not select this item until the other settings are correct) TYPE: IN-BAND CODE: NI or CSU, as appropriate • For ESF framing, configure as follows: MODE: LOOP-UP (Do not select this item until the other settings are correct) TYPE: ESF-DL CODE: Network (NIU) or LINE (CSU), as appropriate 5. Select the MODE line and press the LOOP-UP (F1) F-key. A. A message displaying “LOOPING UP” followed by a “LOOP UP SUCCEEDED” will be displayed. B. Press the GRAPHIC key on the keypad for a visual confirmation. • Refer to chapter 3, section 6, Loopback & Span Control for additional information about loopback capabilities. 332 SunSet T10 Rev. B 6. Press the ESCAPE key on the keypad four times to return to the MAIN MENU. 7. Select MAIN MENU > OTHER MEASUREMENTS > PROPAGATION DELAY and the SunSet T10 will perform a propagation delay measurement on the looped-up circuit. Read the value of circuit delay reported in µS. 8. When finished, press the ESCAPE key on the keypad twice to return to the MAIN MENU 9. Select LPBK & SPAN CONTROL > CSU & NI CONTROL and select the MODE line. 10. Press the LOOP-DN (F2) F-key to release the loopback. Verify that the “LOOP DOWN SUCCEEDED” message is displayed. 11. Press the ESCAPE key on the keypad three times to return to the MAIN MENU. 11. Disconnect the SunSet T10 from the circuit. Ch.4 Applications 333 1.12 Determine Distance to Loopback 1. Verify that the span is not in service. This test will disrupt service. 2. Select MAIN MENU >TEST CONFIGURATION and configure as follows: TEST MODE: T1SINGL RxLVL-1: TERM FRAMING: as specified by your design Tx CODING: as specified by your design Tx SOURCE: NORMAL XMT CLOCK: INTERN TEST RATE: 1.544M LBO 1: 0 dB When done, press the ENTER key on the keypad to return to the MAIN MENU. 3. Connect the SunSet T10 to the circuit as shown in Figure 172. Press the HISTORY key to acknowledge the blinking LEDs. 4. Select LPBK & SPAN CONTROL > CSU & NI CONTROL • For SF framing, configure as follows: MODE: LOOP-UP (Do not select this item until the other settings are correct) TYPE: IN-BAND CODE: NI or CSU, as appropriate • For ESF framing, configure as follows: MODE: LOOP-UP (Do not select this item until the other settings are correct) TYPE: ESF-DL CODE: Network (NIU) or LINE (CSU), as appropriate 5. Select the MODE line and press the LOOP-UP (F1) F-key. A. A message stating “LOOPING UP” followed by a “LOOP UP SUCCEEDED” will be displayed. B. Press the GRAPHIC key on the keypad for a visual confirmation. Note: This can be done for any type of loopback - hardware loopback, repeater loopback, and so on. 334 SunSet T10 Rev. B 6. Press the ESCAPE key on the keypad four times to return to the MAIN MENU. 7. Select MAIN MENU > OTHER MEASUREMENTS > PROPAGATION DELAY and the SunSet T10 will perform a propagation delay measurement on the looped-up circuit. A. Read the value of circuit delay reported in kFt. This shows how many kilofeet there are between the SunSet T10 and the loopback device. This measurement is accurate to about 1000 feet and is useful for making sure that the looped repeater is in the expected apparatus case. • • This measurement is valid only if the line does not pass through any network elements and/or transmission elements that introduce appreciable delay. Line repeaters will not cause a problem. Fiber muxes, 3x1 muxes, 3x1 digital cross-connect systems, and office repeater bays that are equipped with dejittering circuits will cause a problem. Even if there are devices that cause excessive delay, valuable data can be obtained by looking at the difference in delay time between a loopback at a known location and a loopback at the unknown location. 8. When finished, press the ESCAPE key on the keypad twice to return to the MAIN MENU. 9. Select LPBK & SPAN CONTROL > CSU & NI CONTROL and select the MODE line 10. Press the LOOP-DN (F2) F-key to release the loopback. Verify that the “LOOP DOWN SUCCEEDED” message is displayed. 11. Press the ESCAPE key on the keypad three times to return to the MAIN MENU. 12. Disconnect the SunSet T10 from the circuit. Ch.4 Applications 335 1.13 Basic Dialing Procedure This outlines the simplest dialing procedure used. 1. Select MAIN MENU > VF CHANNEL ACCESS > PLACE/ RECEIVE CALLS and select the dialing METHOD line. Choose MF, DTMF, or DP. 2. Before dialing, make sure that OFFHOOK (F2) has been selected for theTX ABCD line and that a dial tone can be heard. The most recently dialed phone number will be shown. • To dial the previous number, press the ENTER key on the keypad. • To delete the previous number press the DELETE (F2) F-key until the number is completely deleted. • To enter a new number: A. Press the SHIFT key on the keypad, the SHIFT indicator will appear. B. Enter the numbers 0 through 9, A, B, C, D, E and F on the keypad. For MF method, * and # cannot be used. For DTMF dialing, use the “E” F-key for (*) and “F” F-key for (#). Entering up to 32 digits is permitted. C. Press the SHIFT key on the keypad to remove the SHIFT indicator. Note: For MF dialing, A=KP, B=ST, C=ST1, D=ST2, E=ST3, F=PAUSE (,). 3. After a number is entered, press the ENTER key on the keypad to dial the number (remember to be OFFHOOK and listen for a dial tone). This will send the indicated digits with DIAL PERIOD and SILENT PERIOD as indicated in VF CHANNEL ACCESS, DIAL/SPRVIS SETUP. Use this procedure to speed dial a preprogrammed user number: 1. Select MAIN MENU > VF CHANNEL ACCESS > DTMF/MF/ DP DIALING and select the dialing method then NUMBER. 2. Press the USER (F1) F-key to get the list of USER DIAL NUMBERS. This is the speed dial list. 3. Select the desired number and press the ENTER key on the keypad twice to dial the number (Remember to be OFFHOOK and listen for a dial tone). The SunSet T10 automatically returns to the VF CHANNEL ACCESS screen. 336 SunSet T10 Rev. B 1.14 Entering & Editing Speed Dialing Numbers The SunSet T10 allows for storing of up to 10 DTMF, DP, or MF USER numbers. Each USER number can contain up to 32 digits. An character label up to ten characters long can be programmed for each phone number. The label makes it easier to remember what the number is used for. Follow this procedure to program the number 12345ABCD*#0 with a label of TEST01: 1. Select MAIN MENU > VF CHANNEL ACCESS > PLACE/ RECEIVE CALLS 2. Select the NUMBER line and press the USER (F1) F-key. 3. Select a blank space and press the CREATE (F1) F-key. 4. The cursor should now be at the LABEL editing position, ready to accept the entry. 5. Press the TOGGLE (F3) F-key. The letter A on the character grid starts blinking. 6. Use the arrow keys on the keypad to select the T character. Press SELECT (F4) F-key. The character T is now the first character of the label. Select the characters E, S, and T by using the same procedure. 7. After selecting the last T, press the TOGGLE (F3) F-key. The character grid will stop blinking. 8. Press the SHIFT key on the keypad to display the SHIFT indicator and use the keypad and press 0, then 1. 9. The label is now completed and TEST01 should appear next to the LABEL line. 10. Press the SHIFT key on the keypad to remove the SHIFT indicator. 11. Select the NUMBER line to enter the telephone number. 12. Press the SHIFT key on the keypad to display the SHIFT indicator. 13. Enter the phone number. Press the keys on the keypad to enter this number, 12345ABCD*#0. 14. When done, press the SHIFT key on the keypad to remove the SHIFT indicator. 15. Press the ENTER key on the keypad to accept the new USER DIAL NUMBER; it will be displayed on the list of USER DIAL NUMBERS. 16. To edit the number, select it and press the EDIT (F2) F-key. 17. The cursor is now positioned on the first character of the LABEL. Press the INSERT (F1) F-key to start inserting more digits at that position, or press the DELETE (F2) F-key to Ch.4 Applications 337 remove one or more digits at that position. The cursor may be moved to the right before pressing the INSERT or DELETE Fkeys. Toggle into the character grid as described in steps 5 through 9, if needed. 18. When done with the LABEL as described in step 17, confirm that the SHIFT indicator is off and that the character on the character grid has stopped blinking. Then select the number line. A. If needed, press the INSERT (F1) F-key to start inserting more digits at that position, or press the DELETE (F2) F-key to remove one or more digits at that position. The cursor may be moved to the right before pressing the INSERT or DELETE F-keys. B. Press the SHIFT key on the keypad to display the SHIFT indicator to enter different numbers using the keypad. 19. If a mistake is made while editing an existing user number, press the ESCAPE key on the keypad to abort editing. The original user number is not affected. 20. When done, press the ENTER key on the keypad; the edited label will be displayed within the list. Press the ESCAPE key on the keypad twice to return to the VF CHANNEL ACCESS menu. 338 SunSet T10 Rev. B 1.15 Monitor a Voice Frequency Channel This procedure is for monitoring a voice frequency channel within a T1 circuit. Figure 179 illustrates the setup. This test maybe performed while the span is carrying live customer traffic. SERIAL PORT MULTI PORT TX LINE 2 RX TX T1 Equipment MON MON OUT OUT IN IN DSX DSX LINE 1 NimH 15V RX + T1 Equipment Figure 179 Monitoring an In-Service Voice Frequency Channel 1. Select MAIN MENU > TEST CONFIGURATION and configure as follows: TEST MODE: T1SINGL RxLVL-1: BRIDGE or DSXMON FRAMING: As specified by the circuit Tx CODING: As specified by the circuit TX SOURCE: THRU XMT CLOCK: L1-Rx TEST RATE: 1.544M LBO 1: 0 dB When done, press the ENTER key on the keypad to return to the MAIN MENU. Ch.4 Applications 339 2. Connect the SunSet T10 to the circuit as shown in Figure 179. Press the HISTORY key on the keypad to clear the blinking LEDs. 3. Select MAIN MENU > VF CHANNEL ACCESS > VF MEASUREMENTS 4. Select the desired transmit and receive channels, and LISTEN SIDE from which to monitor. The channel number is automatically converted to a timeslot number on SF-D4, ESF, and SLC96 A-digroup DS1s. The SunSet T10 refers to the framing type to make this conversion. If another type of framing is used, refer to Table 17, Channel Numbering, and Table 18, Channel Numbering, SLC-96 to determine which timeslot to specify. 5. Adjust the volume to the desired level by using the volume keys on the keypad. Note: If unable to monitor the channel, verify that frame synchronization is present. If it is not, press the AUTO key on the keypad. If framing is still not achieved, change the RxLvL in the TEST CONFIGURATION screen. The SunSet T10 cannot perform the monitor function if framing is unavailable. 340 SunSet T10 Rev. B 1.16 Simple Talk/Listen DSX SERIAL PORT MULTI PORT TX LINE 2 RX TX LINE 1 NimH 15V RX + MON MON OUT OUT IN IN DSX DSX Customer Premises Figure 180 Simple Talk/Listen This is the simplest procedure for talking and listening on a T1 circuit. 1. Verify that the span is not in service. This test will disrupt service for the 23 channels that are not in use. 2. Select MAIN MENU > TEST CONFIGURATION and configure as follows: TEST MODE: T1SINGL RxLVL-1: TERM FRAMING: as specified by the circuit, except UNFRAME Tx CODING: as specified by the circuit Tx SOURCE: NORMAL XMT CLOCK: INTERN TEST RATE: 1.544M LBO 1: 0 dB When done, press the ENTER key on the keypad to return to the MAIN MENU. Note: UNFRAME cannot be selected for the framing type. It is not possible to perform talk and listen functions on an unframed signal. One of the framing LEDs must be lit for this procedure to work. 3. Connect the SunSet T10 to the circuit as shown in Figure 180. Press the HISTORY key on the keypad to acknowledge the blinking history LEDs. 4. Select MAIN MENU > VF MEASUREMENTS and choose the receive (listen) and the transmit (talk) channels; they are usually the same. Talking and listening is now possible on the Ch.4 Applications 341 channel selected. Adjust the volume to the desired level by using the volume keys on the keypad. Note: The SunSet T10 will automatically convert the channel number to a timeslot on SF-D4, ESF, and SLC-96 A digroups. For other framing formats or digroups, refer to the channel numbering tables in Tables 17 and 18 to determine which “channel” to specify with the SunSet T10. 5. When finished, disconnect the SunSet T10 from the circuit. 342 SunSet T10 Rev. B 1.17 Sending a Tone This procedure will disrupt service. Be sure the T1 line is not carrying traffic and that it will be able to withstand the hits that this procedure will introduce. 1. Configure the SunSet T10 for the appropriate TEST CONFIGURATION mode for sending the tone: Tx SOURCE: When TxSOURCE is set for NORMAL in the TERM mode, the SunSet T10 drops and inserts on the selected channels and fills the other 23 channels with idle code. The received signal is terminated at the SunSet T10 and is not retransmitted. Tx SOURCE: When TxSOURCE is set for THRU mode, the talk/listen is performed on the LINE 1 or LINE 2 side of a fullduplex circuit. The other 23 channels of that side are transmitted through without disruption. All 24 channels of the other side are transmitted without disruption. There will be a momentary hit on both sides when the SunSet T10 is plugged into the circuit and when it is unplugged. There will also be a hit if the access modes are changed from one side to the other side, even when the cords are not disturbed. 2. When finished configuring the test, press the ENTER key on the keypad to return to the MAIN MENU. 3. Plug the SunSet T10 into the circuit. Refer to Figure 180, Simple/Talk Listen. Press the HISTORY key on the keypad to clear the blinking LEDs. 4. Select MAIN MENU > VF CHANNEL ACCESS > VF MEASUREMENTS and use the NEXT (F1) or PREV (F2) F-keys to set up the receive and transmit channels. 5. Select the INSERT TYPE line and press the TONE (F2) F-key. 6. Select the TONE FREQ Hz line and choose the desired frequency using the F-keys. Use the more (F4) F-key to display additional alternatives. A. If needed, enter a tone frequency directly from the keypad using the SHIFT and number keys on the keypad. Enter a value between 50 Hz and 3950 Hz. 7. Select the TONE LVL dBm line and select either a 0 dBm level or a -13 dBm level. A. If needed, enter the tone level directly from the keypad using the SHIFT and number keys on the keypad. Use the MINUS (F1) F-key if the entry is lower than 0 dBm. Ch.4 Applications 343 8. Press the ENTER key on the keypad when the settings are completed. The SunSet T10 is now transmitting a tone on the selected channel. 9. When finished, disconnect the SunSet T10 from the circuit. 344 SunSet T10 Rev. B 2.0 Advanced Applications 2.1 Fractional T1 Testing Term Access Monitor Access TAD FAD To other end of circuit. Interoffice Facilities 3x1 DCS or M13 DSX-1 1x0 Digital Cross-Connect System (DCS) Terminal Access CSU or NI (Smart Jack) DSX-1 FRAC T1 MUX Fractional T1 Termianal Equipment (Video, Router, Bridge, other) FT1 Channel Format: Term Access Points: N FT1 channels + 24-N idel channels Monitor Access Points: N FT1 channels + 24-N active channels from other circuits. Figure 181 Fractional T1 Circuit Fractional T1 circuits are circuits with data rates of Nx56 kbps or Nx64 kbps, where N can be from 1–24 channels. N channels of the T1 line are dedicated to the fractional T1 circuit. The remaining channels of the T1 line are filled with either an idle code or other revenue traffic. A fractional T1 circuit typically starts out at the customer premises at a fractional T1 CSU. Refer to Figure 181. The purpose of this CSU is to convert the signal into a standard T1 signal suitable for transmission on the telephone company network. The CSU may also multiplex other fractional signals into an aggregate fractional signal within the T1. The CSU is configured to place the data into either an Nx56 or Nx64 kbps format. Nx56 utilizes the first 7 bits in each channel and allows the customer to transmit an unlimited number of zeroes even when the T1 line is optioned for AMI coding. The CSU places a 1 in the eighth bit to ensure 12.5% ones density even when the customer is transmitting all zeroes. Ch.4 Applications 345 Nx64 is like Nx56, except the CSU inserts no ones. This format is generally used when the T1 line is configured using B8ZS line code or alternating channel assignment. In the B8ZS case, the line code ensures adequate pulse density regardless of the number of zeroes transmitted on the circuit. In the alternating channel assignment case, the idle pattern inserted into the alternating idle channels ensures adequate ones density regardless of the customer data transmitted in the alternating active channels. The CSU must be configured to put the fractional T1 channels in the proper positions within the 24 T1 channels available in the T1 line. Three formats exist: sequential order, alternating order, and random order. Sequential order is different from alternating order in that all the fractional channels are located contiguously within the T1 frame. For example the same 384 kbps circuit might use channels 1 through 6 of the T1 line. The alternating order format was described in the previous paragraph. For example, a 384 kbps circuit (6x64) might use channels 1, 3, 5, 7, 9, and 11. Channels 2, 4, 6, 8, 10, and 12 might be filled with a 01111111 idle code. A randomly configured 384 kbps circuit might use channels 4, 9, 10, 17, 20, and 24. In a fractional T1 circuit, such as a video circuit, it is vital that each channel of the circuit arrives in the same order (phase) that it leaves. If this does not happen, the signal becomes scrambled and the receiver cannot properly decode the information. The signal will generally arrive in phase only if the fractional T1 circuit travels as a bundle through the various network elements and transmission media. If individual channels should become split onto two different transmission paths, the transmission delay of the two paths will probably be different. The function of the CSU in the fractional T1 circuit shown in Figure 181 has already been covered. Other elements serve different functions. For instance, the 1x0 DCS (Digital Cross-connect System) is used to cross-connect the incoming fractional T1 line onto the desired transport line. The 1x0 DCS allows many fractional T1 circuits to be combined with other channelized circuits onto more densely-packed T1s. The idle channels are simply discarded as they pass into the DCS. This reduces costs by providing highest utilization (fill) on the T1 paths in the long-haul portion of the network. The M13 or 3x1 DCS allows the grouping of many T1s onto selected higher-speed transmission paths for long-haul transport. The fractional circuit passes through a similar group of network elements at the far end of the circuit. 346 SunSet T10 Rev. B 2.1.1 FT1 Circuit Acceptance Test Procedure Central Office SERIAL PORT MULTI PORT TX LINE 2 RX TX LINE 1 NimH 15V RX + 1X0 DCS DSX DCX MON MON OUT OUT IN IN To CSU To Far End FT1 CSU To DSX Customer Premises Near End FT1 CSU Figure 182 Plugging into the FT1 Circuit This is an acceptance test for a fractional T1 circuit. It is an advanced procedure that should be attempted only by personnel familiar with the T1 test procedures described earlier in this section. This test may require assistance at the far end. 1. Verify that the fractional circuit is not in service. This acceptance test will disrupt service. 2. Select MAIN MENU > TEST CONFIGURATION and configure as follows: TEST MODE: T1DUAL Tx/INSERT: L1-Tx or L2-Tx Rx/DROP: opposite of Tx/INSERT RXLVL-1: DSXMON RXLVL-2: DSXMON Tx SOURCE: TESTPAT FRAMING: as specified by the circuit Tx CODING: as specified by the circuit XMT CLOCK: INTERN if facing the Fractional CSU, otherwise loop through L2-Rx if facing the 1x0 DCS TEST RATE: Nx56 or Nx64, setup the desired channels for Ch.4 Applications 347 transmit and receive. Press the ENTER key on the keypad when completed. The SunSet T10 will return to the TEST CONFIGURATION screen. LBO 1&2: 0 dB (or as required) When done with press the ENTER key on the keypad to return to the MAIN MENU. Notes: • When selecting Nx56 or Nx64, the screen will switch to the FT1 TIMESLOT screen. Manually set up the timeslots to the configuration indicated in the circuit record. If the timeslot configuration is unknown, press the AUTO (F1) F-key to configure the active channels. • AUTO configuration may not yield the proper channels if any of the active channels are transmitting an idle code. It will also not work properly if the idle code set in OTHER FEATURES > OTHER PARAMETERS > IDLE CHANNEL CODE is not the same as the idle code on the circuit being tested (7F = 01111111, FF = 11111111). One way to observe the idle and active channels is to plug the SunSet T10 in using the 1.544 Mbps test rate and then select MAIN MENU > VIEW RECEIVED DATA. This will allow you to verifiy what the SunSet T10 establishes for AUTO configuration. 3. Connect the SunSet T10 to the circuit as shown in Figure 182. 4. Loop up the circuit toward the near end CSU. A standard CSU loopback code may be used from the access point illustrated in Figure 181, because the SunSet T10 has access to the entire T1 terminating at the CSU. Note: The SunSet T10 may need to be configured back to the 1.544M TEST RATE in the TEST CONFIGURATION screen in order to loop up the CSU. 5. Change the Tx/INSERT to L1-Tx and Rx/DROP to L2-Rx to loop towards the far end. 6. Loopback the far end FT1 CSU. The loop code will need to be known to activate the far end FT1 CSU. This may require assistance at the far end. 7. Change the access Tx/INSERT to L1-Tx and Rx/DROP to L1Rx. Press the GRAPHIC key on the keypad to verify that the SunSet T10 is sending and receiving across the entire length of the span from end to end. 8. From the MAIN MENU > MEASUREMENT RESULTS, perform the acceptance test. Verify that the fractional T1 service performs to the requirements for the service delivered. 348 SunSet T10 Rev. B 2.2 SLC-96 Testing This section contains application notes on SLC-96 testing. Refer to the digital loop carrier maintenance manual for detailed information also see TR-TSY-000008 for SLC-96 reference information. Note that most SLC-96 systems come with maintenance capabilities built into the system. Use these maintenance features as a first step in troubleshooting SLC-96 problems. T1 test equipment should be only be used when the SLC-96 maintenance features are not available. WARNING! SLC-96 systems carry up to 96 channels of customer traffic. Properly trained personnel should only use the test setups described here. Use these test setups only in conjunction with a SLC-96 maintenance manual. Verify with the manual that the planned maintenance activities will not cause a disruption in service. Three typical SLC-96 maintenance applications are discussed in this section. The applications cover in-service data link monitoring, out-of-service testing, and in-service digroup testing. Use Figure 183 as a guide for each of these applications. Central Office Controlled Environment Vault Central Office Terminal Remote Terminal PBX ... WP1 WP18 A DIGROUP - SLC-96 FRAME (ALL MODES) Central Office Switch NOTE B DIGROUP (MODE 1 ONLY) D4 FRAME C DIGROUP: D4 (MODES I, III) SLC-96 (MODE II) D DIGROUP (MODE 1) D4 FRAME P DIGROUP - SLC-96 FRAME Figure 183 Typical SLC-96 System Configuration SLC-96 systems are used to carry subscriber telephone service, as well as a variety of special services. The systems provide pair gain by multiplexing up to 96 metallic loops onto 4 T1 lines. These systems have a remote terminal located near the customer and a central office terminal located in the central office. The central office terminal may have a DS1 or analog metalCh.4 Applications 349 lic test mode to the switch. Conversely, newer switches may be built with a TR-TSY-000008 test mode (SLC-96 test mode standard) so that there is no need for a central office SLC-96 terminal. SLC-96 systems have three modes of operation. Mode I is where all 4 digroups are used; each channel of each digroup is reserved exclusively for a given customer. Mode II is where only 2 digroups are used for all 96 channels; the SLC-96 system keeps track of which channels are allocated to which customers through the C bits in the SLC data link. Mode III: the system serves only special service lines. This mode uses only two digroups, because only 48 channel units can be plugged into the terminals. The A digroup transmits the system’s data link through the SLC-96 framing format. The data link contains alarm, protection switching, far end looping, and other maintenance information. The B and D digroups use D4 framing. These digroups are not used in modes II and III. The C digroup also uses SLC-96 framing. The C datalink is used only in mode II. In this mode, it carries channel allocation information. The SLC-96 system uses a protection digroup for ensuring a higher level of reliability. Either the remote terminal or the central office terminal may initiate a switch to the protection digroup if a transmission failure is encountered. 350 SunSet T10 Rev. B 2.2.1 SLC-96 Data Link Monitoring Central Office SERIALPORT MULTIPORT Central Office Terminal or Direct Switch Interface Central Office Terminal MON Plug Position 1 TX LINE 2 RX TX LINE 1 NimH 15V RX + Remote Terminal MON OUT OUT IN IN DSX DSX Plug Position 2 A Digroup Controlled Environment Vault Remote Terminal Figure 184 Monitoring the SLC Data Link This procedure is for monitoring the “A data link” to observe the operational status of an in-service SLC-96 system. 1. Select MAIN MENU > TEST CONFIGURATION and configure as follows: TEST MODE: T1SINGL RxLVL-1: DSXMON FRAMING: SLC-96 Tx CODING: AMI (or as provisioned) Tx SOURCE: NORMAL XMT CLOCK: INTERN TEST RATE: 1.544M LBO 1: 0 dB (or as required) When done, press the ENTER key on the keypad to return to the MAIN MENU. Ch.4 Applications 351 2. Connect the SunSet T10 to the circuit as shown in Figure 184, Plug Position 1. 3. Select MAIN MENU > MEASUREMENT RESULTS; observe if the signal has any BPVs or SLC-96 framing errors. 4. Press the ESCAPE key on the keypad to escape from MEASUREMENT RESULTS and select DATA LINK CONTROL > MONITOR DATA LINK. Observe if a protection switch is in place. If there is one, note which digroup and the direction of transmission. Observe if a far end loop is in place on any of the digroup; this will be signified by ALM next to the FELP category. 5. Reposition the plug into the remote terminal monitor jack. (Plug Position 2 in Figure 184). Observe: the mode of the remote card (WP1, WP1B). if there is a SLC-96 system alarm. if any of the remote shelves are in alarm. if there is a protection line switch in place. if there is a far end loop in place. 6. Take appropriate maintenance action. 7. When done disconnect the SunSet T10 from the circuit. 352 SunSet T10 Rev. B 2.2.2 Out-of-service SLC-96 Testing Central Office SERIAL PORT MULTI PORT TX LINE 2 RX TX LINE 1 NimH 15V RX + Central Office Terminal Remote Terminal MON MON OUT OUT IN IN DSX DSX Central Office Terminal or Direct Switch Interface Controlled Environment Vault A Digroup Remote Terminal Figure 185 SLC-96 Out-of-Service Testing This procedure is for out-of-service testing on an SLC-96 system. This test cannot be performed on a live circuit. 1. Select MAIN MENU > TEST CONFIGURATION and configure as follows: TEST MODE: T1SINGL RxLVL-1: TERM FRAMING: SLC-96 Tx CODING: AMI (or as provisioned) TX SOURCE: NORMAL XMT CLOCK: INTERN TEST RATE: 1.544M LBO 1: 0 dB (or as required) When done, press the ENTER key on the keypad to return to the MAIN MENU. Ch.4 Applications 353 2. Connect the SunSet T10 to the circuit as required for testing. Refer to Figures 184, 185, and 186. More than one SunSet T10 may be necessary because of the need to transmit and receive maintenance commands on the A digroup while performing bit error testing on another digroup. Possible tests to perform include: • • • • • • • • switching digroup A through D to protection. looping back digroup A through D and P to verify transmission performance. inducing the system to switch to protection by creating a loss of signal, loss of frame, or high bit error rate. verifying transmission of proper alarm indication when a shelf or power source has gone down. verifying the central office terminal transmits an AIS (blue alarm) in the downstream direction when signal has been lost in the upstream direction. verifying that A digroup can do a half-switch when half of the Adigroup, and half of the protection digroup is not working. verifying fast, and transparent protection switching so that users do not notice a problem. verifying proper assignment of channels during mode II operation. 3. When finished, disconnect the SunSet T10 from the circuit. Central Office SERIAL PORT MULTI PORT TX LINE 2 RX TX 8 6 Remote Terminal MON LINE 1 NimH 15V RX + SERIAL PORT 7 MULTI PORT TX LINE 2 RX TX LINE 1 NimH 15V RX + 3 2 Central Office Terminal MON 10 OUT OUT 4 IN IN DSX DSX 1 Central Office Terminal or Direct Switch Interface 5 9 Controlled Environment Vault Remote Terminal A Digroup Notes: 1. Plug the cords in the order shown. 2. Two sets are required for this setup. 3. A termination plug may be needed in each OUT jack. Otherwise, the MON signal may be unreadable. Figure 186 SLC-96 A Digroup Data Link Transmission 354 SunSet T10 Rev. B 2.3 In-Service Hitless Dual Drop & Insert THRU Testing SERIAL PORT MULTI PORT TX LINE 2 6 4 RX TX 5 LINE 1 NimH 15V RX + 2 T1 Equipment, 1 T1 Equipment, 2 MON MON 1 3 IN OUT OUT IN OUT IN IN OUT 7 DSX 8 Figure 187 In Service Full Duplex THRU Drop and Insert Warning! Only experienced technicians should attempt this procedure. Any mistakes will disrupt service. By entering the VF CHANNEL ACCESS menu, the SunSet T10 will start sending a tone, or sound from the microphone, to the specified channel that is set in VF MEASUREMENTS. Make sure these settings are correct before continuing. In-service drop and insert testing is useful for : • • placing a telephone call on a single channel. sending and receiving tones to test channels. Use the following procedure: 1. Select MAIN MENU > TEST CONFIGURATION and configure as follows: TEST MODE: T1DUAL Tx/INSERT: L1-Tx Rx/DROP: L2-Rx RxLVL-1: DSXMON or BRIDGE RxLVL-2: DSXMON or BRIDGE Tx SOURCE: THRU FRAMING: as specified by the circuit Ch.4 Applications 355 Tx CODING: as specified by the circuit XMT CLOCK: L1-Rx TEST RATE: 1.544M LBO 1&2: 0 dB When done, press the ENTER key on the keypad to return to the MAIN MENU. 2. Depending on the test application, the following can be done: • For talk and listen: A. Select MAIN MENU > VF CHANNEL ACCESS >VF MEASUREMENTS, select the receive (listen) and transmit (talk) channels (they are usually the same channel number). Choose TALK for the INSERT TYPE and L1-Rx for the LISTEN SIDE. When connected to the circuit, talking, and listening can be done on the selected channel. B. Adjust the volume to the desired level by pressing the volume keys on the keypad. • To send and receive a tone: A. Select MAIN MENU > VF CHANNEL ACCESS > VF MEASUREMENTS; use the NEXT (F1) or PREV (F2) Fkeys to set up the receive and transmit channels. Select the rest of the menu items as follows: Tx-1 T/S: Any Rx-2 T/S: Any Rx-1 T/S: Any INSERT TYPE: TONE TONE FREQ Hz: pick desired tone frequency TONE LVL dBm: pick desired tone level Tx-1 A/B/C/D: pick desired action LISTEN SIDE: BOTH Once connected to the circuit, a tone will be transmitted on the selected channel. 3. To conduct a hitless dual drop and insert THRU mode test on a line that is in service: • • make sure all the connections are made in accordance with the numbering procedure in Figure 187. If performed properly, this test will disrupt service for a few hundred milliseconds. 4. Press the HISTORY key on the keypad to clear the blinking LEDs. 356 SunSet T10 Rev. B • These procedures assume that both EQUIPMENT 1 and EQUIPMENT 2 are set to loopback mode. 5. If in talk and listen mode, talking and listening on the selected channel and line is possible. If you selected CHANNEL 1 and set the LISTEN SIDE to L1Rx, you should hear a voice conversation only on CHANNEL 1 from EQUIPMENT 1. EQUIPMENT 2 should also be able to hear only your voice on CHANNEL 1 since you are transmitting out to LINE 1 on that specific channel (see Figure 187). If you change the channel, then you will be able to talk and listen on that specific channel. The unselected channels of both EQUIPMENT 1 and 2 should be uninterrupted. For tones, check to see that the same tone frequency level is being received as was inserted on the specified channel (i.e. the TONE FREQ Hz specified should be the same as the Rx1 FRQ/LVL). The transmitted A/B/C/D bits should be the same as the received A/B/C/D bits when the ONHOOK (F1), OFFHOOK (F2), and WINK (F3) F-keys are pressed. 6. Try sending two different tones. A. Have EQUIPMENT 1 send a 404 Hz tone on CHANNEL 1. B. Have EQUIPMENT 2 send an 1804 Hz tone also on CHANNEL 1. C. From the SunSet T10, the different tones should be audible on CHANNEL 1 by looking at the RxFREQ/LEVEL from the line that was specified in TEST CONFIGURATION. • CHANNEL 1 of LINE 1 should be a 404 Hz tone. • CHANNEL 1 of LINE 2 should be at 1804 Hz. • For LINE 1, make sure that the Rx-1 A/B/C/D bits for the SunSet T10 are the same as the transmitted A/B/C/D bits from EQUIPMENT 1. • The Line 1 Tx-1 A/B/C/D bits for the SunSet T10 should also be the same as the received A/B/C/D bits at EQUIPMENT 2. 7. Check the other channels by repeating step 6. Both EQUIPMENT 1 and EQUIPMENT 2 should not be disturbed. 8. Repeat the same checks for LINE 2. Ch.4 Applications 357 2.4 Advanced Talk/ Listen Advanced Talk/Listen allows use of different access modes, signaling, and other additional features. Use the Simple Talk/Listen procedure as a reference for this procedure. 1. Verify that the span is not in service if a disruptive access mode is used. 2. Select MAIN MENU > TEST CONFIGURATION, configure as needed: Tx SOURCE: NORMAL. In the TERM mode, the SunSet T10 drops and inserts on the selected channels and fills the other 23 channels with idle code. The received signal is terminated at the SunSet T10 and is not retransmitted. Tx SOURCE: THRU. In THRU mode, the talk/listen will be performed on the LINE 1, or the LINE 2 side of a full-duplex circuit. The other 23 channels of that side will be transmitted without disruption. All 24 channels of the other side will be transmitted without disruption. There will be a momentary hit on both sides when the SunSet T10 is plugged into the circuit and when it is unplugged. There will also be a hit if access modes are changed from one side to the other side. 3. Connect the SunSet T10 to the circuit according to the access mode selected. 4. Press the HISTORY key on the keypad to clear the blinking LEDs. 5. Select MAIN MENU > VF CHANNEL ACCESS > VF MEASUREMENTS 6. Select the receive (listen) and transmit (talk) channels. 7. Set the INSERT TYPE to TALK. If access to a D1D, D2, or SLC-96 digroups B-D is required, refer to Tables 17, Channel Numbering, and 18, Channel Numbering-SLC-96. 8. Talking and listening on the selected channel is now possible. Adjust the volume to the desired level by using the volume keys on the keypad. 9. If control supervision of the circuit is needed, go to Tx-1 or Tx2 A/B/C/D and enter the supervision bits in order to go off-hook, on-hook, or wink. Use the appropriate F-keys, ON-HOOK (F1), OFFHOOK (F2), WINK (F3), or SEND (F4) to send the ABCD bits. View the supervision bits that are returned on this same screen in Rx-1 or Rx-2 A/B/C/D. 358 SunSet T10 Rev. B A. Press the ESCAPE key on the keypad to exit this screen. The last supervision bits sent will be sent for the remainder of the session. 10. If dialing is to be performed on the circuit: A. Select DTMF DIALING and press the ENTER key on the keypad. B. Enter the number to be dialed and then press the ENTER key on the keypad. 11 When finished, disconnect the SunSet T10 from the circuit. For reference, the following tables list the common signaling arrangements used on D4 channel banks. TRMT refers to the signaling bits transmitted by the channel bank equipped with indicated channel card. RCV refers to the signaling bits received by the channel bank. * means that either a 1 or a 0 may appear. Ch.4 Applications 359 Dial Pulse Originating (DPO) VF input to DPO TRMT AB Loop open 00 Loop closure 11 ** ** RCV AB ** ** 0* 1* DPO VF Output Dial Pulse Terminating (DPT) VF input to DPT TRMT AB Normal batt 00 Reverse batt 11 ** ** RCV AB ** ** 0* 1* DPT VF Output 2- or 4-wire E&M E&M Input M-lead grd or open M-lead batt TRMT AB 00 11 ** ** Revertive Pulse Originating (RPO) VF Input to RPO TRMT AB Loop open 00 Loop closure 11 ** ** ** Normal batt Reverse batt Loop open Loop closure RCV AB ** ** 0* 1* E&M Output E-lead open E-ld grd or looped RCV AB ** ** 01 00 1* RPO VF Output Normal batt, no RP Normal batt & RP Reverse batt Revertive Pulse Terminating (RPT) VF Input to RPT TRMT RCV AB AB Normal batt 00 ** Reverse batt 11 ** ** 0* ** 1* RPT VF Output Loop open Loop closure Sleeve Dial Pulse Originating (SDPO) VF input to SDPO TRMT RCV AB AB Loop open 00 ** Loop closure 11 ** ** 0* ** 1* SDPO VF output No sleeve gnd Sleeve gnd Normal batt Reverse batt Duplex (DX) 2-wire, 900 ohm or 4-wire, 600 ohm VF input to DX TRMT RCV AB AB On-hook (idle) 00 ** Off-hook (busy) 11 ** ** 0* ** 1* DX VF output On-hook (idle) Off-hook (busy) Equalized Transmission Only (ETO), or TO, 4- or 2-wire VF input to ETO TRMT RCV ETO VF output AB AB No signaling ** ** No signaling Table 19 D4 Channel Bank Signaling part 1 of 2 360 SunSet T10 Rev. B Foreign Exchange Office End (FXO), Gnd Start mode VF input to FXO TRMT RCV AB AB No tip gnd 1* ** Tip gnd 0* ** No ringing *1 ** Ringing *0 ** ** 0* ** 1* ** *1 ** *0 FXO output Loop open Loop closure No ring gnd Ring gnd Foreign Exchange Office End (FXO), Loop Start mode VF input to FXO TRMT RCV FXO output AB AB No ringing 01 ** Ringing 00 ** ** 0* Loop open ** 1* Loop closure Foreign Exchange Subscriber End (FXS) grd start mode VF input to FXS TRMT RCV FXS VF output AB AB Loop open, no ring gnd 01 ** Ring gnd 00 1* No tip gnd Loop closure, or ring gnd 11 0* Tip gnd ** 1* No tip gnd, no ring ** 01 Tip gnd, no ringing Loop open 01 00 Tip gnd, ringing Loop closure 11 00 Tip gnd, no ringing Foreign Exchange Subscriber End (FXS), loop start mode VF input to FXS TRMT RCV FXS VF output AB AB Loop open 01 ** Loop closure 11 ** *1 *1 No ringing Loop open 01 *0 Ringing Loop closure 11 *0 No ringing Pulse Link Repeater (PLR) VF input to PLR TRMT AB E-lead open 00 E-lead grd or loop 11 ** ** RCV AB ** ** 0* 1* PLR E&M output M-lead grd or open M-lead batt or loop Ringdown (RD) 2-wire, 900 ohm or 4-wire, 600 ohm Input to RD TRMT RCV RD output AB AB No ring to t,r simp’x 11 ** 20Hz ring t,r simp’x 00 1* No ring to t,r pair 20Hz ring t,r simp’x 11 0* ring on t,r pair sg lead at grd 11 ** sg lead at -48 Vdc 11 0* 48Vdc to sg lead sg lead at -48 Vdc 00 1* Grd sens relay to sg D4 Channel Bank Signaling part 2 of 2 Ch.4 Applications 361 2.5 Testing SUPERTRUNK VF DS-0 1. Select MAIN MENU > TEST CONFIGURATION and configure as follows: TEST MODE: T1SINGL RxLVL- 1: TERM FRAMING: SF- D4 or ESF, based on the design of the circuit CODING: AMI TxSOURCE: NORMAL XMT CLOCK: L1- Rx TEST RATE: 1.544M LBO 1: 0 dB When done, press the ENTER key on the keypad to return to the MAIN MENU. 2. Select SEND TEST PATTERN and select the 1–8 pattern. Warning! Failure to transmit this code back to the switch while measuring the T1 signal may result in the switch automatically removing the trunks from service and failing the T1 circuit. 3. Press the ENTER key on the keypad to return to the MAIN MENU. 4. Connect the SunSet T10 to the T1 circuit using the appropriate cord plugged into the Line 1 Tx and Rx jacks. If using the SunSet Dual Bantam to Modular Plug cord, the marked side of the Dual Bantam cord should be inserted into the Line 1 Rx jack. 5. Press the HISTORY key on the keypad to clear the flashing ERRORS LED. 6. Select MEASUREMENT RESULTS. 7. Press the STOP (F3) F-key and then press the RESTART (F3) F-key to restart the test. • • Verify that the PULSES LED and the framing LED (SF or ESF) are green. The MEASUREMENT RESULTS summary screen should indicate NO ERRORS. 8. Press the ESCAPE key on the keypad to return to the MAIN MENU. 9. Select VF CHANNEL ACCESS > VF MEASUREMENTS. 10. Select the Rx-1 T/S line and use the NEXT (F1) or PREV (F2) F-keys to select the DS-0 to be tested (1–24). 11. Select the INSERT TYPE line and press the TALK (F1) F-key. 362 SunSet T10 Rev. B 12. Press the ESCAPE key on the keypad to return to VF CHANNEL ACCESS. 13. Select DIAL/SPRVIS SETUP and select the TRUNK TYPE line. Choose the appropriate trunk type, E&M, G-START, or LSTART. • If selecting either G-START or L-START, then select the EQUIPMENT line. Choose FXO or FXS, as appropriate. EQUIPMENT is not applicable for Type E&M. 14. Press the ENTER key on the keypad to return to the VF CHANNEL ACCESS menu. 15. Select PLACE/RECEIVE CALLS and select the METHOD line. Press the DTMF (F2) F-key. 16. Select the NUMBER line. A. Press the SHIFT key on the keypad. B. Enter the number to be dialed using the keypad. C. Press the SHIFT key again to release the SHIFT. 17. Select the Tx ABCD line and press the OFF-HOOK (F2) F-key. • • • If a dial tone is not received, the trouble is at the control office. Look at the Rx ABCD bits. If using G- START or L-START trunk type, OFF-HOOK should be observed. If using E&M trunk type, a wink should be received. 10. Select the NUMBER line and press the SEND (F2) F-key. • • “DIALING A” should be displayed. DTMF tones should be heard if the volume is set high enough. 11. The call should now be completed and a Talk/Listen test can now be performed. Ch.4 Applications 363 3.0 Datacom Applications 3.1 Point to Point Datacom Testing In this application, the SunSet T10 (DTE) is connected to a modem (DCE) to perform a simple BERT test. The V.35 interface will be used. This test will allow the SunSet T10 to send and receive signals with a DCE. 1. Verify that the datacom circuit is not in service. This test will disrupt the service. 2. Select MAIN MENU > TEST CONFIGURATION and configure as follows: TEST MODE: DATACOM TYPE: as required by interface; for this example use V.35. MODE: DTE TEST RATE: as required by modem REF CLOCK: INTERN Note: If the SunSet T10 supplies the timing source, select INTERN for REF CLOCK. If the SunSet T10 is using timing from the network, select RECEIVE. When the SunSet T10 uses received timing, the test rate selection is not significant, since the SunSet T10 will use its received rate. When done, press the ENTER key on the keypad to return to the MAIN MENU. 3. Connect the SunSet T10 to the modem as shown in Figure 188. SERIAL PORT MULTI PORT TX LINE 2 RX TX LINE 1 NimH 15V RX + Datacom Cable SCSI-36 to DB37 Interface SunSet p/n SS308 V.35 DTE Modem DCE Figure 188 Modem Testing with Datacom 364 SunSet T10 Rev. B 4. Select SEND TEST PATTERN and select a pattern. Certain patterns may not be available depending on the test rate. If a pattern is not available, a message will appear at the bottom of the display screen. 5. Press the ESCAPE on the keypad to return to the MAIN MENU. 6. Select DATACOM INTERFACE and refer to Figure 189. 21:10:05 MEAS DATACOM INTERFACE MODE- DTE TYPE - V.35 TRANSMIT RTS : ON DTR : ON RL : OFF LL : ON RECEIVE CTS - ON DSR - ON DCD - ON TxCLK- LIVE RxCLK- LIVE DATA- LIVE ON OFF Figure 189 Datacom Interface Screen 7. Check that the transmit leads RTS and DTR are turned on. If not, select the lead and press the ON (F1) F-key. A. Try turning these signals ON or OFF to test whether the modem is receiving the SunSet T10’s signal. 8. Select LL, local loop and press the ON (F1) F-key This will activate a loop on the modem. 9. Examine the received information. TxCLK, RxCLK, and DATA should all show LIVE. 10. Press the ESCAPE key on the keypad to return to the MAIN MENU 11. Select MEASUREMENT RESULTS. • • • The RCV and XMT patterns should be the same. The PAT SYNC LED should be green. If not, press the RESYNC key on the keypad. If the PAT SYNC LED still is not green, the modem may have a problem regenerating the pattern. The RxHz should be the same as the transmitted rate. If there is a discrepancy, the modem may have a problem retransmitting the clock. Ch.4 Applications 365 12. Test the validity of the loop by injecting errors and confirming that they come back. Do this by pressing the ERR INJ key on the keypad. • The BIT ERROR LED should be red and one bit error should be recorded in MEASUREMENT RESULTS. 12. When finished, disconnect the SunSet T10. 366 SunSet T10 Rev. B 3.2 Fault Location with Remote & Local Loopbacks This application provides a troubleshooting procedure using the remote and local loopback capabilities of the SunSet T10. Figure 190 shows a remote and local loopback. Local Loopback Modulator Output RS-449 DTE DCE Demodulator Output West DTE RS-449 Remote Loopback East RCV DATA DCE Phone Line DCE ... DTE XMT DATA Figure 190 Local and Remote Loopback 1. Select MAIN MENU > TEST CONFIGURATION and configure as follows: TEST MODE: DATACOM TYPE: per interface MODE: DTE TEST RATE: per modem REF CLOCK: INTERN When done, press the ENTER key on the keypad to return to the MAIN MENU. 2. Connect the SunSet T10 to the modem under test. 3. Select DATACOM INTERFACE. Confirm that the transmit leads RTS and DTR are turned on. If not, select the lead and press the ON (F1) F-key. 4. Select the LL line and press the ON (F1) F-key, this activates a loop on the modem. The transmit and receive data LEDs should light up. If the received data LED of the modem lights up, but not the transmit data LED, then the modem is faulty. This is because it cannot transmit the received data back to the SunSet T10. 5. Press the ESCAPE key on the keypad to return to the MAIN MENU. 6. Select MAIN MENU > MEASUREMENT RESULTS and verify that the RxHz line is equivalent to the test rate. If there is a Ch.4 Applications 367 discrepancy, the modem will have a problem retransmitting the clock. 7. Check that the RCV and XMT patterns are the same. 8. The PAT SYNC LED should be green. A. If not, press the RESYNC key on the keypad. B. If the LED is still red, the modem may have a problem regenerating the pattern. 9. Test the validity of the loop by pressing the ERR INJ key on the keypad. A. Verify that these errors come back. B. The BIT ERROR LED should be red and a bit error should be recorded in MEASUREMENT RESULTS. 9. If the previous steps have been completed successfully, then the local modem is not at fault. A. Return to the DATACOM INTERFACE screen and turn off the LL (local loop) line. 10. Now that the local modem is ruled out, the far end modem will need to be tested using a remote loopback. 11. To test the remote loopback, check that the far end modem has a loopback capability at the interface (the modem must be able to loop TxDATA to the RxDATA. It also must loop TxCLK, RxCLK, and TCLK to TxDATA). 12. To use the modem, it may be necessary to connect a PC to dial out. Once the connection is in place, disconnect the PC and replace it with the SunSet T10 datacom connector. Note: It may also be necessary to set the DTR to be always on by using the PC so that the line is not dropped when switching from the PC to SunSet T10 datacom connector. 13. Select MAIN MENU > DATACOM INTERFACE; check that the transmit leads RTS and DTR are turned on. If not, select the lead and press the ON (F1) F-key. Select RL and press the ON (F1) F-key. 14. Press the ESCAPE key on the keypad to return to the MAIN MENU. 15. Select MEASUREMENT RESULTS and verify that the RxHz line is equivalent to the test rate. • If RxHz is low, then the clock is not being received properly from the far end modem. 368 SunSet T10 Rev. B 16. Check the RCV and XMT patterns, they should be the same. The PAT SYNC LED should be green. • If the items in step 15 are correct. A. Perform a BERT test by pressing the ERR INJ key on the keypad. B. Verify that the errors injected come back. The BIT ERROR LED should be red and a bit error should be recorded in MEASUREMENT RESULTS. C. If this is successful, then the phone line and the far end modem are operating properly. • If the BERT test is not successful, this indicates a problem with either the phone line or the far end modem. A. To test the far end modem, perform a local loopback on that end, following steps 6—11 of this procedure. • • If there are no problems with this local loopback, then the problem is with the phone line. If there are problems, the modem is at fault. Ch.4 Applications 369 3.3 Emulating a Terminal Multiplex In the T1-MUX Mode, the SunSet T10 emulates a 64 kbps to 1.544 Mbps multiplexer. Use this procedure to multiplex one or more 64 kbps signals onto a 1.544 Mbps signal. This application is useful if you suspect a faulty multiplex. By successfully substituting the SunSet T10 for a MUX, you can isolate the problem to that replaced MUX. 1. From the MAIN MENU > TEST CONFIGURATION and configure as follows. TEST MODE: T1-MUX T1 section Tx/INSERT: L1-Tx Rx/DROP: L1-Rx FRAMING: As specified by the span design CODING: As specified by the span design RxLVL-1: TERM RxLVL-2: TERM XMT CLK: L1-Rx Note: In T1-MUX, the set is forced to received timing. LBO 1&2: As specified by the span design DATACOM section TYPE: Select the datacom interface that will provide a 64 kbps frame. TxSRC: T1DRP MODE: DCE; in T1-MUX the SunSet T10 is forced to DCE. MUX section BERT: T1DRP T1INS: The same as DATACOM TYPE (i.e. RS232). T1T/S: Select the 64 kbps timeslot(s) to be multiplexed from the datacom to the T1 side (see step 3). 3. Select the 64Kbps timeslot(s) to be multiplexed. A. Press the Nx64K (F1) F-key to enter the T10 TIME SLOT screen. B. Use the arrow keys to move the flashing cursor to the desired receive timeslot and press the SELECT (F2) F-key. As you select your receive timeslots, the respective transmit timeslots will also be highlighted. This is because the receive and transmit timeslots should normally be set to the same numbers. 370 SunSet T10 Rev. B • • • If you want these timeslots to differ, select the transmit section and manually set up the desired timeslots. You may also press UN-SEL (F3) to de-select a particular timeslot or CLR-ALL (F4) to erase all the selected timeslots and start with a clear screen. For RS232, you may select only one receive and transmit timeslot. 4. Connect the SunSet T10 to the circuit according to Figure 191. 5. Press the HISTORY key to acknowledge any blinking history lights and turn them off. 6. Verify that the PAT SYNC LED is lit green. If not, press the RESYNC key on the keypad. Nx64 kbps DCE 1 PULSES SF YEL/IDLE POWER B8ZS ESF AIS LOW BATT ERRORS PAT SYNC SLC-96 SF BIT ERROR B8ZS ESF YEL/IDLE ERRORS SLC-96 PULSES 2 AIS SunSet T10 DTE 12:34:41 MEAS VIEW RECEIVED DATA PAGE : 01 T/S BINARY HEX ASCII 01 11011111 DF ( ) 02 11000010 C4 (#) 03 01000010 42 B (B) 04 00011110 1E (X) 05 01100101 65 e ( ) 06 00101110 2E (t) 07 11010100 D4 (+) 08 11000101 C5 ( ) PAGE-UP PAGE-DN F1 RESUME F2 STORE F3 F4 SUNRISE TELECOM F1 F2 F3 A RESYNC B LIGHT C GRAPHIC D ERR INJ E AUTO 1 VOL UP 2 VOL D N HISTORY F 4 5 S H I FT 7 POWER PRN SCRN 8 ESCAPE F4 1.544 Mbps To T10 L1-Rx L1-Tx OUT IN Multiport Terminal Equipment 3 6 9 ENTER 0 T1-MUX Figure 191 Emulating a Terminal Multiplex • In Figure 191, the DTE supplies the transmitted 64 kbps signal, to the SunSet T10 through the multiport. The SunSet T10 multiplexes this 64 kbps signal onto a 1.544 Mbps T1 signal, which is then transmitted through the T1 L1-Tx jack. In Figure 191, the SunSet T10 is connected to an IN/OUT Ch.4 Applications 371 monitor jack. The 1.544M signal is passed from the IN to the OUT jack and back to the L1-Rx jack on the SunSet T10. This setup allows checking the multiplexed signal. Step 7 outlines the procedure for checking the multiplexed 1.544M signal. 7. Inject an error from the DTE. A. Check that the BERT line in the TEST CONFIGURATION screen is set to T1DRP. This means that the LEDs will show information about the signal received on the T1 L1-Rx port. B. Upon injecting the error, the ERRORS LED should light red. If it does, the multiplexing ability of the SunSet T10 has been verified. With this ability, the SunSet T10 can replace a MUX. C. If a faulty MUX is suspected, replace it with the SunSet T10 by following the previous steps. If the circuit problems clear up with the SunSet T10, this verifies that the problems exist with the MUX. 372 SunSet T10 Rev. B 3.4 Emulating an Add/Drop Multiplexer The SunSet T10 has the capability to emulate an Add/Drop Multiplex. Use this procedure to drop and insert 64 kbps timeslots between a datacom device and T1 lines. 1. Select MAIN MENU > TEST CONFIGURATION and configure as follows: TEST MODE: T1 DUAL Tx/INST: L1-TX Rx/DROP: L2-RX RxLVL-1: TERM RxLVL-2: TERM Tx SOURCE: THRU FRAMING: as provisioned Tx CODING: as provisioned XMTCLK: L1-RX TEST RATE: 1.554M LBO 1&2: as provisioned When done, press the ENTER key on the keypad to return to the MAIN MENU. 2. Connect the SunSet T10 to the two TEs (terminal equipment) in the order shown in Figure 192. A. Plug into the OUT jack of TE 1; connect the same cord to LINE 1 Rx on the SunSet T10. B. Plug a second bantam cord to the OUT jack on TE 2; connect this cord to LINE 2 Rx on the SunSet T10. C. Plug the third bantam cord to LINE 1 Tx of the SunSet T10 and then plug a fourth cord into LINE 2 Tx. Do not connect either of these cords to the TE yet. D. Verify that the SunSet T10s LEDs for LINE 1 and LINE 2 show proper framing, coding, and no errors. In other words, there should be green LEDs for CODING, FRAMING, and no red LEDs. E. Press the GRAPHIC key on the keypad, and verify that the SunSet T10 is in THRU Mode. F. Connect the cord from LINE 2 Tx to the IN jack of TE 1. The circuit will be disrupted for two or more seconds when the cords are connected. G. Connect the cord from LINE 1 Tx to the IN jack of TE 2. The circuit will be disrupted for two or more seconds when the cords are connected. Ch.4 Applications 373 SERIAL PORT MULTI PORT TX 6 LINE 2 4 RX TX 5 LINE 1 NimH 15V RX + 2 TE 1 Test Pattern: All Zeros TE 2 Test Pattern: 1-4 OUT 1 3 OUT IN 7 8 IN Figure 192 Emulating an Add/Drop Multiplex 3. Press the HISTORY key on the keypad to acknowledge any blinking LEDs. Verify that the PAT SYNC LED is green. 4. Select MAIN MENU > OTHER MEASUREMENTS > VIEW RECEIVED DATA. A. Since Rx/DROP= L2-Rx in the TEST CONFIGURATION screen has been selected, the data displayed is from LINE 2 Rx. B. Verify that the pattern sent by TE 2 is shown on all of the timeslots. According to Figure 192, the 1–4 pattern should be seen. This confirms that the SunSet T10 is receiving the LINE 2 signal properly. C. Press the ESCAPE key on the keypad twice to return to the MAIN MENU. 5. Select MAIN MENU > TEST CONFIGURATION and change Rx/DROP to L1-Rx. A. Press the ENTER key on the keypad to return to the MAIN MENU. 6. Select MAIN MENU > OTHER MEASUREMENTS > VIEW RECEIVED DATA. A. This time, the data displayed refers to LINE 1 Rx. B. Verify that the pattern transmitted by TE 1 is shown on all available timeslots in this screen. According to Figure 192, 374 SunSet T10 Rev. B the ALL ZEROES pattern should be on all timeslots. This confirms that the SunSet T10 is receiving the LINE 1 signal properly. Now the SunSet T10 is ready to connect to the Datacom device. C. Press the ESCAPE key on the keypad twice to return to the MAIN MENU. 7. Select MAIN MENU > TEST CONFIGURATION and configure as follows: TEST MODE: T1-MUX T1 section Tx/INST: L1-Tx Rx/DROP: L1-Rx FRAMING: as specified by the span design CODING: as specified by the span design RxLVL-1: TERM RxLVL-2: TERM XMTCLK: L1-RX Note in T1-MUX, the SunSet T10 is forced to received timing. LBO 1&2: as specified by the span design DATACOM section TYPE: Select the datacom interface that will provide a 64 kbps frame. TxSRC: T1DRP MODE: DCE, note in T1-MUX the SunSet T10 is forced to DCE. MUX section BERT: The same as DATACOM TYPE (i.e. RS232). T1INS: The Datacom TYPE selected above (i.e. RS232). T1T/S: Select the 64 kbps time slot(s) to be multiplexed from the datacom to the T1 side (see step 8). 8. Select the 64 kbps timeslot(s) to be multiplexed. A. Press the Nx64K (F1) F-key to enter the T10 TIME SLOT screen. B. Use the arrow keys to move the flashing cursor to the desired receive timeslot and press the SELECT (F2) F-key. As you select your receive timeslot, the respective transmit timeslot will also be highlighted. This is because the receive and transmit timeslots should normally be set to the same numbers. • If you want these timeslots to differ, select the transmit section and manually set up the desired timeslots. Ch.4 Applications 375 • • You may also press UN-SEL (F3) to de-select a particular timeslot or CLR-ALL (F4) to erase all the selected timeslots and start with a clear screen. For RS232, you may select only one receive and transmit timeslot. B. Press the ENTER key on the keypad when finished. You will return to the TEST CONFIGURATION screen. 9. Connect the SunSet T10 to the datacom device through the multiport. Refer to Figure 193. Datacom Device 1 PULSES SF YEL/IDLE POWER B8ZS ESF AIS LOW BATT ERRORS SLC-96 PAT SYNC SF BIT ERROR B8ZS ESF YEL/IDLE ERRORS SLC-96 PULSES 2 DTE Test Pattern 511 AIS SunSet T10 MEAS VIEW RECEIVED PAGE : 01 T/S BINARY HEX 01 11011111 DF 02 11000010 C4 03 01000010 42 04 00011110 1E 05 01100101 65 06 00101110 2E 07 11010100 D4 08 11000101 C5 PAGE-UP PAGE-DN F1 12:34:41 DATA ASCII ( ) (#) B (B) (X) e ( ) (t) (+) ( ) RESUME F2 To T10 L1-Rx L1-Tx L2-Rx L2-Tx Multiport STORE F3 F4 Test Equipment 1 OUT IN Test Pattern 0000 SUNRISE TELECOM F1 F2 F3 F4 A RESYNC B LIGHT C GRAPHIC D ERR INJ E AUTO 1 VOL UP 2 VOL D N HISTORY 4 5 7 8 F S H I FT ESCAPE POWER PRN SCRN Test Equipment 2 3 6 9 OUT IN ENTER 0 Test Pattern 1- 4 Figure 193 Emulating Add/Drop MUX 10. Press the HISTORY key on the keypad to clear any blinking LEDs. 11. Verify that the PAT SYNC LED is green and no red error LEDs appear. 12. Press the ESCAPE key on the keypad to return to the MAIN MENU. 13. Select MAIN MENU > OTHER MEASUREMENTS >VIEW RECEIVED DATA A. Verify that the SunSet T10 is receiving DTE’s test pattern on the multiport. Since the datacom type for BERT in the 376 SunSet T10 Rev. B TEST CONFIGURATION screen has been selected, the pattern received on the multiport should be displayed in this screen. For Figure 193, 511 should be seen. Even if only a few Nx64 timeslots have been selected in the TEST CONFIGURATION screen, expect to see the datacom pattern on all timeslots. 14. Verified in the previous steps, the SunSet T10 is receiving a proper signal on both T1 Line receive jacks, as well as on the multiport. A. Verify that the SunSet T10 is inserting the datacom’s signal on the selected timeslots. • On Line 1, the SunSet T10 transmits the signal received on L1-Rx, but it inserts the signal received on the multiport into the Nx64K timeslots selected in the TEST CONFIGURATION screen. For this reason, TE 2 is the best place to check the SunSet T10s insert capability. TE 2 should receive the datacom’s pattern, here 511, on the selected timeslots and TE 1’s pattern, here all zeros, on all the other timeslots. 15. If TE 2 is not capable of displaying its received data, plug a second SunSet T10 into the monitor jack. Turn the second SunSet T10 on and in the TEST CONFIGURATION screen configure the second SunSet T10 as follows: TEST MODE: T1SINGL RxLVL-1: DSXMON FRAMING: as required Tx CODING: as required Tx SOURCE: NORMAL XMT CLOCK: INTERN TEST RATE: 1.544M LBO 1 : as required When done, press the ENTER key on the keypad to return to the MAIN MENU. 16. Connect Line 1 Rx to the MON jack of TE 2. 17. Press the HISTORY key on the keypad to acknowledge any blinking LEDs. 18. Select OTHER MEASUREMENTS > VIEW RECEIVED DATA and verify that the datacom’s pattern is on the selected timeslots and that TE 1’s pattern is on the other timeslots. 19. This verifies the proper insert operation of the SunSet T10. Disconnect the SunSet T10s from the circuit. Ch.4 Applications 377 4.0 ISDN Applications 4.1 ISDN PRI Call Setup This procedure outlines an ISDN call. 1. Verify that the span is not in service. This ISDN call will disrupt service. 2. Select MAIN MENU >TEST CONFIGURATION and configure as follows: TEST MODE: T1SINGL RxLVL-1: TERM FRAMING: as specified by the circuit Tx CODING: as specified by the circuit Tx SOURCE: NORMAL XMT CLOCK: L1-Rx TEST RATE: 1.544M LBO 1: 0 dB When done, press the ENTER key on the keypad to return to the MAIN MENU. 3. Select SEND TEST PATTERN and choose 1-8. Press the ENTER key on the keypad to return to the MAIN MENU. Note: 1–8 should be used for all ISDN applications; QRS may bring down the switch. 4. Connect the SunSet T10 to the circuit as shown in Figure 194, if emulating TE (terminal equipment). Use Figure 195 if emulating NT (network terminal). Press the HISTORY key on the keypad to clear the blinking LEDs. 5. Select OTHER MEASUREMENTS > VIEW RECEIVED DATA, use the PAGE-DN (F2) F-key to view T/S 24. Six consecutive ones together with two zeroes should be displayed; for example, 00111111, 11001111, or 11110011. If this is not seen, then the D-channel is not set up to handle ISDN messages. 6. Press the ESCAPE key on the keypad until ISDN PRIMARY RATE is reached. Setup the CONFIGURATION and OTHER PARAMETERS screens according to the circuit. 7. Press the ESCAPE key on the keypad until START LINK/ CALL SETUP is reached. Check to see if a READY message is displayed. This signifies that the D-channel is running. Set up the call by pressing the CALL (F3) F-key. Enter the desired parameters. Press the CALL (F3) F-key to place a call. 378 SunSet T10 Rev. B Note: The SunSet T10 is able to call itself, which allows the testing of two channels at once. This call must be acknowledged. When the SunSet T10 rings, or displays the “Receive a Call” message, press the ACC-LOOP (F3) F-key to accept the looped call. When finished, press either DISC-1, or the DISC-2 F-keys, to disconnect the line. Central Office or PBX MON SERIAL PORT MULTI PORT TX LINE 2 RX TX LINE 1 NimH 15V RX + Central Office OUT IN Figure 194 ISDN Call Setup - TE Mode Customer Premises MON SERIAL PORT MULTI PORT TX LINE 2 RX TX LINE 1 NimH 15V RX + Central Office Switch OUT IN Figure 195 ISDN Call Setup - NT Mode 8. A “SEND L1 CONNECTION ACKNOWLEDGE” message should be observed. When finished with the call, press the DISC (F2) F-key to disconnect. 9. Disconnect the SunSet T10 from the circuit. Ch.4 Applications 379 4.2 ISDN PRI Monitoring The following procedure illustrates placing an ISDN call. 1. This test may be performed while the PRI line is in-service. 2. Select MAIN MENU > TEST CONFIGURATION and configure as follows: TEST MODE: T1DUAL Tx/INSERT: L1-Tx Rx/DROP: L1-Rx RxLVL-1: DSXMON RxLVL-2: DSXMON Tx SOURCE: TESTPAT FRAMING: as specified by the circuit Tx CODING: as specified by the circuit XMT CLOCK: L1-RX TEST RATE: 1.544M LBO 1&2: 0 dB (or as required) When done, press the ENTER key on the keypad to return to the MAIN MENU. 3. Select SEND TEST PATTERN and choose 1–8. Press the ENTER key on the keypad to return to the MAIN MENU. Note: 1–8 is the normal pattern to use for ISDN applications; QRS may bring down the switch. 4. Connect the SunSet T10s LINE 1 and 2 Rx jacks to the DSX Monitor jacks, as shown in Figure 196. Press the HISTORY key on the keypad to clear the blinking LEDs. This test maybe performed anywhere access to the T1 circuit is provided, i.e. central office, customer premises, or span. 5. Select OTHER MEASUREMENTS > VIEW RECEIVED DATA, use the PAGE-DN (F2) F-key to view T/S 24. Six consecutive ones together with two zeroes should be displayed; for example, 00111111, 11001111, or 11110011. If this is not seen, then the D-channel is not set up to handle ISDN messages. 380 SunSet T10 Rev. B Customer Premises SERIAL PORT MULTI PORT TX LINE 2 RX TX LINE 1 NimH 15V RX + MON PBX (TE) OUT IN DSX Central Office MON OUT IN Switch (NT) DSX Figure 196 ISDN Monitoring 6. Select MAIN MENU > OTHER MEASUREMENTS > ISDN PRIMARY RATE > CONFIGURATION and select TE as the EMULATE TYPE and then choose Q.931 STD according to the circuit. Escape out to ISDN PRIMARY RATE 7. Select OTHER PARAMETERS, check these settings and decide if any need to be changed. Refer to Chapter 3; Section 6.7.7, Other Parameters for information on these settings. Ch.4 Applications 381 8. To capture only a select group of messages, select SETUP FILTER from ISDN PRIMARY RATE. Here choose to capture only messages with a certain Call Reference value, Called Number, or Caller Number. To do so: A. Select FILTER TYPE, press the F-Key corresponding to the desired type. B. Select NUMBER. Press the SHIFT key on the keypad so the SHIFT indicator appears at top. Then enter the numbers from the keypad. C. When finished, press the SHIFT key again to clear the SHIFT indicator. D. To capture all messages, press the NONE (F4) F-key for Filter Type. 9. Escape out to ISDN PRIMARY RATE and select START TRACER. If a call is placed at either end then both LINE 1 and LINE 2 ISDN messages should be observed being sent and received. Press the PAUSE (F2) F-key to pause the messages. The RESTART (F1) F-key will restart the tracing process. 10. Escape out to ISDN PRIMARY RATE and select VIEW/PRINT TRACER. At the initial screen, choose to view, or print all of the messages, or a certain number of messages. To view/print a select number: A. Select VIEW FROM. B. Press the SHIFT key on the keypad and enter the number of the message to view with the number keypad. C. Press the SHIFT key on the keypad to clear the SHIFT indicator. D. Select VIEW TO. Repeat steps B and C to enter in the message number where to stop viewing. 11. When finished, disconnect The SunSet T10 from the circuit. 382 SunSet T10 Rev. B 4.3 ISDN PRI Data Call Setup This procedure illustrates an ISDN Data call. Illustrated in Figure 197 is a point-to-point call. Figure 198 illustrates a loopback device call. Calling a loopback device is quicker and less labor intensive than the point-to-point call. If making a point-topoint call, be sure each SunSet T10 is transmitting the same pattern. 1 2 PULSES SF B8ZS ESF ERRORS SLC-96 PAT SYNC PULSES SF YEL/IDLE BIT ERROR POWER AIS LOW BATT B8ZS ESF YEL/IDLE ERRORS SLC-96 1 2 AIS PULSES SF B8ZS ESF ERRORS SLC-96 PAT SYNC PULSES SF BIT ERROR B8ZS ESF YEL/IDLE ERRORS SLC-96 SunSet T10 F1 RESUME F2 POWER AIS LOW BATT AIS SunSet T10 12:34:41 MEAS VIEW RECEIVED DATA PAGE : 01 T/S BINARY HEX ASCII 01 11011111 DF ( ) 02 11000010 C4 (#) 03 01000010 42 B (B) 04 00011110 1E (X) 05 01100101 65 e ( ) 06 00101110 2E (t) 07 11010100 D4 (+) 08 11000101 C5 ( ) PAGE-UP PAGE-DN YEL/IDLE 12:34:41 MEAS VIEW RECEIVED DATA PAGE : 01 T/S BINARY HEX ASCII 01 11011111 DF ( ) 02 11000010 C4 (#) 03 01000010 42 B (B) 04 00011110 1E (X) 05 01100101 65 e ( ) 06 00101110 2E (t) 07 11010100 D4 (+) 08 11000101 C5 ( ) ISDN Network STORE F3 PAGE-UP PAGE-DN F4 F1 RESUME F2 SUNRISE TELECOM STORE F3 F4 SUNRISE TELECOM F1 F2 F3 F4 F1 F2 F3 F4 A RESYNC B LIGHT C GRAPHIC D ERR INJ A RESYNC B LIGHT C GRAPHIC D ERR INJ E AUTO 1 VOL UP 2 VOL D N 3 HISTORY E AUTO 1 VOL UP 2 VOL D N HISTORY F 4 5 6 F 4 5 7 8 9 S H I FT 7 8 S H I FT ESCAPE POWER ENTER PRN SCRN ESCAPE 0 POWER PRN SCRN 3 6 9 ENTER 0 Figure 197 Point-to-Point Call SF PULSES 1 2 YEL/IDLE POWER AIS LOW BATT B8ZS ESF ERRORS SLC-96 PAT SYNC PULSES SF BIT ERROR B8ZS ESF YEL/IDLE ERRORS SLC-96 ISDN Network AIS SunSet T10 12:34:41 MEAS VIEW RECEIVED DATA PAGE : 01 T/S BINARY HEX ASCII 01 11011111 DF ( ) 02 11000010 C4 (#) 03 01000010 42 B (B) 04 00011110 1E (X) 05 01100101 65 e ( ) 06 00101110 2E (t) 07 11010100 D4 (+) 08 11000101 C5 ( ) PAGE-UP PAGE-DN F1 RESUME F2 Switch STORE F3 F4 SUNRISE TELECOM F1 F2 F3 F4 A RESYNC B LIGHT C GRAPHIC D ERR INJ E AUTO 1 VOL UP 2 VOL D N 3 F 4 5 S H I FT 7 8 ESCAPE POWER PRN SCRN Switch HISTORY 6 9 ENTER Loopback Device 0 Figure 198 Loopback Call 1. Verify that the span is not in service. This ISDN call will disrupt service. Ch.4 Applications 383 2. Select MAIN MENU > TEST CONFIGURATION and configure as follows: TEST MODE: T1SINGL RxLVL-1: TERM FRAMING: as specified by the circuit Tx CODING: as specified by the circuit Tx SOURCE: NORMAL XMT CLOCK: L1-Rx TEST RATE: 1.544M LBO 1: 0 dB When done, press the ENTER key on the keypad to return to the MAIN MENU. 3. Connect the SunSet T10 to the circuit as shown in Figure 194. Press the HISTORY key on the keypad to clear the blinking history lights. 4. Select OTHER MEASUREMENTS > VIEW RECEIVED DATA; use the PAGE-DN (F2) F-key to view T/S 24. Six consecutive ones together with two zeroes should be observed; for example, 00111111, 11001111, or 11110011. If not observed, then the D-channel is not set up to handle ISDN messages. 5. Escape to the MAIN MENU and select OTHER MEASUREMENTS > ISDN PRIMARY RATE and set up the CONFIGURATION and OTHER PARAMETERS screens according to the circuit. 6. Escape out and select START LINK/CALL SETUP. A. Wait and verify that the READY indicator is at the top of the screen. This indicates that the D-Channel is operational. B. Set up the call by pressing the CALL (F3) F-key. C. Enter the desired parameters making sure that CALL TYPE is DATA-56, or DATA-64. D. Press the call (F3) F-key to place the call. 7. A “SEND L1 CONNECTION ACKNOWLEDGE” message should be displayed. After the message is displayed, press the BERT (F2) F-key to display the BERT measurements. 8. After finishing the call, press the DISC (F2) F-key to disconnect. 9. Disconnect the SunSet T10 from the circuit. 384 SunSet T10 Rev. B 4.4 Emulate a ISDN Network Terminal or PBX This procedure illustrates how the SunSet T10 can replace a NT, or PBX. 1. Verify that the span is not in service. This ISDN call will disrupt service. 2. Select MAIN MENU > TEST CONFIGURATION and configure as follows. TEST MODE: T1SINGL RxLVL-1: TERM FRAMING: as specified by the circuit Tx CODING: as specified by the circuit Tx SOURCE: NORMAL XMT CLOCK: INTERN TEST RATE: 1.544M LBO 1: 0 dB When done, press the ENTER key on the keypad to return to the MAIN MENU. 3. Select SEND TEST PATTERN and choose 1–8. Press the ENTER key on the keypad to return to the MAIN MENU. Note: 1-8 is the normal pattern to use for ISDN applications; QRS may bring down the switch. 4. Connect the SunSet T10 to the circuit as shown in Figure 195. Press the HISTORY key on the keypad to acknowledge the blinking LEDs. 5. Select OTHER MEASUREMENTS > VIEW RECEIVED DATA; use the PAGE-DN (F2) F-key to view T/S 24. Six consecutive ones together with two zeroes should be observed; for example, 00111111, 11001111, or 11110011. If not observed, then the D-channel is not set up to handle ISDN messages. 6. Escape to the MAIN MENU and select OTHER MEASUREMENTS > ISDN PRIMARY RATE and set up the CONFIGURATION and OTHER PARAMETERS screens according to the circuit. Make sure to set up EMULATE TYPE to NT in CONFIGURATION. 7. Escape out and select START LINK/CALL SETUP; verify that the READY indicator is at the top of the screen. This indicates that the D-Channel is operational and the SunSet T10 now emulating an ISDN NT device capable of receiving or placing a call. 8. Once finished, escape out, and disconnect the SunSet T10 from the circuit. Ch.4 Applications 385 4.5 46B+2D Call Setup This procedure illustrates making an ISDN call on a 46B+2D ISDN line. AT&T requires NATL-2 protocol to perform this test. Central Office 1 PULSES SF YEL/IDLE POWER B8ZS ESF AIS LOW BATT ERRORS PAT SYNC SLC-96 SF BIT ERROR B8ZS ESF YEL/IDLE ERRORS SLC-96 PULSES 2 12:34:41 MEAS VIEW RECEIVED DATA PAGE : 01 T/S BINARY HEX ASCII 01 11011111 DF ( ) 02 11000010 C4 (#) 03 01000010 42 B (B) 04 00011110 1E (X) 05 01100101 65 e ( ) 06 00101110 2E (t) 07 11010100 D4 (+) 08 11000101 C5 ( ) PAGE-UP PAGE-DN F1 Primary D Channel PRI ID: 00 AIS SunSet T10 RESUME F2 Backup D Channel PRI ID: 01 STORE F3 F4 SUNRISE TELECOM F2 F3 A RESYNC B LIGHT C GRAPHIC D ERR INJ E AUTO F1 1 VOL UP 2 VOL D N HISTORY F 4 5 6 S H I FT 7 POWER PRN SCRN 8 ESCAPE F4 3 Switch 9 ENTER 0 Figure 199 Back-up D Channel 1. Perform this test while the line is out of service. 2. Select MAIN MENU >TEST CONFIGURATION and configure as follows: TEST MODE: T1DUAL Tx/INSERT: L1-Tx Rx/DROP: L1-Rx RxLVL-1: TERM RxLVL-2: TERM Tx SOURCE: TESTPAT FRAMING: as specified by the circuit Tx CODING: as specified by the circuit XMT CLOCK: L1-Rx TEST RATE: 1.544M LBO 1&2: 0 dB (or as required) When done, press the ENTER key on the keypad to return to the MAIN MENU. 3. Connect the SunSet T10 to the circuit as shown in Figure 199. Press the HISTORY key on the keypad to clear the blinking LEDs. 386 SunSet T10 Rev. B 4. Select ISDN PRIMARY RATE > CONFIGURATION and set up according to the circuit making sure the EMULATE TYPE is set for TE. 5. Escape out and select ISDN PRIMARY RATE > OTHER PARAMETERS. Set up “Line 1 D-chnl” and “L 2 Bkup D-Chnl” according to the circuit. 6. Escape out and select ISDN PRIMARY RATE > BACKUP D CHNL TEST. Both LINE 1 and LINE 2 ISDN messages should be sent, and information about a message should be received for either LINE 1 or LINE 2. 7. Press the L-STAT (F1) F-key to display the status of both lines. LINE 1 should display “In service”, and LINE 2 should display “Standby”. To test whether or not LINE 2 acts as a backup PRI line, press the DROP-L1 (F1) F-key to manually drop LINE 1. LINE 1 should display “Manual out of service” and LINE 2 should change now to “In service”. To establish LINE 1 once again press the EST-L1 (F1) F-key and it should now display “Stand by”. Wait until it changes to “In-Service.” 8. Escape to the BACKUP D CHNL TEST and press the CALL (F3) F-key. Now enter the specific parameters related to the call, making sure to select either LINE 1, or LINE 2 for the B channel (B CHNL LINE). When the settings are complete, press the CALL (F3) F-key. 9. After successfully placing and receiving the call, the screen will display “SEND L1 CONNECTION ACKNOWLEDGE”. 10. When finished with the call press the DISC (F2) F-key to disconnect. 11. Disconnect the SunSet T10 from the circuit. Ch.4 Applications 387 4.6 47B+D Call Setup This procedure illustrates making an ISDN call on a 47B+D ISDN line. Perform this test while the circuit is out-of-service. 1 2 PULSES SF B8ZS ESF ERRORS SLC-96 PAT SYNC PULSES SF YEL/IDLE BIT ERROR POWER AIS LOW BATT B8ZS ESF YEL/IDLE ERRORS SLC-96 Central Office D Channel PRI ID: 00 AIS SunSet T10 PRI ID: 02 12:34:41 MEAS VIEW RECEIVED DATA PAGE : 01 T/S BINARY HEX ASCII 01 11011111 DF ( ) 02 11000010 C4 (#) 03 01000010 42 B (B) 04 00011110 1E (X) 05 01100101 65 e ( ) 06 00101110 2E (t) 07 11010100 D4 (+) 08 11000101 C5 ( ) PAGE-UP PAGE-DN F1 RESUME F2 STORE F3 F4 SUNRISE TELECOM F1 F2 F3 F4 A RESYNC B LIGHT C GRAPHIC D ERR INJ E AUTO 1 VOL UP 2 VOL D N HISTORY F 4 5 6 S H I FT 7 POWER PRN SCRN 8 ESCAPE Switch 3 9 ENTER 0 Figure 200 47B + D 1. Select MAIN MENU > TEST CONFIGURATION and configure as follows: TEST MODE: T1DUAL Tx/INSERT: L1-Tx Rx/DROP: L1-Rx RxLVL-1: TERM RxLVL-2: TERM Tx SOURCE: TESTPAT FRAMING: as specified by the circuit Tx CODING: as specified by the circuit XMT CLOCK: L1-Rx TEST RATE: 1.544M LBO 1&2: 0 dB (or as required) When done, press the ENTER key on the keypad to return to the MAIN MENU. 2. Connect the SunSet T10 to the circuit as shown in Figure 200. Press the HISTORY key on the keypad to clear the flashing LEDs. 3. Select OTHER MEASUREMENTS > VIEW RECEIVED DATA, use the PAGE-DN (F2) F-key to view T/S 24. Six consecutive ones together with two zeroes should be displayed; for example, 00111111, 11001111, or 11110011. If not observed, then the D-channel is not set up to handle ISDN messages. 388 SunSet T10 Rev. B 4. Escape and select ISDN PRIMARY RATE > CONFIGURATION. Set up according to the circuit, making sure the EMULATE TYPE is set for TE. 5. Escape and select ISDN PRIMARY RATE > OTHER PARAMETERS. Set up LINE 1 D-Channel. Set up for 47B+D emulation by setting the 47B+D CONFIG to ENABLE. Note that the L2 INTERFACE ID will automatically change to 2, when 47B + D is enabled. 6. Escape and select ISDN PRIMARY RATE > START LINK/ CALL SETUP. Press the call (F3) F-key. Now enter the specific parameters related to the call making sure to select either LINE 1, or LINE 2, to place the B-channel call found in B CHNL LINE. Press the call (F3) F-key to place the call. 7. After successfully placing and receiving the call, the SunSet T10 will display “SEND L1 CONNECTION ACKNOWLEDGE”. 8. When finished with the call press the DISC (F2) F-key to disconnect. 9. Disconnect the SunSet T10 from the circuit. Ch.4 Applications 389 4.7 Receiving Two Simultaneous B-Channel Calls This procedure illustrates receiving two simultaneous B-Channel calls. 1. Verify that the span is not in service. This ISDN call will disrupt service. 2. Select MAIN MENU >TEST CONFIGURATION and configure as follows. TEST MODE: T1SINGL RxLVL-1: TERM FRAMING: as specified by the circuit Tx CODING: as specified by the circuit Tx SOURCE: NORMAL XMT CLOCK: L1-Rx TEST RATE: 1.544M LBO 1: 0 dB When done, press the ENTER key on the keypad to return to the MAIN MENU. 3. Select SEND TEST PATTERN and choose 1–8. Press the ENTER key on the keypad to return to the MAIN MENU. Note: 1–8 is the normal pattern to use for ISDN applications; QRS may bring down the switch. 4. Connect the SunSet T10 to the circuit as shown in Figure 194. Press the HISTORY key on the keypad to clear the blinking LEDs. 5. Select OTHER MEASUREMENTS > VIEW RECEIVED DATA; use the PAGE-DN (F2) F-key to view T/S 24. Six consecutive ones together with two zeroes should be displayed; for example, 00111111, 11001111, or 11110011. If not observed, then the D-channel is not set up to handle ISDN messages. 6. Escape and select ISDN PRIMARY RATE. Set up the CONFIGURATION, and OTHER PARAMETERS screens according to the circuit. Make sure to set up EMULATE TYPE to TE in CONFIGURATION. 7. Escape and select START LINK/CALL SETUP. Verify that the READY indicator is at the top of the screen. This indicates that the D-Channel is operational. 8. When receiving a call, the SunSet T10 displays a “RECEIVE A CALL” message. Press the ACC-TERM (F2) F-key to accept 390 SunSet T10 Rev. B the first call in a terminated mode. Press the INFO (F1) F-key for more information on the first call. Press the ESCAPE key on the keypad to return to the CALL SETUP screen. 9. When receiving another call, the SunSet T10 displays another “RECEIVE A CALL” message. The ACC-TERM (F2) and ACCLOOP (F3) F-keys are now available. Pressing the INFO (F1) F-key displays information about both calls. Shown in Figure 201 is sample INFO screen. 21:10:05 CALL No.1 CREF No:579 DIR - RECEIVE Bch CFG: TERM Bch LN#: LINE 1 BEARER: VOICE CHANNEL: 3 CLER ID: 4083638000 CALL No.2 CREF No:580 DIR - RECEIVE Bch CFG: LOOP Bch LN#: LINE 1 BEARER: VOICE CHANNEL:10 CLER ID: EMPTY Figure 201 Receive a Call - INFO Screen 10. When finished disconnect from either call by pressing one of the following F-keys, DISC-1 (F2) for CALL No.1, or DISC-2 (F3) for CALL No. 2. 11. Disconnect the SunSet T10 from the circuit. Ch.4 Applications 391 5.0 SS7 Applications This application demonstrates how the SunSet T10 can receive SS 7 messages. In the following procedure, two SS7 nodes (SSPs) are sending basic call procedure messages to each other. The SunSet T10 can receive, and decode these messages to monitor the call procedure. Figure 202 shows part of the SS7 network. 027-024-000 036-032-000 DSX-1 MON MON OUT OUT IN IN TANDEM STP SF PULSES 1 B8ZS ESF ERRORS B8ZS ERRORS YEL/IDLE POWER AIS LOW BATT PAT SYNC SLC-96 PULSES 2 ISUP Messages IAM ACM ANM REL RLC TANDEM SF BIT ERROR ESF YEL/IDLE SLC-96 AIS SunSet T10 12:34:41 MEAS VIEW RECEIVED DATA PAGE : 01 T/S BINARY HEX ASCII 01 11011111 DF ( ) 02 11000010 C4 (#) 03 01000010 42 B (B) 04 00011110 1E (X) 05 01100101 65 e ( ) 06 00101110 2E (t) 07 11010100 D4 (+) 08 11000101 C5 ( ) PAGE-UP PAGE-DN F1 RESUME F2 STORE F3 F4 SUNRISE TELECOM F2 F3 A RESYNC B LIGHT C GRAPHIC D ERR INJ E AUTO F1 1 VOL UP 2 VOL D N HISTORY F 4 S H I FT 7 POWER PRN SCRN 5 8 ESCAPE F4 3 6 9 ENTER 0 Figure 202 SS7 Network Testing The following is a common configuration setting when testing a link. Use the following procedure: 1. Select MAIN MENU > TEST CONFIGURATION and configure as follows: TEST MODE: T1 DUAL Tx/INSERT: L1-TX Rx/DROP: L1-TX RxLVL-1: DSXMON RxLVL-2: DSXMON Tx SOURCE: THRU FRAMING: SF-D4 Tx CODING: B8ZS XMT CLOCK: L1-RX TEST RATE: 1.544M LBO 1 & 2: 0 dB When done, press the ENTER key on the keypad to return to the MAIN MENU. 392 SunSet T10 Rev. B 2. Connect both LINE 1 and LINE 2 Rx to the DSX Monitor jacks. If red LEDs appear for framing, press the AUTO key on the keypad. The SunSet T10 will attempt to synchronize on the received framing. 3. Select OTHER MEASUREMENTS > SS7 ANALYSIS > CONFIGURATION and configure as follows: Line 1 Rx T/S: 2 Line 2 Rx T/S: 2 SS7 VERSION: ANSI TRUNK RATE: 56k DISPLAY INPUT: HEX When done, press the ENTER key on the keypad to return to the SS7 ANALYSIS menu. In the above settings for both LINE 1 and 2, T/S 2 was selected, since that is the timeslot for the SS7 link. Also selected was a Trunk Rate of 56k, since that is a common rate for the United States. 4. Select SU ANALYSIS. A high number of FISUs and a low number of MSUs should be observed, unless this is a high traffic SS7 network. 5. Escape to SS7 ANALYSIS and select MSU MONITOR > START TRACER; the SunSet T10 should start displaying messages. To capture only a select group of messages, select the filtering fields within SETUP FILTER. Refer to chapter 3, section 6.8.2.1 for more information on each of the filtering types. In this application, ISUP messages are captured; therefore, SI FIELD: ISUP was selected. 6. To view each message individually, escape back to the MSU MONITOR and select VIEW/PRINT TRACER. To begin viewing, press the VIEW (F3) F-key. Figure 203 shows a sample screen. Ch.4 Applications 393 02:08:58 RCV MESG NO.65 LINE 1 95-01-01 (ANSI) 03:42:51.08 ISUP DCP: 00-20-24 9C 00 0C 47 00 C1 19 02 00 PAGE-UP 26 00 90 01 85 01 98 06 24 00 07 11 20 00 80 00 PAGE-DN 00 10 18 00 1B 0A 61 09 18 03 31 2D 00 05 37 20 DECODE Figure 203 View Message, Hexadecimal From Figure 203, observe this is message number 65 and it was received on LINE 1. This message shows the DPC in hexadecimal. 7. Press the DECODE (F3) F-key to see the decoded message. Refer to Figure 204. 02:15:34 RCV MESG NO.65 (ANSI) LINE 1 95-01-01 03:42:51.08 MSU- ISUP BSN:1C 1 FSN:41 1 SI :5 SSF:8 CIC:0019 DPC: 036-032-000 OPC:027-024-000 mesg type 01 IAM NOC INDI:00 FRW INDI:00 10 CLN CTGY:0A USR INFO:90 98 CALLD NO:>> 161373740 CALL REF:11 00 00 09 2D 20 PAGE-UP PAGE-DN HEX L4deco Figure 204 View Message, Decoded 394 SunSet T10 Rev. B The decoded screen in Figure 204 displays the DPC and OPC in decimal format. This is an ISUP Message Signaling Unit. The message type is IAM (Initial Address Message). Also shown on this screen are the hex values for: • • • • • • nature of connection indicator. forward call indicator. calling party category. user service information. called party number. call reference. To find out the translation of these hex values, select the corresponding field and press the L4deco (F4) F-key. Figure 205 shows an example of one of the Layer 4 decodings and shows the decoding bit-by-bit according to ANSI documentation. bits HGFEDCBA 00000000 02:22:06 bits BA: Satellite Indicator 00 no satellite circuit in the connection bits DC: Continuity check ind continuity check not required bit bits E: Echo control device 0 outgoing half echo control device not included F-H:Spare Figure 205 Nature of Connection, Layer 4 Decode 8. When finished viewing messages, disconnect the SunSet T10 from the circuit. Ch.4 Applications 395 6.0 GSM Voice/TRAU/BERT Testing EIR BSC MSC HLR BTS BSC A Interface BTS Um Interface Abis Interface VLR AUC Network Subsytem AUC Authentication Center BSC Base Station Controller BTS Base Transceiver Station E I R Equipment Identity Register HLR Home Location Register MSC Mobile Switching Center VLR Visitor Location Register Figure 206 GSM Network The SunSet T10 is a powerful tool for maintaining/installing GSM networks. It offers three tests for testing the TRAU (Transcoder and Rate Adaption Unit). They are: • • • 16k TRAU frame BER testing. Check voice quality with real-time 13k speech monitoring. Insert GSM encoded speech message to test TRAU/BTS. 6.1 16K BER Testing 1. Select MAIN MENU > TEST CONFIGURATION and configure as follows: TEST MODE: T1SINGL RxLVL-1: TERM FRAMING: as specified by the circuit Tx CODING: as specified by the circuit Tx SOURCE: NORMAL XMT CLOCK: INTERN TEST RATE: 1.544M LBO 1: 0dB When done, press the ENTER key on the keypad to return to the MAIN MENU. 2. Connect the SunSet T10s LINE 1 transmit and receive jacks to the circuit under test. 396 SunSet T10 Rev. B 3. Select OTHER MEASUREMENTS > GSM VOICE/TRAU BERT > 16K BERT, configure as shown in Figure 207. 21:10:05 GSM 16K BERT LINE NUMBER: TIME SLOT : SUB CHANNEL: PATTERN : LINE 1 02 2 2047 ELAPSED TIME: 000:08:37 ERROR: 0 RATE: 0.0e-06 ES : 0 EFS : 0 SES : 0 UAS : 0 LOSS : 0 STOP 2047 more PRINT Figure 207 GSM 16K BERT Screen The following measurements are in the lower portion of the screen within Figure 207: ELAPSED TIME: This is the elapsed time since the beginning of the test. This counter begins counting when entering the 16K BERT screen, or after pressing the STOP/ RESUME (F1) key. ERROR: The number of bit errors that have occurred since the start of the test. ES: This is the number of errored seconds since the beginning of the test. EFS: This is the number of error-free seconds since the beginning of the test. SES: This is the number of severely errored seconds since the beginning of the test. A severely errored second contains a 10-3 error rate. UAS: This is the number of unavailable seconds since the beginning of the test. An unavailable second begins after 10 consecutive severely errored seconds (SES). It also occurs when there is a loss of signal. LOSS: Loss of signal seconds is a count of the number of seconds with a loss of signal since the beginning of the test. This refers to the loss of the entire 64 Kbps signal. Ch.4 Applications 397 6.2 Monitoring Network Traffic & Voice Quality 1. Select MAIN MENU > TEST CONFIGURATION and configure as follows: TEST MODE: T1DUAL Tx/INSERT: L1-TX Rx/DROP: L1-RX RxLVL-1: DSXMON, if a DSX Monitor access point is available. RxLVL-2: DSXMON, if a DSX Monitor access point is available. Tx SOURCE: TESTPAT FRAMING: as specified by the circuit Tx CODING: as specified by the circuit XMT CLOCK: L1-RX TEST RATE: 1.544M LBO 1&2: 0dB When done, press the ENTER key on the keypad to return to the MAIN MENU. 2. Connect the SunSet T10s Line 1 and 2 receive jacks to the DSX Monitor jacks. 3. Select OTHER MEASUREMENTS > GSM VOICE/TRAU/ BERT, GSM MONITOR. Refer to Figure 208. Indicates speach frame (uplink direction) on T/S 01, subchannel 1 00:13:12 T/S GSM LINE 2 1 Press to display traffic on Line 1 S--- ---- ---^ 7 ---- -S-- ---^ ^ 13 S--- ---- ---S ^ 19 ---- ---- ---- LINE 1 D & I ---- ---- --I---- --D- --S^ ---- ---- ---^ ---- -S----- JUMP PAUSE Figure 208 GSM Monitor Screen 398 SunSet T10 Rev. B Displayed in Figure 208 are all 24 timeslots. The top row contains timeslots 1–6; the second row has 7–12, and so on. Also shown in this screen are the 4 sub-channels contained within each timeslot. This screen shows the timeslots on LINE 2; alternately, press the LINE 1 (F1) F-key to view the activity on LINE 1. Use this screen to monitor for the following TRAU frames on each subchannel: S = Speech- This refers to the uplink direction. D = Data I = Idle (speech idle) - = Unknown The arrow below the “S” speech symbol indicates the direction: ^ = uplink direction (user to network) v = downlink direction (network to user) 4. An “S” in one of the sub-channels indicates speech; this 13k GSM encoded speech can be dropped to the SunSet T10s speaker to monitor voice quality. To do so: A. Select a sub-channel displaying speech. B. Press the D&I (F2) F-key to drop the sub-channel to the speaker. Ch.4 Applications 399 6.3 Transmitting a GSM Encoded Voice Message 1. Select MAIN MENU > TEST CONFIGURATION and configure as follows: TEST MODE: T1SINGL RxLVL-1: TERM FRAMING: as specified by the circuit Tx CODING: as specified by the circuit Tx SOURCE: NORMAL XMT CLOCK: INTERN TEST RATE: 1.544M LBO 1: 0dB When done, press the ENTER key on the keypad to return to the MAIN MENU. 2. Connect the SunSet T10s Line 1 transmit and receive jacks to the circuit under test. 3. Select OTHER MEASUREMENTS > GSM VOICE/TRAU/ BERT, VOICE/TRAU XMT and configure as shown in Figure 209. 00:04:49 Determines the transmit line VOICE & TRAU XMT Determines the timeslot: 1-24 Determine which subchannel (1-4) inside the timeslot Set the idle code inserted on non-selected channels. Transmit in the uplink (BTS to BSC), or downlink (BSC to BTS) direction. Configure the time alignment delay, or advance. LINE NUMBER: TIME SLOT : SUB CHANNEL: IDLE CODE : LINK DIRCTN: TIME ALGMNT: RCV CBITS PAUSE LINE 1 7 1 11111111 UPLINKUPLINK DELAY 0 x500us : UPLINK DNLINK Figure 209 Voice & TRAU XMT Configuration Screen 4. The 13K RPE LTP coded message “Sunrise Telecom, a step ahead’ will be transmitted on the selected line, timeslot, and sub-channel. 400 SunSet T10 Rev. B 7.0 Installing a Frame Relay Circuit 7.1 PING Test Every Internet device has its own IP (Internet Protocol) address. Multiple LAN segments can be connected via a Frame Relay network. A common way to discover whether two remote LAN segments using the TCP-IP protocol are connected is to send a PING (Internet Control Message Protocol) message from one segment to another. When a PING message is received, Internet devices acknowledge the message by sending an echo message back. 1. Select MAIN MENU > TEST CONFIGURATION and configure as follows: TEST MODE: T1SINGL RxLVL-1: TERM FRAMING: per circuit, or use the AUTO key on the keypad to configure on the line’s framing type. Tx CODING: per circuit Tx SOURCE: NORMAL XMT CLOCK: L1-Rx TEST RATE: Nx64K or Nx56K. It is crucial to select the proper test rate for the frame relay data. If the configured rate is unknown, press the AUTO (F1) F-key. The SunSet T10 automatically configures to the active channels. Active channels are highlighted. Press the ENTER key on the keypad to return to the TEST CONFIGURATION screen. LBO 1: 0 dB When done, press the ENTER key on the keypad to return to the MAIN MENU. 2. Connect the SunSet T10 to the circuit using its Line 1 Rx and Tx jacks. Once connected, the PULSES and framing (i.e. SF) LEDs should both be green. Flashing LEDs indicate a history condition. Press the HISTORY key on the keypad to clear the LEDs. 3. Select MEASUREMENT RESULTS to check for no errors, as well as a valid frequency and level. To restart the test, press the STOP (F3) F-key, and press the RESTART (F3) F-key. After restarting the test, the SunSet T10 should display “NO ERRORS” on the summary screen. When finished, press the ESCAPE key on the keypad. Ch.4 Applications 401 4. Select MAIN MENU > OTHER MEASUREMENTS > VIEW RECEIVED DATA. This screen displays which channels are idle and which channels are used for data. Idle channels display the circuit’s idle code of FF or 7F. Press the PAGE-DN (F2) Fkey to scroll through all timeslots; the first page shows timeslots 1–8, next page shows 9–17, next shows 18–24. This is a way of determining the test rate of the circuit and to verify that the SunSet T10 is properly configured. When finished, press the ESCAPE key on the keypad twice to return to the MAIN MENU. 5. Select FRAME RELAY > CONFIGURATION and configure as follows: INTERFACE: UNI STANDARD: Press the AUTO (F4) F-key. The SunSet T10 automatically finds the standard for the circuit. DLCI VALUE: Press the AUTO (F4) F-key. The SunSet T10 automatically finds the DLCI length of the circuit. • The last 4 settings (T391, N391, N392, N393) determine how often the full status enquiry/response is sent, how much time should elapse, and error thresholds. Unless a specific test is needed to check these parameters, leave them at their default values: T391: 10 N391: 6 N392: 3 N393: 4 After these settings are configured, escape back to the FRAME RELAY menu 6. Select LMI ANALYSIS. Upon displaying this screen, the SunSet T10 begins sending/responding the link management signaling to check the status of the UNI (user-network interface). The SunSet T10 sends a status inquiry message every 10 seconds per the T391 setting. A. The network must respond with a status message for each enquiry message. After sending/receiving the right number of enquires (as determined from N391 setting), the SunSet T10 sends a full status inquiry to the network. When the SunSet T10 receives a full status message from the network, it reports the “LINK OK”. 402 SunSet T10 Rev. B B. Upon entering LMI ANALYSIS, wait approximately 30 seconds (depending on the parameters). If the SunSet T10 received a proper response form the network, it displays “LINK OK”. If the SunSet T10 does not receive a proper response from the network, it displays “LINK ERROR”. 7. Press the PVC (F1) F-key to see the DLCI activity on the permanent virtual circuit. This screen reports all configured PVCs and gives a status for each (active, or idle). 8. Press the LMI (F3) F-key to return to the LMI analysis screen. 9. The link between the SunSet T10 and the network (UNI Interface) is now verified. Ch.4 Applications 403 404 SunSet T10 Rev. B Chapter 5 Reference 1.0 Abbreviations A ACK - Acknowledge is a control character signaling that the receiver is ready to accept the next block. AFBER - Average Framing Bit Error Rate AIS - Alarm Indication Signal indicates an all ones signal on the active receive jack. AISS - Alarm Indication Signal Seconds is a count of the number of seconds in which AIS was detected. ALM - Alarm AMI - Alternate Mark Inversion is a method of transmitting binary digits, in which successive “marks” are of alternating polarity, but of equal amplitude. A space designates zero amplitude. ANSI- American National Standards Institute is the principal standards development organization in the US. ARM-INB - Arm Inband AS - Available Second ASCII - American Standard Code for Information Interchange AVBER - Average Bit Error Rate AVCER - Average CRC-6 block Error Rate B B Channel - Bearer Channel is a 64 Kbps ISDN user channel that carries digital data, PCM-encoded digital voice, or a mixture of lower-speed data traffic. B8ZS - Bipolar 8-Zero Substitution is a type of line coding format for T1 lines that uses bipolar violations to encode strings of eight consecutive zeroes. BPV - Bipolar Violation BTSLP - Bit Slip occurs when the synchronized pattern either loses a bit or gains an extra bit through stuffing. BUFF - A Buffer is a device that stores data temporarily from a faster device. Ch.5 Reference 405 C CCITT - Comite Consultatif Internationale de Telegraphique et Telephonique is an international consultative committee that sets worldwide communications standards. CER - CRC-6 Error Rate Checksum - The total of a group of data items used for errorchecking purposes. CLR - Clear COFA - Change of Frame Alignment indicates when the framing has moved to a new position. CONFIG - Configuration CRC-6 - Cyclic Redundancy Check Code - 6 is a method of error detection for link-layer data transmissions. CSU - Customer Service Unit is a digital DCE used to terminate digital circuits (i.e. DDS, T1 lines) at the customer site. CTL - Control CUFBER - Current Framing Bit Error Rate CURBER - Current Bit Error Rate D dB - Decibel is a unit of measure of signal strength, usually the relationship between a transmitted signal and a standard signal source. dBdsx - decibel referenced to dsx power level DCE - Data Communication Equipment is the equipment that enables a DTE to communicate over a telephone line or data circuit. DCS - Digital Cross-connect System DDS - Dataphone Digital Service is a private line digital service with typical data rates of 2.4, 4.8, 9.6, and 56 Kbps. DENS - Density DGRM - Degraded Minute DLF - Data Link Frame DS1 - Digital Signal 1 is the term for the electrical signal found at the metallic interfaces of T1 circuits where most testing is performed. DSX - Digital Signal Cross-connect 406 SunSet T10 Rev. B DSXMON - DSX Monitor signal DTE- Data Terminal Equipment is a user device such as terminals and computers that connects to DCE. DTMF - Dual Tone Multi Frequency is a type of audio frequency signaling, generated by touchtone telephones. E E&M Signaling is a method of signaling between junction equipment in an exchange and a signaling unit associated with a transmission equipment using two leads- a receive (E) lead and a transmit (M) lead. ERR INJ - Error Injection ES - Errored Second ESF - Extended Super Frame is a framing method with 24 frames grouped together. ET - Elapsed Time is the total time during which a circuit is occupied by a connected call. EXTERN - External EXZS - Excess Zeroes Seconds F F1 - Function 1 FAC - Facility FBE - Framing Bit Error FBER - Framing Bit Error Rate FDL - Facility Data Link FELP - Far End Loop FREQ - Frequency FRM - Frame. In data transmission, the sequence of contiguous bits bracketed by and including beginning and ending flag sequences. FSLIP - Frame Slip occurs each time the phase of the line under test has deviated from the phase of reference by 193 bits. FT1 - Fractional T1 is a service aimed at customers who do not need all 24 channels of a full T1 line. Ch.5 Reference 407 H HEX - Hexadecimal is a 16-digit number system consisting of the digits 0, 1, 2, 3, 4, 5, 6, 7, 8, 9, A, B, C, D, E, and F. This base-16 number system often used in computers. HOLDSCRN - Hold Screen Hz – Hertz is a unit of frequency, one cycle per second. I INTERN - Internal INV - Inverted ISDN - Integrated Services Digital Network is a CCITT standard for a network that accommodates a variety of mixed digital transmission services. K kFt - kilo (1000) Feet L LBO - Line Build Out LDNS - Low Density Seconds is a count of the number of seconds where the n(n-1) rule is broken. LLPBK - Line Loopback LOFS - Loss of Frame Second occurs at the onset of three consecutive OOFS (Out Of Frame Seconds). LOG - Logical LOS - Loss of Signal LOSS - Loss of Signal Second LPBK - Loopback is a diagnostic procedure used for transmission devices. A test message is transmitted to the device being tested and then sent back to the originator, where it is compared to the original message. LPBKQRY - Loopback Query Lpp - Level peak-to-peak. The peak-to-peak level of negative and positive pulses received. LVL - Level M mbps - megabits per second. MON - Monitor mW - milliwatt 408 SunSet T10 Rev. B N NI - Network Interface NOTE - Network Office Terminating Equipment NV RAM - Non Volatile Random Access Memory O OOF - Out Of Frame OOFS - Out of Frame Second is a count of out of frame seconds that have occurred since the beginning of the test. P PAT - Pattern PLPBK - Payload Loopback ppm - parts per million PRBS - Pseudo Random Bit Sequence PRN SCRN - Print Screen PRNT - Print PRNTR - Printer PWRLPQRY - Power Loop Query PWCUTTH - Power Cut Through Q QRS - Quasi Random Signal is a signal is formed from a 20stage shift register and is zero-constrained for a maximum of 14 consecutive zeroes. R R - Receive REF - Reference RT - Remaining Time Rx - Receive S SABME- Set Asynchronous Balanced Mode Extended SAPI - Service Access Point Identifier SCRN - Screen SES - Severely Errored Second SF - Super Frame. SIG - Signal Ch.5 Reference 409 SHLF - Shelf SLC-96 - Subscriber Loop Carrier - 96 channel SMPX - Simplex SPLT - Split SW - Switch SYNC - Synchronized SYLS - Synchronization Loss Second T T - Transmit T/S - Time Slot TEI- Terminal Endpoint Identifier TERM - Terminated TOUT - Time Out TOUTDIS - Timeout Disable Tx - Transmit U UA - Unnumbered Acknowledgment UAS - Unavailable Second UI - Unit Interval UNIVLDN - Universal Loopdown µS - microsecond V VF - Voice Frequency Y YEL - Yellow YELS - Yellow Alarm Second 410 SunSet T10 Rev. B 2.0 Standard Test Patterns This section defines the various test patterns transmitted and recognized by the SunSet T10. The long patterns are written in hexadecimal form, also known as “HEX”. A pattern is written in HEX, if it is written with pairs of numbers separated by commas. HEX is a 16-digit number system consisting of the digits 0, 1, 2, 3, 4, 5, 6, 7, 8, 9, A, B, C, D, E, and F. The HEX pattern 15 FA translates to the binary pattern 0001 0101 1111 1010, where the left-most bit is transmitted first. QRSS QRSS is the industry-standard Quasi Random Signal. This signal is formed from a 20-stage shift register and is zero-constrained for a maximum of 14 consecutive zeroes. When transmitted in a framed signal, up to 15 consecutive zeroes will occur, in accordance with AMI minimum density requirements. 55DLY The Daly 55 Octet pattern is a special stress pattern that obeys industry standards for pulse density and maximum consecutive zeroes in both AMI and B8ZS coded circuits. Framing bits occur at octet boundaries. Note that the Daly 55 octet pattern replaced the original 55 octet pattern (refer to T1–6). The Daly 55 octet pattern is as follows: 80, 80, 80, 80, 80, 80, 01, 80, 80, 80, 80, 80, 80, C0, 80, 80, 80, 80, E0, 80, 80, 80, 80, AA, AA, AA, AA, 55, 55, 55, 55, 80, 80, 80, 80, 80, 80, FF, FF, FF, FF, FF, FF, 01, 80, 01, 80, 01, 80, 01, 80, 01, 80, 01, 80 2e23 2e23 is the industry-standard 2e23-1 pseudo random bit sequence. This signal is formed from a 23-stage shift register and is not zero-constrained. This pattern contains up to 22 zeroes in a row and violates standards for consecutive zeroes in AMI-coded transmission. 2047 2047 is the industry-standard 2047 bit code used for DDS applications. Ch.5 Reference 411 1–8 The industry-standard 1 in 8 pattern is used for stress testing AMI and B8ZS lines. The pattern is also called 1:7 in older literature. The pattern is frame aligned (f is the framing bit) as shown in its binary form: f 0100 0000 FOX The industry-standard FOX pattern is used in data communications applications. The ASCII translation of the pattern is the “Quick brown fox....” sentence. The pattern is frame aligned to ensure proper ASCII translation of the bits. Sending the pattern with signals is recommended; otherwise, ASCII translation is not possible. The FOX pattern is as follows: 2A, 12, A2, 04, 8A, AA, 92, C2, D2, 04, 42, 4A, F2, EA, 72, 04, 62, F2, 1A, 04, 52, AA, B2, 0A, CA, 04, F2, 6A, A2, 4A, 04, 2A, 12, A2, 04, 32, 82, 5A, 9A, 04, 22, F2, E2, 04, 8C, 4C, CC, 2C, AC, 6C, EC, 1C, 9C, 0C, B0, 50 2e20 2e20 is the industry-standard 2e20-1 pseudo random bit sequence. This signal is formed from a 20-stage shift register and is not zero-constrained. This pattern contains up to 19 zeroes in a row and violates standards for consecutive zeroes in AMI-coded transmission. The QRSS pattern is derived from 2e20. 511 511 is the industry standard 511-bit code used for DDS applications. 1–16 The industry-standard 1 in 16 pattern is used for over-stressing AMI lines. It violates industry standards for pulse density; therefore, an AMI circuit that fails this test could still be a good circuit. The pattern is frame aligned (“f” is the framing bit) as shown in its binary form: f 0100 0000 0000 0000 ALL 1 The industry-standard all 1s pattern is used for stress testing AMI and B8ZS lines. If sending the pattern unframed, it is interpreted as an AIS (Alarm Indication Signal). The ALL 1 pattern is shown in its binary form as follows: 1111 412 SunSet T10 Rev. B 2e15 2e15 is the industry standard 2e15-1 pseudo random bit sequence. This signal is formed from a 15-stage shift register and is not zero-constrained. This pattern contains up to 14 zeroes in a row and does not violate standards for consecutive zeroes in AMIcoded transmission. 127 127 is the industry-standard 127-bit code used for DDS applications. 3–24 The industry-standard 3 in 24 pattern is used for stress testing AMI lines. The pattern is frame aligned ("f" is the framing bit) as shown in its binary form: f 0100 0100 0000 0000 0000 0100 ALL 0 ALL 0 is the industry-standard all zeroes pattern. This pattern is often used to make sure that clear-channel lines are properly provisioned for B8ZS during circuit turn-up. If a portion of the circuit is AMI, pattern synch and/or signal will be lost. The following is the actual pattern: 0000 ALT10 ALT 10 is the industry-standard alternating ones and zeroes pattern. The pattern is frame aligned with "f" showing the location of the framing bit. The following is the actual pattern: f 0101 0101 63 63 is the industry-standard 63-bit code used for DDS applications. T1-1 This 72-octet pattern is used for stress testing T1 circuits and network elements. The following is the actual pattern, with "f" showing the locations of the framing bit: f 01, 01, 01, 01, 80, 00, 80, 80, 80, C0, 01, 80, 01, 80, 80, 01, 80, 44, 00, 04, 44, 00, 04, 55, f 55, 55, 55, 55, AA, AA, AA, AA, 55, 55, 55, 55, AA, 55, 55, AA, AA, AA, 01, 01, FF, FF, FF, FF, f FF, FF, FF, 7F, FF, FF, 24, 92, 49, 11, 11, 11, 08, 42, 10, 84, 21, 04, 10, 41, 02, 04, 08, 01 Ch.5 Reference 413 T1–2 This 96-octet pattern is used for stress testing T1 circuits and network elements. The pattern can cause framing problems and should not be used with SF framing. The following is the actual pattern, with "f" showing the locations of the framing bit: f FF, FF, FF, FF, FF, FF, FF, FF, FF, FF, FF, FF, FF, FF, FF, FF, FF, FF, FF, FF, FF, FF, FF, FF, f FF, FF, FF, FF, FF, FF, FF, FF, FF, FF, FF, FF, FF, FF, FF, FF, FF, FF, FF, FF, FF, FF, FF, FF, f 55, 55, 55, 55, 01, 80, 01, 80, 01, 80, 01, 80, 01, 80, 01, 80, 01, 80, 01, 80, 01, 80, 01, 80, f 55, 55, 55, 55, 01, 80, 01, 80, 01, 80, 01, 80, 01, 80, 01, 80, 01, 80, 01, 80, 01, 80, 01, 80 T1–3 This 54-octet pattern is used for stress testing T1 circuits and network elements. The framing bit is inserted at octet boundaries. The pattern violates the 15 zeroes constraint when transmitted in a framed AMI signal. However, in unframed transmission or B8ZS transmission it meets the zeroes constraint. The following is the actual pattern: 80, 80, 80, 80, 80, 80, 00, 80, 80, 80, 80, 80, 80, C0, 80, 80, 80, 80, E0, 80, 80, 80, 80, AA, AA, AA, AA, 55, 55, 55, 80, 80, 80, 80, 80, 80, FF, FF, FF, FF, FF, FF, 01, 80, 01, 80, 01, 80, 01, 80, 01, 80, 01 T1–4 This 120-octet pattern is used for stress testing T1 circuits and network elements. The following is the actual pattern, with “f” showing the locations of the framing bits: f FF, FF, FF, FF, FF, FF, FF, FF, FF, FF, FF, FF, FF, FF, FF, FF, FF, FF, FF, FF, FF, FF, FF, FF, f FF, FF, FF, FF, FF, FF, FF, FF, FF, FF, FF, FF, FF, FF, FF, FF, FF, FF, FF, FF, FF, FF, FF, FF, f FF,FF, FF, FF, FF, FF, FF, FF, FF, FF, FF, FF, FF, FF, FF, FF, FF, FF, FF, FF, FF, FF, FF, FF, FF, f 55, 55, 55, 55, 08, 08, 08, 08, 08, 08, 08, 08, 08, 08, 08, 08, 08, 08, 08, 08, 08, 08, 08, 08, f 55, 55, 55, 55, 08, 08, 08, 08, 08, 08, 08, 08, 08, 08, 08, 08, 08, 08, 08, 08, 08, 08, 08, 08 T1–5 This 53-octet pattern is used for stress testing T1 circuits and network elements. The framing bit is inserted at octet boundaries. The following is the actual pattern: 01, 80, 01, 80, 01, 80, 01, 80, 01, 80, 01, 80, 01, 80, 01, 80, 01, 80, 01, 80, 01, 80, 01, 80, 01, 80, 01, 80, 01, 80, 80, F5, 55, 80, 80, 80, 80, FF, FF, FF, FF F5, 55, 80, 80, 80, 80, FF, FF, FF, FF, FF, 80, 80, 80, 80, FF, FF, FF, FF, FF, FF, FF, D3 414 SunSet T10 Rev. B T1–6 (55 octet) This is the original 55-octet pattern. It is used for stress testing T1 circuits and network elements. If transmitted in a framed signal with AMI coding, it will violate the 15-zero constraint. It does not violate the zeroes constraint in an unframed signal. If framed, the framing bit is inserted at octet boundaries. The following is the actual pattern: 80, 80, 80, 80, 80 80, 00, 80, 80, 80, 80, 80, 80, C0, 80, 80, 80, 80, E0, 80, 80, 80, 80, AA, AA, AA, AA, 55, 55, 55, 55, 80, 80, 80, 80, 80, 80, FF, FF, FF, FF, FF, FF, 01, 80, 01, 80, 01, 80, 01, 80, 01, 80, 01, 80 2.1 DDS Pattern Notes The DDS test patterns were developed specifically for DDS applications. DDS-1, DDS-2, and DDS-6 should not be used as 1.544 Mbps T1 test patterns on AMI coded lines, because they have an excess of 150 consecutive zeroes. This will cause the T1 line to record a loss of signal. These patterns are used for DDS, fractional Nx56 T1 applications, and special laboratory applications. DDS-3 01001100 DDS-4 00000010 DDS-6 FE, FE, FE, FE, FE, FE, FE, FF Ch.5 Reference 415 3.0 Frame Relay Technology Frame relay is a packet-switching protocol that provides high bandwidth and low delay over a WAN (Wide Area Network). Packet switching organizes data into individually addressed frames, or packets instead of placing data into timeslots. A frame relay network consists of endpoints (servers, PCs, hosts), access equipment (bridges, routers, FRADs), and network equipment (switches, network routers). 3.1 Frame Relay Structure The frame structure is quite simple. The customer’s data packets are not changed; frame relay adds a header to the frame. The header can be 2, 3, or 4 octets long. Figure 210 shows the different header formats. 8 7 6 5 4 3 2 1 2 octet DLCI DLCI FECN BECN C/R DE EA=0 EA=0/1 3 octet DLCI FECN BECN DLCI DLCI or Core Control C/R DE D/C EA=0 EA=0 EA=1 4 octet DLCI DLCI FECN BECN DLCI DLCI or Core Control C/R DE EA=0 EA=0 EA=0 EA=0 D/C Figure 210 Frame Relay Header Formats The following fields are included in the header: DLCI: Data link connection identifier. C/R: Command/response bit EA: Extended address bit indicates whether there are more octets in the header. EA=0, more octets, EA=1, last octet. FECN: Forward explicit notification bit. When frame relay equipment detects possible congestion, it notifies all downstream equipment of congestion with the FECN bit. BECN: When frame relay equipment detects possible congestion, it notifies the upstream equipment of congestion with the bit backward explicit notification bit. 416 SunSet T10 Rev. B DE: Frames tagged with the discard eligibility bit will be the first discarded during times of congestion. D/C: DL–Core/Control. This bit is used in 3–4 octet length headers to specify whether the last octet contains control bits or DLCI bits (D/C=0, DLCI, D/C=1, control bits). 3.1.1 DLCIs The largest portion of the header is the DLCI. The DLCI can be 10 bits (2 octets), 16 bits (3 octets), or 23 bits (4 octets) long. The 10-bit DLCI is most commonly used. The DLCI identifies the connection in a frame relay link; DLCI identifies both the sender and destination. For LAN-WAN internetworking, the DLCI identifies the port to which the destination LAN is attached. Refer to Figure 211. LAN LAN RO UTER B LAN DLCI 1, 5, 12 RO UTER C DLCI 25, 89 RO UTER A DLCI 4 FR Switch FR Switch FRAD DLCI 9, 25, 1002 FR Switch FR Switch Figure 211 DLCI Values DLCIs typically have local significance between the customer and the network. For example, Routers B and C cannot use the same DLCI values. However, Router C and the FRAD may use the same DLCI values, since they are connected to a different frame relay switch. This allows more connections on the network (otherwise, only 1023 connections could be established with the 10-bit DLCIs). Table 20 shows the possible DLCI length and corresponding possible addresses. Ch.5 Reference 417 Bit Length 10 16 23 Address Range 0 to 1023 0 to 65535 0 to 8388607 DLCI Header 2 octets 3 octets 4 octets Table 20 DLCI Length & Possible Addresses Frames are routed through the network using the DLCI values. When a frame relay switch receives a frame, it checks its DLCI value. If it is a valid DLCI value, it sends the frame toward its destination. If the DLCI is not defined in its table, the frame relay switch discards the frame. In Figure 211, note that each connection may have several DLCIs assigned. Frame relay allows users to send data to/from multiple locations over the same circuit. In Figure 211, Router C has 2 DLCIs assigned. Figure 212 shows a possible use for these 2 DLCI values. LAN LAN RO UTER B RO UTER C DLCI 89 DLCI 25 LAN RO UTER A Figure 212 Multiple PVC Connections Router C uses DLCI 89 to transmit/receive data to and from Router B. Router C also uses DLCI 25 to send data to and from Router A. Several DLCI values are reserved for signaling. LMI signaling uses DLCIs 0 (for ANSI D) and 1023 (original LMI) to transmit link status information. 418 SunSet T10 Rev. B 3.1.2 Link Management (LMI) User to Network-LMI T392 Status Enquiry-SE N392 N393 DTE DCE T391 N391 Network to User-LMI Status Report - S Periodic Polling Based on Timer and Counter User Default Range Actions Every 10 seconds user sends Status Enquiry T391 10 sec. 5-30 sec. Timer, Event = Transmission of a Status Enquiry (SE) N391 6 sec. 1-255 sec. Counter, Every 6 events sends a Full Status Enquiry (FSE) Network Default T392 10 sec. Range Actions Timer, Reset upon receiving SE or 5-30 sec. *Error: T392 expired or invalid SE sequence number N392 3 (Threshold) 1-10 sec. Error threshold N393 4 (Modulo) 1-10 sec. Event counter with modulo X range Figure 213 LMI Counters Link management signaling was developed to communicate important status information between the user and network (over the UNI). LMI (Link Management Interface) defines special management frames with a unique DLCI address that are passed between the network and local access devices. Link management signaling checks if the user-network link is connected and active as well as informing the user on the status of all virtual circuits at that interface. It reports on: • • • whether the interface is active; this is often called a “heartbeat” or “keep-alive” signal. all valid DLCIs defined at that interface. the status of each virtual circuit (PVC): new, active, or inactive. Link management signaling shows the addition/deletion of virtual circuits and the availability of new virtual circuits. Three specifications define link management: • • • ANSI T1.617, Annex D ITU Q.933, Annex A Original LMI (FRF.1.1) Ch.5 Reference 419 The link management protocol must be configured the same on the network device, and on the switch. A mis-configuration will cause the network to declare this link inactive and discard any frames transmitted to or from this link. The user device (router or test set) periodically sends a “STATUS ENQUIRY” message to the network to check if the link is still active. The network responds with a “STATUS” message. If a number of STATUS messages are not answered, the user declares the link down. The network also runs a timer to receive STATUS ENQUIRY message from the user. If it does not receive a STATUS ENQUIRY as expected, the network will declare the link down. After a specified number of STATUS ENQUIRY/STATUS cycles, the user sends a FULL STATUS request; this requests the status of all PVCs from the network. The network sends a FULL STATUS, including the status of all PVCs (new, deleted, active, inactive). Parameters determine how often the “KEEP ALIVE” message is sent, how often the full status enquiry/response is sent, and how much time should elapse when waiting for a response. Figure 213, LMI Counters illustrates some of these parameters. 420 SunSet T10 Rev. B 4.0 HDSL Technology Overview HDSL (High bit-rate Digital Subscriber Line) is a technology that provides high-speed digital transmission over existing copper lines. HDSL is symmetric, meaning it provides the same amount of bandwidth upstream and downstream. HDSL is commonly deployed as an alternative to repeatered T1 lines. HDSL has a speed of 1.544 Mbps over two copper pairs and has an operating distance of 12,000 feet. Investigated in the early 1990’s was the use of 2B1Q line coding to carry DS1 services. By carrying half of the 1.544 Mbps DS1 rate on 2 line pairs, allows delivery of DS1 service on loops up to 12,000 feet without repeaters. The ANSI T1E1 group has endorsed both 2B1Q and CAP (Carrier Amplitude Phase) line coding for HDSL. Placed on both ends of the twisted-pair loop is a pair of HDSL transceivers. The transceivers provide the interface between DS1 and HDSL full-duplex links. Loop 1: 784K Full-duplex HTU-C CO DSX-1 Central Office Interface HDSL Interface Loop 2: 784K Full- duplex HTU-R Remote HDSL CPE DSX-1 Interface Interface HTU-C: High bit-rate Terminal Unit-Central Office HTU-R: High bit-rate Terminal Unit-Remote Distribution Figure 214 HDSL Span Illustrated in Figure 214, the HDSL system is composed of two pairs of CSA-compatible loops (Loops 1 and 2). Bi-directional data at a rate of 784 Kbps is transmitted/received on each loop. The combined data from these loops forms a 1.544Mbps DS1 bit rate. Placed on each end of the HDSL system is an HTU (High bit-rate Terminal Unit). The HTUs receive the DS1 signal and generate a line signal to place on the loop. The receiving HTU takes this signal and recovers the original DS1 signal. An HTU in the CO (Central Office) is the HTU-C (High bit-rate Terminal UnitCentral Office). An HTU near the CI (Customer Installation) is the HTU-R (High bit-rate Terminal Unit- Remote Distribution). With HDSL, T1 service can be provided wherever transceivers can be installed at both ends of the twisted-pair loop. This is more simple and cost-effective than repeater installation. Deploying HDSL circuits can be much quicker than traditional T1 circuits. Another benefit of HDSL is that bridge taps do not need to be removed if they total less than 2,500 ft. Ch.5 Reference 421 5.0 GR-303 Technology Overview GR-303 is a Bellcore-defined interface between the central office switch and a remote terminal to handle all call management and operation functions for the DLC (Digital Loop Carrier) system. Known formerly as TR-303, GR-303-CORE has replaced it. GR303 is an IDLC (Integrated Digital Loop Carrier) system that consists of an IDT (Integrated Digital Terminal) and a RDT (Remote Digital Terminal). The IDT is part of the LDS (Local Digital Switch) in the Central Office. Figure 215 provides a basic illustration of a GR-303 IDLC system. Serving Central Office MON MON LDS LTE IDT OS LTE OS OS RDT Distribution network: analog, xdsl, copper, wireless, etc. LDS: Local Digital Switch IDT: Integrated Digital Terminal OS: Operations System RDT: Remote Digital Terminal LTE: Line Terminal Equipment Figure 215 GR-303 System The GR-303 Interface (IDT-RDT) can range from 2–28 DS1 lines. The 2-line minimum meets small-sized applications, while allowing for a back-up system. The 28-line maximum meets largesized applications and is consistent with higher rate facilities (DS3). GR-303’s main advantage is its flexible concentration; GR-303 may support up to 2048 subscribers sharing between the 2 and 28 DS1 lines. This reduces the hardware requirements at the LDS. The level of concentration is provisioned by the telco. Assigned for call-processing operations is one DS0. The TMC (Timeslot Management Channel) occupies channel 24. There is a primary TMC (possibly, though not necessarily on DS1 #1) and a back-up TMC on a separate DS1 line, thereby robbing two DS0’s for call management. When a customer goes off-hook, the TMC is used to dynamically assign a DS0 for the call. Once assigned a DS0, the robbed ABCD bits for that DS0 are used for call supervision. When the customer goes on-hook (ABCD bits), the IDT releases the DS0 through TMC messages. The TMC uses a subset of Q.931 protocol for its messages. Q.931 is the standard used by ISDN. In fact, if ISDN is known, most of the GR-303 messages and call procedures should be familiar. 422 SunSet T10 Rev. B GR-303 has an alternative method of call management. Instead of a TMC, a system might use a CSC (Common Signaling Channel) to handle call processing. Found on channel 24 and backed up on channel 24 of a different DS1 line is the CSC. CSC verses TMC is an either\or situation. The CSC differs from TMC because it does not use ABCD robbed-bit signaling. Accomplished by the protocol messages in the CSC are both timeslot assignment and call supervision. Allocated for operational functions is another DS0. This is the eoc (Embedded Operations Channel). Assigned to channel 12 of one DS1; its backup is on channel 12 of another DS1. The eoc handles provisioning, performance monitoring, and alarm reporting. Ch.5 Reference 423 5.1 TMC and Hybrid Signaling Used for dynamic timeslot assignment is TMC. Its main function is to assign the timeslot used for each call. Once assigned to the line unit for a call, ABCD bits on a specified DS0 handle the supervision. In Figure 216, the IDT initiates the call. RDT IDT Customer SETUP (CRV, DS1,DS0#) CONNECT DS0 CONNECTED DISCONNECT (cause 16) RELEASE RELEASE COMPLETE DS0 RELEASED Figure 216 TMC Call Procedure, Initiated by IDT The IDT sends a SETUP message identifying the called line termination (via the Call Reference Value) and allocates the DS1/ DS0 for the call. Before it sends the SETUP message, it also begins transmitting ABCD signaling on the allocated DS0. When the RDT receives the SETUP message, it connects the line termination unit to the designated DS0 channel. The RDT also begins transmitting/responding to ABCD signaling on the DS0. It responds on the TMC with a CONNECT message. When the IDT receives an on-hook indication for the call, it sends a DISCONNECT message to the RDT. When the RDT receives the DISCONNECT message, it disconnects the line termination from the DS0 and sends a RELEASE message to the IDT. The IDT then disconnects this 424 SunSet T10 Rev. B DS0 and sends a RELEASE COMPLETE message to the RDT. This DS0 is now available for other calls. When the RDT initiates the call, the procedure differs. Refer to Figure 217. RDT IDT Customer SETUP (CRV) CONNECT (CRV, DS1,DS0) CONNECT Ack DS0 CONNECTED DISCONNECT (cause 16) RELEASE RELEASE COMPLETE DS0 RELEASED Figure 217 TMC Call Procedure, Initiated by RDT When the RDT detects a service request from a customer, the RDT sends a SETUP message indicating the line termination (by the CRV). When the IDT receives this SETUP message, it responds with a CONNECT which tells the RDT which DS1/DS0 to use for the call. The IDT also begins transmitting ABCD signaling on this designated DS0. When the RDT receives the CONNECT message, the RDT determines that this DS0 is available for the call. If the DS0 is available, the RDT begins transmitting/ responding to ABCD signaling on this channel. The RDT also sends a CONNECT ACKNOWLEDGE message on the TMC to the IDT. When the IDT receives the CONNECT ACK, it begins responding to ABCD signaling on the DS0. The clearing procedure is the same as described previously. Ch.5 Reference 425 5.2 CSC and Out-of-Band Signaling IDT SETUP (CRV) RDT Customer SETUP ACK (CRV, DS1,DS0) DIAL TONE Tip-ring voltage Loop closure DTMF TONES INFORMATION DP Digits CONNECT DISCONNECT (cause 16) DTMF or DP Digits Loop open RELEASE RELEASE COMPLETE Figure 218 CSC Call Procedure, Customer Initiated In this case, for all signaling and timeslot assignments the CSC is used. Robbed bit ABCD signaling is not used. In the first example, the customer initiates the call. Refer to Figure 218. When the RDT detects that a customer is requesting service, it sends a SETUP message to the IDT indicating the Call Reference Value of the customer requesting service. The IDT responds with a SETUP ACKNOWLEDGE message indicating which DS1/ DS0 to use for the call. When the RDT receives this SETUP ACKNOWLEDGE, the RDT connects the line unit to the indicated DS0. When the IDT initiates call clearing, it sends a DISCONNECT message. The RDT then disconnects the line unit from the DS0 and sends a RELEASE message. The IDT then sends a RELEASE COMPLETE message and the DS0 is disconnected. If the RDT initiates call clearing, it sends a DISCONNECT to the IDT. The IDT sends a NOTIFY message to the RDT, while the LDS determines if it can clear the call. If the LDS can clear the 426 SunSet T10 Rev. B call, the IDT disconnects the DS0 and sends a RELEASE message. The RDT responds with a RELEASE COMPLETE message and disconnects the line unit from the DS0. When initiating the call from the IDT, the IDT sends the SETUP message identifying the DS1/DS0 to use for the call. When the RDT determines it can complete the call. The RDT then sends a CALL PROCEEDING message to the IDT informing the IDT that customer alerting has begun. When the RDT detects that the customer has been connected (i.e. loop closure on a loop start circuit), it removes the alerting signal and sends a CONNECT message to the IDT. Ch.5 Reference 427 5.3 Embedded Operations Channel The eoc (Embedded Operations Channel) uses LAP-D protocol for Layer 2 operations. For the application layer, the eoc uses CMISE/ASN.1 (Common Management Information Services/ Abstract Syntax Notation.1). The CMISE model is defined in TR-303 Supplement 3 and GR-2833. Although GR-2833 is replacing parts of TR-303, the TR-303 model is still in use. For LAP-D, specific SAPI/TEI combinations have fixed assignments in the eoc. Shown in Table 21 is a quick-reference table. SAPI 1 1 1 1 1 1 1 1 1 TEI 0 1 2 3 4 5 6 7 8-11 Data Link Function EOC Path Switching Operations RDT- Provisioning / Memory Administrative OS RDT- Maintenance / Surveillance OS RDT- Testing OS RDT-IDT RDT- Test System Controller 1 RDT- Test System Controller 2 RDT- Test System Controller 3 User Assignable Table 21 SAPI/TEI Valid Combinations Used as follows are these combinations: • • • • • • SAPI=1, TE1=0: used for eoc path switching operations. In response to operations messages received from an OS, the IDT or RDT will initiate a switch from the active eoc or TMC to the standby eoc or TMC. SAPI=1, TEI=4: used for operations interactions between the IDT and RDT. SAPI=1, TEI=1: used for provisioning and memory administration OS (Operations System) to communicate with the RDT when provided with an OIM with a gateway function. SAPI=1, TEI=2: used for a maintenance and surveillance OS to communicate with the RDT when provided with an OIM with a gateway function. SAPI=1, TEI=3: used when a testing OS communicates with the RDT when provided with an OIM with a gateway function. SAPI=1, TEI=5: used when a TSC communicates with the RDT when an OIM with provided with a gateway function. 428 SunSet T10 Rev. B 5.4 TMC/CSC Cause Values The following is a table of cause values that the switch and RDT must support, as defined by GR-303-CORE. Value 16: Normal Clearing 27: Destination out-ofservice 30: Response to Status Enquiry 34: Channel Unavailable 35: Distribution Channel Unavailable 41: Temporary Failure 44: Line Unit Unavailable 47: Ring Failure 81: Invalid Call Reference 96: Mandatory Element Missing 97: Message Unimplemented 99: Information Element Unimplemented 100: Invalid Information Element Contents Definition Sent by the RDT/IDT to indicate that call clearing has begun, after recognizing that the customer went on-hook. Sent by the IDT to indicate that call clearing was initiated because the customer is in a permanent signal state. Sent by the RDT in Status messages, which is sent in response to Status Enquiry messages. Sent by the IDT to reject a call setup when there is no DS0 available to carry the call. In addition, the RDT may reject a call with this cause value if it believes that the DS0, specified by the IDT, is already in use or is unavailable. Sent by the RDT to reject call establishment when the distribution channel, as indicated by the CRV, is blocked. Sent by the IDT to initiate call clearing after recognizing that there is a call state mismatch. The RDT may also send this message in a STATUS message if it believes there is a call state mismatch. In addition, the IDT and RDT may send this message to indicate call clearing due to a call failure event like a timer expiry, or if a resource becomes unavailable during the call. Sent by the IDT/RDT to reject a call setup when the line termination, as indicated by the CRV, is incapable of providing service. After receiving a Release Complete message with this cause value, the RDT/IDT immediately stops call establishment. Sent by the RDT to reject call establishment when the line indicated by the CRV fails the ring pre-trip test. Sent by the RDT/IDT to reject a message that contains an invalid call reference value. Sent by the RDT/IDT to reject a message that does not contain a required information element. Sent by the RDT/IDT to reject an unrecognizable message. Sent by the RDT/IDT to indicate that it did not recognize an information element in the received message. Sent by the RDT/IDT to reject a message that contains an invalid information element (coded incorrectly). Table 22 GR-303-CORE Cause Values Ch.5 Reference 429 6.0 GSM TRAU Technology Overview 6.1 GSM Network Architecture Governed by the ETSI standards series 12 is GSM (Global System for Mobile Communication). GSM technology uses a digital standard for voice and data applications. Figure 219 shows a typical GSM network. EIR BSC MSC HLR BTS BSC A Interface BTS Um Interface Abis Interface VLR AUC Network Subsytem AUC Authentication Center BSC Base Station Controller BTS Base Transceiver Station E I R Equipment Identity Register HLR Home Location Register MSC Mobile Switching Center VLR Visitor Location Register Figure 219 GSM Network The three major components of a GSM network include the MS (Mobile Station), BSS (Base Station Subsystem), and NS (Network Subsystem). It is then connected to a fixed network like a PSTN (Public Switched Telephone Network). A MS consists of a ME (Mobile Equipment) and SIM (Subscriber Identity Module). The SIM is physically a smart card that identifies the subscriber to the GSM network. It also authenticates and encrypts a subscriber’s voice identified by the IMSI (International Mobile Subscriber Identity). Once a SIM card is inserted to a GSM terminal, or ME, it becomes a MS. Like the SIM, the ME can also be identified using the IMEI (International Mobile Equipment Identity). While a subscriber roams or is stationary, the MS transmits a radio signal to one of the many BTSs (Base Transceiver Station). These BTS cells are equipped with radio transceivers to send and receive signals using a radio-link protocol via an Um interface. 430 SunSet T10 Rev. B The BTSs are in turn managed by a BSC (Base Station Controller). Using the A-bis interface, the BSC handles radio-channel setup, frequency hopping for security measures, and handovers. In some instances, a TRAU (Transcoder Rate Adaptation Unit) is placed at a BTS to perform transcoding between 64 Kbps A-law speech and 13 Kbps RPE/LTP speech. The TRAU may also be located at or in conjunction with the BSC. The BSC then connects the MS to the MSC (Mobile Switching Center) using the A-interface. Using four registers, the MSC handles subscriber registration, authentication, location updates, handovers, and call roaming. The HLR (Home Location Register) is the central database for all subscribers holding the identity of the subscriber, services accessible to the subscriber, and current location of the MS. Given a MS ISDN (MSISDN) number; a call is routed by looking up the corresponding IMSI found in the HLR. The VLR (Visitor’s Location Register) contains information about all MSs within the area served by the MSC. Found in the VLR is information such as MS identity, the area in which it was last registered, additional information pertaining to the subscriber, and any supplementary services available. A MSC refers to the VLR each time a MS receives or makes a call. A security register called the AUC (Authentication Center) validates a SIM and performs a mathematical calculation on the same secret information stored in SIM. Another security register is the EIR (Equipment Identity Register). Using a list of three categories, the EIR ensures that all MEs used are valid and authorized to function on the PLMN (Public Land Mobile Network). Together, the MSC, HLR, VLR, AUC, and EIR make up the Network Subsystem that connects the GSM network to a fixed network. Ch.5 Reference 431 6.2 TRAU Frames A TRAU may be located at the BTS, BSC, or MSC. Figure 220 shows the different placements of transcoders. MS MS MS TRAU BTS BTS BTS A-bis 16 kbps A-bis 16 kbps A-bis 16 kbps A-Interface BSC BSC BSC 64 kbps T R A U A-Interface 64 kbps 16 k T R A U 64 k MSC MSC MSC Figure 220 TRAU Locations When positioning the transcoder remotely to the BTS (i.e. at the BSC), the CCU (Channel Codec Unit) in the BTS controls some of the functions of the remote TRAU at the BSC. In-band signaling performs this remote control. These signaling bits are known as C-bits. C-bits control: • • • • shift between data and speech frames. rate adaptation for data calls. downlink time framing for speech frames. transfer DTX information. 432 SunSet T10 Rev. B 6.2.1 TRAU Frame PCM Frame - 1.544 Mbps TS 1 TS 2 TS 3 ..... TS 24 Control Bits C1 - C4 C5 C6 - C11 Frame Type Channel Type (Full/Half) Time Alignment C12 - C15 Frame Indicators C16 Spare Frame Indicators C17 DTX Indicator/Spare C18 - C21 Spare Bits Synchronization Control Bits User Data User Data/Control Bits 0000000000000000 C1- - - - - C15 Bit 0 16 32 D-Bits D/C/T - Bits 304 320 Figure 221 16 Kbit TRAU Frame Divided into four 16 kbps sub-channels are the 64 kbps timeslots. Each devotes 13 kbps to voice, with 3 kbps remaining for spare bits. A TRAU (Transcoder and Rate Adaption Unit) does the required transcoding between the 64 kbps and 16 kbps channels. A TRAU may be located at the BTS, BSC or MSC. If located outside the BTS, the TRAU is controlled by in-band signaling, using some of the spare bits. A TRAU frame, containing 320 bits, is used to send signals between the BSC and the TRAU. Its use is mandatory when the A-bis interface is applied. Ch.5 Reference 433 7.0 T1 Technology This section is an overview of T1 technology, and equipment. It also explains the basics of troubleshooting and sectionizing problems with T1 circuits. T1 is a general term that refers to the transmission of 1.544 Mbps digital circuits over any media. T1 can be transported over copper, fiber, or radio. DS1 is the term for the electrical signal found at the metallic interfaces for this circuit where most testing is performed. 7.1 T1 Transmission 7.1.1 T1 Usage Used for a variety of purposes are T1 circuits. They are widely embedded in the network distribution architecture as a convenient means of reducing cable pair counts by carrying 24 voice channels in one 4 wire circuit. End users have migrated their private networks onto leased T1s as a means of reducing their network operation costs. DS1 is a universal digital access point to traditional digital networks and newer fiber optic synchronous networks. 7.1.2 T1 Services Telephone companies are now selling T1 point-to-point circuits in a variety of formats. Channelized T1 circuits are often sold as a means of connecting PBXs (Private Branch Exchanges) or ACDs (Automatic Call Distributors) to a central office switch. In this case, the telephone company may also install and maintain a channel bank for the customer at their premises. T1 “pipes” are sold to more sophisticated users who only require point-to-point connectivity of a T1 circuit from the telephone company. 434 SunSet T10 Rev. B 7.1.3 DS1 Network Elements Customer Premises D4 C S U N I U 2 3 9 2 3 9 2 3 9 Central Office SONET MUX DSX-1 O R B DSX-1 O R B Central Office SONET MUX Customer Premises PBX C S U N I U 2 3 9 2 3 9 2 3 9 Figure 222 DS1 Network Elements As shown in Figure 222, a rich variety of equipment is available for T1 circuits. CSUs (Customer Service Units) can convert a V.35 or other computer-based synchronous signal format into the DS1 format and insert the appropriate DS1 framing. CSUs also provide loopback capability, indicator lights, monitor jacks, and split access for troubleshooting and installation debugging. Installed by the telephone company at customer premises for a variety of maintenance reasons, the NIUs (Network Interface Units) provide a loopback, at the telephone company’s control. This loopback allows the telephone company to verify that the circuit works all the way to the point of interface with the customer’s network. The NIUs may also be configured to loopback signal, send AIS, or send idle signal when the customer signal is unplugged. New kinds of NIUs even provide performance monitoring information and maintenance switching capability. T1 can be transmitted over twisted pair, fiber, or digital radio. Twisted pair (normal telephone wire) is the most widely spread form of transmission and has several types of associated network elements. Regenerative repeaters, for example AT&T’s 239 series, are located up to 6000 feet apart on a twisted pair span. Ch.5 Reference 435 The repeaters are in apparatus cases, which are located within 3000 feet of the central office and the customer premises. This avoids cross-talk problems when the signal is on building wiring. Newer line repeaters offer loopback capability for faster span sectionalization. Central office repeaters provide the 60 mA span current used for powering the regenerative repeaters on the span. Housed in ORBs (Office Repeater Bays), these newer central office repeaters automatically adjust the supplied voltage to adapt to varying numbers of repeaters plugged into the span. They also may have fractional T1 blocking capability to allow the telephone company to sell a reduced price T1 that only carries a certain number of channels. They also may have automated loopback capability and span power-down/power-up capability. Found at the ends of DS1 lines, is a variety of equipment. D4 channel banks are a traditional form of multiplexer that converts ordinary telephone wires to 64 kbps channels for multiplexing onto a DS1. Newer D4 banks offer a wide variety of channel plug-ins to handle DDS-style circuits, private line circuits, and even ISDN. Found in the Bell environment are AT&T SLC-96® and SLC-5 system. These Bell systems are enhancements to the older D4 style. M13 multiplexes are a traditional higher-order multiplexer for DS1s. These multiplexers take up to 28 DS1s and multiplex them into a single DS3. Note that the DS1 framing and payload still exist inside the DS3 signal, but not passed through is the DS1 line coding. Often found at the end of T1 lines are toll switches and PBXs class 5 switches (central office switches connected to local subscribers). These elements use DS1s as a way of concentrating their connections to local subscribers and interoffice trunks. The function of these elements is to take supervision and addressing information from subscribers, set up a call throughout the world network for the subscriber, connect the subscriber through when the path is setup, and terminate the call when the subscriber is finished. A variety of DCSs (Digital Cross-connect Switches) connect to DS1 lines. DCSs commonly reduce the space required for achieving channel cross-connection, eliminate the manual labor associated with cross connection, and can provide fast computerized rerouting of facilities in the event of a network outage. The common DCSs are type 1x0, 1x1, and 3x1. A 1x0 DCS has DS1 ports interfacing the network. Internally it cross-connects DS0s between the DS1s according to instructions entered through an administrative terminal. The 1x0 DCS takes the place of many racks of 1x0 multiplexes combined with a DSX-0 manual crossconnect bay. Another name for a 1x1 DCS is an electronic DSX-1. Designed as a replacement for the DSX-1, a 3x1 DCS has DS3 ports and possibly DS1 ports facing the network. This replaces a bank of M13 multiplexes and the DSX-1. 436 SunSet T10 Rev. B Deployed in the network is a wide variety of SONET (Synchronous Optical Network) equipment. This equipment operates at higher rates and introduces a wide variety of new signal formats, both optical and electrical. Designed to interface to an embedded network, most SONET equipment also has DS1 and DS3 interfaces. SONET equipment replaces equipment like M13 multiplexes and 3x1 DCSs. 7.1.4 DS1 Standards Many standards govern various parts of DS1 transmission and network elements. The two most important standards are: • ANSI T1.102 - 1987, Digital Hierarchy, Electrical Interfaces • ANSI T1.403, Network-to-Customer Installation - DS1 Metallic Interface 7.1.5 DS1 Signal 3.0 V 1 0 0 1 0 0 0 1 0.0 V -3.0V Figure 223 DS1 Pulse Transmission The DS1 signal is a 1.544 Mbps, 3V signal. Like the DS3 signal, it uses a bipolar format. Unlike DS3, there are two line codes used in transmission, AMI (Alternate Mark Inversion) and B8ZS (Bipolar 8-Zero Substitution). When DS1 was first introduced AMI was the original line code. However, its use is not optimal in today’s networks, which mix data transmission with voice transmission and which require near error-free quality. The drawback with AMI line coding is that it requires the terminal transmitting data to have at least a 12.5% average 1s density and a maximum of 15 consecutive zeroes. This data content is impossible to guarantee when computer data is transmitted, so transmission quality can suffer. In comparison, B8ZS uses a bipolar violation substitution which guarantees the 12.5% average with a maximum number of 7 consecutive 0s. Consequently, networks are moving towards B8ZS line code usage. Refer to Figure 223, DS1 Pulse Transmission for an illustration of the DS1 signal. Ch.5 Reference 437 7.1.6 T1 Framing Channel 1, 8 Bits/Channel Channels 2-23 Channel 24 Frame Bit Bit 1 Frame 1 Frame 2 Frames 3-11 or 3-23 Last Frame = 12 or 24 SF = 12 ESF = 24 Figure 224 DS1 Frame Structure T1 framing is simpler than DS3 framing. In T1, there are 192 data bits and 1 framing bit. With framing the first bit of the frame is easily found. Most T1s are arranged with 24 channels of data, with one byte (8 bits) transmitted per channel per frame. Channel 1 is the first 8 bits after the frame bit channel 2 is the second 8 bits after the framing bit and so on. 8000 frames per second are transmitted. Each channel provides 64 kbps bandwidth. Refer to Figure 224. There are 3 kinds of standardized T1 framing in use today, SF, ESF, and SLC-96®. The simplest is SF (Super Frame), which consists of 12 T1 frames grouped together. The 12 framing bits are transmitted in a recognizable pattern such that the super frame is organized into frame number 1, frame number 2, and so on. ESF (Extended Super Frame) groups 24 SF frames together. Of the 24 framing bits, only 6 are used to establish the frame position, i.e. which frame is number 1, which frame is number 2, and so on. ESF uses another 6 framing bits for a CRC-6 (Cyclic Redundancy Check code - 6), and uses another 12 framing bits for the FDL (Facility Data Link). The CRC-6 bits are the remainder from a division of the bits of the previous frame by a sixth-order polynomial and if the two figures are not identical then the monitoring device can assume that a transmission error has occurred somewhere between the measurement point and the origin of the ESF-framed signal. Any 438 SunSet T10 Rev. B monitoring device along the line can do the same division process and compare its remainder to the CRC-6 bits. The FDL is a 4 kbps data channel that allows terminal-toterminal communications on an in-service circuit. One example of in-service communication is the performance report message broadcasted once per second on an in-service circuit. This message is discussed later in the End-to-end Performance Monitoring section in this chapter. The FDL also provides a secure communication channel that the customer cannot influence. For instance, ESF NIU loopback commands are transmitted on the data link so that there is no chance that the customer’s own payload data will accidentally loop up the NIU. The SLC-96® framing is used on AT&T’s SLC-96® product line. The framing supports a broad variety of maintenance functions such as alarm transmission, automatic switching to protection line, and far end loop back. The DS1 link in between the central office terminal and the remote terminal uses SLC-96® framing. Ch.5 Reference 439 7.1.7 PCM Step 1 Sampling the Signal 125 mS Step 2 m-Law Conversion 256 Amplitude Number Signal Voltage Figure 225 PCM Sampling and µ-Law Encoding PCM (Pulse Code Modulation) is a technology that allows digitization of a voice conversation and inserting it on a T1 line. The voice conversation, a 4 kHz analog bandwidth is transmitted through the network. Through the Nyquist theorem, 8000 samples per second are taken in order to achieve the 4000 Hz bandwidth requirement. As shown in Figure 225, PCM Sampling and µ-Law Encoding, the analog signal is sampled at 125 µS intervals, 8000 times per second. Each sample is a measurement of the voltage of the analog signal. The voltage level is then converted to an 8-bit binary word. An 8-bit word provides 256 different levels, which is not enough to produce a quality sound. To produce a quality sound a µ-law transformation is applied, which puts a constant dB level in between each voltage step. This creates a nonlinear relationship between the pulse amplitude and the level number, but it is more pleasing to the ear because it provides a more constant signal-tonoise ratio at a wide range of volumes. Each 8-bit word occupies one channel in one frame. Because there are 24 channels available, up to 24 conversations can be on the T1 signal. 440 SunSet T10 Rev. B 7.1.8 Switching An understanding of switching is helpful when troubleshooting T1 circuits. DS1, DS2, and DS3 signals are plesiochronous, that is, they are not frequency-locked with respect to each other. The DS2 and DS3 signals have stuff bits built into the framing. This allows for slippage of all signals with respect to each other, and not cause any transmission errors. The frequencies are required to be about +/- 20 to 50 ppm of center frequency for error free transmission. After adopting digital plesiochronous (sometimes called asynchronous) transmission technology, switches began converting from analog to digital technology. Unfortunately, the original DS1 framing concept never anticipated a need to cross-connect DS0s directly from one DS1 to another DS1, which is what happens inside a digital switch. A call that comes in one channel of a DS1 goes out on another channel of another DS1. 8000 times a second, a switch takes 1 received frame from each of the DS1s connected to it. The switch disassembles each frame into the 24 independent timeslots. It checks its call map to see where to send each of the received timeslot bytes. Then it sends each byte to the appropriate DS1 transmit port. It then assembles all the bytes for each transmit DS1, inserts any idle code on timeslots that are not actively in the middle of a call, and inserts an appropriate framing bit for the frame type being used. Finally, it transmits each DS1 frame every 1/8000 of a second. There are several 125 mS periods of delay for a byte as it moves through the switch. Not all DS1s will have frames ending at exactly the same moment in time. For this reason, the switch maintains a buffer for each transmitted and received DS1 signal. Each buffer provides an elastic store of bits, so that the switch will always have bits available to transmit or receive at the required moment. The received and transmitted DS1s must be at the same frequency of the switch. Any received DS1 that is going too slowly will eventually run out of bits in its buffer. This is because the switch is taking bits out of the buffer faster than the DS1 is filling the buffer. When the buffer is empty, the switch must insert extra data in each of the transmitted timeslots on the cross-connected channels. An error has now occurred, because the transmitted bits do not match the received bits. Likewise, if any of the received DS1’s frequency is higher than the switch, the receive buffer will overflow. This is because the bits are coming in faster than they are leaving. Once the buffer overflows, some of the received bits are not transmitted on the cross-connected channel. An error has again occurred; this time because data has been lost. The deployment of digital switches has resulted in an effort to synchronize all DS1s so that errors will not occur in switched circuits that use DS1 for transport. Ch.5 Reference 441 7.1.9 Synchronization Toll Office Toll Switch DS1 Central Office Class 5 Switch DS1 Customer Premises PBX DS1 Master Slave Master Slave Master Customer Premises D4 DS1 Slave Figure 226 Timing Distribution DS1 circuits need synchronization with each other to avoid the switching problems described in the previous section. Minor frequency deviations will cause only pops and crackles on a voice circuit. Rendered virtually useless by the regular errors resulting from frequency slippage are data circuits. If a DS1 is slipping by more than 100 to 300 bps, a digital switch may even put the DS1 out of service, and declare an alarm. Synchronization is achieved when all signals can have their frequency traced back to the same clock. When installing a network element, its timing relationship is one of the items that need consideration. This is usually one of master/slave. For instance, if connecting a PBX to a central office switch via a T1 line, usually the central office switch is synchronized to the network. Therefore, the DS1 signal received by the PBX from the central office is synchronized to the network. Thus, the PBX should be setup for slave timing mode, with the DS1 signal received from the central office used as the timing source. In turn, a D4 channel bank that is connected to the PBX should be slaved to the PBX. Illustrated in Figure 226 is one possible distribution of clocking in the network. Note that a network element which is slave timed to another network element may also be the master to other network elements attached to it. Also, note that loop timing, or receive timing is the same as slave timing. Loop timing, because the received timing is looped out the transmitter. Receive timing, because the timing source is from the received signal. 442 SunSet T10 Rev. B Another method is internal timing. The advantage of this is that the element will always be able to generate a signal, so no clock signal is required. Test sets performing acceptance testing usually use internal timing. Note that internal timing is not acceptable when the test set will be transmitting toward a switch for Nx64 kbps testing; the switch is drawing its timing from something other than the test set. In this case, the test set should be loop timed. 7.1.10 Supervision Common T1 framing methods transmit supervisory information through robbed bit signaling. Every 6 frames the least significant bit in the PCM byte for every channel is robbed. This robbed bit transmits the signaling information. In SF framing, the robbed bits in the sixth and twelfth frames form the A and B signaling bits for each channel. The type of circuit carried in the channel determines the bit interpretation. For instance, on an E&M circuit, when A= 0 and B= 0, the circuit is idle, (the user is on-hook). When A = 1 and B = 1, the circuit is seized (the user is off-hook). In ESF framing, there are 24 frames grouped together, with bit 8 of each channel in frames 6, 12, 18, and 24 as the ABCD signaling bits. Most ESF signaling is identical to SF signaling, the C and D bits are copies of the A and B bits. The SLC-96® data link handles SLC-96® supervision. 7.1.11 Addressing Addressing is the process of sending a telephone subscriber address to setup a call. The oldest addressing technique in use today is pulse dialing. With pulse dialing, the phone goes on-hook and off-hook 10 times per second, in order to dial a number. For example, to dial a 7, the system starts in the off-hook condition, and then goes on-hook/off-hook 7 times. Rotary phones use this technique. The addressing information is transmitted through a T1 line by toggling the A and B bits from the off-hook state to the on-hook state at a rate of 10 times per second. In switched 56 services, this addressing is now common. MF (Multi Frequency) is an addressing technique used for interoffice signaling in a telephone network. It uses a group of paired frequencies to form a single address tone. In addition to supporting the digits 0 through 9, MF offers many other control codes for specialized network applications like billing, pay phones, etc. DTMF (Dual Tone Multi Frequency) is the common addressing method on today’s phones. Like MF, it uses pairs of tones to send a digit. Unlike MF, it uses two separate groups of tones. DTMF supports 16 digits, 0 through 9, #, *, and A through D. Ch.5 Reference 443 7.1.12 AIS and Yellow Alarms Yellow Alarm Transmission DS0 Alarm Conditioning D4 Yellow Loss of Frame or AIS AIS Transmission Loss of Signal DS1 M1 Channelized AIS DS1 M1 AIS Figure 227 AIS and Yellow Alarms In DS1, AIS and yellow alarms work just as they do in DS3. An intermediate network element such as an M13 multiplex, 1x1 DCS, or SONET mux, transmits AIS downstream when it receives a loss of signal. The DS1 AIS is an all 1s unframed signal. A terminating network element such as a D4 channel bank, PBX, central office switch, or 1x0 DCS sends a yellow alarm back towards the other end when it receives a loss of frame. Note that receiving an AIS means there is a loss of frame. Terminating elements also need to condition the DS0s that the DS1 carries when the frame is lost. For instance, a D4 channel bank is to condition its channel cards to take them out of service. Then it transmits an appropriate out-of-service signal to any low speed equipment. Refer to Figure 227 for diagrams of how the transmission of AIS and yellow alarms works. 444 SunSet T10 Rev. B 7.1.13 Loopbacks Central Office SF PULSES 1 2 YEL/IDLE POWER AIS LOW BATT B8ZS ESF ERRORS SLC-96 PULSES SF BIT ERROR ESF YEL/IDLE B8ZS ERRORS PAT SYNC SLC-96 AIS SunSet T10 MEAS VIEW RECEIVED PAGE : 01 T/S BINARY HEX 01 11011111 DF 02 11000010 C4 03 01000010 42 04 00011110 1E 05 01100101 65 06 00101110 2E 07 11010100 D4 08 11000101 C5 PAGE-UP PAGE-DN F1 12:34:41 DATA ASCII ( ) (#) B (B) (X) e ( ) (t) (+) ( ) RESUME F2 STORE F3 F4 SUNRISE TELECOM F2 F3 A RESYNC B LIGHT C GRAPHIC D ERR INJ E AUTO F1 1 VOL UP 2 VOL D N HISTORY 4 5 7 8 F DSX-1 MON MON OUT OUT IN IN S H I FT ESCAPE POWER PRN SCRN F4 3 6 9 ENTER 0 O R B Customer Premises PBX C S U N I U 2 3 9 2 3 9 2 3 9 Figure 228 DS1 Loopback Testing To quickly verify the performance of a new DS1 circuit, use loopback testing. It can also greatly speed up the fault sectionalization process on a circuit that is not working properly. A variety of equipment provides loopback capabilities, newer central office repeaters, newer regenerative line repeaters, NIUs, CSUs, and M13 multiplexes. Discussed in the previous DS1 equipment section are the general characteristics of this equipment. Figure 228 shows the variety of loopback points available from the central office for a fault sectionalization process. Ch.5 Reference 445 7.1.14 End-to-End Performance Monitoring Central Office SF PULSES 1 B8ZS ESF ERRORS YEL/IDLE POWER AIS LOW BATT PAT SYNC SLC-96 SF BIT ERROR B8ZS ESF YEL/IDLE ERRORS SLC-96 PULSES 2 AIS SunSet T10 12:34:41 MEAS VIEW RECEIVED DATA PAGE : 01 T/S BINARY HEX ASCII 01 11011111 DF ( ) 02 11000010 C4 (#) 03 01000010 42 B (B) 04 00011110 1E (X) 05 01100101 65 e ( ) 06 00101110 2E (t) 07 11010100 D4 (+) 08 11000101 C5 ( ) PAGE-UP PAGE-DN F1 RESUME F2 STORE F3 F4 PRM SUNRISE TELECOM F1 F2 F3 A RESYNC B LIGHT C GRAPHIC D ERR INJ E AUTO 1 VOL UP 2 VOL D N HISTORY F DSX-1 MON MON Performance Monitoring Equipment OUT OUT IN IN 4 S H I FT 7 POWER PRN SCRN 5 8 ESCAPE F4 3 6 9 ENTER 0 O R B Customer Premises PBX C S U CRC Error Source PRM Figure 229 DS1 Performance Monitoring End-to-end performance monitoring is possible through ESF framing and CSUs that support PRM (Performance Report Messaging) on ESF FDL. Specified in ANSI T1.403 is this capability. The concept is similar to that described in the DS3 performance monitoring section. In ESF performance monitoring, any CRC-6 error, or bipolar violation that the CSU receives is transmitted towards the other direction in the PRM on the FDL. This way various telephone companies that provide transport service can have an equal ability to see the quality of the end-to-end transmission, while the circuit is in-service. Before this capability was available, the circuit would have to be out of service in order to measure the performance. This end-to-end performance monitoring capability gives the customer a way to verify the quality of the service that the telephone company is delivering. It also allows the telephone company to setup internal monitoring systems to report on the average grade of service provided to customers. The telephone company may also receive early warning of some failures, i.e. those failures preceded by a gradual period of deterioration. This early warning allows the telephone company to fix the problem before the service is lost. Illustrated in Figure 229 is End-to-end performance monitoring. In this, a fault on the transmission line induces repeated errors on the service. The CSU at the end of the line sees the errors as CRC6 errors and generates a PRM in the other direction. The installed performance monitoring equipment in the central office and the technician using their SunSet T10 can both see the message. 446 SunSet T10 Rev. B 7.2 Troubleshooting and Fault Sectionalization This section will help locate problems on T1 circuits. First is a checklist on various problems that often happen with T1 circuits followed by information about errors and alarms to help quickly find the problem. Is the circuit properly wired? Check for loose wire wraps, bad splices, connections to wrong pairs, etc. Are there any cable problems? For example: bridge taps, “wet” cable, paper insulated cable, shorts, or grounds. Is the cable T-screened? Ideal T1 transmission cables use a screen to separate the two directions of transmission to prevent cross talk. Are the T1s in the screened cable properly separated into transmit and receive binder groups? Is the circuit properly connected at all of the offices along its route? Is transmit and receive plugged in backwards? A surprising number of circuits are backwards. Try the other way. Are there any AMI/B8ZS mismatches? AMI and B8ZS line codes are incompatible. Both ends of a T1 line must use the same coding. If all ones work correctly, QRS has errors and 3in-24 will not synchronize, it is probably an AMI/B8ZS mismatch. Is the CSU, or other element set to stuff 1s to prevent low density? This is required for AMI circuits but will cause loss of synchronization on 3-in-24, errors on QRS, and no errors on all 1s circuits. Is there a framing mismatch? Check that the framing is the same on both sides. Does the problem reappear when dropping the loopback? The problem is probably with the equipment on the far side of the loopback. Is a switch or PBX connected? Look for frequency mismatch. Are DS1 signals used throughout? Sometimes a DS1 is plugged into a DS1C by mistake, or other signal format incompatibility maybe present. Ch.5 Reference 447 Is there a double loopback? Sometimes two or more loopbacks of the same type are present where only one is expected. In this case a double or triple loop may occur on a loopback code and the loopdown code may have to be transmitted two or more times before all the loops come down. Is there a termination problem? All lines should have only one 100Ω termination. Other terminations should be high impedance. If not sure, try TERM, BRIDGE, and MONITOR. Is the level too low? The received level should be at least -15 dB dsx for most equipment. Is there a frequency synchronization problem? Refer to the frequency synchronization discussion in this chapter. Is there a cross-talk problem? If the signal level is lower than -12 dB, another signal could be cross talking onto the received T1 line. Are there repeaters and are they at the right spacing? Is there a span power problem? 60 mA span power needs to be delivered to all repeaters on the span; all repeaters should have their power switches properly set to LOOP or THRU. The central office automatic span-powering repeater should be delivering the proper voltage to power the span. All the repeaters before the farthest one away from the central office should be set to THRU. Is the farthest repeater or the NIU set to LOOP? Too many repeaters will overload the central office repeater. Is the span to power the NIU and is it providing the proper power? Is the central office repeater transmitting a 6V signal that is not being padded to 3V before it gets to the next equipment? Is the test cord broken or dirty? This can cause misleading test results. Is the test set working properly? This can also cause confusion when troubleshooting problems. A quick way to check the test set is to loop the test cord from transmit to receive, checking both the cord and the set at the same time. Common test set problems are wrong termination (TERM, BRIDGE, DSXMON), wrong clock setting (INTERNAL is right for most cases), wrong framing, wrong line code, wrong Nx64 selection, and wrong test pattern. 448 SunSet T10 Rev. B 7.2.1 Fault Sectionalization BPVS PUL 1 PUL ESF SLC SF ORS YE -96 AIS PAT ESF SLC BPVS FBE CRC SF ORS SES B8ZS ERR SES B8ZS ERR 2 BIT -96 YE L/I DL E POW SYN ERR L/I LOW C OR ER BAT T DL E Su AIS nS et T1 0 MEA PAG S T/S E VIE : W 01 02 BIN01 REC EIV 03 110 ARY ED 04 12: 110 111 DAT 05 010 000 11 HEX 34: A 06 000 000 10 DF 41 ASC 07 011 111 10 C4 08 II 001 001 10 42 ( 110 011 01 1E ) PAG B (#) 110 101 10 65 (B) E-U 001 00 2E P e (X) 01 D4 F1 ( PAG C5 (t)) E-D (+) N F2 ( RES ) UME SU NR ISE F1 POW PRN 1 UP 7 M13 F4 RE F4 ERR D INJ HIST 3 ORY 6 APE DSX-1 MON OUT 8 N ENT 0 D4 GRA C PHIC VOL 2 DN 5 SCR STO F3 B LIGH T VOL 4 T ESC ER F3 TEL ECO M F2 RESYA NC E AUT O F SHIF 9 ER M13 IN Loss of Signal PUL 1 PUL SF ORS ESF SES SLC B8ZS ERR SF ORS YE -96 AIS PAT ESF SLC Su -96 nS et BIT YE AIS L/I T1 0 SU NR ISE F1 OR E PRN M13 M13 GRA C PHIC VOL 2 DN 5 SCR N F3 TEL ECO M STO F4 E LOW ER BAT T Red Pulses RE ENT 9 ER F4 ERR D INJ HIST 3 ORY 6 8 0 D4 1 UP 7 APE DL F3 B LIGH T VOL 4 T ESC C F2 RESYA NC E AUT O F SHIF ER L/I POW SYN ERR DL MEA PAG S T/S E VIE : W 01 02 BIN01 REC EIV 03 110 ARY ED 04 12: 110 111 DAT 05 010 000 11 HEX 34: A 06 000 000 10 DF 41 ASC 07 011 111 10 C4 08 II 001 001 10 42 ( 110 011 01 1E ) PAG B (#) 110 101 10 65 (B) E-U 001 00 2E P e (X) 01 D4 F1 ( PAG C5 (t)) E-D (+) N F2 ( RES ) UME POW D4 SES B8ZS ERR 2 Trouble DSX-1 MON OUT IN Trouble D4 Figure 230 BPVs & LOS in DS1 Fault Sectionalization Fault sectionalization techniques vary depending on whether the T1 circuit is in-service or out of service. If out of service, then start from the middle and loop back the circuit in each direction to see which side has the problem. Next, go to the middle of the problem side and do another loopback in each direction. Repeat this procedure until the problem is located. Refer to Figure 228 for an illustration of the loopback test. This figure shows many of the loopbacks that may be available in one direction from the central office. Note that there also may be DS3 loopbacks available if the circuit is a DS3 circuit, or DS1 channel loopbacks may be available in higher order multiplexes. If the circuit is in service, non-disruptive performance monitoring techniques are used. Simply plugging into monitoring jacks and observing the information can show much about the circuit. Be sure to plug into the monitor jack for each direction and look at the results. The following paragraphs tell what conclusions can make from various results at different monitor points. In the accompanying diagrams, a SunSet T10 shows what abnormal conditions it is seeing from its monitor point. In the diagrams, a black dot indicates a line impairment that is causing steady or bursty errors. A missing signal arrow indicates a loss of signal. If the circuit uses ESF framing then CRC is in the diagram. Likewise, if C-bit parity error is listed, this is only if C-bit parity framing is used. Ch.5 Reference 449 7.2.2 Bipolar Violations and Loss of Signal If seeing DS1 or DS3 bipolar violations or loss of signal then the fault is close to the tester. DS1 bipolar violations pass through line repeaters, office repeaters, and NIUs, but cannot pass through multiplexes, DCSs, switches, signal format changes (i.e. from optical to electrical), and some types of CSUs. DS3 bipolar violations indicate that the problem is between the test set and the nearest DS3 equipment, within a few hundred feet. The DS3 format only exists at interconnections between equipment. Different formats are for transmission over long distances. In comparison, transmitting a DS1 electrical signal through regenerative line repeaters for hundreds of miles is possible. Thus, a DS1 bipolar violation indicates a transmission problem between the test set and the last multiplex, DCS, or other element that stops bipolar violations. Figure 230 illustrates the DS1 case. 7.2.3 Frame Bit, Bit, CRC-6, and C-Bit Parity Errors Test at DSX-1 PUL 1 SF ORS ESF SES SLC B8ZS ERR SES B8ZS ERR PUL 2 SF ORS YE -96 AIS PAT ESF SLC -96 BIT YE L/I L/I DL E POW SYN ERR OR C LOW ER BAT T DL E Su AIS nS et T1 0 MEA PAG S T/S E VIE : W 01 02 BIN01 REC EIV 03 110 ARY ED 04 12: 110 111 DAT 05 010 000 11 HEX 34: A 06 000 000 10 DF 41 ASC 07 011 111 10 C4 08 II 001 001 10 42 ( 110 011 01 1E ) PAG B (#) 110 101 10 65 (B) E-U 001 00 2E P e (X) 01 D4 F1 ( PAG C5 (t)) E-D (+) N F2 ( RES ) UME Trouble Here or Here SU NR ISE F1 VOL 1 UP 5 PRN SCR 7 ENT PUL 1 ERR D INJ DSX-1 MON OUT 9 ER PUL ESF SLC SF ORS YE -96 AIS PAT ESF SLC -96 BIT YE L/I L/I DL E POW SYN ERR OR C LOW DS1 FBE DS1 ER BAT T DL E Su AIS nS et T1 0 MEA PAG S T/S E VIE : W 01 02 BIN01 REC EIV 03 110 ARY ED 04 12: 110 111 DAT 05 010 000 11 HEX 34: A 06 000 000 10 DF 41 ASC 07 011 111 10 C4 08 II 001 001 10 42 ( 110 011 01 1E ) PAG B (#) 110 101 10 65 (B) E-U 001 00 2E P e (X) 01 D4 F1 ( PAG C5 (t)) E-D (+) N F2 ( RES ) UME SU NR ISE F1 PRN GRA C PHIC VOL 2 DN 7 8 N F4 RE ENT 9 ER F4 ERR D INJ HIST 3 ORY 6 APE 0 M13 1 UP 5 SCR TEL ECO M F3 B LIGH T VOL 4 T ESC ER STO F2 RESYA NC E AUT O F SHIF POW F3 D4 SF ORS SES B8ZS ERR IN SES B8ZS ERR 2 FBE CRC HIST 3 ORY 8 M13 M13 Channelized DS1 Test at DSX-3 D4 RE 6 APE N 0 D4 F4 F4 GRA C PHIC VOL 2 DN 4 T ESC ER STO F3 B LIGH T E AUT O F SHIF POW F3 TEL ECO M F2 RESYA NC DSX-3 MON OUT IN Trouble M13 D4 Figure 231 FBE and CRC in DS1 Testing Frame Bit, Bit, CRC-6, and C-Bit Parity Errors travel with the DS1 circuit for the entire length of the circuit. They pass through higher order multiplexes. They also pass through changes in line format from copper-to-fiber, fiber-to-radio, etc. If they are occurring with bipolar violations, then the problem is local and if occurring without bipolar violations, then the problem is behind the last format change. Figure 231 shows what these errors mean when seen without BPVs. 450 SunSet T10 Rev. B 7.2.4 AIS and Yellow Alarm Yellow Alarm at DSX-1 PUL 1 ESF SLC SF ORS MEA PAG AIS Yellow YE -96 AIS PAT ESF BIT -96 YE L/I DL E POW SYN ERR L/I LOW C OR ER BAT T DL E Su AIS nS et T1 0 S Yellow T/S E VIE : W 01 02 BIN01 REC EIV 03 110 ARY ED 04 12: 110 111 DAT 05 010 000 11 HEX 34: A 06 000 000 10 DF 41 ASC 07 011 111 10 C4 08 II 001 001 10 42 ( 110 011 01 1E ) PAG B (#) 110 101 10 65 (B) E-U 001 00 2E P e (X) 01 D4 F1 ( PAG C5 (t)) E-D (+) N F2 ( RES ) UME SU NR ISE F3 1 UP PRN F4 GRA C PHIC ERR D INJ HIST 3 ORY 5 SCR RE F3 VOL 2 DN 4 T ESC ER F4 F2 B LIGH T VOL F SHIF POW STO TEL ECO M F1 RESYA NC E AUT O 7 6 APE DSX-1 MON OUT 8 N ENT 0 D4 SF ORS SES B8ZS ERR SLC Loss of Signal Here or Here SES B8ZS ERR PUL 2 9 ER M13 M13 AIS at DSX-1 D4 IN PUL 1 PUL SF ORS ESF SES SLC B8ZS ERR SES B8ZS ERR 2 SF ORS YE -96 AIS PAT ESF SLC -96 BIT YE L/I L/I DL E POW SYN ERR OR C LOW ER BAT T DL E Su AIS nS et T1 0 MEA PAG S T/S E VIE : W 01 02 BIN01 REC EIV 03 110 ARY ED 04 12: 110 111 DAT 05 010 000 11 HEX 34: A 06 000 000 10 DF 41 ASC 07 011 111 10 C4 08 II 001 001 10 42 ( 110 011 01 1E ) PAG B (#) 110 101 10 65 (B) E-U 001 00 2E P e (X) 01 D4 F1 ( PAG C5 (t)) E-D (+) N F2 ( RES ) UME SU NR ISE F1 Loss of Signal Here or Here D4 M13 1 UP 4 T PRN GRA C PHIC VOL 2 DN 5 ESC ER SCR STO F4 AIS RE F3 B LIGH T VOL F SHIF POW F3 TEL ECO M F2 RESYA NC E AUT O 7 F4 ERR D INJ HIST 3 ORY 6 APE 8 N 0 ENT 9 ER AIS M13 DSX-1 MON OUT IN D4 Figure 232 DS1 Yellow and AIS AIS indicates that the line problem is somewhere behind the last multiplex, DCS, fiber mux, or other device that replaces a loss of signal with AIS. Yellow alarm means the received signal has been lost at the end of the line that generated the monitored signal. When monitoring in the other direction, if it is a framed signal, then the problem must exist between the test set and the end of the line generating the Yellow alarm. If it is an unframed signal (i.e. AIS or loss of signal) the problem is between the test set and the other end of the circuit. Figure 232 shows how the AIS and Yellow alarms show up in DS1 and DS3 fault sectionalization. Ch.5 Reference 451 7.2.5 FEBE or ESF PRM Errors PUL 1 SES B8ZS SF ERR 2 PUL ORS ESF SES SLC B8ZS ERR SF ORS YE -96 AIS PAT ESF SLC Su BIT -96 nS YE et AIS T1 L/I SU NR ISE F1 OR E SHIF 4 PRN SCR STO F4 E LOW ER BAT T 2 VOL 2 DN 7 ENT SF ORS ESF SES SLC SF YE -96 AIS PAT ESF SLC Su RE BIT -96 nS YE et AIS T1 L/I SU NR ISE HIST 3 ORY VOL F SHIF POW 9 1 UP 4 T PRN GRA C PHIC VOL 2 DN 5 ESC ER SCR STO F4 L/I DL E POW SYN ERR DL OR C LOW ER BAT T E No Errors RE F3 B LIGH T E AUT O ER F3 TEL ECO M 0 F2 RESYA NC F4 ERR D INJ 8 0 PUL B8ZS ERR ORS MEA PAG S T/S E VIE : W 01 02 BIN01 REC EIV 03 110 ARY ED 04 12: 110 111 DAT 05 010 000 11 HEX 34: A 06 000 000 10 DF 41 ASC 07 011 111 10 C4 08 II 001 001 10 42 ( 110 011 01 1E ) PAG B (#) 110 101 10 65 (B) E-U 001 00 2E P e (X) 01 D4 F1 ( PAG C5 (t)) E-D (+) N F2 ( RES ) UME 6 APE N SES B8ZS ERR ESF PRM Errors F1 GRA C PHIC 5 ESC ER 1 UP T POW F3 TEL ECO M DL F3 B LIGH T VOL PUL 1 C F2 RESYA NC E AUT O F 0 L/I POW SYN ERR DL MEA PAG S T/S E VIE : W 01 02 BIN01 REC EIV 03 110 ARY ED 04 12: 110 111 DAT 05 010 000 11 HEX 34: A 06 000 000 10 DF 41 ASC 07 011 111 10 C4 08 II 001 001 10 42 ( 110 011 01 1E ) PAG B (#) 110 101 10 65 (B) E-U 001 00 2E P e (X) 01 D4 F1 ( PAG C5 (t)) E-D (+) N F2 ( RES ) UME 7 F4 ERR D INJ HIST 3 ORY 6 APE 8 N 0 ENT 9 ER Loss of Signal Here or Here ESF PRM CSU M13 M13 DSX-1 MON OUT ESF PRM CSU IN Figure 233 DS1 ESF PRM Errors Both of these alarms indicate that the received errors are at the end of the line that is generating these messages. If seeing no errors on the other direction of the monitored line, then the problem exists between the test set and the end generating the FEBE or PRM error messages. If the other side shows BPVs, CRC-6, frame, or other errors, then the problem exists between the test set and the end of the circuit that is not generating the FEBE or PRM error messages. If both DS3 FEBEs and DS1 PRM errors are seen while monitoring a DS1 circuit from a DS3 access point. Then the problem exists before the end of the DS3. If seeing ESF PRM errors but FEBEs are not seen on a C-bit parity framed DS3 while monitoring a DS1, then the problem exists between the side of the circuit generating the ESF PRMs and the end of the DS3 mux. Figure 233 shows a typical example of a network fault leading to this indication. 452 SunSet T10 Rev. B 8.0 SS7 Technology Overview SS7/ CCS7 (Signaling System Number 7) is a common channel signaling system conceived to provide services such as interprocessor transaction for call/remote control, maintenance/network management signaling. This is a reliable means for information transfer in the correct sequence without loss or duplication. A number of applications are supported by SS7: PSTN (Public Switching Telephone Network), ISDN (Integrated Services Digital Network), SCP (Service Control Point) services, PLMN (Public Land Mobile Network), and Operations administration and Maintenance of networks. 8.1 SS7 Network Architecture The SS7 network is comprised of signaling points (SPs) connected together by dedicated circuits identified as signaling links. There are three types of SPs: Service Switching Point (SSP), Signaling Transfer Point (STP), and Service Control Point (SCP). Depicted in Figure 234 is a typical SS7 network. The primary purpose of the SSP is to originate and process requests for trunks. In addition, it originates requests for network services. Every SSP is connected to a pair of STPs for load sharing and backup purposes. The primary purpose of a STP is to route signaling messages between different SSPs in the network. Usually, there are two levels of hierarchy in arranging STPs: local level and regional level. The local level STP pair routes signaling traffic within a specified local area. While regional level STPs route traffic between the specified local areas. SCP’s primary function is to process database query messages for advanced network services such as 800 numbers and alternative billing. SCPs are paired to protect the SS7 against loss of data in case of SCP failure. Each SCP is connected to the regional STP, thus providing regional service. Ch.5 Reference 453 SSP ? Local STP A-Link STP ELi nk SSP ? STP ink Local STP B-L SSP A Regional STP STP STP C-Link SSP B STP SSP C SSP ? K A-LIN D-Link STP SCP SCP SSP D Figure 234 SS7 Network In reference to Figure 234, the following list identifies the link nomenclature: • • • • • • A link: Access links that connect switching offices to the STPs. B link: Bridge links that connect one mated pair of STPs to the second mated pair. C link: Cross links that connect a mated pair of STPs to each other. D link: Down links that connect the RSTPs to the LSTPs E link: Extended links that connect the switching offices to the STP pairs other than its home pair. F link: Links that connect one SP to another, but neither SP is an STP. 454 SunSet T10 Rev. B 8.2 SS7 Protocol The first three levels of the SS7 protocol follow the OSI (Open System Interconnect) definition quite closely. However, due to the dedicated link nature of SS7, many of the upper OSI layer functionalities were deemed redundant. Figure 235 illustrates the correlation. 7 6 5 4 3 2 1 Application Presentation Session Transport Network Data Link Physical TUP ISUP MTP SCCP TCAP TCAP ISUP TUP SCCP MTP Telephone User Part ISDN User Part Message Transfer Part Signaling Connection Control Part Transaction Capabilities Application Part Figure 235 SS7 and OSI Protocol Architecture MTP The MTP (Message Transfer Part) performs functions such as transmitting bits, detecting and correcting errors, and end-toend routing. The MTP layer is divided into three levels, each of which provides a unique function. • • • Level 1 (Physical Level) - provides the physical, electrical, and procedural characteristics of a SS7 link Level 2 (Data Link Level) - provides the functionality needed to do SU alignment, error detection/ correction, link synchronization, and flow control Level 3 (Signaling Network Level) - provides two major subfunctions: signaling message handling and signaling network management. Signaling message handling contains a discrimination function (determining if a message is destined to its node), a distribution function (delivering a message to the appropriate user part), and a routing function (picking the appropriate route to a destination node). The signaling network management provides the procedures needed to restore normal signaling conditions in the event of failure or link congestion. Ch.5 Reference 455 SCCP The Signaling Connection Control Part provides the routing capabilities for signaling messages through the GTT (Global Title Translation) process. Using the SCP as the main database for storing SP addresses, other SPs can be freed of this task. SCCP provides the functionality needed for non-circuit services (i.e. transactional services for database access). These services are divided into two groups: connection-oriented and connectionless. Connection-oriented services provide segmenting and reassembly capabilities of the network service data units that need to be transmitted through the SS7 network. Connectionless services provide the capability to transfer one data unit. Segmentation and reassembly are not available in connectionless services. ISUP The ISDN User Part is used in SS7 to support basic bearer services (which involve the setup and release of 64 Kb/s network switched circuit exchanges) and supplementing services such as call forwarding, calling, line identification, user-to-user signaling, closed user groups, and direct dialing. Another service supported by ISUP is call switching of basic phone calls for both speech and data calls, as specified by its standards for international semiautomatic and automatic telephone and circuit switched traffic. TUP The Telephone User Part is used with SS7 to support international telephone call control signaling. TCAP Transaction Capability Application Part refers to the building blocks of the Application layer network services used by SS7 users to provide a standard procedure of adding network services, The current list of application uses includes: • • • • mobile service application. operation and maintenance. non circuit control related exchange of signaling information. registration and activation of supplementary services. 456 SunSet T10 Rev. B 8.3 SS7 Messages There are three basic message types: • Message Signaling Unit (MSU) - The MSUs are the units used by the ISUP, TUP, and TCAP messages. They provide the structure to house the messages. A description of each field is shown in Figure 236. Flag Flag CK SIF S10 LI FIB FSN BIB BSN First BIT Received BSN Backward Sequence Number: Indication of the last message received. BIB Backward Indicator Bit: Bit inverted for negative acknowledgement of the BSN message. FSN Forward Sequence Number: Indication of the message sent. FIB Forward Indicator Bit: Bit is inverted to indicate the retransmission of negative acknowledgement messages. LI Length Indicator SIO Signalling Info. Octet: Identify various types of messages (ie. ISUP, SCCP). SIF Signalling Info. Field: Section that contains the message (max. 272 octets). CK Cyclic Redundancy Check: 2 octets Figure 236 MSU Message Structure Ch.5 Reference 457 • Link Status Signal Unit (LSSU) - LSSUs are used to indicate the status of a node's level 2 message handling capabilities over a specific link. They are used to inform other nodes in the event of congestion, outage, link reset, etc. A description of each field is shown in Figure 237. Flag Flag CK SF LI FIB FSN BIB BSN First BIT Received BSN Backward Sequence Number: Indication of the last message received. BIB Backward Indicator Bit: Bit inverted for negative acknowledgement of the BSN message. FSN Forward Sequence Number: Indication of the message sent. FIB Forward Indicator Bit: Bit is inverted to indicate the retransmission of negative acknowledgement messages. LI Length Indicator SIO Signalling Info. Octet: Identify various types of messages (ie. ISUP, SCCP). SF Status Field: Shows the Status of the link. CK Cyclic Redundancy Check: 2 octets Figure 237 LSSU Message Structure 458 SunSet T10 Rev. B • Fill-In Signal Unit (FISU) - As named, FISUs are used to "fill in" when there is no traffic on the link. This keeps the link aligned. Flag Flag CK LI FIB FSN BIB BSN First BIT Received BSN Backward Sequence Number: Indication of the last message received. BIB Backward Indicator Bit: Bit inverted for negative acknowledgement of the BSN message. FSN Forward Sequence Number: Indication of the message sent. FIB Forward Indicator Bit: Bit is inverted to indicate the retransmission of negative acknowledgement messages. LI Length Indicator CK Cyclic Redundancy Check: 2 octets Figure 238 FISU Message Structure Ch.5 Reference 459 8.4 ISUP Message Example ISUP messages are used to provide circuit-related control information. In general, the most basic application used today for ISUP is call set-up. The IAM (Initial Address Message) is the first message sent for setting up a call. Subsequently, there are a number of other messages being exchanged to connect and eventually release the call. Figure 238 shows the complete call process. STP Exchange Exchange IAM COT ACM ANM REL RCL IAM COT ACM ANM REL RCL Initial Address Message Continuity Check Address Completion Message Answer Message Release Release Complete Figure 239 Typical Phone Call ISUP Messages IAM contains the essential information required for the call. It has the flexibility to expand with additional parameters, as new service is required. Figure 239 illustrates the typical information in an IAM message. Message Type: Nature of Connection: Forward Call Indicator: Calling Party’s Category: Uses Service Info: Called Party Number: Calling Party Number: IAM Continuity Check National; no interworking; caller: ISDN Ordinary Speech; Circuit 14158552301 14083638000; presentation allowed Table 23 Typical IAM Information Fields 460 SunSet T10 Rev. B Chapter 6 Troubleshooting & Customer Information 1.0 Troubleshooting The following are suggestions for when the SunSet T10 is not performing as expected. • Problem: Continuous BPVs show on screen even though there should be no problem with the signal. Suggestion: Check the line interface: • • • • do not use DSXMON for a full 3V signal do not use TERM for a monitor jack try both BRIDGE and DSXMON for a mon jack do not use BRIDGE or DSXMON on a signal that has been opened and is no longer properly terminated • Problem: The SunSet T10 performs improperly Suggestions: 1. Perform a SELF TEST and see if the problem has been resolved. If the SELF TEST shows an ERROR CODE, repeat the test to see if the SunSet T10 was able to automatically correct the problem. 2. Try turning the SunSet T10 off wait 10 seconds and then turn the SunSet T10 on again. 3. Try ERASE NV RAM. Select MAIN MENU > OTHER FEATURES > SYSTEM CONFIG > ERASE NVRAM and follow the on-screen instructions. WARNING! Performing an Erase NVRAM will erase all user-programmed information, measurement results and history buffers. Note: Be sure to turn the power off for at least 5 seconds after completing the ERASE NV RAM operation Ch.6 Troubleshooting & Customer Information 461 • Problem: The SunSet T10 does not power up properly Suggestions: 1. Confirm that the battery is charged or the charger is connected. The SunSet T10s charger is powerful enough to power the SunSet T10 and recharge the battery simultaneously. 2. Confirm that a correctly installed software cartridge is in place. A flickering screen usually indicates that the software cartridge is either loose or missing. Refer to the cartridge installation procedure if necessary. • Problem: The SunSet T10 displays a Security Violation when switched on. Suggestion: 1. Make sure the serial number of the software cartridge matches the serial number on the back of the SunSet T10. Each software cartridge is setup for a specific SunSet T10. If swapped between SunSet T10s, the SunSet T10 may not work properly. • Problem: Keypad keys do not work properly. Suggestions: 1. Verify the SHIFT status by pressing and releasing SHIFT key on the keypad. Observe the SHIFT indicator on the display. 2. Do not press SHIFT key simultaneously with another key on the keypad. 3. Press the SHIFT key again. The SunSet T10 may not have registered it the first time. 4. Turn the SunSet T10 off wait 10 seconds and then turn it on again. • Problem: Measurement is not working properly (loss of signal, no pattern synch). Suggestions: 1. Verify signal TEST MODE and RxLVL-1, or RxLVL-2 settings in the TEST CONFIGURATION screen. 2. Verify that proper cable connections are in accordance with the circuit to the circuit graphic. 3. Make sure that OUT is plugged to IN and vice-a-versa. 4. Twist the plugs inside the jacks and check for proper insertion. 5. Check continuity of the cables. 462 SunSet T10 Rev. B • Problem: Test Patterns will not synchronize. Suggestions: 1. Press RESYNCH on the keypad to force the SunSet T10 to resynchronize on the pattern, framing type, and line coding. 2. Verify that the sent pattern is the desired pattern. Check this in the SEND TEST PATTERN screen. 3. Verify that there is no AMI/B8ZS mismatch. • Problem: Test patterns will not synchronize with other test equipment. Suggestions: 1. Verify that PATTERN INVERSION is set for DISABLE in the OTHER FEATURES > OTHER PARAMETERS screen. 2. Use VIEW RECEIVED DATA to look at the pattern the other test set is sending. • Problem: Voice Frequency section does not work. Suggestions: 1. Verify that the SunSet T10 has a valid framing type showing in the LED indicators. If there is no valid framing, put proper framing on the T1 signal. 2. Make sure that the timeslot number is not confused with the channel number. 3. Make sure the received channel and the transmit channel are correct. Ch.6 Troubleshooting & Customer Information 463 2.0 Calibration The SunSet T10 is self-calibrating. It requires no adjustments and does not need to be returned to Sunrise Telecom for calibration. If required to perform a periodic calibration on the SunSet T10, use this procedure: 1. Switch the SunSet T10 on. 2. Verify that all LEDs blink in sequence and that each LED lights properly. The POWER LED should always be green and the LOW BATT LED should light only when the battery is nearly discharged. 3. Verify that there are no errors listed at the completion of the self-test. 4. Connect a single bantam to single bantam cord from LINE 1 TX to LINE 1 RX. 5. From the MAIN MENU > TEST CONFIGURATION and configure as follows: TEST MODE: T1SINGL RxLVL-1: TERM FRAMING: ESF Tx CODING: B8ZS Tx SOURCE: NORMAL XMT CLOCK: INTERN TEST RATE: 1.544M LBO - 1: 0 dB When done, press the ENTER key on the keypad to return to the MAIN MENU. 6. If necessary, press the HISTORY key to acknowledge any flashing history LEDs. Verify that the PULSES, ESF, and PAT SYNC LEDs are green. The B8ZS LED maybe on, depending on the test pattern transmitted. 7. Select MEASUREMENT RESULTS. Using the PAGE-UP (F1) and PAGE-DN (F2) F-keys, access the “LINE 1 - SIGNAL” screen. Verify that the +LVL is 3.00V +/- 10% and that the -LVL is 3.00V +/- 10%. 8. Verify that the FREQ is 1544000 +/- 1 Hz. 9. Press the ESCAPE key on the keypad to return to the MAIN MENU. 10.Connect a single bantam to single bantam cord from LINE 2 TX to LINE 2 RX. 464 SunSet T10 Rev. B 11.Select TEST CONFIGURATION and configure as follows: TEST MODE: T1DUAL Tx/INSERT: L2-Tx Rx/DROP: L2-Rx RxLVL-1: TERM RxLVL-2: TERM Tx SOURCE: TESTPAT FRAMING: SF-D4 Tx CODING: AMI XMT CLOCK: INTERN TEST RATE: 1.544M LBO 1&2: 0 dB When done, press the ENTER key on the keypad to return to the MAIN MENU. 12.If necessary, press the HISTORY key on the keypad to acknowledge any flashing history LEDs. Verify that the PULSES, SF and PAT SYNC LEDs are green. 13.Select MEASUREMENT RESULTS. Using the PAGE-UP (F1) and PAGE-DN (F2) keys, access the “LINE 1 SIGNAL” screen. Verify that the +LVL is 3.00V +/- 10% and that the -LVL is 3.00V +/- 10%. 14.Verify that the FREQ is 1544000 +/- 1 Hz. 15.Press the ESCAPE key on the keypad to return to the MAIN MENU. The calibration procedure is now complete. Ch.6 Troubleshooting & Customer Information 465 3.0 Customer Information 3.1 Customer Service General Sunrise Telecom Customer Service is available from 7:30 AM to 5:30 PM Pacific Standard Time (California, U.S.A.). Customer Service performs the following functions: • • • Answers customer questions over the phone on such topics as product operation and repair. Facilitates prompt repair of malfunctioning SunSet s. Provides information about product upgrades. A RMA (Return Merchandise Authorization) Number is required before shipping any product to Sunrise Telecom for repair. Out-of-warranty repairs require both an RMA and a Purchase Order before returning the unit. All warranted repairs are good for 90 days. Please contact Customer Service if any additional assistance is required: Customer Service: Sunrise Telecom Incorporated 302 Enzo Drive San Jose, CA 95138 U.S.A. Toll Free: 1-800-701-5208, 24 hours per day, 7 days a week. Fax: 1 408 363 8313 Internet: http://www.sunrisetelecom.com Email: [email protected] 466 SunSet T10 Rev. B 3.2 Express Limited Warranty A. Hardware Coverage. COMPANY warrants hardware products against defects in materials and workmanship. During the warranty period COMPANY will, at its sole option, either (i) refund of CUSTOMER’S purchase price without interest, (ii) repair said products, or (iii) replace hardware products which prove to be defective; provided, however, that such products which COMPANY elects to replace must be returned to COMPANY by CUSTOMER, along with acceptable evidence of purchase, within twenty (20) days of request by COMPANY, freight prepaid. B. Software and Firmware Coverage. COMPANY warrants software media and firmware materials against defects in materials and workmanship. During the warranty period COMPANY will, at its sole option, either (i) refund of CUSTOMER’S purchase price without interest, (ii) repair said products, or (iii) replace software or firmware products which prove to be defective; provided, however, that such products which COMPANY elects to replace must be returned to COMPANY by CUSTOMER, along with acceptable evidence of purchase, within twenty (20) days of request by COMPANY, freight prepaid. In addition, during the warranty period, COMPANY will provide, without charge to CUSTOMER, all fixes and patches to the original product specifications sold which COMPANY issues during the warranty period. COMPANY does not warrant or represent that all software defects will be corrected. In any case where COMPANY has licensed a software product “AS-IS,” COMPANY’S obligation will be limited to replacing an inaccurate copy of the original material. This warranty does not cover upgrade or enhancements to product software and firmware. C. Period. The warranty period for Hardware, Software and Firmware will be One (1) Year from date of shipment to CUSTOMER. The COMPANY may also sell warranty extensions or provide a warranty term of three years with the original sale, which provide a longer coverage period for the test set chassis, software and firmware, in which case the terms of the express limited warranty will apply to said specified warranty term. Ch.6 Troubleshooting & Customer Information 467 D. Only for CUSTOMER. COMPANY makes this warranty only for the benefit of CUSTOMER and not for the benefit of any subsequent purchaser or licensee of any merchandise. E. LIMITATION ON WARRANTY. THIS CONSTITUTES THE SOLE AND EXCLUSIVE WARRANTY MADE BY COMPANY WITH RESPECT TO HARDWARE, SOFTWARE AND FIRMWARE. THERE ARE NO OTHER WARRANTIES, EXPRESS OR IMPLIED. COMPANY SPECIFICALLY DISCLAIMS THE IMPLIED WARRANTIES OF MERCHANTABILITY AND FITNESS FOR A PARTICULAR PURPOSE. COMPANY’S LIABILITY UNDER THIS AGREEMENT WITH RESPECT TO A PRODUCT, INCLUDING COMPANY’S LIABILITY FOR FAILURE AFTER REPEATED EFFORTS TO INSTALL EQUIPMENT IN GOOD WORKING ORDER OR TO REPAIR OR REPLACE EQUIPMENT, SHALL IN NO EVENT EXCEED THE PURCHASE PRICE OR LICENSE FEE FOR THAT PRODUCT, NOR SHALL COMPANY IN ANY EVENT BE LIABLE FOR ANY INCIDENTAL, CONSEQUENTIAL, INDIRECT, OR SPECIAL DAMAGES OF ANY KIND OR NATURE WHATSOEVER, ARISING FROM OR RELATED TO THE SALE OF THE MERCHANDISE HEREUNDER, INCLUDING BUT NOT LIMITED TO DAMAGES ARISING FROM OR RELATED TO LOSS OF BUSINESS, LOSS OF PROFIT, LOSS OF GOODWILL, INJURY TO REPUTATION, OVERHEAD, DOWNTIME, REPAIR OR REPLACEMENT, OR CHARGE-BACKS OR OTHER DEBITS FROM CUSTOMER OR ANY CUSTOMER OF CUSTOMER. G. No Guaranty, Nonapplication of Warranty. COMPANY does not guaranty or warrant that the operation of hardware, software, or firmware will be uninterrupted or error-free. Further, the warranty shall not apply to defects resulting from: (1) Improper or inadequate maintenance by CUSTOMER; (2) CUSTOMER-supplied software or interfacing; (3) Unauthorized modification or misuse; (4) Operation outside of the environmental specifications for the product; (5) Improper site preparation or maintenance; or (6) Improper installation by CUSTOMER. 468 SunSet T10 Rev. B Index A Abbreviations; 405 B BPV AS; 114 ES; 113 C Calibration; 464 CODING AMI; 52 B8ZS; 52 Connector Panel Line 1; 36 Line 2; 36 MULTI PORT; 36 NimH 15V; 36 SERIAL PORT; 36 Contrast Control; 42 CSU and NI Control CODE; 74 ESF-DL Codes; 74 In-Band Codes; 74 MODE; 73 TYPE; 73 CSU/NI Emulation LLPBK-1; 309, 311 LLPBK-2; 311 PLPBK-1; 309 Customer Service; 466 D Data Link Control - ESF BPV; 300 C=<10; 300 C=<100; 300 C=<319; 300 C=<5; 300 C>320; 300 CRC-1; 300 DETEC TIME; 300 ELAPS TIME; 300 FSBEE; 300 Index 469 Data Link Control - ESF, con’t PLB sec; 300 R; 300 SEFE; 300 SLIP; 300 SPRM; 301 SPRM/PRM; 299 U1; 300 U2; 301 YEL sec; 300 Datacom Bit Error Screen %AS; 128 %DGRM; 128 %EFS; 128 %ES; 127 %SES; 128 %UAS; 128 AS; 128 BIT; 127 DGRM; 128 EFS; 128 ES; 127 RATE; 127 SES; 127 UAS; 128 Datacom Test Configuration BIT/CHAR; 71 MODE; 70 PARITY; 71 REF CLOCK; 70 STOP BITS; 71 TEST RATE; 70 TYPE; 69 DCS; 346 DDS Loop Back Access Screen CODE; 147 CSU; 147 DEV NO; 147 DSO-DP; 147 DSU; 147 LATCH; 146 MODE; 146 NON-LAT; 146 OCU; 147 TYPE; 146 470 SunSet T10 Rev. B DDS Measurement Results %UAS; 148 BER; 148 BIT; 148 CODE; 148 ELAP TIME; 148 FRME; 148 PATT; 148 RATE; 148 UAS; 148 DDS Measurements Rx T/S; 144 SEND PATT; 145 TEST RATE; 144 Tx T/S; 144 DDS Test Patterns DDS-3; 415 DDS-4; 415 DDS-5; 415 Dialing Procedure; 336 E EFS; 128 Error Injection Screen BPV; 285 BURST; 285 COUNT; 286 FRAME; 285 LOG+BPV; 285 LOGIC; 285 MODE; 285 RATE; 285, 286 TYPE; 285 F FBER; 119 Figures 001 Cartridge Installation; 13 002 Cartridge After Installation; 14 003 Instrument Stand Installation; 15 004 T1SINGL, TEST RATE: Nx64K; 17 005 T1SINGL, TEST RATE: 1.544M; 18 006 Measurement Results - NO ERRORS; 19 007 SunSet T10 Front View; 27 008 SunSet T10 Keypad; 28 009 LED Panel; 33 010 T10 Connector Panel; 36 Index 471 Figures, con’t 011 Printer Cable Pin Assignments; 38 012 SS122C Null Modem Pin Assignments; 39 013 Switch Settings for SS118 Printer; 40 014 Printing to a Parallel Printer; 41 015 Remote Control Typical Layout; 43 016 SunSet T10 Menu Tree; 47 017 T1 SINGL Test Configuration Menu; 49 018 T1 SINGL Graphic; 49 019 SunSet T10 Time Slot Screen; 54 020 T1DUAL Test Configuration; 56 021 T1DUAL Graphic Test Mode; 56 022 Loop or Slave Timing; 60 023 Slave to Slave Timing; 61 024 External Timing; 61 025 Internal Timing; 62 026 T10 Time Slot Screen; 63 027 T1 - MUX Mode Configuration; 65 028 Datacom Configuration Menu; 69 029 Loopback and Span Control Menu; 72 030 CSU and NI Control; 73 031 Teltrend Office Repeater; 78 032 Teltrend Line Repeater; 81 033 Westell Office Repeater; 83 034 Westell Line Repeater; 86 035 Westell NIU/PM & MSS Menu; 88 036 Retrieve View All PM Reports; 89 037 MSS Switch Control; 92 038 MSS Ramp Access; 94 039 Teltrend MSS Switch Control; 96 040 HDSL Span Control; 98 041 Send Test Pattern Menu; 100 042 T1 Single, Line 1 Summary Screen; 105 043 T1 Dual Summary Screen; 105 044 T1 Single, Line 1 Summary Screen; 108 045 T1 Dual Summary Screen; 108 046 No Errors Screen; 109 047 BPV Line 1 Line Screen; 113 048 Line 1 Signal Screen; 115 049 Line 1 Frame Screen; 118 050 Line 1 - ESF CRC-6 Screen; 121 051 Line 1 Logical Screen; 123 052 Frequency Screen; 125 053 Datacom Bit Error Screen; 127 054 Other Measurements Menu; 130 055 View Received Data; 130 472 SunSet T10 Rev. B Figures, con’t 056 Propagation Delay; 133 057 Quick Test - I; 135 058 Quick Test - II; 135 059 Ticket Label Entry; 136 060 Quick Test Summary; 138 061 Quick Test Results; 139 062 Pulse Mask Analysis; 141 063 DDS Measurements Menu; 143 064 DDS Configuration & Send Pattern Screen; 144 065 DDS Loop Back Access Screen; 146 066 DDS Measurement Results; 148 067 Send/Receive Control Code; 149 068 ISDN Primary Rate Menu; 151 069 ISDN Configuration; 152 070 Emulate Type; 152 071 Call Setup Screen; 155 072 Sequential Call Setup; 157 073 Sequential Call Results; 159 074 BERT Test; 160 075 Sequential BERT Results; 161 076 Start Link/Call Setup; 163 077 ISDN INFO Screen; 166 078 ISDN BER Measurements; 167 079 Receiving a Call Screen; 168 080 Backup D Channel Status Screen; 169 081 L-STAT Screen; 170 082 D Channel Filter Setup Screen; 172 083 Start Tracer Screen for ISDN; 173 084 ISDN View/Print Tracer Screen; 174 085 ISDN HEX View Screen; 175 086 ISDN VIEW Message Screen - Decode View; 175 087 Information Element; 176 088 ISDN Other Parameters; 177 089 SS7 Analysis Menu; 180 090 SS7 Configuration; 181 091 Setup Filter; 183 092 SCCP Setup Filter; 189 093 View/Print Tracer; 197 094 ANSI SCCP Message, Hex View; 198 095 ANSI SCCP Message, Decode View; 199 096 Layer 4 Decoded TCAP Message; 200 097 Component Decode Screen; 203 098 SU Analysis, Count Screen; 204 099 SU Analysis, Statist Screen; 205 100 GSM VOICE/TRAU/BERT Menu; 206 Index 473 Figures, con’t 101 GSM Monitor Screen; 207 102 VOICE/TRAU XMT Screen; 209 103 Uplink/Downlink Directions; 210 104 GSM 16K BERT; 211 105 Switched 56 Testing Menu; 213 106 SW56 Test Configuration; 214 107 SW56 Call Setup Screen; 216 108 Measurement Results Screen; 218 109 Teleos Call Monitor Setup Screen; 219 110 VF Channel Access Menu; 220 111 VF Measurements Setup Screen; 221 112 View Line 1 & 2 CAS; 225 113 Dial/Supervision Setup; 226 114 Place/Receive Calls Menu; 229 115 DTMF/MF/DP Analysis; 232 116 DTMF / MF / DP Analysis Screen 1; 234 117 DTMF / MF / DP Analysis Screen 2; 234 118 Noise Analysis Menu; 235 119 MF Tracer Screen; 236 120 MF View Tracer Screen; 238 121 Signaling Analysis, AB Bits; 239 122 Signaling Analysis, DECODE; 240 123 Monitor TMC/CSC Menu; 241 124 TMC Configuration Screen; 242 125 TMC Filter; 243 126 Start Tracer Screen; 247 127 View / Print Tracer; 249 128 View Tracer with Post-filter; 250 129 Release Message; 251 130 Setup Message; 252 131 TMC Statistics; 254 132 Send Message Menu; 255 133 Message Composer; 256 134 Message Composer with Layer 3; 257 135 EOC Setup Screen; 259 136 EOC Filter Selection; 261 137 EOC Statistics, Page 1; 262 138 EOC Statistics, Page 2; 263 139 Frame Relay Menu; 264 140 Frame Relay Configuration; 266 141 LMI Analysis; 269 142 PVC Status Screen; 270 143 Ping Test Configuration; 271 144 Ping Test-in Progress; 273 145 PING Response Screen; 274 474 SunSet T10 Rev. B Figures, con’t 146 Other Features Menu; 275 147 System Configuration Menu; 275 148 General Configuration Screen; 278 149 Version / Option Screen; 282 150 Measurement Configuration; 283 151 Error Injection Screen; 285 152 Other Parameters; 288 153 Coding Mismatch Message; 290 154 View Test Record; 291 155 Data Link Control SLC-96; 293 156 Monitor Data Link SLC-96; 294 157 SLC-96 Send Message; 295 158 View Data Link; 297 159 Data Link Control - ESF; 298 160 Monitor T1.403 PRM; 299 161 T1.403 SPRM Decode; 301 162 Monitor T1.403 NPRM Screen; 302 163 Monitor T1.403 BOM; 303 164 Data Link Transmit T1.403 PRM; 304 165 Data Link Send Message; 305 166 Retrieve Counter; 307 167 CSU/NI Emulation, T1 SINGL; 308 168 CSU/NI Emulation, T1DUAL; 310 169 Plugging in-DSXMON Mode; 314 170 Plugging in-BRIDGE Mode; 314 171 Plugging in-TERM Mode; 314 172 Accepting a New T1 Span; 315 173 Monitoring an In-Service Circuit; 317 174 Verify Proper B8ZS/ AMI Optioning; 320 175 Frequency Synchronization Problems; 323 176 Measuring Signal Level; 325 177 Checking DSX Wiring; 327 178 Ten-Bit Pattern; 329 179 Monitoring an In-Service Voice Frequency Channel; 339 180 Simple Talk/Listen; 341 181 Fractional T1 Circuit; 345 182 Plugging into the FT1 Circuit; 347 183 Typical SLC-96 System Configuration; 349 184 Monitoring the SLC Data Link; 351 185 SLC-96 Out-of-Service Testing; 353 186 SLC-96 A Digroup Data Link Transmission; 354 187 In Service Full Duplex THRU Drop and Insert; 355 188 Modem Testing with Datacom; 364 189 Datacom Interface Screen; 365 190 Local and Remote Loopback; 367 Index 475 Figures, con’t 191 Emulating a Terminal Multiplex; 371 192 Emulating an Add/Drop Multiplex; 374 193 Emulating Add/Drop MUX; 376 194 ISDN Call Setup - TE Mode; 379 195 ISDN Call Setup - NT Mode; 379 196 ISDN Monitoring; 381 197 Point-to-Point Call; 383 198 Loopback Call; 383 199 Back-up D Channel; 386 200 47B + D; 388 201 Receive a Call - INFO Screen; 391 202 SS7 Network Testing; 392 203 View Message, Hexadecimal; 394 204 View Message, Decoded; 394 205 Nature of Connection, Layer 4 Decode; 395 206 GSM Network; 396 207 GSM 16K BERT Screen; 397 208 GSM Monitor Screen; 398 209 Voice & TRAU XMT Configuration Screen; 400 210 Frame Relay Header Formats; 416 211 DLCI Values; 417 212 Multiple PVC Connections; 418 213 LMI Counters; 419 214 HDSL Span; 421 215 GR-303 System; 422 216 TMC Call Procedure, Initiated by IDT; 424 217 TMC Call Procedure, Initiated by RDT; 425 218 CSC Call Procedure, Customer Initiated; 426 219 GSM Network; 430 220 TRAU Locations; 432 221 16 Kbit TRAU Frame; 433 222 DS1 Network Elements; 435 223 DS1 Pulse Transmission; 437 224 DS1 Frame Structure; 438 225 PCM Sampling and µ-Law Encoding; 440 226 Timing Distribution; 442 227 AIS and Yellow Alarms; 444 228 DS1 Loopback Testing; 445 229 DS1 Performance Monitoring; 446 230 BPVs & LOS in DS1 Fault Sectionalization; 449 231 FBE and CRC in DS1 Testing; 450 232 DS1 Yellow and AIS; 451 233 DS1 ESF PRM Errors; 452 234 SS7 Network; 454 235 SS7 and OSI Protocol Architecture; 455 476 SunSet T10 Rev. B Figures, con’t 236 MSU Message Structure; 457 237 LSSU Message Structure; 458 238 FISU Message Structure; 459 239 Typical Phone Call ISUP Messages; 460 Fractional T1; 345 Frame Relay Configuration ANSI617; 266 DLCI LENGTH; 267 DLCI VALUE; 267 INTERFACE; 266 LMI; 266 N391; 267 N392; 267 N393; 267 Q.933; 266 STANDARD; 266 T391; 267 TIMER; 267 UNI; 266 Frame Relay, LMI Analysis ELAPSED TIME; 269 heartbeat; 268 keep-alive; 268 LINK ERROR TOTAL; 269 LINK OK TOTAL; 269 PVC (Permanent Virtual Circuit); 268 RESP. SEQ NUM; 269 TIMEOUT ERRORS; 269 virtual circuits; 268 WRONG MESSAGES; 269 Frame Relay, PING TEST DEST IP; 272 IP (Internet Protocol) address; 271, 401 LMI MESSAGE; 272 LOCAL IP; 271 NLPID; 272 NO OF PINGS; 272 RFC 1490; 272 TCP-IP protocol; 271, 401 TIMEOUT; 272 Frame Relay, PING TEST Response ECHOED IPS NO; 274 Frame Relay, PING TEST Results AVG; 273 CUR; 273 Index 477 Frame Relay, PING TEST Results, con’t ERROR; 273 MAX; 273 MIN; 273 PINGS; 273 RECEIVE; 273 ROUND TRIP TIME; 273 SENT; 273 STATUS; 273 UNREACH; 273 Frame Relay Structure BECN; 416 C/R; 416 D/C: DLCore/Control; 417 DE; 417 DLCI; 416, 417 EA; 416 FECN; 416 FRAMING SLC-96®; 52 UNFRAME; 52 G General Configuration Screen BACK LIGHT; 279 BAUD RATE; 279 BITS/CHAR; 280 CR/LF INSRT; 280 DATE (Y-M -D); 278 MEAS DURATION; 283 OUT OF FRAME; 284 PARITY; 279 PRINT EVENT; 284 PRINT PERIOD; 284 PRINTER; 279 STOP BIT; 280 TIME (H :M :S); 278 GR-303 Monitor, EOC Setup CHANNEL; 259 FILTER ON; 260 GR-303 Monitor, EOC Statistics %/COUNT; 263 DISCARD FR; 262 DM; 263 ERRORED FR; 262 ET; 262 INFO; 263 478 SunSet T10 Rev. B GR-303 Monitor, EOC Statistics, con’t REJ; 263 RNR; 263 RR; 263 SABME; 263 TOTAL FR; 262 GR-303 Monitor, Message Types CALL REF; 252 CALL REF SUFFIX; 252 CAUSE; 252 DS0 #; 252 DS1 #; 252 GR-303 Monitor, Start Tracer Buffer No; 247 Current No; 247 Date and time stamp; 247 RDT<-IDT; 247 GR-303 Monitor, TMC Configuration Call Ref; 244 Cause Value; 245 CRC Check; 243 DS0 Number; 245 DS1 Number; 244 Layer-2 Msg; 243 Layer-3 Msg; 244 TIME SLOT; 242 GR-303 Monitor, View / Print Buffer QUALIFIED; 250 GR-303 Technology Bellcore-defined interface; 422 CMISE/ASN.1; 428 CONNECT ACK; 425 CONNECT message; 424 CSC; 423 DISCONNECT message; 424 DLC; 422 eoc; 423, 428 GR-2833; 428 GR-303-CORE; 422 IDLC; 422 IDT; 422 LAP-D protocol; 428 LDS; 422 Q.931 protocol; 422 RDT; 422 RELEASE COMPLETE message; 425 Index 479 GR-303 Technology, con’t RELEASE message; 424 robbed ABCD bits; 422 SAPI/TEI; 428 SETUP message; 424 TMC; 422 GSM 16K BERT EFS; 212 ELAPSED TIME; 212 ERROR; 212 ES; 212 LINE NUMBER; 211 LOSS; 212 PATTERN; 212 SES; 212 SUB CHANNEL; 212 TIME SLOT; 211 UAS; 212 GSM 16K BERT screen EFS; 397 ELAPSED TIME; 397 ERROR; 397 ES; 397 LOSS; 397 SES; 397 UAS; 397 GSM Monitor D & I; 208 IDLE CODE; 210 JUMP; 208 LINE 1/LINE 2; 208 LINE NUMBER; 209 LINK DIRCTN; 210 RCV CBITS; 210 SUB CHANNEL; 210 TIME ALGMNT; 210 TIME SLOT; 209 TRAU frames; 207 GSM Monitor screen TRAU frames; 399 GSM Network 13 Kbps RPE/LTP speech; 431 64 Kbps A-law speech; 431 A-bis interface; 431 A-interface; 431 AUC; 431 480 SunSet T10 Rev. B GSM Network, con’t BSC; 431 BSS; 430 BTS; 430 C-bits; 432 CCU; 432 EIR; 431 ETSI; 430 HLR; 431 IMEI; 430 IMSI; 430 ME; 430 MS; 430 MS ISDN; 431 MSC; 431 NS; 430 PLMN; 431 PSTN; 430 SIM; 430 TRAU; 431, 432 Um interface; 430 VLR; 431 H hardware self test; 281 HDSL Span Control ARM-DL; 99 ARM-INB; 98 COMMAND; 98 EQUIPMENT; 99 HRE; 99 HTU-C and HLU; 99 HTU-R and HRU; 99 LOOP-DN; 99 LOOP-UP; 99 TOUTDIS; 99 UNARMDL; 99 UNARMIN; 98 HDSL Technology 2B1Q; 421 2B1Q line coding; 421 CAP; 421 CSA-compatible loops; 421 full-duplex links; 421 HTU; 421 HTU-C; 421 HTU-R; 421 Index 481 HDSL Technology, con’t twisted-pair loop; 421 I Instrument Stand; 14 ISDN, Backup D Channel Test D-CHANNEL No.; 170 DISC; 169 FRM LOSS; 171 INTERFACE ID; 170 L-STAT; 169 MOOS; 170 Out of Service; 170 SIG LOSS; 171 Status Message; 170 ISDN Configuration EMULATE TYPE; 153 NT; 153 Q.931 STD; 153 TE; 153 TEST PATTERN; 153 ISDN Data call loopback call; 383 point-to-point; 383 ISDN INFO Screen Bch CFG; 166 BEARER; 166 CALL NO.; 166 CHANNEL; 166 CLED ID; 166 CREF NO.; 166 DIR; 166 ISDN Other Parameters 47B + D CONFIGURE; 179 L1 INTRFACE ID; 178 L2 INTRFACE ID; 179 L2Bkup D chnl; 177 Layer 2 SAPI; 178 Layer 2 TEI; 178 Line 1 D chnl; 177 ISDN, Placing a Call B CHANNEL; 164 CALL TYPE; 165 CALLED No.; 163 CALLER No.; 164 Disconnecting; 165 NSF CODE; 164 482 SunSet T10 Rev. B ISDN, Placing a Call, con’t NSF TYPE; 164 ISDN, Receiving a Call Screen ACC-LOOP; 168 ISDN Sequential Call test CALL TYPE; 158 DIAL NUMBER; 158 HOLD TIME; 157 MY PHONE NUMBER; 158 SELF CALL; 158 ISUP messages; 460 K Keypad 0 through 9; 29 A, B, C, D, E, F; 29 AUTO; 31 Cursor (arrow) keys; 32 ENTER; 32 ERR INJ; 31 ESCAPE; 32 F1-F4; 30 GRAPHIC; 30 HISTORY; 31 LIGHT; 30 Orange Label; 28 PRN SCRN; 29 RESYNC; 30 Shift; 29 VOL UP & VOL DN; 31 White Label; 28 L LB0 1; 55 LEDs; 33 AIS; 35 B8ZS; 34 BIT ERROR; 33 ERRORS; 35 ESF; 35 LOW BATT; 34 PAT SYNC; 33 POWER; 34 PULSES; 34 SF; 35 SLC-96; 35 YEL ALM; 35 Index 483 LINE 1 ESF CRC-6 %AS; 122 %ES; 122 %SES; 122 %UAS; 122 AS; 122 CER; 121 CRC; 121 CURCER; 121 ES; 122 SES; 122 UAS; 123 Line 1 Frame Screen %AS; 120 %UAS; 121 AS; 120 COFA; 119 CUFBER; 119 ES; 120 FBE; 118 FBER; 119 FSLIP; 118 LOFS; 120 OOFS; 119 UAS; 121 YELS; 119 Line 1 Frequency Screen +WANDER; 126 -WANDER; 126 CLKSLIP; 126 FSLIP; 126 MAX/Hz; 125 MIN/Hz; 126 RCV/Hz; 125 REFCLCK; 126 Line 1 Logical Screen %AS; 124 %ES; 124 %SES; 124 %UAS; 124 BER; 123 BIT; 123 BTSLP; 123 CURBER; 123 Line 1 Signal Screen %UAS; 115 484 SunSet T10 Rev. B Line 1 Signal Screen, con’t +LVL; 116 -LVL; 116 AISS; 116 AS; 115 EXZS; 116 LDNS; 116 LOSS; 115 Lpp; 117 SMPX; 117 UAS; 115 Line/BPV Screen %AS; 114 %DGRM; 114 %SES; 114 %UAS; 114 AS; 114 BER; 113 BPV; 113 CURBER; 113 DGRM; 114 Link Management (LMI) ANSI T1.617, Annex D; 419 heartbeat; 419 ITU Q.933, Annex A; 419 keep-alive; 419 Original LMI (FRF.1.1); 419 Load Samples; 292 M M13; 346 Measurement Results Summary Screen %EFS; 111 %ES; 111 BER; 110 BIT; 109 BPV; 109 BPVR; 109 CRC; 110 EFS; 111 ES; 111 FBE; 110 Lpp; 112 SES; 111 UAS; 112 Menu Tree; 47 Index 485 Monitor Data Link SLC-96 A SHLF; 294 A-FELP; 294 B SHLF; 294 B-FELP; 294 C BITS; 294 C SHLF; 294 C-FELP; 294 D SHLF; 294 D-FELP; 294 M-BITS; 294 MAJOR; 294 MINOR; 294 MODE; 294 P-FELP; 294 POWER; 294 PROTECT LINE SWITCH; 294 Monitor T1.403 NPRM Screen FrConv; 302 Per Alert; 302 MSS Ramp Access ACTION; 94 LINE; 94 MSS Switch Control ACTION; 92 LINE; 92 N NV (Non Volatile) RAM; 281 Nx56; 345 Nx64; 345 O Other Parameters AUDIBLE ERROR BEEP; 288 CODE MISMATCH MSG; 290 IDLE CHANNEL CODE; 288 PATTERN INVERSION; 288 PATTERN LOCK; 289 REMOTE CONTROL; 289 P Printer PR40A; 38 Propagation Delay Screen; 133 486 SunSet T10 Rev. B Q Quick tests; 135 R Remote Control; 43 RMA; 466 RTRV 54016 PM CNTR BES; 307 CSS; 307 ES; 307 LOFC; 307 SES; 307 UAS; 307 RxLVL-1 BRIDGE; 50 DSX MON; 51 TERM; 50 S Send Test Pattern USER; 100 Send/Receive DDS Control Codes Receiving Codes; 150 Transmitting Codes; 149 Sequential BERT Test CH; 160 ET; 160 PATT; 160 RATE; 160 TxB# & RxB#; 160 Sequential BERT Test Results BER; 160 BIT; 160 EFS; 161 ES; 161 SES; 161 STATUS; 161 UAS; 161 SLC-96 digroup; 350 Mode I; 350 Mode II; 350 Mode III; 350 TR-TSY-000008; 349 smart jack; 88 Speed Dialing; 337 Index 487 SS7 ANSI SCCP Message, Decode View L4deco; 200 SS7 Component Decode Screen CORRELATN ID; 203 OPERATION CODE; 203 SS7 Configuration Menu HEX INPUT; 182 Line 1 Rx T/S; 181 Line 2 Rx T/S; 181 SS7 VERSION; 181 TRUNK RATE; 181 SS7, Filtering fields for ISUP ADDR SGNL; 187 CIC CODE; 187 MESG TYPE; 187 SS7, Filtering fields for SCCP ADDR SGNL; 190 DEST TRXID; 192 MESG TYPE; 189 ORIG TRXID; 191 SIG PT COD; 191 SLS CODE; 189 SUBSYS NO; 190 TCAP FILTR; 191 SS7, Layer 2 Filtering items BSN/BIB; 195 FISU/LSSU; 195 FSN/FIB; 195 SS7, Layer 3 Filtering fields for SNM HEAD CODE; 193 SLS CODE; 193 SS7, Layer 3 Filtering items for SNT HEAD CODE; 194 SLS CODE; 194 SS7 Layer 4 Decoded TCAP Message PACKAGE TYPE; 201 SS7 Messages FISU; 459 LSSU; 458 MSU; 457 SS7, MSU Monitor-Setup filter ISUP; 184 LINE 1 DPC; 184 LINE 1 OPC; 184 SCCP; 184 SI FIELD; 184 488 SunSet T10 Rev. B SS7, MSU Monitor-Setup filter, con’t SNM; 184 SNT; 184 TUP; 184 SS7 Protocol ISUP; 456 MTP; 455 SCCP; 456 TCAP; 456 TUP; 456 SS7 TCAP Package Type Identifiers Abort; 201 COMP TYPE; 201 Conversation with Permission; 201 Conversation without Permission; 201 Invoke (Last); 202 Invoke (Not Last); 202 ORIG TRX ID; 201 Query with Permission; 201 Query without Permission; 201 Reject; 202 Response; 201 Return Error; 202 Return Result (Last); 202 Return result (Not Last); 202 Unidirectional; 201 SS7, TUP filtering fields ADDR SGNL; 185 CIC CODE; 185 HEAD CODE; 185 Standard Test Patterns 1–16; 412 1–8; 412 127; 413 2047; 411 2e15; 413 2e20; 412 2e23; 411 3–24; 413 511; 412 55DLY; 411 63; 413 ALL 0; 413 ALL 1; 412 ALT10; 413 FOX; 412 Index 489 Standard Test Patterns, con’t QRSS; 411 T1–2; 414 T1–3; 414 T1–4; 414 T1–5; 414 T1–6 (55 octet); 415 T1-1; 413 SW56 Call Setup METHOD; 216 NUMBER; 216 SW56 Measurement Results %UAS; 218 BER; 218 BIT; 218 CODE; 218 ELAP TIME; 218 FRME; 218 PATT; 218 RATE; 218 RXA/B; 218 TXA/B; 218 UAS; 218 Switched 56 Testing OFF-HOOK A/B/C/D; 215 ON-HOOK A/B/C/D; 215 RCV CHANNEL; 214 TEST PATTERN; 214 USER PATTERN; 215 XMT CHANNEL; 214 System Profiles; 276 T T1 - MUX Test Configuration BERT; 67 CODING; 66 DATACOM; 67 FRAMING; 66 LBO 1&2; 66 MODE; 67 MUX; 67 Rx/DROP; 66 RxLVL-1 & RxLVL-2; 66 T1; 65 T1INS; 67 T1T/S; 68 Tx SRC; 67 490 SunSet T10 Rev. B T1 - MUX Test Configuration, con’t Tx/INSERT; 65 TYPE; 67 XMTCLK; 66 T1 Technology ACD; 434 AIS; 435, 444, 451 AMI; 437 ANSI T1.102 - 1987; 437 ANSI T1.403; 437, 446 B8ZS; 437 Central office repeaters; 436 Channelized; 434 class 5 switches; 436 CSU; 435 D4 channel banks; 436 DCS; 436 DS1; 434 DS1 framing; 435 DS3; 436 DTMF; 443 FDL; 446 internally timed; 443 loop timing; 442 m-Law Encoding; 440 M13 multiplexes; 436 master/slave; 442 MF; 443 NIU; 435 Nyquist theorem; 440 ORB; 436 PBX; 434, 436 PCM; 440 pipes; 434 plesiochronous; 441 PRM; 446 pulse dialing; 443 receive timing; 442 Regenerative repeaters; 435 robbed bit signaling; 443 SONET; 437 Standard Framing ESF; 438 SF; 438 SLC-96®; 438 T1; 434 Index 491 T1 Technology, con’t toll switches; 436 Troubleshooting and Fault Sectionalization; 447 Twisted pair; 435 Yellow alarm; 451 yellow alarms; 444 T1-MUX mode; 129 T1DUAL Test Mode CODING; 60 FRAMING; 59 LBO 1&2; 64 Rx/DROP; 57 RxLVL-1 & 2; 57 TEST RATE; 62 Tx SOURCE; 59 Tx/INSERT; 57 XMT CLOCK; 60 Tables 01 Switch Settings for SS118B, C & D Printers; 40 02 Inband Codes; 74 03 ESF-DL Codes; 75 04 Bridge Tab Test Patterns; 140 05 DDS Control Codes; 149 06 Q.931 Cause Values; 162 07 TUP Heading Codes; 186 08 ISUP Message Types; 188 09 SCCP Message Types; 190 10 Subsystem Numbers; 191 11 SNM Heading Codes; 193 12 SNT Heading Codes; 194 13 TCAP Package Type Identifiers; 201 14 TCAP Component Type Identifiers; 202 15 Cause Values; 245 16 SAPI/TEI Valid Combinations; 260 17 Channel Numbering; 330 18 Channel Numbering - SLC-96; 331 19 D4 Channel Bank Signaling; 360 20 DLCI Length & Possible Addresses; 418 21 SAPI/TEI Valid Combinations; 428 22 GR-303-CORE Cause Values; 429 23 Typical IAM Information Fields; 460 Teltrend Line Repeater ARM-DL/INB; 82 LOOP-DN; 82 LOOP-UP; 82 LPBKQRY; 82 492 SunSet T10 Rev. B Teltrend Line Repeater, con’t PWCUTTH; 82 PWRQRY; 82, 87 RPTR NO; 82 SPAN CTRL; 81 STATUS; 81 TIME; 81 TOUTDIS; 82 UNARMDL; 82 UNIVLDN; 82 Teltrend MSS ACTION; 96 LINE; 96 Teltrend Office Repeater ARMDL/INB; 79 CLR-FT1; 80 DUAL-LB; 80 LOOP-DN; 80 LOOP-UP; 79 LPBKQRY; 79 POWR-DN; 79 RPTR NO; 80 Span; 78 SPAN CTRL; 79 STATUS; 78 TIME; 78 TOUTDIS; 79 UNARMDL; 79 UNBLOCK; 80 UNIVLDN; 79 TEST RATE 1.544M; 53 Nx56K; 53 Nx64K; 54 Tx SOURCE NORMAL; 52 THRU; 52 U UAS; 111, 115 V VF Measurements Dial/SPRVIS Setup % BREAK; 228 BKWRD SPRVISN; 228 DIAL PERIOD; 226 DIAL PULSE (10pps); 228 Index 493 VF Measurements Dial/SPRVIS Setup, con’t E&M; 227 EQUIPMENT; 227 FXO; 227 FXS; 227 G-START; 227 IDLE; 228 INTERDIGIT PRD; 228 L-START; 227 SILENT PERIOD; 227 Supervision Trunk Type; 227 TONE LEVEL dbm; 227 VF Measurements, DTMF/MF/DP Analysis AUTO SCAN; 232 DIAL TYPE; 232 Tx SPRVN; 233 VF Measurements, Place/Receive Calls DP; 229 DTMF; 229 METHOD; 229 MF; 229 NUMBER; 230 Rx ABCD; 231 Rx CHNL; 231 SCAN; 231 TX AB; 230 Tx CHNL; 230 VF Measurements Setup Screen INSERT TYPE; 222 LISTEN SIDE; 224 QUIET; 223 TALK; 222 TONE; 222 TONE FREQ Hz; 223 TONE LVEL dBm; 223 Tx-1 A/B/C/D; 223 Tx-1 T/ S; 221 View Received Data ASCII; 131 BINARY; 131 HEX; 131 494 SunSet T10 Rev. B W WAN; 416 Warranty; 467 Westell Line Repeater ARM-DL/INB; 87 LOOP-DN; 87 RPTR NO; 87 RPTR TYPE; 87 SPAN; 86 SPAN CTRL; 86 STATUS; 86 TIME; 86 TOUTDIS; 87 UNARMDL; 87 UNIVLDN; 87 Westell NIU/PM & MSS ACCUM PRD; 90 B8ZS; 90 CVL; 90 CVP; 90 DIRECT; 90 ESL; 90 ESP; 90 MSEC; 90 PDVS; 90 PM PERIOD; 90 SESL; 90 SESP; 90 STAT; 90 UASL; 90 UASP; 90 Westell Office Repeater ARM-DL/INB; 84 LOOP-DN; 85 LOOP-UP; 85, 87 LPBKQRY; 85 RPTR NO; 85 RPTR TYPE; 85 SEQLPBK; 85, 87 SPAN; 84 SPAN CTRL; 84 STATUS; 84 TIME; 84 TOUTDIS; 84 UNARMDL; 84 UNIVLDN; 85 Index 495 X XMT CLOCK INTERN; 53 L1-Rx; 53 L2-Rx; 53 496 SunSet T10 Rev. B