1
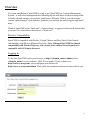
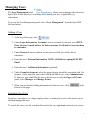
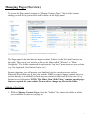
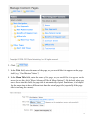
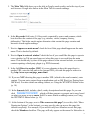
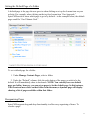
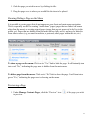
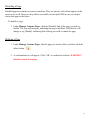
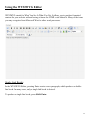
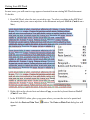
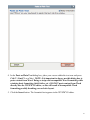
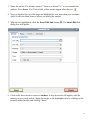
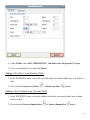
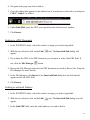
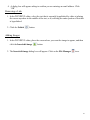
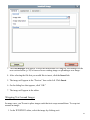
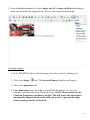
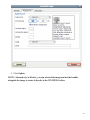
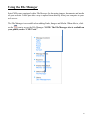
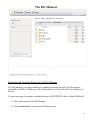
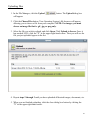
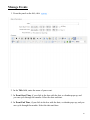
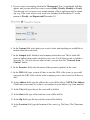
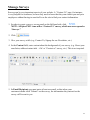
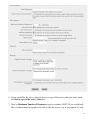
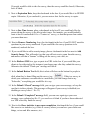
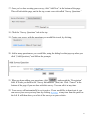
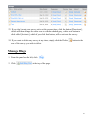
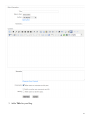
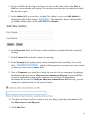
User Manual
TABLE OF CONTENTS
OVERVIEW .................................................................................. 4
BROWSER COMPATIBILITY ............................................................ 4
LOGGING IN ................................................................................... 4
MANAGING USERS .................................................................... 5
ADDING A USER ............................................................................ 5
SEARCHING FOR A USER................................................................ 5
EDITING A USER ............................................................................ 6
DELETING A USER ......................................................................... 6
IMPORTANT INFORMATION ........................................................... 6
MANAGE PAGES ........................................................................ 7
ADDING A NEW PAGE.................................................................... 7
EDITING AN EXISTING PAGE ....................................................... 10
SETTING THE DEFAULT PAGE OF A FOLDER................................ 11
REORGANIZING PAGES ................................................................ 11
SHOWING/HIDING A PAGE ON THE MENU ................................... 12
PREVIEWING A PAGE ................................................................... 12
DISABLING A PAGE...................................................................... 13
DELETING A PAGE ....................................................................... 13
USING THE WYSIWYG EDITOR .......................................... 13
SINGLE LINE BREAKS .................................................................. 14
PASTING FROM MS WORD .......................................................... 15
FORMATTING TEXT ..................................................................... 17
WORKING WITH ANCHORS .......................................................... 17
INSERTING SPECIAL CHARACTERS .............................................. 19
WORKING WITH/ADDING TABLES ............................................... 19
LINKING TO AN EXTERNAL URL ................................................. 21
LINKING TO ANOTHER PAGE WITHIN YOUR SITE ........................ 21
2
LINKING TO A PDF DOCUMENT .................................................. 22
LINKING TO AN EMAIL ADDRESS ................................................. 22
REMOVING A LINK ...................................................................... 23
ADDING IMAGES .......................................................................... 23
WRAPPING TEXT AROUND IMAGES ............................................. 24
RESIZING IMAGES ........................................................................ 25
USING THE FILE MANAGER ................................................ 27
BROWSING/INSERTING ITEMS INTO THE WYSIWYG EDITOR .... 28
UPLOADING FILES ....................................................................... 29
MANAGE EVENTS .................................................................... 30
MANAGE TESTIMONIALS ..................................................... 32
MANAGE SLIDESHOW ........................................................... 32
MANAGE SURVEYS ................................................................. 34
MANAGE BLOGS ...................................................................... 38
3
Overview
Your new installation of SpireCMS is ready to go! SpireCMS is a Content Management
System – a web-based management tool allowing anyone with basic word-processing skills
to easily edit and manage your website quickly and efficiently. With it, you can manage
content, upload images, view statistics, optimize your website for search engines and much
more.
Think of SpireCMS as the “back-end,” of your website, as opposed to the actual website that
your users see, sometimes referred to as a “front-end.”
Browser Compatibility
SpireCMS is compatible with Firefox, Google Chrome and Mac Safari. It has limited
compatibility with Microsoft Internet Explorer. Note: Although SpireCMS has limited
compatibility with Internet Explorer, your website front-end has been designed to be
compatible with ALL major browsers.
Logging In
To log into SpireCMS, point your browser to http://<domain_name>/admin, where
<domain_name> is your website’s URL. For example, if your website were
http://www.xyzcorp.com, you would point your browser to
http://www.xyzcorp.com/admin. Then, enter the username and password provided to you.
4
Managing Users
The User Management panel
allows you to manage who can access
SpireCMS. It also allows you to manage users within your site, if applicable (e.g.
subscribers).
To access the User Management panel, select “User Management” from the SpireCMS
left-hand menu.
Adding a User
1. At the top of the page, click
.
2. Under Login Information: Username, enter a username for the new user. HINT:
Enter the user’s email address for their username. It will make it easy for them
to remember.
3. Under Password, enter a random, secure password that you will be able to
remember.
4. Enter the user’s Personal Information. NOTE: All fields are optional EXCEPT
Email.
5. Enter the user’s Additional Information (optional).
6. Under Group Involvement, select the group the user should be associated with. For
instance, if you want this user to have full SpireCMS access, select Administrator.
If, however, you would like the user to have access to only the Pages and Events
panel, select Manager and Manage Events.
7. When you are finished editing information for this new user, click
bottom of the page.
at the
Searching for a User
If you have subscribers, or a large employee base, searching for a user is the easiest way to
find and manage that user.
To search for a user, use the search tool located at the top, right-hand corner of your screen.
5
Editing a User
1. From the User Management screen, click on the user you wish to edit.
2. Edit the information as needed (see “Adding a User” for specific details).
3. Click Update.
Deleting a User
1. From the User Management panel, find the user you wish to delete, and then click
the delete
button.
2. A confirmation box will appear. Click “OK” to confirm the deletion. WARNING!
Deletion cannot be undone. NOTE: You cannot delete your own account.
Important Information
My SpireCMS Information
Login URL: http://
Username:
Password:
6
Managing Pages (Overview)
To access the Pages panel, navigate to “Manage Content: Pages.” Most of the content
editing you will do on your website will be done via the Pages panel.
The Pages panel is divided into two major sections: Folders (on the left) and Contents (on
the right). The root of your website is always the folder called “Website” or “Main
Navigation.” The folders underneath it represent the “top level” menu items on your website
(e.g. Our Approach, New Patient Center, etc.).
In most situations, you will prepare your finalized copy in a word processor such as
Microsoft Word, then copy it into your website. While you may compose content into your
website directly, it is advisable to back-up your content via Microsoft Word in case of e.g.
Internet service disruption. NOTE: The folder “Don’t Edit These” contains special pages
that are required for your website. Do not edit or change any files in this folder.
Adding a New Page
1. While in Manage Content: Pages, from the “Folders” list, choose the folder in which
you would like to create a new page in.
7
2. Click
.
3. In the Title field, enter the name of the page, as you would like it to appear on the page
itself (e.g. “Our Mission/Vision.”)
4. In the Menu Title field, enter the name of the page, as you would like it to appear on the
menu (to see this, click “Show Advanced Title & Menu Options”). By default, when you
move focus into this field, the page title it automatically copied. Sometimes, it is helpful
for the menu item to have different text than the actual page title (especially if the page
title is too long for a menu).
8
5. The Meta Title field shows up as the title in Google search results, and at the top of your
web browser. Google also factors in the Meta Title for search rankings.
6. In the Keywords field, enter 5-10 keywords, separated by spaces and commas, which
best describes the content of the page (e.g. mission, vision, company, history,
philosophy). This helps search engine determine what content the page contains and
increases search engine rankings.
7. Next to Appears on main menu? check the box if this page should appear on the main
menu. This is checked by default.
8. Next to Open in external window? check the box if you would like this page to open in
a new window (or Tab on some browsers) when this page is accessed from the main
menu. This should only by done if this page redirects to an external website, or contains
content requiring a third-party plugin (e.g. PDF document).
9. In the field Direct to another URL? if you are planning to have this page direct to
another URL, enter the full path to the external URL you wish this page to redirect to.
E.g. http://www.xyz.com/page_name.html.
10. If you are NOT directing this page to another URL (which is the usual scenario), enter
content. You can paste content from an application such as MS Word (see Pasting form
MS Word). For more details on adding content, see Using the WYSIWYG Editor below
(p. 14).
11. In the Synopsis field, include a brief, catchy description about this page. Or you can
click
, which will then generate a synopsis on its own, based
on what you wrote in the Content field. For more details on adding content, see Using
the WYSIWYG Editor below (p. 14).
11. At the bottom of the page, next to Who can access this page? (to see this, click “Show
Permission Options” at the bottom), you may specify who can access this page (the
default is anybody). For example, if you wish to only have Members access this page,
check the Members checkbox. This page will only appear on the menu if a Subscriber is
9
logged into your website, and, if anyone other than a subscriber attempts to access this
page, they will be directed to a login screen. (The checkboxes here reflect groups that
will have been pre-configured by the development team).
12. Under Who can EDIT this page? you may specify who can edit this page. SpireCMS
supports limited access into the back-end so that only certain people with access can
actually edit pages. For instance, if your company has an “About Us” section and a
“Products” section, you may wish to assign certain people to be able to edit your
company’s “About Us” section, but not your “Products” section.
13. Click Add New.
Editing an Existing Page
1. Under Manage Content: Pages, find the page you wish to edit, and click on the
page’s title (link).
2. Edit the page as desired (see Adding a New Page above for specific details).
3. Click Update. NOTE: Changes made are instantly live on your front-end.
10
Setting the Default Page of a Folder
A default page is the page the user goes to when clicking on a top-level menu item on your
website. For example, when clicking on the top-level menu item “Our Approach,”
SpireCMS needs to know which page to go to by default – in the example below, the default
page would be “Our Ultimate Goal.”
To set a default page for a folder:
1. Under Manage Content: Pages, select a folder.
2. Under the “Default” column, click the radio button of the page you wish to be the
default. It will immediately show a checkmark. NOTE: You can only have one default
page per folder; however, you can set no pages to be the default page. In this instance,
if the front-end user clicks on that folder from the menu, a dynamic page will display
showing a list of pages available within that folder.
Reorganizing Pages
SpireCMS supports drag-and-drop functionality to allow easy organizing of items. To
reorder a page:
11
1. Grab the page you wish to move by clicking its title.
2. Drag the page over to where you would like the item to be placed.
Showing/Hiding a Page on the Menu
It is possible to create pages that do not appear on your front-end main menu navigation.
This is especially useful for creating “stand-alone” pages (pages that are linked via means
other than the menu) or creating staged pages (pages that are not approved to be live to the
public yet). Pages that are hidden from the menu still are fully active, and may be linked to
from other sources (e.g. an email newsletter, a postcard, other pages within the site, etc.)
To show a page on the menu: Click on its “Yes” link to hide the page. It will instantly turn
into a red “No,” indicating the page now is hidden from the main menu.
To hide a page from the menu: Click on its “No” link to show the page. It will turn into a
green “Yes,” indicating the page now is showing on the menu.
Previewing a Page
1. Under Manage Content: Pages, click the “Preview” icon
to preview.
of the page you wish
12
Disabling a Page
Disabled pages are similar to items in a trashcan. They are inactive and will not appear on the
menu or site at all. However, they still are accessible via the SpireCMS in case you wish to
restore that page in the future.
To disable a page:
1. Under Manage Content: Pages, click the [Disable] link of the page you wish to
disable. The row will turn gray, indicating the page is disabled. The link also will
change to say [Enable], indicating that clicking on it will re-enable the page.
Deleting a Page
1. Under Manage Content: Pages, find the page you wish to delete, and then click the
delete button.
.
2. A confirmation box will appear. Click “OK” to confirm the deletion. WARNING!
Deletion cannot be undone.
13
Using the WYSIWYG Editor
WYSIWYG stands for What You See Is What You Get. It allows you to produce formatted
content for your website without having to know the HTML code behind it. Many of the icons
you may recognize from Microsoft Word or other word processors.
Single Link Breaks
In the WYSIWYG Editor, pressing Enter creates a new paragraph, which produces a doubleline break. In many cases, only a single link break is desired.
To produce a single-line break, press Shift+Enter.
14
Pasting from MS Word
In most cases, you will want to copy approved content from an existing MS Word document.
To do this:
1. From MS Word, select the text you wish to copy. To select everything in the MS Word
document, place your cursor anywhere in the document and press Ctrl+A (Cmd+A on a
Mac).
2. Right-click on the selected text and choose Copy, or use the keyboard shortcut Ctrl+C
(Cmd+C on a Mac).
3. In the WYSIWYG editor, place your cursor where you want the text to be pasted and
then click the Paste as Plain Text
appear.
button. The Paste as Plain Text dialog box will
15
4. In the Paste as Plain Text dialog box, place your cursor within the text area and press
Ctrl+V (Cmd+V on a Mac). NOTE: It is important to always use this dialog box to
paste content form Word. Doing so strips out incompatible Word formatting while
retaining basic formatting (bold, italics, etc.). DO NOT paste content from Word
directly into the WYSIWYG editor, as this will result in incompatible Word
formatting possibly breaking your website layout.
5. Click the Insert button. The formatted text appears in the WYSIWYG editor.
16
Formatting Text
Your WYSIWYG editor has been pre-configured to contain styles applicable to your website’s
style and color scheme. This is designed to enforce the greatest possible usability for your
online customers, and maintain your site’s professional look and feel.
To style text; select the text you wish to style, and the use the Styles dropdown on your
WYSIWYG editor.
To style text; select the text you wish to style, and the use the Styles dropdown on your
WYSIWYG editor.
Working with Anchors
Anchors are very useful when you have a lot of text on a page, and don’t feel like the customers
would want to scroll all the way down the page to try and find what they’re looking for. It is
often used for an FAQ (frequently asked questions) page on a site.
1. In the WYSIWYG editor, place your cursor next to the text down the page where you
want them to land when they click the link at the top of the page. Click the Anchor
tool.
2. The Insert/Edit anchor box will appear.
17
3. Name the anchor. For instance name it “Answer to About Us,” or even number the
anchors. Press Insert. You’ll see a little yellow anchor appear after the text.
4. Next, go back to the top of the page and highlight the text, that when your customer
clicks it will take them down to where you placed the anchor.
5. With the text highlighted, click the Insert/Edit link button
dialog box will appear.
. The Insert/Edit link
6. Click on the drop-down box next to Anchors. A drop down list will appear; with the
names you gave each anchor. Apply the anchor to the highlighted text by clicking on the
properly named anchor and clicking “Insert.”
18
Inserting Special Characters
To work with special characters, such as the copyright symbol ©, TM symbol, etc., use the
Special Characters
.
Working with Tables
Occasionally, you may have content or data that needs to be presented in a tabular format.
SpireCMS provides the capability to add tables into your web pages.
Adding a Table
1. In the WYSIWYG editor, click the Table
will appear.
tool. The Insert/Modify table dialog box
2. Under Cols and Rows, specify the number of columns and rows you would like to have
in the table. You can always add and delete columns and rows later.
3. Under Cellpadding and Cellspacing, specify the amount of padding you wish to have
between cells in the table. If you are not sure what to enter, use Cellpadding: 4 and
Cellspacing: 4 for a padded table, or Cellpadding: 0 and Cellspacing: 0 for a table that
is completely collapsed (has no padding between cells).
19
4. Under Width, enter 100%. IMPORTANT: You must enter the percent (%) sign.
5. Leave everything else as is and click Insert.
Adding a New Row to an Existing Table
1. In the WYSIWYG editor, select the row with which you want to add a new row before or
after.
2. Press either the Insert row before
or Insert row after
button.
Adding a New Column to an Existing Table
1. In the WYSIWYG editor, select the column with which you want to add a new column
before or after.
2. Press either the Insert column before
or Insert column after
button.
20
Deleting a Row from an Existing Table
1. In the WYSIWYG editor, select the row you wish to delete.
2. Press the Delete row
button.
Deleting a Column from an Existing Table
1. In the WYSIWYG editor, select the column you wish to delete.
2. Press the Delete column
button.
Linking to an External URL
1. In the WYSIWYG editor, select the word(s) or image you wish to hyperlink.
2. With the text selected, click on the Link
appear.
tool. The Insert/edit link dialog box will
3. In the Link URL field, enter the full URL path (e.g. http://www.xyzcorp.com) for the
link you wish to link to. If you are linking to an external website (a website whose
domain name is different from the site you are editing), it is a good practice to have that
link open in a new window. To do this, next to Target, choose “Open in new window
(_blank).”
4. Click Insert. The text you selected originally should appear hyperlinked.
NOTE: In almost all cases, if you have another browser window/tab open, you can
copy and paste the URL that appears in the address bar if you would like to link to
that site or page.
Linking to Another Page within your Site
1. In the WYSIWYG editor, select the word(s) or image you wish to hyperlink.
2. With the text or image selected, click on the Link
box will appear.
tool. The Insert/edit link dialog
3. Open a new browser window (or browser tab).
21
4. Navigate to the page you wish to link to.
5. Copy the address that appears in the address bar of your browser (select the text and press
Ctrl+C, Cmd+C on a Mac).
6. Under Link URL, paste the URL you copied from the other browser window.
7. Click Insert.
Linking to a PDF Document
1. In the WYSIWYG editor, select the word(s) or image you wish to hyperlink.
2. With the text selected, click on the Link
appear.
tool. The Insert/edit link dialog will
3. If you know the URL to the PDF document, you can paste it in the Link URL field. If
not, click the File Manager
button.
4. Browse the File Manager and select the PDF document you wish to link to (See Using the
File Manager for more details).
5. In the File Manager, click Insert. In the Insert/edit link dialog box, the link should
appear in the Link URL field.
6. Click Insert.
Linking to an Email Address
1. In the WYSIWYG editor, select the word(s) or image you wish to hyperlink.
2. With the text selected, click on the Link
appear.
tool. The Insert/edit link dialog box will
3. In the Link URL field, enter the email address you wish to link to.
22
4. A dialog box will appear asking to confirm you are entering an email address. Click
“OK”
Removing a Link
1. In the WYSIWYG editor, select the text that is currently hyperlinked by either a) placing
the cursor anywhere in the middle of the text, or b) selecting the entire portion of text that
is hyperlinked.
2. Click the Unlink
button.
Adding Images
1. In the WYSIWYG editor, place the cursor where you want the image to appear, and then
click the Insert/edit image
button.
2. The Insert/edit image dialog box will appear. Click on the File Manager
icon.
23
3. The File Manager will appear. Follow the instructions on Using the File Manager in the
next section below (p. 26) to browse for an existing image or uploading a new image.
4. After selecting the file that you would like to insert, click the Insert link.
5. The image will appear in the “Preview” box on the left. Click Insert.
6. On the dialog box that appears, click “OK.”
7. The image will appear in the editor.
Wrapping Text Around Images
In many cases, you’ll want to place images such that text wraps around them. To wrap text
around an image:
1. In the WYSIWYG editor, select the image by clicking on it.
24
2. From the Styles dropdown list, choose Image on Left or Image on Right (depending on
where you would like the image placed). The text will wrap around the image.
Resizing Images
1. In the WYSIWYG editor, select the image you wish to resize by clicking on it.
2. Click on the Image
tool. The Insert/edit image dialog box will appear.
3. Choose the Appearance tab.
4. Under Dimensions, enter the width you would like the image to be. For most
websites, choosing a size under 300 pixels is best. NOTE: Always make sure the
Constrain Proportions checkbox is checked. This will ensure that the height is
automatically adjusted based on the width you specify, to prevent the image
from becoming stretched or distorted.
25
5. Click Update.
NOTE: Alternatively, in Firefox, you can selected the image and use the handles
alongside the image to resize it directly in the WYSIWYG editor.
26
Using the File Manager
SpireCMS comes equipped with a File Browser for browsing images, documents and media
on your website. It also provides a way to upload items directly from your computer to your
web server.
The File Manager is accessible when adding Links, Images and Media. When able to, click
on the
icon to access the File Manager. NOTE: The File Manager also is available on
your panels, under “CMS Tools.”
27
The File Manager
Browsing and Inserting Items into the File Manager
The File Manager is arranged similar to a standard Operating System (OS) file explorer,
with folders and files. Clicking on a file will produce a preview in the Preview window on
the left.
To insert an image, document or media item into the WYSIWYG editor or SpireCMS itself:
1. Choose the item from the File Manager.
2. Click the Insert link on the bottom left-hand corner.
28
Uploading Files
1. In the File Manager, click the Upload
will appear.
button. The Upload dialog box
2. Click the Choose Files button. Your Operating System’s file browser will appear,
allowing you to choose a file from your computer. NOTE: For images, you must
choose an image file that is .gif, .jpg or .png only.
3. Select the file you wish to upload, and click Open. Click Upload to Server. Once it
has reached 100%, click the “X” in the upper right-hand corner. Then you will see the
file you just uploaded appear in the list.
4. Repeat steps 2 through 3 until you have uploaded all desired images, documents, etc.
5. When you are finished uploading, click the close dialog box button by clicking the
“X” in the upper right-hand corner.
29
Manage Events
1. From the panel on the left, click
.
2. In the Title field, enter the name of your event.
3. In Event Start Time, if you click in the box with the date, a calendar pops up, and
you can cycle through the months. Select the date and time.
4. In Event End Time, if you click in the box with the date, a calendar pops up, and you
can cycle through the months. Select the date and time.
30
5. If your event is reoccurring, click in the “Recurrence” box. A checkmark will then
appear, and you can select the event to reoccur Daily, Weekly, Monthly or Yearly.
You also can set it to repeat every certain amount of days, and repeat until a certain
day (e.g. If the event occurs every week on a Saturday until December 21, set the
pattern to Weekly, and Repeat until December 21).
6. In the Content field, write what your event is about, and anything you would like to
include about the event itself.
7. In the Synopsis field, include a brief summary about the event. This is what will
come up online when people search for your event. You’ll always want to include a
Synopsis. Or, if you’re not sure what to write, you can click the “Generate from
Content” button.
8. In the Presenter field, write the name of the presenter (speaker) at the event.
9. In the URL field, type, or paste (if there is one) the URL of the event, or you could
type/paste the URL of the website of the company your event is based on (if there is
one).
10. In the Address field, type the address the event will be held at. NOTE: The Address
2 field only is necessary if you have a second part to your address (e.g. Suite number).
11. In the City field, type the city the event will be held in.
12. In the State field, type of the state the event will be held in.
13. In the Zip field, type the zip code the event will be held in.
14. In the Location field, type the location of the event (e.g. The Store, The Classroom,
etc.).
31
15. In the Directions URL field, use Google Maps.
16. In the Directions field, you can type in your own directions instead, if you would
like (e.g. From the South:.. From the North:..).
Manage Testimonials
If you are a business in which clients can or have given testimonials for, you can include
these written or spoken testimonials on your website.
1. From the panel on the left, click
.
2. In the Quote field, you can type the quote from the individual yourself, or if it was
emailed to you, you can copy and paste the quote into this field.
3. In the Synopsis field, type (or copy and paste) a brief, highlighting summary of the
quote that was just entered. This will be what shows up on the bottom of your site.
And if visitors to your site would like to see the full quote, they can click on it, and
also see more testimonials from other customers.
4. In the Author field, type the name of the person who spoke the quote.
5. In the Author Company field, type the name of the company the person who spoke
the quote is with (if applicable).
6. If you have an image of the person who spoke the testimonial, you can upload the
image. See “Adding Images,” p. 23.
Manage Slideshow
Slideshows are useful for your website in order for visitors to see some of what you do,
highlighted products and any other items you may want to highlight with pictures on the
home page of your site. In order to create an aesthetically pleasing slideshow, the pictures
for the slideshow need to be a pre-set size (e.g. 640x300), and they also need to be in
landscape format, not portrait. In order to do this:
Part 1: Photoshop
1. Open (download) Photoshop.
32
2. Click File, New, Blank File, and then enter the width and height your picture needs to be
to fit into your slideshow. For instance, 640 x 300. Enter “640” in the width box, and
“300” in the height box. Title it “Slideshow Template.”
3. Now click File, Open and grab your picture you want in the slideshow.
4. Go to your layers panel on the right-hand side, and double-click on your picture, then
click “OK.”
5. On the left-hand side, click on the arrow (move tool, very top icon).
6. Grab your image – hover over your .psd template tab (the blank file we created). Still
holding onto your click, once the template shows, hover over the image and then let go
of the click.
7. You might need to scroll out some so you can see the transform tools. Grab corners only
and drag so that the image fits in the template.
8. Once the original picture is sized into the template, go to “File, Save for Web.” Make
sure it is a “JPEG.”
Part 2: Adding your slide to SpireCMS
1. Login to SpireCMS.
2. Under “Manage Media” on the left-hand side, click “Slideshow.”
3. At the top. Click “Add Slide.”
4. Give slide a title.
5. Click “Choose Image”, then the Upload button.
6. Click “Choose Files”, and then select your image we re-sized in Photoshop, then
“Open.” Then, select “Upload to Server.”
7. Now look for the photo we uploaded, select it, and click “Insert.”
8. Click “Add New.”
33
Manage Surveys
Surveys can be very important aspects of your website. A “Contact Us” page, for instance,
is very helpful for customers, because they need to know that they can contact you and your
employees without having to search all over the site to find your contact information.
1. In order to create a survey, on our panel on the left-hand side, click
.
NOTE: All SpireCMS’ come with a “Contact Us” survey, which will show up under
“Surveys.”
2. Click
.
3. Give your survey a title (e.g. Contact Us, Signup for our Newsletter, etc.).
4. In the Content field, enter content about the background of your survey (e.g. About your
newsletter, address/contact info – if it’s a “Contact us” survey, etc.). This is not required.
5. In Email Recipients you must enter at least one email, so that when your
customers/clients click “Submit” on the survey, the information they entered on the
survey will be sent to you.
34
6. If you would like the survey taker to receive a copy of the survey they just took, check
the Send a copy to the survey taker box.
7. Next to Maximum Number of Responses, type in a number ONLY IF you would only
like a certain amount of people to be able to take the survey (e.g. if you type in 50, only
35
50 people would be able to take the survey, then the survey would be closed). Otherwise,
leave it blank.
8. Next to Expiration Date, keep the checkmark in the box if you would like it to NEVER
expire. Otherwise, if you uncheck it, you can enter a date for the survey to expire.
9. Next to One Time Access, place a checkmark in the box IF you would only like the
person taking the survey to be able to take it once. For instance, you would probably
want to leave it unchecked if it’s a “Contact us” survey, so that that person can contact
you more than once.
10. Next to Remove Numbering, leave the checkmark in the box if you DO NOT want the
questions in your survey numbered. If you would like the survey questions to be
numbered, uncheck the box.
11. If you would like to add a security image, place a checkmark in the box next to Add
Security Image. This will make it so that you will not receive spam from the survey,
and makes sure that a “human” is filling out the survey, not a bot, etc.
12. In the Redirect URL box, type or paste in a URL in the box if you would like your
clients to be redirected to (for instance) your home page after they submit the survey.
Otherwise the default “Thank you” message will show.
13. In the Submit Button Text field, this is what will show on the button for people to
click when they’re done filling out the survey (e.g.
). If this is a survey in
which your customers can subscribe to a newsletter, you can change that to say
“Subscribe,” or anything you would like it to say.
14. In the Default “Closed” message field, you can type your own message, or keep the
one that is in there already. This message will appear if your survey is disabled (see
disabling a survey below – No. 23)
15. In the Default “Completed” message field, you can once again type your own
message, or as explained on No. 12, you can leave it blank if you have them redirected
to a URL after they finish the survey.
16. Next to the Show statistics to user upon completion, checkmark the box if you would
like users to see statistics (e.g. if this is a survey where you can have your clients rate
things, or true and false answers, etc.).
36
17. Once you’re done creating your survey, click “Add New” at the bottom of the page.
This will refresh the page, and at the top, create a new tab called “Survey Questions.”
18. Click the “Survey Questions” tab at the top.
19. Create your survey with the questions you would like to ask, by clicking
.
20. Add as many questions as you would like, using the dialog box that pops up when you
click “(Add Question),” and follow the prompts.
21. When are done adding your questions, click
, underneath the “Description”
field. It’ll take you back to the “Survey Information” (first) tab. Click “Cancel” at the
bottom of the page if you are done with this survey. You can edit it at any time.
22. Your survey will automatically be set to active. If you would like to deactivate it, you
can access your surveys at any time by clicking
at any time from the panel on
the left. It will then show you a list of the surveys on your website.
37
23. If you don’t want your survey active at the present time, click the button [Deactivate],
which will then change the entire row to a darker-shaded gray, with a new button to
click called [Activate], which if you click that button, will re-activate the survey.
24. If you want to delete any survey at any time, simply click the Delete
row of the survey you wish to delete.
button in the
Manage Blogs
1. From the panel on the left, click
2. Click
.
at the top of the page.
38
3. Add a Title for your blog.
39
4. If you would like for the blog to post on your site at a later date, click in the Date to
Post box, and a calendar will pop up. You can then select the date for which you would
like the blog to post.
5. In the Author field, you can leave it blank (No Author), or you can Add Author by
clicking the Add Author button (
). The dialog box below will then show
up. Simply add the name of the author and click Submit.
6. In the Keywords field, you’ll want to add words that are included from the content of
the blog.
7. In the Content field, write the content of your blog.
8. In the Synopsis field, include a brief, catchy description about your blog. Or you can
click
, which will then generate a synopsis on its own, based
on what you wrote in the Content field.
9. Next to Comments, you can allow visitors on your site to leave comments by placing a
checkmark in the box next to Allow users to comment on this post. If you would like
to receive notifications when people comment on your blogs (recommended),
checkmark the box next to Notify me when new comments are left, that way, you can
manage the comments that are left on your blog(s).
10. You also can choose to allow visitors to rate your blog, by placing a checkmark in the
box Allow users to rate this post.
11. Click Add New.
40