1
Communica
tion
User Manual
with
PC
Abou -l rn=u:es are
GPS signals
neaded tr-.c
reception
imeasq of
failure
r
I
TI
ITII-IIIIIIIIIIIIIIIII
ion'
trocal GPS
sarellire signal.
Loss of map
Iryut a ms passrord
aft€r recol'ering the
data
GPS data
Speed Radar Alarm Navisator
-52-
I
ffi
r
F
I
Contents
Welcome
Welcome
J
Chapter I Beginning Use
5
Thanks for using the device.
5
features.
l.l
Appearance
1.2 Power Supply
& Charging
6
1.3 Basic Use
8
1.4 System Main Interface and Major Functions
ll
:
,/
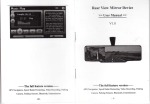
It supports
the following
Built-in radar detection module, to change
the
traditional back-mounl radar, the perfect outlook;
./ 5.0 inch of
touch-definition screen, with
I
I
Chapter
II
l3
GPS
2.1 Map
l4
2.2 Navigation
l5
2.3 Reception
l5
Chapter
III
Interface and Operation
Chapter fV Tfoubleshooting
9
three-dimensional real map;
,/
./
Support multi map in one system to ensure that
you can easily reach the destination;
Hidden radar receiver is built in. Make it for free
installation. It is a full-frequency super-receiver;
r'
Built-in 4G flash memory (optional), support up
to l6G extended memory;
'/
Support FM transmitter function. The voice of
MP3, MP4, navigation can be broadcast to the
4t
original car audio playback, the frequency of free
settings;
,/
Full-frequency radar receiver, full-range digital
voice broadcast;
,/
Efficient and accurate frequency ofthe radar
refused to interfere with;
./ MP3 player, MP4 player,
entertainment features.
-2-
-3-
set,
multimedia
F
To fully exert the functions of the device and to
understand the operation details, please read the manual
Chapter
carefully. You may see the following supplemental
[Note]: Explanation of relevant subjects
of
Use
This chapter introduces the appearance, components
and
basic operations ofthe device.
information in the manual.
[Relevant Information]: Extra information
I Beginning
l.l
relevant
Appearance
subjects
The effect figure below is subject to the material
object.
[Attention]: Precautions or warnings of relevant subjects.
Please pay attention to this information and follow the
instructions
to avoid devastating influence on yourself
and others.
[*]: Optional function.
-4-
t
J
SN
Component
I
Power key
Explanation
Powering on/ offand sleep
-5-
2
MINI
USB
port
Communicating
with PC
MINI USB cable and used
via
as the
charging port
3
Earphone jack
Connected with the stereophone
4
Video jack
Camera in (optional)
5
Speaker
Playing sounds
When the GPS navigator is unconnected to the charger, it
is
powered
by the Li-polymer battery. The
When the GPS navigator is connected to the charger, it is
powered by external power and the battery is charged.
[Attention] The GPS navigator adopts inrernal
non-removable Li-polymer battery. To avoid battery
rupture, explosion, release
6
Detected
Speed Radar detect window
window
battery
capacity icon Eil in the system main interface shows
current residual baltery capacity.
of
hazardous substance or
burn, do not unpack, pierce, strike on or discard the
battery in fire or water.
7
Power jack
t2Y
8
SD card slot
Support up to 32GB
1.2.2 Charging by Charger
The GPS navigator must be charged with the charger
before first use.
1.2 Power Supply
& Charging
Charge the GPS navigator
first
fully with the charger before
use.
Plug the USB terminal of the charger into the USB port
on the left side of the GpS navigator and the other to the
power socket
to supply power and
charge the GpS
navigator.
1.2.1 Power Supply
The device can be powered by the built-in battery or
external power supply.
-6-
[Note] The charging indicator light is red during
charging. Do not unplug the charge until the battery is
fully charged and the indicator light tums green. please
charge the GPS navigator when the battery is low or used
up in succeeding use.
-7
-
1.2.3 Charging by Car Charger
Plug one terminal of the car charger into the USB port on
the left side of the GPS navigator and the other to the
charging port
to supply
power and charge the
GPS
navigator.
[Note] Plug in the car charger after the automobile is
started to avoid damage due to current surge.
1.3 Basic Use
1.3.1 Powering on/off
&
SleeP
1.3.2 Restarting the System
2.3.1.1 Powering on
When the system does not response, press the reset key
Press the power key on the top side of the GPS navigator
on the back of the GPS navigator to restart the syslem.
for at least two seconds to power it on.
[Note] Great humidity fluctuation may lead
lead to no response of the system.
to short
[Relevant Information] The following situations might
circuit of the GPS navigator. Power on the navigator
l. Delay or stagnancy in interface switching;
after it has accommodated to new environment.
2. Failure of function activation with overlong execution;
& SleeP
Long press the power key to power off the GPS
navigator. The following interface will be prompted. lf
srep is selected, the navigator will automatically resume
the power key
the state before entering sleep mode when powered on
data regularly.
2.3.1.2. Powering off
3. Failure to power on/off the GPS navigator by pressing
[Note] Restarting the system by pressing the reset key
Please backup your
will result in loss of unsaved data.
again.
-8-
-9
-
1.3.3 Fixing the GPS Navigator with Mounting
The mounting
kit is
Kit
1.4 System Main Interface and
Major
Functions
of a back splint and a
navigator in an automobile, fix
composed
bracket. To use the GPS
it on the dashboard under the front windshield.
[Note] Do not place the GPS navigator in positions
obstructing the driver's vision. Do not place it without
Long press the power key on the top side of the GPS
navigator to enter the system main interface shown
below.
fixing it, or in the place of air bag or the area after the air
,"*oj
r rat;{
bag is inflated.
t-
"ffi =H
rl:t.,1
1.3.4 Using Storage Card
:
::
i.i. ,l.i ;;
r
. .
Copy mapping applications, map data and media files in
a storage card. Insert the card in the corresponding slot.
;
[Note]
1. Do not take out the card while an navigation
program is being run or a media file is being played.
2. To avoid drop or crash of the card, do not exert
heavy pressure on it or bend it.
3. Avoid using or
storing the card in high
temperature, high humidity or direct sunlight. Keep
the card away from liquid or corrosive substance.
4. Mind the direction while inserting the T-FLASH
card to avoid damaging the slot or the card.
The main functions are listed as below.
Function
GPS
Explanation
Tap to enable navigation function
l;=t:l'=
Music player
Volume
Set
Backlight
Set backlight brighnress
supported
Language
Set Language
WMY ASF andAVI files supported;
Adjustment of playing progress, pause
Datetime
Time and date settings
Calibration
Calibration
and full-screen play supported
Factoty
Factoty
TXT files reading supporting page
Sys info
Check the latest information
WMA9
and WAV files supported;
Random, sequence and cycle
Movie player
E-book
play
Volume
selection
USB
Set the USB function
Flash
SWF files supported;
Wallpaper
Set Desktop Wallpaper
FM
FM channel to adjust the power
Calculator
Units can be calculated
Unit
The unit conversion
Gps info
Recorded signal
satellite receiver and display
it on the map. Set a
Theme
Theme settings
destination, and the system
will
automatically work out
Photo
JPG, GIF, BMP and PNG frles supported;
browser
Photo rotation, zoom in/out and auto play
Chapter
II
GPS
Various navigation mapping applications can be installed
in the GPS navigator, such
as Route and iGO intelligent
navigation systems, which position the navigator via the
the best path to help the user reach the destination safely
and quickly.
supported
Power on the mirror GPS machine firstly, and run the
Explorer
Go to the desktop
GPS navigation program.
Gobang
Gobang games
window:
BoxMan
BoxMan games
Snake
Snake games
Nav path
Navigation path specified
If the radar detector connect to the power and work, the
mirror GPS will say "RF connect success" and display
"RF connected". Otherwise it will say "RF connect
-t2-
It will enter the following
-13-
fail" and display "RF disconnected"
a period after product release. Please drive according to
road condition and abide by traffic regulations.
2.2 Navigation
Navigation paths are for reference only, and the user may
\s
lB.-
decide whether to follow them.
2.3 Reception
,:,:::
High and crowded structures (such as inside of funnels,
space between high buildings, underground car parks and
Traflic Lighling
f*ry:era alarnr
c^a, tr
under viaducts), weather change or satellite sipals
turnoff may influence signal reception, resulting in
positioning failure, inaccurate positioning, navigation
failure or system function abnormity.
With stereoscopic maps, instant animation, voice prompt
and text prompt
of the navigation
system. you will
appreciate its unique charm and enjoy a great trip.
Different navigation maps may have different operation
methods. Please
navi
2.1 Map
Due to
transportation development, inconformity
befween products and real traffic information will occur
-14-
follow instructions of
corresponding
gation mapping applications.
[Note] Before using the GPS navigator, please purchase
and install mapping applications and appoint file paths.
For setting methods please refer to 6.10
Setting
Navigation Path.
Chapter
III
Minimize
Interface and Operation
3.1 Music Player
Tap
in the system main interface to enter the
interface.
ffi
ffi
G
Play
Continue playing the paused,/
Pause
Pause
t
Set
1.--
musrc interface as shown below.
Minimize the music player
and return to the Media
ttu/
stopped music.
the music
being
played.
Stop
Stop the music being played.
play
Select sequence, random or
sequence
cycle play.
[d
Previous
Play the previous music.
tffi
Next
Play the next music.
Volume
Drag it leftward to turn down
or rightward to turn up the
r-t
k
volume.
Progress
Drag it leftward or rightward
to play from a previous or
future moment.
lte{
Music list
Enter
it to select music to
play.
Icon
g
Explanation
Name
Close
Close the music player.
16-
IIIETI
KJ
Time
Display the run time.
Equalizer
Enter the equalizer.
Tap
[*]
in the interface Music Play to enter the Music
list shown
ry!
tt---rc,
as below.
Md
Delete
Select one piece of music in the play
one
list and tap the icon to delete it.
Delete
Delete all the music in the play list.
all
3.2 Movie Player
,r, *l
in the video player interface shown as
below..
Icon
g
Explanation
Name
Close
Close the Music List
Scroll
Drag
bar
all music.
Add one
Add a piece of music on the left list
it
upward,/ downward
to view
E
I*l
trot
to the play list on the right.
ru
Add all
Add all the music on the left list to
the play Iist on the right.
-
18 -
Icon
Name
re
Close
Explanation
Close the video player.
*s}
Previous
Play the previous film.
film
r:'l
Play
i.,.3.--i
Next film
Play the next film.
L'*.J
':: i
i:!J
Stop
Stop the film being played.
Continue playing the paused/
stopped music.
Video
folder
Progress
Enter it to select a film to play.
Drag the sliding block leftward
to play from a
moment
previous
or rightward coming
moment.
f:TI
Volume
Drag
it
leftward to turn down
or rightward to turn up
Icon
Name
ET
Close
Close the video folder.
Scroll bar
Drag the sliding
the
upward/ downu,ard
volume-
M
Time
Display the play time and the
music duration.
Tup !,#&l
n the
in
he Video
Video Player
interface
Explanation
to
ml
ffifrN
block
view
all the files hside the folder.
Film
name&
enter the
to
Film name and
is
format
format
video folder shown as below
3.4 E-book Reader
[*l
rup
-20 -
liill
in the Media interface to enter rhe
-21 -
reader
ffi
interface shown as below-
ffi:
twc4
He had stopped his pacinq. his eyes rnovinq over Ron.
ffi
"3o you think I roLrld ha.,,e a look at the rat?" he said
evenly.
"!fhat?" said Ron. "\tihat's Scabbers qot to do
Setting
theme, font,
New
Select partial text and tap the
bookmark
icon to create a bookmark.
Bookmark
Enter the bookmark list to
list
select or delete a bookmark.
pages
fap ffi
a text
word size and bold fype.
Page/ total
r,vith it?''
Select
in the e-book
Current page/ total pages
reader interface
to
enter the
setting interface shown as below.
Icon
Name
Ermilnir
File name&
Current file name
g
format
format.
Close
Close the reader.
Scroll bar
Drag the sliding
Explanation
upward,/ downward
IJ
and
block
to view
all content ofthe e-book.
Folder
Enter the e-book folder to
select an e-book to read.
6N
Previous
Read the previous page.
i
Next
Read the next page.
11
Icon
Name
EI
Close
Explanation
Exit the setting interface
- 2) -
l*l
@
Save
Save the setting.
Theme
Tap
J==
Scroll bar
to select a theme for
downward to view all TXT files.
N]
the e-book.
Font
Tap *E to select a font for the
e-book.
Bold
Drag the sliding block upward/
ffi
File
The file name and format
name&
format
Tap to enable bold type. Tap it
again to cancel.
T
pu
in the e-book
reader interface
to
enter the
e-book folder shown as below.
To create a bookmark, locate a page by taping
M
F€
or
or dragging the scroll bar in the reader interface and
drag to select text content. Tap
ffi
when
it is on.
Tap
OK to finish.
Tap Wffi to view created bookmarks in the interface of
Bookmark List shown
Icon
E
fI
Name
as below.
Explanation
Close
Close current folder.
Refurn
Retum to the previous folder.
-24-
-25-
Drag the scroll bar and select a bookmark on the
left list.
to go to the page with the bookmark or tap
to delete the bookmark.
tg ffi
ffi
,., M,,
the photo browser interface shown
as
below.
3.5 Flash player
,)
,ro
Hd ,,
the photo browser interface shown
\
as
below.
3.8 FM
\t
I
,u, ffil *
rhe photo browser interface shown
below.
3.6 Wallpaper
-26-
-27
-
as
Operation Instruction
Operation Instruction
3.9 Calculator
tffir
Tap E!iliil
below
;1
the photo browser interface shown
in
the photo browser interface shown
as
.a
g
t=l
CIose
Exit the FM Setting.
Save
Save current setting.
Use FM
Tick in the box to enable
FM function.
t-------{-l
bii/
Frequency
Drag the slide block
rightward (or tap @f
3.10
Unit
to increase the frequency
and leftward (or
tap
H ) to reduce the
-]
frequency.
The
frequency range is 88.00
Mhz-108.00 Mhz.
-28-
Trp
below.
as
Operation Instruction
Operation lnstruction
rup ffiffi to prompt a dialog
as below.
3.12 GPS info
,.0
ffi ,,
below
the photo browser interface shown
as
Tap OK
to
reset the GPS satellite
or tap Cancel to
exit.
3.13 Theme
,* M
below.
t
the photo browser interface shown
as
0peration Instruction
Operation Instruction
lcon
Name
B
Previous
Explanation
Mew the preview photo in
the
folder.
:::,*.{,4f,
Next
View the next photo in the folder.
;i._..;l
Zoomin
Scale up current photo.
Zoom out
Scale down current photo.
Rotate
Rotate currenl photo
90
clockwise.
3.14 Photo Browser
Auto play
Cycle play all the photos in the
folder from current photo.
,"0 [H in rhe photo
browser interface shown
as
ffi
@
- 5/ -
Enter the photo folder to select
a
photo.
below.
;k
Folder
Close
Close the bro,ivser and retum to
the Media interf,ace.
-33-
Operation Instruction
Operation Instruction
fap ffi in the browser
interface
to enter the photo
3.15 Explore
folder shown as below.
,ro H
in the
photo brorvser interface sho*n
as
below.
x#
-@
s
tat
Etr
"
f,]'lt
U
Icon
Name
EI
Close
M
Retum
*ffiw
Close the current folder.
Return to thc previous folder.
Scroll bar
[]
L-J
Explanation
Dras the sliding block to view all
the photos.
-34-
.wi
ows Embedded
-35-
CE 6.t
Operation Instruction
Operation Instruction
3.16 Gobang
,* ffiil in rhe photo browser interface shown
as
below.
3.19 Nav path
ill
iHtl
Tap
irir,'..::::
below.
3.18 Snake
the photo brorvser interface shown
-36-
in the
photo browser interface shotvn
as
Operalion Instruclion
Operation Instruction
3.20 Volune
El
Select a map address and tap
fl5YrgbtioD.."
M., .4i,ffi
_
,o save the setting.
Tap to select a map address.
iH:
Tick in the box to run the set
navigation map when the
I
"ffi. I rit
$&M
Tap ,",';',;'ti:'t
in the photo browser interface sho''n
as
below.
navigator is powered on.
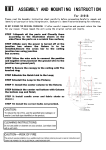
Communication
Poor
with PC
connection
GPS
signals
reception
USB
USB
About 3 minutes
Poor
GPS
signal
failure
Connect the
cable.
needed for
are
low
intensity of local GPS
satellite signal.
Contact your agent or
Loss of
data
map
Accidental
deletion
distributor.
Input a new password
after recovering
GPS data.
@
the
Close
Exit the
volume
setting.
I -{it.....--
I
Volume
Ten volume grades
(from mute
-rJ
-Err
available. Tap to
decrease
volume by grade.
-38-
to
maximum)
-39-
the
Operation Instruction
Operation Instruction
Sounds for
taps
Li.m
it to enable the
function. Tap it
Tap
again to disable the
function.
Power-on
music
J or |: to
select power-on
@
Exit rhe
Close
backlight
setting.
r=t
Drag leftrvard to turn
down or rightrvard to
Backlighl
Tap
kmEr-rl
tum up the backlight.
Auto off
Auto backlight shutoff
after service stop for a
music or disable it.
period. The options are
3.21 Backlight
always On, l0s. 30s,
lm,2mand 3m. Tap -photo browser interface shown
or .): to vierv the
options in c-vcle or
as
select one.
3.22 Language
:::::""
=,
Tap
:
^
.;:
[j
r".{
:i-:'g'-r:.:Sz
in the photo browser interface
below.
-40-
-41
-
shog.n
as
Operation Instruction
Tap
*
or
..),:,
Operation lnstruction
to select a system language and tap [?l
to save the selection.
,,. .*rj, in
ser rhe \ ear.
month. day, hour and minute.
3.23 Date time
Tap
Setting the system date and time
In the above interface, tap E or E ro
[Note]: Time format options are 12-hour and l-l-hour.
Setting the system time zone
the photo browser ilterface shown
below.
as
ln the above interface, tap ( s1 ) lo selecl a time
zone. For example, select "(GNIT-{S:00) Beijine.
Chongqing, Hong Kong, Urumqi" for China.
3.24 Calibration
,-r-j
Tap
"-i,:,::2,:.i:,
in the photo
brou,ser interface
below.
-42-
- q) -
shosl
as
I
Operation Instruction
Operation Instruction
l ti
!Yl
!
Ple6e tap on Sre crosslhes firmly
The cro.slins will continue to move until
the 5seen is alEnBd,
I
I
Tap yes to execute calibration or no to cancel calibration
3.25 Factory
and go back to the setting interface.
Tap no, and the following calibration interface
is
prompted. Click the center of cross cursor with the touch
pen and the cursor shifts from the center, upper left, lower
left, upper right and lower right to finish the calibration
and the interface
will be closed automatically to go back
to the setting interface.
Tap
?'-'-:',:;:-z.
in the photo browser interface shos,,
below.
t,ffi
' i&*
i
,tJ=
,=f
r:l-: i...
Ii
-45-
as
Operation Instruction
Operation Instruction
3.26 Sys info
card plugged in the slot;
2. Tapffi
t
\ry.
::::::::
Tap
: ,,,,,,,/
11':r
-ii:'.;
in the photo browser interface shown
as
in the photo browser interface shown
as
Option
in the setting
interface
to enter usB
as shown below.
below.
3.27 USB
'Bdu
Tap rir
below.
6.9 USB Setting
Connect the GPS navigator to PC via the MINI USB porl
Select MASS STORAGE and tap
E .
save iL
to transmit data, or back up data from the navigator data
3. Connect the MINI USB terminal of the USB cord to
to PC.
the MINI USB port of the GPS navigator and the
The GPS navigator provides MASS STORAGE and MS
standard USB terminal to the USB Host port of PC. Then,
STORAGE modes. Select one in the USB setting.
the navigator stop the current program and switch to the
following interface.
6.9.1MASS STORAGE
l.
Have the GPS navigator in operation status and the SD
-46-
-4'7
-
Operation Instruction
t,.ryfi
Li#
You may select
to enter USB charsine mcrle an.l
the system main interface
5.
After cornmunication, unplug the MD{I USB
cab,le.
6.9.2 MS ACTIVESYNC
1.
4. Select
ffi
,o connect the GPS navigator to
PC will recognize
the
PC. The
Tap
Option
in the setting
as shown
interface
ro enter LSB
below
navigator and prompt the
following interface.
Select MASS ACTIVESYNC and tap
E
,o
sar-e the
setting.
2. Install the application Mobile Derice in a drir e of PC.
Then the following icon rvill appear
-48-
-49-
in the drir e
Operation lnstruction
Qtration Instruction
selection.
{Chapter
!.!+LrL: B*r.ire
3. Connect the MINI USB terminal of the USB cable to
the MINI USB port of the GpS navigator and
4. After the PC finds new hardware, double click the
Mobile Device drive in the selection area to enter the
memory of GPS navigator for data transmission.
[Attention] For data safety back up the navigator data
If MASS STORAGE is selected wbile
the GpS
navigator is connected with PC, other operations will be
suspended.
[Attention] The following operations will stop suspend
the communication of the system and pC and unsaved
data
will
be lost.
l. Unplugging
MINI USB cable;
2. Powering offthe GPS navigator;
the
3. Resetting the system;
4. Tap the on close button on the top right.
in
*normal operation of the GPS
Fr ffi
poblems, please contact our customer s€ffie
Fault
Starmp
System down
Sudden
power cut
Lowbattery
Low
No/
vague
h*.
of
c€DIEr-
display
Incorrect
tappinC
rcsponse
Backlight
off
Touch screen
not calibrated
Low volume
No sounds
mal
portr
and chagefubffiySr+ply
Res€t tte
GPS
navigatu-
swptv qpnel
pocf
and chagethteyTumry6ebar+ltlr
backlight
Poor contact
ofearphone
-50-
case
SoHLr
Reason
Lowbattery
failure
After transmission, unplug the USB cable.
[Note]
Please carry out the following operatims
rhe
standard USB terminal to the USB Host port of pC.
5.
IV Troubleshooting
Try the srEeawilh tte
touchpm
Recalihme thc sroen-
Tumt4lthe ruhmeComecttteeaphme.


![OverView Control Manager user`s manual - operator [v04]](http://vs1.manualzilla.com/store/data/005659468_1-4c522981c7089838b286d7fbb1120c24-150x150.png)