1
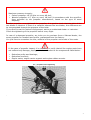
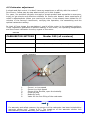
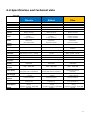
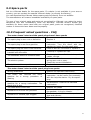
9.0 Spare parts
Ask to a Vittorazi dealer for the spare-parts. If a dealer is not available in your area or
country, you can contact the nearest Vittorazi dealer (or directly the factory).
You can download the Vittorazi Motors spare parts list directly from our website.
The manufacturer will ensure immediate availability of spare parts.
The use of non original parts and parts not recognized by Vittorazi, can make the motor
dangerous and this immediately voids the warranty. Vittorazi doesn't accept any
warranty for those motor used with non original parts, parts not recognized, modified
motors or those who have been used improperly.
10.0 Frequent asked questions - FAQ
The motor doesn’t start and the spark-plug doesn’t have sparks
The spark-plug is worn out or defective
The spark-plug is wet from gasoline
The spark-plug has soot in the electrode
The spark-plug cap is not properly
installed with the cable
The shutdown button is linked to earth
The electric system
The ignition coil has a problem
Replace it
Disassemble the spark-plug and the
carburetor. Turn the motor with the
starting by hand. Dry the spark-plug.
Clean it with an iron brush or replace it.
Checkup or replace the cap.
Check operation of the button, the
cables, wirings.
Make sure that there are no cables or
wiring worn out or open.
Check the correct installation.
Replace it
The motor doesn’t start and the spark-plug have sparks
Wrong carburetion
The motor has received too much
gasoline for a wrong procedure of
starting
The motor has received too much
gasoline for a wrong carburetion. The
spark-plug is wet.
The reed valve is worn out
Aspiration of air from the junctions
Aspiration or exhaust pipe clogged
Carburetor problem
Restore the standard carburetion
Disassemble the spark-plug and the
carburetor. Let the motor turn manually
with the help the starter. Dry the sparkplug.
As said above. Restore the standard
carburetion.
Replace the petals
Control and replace, where necessary,
the gaskets, o-ring or oilseals.
Check the conduit of the airbox, exhaust
pipe and silencer.
Disassemble and inspect
19