1
CQ/X Client: User Guide
Revision 1.7
All Rights Reserved by C. W. Sanders, NO5W
CQ/X Client: User Guide
by C. W. Sanders, NO5W
Contact: [email protected]
CQ/X Client: User Guide
All rights reserved by C. W. Sanders, NO5W
All rights reserved. This document should not be alterted in any way without the written consent of the author.
However, in its unmodified form, the document may be freely distributed without the consent of the author.
Products that are referred to in this document may be either trademarks and/or registered trademarks of the
respective owners. The author makes no claim to these trademarks.
While every precaution has been taken in the preparation of this document, the author assumes no responsibility for
errors or omissions, or for damages resulting from the use of information contained in this document or from the use of
programs and source code that may accompany it. In no event shall the author be liable for any loss of profit or any
other commercial damage caused or alleged to have been caused directly or indirectly by this document.
Original: 31-October-2004.
Revision 1.2: 13-September-2005
Revision 1.3: 05-November-2005
Revision 1.4 22-May-2006
Revision 1.5 23-July-2006
Revision 1.6 21-September-2006
Revision 1.7.1 10-January-2007
Revision 1.7.2 09-May-2007
Revision 1.7.3 09-August-2007
Revision 1.7.4 12-August-2007
Revision 1.7.5 12-May-2008
Revision 1.7.6 04-March-2009
Revision 1.7.7 12-November-2009
The Woodlands, TX
Acknowledgements
The author would like to thank the following individuals for providing helpful comments, suggestions, and user
feedback during the development of CQ/X.
Alan Sewell - N5NA
Alan has been one of the most long-standing and enthusiastic users of CQ/X and has made numerous
suggestions for improvements as well as contributing several of the recordings used in the trips contained in
the GPS simulator. Recently he has taken the lead in developing the data files for supporting additional state
QSO parties including, Virginia, North Dakota, Arizona, Nevada, and others. He also performed testing on
using the TIGER2000 data set for the polygon models and converted all of the polygons to that data set. He
has also developed two very nice tutorials on the use of CQ/X which have been included in the help. Most
recently Alan has developed the data files that allow CQ/X to support multi-contest operation.
Gary Schmidt - W5ZL
Gary has made many suggestions for improvement following his three trips to Oklahoma operating NO5W/M
and a trip in the Texas QSO party in a multi-two configuration.
Colin Jenkins - KU5B
Colin has been an enthusiastic beta tester of several radio modules and a user on trips in NO5W/M in
Louisiana and Oklahoma and as KU5B/M in Louisiana.
Larry Hammel - K5OT
Larry made a number of suggestions for improving CQ/X following our recent mobile multi-op adventure with
W5ZL in the Texas QSO Party.
Jim Stahl - K8MR
Early in the development of CQ/X Jim provided a number of suggestions for improvement.
Contents
I
Table of Contents
Part I Introduction and Quick Start Steps
1 Purpose
6
................................................................................................................................... 6
2 System Requirements
................................................................................................................................... 6
3 Other Requirements
................................................................................................................................... 7
4 Quick Start Steps
................................................................................................................................... 8
5 Quick Reference
...................................................................................................................................
Case: No GPS
8
6 Quick Reference
...................................................................................................................................
Case: For GPS Use
9
7 Registration ................................................................................................................................... 11
8 How To Contribute
................................................................................................................................... 11
Part II Installation
12
1 Directory Structure
................................................................................................................................... 12
2 Required Files
................................................................................................................................... 14
Part III Configurations
14
1 Single Mobile...................................................................................................................................
Operator with GPS and GPS Passthrough
14
2 Single Op: No
...................................................................................................................................
Spots and No GPS
15
3 Single Op With
...................................................................................................................................
GPS: No Spots
16
4 Single Op Dual
...................................................................................................................................
PC Configuration With GPS and Spots
17
5 Single Op Single
...................................................................................................................................
PC With GPS and Spots
18
6 Single Op Dual
...................................................................................................................................
Networked PC Configuration With GPS and Spots
18
7 Adding a Station
...................................................................................................................................
for Multi Operations
19
8 Setting Up a ...................................................................................................................................
Networked Configuration
20
9 Multi-op Mobile
...................................................................................................................................
CW-Capable Configuration Without Spotting
21
10 Using the Server
...................................................................................................................................
Module
21
11 Single Mobile...................................................................................................................................
Setup at NO5W
21
Part IV Setting Up Devices
28
1 Setting Up a ...................................................................................................................................
Radio
28
2 Setting Radio...................................................................................................................................
Parameters
30
3 Manual Radio
...................................................................................................................................
Tracking
31
4 Radio Interface
...................................................................................................................................
Health Check
32
5 Setting Up a ...................................................................................................................................
Keyer
32
6 Setting Keyer...................................................................................................................................
Parameters
32
7 Setting Up a ...................................................................................................................................
GPS
34
8 Setting Up a ...................................................................................................................................
Spot Source
34
All rights reserved by C.W. Sanders, NO5W
I
II
CQ/X Client: User Guide
9 More for Radio
...................................................................................................................................
Devices
35
10 More for WinKey
................................................................................................................................... 38
11 More for Elecraft
...................................................................................................................................
K3
41
12 Small Control
...................................................................................................................................
Interface for Elecraft K3
46
13 Using the Shuttle
...................................................................................................................................
Pro 2 with the Elecraft K3
47
Part V Messages and Function Key Assignments
50
1 Setting Up Messages
................................................................................................................................... 50
2 Embedded Message
...................................................................................................................................
Symbols
52
3 Required Messages
................................................................................................................................... 53
4 Associating Messages
...................................................................................................................................
with QSO Entry Items
54
5 Available Function
...................................................................................................................................
Key Commands
54
6 Assigning Function
...................................................................................................................................
Keys
60
Part VI Operating a Contest
62
1 Starting a New
...................................................................................................................................
Contest
62
2 Restarting a ...................................................................................................................................
Contest
63
3 Setting the Log
...................................................................................................................................
Time Stamp
63
4 Using the Startup
...................................................................................................................................
Wizard
64
5 Loading Calls
...................................................................................................................................
from Previous Logs
64
6 Calling CQ ................................................................................................................................... 65
7 Making a QSO
...................................................................................................................................
Entry
65
8 Handling a Second
...................................................................................................................................
Caller
66
9 Auto-scheduling
...................................................................................................................................
QSO Ending Messages
67
10 Initiating a Search
...................................................................................................................................
& Pounce QSO
67
11 Revising a Log
...................................................................................................................................
Entry
68
12 Recording an...................................................................................................................................
operator note
68
13 Running Stations
...................................................................................................................................
from a Multi-County Boundary
69
14 Preparing a Summary
...................................................................................................................................
Sheet
70
15 Finalizing the...................................................................................................................................
Logs
70
16 Exporting Logs
...................................................................................................................................
to an ADIF File
71
17 Operating Multiple
...................................................................................................................................
Contests
72
18 Operating Non-QSO
...................................................................................................................................
Party Contests
76
ARRL Field Day
.......................................................................................................................................................... 76
ARRL Sweepstakes
.......................................................................................................................................................... 82
CQ WW WPX ..........................................................................................................................................................
Contest
83
CWOps Mini CWT
..........................................................................................................................................................
Contest
83
North American
..........................................................................................................................................................
QSO Party
83
North American
..........................................................................................................................................................
Sprint
83
NCCC Sprint and
..........................................................................................................................................................
NCCC Internet Sprint
84
RAC Winter Contest
.......................................................................................................................................................... 84
IARU-HF Contest
.......................................................................................................................................................... 84
Cross-Country
..........................................................................................................................................................
CHN Operation
85
CQ/X de NO5W
Contents
Part VII Route Planning for Mobile QSO Party
Operation
III
85
1 Planning Route
...................................................................................................................................
for Non-Use of GPS
85
2 Route Planning
...................................................................................................................................
Dialog
87
3 Planning Route
...................................................................................................................................
for Use of GPS
88
4 Adding County
...................................................................................................................................
Crossing Information
90
5 Importing County
...................................................................................................................................
Crossing Information
91
6 Building Routes
...................................................................................................................................
from Crossings
92
7 Hints for Building
...................................................................................................................................
Crossing Files
93
8 Starting a Route
................................................................................................................................... 96
9 Changing Counties
................................................................................................................................... 96
10 Adding Strip...................................................................................................................................
Maps to the Route
97
11 Associating Maps
...................................................................................................................................
With Counties Dialog
97
12 Viewing Strip...................................................................................................................................
Maps
98
13 Using GPS ...................................................................................................................................
Logging
100
14 Posting Trip...................................................................................................................................
Plans
101
15 Exporting Crossing
...................................................................................................................................
Data As a KML File
102
16 Example KML
...................................................................................................................................
File
104
17 Defining a Route
...................................................................................................................................
Path Using Google Maps
105
18 Building a Crossing
...................................................................................................................................
File Using Google Maps
108
19 Operating Cross
...................................................................................................................................
Country Using CQ/X
112
Part VIII GPS-Related Topics
115
1 GPS Status...................................................................................................................................
Panel
115
2 Defining Waypoints
................................................................................................................................... 119
3 Tracking Multiple
...................................................................................................................................
Waypoints
120
4 Setting GPS...................................................................................................................................
Reporting Parameters
121
5 Setting Up Desired
...................................................................................................................................
Speed Indicators
123
6 Setting Up Automatic
...................................................................................................................................
County Changes
124
7 Using Where
...................................................................................................................................
Am I
124
8 GPS Advisory
...................................................................................................................................
Modes
126
9 County Locator
................................................................................................................................... 126
10 County Boundary
...................................................................................................................................
Polygons
129
11 Adding Polygonal
...................................................................................................................................
Regions
131
12 Reporting Your
...................................................................................................................................
Position
134
13 CQ/X QSL Format
................................................................................................................................... 135
14 Preparing CQ/X
...................................................................................................................................
GPS QSL Logs
136
15 Preparing a...................................................................................................................................
Log On a Map KML File
137
16 Setting up a...................................................................................................................................
GPS Pass Through
140
All rights reserved by C.W. Sanders, NO5W
III
IV
CQ/X Client: User Guide
17 GPS Passthrough
...................................................................................................................................
Via a Virtual Null Modem
141
18 Using a Networked
...................................................................................................................................
GPS
142
19 Using GPS ...................................................................................................................................
Recorder
142
20 Using the GPS
...................................................................................................................................
to Set CPU Time
144
Part IX Miscellaneous Topics
144
1 QSO Entry Box
................................................................................................................................... 145
2 QSO Entry Check
...................................................................................................................................
Grid
145
3 Log Display...................................................................................................................................
Grid
146
4 Score Display
...................................................................................................................................
Grid
147
5 Vertical Score
...................................................................................................................................
Format
147
6 Similar Calls
...................................................................................................................................
Page
149
7 QSO Revision
...................................................................................................................................
Dialog
150
8 Message Resolution
...................................................................................................................................
Dialog
151
9 Query Messages
................................................................................................................................... 152
10 Setting Up a...................................................................................................................................
Backup Log
152
11 Keyer Parameters
...................................................................................................................................
Dialog
153
12 Customizing
...................................................................................................................................
the Display
154
13 Special Keystroke
...................................................................................................................................
Combinations
156
14 Moving Spots
...................................................................................................................................
to the Spot Window
158
15 Preparing County
...................................................................................................................................
Logs
158
16 Preparing Statistical
...................................................................................................................................
Results
159
17 Preparing Statistical
...................................................................................................................................
Results for Non-Qso Party
160
18 Preparing a...................................................................................................................................
Summary Sheet
162
19 User-Supplied
...................................................................................................................................
Help
163
20 Setting up the
...................................................................................................................................
Session Clock
165
21 Location Cues
...................................................................................................................................
for SSB Operation
167
22 Multi-County
...................................................................................................................................
Setup Dialog
167
23 Multi-County
...................................................................................................................................
Messaging and Logging Dialog
169
Part X Test Results, Limitations, and Known
Problems
171
1 Operating Results
................................................................................................................................... 171
2 General Problems
................................................................................................................................... 172
3 Cautions and
...................................................................................................................................
Situations to Avoid
173
4 User Interface
...................................................................................................................................
Problems
174
5 Radio-Related
...................................................................................................................................
Problems
174
6 Keyer-Related
...................................................................................................................................
Problems
174
7 GPS-Related
...................................................................................................................................
Problems
175
CQ/X de NO5W
Contents
Part XI Revision History
V
175
1 Revision 1.0................................................................................................................................... 175
2 Revision 1.1................................................................................................................................... 175
3 Revision 1.2................................................................................................................................... 176
4 Revision 1.3................................................................................................................................... 176
5 Revision 1.4................................................................................................................................... 177
6 Revision 1.5................................................................................................................................... 178
7 Revision 1.6................................................................................................................................... 178
8 Revision 1.7................................................................................................................................... 179
Index
183
All rights reserved by C.W. Sanders, NO5W
V
6
CQx Client: User Guide
1
Introduction and Quick Start Steps
1.1
Purpose
This guide covers the essential information needed by the user to get CQ/X de NO5W up and running
in a minimum amount of time. It also contains additional user help information in the section
Miscellaneous Topics 144 .
Before beginning or even considering to use the program the user should be aware of the
System Requirements 6 and Other Requirements 7 . Please review these.
When you are ready to start consult the Quick Start Steps
1.2
8
.
System Requirements
Operating System:
· Windows 2000/XP: This program was developed and extensively tested on a Windows 2000/XP
system. This is the preferred platform.
· Windows 98SE: Limited testing has been performed on a Windows 98SE system with no major
problems but a few idiosyncrasies noted in the section on General Problems 172 . Please report any
observed problems not already included to [email protected].
· Windows 98/ME: No testing has been performed on a Windows 98 or Windows ME system.
· Windows 95: It is not expected that the program will run on a Windows 95 operating system.
· Windows 3.1: The program will not run under Windows 3.1
· DOS: The program will not run under DOS.
Processor Class: The lowest level machine on which extensive testing has been performed is a 400
MHz Pentium II class machine with 256 MB of memory running Windows XP. Performance is
adequate for that level of machine.
Drive Space: With the large size of current disk drives this requirement is largely academic. However
the following is offered for those needing to conserve disk space.
·
·
·
·
·
Core User Interface module: The core user interface module requires approximately 2MB.
Device Modules: The modules for radios, keyers, GPS typically each require .5MB
Transceiver Manuals: The pdf files for manuals appear to be in the 1.5 - 4.5 MB range.
Contest Modules: The module for each contest can range from .5MB to 1.0MB
Map Modules: A map clipped from Streets and Trips showing a single county and small parts of
adjacent counties typically requires about .5 MB as a .bmp file.
If drive space is an issue a minimal installation would be one containing the core user interface
module, a device module for a single radio type and a single keyer type and a contest module for a
single contest. The requirements for such an installation would be approximately 4MB.
On the other hand an installation for covering a typical "full-bore" Texas QSO Party route of 36
counties with a map image for each county could be in the range 22-25 MB.
CQ/X de NO5W
Introduction and Quick Start Steps
1.3
7
Other Requirements
1. CW Keying Requirements:
Since the program is designed to use an external device for generating CW and keying the transmitter
it is necessary for the user to provide one of the following two supported keying devices that interface
to the PC via a serial connection:
WinKey: This keyer is supplied by K1EL at: www.k1el.com. It is a very reasonably priced and fullfeatured kit. Assembly of the circuit components on the board can be performed in an hour or two.
Time required to mount the board and connectors in the user-provided cabinet/enclosure depends on
the metal-working ability of the builder with the installation of the DB-9 connector being the only
challenging part.
Note: WinKeys are currently present in several devices including the following:
1. The USB hub (Navigator) available from US Interface contains a WinKey and has been
successfully tested with the program. It also contains an auxiliary RS-232 port and supports the
CAT interface to the radio which is useful for interfacing a serial GPS and the radio to the PC.
2. The USB Micro CW Keyer, produced by MicroHam, uses the K1EL WinKey and works with CQ/X.
Hamation Keyer: This keyer is supplied by K7MI at www.hamtoys.com. It is a moderately priced fully
assembled keyer but with somewhat limited features. It will accept message strings for sending and
will also accept a command to change keying speed.
HamGadgets Keyer: This keyer is supplied by N0XAS at Ham Gadgets. It is a moderately priced fully
assembled keyer and has the capability to emulate the K1EL WinKey commands. Although I have not
tested it with CQ/X it should work fine.
Another device which could serve as an external keyer but is not supported in the current version of
the program is:
W5XD Multi-Keyer: This box is primarily for SO2R so it is much more than a keyer. As a keyer it has
less functionality than the WinKey but more than the Hamation Keyer. However, it is the most
expensive of the three. Control of this device uses the RS232 control signals in such a way that rig
control and keyer control can take place over the same port reducing the port requirements. It is
available from www.writelog.com. Note: Although this device is not supported in the current version
support for it is planned for the future.
2. Route Planning:
Although not a requirement, it is highly recommended that route planning for mobile QSO party
operation be performed using a mapping program that contains county line information. One such
program is Microsoft's Streets and Trips.
3. Requirements for Spotting:
Since the program is designed to use an external program for accessing spotting information from DX
Clusters it is necessary that you provide such a program if it is desired to use the spotting capability.
The spotting features of CQ/X have been tested with the following programs providing the spots over a
serial link.
DXTelnet: This program was developed by IK4VYX and is available for a small registration fee from
http://www.qsl.net/wd4ngb/telnet.htm
ARUser: This program is freeware available from VE7CC at http://www.ve7cc.net/.
All rights reserved by C.W. Sanders, NO5W
8
1.4
CQx Client: User Guide
Quick Start Steps
Here is a list of topics that you should review when getting started with the program as a standalone
station. There is also a separate document (ExploringCQX.pdf) available from the website
CQ/X documentation page of the website that provides about a dozen guided activities for getting
acquainted with the program. This file is also included in the installation package and is accessible
from the Help menu (Help | Getting Started | Exploring CQ/X).
1.
2.
3.
4.
5.
6.
7.
8.
9.
1.5
Installation 12 - Run the setup exe from the CD and follow the instructions. Once the program is
installed you can use the configuration wizard to receive prompts for performing the following
steps or you can skip the wizard and configure the program without the prompts.
Setting Up a Radio 28 - Connect your radio to a desired port and register it with CQ/X using the
Radios | Connect menu item.
Setting Up a Keyer 32 - Connect your external keyer to a desired port and register it with CQ/X
using the Keyers | Connect menu item.
Setting Up a GPS 34 - If you are using a GPS connect it to a desired port and register it with CQ/X
using the GPS | Connect menu item.
Messages and Function Key Assignments 50 - Review the default message and function key
assignments and modify as desired.
Starting a New Contest 62 - Use the menu item Files | New Contest to select the contest, contest
categories, operator information, etc.
Setting Up Messages 50 - Review the messages and Embedded Message Symbols 52 making
sure that the messages are appropriate for the contest.
Review the information in Calling CQ 65 , Making a QSO Entry 65 , and
Initiating a Search & Pounce QSO 67 and test your setup and understanding by making some test
QSOs.
Route Planning for Mobile QSO Party Operation 85 - If you are planning to use CQ/X to operate
mobile in a QSO party perform the steps outlined in Planning Route for Non-Use of GPS 85 or
Planning Route for Use of GPS 88 as appropriate.
Quick Reference Case: No GPS
Before the contest perform the following
1. Use QPTools | Plan Route to develop the sequence of counties defining the route.
2. If desired use QPTools | Post Route Plans to connect to the County Hunter website to post your
route and any comments.
3. Use Keyer | Edit Message Template to define the format of your messages. Insert embedded
symbols in the messages by first positioning the cursor at the desired point of insertion and rightclicking and selecting the desired symbol from the pop-up menu. Once you are satisfied with your
messages save and reload the template. The messages are now ready to be changed as you
advance through the counties and work stations. Note: It is important to perform this step even
if you plan to operate only SSB since the program obtains logging information from these
messages.
4. Use Options | Assign Commands to assign commands to the function keys.
5. If you wish to have strip maps available for viewing within the program use a mapping tool and a
screen capture tool to capture images and save them as bmp files. Then use the QPTools |
Associate Maps to associate each image file with a county.
6. Use Radio | Connect/Disconnect or Keyer | Connect/Disconnect to assign the radio and keyer
to their respective ports. Be sure to connect and test each device. The next time you close the
application be sure to answer Yes to the question "Save New Port Assignments" so that you can
CQ/X de NO5W
Introduction and Quick Start Steps
9
easily reconnect all devices to their proper ports.
7. If your radio is not supported or for any other reason (e.g. insufficient number of ports) you do not
wish to automatically track the radio use Radio | Track Radio Manually to specify frequency and
mode.
On Startup/Restart of the program
1. Use QPTools | Plan Route to review the sequence of counties and to specify the starting county.
2. Use QPTools | Associate Maps to review the map associations and make any desired changes.
Use QP Tools | View Maps to select a map for viewing and dock the map if it is desired for it to
remain in view.
3. Use Radio | Connect/Disconnect to connect devices to their respective ports. If you have saved
your port assignments you can use the button labeled "Restore from Previous Session" to restore
all devices.
During the contest
1. Send CQ (in CW mode using the key you assigned to the CQ message)
2. Enter call of responder and press Enter to send your exchange info
3. Enter received exchange information separated by spaces in any order, referring to the Check grid,
if desired, to insure proper interpretation
4. Press Enter to log the contact and send the CQT message. If the contact won't log refer to the
Check grid to see what might be missing.
After the contest
1. Before finalizing the log it is a good idea to close and restart the program to ensure that all
changes are recorded correctly in the scoring.
2. Use File | Finalize Logs to convert the internal log to Cabrillo format. Enter any soapbox
comments including statistical results and then use the Browse button to specify the file where the
final log is to be kept.
3. Use QPTools | Prepare Summary Sheet and the Browse button to specify the file where it is to
be saved. It is good idea to create a separate directory in which to save all results from each
contest.
4. If desired, or required by the contest, use QPTools | Prepare County Logs to prepare these logs.
5. Use File | Post to 3830 Reflector to connect to the site to file your 3830 report.
6. Of course, don't forget to also submit your log to the sponsor!
After after the contest
1. It would be greatly appreciated if you would provide feedback regarding your experience (good or
bad) using the program including any suggestions for improvements. Provide comments to
[email protected].
2. If you are interested in using this program but find that your state QSO Party is not supported in the
current version contact NO5W to see if that support is available in the latest version or to find out
how you can participate in the development of the necessary files to add that support.
3. Consider adding a GPS to your next outing.
1.6
Quick Reference Case: For GPS Use
Before the contest perform the following
1. Use a mapping program such as Streets and Trips (S&T) to plan your route and locate each of
your county crossings. Build and save the file of county crossing information as described in the
on-line help topic Building Routes from Crossings 92 and use QPTools | Build Plan From
Crossings to import the crossing information into the program. Save the (S&T) trip file for use
during the contest. You can, of course, save these files in any convenient location and with any
names that are easy to remember. In my use of the program I have found the maps subdirectory
associated with the QSO Party to be a good place to store these files. This is an optional step but
is required if you desire real-time estimates of the distance and time to the next county.
All rights reserved by C.W. Sanders, NO5W
10
CQx Client: User Guide
2. Use the mapping program to define any waypoints and build a file of these waypoints as described
in the on-line help topic Defining Waypoints 119 . This step is also optional but is required if you
desire real-time estimates of the distance to important waypoints.
3. If desired use QPTools | Post Route Plans to connect to the County Hunter website to post your
route and any comments using cut and paste.
4. Use Keyer | Edit Message Template to define the format of your messages. Insert embedded
symbols in the messages by first positioning the cursor at the desired point of insertion and rightclicking and selecting the desired symbol from the pop-up menu. Once you are satisfied with your
messages save and reload the template. The messages are now ready to be changed as you
advance through the counties and work stations. Note: It is important to perform this step even
if you plan to operate only SSB since the program obtains logging information from these
messages.
5. Use Options | Assign Commands to assign commands to the function keys.
6. If you wish to have strip maps available for viewing within the program use a mapping tool and a
screen capture tool to capture images and save them as bmp files. Then use either the QPTools |
Associate Maps menu item to associate each image file with a county or use the User Defined
Help menu item as described in the on-line help topic User-Supplied Help 163 . Note: If you plan to
use real-time tracking in a mapping program strip maps do not offer any advantage and you may
wish to omit this step.
7. Use Radio | Connect/Disconnect or Keyer | Connect/Disconnect to assign the radio, keyer and
GPS to their respective ports. Be sure to connect and test each device. The next time you close
the application be sure to answer Yes to the question "Save New Port Assignments" so that you
can easily reconnect all devices to their proper ports. It is also a good idea to have a diagram
showing which devices are attached to which ports.
On Startup/Restart of the program - The configuration wizard will prompt you through most of the
following steps or you can skip the wizard and perform them without the prompts.
1. Use Radio | Connect/Disconnect to connect devices to their respective ports. If you have saved
your port assignments you can use the button labeled "Restore from Previous Session" to restore
all devices.
2. Use GPS | GPS Advises County Change to set the desired GPS Advisory mode. If you choose
AUTO the program will automatically change your messages to correspond to the current county
and will locate the next county crossing if you have defined one for the current county. If there is
more than one crossing defined for the current county the program will ask you to resolve. (Use
GPS | Resolve Multiple County Crossings)
3. Use GPS | Set Parameters to define and/or import any waypoints and to set up pass through of
GPS information to a mapping program such as Streets and Trips. You can also set up any GPS
logging features at the same time (e.g. CQ/X QSL-Ready logging).
4. If you are using Streets and Trips you can use QPTools | Start Interactive Map to startup Streets
and Trips and select the desired trip *.est file. If using another mapping program start it up from the
desktop. Another approach to using real-time mapping is to define the mapping program in the
User-Defined Help and then to start it from the Help menu. This latter approach avoids the problem
of having to remember where the file defining the trip is located. See on-line help topic UserSupplied Help 163 for how to set up User-Defined help.
5. In the mapping program connect it to GPS information for real-time position tracking by specifying
a port that is connected via a null modem to the GPS Pass Through port defined in step 3 above.
Consider using virtual serial ports to save two physical ports (see on-line help topic for details)
6. Use QPTools | Build Route From Crossings to import the county line crossing information. This
information will be used to calculate the distance and time to the next crossing and, if the AUTO
mode is not in use, the resulting sequence will be used to sequence through the counties.
During the contest
1. Send CQ (in CW mode using the key you assigned to the CQ message)
2. Enter call of responder and press Enter to send your exchange info
3. Enter received exchange information separated by spaces in any order, referring to the Check grid,
if desired, to insure proper interpretation
4. Press Enter to log the contact and send the CQT message. If the contact won't log refer to the
CQ/X de NO5W
Introduction and Quick Start Steps
11
Check grid to see what might be missing.
After the contest
1. Before finalizing the log it is a good idea to close and restart the program to ensure that all
changes are recorded correctly in the scoring.
2. Use File | Finalize Logs to convert the internal log (…\CQxClientLogView.log) to Cabrillo format.
Enter any soapbox comments including statistical results and then use the Browse button to
specify the file where the final log is to be kept.
3. If a separate summary sheet is required use QPTools | Prepare Summary Sheet and the Browse
button to specify the file where it is to be saved. It is good idea to create a separate directory in
which to save all results from each contest.
4. If desired, or required by the contest, use QPTools | Prepare County Logs to prepare individual
logs for each county.
5. Use File | Post to 3830 Reflector to connect to the site to file your 3830 report.
6. Of course, don't forget to also submit your log to the sponsor!
After after the contest
1. It would be greatly appreciated if you would provide feedback regarding your experience (good or
bad) using the program including any suggestions for improvements. Provide comments to
[email protected].
2. If you have developed a county crossing file for your trip consider sharing it with others for use in
future parties by submitting it to [email protected]. I will collect these files into a database
and add a feature to the program for accessing this data. Better still, if you know of a readily
available (i.e. free) source of county crossing information please share information regarding that
source.
3. If you are interested in using this program but find that your state QSO Party is not supported in the
version you are using, contact NO5W to see if that support is available in the latest version or to
find out how you can participate in the development of the necessary files to add that support.
Also refer to the "How to Contribute" item under Help.
1.7
Registration
In its current form, and probably for the foreseeable future, the program is being offered free so there
is no registration fee, and actually no requirement to let me know you have downloaded the program.
However, if you use the program please send a note to [email protected]. Doing so will allow
me to inform you of any updates, significant bugs, etc. I am also interested in your opinion (good or
bad) of the program, any problems you encounter in using it, and any suggestions you might have for
improving it.
As I hope you appreciate bringing the program to its current state of development represents a
significant number of man hours. However, it has been an enjoyable journey and one that I intend to
continue by supporting the program and continuing to improve it. I hope that your experience with the
program is a good one and that, if you are not already out and about in your state QSO party, use of
the program will encourage you to do so.
73/Chuck/NO5W
1.8
How To Contribute
Here are two ways you can contribute to the development of CQ/X, none of which involve transfer of
funds or programming.
All rights reserved by C.W. Sanders, NO5W
12
CQx Client: User Guide
County Polygon Performance Tests – If you have looked at some of the county polygon files or just
reviewed the size of some of them you have probably noted that some, notably those for counties
whose boundaries are defined by coast lines or rivers, can be quite large – the largest one noted so far
on casual observation is Monroe county in Florida which contains approximately 3300 vertices. I have
tested the performance of the program on a number of mostly landlocked counties in Texas with good
results but it would certainly be interesting and useful to have test results from other, more
complicated, counties. So, as you travel around your home state, take your GPS and laptop running
CQ/X along for the ride and observe the performance of the program in terms of accuracy of
determining each county and your ability to continue to enter QSO information while the program is
analyzing the county polygons. Send me your results including the counties tested and some
description of the computer used.
Problem Reporting and Suggestions for Enhanced Features -- I am always looking for ways to
improve the program, primarily by adding new features, but also sometimes by fixing bugs or improving
on an existing feature. Some of the best enhancements to the program have been initiated by users. If
you encounter any problems using the program be sure to contact me with a description of the
problem.
I will be glad to acknowledge any significant contributions along the above lines in the "about" screens
and/or help files associated with CQ/X.
2
Installation
Installation of CQ/XClient from the distribution CD is straightforward and can be performed using the
following steps:
1. Insert disk
2. Navigate to setup.exe
3. Run setup.exe
4. Answer Next Next ...and follow instructions
Beginning with version 1.2 a full set of files in their respective directories are included on the
distribution CD. Should it be necessary to reinstall a single file or two simply copy the file(s) from the
distribution CD to the corresponding directory on the target machine. As described in
Directory Structure 12 the relative directory structure must be maintained in order for the program to
work properly. There are no registry settings required by CQ/X.
2.1
Directory Structure
The root directory (CQxClient) may be located anywhere but the following subdirectories under
CQxClient and their subdirectories should be located as shown below. Some of the files in these
directories are Required Files 14 .
CQ/X de NO5W
Installation
13
CQXClient: This is the main directory. It contains the main exe file CQxClient.exe and several
supporting files, most of which are related to data required for initializing and restarting the application.
The internal log file (CQXClientLogView.log) resides in this directory.
ContestDefns: This subdirectory contains the following types of files
· DLL files: dynamic link library file required for each contest which contains processing specific to
that contest. Most QSO parties use the same DLL (TQP.DLL) with specifics for individual parties
contained in the *.def files that resides in the subdirectory for that party.
· Definition file - a text file of definition information required for each contest (e.g. OHQP.def which
would reside in OhioQSOParty subdirectory)
· Multiplier file - a text file of multiplier information required by contests. These files all have the
format of the well-known CTY.DAT file which is one of the files contained in this subdirectory. The
county information for each QSO party is contained in a similar (*.MLT) file that has been
augmented with information regarding county adjacencies, etc. The *.MLT file for the counties of
each QSO party reside in the subdirectory for that party.
· ConList.dat - a text file listing of each of the supported contests, and their DLL, and DEF files
· Polygon subdirectories - a separate directory for each party containing the polygons defining the
boundaries of each county of that state. (e.g. TXQP_Polygons contains the polygons for Texas
QSO Party)
Devices: This subdirectory contains the following types of files which are contained in subdirectories
for each device type.
· Device DLL files - dynamic link library file containing processing specific to that device
· Device Manuals - a PDF file of the User Manuals for each device, if available
· Device Images - an image file for each device, if available
Documents: This subdirectory contains various documents and presentations related to CQ/XClient
All rights reserved by C.W. Sanders, NO5W
14
CQx Client: User Guide
and CQ/XServer as well as the PDF version of this and other help files.
LogData: This subdirectory contains a DLL (LogData.dll) for performing duping functions and some
call sign data base files. It is also one of the locations where the user can create a subdirectory for
containing the logs of each contest.
Maps: This subdirectory and the subdirectories under it contain map information for each contest in
which mapping is important (i.e. the state QSO parties). These subdirectories are populated by the
user. It is recommended that all route-related files (map images, Streets and Trips route files, and
county crossing files) be placed in a separate subdirectory for each party.
2.2
Required Files
For information on the required directory structure see the Directory Structure
12
topic.
The following files should be considered mandatory and should not be modified or moved
1.
2.
3.
3
Root directory CQxClient - all files
Subdirectory ContestDefns - all files
Subdirectory Devices - all files in subdirectory DeviceDLLs
Configurations
There are a number of ways of configuring CQ/XClient to provide desired capabilities. This section
discusses a few of the alternatives including the following. The first configuration is the one envisioned
in the initial design of CQ/X and is the one most often used by the author.
· Mobile Operator with GPS and GPS Passthrough:
Single Mobile Operator with GPS and GPS Passthrough 14
· Single Operator Basic Configuration: Single Op: No Spots and No GPS 15
· Single Operator Basic Configuration with GPS but No Spots: Single Op With GPS: No Spots
· Single Operator Dual PC Configuration with GPS and Spots:
Single Op Dual PC With GPS and Spots 17
· Single Operator Single PC Configuration with GPS and Spots
· Single Operator Single Networked PC Configuration with GPS and Spots
· Multi-operator Networked Configurations with GPS and Spots
16
Note: The networked configurations require CQ/XServer and are not supported in the current version
but are planned for a future release.
3.1
Single Mobile Operator with GPS and GPS Passthrough
The following configuration would be useful for single op mobile CW operation with a GPS and a
mapping program for real-time position tracking.
Here it has been assumed that the PC has a single RS-232 port and a single USB port. The additional
RS-232 ports are realized using a USB to 4 RS-232 port expander. The DLLs that implement the serial
interfaces shown in this drawing will of course be specific to the chosen radio and keyer and will be
loaded by CQ/X when you set up the radio and keyer as described in Setting Up a Radio 28 and
Setting Up a Keyer 32 . In order to use all of the GPS capability of CQ/X it is necessary that the GPS
supports the $GPGAA and $GPRMC sentences of the standard NMEA-0183 protocol. The SioNMEA
DLL providing the GPS interface will be loaded by CQ/X when you set up the GPS as described in
CQ/X de NO5W
Configurations
Setting Up a GPS
34
15
.
There are a couple of modifications to this configuration that should be mentioned:
1. GPS Pass Through Connection - this connection can also be implemented using a virtual null
modem as described in the topic GPS Passthrough Via a Virtual Null Modem 141 .
2. USB Hub - The USB-4RS232 hub can be replaced with an interface box (The Navigaror) available
from US Interface that integrates the WinKey and CAT interfaces and provides an RS-232 port
which can be used for the GPS interface. All of this in a single RFI-protected box that also
contains a soundcard for recording QSOs and for using other digital modes. Power for the box is
obtained from the USB connection. For additional details see US Interface.
3.2
Single Op: No Spots and No GPS
The most basic configuration that includes CW capability is shown in the following diagram where it
has been assumed that the PC has a single RS-232 port and a single USB port. If the PC has only
USB ports then a second USB-RS232 adapter can be used. My best experience with these adapters
has been with the Keyspan devices but others may work as well.
All rights reserved by C.W. Sanders, NO5W
16
CQx Client: User Guide
In this example an Icom IC-706 radio and a WinKey keyer have been chosen. The DLLs shown in this
drawing will of course be specific to the chosen radio and keyer and will be loaded by CQ/X when you
set up the radio and keyer as described in Setting Up a Radio 28 and Setting Up a Keyer 32 .
3.3
Single Op With GPS: No Spots
The following configuration would be useful for single op mobile CW operation with a GPS.
Here it has been assumed that the PC has a single RS-232 port and two USB ports. The USB-RS232
adapter shown with the GPS may or may not be required depending on the particular GPS used as
some come with built-in USB capability.
In this example an Icom IC-706 radio and a WinKey keyer have been chosen. The DLLs shown in this
drawing will of course be specific to the chosen radio and keyer and will be loaded by CQ/X when you
set up the radio and keyer as described in Setting Up a Radio 28 and Setting Up a Keyer 32 . In order
to use all of the GPS capability of CQ/X it is necessary that the GPS supports the $GPGAA and
$GPRMC sentences of the standard NMEA-0183 protocol. The SioNMEA DLL providing the GPS
interface will be loaded by CQ/X when you set up the GPS as described in Setting Up a GPS 34 .
CQ/X de NO5W
Configurations
3.4
17
Single Op Dual PC Configuration With GPS and Spots
The following configuration would be useful for single op mobile CW operation with a GPS and with
access to a DXCluster node provided, for example, by a cell phone connection that supports internet
access.
Here, yet another RS-232 port is required on the CQ/XClient PC since it has been assumed that the
PC has a two RS-232 ports and two USB ports. The USB-RS232 adapter shown with the GPS may or
may not be required depending on the particular GPS used as some come with built-in USB capability.
The requirement for the second PC can be relaxed if yet another RS-232 port is available. This is
discussed in Single Op Single PC With GPS and Spots 18 .
In this example an Icom IC-706 radio and a WinKey keyer have been chosen. The DLLs shown in this
drawing will of course be specific to the chosen radio and keyer and will be loaded by CQ/X when you
set up the radio and keyer as described in Setting Up a Radio 28 and Setting Up a Keyer 32 . In order
to use all of the GPS capability of CQ/X it is necessary that the GPS supports the $GPGAA and
$GPRMC sentences of the standard NMEA-0183 protocol. The SioNMEA DLL providing the GPS
interface will be loaded by CQ/X when you set up the GPS as described in Setting Up a GPS 34 . The
SioSpots DLL providing support for receiving spots from the spotting PC will be loaded by CQ/X when
you set up the Spots as described in Setting Up a Spot Source 34 .
All rights reserved by C.W. Sanders, NO5W
18
3.5
CQx Client: User Guide
Single Op Single PC With GPS and Spots
The following configuration would be useful for single op mobile CW operation with a GPS and with
access to a DXCluster node provided, for example, by a cell phone connection that supports internet
access.
Here, yet another RS-232 port is required on the CQ/XClient PC but the need for another PC is
eliminated. This requires that the spotting application (ARUser or DXTelnet) run on the same PC as
CQ/XClient. In this case the PC must have three RS-232 ports and two USB ports. The USB-RS232
adapter shown with the GPS may or may not be required depending on the particular GPS used as
some come with built-in USB capability.
In this example an Icom IC-706 radio and a WinKey keyer have been chosen. The DLLs shown in this
drawing will of course be specific to the chosen radio and keyer and will be loaded by CQ/X when you
set up the radio and keyer as described in Setting Up a Radio 28 and Setting Up a Keyer 32 . In order
to use all of the GPS capability of CQ/X it is necessary that the GPS supports the $GPGAA and
$GPRMC sentences of the standard NMEA-0183 protocol. The SioNMEA DLL providing the GPS
interface will be loaded by CQ/X when you set up the GPS as described in Setting Up a GPS 34 . The
SioSpots DLL providing support for receiving spots from the spotting PC will be loaded by CQ/X when
you set up the Spots as described in Setting Up a Spot Source 34 .
3.6
Single Op Dual Networked PC Configuration With GPS and Spots
The requirement for three RS-232 ports on a single PC imposed by the
Single Op Single PC With GPS and Spots 18 configuration can be relaxed if a network and a second
PC is available. The diagram below shows how this could be done using the server application
CQ/XServer.
In this configuration the CQ/X Network Server has been introduced on the second (Server) PC. The
telnet application ARUser or DXTelnet receives the spots from the internet via the Router/hub and
CQ/X de NO5W
Configurations
19
passes these spots to the server application on the server PC via an RS-232 connection. The server
application in turn supplies these spots to the client over the ethernet network. Also, in order to balance
the requirements for ports and processing between the two PCs, the GPS has been moved to the
server PC. The server application passes the GPS information to the client via the ethernet network.
3.7
Adding a Station for Multi Operations
The configuration described in Single Op Dual PC Configuration With GPS and Spots 17 can be easily
extended to support a multi-op environment. All that is required is to add a module of the form shown
below to the network and to add any inter-station communication management capabilities to the
server application. See topic Setting Up a Networked Configuration 20 for a step-by-step procedure for
setting up a multi-op networked configuration.
All rights reserved by C.W. Sanders, NO5W
20
3.8
CQx Client: User Guide
Setting Up a Networked Configuration
Here are the steps for setting up CQ/X to operate in a networked configuration with spotting and a
GPS.
The following assumes that the hardware is configured as shown in the drawings accompanying topics
Single Op Dual Networked PC Configuration With GPS and Spots 18 and
Adding a Station for Multi Operations 19 . Other configurations are possible. The configuration shown
was developed to limit the number of RS-232 ports required on each machine to two (2). The USB-RS232 adapters that I have successfully tested with WinKey are the Keyspan devices.
1.
2.
3.
4.
5.
Set up the hardware as shown on the diagrams mentioned above.
Use ipconfig to determine the IP-address of the server machine
Check to make sure that all machines are set for UTC
Start CQ/X-Server on its machine
On CQ/X-Server use File | Operating Positions to set the number of operating positions
desired
6. Start the CQ/X-Clients in networked mode and use File | Network Access menu item to register
each client with CQ/X-Server assigning each to the desired position.
7. Start the Spot Front End -- either ARUser or DXTelnet may be used. Check the configuration for
communication on the appropriate port. 4800 baud is a recommended speed.
8. Use Communications | Serial Ports menu item on CQ/X-Server to set it up to receive spots over
the serial port. Baud rate should, of course, be the same as that set up in step 7.
9. Connect ARUser/DXTelnet to the desired node and check that spots begin flowing to CQx-Server
and CQx-Clients. Use the Spots menu on each client to filter the spots received by that client.
10. Check operator communications by sending a note or two.
11. For each station check that contest messages are set up properly for the desired contest.
CQ/X de NO5W
Configurations
21
12. For each station check that keyboard commands are set as desired
13. For each station check that the WinKeys are keying the radios
14. For each station check that the computer is tracking radio mode and frequency and that the radio
is responding to changes in mode and frequency entered on CQ/X-Client.
15. Check that the logs are initialized on each client.
If it is desired to add one or more other stations simply add a clients as shown in topic
Adding a Station for Multi Operations 19 and make sure to add the operating position to CQ/X-Server.
On these additional stations the USB-RS-232 converter can be avoided if two RS-232 ports are
available.
3.9
Multi-op Mobile CW-Capable Configuration Without Spotting
If access to the DX-Cluster is not available and it is desired to set up a multi-op CW-capable
configuration including a GPS then the configuration diagrams simplify in the following way:
On the server machine remove the null modem connection that supports the spotting link.
On the client station shown in Single Op Dual Networked PC Configuration With GPS and Spots 18
remove the ARUser/DXTelnet application and the RS-232 connection supporting the spotting link to
the CQ/X Server.
All client machines will have the form shown in Adding a Station for Multi Operations
3.10
19
Using the Server Module
There is a separate file of notes on how to setup and use the server module for networking CQ/X
Client. Access this file using the Networking item on the Help menu.
3.11
Single Mobile Setup at NO5W
This section provides information on the mobile setup in use at NO5W. The block diagram shows the
IC-7000 radio, the Winkey serial keyer, a Garmin GPS-18 PC and a Keyspan USB to 4 RS-232 port
expander all of which are located in the rear of the vehicle. The operating position in the passenger
seat consists of a lapdesk containing the remote head of the IC-7000, a Palm paddle, and a laptop
running CQ/X and Streets and Trips with a pair of virtual serial ports providing communication between
the two programs.
All rights reserved by C.W. Sanders, NO5W
22
CQx Client: User Guide
Here are some pictures showing the physical installation:
CQ/X de NO5W
Configurations
The Operating Position
All rights reserved by C.W. Sanders, NO5W
23
24
CQx Client: User Guide
The rear interface compartment
CQ/X de NO5W
Configurations
The GPS mounted on rear side window:
All rights reserved by C.W. Sanders, NO5W
25
26
CQx Client: User Guide
The radio mounting
CQ/X de NO5W
Configurations
The antenna mount
All rights reserved by C.W. Sanders, NO5W
27
28
CQx Client: User Guide
The HiQ-4/80 antenna
4
Setting Up Devices
4.1
Setting Up a Radio
If you wish to track the radio mode and frequency manually see Manual Radio Tracking
follow the steps below to set up for automatic tracking.
31
. Otherwise
After connecting the radio to the desired serial port perform the following steps to register the radio with
CQ/X.
1.
2.
3.
4.
5.
6.
7.
8.
Use the Radios | Connect/Disconnect menu item to open the device connection dialog
Select the com port to which the radio is connected.
Select the radio reference label (Left Radio, Right Radio)
Select the radio type (K3, FT-1000MP, IC-706MKIIG, etc)
Select the desired RTS/DTS option. The value shown as (Def) is the default value and is
recommended.
Select the baud rate to be used. Consult the user's manual if necessary and if the radio has
selectable baud rates be sure to select that baud rate on both the radio and this Device
Connection dialog.
Press the Connect button and note the connection status in the status window.
The About button can be used to view additional information about the radio including
· Access to the vendor web site
· User manual
CQ/X de NO5W
Setting Up Devices
29
· Date/Version of the CQ/X DLL file used to interface to the radio - this will be useful in case it
is necessary to report problems regarding the radio interface.
Note that when you close the application you will be asked whether you want to save the port
assignments. If you answered Yes to that question a restart of the program and reconnection of the
devices can be done by simply clicking the Restore-Connect-Close button which will do the
connection of each device to its previously assigned port and upon completion will close the dialog.
On the other hand if you answered Yes to saving the port assignments when you closed the program,
on restarting the program you can use the Restore from Previous Session button to restore the
connection information stopping short of actually connecting. Connection can then be done either using
the Connect All button or the individual Connect button associated with each device.
All rights reserved by C.W. Sanders, NO5W
30
4.2
CQx Client: User Guide
Setting Radio Parameters
Menu item Radio | Set Parameters is used to set the operating limits of each band-mode combination.
These operating limits are used when it is desired to make an entry (F=L or F=H) on the QSO Entry
Panel (see QSO Entry Box 145 and Special Keystroke Combinations 156 ) to move to the lower or upper
operating limit for the current band-mode respectively. The upper and lower operating limits are set via
the following dialog:
CQ/X de NO5W
Setting Up Devices
31
After the desired changes are made click on Apply to save the changes. These band limits are saved
across a restart of the program.
4.3
Manual Radio Tracking
If, for whatever reason, you do not wish to and/or can not use the automatic tracking of radio
information as described in Setting Up a Radio 28 you can manually maintain radio information for use
in logging. To do this check the menu item Radios | Track Left (Right) Radio Manually and perform
the following steps:
1.
2.
Right click the Mode panel for the desired radio and select the desired mode from the popup.
Select the Frequency input area for the desired radio and enter the desired frequency (in Hz) using
the format xx.xxx.xxx followed by the Enter key.
You can also change frequency by entering F=14030000 in the QSO Entry Box 145 and pressing the
Enter button.
You can also change modes by entering M=CW, M=USB, M=LSB in the QSO Entry Box 145 and
pressing the Enter button
Note: These are the same steps that are used to enter frequency and mode under automatic
operation.
All rights reserved by C.W. Sanders, NO5W
32
4.4
CQx Client: User Guide
Radio Interface Health Check
The interface with the logging radio contains communication timeout logic to detect loss of
communication with the radio. This runs on a 30 second cycle and alerts the user if there has been
more than 45 seconds since the last communication with the radio. The purpose of this feature is to
remind the user to re-establish the radio connection following the radio being powered off, for example
during a gas stop. The warning message box contains a button for accessing the dialog for reestablishing communication. After accessing this dialog simply press the Disconnect button and then
the Connect button to restart the interface.
4.5
Setting Up a Keyer
Setting up a keyer is similar to Setting Up a Radio
28
.
After connecting the keyer to the desired serial port perform the following steps to register the keyer
with CQ/X.
1. Use the Keyers | Connect/Disconnect menu item to open the device connection dialog
2. Select the com port to which the keyer is connected.
3. Select the keyer reference label (Left Keyer, Right Keyer)
4. Select the keyer type (MiLog, WinKey, etc)
5. Select the baud rate to be used consulting the user's manual if necessary.
6. Press the Connect button and note connection status in the status window.
7. The About button can be used to view additional information about the keyer including
· Access to the vendor web site
· User manual
· Date/Version of the CQ/X DLL file used to interface to the keyer - - this will be especially useful in
case it is necessary to report problems regarding the keyer interface.
4.6
Setting Keyer Parameters
Menu item Keyer | Set Parameters is used to set the speed limits and other parameters associated
with the keyer using the dialog shown below. After the desired changes are made click on Apply to
save the changes. All of these parameters are saved across a restart of the program.
CQ/X de NO5W
Setting Up Devices
33
Speed Limits: These limits are used when it is desired to make an entry (K=L or K=H) on the QSO
Entry Panel (see QSO Entry Box 145 and Special Keystroke Combinations 156 ) to move to the minimum
or maximum speed respectively.
Speed Increments: The speed increment value is used with the function keys assigned to increment
or decrement the keying speed.
Weight Parameters: Use these to change the weighting of the keying.
All rights reserved by C.W. Sanders, NO5W
34
CQx Client: User Guide
Send Call While Entering Character Count: Set this parameter to determine the number of
characters required to trigger sending of a call as it is being entered if that option is selected.
Auto CQ: Use these parameters to enable Auto CQ, to set the delay time in seconds between each
CQ and to select whether to have the Auto CQ automatically resume following logging of a QSO and,
in the case of mobile operation, across a county change. In the case of resumption after a QSO the
normal CQT message will be sent and then will be following by the repeating CQ. In the case of
resumption following a county change any new county announcement will be sent and then followed by
the repeating CQ. In all cases Auto CQ will terminate after ten (10) CQs have been sent and will then
restart on the next keyboard event that initiates a CQ -- function, return, shift+spacebar.
Converse: A very rudimentary converse capability is provided.
4.7
Setting Up a GPS
Setting up a GPS is similar to Setting Up a Radio
28
.
After connecting the GPS to the desired serial port perform the following steps to register the GPS with
CQ/X.
1.
2.
3.
4.
5.
6.
7.
8.
9.
With the GPS OFF turn on the laptop -- see note below.
Use the GPS | Connect/Disconnect menu item to open the device connection dialog
Select the com port to which the GPS is connected.
Select the device type GPS
Select the GPS type (NMEA 0183, Garmin)
Select the baud rate (4800) to be used.
Press the Connect button and note the connection status in the status window.
At this point the GPS may be turned ON
The About button can be used to view additional information about the GPS including
· Access to the vendor web site
· User manual
· Date/Version of the CQ/X DLL file used to interface to the GPS - this will be especially useful in
case it is necessary to report problems regarding the GPS interface.
10. After closing the device connection dialog you should observe the GPS status information begin
updating on the GPS Status Panel 115 once the GPS has acquired the satellites. Be sure to set
your GPS to output in the NMEA 0183 format as this is the only protocol supported at this time.
Speed is obtained from the GPRMC output sentence and all of the rest of the information is
obtained from the GPGAA output sentence.
Note:
It has been observed that it is important to make sure that the GPS is turned OFF prior to turning on
the laptop and registering the GPS with an application. If the GPS is ON when the laptop is powered
up, signals on the serial port from the GPS may appear to be an external mouse connection. This will
make control of the mouse cursor extremely difficult, if not impossible, and will probably make it
impossible to gain control of the serial port from the laptop.
4.8
Setting Up a Spot Source
The program is capable of receiving spots via a serial connection to any program that can supply spots
in the standard format over a serial connection. Two such programs are DXTelnet and ARUser. These
can be running on either the same machine as the one hosting CQ/X or on a different machine. Of
course the configuration wherein the spot source is running on the same machine as CQ/X will require
two additional ports or a virtual pair forming a virtual null modem. On the other hand, the configuration
in which the spot source is running on a separate machine will require only one additional port on the
CQ/X machine but will require an additional PC. See additional discussion on these considerations in
CQ/X de NO5W
Setting Up Devices
the sections Single Op
15
, Multi Op
19
, and Networked Configurations
20
35
.
The following addresses only the receiving end of the Spot Source-Spot Receiver connection. Setting
up a Spot source is similar to Setting Up a Radio 28 .
After connecting the Spot Source to the desired serial port perform the following steps to register the
Spot Source with CQ/X.
1.
2.
3.
4.
5.
6.
7.
8.
9.
Use the Spots | Connect/Disconnect menu item to open the device connection dialog
Select the com port to which the Spots Source is connected.
Select the device type Spots
Select the Spots type (DxTelnet, ARUser)
Select the baud rate to be used.
Press the Connect button and note the connection status in the status window.
The About button can be used to view additional information about the Spot Source including
· Access to the vendor web site
· User manual
· Date/Version of the CQ/X DLL file used to interface to the Spot Source
After closing the device connection dialog you should observe the Spot information begin
updating.
The spots can be further configured using the menu item Spots | Filtering.
Note: In order to receive spots it is important that the PC be set to UTC. Otherwise CQ/X may think the
spots are too old for presentation.
You can also add items to the bandmap as you tune across the band. To do this enter a call in the
QSO Entry window associated with the radio and click on the spot button or press the key you have
assigned to the "Add Call to Bandmap" task.
4.9
More for Radio Devices
Display and/or control of additional features of a radio are available by selecting the appropriate Left
and/or Right More buttons and then selecting Radio from the resulting pop-up menu. The first time this
action is performed in a session the following dialog will be called up to allow the user to select display
options and to define frequency presets, if desired.
All rights reserved by C.W. Sanders, NO5W
36
CQx Client: User Guide
VFO Display Options - allows you to specify either or both of the VFOs for display and, if both are
selected, they can be shown in either a horizontal or vertical format.
Frequency Presets - this section allows you to define a set of frequencies (in KHz) which will be
available on the control panel associated with each VFO and will allow for rapid selection of
frequencies. Presets may be added to the list manually or may be loaded from a file.
If the "Do not show ..." checkbox is checked this panel of options will not appear on subsequent uses
of the More | Radio button until the radio is disconnected and connected again.
Closing this dialog will result in the following non-modal dialog for controlling frequency, mode, and
other features of the radio. In the dialog below both VFOs have been chosen to be displayed in a
vertical arrangement.
CQ/X de NO5W
Setting Up Devices
37
Active VFO - In this example the radio button corresponding to VFOA has been selected making
VFOA the active VFO. Any changes in the frequency or mode of the radio will be reflected on VFOA.
Likewise any changes to the mode and/or frequency of the VFOA elements of this dialog will cause the
data to be written to the radio. Any changes to the inactive VFO will not be written to the radio and any
changes in the radio will not be reflected in the inactive VFO.
Transferring VFO Data - Data may be transferred/exchanged between the two VFOs and between
each VFO and memory as follows
The left most button transfers the mode and frequency of VFOA to VFOB.
The next button causes the mode and frequency of the two VFOs to be exchanged.
The next button transfers the mode and frequency of VFOB into VFOA.
The next button transfers the mode and frequency of VFOA into memory. Loading of the memories
can be performed either manually by inputting various frequencies and modes by hand and then
pressing this button. Alternatively select various modes and frequencies on the radio and then, using
the active VFO, write the data to memory.
· The right most button causes a list of previously stored memory locations to be displayed from which
a given element can be selected and written to the VFO. Use the cursor keys or the mouse to select
the desired memory data and then perform any of the following to cause the transfer from memory to
the VFO to take place: Press Enter, or Double click, or Press the lower left hand button.
·
·
·
·
All rights reserved by C.W. Sanders, NO5W
38
CQx Client: User Guide
VFO memories are saved across a restart of the program so that, once set up, it will not be necessary
to manually reestablish these memories.
4.10
More for WinKey
All of the parameters of the WinKey can be configured by selecting the appropriate Left and/or Right
More buttons and then selecting Keyer from the resulting pop-up menu. This will call up the following
dialog on which the keyer parameters for WinKey may be set. A description of these parameters
follows. Further details can be found in the WinKey documentation provided by K1EL at the
WinKey Homepage:
CQ/X de NO5W
Setting Up Devices
39
Keyer Modes - Iambic A, iambic B, Ultimatic, and Bug keying modes are supported by the WinKey
keyer. In iambic mode the keyer makes the dits and dahs automatically based on the paddle pressed.
In Bug mode the keyer makes the dits and the user makes the dahs. In either iambic mode alternating
dits and dahs are sent if both paddles are held closed. In mode B an extra alternate dit or dah is sent
after both paddles are released. In Ultimatic mode when both padles are pressed the keyer will send a
continuous stream of whichever paddle was last pressed. If you wish to use another keyer (e.g. Logic
Keyer) for the paddle then connect the output of that keyer to the paddle input of the WinKey and set
the WinKey for bug operation.
All rights reserved by C.W. Sanders, NO5W
40
CQx Client: User Guide
Options | Swap Paddles - If this box is checked then the right and left paddles will be swapped from
normal wherein the left paddle is the dit paddle and the right paddle is the dah paddle.
Options | Auto Space - If you pause for more than one dit time between a dit or dah WinKey will
interpret this as a letter-space and will not send the next dit or dah until full letter-space time has
elapsed.
Options | Contest Spacing - When Contest Spacing is selected WinKey reduces the wordspace time
by one dit. Instead of 7 dits per wordspace, contest spacing uses six dits per wordspace.
Options | Paddle Watchdog - When this option is enabled the keyer will be disabled after 128
consecutive dits or dahs to guard against either of the paddles being accidentally held continuously
closed.
Options | Paddle Echo - When this option is selected each character keyed using the paddle will be
echoed back to the host PC after the character has been completely sent.
Options | Serial Echo - When this option is selected each character keyed by the WinKey will be
echoed back to the host PC after the character has been completely sent.
Options | Paddle Only Sidetone - When this option is selected the side tone for machine generated
CW will be silenced and only the paddle generated CW will have a side tone.
Options | No Sidetone - When this option is selected neither machine generated CW or paddle
generated CW will cause a side tone.
Custom Settings | Weight - A proportional amount is either added or subtracted from the length of all
dits and dahs. Keying speed is unaffected since any increase in key down time is subtracted from key
up time.
Custom Settings | PTT Lead-in - The PTT output of Winkey can be used to switch a transmitter or
amplifier over to transmit mode in advance of (prior to) keying. The PTT Lead-in setting controls the
amount of time between switching to transmit mode and start of the actual keying.
Custom Settings | PTT Tail - This setting controls how long the transmitter or amplifier being
controlled by the PTT signal will remain in the transmit mode after keying has stopped.
Custom Settings | Farnsworth Speed - When the speed setting of the Winkey is below the
Farnsworth speed characters are sent at the Farnsworth speed and the inter-character space is
adjusted to obtain the desired keying speed in WPM. When the speed setting of the Winkey is above
the Farnsworth speed Farnsworth keying is disabled.
Custom Settings | Dah Dit Ratio - Changing this setting changes the ratio of dah key down time to dit
key down time away from its normal 3:1 value.
Custom Settings | Compensation (msec) - Keying compensation allows a fixed amount of key down
time to be added to all dits and dahs to compensate for shortening of the dit and dah elements
produced when some transceivers are operated in QSK mode. Key compensation is similar to
weighting but differs from weighting in that the time added under compensation is independent of the
keying speed.
Custom Settings | First Extension (msec) - The first extension setting adds a specified amount of
time to the first element in a keying sequence to offset the shortening of the first element due to slow
break-in response of some radios.
Custom Settings | Paddle Switchpoint - This setting controls the time delay between when sensing
of the next paddle press enabled following sensing of the current press. If this setting is too small
CQ/X de NO5W
Setting Up Devices
41
unwanted dits or dahs will be sent. If the setting is too large the paddle keying will feel sluggish since
you will not be able to get ahead of the keyer.
Custom Settings | Sidetone Frequency - In addition to the CW keying output Winkey provides a
auxiliary output that may be selected to be the PTT control, sidetone, or the keying line. When sidetone
is selected as the auxiliary output the frequency of the tone may be changed using this custom setting.
Pin 5 Configuration - These buttons allow the user to specify the role of the auxiliary output: PTT,
sidetone, keying.
Set Speed Pot - Select a minimum speed (Min) and a maximum speed (Max) range for the speed pot
and then click on the Set Pot button to setup the speed pot. Default values for Min and Max are 10 and
40 respectively. After closing the dialog you can choose to control speed using the pot by either
selecting it in the drop down box or by typing K=0 in the QSO Entry Box 145 followed by pressing the
Enter key. Selecting another speed in the drop down will disable the Speed Pot and will set the keying
speed to the value in the drop down. Note that if you are using an early (non USB) version of the
WinKey you will need to specify the Pot Range of either Half or Full depending on the configuration in
which your speed pot connected to the WinKey. Click on the Note button for details. Probably the
simplest approach is just trial and error to see which of the two works.
Speed (wpm) - This group of controls allows you to adjust the speed of the keyer in words per minute
using the slider. The speed setting is read out in the box in the middle of the slider. The range of
adjustment may be changed using the dials on the left and right to adjust the minimum and maximum
speeds respectively. Note that if the speed is set below the Farnsworth speed characters will be sent
with inter element spacing corresponding to the Farnsworth speed. If the speed is set above the
Farnsworth speed Farnsworth keying is disabled. The speed setting may be tested by pressing the
Test Speed Change button to send the test message at the specified speed.
Test message - Enter a message in this box and then press start to test the capabiliity to start, stop,
pause, and resume the keyer. If looping is enabled the message will continue to loop until looping is
disabled. Serial echo and/or Paddle echo of the sent message can also be observed if either or both of
these options have been enabled.
Tune (sec) - Pressing of the Tune button will key the transmitter for the specified number of seconds.
4.11
More for Elecraft K3
The Elecraft K3 has an extensive instruction set for PC control of essentially all aspects of the radio.
For this reason the More function for the K3 is essentially a complete control program for the radio and
works somewhat differently from the More function for the other radios. Clicking on the More button
calls up the following display.
The basic platform for the user interface is a high resolution image scanned from the front of the K3
User Manual. For the most part the interface works in exactly the same way as the real front panel of
the radio, the main exceptions being cases where there is more/less capability on the PC vs the
capability of the actual K3 hardware. You can also see that some items (SWR, Config, Info, and
various data entry/readout items) have been added. Here are some of the features.
All rights reserved by C.W. Sanders, NO5W
42
CQx Client: User Guide
Button Controls: Each of the buttons performs the indicated function and the Tap/Hold feature is
implemented with configurable hold time. In addition, the left/right mouse buttons can be used
respectively for Tap/Hold.
Frequency Entry: Clicking on the Freq Ent button opens an edit window on the VFOA part of the
"LCD" display from which a frequency can be typed in.
Frequency Tuning: Frequency tuning is currently performed with the cursor and page up/down keys.
The tuning increment for the cursor keys is set using the radio buttons shown on the main tuning knob.
The tuning increment for the page keys, which is intended for larger frequency changes including band
changes, is set on the config page described below.
Rotary Controls: Rotary controls including AF Gain, Sub AF Gain, RF Gain, Sub RF Gain, Speed,
PWR, etc are controlled using the cursor keys with the value read out in the small window shown on
the control. Since some of these controls are more frequently used than others it may be desirable to
access them using the Tab key rather than moving the mouse. Controls to include as tab stops and the
tab order are specified in the Config dialog below.
LCD Display: This display shows essentially the same information, including transitory status info, as
on the radio with the following current exceptions: S-meter readout is in text form, Bandwidth
information is also in text form. There is a separate "LCD panel" for a graphical S-meter that is
accessed using the small yellow circle near the LCD display.
CQ/X de NO5W
Setting Up Devices
43
There are actually several layers of the LCD display including the following LCD Menu layer:
This LCD Menu layer is activated from the Menu button and allows choosing menu items from various
categories and modifying those menu items. Clicking on the small question mark button brings up the
user manual documentation for that menu item in a small window as shown here.
The following LCD layer which shows installed options and firmware revisions, is accessed by clicking
on the Info button.
Clicking on the Power button will power down the radio but to make sure that this is the desired action
the following "do you really want to do this" LCD layer is presented.
SWR Button: A small SWR button, placed near the RIT/XIT area, is used to check the SWR at the
All rights reserved by C.W. Sanders, NO5W
44
CQx Client: User Guide
antenna. Clicking on this button will put the antenna tuner into bypass mode, reduce power to a
specified level, activate the tune button for a specified number of seconds, display the SWR on the
button face, and then deactivate the tune button returning the power level and antenna tuner to their
previous states. The power level and number of seconds associated with the SWR check are set in the
Configuration Dialog below.
Configuration Button/Dialog: A small Config button, placed near the RIT/XIT area is used to access
the Config Dialog below for setting parameters associated with the remote kit including:
Hold time for discriminating between Tap and Hold presses of the buttons,
Frequency increment for the page up/down keys,
Tab stops and Tab Order for the rotary controls,
Preferred power settings enabling the power output to be automatically modified when either an
antenna change or a mode change occurs,
· Quick-memory parameters, and
· Options for forcing the paddle speed of the K3 to track the speed being set by an external WinKey,
and
· Another option for forcing the CW Tune feature to always be on when in the CW mode.
·
·
·
·
Of course independent paddle and external keyer speeds are possible only if the paddle is plugged
directly into the K3 instead of into the external keyer.
CQ/X de NO5W
Setting Up Devices
45
Quick Memory Dialog: After the Quick Memories have been configured using the above dialog,
clicking on the M->V button calls up the following dialog for choosing the memory. As shown in the
screen shot below those quick memories that have been configured are highlighted. Hovering over
each of them gives information on the associated quick memory. Clicking on the desired quick memory
writes that information into the radio.
All rights reserved by C.W. Sanders, NO5W
46
4.12
CQx Client: User Guide
Small Control Interface for Elecraft K3
The full interface described in More for Elecraft K3 41 allows almost complete control and monitoring
of the K3 but takes up a lot of screen real estate so the dialog below is provided as an alternate means
of controlling and monitoring often used K3 parameters.
Full button: The button labeled Full in the lower right hand corner is provided to facilitate access to the
interface described in More for Elecraft K3 41 . There is a similar button on the full interface that
provides quick access to the small interface.
SWR button: Click on this button to measure the SWR of the antenna at the current VFO-A frequency
with the K3 antenna tuner removed from the path. The SWR will be displayed in the window normally
reserved for the clock and when tuning is complete the clock window will revert to showing the selected
time.
CQ/X de NO5W
Setting Up Devices
47
Clock buttons: Use these radio buttons to select whether to show normal (UTC) time or the time
remaining in the session. In order for the session time to be correct it must be set up in the main user
interface.
Entry-less controls: Controls labeled PRE, ATT, NB, NR, AGC, M1, M2, M3, M4, Up, Dn, A<->B, A>B and CLR do not require entry of a value and are straightforward since they perform the same
actions as on the full interface. Up(Dn) moves the band up(down) and A<->B exchanges VFOs A and
B. For the on/off controls red indicates OFF and green indicates ON. For AGC there are three states:
OFF (red), Slow (yellow), and Fast (green) and the button sequences between those states.
Entry controls: The remaining controls A->, B->, RIT, AFG, RFG, XFIL, and SPD (speed) require
entry of a numerical value. To save space a single shared slider is provided for inputting the values for
each of these. Each control in this set consists of a button for assigning the slider to the control and an
edit window in which to display the value of the control. The cursor left and right keys can be used with
the slider to make small incremental changes if it is not desired to use the mouse. Page up and down
keys may be used with the slider to make larger incremental changes. Each control has page and
cursor key increments appropriate to the quantity being adjusted.
For example to set the audio gain click on the AFG button. The window just to the right of the AFG
button will turn yellow, the buttons on each end of the slider will indicate the minimum and maximum
values available for AFG, the slider will be positioned to the current value of AFG, and AFG inputs from
the radio will be inhibited from being displayed on the dialog. Once adjustment has been completed
click on the Release button to release the slider from its current assignment and to remove the inhibit
flag from AFG so that any changes on the radio will again be reflected on the dialog.
You can use the display windows associated with each of these controls to input values. Placing the
cursor in the window will cause the window to change to yellow and will inhibit data from the radio from
updating the control. After typing the desired value press the Enter key to input the value.
Another approach, which avoids use of the mouse is to press the function key assigned to the control,
then use the cursor left/right arrow keys to decrease/increase the value, and then press the function
key again to terminate the adjustment process for that parameter.
Still another approach exists if a Shuttle Pro 2 is available and has been configured. This is covered in
Using the Shuttle Pro 2 with the Elecraft K3 47
4.13
Using the Shuttle Pro 2 with the Elecraft K3
The function keys F1-F12 and the combination SHF+F7 assigned to specific tasks on the K3 Control
Subset interface enable use of a Contour Shuttle Pro 2 device, shown below, for controlling the
functions of the interface. In effect the Shuttle Pro 2 provides a configurable multi-purpose tuning knob
for the K3.
All rights reserved by C.W. Sanders, NO5W
48
CQx Client: User Guide
During configuration of the Shuttle Pro 2 using the Contour-provided dialog below the user assigns
keystrokes or macros consisting of several keystrokes to each of the fifteen keys on the device. The
device keys can function as single or multiple presses of the assigned key.
CQ/X de NO5W
Setting Up Devices
49
For the K3 Control Subset a separate function key F1-F12 should be assigned to each device key and
the wheel right (left) should be assigned to the right (left) arrow keys. It is also useful to define two
macros: a macro to run the SHF+F7 combination, and a macro to run the ALT+Tab combination. In my
application of the Shuttle Pro 2 I make the following assignments
·
·
·
·
F1 is assigned to the Shuttle Pro 2 key in the leftmost position of the top row
F2 is assigned to the key in the next position of the top row
F3 is assigned to the key in the next position of the top row
F4 is assigned to the rightmost key in the top row
· F5-F9 are assigned in order to the next row of keys
· F10-F11 are assigned to the first keys beneath the wheel
· F12 is assigned to the leftmost key in the bottom row of keys
· ALT+Tab is assigned to the black key to the left of the wheel
· SHF+F7 is assigned to the black key to the right of the wheel
So here's how it works assuming that the QSO Entry screen of CQ/X has the focus and that the K3
Control Subset is also present.
1.
2.
Press the black key to the left of the wheel to move the focus to the K3 Control Subset
If it is desired to adjust the AFG press the left most key on the top row of the Shuttle Pro 2 (the key
assigned to F1)
All rights reserved by C.W. Sanders, NO5W
50
CQx Client: User Guide
3.
4.
5.
5
Turn the wheel left to decrease the AFG and right to increase it
Press the left most key on the top row of the Shuttle Pro 2, the key assigned to F1, to terminate
the adjustment of AFG
Press the black key to the left of the wheel to move the focus back to the QSO Entry screen or
press another key on the Shuttle Pro 2 to adjust another parameter.
Messages and Function Key Assignments
This section discusses how to define messages and how to assign function keys to those messages. It
also describes certain Embedded Message Symbols 52 that are used to reference certain QSO
information that will replace the embedded symbol when a QSO is being made.
5.1
Setting Up Messages
Each contest will require a potentially unique set of messages and it is up to the user to define these
messages in the message template. To do this use any of the menu items Keyer | Edit Message
Template, Keyer | Load Message Template From, or Keyer | Load Default Messages to load the
following dialog for editing the messages. The default messages provided are specific to the selected
contest and type of operation (internal mobile, internal fixed, external) but will need to be changed to
include your specific information (name, call sign, etc) as required by the contest. Any of the above
menu items will cause the following dialog to appear for changing the messages.
CQ/X de NO5W
Messages and Function Key Assignments
51
Enter the desired message content and Embedded Message Symbols 52 in each of the message edit
windows. This dialog also shows the key or function key that will cause the message to be sent. The
function key assignments may be modified using the menu item Keyer | Assign Function Keys as
described in Assigning Function Keys 60 .
When you have completed the message definitions you can save and apply the messages in the
message template using the Update Template button. The message definitions will remain, across a
restart of the program, as defined in the message template until you again modify the message
template using the menu item Keyer | Edit Message Template. Following the Update operation the
current messages are displayed on the Messages page in the upper right hand area of the main
display. You can also save the current message template in a file for later use across changes in
All rights reserved by C.W. Sanders, NO5W
52
CQx Client: User Guide
contests. This is done using the menu item Keyer | Save Message Template As or the Save As
button on the above dialog. This will allow you to define and save message definitions for various
contests and then you can use the menu item Keyer | Load Message Template From to restore the
message template. If you do not explicitly save the message template following an edit session the
template will be saved automatically when you exit the message editing area but will not be applied.
If you have inserted county symbols (# and/or !) representing the current and next counties in the
mesage template these symbols must be resolved in the actual message area prior to making a QSO.
If there are unresolved county symbols present in the message template when it is saved, the
Message Resolution Dialog 151 will be activated to request resolution and to provide access to several
methods of resolution.
A typical basic set of message definitions and their associated function keys are shown above for
operating as a mobile in the Texas QSO Party.Note that the user has assigned messages CQ, CQX,
CQT the function keys F1, F2, and F3 respectively. Using these function keys a run QSO could
proceed in the following way after resolving the county symbols.
1.
2.
3.
4.
Press F1 to send CQ
On receipt of a responder's call sign enter it on the QSO Entry Box 145 and press F2 or Enter
If the responder requests a repeat press F2
On receipt of the responder's exchange information enter it on the QSO Entry Box 145 and press
F3 or Enter to send the thank you message, log the contact, and request the next caller.
For a description of the role and use of the CQN message see the discussion in
Handling a Second Caller 66 .
The keys shown with messages QS0-QS2 are dedicated to those messages and are intended for
alternate CQT confirmation/QSL messages at the end of the QSO. They each result in sending their
associated message and logging the QSO. It is important to note that in order to enable them it is
necessary to enable the NA Emulator (see Assigning Function Keys 60 ).
The assigned function keys respond by sending their associated message regardless of the state of
the QSO. On the other hand the Enter key is sensitive to the current state of the QSO and will send a
message based on that state.You could also set up a function key for each of the components of the
exchange and in that case step 3 above could be replaced by pressing the function key associated with
the requested item. See also Making a QSO Entry 65 . In general when running stations it is easiest to
simply enter the information and press Enter allowing the Enter key to carry you to the next state and
then, if a fill or repeat is requested by the responder, an appropriately defined function key is used to
provide that fill.
The County-State Separator is used when it is desired to include full county names including the state
in messages and it is desired to separate the county and state with some spaces, or a comma, etc.
This is used primarily in the Cross-Country County Hunter Net operations as described in CrossCountry CHN Operation 85 .
5.2
Embedded Message Symbols
The following symbols have special meaning when embedded in messages.
· The @ symbol refers to the call sign currently in the QSO Entry Box 145 for the Logging Radio and
applies to all contests.
· The # symbol is used to refer to the current county in the message template for mobile operation in
state QSO parties. When the mobile route is started the # symbol in the message template is
replaced by the abbreviation of the first county and then subsequent county abbreviations replace
CQ/X de NO5W
Messages and Function Key Assignments
53
the current county when the Next County menu item is executed.
· The ! symbol is used to refer to the next county in state QSO parties. When the mobile route is
started the ! symbol in the message template is replaced by the abbreviation of the second county
and then subsequent county abbreviations replace the next county when the Next County menu item
is executed.
· The ^ symbol is used to refer to the current QSO number in contests requiring that information in the
exchange
· The ~ symbol is used in the Next Way Point message (NWP) to refer to the minutes to go to reach
the next waypoint
Using the Edit Messages Dialog described in Setting Up Messages 50 you can either type these
symbols directly into the appropriate message array or you can right click in the desired message box
and select the symbol from the resulting pop-up menu.
The county symbols (# and !) are resolved to a specific value when either of the following are true:
· A route plan has been defined and a starting county has been specified - see
Planning Route for Non-Use of GPS 85
· A GPS is in use and the GPS Advisory Mode is AUTOmatic - see GPS Advisory Modes 126
Attempts to send the messages CQ, CQX, SP, SPX while there are unresolved county symbols
present in the messages will result in an error message of the form "Messages have unresolved county
symbols # and/or ! - Please correct". This error is corrected by any of the following
1.
2.
3.
Selecting the current county by double-clicking on the desired county in the
Route Planning Dialog 87
Setting the GPS Advisory mode to AUTOmatic in which case the GPS will set the current county
and will obtain the next county from the route plan.
Typing a # in the QSO Entry window and selecting the county from the drop downs
One could also manually resolve the error by editing the message template and replacing the # and !
by the abbreviation of the current and next counties but this is not recommended since it defeats the
automatic message management features of the program.
5.3
Required Messages
The following messages must be defined and must be consistent regardless of whether operation will
be CW or Phone. These messages must be defined since the information they contain will be used to
determine part of the information to be logged.
CQ - This is the message sent to solicit a QSO in Run mode. The call sign contained in this message
is used in constructing the log.
CQX - This is the message sent as the exchange when a Run mode QSO is made. This message is
parsed for the information required by the log.
CQT - This is the message sent at the end of a Run mode QSO to thank the responding station and to
solicit the next QSO. Ending the QSO with the Enter key will cause the CQT message to be sent.
QRZ - This message is required if you want to end a Run mode QSO with a message different from
the normal CQT message while retaining the option to use the CQT message for this purpose. Ending
the message with the Ctrl+Enter key combination rather than the simple Enter key will cause the QSO
to be logged and the QRZ message to be sent. Use of the QRZ in combination with CQT can also be
All rights reserved by C.W. Sanders, NO5W
54
CQx Client: User Guide
auto-scheduled as explained in Auto-scheduling QSO Ending Messages
67
.
CQN - This message is required if you want to be able to handle two callers back to back as described
in the topic Handling a Second Caller 66 . This message should have the combined format of a CQT
and CQX message. Something of the form "TU NOW @ 5NN #"
SP - This is the message used to request a QSO in the Search and Pounce mode. Usually it will be
simply the call sign of the requesting station but can be of any form desired by the user.
SPX - This is the message sent as the exchange when an S&P QSO is being made.
All other messages are optional. However, if you plan to operate CW, it is highly recommended that the
Query Messages 152 associated with the QSO entry items be defined.
5.4
Associating Messages with QSO Entry Items
Query Messages
The messages labeled Q1, Q2, Q3, Q4, Q5 are special query messages used to query the responding
station to request fills of missing items. The left-most column of the QSO Entry Check Grid 145 is
associated with query message Q1, the next item to the right is associated with query message Q2,
and so on. As long as there is missing information on the row of the QSO Entry Check Grid 145
corresponding to the logging radio, logging of the QSO will not take place. When operating CW and
attempting to log an incomplete QSO (by pressing Enter) the query message associated with the leftmost missing item will be sent.
Query messages can also be controlled by function keys if function keys have been assigned to them.
5.5
Available Function Key Commands
Although each of the following tasks may be performed with the mouse either through menu selection
or selection of page tabs, to avoid use of the mouse it is useful to assign some of them to function keys
depending on the operating style/requirements of the user and the particular contest.
The following tasks can be assigned to the function keys using the steps described in
Assigning Function Keys 60 .
· Access Band Map Page - Pressing the function key assigned to this task causes the page
containing the Band Map information to be visible if it is not already so.
· Access Commands Page - Pressing the function key assigned to this task causes the Commands
Page containing the assigned commands information to be visible if it is not already so.
· Access GPS Page - Pressing the function key assigned to this task causes the page containing the
GPS information to be visible if it is not already so.
· Access Logs - Pressing the function key assigned to this task causes the Log Display Grid 146 to be
focused and the last entry in the log to be selected. Use the cursor up/down keys to select other log
entries and then press the Enter key if it is desired to revise that entry. This will open the
QSO Revision Dialog 150 on that QSO. Revision of the QSO then follows the steps described in
QSO Revision Dialog 150 .
· Access Maps Page - Pressing the function key assigned to this task causes the MapsPage
containing the currently docked map to be visible if it is not already so. If no map has been docked
on the page then you should first define a route, then associate maps with counties, and then use
CQ/X de NO5W
Messages and Function Key Assignments
55
View Map to call up the desired map. While viewing the map you can dock it on the Maps Page.
Once on the page the assigned function key can be used to bring it into view.
· Access Messages Page - Pressing the function key assigned to this task causes the
MessagesPage containing the function key assigned message information to be visible if it is not
already so.
· Access More (Controls) - Pressing the function key assigned to this task is equivalent to clicking on
the More button of the logging radio/keyer. A popup appears from which the user can select the
More controls page for either the logging radio or logging keyer
· Access Multipliers Page - Pressing the function key assigned to this task causes the
MultipliersPage containing the status of each of the multipliers to be visible if it is not already so.
· Access Score Page - Pressing the function key assigned to this task causes the Scores page in the
left hand paging control to become visible if it is not already so.
· Access Similar Calls Page - Pressing the function key assigned to this task causes the page
containing the call search to be visible if it is not already so.
· Access Soap Box - Pressing the function key assigned to this task causes the Soap Box dialog to
become active if it is not already so.
· Access Where Am I - Pressing the function key assigned to this task causes the Where Am I dialog
to become active if it is not already so.
· Access Waypoint Tracking - Pressing the function key or combo assigned to this task causes the
focus to be shifted to the Waypoint Tracker used in Tracking Multiple Waypoints 120 so that the
selection of a waypoint may be performed using the cursor keys.
· Access Previous QSOs - If the menu item Display | Use Right Radio Area for Previous QSO Info
has been checked and keys assigned to presenting data in this area pressing the function key
assigned to this task will access the latest element in the information grid.
· Activate Auto GPS Advisory - Pressing the function key or key combination assigned to this task
causes the GPS Advisory to enter the Automatic mode.
· Activate SWR Tuning - Pressing the function key or key combination assigned to this task causes
the SWR Tuning status of the LoggingRadio to be turned ON. Turn off the SWR Tuning using
ESCape. It should be noted that not all radios support PC control of SWR readout.
· Add Call to Bandmap -Assign this command to a key to enable the key to add the call in the
currently focused QSO Entry Box 145 to the bandmap. The call will be recorded along with the
current frequency of the radio associated with the QSO Entry Box.
· Add Local Operator Note - Assign this command to a key to enable the key to call up the dialog for
adding a note described in Recording an operator note 68 .
· Buffer Second Call - Assign this command to a key to enable the key to buffer the right most call in
the logging QSO Entry window and then remove it from the QSO Entry window. This is used in
conjunction with the CQN message wherein the operator copies two calls in response to his CQ and
is able to enter both calls and then wants to go immediately to the second caller after logging the
contact with the first caller. This task should not be assigned to the += key. See
Handling a Second Caller 66 for details.
· Clear Entry Window - Assign this command to a key to enable the key to clear the entry window of
All rights reserved by C.W. Sanders, NO5W
56
CQx Client: User Guide
the logging radio.
· Clear RIT Frequency - Pressing the function key or key combination assigned to this task causes
the RIT frequency of the LoggingRadio to be set to zero. It should be noted that not all radios
support PC control of RIT.
· Increment AF Gain - Assign this command to a key to enable the key to increase the AF Gain of the
logging radio. Only applies to K3 currently
· Decrement AF Gain - Assign this command to a key to enable the key to decrease the AF Gain of
the logging radio. Only applies to K3 currently
· Increment Band - Pressing the function key assigned to this task will increase the band of the
logging radio.
· Decrement Band - Pressing the function key assigned to this task will decrease the band of the
logging radio.
· Increment Mode - Pressing the function key assigned to this task will increase the mode of the
logging radio.
· Decrement Mode - Pressing the function key assigned to this task will decrease the mode of the
logging radio.
· Decrement Speed - Pressing the function key assigned to this task causes the keying speed to be
decreased by the keying increment set up using the menu item Key | Set Keying Parameters.
· Increment Speed - Pressing the function key assigned to this task causes the keying speed to be
increased by the keying increment set up using the menu item Key | Set Keying Parameters.
· Modify Fi Msg (i=1, 2, ...8) - Assign this command to a key to enable the key to initiate modificaton
of the message associated with function key Fi. This will open up the Message Template Editor with
focus on the message associated with the given function key. This is one of the function key
assignments available in the NA emulator.
· Move RIT Frequency Down - Pressing the function key or key combination assigned to this task
causes the RIT frequency of the LoggingRadio to be decreased by one step. It should be noted that
not all radios support PC control of RIT.
· Move RIT Frequency Up - Pressing the function key or key combination assigned to this task
causes the RIT frequency of the LoggingRadio to be increased by one step. It should be noted that
not all radios support PC control of RIT.
· Next County - Pressing the function key assigned to this task will cause the county in a QSO party
to change to the next county along a defined route. See the discussion in
Route Planning for Mobile QSO Party Operation 85 .
· Perform Call Search - Pressing the function key assigned to this task will initiate a call sign search
as described in "using the spot windows to initiate a run mode QSO" under topic
Making a QSO Entry 65 . With a partial call typed into the QSO Entry Box 145 pressing the assigned
function key will copy the call to the associated spot window and will enable the use of this window
for performing a call search on its contents. Pressing the assigned function key with nothing entered
in the QSO Entry Box 145 will terminate the use of the spot window for this purpose.
· Previous County - Pressing the function key assigned to this task will cause the county in a QSO
party to change to the previous county along a defined route. See the discussion in
CQ/X de NO5W
Messages and Function Key Assignments
Route Planning for Mobile QSO Party Operation
85
57
.
· Request Fills - Pressing the function key assigned to this task will cause the message associated
with a needed fill on the Logging Radio to be sent. If a fill is needed for more than one item the
request associated with the left most item in the QSO Entry Check Grid 145 will be sent. See also
Associating Messages with QSO Entry Items 54 .
· Remove last QSO - Pressing the function key assigned to this task deletes the last QSO added to
the log.
· Revise last QSO - Pressing the function key assigned to this task selects the last QSO added to the
log and then opens the QSO Revision Dialog 150 on that QSO. Revision of the QSO then follows the
steps described in QSO Revision Dialog 150 .
· Send Last Word Query - If a QSO entry box has the focus, pressing the function key or key
combination assigned to this task causes the last word in the focused QSO entry box to be sent
followed by a question mark.
· Send Last Sequence Number In Log - Pressing the function key or key combination assigned to
this task causes the last sequence number in the log to be sent via the logging radio. This is useful
in the NA Sprint contest when you have just sent your exchange while in the S&P mode and the
other station asks for a repeat and the sequence counter has already incremented.
· Send Previous Exchange from Left Radio - Pressing the function key assigned to this task causes
the exchange message from the previously logged QSO from the left radio to be sent. If a key is
assigned to this task it will be useful for responding to fill requests after the contact has been logged
on the left radio.
· Send Previous Exchange from Logging Radio - Pressing the function key assigned to this task
causes the exchange message from the previously logged QSO from the current Logging Radio to
be sent. If a key is assigned to this task it will be useful for responding to a request to repeat all after
the contact has been logged.
· Send Previous Exchange from Non-logging Radio - Pressing the function key assigned to this
task causes the exchange message from the previously logged QSO from the current non-Logging
Radio to be sent. If a key is assigned to this task it will be useful for responding to fill requests
received via the non-logging radio after the contact has been logged and after the logging status has
been switched to the other radio. This could be the case wherein a contact has just been made and
logged on the S&P radio and logging status has been switched back to the Run radio when a fill
request comes in from the S&P contact.
· Send Previous Exchange from Right Radio - Pressing the function key assigned to this task
causes the exchange message from the previously logged QSO from the right radio to be sent. If a
key is assigned to this task it will be useful for responding to fill requests after the contact has been
logged on the right radio.
· Send A1 - Pressing the function key or key combination assigned to this task causes the message
defined as A1 to be sent. This message is the answer you want to send in response to a request for
fill of the item from the first column (call-sign) of the QSO Entry Check Grid 145 .
· Send A2 - Pressing the function key or key combination assigned to this task causes the message
defined as A2 to be sent. This message is the answer you want to send in response to a request for
fill of the item from the second column of the QSO Entry Check Grid 145 .
· Send A3 - Pressing the function key or key combination assigned to this task causes the message
defined as A3 to be sent. This message is the answer you want to send in response to a request for
All rights reserved by C.W. Sanders, NO5W
58
CQx Client: User Guide
fill of the item from the third column of the QSO Entry Check Grid 145 .
· Send A4 - Pressing the function key or key combination assigned to this task causes the message
defined as A4 to be sent. This message is the answer you want to send in response to a request for
fill of the item from the fourth column of the QSO Entry Check Grid 145 .
· Send A5 - Pressing the function key or key combination assigned to this task causes the message
defined as A5 to be sent. This message is the answer you want to send in response to a request for
fill of the item from the fifth column of the QSO Entry Check Grid 145 .
· Send CQ - Assign this command to a key to enable the key to send message CQ. Note that Auto
CQ, if enabled, can only be initiated from key(s) that are assigned to this task. In other words calling
CQ using Shift + Spacebar as described in Special Keystroke Combinations 156 will NOT initiate
Auto CQ.
· Send CQD - Assign this command to a key to enable the key to send message CQD.
· Send CQX - Assign this command to a key to enable the key to send message CQX.
· Send Next County Message - Assign this command to a key to enable the key to send the next
county message NEXT <CTY> IN ABT <NN> MINS if the time to the next county is available or
otherwise send NEXT <CTY>. This is an alternative to the Ctrl+N key combination.
· Send Short Next County Message - Assign this command to a key to enable the key to send the
short next county message.
· Send CQT - Assign this command to a key to enable the key to send message CQT and log the
QSO.
· Send NWP - Assign this command to a key to enable the key to send message the next way point
message NWP. This is for use of solo mobile operators in state QSO parties.
· Send Q1 - Pressing the function key or key combination assigned to this task causes the message
defined as Q1 to be sent. This message is the one that will be sent if the item from the first column
(call-sign) of the QSO Entry Check Grid 145 needs a fill.
· Send Q2 - Pressing the function key or key combination assigned to this task causes the message
defined as Q2 to be sent. This message is the one that will be sent if the item from the second
column of the QSO Entry Check Grid 145 needs a fill.
· Send Q3 - Pressing the function key or key combination assigned to this task causes the message
defined as Q3 to be sent. This message is the one that will be sent if the item from the third column
of the QSO Entry Check Grid 145 needs a fill.
· Send Q4 - Pressing the function key or key combination assigned to this task causes the message
defined as Q4 to be sent. This message is the one that will be sent if the item from the fourth column
(if one exists) of the QSO Entry Check Grid 145 needs a fill.
· Send Q5 - Pressing the function key or key combination assigned to this task causes the message
defined as Q5 to be sent. This message is the one that will be sent if the item from the fifth column
(if one exists) of the QSO Entry Check Grid 145 needs a fill.
· Send QRL - Assign this command to a key to enable the key to send message the message defined
as QRL.
CQ/X de NO5W
Messages and Function Key Assignments
59
· Send QRU - Assign this command to a key to enable the key to send message the message defined
as QRU.
· Send QSY - Assign this command to a key to enable the key to send message the message defined
as QSY.
· Send SP - Assign this command to a key to enable the key to send message SP which is typically
used to send your call sign when in search and pounce mode. Of course it can be used to send your
call sign at any time.
· Send SPX - Assign this command to a key to enable the key to send message SPX which is typically
used to send the exchange when in search and pounce mode. Of course it can be used to send that
information at any time.
· Show Mult QSOs - Pressing the function key assigned to this task causes a list of all QSOs with the
multiplier currently entered in the QSO Entry Box 145 to be presented. Note: this requires that the
user has selected to show this type of information in the right hand radio area. See topic
Customizing the Display 154 for details.
· Silently Log QSO - Pressing the function key assigned to this task causes the QSO entered on the
QSO Entry Box 145 corresponding to the Logging Radio to be logged without sending any CW
signals.
· Silently Log Multi-QSOs - Pressing the function key assigned to this task creates and logs a QSO
for each of the counties entered on the QSO Entry Box 145 corresponding to the Logging Radio.
Logging is performed without sending any CW signals. This is useful when working a state QSO
party that allows operation from the intersection of two or more counties.
· Size to Fit Central Panels - Pressing the function key assigned to this task will shrink the CQ/X
display and move the horizontal scroll bar to show only the central panels on the main display.
Pressing the function key a second time will return the display to its original size. This is useful when
it is desired to rapidly view a real-time map that is open behind the CQ/X display.
· Toggle AutoCQ - Pressing the function key assigned to this task causes the AutoCQ state of the
currently active keyer to be toggled. If an Auto CQ is in progress it will be terminated immediately
and AutoCQ will be turned off. If the AutoCQ is off AutoCQ will be turned on and the next CQ will
initiate the Auto CQing.
· Toggle Logging Radio - Pressing the function key assigned to this task causes the Logging Radio
state to be switched to the other radio if it is enabled. Both radios must, of course, be enabled for this
key to perform its function.
· Toggle Max/Min Speed - Pressing the function key assigned to this task causes the speed of the
keyer currently assigned to the Logging Radio to change between its minimum and maximum values
which are set up using the KeyerParametersDialog. If the speed is not initially at either the max or
min value it will enter the toggle cycle at the max/min value that is most distant from the current
speed. If the current speed is equidistant from the max and min values it will enter the toggle cycle
at the minimum value.
· Toggle Preset/Max Speed - Pressing the function key assigned to this task causes the speed of the
keyer currently assigned to the Logging Radio to change between its preset speed and maximum
speed. The maximum speed is set up using the KeyerParametersDialog. The Preset speed is set up
anytime the keyer's speed combo box is used to set the speed or when a speed
increment/decrement is performed.
· Toggle Preset/Min Speed - Pressing the function key assigned to this task causes the speed of the
All rights reserved by C.W. Sanders, NO5W
60
CQx Client: User Guide
keyer currently assigned to the Logging Radio to change between its preset speed and minimum
speed. The minimum speed is set up using the KeyerParametersDialog. The Preset speed is set up
anytime the keyer's speed combo box is used to set the speed or when a speed
increment/decrement is performed.
· Toggle RIT Status - Pressing the function key or key combination assigned to this task causes the
RIT On/Off status of the LoggingRadio to be changed to the alternate state. It should be noted that
not all radios support PC control of RIT.
· Toggle XIT Status - Pressing the function key or key combination assigned to this task causes the
XIT On/Off status of the LoggingRadio to be changed to the alternate state. It should be noted that
not all radios support PC control of XIT.
· Update GPS Now - Pressing the function key or key combination assigned to this task causes the
displayed GPS information to be updated on the next receipt of data from the GPS.
The assignments are recorded on the Commands Page for reference by the user and will persist
across a restart of the program..
5.6
Assigning Function Keys
Although all tasks may be performed by point and click operations with the mouse either through menu
selection or selection of page tabs, it is best to assign some often used tasks to function keys
depending on the operating style/requrements of the user. These function key assignments will be
active when the focus is on one of the QSO Entry Box 145 areas which is the normal place for the focus
to reside. They only apply when the focus is on one of the QSO Entry boxes. There is also a set of
non-assignable function keys for use with the Small Control Interface for Elecraft K3 46 . The MultiCounty Messaging and Logging Dialog 169 also contains some non-assignable function keys that are
shown in the status bar at the bottom of that dialog.
Function keys F1-F12, as well as the combination Alt+Fx, Ctrl+Fx, Shift+Fx, and the keys on the
numeric keypad as well as the PageUp/PageDown keys may all be assigned to specific tasks using
either of the menu items Keyer | Assign Function Keys or Options | Assign Commands. Choosing
either of these menu items will activate the following dialog which contains a listing of the function keys,
a combo box for selecting the task to be performed by the key, and a window that provides a brief
description of the task. A set of default key assignments, specific to the selected contest, may be used
as a starting point by pressing the button labeled Load Defaults. See
Available Function Key Commands 54 for a list and description of the tasks that can be assigned. To
enable the tasks assigned to the numeric keypad be sure to turn Num Lock on.
CQ/X de NO5W
Messages and Function Key Assignments
61
After completing the assignments pressing the Assign Keys button will set up the keys to perform the
specified function and will close the dialog. On closing the dialog the task assignments will appear on
the CommandsPage. After closing the dialog the assigned task can be initiated by either pressing the
assigned function key or by clicking on the associated button on the CommandsPage the former being,
of course, the preferred approach.
The assigned commands will be retained across a restart of the program so it is not necessary for the
user to explicitly save the command set. However, the user may find it useful to save certain sets of
commands for use across changes in the contests being worked. This can be done using the Save To
File button with later loading of the file using the Load From File button.
Using the Emulate NA button you can also assign keys to emulate some of the keys used by NA. Use
of this button will activate the following dialog which contains a check list of the available key
emulations as shown in the following screen shot.
All rights reserved by C.W. Sanders, NO5W
62
CQx Client: User Guide
Use either the mouse or the Enter key (by highlighting the desired item and pressing Enter) to toggle
the check mark by each of the items. Once satisfied with the selections press the Enable Emulator
button to enable all of the checked items. Note that, the enabled emulation is retained across a restart
of the program. So, if you always use the same emulation, you will only have to perform this operation
once.
Pressing the Enable Emulator key will setup the associated tasks of the checked items in the
Assigning Function Keys dialog. Pressing the Disable Emulator button will deselect and clear the key
assignments of all of the keys associated with the emulator.
6
Operating a Contest
6.1
Starting a New Contest
When CQ/X starts up it provides the following options
Resume Current Contest - use this option if it is desired to continue a contest following a restart of
the program. In this case all logging and duping will pick up where it left off when CQ/X was closed
Start a New Contest - use this option if it is desired to start a new contest. In this case a dialog will be
presented for filling in user information which will be used in constructing the final summary sheet and
the final Cabrillo version of the log. Once satisfied that the user information is correct pressing Ok will
start the new contest. If a contest log already exists you will be asked to review the information and can
save the existing log if that is desired. Otherwise all logging and duping information will be cleared and
a new log file will be created.
It is also possible to start a new contest after CQ/X has been started. To do this use the File | Start
New Contest menu item and fill in the information.
CQ/X de NO5W
Operating a Contest
6.2
63
Restarting a Contest
Following a shutdown of CQ/X you can restart the program and pick up where you left off but you will
need to perform the following. A startup wizard (see Using the Startup Wizard 64 ) is available to walk
you through these steps:
1. Use Radio | Connect/Disconnect to connect devices to their respective ports. If you have saved
your port assignments you can use the button labeled "Restore from Previous Session" to restore
all devices.
2. Use GPS | GPS Advises County Change to set the desired GPS Advisory mode. If you choose
AUTO the program will automatically change your messages to correspond to the current county
and will locate the next county crossing if you have defined one for the current county. If there is
more than one crossing defined for the current county the program will ask you to resolve. (Use
GPS | Resolve Multiple County Crossings)
3. Use GPS | Set Parameters to define any waypoints and to set up pass through of GPS
information to a mapping program such as Streets and Trips. You can also set up any GPS logging
features at the same time (e.g. CQ/X QSL-Ready logging).
4. If you are using Streets and Trips you can use QPTools | Start Interactive Map to startup Streets
and Trips and select the desired trip *.est file. If using another mapping program start it up from the
desktop.
5. In the mapping program connect it to GPS information for real-time position tracking by specifying
a port that is connected via a null modem to the GPS Pass Through port defined in step 3 above.
Consider using virtual serial ports to save two physical ports (see on-line help for details)
6. If you are not using a GPS you will be asked to restart/reestablish your route plan. If the starting
county is in your previously defined plan simply double-click on the desired starting county when
the Route Planning dialog comes up. If you are deviating from your original plan you will need to
use the route planning dialog to build your new plan.
7. If you are using a GPS use QPTools | Build Route From Crossings to import the county line
crossing information. This information will be used to calculate the distance and time to the next
crossing and, if the AUTO mode is not in use, the resulting sequence will be used to sequence
through the counties. If you are using the AUTO mode then the current county will be automatically
detected and selected as the starting point in your route.
6.3
Setting the Log Time Stamp
There is an option under the File menu to setup the logging time stamp. Selection of this menu item
will open the following dialog.
All rights reserved by C.W. Sanders, NO5W
64
CQx Client: User Guide
Here you can choose to always use the CPU time as the time stamp source or you can choose to use
the time from the GPS when it is available with failover to the CPU time if the GPS goes off line. The
second section of the display provides a means of calibrating the log time from the CPU by selecting a
desired correct time stamp for the current time. This will generate an offset to be used in determining
the log time from the CPU time.
6.4
Using the Startup Wizard
A startup wizard is provided to walk you through the main steps required to configure the application.
This includes the following activities:
1.
Setting up Devices as described in Setting Up a Radio 28 , Setting Up a Keyer 32 , and
Setting Up a GPS 34
2. Setting GPS Parameters as described in Setting GPS Reporting Parameters 121
3. Defining a Route Plan as described in Planning Route for Non-Use of GPS 85 and
Planning Route for Use of GPS 88 , and Route Planning for Mobile QSO Party Operation
4. Defining a Tracking Map
5. Reviewing/revising the Message Template as described in Setting Up Messages 50
6. Reviewiing/revising keyer speed and weight parameters.
7. Reviewiing/revising radio band limit parameters.
8. Defining the Display Options
9. Defining User-Supplied Help 163
10. Defining Keystrokes and Assigning Function Keys 60
11. Setting the session clock by setting/verifying the sessions of the contest as described in
Setting up the Session Clock 165
6.5
85
Loading Calls from Previous Logs
Use the menu item File | Load Exchange Info to load calls and other information contained in logs
from previous contests or from files. The extraction of information from these files assumes that the
call is the rightmost space-separated substring that qualifies as a callsign. It is also assumed that the
exchange information (if any) is everything to the right of the extracted call. So the following type of
lines would result in a call being imported
CQ/X de NO5W
Operating a Contest
ACall
xxxxxxx ACall
xxxxxxx ACall ExchangeInfo
QSO: 14045 CW 2004-02-28 1501 NO5W
599 PIK W0GXQ
65
599 MN
the latter case being recognized as a Cabrillo-like line wherein the call that will be imported will be
W0GXQ and the exchange information will be 599 MN.
6.6
Calling CQ
To begin a CW Run mode QSO you can do any of the following:
· press the function key assigned to the CQ message or
· use Shift+Spacebar.
· Press Enter key with nothing except possibly blanks in the QSO Entry window. This requires that you
have set Enter Key Sends CQ under the Display menu.
See Assigning Function Keys
6.7
60
for information on setting up a function key to call CQ.
Making a QSO Entry
Run Mode QSO
· After receiving a response to a CQ enter the call sign of the calling station in the QSO Entry Box 145
and press Enter. In CW mode if you are unsure of the call sign or only copied part of it and want to
send the call or part of it followed by a question mark hold down the shift key and press Enter. This
will send the contents of the right most substring along with a question mark. Also see note below
regarding use of the Spot windows for initiating a QSO.
· In CW mode the CQ exchange message (CQX) will then be sent. In Phone mode you will provide
the exchange.
· The Enter key from the previous steps will insert a space making ready for you to enter the
exchange information sent by the calling station in the QSO Entry Box 145 . The exchange information
can be entered in any order with spaces separating the items[see note below for exceptions]. Again
if you are operating CW and are unsure of the exchange and want to send a substring followed by a
question mark hold the shift key down and press Enter.
· If all required items have been successfully parsed these items will show up in the
QSO Entry Check Grid 145 and no columns in that grid will be blank for the logging radio. Pressing
Enter again will cause the QSO to be logged and the CQT message to be sent in CW mode. If you
have enabled the NA Emulator (see Assigning Function Keys 60 ) you can also confirm and log the
QSO using any of the [, ], or \ keys.
· In any case when attempting to log the QSO if there are missing exchange items in the
QSO Entry Check Grid 145 the QSO will not be logged and, in CW mode, the Query Messages 152
associated with the missing item will be sent. If you are operating Phone mode and pressing Enter
and the contact is not being logged review the QSO Entry Check Grid 145 to see what entries might
be missing and request a fill.
S&P Mode QSO
· Request an S&P QSO in CW mode by pressing the function key assigned to the SP message or by
pressing the space bar while holding down the Alt key.
· After successfully requesting an S&P QSO enter the received exchange information in the
QSO Entry Box 145 in any order separated by spaces
· In CW mode press either the Enter key or the function key assigned to the SPX message to send
the exchange information. In Phone mode press the Enter key and give the exchange information.
· Make sure the call sign and other QSO information is correct
All rights reserved by C.W. Sanders, NO5W
66
CQx Client: User Guide
· Press Enter to log the QSO
· If there are missing exchange items the QSO will not be logged until they have been entered but in
the case of silently logging the QSO no request for fills will be sent.
Exceptions to Exchange Entry Order
There are a few contests where order of entry of the information in the QSO Entry box is important
because of possible ambiguity in the meaning of a given entry item. Three state QSO parties
(Colorado, Minnesota, and New Mexico) use Operator Name as one of the exchange elements along
with a county abbreviation. in the following cases, which are specified in the *.def file for the QSO party,
the county abbreviation could also be an operator name.
Colorado: ADA, ARA,BEN, CHE, DEL, GAR, GIL, SAM
Minnesota: BEN, KIT, LES, POP, RAM, RIC
New Mexico: CAT, DEB, DON, LEA, VAL
The general rule to follow here is that the rightmost entry item is the county abbreviation and the next
rightmost item is the operator name.
6.8
Handling a Second Caller
Assume you call CQ and copy two callers (CALL1 and CALL2) and wish to respond to CALL2
immediately after logging the contact with CALL1 rather than sending the normal CQT message. Use
of the Alt+Enter key combination, or an assigned function key or combination, allows CALL2 to be
buffered for processing and the contact with CALL2 to be initiated using the CQN message. The only
requirement is that the QSO Entry line should have one of the following possible formats when the
combination Alt+Enter or the assigned function key is pressed.
CALL1 CALL2
CALL1 EXCHANGE1 CALL2
CALL1 CALL2 EXCHANGE1
CALL1 SUBEXCHANGE1 CALL2 SUBEXCHANGE2
In other words CALL2 must be the rightmost call on the entry line.
In the above, Alt+Enter must be pressed prior to logging the contact with CALL1 (otherwise CALL2 will
be regarded as a correction to CALL1).
Once Alt+Enter is pressed the entry line will become
CALL1
CALL1 EXCHANGE1
CALL1 EXCHANGE1
CALL1 SUBEXCHANGE1 SUBEXCHANGE2
respectively and CALL2 will be saved in a next call buffer.
On logging the contact with CALL1 the next call buffer will be examined and, if it contains a call, that
call will be copied into the entry line and message CQN will be sent. If the next call buffer is empty then
the normal CQT message will be sent. So an appropriate message for CQN, when operating mobile in
a QSO party where signal report and county are the exchange items, would be something like: NOW
@ 5NN #.
So here is one of the possible sequences:
1.
Press Shift+Spacebar to call CQ
CQ/X de NO5W
Operating a Contest
2.
3.
4.
5.
6.
7.
8.
67
When W5ZL and W5XX respond type W5ZL in the QSO Entry window
Press Enter to respond to W5ZL
While the exchange is going out to W5ZL type W5XX to the right of W5ZL
Type the exchange information from W5ZL to the right of W5XX
Press Alt+Enter to save W5XX to the next call buffer
Press Enter to log the contact with W5ZL. This will copy W5XX to the QSO Entry window and
send the CQN message with W5XX as the call.
Type the exchange information for W5XX and press enter to log the contact with W5XX and to
send the CQT message.
Note also that Steps 6 and 5 could have been interchanged.
6.9
Auto-scheduling QSO Ending Messages
The normal message for ending a QSO is the CQT message but, as explained in
Required Messages 53 it is possible to end a QSO with the QRZ message either explicitly using the
key combination Ctrl+Enter or by setting up a rule for the use of CQT vs QRZ using the following
dialog:
Although not a requirement, the intent of the QRZ message is to provide a shorter alternate to the CQT
message for use when the pileup is large and the rate correspondingly high. This dialog allows you to
set up the following parameters that will control the automatic selection of CQT versus QRZ ending
messages.
·
·
·
·
6.10
Rate at which use of the QRZ message should begin
Rate at which the ending message should revert to CQT
Maximum number of QSOs that can be completed without a CQT message
Maximum number of minutes allowed between use of a CQT message
Initiating a Search & Pounce QSO
To request an S&P QSO press the function key assigned to the SP message.
All rights reserved by C.W. Sanders, NO5W
68
CQx Client: User Guide
To begin a Search & Pounce mode QSO you can do either of the following:
· press the function key assigned to the SP message or
· use Alt+Spacebar which requires less hand movement than the function key.
See Assigning Function Keys
60
for information on setting up a function key to do SP.
Initiating a Search and Pounce QSO will set the Enter key into the search and pounce mode. The next
press of the Enter key will first look for any missing exchange items and, if there are some, will send
the corresponding request for fill (Q1, Q2, Q3,..). If there are no missing exchange items the Enter key
will log the QSO and send the SPX message which, for some contests (e.g. Sprint) may be different
from the CQX message. At the end of the S&P sequence the Enter key will be set back into the CQ
mode.
6.11
Revising a Log Entry
Any of the following procedures can be used to revise a QSO after it has been logged.
1.
2.
3.
4.
Double-click on the desired QSO in the Logs part of the main display using the left mouse button
When the QSO Revision Dialog 150 appears enter/modify the QSO information.
Click on the Save button or press the Enter key which will close the dialog and return focus to the
QSO Entry Box 145 currently in use.
If the menu item Display | Recalc Score on Each Log Revision is checked the log will be rescored
and the Score Display Grid 147 will be updated. Otherwise recalculation of the score will not be
performed until requested by using the menu item Display | Recalculate Score Now.
Alternately, if the <ACCESS_LOGS> command has been assigned to a key or key combination as
described in Available Function Key Commands 54 , the following procedure can be used to revise a
QSO
1.
2.
3.
4.
5.
Press the key(s) assigned to the <ACCESS_LOGS> command
Use the up/down cursor keys to highlight the QSO to be revised and press Enter
When the QSO Revision Dialog 150 appears enter/modify the QSO information.
Click on the Save button or press the Enter key which will close the dialog and return focus to the
QSO Entry Box 145 currently in use.
If the menu item Display | Recalc Score on Each Log Revision is checked the log will be rescored
and the Score Display Grid 147 will be updated. Otherwise recalculation of the score will not be
performed until requested by using the menu item Display | Recalculate Score Now.
Another option, applicable only to the last QSO logged, is available if the command
<REVISE_LAST_QSO> has been assigned to a function key. Use of this option provides direct access
to the QSO Revision Dialog 150 for the most recently logged QSO. Follow steps 3 and 4 of the
procedure described above.
6.12
Recording an operator note
Revising a log entry is easy but sometimes it is necessary to make a quick note for later
retrieval/review. Using the menu item Edit | Add Operator Note or an assigned function key or a
function key in combination with ALT-CTRL-SHIFT will activate the following dialog.
CQ/X de NO5W
Operating a Contest
69
Type in the note and either click on the Add button or press Enter to save the note. Click on the column
header labeled "Time Stamp" to toggle the order of presenting the notes from newest first to newest
last. Clicking on the combo box to select a call will show only those notes that contain the selected call.
To see all of the notes click on the Show All button. Operator notes are saved across a restart so there
is no requirement to manually save the notes but it may be of interest after a contest is over or at some
point to archive the notes to a specified file. The Archive Notes button provides this capability. The
Clear Notes button provides the capability of clearing the notes with the option of first archiving them.
6.13
Running Stations from a Multi-County Boundary
Some QSO parties allow for operation on county lines and/or at points where two or more counties
meet. CQ/X provides a means of efficiently running stations from these locations. It consists of a three
step process
Step 0: You should first insure that the county resolution symbol (#) is included in the CQX, SPX,
MCQ, and MTU messages using the menu item Keyer | Edit Message Template (see Note 1 below).
Next perform the following steps to define your "trip" around the counties involved in your multi-county
operation.
Step 1: The Multi-County Setup Dialog 167 is used to define the multi-county location. This dialog plays
the same role in multi-county operation as the Route Planning Dialog shown in topic
Planning Route for Non-Use of GPS 85 does for road trip operation.
Step 2: The Multi-County Messaging and Logging Dialog 169 is used to send exchanges and log
contacts.
It is of course important to choose such operating points with safety and respect for private property as
the highest priorities. This generally will exclude operations from the side of roadways. Multi-county
operation is best suited for expedition style portable but non-mobile operations from locations such as
farmer's fields (with approval of the farmer of course), etc.
Note 1: Think of the multi-county operation as a mobile that is visiting each of the counties involved on
each of the QSOs. When you save the message template you will be asked via the
Message Resolution Dialog 151 .to resolve the unknown county. On this dialog press the Resolve Later
button since the resolution will come from the multi-county operation defined using the MultiCounty Setup Dialog 167 in Step 1.
All rights reserved by C.W. Sanders, NO5W
70
6.14
CQx Client: User Guide
Preparing a Summary Sheet
Using the menu item QP Tools | Prepare Summary Sheet will activate the following dialog:
If you need to make any changes to the user information prior to preparing the summary use the File |
Modify User Information to make those changes. Use the Browse button to specify a file name to which
the summary sheet should be saved. You can view the summary sheet on completion by checking the
provided checkbox prior to pressing the Ok button.
6.15
Finalizing the Logs
When you are ready to finalize the logs for submitting to the sponsor using the menu item File | Finalize
Logs will call up the dialog shown below which opens up showing the Cabrillo header information, the
comments previously prepared using the menu item File | Prepare Soapbox. Also shown will be
several sample lines from the QSO portion of the Cabrillo file.
CQ/X de NO5W
Operating a Contest
71
Pressing the Prepare Statistics button will activate the dialog for Preparing Statistical Results 159 . Once
satisfied with the formating of the statistical results use the appropriate button on the dialog for
preparing statistical results to copy the results to the clipboard. Closing that dialog will return you to the
dialog for finalizing the log. Position the cursor where you want the statistical results to be inserted and
then press the button labeled Paste from Clipboard.
Once satisfied with the soapbox comments use the Browse button and resulting dialog to specify the
file to which the finalized logs should be saved.
6.16
Exporting Logs to an ADIF File
Using the menu item File | Export Log As ADIF File it is possible to export the log information in the
standardized tagged file Amateur Data Information Exchange format. Clicking on this item will activate
the following dialog where simple line break formating to a selected output file can be set up and
initiated.
All rights reserved by C.W. Sanders, NO5W
72
CQx Client: User Guide
Here the user has selected to have the frequency, mode, date, and time information on the first line of
each record followed by a line of sent information and then by a line of received information. If it is
desired to have each item appear on a separate line you can, of course, place a check mark next to
each item.
6.17
Operating Multiple Contests
In late April there is a weekend with the following two QSO parties
· Florida QSO Party or FQP
· Nebraska QSO Party or NEBQP
Also in early May there is a weekend with the following three QSO parties:
· Seventh Call Area QSO Party or 7QP
· New England QSO Party or NEQP
· Indiana QSO Party or INQP
In late August there is a weekend with the following three QSO parties:
· Ohio QSO Party
· Kansas QSO Party
· Hawaii QSO Party
Then in early-October a weekend with the following two QSO parties:
· Pennsylvania QSO Party
· Arizona QSO Party
And in mid-October there is a weekend with the following two QSO parties:
· New York QSO Party
· Iowa QSO Party
CQ/X de NO5W
Operating a Contest
73
Fortunately the individual contests on the April and May weekends as well as the New York and Iowa
parties have the same exchange (CALL + RST + QTH) allowing easy creation of the multi-contests FLNE-QSOPARTY, 7-NE-IN-QSOPARTY, and NY-IA-QSOPARTY which can be used to log contacts
from any of those parties.
And the August contests have similar exchanges (CALL + NUM + QTH) where in the Ohio QP the
NUM is an incrementing sequence number and in the Kansas and Hawaii QPs the NUM is a signal
report. So in this case the main challenge is to know, or have the software know, when to send signal
report and when to increment and send a sequence number.
Finally the mid-October contests have somewhat similar exchanges (CALL + NUM + QTH) but with
additional "twists". In the Pennsylvania QP the number is an incrementing sequence number and the
QTH is an ARRL section abbreviation, whereas in the Arizona QP the number is a signal report and
the QTH is the state. So in this case there two challenges: 1. knowing when to send RST vs sequence
and 2. knowing when to send ARRL section vs state.
If you are outside the target areas operate in one of these "multi-contests" by choosing FL-NE-QSOPARTY, 7-NE-IN-QSOPARTY, KS-OH-HI-QSOPARTY, NY-IA-QSOPARTY, or PA-AZ-QSOPARTY
when starting up. You will notice that there is only one choice of location -- Outside. On the other hand
if you are inside one of the target areas you should just choose your normal QSO party.
Limitations -- The following limitation will be addressed in future releases.
· The FL-NE-QSO-PARTY, 7-NE-IN-QSOPARTY, KS-OH-HI-QSOPARTY, NY-IA-QSOPARTY, and
the PA-AZ-QSOPARTY are the only multi-contests supported at this time.
· Scoring for the individual contests during the multi-QP is not currently supported.
Operating
7-NE-IN-QSOPARTY: Once you have chosen the 7-NE-IN-QSOPARTY operate it in normal fashion
but be sure to log the New England counties using their five-character abbreviations since the following
INQP counties create an ambiguous entry which could be in either INQP or NEQP if only three
characters are used and would lead to confusion when splitting the log: BAR, BEN, CAR, FRA, HAN,
HAR, KNO, NEW, ORA, SUL.
FL-NE-QSOPARTY: Note that there are no duplicate county abbreviations in the FL-NE-QSO-PARTY.
KS-OH-HI-QSOPARTY: Note that there are several duplicate county abbreviations in the KS-OH-HIQSOPARTY which have been removed by appending an HI to the right hand side of each of the
normal Hawaii county abbreviations. In order to get CQ/X to recognize and log these counties you will
need to include the HI in the entry. The other challenge in this multi-contest is to send the correct
number to the other station depending on whether the station is in KS, HI, or OH. The software has
information about each county abbreviation to allow it to know from the county abbreviation that you
entered whether you are working KS, HI, or OH. Also when you make your first QSO with a given
station the software records, from the entered county, whether that station is a KS, HI or OH station so
that the next time you work it the software will know whether to send RST or an incremented sequence
number. So it is important on your first QSO with a station to defer sending your exchange until you
have entered at least the county of the other station – normally this is what you would do but
sometimes you might need to enter or revise the county entry after sending the exchange. Also
included in the software is a small file of calls that have been recently active in the Ohio QP. The file is
located in the LogData subdirectory and is called OHQP_Calls.txt. You can edit that file if you like but
be sure to leave the name unchanged. To help you know whether the software has enough information
to decide on the proper exchange there is a Red/Green indicator just to the left of the QSO entry box.
Finally concerning your messages be sure to include a ^ character in any message you want to contain
the sequence number or RST. It is not necessary to embed 5NN or 599 in your messages since the
software will handle that.
All rights reserved by C.W. Sanders, NO5W
74
CQx Client: User Guide
NY-IA-QSOPARTY: Note that there are thirteen common county abbreviations between NY and IA. To
distinguish them the characters NY or IA have been appended to all the abbreviations of counties in
New York and Iowa respectively. For the abbreviations that aren't common the complete abbreviation
will be detected as soon as you type the first three letters For the common ones the complete
abbreviation will be detected as soon as you enter the appended N or I. The appended NY and IA will
be automatically removed when the log is split into individual logs.
PA-AZ-QSOPARTY: In this multi-QP there are no duplicate county abbreviations since AZ uses a five
character abbreviation and PA uses three characters. The main challenge in this mult-QP is to send
the correct number and the correct QTH -- your sequence number and section if you are working PA or
a signal report and your state if you are working AZ. The software has information about each county
abbreviation to allow it to know from the county abbreviation that you (may have) entered whether you
are working PA, or AZ. Also when you make your first QSO with a given station the software records,
from the entered county, whether that station is a PA station so that the next time you work it the
software will know whether to send RST or an incremented sequence number even befoe you enter
the county. So it is important on your first QSO with a station to defer sending your exchange until you
have entered at least the county of the other station – normally this is what you would do but
sometimes you might need to enter or revise the county entry after sending the exchange. Also
included in the software is a small file of calls that have been recently active in the Pennsylvania QP.
The file is located in the PAAZ_QSOParty subdirectory and is called PAQP_Calls.txt. When you work a
PA station that station's call is added to the file. Also you can edit that file if you like but be sure to
leave the name unchanged. To help you know whether the software has enough information to decide
on the proper exchange there is a Red/Green indicator just to the left of the QSO entry box. Finally
concerning your messages be sure to include a ^ character in any message you want to contain the
sequence number or RST and any message in which your QTH is to appear enter it as your section.
The software will automatically change your section in any messages to your state as necessary based
on the location of the station you are working.
Creating the Individual Logs
Note: It is best to operate the entire period as a Multi-QP. In other words, in the case of the FL-NE-QP
the Nebraska Party ends several hours before the Florida Party. It is best to hold off on splitting the
logs until the Florida Party is over or until you are ready to finalize both logs.
If you are operating from outside the target areas once you are ready to create the final log for each of
the individual contests use menu item File | Split Multi-Contest Log to activate the following dialog for
creating either backup or final copies of your Cabrillo log:
Select the contest and then click on the Finalize Cabrillo Log button. The following form for producing
the final Cabrillo-formated log for that contest will be displayed.
CQ/X de NO5W
Operating a Contest
75
If you plan to submit the resulting file as your final log you should enter your soapbox comments and
review the header information. However, you may want to regard this file as a backup Cabrillo log and
wait to enter soapbox comments on the Cabrillo that you can produce during the final scoring process
described below. In either case you should specify where to save the Cabrillo file and then click on the
Save button.
Then repeat this process for the other contests in the Multi-QP.
After completing the above process for each of the contests in the Multi-QP you will have Cabrillo files
that can be submitted to the sponsor except that there are a few items in the Cabrillo header that you
will need to review and edit. These include the CATEGORY-POWER and the CLAIMED-SCORE. You
know your power so that item can be edited manually using a text editor such as Notepad and you
could leave the score blank. However the following process will handle both of those items.
Caution: The following assumes that you have completed the above process for each
of the contests in the Multi-QP
All rights reserved by C.W. Sanders, NO5W
76
CQx Client: User Guide
Calculating Clamed Score and Performing Other Operations for Individual Logs of a Multi-QP
Once you have split the log into the backup Cabrillo logs for each of the contests the following process
can be used to calculate the final claimed score for each contest, and for preparing your data for a
3830 report. It can also be used to prepare your final submission to the log checkers and to 3830.
For ease of reference it is assumed that you have just operated in the multi-QP consisting of the
Florida QSO Party and the Nebraska QSO party and that you have saved the individual backup
Cabrillo-formated logs for those two contests. During that process an intermediate file was produced
for each of the contests and saved in the LogData subdirectory as LV_FL-QSO-PARTY.log and
LV_NEB-QSO-PARTY.log. You can use those files in the following process to develop your final
submission including claimed score for each contest as well as statistics, and data for posting on 3830
1.
2.
Use the File | New Contest menu item to select the Florida QSO Party
Go through the process of changing to that party, entering your power, your club, and other
information.
3. After exiting the New Contest dialog Close CQ/X
4. Delete the file CQxClientLogView.Log that is in the CWSoft\CQxClient\ directory
5. Copy the file LV_FL-QSO-PARTY.log into the CWSoft\CQxClient\ directory.
6. Rename that copy of LV_FL-QSO-PARTY.log to CQxClientLogView.log
7. Restart CQ/X
8. At this point CQ/X is setup to operate and perform any other operations with the Florida QSO
Party.
9. The score, QSOs, and Mults will be shown on the normal Score tab.
10. Now choose menu item Finalize Cabrillo Log and go through the normal process for completing
the Cabrillo log.
11. Use the menu item File | Post to 3830 Reflector to post your 3830 comments for FQP
Once you have finished with the FQP log perform similar steps for the Nebraska QSO Party.
Of course a similar process applies to the logs created for the combined 7QP, New England, and
Indiana QSO Parties
6.18
Operating Non-QSO Party Contests
With version 1.7 support for the following non-QSO party contests was added. This topic provides
some special considerations that the user should be aware of when operating these contests.
·
·
·
·
·
·
·
ARRL Field Day 76
ARRL Sweepstakes 82
North American QSO Party
North American Sprint 83
NCCC Sprint 84
RAC Winter Contest 84
IARU-HF Contest 84
83
6.18.1 ARRL Field Day
In Field Day the exchange is a transmitter count, a letter designating the class of operation and an
ARRL/RAC section abbreviation. These exchange items may be entered in any order and the
transmitter count and class designator can be either separated by a space(s) or combined. In fact the
entire exchange can be entered without any spaces (e.g. 2ASTX will be interpreted as 2A STX)
The Field Day module also provides support for the following that are specific to that event:
· A dialog for tracking Field Day Bonus points
CQ/X de NO5W
Operating a Contest
·
·
·
·
·
·
·
·
A dialog for entering the W1AW Field Day Bulletin
A dialog for recording GOTA station participants
A menu item for viewing the Field Day packet
A dialog for preparing a dupe sheet
Access to CW and SSB Operator Notes used at the NARS Field Day site
Access to Startup Notes used at the NARS site
Access to a Keyboard Template used at the NARS site
Access to the ARRL Field Day packet for the current year
These items are all accessed via the Field Day Tools menu item.
Double-click on any row of the Bonus Point Tracker to enter Earned Points and assignments.
All rights reserved by C.W. Sanders, NO5W
77
78
CQx Client: User Guide
Type the W1AW Bulletin into the memo area of the following dialog. Use the View Schedule button to
see the schedule of bulletin transmissions and the Save To/Load From File buttons to save and
retrieve copies of the Bulletin.
CQ/X de NO5W
Operating a Contest
79
GOTA operator information may be entered using the following dialog. Double-click on any row and
use the resulting dialog to make changes or use the Add an Operator button to enter information for a
new operator.
All rights reserved by C.W. Sanders, NO5W
80
CQx Client: User Guide
The following dialog may be used to prepare the dupe sheets required as part of the submission.
CQ/X de NO5W
Operating a Contest
81
On the dupe sheet dialog specify the log file to use. Choosing Internal Current Field Day Log will
prepare a dupe sheet on the current internal log whereas choosing External Field Day Log will allow
the user to choose another file to dupe. The only requirements on this other file is that it
·
·
·
·
·
be Cabrillo-like in the sense that
each QSO be on a single line and be preceded by "QSO:",
that the items be separated by spaces,
that the frequency be in KHz and be the item just prior to the mode which can be CW, DG, PH.
the call of the station worked must be the last call in the QSO line.
All rights reserved by C.W. Sanders, NO5W
82
CQx Client: User Guide
After choosing a file the user can select the bands and modes to include in the dupe sheet. Once those
are selected clicking on Process will, after a few seconds, populate the dupe sheet. Once prepared the
dupe sheet may be written to a file for printing by clicking on the Print To A File button.
6.18.2 ARRL Sweepstakes
In the ARRL Sweepstakes there are two numerical type entries in the exchange,
1.
2.
a sequence number and
a two digit check year.
The parsing logic uses the following rules to resolve the ambiguity between these two items where N
represents any single digit and P represents any precedence character, CK represents a one or twodigit check, and SEC represents a section indicator.
· In any input string of the form N P CK SEC, N will be interpreted as the sequence number and CK
as the check number
· a sub-string of the form NNN or NNNN, space-delimited from the rest of the string, will be parsed to
a sequence number
· a sub-string of the form NP (or NNP, or NNNP, or NNNNP), space-delimited from the rest of the
string, will be parsed to a sequence number N (or NN or NNN or NNNN) and precedence P
· a sub-string of the form N P (or NN P), space-delimited from the rest of the string, will be parsed to a
sequence number N (or NN) and precedence P
· a sub-string of the form P, space-delimited from the rest of the string, will be parsed to a precedence
P
Sequence numbers greater than 99 can be entered with or without the precedence. So, in general it is
best to input the sequence number and the precedence as a single string. When in doubt you can
always review the check grid to see how the input is being parsed.
The above applies to entries made in the QSO Entry Box 145 as well as those made in the
QSO Revision Dialog 150 .
The upshot of these rules is
If you need to revise the sequence number and wish to do that revision by typing the new
sequence number to the right of the check you should either type the sequence number as a
three digit number with leading zeros as necessary or type the sequence number followed,
without a space, by the precedence.
For example if you are working W5XYZ and initially miss the sequence number and type
W5XYZ A 58 STX
You then ask for a fill of the number and receive 12. You can type the number on the end of the string
as 012 making the entry read
W5XYZ A 58 STX 012
Alternately you could type the number on the end of the string as 12A making the entry read
W5XYZ A 58 STX 12A
Either of the above will be correctly interpreted by the parsing logic. However if you simply enter 12 on
the end of the existing string the 12 will be interpreted as a revision of the check year and the
sequence number will remain unfilled in the check grid.
CQ/X de NO5W
Operating a Contest
83
6.18.3 CQ WW WPX Contest
In the CQ WW WPX Contest the exchange is a signal report and a sequence/serial number. Use of
leading zeros in the serial number is optional when sending the exchange. To elect to send leading
zeros use the menu item Keyer | Send Leading Zeros on Sequence Numbers.
The signal report defaults to 599 or 59 as appropriate for CW or SSB. If it is desired to enter something
other than the default append an R to the desired signal report - e.g. 579R to input a signal report of
579 or 49R in order to enter a non-default signal report like 49 for phone. If you choose to enter a
signal report in this way be sure to separate it from the sequence number by at least one space.
Normally you will just enter the call sign and the sequence number.
6.18.4 CWOps Mini CWT Contest
In the CWOps Mini CWT contest there are two entries in the exchange,
1.
2.
a Name
a Member number or State/Province/Country if a non-member.
Operator name is one of the exchange items in this contest. Of course your name will be a fixed value
throughout the contest so it can be entered directly in any messages. However, in your CQT message
or your SPX message you may want to include the name of the operator you are working. You can do
this by placing a percent sign where you want the operator's name to be inserted. The name that will
be inserted is the name you entered based on his exchange.
6.18.5 North American QSO Party
In the NAQP contests the exchange is a name and state/province/country. There is the possibility of
ambiguity in the case of the string AL which could be either name=AL or state=AL. In this case the
order of entry of name and state needs to be CALL NAME STATE. For example the following entries
will have the indicated results
K0AD AL MN will be logged as Name=AL, State=MN
W4YZ AL will be logged as Name=AL, State=AL
W4YZ NC AL will be logged as Name=AL, State=AL
W4YZ NC AL NC will be logged as Name=AL, State=NC
6.18.6 North American Sprint
In the North American Sprint contests the exchange is a sequence number, a name, and a
state/province/country. There is the possibility of ambiguity in the case of the string AL which could be
either name=AL or state=AL. In this case the order of entry of name and state needs to be NAME
STATE. For example the following entries will have the indicated results
K0AD 123 AL MN will be logged as Name=AL, State=MN
W4YZ 123 AL will be logged as Name=AL, State=AL
W4YZ 123 NC AL will be logged as Name=AL, State=AL
W4YZ 123 NC AL NC will be logged as Name=AL, State=NC
QSY Rule - After making a solicited* (CQ) contact in the NA Sprint a station must QSY by at least
5KHz before soliciting another contact or by least 1KHz before requesting a search and pounce
contact. The background color on the frequency display is used in the following way to indicate ability
to make these two types of contacts under the QSY rule:
· Red - The current displayed frequency is such that neither a CQ nor a S&P QSO may be made
· Black - The current displayed frequency is such that a S&P QSO may be made but a CQ QSO may
not.
All rights reserved by C.W. Sanders, NO5W
84
CQx Client: User Guide
· Gray - The current displayed frequency is such that either a S&P or a CQ QSO may be made
*Note: A solicited (CQ) contact is any contact initiated with a CQ or QRZ as well as any contact made
on a frequency inherited by the station by virtue of that station making a S&P contact with the previous
"owner" of the frequency.
6.18.7 NCCC Sprint and NCCC Internet Sprint
The NCCC Sprint is similar to the North American Sprint contests with the following exceptions
· The same station can be worked multiple times on the same band provided 1 contact separates the
contact in both logs.
· Back-to-back contacts on different bands are OK.
· NAQP Multipliers count once per band, as in NAQP
· KH6 is a multiplier
· The 5kHz QSY rule reduced to 1kHz
· 160 meter QSOs permitted, as in NAQP
· 100 watts or less power, as in NAQP
· 30-minute contest period
· Scoring is total QSOs times sum of multipliers on each band, as in NAQP
The NCCC Internet Sprint is the same as the NCCC Sprint except that three intervening QSOs are
required in both logs before working the same station on the same band.
For further comments see North American Sprint
83
.
6.18.8 RAC Winter Contest
In the RAC Winter Contest the exchange is a signal report and either a sequence number, if sender is
a non-Canadian station, or a Canadian province abbreviation if the sender is a Canadian station. The
signal report defaults to 599 or 59 as appropriate for CW or SSB. If it is desired to enter something
other than the default append an R to the non-default signal report - e.g. 579R to input a signal report
of 579.
6.18.9 IARU-HF Contest
In the IARU-HF Contest the exchange is a signal report and either a zone number, a member society
abbreviation, or an IARU official's designator (AC,R1,R2,R3). The signal report defaults to 599 or 59 as
appropriate for CW or SSB. If it is desired to enter something other than the default append an R to the
non-default signal report - e.g. 579R to input a signal report of 579 or 49R in order to enter a nondefault signal report like 49 for phone. The latter will also avoid the possible ambiguity with zone 49.
The user should also be aware of the following duplication in the member society abbreviations:
ARM - Moldava(ER) and Monaco(3A)
CARS - Cayman Islands(ZF) and Cyprus(5B)
GARS - Ghana(9G) and Gibralta(ZB)
MARS - Maritius(3B8) and Montserrat(VP2M)
RCH - Haiti(HH) and Honduras(HR)
RCP - Peru(OA) and Paraguay(ZP)
To insure that the proper multiplier credit is given for these member society abbreviations the
abbreviations will be logged as:
ARM-ER
ARM-3A
CQ/X de NO5W
Operating a Contest
85
CARS-ZF
CARS-5B
GARS-9G
GARS-ZB
MARS-3B
MARS-VP
RCH-HH
RCH-HR
RCP-OA
RCP-ZP
When the Cabrillo log is finalized the -XX designators will be automatically removed from the log.
6.18.10 Cross-Country CHN Operation
CQ/X can also be used for cross country operation in the County Hunter Nets if you are making a trip,
possibly covering several states. This type of operation has some of the same features as state QSO
parties but also differs in many respects from that type of operation and requires some special setup
and some special CQ/X features put in place for that purpose. Details of how to setup CQ/X for
operation within the CHN context are covered in topic Operating Cross Country Using CQ/X 112 .
7
Route Planning for Mobile QSO Party Operation
Two types of route planning are available. The one you choose will depend on whether or not you are
planning to use a GPS.
Planning a route if a GPS is not going to be used. In that case the route plan will consist simply of a list
of counties in the order in which they are to be covered. See Planning Route for Non-Use of GPS 85
for information on setting up this list.
If a GPS is going to be used to provide real-time estimates of the distance to the next county the route
plan must include the latitude and longitude of the planned county crossings. See
Planning Route for Use of GPS 88 for information on setting up the county crossing information. Once
the county crossing information has been setup the list of counties will be generated from the crossing
information.
7.1
Planning Route for Non-Use of GPS
If you are planning to use a GPS to provide a real-time estimate of distance to next county you should
build your route from county crossing information using the steps described in
Planning Route for Use of GPS 88 .
If a GPS will not be used you can simply follow the steps below to create a list of counties in your route.
1.
2.
3.
4.
5.
6.
7.
Use the QSO Party-specific menu item QSO Party | Plan Route
From the Route Planning dialog choose the first county in your route
Once the first county is chosen it will be transferred to the Counties in Route and the drop down
box in the Next County Selection area will change to contain only those counties that are adjacent
to the most recently selected county.
Continue by selecting each county to add to the list and use the Add To Route button to add the
county
Repeat until all of the desired counties have been added
Use the Save to File button to save the list to a file to avoid having to repeat the above steps at a
later session.
It is highly recommended that you use a mapping tool such as MS Streets and Trips to determine
your actual route through the county sequence and to determine that it is actually possible to drive
between counties A and B. To refine the route in Streets and Trips you may find it useful to import
All rights reserved by C.W. Sanders, NO5W
86
CQx Client: User Guide
8.
9.
the sequence of county polygons. Use the button labeled Prepare Polygon Sequence to prepare
the sequence of files to import.
You can also import a file that contains non-adjacent counties. In order to do this check the Allow
Non-Adjacent Counties in Route box. This would be useful if, for example, you wish to create a
KML file containing all of the counties in a state.
Two buttons are provided for producing KML files which are useful for posting information on the
web as Google Maps
A. The Export Route as KML File button calls up a dialog for setting up an export of a KML file
containing counties in your route.
B. The Export All as KML File button calls up a dialog for setting up an export of a KML file of
all the counties in the state.
CQ/X de NO5W
Route Planning for Mobile QSO Party Operation
7.2
87
Route Planning Dialog
The Route Planning Dialog is useful for planning a route in the case where no GPS is to be used or to
prepare a sequence of polygon files for use in planning the actual driving route, or as a preliminary step
to building the file of county crossings for use with a GPS.
After selecting the First County in Route, additional counties adjacent to the previously selected county
will appear in the Next County combo box. Selecting the desired next county and pressing the Add to
Route button will add the selected county to the route list.
Buttons along the right hand side of the Counties in Route list allow you to perform various operations
including: deleting the last entry, deleting all entries, loading from a file and saving to a file.
As the name implies, the Restart button enables you to completely restart the route building process.
The Restart at Selection button enables you to delete all of the entries after a selected entry in order to
resume the route building at the selected county.
The button labeled Prepare Polygon Sequence (shown in the screen shot below) allows you to create
All rights reserved by C.W. Sanders, NO5W
88
CQx Client: User Guide
the sequence of county polygon files for the Counties in Route. These files will be named
RoutePoly_n_Abbrev.txt where n is the position of the county in the sequence and Abbrev is the
abbreviation for the county. They will be saved in subdirectory (RoutePolygons) of the maps directory
for the given QSO party. Importing these files into a mapping program will give a polygon
representation of the route from which a driving route can be developed.
Another button allows the user to export the sequence of counties as a KML file for use with Google
Maps.
7.3
Planning Route for Use of GPS
Using an on-board GPS will allow you to obtain real-time estimates of the distance to the next county
crossing. In order to make use of this feature you must describe the planned route to a sufficient level
of detail -- namely information must be available to the program regarding the latitude and longitude of
each county line crossing. This information is built by the user and placed in a County Line Crossing
file which is a text file having the format described below.
There are three ways to build the County Line Crossing file, two of them requiring connection to the
internet and the other requiring only a mapping program on the local machine.
Google Path Method - Using this method you draw a Google Map of your planned route and then,
after copying a few links and performing a download, you can have CQ/X analyze the route to
determine the county line crossing points, and to build the necessary crossing file and other data. This
is the least labor-intensive method for building a crossing file and it enables easy modification of the
route with the only requirement being the development of some skill at drawing the map and making
sure that the resulting path goes where you intend to go. It also has the advantage that, during
operation, distance calculations to county lines and to waypoints will be based on the actual driving
CQ/X de NO5W
Route Planning for Mobile QSO Party Operation
89
distance along the specified drive path rather than on radial (line of sight) distances. For details on how
to use this method see topic Building a Crossing File Using Google Maps 108 .
Google Map Method -- To use this method you should first build a Crossing File that contains only the
From-To County names and the highway labels but no lat/lon information. Once that file is built you can
add the lat/lon information by logging into the CQ/X website and navigating to the Tools page. On that
page you will find a link to instructions on how to add the lat/lon information and you will find an index of
state/regions from which a Google map with overlays of the counties may be accessed. After
accessing the Google map you can find the lat/lon data for each crossing point by right-clicking on the
crossing point and then using Ctrl+C and Ctrl+V to copy the lat/lon data into your text file. Detailed
instructions including a one-line Java script instruction are included on the web site. These instructions
may also be accessed from the Help menu item "Use Google Map to Create Crossing File".
The advantage to the Google Path and Google Map methods is that the lat/lon values do not have to
be typed in. In the Google Path method they are calculated by CQ/X and in the Google Map method
they are picked from the screen rather than typed in. The need to be connected to the internet may be
a disadvantage, especially if you have a slow connection or a slow machine. The Google Path and
Google Map methods are definitely not recommended for those with dial-up connections.
Streets & Trips Method -- This method doesn't require access to the internet but it does require that
you have trip planning software such as Streets & Trips or similar software installed on your machine.
In the following it will be assumed that you have access to Streets & Trips. The steps for planning a
route using Streets and Trips are:
1. Choose the TQP | Build Route From Crossings menu item
2. The resulting screen contains instructions and a button for starting Streets and Trips to either build a
new route or restart the planning of an existing route.
3. After planning of the route is completed use the pushpin and location sensor in Streets and Trips to
annotate each of the county crossings in the driving order using the following convention
FromCounty-ToCounty HwyLabel Latitude Longitude
where the highway label (HwyLabel) is included for reference in case there is more than one crossing
involving the same from and to counties. The above line of data is space delimited so it is important to
remove any spaces in the county names when entering the From and To county names. For example
Red River should be entered as RedRiver. Be careful to apply the proper sign to the latitude and
longitude (North = +, West = -).
4. At this point you can save the trip or continue to Adding County Crossing Information 90 .
All rights reserved by C.W. Sanders, NO5W
90
7.4
CQx Client: User Guide
Adding County Crossing Information
In this section it is assumed that you have developed a trip plan using Streets and Trips and have
annotated each county crossing as described in Planning Route for Use of GPS 88 . The following
procedure can be used to import this information into CQ/X.
1.
2.
3.
Start up Streets and Trips and access the appropriate trip file.
Open a text editor such as Notepad
Proceeding in the driving direction highlight each of the county crossing annotations and copy and
paste that information into the text editor.
4. Once complete save the text editor file
5. Streets and Trips and/or the text editor can be closed at this point if desired.
6. In CQ/X use the TQP | Build Route From Crossings option
7. At the instruction screen press the button labeled Assign Crossings. This will start an Open file
dialog from which the desired county crossing file can be selected.
8. Opening the desired crossing file will populate the Building Routes from Crossings 92 dialog on
which the county crossings are listed in trip order along with the distance between each of the
crossings and the minimum, maximum, and average distances of the distances between them.
9. To select a starting county from the county crossings screen double click on the desired From
county. This will save the route and the county crossing information for use by CQ/X. You can also
just press the Apply button which will select the first From county as the starting county.
10. Following this the route will be started and a dialog will be presented requesting a review of the
CQ/X de NO5W
Route Planning for Mobile QSO Party Operation
91
resulting messages. If the DLL associated with the QSO Party is not the latest version a message
box may appear requesting the user to start the route from the QP Tools | Start Route menu item.
7.5
Importing County Crossing Information
Once county crossing information has been captured in a text file (see
Adding County Crossing Information 90 ) that information may be imported to define a route or to
restart a session after CQ/X has been shut down for lunch or the evening QSO Party recess or for
whatever other reason.
To import this information do the following:
1.
2.
3.
4.
5.
6.
Select the QSO Party Tools menu item labeled Build Plan From Crossings
When the instruction panel comes up press the Assign Crossings button and select the desired
county crossing file from the open file dialog.
This will populate the county crossing information on the Building Routes from Crossings 92
dialog and will validate the sequence of From and To counties is consistent -- i.e. the To County
from the previous crossing is the From County for the current crossing. It will also perform a
reasonability check on the latitude and longitude. Any items that need correcting will be flagged.
Correct any items by either typing into the edit boxes or by using the buttons for reversing the
county names in a flagged crossing or for reversing the signs of latitude and/or longitude. On
closing this dialog an opportunity will be provided to save any changes either in the existing file
(default) or by choosing another file name.
Press the Apply to define the starting point of the route at the From county on the first row of the
dialog. If it is desired to start the route at another county double click on that county where it
appears as a From county.
The above steps set the starting county, import the list of county crossings and associated data
All rights reserved by C.W. Sanders, NO5W
92
CQx Client: User Guide
into the program, and initialize the messages. If an older version of the DLL associated with the
QSO party is being used the final step to initialize the route and associated messages must be
performed as a manual step in response to a message box that will appear requesting the user to
start the route using the menu item under QSO Party Tools labeled Start Route. If this occurs you
should request a new DLL since many changes have been made since that earlier version.
7.6
Building Routes from Crossings
The Building Route From Crossings dialog is a dialog showing the from and to counties of each county
crossing as well as the highway number, the latitude and longitude and the distance between the
crossings. An example is shown below:
When this dialog is activated a scan of the resulting fields is performed to determine if the county
sequences are consistent with the requirement that the To County of the previous row is the From
County of the current row and to determine if the latitudes and longitudes are reasonable.
Reasonability checks on latitude and longitude are based on a check to determine whether the point is
within the rectangle that bounds the state sponsoring the QSO party. Since the most common problem
CQ/X de NO5W
Route Planning for Mobile QSO Party Operation
93
is failure to include a negative sign on the longitude a button is provided for reversing the sign.
Any suspect items are flagged for correction and must be corrected prior to applying the crossings.
Corrections are made by either direct entry into the suspect field or by using the buttons. An
opportunity to save a new version of the crossings file including the corrections is provided when the
dialog is closed.
Note: If you import a file and it contains a number of latitude and/or longitude errors and there are no
obvious sign errors the most likely source of the problem is that the imported file is not for the current
state. In that case you should close and browse for another file to import.
7.7
Hints for Building Crossing Files
Here are a few things to be aware of when building and using crossing files.
Role of the Crossing File
First it may be helpful to remember that the main use of the crossing file in CQ/X is to allow the
program to estimate the distance and time to the next county. It also should be emphasized that the
ability to determine what county you are in does NOT depend on having a crossing file. If a crossing file
is present here's how it is used.
Crossing File Process
When the program detects that you are in a given county it scans the crossing file to find all of the
instances wherein the current county is the From County. If it finds more than one you will see "Multiple
Crossings" displayed where the next crossing would normally appear. In this case the user will need to
tell the program which of the multiple crossings is the next one. This can be done in two ways
· Click on the Multiple Crossings panel and select the next crossing from the resulting pop-up
menu OR
· Select the next crossing from the menu item GPS | Resolve Multiple County Crossings
Once any multiple crossings have been resolved for the current county the program knows the next
crossing point and can calculate the distance and time to that point based on current position and
speed.
Hint 1: Include Both Crossings for a Short Detour into a County
Very often a short detour is required to activate an additional county. The operator exits county A into
county B, stops just across the county line in county B, operates for a period and then exits county B
back into county A along the same path. To make the program happy in this circumstance be sure to
include both county line crossings in the file. An example of this is the Polk-Trinity SR356 and the
Trinity-Polk SR356 pair of crossings in the files below.
Hint 2: Include Crossing Points for All Counties In Path To First
Let's say you will be doing a "figure eight" type of route. Perhaps its a two-day event and you will be
leaving from home on both days but on the first day you do not intend to operate the contest from your
home county -- you'll cover that county on the second day and will begin the first day in the county next
to your home county. It's tempting to not include your home county as the first From County in the
crossing file but to avoid confusion you should. Here's an example from my 2008 Texas QSO party trip
that should help to clarify this.
My home county is Montgomery but because I was doing a figure eight route I did not plan to activate
Montgomery on the first day. Here are two possible crossing files that I could have used. Both of these
files apply to both days with the Saturday night stop in Montgomery and the first crossing on Sunday is
the Montgomery-Wall FM1488 crossing.
All rights reserved by C.W. Sanders, NO5W
94
CQx Client: User Guide
CQ/X de NO5W
Route Planning for Mobile QSO Party Operation
95
In the case with Harris as the first county starting out in Montgomery on the first day the program will
scan the crossing file and find only the Montgomery-Waller FM1488 crossing with Montgomery as the
from county. Therefore while the operator is still in Montgomery on the first day Montgomery-Waller will
be considered the next county and the distance calculated on that basis. This will yield an erroneous
indication of distance and time to the next county. Of course once the operator has crossed into Harris
county the program will detect two county crossings (Harris-Liberty FM1960 and Harris-Waller
FM1488), the operator will select Harris-Liberty, and the calculation of time and distance to next county
will be correct. So its only during the initial part of the trip while the operator is still in Montgomery
county that there will be an error.
On the other hand in the case with Montgomery as the first county the program will scan the crossing
file and find two crossings (Montgomery-Harris I45 and Montgomery-Waller FM1488) with Montgomery
as the from county. The operator will choose the first of the two and the calculation of time and
distance to the next county will be correct from the start.
Hint 3: Create Multiple Crossing Files If You Anticipate Detours
If you anticipate detours or optional counties you will need to create a crossing file for each of the
possible paths if you want the distance and time to next county indications to remain correct. It's best to
All rights reserved by C.W. Sanders, NO5W
96
CQx Client: User Guide
create these files before the trip starts. As noted at the beginning of this topic the detection of current
county will NOT be affected if the crossing file is no longer applicable to the trip, only the calculation of
time and distance to next county will be affected.
7.8
Starting a Route
The starting county of a route is specified on either of the following dialogs depending on whether or
not the route has been planned for use of a GPS
If the route is not being planned for use of a GPS plan the route and define the starting county using
the Route Planning Dialog 87 . Then highlight the starting county and press the button labeled Start At
Selected County or double-click on the desired starting county. This will define the route and the
starting county and will start the route.
If the route is being planned for use of a GPS plan the route, define the county crossings, and import
the county crossings using the Building Routes from Crossings 92 dialog. Then press the Apply button
or double click on the desired starting county where it shows as a From county. This will define the
route and the starting county and will start the route. If you have GPS Advises County Change enabled
in AUTO mode the automatically detected current county will be used as the starting county.
7.9
Changing Counties
County Changes Based on Route Plan or GPS Data
Once a route has been started you can change counties either manually or, automatically if a GPS is
being used and the county crossing information has been defined to support the GPS.
To change to the next county manually use the Next County option under the QSO Party Tools menu
item for the QSO party. This can be accomplished with either the mouse, with the key stroke sequence
Alt+Q, N or by pressing a function key if one has been assigned to the Next County task as described
in Assigning Function Keys 60 . The first time the Next County operation is performed or at the start of
a route a message box will appear requesting that the modified messages containing county
abbreviations be verified for correctness. If desired, this message box can be bypassed on subsequent
county changes.
If the automatic county change feature has been enabled county changes will occur when a county
crossing has been reached and as soon as no QSO is underway. See
Setting Up Automatic County Changes 124 for further details on configuring this feature.
Use the Previous County option under the QSO Party Tools menu item to move backwards through the
counties in the route. In order to do this you should first set the GPS Advisory Mode to OFF.
County Changes from the QSO Entry Boxes
In order to use any of the above methods you must either be using the GPS Auto-Advisory mode or
must have set up a route plan. If you have not established a route plan and wish to change counties
manually type # as the right most element on either the left or right QSO Entry Box 145 . This will
activate a small form containing a focused drop down list of the counties. Typing the first letter of the
desired county will bring the list to the first county starting with that letter. If necessary use the cursor
down/up keys to access the desired county and either press Enter or use the mouse to click on the
Apply button. This will change all messages, etc to reflect the selected county. If you are using the
GPS Auto-Advisory feature described in GPS Advisory Modes 126 it will be disabled but the current
county being detected will continue showing on the You Are In/Out array. After applying the desired
county, focus will be returned to the QSO Entry Box 145 from which the action was initiated.
CQ/X de NO5W
Route Planning for Mobile QSO Party Operation
7.10
97
Adding Strip Maps to the Route
The addition of strip maps is primarily useful when not using a GPS. When a GPS is available it is
preferable to use GPS Passthrough Via a Virtual Null Modem 141 to pass GPS data to a mapping
program such as Streets & Trips. This will provide a real-time indication of location.
If desired, a set of "strip maps" may be added to the program and associated with each of the counties
in the route. After the route has been developed and finalized using a trip planning tool simply select
portions of the route and perform a screen capture of the desired map region and save the captured
image as a .bmp file.
To associate the captured image with a county use the QP Tools | Associate Maps option which will
bring up the Associating Maps With Counties Dialog 97 . For each county browse to the name of the
associated map file, select the file and press the Open button in the Open File dialog to copy the
complete path and name of the file to the edit box associated with the selected county. Once done use
the Save To File button to save the associations for later use. To make the associations available to
the program press the Apply button.
For an alternative approach for making strip map information available see topic UserSupplied Help 163 .
7.11
Associating Maps With Counties Dialog
The following dialog allows for a map file to be associated with each county on the route as described
in topic Adding Strip Maps to the Route 97 . An alternative approach is to use User-Supplied Help 163 .
All rights reserved by C.W. Sanders, NO5W
98
7.12
CQx Client: User Guide
Viewing Strip Maps
Once a set of "strip maps" has been created and associations made betwen the counties on the route
and the maps as described in Adding Strip Maps to the Route 97 , the maps may be selected for
viewing usng the QP Tools | View Maps menu item. This will cause the following map selection/viewing
dialog to appear.
CQ/X de NO5W
Route Planning for Mobile QSO Party Operation
99
The Current County button will cause the map associated with the current county to be presented in
the viewing window and similarly for the Next County button. Maps associated with other counties may
be selected by double-clicking the county name in the list provided along the left hand side of the
dialog.
The above dialog is a modal dialog so it will not be possible to perform other activities until the dialog is
closed. If it is desired to have the map remain visible while performing other activities the Dock It
button should be used. This will close the dialog and add the map to a scrollable window in the tab
control on the right hand side of the main display where it will remain visible as long as the Maps tab is
selected.
All rights reserved by C.W. Sanders, NO5W
100
CQx Client: User Guide
You can also use the User-Supplied Help 163 to provide access to a set of strip maps.
Prior to setting up strip maps you should also review how to set up the GPS Passthrough feature
described in topics Setting up a GPS Pass Through 140 and
GPS Passthrough Via a Virtual Null Modem 141 . Using the pass through feature there is little need for
the strip maps.
7.13
Using GPS Logging
If you have GPS capability there are several options available to enable you to log your position as you
traverse your QSO party route. These options may be accessed under the GPS | Set Logging
Parameters item to call up the Setting GPS Reporting Parameters dialog. The following options are
available for logging your position:
CQ/X de NO5W
Route Planning for Mobile QSO Party Operation
101
· No GPS Log - this is the default option
· Periodic Logging of selected information - specify the period and use the check boxes under
Select GPS Information To Record to select the information to be logged and specify the name of
the logging file to produce a periodic log.
· Log Selected Information on Each QSO - Use the check boxes under Select GPS Information To
Record to select the information to be logged and specify the name of the logging file to produce a
log on each QSO
· Log Selected Informaiton on Each QSO and at Least once every so many miles - this option is
similar to the previous one except that it insures logging sufficient to recreate the route. Select the
information to record and the maximum distance between logs and the name of the log file to
produce QSO information along with track information.
· CQ/X QSL-ready format on each QSO - this option produces a fixed selection of information in a
fixed format on each QSO. The format is such that the information can be easily imported into a
mapping program such as Streets and Trips for production of a "QSL" showing where each QSO
was made along with QSO type information for each contact. See topic CQ/X QSL Format 135 for
details.
7.14
Posting Trip Plans
Once you have planned your mobile operations for a QSO party and have a sequence of counties that
you are going to cover your plan can be posted to County Hunter Dot Com using the menu item QP
Tools | Post Route Plans. This will bring up the following dialog with the sequence of counties filled in.
All rights reserved by C.W. Sanders, NO5W
102
CQx Client: User Guide
Add any desired text around the list of counties and then press connect. This will copy the text to the
clipboard and will connect you to the county hunter site. Once on the site follow the normal process for
adding a topic under Planned Trips and once the appropriate entry window comes up use Ctrl + V to
paste in your writeup.
7.15
Exporting Crossing Data As a KML File
Google Maps provides a neat way to distribute your route via the internet using a KML file. CQ/X
provides the capability of exporting to a KML file either from the Route Planning Dialog 87 or the
Building Routes from Crossings 92 dialog.
Route Planning Dialog -Prepare the sequence of counties as described in Route Planning Dialog 87 and then press the button
labeled Export As KML File after which you will get the dialog shown below. You may want to review
the document entitiled "Posting Routes Using Google Maps" that is available on the website as well as
from the Help menu. That document contains detailed instructions on how to do this.
Building Routes from Crossings Dialog -After preparing and then importing your crossing information as described in the following topics
· Adding County Crossing Information 90 and
· Importing County Crossing Information 91
you can use the Export As KML button on the Building Routes from Crossings
KML file.
92
dialog to create the
First we have to prepare the KML file and then we have to make it available to Google Maps. Here are
the steps.
CQ/X de NO5W
Route Planning for Mobile QSO Party Operation
103
Prepare KML File - Once you click on the Export As KML button the following dialog will appear.
· Fill in the call sign you want to appear on each of the county crossing notations on the Google Map
· Select the format of the notation - two are available
· Specify your days of operation and if its both days select the starting county for Sunday and indicate
whether that county will also be your last county on Saturday.
· In the case of preparing the KML file from the county line crossing data you also have the option of
including the county boundaries.
· If you have APRS capability and want your position to be shown on your map check the APRS box
and indicate the call sign to be tracked.
· If you have developed a route using Google Maps and have saved the resulting KML and want the
planned route to appear on your map check the Planned Path box and browse to the KML file
containing the route. The Help button will access a pdf document that explains the details of how to
develop a route using Google Maps.
· Note the name and destination of the file[1]
All rights reserved by C.W. Sanders, NO5W
104
CQx Client: User Guide
· Press the Prepare KML File button.
Note 1: If you want to add a note to appear at some point on your route look at the structure of the
data in the <Placemark> tag and add a placemark of similar structure that contains your note along
with the coordinate info. Be sure to end the structure with the </Placemark> tag.
That completes the preparation of the KML file. If you want to view/edit it use Notepad or another text
file viewer, or check the box labeled ShowKML on Completion.. Here is an Example KML File 104 . If
you decide to edit this file be careful to preserve the structure.
Make KML File Available to Google Maps
· Save the file on a webserver. Perhaps you have your own personal web host that will do this. If it is
available you might also want to have a link to it posted on the web page of the QSO party you are
participating in. Another alternative, if it is available, would be for the QSO party to host it on their
website.
· Now copy the URL from the previous step into the Google Maps search field
· After Google Maps completes its search you should see your data as a series of points on the map
and there will be instructions on the page showing your map that describe how to send it as a link.
Code will also be provided that you can copy and paste into a web page if you wish to embed the
map.
This dialog is may also be used to create KML files for situations in which the day information is not
appropriate. In that cas you should select the No Days option.
For the QSO Party Organizer/Coordinator
Also, under Optional Includes, note that you have the option of including a notation of the stations that
are active in each county. This is primarily for the QSO party organizer who is collecting and publishing
Google Maps showing counties in the state and the stations that have announced plans to operate
from that county. The Active Stations file referenced in this must, of course, be provided by the user
and should be a simple text file having a row for each county with the following format
<CountyFullName>=<Station1>,<Station2>,<Station3>,...
Note that there is also an option for producing a KML file containing only those counties for which no
activity has been announced. In that case you will need to provide the same Active Stations File and
should check the box labeled Stations Active in Each County.
7.16
Example KML File
Here's an example KML file consisting of three placemarks.
CQ/X de NO5W
Route Planning for Mobile QSO Party Operation
7.17
105
Defining a Route Path Using Google Maps
Here's a step-by-step description of how to define a route for inclusion in a CQ/X Overlay KML file. This
document is based on notes supplied by Pat Cain K0PC.
Step 1: Since you will be storing data on Google's servers you will need a Google account. If you do not
have one you should establish one now -- it is free.
Step 2: After establishing your account open Google Maps and sign-in to your account.Then choose the
My Maps link, then choose the resulting Create New Map link.
Step 3: Add a title and description for your map and then Zoom/Pan the map as necessary to get a
convenient view of your starting point and then locate the Line Draw Icon in the upper left hand corner of
the map and select Draw a Line Along Roads
Step 4: Click on the starting point of your route and then double-click on the ending point. Google will
choose a route between the starting and ending points as shown below for a route between Ardmore and
All rights reserved by C.W. Sanders, NO5W
106
CQx Client: User Guide
Stillwater, Oklahoma.
Step 5: You will likely want to change the route chosen by Google. To do this click on the route and drag
the point to a new road. If you do not like the resulting change do can undo it with the link that reads The
line has been changed. Undo.
CQ/X de NO5W
Route Planning for Mobile QSO Party Operation
Step 6: Repeat Step 5 as many times as needed until you have the desired route. Which might look
something like.
All rights reserved by C.W. Sanders, NO5W
107
108
CQx Client: User Guide
Step 7: When you are satisfied with your route click on the View in Google Earth link shown on the right
hand side of the screen shot in Step 5.
Step 8: This will open a dialog box for either viewing the route in Google Earth or saving the route (as a
KML file). Elect to save the file. This is the file that you will want to identify in the CQ/X KML
preparation dialog shown in topic Exporting Crossing Data As a KML File 102 for insertion in the KML file
as a NetworkLink to the Google server farm.
Step 9: As a final step you should click on the Done button in Google Maps to save the route.
Note that, since the route is being saved and inserted as a NetworkLink, later revisions that you make to the
route will be automatically reflected without having to regenerate the KML file prepared by CQ/X.
7.18
Building a Crossing File Using Google Maps
Using the Google Path Method described in this topic you can draw a Google Map of your planned
route and then after copying a few links and performing a download, CQ/X will analyze the map to
determine the county line crossing points, and to build the necessary crossing file and other data. This
CQ/X de NO5W
Route Planning for Mobile QSO Party Operation
109
is the least labor-intensive method for building a crossing file and it enables easy modification of the
route with the only requirement being the development of some skill in drawing the map and making
sure that the resulting path goes where you intend to go.
The county line crossing file produced using this method is a simple space-delimited text file listing, in
the order of travel, each of the county line crossings. The format of each row of the crossing file that
results from this method is:
FromCounty-ToCounty HwyLabel Latitude Longitude DistanceFromStart
The only difference in this file and the crossing files discussed in the other crossing file methods (see
e.g. Adding County Crossing Information 90 ) is the presence of the additional DistanceFromStart item.
As in the other crossing files there should be no spaces within any of the items. So, for example, the
county Red River should be entered as RedRiver and a highway such as US 183 should be entered as
US183. Highway labels are more for the human user and have no role in CQ/X calculations. Their only
role is in displaying information to the user in order to distinguish two crossings involving the same two
counties. In the crossing file north latitude is entered as a positive value and west longitude is entered
as a negative value. In the Google Path Method all of these requirements are handled for you by the
software. Here is the process to follow.
The Google Path Process - After developing a general idea of where you want to go you should draw
that plan on a Google Map and then download a file of latitude and longitude values that describe the
route. Here's how you do that assuming you are using FireFox as your browser. Other browsers may
require a slightly different process but it should be easy to translate the following to your browser.
1: The topic Defining a Route Path Using Google Maps 105 describes the steps necessary for drawing
your route plan on a Google Map. Follow the steps in that topic to create and save a map of your route.
2. Once you have completed step 1 and are ready to process your route plan make sure you have
selected the QSO party associated with the route. Then select the menu item QPTools | Build Plan
Using a Google Map. This will open the following dialog
All rights reserved by C.W. Sanders, NO5W
110
CQx Client: User Guide
3. When you are ready to perform the process return to Google and sign in to retrieve your map.
4. Once the map is shown right click on the View in Google Earth link and Elect to "Copy Link Location"
5. Make sure the cursor is in the step 4 window on the above dialog and use Ctrl+V to paste the link
6. Click the Modify button to modify the link
7. Click the Copy to Clipboard button
8. Paste the clipboard into the URL Locator on the Google Maps page and click the GO arrow or
whatever is appropriate for your browser.
9. Elect to save the path KML file in a desired location on your desktop
10. Browse to the path KML file obtained from Google Maps and saved in Step 9.
11. Browse to specify the two output files
12. Click on the Process button
13. In a few seconds, or perhaps longer if it is a big route, the following dialog listing the found county
line crossings will appear.
CQ/X de NO5W
Route Planning for Mobile QSO Party Operation
111
Note that the Miles to Next shown in the rightmost column contains the actual driving distances from
one county line to the next and the minimum, average, and maximum distances are also based on
driving distances. Also note the Highway column (HWY) has been filled in with place holder values
(HWYx) since the KML file does not contain highway information. If you require in indication of the
actual highway involved in each crossing you can edit the HWY values and the crossing file specified in
step 11 will be modified to include the highway information. Do not include any spaces in the highway
notation.
From the above dialog you can export the results as a KML file that will contain an overlay of each of
the counties along with a placemarker at each of the found county line crossings. If desired post this
file to your website and ask Google Maps to find it and you can then examine how accurately the
county lines have been located. Most of the crossings will be within a few hundred yards of the county
line shown in the map overlay -- close enough for use in CQ/X distance/time to next calculations.
When you click the Apply button on the above dialog any modifications made to the crossing
information will be saved in the same file -- the one from step 11-- and is ready to be used in actual
operation to calculate distances to next county and to waypoints. On a restart of the program for the
same QSO party you will have the option of reloading the crossing information produced by the above
steps. It will only be necessary to repeat the above steps if you modify your route.
All rights reserved by C.W. Sanders, NO5W
112
CQx Client: User Guide
During operation the lat/lon data from the GPS is used to determine where you are along the path and
from that how far it is to the next crossing and to specified waypoints. When you define the waypoints
they are automatically bound to the path. Additional details regarding the operational aspects of this
approach are discussed in topic GPS Status Panel 115 .
The contents of the refined path file are not shown. This file is a refined version of the lat/lon
information obtained from the KML file. The file contains lat/lon points spaced along the path so that
the distance between points is no more than .25 miles. It also contains an indication of the distance of
each point from the start and the results of county detection at each of the lat/lon points.
7.19
Operating Cross Country Using CQ/X
Beginning with version 1.7.9.4 it is possible to use CQ/X for cross country trips without having to
change the QSO party every time a new state is entered. To do this choose either the Cross-Country
or MARAC QSO Party as the contest when Starting a New Contest 62 and make sure you select
Inside Mobile as the operating type. Once either Cross-Country or MARAC is chosen a button labeled
"Choose States for Cross Country Operation" will become visible. Clicking on that button will call up the
following State Selection dialog.
CQ/X de NO5W
Route Planning for Mobile QSO Party Operation
113
When the Cross-Country operation is started the standard polygon data for each of the selected states
will be loaded and will be used in the county detection processing. In order to avoid overloading the
computer with unnecessary data it is recommended that you only select those states you are planning
to operate from each day. This will require you to, in effect, change the contest each day. Prior to doing
this you should make sure you finalize the previous day's log using either of the menu items File |
Finalize Cabrillo Log or File | Export Log as ADIF.
Cross Country operation using the County Hunter Nets (CHN) has some different requirements from
state QSO party operations. The following features are included to help meet those requirements:
1. Use menu item Keyer | Use Full County Name. Once this option is chosen the # sign in any
messages will be replaced by the full county name, including the state, whenever there is a change of
county. You can choose to provide a separator between the county full name and the state
abbreviation. This separator may also be changed on the dialog for Setting Up Messages 50 . It is
more convenient to do it there since that location does not involve defining a new contest.
2. Use the * symbol to embed the received signal report in any messages. This is useful in echoing the
All rights reserved by C.W. Sanders, NO5W
114
CQx Client: User Guide
signal report received from the other station as is the practice in CHN operation.
3. The normal log restricts the QTH entry to the abbreviation associated with the QTH of the other
station. However, in CHN operation the received QTH is likely to be more free form so this is allowed in
CQ/X when using Cross-Country and MARAC QSO parties. However, the normal log restricts the
length of the QTH to be no more than six characters. If you want to capture everything entered on the
QSO Entry Box 145 (e.g. N4PJ 559 REDRIVERTX) on each QSO use the File | Setup Extended Log
to setup a log for that purpose. Each line in the extended log will contain the following:
QSO: DATE TIME BANDMODE <SENT COUNTY-RST><CONTENTS OF QSO ENTRY BOX>
4. The exchange between the two stations is somewhat different in CHN operation and takes a form
similar to the following.
·
·
·
·
·
NO5W solicits a QSO: CHN DE NO5W/M MONTGOMERYTX
N4PJ responds: N4PJ/M
NO5W: N4PJ/M 599
N4PJ: 339 REDRIVERTX
NO5W: R UR 339
To satisfy the requirements of the normal logging process it is recommended that the CQX message
be NO5W 5NN # and that the QRL, QRU, and CQT messages be set up with assigned keys to send
the exchanges with the responding station
QRL: @ 5NN -- assigning a key (e.g. F2) to this message will cause the other station call sign to be
sent followed by 5NN
QRU: R UR * -- assigning a key (e.g. F3) to this message will cause the signal report received from the
other station to be sent preceded by R UR
CQT: TU CHN NO5W/M -- assigning a key (e.g. F4) to this message will log the contact in the normal
and, if setup, the extended log.
In the case where the other station does not provide a QTH, which is optional in CHN operation, you
should enter something like NA to provide the free, but required, QTH information.
5. For those who like to send actual signal reports as opposed to standard 559 or 599 messages A1AA can be set up with assigned keys to send these non-standard RST reports.
6. The standard implementation for state QSO party operation described in
Running Stations from a Multi-County Boundary 69 does not fit the model used by CHN very well and it
is best to use a workaround approach, pressing into service some of the additional message buffers.
First of all the message announcing your location will need to include two or more counties and it may
be useful to split the message over two message buffers. For example for operation on the county line
between Lake and Sumter counties in Florida you could set up messages Q1 and Q2 as
Q1: CHN NO5W/M LAKE FL
Q2: ES SUMTER FL
Then to announce your location and solicit contacts you could push the button assigned to Q1 followed
immediately by the button assigned to Q2. You could also use the Extended Log to help with logging of
the multiple QSOs that need to entered. One way of doing this is to put start and end markers each
time you are set to do county line operation. For county line operation on the Lake-Sumter county line
in Florida you could type in a pseudo-QSO into the QSO Entry window as
N4START LAKEFL-SUMTERFL and then press the key assigned to silently log a QSO. This will
put an entry of the following form into the Extended log. QSO:2011-06-06 0618 20CW <SENTFROM-RST>LAKEFL-559 <QSO-ENTRY>N4START LAKEFL-SUMTERFL
CQ/X de NO5W
Route Planning for Mobile QSO Party Operation
115
Then you make QSOs in the normal way and they will be entered into the Extended Log as
QSO:2011-06-06 0624 20CW <SENT-FROM-RST>LAKEFL-229 <QSO-ENTRY>N5NA 339 TX
When the Lake-Sumter county line operation is over you enter the pseudo-QSO info N4END LAKEFLSUMTERFL into the QSO Entry window and press the silently log QSO key which will create the
ending marker for this county line operation.
QSO:2011-06-06 0638 20CW <SENT-FROM-RST>LAKEFL-559 <QSO-ENTRY>N4END
LAKEFL-SUMTERFL
Once you are ready to produce a final log you will have an extended log that looks like
QSO:2011-06-06 0618 20CW <SENT-FROM-RST>LAKEFL-559 <QSO-ENTRY>N4START
LAKEFL-SUMTERFL
QSO:2011-06-06 0624 20CW <SENT-FROM-RST>LAKEFL-229 <QSO-ENTRY>N5NA 339 TX
other QSOs on this county line
QSO:2011-06-06 0638 20CW <SENT-FROM-RST>LAKEFL-559 <QSO-ENTRY>N4END
LAKEFL-SUMTERFL
and you will be able to confirm QSOs with N5NA in both Lake and Sumter counties by referring to the
Extended log.
8
GPS-Related Topics
Additional GPS-related topics are covered here including:
·
·
·
·
·
·
·
·
·
·
·
·
·
·
·
·
8.1
GPS Status Panel 115
Defining Waypoints 119
Setting GPS Reporting Parameters 121
Setting Up Desired Speed Indicators 123
Setting Up Automatic County Changes 124
Using Where Am I 124
GPS Advisory Modes 126
County Locator 126
County Boundary Polygons 129
Reporting Your Position 134
CQ/X QSL Format 135
Preparing CQ/X GPS QSL Logs 136
Setting up a GPS Pass Through 140
GPS Passthrough Via a Virtual Null Modem 141
Using a Networked GPS 142
Using GPS Recorder 142
GPS Status Panel
Information supplied by the GPS is presented under the GPS tab found on the left hand side of the
main display.
All rights reserved by C.W. Sanders, NO5W
116
CQx Client: User Guide
The GPS panel contains the following information:
· GPS Status - Indicates On/Off status and whether GPS is client (Local) or server (Remote) based.
· Sats in View - The number of satellites in view of the GPS receiver
· GPS Time - The time in hours:minutes:seconds UTC received from the GPS.
· Latitude - The latitude received from the GPS on the last update.
· Longitude - The longitude received from the GPS on the last update.
· Speed - The speed in Miles Per Hour of the vehicle as reported by the GPS.
· Heading - The direction of travel or bearing as obtained from the GPS via the GPRMC sentence.
North is taken as the zero reference for the heading with positive values indicating directions East of
CQ/X de NO5W
GPS-Related Topics
117
North and negative values directions West of North. The heading is used in calculating the speed of
closure toward a county line crossing point.
· Grid square - The six-character grid square containing the vehicle's current position.
· Update Rate - The number of seconds between GPS display updates. The program does not
control the rate at which data is received from the GPS but only the rate at which new information is
presented on the display. The default value for this parameter is 10 secs. You can modify it using the
menu item GPS | GPS Parameters. Using that same menu item you can set up to use a different
update rate as the distance to a county line crossover becomes less than the Alert Range.
· Alert Range - When the distance to the next county line crossing point becomes less than the Alert
Range the period for updating the GPS information, including county detection, will change to the
value defined on the GPS parameter setting dialog reached via menu item GPS | GPS Parameters.
Also the panel listing the name of the next county line crossing will turn red and remain so until the
county line has been crossed and a new county line crossing is present on the panel at which time
the update period will revert to the normal update rate.
· Miles to Waypoint - This can be either radial ("crow flies") distance (indicated by R) from the current
position to the selected waypoint or it can be the drive path distance (indicated by K). In order to
have the drive path distance displayed you should build your route using the menu item QPTools |
Build Plan Using a Google Map to build the route from a KML file as explained in
Building a Crossing File Using Google Maps 108 . Waypoints are defined using the menu item GPS |
Define Waypoints as described in the Defining Waypoints 119 topic. When waypoints are defined
they are bound to the drive path and are located on the drive by their distance from the start of the
path.
· Miles to Next County - Assuming that you have entered a route plan that contains the county line
crossings in the order in which they will be encountered this can be either the radial ("crow flies")
distance (indicated by R) from the current position to the next county line or it can be the drive path
distance (indicated by K). In order to have the drive path distance displayed you should build your
route using the menu item QPTools | Build Plan Using a Google Map to build the route from a
KML file as explained in Building a Crossing File Using Google Maps 108 . If you choose not to use
the Google Path method see topics Adding County Crossing Information 90 , and
Importing County Crossing Information 91 for details of how to set up this information. The color of
the traffic light symbol next to the miles to next county data is an indicator of desired speed and is
determined by the relationship between the Minutes to Goal and Minutes to Next County described in
Vertical Score Format 147 . The colors are green, yellow, or red and are determined in the following
way:
Green if Minutes To Goal < Minutes To Next County - 5
Yellow if Minutes To Goal >= Minutes To Next County - 5 and < Minutes To Next County + 5
Red if Minutes To Goal >= Minutes To Next County + 5
· Distance Calculation Indicators(K/R) - To the right of the Miles To Waypoint and Miles to Next
County numerical values are symbols (K or R) that indicate the method used to calculate the
distances. R indicates that the distance is the radial (line of sight) distance and K indicates that the
distance is the actual driving distance. In order to display the actual driving distance it is necessary to
use the method described in Building a Crossing File Using Google Maps 108 to build your crossing
file. When the actual driving distance is used CQ/X uses the latitude and longitude values from the
GPS to determine how far along the path you are currently located and from that and the precalculated distance of waypoints and county line crossings along the path it determines the actual
driving distance to the waypoints and county line crossings. Of course as you drive along you may
have to detour from your planned plath. When this deviation exceeds .75 miles the calculation of
distances changes over from K to R since the drive path method may no longer be applicable. When
the detour is over and you are back on the planned drive path the calculation of distances reverts to
All rights reserved by C.W. Sanders, NO5W
118
CQx Client: User Guide
the drive path method.
· Time (In Cty/To Next) - The "In" part of this display element shows the total time (Minutes:Seconds)
spent in the current county updated on each update from the GPS. The time in each county is
tracked as county changeovers occur so that the Time In Cty represents the total time in the county
in the case where a county is entered more than once. The "To Next" part of the display element
shows the estimated number of minutes to the next county line based on current closing speed and
distance to the county line crossing point as specified in the crossings file. Closing speed is
computed as the component of the speed along the vector frrom the current position to the position
of the county crossing. For reference the closing speed is shown at the bottom of this display area.
When the closing speed becomes negative (indicating that the vehicle is moving away from the
crossing) the "Time To Next Cty" is shown as NC. When the closing speed drops below a userconfigurable threshold speed the Time To Next Cty is not updated until the closing speed again
exceeds the threshold or becomes negative. The estimated Time To Next Cty is highly dependent
on the track taken to the county crossing and the current speed of the vehicle and is most useful
when the vehicle is close to the county crossing and is closing in on the county crossing under
uniform straight-line motion. See also the discussion under topic
Setting GPS Reporting Parameters 121 . Time In County results for each county are saved in the
restart file so that accumulations can continue where they left off prior to the shutdown. On the start
of a new contest the Time In County for the first county will not begin accumulating until at least one
QSO has been worked. Accumulated Time In County for all counties activated is shown under the
Status tab on the left side of the main display.
· Next County Line Indicator - The next county line is shown in the format
<FromCounty-ToCounty-HwyID>
where the county names are shown in abbreviated form and the HwyID is whatever string you
entered to identify the highway when you constructed your crossings-based route plan. This
assumes you have entered a route plan that contains the county line crossings in the order in which
they will be encountered. See topics Adding County Crossing Information 90 ,
Importing County Crossing Information 91 , and Building a Crossing File Using Google Maps 108 for
details of how to set up this information.
· GPS Advisory Indicator - This panel shows the mode that the operator has set for the GPS [County
Change] Advisory which can be any of the following modes: OFF, MANual, AUTOmatic. See topic
GPS Advisory Modes 126 for details.
· You Are In/Near Indicator - This grid uses your current position along with radius, center of the
county bounding circle, and USGS data representing the county boundary of each county to display
a list of all of the near counties and an (IN/OUT) indication of the county that you are currently in. Any
county not in the list will not be valid for a QSO at this time. However, of course, only one of the
counties on the list will be the actual current county and this is indicated with IN. Beside each of the
counties there is also an indicator of the ratio of the distance to the county reference to the county
radius. An up/down arrow provides an indicator of whether this ratio is increasing or decreasing.
These two indicators taken together will indicate which counties are about to exit the list - for
example in the screen shot below San Patricio (SPAT) county is about to exit the list since its ratio is
near 1.0 and is increasing. See topics County Locator 126 and County Boundary Polygons 129 for
additional details.
CQ/X de NO5W
GPS-Related Topics
8.2
119
Defining Waypoints
If a GPS is available it is useful to define a set of Waypoints so that a real-time indication of the
distance to a selected waypoint will be available . Waypoints are similar to, but handled separately from
county crossings, and are simply points of interest along the route (Best BBQ in TX, Home QTH,
Saturday Night Motel, etc).
To define a set of waypoints use the menu item GPS | Define Waypoints. This will cause the dialog
Setting GPS Reporting Parameters 121 to appear. In the Define Waypoints area of this dialog enter a
waypoint descriptor followed by the latitude and then the longitude of the waypoint using spaces to
separate the three items. Then press the Add button to add the waypoint to the list.
All rights reserved by C.W. Sanders, NO5W
120
CQx Client: User Guide
Once defined on this dialog the program will continue to use these waypoints until modified. However it
is a good idea to save the waypoints to a file in order to manage multiple sets of waypoints. Waypoints
can be imported from a file using the button labeled "Load Waypoints from File" on this dialog.
Another approach to defining waypoints is to first compile a file using a mapping program such as
Streets and Trips. Here are the steps for this approach.
1.
2.
3.
4.
5.
6.
7.
8.3
Start up Streets and Trips and access the appropriate trip file.
Open a text editor such as Notepad
Place a pushpin at each of the desired waypoints and place a description in the pushpin balloon.
Using the location tool add latitude and then longitude information to the pushpin balloon.
Now highlight each of the waypoints in turn and press Ctrl+C to copy the waypoint information to
the clipboard. Then use Alt+Tab to access the text editor and then, after positioning the cursor at
the next line, use Ctrl+V to copy the waypoint information into the text editor. Note that there will be
tabs between some of the data elements instead of spaces. It is not necessary to remove these
tabs as they will be handled properly by the Waypoint import process.
Once complete save the text editor file with a meaningful name in a logical location that you can
remember. The maps subdirectory for the given QSO party would be one such location but you
may want to define your own subdirectory for all of your files associated with the QSO party.
To insure that the waypoints appear in the desired order you may want to add A-, B-, C-, ... to the
beginning of each descriptor.
Tracking Multiple Waypoints
Often it is difficult to know which waypoint to select from the drop down on the GPS panel. The menu
item GPS || Track Multiple Waypoints which has associated hot keys Ctrl + T can be used to set up
tracking of several waypoints based on distance from the current location of the vehicle. The name and
distance for the selected waypoints are shown in the following always on top form
As indicated in the screen shot there are two ways to select the waypoints to be tracked.
Closest N Method: This method will track the closest N waypoints and will display then in increasing
order of distance from the current location. Color coding indicates whether the distance is increasing or
decreasing on the latest update from the GPS.
All Within X Miles Method: This method will track all way points that are within X miles of the current
CQ/X de NO5W
GPS-Related Topics
121
location and will display then in increasing order of distance from the current location. Color coding
indicates whether the distance is increasing or decreasing on the latest update from the GPS.
When a change is made in either the method used or the associated N or X parameters the tracker will
update on the next update cycle of the GPS. Columns are automatically sized to fit the entire waypoint
name and distance values into their respective columns so sizing of the columns with the mouse is not
necessary and is not advised since any resizing will be undone on the next GPS cycle.
The user can select any of the tracked waypoints for display on the GPS panel by selecting a waypoint
on the tracker and either pressing the Enter button or double-clicking with the mouse. A function key or
combo may be assigned to the task of accessing the Waypoint Tracker. The following rules for
updating the Waypoint Tracker have been implemented to reduce the frequency of flicker that results
from each update of the Waypoint Tracker:
1. Time between updates should be at least 30 seconds
2. Within the first constraint an update should occur whenever the change in distance for at least one
waypoint is greater than .5 miles
3. Within the first constraint an update should occur whenever the order of the waypoints changes
including the addition of a waypoint to the display.
If it is desired to track a waypoint on a more frequent basis then that waypoint should be assigned to
the GPS panel using the method described above. When that is done there will, of course, be a
difference between the distance shown on the tracker and that shown on the GPS panel due to their
different update rates. However, the difference should never be more than about .5 miles.
8.4
Setting GPS Reporting Parameters
Use the following dialog, accessed via the main menu items: GPS | Set Parameters, GPS | Setup GPS
Log, and GPS | Define Waypoints, to change GPS reporting parameters
All rights reserved by C.W. Sanders, NO5W
122
CQx Client: User Guide
· Time Between GPS Display Updates - see topic GPS Status Panel 115
· C/L Alert Range - County Line Alert Range and associated update period. Set these values to have
the update rate automatically changed when the distance to the next county line becomes less than
the Alert Range. See topic GPS Status Panel 115 . Changing to a smaller update period will tend to
improve the accuracy of the county line crossing determination but will add to the CPU loading.
· Min. Speed [required] to Update Estimated time to the next county - this parameter enables you
to control the minimum vehicle closing speed at which the estimate of the time to reach the next
county crossing is updated. If this parameter is set too low the time displayed will fluctuate
significantly under variable speed situations (e.g. passing through small towns with numerous
stoplights or when deciding to stop by the side of the road to tend to the remaining pileup). Setting
this parameter in the range of 50-60 mph will allow a reasonable estimate to be maintained. In this
case the estimated time will be the time required once you are back underway at the previous
"cruising" speed.
· Enable GPS Passthrough Via Port - checking this box allows you to pass GPS data to another
application. Assuming sufficient ports are available this can be used to pass data to a mapping
program such as Streets and Trips. See topic Setting up a GPS Pass Through 140 for details.
CQ/X de NO5W
GPS-Related Topics
123
· Record GPS Information - In this group box you can specify whether or not you wish to record
information from your GPS and, if so, the following means of logging that information
1. Log selected GPS-related information on each QSO in a separate file which you specify. In this
mode the information to be recorded may be customized using the check boxes in the area
labeled Select GPS Information to Record.
2. Log selected GPS-related information periodically in a file which you specify and at a period
which you specify. In this mode the information to be recorded may be customized using the
check boxes in the area labeled Select GPS Information to Record.
3. Log selected GPS-related information on each QSO or whenever a specified distance has been
covered since the previous update of the GPS log (whichever comes first) in a separate file
which you specify. In this mode the information to be recorded may be customized using the
check boxes in the area labeled Select GPS Information to Record.
4. Log information in CQ/X QSL-ready format on each QSO. This option creates a log of each
QSO with information arranged in comma separated value (csv) format suitable for direct import
into Streets and Trips as a set of pushpins annotated with information about the QSO and
located on the map at the position where the QSO took place. After the QSO party you can send
stations a QSL file which, assuming they have streets and trips, can be be imported to produce
a nice set of QSLs showing location of the QSO. For additional discussion see topic
CQ/X QSL Format 135 .
· Waypoint definitions - To add a new Waypoint to the list enter the Name, Latitude, and Longitude
of the Waypoint in that order as a space delimited string and press the Add button. It is important
that the latitude and longitude be entered with the correct sign (N/E=+, S/W=-).
This dialog also allows the waypoints to be loaded from a file. If a large number of waypoints are going
to be defined it is probably easiest to develop a file of waypoints using a trip planning tool such as
Microsoft's Streets and Trips in a manner similar to that described in
Adding County Crossing Information 90 .
1.
2.
3.
Start up Streets and Trips and access the appropriate trip file.
Open a text editor such as Notepad
In Streets and Trips annotate each of the waypoints along the route with Waypoint Name,
Latitude, and Longitude.
4. Once all of the waypoints have been annotated save the trip file
5. High light each of the waypoint annotations and copy and paste that information into the text
editor.
6. Once complete save the text editor file
7. Streets and Trips and/or the text editor can be closed at this point if desired.
8. In CQ/X use the GPS | Define Waypoints option to access the above dialog
9. Use the Load Waypoints from File button to import the waypoint file.
10. To make the waypoints available to the program press the Apply button.
· Although waypoint definitions will persist from one session to another it is a good idea to save any
important collection of waypoints in a file for later use. Buttons are available for saving and loading
waypoints to/from a file.
8.5
Setting Up Desired Speed Indicators
The traffic light symbol next to the miles to next county data on the GPS Status Panel 115 is an
indicator of desired speed. In a future release it is intended that the parameters for controlling the color
of this symbol will be user-configurable based on QSO rate and distance to the next county line.
In the current release the colors are not user-configurable and are independent of QSO rate. The
default colors are green, yellow, or red based only on the distance to the next county
Green - greater than ten miles to the next county
Yellow - less than ten but more than five miles to the next county
All rights reserved by C.W. Sanders, NO5W
124
CQx Client: User Guide
Red - less than five miles to the next county
This feature will be configurable in a future release.
8.6
Setting Up Automatic County Changes
After connecting to and starting the GPS use the menu item GPS | GPS Advises County Changes to
access the GPS Advisory Mode selection dialog shown below. Choose the AUTO mode and then click
OK. This will allow the GPS to change the county automatically whenever a new county is detected and
a QSO is not in progress. If a QSO is in progress the county will be changed as soon as the QSO is
logged.The mode of the GPS Advises County Changes feature is displayed on the
GPS Status Panel 115 . If you want an announcement of new county to occur when in CW mode check
the indicated checkbox on the GPS Advisory Mode dialog.
8.7
Using Where Am I
Under the main menu item labeled GPS there is a subitem labeled "Where Am I?" Selecting this item
will bring up the following Where Am I Dialog which shows the current latitude and longitude, the
current nearest waypoint and nearest county crossing as well as distance to each. Upon selection of
the down arrows the distance to all waypoints and county crossings in ascending order of distance
from the current location will be listed. Also included is a small (typically < 4) list of counties, one of
which is the county in which you are currently located (see topic County Locator 126 for details).
CQ/X de NO5W
GPS-Related Topics
125
When this dialog is called up a small file named CQX_WhereAmI.txt containing the latitude and
longitude information is written out. If Streets and Trips is available pressing the View Map button will
open up that application. Using the Streets and Trips data wizard to import the CQX_WhereAmI.txt file
will cause the current position to be pinpointed on the map.
Another more elegant way of pinpointing current location on the map is to simply interface a GPS to the
mapping program. There are at least three ways to do this while continuing to provide GPS input to
CQ/X :
1.
2.
3.
Purchase a second GPS and interface it to the mapping program using a separate port. This
requires an additional GPS and an additional port, either serial or USB depending on the
capabilities of the GPS and the mapping program.
Purchase or build an RS-232 splitter to split the signal from a single GPS so that both the mapping
program and CQ/X can listen to the GPS. This requires an additional serial port and construction
or purchase of an RS232 splitter.
Provide a GPS pass through capability in CQ/X wherein it passes the GPS sentences to the
mapping program. If the mapping program only supports RS232 serial input then this option will
require two additional serial ports: one for the pass through output of CQ/X and one for input to the
mapping program. This capability is provided and is described in detail in topic
All rights reserved by C.W. Sanders, NO5W
126
CQx Client: User Guide
Setting up a GPS Pass Through 140 .
8.8
GPS Advisory Modes
As explained in County Boundary Polygons 129 the GPS can determine which county you are currently
in by performing an analysis of the USGS county boundary polygon. You can choose to use this
information in three ways by getting county change advisories from the GPS in the following three
modes. To change the GPS Advisory mode use the menu item GPS | GPS Advises County Change.
This will cause the following dialog to appear
· GPS Advisory OFF: This mode is the default and is selected by choosing the option labeled "Do not
issue county change advisory" In this mode it is the responsibility of the operator to realize, from
information in the You Are In/Near grid or road signs, that it is time to change counties. If a route has
been defined that includes the sequence of counties this can be done by pressing the key assigned
to the Next County task until the desired county is present. If no such route is defined the messages
affected by the county change will need to be changed manually.
· GPS Advisory MANual: This mode is selected by choosing the option labeled "Issue county change
advisory with option to decline". In this mode a pop up window is presented to the operator indicating
the need for a county change. The operator may either Accept or Reject the county change. On
acceptance the county will be automatically changed by the program using the message template
defined for the contest. On rejection the program will again alert the operator to the need for a
change after a sufficient time or distance has elapsed.
· GPS Advisory AUTOmatic: This mode is selected by choosing the option labeled "Change county
automatically when GPS ...". In this mode the program automatically changes the county when the
need for the change is detected by the GPS. If a QSO is in progress when the need for the change is
detected the change will occur as soon as any in progress QSO is logged using the message
template defined for the contest. If the option to announce the new county is checked and you are
operating in CW mode the message 'NEW <county abbreviation>" will be sent twice when the
changeover to the new county occurs.
8.9
County Locator
On the GPS Status Panel 115 as well as the Where Am I Dialog there is a small list entitled "You are
in/near [the following counties]". To understand how to use this information it is helpful to understand
CQ/X de NO5W
GPS-Related Topics
127
how it is developed. It should be noted that none of the work involved in the steps below is required of
the user since this is all done during the development of the data files that support the particular QSO
party or during program operation. The information is presented solely to help you understand the
meaning of the information presented.
Step 1: County Reference Point Determination - Associated with each county is a reference point
which is the latitude and longitude of a bounding circle that is determined during first access of the
county polygon file to be the center of the smallest circle that completely encloses the county.
Step 2: Determination of Each County Radius - Once the center point is determined an iterative
process is used to make sure all points on the county polygon are included in the bounding circle. The
center point of the bounding circle as well as its reference are written back out to the county polygon
file for future use.
An Example: The screen shot below illustrates this for Harris, Waller, Montgomery, and Grimes
counties and a hypothetical TQP route. The small car on the map shows the current position which will
be noted to be within the Harris, Montgomery, and Waller footprints but outside the Grimes footprint.
For this example it can be seen that the footprints encompass significant areas outside of their
respective counties and this leads to some uncertainty as to which county in the list one is actually
located in. The program uses the County Boundary Polygons 129 to resolve this uncertainty. If a map
with real-time tracking is being used then this uncertainty may also be resolved by consulting that map.
All rights reserved by C.W. Sanders, NO5W
128
CQx Client: User Guide
Step 3: Analysis of County Boundary Polygons - A final determination of the county location can be
made by analyzing the boundaries of each of the counties that pass the screening tests performed by
comparing distance to the reference point to the radius of the bounding circle. The polygon test is
performed only on those counties that pass the screen and is based on the county boundary
information that is available from the USGS. See topic County Boundary Polygons 129 for other details.
Use As County Abbreviation Validity Check: The original impetus for developing this feature of the
program was to provide a validity check on a manually entered county abbreviation. When a county
abbreviation is entered in the (CQ, CQX, SPX) message fields a check is made to ensure that the
county abbreviation is contained in the short list of counties in which you could be located. If the
abbreviation is not in the list then the entered abbreviation is flagged as an error.
CQ/X de NO5W
GPS-Related Topics
8.10
129
County Boundary Polygons
The polygon description of each county has been obtained by downloading USGS data from the
internet and processing each county in the QP state into a file with the name
<CountyAbbrev>_polyXY.txt. During this processing an analysis is made of each county polygon to
determine the geometric center of the county and the radius of the smallest circle that can be
circumscribed on the polygon. Also a calculation is made to determine the radius of the largest circle
with center at the geometric center that can be inscribed in the polygon. The geometric center and
radius information is written to the county file along with vertex information with each vertex converted
from Longitude-Latitude format to X-Y format with the origin of the X-Ycoordinate system located at the
center of the bounding (outer) circle. The following screen shot shows the inner and outer circles for
Montgomery County, TX along with pushpins representing some of the vertices of the county polygon.
These inner and outer bounding circles are used to provide a quick screening analysis on first starting
the GPS to determine the current county.
· Outer Circle Screen - If the current location is not within the outer circle of a county that county
does not need to be examined any further.
All rights reserved by C.W. Sanders, NO5W
130
CQx Client: User Guide
· Inner Circle Screen - If a county is found whose inner circle contains the current location then that
county is the current one.
If no county is found to satisfy the Inner Circle Screen then the counties passing the Outer Circle
Screen must be examined in detail. This analysis uses a winding number algorithm to count the
number of times the polygon encircles the current location. The only county having a non-zero winding
number will be the county containing the current location. It should be noted that some counties are
defined by multiple disjoint polygonal regions as, for example, is Newport County Rhode Island shown
here. In that case each of the disjoint regions is subjected to a winding number analysis to determine if
any of the regions contains the current point. An attempt is made to optimize the efficiency of this
process by testing the regions in the order of their size with the largest being tested first. In this case
size is determined as the length of the radius of the bounding circle of each region. This work is done
when the polygon files are developed for each QSO party.
Pool Maintenance
During operation once the current county is determined a pool of adjacent county polygons is formed
which will be examined on each update of the GPS to determine whether there has been a county
change. If there has been a change the pool will be updated with possibly new counties and cleaned of
any counties that are no longer adjacent to the current county The pool typically consists of no more
CQ/X de NO5W
GPS-Related Topics
131
than 5-6 counties which considerably reduces the number of counties that need to be examined in
detail on each GPS update. Should it occur that the pool of counties has no county that contains the
current point(see note) then a rebuild of the pool is performed in which all counties are examined
using the above screening process.
Note: If the list of counties adjacent to county A is missing county B then the pool formed when the
current location is in county A may not contain county B. On transitioning from county A to county B
examination of the counties in the pool will not find county B so the search for the "IN county" will be
unsucessful. When this is detected a rebuild is necessary to determine the "IN county".
8.11
Adding Polygonal Regions
Note: Beginning with version 1.7.7 Patch 177-05 we have reviewed all of the states and, where
necessary, replaced the original USGS boundary models, which were land-based, with TIGER2009
models which accurately model the county definition, including county lines that extend over water. For
that reason if you are using 1.7.7 patched through 177-05 or a later version you should not need to use
the Add Polygonal Regions capability. As an example, the following screen shot shows the new model
based on TIGER2009 for the Tampa Bay area.
Contrast the TIGER2009 model to the original USGS model
All rights reserved by C.W. Sanders, NO5W
132
CQx Client: User Guide
The menu item QP Tools | Add Polygon Region provides a means of augmenting the USGS polygon
boundary files. The problem addressed by this menu item is that the USGS polygons apparently model
the landmass but do not include bridges over long expanses of water.
Bridges over ordinary rivers present no problem but it may be necessary to augment these files when
there are bridges that span a long expanse of water. This was discovered while operating the 2007
Florida QSO party in which part of the route included the long bridge on I-275 in the Tampa area. It
was also noticed in Charlotte county while on the I-75 bridge across Charlotte Harbor.
The case of the I-275 bridge turned out to be especially critical since there are two county lines
(Manatee-Hillsborough) and (Hillsborough-Pinellas) defined on the bridge.
CQ/X de NO5W
GPS-Related Topics
133
In order to have the county changes correctly performed the user has two options:
1.
2.
Manually change the county using the special # keystroke as described in
Special Keystroke Combinations 156 .
Modify the USGS polygon models for the affected counties by adding polygons that include the
bridge.
The first method has the disadvantage that it requires the user to remember to change back to
automatic county detection once the bridge has been crossed while the second method allows the user
to continue using the automatic county detection feature even while traversing the bridge. Adding
polygons to model a long bridge should of course be done prior to setting out. The dialog below
facilitates this approach and includes instructions on its use. The dialog also provides a means of
restoring the original files if necessary.
All rights reserved by C.W. Sanders, NO5W
134
CQx Client: User Guide
In the Tampa Bay case described above the polygon models for Pinellas, Hillsborough, and Manatee
would all need to be augmented to include appropriate parts of the I-275 bridge. For simplicity
Charlotte Harbor was used to illustrate steps 3 and 4 in the dialog. However, modeling the I-75 bridge
across Charlotte Harbor is not critical since Charlotte county is on both sides of the bridge. The only
thing that will happen in this case is that no IN county will be present while traversing the bridge but the
messages will continue to reflect presence in Charlotte county.
8.12
Reporting Your Position
If you have a GPS interfaced to CQ/X and are requested to post your latitude and longitude or if things
get slow and you simply want to pass tracking information to listeners this can be done using the key
combination Ctrl + L. This will snapshot the GPS coordinates and activate the following dialog.
CQ/X de NO5W
GPS-Related Topics
135
Once this dialog appears use the cursor keys to select which of the components of position to send
and then either click on the Send button or press Enter to send the message. Generally you would start
by sending both components and then, in response to a request for repeat of a specific component,
would send only the requested component.
The dialog is activated with a keying speed of 20 wpm. To change the speed tab to the speed combo
box and use the cursor keys to select the desired speed. When the dialog is closed the speed will
revert to the last value it had prior to activating the dialog.
8.13
CQ/X QSL Format
The CQ/X QSL format is simply a format for logging the position at which a QSO was made in order to
easily import the information into a mapping program such as Streets and Trips for display of the QSO
on a map. After the QSO party the file produced using the CQ/X QSL format can be easily parsed for
all of the contacts with a given station resulting in a file of the following form:
Using the data import capability of Streets and Trips the above information can be imported onto a
All rights reserved by C.W. Sanders, NO5W
136
CQx Client: User Guide
map showing the QSO Party route along with a pushpin for each of the contacts in the above file.
Turning on selected pushpins shows information in the following form where the Bell, Milam, Burleson
QSOs are shown
Production of these "QSLs" could be performed either by the in-state station or, to minimize the
workload on that station, the CSV file along with a list defining the route could be supplied to the
requesting station with production of the "QSLs" performed by the requesting station using their own
copy of Streets and Trips. As an enhancement to the latter approach the sponsor of the QSO Party
could collect the GPS logs and route plans of all in-state GPS-enabled mobile stations and make them
available for down load from their web site -- after the closing date for log submittal of course.
Hint: When producing the QSLs from a screen with resolution of 1024x768, a screen capture of a
region of height = 365 pixels and width = 565 pixels will fit nicely on 4x6 paper.
8.14
Preparing CQ/X GPS QSL Logs
If you have GPS capability and have turned on the GPS QSL-ready logging feature described in
Using GPS Logging 100 at the end of the party you can produce interesting map-based QSLs. To
produce the QSL-enabled log for any given station requires extraction of that station's QSOs from the
total GPS QSL log. This can be done using the main menu item QP Tools | Prepare QSL Log Files.
Selection of this menu item will activate the following dialog for preparing the logs
CQ/X de NO5W
GPS-Related Topics
137
Specifying the file containing the GPS QSL log will fill the Available Calls drop-down box with all of the
calls found in the log. Selection of a call and pressing the Extract QSL Log button will fill the list box
with information for each of the QSOs with the selected station. If it is desired to change the time
stamp format with each log entry this can be done by checking the Change Time Stamp check box and
supplying the necessary information. The final step is to save the results to a file of your choosing.
Following the above process will produce a file with the proper format to import into Streets and Trips
as a set of push pins with sufficient information in each pushpin balloon to document the QSO as
described in CQ/X QSL Format 135 . The header information in the resulting file is the same as that
shown in the above screen shot and is present to "fool" Streets and Trips into importing the information
in a certain way.
After importing the information into Streets and Trips select one of the resulting push pins and then
under the Data menu item select Data Set Properties to change the appearance of the push pins and
to change how the information in the pushpin balloons is presented.
8.15
Preparing a Log On a Map KML File
It's several weeks after the contest and the log submission deadline has passed. You decide you would
like to post your mobile log on the web in a searchable format and in a way that shows the mobile
nature of your adventure allowing users to see where you were when they worked you and, if desired,
to view the surrounding countryside. You remembered to have CQ/X keep a GPS QSL log so you've
got lat/lon data for each QSO. You go into the QP Tools menu and select the menu item Prepare Log
On A Map which activates the following dialog for formating and preparing the KML file that you will
publish using Google Maps.
All rights reserved by C.W. Sanders, NO5W
138
CQx Client: User Guide
First it's necessary to make sure that the log you are going to post is for the contest that you currently
have selected. If not you exit this dialog and use the New Contest item under the Files menu to select
the contest that corresponds to the GPS log. This will ensure that correct county polygon data is loaded
into the program.
Once the GPS log file is selected it will be analyzed for number of counties, number of QSOs, and
maximum QSOs in a county in order to determine the number of color coding selections that are
needed.
You can elect to include county overlays for all of the counties in the state, or for only those that you
CQ/X de NO5W
GPS-Related Topics
139
have activated, or no county overlays at all. If you choose to show overlays then you may want them to
be color-coded based on the number of QSOs in each. You select the colors to be used along with the
color for the boundary line and the opacity/transparency of the overlay colors.
You then select background and text colors for the QSO balloons that will be activated. You decide to
include a hyperlink to the 3830 report that you filed earlier. You use the Find button to locate the URL
for the report in the 3830 archives and then paste the URL into the edit box immediately to the left of
the Find button.
Finally you click on the Prepare KML button to produce the KML file which you then upload to your
website. Using the information provided in the How To Post document you then request Google Maps
to find the file and you use the link information provided by Google Maps to add a link to the map on a
web page. The following screen shots show an example of the results. A QSO with a given station can
be found using the standard find menu item resulting in a balloon at the location of the QSO. Of course
you can zoom in for a closer view if desired or you can zoom in for a street level view using the symbol
of the little man just above the zoom control.
Note that when a number of QSOs have been made at or very near the same location only one place
marker will be shown and the QSO balloons for the additional QSOs may be accessed using the
nearby results link.
Finally clicking on an area of a county rather than on a QSO placemarker will show the county identifier
and the number of QSOs made in that county as shown in the final screen shot.
All rights reserved by C.W. Sanders, NO5W
140
8.16
CQx Client: User Guide
Setting up a GPS Pass Through
The SioNMEA.DLL module developed for use with CQ/X is capable of passing the data received from
the GPS through to a mapping application such as Streets and Trips. To reduce loading only the
GPGGA sentences are passed. Ability to use this capability depends on the availability of sufficient
serial ports to support the radio, keyer, GPS and the GPS pass through. A USB to 4 serial port
expander is ideal for this application with three of the ports used for radio, keyer, and GPS the
remaining port can be used for the pass through connection connecting via a null modem to the single
on-board serial port found on the laptop. The diagram below shows the setup. Topic
GPS Passthrough Via a Virtual Null Modem 141 describes how to use two virtual serial ports to form a
virtual null modem in order to eliminate the two physical serial ports and null modem associated with
the GPS pass through.
CQ/X de NO5W
GPS-Related Topics
8.17
141
GPS Passthrough Via a Virtual Null Modem
The two additional serial ports shown in the configuration diagram in
Setting up a GPS Pass Through 140 can be eliminated using a pair of virtual serial ports to form a
virtual null modem. In this case the virtual null modem is used to pass the GPS data directly from CQ/X
to the mapping program (e.g. Streets and Trips) without using any physical serial ports as shown in the
diagram below.
Virtual null modem software is available from several sources including Phil Covington's SDR Page. If
you wish to use this approach with Streets and Trips you should verify that the virtual null modem
software is build 114 or later as this is the earliest version that meets all the requirements of Streets
and Trips (this warning may also apply to other mapping programs). Also be sure to modify the
install.bat file to install the two virtual com ports at port numbers that you are not currently using.
All rights reserved by C.W. Sanders, NO5W
142
8.18
CQx Client: User Guide
Using a Networked GPS
Note: This feature requires the use of the CQXServer module and is a future capability not supported
in the current release. If you have need for this capability please contact the author to determine its
availability.
For a multi operation a single GPS can be connected to the server PC with GPS signals being
distributed across the network. To do this
1. First establish the network using the procedure described in
Setting Up a Networked Configuration 20 .
2. Once the network is established choose menu item GPS | Server GPS on the client machines.
3. Each machine will then have GPS data and essentially all of the operations normally used with a
standalone GPS can be used. For any exceptions or cautions see the notes below .
Notes:
1. When using the the Server GPS the update rate should be set on the server machine.
2. When first establishing the GPS Pass through option in a networked configuration it is best to set
the update rate to four seconds or less, otherwise the mapping program may time out with a
message indicating no data is being received. Once the pass through connection is established
the update rate can be increased somewhat if that is desired or necessary.
8.19
Using GPS Recorder
The menu item Recorder | GPS Record/Playback provides a means of spawning a program
(SimGPS.exe) for recording and playing back GPS information. The recordings produced can be
CQ/X de NO5W
GPS-Related Topics
143
useful in testing and/or demonstrating CQ/X in those situations where it is not feasible to take the
audience on an actual trip. When the record/playback program is spawned the following dialog will be
presented.
Recording GPS Information - To record GPS information use the GPS Passthrough feature to pass
GPS information to the recorder from CQ/X. Perform the following steps:
1.
2.
3.
4.
5.
6.
In CQ/X make sure the GPS is ON and that GPS Pass through has been set up to pass data via
connected ports
After selecting Recorder | GPS Record/Playback select the port to be used to receive GPS
information from CQ/X
Make sure the port is set for 4800/8/1/None
Click on the Connect/Record button to connect the port
In the Record area specify the following:
· Sentence types to record
· File to record the data to
Click on the Start button to start the recording
All rights reserved by C.W. Sanders, NO5W
144
CQx Client: User Guide
7.
8.
9.
Use the Current Data area to view the data that is currently being recorded.
Use the Stop button to stop the recording.
If it is desired to create a file of latitude and longitude pairs for example to import into a mapping
program to show the path defined by the recording use the menu item File | Export Record as
Path Data.
Playing back GPS Information - To playback GPS information perform the following steps:
1.
2.
3.
4.
5.
6.
7.
In CQ/X make sure it is setup to receive GPS information via an appropriate port (real or virtual)
Configure the CQ/X for simulated GPS use just as you would for normal use
Select Recorder | GPS Record/Playback and select the port to be used to send GPS information
to CQ/X
Make sure the port is set for 4800/8/1/None
Click on the Connect/Playback button to connect the port
In the Playback area specify the following:
· Sentence types to send
· File to obtain the data from
· File to obtain waypoints from in case you wish to start/end the playback at waypoint positions
other than the beginning and ending of the file
Press the Play button to begin the playback and the Stop/Reset button to reset playback to the
start.
Note: A pair of virtual serial ports acting as a virtual null modem is a very convenient way to interface
the GPS Recorder/Simulator to CQ/X. See the discussion in topic
GPS Passthrough Via a Virtual Null Modem 141 that describes a source for virtual serial ports.
Caution: While it is possible to use the feature to set CPU time from the simulated GPS you should
avoid this since the date/time information in the source file will be significantly different from true time.
8.20
Using the GPS to Set CPU Time
Once the GPS has acquired the satellites you can use the menu item GPS | Set CPU Time from GPS
to synchronize the CPU time to the GPS signal to within the update period of the GPS. This converts
the UTC time of the GPS to whatever local timezone you have set on the CPU and maintains this local
timezone.
Note: If you prefer to manually set the CPU time using Control Panel you should do so prior to setting
up the GPS. Setting of the CPU time via the Control Panel while the GPS is running and connected to
CQ/X may cause the GPS logic to stop updating. If this happens simply use the menu item GPS |
Connect/Disconnect and resulting dialog to disconnect and then reconnect the GPS.
9
Miscellaneous Topics
This section discusses the following topics
·
·
·
·
·
·
·
·
QSO Entry Box
QSO Entry Check Grid
Query Messages
Route Planning Dialog
Associating Maps With Counties
Setting up a Backup Log
Customizing the Display
Special Keystroke Combinations
CQ/X de NO5W
Miscellaneous Topics
145
· Moving Spots to the Spot Window
· Preparing Statistical Results
9.1
QSO Entry Box
Each radio has an edit box for entering QSO information. However, in most mobile QSO party
operation SO1R will be the operating mode so the right hand radio area can be used to present
information on previous QSOs with the station/mult entered in the QSO Entry window by choosing that
option under the Display menu item and setting up the necessary function keys to initiate the search for
previous QSO information. The screen shot below indicates that K5NZ has been worked in two
previous counties (TITU and SMIT) on 40M CW while the user was in NUEC.
At the start of a QSO, when operating CW, there is an option (see Keyer | Send Call While Entering)
that, when turned on, will begin sending the call as soon as a configurable number of characters, set in
the KeyerParametersDialog, have been entered.
In the QSO Entry window data may be entered in any order separated by spaces and will be parsed
into the separate items required by the contest. The results of this parsing are shown in the
QSO Entry Check Grid 145 . Once the required information is complete pressing Enter will cause the log
to be updated with data from the entry box associated with the LoggingRadio.
Here is a screen shot of a QSO in-progress on the left radio. In this case K5NZ is being worked in
RRIV county on 40 meters and is a new mult as indicated by the yellow highlighting in the entry
window. The QSO Entry area also contains summary GPS information in the format [CurrentCounty
TimeInCurrentCounty][MilesToNextCounty MinutesToNextCty NextCounty]
You can also change keying speed and the frequency of the radio by making an entry in the
corresponding QSO Entry Box as well as requesting a key down for a number of seconds, etc -- see
topic Special Keystroke Combinations 156 for details.
9.2
QSO Entry Check Grid
The QSO Entry Check Grid shows the results of parsing the information entered in the QSO Entry box.
There is a separate row for each of the two radios. Highlighting designates the radio and associated
QSO Entry box for the radio that currently has the logging status. In the example below K5NG was
initially entered in BOWI county and then a correction was made changing the call to K5NZ. The QSO
Entry Check Grid shows the results of parsing the items in the QSO Entry Box 145
All rights reserved by C.W. Sanders, NO5W
146
CQx Client: User Guide
As long as there is missing information on the row corresponding to the logging radio, logging of the
QSO will not take place. When operating CW and attempting to log an incomplete QSO the query
message associated with the left most missing item will be sent. See
Associating Messages with QSO Entry Items 54 for details on setting up these query messages.
Also note in the above screen shot that the operator has been in county SPAT for 02:27 minutes, that
the mileage to the next county (NUEC) is 11.42 miles and the estimated time to reach NUEC is 14:22.
The most recent exchange with K5NZ was from RRIV and the operator has also requested a listing of
all of the QSOs with K5NZ two of which were from NUEC and one from KLEB while K5NZ was in TITU,
SMIT, and RRIV all contacts being on 40M CW.
9.3
Log Display Grid
The Log Display Grid is a view into the QSO log in essentially the form the QSOs will appear in the final
log. It can be used to access previous QSOs for making revisions of received information where
necessary. Sent information is shown in gray and received information in yellow. The arrow symbols on
the left of the display may be used to scroll to the top or bottom of the grid.
Double-clicking on any entry or selecting an entry and then pressing Enter will call up the
QSO Revision Dialog 150 with information filled in for the selected log entry.
Access to the most recent QSO can be obtained by any of the following methods
1.
2.
3.
Double-clicking on the last entry
Pressing keys Alt+E to call up the Edit main menu item and then key R to access the revision
dialog
Pressing any function key that has been assigned to the <REVISE_LAST_QSO> command.
CQ/X de NO5W
Miscellaneous Topics
147
Access to the Log Display Grid may be obtained by clicking with the mouse or by pressing any function
key that has been assigned to the <ACCESS_LOGS> command described in
Available Function Key Commands 54 .
9.4
Score Display Grid
The score tally, including bonus points, is kept in this grid
Use the menu items Display | Scoring - Show Current Mode Only, Show Current Band Only, Show All
Bands and Modes to modify the visible band/mode cells.
Click on the button labeled Bonus to see the bonus points that have been included. This will activate a
dialog of the following form.
9.5
Vertical Score Format
To create more room for the Log Display Grid 146 it is useful to convert the score grid to a vertical
format as shown below. This is done using the menu item Display | Move Score to Left Panel
All rights reserved by C.W. Sanders, NO5W
148
CQx Client: User Guide
When a GPS is in use and county crossings have been defined the vertical format has the added
advantage of allowing presentation of results for the current county as well as projections for the
contest. In the example above the operator has been in MILAm county for 4 minutes and 25 seconds
and has made 4 QSOs against his selected goal of 50. His in-county rate is 53 QSOs per hour and at
this current rate he will need to spend at least 52 more minutes in the county to reach this goal. Based
on his current speed and distance to the county crossing there are only about 22 minutes remaining in
the county so if the goal is to be met either a stopping location needs to be found or, if feasible, a new
speed of about 24 mph (probably not feasible) would allow continued forward progress while allowing
time to reach the targeted goal of 50 QSOs.
The average QSO per county includes a projection of the number of QSOs that will be worked in the
current county by using the current QSOs in the county, the rate in the county and the Minutes to the
Next county. Using this approach in the above example the average number of QSOs per county is
CQ/X de NO5W
Miscellaneous Topics
149
projected to be 20 and with the indicated 30 counties planned the current projection for total QSOs is
600.
The relationship between Mins to Goal and Mins to Next is used to modify the color of the traffic light
symbol on the GPS Status Panel 115 .
Note that data under the county results is updated on each update cycle of the GPS data which is
typically every 10 seconds. So, after logging a new QSO, you should see the data update after no more
than 10 seconds but not immediately.
Note also that Mins to Next and Suggest Speed require that county crossing information is available so
that an estimate of the time to the next county can be obtained.
9.6
Similar Calls Page
This page of the right hand paging control is used to show the results of the similar call search that is
performed as the call is being typed into the QSO Entry window. In the example below the user has
typed W2 into the QSO Entry window.
If it is desired to select a call from the Similar Calls page hold the left shift down and then press the
CursorUp/Down keys to move up/down through the list and to transfer the focus to the Similar Calls
page. Once a call is selected pressing the Enter key will append a space followed by the selected call
to the current entry in the QSO Entry window and will transfer focus back to the QSO Entry window.
All rights reserved by C.W. Sanders, NO5W
150
CQx Client: User Guide
This will make the selected call the detected call for logging while preserving any previously entered
information in the QSO Entry window.
While focus is on the Simiar Calls page you can send a selected call sign followed by a question mark
by continuing to hold down the left shift key while pressing the Enter key. Focus will remain on the
Similar Calls page. If you then want to copy the selected call to the QSO Entry window release the shift
key and press the Enter key.
9.7
QSO Revision Dialog
The QSO Revision Dialog appears when either a double-click is performed on an entry in the
Log Display Grid 146 or the Enter key is pressed once a row of the Log Display Grid 146 has been
selected. The only enterable areas on this dialog are the edit box labelled Revised QSO Entry and the
band and mode selection windows. When the dialog opens the cursor will be positioned at the end of
the Revised QSO Entry edit field. Information is entered in the same way in this edit field as it is in the
QSO Entry Box 145 . The dialog is presented in large fonts to improve visibility in the mobile
environment.
As indicated in the screen shot above, the dialog shows the following information:
· Original Log Entry - a read-only edit box that shows a duplicate of the row of the
Log Display Grid 146 on which the double-click was performed
· Check Grid - a read-only grid showing the original information received from the contacting station
and the results of the revision
· Revised QSO Entry - an edit box for entering the revised information for the contact. Information is
entered in the same way in this edit box as it is in the QSO Entry Box 145 . In other words the
element(s) to be revised can be either modified by positioning the cursor at the element and making
the revision or by entering the new versions of the element(s) at the right hand end of the edit box in
any order. As revisions are made in the edit box the interpretation of the information will be shown in
CQ/X de NO5W
Miscellaneous Topics
151
the Check Grid. The program will always parse the entered string to pick up the right-most element
of each type.
· Edit Band/Mode - these windows provide the capability to modify the band and/or mode on which
the QSO took place. This part of the dialog will probably only be of use when manual radio tracking
is being used and the operator has forgotten to change the band/mode.
Once you are satisfied with the revision press Save to capture the revision for mult and dupe
processing and for constructing the final logs. The dialog will close and you will observe the changes
reflected in the Log Display Grid 146 . If the menu item Display | Recalc Score on Each Log Revision is
checked the changes will also be reflected in the Score Display Grid 147 , otherwise the changes will not
be reflected until the menu item Display | Recalculate Score Now is selected.
If it is decided not to make the revision press Cancel or the Escape key to exit the revision dialog.
All of the function keys F1 - F12 remain available for sending messages while this dialog is open.
Function keys assigned to commands are not available while this dialog is open.
9.8
Message Resolution Dialog
If there are unresolved county symbols (# and !) present in the message template when it is saved, the
dialog shown in the screen shot below will be activated to request resolution and to provide access to
three methods of resolution.
Method 1: Apply Route Plan - Use this method if you have defined your route as a simple sequence
of counties but have not defined your route via a sequence of county crossings. Clicking the Apply
Route Plan button will provide access to the Route Planning Dialog 87 from which you can double-click
on the desired current county. This will replace the county symbols (# and !) with the abbreviations for
the current and next counties on the messages array. Of course the template itself will continue to
contain the symbols so that it can be used when a county change operation is performed.
Method 2: Apply Crossings - Use this method if you have defined your route as a sequence of county
crossings for use with a GPS but are not using the AUTO mode of the GPS Advisory Modes 126 .
Clicking the Apply Crossings button will provide access to the dialog for selecting a file of county
crossing information for import as described in Importing County Crossing Information 91 .
Method 3: Apply GPS Auto - Use this method if you have a GPS connected. Clicking the Apply GPS
All rights reserved by C.W. Sanders, NO5W
152
CQx Client: User Guide
Auto button will set the GPS advisory mode to AUTO, the GPS will detect the current county and if a
sequence of county crossings has been defined will determine the next county. The current and next
counties will be used to replace the county symbols (# and !) with the abbreviations for the current and
next counties on the messages array.
9.9
Query Messages
The messages labeled Q1, Q2, Q3, Q4, Q5 are special query messages used to query the responding
station to request fills of missing items. The left-most column of the QSO Entry Check Grid 145 is
associated with query message Q1, the next item to the right is associated with query message Q2,
and so on. As long as there is missing information on the row of the QSO Entry Check Grid 145
corresponding to the logging radio, logging of the QSO will not take place. When operating CW and
attempting to log an incomplete QSO (by pressing Enter) the query message associated with the leftmost missing item will be sent.
Query messages can also be controlled by function keys if function keys have been assigned to them.
9.10
Setting Up a Backup Log
To set up a backup log use the File | Setup Backup Log item. This will activate the Auto Backup Dialog
shown below in which the backup drive and directory as well as the maximum minutes and maximum
QSOs between backups may be set. After checking the Enable Auto Backup box press Accept to
activate the backup process.
A backup file of the form Copy(n) of CQxClientLogView will be written to the specified directory
whenever
1. the number of QSOs since the last backup exceeds the maximum QSOs between backups or
2. the time since the last backup exceeds the maximum time between backups and there has been a
change in the log since the last backup.
CQ/X de NO5W
Miscellaneous Topics
9.11
153
Keyer Parameters Dialog
The Keyer Parameters Dialog shown below provides a means of changing parameters associated with
the behavior of each of the keyers.
Using this dialog you can set the keyer speed range, the speed increment that will be applied whenever
the key assigned to incrementing/decrementing keying speed is pressed, the weight range and weight
increments and the number of characters required to initiate transmission of he call sign when using
the Keyer | Send Call While Entering option. You can also enable Auto CQ and set the Auto CQ delay
All rights reserved by C.W. Sanders, NO5W
154
CQx Client: User Guide
between CQs from this dialog.
After changing any of the parametes be sure to press the Apply button in order to have the change
take effect.
Note that only the keyers that are connected can be modified using this dialog.
The dialog also provides a small window for entering text when using the keyboard mode to converse.
The keyboard mode can be entered using Ctrl + C which will activate the above dialog.
9.12
Customizing the Display
The appearance of the display can be customized in the following ways all of which are covered under
the Display menu item:
QSO Entry Fonts - Use this option to change the color, size, font face, etc of the font used in the
QSO Entry Box 145 . Changing this font will cause the entry font to change for both radios as well as for
the Spot windows associated with both radios and the search list used in conjunction with the Spot
window when it is used to initiate QSOs as described in Making a QSO Entry 65 .
Similar Call Display Fonts - Use this option to change the color, size, font face, etc of the font used
on the Similar Calls Page 149 .
Log Display Fonts - Use this option to change the color, size, font face, etc of the font used in the
Log Display Grid 146 . Changing this font will usually require resizing of the columns of this grid. Users
who regard certain elements of the grid to be redundant or unnecessary can hide or partially hide those
elements by resizing the columns. Of course a large font will require that the display contain fewer lines
of the log. The overall size of the log display can be increased by moving the Score Display Grid 147 to
the left hand tab panel and converting it from horizontal to Vertical Score Format 147 . Use the menu
option Display | Move Score to Left Panel to do this. Additional screen real estate can be allocated to
the log display by moving the Notes display to the right hand tab panel by using the menu item Display
| Move Notes to Right Panel. Both of these actions are retained across a restart of the program, as is
the Log Display column sizing so it is only necessary to perform this configuration step once. The
screen shot below shows an example wherein the log display fonts have been set to 14 point bold.
Rearrange Panels - Use this option to change the order of presentation of the central panels for
CQ/X de NO5W
Miscellaneous Topics
155
Radios, Scoring, Logging, Check, QSO Entry, Notes, and Rates. Selecting this menu item will activate
the following Reordering dialog. To change the order of the panels simply drag the items to their
desired new positions and press the Re-Order button. If it is desired to return to the default order press
the button labeled Restore Default Order. The panel order is retained across a restart so the ordering
will remain until a decision is made to change it again.
Use Right Radio (QSO Entry) Area for Previous QSO Information - Since the majority of mobile
operations will not be SO2R one of the dual entry areas for Left and Right radios is redundant.
Choosing this option allows the user to query the log for information regarding previous QSOs with the
station or multiplier that is currently entered in the QSO Entry Box 145 . This, for example, could be used
with the NA Key Emulator in which F9 is used to query the log for all QSOs with the station whose call
is entered and F10 is used to query the log for all QSOs with the multiplier that is entered. This area of
the display can be accessed using either the mouse or by setting up a function key to execute the task
Access Previous QSOs. With a row of the list of previous QSO information highlighted pressing Enter
or double-clicking with the mouse will cause the radio to be set to the frequency and mode associated
with the hightlighted QSO. This, of course, requires that the user assign the radio and keyer in use to
the left radio/keyer.
View Local Logs - In multi-op situation use this option if it is desired to see only the log of the local
station and not the combined log of the team. The label on this panel will indicate the current
Local/Team selection.
View Team Logs - In multi-op situation use this option if it is desired to see the combined log of the
multi-op team. The label on this panel will indicate the current Local/Team selection.
Scoring - Show Current Mode Only - In a multi-mode contest use this option to show only the current
mode on the scoring grid while "squeezing" the other mode.
Scoring - Show Current Band Only - In a multi-band contest use this option to show only the current
band on the scoring grid while "squeezing" the other bands.
Scoring - Show All Bands and Modes - Use this option to show all bands and modes allowed in the
contest.
Hide GPS - Use this option to hide/unhide the GPS panel.
Size to Fit Center Panels - Use this option to accomodate other applications that might need to be
visible on screen (e.g. a mapping program such as Streets and Trips in mobile operation for a QSO
party). The display will be sized to the width of the center panels and positioned to show only the center
All rights reserved by C.W. Sanders, NO5W
156
CQx Client: User Guide
panels where the main actions of QSO Entry, Logging, Score Reporting, Radio Control, etc occur.
9.13
Special Keystroke Combinations
The following are special key stroke combinations that allow some control actions to be performed
without use of the mouse. See also Assigning Function Keys 60 for a description of how to program
the function keys and combinations (Alt+, Ctrl+, Shift+) function key, as well as the numeric keypad to
perform various tasks.
Keystrokes Associated with Keying
· Ctrl+C - Enter conversational keyboard keying mode
· Ctrl+D - Decrement keying speed by a single step
· Ctrl+I - Increment keying speed by a single step
· Shift+Space bar - Send CQ message on the logging radio
Keystrokes Associated with QSO Entry Panel
· Ctrl+Y - Request a QSY
· Ctrl+R - Toggle the logging radio status to the other radio
· Ctrl+W - Clear the QSO Entry box of the logging radio
· Ctrl+S - Clear the Spots Entry box of the logging radio
· Shift+Enter - In CW mode if the QSO Entry Box 145 has the focus the keystroke combination
Shift+Enter will send a message consisting of the rightmost substring entered in the QSO Entry
window followed by a question mark.
· Shift+Cursor Left/Right - If the QSO Entry Box 145 has the focus the keystroke combination
Shift+Cursor Left (Right) will move the RIT of the associated radio down (up). Continuing to hold the
Cursor Left/Right key down will continue to move the RIT down (up). Of course this only applies if the
radio supports RIT tuning under PC control.
· Alt+Enter - If the QSO Entry Box 145 has the focus the keystroke combination Alt+Enter allows you
to queque up a second (right most) call entered in the QSO Entry Box for processing immediately
after the first call is processed. This is explained in detail in the topic Handling a Second Caller 66 .
You can also assign the Insert key as well as a function key or its combination with Alt, Ctrl, Shift to
perform this task.
· Enter K=ss as right most item to change keying speed where
ss=numeric value or
"L" for minimum speed assuming you have set a minimum speed using Keyer | Set Parameters
menu item
"H" for maximum speed assuming you have set a maximum speed using Keyer | Set Parameters
menu item
· Enter F=fffffff as right most item to change frequency where
ffffff=numeric value of new frequency in Hz
"L" for lower operating limit for the current band and mode as set using Radio | Set Parameters
menu item
"H" for upper operating limit for the current band and mode as set using Radio | Set Parameters
menu item
· Enter M=mmm as right most item to change the mode where
mmm="C" or "CW" changes the mode to CW
mmm="U" or "USB" changes the mode to USB
mmm="L" or "LSB" changes the mode to LSB
· Enter TUNE=tt as right most item (1<=tt<=99) to force keying of the radio for tt seconds. Terminate
prior to tt seconds using the ESCape key.
· Type a # (no Enter required) as right most item to activate a dialog from which a new county can be
chosen. Select the desired county and press Enter to change all county-dependent messages, etc.
The user can elect to have the combo box filled with all counties or, if a GPS is in use, to have the
combo box filled with counties that are in the vicinity of the current GPS specified latitude and
CQ/X de NO5W
Miscellaneous Topics
157
longitude. Note that, once the county is specified in this way, the GPS Advisory mode will be set to
OFF and it is up to the user to return it to any other desired state.
· Left and Right Bracket and Slash [ ] \ - These are alternatives to using the Enter key to confirm
and log a QSO and are intended to be used with short confirmation messages which are defined
using the Message Editing Dialog (see Setting Up Messages 50 ). They are dedicated to sending
messages QS0, QS1, and QS2 respectively. To use them the NA Emulator must be enabled (see
Assigning Function Keys 60 ).
Note: In the items above for Enter K=, Enter F=, etc the K, F must be space separated from any string
on its left.
Keystrokes Associated with the GPS
· Ctrl+P - Request an immediate update of the position. The update will occur on receipt of the next
data from the GPS which will usually be within 1 second.
· Ctrl+L - Send location information in the form of latitude and longitude of current position. A dialog
will appear and allow sending latitude and longitude or only latitude or only longitude. The latter two
would be useful in answering requests for repeats of one or the other of latitude and longitude.
· Ctrl+N - Send next county information in the form <Next Cty> + "IN ABT " <Minutes> " MINS" where
the time part of this message will be sent only if the time estimate is available.
Keystrokes Associated with a QSO Party QP Tools Plug-in Menu
· Alt+Q - Process access to the QP Tools menu item associated with each QSO party
· Alt+Q then N - Change to the next county on a defined QSO party route
Keystrokes Associated with Spots
· Left Shift+CursorUp - If you are using Spotting you can access the spots using this key
combination. As described in Moving Spots to the Spot Window 158 holding down the left shift key
and pressing the CursorUp key will move the Spot pointer up the list of spots and will bring the
currently selected spot into the Spot window of the QSO Entry Box 145 . Similar use of the
CursorDown in combination with the LeftShift key will move the spots pointer down the list.
Keystrokes Associated with the Spot Window
· Shift+Enter - If the option to use the Spot windows for searching for calls containing specified
substrings is selected it is possible to search to pick the call from a list rather than typing in the entire
call. As explained in topic Making a QSO Entry 65 this can be useful in mobile QSO party operation
wherein it is possible to work the same station numerous times as changes are made in the band,
mode, and/or county. When using this option in CW mode the keystroke combination Shift+Enter will
send a message consisting of the string entered in the Spot window followed by a question mark,
whereas the Enter key alone will activate the list of possible calls.
Keystrokes When the Similar Calls Page Is Active
· Shift+Cursor Up - If the Similar Calls Page 149 is the active page on the left hand paging control
then holding down the left shift key while pressing the CursorUp key will change the focus to the
Similar Calls page and move the selection up through the list of similar calls.
· Shift+Cursor Down - If the Similar Calls Page 149 is the active page on the left hand paging control
then holding down the left shift key while pressing the CursorDown key will change the focus to the
Similar Calls page and move the selection down through the list of similar calls.
· Enter Key - If the Similar Calls Page 149 is the active page on the left hand paging control and has
the focus (by virtue of either of the above Shift + CursorUp/Down key strokes) pressing the Enter key
will append a space and the selected similar call sign to the QSO Entry box of the logging radio
making the similar call the detected call sign and preserving any previously entered information.
· Shift + Enter Key - If the Similar Calls Page 149 is the active page on the left hand paging control
and has the focus (by virtue of either of the above Shift + CursorUp/Down key strokes) pressing the
All rights reserved by C.W. Sanders, NO5W
158
CQx Client: User Guide
Enter key while holding down the left shift key will send the selected call followed by a question mark.
9.14
Moving Spots to the Spot Window
When using the spotting feature a spot can be selected and transferred to the Spot window just above
the QSO Entry Box 145 using one of the following methods
1.
2.
3.
Click on the spot with the left mouse button
Use the key combinations LeftShift+CursorUp (LeftShift+CursorDown) as described in
Special Keystroke Combinations 156 to cycle through the spots on the current band.
Tune the radio across the band and as the frequency comes within the selected bandwidth the
spot will transfer. Once the radio is tuned outside of the bandwidth of the spot it will be deleted
from the Spot Window.
Once a spot is selected information on that spot will appear in the Spot Window just above the QSO
Entry box of the LoggingRadio and focus will be transferred to that window. If the Spot Window has the
focus pressing Enter will transfer the spotted call and the focus to the QSO Entry box.
9.15
Preparing County Logs
If it is desired to separate the composite log into a series of individual logs for each county use the
menu item Preparing County Logs under QP Tools. This will activate the following dialog in which you
can specify which counties you wish to process and the location to save these county logs to. It is best
to create a directory to contain these logs.
CQ/X de NO5W
Miscellaneous Topics
159
The files containing the logs are shown in the Results memo. If it is desired to review any of these logs
double-click on the desired file name in this memo.
9.16
Preparing Statistical Results
After the contest, preparation of the 3830 report and soapbox comments for the log is aided by the
item QPTools | Prepare Statistics. Available options depend on whether the user is an in-state or outof-state participant and are shown below.
All rights reserved by C.W. Sanders, NO5W
160
CQx Client: User Guide
The [initial] Ten Minute Hourly Rate in Each County is computed by taking the number of QSOs that
occurred in the ten minute period immediately following the first QSO in the county and multiplying by
six.
Results are written to the Results memo for viewing and for further editing. Once satisfied with the
formatting of the results use Browse to specify a desired path and file name for saving the results to
and then press Save Results.
Copy to Clipboard can be used if it is desired to transfer the contents of the results memo into another
form or file such as when Finalizing the Logs 70 .
9.17
Preparing Statistical Results for Non-Qso Party
In the case of non-QSO party contests the statistical results are handled by a slightly different dialog
since the focus is somewhat different in these events. Here's a screen shot of the dialog.
CQ/X de NO5W
Miscellaneous Topics
161
Use the arrow buttons to preview each of the types of statistical results. Once the desired results are
chosen specify a file to save the results to and then click on the Process/Save button to produce the
results. If it is desired to veiw the results on completion be sure to specify that before clicking on the
Process/Save button.If you elect to view the results on completion the following dialog will be
presented. From this dialog you can post to the clipboard if, for example you wish to include these
results as part of your soapbox or as part of your 3830 posting.
All rights reserved by C.W. Sanders, NO5W
162
9.18
CQx Client: User Guide
Preparing a Summary Sheet
Many contests require the submission of a summary sheet along with the logs. Menu item QPTools |
Prepare Summary can be used to perform an analysis of the log for the specific information required
by the contest and inserting it in a template specific to the contest.
Prior to beginning prepartion of a summary sheet it is a good idea to review the information defined
when the contest was begun to see if any changes are needed. This can be done using menu item File
| Modify User Information. When you are satisfied with the user information return to select the
QPTools | Prepare Summary menu item. This will bring up the following dialog allowing you to browse
to a location to save the results to and to request a display of the completed sheet:
CQ/X de NO5W
Miscellaneous Topics
9.19
163
User-Supplied Help
You can add access to your own help information using the menu item Options | Configure UserSupplied Help which will activate the following dialog.
As the instruction panel at the top of the dialog indicates you supply a label for the help and a source
file and then use the Add button to add that topic to the list. After applying the list of help topics they will
appear under the Help menu as submenu items to User-Supplied Help as shown below.
All rights reserved by C.W. Sanders, NO5W
164
CQx Client: User Guide
As this screen shot suggests User-Supplied Help is an alternative method for providing access to strip
maps. It can also be used to activate Streets and Trips or Street Atlas running, for example, the file
used to plan the trip. This can be a handy way of avoiding having to rummage around during the
contest for the trip planning file. Clicking on menu item TQP Real-time Tracking Map in the above
example will cause Streets and Trips to open the specified *.est file.
Bitmap (*.bmp) and text files (*.txt) are handled by the program whereas other files are processed by
shelling out to the application recognized by the file associations (*.pdf, *.doc, etc). So if you use a
mapping program other than Streets and Trips inserting the appropriate file in the user help should
cause it to open and run with the specified file.
Some other types of information that I have found useful to place under User-Supplied help are:
· Latest contest rules downloaded from the sponsor web-site in either pdf or mht (single file web page)
format
· e-Mail confirmation of hotel reservations for Saturday and/or Sunday evening lodging
· Driving instructions prepared for the driver.
· Operating plans of other mobiles
· Antenna controller settings for each band
· Com port assignments for radio, keyer, and GPS.
· Pre-contest emails exchanged with other participants
· Time line files produced by Streets and Trips - handy for seeing how close we are to the planned
schedule and whether corrective action is required
· If you have access to the internet, as you would at a fixed station, you can include URL's in the file
list. For example you might include the published Google Map of a mobile(s) you would like to track.
Although not shown on the screen shot of the User-Supplied Help dialog there is also the capability of
saving/loading the file list to/from a file. This list of user-supplied help files is retained across a restart
of the program so it is not necessary to save the list. However when changing contests it is often useful
to save and later reload a list of help files.
CQ/X de NO5W
Miscellaneous Topics
9.20
165
Setting up the Session Clock
The title bar of the main form contains a session clock that displays the time (in HH:MM:SS) remaining
in the current session or the next session if there is no current session -- e.g. before the contest starts
or during the intermission period between a two-session contest. Since most contests have welldefined start dates and session definitions that information, where available, is included in the contest
definition file so it is only necessary for you to verify the information and to make any necessary
changes. This is done using the following dialog which is one of the dialogs called by the startup wizard
and which can be accessed from the Display menu. When using the K3 the session clock will also
showup on the Small Control Interface for Elecraft K3 46 .
On this dialog all dates and times should be considered as UTC. You can select the starting date as
either a Weekend, Today, or Tomorrow.
Selected Weekend: Using this radio button and selecting a month for the contest will fill the
associated date combo with all of the weekend days of that month from which the date containing the
start hour of the first session can be selected. Then hour and day of the Start and End hour of each
session are selected.
Note that all hours are defined by their start times so that in the example shown in the following screen
shot, which is an older version of the dialog, the first session actually ends at 0400 on UTC Sunday 9Apr-2006 and the second session ends at 0000 on UTC Monday 10-Apr-2006. Day 1 always
references the Start Date and Days 2 and 3 are the days immediately following the Start Date
All rights reserved by C.W. Sanders, NO5W
166
CQx Client: User Guide
The preview button can be used to check the results of the settings as shown below prior to applying
them. Once satisfied with the session definitions press Apply to activate the session clock.
Today: Using this radio button will cause today's date to be the start date. This would be useful if the
dates for the contest that are in the definition file for the contest need to be modified.
Tomorrow: This radio button is useful if you are setting up the session clock for a contest which will be
CQ/X de NO5W
Miscellaneous Topics
167
starting tomorrow and you do not wish to wait until tomorrow to set the clock. An example of this would
be the NA Sprints which begin at 0000Z. At the rate the sprint QSOs come waiting until the sprint starts
to set the clock would loose you 10-15 QSOs!
Half-Hour Checkbox: This option is present to support the NCCC NS Sprint. Selecting a starting time
will automatically set the end time to half hour later.
9.21
Location Cues for SSB Operation
When operating SSB it is useful to know the full name of the county in addition to the abbreviation.
Also since I operate very little SSB I often stumble over the proper phonetics to use and what will
actually come out is unpredictable. The menu item Display | SSB-Show Location Cues will present this
information in a non-modal "always on top" window that changes as the counties change. The screen
shot below shows an example:
When operating SSB I find it handy to locate this window just below the QSO Entry panel.
9.22
Multi-County Setup Dialog
The dialog shown below is used to define the counties involved in a multi-county operation.
Use of this dialog is similar to that described in the topic Planning Route for Non-Use of GPS 85 . A
first county in the multi-county is chosen and then successive counties are added. If the route has been
defined in terms of county line crossings it is possible, using the Next County Line button, to pull the
multi-county operation from that data. A pair of radio buttons allows the user to specify whether the
exchange information is to be sent as separate exchanges for each county or a single exchange
containing the names of each of the counties. Clicking on the Apply button will set up the defined multicounty operation for the next time this type of operation is initiated using the menu item QP Tools |
Initiate Multi-County Operation. A multi-county run operation is performed using the MultiCounty Messaging and Logging Dialog 169 .
If the multi-county operating points have been defined and saved using the button labeled Add to List
of Multi-County Operations you can select them using the button labeled Load from List of MultiCounty Operations.
All rights reserved by C.W. Sanders, NO5W
168
CQx Client: User Guide
.
Clicking on the Load from List of Multi-County Operations will call up the following dialog from which a
multi-county operation can be selected by either selecting the item in the list and double-clicking or
clicking on the Apply button.
CQ/X de NO5W
Miscellaneous Topics
9.23
169
Multi-County Messaging and Logging Dialog
This dialog is used to run stations from a multi-county location and is accessed using the QP Tools |
Initiate Multi-County Operation menu item. It can be used for sending separate exchange for each of
the counties or for sending a single exchange that has the county information for all of the counties.
The choice of multiple or single exchanges and a specification of the counties to be involved is made
during the setup of the multi-county operation as described in Multi-County Setup Dialog 167 '
Multiple Exchange Case: The formats of the MCQ (multi-county CQ Message) and the MTU (multicounty CQT message) are defined using the menu item Keyer | Edit Message Template using the #
sign to hold a place for a county abbreviation. Press Enter or F1 to call CQ. When a station comes
back type in the call and press Enter. This will send the exchange for the first county. Type in the
exchange information received from the caller and press Enter. If there is missing information, a query
message will be sent requesting a fill. After this information is entered logging and sending of the
exchange for the other counties proceeds as follows.
If all information is complete the Log button for the first county will assume the focus and pressing it will
log the QSO, send the next exchange and move the focus to the Log button for the second county.
Once that exchange has been received from the caller press Enter to send the next exchange and the
focus will move to the next Log button. Pressing Enter on the last Log button will send the MTU
message, and return focus to the QSO Entry window.
· Enter Case 1: If a Log button has focus Enter will cause the exchange for the next county to be
sent and the focus will advance to the next Log button if there are remaining counties to log, or, if all
counties have been logged Enter will cause the MTU message to be sent and will reset the status
indicators and clear and return focus to the QSO Entry window.
· Enter Case 2: If a Send button has focus Enter will cause the associated message to be sent and
the focus to move to the associated Log button. Note that this will not be the normal case if things
are proceeding smoothly but could be the case if the caller requests a repeat. In that case you can
either tab back to the Send button or use the F2 key to send the requested repeat of the current
exchange leaving the focus on the Log button.
· Tab -- advances the focus in the following sequence Send->Log->Send->Log ...->Log->QSO Entry
window
· Shift +Tab moves the focus in the opposite direction
· The current state of the Send/Log process is shown by the green and red rectangles to the right of
the buttons with green indicating complete and red indicating incomplete.
All rights reserved by C.W. Sanders, NO5W
170
CQx Client: User Guide
Note that if you have already worked a station in one or more of the counties that message window will
be shown in red as soon as the QTH of the caller is entered. If the check box labeled Work all dupes,
not just the first one in the multi-county is not checked then any message, after the first message,
that is shown in red will be skipped and the associated county will not be logged. On the other hand if
the Work all dupes.... check box is checked then all counties will be sent and logged.
Suggestion: Since the first county will always be worked it is a good idea, when building a multi-county
operation, to reserve the first county for a new one rather than one that you have already activated.
That will allow you to skip a county when you are called by a station that has already been worked from
that county.
Single Exchange Case: Make sure the QSO Entry window has focus and press Enter to call CQ.
When a station comes back enter the call and press Enter. This will send a single exchange containing
location information for all of the counties. Enter the exchange information received from the caller and
press Enter. If all information is complete the associated Log button will assume the focus and
pressing it will log the QSO as multiple entries in the log and will return the focus to the QSO Entry
window, clear the window and cause the CQT message to be sent. If there is missing information in
the received exchange a query message will be sent requesting a fill. Note that the Work all dupes ....
option only applies to the Multiple Exchange case. In the single exchange case all counties will be sent.
As indicated on the above screen shot there are a number of assigned keys that may be used with this
dialog. In addition holding down the shift key and pressing enter will cause the last word on the QSO
Entry window to be sent followed by a question mark.
CQ/X de NO5W
Test Results, Limitations, and Known Problems
10
171
Test Results, Limitations, and Known Problems
CQ/X has been tested during each stage of development as well as during actual contest operation
including the following mobile operations:
1.
2.
3.
4.
5.
6.
7.
8.
9.
10.
11.
12.
13.
14.
15.
16.
17.
2004 Texas QSO Party. See 3830 Report for 2004 Texas QSO Party.
2005 Louisiana QSO Party. See 3830 Report for 2005 Louisiana QSO Party.
2005 Mississippi QSO Party. See 3830 Report for 2005 Mississippi QSO Party.
2006 Oklahoma QSO Party. See 3830 Report for 2006 Oklahoma QSO Party
2006 Georgia QSO Party. See 3830 Report for 2006 Georgia QSO Party.
2006 Texas QSO Party. See 3830 Report for 2006 Texas QSO Party
2007 Mississippi QSO Party. See 3830 Report for 2007 Mississippi QSO Party
2007 Florida QSO Party. See 3830 Report for 2007 Florida QSO Party
2007 Texas QSO Party. See 3830 Report for 2007 Texas QSO Party
2008 Louisiana QSO Party. See 3830 Report for 2008 Louisiana QSO Party
2008 Mississippi QSO Party. See 3830 Report for 2008 Mississippi QSO Party
2008 Oklahoma QSO Party. See 3830 Report for 2008 Oklahoma QSO Party.
2008 Florida QSO Party. See 3830 Report for 2008 Florida QSO Party
2008 Texas QSO Party. See 3830 Report for 2008 Texas QSO Party.
2009 Oklahoma QSO Party. See 3830 Report for 2009 Oklahoma QSO Party
2009 Florida QSO Party. See 3830 Report for 2009 Florida QSO Party
2009 Texas QSO Party. See 3830 Report for 2009 Texas QSO Party.
To date the development of CQ/X has been focused almost exclusively on state QSO parties and the
use of GPS and other features that have a useful role in those contests for the single mobile operator.
Because of this focus certain features that one would normally expect to find in a modern contest
logging program are absent or at best have limited capability. These include:
· Support for a limited number of contests - See the website for a list of about 25 QSO parties
supported.
· An efficient means for operating on a county line was not provided in the initial versions but is
provided beginning with version(1.6). See topics Running Stations from a Multi-County Boundary 69 ,
Multi-County Setup Dialog 167 , and Multi-County Messaging and Logging Dialog 169 .
· Support for a limited number of radios - Icom, Elecraft K3, and Kenwood TS-480 primarily with
Yaesu and Ten Tec available in beta.
· Limited support for SO2R - Two entry areas are provided and multiple keyers and radios can be
interfaced but there is no audio switching, etc, so SO2R support must be considered as incomplete
in this version. In SO1R operation it is recommended that you use the left radio since this enables
use of the right radio QSO Entry area for display of previous QSO information with the current
station/mult.
· Limited support for networked operations - a networked version is nearing completion with the
remaining work mostly in the area of protecting and recovering from network failures. The first use of
CQ/X in a networked environment was in the 2008 Oklahoma QSO Party. While some work remains
it is expected that this capability will be released in the near future (version 1.8.0).
Plans are to address each of the above limitations in future releases with the first bullet item being the
one most likely to be addressed first since that is the area of most need to support my own personal
operating preferences.
10.1
Operating Results
The first full use of CQ/X during actual contest operation was the 2004 Texas QSO Party which is the
contest for which it was originally developed. See 3830 Report for 2004 Texas QSO Party . During this
All rights reserved by C.W. Sanders, NO5W
172
CQx Client: User Guide
contest the following setup was used and tested extensively during approximately 1100 QSOs covering
33 Texas counties:
Radio: IC-706MKIIG - changed to IC-7000 April 2006
Keyer: Winkey - began using embedded WinKey in the Navigator by US Interface September
2007
Port Expander: Keyspan - changed to the Navigator by US Interface September 2007
USB - RS232 Adapter: Keyspan - changed to the Navigator by US Interface September 2007
GPS: Garmin Street Pilot III - changed to Garmin GPS-18PC in 2006
Paddle: Palm mini paddle
Laptop: Dell D400 running XP
Networking: None
SO1R/SO2R: SO1R
The program has also been tested/used in the following QSO parties
1.
2.
3.
4.
5.
6.
7.
8.
9.
10.
11.
12.
13.
14.
15
16.
17.
2004 Texas QSO Party. See 3830 Report for 2004 Texas QSO Party.
2005 Louisiana QSO Party. See 3830 Report for 2005 Louisiana QSO Party.
2005 Mississippi QSO Party. See 3830 Report for 2005 Mississippi QSO Party.
2006 Oklahoma QSO Party. See 3830 Report for 2006 Oklahoma QSO Party
2006 Georgia QSO Party. See 3830 Report for 2006 Georgia QSO Party.
2006 Texas QSO Party. See 3830 Report for 2006 Texas QSO Party
2007 Mississippi QSO Party. See 3830 Report for 2007 Mississippi QSO Party
2007 Florida QSO Party. See 3830 Report for 2007 Florida QSO Party
2007 Texas QSO Party. See 3830 Report for 2007 Texas QSO Party
2008 Louisiana QSO Party. See 3830 Report for 2008 Louisiana QSO Party
2008 Mississippi QSO Party. See 3830 Report for 2008 Mississippi QSO Party
2008 Oklahoma QSO Party. See 3830 Report for 2008 Oklahoma QSO Party.
2008 Florida QSO Party. See 3830 Report for 2008 Florida QSO Party
2008 Texas QSO Party. See 3830 Report for 2008 Texas QSO Party
2009 Oklahoma QSO Party. See 3830 Report for 2009 Oklahoma QSO Party.
2009 Florida QSO Party. See 3830 Report for 2009 Florida QSO party
2009 Texas QSO Party. See 3830 Report for 2009 Texas QSO Party.
No significant problems were noted during these operations but you should consult the topic
Cautions and Situations to Avoid 173 .
10.2
General Problems
Problem GEN-1
Problem Area: Behavior of escape key under Win98SE.
Opened On: July 16, 2004
Description: On most of the forms you can press the escape key to close the form. It has been noted
that under Win98SE use of the escape key causes the form to be minimized rather than closed.
Workaround: Use the mouse and the normal close/cancel button or standard form close point
to close a form.
Status: Open
Problem GEN-2
Problem Area: Inclusion of "dummy" signal report when logging the Wisconsin QSO Party.
Opened On: December 20, 2005
Description: The Wisconsin QSO party requires only two elements (Call and QTH) in the exchange
CQ/X de NO5W
Test Results, Limitations, and Known Problems
173
which is different from most other QSO parties which require three elements. To avoid creating
special-purpose logic just for the WIQP a "dummy RST" (isn't that what most signal reports are
anyway!) is logged. This RST will be removed when the log is finalized.
Workaround: Do not include a signal report item in the messages (CQX, SPX). As noted above, the
dummy RST will be removed when the log is finalized using menu item File | Finalize Log. However,
you should not attempt to import the finalized log back into CQ/X.
Status: Open
10.3
Cautions and Situations to Avoid
Here is a list of situations that I have encountered while using the program that have caused me some
lost time and frustration.
USB Connection -- make sure that your USB connection to the laptop as well as to the USB-RS232
expander is secure and can not move within the connector. If not secured the USB connector may
"wiggle" within the receptacle causing loss of the connection to all devices and forcing a restart of the
laptop. This wiggle could be caused for example by the operator stretching his legs and moving the lap
desk. I use an extension USB cable that is securely fastened to the lap desk very close to where it will
connect to the laptop. The other end of the extension cable provides a secure connection to the USB
cable running to the back of the vehicle where the expander resides.
Unplugging the USB Connection - a corollary to the above caution is to never unplug the USB
connection between the laptop and the expander while the program has devices connected. It is
permissible, and sometimes advantageous, to unplug the USB connection once all devices have been
Disconnected using the Port Assignments dialog. Sometimes it is useful to do this as a quick way of
releasing previously used serial ports in case you get into a situation wherein the program thinks the
serial ports are in use.
Pit Stops -- Well, of course, these cannot be avoided! But there is a best way to handle the inevitable
stops for gas and bio-breaks. Even with the use of the Wizard it takes awhile to restart the program so
it is best to leave it running during the stop. This requires sufficient battery support to keep the laptop
running for 10-15 minutes so make sure the supply for the laptop is fully charged.
· Radio Shutdown/Restart - You will probably want to shut down the radio during the stop to
protect against voltage spikes on restarting the engine. If so just turn off the radio and after engine
startup turn it back on. After restarting the radio you should go to Radio | Connect/Disconnect
menu item and access the Connect/Disconnect dialog. Press the Disconnect and then the
Connect buttons corresponding to the radio and verify that the program again recognizes the
radio. In some cases you may need to jiggle the tuning knob and possibly change the mode or
band of the radio to cause the program to read the radio data. When jiggling the tuning knob be
sure you have the frequency of the radio unlocked!
· GPS Shutdown/Restart - Follow a procedure similar to the above if it is necessary to shutdown
and restart the GPS. Some units eat batteries and when this is the case they will automatically
shutdown when they sense loss of external power. For this reason I have found that powering the
GPS from an always on source is very useful. I use a Garmin GPS-18PC located in the rear of the
SUV looking out the driver side window and powered via a cigarette lighter connector connected to
a RigRunner, also in the rear of the vehicle. Of course you want to eventually disconnect the
power to avoid the possibility of draining your vehicle battery.
· Keyer Shutdown/Restart - It is generally not required to shutdown the keyers.
Closing laptop cover - It may be laptop dependent but on my machine, a Dell Latitude D400, closing
the cover while the program is attempting to communicate with the GPS, keyer, and radio, causes the
XP error message "This application has encountered a problem and must close". If you need to close
the laptop cover and do not wish to shutdown the application completely then use menu Keyer |
Connect/Disconnect (or similar item under GPS and Radio) and press the Disconnect All button on the
All rights reserved by C.W. Sanders, NO5W
174
CQx Client: User Guide
resulting dialog. When ready to restart just open the cover and use Keyer | Connect/Disconnect and
press the Connect All button to restore communication with the devices.
10.4
User Interface Problems
None reported.
10.5
Radio-Related Problems
Problem RADIO-1
Problem Area: Use of CQ/X and Turbo Tuner with IC-7000.
Opened On: September 20, 2006
Description: The Turbo Tuner and CQ/X must share the CI-V port and do not appear to play well
together. It is difficult to get both to work at the same time.
Workaround: The Turbo tuner requires that the radio look like an IC-706MKIIG so here is what you
need to do
1.
2.
3.
4.
Set the Baud rate in the IC-7000 to 300
Set the CI-V address in the IC-7000 to 0x58 (the standard address of the IC-706MKIIG)
In CQ/X select the IC-706MKIIG as the radio rather than the IC-7000.
Also see problem RADIO-2.
Status: Open, and likely to remain so until next upgrade of the Turbo Tuner software.
Problem RADIO-2
Problem Area: Order of Assigning Radio Port Affects Performance.
Opened On: September 20, 2006
Description: In assigning devices to comm ports it is best to assign the radio first.
Workaround: Assign the radio first followed by the keyer and GPS in any order.
Status: This appears to only be an issue when using the Turbo Tuner.
Problem RADIO-3
Problem Area: Powering the radio off and then back on causes communication with the radio to be
lost
Opened On: September 20, 2006
Description: This problem will lead to frequency/mode errors in logging.
Workaround: Remember to always re-establish the radio interface following a radio shutdown.
Status: Closed. Time-out logic was added to detect loss of communication and to alert the user.
10.6
Keyer-Related Problems
Problem KEY-1
Problem Area: Behavior of WinKey interface under Win98.
Opened On: June 1, 2004
Description: The interface will not drive the WinKey keyer under Win98.
Workaround: None known
Status: Open
CQ/X de NO5W
Test Results, Limitations, and Known Problems
10.7
175
GPS-Related Problems
Problem GPS-1
Problem Area: Behavior of GPS interface on attemping to connect.
Opened On: September 1, 2005
Description: The operating system complains on an attempt to connect the GPS. On a few
occassions when using the Connect All button to initialize the GPS the operating system complains
with a message indicating that the "application" has encountered an error and must shut down.
Apparently the application being referenced is the DLL that implements the GPS interface. When this
happens you should note that the GPS status panel continues to indicate that the GPS is OFF.
Workaround: I have found that the GPS connection is usually successful on the second try so simply
press the Disconnect button associated with the GPS and then press the Connect button. After doing
this it is a good idea to check that the program is still alive.
Status: Closed. This problem has been fixed in version 1.7.2.
Problem GPS-2
Problem Area: GPS Auto Advisory fails to update county on crossing a county line.
Opened On: April 28, 2007
Description: When crossing a long bridge across Tampa Bay the IN County went blank and Auto
Advisory failed to update the county-dependent messages.
Workaround: Use the # key to manually change counties.
Status: Closed. A dialog has been introduced in version 1.7.2 to allow the user to augment the USGS
polygon data to include long bridges over water in which there are county changes. See topic
Adding Polygonal Regions 131 .
Problem GPS-3
Problem Area: GPS is detected as a mouse rendering the machine unusable.
Opened On: July 9, 2007
Description: If a GPS is connected to a serial port while the machine is booting up it will be detected
as a mouse and will render the machine unusable.
Workaround: This is a result of the auto-detection process performed by the operating system during
boot-up. Microsoft provides a tool (COMDisable) that allows the user to disable this auto-detection
process on selected com ports. See the following link for a description of this tool and for a link from
which it can be downloaded COMDisable Tool.
Status: Closed. Use the COMDisable tool if you encounter this problem..
11
Revision History
11.1
Revision 1.0
Revision 1.0 Initial Release 21-August-04
11.2
Revision 1.1
Revision 1.1 dated 3-August-05 includes the following changes
1.
Removed reference to old e-mail address
All rights reserved by C.W. Sanders, NO5W
176
CQx Client: User Guide
2.
3.
4.
5.
6.
7.
8.
9.
10.
11.
12.
13.
14.
15.
16.
17.
18.
19.
20.
21.
22.
23.
24.
25.
26.
27.
28.
29.
30.
31.
32.
33.
34.
35.
11.3
Modified the GPS Status Panel 115 topic to include new items including Heading, Miles to
Waypoint, a description of use of closing speed in Mins to Next County, GPS Advisory Modes, and
GPS Pass Through.
Revised the topic Assigning Function Keys 60
Added the topic Defining Waypoints 119
Added the topic Adding Strip Maps to the Route 97
Added the topic Viewing Strip Maps 98
Added the topic Associating Maps With Counties Dialog 97
Added the topic Setting GPS Reporting Parameters 121
Added the topic QSO Revision Dialog 150
Added the topic Log Display Grid 146
Completed the topic Available Function Key Commands 54
Completed the topic Route Planning Dialog 87
Completed the topic Editing a QSO 68
Added the topic Using Where Am I 124
Added the topic More on WinKey 38
Added the topic CQ/X QSL Format 135
Added the topic More for Radio Devices 35
Added the topic Posting Trip Plans 101
Added the topic Preparing CQ/X GPS QSL Logs 136
Added the topic Reporting Your Position 134
Added the topic Preparing Statistical Results 159
Added the topic Setting up a GPS Pass Through 140
Added the topic County Locator 126
Added the topic GPS Advisory Modes 126
Added the topic County Boundary Polygons 129
Added the topic GPS Passthrough Via a Virtual Null Modem 141
Added the topic Using a Networked GPS 142
Added the topic Finalizing the Logs 70
Added the topic Preparing a Summary Sheet 70
Added the topic Preparing County Logs 158
Added the topic How To Contribute 11
Added the topic Quick Reference Case: No GPS 8
Added the topic Quick Reference Case: For GPS Use 9
Continued adding some keywords.
Corrected some typos and made minor wording changes.
Revision 1.2
Revision 1.2 dated 13-September-05 includes the following changes most of which are related to
internal programming changes to support rules of additional QSO parties:
1.
2.
3.
11.4
Added support for Pennsylvania QSO Party
Added support for Washington State Salmon Run
Minor revisions to several topics including updating screen shots of dialogs that had been modified
Revision 1.3
Revision 1.3 dated 05-November-05 includes the following changes many of which are related to
internal programming changes to support rules of additional QSO parties:
1.
2.
3.
Added support for the Illinois QSO Party
Added support for the Louisiana QSO Party
Added support for the Mississippi QSO Party
CQ/X de NO5W
Revision History
4.
5.
6.
7.
8.
9.
10.
11.
12.
13.
14.
15.
16.
17.
11.5
177
Added support for the Georgia QSO Party
Added support for the Oklahoma QSO Party
Added support for the Florida QSO Party
Added support for the Wisconsin QSO Party
Fixed problem wherein sequence numbers were logged incorrectly when Silently Logging QSO
Fixed a message formatting problem wherein the embedded serial number symbol (^) was
incorrectly formatted if it was not space-separated from the remainder of the message
Added ability of program to gracefully degrade when the GPS advisory mode is AUTO and there
are missing county polygons.
Added User-Supplied Help capability that allows user to provide their own help information - see
User-Supplied Help 163 .
Added access to an Exploring CQ/X document to the Help | Getting Started menu.
Added menu item QPTools | Sample Crossing/Waypoint Files for easy reference on the format of
these files.
Converted the Waypoint file from comma-separated format to space-separated format to promote
consistency with the format of the Crossings file.
Disabled the Save Raw GPS data capability and moved it to a separate GPS Record/Playback
application.
Added the capability to write out the sequence of county polygons for a route developed in the
Route Planning Dialog 87 to enable easy import into a mapping program for use in trip planning
and modified the topic accordingly.
Fixed problem with the popup for resolving multiple county crossings when there were no multiple
county crossings.
Revision 1.4
Revision 1.4 dated 22-May-06 includes the following changes:
1.
2.
3.
4.
5.
6.
7.
8.
9.
10.
11.
12.
13.
14.
15.
16.
17.
18.
19.
20.
Added support for the Minnesota QSO Party
Fixed a GPS startup/initialization problem
Re-installed the Connect All button on the ports form
Added option to automatically announce new county
Added the topic Using GPS Recorder 142
Replaced the polygon inside/outside ray-crossing logic with winding number logic
Revised the Directory Structure 12 topic to reflect the new directory structure.
Added Setting Radio Parameters 30 and Setting Keyer Parameters 32 topics.
Added information regarding changing keying speed and frequency in topics QSO Entry Box 145
and Special Keystroke Combinations 156
Added Display menu item SSB-Show Location Cues (see Location Cues for SSB Operation 167 ) to
show full county name and phonetics when operating SSB.
Added the topic Using GPS to Set CPU Time 144 .
Added support for the Michigan QSO Party
Added support for the Seventh Call Area QSO Party (7QP)
Added support for the New England QSO Party
Added the Score Display Grid 147 topic.
Added the option to recalculate the score after each log revision or on demand and revised the
topic Revising a Log Entry 68 to reflect this option.
Revised the Changing Counties 96 topic to reflect the ability to change the current county from the
QSO Entry box.
Revised the topic Making a QSO Entry 65 to reflect the option to use the Spot windows for
initiating a QSO.
Revised the topic Assigning Function Keys 60 to reflect the capability of assigning keys to emulate
the keys used by other programs (NA and CT).
Added the capability of using the right radio QSO entry area for presenting information about
All rights reserved by C.W. Sanders, NO5W
178
CQx Client: User Guide
21.
22.
23.
24.
25.
26.
27.
28.
29.
30.
31.
32.
11.6
previous QSOs with either the currently entered call or multiplier and revised the topic
Customizing the Display 154 to reflect this capability
Added a Startup Wizard to walk the user through the main startup steps and added the topic
Using the Startup Wizard 64 to summarize this capability.
Added a session clock and associated topic Setting up the Session Clock 165 .
Added basic support for the Icom IC-7000.
Added the Cautions and Situations to Avoid 173 topic.
Fixed a problem related to daylight savings time in the countdown feature.
Added a Time In County element to the GPS Status Panel 115 and ability to capture the Time In
County for each county activated.
Added support for the Alabama QSO Party
Replaced the search feature in the QSO Entry area with a panel that provides a single line of GPS
information in the form [CurrentCty TimeInCurrentCty][MilesToNextCty MinsToNextCty NextCty]
and revised the QSO Entry Box 145 topic accordingly.
Added a feature to enable the user to enlarge the logging window by either moving the
Score Display Grid 147 to the left hand tab panel and/or moving the Notes panel to the right hand
tab panel. Also added the ability to change the font size and other properties in the
Log Display Grid 146 . See Customizing the Display 154 for details.
Added ability to change the mode from the QSO Entry Box 145 and modified the associated topic.
Fixed an Enter-key sequencing problem that occurred on the first QSO following use of the
Shift+Spacebar for calling CQ.
Added an acknowledgement section to the user manual to acknowledge suggestions from users.
Revision 1.5
Revision 1.5 dated 23-July-06 includes the following changes:
1.
2.
3.
4.
5.
6.
11.7
Modified the county polygon analysis method so that all polygons being analyzed have the same
reference point for the conversion from latitude/longitude coordinates to rectangular X/Y
coordinates. The original approach used a different reference point for each county resulting in
small gaps along the boundary between two adjacent counties. This change required adding the
latitude/longitude based polygons to the data base.
Improved the accuracy of the polygon sequence available from the Route Planning Dialog 87 by
using the original USGS latitude/longitude polygons rather than re-creating them from X/Y based
polygons.
Added a dialog for easy entry of frequency and mode when initiating manual radio tracking.
Added support for the California QSO Party.
Fixed a sequence number problem that occurred on restart when using a single sequence number
rather than county-specific sequence number for each county.
Fixed a sequence number problem wherein duplicate contacts resulted in reuse of the sequence
number.
Revision 1.6
Revision 1.6.3 dated 21-September-06 includes the following changes:
1.
2.
3.
4.
5.
6.
7.
Added support for multi-county QSO origination.
Added support for networked operation
Added spell checking to the Building Routes from Crossings 92 dialog.
Improved coordination between the Plan Route and Build Route from Crossings dialogs.
Corrected a problem with the club list population code.
Corrected a problem in the Auto Backup process.
Documented the problem with Turbo Tuner and CQ/X sharing CI-V port in IC-7000 and
workaround.
CQ/X de NO5W
Revision History
11.8
179
Revision 1.7
Revision 1.7.2 dated 09-May-07 includes the following changes:
1.
2.
3.
4.
5.
6.
7.
8.
9.
10.
11.
12.
13.
14.
15.
16.
17.
18.
19.
20.
21.
22.
23.
24.
25.
26.
27.
28.
29.
Added support for the Kenwood TS-480 including support for multiple VFOs and RIT/XIT
Added support for the ARRL Sweepstakes 82 contest.
Added support for the North American QSO Party 83 .
Added support for the RAC Winter Contest 84 .
Added support for the North American Sprint 83 .
Revised the process for Assigning Function Keys 60 .
Fixed a problem with text alignment in the Log Display Grid 146 that occurred following font resizing.
Fixed a problem with the height of the Log Display Grid 146 that occurred following font re-sizing
causing the most recent QSOs to be hidden..
Fixed a problem wherein the configuration wizard was calling an obsolete version of the function
key assignment dialog.
Revised the Exploring CQ/X document including more detail on using the GPS simulator.
Revised the Exploring CQ/X document to include a section on Assigning Function Keys 60 .
Removed leading zero from the Next County report described in
Special Keystroke Combinations 156 under keystrokes associated with the GPS.
Added a feature wherein Shift + Enter sends the right most substring of the focused
QSO Entry Box 145 followed by a question mark.
Added Setting Keyer Parameters 32 and Setting Radio Parameters 30 to the wizard.
Added a message and user decision point that is activated if the user tries to manually change
counties while the GPS is in AUTO advisory mode. Decision to continue with manual entry
disables the AUTO advisory mode.
Added the capability to test a radio interface from the Test button of the Port Assignments dialog.
Fixed the previous log import process used to load calls and exchange information from files as
described in topic Loading Calls from Previous Logs 64 .
Added the section Single Mobile Setup at NO5W 21 .
Support for networked operation has been removed from this release pending completion of
improvements in the error-handling/recovery capabilities. If your application requires networking
please contact the author to determine status and availability of this capability.
Fixed a problem wherein the embedded message symbols in the message template would get
replaced with the actual data. In the case of embedded county symbols this would cause the
automatic updating of the county information to malfunction.
Fixed a problem with the GPS interface that would cause it to throw an error message on startup.
Added support for the Icom IC-756 Pro III and for com port COM3.
Added a Trips facility to the GPS Simulator to make it easier to access the necessary playback
files and enabling the user to define their own trips.
Added a set of default message and key assignments specific to each supported contest and a
mechanism for loading them to provide a starting point for defining your own custom messages
and key assignments.
Added ability to monitor frequency status for CW contests having a QSY rule. See
North American Sprint 83 topic.
Fixed a problem in the Build Route From Crossings processing wherein a blank line or missing
data caused an error.
Added a feature wherein use of Alt + Enter allows the user to que up a second caller and a
message (CQN) by which to initiate an exchange with the second caller immediately after logging
the QSO with the first caller. See Special Keystroke Combinations 156 and
Handling a Second Caller 66 .
Added a section to the score grid, when it is in Vertical Score Format 147 , to show results for the
current county when a GPS is in use including QSOs in the county, hourly rate in the county,
remaining time required to reach QSO goal, etc.
Added a feature wherein use of Ctrl+Enter allows the user to end a QSO with a message (QRZ)
other than the normal CQT.
All rights reserved by C.W. Sanders, NO5W
180
CQx Client: User Guide
30. Added a feature Auto-scheduling QSO Ending Messages 67 for alternating use of CQT/QRZ
messages based on the current 10 minute QSO rate.
31. Added a Radio Interface Health Check 32 to detect loss of communication with the logging radio.
32. Added a feature Adding Polygonal Regions 131 for augmenting the USGS boundary files when it is
necessary to model a bridge over a long expanse of water.
Revision 1.7.3 dated 09-August-07 includes the following changes:
1.
Added an option for the county selection combo box on the dialog resulting from entry of the #
character (see Special Keystroke Combinations 156 ) to either display all of the counties in the state
or only those that are in the vicinity of the current GPS latitude and longitude.
2. Fixed problems with the Remote (server-based) GPS including Time to Next County, ability to log
GPS information, etc.
3. Added capability to automatically change the GPS display update rate when distance to a county
line crossing becomes less than a user-defined Alert Range.
4. Added a progress bar on startup/restart.
5. Added a calculation and display of four/six-character grid square indicator to support VHF/UHF
contests. See GPS Status Panel 115 .
6. Added support for the Colorado QSO Party.
7. Improved support for VHF bands where allowed in some QSO parties.
8. Added support for the IARU-HF Contest 84 .
9. Fixed a problem wherein the multiplier array was not updating when changing modes from CW to
PHone.
10. Added support for the Northern California Contest Club Sprint. See topic NCCC Sprint 84 .
11. Added the capability to export the logs to an ADIF formatted file. See topic
Exporting Logs to an ADIF File 71 .
12. Fixed a sequence number parsing problem in the ARRL Sweepstakes module.
13. Added radio tuning to the bandmap to allow spots to be selected by tuning across the band.
14 Fixed scoring problems in the NAQP and NA Sprint modules related to the handling of multipliers.
Revision 1.7.4 dated 12-August-07 includes the following changes:
1. Added support for the Arkansas QSO Party.
2. Added Help menu access to the State QSO Party calendar maintained by WA7BNM.
Revision 1.7.5 dated May-08 includes the following changes after all 175-xx patches have been
installed. The last patch is 175-06 and is dated March-09.:
1.
Added the capability to export the county crossings data to a KML file for Google Maps - see
Exporting Crossing Data As a KML File 102 .
2. Fixed several problems with multi-county operation including a crash on calling up the MultiCounty Messaging and Logging Dialog 169 and failure to include sequence numbers in the
outgoing message.
3. Added support for the IC-718
4. Fixed problems with the user interface including: Failure to highlight misspelled county names on
the Building Routes from Crossings 92 dialog and Hiding/minimizing some dialogs under certain
conditions causing the program to appear to be locked up.
5. Added the capability to export a sequence of counties from the Route Planning Dialog 87 as a
KML file.
6. Fixed a problem with GPS logging of the grid square.
7. Fixed a problem wherein a # symbol would appear for about 10 seconds in the message array
causing a problem if a QSO was attempted during that time.
8. Added the capability to assign tasks to the numeric keypad.
9. Added the capability to interface via comm ports with numbers higher than nine(9).
10. Added support for the Indiana QSO party.
11. Added the Send Last Word Query task to the list of tasks that may be assigned to function keys or
key combinations.
CQ/X de NO5W
Revision History
181
12. Added the Send Next County Message task to the list of tasks that may be assigned to function
keys or key combinations.
13. Fixed a problem wherein the QSO mode would get stuck in the S&P state causing problems with
the Enter key processing.
14. Added the Send Last Sequence Number in Log task to the list of tasks that may be assigned to
function keys or key combinations.
15. Added the capability to save/load the list of User-Supplied Help files to/from a file.
16. Added the capability to record operator notes for later review Recording an operator note 68 and
provided a key-assignable task for accessing the associated dialog.
17. Fixed a problem with the keyboard (converse) keying mode.
18. Added an option Keyer | Send Call While Entering in which, at the beginning of a Run QSO,
transmission of the call is initiated as it is being entered and after a user-configurable number of
characters have been entered.
19. Added support for the Icom IC-706MKII.
20. Modified GPS logging to use a time stamp from the GPS rather than from the CPU.
21. Fixed a problem with GPS logging in the networked configuration wherein the local machine mode
and frequency were being recorded for QSOs made on remote machines.
22. Revised the Alabama QSO party module to support new rules and county names for 2008.
23. Added an Auto CQ option including capability to adjust the delay between CQs.
24. Improved the Build Plan from Crossings dialog used in setting up the crossing files for QSO party
operation
25. Added support for the ARRL Field Day event.
26. Added speed pot support and ability to silence the side tone to the WinKeyer module.
27. Added capability to prepare a dupe sheet for ARRL Field Day.
28. Added support for the NCCC Internet Sprint
29. Added support for the New Mexico QSO Party
30. Fixed a sequence number logging problem in the ARRL Sweepstakes
31. Fixed an instability in the frequency readout for the FT-920
32. Fixed a problem with direct entry of the county in the LA QP
33. Fixed a data problem in the multiplier/county adjacency file for the Arkansas QSO Party that
caused the county detection logic to fail.
34. Added the GPS Alert Range to the GPS restart file to enable it to be retained across a restart.
35. Changed the path description for the location of trips files from absolute full path to path relative to
the GPS Simulator
36. Added a multiplier summary to the Prepare Statistics option.
37. Fixed a data problem wherein IN was missing from the multiplier file for the New Mexico QSO
Party.
38. Improved the Enter Key processing to correct a problem wherein clearing the QSO entry line after
sending the exchange but not logging the contact caused an incorrect enter key response following the
next entry of a call.
39. Added a K3-specific module for interfacing to that radio.
40. Added a Similar Calls page to the left hand page control to show calls similar to the one being
typed into the QSO entry windows.
41. Added assignable function key access to the Similar Calls and Score pages.
Revision 1.7.6 dated 04-March-09 has the following patches. See the readabout documents for details
on what the patches contain.
1.
2.
3.
4.
5.
6.
7.
8.
Patch 176-01
Patch 176-02
Patch 176-03
Patch 176-04
Patch 176-05
Patch 176-06
Patch 176-07
Patch 176-08
All rights reserved by C.W. Sanders, NO5W
182
CQx Client: User Guide
9. Patch 176-09
10. Patch 176-10
CQ/X de NO5W
Index
Clearing Notes 68
Closest N Method 120
Closing Speed 115
County boundary polygons 129
County bounding circle 129
County changes from QSO Entry Box 96
County Crossings 90, 91, 92
County line alert range 121
County Line Project 11
County locator 126
County logs 158
County Polygon Performance Tests 11
County radius 126
County reference point 126
CQT/QRZ Scheduling rule 67
Cross-country operation 112
Customizing 154
Index
-33830 reporting
159
-77-NE-IN-QSOPARTY
72
-AActive VFO 35
Adding Polygon Regions 131
Adding strip maps 97
ADIF export 71
All Within X Miles Method 120
Archiving Notes 68
ARRL Field Day 76
ARRL Sweepstakes 82
Associating 97
Maps 97
Augmenting USGS Polygons 131
Auto CQ 153
Auto CQ delay 153
Auto-scheduling CQT/QRZ 53
Auto-scheduling QSO Endings 67
Average QSOs per County 147
-DDecrement AF Gain 54
Default key assignments 60
Default messages 50
Defining Route Path 105
Distribution CD 12
-EEmbedded message symbols 52
ExploringCQX 8
Extending Support to Other QSO Parties
-BBackup 152
Bonus information 147
Bounding circle 129
Buffer second call 54
Building routes from county crossings
-F92
-CCabrillo 70
Calling CQ 65
Changing counties 96
Changing frequency via QSO Entry panel 156
Changing keying speed via QSO Entry panel 156
All rights reserved by C. W. Sanders, NO5W
183
Field Day 76
Field Day Bonus Points 76
Finalizing 70
Finalizing logs 70
FL-NE-QSO-PARTY 72
Function key assignments 54
-GGOTA Station 76
GPS Advisory AUTO 126
GPS Advisory Indicator 126
GPS Advisory MAN 126
11
184
CQ/X Client: User Guide
GPS Advisory Mode 115
GPS Advisory OFF 126
GPS Logging 100
GPS Pass through 140
GPS Path Data 142
GPS Playback 142
GPS Power 173
GPS Record 142
GPS Time 115
GPS-18PC 173
-LLimitations 171
Loading calls 64
Loading VFO memories
Log display fonts 154
Logs 152
Backup 152
-M-
-HHalf-hour Session 165
Hamation 7
Health Check 32
How to Contribute 11
-IIARU-HF Contest 84
Importing data 91
Inactive VFO 35
Increment AF Gain 54
Inner circle screen 129
Installation 12
Interface Health Check 32
-KK3 Configuration Dialog 41
K3 control subset 46
K3 CW Tune Always On in CW Mode
K3 Menu LCD 41
K3 Paddle Speed Tracking 41
K3 Power Off Warning 41
K3 Quick Memory Dialog 41
K3 Rotary Controls 41
K3 small interface 46
K3 Tab Settings 41
K3 Tap/Hold 41
KML file example 104
KML file export 102
Known problems 171
35
41
MARAC data 112
Member society abbreviations 84
Message CQ 53
Message CQN 53
Message CQT 53
Message CQX 53
Message QRZ 53
Message SP 53
Message SPX 53
Microham 7
Miles to Next County 115
Miles to Waypoint 115
Mins to Goal 147
Mins to Next 147
Modeling Bay Bridges 131
Moving a similar call to the QSO Entry window 156
Multi 21
Multi-contest 72
Multi-county Messaging and Logging Dialog 169
Multi-county operation 69
Multi-county setup dialog 167
Multiple crossings 93
Multi-polygon county example 129
Multi-QSO logging 54
-NNA Emulation 60
NAQP 83
NCCC Internet Sprint 84
NCCC Sprint 84
Networked GPS 142
Networking 21
Non-QSO party contests 76
Non-QSO Party Statistical Results
160
CQ/X de NO5W
Index
North American QSO Party
North American Sprint 83
Numeric key pad 60
Numeric keypad 156
185
83
-OOperator Notes 68
Outer circle screen 129
-PPass through 140
Pit Stops 173
Polygons 129
Posting trip plans 101
Pounce 67
Prepare Statistical Results 160
Preparing county logs 158
Projected QSOs 147
-QQSL Format 135
QSO Endings 67
QSO Entry fonts 154
QSO Revision dialog 150
Quick Reference Case No GPS 8
Quick Reference For GPS Users 9
-RRAC Winter Contest 84
Remote GPS 142
Required messages 53
Resolve multiple crossings 93
Resolving county symbols 151
Resuming a contest 62
Revising a QSO 68
Rig Runner 173
Route 85
planning 85
starting 85
Route planning for GPS Use 88
All rights reserved by C. W. Sanders, NO5W
-SSats In View 115
Score grid 147
Searching for calls using the spot window
Selecting a similar call 156
Send Call While Entering 145
Send Last Word Query 54
Server 21
Session on Selected Weekend 165
Session on Today 165
Session on Tomorrow 165
Session Start Date 165
Session Start Hour 165
Shift+Spacebar 54
Shuttle Pro 2 46, 47
SimGPS.exe 142
Similar Call fonts 154
Starting a contest 62
Starting a route 96
Statistical results 159
Suggest Speed 147
Summary sheet 162
Sweepstakes 179
65
-TTampa Bay 131
Test results 171
Time In County 115
Time To Next County 115
Tracking 120
Tracking multiple waypoints
Transferring VFO data 35
Turbo Tuner 174
120
-UUnresolved message symbols 52
Update Rate 115
US Interface 7
User-Supplied Help 163
USGS polygon data 129
Using Turbo Tuner with CQ/X and IC-7000
174
186
CQ/X Client: User Guide
-VViewing strip maps 98
Virtual Null Modem 141
Virtual Serial Port Build 114
Virtual Serial Ports 141
141
-WW1AW Bulletin 76
Waypoint description 121
Waypoints 119
Where Am I 126
Winding number 129
Winkey 7
Winkey compensation 38
Winkey custom parameters
Winkey first extension 38
Winkey paddle echo 38
Winkey PTT lead-in 38
Winkey PTT tail 38
Winkey serial echo 38
WinKey speed pot 38
38
CQ/X de NO5W


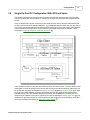


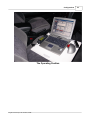


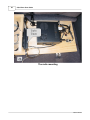


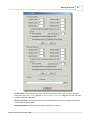
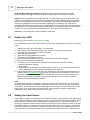

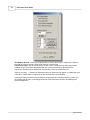

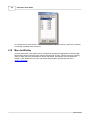


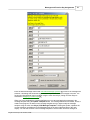


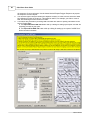
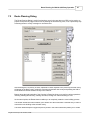
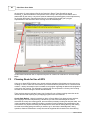


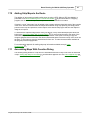


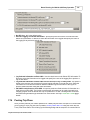


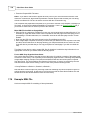
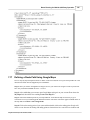


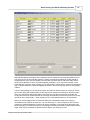


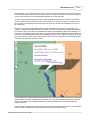
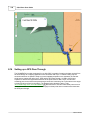
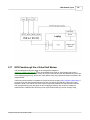


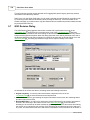


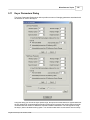
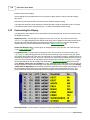


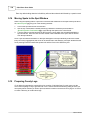

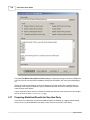


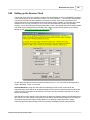


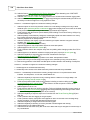


![TR4W User Manual [English Version]](http://vs1.manualzilla.com/store/data/005798737_1-5ae60a1fb1429eafa2ca68266ac47e3b-150x150.png)
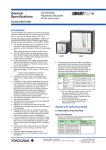


![TR4W User Manual [English Version]](http://vs1.manualzilla.com/store/data/005728234_1-e27c4fea1c6d513d6e0fdc1451ef66f1-150x150.png)