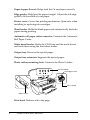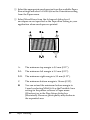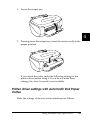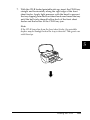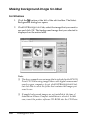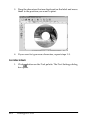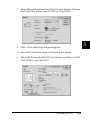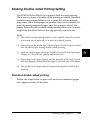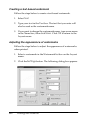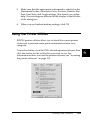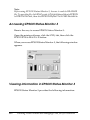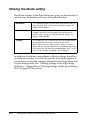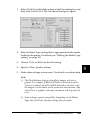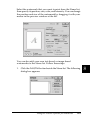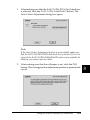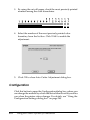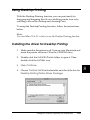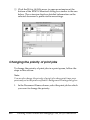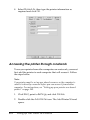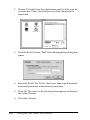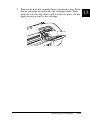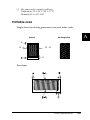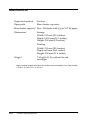
1
Color Ink Jet Printer
All rights reserved. No part of this publication may be reproduced, stored in a retrieval
system, or transmitted in any form or by any means, electronic, mechanical, photocopying,
recording, or otherwise, without the prior written permission of SEIKO EPSON
CORPORATION. The information contained herein is designed only for use with this EPSON
printer. EPSON is not responsible for any use of this information as applied to other printers.
Neither SEIKO EPSON CORPORATION nor its affiliates shall be liable to the purchaser of
this product or third parties for damages, losses, costs, or expenses incurred by the purchaser
or third parties as a result of accident, misuse, or abuse of this product or unauthorized
modifications, repairs, or alterations to this product, or (excluding the U.S.) failure to strictly
comply with SEIKO EPSON CORPORATION's operating and maintenance instructions.
SEIKO EPSON CORPORATION shall not be liable for any damages or problems arising from
the use of any options or any consumable products other than those designated as Original
EPSON Products or EPSON Approved Products by SEIKO EPSON CORPORATION.
SEIKO EPSON CORPORATION shall not be held liable for any damage resulting from
electromagnetic interference that occurs from the use of any interface cables other than those
designated as EPSON Approved Products by SEIKO EPSON CORPORATION.
EPSON is a registered trademark and EPSON Stylus is a trademark of SEIKO EPSON
CORPORATION.
PRINT Image Matching Version 2.0. Copyright 2002 SEIKO EPSON CORPORATION. All
rights reserved. PRINT Image Matching is a trademark of SEIKO EPSON CORPORATION.
The PRINT Image Matching logo is a trademark of SEIKO EPSON CORPORATION.
PRINT Image Matching is a term for the print command that is embedded in header file of
the image created by digital camera. It contains color setting and image parameter
information.
Microsoft and Windows are registered trademarks of Microsoft Corporation.
General Notice: Other product names used herein are for identification purposes only and may be
trademarks of their respective owners. EPSON disclaims any and all rights in those marks.
Copyright © 2002 by SEIKO EPSON CORPORATION, Nagano, Japan.
User’s Guide
Contents
Printer Parts and Functions
Unpacking the Printer . . . . . . . . . . . . . . . . . . . . . . . . . . . . . . . . . . . . . .
Printer Parts and Control Panel Functions . . . . . . . . . . . . . . . . . . . . .
Printer parts . . . . . . . . . . . . . . . . . . . . . . . . . . . . . . . . . . . . . . . . . .
Buttons . . . . . . . . . . . . . . . . . . . . . . . . . . . . . . . . . . . . . . . . . . . . . .
Lights. . . . . . . . . . . . . . . . . . . . . . . . . . . . . . . . . . . . . . . . . . . . . . . .
1
2
2
5
6
Safety Instructions
Important Safety Instructions . . . . . . . . . . . . . . . . . . . . . . . . . . . . . . . . 8
When setting up your printer . . . . . . . . . . . . . . . . . . . . . . . . . . . 8
When choosing a place for the printer . . . . . . . . . . . . . . . . . . . . 9
When using the printer. . . . . . . . . . . . . . . . . . . . . . . . . . . . . . . . 10
When handling the ink cartridges . . . . . . . . . . . . . . . . . . . . . . 11
When using Automatic Roll Paper Cutter. . . . . . . . . . . . . . . . 12
Warnings, Cautions, and Notes . . . . . . . . . . . . . . . . . . . . . . . . . . . . . 13
Chapter 1 Paper Handling
Loading Plain Paper. . . . . . . . . . . . . . . . . . . . . . . . . . . . . . . . . . . . . . .
Loading Special Paper and Other Media . . . . . . . . . . . . . . . . . . . . .
Loading capacities for EPSON special media . . . . . . . . . . . . .
Loading Envelopes. . . . . . . . . . . . . . . . . . . . . . . . . . . . . . . . . . . . . . . .
Loading Matte Board . . . . . . . . . . . . . . . . . . . . . . . . . . . . . . . . . . . . . .
14
15
18
18
22
Chapter 2 Double-Sided Printing
Using Double-Sided Printing . . . . . . . . . . . . . . . . . . . . . . . . . . . . . . . 28
i
Chapter 3 Using Roll Paper
Using the Roll Paper Holder . . . . . . . . . . . . . . . . . . . . . . . . . . . . . . . .32
Loading the roll paper . . . . . . . . . . . . . . . . . . . . . . . . . . . . . . . . .33
Printing on Roll Paper. . . . . . . . . . . . . . . . . . . . . . . . . . . . . . . . . . . . . .38
Printing area and margins. . . . . . . . . . . . . . . . . . . . . . . . . . . . . .39
For Windows users. . . . . . . . . . . . . . . . . . . . . . . . . . . . . . . . . . . .41
For Macintosh users . . . . . . . . . . . . . . . . . . . . . . . . . . . . . . . . . . .45
Removing Roll Paper from the Printer. . . . . . . . . . . . . . . . . . . . . . . .51
Removing roll paper from the printer using operation panel53
Storing EPSON Roll Paper . . . . . . . . . . . . . . . . . . . . . . . . . . . . . . . . . .54
Chapter 4 Using Automatic Roll Paper Cutter
Attaching Automatic Roll Paper Cutter. . . . . . . . . . . . . . . . . . . . . . .55
Printer driver settings with Automatic Roll Paper Cutter . . .56
Cutting position adjustment with Automatic Roll Paper Cutter
60
Attaching the Photo Catcher . . . . . . . . . . . . . . . . . . . . . . . . . . . . . . . .67
Using Automatic Roll Paper Cutter . . . . . . . . . . . . . . . . . . . . . . . . . .70
For Windows users. . . . . . . . . . . . . . . . . . . . . . . . . . . . . . . . . . . .70
For Macintosh users . . . . . . . . . . . . . . . . . . . . . . . . . . . . . . . . . . .75
Removing the Photo Catcher . . . . . . . . . . . . . . . . . . . . . . . . . . . . . . . .81
Removing the Automatic Roll Paper Cutter . . . . . . . . . . . . . . . . . . .82
Chapter 5 Printing on CD-R
Notice for CD-R Printing . . . . . . . . . . . . . . . . . . . . . . . . . . . . . . . . . . .84
Available size of CD-R. . . . . . . . . . . . . . . . . . . . . . . . . . . . . . . . .85
Installing EPSON Print CD . . . . . . . . . . . . . . . . . . . . . . . . . . . . .86
Print position adjustment . . . . . . . . . . . . . . . . . . . . . . . . . . . . . .87
Color settings . . . . . . . . . . . . . . . . . . . . . . . . . . . . . . . . . . . . . . . .97
Cleaning the Printer . . . . . . . . . . . . . . . . . . . . . . . . . . . . . . . . . . . . . . .99
Setting CD-R. . . . . . . . . . . . . . . . . . . . . . . . . . . . . . . . . . . . . . . . . . . . .100
Preparing data . . . . . . . . . . . . . . . . . . . . . . . . . . . . . . . . . . . . . . . . . . .107
Accessing EPSON Print CD . . . . . . . . . . . . . . . . . . . . . . . . . . .107
Selecting CD-R size for printing. . . . . . . . . . . . . . . . . . . . . . . .108
ii
Making background image for label . . . . . . . . . . . . . . . . . . .
Editing characters . . . . . . . . . . . . . . . . . . . . . . . . . . . . . . . . . . .
Printing curved characters . . . . . . . . . . . . . . . . . . . . . . . . . . . .
Saving the label data . . . . . . . . . . . . . . . . . . . . . . . . . . . . . . . . .
Accessing EPSON Print CD help . . . . . . . . . . . . . . . . . . . . . .
Printing on CD-R . . . . . . . . . . . . . . . . . . . . . . . . . . . . . . . . . . . .
Print cancellation in Windows . . . . . . . . . . . . . . . . . . . . . . . .
Cancel print job while printing . . . . . . . . . . . . . . . . . . . . . . . .
Print cancellation in Macintosh . . . . . . . . . . . . . . . . . . . . . . . .
109
112
115
118
119
120
125
126
128
Chapter 6 Printing with Windows
Printer Software Introduction. . . . . . . . . . . . . . . . . . . . . . . . . . . . . .
Getting more information . . . . . . . . . . . . . . . . . . . . . . . . . . . .
Accessing the printer software . . . . . . . . . . . . . . . . . . . . . . . .
Making Settings on the Main Menu . . . . . . . . . . . . . . . . . . . . . . . .
Making the Media Type setting . . . . . . . . . . . . . . . . . . . . . . .
Making the Ink setting . . . . . . . . . . . . . . . . . . . . . . . . . . . . . . .
Making the Mode setting . . . . . . . . . . . . . . . . . . . . . . . . . . . . .
Previewing your printout . . . . . . . . . . . . . . . . . . . . . . . . . . . .
Making Settings on the Paper Menu . . . . . . . . . . . . . . . . . . . . . . . .
Making Settings on the Layout Menu . . . . . . . . . . . . . . . . . . . . . . .
Making Reduce/Enlarge settings . . . . . . . . . . . . . . . . . . . . . .
Making Double-sided Printing Setting . . . . . . . . . . . . . . . . .
Making Multi-Page settings. . . . . . . . . . . . . . . . . . . . . . . . . . .
Making Watermark settings . . . . . . . . . . . . . . . . . . . . . . . . . .
Using the Printer Utilities . . . . . . . . . . . . . . . . . . . . . . . . . . . . . . . . .
EPSON Status Monitor 3 . . . . . . . . . . . . . . . . . . . . . . . . . . . . .
Nozzle Check . . . . . . . . . . . . . . . . . . . . . . . . . . . . . . . . . . . . . . .
Head Cleaning . . . . . . . . . . . . . . . . . . . . . . . . . . . . . . . . . . . . . .
Print Head Alignment . . . . . . . . . . . . . . . . . . . . . . . . . . . . . . .
Printer and option information . . . . . . . . . . . . . . . . . . . . . . . .
Speed & Progress. . . . . . . . . . . . . . . . . . . . . . . . . . . . . . . . . . . .
Getting Information Through Online Help . . . . . . . . . . . . . . . . . .
Accessing help from your application . . . . . . . . . . . . . . . . . .
Accessing help from the Windows Start menu. . . . . . . . . . .
iii
130
131
131
132
133
136
137
145
148
154
155
156
162
165
168
169
170
170
170
175
179
182
182
183
Chapter 7 Checking Printer Status and Managing Print Jobs for
Windows
Using the Progress Meter . . . . . . . . . . . . . . . . . . . . . . . . . . . . . . . . . .184
Epson Printing Tips . . . . . . . . . . . . . . . . . . . . . . . . . . . . . . . . . .185
Error messages . . . . . . . . . . . . . . . . . . . . . . . . . . . . . . . . . . . . . .185
Using EPSON Spool Manager . . . . . . . . . . . . . . . . . . . . . . . . . . . . . .186
Using EPSON Status Monitor 3. . . . . . . . . . . . . . . . . . . . . . . . . . . . .186
Accessing EPSON Status Monitor 3. . . . . . . . . . . . . . . . . . . . .187
Viewing information in EPSON Status Monitor 3. . . . . . . . .187
Chapter 8 Using the Printer Software for Macintosh
Printer Software Introduction . . . . . . . . . . . . . . . . . . . . . . . . . . . . . .189
Making Settings in the Print Dialog Box . . . . . . . . . . . . . . . . . . . . .190
Making the Media Type setting . . . . . . . . . . . . . . . . . . . . . . . .191
Making the Ink setting. . . . . . . . . . . . . . . . . . . . . . . . . . . . . . . .194
Making the Mode setting . . . . . . . . . . . . . . . . . . . . . . . . . . . . .195
Setting the print time . . . . . . . . . . . . . . . . . . . . . . . . . . . . . . . . .202
Previewing your printout . . . . . . . . . . . . . . . . . . . . . . . . . . . . .203
Saving spool data as a file . . . . . . . . . . . . . . . . . . . . . . . . . . . . .205
Making settings in the Page Setup dialog box . . . . . . . . . . . . . . . .206
Defining a custom paper size . . . . . . . . . . . . . . . . . . . . . . . . . .211
Printing on both sides of the paper . . . . . . . . . . . . . . . . . . . . .214
Making Settings in the Layout Dialog Box . . . . . . . . . . . . . . . . . . .220
Making the Fit to Page setting . . . . . . . . . . . . . . . . . . . . . . . . .221
Making Watermark settings . . . . . . . . . . . . . . . . . . . . . . . . . . .221
Making Multi-Page settings . . . . . . . . . . . . . . . . . . . . . . . . . . .224
Making Print Order settings . . . . . . . . . . . . . . . . . . . . . . . . . . .227
Using the Printer Utilities. . . . . . . . . . . . . . . . . . . . . . . . . . . . . . . . . .227
EPSON StatusMonitor . . . . . . . . . . . . . . . . . . . . . . . . . . . . . . . .228
Nozzle Check . . . . . . . . . . . . . . . . . . . . . . . . . . . . . . . . . . . . . . .228
Head Cleaning . . . . . . . . . . . . . . . . . . . . . . . . . . . . . . . . . . . . . .229
Print Head Alignment . . . . . . . . . . . . . . . . . . . . . . . . . . . . . . . .229
Printer and option information . . . . . . . . . . . . . . . . . . . . . . . .232
Configuration . . . . . . . . . . . . . . . . . . . . . . . . . . . . . . . . . . . . . . .235
Using Desktop Printing . . . . . . . . . . . . . . . . . . . . . . . . . . . . . . . . . . .236
Installing the driver for Desktop Printing . . . . . . . . . . . . . . .236
iv
Printing with the Desktop Printing function. . . . . . . . . . . . .
Managing print jobs using the Desktop Printer window . .
Using the Printing menu . . . . . . . . . . . . . . . . . . . . . . . . . . . . .
Getting Information Through Online Help . . . . . . . . . . . . . . . . . .
237
238
240
240
Chapter 9 Checking Printer Status and Managing Print Jobs for
Macintosh
Using EPSON StatusMonitor . . . . . . . . . . . . . . . . . . . . . . . . . . . . . .
Accessing EPSON StatusMonitor . . . . . . . . . . . . . . . . . . . . . .
Using the Configuration Settings dialog box . . . . . . . . . . . .
Using EPSON Monitor3 . . . . . . . . . . . . . . . . . . . . . . . . . . . . . . . . . .
Accessing EPSON Monitor3 . . . . . . . . . . . . . . . . . . . . . . . . . .
Managing print jobs using EPSON Monitor3 . . . . . . . . . . . .
Changing the priority of print jobs . . . . . . . . . . . . . . . . . . . . .
242
242
243
245
245
246
247
Chapter 10 Setting Up Your Printer on a Network
For Windows Me, 98, and 95 Users . . . . . . . . . . . . . . . . . . . . . . . . .
Setting up your printer as a shared printer . . . . . . . . . . . . . .
Accessing the printer through a network . . . . . . . . . . . . . . .
For Windows XP, 2000 and NT 4.0 Users . . . . . . . . . . . . . . . . . . . .
Setting up your printer as a shared printer . . . . . . . . . . . . . .
Accessing the printer through a network . . . . . . . . . . . . . . .
For Macintosh Users . . . . . . . . . . . . . . . . . . . . . . . . . . . . . . . . . . . . .
Setting up your printer as a shared printer . . . . . . . . . . . . . .
Accessing the printer through a network . . . . . . . . . . . . . . .
249
249
251
253
254
255
258
258
260
Chapter 11 Increasing the Print Speed
General tips . . . . . . . . . . . . . . . . . . . . . . . . . . . . . . . . . . . . . . . . . . . . .
Using the Speed & Progress dialog box (Windows only) . . . . . .
EPSON Printer Port. . . . . . . . . . . . . . . . . . . . . . . . . . . . . . . . . .
Using Port Configuration (Windows NT 4.0 only) . . . . . . .
v
262
264
265
268
Chapter 12 Printing with PRINT Image Matching
How is PRINT Image Matching used? . . . . . . . . . . . . . . . . . . . . . . .270
Media for which PRINT Image Matching is enabled . . . . . .270
Chapter 13 Replacing Ink Cartridges
Replacing an Empty Ink Cartridge . . . . . . . . . . . . . . . . . . . . . . . . . .271
Using the printer's control panel . . . . . . . . . . . . . . . . . . . . . . .273
Using the Status Monitor. . . . . . . . . . . . . . . . . . . . . . . . . . . . . .279
Replacing an Ink Cartridge . . . . . . . . . . . . . . . . . . . . . . . . . . . . . . . .279
Using the printer’s control panel . . . . . . . . . . . . . . . . . . . . . . .279
Chapter 14 Maintenance
Checking the Print Head Nozzles . . . . . . . . . . . . . . . . . . . . . . . . . . .283
Using the Nozzle Check utility. . . . . . . . . . . . . . . . . . . . . . . . .283
Using the control panel buttons . . . . . . . . . . . . . . . . . . . . . . . .284
Cleaning the Print Head . . . . . . . . . . . . . . . . . . . . . . . . . . . . . . . . . . .285
Using the Head Cleaning utility. . . . . . . . . . . . . . . . . . . . . . . .286
Using the control panel buttons . . . . . . . . . . . . . . . . . . . . . . . .289
Aligning the Print Head . . . . . . . . . . . . . . . . . . . . . . . . . . . . . . . . . . .291
For Windows users. . . . . . . . . . . . . . . . . . . . . . . . . . . . . . . . . . .291
For Macintosh users . . . . . . . . . . . . . . . . . . . . . . . . . . . . . . . . . .292
Cleaning the Printer . . . . . . . . . . . . . . . . . . . . . . . . . . . . . . . . . . . . . .292
Transporting the Printer . . . . . . . . . . . . . . . . . . . . . . . . . . . . . . . . . . .293
Updating and Uninstalling Software . . . . . . . . . . . . . . . . . . . . . . . .294
Updating to Windows Me or 98 . . . . . . . . . . . . . . . . . . . . . . . .295
Updating the printer software in Windows XP, Me, 2000 or NT
4.0 . . . . . . . . . . . . . . . . . . . . . . . . . . . . . . . . . . . . . . . . . . . . . . .295
Uninstalling the printer driver . . . . . . . . . . . . . . . . . . . . . . . . .295
Uninstalling EPSON Print CD . . . . . . . . . . . . . . . . . . . . . . . . .297
Chapter 15 Troubleshooting
Diagnosing the Problem . . . . . . . . . . . . . . . . . . . . . . . . . . . . . . . . . . .298
vi
Online problem solving . . . . . . . . . . . . . . . . . . . . . . . . . . . . . . 298
Error indicators . . . . . . . . . . . . . . . . . . . . . . . . . . . . . . . . . . . . . 300
EPSON Status Monitor . . . . . . . . . . . . . . . . . . . . . . . . . . . . . . . 302
Running a printer operation check . . . . . . . . . . . . . . . . . . . . . 302
Print Quality Problems . . . . . . . . . . . . . . . . . . . . . . . . . . . . . . . . . . . 305
Horizontal banding . . . . . . . . . . . . . . . . . . . . . . . . . . . . . . . . . . 305
Vertical misalignment or banding . . . . . . . . . . . . . . . . . . . . . 306
Incorrect or missing colors . . . . . . . . . . . . . . . . . . . . . . . . . . . . 307
Blurry or smeared printout . . . . . . . . . . . . . . . . . . . . . . . . . . . 307
Print quality does not improve after head cleaning. . . . . . . 309
Printout Problems Not Related to Print Quality . . . . . . . . . . . . . . 309
Incorrect or garbled characters . . . . . . . . . . . . . . . . . . . . . . . . 310
Incorrect margins. . . . . . . . . . . . . . . . . . . . . . . . . . . . . . . . . . . . 310
Inverted image . . . . . . . . . . . . . . . . . . . . . . . . . . . . . . . . . . . . . . 311
Blank pages print. . . . . . . . . . . . . . . . . . . . . . . . . . . . . . . . . . . . 311
Printout has smears on the bottom edge . . . . . . . . . . . . . . . . 312
Printing is too slow . . . . . . . . . . . . . . . . . . . . . . . . . . . . . . . . . . 312
Paper Does Not Feed Correctly . . . . . . . . . . . . . . . . . . . . . . . . . . . . 313
Paper does not feed . . . . . . . . . . . . . . . . . . . . . . . . . . . . . . . . . . 313
Multiple pages feed. . . . . . . . . . . . . . . . . . . . . . . . . . . . . . . . . . 314
The paper jams. . . . . . . . . . . . . . . . . . . . . . . . . . . . . . . . . . . . . . 315
Paper is not ejected fully or is wrinkled. . . . . . . . . . . . . . . . . 315
Paper does not feed correctly when using the double-sided printing feature . . . . . . . . . . . . . . . . . . . . . . . . . . . . . . . . . . . . . . . 316
CD-R Tray does not feed correctly . . . . . . . . . . . . . . . . . . . . . 316
Printer Does Not Print . . . . . . . . . . . . . . . . . . . . . . . . . . . . . . . . . . . . 317
All lights are off . . . . . . . . . . . . . . . . . . . . . . . . . . . . . . . . . . . . . 317
Lights came on and then went out . . . . . . . . . . . . . . . . . . . . . 318
Only the power light is on . . . . . . . . . . . . . . . . . . . . . . . . . . . . 318
Paper out light is flashing or on . . . . . . . . . . . . . . . . . . . . . . . 319
Error light is on and power light is flashing . . . . . . . . . . . . . 320
Correcting USB Problems . . . . . . . . . . . . . . . . . . . . . . . . . . . . . . . . . 320
USB connections . . . . . . . . . . . . . . . . . . . . . . . . . . . . . . . . . . . . 320
Windows operating systems . . . . . . . . . . . . . . . . . . . . . . . . . . 321
Printer software installation . . . . . . . . . . . . . . . . . . . . . . . . . . 321
Cancelling Printing. . . . . . . . . . . . . . . . . . . . . . . . . . . . . . . . . . . . . . . 325
For Windows Me, 98, and 95 users . . . . . . . . . . . . . . . . . . . . . 325
For Windows XP, 2000 and NT 4.0 users. . . . . . . . . . . . . . . . 327
For Macintosh users . . . . . . . . . . . . . . . . . . . . . . . . . . . . . . . . . 328
vii
Chapter 16 Options and Consumable Products
Options . . . . . . . . . . . . . . . . . . . . . . . . . . . . . . . . . . . . . . . . . . . . . . . . .330
Interface cables . . . . . . . . . . . . . . . . . . . . . . . . . . . . . . . . . . . . . .330
Network adapter . . . . . . . . . . . . . . . . . . . . . . . . . . . . . . . . . . . .331
Consumable products . . . . . . . . . . . . . . . . . . . . . . . . . . . . . . . . . . . . .331
Ink cartridges . . . . . . . . . . . . . . . . . . . . . . . . . . . . . . . . . . . . . . .331
Media types . . . . . . . . . . . . . . . . . . . . . . . . . . . . . . . . . . . . . . . . .331
Appendix A Printer Specifications
Printing . . . . . . . . . . . . . . . . . . . . . . . . . . . . . . . . . . . . . . . . . . . . . . . . .336
Paper . . . . . . . . . . . . . . . . . . . . . . . . . . . . . . . . . . . . . . . . . . . . . . . . . . .336
Paper specifications . . . . . . . . . . . . . . . . . . . . . . . . . . . . . . . . . .337
Printable area . . . . . . . . . . . . . . . . . . . . . . . . . . . . . . . . . . . . . . .340
Ink Cartridges . . . . . . . . . . . . . . . . . . . . . . . . . . . . . . . . . . . . . . . . . . .342
Mechanical . . . . . . . . . . . . . . . . . . . . . . . . . . . . . . . . . . . . . . . . . . . . . .345
Electrical . . . . . . . . . . . . . . . . . . . . . . . . . . . . . . . . . . . . . . . . . . . . . . . .346
Environmental . . . . . . . . . . . . . . . . . . . . . . . . . . . . . . . . . . . . . . . . . . .347
Standards and Approvals. . . . . . . . . . . . . . . . . . . . . . . . . . . . . . . . . .347
System Requirements . . . . . . . . . . . . . . . . . . . . . . . . . . . . . . . . . . . . .348
For Windows computers . . . . . . . . . . . . . . . . . . . . . . . . . . . . . .348
For Macintosh computers . . . . . . . . . . . . . . . . . . . . . . . . . . . . .349
Appendix B Customer Support
Technical Support Web Site . . . . . . . . . . . . . . . . . . . . . . . . . . . . . . . .351
Regional Customer Services. . . . . . . . . . . . . . . . . . . . . . . . . . . . . . . .351
Glossary
viii
Printer Parts and Functions
Unpacking the Printer
Your printer box should include a CD-ROM containing printer
software that runs your printer and the items shown in the
illustration.
Printer
Paper support
Power cord
Ink cartridges
Front sheet feeder
CD-R print position check disk
8 cm CD support
CD-R tray
Roll paper holder
Auto cutter
Photo catcher
1
Printer Parts and Functions
In some locations, the power cord comes attached to the printer.
The shape of the AC plug varies by country; be sure the plug
included is the right shape for your location.
Remove all protective materials packed with your printer before
setting up and plugging in the printer. Follow the instructions
included with the printer to remove these materials. Save all
packaging and protective materials for transporting the printer in
the future.
Printer Parts and Control Panel Functions
Printer parts
paper support
paper stopper
(upper)
edge guides
paper stopper
(lower)
sheet feeder
matte board
feeder
printer cover
automatic roll paper
cutter connector
photo catcher mounting hole
output tray
output tray
extension
Paper support: Supports the paper loaded in the sheet feeder.
Paper stopper (upper): Helps load the No.10 and DL envelopes
correctly.
Printer Parts and Functions
2
Paper stopper (lower): Helps load the C6 envelopes correctly.
Edge guides: Help load the paper straight. Adjust the left edge
guide to fit the width of your paper.
Printer cover: Covers the printing mechanism. Open only when
installing or replacing ink cartridges.
Sheet feeder: Holds the blank paper and automatically feeds the
paper during printing.
Automatic roll paper cutter connector: Connects the Automatic
Roll Paper Cutter.
Matte board feeder: Holds the CD-R tray and the matte board
and feeds them using the front sheet feeder.
Output tray: Receives the ejected paper.
Output tray extension: Supports the ejected paper.
Photo catcher mounting hole: Connects the Photo Catcher.
control panel
cartridge cover
print head
adjust lever
Print head: Delivers ink to the page.
3
Printer Parts and Functions
Cartridge cover: Covers the ink cartridges. Open only when
installing or replacing ink cartridges.
Control panel: Controls various printer functions. See the next
section for details.
Adjust lever: Adjusts the distance between the print head and the
paper to prevent smearing. Adjust the ^ position of the lever
should ink appear to smear across your document when printing
on matte board, or envelopes. Adjust the lever to the position
when printing on CD-R. Adjust the lever to the position when
you load or remove some kinds of paper.
m
Plain paper
EPSON special media
Paper whose thickness is 0.08 mm to 0.3 mm
^
Envelope
Paper whose thickness is 0.4 mm to 1.6 mm
CD-R tray
Paper whose thickness is 1.7 mm to 2.5 mm
Open
roll paper feeder
roll paper edge
guides
roll paper holder
roll paper knob
USB interface cable connector
parallel interface cable connector
Printer Parts and Functions
4
Roll paper feeder: Holds the roll paper and automatically feeds
it after holding the roll paper with your hand for three seconds.
Roll paper edge guides: Helps load the roll paper straight. Adjust
the edge guide to fit the width of your paper.
Roll paper holder: Attaches to the printer and holds the roll
paper.
Roll paper knob: Turn to roll up the roll paper.
USB interface cable connector: Used to connect the USB cable to
the computer and the printer.
Parallel interface cable connector: Used to connect the parallel
cable to the computer and the printer.
Buttons
Button
Function
P
Turns the printer on and off.
power
Clears the printer's memory if pressed twice while the
power is on.
To turn off the printer, hold down the P power button
until the light goes out.
5
m
Loads or ejects paper.
paper
Resumes printing if pressed after a paper out error or
double feed error.
Printer Parts and Functions
H
ink
Moves the print head to the ink check position when
and empty ink cartridge is detected. Moves the print
head to the ink cartridge replacement position.
Returns the print head to its home position after ink
cartridge replacement.
Performs print head cleaning if held down for three
seconds when the H ink out light is off.
z
roll paper
(without the
cutter)
Prints a cutting guideline and feeds roll paper to a
position where it can be easily removed from the sheet
feeder if pressed after printing.
Feeds roll paper to the printing position if pressed after
cutting the paper.
Feeds roll paper in reverse to a position where it can be
easily removed from the roll paper feeder if pressed for
3 seconds.
z
roll paper
(with the
cutter)
With driver setting Single Cut or Double Cut
Cuts roll paper at the position that is selected and ejects
it if pressed after printing. Then feeds roll paper to the
printing position automatically.
With driver setting Not Cut
Cuts roll paper with a margin and ejects it if pressed
after printing. Then feeds roll paper to the printing
position automatically.
Lights
Light
Description
P
On when the printer is on.
power
Flashing when the printer is receiving data, printing,
replacing an ink cartridge, charging ink, or cleaning the
print head.
Printer Parts and Functions
6
m
paper out
On when the printer is out of paper or when a double
feed Error is detected. Load paper into the sheet
feeder, then press the m paper button to resume
printing.
Flashing when the paper is jammed. Take all of the
paper out of the feeder, then reload the paper. If the
light continues to flash, turn off the printer and gently
pull all of the paper out of the printer.
H
Flashing when the ink cartridge is nearly empty.
ink out
On when the ink cartridge is empty. Replace the ink
cartridge, black (T0331), cyan (T0332), magenta
(T0333), yellow (T0334), light cyan (T0335) or light
magenta (T0336).
Flashing when the print head moves to the ink cartridge
replacement position.
7
Printer Parts and Functions
Safety Instructions
Important Safety Instructions
Read all of the instructions in this section before using your
printer. Also, be sure to follow all warnings and instructions
marked on the printer.
When setting up your printer
Observe the following when setting up the printer:
❏ Do not block or cover the openings in the printer’s cabinet.
❏ Use only the type of power source indicated on the printer’s
label.
❏ Avoid using outlets on the same circuit as photocopiers or air
control systems that regularly switch on and off.
❏ Avoid electrical outlets controlled by wall switches or
automatic timers.
❏ Keep the entire computer system away from potential sources
of electromagnetic interference, such as loudspeakers or the
base units of cordless telephones.
❏ Do not use a damaged or frayed power cord.
Safety Instructions
8
❏ If you use an extension cord with the printer, make sure that
the total ampere rating of the devices plugged into the
extension cord does not exceed the cord’s ampere rating. Also,
make sure that the total ampere rating of all devices plugged
into the wall outlet does not exceed the wall outlet’s ampere
rating.
❏ Do not attempt to service the printer yourself.
❏ Unplug the printer and refer servicing to qualified service
personnel under the following conditions:
The power cord or plug is damaged; liquid has entered the
printer; the printer has been dropped or the cabinet damaged;
the printer does not operate normally or exhibits a distinct
change in performance.
When choosing a place for the printer
Observe the following when choosing a place for the printer:
❏ Place the printer on a flat, stable surface that extends beyond
the printer base in all directions. If you place the printer by
the wall, leave more than 10 cm between the back of the
printer and the wall. The printer will not operate properly if
it is tilted or at an angle.
❏ When storing or transporting the printer, don’t tilt it, stand it
on its side or turn it upside down. Othewise ink may leak from
the cartridge.
❏ Leave enough space in front of the printer for the paper to be
fully ejected.
❏ Avoid places subject to rapid changes in temperature and
humidity. Also, keep the printer away from direct sunlight,
strong light, or heat sources.
9
Safety Instructions
❏ Avoid places subject to dust, shocks, and vibrations.
❏ Leave enough room around the printer to allow for sufficient
ventilation.
❏ Place the printer near a wall outlet where the plug can be
easily unplugged.
When using the printer
Observe the following when using the printer:
❏ Do not insert objects through the slots in the printer’s cabinet.
❏ Take care not to spill liquid on the printer.
❏ Do not put your hand inside the printer or touch the ink
cartridges during printing.
❏ Do not move the print head by hand; otherwise, you may
damage the printer.
❏ Always turn the printer off using the P power button. When
this button is pressed, the P power light flashes. Do not
unplug the printer or turn off the power to the outlet until the
P power light stops flashing.
❏ Before transporting the printer, make sure that the print head
is in the home (far right) position and the ink cartridges are
in place.
❏ Leave the ink cartridges installed. Removing the cartridges
can dehydrate the print head and may prevent the printer
from printing.
Safety Instructions
10
When handling the ink cartridges
Observe the following when handling the ink cartridges:
❏ Keep ink cartridges out of the reach of children. Do not allow
children to drink from or otherwise handle the cartridges.
❏ Do not shake the used ink cartridge once you remove it from
the package; this can cause leakage.
❏ Be careful when you handle the used ink cartridges, as there
may be some ink surrounding the ink supply port. If ink
should come into direct contact with your skin, wash the area
thoroughly with soap and water. If ink should come into
direct contact with your eyes, flush them immediately with
water. If you feel discomfort or if vision is impaired, see a
doctor immediately.
❏ Do not remove or tear the label on the cartridge; this can cause
leakage.
❏ Install the ink cartridge immediately after you remove it from
its package. Leaving the cartridge unpacked for a long time
before use may result in reduced print quality.
❏ Do not use an ink cartridge beyond the date printed on the
cartridge carton. For best results, use up the ink cartridges
within six months of installing them.
❏ Do not dismantle the ink cartridges or try to refill them. This
could damage the print head.
❏ After bringing an ink cartridge inside from a cold storage site,
allow it to warm up at room temperature for at least three
hours before using it.
❏ Store ink cartridges in a cool, dark place.
11
Safety Instructions
❏ Each time the cartridge is inserted, some ink is consumed
because the printer automatically performs a reliability check.
❏ Do not touch the green IC chip on the side of the cartridge.
This may affect normal operation and printing.
❏ The IC chip on this ink cartridge retains a variety of cartridge
related-information, such as the amount of ink remaining, so
that a cartridge may be removed and reinserted freely.
However, each time the cartridge is inserted, some ink is
consumed because the printer automatically performs a
reliability check.
❏ The amount of ink consumed will vary among colors
depending on the media you use, the printer driver settings
you make, and the data you print.
❏ If you remove an ink cartridge for later use, protect the ink
supply area from dirt and dust and store it in the same
environment as the printer. A valve in the ink supply port
makes covers or plugs unnecessary, but the ink may stain
items that come in contact with this area of the cartridge. Do
not touch the ink supply port or surrounding area.
When using Automatic Roll Paper Cutter
❏ Do not attach or remove this product while the power to the
printer’s main unit is on.
❏ Keep the cutter out of the reach of children.
❏ Do not touch the paper ejection part and cutter blade.
❏ Do not place the cutter on an unstable surface (such as on an
unstable table or a tilted surface).
❏ Do not disassemble or modify the cutter.
Safety Instructions
12
ENERGY STAR® Compliance
As an ENERGY STAR® Partner, EPSON has
determined that this product meets the
ENERGY STAR® guidelines for energy
efficiency.
The International ENERGY STAR® Office Equipment Program is
a voluntary partnership with the computer and office equipment
industry to promote the introduction of energy-efficient personal
computers, monitors, printers, fax machines, copiers, and
scanners in an effort to reduce air pollution caused by power
generation.
Warnings, Cautions, and Notes
w
c
Warnings must be followed carefully to avoid bodily injury.
Cautions must be observed to avoid damage to your equipment.
Notes contain important information and useful tips on the operation
of your printer.
13
Safety Instructions
Chapter 1
1
Paper Handling
1
Loading Plain Paper
1
Follow the steps below to load plain paper in the printer.
1. Lower the output tray. Next, slide the left edge guide so that
the distance between the edge guides is slightly wider than
the width of your paper.
2. Fan a stack of paper, then tap it on a flat surface to even the
edges.
3. Load the stack of paper in the sheet feeder with the printable
side up and the right edge of the paper resting against the
right edge guide. Then, slide the left edge guide against the
left edge of the paper.
1
1
1
1
1
1
1
1
Note:
❏ Leave enough space in front of the printer for the paper to be
fully ejected.
Paper Handling
14
1
❏ Always load paper into the sheet feeder short edge first.
❏ Make sure that the paper stack fits under the arrow mark inside
the edge guide.
Loading Special Paper and Other Media
You can achieve good results with most types of plain paper.
However, coated paper results in higher quality printouts
because these media absorb smaller amounts of ink.
EPSON provides special media that are formulated for the ink
used in EPSON ink jet printers. EPSON recommends using media
distributed by EPSON to ensure high-quality results. See “Media
types” on page 331 for a complete list of these products.
When loading special media distributed by EPSON, read the
instruction sheets packed with the media first and keep the
following points in mind.
c
15
Caution:
Cleaning sheets packaged with EPSON special media should not
be used with this printer. The cleaning function performed by
these sheets is not necessary with this type of printer, and the
sheets could jam in the printer.
Paper Handling
❏ Load the media printable side up in the sheet feeder. See the
instruction sheets packed with the media to determine which
side is the printable side. Some types of media have cut
corners to help identify the correct loading direction, as
shown in the illustration.
printable side up
cut corner
1
1
1
1
1
1
1
Note:
If you extend the printable area by selecting Maximum as the
Printable Area setting in the printer software, the cut corner on
special paper may mar your printout.
1
❏ Make sure that the paper stack fits under the arrow mark
located on the inside surface of the left edge guide.
1
❏ If the paper is curled, flatten it or curl it slightly toward the
opposite side before loading. Printing on curled paper may
cause ink to smear on your printout, especially when printing
with Maximum selected as the Printable Area setting.
1
1
1
Paper Handling
16
❏ Set the adjust lever to the ^ position if ink smears occur when
printing on thick media. To set the adjust lever, open the
printer cover and position the lever as shown in the
illustration.
Note:
❏ To avoid gaps, always return the adjust lever to the m position
before printing on media of standard thickness.
❏ When the adjust lever is in the ^ position, make sure that the
High Speed check box in the printer driver’s Advanced dialog
box is cleared. To clear this check box, you may also need to
change the Print Quality setting or align the print head using
the Print Head Alignment utility.
❏ If you wish to print on the reverse side of an Ink Jet Card with
Maximum selected as the Printable Area setting, curl the card
so that it will lie flat before loading. Set the adjust lever to the
^ position before printing.
17
Paper Handling
Loading capacities for EPSON special media
Refer to the chart below to find the loading capacities for EPSON
special media.
Media Type
Loading Capacity
PhotoQuality Ink Jet Paper
Up to 100 sheets.
Photo Quality Ink Jet Cards
Up to 30 index cards.
Always place the included support
sheet* under the cards.
Ink Jet Transparencies
Up to 1 sheets. Always place a sheet
of plain paper under the stack of
transparencies as a support sheet.
Matte Paper-Heavyweight
Up to 20 sheets. Always place a
support sheet* under the stack of
paper.
Archival Matte Paper
1
1
1
1
1
Double Sided Matte Paper
Premium Glossy Photo Paper
1
One sheet at a time.
Premium Semigloss Photo Paper
1
* Take care not to print on support sheets that are loaded under special
media.
1
1
Loading Envelopes
When printing on envelopes, please note the following:
❏ You can load up to 15 envelopes at a time in the sheet feeder.
Note:
The folding quality and thickness of envelopes varies widely. If the
total thickness of the stack of envelopes exceeds 10 mm, press each
envelope in the stack flat before loading. If print quality declines
when a stack of envelopes is loaded, load one envelope at a time.
Paper Handling
18
1
1
1
❏ Open the printer cover and set the adjust lever to the
^ position.
Note:
❏ Return the adjust lever to the standard m position after printing
envelopes. To avoid gaps, always return the adjust lever to the
^ position before printing on other media.
❏ When the adjust lever is in the ^ position, make sure that the
High Speed check box in the printer driver’s Advanced dialog
box is cleared. To clear this check box, you may also need to
change the Print Quality setting.
❏ Raise the paper stopper (lower) when loading C6 envelopes and
the paper stopper (upper) when loading No.10 and DL
envelopes, as shown in the illustrations.
When loading C6 envelopes
When loading No.10 and DL envelopes
19
Paper Handling
1
1
1
❏ Load envelopes short edge first with the flap side left, as
shown in the illustration.
1
1
Available envelopes sizes are:
No.10, DL, C6, 132 mm × 220 mm
1
1
1
1
❏ Do not use envelopes that are curled or folded.
❏ Flatten the envelope flaps before loading.
1
❏ Avoid using envelopes that are too thin as they may curl
during printing.
1
❏ Select Plain Paper as the Media Type setting on the Main
menu in the printer software.
Paper Handling
1
20
❏ Select the appropriate envelope size from the available Paper
Size settings and select Landscape as the Orientation setting
from the Paper menu.
❏ Select MicroWeave from the Advanced dialog box if
envelopes are not specified as the Paper Size setting in your
application when envelopes are printed.
21
A:
The minimum top margin is 3.0 mm (0.12”).
B-L:
The minimum left margin is 3.0 mm (0.12”).
B-R:
The minimum right margin is 3.0 mm (0.12”).
C:
The minimum bottom margin is 14 mm (0.55").
✽:
You can extend the minimum bottom margin to
3 mm by selecting Maximum as the Printable Area
setting on the printer software's Paper menu
(Windows) or in the Page Setup dialog box
(Macintosh). However, print quality may decline in
the expanded area.
Paper Handling
Loading Matte Board
1
When printing on the matte board whose thickness is between
0.4 to 2.5 mm, please note the following:
c
Caution:
❏ Follow the instructions below to load the matte board. If you
load it in a wrong way, you may damage the printer.
❏ Since the roll paper holder covers the matte board feeder,
remove the roll paper holder before loading the matte board.
1. Turn on the printer.
Note:
❏ Always turn on the printer before loading the matte board;
otherwise, the matte board cannot feed into the printer correctly.
❏ Remove the automatic roll paper cutter if it is attached on the
printer.
1
1
1
1
1
1
2. Push back the tray extension.
1
1
1
1
1
Paper Handling
22
3. Open the printer cover, then set the adjust lever to the
position. The m paper light flashes quickly.
4. Set the front sheet feeder to the printer.
Note:
Attach the front sheet feeder firmly to the right position of the
printer.
23
Paper Handling
5. Slide the left edge guide to the position wider than the width
of the matte board.
1
1
1
1
1
1
6. Insert the matte board with the printable side up. Touch the
matte board to the right side of the front sheet feeder and
insert it vertically. Load one sheet at a time.
1
1
1
1
1
1
Paper Handling
24
A: roller
B: The matte board should be set so that the 5 to 10 cm portion may hide
in the roller bottom from the end.
25
Paper Handling
Note:
❏ Flatten the paper before loading.
1
❏ Do not load the paper whose corner is folded.
1
❏ Use the white paper only.
7. To load the matte board whose thickness is 0.4 mm to 1.6 mm,
return the adjust lever to the ^ position. To load the matte
board whose thickness is 1.7 mm to 2.5 mm, return the adjust
lever to the position.
Note:
❏ Do not move the adjust lever during printing; this may damage
the printer.
❏ Return the adjust lever to the m position after printing on the
matte board. Printing on the paper with ^ or position may
blur the print quality.
8. Close the printer cover, then press the m paper button. The
matte board will feed automatically into the printer.
1
1
1
1
1
1
1
1
1
1
Paper Handling
26
Note:
The m paper light starts flashing if the adjust lever is set
inappropriately. Set the adjust lever to the right position and press
the m paper button.
27
Paper Handling
Chapter 2
2
Double-Sided Printing
2
Using Double-Sided Printing
The EPSON Stylus Photo 950 supports double-sided printing.
There are two types of double-sided printing available. Standard
double-sided printing allows you to print the odd-numbered
pages first. Once these pages are printed, they can then be
reloaded to print the even-numbered pages onto the opposite side
of the paper. Folded Booklet double-sided printing allows you to
make single-fold booklets. For more details about making
single-fold booklets and double-sided printing, refer to “Making
Settings on the Layout Menu” on page 154 for Windows, or
“Making settings in the Page Setup dialog box” on page 206 for
Macintosh.
Note:
❏ The double-sided printing feature is not available when the printer
is accessed over a network, or is used as a shared printer.
❏ Depending on the media type, stacks of up to 30 sheets can be loaded
into the sheet feeder during double-sided printing.
❏ Only use media types which are suitable for double-sided printing.
Otherwise, the printout quality may deteriorate.
❏ Depending on the type of paper and the amount of ink used to print
text and images, ink may bleed through to the other side of the paper.
❏ The surface of the paper may be smeared during the double-sided
printing.
2
2
2
2
2
2
2
2
2
2
Double-Sided Printing
28
Windows users will select the Double-Sided Printing check box
from the Layout menu of the printer driver. To access your printer
driver, see “Accessing the printer software” on page 131.
Macintosh users will select the Double-Sided Printing check box
from the Page Setup dialog box. For information on making
settings in this dialog box, see “Printer Software Introduction” on
page 189.
29
Double-Sided Printing
Once the Double-Sided Printing check box is selected, the
following settings are possible.
2
Margins
Click this button to open the Margins dialog box. This setting
allows you to specify the edge where the binding will be placed.
You can choose between Left, Top, and Right. You can also specify
the width of the binding margin by entering a value in the Binding
Margin text box.
2
2
2
2
2
2
2
2
2
2
Folded Booklet
2
Double-Sided Printing
30
Select this check box to make single-fold booklets. For more
details on this feature, refer to “Making Settings on the Layout
Menu” on page 154 for Windows, or “Making settings in the Page
Setup dialog box” on page 206 for Macintosh.
Once you have made your settings, click OK to save them. Load
paper in the sheet feeder, then send the print job from your
application. The odd-numbered pages will print first (if Folded
Booklet was not the selected setting). Instructions for generating
the even-numbered pages will be displayed while the
odd-numbered pages are output. Follow the instructions
provided and click Resume.
31
Double-Sided Printing
Chapter 3
3
Using Roll Paper
3
Using the Roll Paper Holder
With the roll paper holder mounted on the printer, you can print
in roll paper format, which is convenient for banner printing.
When you are printing using the roll paper holder, keep the
following in mind:
3
3
3
❏ Load the paper printable side up.
❏ Use flat, undamaged paper. If the paper is curled, flatten it
before loading to avoid paper feeding problems.
3
❏ Always handle the paper by the edges.
❏ Provide ample space in front of the printer for the paper to
eject fully.
❏ Make sure that the output tray is down and the output tray
extension is closed.
❏ Check that the end of the paper is cut cleanly, perpendicular
to the long axis of the paper. If it is cut on a diagonal or not
cleanly, the paper may not feed smoothly or the print may
extend off the edge of the paper.
❏ EPSON recommends using media distributed by EPSON to
ensure high-quality results.
3
3
3
3
3
3
Using Roll Paper
32
Loading the roll paper
Follow the directions below to mount the roll paper holder and
load the roll paper.
1. Load roll paper in the roll paper holder.
Note:
Remove the transparent sheet after setting the roll paper into the
holders.
2. Check that the end of the roll is cut perpendicularly to the
edges as shown, using a triangle.
c
33
Caution:
Always use a triangle or other tool to ensure that the end of
the roll is cut perpendicularly. A diagonal cut may cause
paper feed problems.
Using Roll Paper
3. Remove the paper support and lower the output tray. Then
turn on the printer.
3
3
3
3
3
3
4. Make sure that the adjust lever is set to the m position.
3
3
3
3
3
3
Using Roll Paper
34
5. Insert the roll paper holder adapter into the slot at the rear of
the printer, then attach the roll paper holder to the adapter.
6. Pull out approximately 40 cm of the roll paper and load it into
the roll paper feeder as far as it will go, flush with the right
roll paper edge guide from the printer back. Then adjust the
edge guide to the paper size.
35
Using Roll Paper
c
Caution:
Do not load the roll paper into the sheet feeder for regular
paper.
3
3
3
3
7. To load the paper correctly, you must hold the paper in place
with your hand for three seconds. The paper will feed into the
printer automatically.
3
3
3
3
3
3
3
3
Using Roll Paper
36
Note:
If the roll paper is not feeding easily, flatten it. To flatten the roll
paper, place it printable-side up between the pages of the instruction
booklet packaged with the roll paper to protect it. Then, roll the
booklet in the opposite direction to the paper’s curl.
8. Open the printer cover and make sure that the paper is
feeding correctly. If it is not straight, press the z roll paper
button for at least three seconds to eject the paper. The error
light comes on.
37
Using Roll Paper
9. Turn the roll paper knob and roll up the roll paper. Press the
z roll paper button to clear the error, then feed the paper
again following from step 6.
3
3
3
3
The roll paper is now loaded. Next, set up the printer software
and try printing. For details on setting up the printer software,
refer to “Printing on Roll Paper” on page 38.
3
3
3
Printing on Roll Paper
Once you have prepared your roll paper and it is loaded in the
printer, you must make settings in the printer software in order
to print.
Note:
❏ Always check the ink levels before printing on roll paper as replacing
ink cartridges while the roll paper is loaded can smear the paper.
❏ We recommend replacing the roll paper with a new roll when there
is 20 cm remaining. Otherwise, print quality may be compromised
on the remaining portion.
3
3
3
3
3
Using Roll Paper
38
❏ Do not select A4 or 100 × 150 mm sheet paper for the Paper Size
setting when roll paper is loaded in the sheet feeder. Doing so causes
unnecessary paper to be fed after each print job. If you have already
started printing, press the Cancel button. Wait until the printer
stops printing and feeding paper. Cut off the paper at the back of the
printer, then turn off the printer. The remaining paper is ejected.
Printing area and margins
You can change the printing area and the margins for roll paper
with the printer driver settings. There are two margin settings.
One setting creates a 3 mm margin on both sides of your printout.
The other setting prints with no margins on either side of your
printout.
Follow the steps below to change the margins between pages of
printed data.
1. Select Roll Paper as the Paper Source in the printer driver.
2. When printing is finished, press the z roll paper button once
to print a cutting guideline about 14 mm from the bottom of
the print data.
3. To print the next print job, press the z roll paper button to
feed the paper back to the printing position. Then start the
next print job. The space between pages is automatically set
to 54 mm, as shown below.
Standard margins
39
Using Roll Paper
No margins
3
3
Note:
You must press the z roll paper button, or the printer will not
operate even if you send a new print job. Do not press the z roll
paper button more than necessary. Doing so can damage the prinout.
To print data with no margins between separate files, as
shown below, do not press the z roll paper button between
print jobs.
Standard margins
3
3
3
3
No margins
3
3
3
Note:
The top margin is automatically set to 40 mm, regardless of the margin
setting.
3
3
3
Using Roll Paper
40
For Windows users
Note:
❏ When printing on roll paper, you cannot use the Reverse Order
or Rotate by 180° features. You also cannot select Maximum or
Centered as the Printable Area setting, or use the functions on
the Layout menu.
❏ Do not select PhotoEnhance in the printer software, as this may
cause your printout to have gaps.
After the roll paper is loaded in the printer, follow the steps below
to configure your printer software for printing.
1. Open the file you want to print in the appropriate application.
2. Access the printer software from within the application.
Note:
For details on accessing the software, refer to the application’s user
manual. In many applications, you can select Print directly from the
File menu, then access the printer software by clicking the
Properties button.
41
Using Roll Paper
3. Click the Paper tab, select Roll Paper for Paper Source, and
select the appropriate page size.
3
3
3
3
3
3
When you select a predefined paper size, if the data exceeds
the selected size, it is printed as individual pages on the roll
paper. A 54 mm margin is inserted between each page of data
when you press the z roll paper button.
To define a custom paper size, select User Defined from the
list. The User Defined Paper Size dialog box opens, allowing
you to specify the length and width of your document. If the
data is not larger than the size of the loaded paper, the data
is printed as one page. This allows you to print large or long
data without page breaks.
For more information, see “Printing area and margins” on
page 39.
3
3
3
3
3
3
Using Roll Paper
42
Note:
Do not select Sheet Feeder as the Paper Source setting in the printer
software when roll paper is loaded in the sheet feeder. Doing so
causes unnecessary paper to be fed after each print job. If you have
already started printing, cancel the print job from the printer
software referring to “Cancelling Printing” on page 325. Wait until
the printer stops printing and feeding paper. Cut off the paper at the
back of the printer, then turn off the printer. The remaining paper
is ejected.
4. If the cutter is attached, select the types of cutting from the
Auto Cut list box.
The Auto Cut settings are as follows:
43
Not Cut
No cutting with the cutter is done.
Single Cut
The paper is cut at the boundary between images
(the boundary between pages). However, the
cutting position may shift slightly.
Using Roll Paper
Double Cut
If you have selected Single Cut and are unhappy with
the gap of the cutting position, select Double Cut. In
this mode, the space between images is extended
and the paper is cut twice inside this space. By
cutting twice, an 18 mm slip of paper is left. Double
Cut is selectable only when printing with No Margins
selected.
Note:
❏ Use the cutter after you attach it and adjust the cutting position.
Refer to the “Cutting position adjustment with Automatic Roll
Paper Cutter” on page 176 for more details about the cutting
position adjustment.
❏ Auto Cut is selectable after the cutter is attached and Roll
Paper is selected as the Paper Source setting.
3
3
3
3
3
❏ If Auto Cut is not available even when Roll Paper is selected
as the Paper Source, the Auto Cutter Attached setting has
not been made in the printer driver. Refer to the “Printer driver
settings with Automatic Roll Paper Cutter” on page 175 and
make the setting.
5. Make the Roll Paper Option settings at the bottom of the
dialog box.
3
3
3
3
3
The Roll Paper Option settings are as follows:
Banner Mode
Select this mode when you want to print
multi-page data as continuous data on the roll
paper, rather than as individual pages. When
this check box is selected, the Save Roll Paper
check box is enabled.
Using Roll Paper
44
3
3
Cut Sheet Mode
Select this mode when you want to print
multi-page data as individual pages, rather
than as continuous data. When this check box
is selected, the Print page frame check box is
enabled.
Save roll paper
Select this check box when you want to save roll
paper. When this check box is selected, the
blank portion of the last page of your document
is not fed through the printer. This feature is only
available when Not Cut and Banner Mode are
selected, and not available when cutting with
the cutter.
Print page frame
Select this check box to print a line on the roll
paper between pages in a multi-page
document to indicate where the paper should
be cut. This feature is useful when it is unclear
where the page breaks should be. This feature
is only available when Not Cut and Cut Sheet
Mode are selected, and not available when
cutting with the cutter.
6. Go to the Main menu and select the media type.
7. Click OK to close the printer software. Print your document
and proceed to the next section, “Removing Roll Paper from
the Printer” on page 51.
For Macintosh users
Note:
❏ The procedures described in this section may vary, depending upon
the application you are using. Check your application’s user manual
for details.
❏ When printing on roll paper, you cannot use the Reverse Order
or Rotate by 180° features, select Maximum or Centered as
the Printable Area setting, or use the functions in the Layout dialog
box.
45
Using Roll Paper
❏ Do not select PhotoEnhance in the printer software, because it
may cause your printout to have gaps.
After the roll paper is loaded in the printer, make sure that the
Stylus Photo 950 is selected in the Chooser before proceeding.
Follow the steps below to configure your printer software for
printing.
3
3
3
1. Open the file that you want to print in the appropriate
application.
3
2. Open the printer software.
3
3
3
Note:
In most applications, you can do this by selecting Page Setup (or
Print Setup) on the File menu.
3
3
3
3
3
Using Roll Paper
46
3. Select Roll Paper for Paper Source and make the appropriate
Paper Size setting. You can select either a predefined paper
size or create a custom paper size.
Note:
Do not select Sheet Feeder as the Paper Source setting in the printer
software when roll paper is loaded in the sheet feeder. Doing so
causes unnecessary paper to be fed after each print job. If you have
already started printing, cancel the print job from the printer
software referring to “Cancelling Printing” on page 325. Wait until
the printer stops printing and feeding paper. Cut off the paper at the
back of the printer, then turn off the printer. The remaining paper
is ejected.
47
Using Roll Paper
4. If the cutter is attached, select the types of cutting from Auto
Cut list box.
3
3
3
3
3
The Auto Cut settings are as follows:
3
Not Cut
No cutting with the cutter is done.
Single Cut
The paper is cut at the boundary between images
(the boundary between pages). However, the
cutting position may shift slightly.
Double Cut
If you have selected Single Cut and are unhappy with
the gap of the cutting position, select Double Cut. In
this mode, the space between images is extended
and the paper is cut twice inside this space. By
cutting twice, an 18 mm slip of paper is left. Double
Cut is selectable only when printing with No Margins
selected.
Note:
❏ Use the cutter after you attach it and adjust the cutting position.
Refer to the “Cutting position adjustment with Automatic Roll
Paper Cutter” on page 176 for more details about the cutting
position adjustment.
❏ Auto Cut is selectable after the cutter is attached and Roll
Paper is selected as the Paper Source setting.
Using Roll Paper
3
3
3
3
3
3
48
❏ If Auto Cut is not available even when Roll Paper is selected
as the Paper Source, the Auto Cutter Attached setting has
not been made in the printer driver. Refer to the “Printer driver
settings with Automatic Roll Paper Cutter” on page 175 and
make the setting.
5. Make any other settings as necessary. Refer to the table below
for details. When finished, click OK.
The Roll Paper Option settings are as follows:
49
Banner Mode
Select this mode when you want to print
multi-page data as a continuous printout on roll
paper, rather than as individual pages. When
this check box is selected, the Save roll paper
check box is enabled.
Cut Sheet Mode
Select this mode when you want to print
multi-page data as individual pages, rather
than as continuous data. When this check box
is selected, the Print page frame check box is
enabled.
Using Roll Paper
Save roll paper
Print page frame
Select this check box when you want to save
roll paper. When this check box is selected, the
blank portion of the last page of your document
is not fed through the printer. This feature is only
available when Not Cut and Banner Mode are
selected, and not available when cutting with
the cutter.
Select this check box to print a line on the roll
paper between pages in a multi-page
document to indicate where the paper should
be cut. This feature is useful when it is unclear
where the page breaks should be. This feature
is only available when Not Cut and Cut Sheet
Mode are selected, and not available when
cutting with the cutter.
3
3
3
3
3
6. Select Print on the File menu to open the Print dialog box.
3
3
3
7. Make the appropriate Media Type setting, then click the Print
button to print your document.
3
3
3
3
Using Roll Paper
50
Note:
Click the
Preview icon button to change the Print button to a
Preview button. Click the Preview button to see a preview of the
printout.
Removing Roll Paper from the Printer
Follow the directions below to remove the paper from the printer.
1. Press the z roll paper button to feed the paper. A cutting
guide line is printed on the roll paper. Follow step 3, if the
cutter is attached since Paper is automatically cut.
Note:
To cancel the paper removal sequence and print more data, press the
z roll paper button and send the next print job. The paper will
return to the printing start position before starting the next print
job. Do not press the z roll paper button more than necessary.
Doing so can damage the printout.
2. Cut the paper along the printed line. Never pull the paper as
you cut it. Doing so may damage the printout. When cutting
the paper, do not cut inside the line (closer to the printer) as
this may cause paper feed problems.
51
Using Roll Paper
Note:
EPSON recommends that you use a triangle or other tool to ensure
that the end of the roll is cut perpendicularly. A diagonal cut may
cause paper feed problems.
3. Set the adjust lever to the
3
3
position.
3
3
3
4. Turn the roll paper knob and roll up the roll paper. Gently
remove the paper.
3
3
3
3
3
3
3
Using Roll Paper
52
5. Set the adjust lever to the m position.
Removing roll paper from the printer using
operation panel
1. Once you have cut the paper, hold down the z roll paper
button for about 3 seconds. The paper feeds in reverse to a
position where it can be easily removed from the sheet feeder
at the back of the printer. If it does not feed to this position,
repeat this step.
53
Using Roll Paper
2. Turn the roll paper knob and roll up the roll paper. Gently
remove the paper, then press the z roll paper button to clear
error light.
3
3
3
3
3
Storing EPSON Roll Paper
3
Return unused paper to the original package as soon as you finish
printing. EPSON recommends storing your printouts in a
resealable plastic bag. Keep them away from high temperature,
humidity, and direct sunlight.
3
3
3
3
3
3
Using Roll Paper
54
Chapter 4
Using Automatic Roll Paper Cutter
Attaching Automatic Roll Paper Cutter
If you use the cutter packed with EPSON STYLUS PHOTO 950,
you can automatically cut the picture images printed
continuously on the roll paper. Attach the cutter as follows.
w
Warning:
❏ Do not attach or remove this product while the power to the
printer’s main unit is on.
❏ Keep the cutter out of the reach of children.
❏ Do not touch the paper ejection part and cutter blade.
❏ Do not place the cutter on an unstable surface (such as on an
unstable table or a tilted surface).
❏ Do not disassemble or modify the cutter.
c
55
Caution:
When attaching the cutter to the printer, turn the printer off for
safety reasons.
Using Automatic Roll Paper Cutter
1. Lower the output tray.
4
4
4
4
2. Pressing down the output tray, insert the cutter exactly to the
proper position.
4
4
4
4
4
If you attach the cutter, make the following settings in the
printer driver before using it. If you do not make these
settings, the Auto Cut mode is not available.
4
Printer driver settings with Automatic Roll Paper
Cutter
Make the settings of the auto cutter attachment as follows.
Using Automatic Roll Paper Cutter
4
4
56
For Windows users
1. For Windows 2000, NT 4.0, Me, 98 and 95 users, click Start,
point to Settings, then click Printers to open the Printer folder.
For Windows XP users, click Start, then click Control Panel,
then click Printers and Other Hardware, then click Printers
and Faxes to open the Printers and Faxes folder.
2. For Windows Me, 98 and 95 users, select EPSON Stylus Photo
950 icon then click Properties on the File menu.
For Windows XP and 2000 users, select EPSON Stylus Photo
950 icon then click Printing Preferences on the File menu.
For Windows NT 4.0 users, select EPSON Stylus Photo 950
icon then click Document Defaults on the File menu.
The printer software opens.
3. Click Utility tab, then click Printer and Option Information.
The Printer and Option Information dialog box opens.
57
Using Automatic Roll Paper Cutter
4. Select the Auto Cutter Attached check box.
4
4
4
4
4
5. Click OK to exit this menu.
Note:
After you attach the cutter, make sure to adjust the cutting position
to improve its precision. In addition, if you use different Paper
Type/Paper Width roll paper, it is recommended that you use the
Auto Cut mode after adjusting the cutting position. Refer to the
“Cutting position adjustment with Automatic Roll Paper Cutter”
on page 60 for more details about the cutting position adjustment.
4
4
4
4
For Macintosh users
1. Click Print on the File menu of your application. The Print
dialog box opens.
4
4
4
Using Automatic Roll Paper Cutter
58
2. Click the
Utility icon button. The Utility dialog box opens.
3. Click Printer Information. The Printer and Option
Information dialog box opens.
59
Using Automatic Roll Paper Cutter
4. Select the Auto Cutter Attached check box.
4
4
4
4
4
5. Click OK to exit this menu.
Note:
After you attach the cutter, make sure to adjust the cutting position
to improve its precision. In addition, if you set the different Paper
Type/Paper Width roll paper, it is recommended that you use the
Auto Cut mode after adjusting the cutting position. Refer to the
“Cutting position adjustment with Automatic Roll Paper Cutter”
on page 60 for more details about the cutting position adjustment.
4
Cutting position adjustment with Automatic Roll
Paper Cutter
4
After you attach the cutter, make sure to adjust the cutting
position to improve its precision.
4
Note:
❏ Before doing the following, it is necessary to turn the printer on and
set the roll paper. Refer to “Loading the roll paper” on page 33 for
more details about the roll paper setting.
4
Using Automatic Roll Paper Cutter
60
4
4
4
❏ If you want to maintain a precise cutting position, it is recommended
that you adjust the cutting position each time you change the type
or size (width) of roll paper.
For Windows users
1. For Windows 2000, NT 4.0, Me, 98 and 95 users, click Start,
point to Settings, then click Printers to open the Printer folder.
For Windows XP users, click Start, then click Control Panel,
then click Printers and Other Hardware, then click Printers
and Faxes to open the Printers and Faxes folder.
2. For Windows Me, 98 and 95 users, select EPSON Stylus Photo
950 icon then click Properties on the File menu.
For Windows XP and 2000 users, select EPSON Stylus Photo
950 icon then click Printing Preferences on the File menu.
For Windows NT4.0 users, select EPSON Stylus Photo 950
icon then click Document Defaults on the File menu.
The printer software opens.
61
Using Automatic Roll Paper Cutter
3. Click Utility tab, then click Printer and Option Information.
The Printer and Option Information dialog box opens.
4
4
4
4
4
4
4. After making sure that Auto Cutter Attached check box is
selected, click the Auto Cutter Adjustment button. The Auto
Cutter Adjustment dialog box opens.
4
4
4
4
4
4
Using Automatic Roll Paper Cutter
62
Note:
If the Auto Cut Adjustment button is not available, make sure
that the Auto Cutter Attached check box is selected. If it is not
selected, the Auto Cutter Adjustment button is not available. In
addition, you cannot use the cutter.
5. After making sure that the roll paper is set, click the Print
button. The cutting position adjustment pattern is printed and
cut off.
6. By using the cut roll paper, check the most precisely printed
number among the color boundaries.
63
Using Automatic Roll Paper Cutter
7. Select the number of the most precisely printed color
boundary from the list box. Click Finish to enable the
adjustment.
4
4
4
4
4
For Macintosh
1. Click Print on the File menu of your application. The Print
dialog box opens.
2. Click the
Utility icon button. The Utility dialog box opens.
4
4
4
4
4
4
4
Using Automatic Roll Paper Cutter
64
3. Click Printer Information. The Printer and Option
Information dialog box opens.
4. After making sure that the Auto Cutter Attached check box
is selected, click the Auto Cutter Adjustment button. The
Auto Cutter Adjustment dialog box opens.
Note:
If the Auto Cutter Adjustment button is not available, make sure
that the Auto Cutter Attached check box is selected. If it is not
selected, the Auto Cutter Adjustment button is not available. In
addition, you cannot use the cutter.
65
Using Automatic Roll Paper Cutter
5. After making sure that the roll paper is set, click the Print
button. The cutting position adjustment pattern is printed and
cut off.
4
4
4
4
4
6. By using the cut roll paper, check the most precisely printed
number among the color boundaries.
4
4
4
4
4
4
4
Using Automatic Roll Paper Cutter
66
7. Select the number of the most precisely printed color
boundary form the list box. Click Finish to enable the
adjustment.
Attaching the Photo Catcher
To receive the paper cut off by the cutter, attach the photo catcher.
Follow the steps below.
67
Using Automatic Roll Paper Cutter
c
Caution:
When using the photo catcher, move the printer to the edge of the
desk or table so that the cloth of the photo catcher hangs as shown
in the illustration. Be careful not to let the printer fall from the
desk or table when moving it. In addition, do not place the printer
on an unstable surface.
4
4
4
4
4
4
1. Attach the arm part of the photo catcher to the output tray.
4
4
✽
4
4
4
4
Using Automatic Roll Paper Cutter
68
✽ Insert the stick shaped projection with d mark side up to the hole
of the output tray.
2. Fix the shaft part of the photo catcher by putting it into the
groove of the arm.
3. Put the cloth inside of the arm and make it like a bag, then
remove any slack by pulling the edges of the cloth to left and
right.
69
Using Automatic Roll Paper Cutter
c
Caution:
The following specifies the size and amount of the roll paper
the photo catcher can hold.
❏ Length range from 55 mm to 178 mm: 40 sheets
4
4
❏ Length range from 178 mm to 297 mm: 1 sheet
In addition, remove the photo catcher in case the length
exceeds 297 mm. If you use paper in excess of this range, a
paper jam may occur or the photo catcher may be damaged.
4
4
4
Using Automatic Roll Paper Cutter
The following describes how to print on the roll paper using the
cutter. The steps from the printer driver settings to cutting are as
follows.
4
4
For Windows users
Note:
❏ When printing on roll paper, you cannot use the Reverse Order
or Rotate by 180° features. You also cannot select Maximum or
Centered as the Printable Area setting, or use the functions on
the Layout menu.
4
4
❏ Do not select PhotoEnhance in the printer software, as this may
cause your printout to have gaps.
4
After the roll paper is loaded in the printer, follow the steps below
to configure your printer software for printing.
4
1. Open the file you want to print in the appropriate application.
4
2. Access the printer software from within the application.
Using Automatic Roll Paper Cutter
70
Note:
For details on accessing the software, refer to the application’s user
manual. In many applications, you can select Print directly from the
File menu, then access the printer software by clicking the
Properties button.
3. Click the Paper tab, select Roll Paper for Paper Source, and
select the appropriate page size.
Note:
Do not select Sheet Feeder as the Paper Source setting in the printer
software when roll paper is loaded in the sheet feeder. Doing so
causes unnecessary paper to be fed after each print job. If you have
already started printing, cancel the print job from the printer
software referring to “Cancelling Printing” on page 325. Wait until
the printer stops printing and feeding paper. Cut off the paper at the
back of the printer, then turn off the printer. The remaining paper
is ejected.
71
Using Automatic Roll Paper Cutter
4. Select the types of cutting from the Auto Cut list box.
4
4
4
4
4
4
The Auto Cut settings are as follows:
4
4
Not Cut
No cutting with the cutter is done.
Single Cut
The paper is cut at the boundary between images
(the boundary between pages). However, the
cutting position may shift slightly.
Double Cut
If you have selected Single Cut and are unhappy with
the gap of the cutting position, select Double Cut. In
this mode, the space between images is extended
and the paper is cut twice inside this space. By
cutting twice, an 18 mm slip of paper is left. Double
Cut is selectable only when printing with No Margins
selected.
4
4
4
4
Using Automatic Roll Paper Cutter
72
Note:
❏ Use the cutter after you attach it and adjust the cutting position.
Refer to the “Cutting position adjustment with Automatic Roll
Paper Cutter” on page 176 for more details about the cutting
position adjustment.
❏ Auto Cut is selectable after the cutter is attached and Roll
Paper is selected as the Paper Source setting.
❏ If Auto Cut is not available even when Roll Paper is selected
as the Paper Source, the Auto Cutter Attached setting has
not been made in the printer driver. Refer to the “Printer driver
settings with Automatic Roll Paper Cutter” on page 175 and
make the setting.
5. Make the Roll Paper Option settings at the bottom of the
dialog box.
The Roll Paper Option settings are as follows:
73
Banner Mode
Select this mode when you want to print
multi-page data as continuous data on the roll
paper, rather than as individual pages. When
this check box is selected, the Save Roll Paper
check box is enabled.
Cut Sheet Mode
Select this mode when you want to print
multi-page data as individual pages, rather
than as continuous data. When this check box
is selected, the Print page frame check box is
enabled.
Using Automatic Roll Paper Cutter
Save roll paper
Print page frame
Select this check box when you want to save roll
paper. When this check box is selected, the
blank portion of the last page of your document
is not fed through the printer. This feature is only
available when Not Cut and Banner Mode are
selected, and not available when cutting with
the cutter.
Select this check box to print a line on the roll
paper between pages in a multi-page
document to indicate where the paper should
be cut. This feature is useful when it is unclear
where the page breaks should be. This feature
is only available when Not Cut and Cut Sheet
Mode are selected, and not available when
cutting with the cutter.
4
4
4
4
6. Go to the Main menu and select the media type.
7. Click OK to close the printer software and print your
document.
4
8. When print job is executed, wait until the printer prints out
the last page and stops its operation.
When you print two or more pages, each printout is
automatically cut except the last page.
4
4
When you print only one page, the printout remains without
being cut.
When Not Cut is selected in the Auto Cut list box, the paper
is ejected without being cut.
Note:
When Double Cut is selected in the Auto Cut list box, the printer
prints the paper with some margin between the printouts. In order
to cut the printouts front and back, gaps of 18 mm are left.
4
4
4
4
9. Press the z roll paper button in order to cut the last page.
Using Automatic Roll Paper Cutter
4
74
When Not Cut is selected in the Auto Cut list box, the paper
is cut with white borders at the edge of the print images.
After your printouts are cut, the printer loads the roll paper
back to the print position and the next job in the print queue
(if any) is printed.
For Macintosh users
Note:
❏ The procedures described in this section may vary, depending upon
the application you are using. Check your application’s user manual
for details.
❏ When printing on roll paper, you cannot use the Reverse Order
or Rotate by 180° features, select Maximum or Centered as
the Printable Area setting, or use the functions in the Layout dialog
box.
❏ Do not select PhotoEnhance in the printer software, because it
may cause your printout to have gaps.
After the roll paper is loaded in the printer, make sure that the
Stylus Photo 950 is selected in the Chooser before proceeding.
Follow the steps below to configure your printer software for
printing.
75
Using Automatic Roll Paper Cutter
1. Open the file that you want to print in the appropriate
application.
4
2. Open the printer software.
4
4
4
4
Note:
In most applications, you can do this by selecting Page Setup (or
Print Setup) on the File menu.
3. Select Roll Paper for Paper Source and make the appropriate
Paper Size setting. You can select either a predefined paper
size or create a custom paper size.
4
4
4
4
4
4
4
Using Automatic Roll Paper Cutter
76
Note:
Do not select Sheet Feeder as the Paper Source setting in the printer
software when roll paper is loaded in the sheet feeder. Doing so
causes unnecessary paper to be fed after each print job. If you have
already started printing, cancel the print job from the printer
software referring to “Cancelling Printing” on page 325. Wait until
the printer stops printing and feeding paper. Cut off the paper at the
back of the printer, then turn off the printer. The remaining paper
is ejected.
4. Select the types of cutting from the Auto Cut list box.
The Auto Cut settings are as follows:
77
Not Cut
No cutting with the cutter is done.
Single Cut
The paper is cut at the boundary between images
(the boundary between pages). However, the
cutting position may shift slightly.
Double Cut
If you have selected Single Cut and are unhappy
with the gap of the cutting position, select Double
Cut. In this mode, the space between images is
extended and the paper is cut twice inside this
space. By cutting twice, an 18 mm slip of paper is
left. Double Cut is selectable only when printing with
No Margins selected.
Using Automatic Roll Paper Cutter
Note:
❏ Use the cutter after you attach it and adjust the cutting position.
Refer to the “Cutting position adjustment with Automatic Roll
Paper Cutter” on page 176 for more details about the cutting
position adjustment.
❏ Auto Cut is selectable after the cutter is attached and Roll
Paper is selected as the Paper Source setting.
❏ If Auto Cut is not available even when Roll Paper is selected
as the Paper Source, the Auto Cutter Attached setting has
not been made in the printer driver. Refer to the “Printer driver
settings with Automatic Roll Paper Cutter” on page 175 and
make the setting.
5. Make any other settings as necessary. Refer to the table below
for details. When finished, click OK.
4
4
4
4
4
4
4
4
4
The Roll Paper Option settings are as follows:
Banner Mode
Select this mode when you want to print
multi-page data as a continuous printout on roll
paper, rather than as individual pages. When
this check box is selected, the Save roll paper
check box is enabled.
4
4
4
Using Automatic Roll Paper Cutter
78
Cut Sheet Mode
Select this mode when you want to print
multi-page data as individual pages, rather
than as continuous data. When this check box
is selected, the Print page frame check box is
enabled.
Save roll paper
Select this check box when you want to save
roll paper. When this check box is selected, the
blank portion of the last page of your document
is not fed through the printer. This feature is only
available when Not Cut and Banner Mode are
selected, and not available when cutting with
the cutter.
Print page frame
Select this check box to print a line on the roll
paper between pages in a multi-page
document to indicate where the paper should
be cut. This feature is useful when it is unclear
where the page breaks should be. This feature
is only available when Not Cut and Cut Sheet
Mode are selected, and not available when
cutting with the cutter.
6. Select Print on the File menu to open the Print dialog box.
79
Using Automatic Roll Paper Cutter
7. Make the appropriate Media Type setting, then click the Print
button to print your document.
4
4
4
4
Note:
Click the
Preview icon button to change the Print button to a
Preview button. Click the Preview button to see a preview of the
printout.
8. When print job is executed, wait until the printer prints out
the last page and stops its operation.
4
4
4
When you print two or more pages, each printout is
automatically cut except the last page.
When you print only one page, the printout remains without
being cut.
4
When Not Cut is selected in the Auto Cut list box, the paper
is ejected without being cut.
4
Note:
When Double Cut is selected in the Auto Cut list box, the printer
prints the paper with some margin between the printouts. In order
to cut the printouts front and back, gaps of approximately 18 mm
are left.
4
9. Press the z roll paper button in order to cut the last page.
Using Automatic Roll Paper Cutter
4
4
80
When Not Cut is selected in the Auto Cut list box, the paper
is cut with white borders at the edge of the print images.
After your printouts are cut, the printer loads the roll paper
back to the print position and the next job in the print queue
(if any) is printed.
Removing the Photo Catcher
Remove the photo catcher using the following steps.
1. Remove the shaft of the photo catcher from the arm.
81
Using Automatic Roll Paper Cutter
2. Remove the arm from the output tray.
4
4
4
4
Removing the Automatic Roll Paper Cutter
4
Remove the cutter as the following steps.
c
Caution:
Be sure to turn the printer off for safety reasons when removing
the cutter from the printer.
Holding down the buttons on both ends of the cutter, pull the
cutter toward you and remove it.
4
4
4
4
4
4
4
Using Automatic Roll Paper Cutter
82
Note:
❏ You can carry out normal printing with the cutter attached. If you
print on A4 size paper, remove the photo catcher and lower the
output tray.
❏ If you print on envelopes or on a CD-R, remove the cutter.
83
Using Automatic Roll Paper Cutter
Chapter 5
5
Printing on CD-R
5
Notice for CD-R Printing
The EPSON STYLUS PHOTO 950 supports CD-R printing. When
printing on the CD-R, keep the following points in mind.
❏ Do not print on the CD-R before writing your data to it. If you
do, fingerprints, dirt, or scratches on the surface may cause
errors while writing data.
❏ It is recommended that you attempt to print using some extra
CD-Rs.
❏ The printed surface can easily be damaged immediately after
printing.
❏ Let the printed CD-R dry for more than 24 hours. Do not insert
the printed CD-R into any CD-ROM drive before it dries
completely.
❏ Do not let the printed CD-R dry in direct sunlight.
❏ Depending on the CD-R type, smearing may occur according
to the level of color saturation.
❏ If the printed surface is sticky even after it has dried, the color
saturation level may be too high. It is recommended that you
lower the level in the color saturation setting of EPSON Print
CD.
❏ Moisture on the printable surface may cause smearing.
Printing on CD-R
5
5
5
5
5
5
5
5
5
5
84
❏ If you print on a large amount of CD-Rs, it is recommended
that you attempt to print using some extra CD-Rs. Then, check
the condition of the printed surface after a full day.
❏ If the printing is made on the CD-R tray or on the internal
transparent compartment by error, wipe it off immediately.
❏ The print quality may not be improved if you re-print on the
printed label surface.
❏ The following specifies the printable area of CD-R.
12 cm CD-R
8 cm CD-R
Available size of CD-R
EPSON STYLUS PHOTO 950 allows for printing on two sizes of
CD-R: 12 cm and 8 cm.
Use only a CD-R labelled as suitable for printing, for example
“Printable on the label surface” or “Printable with ink jet
printers”.
Note:
❏ For more details on CD-R handling and guidelines for writing data,
refer to your CD-R documentation.
85
Printing on CD-R
❏ When CD-R printing, a lower level of color saturation is used
compared with EPSON special paper to ensure the print quality.
❏ When printing on an 8 cm CD-R, use the attachment provided on
the outside of the CD-R before inserting it into the CD-R tray.
Installing EPSON Print CD
5
5
EPSON Print CD allows you to print easily onto a CD-R. EPSON
Print CD is installed after installing the printer driver. If it has
been installed, Windows Me, 98, 95, 2000 and NT 4.0 users can see
an EPSON Print CD icon on the desktop. Windows XP users can
see EPSON Print CD by clicking Start button and pointing to All
Programs. Macintosh users can see EPSON Print CD folder in the
hard disk of your Macintosh.
If EPSON Print CD has already been installed, proceed to “Print
position adjustment” on page 87.
If EPSON Print CD has not been installed, install the software as
follows.
For Windows users
1. Insert the printer software CD in the CD-ROM drive. If the
Installer dialog box does no appear, double-click SETUP.EXE
in the CD-ROM.
2. Select Install Software, and click
5
5
5
5
5
5
5
.
3. Click Advanced and select only EPSON Print CD, then click
Install.
5
5
4. Follow the on-screen instructions.
For Macintosh users
5
1. Insert the printer software CD in the CD-ROM drive.
Printing on CD-R
86
2. Double click the EPSON icon.
3. Select Install Software, and click
.
4. Click Advanced and select only EPSON Print CD, then click
Install.
5. Follow the on-screen instructions.
Print position adjustment
If the print position is misaligned after printing, adjust it as
follows.
For Windows users
1. Print the print position check pattern
To check the print gap, print the position check pattern first.
1. Place the CD-R Print Position Check Disk attached to the
CD-R tray on the CD-R tray and insert it into the printer.
Note:
❏ Refer to “Setting CD-R” on page 100 for more details about
CD-R setting.
❏ If the print position check sheet is warped, flatten it before
loading it.
2. Double-click the EPSON Print CD icon on the desktop to
access EPSON Print CD.
87
Printing on CD-R
Note:
If the EPSON Print CD icon does not appear on the desktop, click
Start button, point to Programs (for Windows Me, 2000, NT 4.0,
98 and 95) or All Programs (for Windows XP) and point to
EPSON Print CD, then click EPSON Print CD.
3. Click Inner/Outer Diameter Settings on the File menu. The
Inner/Outer Diameter Settings dialog box opens.
4. Select 12 cm CD-R and click OK.
5
5
5
5
5
5
5
5. Click Printer Settings on the File menu. The Print Setup dialog
box opens.
6. Select EPSON STYLUS PHOTO 950 from the Name list box
and click Properties.
5
5
5
5
5
Printing on CD-R
88
7. Click the Main tab, then select CD-R from the Media Type
list box.
89
Printing on CD-R
8. Click the Paper tab, then select Manual Feed Slot from the
Paper source list box, A4 from the Paper size list box and
Portrait in Orientation.
5
5
5
5
5
5
5
9. Click OK on the Print Setup dialog box.
10. Select Print from the File menu. The Print dialog box opens.
5
5
5
5
5
Printing on CD-R
90
11. Select Print Position Confirmation Pattern in Print
Confirmation Pattern and click OK.
c
Caution:
❏ Do not switch the adjust lever position during printing.
It may cause hardware damage.
❏ After the CD-R is printed, switch the adjust lever
according to the thickness of paper loaded. For plain
paper which is less thick, switch to m.
2. Measurement of print position gap
Measure the gap using the printed check sheet. Measure the area
as shown in the illustration with a ruler.
91
Printing on CD-R
5
5
5
5
5
A: Height
5
B: Width
Note:
❏ Position the ruler to pass through the center of the circle when
measuring.
5
❏ If you print the position check pattern on the CD-R instead of the
check sheet, you may not measure the gap correctly. Make sure to
include the internal transparent compartment of the CD-R in the
measurement range. Measure the distance from the circumference
of CD-R tray’s center circle to the horizontal line of the check
pattern.
5
5
5
3. Save the measured value to the EPSON Print CD
1. Select Adjust Print Position from the File menu. The Adjust
Print Position dialog box opens.
5
5
Printing on CD-R
92
2. Select the Enter Values check box, then input the measured
value to Height (Top) and Width (Right) and click OK.
Note:
❏ If you re-install the EPSON Print CD, adjust the settings
again.
❏ If you readjust settings after the position gap is found, print the
position check pattern after clicking the Reset button.
For Macintosh users
1. Print the print position check pattern
To check the print gap, print the position check pattern first.
1. Place the CD-R Print Position Check Disk attached to the
CD-R tray on the CD-R tray and insert it into the printer.
Note:
❏ Refer to “Setting CD-R” on page 100 for more details about
CD-R setting.
❏ If the print position check sheet is warped, flatten it before
loading it.
93
Printing on CD-R
2. Double-click the Macintosh HD icon, then the EPSON Print
CD folder then the EPSON Print CD icon.
3. Click Change CD Inner/Outer Diameter on the File menu.
The Change CD Inner/Outer Diameter dialog box opens.
4. Select 12 cm CD-R and click OK.
5
5
5
5
5
5
5. Click Page Setup on the File menu. The Page Setup dialog
box opens.
5
6. Select Manual Feed from the Paper source list box, A4 from
the Paper size list box and Portrait in Orientation.
5
5
5
5
5
7. Click OK to close Page Setup dialog box.
Printing on CD-R
94
8. Select Print from File menu. Print dialog box opens.
9. Slect CD-R from the Media Type list box and Print Position
Check Pattern in Test Print Pattern and click Print.
10. Click OK.
c
Caution:
❏ Do not switch the adjust lever position during printing.
It may cause hardware damage.
❏ After the CD-R is printed, switch the adjust lever
according to the thickness of paper loaded. For plain
paper which is less thick, switch to m.
2. Measurement of print position gap
Measure the gap using the printed check sheet. Measure the area
as shown in the illustration with a ruler.
95
Printing on CD-R
5
5
5
5
5
A: Height
5
B: Width
Note:
❏ Position the ruler to pass through the center of the circle when
measuring.
5
❏ If you print the position check pattern on the CD-R instead of the
check sheet, you may not measure the gap correctly. Make sure to
include the internal transparent compartment of the CD-R in the
measurement range. Measure the distance from the circumference
of CD-R tray’s center circle to the horizontal line of the check
pattern.
5
5
5
3. Save the measured value to the EPSON Print CD
1. Select Fine-tune Print Position from the File menu. The
Fine-tune Print Position dialog box opens.
5
5
Printing on CD-R
96
2. Select the Value Entry check box, then input the measured
value to Top Space and Right Space and click OK.
Note:
❏ If you re-install the EPSON Print CD, adjust the settings
again.
❏ If you readjust settings after the position gap is found, print the
position check pattern after clicking the Reset button.
Color settings
Adjust color saturation
If the ink smears when CD-R printing, follow the steps below.
97
Printing on CD-R
Set the color saturation in the Print Color Correction (for
Windows) or Color Correction (for Macintosh) in the Print dialog
box, and click OK.
5
5
5
5
5
Note:
❏ Ink smearing may differ depending on the type of CD-R even if you
print at the same color saturation level.
❏ If you want to lower the saturation level, adjust it by Brightness
in EPSON Print CD or Contrast in the printer driver.
❏ If the color saturation of the printout is low, set the Print Color
Correction to Darker (for Windows) or Color Correction to
Strong (for Macintosh).
❏ To check the print results, let the printout dry for more than 24 hours
after the printing.
Print the color saturation check pattern
You can print the color saturation check pattern with EPSON
Print CD. This check pattern is printed in bands on the label
surface of CD-R. You can check the appropriate ink saturation
level for your CD-R.
Printing on CD-R
98
5
5
5
5
5
5
5
Print the saturation check pattern using the following steps.
1. Set the CD-R to check the saturation.
2. Select Print from the File menu. The Print dialog box opens.
3. Select Print Density Confirmation in Print Confirmation
Pattern (for Windows) or Print Density check Pattern in Test
Print Pattern (for Macintosh) and click Print.
Cleaning the Printer
Before printing to the CD-R, it is necessary to clean the roller
inside of the printer by feeding and ejecting A4 size plain paper.
This is to prevent the dirt on the roller inside the printer adhering
to the printed surface of the CD-R.
Do this roller cleaning only once before CD-R printing. You do
not need to do this cleaning each time you print on the CD-R.
1. Make sure that the printer is on.
2. Load A4 size paper in the sheet feeder.
3. Press the m paper button. The paper is fed.
99
Printing on CD-R
4. Press the m paper button again. The paper is ejected.
5
5
5
5
5. Repeat steps 2 to 4 above several times.
5
Setting CD-R
5
Insert the CD-R into the printer as follows. The following
describes how to set the 12 cm CD-R as an example.
c
Caution:
❏ Make sure to check the notes for CD-R printing before
inserting the CD-R. Refer to the “Notice for CD-R Printing”
on page 84 for more detailed notes on CD-R printing.
❏ Be sure to insert the CD-R following the steps below. If you
insert CD-R in a different way, the data or printer hardware
may be damaged.
Note:
Before printing to the CD-R, it is necessary to clean the roller inside of
the printer by feeding and ejecting A4 size normal paper. Refer to
“Cleaning the Printer” on page 99 and clean the inside of the printer.
5
5
5
5
5
1. Make sure that the printer is on.
5
Printing on CD-R
100
w
Warning:
Make sure to insert the CD-R tray while the power is on. If
the power is off, automatic print position adjustment may not
be done after inserting the CD-R tray.
2. Push back the tray extension.
3. Open the printer cover, then set the adjust lever to the
position. m paper light flashes quickly.
4. Set the front sheet feeder to the printer.
101
Printing on CD-R
Note:
Attach the front sheet feeder firmly to the right position of the
printer.
5
5
5
5
5
5. Place the CD-R on the CD-R tray with the label surface up.
Note:
Place one CD-R at a time.
12 cm CD-R
5
5
5
8 cm CD-R
Fix the 8 cm CD-R support
provided with the printer to the
outside of CD-R.
5
5
5
5
Printing on CD-R
102
c
Caution:
❏ Before placing the CD-R, make sure that no foreign
particles or substances are on the CD-R tray. These
substances may damage the CD-R’s writing side.
❏ Make sure to use the CD-R tray provided with this
printer. If you use another CD-R tray, there may be a
gap in the print position and printing may not be done
properly.
❏ When you insert an 8 cm CD-R, be sure to use the
provided 8 cm CD-R support, otherwise the printer
position may be misaligned. Do not use other
commercially available attachments, as they may damage
the printer hardware.
6. Slide the left edge guide to the position wider than the width
of the CD-R tray.
103
Printing on CD-R
7. With the CD-R loaded printable side up, insert the CD-R tray
straight and horizontally along the right edge of the front
sheet feeder. Apply light pressure with the hand to prevent
the tray slipping from the front sheet feeder and insert the tray
until the half circle shaped hollow back of the front sheet
feeder and the hollow of the CD-R tray join.
Note:
If the CD-R tray slips from the front sheet feeder, the printable
surface may be damaged when the tray is inserted. Take great care
with this step.
5
5
5
5
5
5
5
5
5
5
5
5
Printing on CD-R
104
✽
✽ Let the hollow of the front sheet feeder and hollow of the CD-R
tray join.
8. Slide the left edge guide against the edge of the CD-R tray.
105
Printing on CD-R
9. Set the adjust lever to the
off.
position. m paper light is turned
5
5
5
5
c
Caution:
Make sure to switch the adjust lever to the position. If you
print in the m position or the ^ position, it may cause
damage to the hardware. In addition, if the lever is set to the
position, the printer will not start printing.
10. Close the printer cover, then press the m paper button. The
CD-R tray is adjusted to the proper position automatically.
5
5
5
5
5
5
5
5
Printing on CD-R
106
Note:
❏ Press the m paper button again to reset the CD-R tray. The
CD-R tray is ejected.
❏ Return the adjust lever to the m position after printing on the
CD-R. Printing on the paper with ^ or position may blur the
print quality.
Preparing data
EPSON Print CD lets you make CD-R labels. Sample images for
label background are provided with the software and used in
these instructions. Follow the instructions for how to use EPSON
Print CD.
Accessing EPSON Print CD
For Windows users
To access EPSON Print CD, double-click the EPSON Print CD icon
on the desktop.
Note:
If the EPSON Print CD icon does not appear on the desktop, click Start
button, point to Programs (for Windows Me, 2000, NT 4.0, 98 and 95)
or All Programs (for Windows XP) and point to EPSON Print CD,
then click EPSON Print CD.
For Macintosh users
To access EPSON Print CD, double-click the Macintosh HD icon,
then the EPSON Print CD folder then the EPSON Print CD icon.
107
Printing on CD-R
Selecting CD-R size for printing
5
For Windows users
1. Select Inner/Outer Diameter Settings from the File menu.
The Inner/Outer Diameter Settings dialog box opens.
5
2. Select 8 cm CD-R or 12 cm CD-R and click OK.
5
5
5
5
5
For Macintosh users
1. Select Change CD Inner/Outer Diameter from the File
menu. The Change CD Inner/Outer Diameter dialog box
opens.
5
5
2. Select 8 cm CD-R or 12 cm CD-R and click OK.
5
5
5
Printing on CD-R
108
Making background image for label
For Windows
1. Click the
button at the left of the edit toolbar. The Select
Background dialog box opens.
2. Click Edit Background tab, select the image that you want to
use and click OK. The background image that you selected is
displayed on the entire label.
Note:
❏ The above example uses an image that is included in the EPSON
Print CD. When using images taken with digital cameras and
saved on your computer, do not click Edit Background tab,
but click File to select the folder that contains the images you
want to use.
❏ If sample background images are not installed at the time of
installation because Compact installation is selected. In that
case, insert the printer software CD-ROM into the CD-Drive.
109
Printing on CD-R
❏ To change background images, click
button. The
Background Option screen opens. Then click Select Image
button on the screen.
5
5
For Macintosh users
1. Click
button on the Tool palette and Adjust Background
screen opens.
2. Click Select Background. A window opens that lets you
select a background image.
5
5
5
5
5
5
5
5
5
5
Printing on CD-R
110
3. Select the Background folder and click Open. The window
that lets you to select background images is displayed.
Note:
The above example uses an image that is included in the EPSON
Print CD. When using images taken with digital cameras and saved
on your computer, select the folder that contains the images you
want to use.
4. Select the background image you want to use and click Open
button.
5. Click OK. The selected background image is displayed on the
entire label.
Note:
To change the background image, return to step 1 and reset.
111
Printing on CD-R
Editing characters
5
For Windows
1. Click the
button at the left end of edit toolbar. The Text
Settings dialog box opens.
5
2. Click Text tab, type characters in the Text textbox and click
OK. The characters typed are displayed on the label.
5
5
5
5
5
Note:
❏ To change the character style, click Text Settings, Text Color,
Shadow, and Distortion tabs that are shown above the Text
Settings dialog box and make changes in the displayed screen.
❏ To correct the characters once typed, double-click on the
characters to open Text Settings dialog box. In the Text Settings
dialog box, you can correct characters you have already typed.
5
5
5
5
5
Printing on CD-R
112
3. Drag the characters that are displayed on the label and move
them to the position you want to print.
4. If you want to type more characters, repeat steps 1-3.
For Macintosh
1. Click
button on the Tool palette. The Text Settings dialog
box opens.
113
Printing on CD-R
2. Click Text Settings tab and type characters in the textbox. The
characters typed in the textbox are displayed on the label.
5
5
5
5
5
5
5
5
Note:
❏ You can change character font, size and style in the Text
Settings dialog box.
❏ To correct the characters once typed, click on the characters. In
the Text Settings dialog box, you can correct characters you
have already typed.
5
5
5
5
Printing on CD-R
114
3. Drag the characters that are displayed on the label and move
them to the position you want to print.
4. If you want to type more characters, repeat step 1-3.
Printing curved characters
For Windows users
1. Click
115
button at the left end of edit toolbar.
Printing on CD-R
2. Click the characters that are typed and displayed on the label.
Handles are displayed on the corner and the center of the
character block.
5
5
5
5
5
5
3. Drag the red handle displayed in the center of the character
block upward or downward. The character block curves to
the dragged direction.
5
5
5
5
5
5
Printing on CD-R
116
Note:
❏ When the characters are unevenly aligned either to the right or
to the left, click
button in the character toolbar, so that they
are pasted evenly.
❏ If you cannot see the handles clearly, remove the background
image before proceeding to this step.
For Macintosh users
1. Click
button on the Tool palette.
2. Click the characters that are typed and displayed on the label.
Handles are displayed in the corner and the center of the
character block.
117
Printing on CD-R
3. Drag the red handle displayed in the center of the character
block upward or downward. The character block curves to
the dragged direction.
5
5
5
5
5
Note:
If you cannot see the handles clearly, remove the background image
before proceeding to this step.
5
5
Saving the label data
5
For Windows users
5
1. Select Save from the File menu. The Save As dialog box
opens.
5
5
5
Printing on CD-R
118
2. To save the label data, locate a folder and specify a file name
and click Save button.
For Macintosh users
1. Select Save from the File menu. The Save dialog box opens.
2. To save the label data, locate a folder and specify a file name
and click Save button.
Accessing EPSON Print CD help
For details on EPSON Print CD, you can also view the EPSON
Print CD help. How to start EPSON Print CD help is described in
this section.
119
Printing on CD-R
For Windows users
Select Help Topics from the Help menu on the EPSON Print CD
window.
5
5
For Macintosh users
Select EPSON Print CD Helps from the Apple menu.
5
Printing on CD-R
EPSON Print CD lets you print images on CD-Rs. Follow the
instruction for how to print on CD-Rs using the EPSON Print CD.
For Windows users
5
5
1. Select Printer Settings from the File menu. Print Setup dialog
box opens.
5
2. Select EPSON Stylus Photo 950 from the Name list box and
click Properties.
5
5
5
5
5
5
Printing on CD-R
120
3. Click the Main tab, and select CD-R from the Media Type list
box.
121
Printing on CD-R
4. Click the Paper tab, then select Manual Feed Slot from the
Paper source list box, A4 from the Paper size list box and
Portrait in Orientation.
5
5
5
5
5
5
5
5. Click OK to return to Print Setup dialog box.
5
6. Click OK.
7. Select Print from File menu. Print dialog box opens.
5
5
5
5
Printing on CD-R
122
8. Select None in Print Confirmation Pattern and click OK.
c
Caution:
❏ Do not change the adjust lever position while printing. Doing
so may damage the printer hardware.
❏ After CD-R is printed, switch the adjust lever according to
the thickness of paper loaded. For plain paper, which is less
thick, switch to m.
Note:
❏ Adjust print position when the print position is misaligned by
referring to “Print position adjustment” on page 87.
❏ When ink smears in the print result, adjust the color saturation by
referring to “Color settings” on page 97.
For Macintosh users
1. Select Page Setup from the File menu. Page Setup dialog box
opens.
123
Printing on CD-R
2. Select Manual Feed from the Paper source list box, A4 from
the Paper size list box and Portrait in Orientation.
5
5
5
5
5
3. Click OK to close Page Setup dialog box.
5
4. Select Print from File menu. Print dialog box opens.
5. Select CD-R from the Media Type list box and None in Test
Print Pattern and click Print.
5
5
5
5
5
5
Printing on CD-R
124
c
Caution:
❏ Do not change the adjust lever position while printing. Doing
so may damage the printer hardware.
❏ After CD-R is printed, switch the adjust lever according to
the thickness of paper loaded. For plain paper, which is less
thick, switch to m.
Note:
❏ Adjust print position when the print position is misaligned by
referring to “Print position adjustment” on page 87.
❏ When ink smears in the print result, adjust color saturation by
referring to “Color settings” on page 97.
Print cancellation in Windows
Print cancellation in Windows is described in this section. Follow
the instruction below to stop printing while the print job is being
executed.
Click the Stop button in Progress Meter displayed at the right end
of the toolbar while printing job is executed. Then the print job
progress is printed out and the print job ceases.
Note:
❏ Progress Meter does not appear if EPSON Status Monitor 3 is not
installed.
❏ When you are printing with roll paper, cut the roll paper and remove
it from the printer after following the above step. Refer to “Using
Automatic Roll Paper Cutter” on page 70 for how to cut roll paper.
Refer to “Removing Roll Paper from the Printer” on page 51 for how
to remove roll paper.
❏ Stop printing if any data error occurs or Progress Meter does not
open for some reason by referring to the following “Cancel print job
while printing” on page 126.
125
Printing on CD-R
Cancel print job while printing
In the step described above, your printer does not stop printing
until all the print data processed to the computer is printed out.
In case print data error occurs for some reason and you want to
quit printing immediately, follow the step below.
5
5
5
For Windows Me,98,and 95 users
1. Turn off the printer, even while a printing job is being
executed. Then the paper loaded for printing is ejected.
Note:
Data remaining in the print job queue is canceled by turning off the
printer.
2. Click Cancel if the screen below appears. It takes time before
the screen shows. You can cancel printing by following this
step.
5
5
5
5
5
5
5
5
5
Printing on CD-R
126
Note:
❏ When the following screen opens after OK is clicked, click the
print data you want to cancel and click Cancel.
❏ When you are printing with roll paper, cut the roll paper and
remove from the printer after following the above step. Refer to
“Using Automatic Roll Paper Cutter” on page 70 for how to
cut roll paper. Refer to “Removing Roll Paper from the Printer”
on page 51 for how to remove roll paper.
For Windows XP, 2000 and NT 4.0 users
1. Turn off the printer, even while a printing job is being
executed. Then the paper loaded for printing is ejected.
Note:
Data remaining in the print job queue is canceled by turning off the
printer.
2. For Windows 2000 and NT 4.0 users, click Start, point to
Settings, then click Printers to open the Printer folder. For
Windows XP users, click Start, then click Control Panel, then
click Printers and Other Hardware, then click Printers and
Faxes to open the Printers and Faxes folder.
3. Double-click the EPSON Stylus Photo 950 icon.
127
Printing on CD-R
4. Select Purge Print Documents (for Windows NT4.0) or
Cancel All Documents (for Windows 2000 and XP) from the
Printer menu. When deleting specific print job data, select the
document you want to delete, and then select Cancel
Printing from Document menu.
Note:
❏ Your print document is not displayed on the Printer Manager
(above figure) if the print job has already been sent to the printer.
In that case, you can stop printing by turning off the printer.
❏ When you are printing with roll paper, cut the roll paper and
remove from the printer after following the above step. Refer to
“Using Automatic Roll Paper Cutter” on page 70 for how to
cut roll paper. Refer to “Removing Roll Paper from the Printer”
on page 51 for how to remove roll paper.
5
5
5
5
5
5
Print cancellation in Macintosh
Print cancellation in Macintosh is described in this section. Follow
the instruction below to stop printing while a print job is being
executed.
Turn off the printer first. Paper loaded for printing is ejected, then
delete the print document as follows.
5
5
5
When using the background print
Use EPSON Monitor3 displayed on the screen to stop printing
when Background Printing is On.
5
1. Select EPSON Monitor3 from the Application menu at the
right end of the menu bar. The EPSON Monitor3 dialog box
opens.
5
5
2. Click the icon of the document you want to delete, then
click .
Printing on CD-R
128
When the print cancellation dialog box appears, follow the
instruction on the screen, then printing stops normally.
Note:
When you are printing with roll paper, cut the roll paper and remove
from the printer after following the above step. Refer to “Using
Automatic Roll Paper Cutter” on page 70 for how to cut roll paper.
Refer to “Removing Roll Paper from the Printer” on page 51 for how
to remove roll paper.
When background print is not used
If you are not using the Background Printing, you can stop
printing by using Macintosh function.
Press . period key while pressing J Command key.
When the print cancellation dialog box appears, follow the
instruction on the screen, then printing stops normally.
Note:
When you are printing with roll paper, cut the roll paper and remove
from the printer after following the above step. Refer to “Using
Automatic Roll Paper Cutter” on page 70 for how to cut roll paper. Refer
to “Removing Roll Paper from the Printer” on page 51 for how to remove
roll paper.
129
Printing on CD-R
Chapter 6
6
Printing with Windows
6
Printer Software Introduction
The printer software which comes with your printer includes a
printer driver and printer utilities. The printer driver lets you
choose from a wide variety of settings to get the best results from
your printer. The printer utilities help you check the printer and
keep it in top operating condition.
The printer driver settings and utilities are on the printer software
menus shown below.
6
6
6
6
Menu
Settings and Utilities
Main
Media Type, Ink, Mode, Print Preview
Paper
Paper Source, No Margins, Auto Cut, Paper Size, Copies,
Orientation, Printable Area, Roll Paper Option
Layout
Reduce/Enlarge, Double-sided Printing, Multi-Page,
Watermark
Utility
EPSON Status Monitor 3, Nozzle Check, Head Cleaning, Print
Head Alignment, Printer and Option Information, Speed &
Progress
6
6
If you encounter any problems when using the printer software,
refer to the Problem Solver HTML manual for help by clicking
Technical Support on the Main menu of the printer software.
6
6
6
6
Printing with Windows
130
Getting more information
For information on using the printer software, see “Making
Settings on the Main Menu” on page 132, “Making Settings on the
Paper Menu” on page 148, or “Making Settings on the Layout
Menu” on page 154.
For information on using the printer utilities, see “Using the
Printer Utilities” on page 168.
Note:
The specific features available in the printer software vary depending on
the version of Windows that you are using.
Online help provides more information about the printer
software. See “Getting Information Through Online Help” on
page 182 for instructions on accessing help.
Accessing the printer software
You can access the printer software from most Windows
applications, or from the Windows Start menu.
When you access the printer software from a Windows
application, the settings that you make apply only to the
application you are using.
When you access the printer software from the Start menu, the
settings that you make apply to all of your Windows applications.
Refer to the appropriate section below.
From Windows applications
Follow the steps below to access the printer software.
1. Click Print or Print Setup on the File menu.
131
Printing with Windows
2. In the dialog box that appears, click Printer, Setup, Options,
or Properties. (Depending on your application, you may need
to click a combination of these buttons.) The printer software
opens.
6
6
From the Start menu
Follow the steps below to access the printer software.
1. For Windows Me, 2000, NT 4.0, 98 and 95 users, click Start,
point to Settings, then click Printers.
For Windows XP users, click Start, then click Control Panel,
then click Printers and other hardware, then click Printers
and Faxes.
2. For Windows Me, 98, and 95 users, select your printer, then
click Properties on the File menu.
For Windows XP and 2000 users, select your printer, then
click Printing Preferences on the File menu.
For Windows NT 4.0 users, select your printer, then click
Document Defaults on the File menu.
The printer software opens.
6
6
6
6
6
6
6
Making Settings on the Main Menu
6
You can make Media Type, Ink, Mode, and Print Preview settings
on the Main menu. Refer to the appropriate section below.
6
6
Printing with Windows
132
Making the Media Type setting
The Media Type setting determines what other settings are
available, so you should always make this setting first.
On the Main menu, select the Media Type setting that matches
the media that is loaded in the printer. To find out what media
type you are using, find your media in the list below, and refer to
the corresponding media type under which it is grouped (shown
in larger type). For some media, there are several Media Type
settings from which to choose.
133
Printing with Windows
Plain Paper
6
Plain paper
Envelopes
EPSON Premium Ink Jet Plain Paper (A4)
EPSON Bright White Ink Jet Paper (A4)
6
S041214
S041442
6
360 dpi Ink Jet Paper
EPSON 360 dpi Ink Jet Paper (A4)
S041059
EPSON Iron-On Cool Peel Transfer Paper (A4)
S041154
6
6
Photo Quality Ink Jet Paper
EPSON Photo Quality Ink Jet Paper (A4)
S041061
EPSON Photo Quality Ink Jet Cards (A6)
S041054
EPSON Photo Quality Ink Jet Cards (5 × 8”)
S041121
EPSON Photo Quality Ink Jet Cards (8 × 10”)
S041122
6
6
EPSON Photo Quality Self Adhesive Sheets (A4) S041106
EPSON Ink Jet Note Cards A6 (with envelopes)
S041147
EPSON Ink Jet Greeting Cards 5 × 8”
(with envelopes)
S041148
EPSON Ink Jet Greeting Cards 8 × 10”
(with envelopes)
S041149
6
6
6
Matte Paper-Heavyweight
EPSON Matte Paper-Heavyweight (A4)
S041256
EPSON Double-Sided Matte Paper
S041569
6
6
Printing with Windows
134
Photo Paper
EPSON Photo Paper (A4)
S041140
EPSON Photo Paper (4 × 6”)
S041134
EPSON Photo Paper (100 × 150 mm)
S041255
EPSON Photo Paper (200 × 300 mm)
S041254
EPSON Panoramic Photo Paper (210 × 594 mm)
S041145
EPSON Photo Paper Cards (A4)
S041177
Premium Glossy Photo Paper
135
EPSON Premium Glossy Photo Paper (A4)
S041287
EPSON Premium Glossy Photo Paper
(100 mm × 8 M)
S041303
EPSON Premium Glossy Photo Paper
(210 mm × 10 M)
S041377
EPSON Premium Semigloss Photo Paper (A4)
S041332
EPSON Premium Semigloss Photo Paper
(100 mm × 8 M)
S041330
EPSON Premium Semigloss Photo Paper
(210 mm × 8 M)
S041336
Printing with Windows
Photo Quality Glossy Film
EPSON Photo Quality Glossy Film (A6)
S041107
EPSON Photo Quality Glossy Film (A4)
S041071
EPSON Photo Stickers 16 (A6)
S041144
EPSON Photo Stickers 4 (A6)
S041176
6
6
6
ColorLife Photo Paper
EPSON ColorLife Photo Paper (A4)
6
S041560
Ink Jet Transparencies
EPSON Ink Jet Transparencies (A4)
6
S041063
6
CD-R
CD-R
6
Note:
The availability of special media varies by location. For the latest
information on media available in your area, contact EPSON customer
services. See “Regional Customer Services” on page 351 for details.
6
6
Making the Ink setting
The Ink setting allows you to print in color or black-and-white.
Click Color to print in color, or Black to print in black-and-white
or grayscale.
6
6
6
Printing with Windows
136
Making the Mode setting
The Mode settings on the Main menu give you three levels of
control over the printer software, as explained below.
Automatic
This mode provides the quickest and easiest way to
start printing. See “Using the Automatic mode” on
page 138 for details.
PhotoEnhance
This mode lets you choose from a variety of
image-correction settings specially designed for
photos. See “Using the PhotoEnhance mode” on
page 139 for details.
Custom
This mode lets you choose from a list of ready-made
or personalized settings suited to the kind of
document that you want to print. When Custom is
selected, the Advanced button is enabled, allowing
you to access the Advanced dialog box. See “Using
the Custom mode” on page 140 for details.
In addition to making comprehensive Mode settings that affect
overall print quality, you can also modify individual aspects of
your printout using the Paper and Layout menus. See “Making
Settings on the Paper Menu” on page 148 or “Making Settings on
the Layout Menu” on page 154 for details.
137
Printing with Windows
Using the Automatic mode
When Automatic is selected as the Mode setting on the Main
menu, the printer software takes care of all detailed settings based
on the current Media Type and Ink settings. To make the Ink
setting, see “Making the Ink setting” on page 136. To make the
Media Type setting, see “Making the Media Type setting” on page
133.
6
6
6
6
6
6
6
6
Note:
❏ Depending on the media selected in the Media Type list (while
Automatic is selected), a slider appears under the Custom radio
button that lets you choose Quality, Speed or the middle level.
Select Quality when print quality is more important than speed.
❏ Most Windows applications feature paper size and page layout
settings that override similar settings in the printer software.
However, if your application does not have these settings, verify the
settings on the Paper menu of the printer software.
Printing with Windows
138
6
6
6
6
Using the PhotoEnhance mode
The PhotoEnhance mode provides a variety of image-correction
settings that you can apply to your photos before printing.
PhotoEnhance does not affect your original data.
Note:
❏ This mode is only available when printing 8-, 16-, 24-, or 32-bit
color data.
❏ Printing with PhotoEnhance selected may increase the time
required for printing, depending on your computer system and the
amount of data contained in your image.
You can select from the following settings.
139
Standard
This setting provides standard image correction for
most photos. Try this first.
People
This setting is best for photos of people.
Nature
This setting is best for outdoor scenery such as
mountains, skies, and oceans.
Printing with Windows
Soft Focus
This setting makes your photos look as if they were
taken with a soft-focus lens.
Sepia
This setting applies a sepia tone to your photos.
6
Selecting PhotoEnhance also enables the Digital Camera
Correction check box. Select this check box when you are
printing photos taken with a digital camera to give your printed
images the smooth, natural appearance of photographs taken
with a film camera.
6
6
6
Using the Custom mode
Selecting Custom as the Mode option enables the Custom Settings
list, from which you can choose a ready-made setting designed
for printing text and graphs. Or, you can select a color-matching
method. You can also create and save your own custom settings.
For details on making your own custom settings, see “Making
Advanced settings” on page 142.
6
6
6
6
6
6
6
6
Printing with Windows
140
By default, you can choose from the following:
Ready-made setting
Description
Economy
This setting is best for printing drafts of text.
ICM
This method automatically adjusts printout
colors to match the colors on your screen. ICM
stands for Image Color Matching.
sRGB
This method is best for color matching with other
sRGB devices.
Advanced Photo
2880dpi
This method enhances the realistic
appearance of your printouts. This setting is
useful for printing photos input with a digital
device such as a digital camera or scanner.
When you select a custom setting, other settings such as Print
Quality, Halftoning, and Color Adjustment are made
automatically. Changes to these settings are reflected in the
display at the left side of the Main menu.
Follow the steps below to select a custom setting.
1. Select Custom as the Mode setting on the Main menu.
2. From the Custom Settings list, select the most appropriate
setting for the type of document or image that you want to
print.
3. Verify the Media Type and Ink settings before printing, as
they may be affected by the custom setting that you select. See
“Making the Media Type setting” on page 133 or “Making the
Ink setting” on page 136 for details.
141
Printing with Windows
Making Advanced settings
The settings in the Advanced dialog box give you complete
control over your printing environment. Use these settings to
experiment with new printing ideas or to fine-tune a range of
print settings to meet your individual needs. Once you are
satisfied with your new settings, you can give them a name and
add them to the Custom Settings list on the Main menu.
Follow the instructions in this section to make Advanced settings.
Note:
The printer software screens that appear in this procedure are for
Windows 98 and 95. The Windows XP, Me, 2000 and NT 4.0 printer
software screens differ slightly in appearance.
1. Select Custom as the Mode setting on the Main menu and
then click Advanced. The Advanced dialog box opens.
6
6
6
6
6
6
6
6
6
6
2. Select a Media Type setting that is appropriate for the media
loaded in the printer. For details, see “Making the Media Type
setting” on page 133.
3. Choose Color or Black as the Ink setting.
Printing with Windows
142
6
6
4. Specify a Print Quality setting.
5. Make other settings as necessary. For details, see online help.
Note:
❏ The PhotoEnhance feature only affects images, not text or
graphs. For example, if Monochrome is selected from the
Tone list (enabled when PhotoEnhance is selected), only the
images in a document will be printed in monochrome. Any
colored text or graphs in the same document will be printed in
color.
❏ Some settings may be unavailable, depending on the Media
Type, Ink, and Print Quality settings that you make.
6. Click OK to apply your settings and return to the Main menu.
To return to the Main menu without applying your settings,
click Cancel. To save your Advanced settings, proceed to the
next section.
143
Printing with Windows
Saving and deleting your settings
To save your Advanced settings in the Custom Settings list, click
Save Settings in the Advanced dialog box. The Custom Settings
dialog box appears.
6
6
6
6
6
6
Type a unique name for your settings in the Name text box, then
click Save. Your Advanced settings will be added to the Custom
Settings list.
Note:
❏ You cannot apply the names of EPSON ready-made settings or
color-matching methods to your custom settings.
❏ You cannot delete the ready-made settings or color-matching
methods from the Custom Settings list.
6
6
6
6
To delete a setting from the Custom Settings list, select it in the
Custom Settings dialog box and click Delete.
6
6
Printing with Windows
144
Using your saved settings
To use your saved settings, select Custom as the Mode setting on
the Main menu, then select your settings in the Custom Settings
list.
If you change the Media Type or Ink settings while one of your
customized settings is selected in the Custom Settings list, the
selection shown in the list returns to Custom Settings. The
customized setting that was previously selected is not affected by
the change. To return to your customized setting, simply reselect
it in the list.
Previewing your printout
Select the Print Preview check box on the Main menu when you
want to view a preview of your document before printing.
145
Printing with Windows
When you send a print job to the printer, the EPSON Print
Preview window opens, allowing you to make changes before
printing.
6
6
6
6
6
6
6
The EPSON Print Preview toolbar contains several icon buttons
which you can use to perform the following functions.
Drag ’n’ Drop
Click this button to select and move
watermarks.
Zoom
Click this button to enlarge or reduce the
size of the previewed page.
Fit To Screen
Click this button to scale the previewed
page so that it fits the size of the window.
This is convenient when you want to see
the entire page at one time.
Maximum
Zoom
Click this button to display the previewed
page at the maximum possible zoom
ratio.
Printing with Windows
6
6
146
6
6
6
Printable Area
On/Off
Click this button to display or hide the
borderlines which indicate the printable
area. The printer cannot print anything
which is outside of this area.
Watermark
Click this button to open the Watermark
Settings dialog box, where you can add
watermarks to the document and
change any of the current watermark
settings.
Reset
Watermark
Click this button to return all watermark
settings to what they were when the
EPSON Print Preview dialog box was first
opened. If no settings have been
changed, this feature is not available.
Previous Page
Click this button to display the page
previous to the one currently being
previewed. If there is no previous page,
this feature is not available.
Next Page
Click this button to display the next page
in the document. If there is no next page,
this feature is not available.
You can also manipulate the previewed document in the
following ways:
❏ Select and preview individual pages.
❏ Reduce or enlarge the size of the preview window.
❏ Magnify the previewed document. To do this, click View and
then Magnify to open the Magnify window, which magnifies
the area of the previewed document that is outlined by the
red box. By dragging the red box, you can change which part
of the document is magnified.
147
Printing with Windows
❏ View the individual pages that comprise a poster. The Poster
window opens automatically when you send a print job while
Poster is selected as the Multi-Page option on the Layout
menu. From this window, you can view the individual pages
which make up a poster. You can also open this dialog box by
clicking View and then Poster.
❏ Apply watermarks. The watermark that you select is
displayed on the previewed image. For detailed information
on customizing watermarks, see “Making Watermark
settings” on page 165.
❏ Specify which pages of the document you would like to print.
To add or remove a page, click the page icon in the list at the
left side of the preview window, then add or remove it using
the commands on the Print Options menu. The Print Options
menu commands are as follows:
6
6
6
6
6
6
Add page
Click this button to add the highlighted
pages to the list of pages to be printed.
Remove page
Click this button to remove the highlighted
pages from the list of pages to be printed.
6
After you have previewed the document, click Print to print the
document, or click Cancel to cancel printing.
6
6
Making Settings on the Paper Menu
Use the settings on the Paper menu to change the paper size, set
the number of copies and other copy parameters, specify the
paper orientation, and adjust the printable area.
The settings which are available vary depending upon whether
the sheet feeder, roll paper or manual feed slot is selected as the
Paper Source setting.
Printing with Windows
148
6
6
6
When you select Sheet Feeder and Manual Feed Slot as the
Paper Source setting, the printer software will appear as shown
below.
149
Printing with Windows
When you select Roll Paper as the Paper Source setting, the
printer software will appear as shown here.
6
6
6
6
6
6
6
You can make the following settings on the Paper menu:
Paper Source
Select the paper source that you want to use from the
selections below.
Sheet Feeder:
Select this to leave a 3-mm margin on both the right
and the left sides of the paper. This option is available
when printing on normal paper.
Roll Paper:
Select this to leave a 3-mm margin on both the right
and the left sides of the roll paper.
Manual Feed Slot:
Select this to print on a matte board and CD-R loaded
in Front Sheet Feeder.
6
6
6
6
6
Printing with Windows
150
No Margins
Check this box when you want to print with no margins.
Sheet Feeder:
Select this to leave no margins on all four sides of the
paper. This option is available only when printing with
paper that is in the Paper size list.
Roll Paper:
Select this to leave no margins on all four sides of the
roll paper. This option is available only when printing
with paper that is on the Paper size list.
You can use the following media with this feature.
Photo Paper:
Panoramic, A4, 100 x 150 mm
Matte Paper-Heavyweight:
A4
Index Card:
5 × 8”
Note
If your application has margin settings, make sure they
are set to zero before printing.
When using this feature with Roll Paper, you need to
use your image-editing software to make the image
4 mm wider than the roll paper.
Printing with this feature selected takes longer than for
normal printing.
Because this feature enlarges the image to a size
slightly larger than the paper size when Sheet Feeder
is selected as the Paper Source setting, the portion of
the image that extends beyond the edges of the
paper will not be printed.
Print quality may decline in the top and bottom areas
of the printout, or the area may be smeared when
printing on media other than listed above. We
recommend printing a single sheet to check quality
before printing large jobs.
You cannot use this feature with the following media:
Photo Quality Glossy Film, Ink Jet Transparencies,
Iron-On Cool Peel Transfer Paper, 360 dpi Ink Jet Paper,
CD-R.
151
Printing with Windows
Auto Cut
If the cutter is attached, you can select the types of
cutting.
Not Cut:
No cutting with the cutter is done.
Single Cut:
The paper is cut at the boundary between images (the
boundary between pages). However, the cutting
position may shift slightly.
Double Cut:
If you have selected Single Cut and are unhappy with
the gap of the cutting position, select Double Cut. In
this mode, the space between images is extended
and the paper is cut twice inside this space. By cutting
twice, an 18 mm slip of paper is left. Double Cut is
selectable only when printing with No Margins
selected.
Note:
Use the cutter after you attach it and adjust the cutting
position. Refer to the “Cutting position adjustment with
Automatic Roll Paper Cutter” on page 176 for more
details about the cutting position adjustment.
Auto Cut is selectable after the cutter is attached and
Roll Paper is selected as the Paper Source setting.
If Auto Cut is not available even when Roll Paper is
selected as the Paper Source, the Auto Cutter
Attached setting has not been made in the printer
driver. Refer to the “Printer driver settings with
Automatic Roll Paper Cutter” on page 175 and make
the setting.
Paper Size
Select the paper size that you want to use. You can
also add a custom paper size.
Copies
Select the number of copies that you want to print.
You can select Collate to print one set at a time or
Reverse Order to print your documents in reverse
order, starting with the last page.
Orientation
Select Portrait (tall) or Landscape (wide) to change
the orientation of your printout. To print closer to the
bottom of the page, select the Rotate by 180° check
box.
Printing with Windows
152
6
6
6
6
6
6
6
6
6
6
6
6
Printable Area
Use this option in the Printable Area Box to adjust the
total area available for printing when Sheet Feeder
and Manual Feed Slot is selected as the Paper Source
setting. Standard and Maximum are only available
when Sheet Feeder is selected. This feature is not
available when No Margins or Roll Paper is selected.
To center the printout, select Centered. To increase
the printable area at the bottom edge from 14 mm to
3 mm, select Maximum.
Note:
The print quality may decline at the edges of the
printout when Maximum is selected as the Printable
Area setting. Before printing large jobs using this
setting, print a single sheet to confirm quality.
When Maximum is selected, make sure that the paper
loaded in the sheet feeder is not curled.
Do not select Maximum while using Premium Glossy
Photo Paper. If you select Maximum when printing on
Premium Glossy Photo Paper, your printout may be
smeared in the expanded area (between 14 mm and
3 mm from the bottom edge).
153
Printing with Windows
Roll Paper
Option
The Roll Paper Option settings are only available when
Roll Paper is selected as the Paper Source setting.
These features are not available when Sheet Feeder
or Manual Feed Slot is selected.
The available settings are described below.
Banner Mode:
Select this mode when you want to print multi-page
data as continuous data on the roll paper, rather than
as individual pages. When this check box is selected,
the Save roll paper check box is enabled.
Cut Sheet Mode:
Select this mode when you want to print multi-page
data as individual pages, rather than as continuous
data. When this check box is selected, the Print page
frame check box is enabled.
Save roll paper:
Select this check box when you want to save roll
paper. When this check box is selected, the blank
portion of the last page of your document is not fed
through the printer. This feature is only available when
Not Cut and Banner Mode are selected, and not
available when cutting with the cutter.
Print page frame:
Select this check box to print a line on the roll paper
between pages in a multi-page document to indicate
where the paper should be cut. This feature is useful
when it is unclear where the page breaks should be or
where the paper should be cut after the last page has
been printed. This feature is only available when Not
Cut and Cut Sheet Mode are selected, and not
available when cutting with the cutter.
6
6
6
6
6
6
6
6
6
Making Settings on the Layout Menu
You can make Reduce/Enlarge, Double-Sided Printing,
Multi-Page, and Watermark settings on the Layout menu. Refer
to the appropriate section below.
Printing with Windows
6
154
6
6
Making Reduce/Enlarge settings
Use the Reduce/Enlarge options on the Layout menu to adjust
the printed size of your document.
You can select from the following settings.
155
Fit to Page
Proportionally enlarges or reduces the size of
your document to make it fit the paper size
selected in the Output Paper Size list.
Custom
Allows you to manually reduce or enlarge an
image. Click the arrows next to the Scale to box
to select a percentage between 10% and 400%.
Printing with Windows
Making Double-sided Printing Setting
The EPSON Stylus Photo 950 supports double-sided printing.
There are two types of double-sided printing available. Standard
double-sided printing allows you to print the odd-numbered
pages first. Once these pages are printed, they can be reloaded to
print the even-numbered pages onto the opposite side of the
paper. Folded Booklet double-sided printing allows you to make
single-fold booklets. Refer to the appropriate section below.
Note:
❏ The double-sided printing feature is not available when the printer
is accessed over a network, or is used as a shared printer.
❏ Depending on the media type, stacks of up to 30 sheets can be loaded
into the sheet feeder during double-sided printing.
6
6
6
6
6
❏ Only use media types which are suitable for double-sided printing.
Otherwise, the printout quality may deteriorate.
6
❏ Depending on the type of paper and the amount of ink used to print
text and images, ink may bleed through to the other side of the paper.
6
❏ The surface of the paper may be smeared during the double-sided
printing.
6
Standard double-sided printing
Follow the steps below to print odd and even numbered pages
onto opposite sides of the sheet.
6
6
6
6
Printing with Windows
156
1. Select the Double-Sided Printing check box from the Layout
menu of your printer driver. For information on accessing the
Layout menu, see “Accessing the printer software” on page
131.
2. Click the Margins button. The following dialog box will
appear.
157
Printing with Windows
3. Specify the edge of the paper where the binding will be
placed. You can choose between Left, Top, and Right.
6
4. Specify the width of the binding margin using the Binding
Margin text box. You can specify any width from 3 mm to 30
mm.
Note:
The actual binding margin may vary from the specified settings
depending on your application. Experiment with a few sheets to
examine actual results prior to printing the entire job.
5. Click OK to return to the Layout menu, then click OK to save
your settings.
6. Load paper in the sheet feeder, then send the print job from
your application. Instructions for generating the
even-numbered pages will be displayed while the
odd-numbered pages are output.
6
6
6
6
6
6
7. Follow the instructions displayed to reload the paper, or
reload the paper as shown in the illustration below.
Note:
❏ The paper may curl during printing due to the amount of ink
used. Should this occur, slightly curl the sheets in the opposite
direction prior to reloading them into the printer.
❏ Align the sheet stack by tapping its edges against a hard, flat
surface prior to reloading the stack into the printer.
❏ Follow the instructions provided when reloading the printouts.
Paper jams or improperly placed binding margins may occur if
the printouts are not reloaded correctly.
6
6
6
6
6
Printing with Windows
158
❏ In the event of a paper jam, refer to “Paper Does Not Feed
Correctly” on page 313.
8. Once the paper is reloaded, click Resume to print the
even-numbered pages.
Folded Booklet double-sided printing
You can also make single-fold booklets using the double-sided
printing feature. To create a single-fold booklet, the pages that
appear on the outside (after the booklet is folded) are printed first.
The pages that will appear inside the booklet can then be printed
after the paper is reloaded into the printer as shown in the
illustration below.
159
Printing with Windows
6
✽
6
6
2
1
3
4
5
6
7
8
6
10 12
6
9 11
Single-fold booklet
6
✽ Binding Edge
A booklet can be created by printing pages 1 and 4 on the first
sheet of paper, pages 5 and 8 on the second sheet of paper, and
pages 9 and 12 on the third sheet of paper. After these sheets are
reloaded into the sheet feeder, you can then print pages 2 and 3
on the back of the first sheet of paper, pages 6 and 7 on the back
of the second sheet of paper, and pages 10 and 11 on the back of
the third sheet of paper. The resulting pages can then be folded
and bound together into a booklet.
Use the following steps to create a booklet as described above.
1. Select the Double-Sided Printing check box from the Layout
menu, then select the Folded Booklet check box.
2. Click the Margins button. The Margins dialog box will
appear.
6
6
6
6
6
3. Specify the edge of the paper where the binding will be
placed. You can choose from Left, Top, and Right.
Printing with Windows
6
160
Note:
When Portrait is selected as the Orientation setting on the Main
menu of your printer driver, Left or Right binding positions are
available. The Top binding position is supported when
Landscape is selected as the Orientation setting.
4. Specify the width of the binding margin using the Binding
Margin text box. You can specify any width from 3 mm to 30
mm. The specified margin width will be used on both sides
of the fold. For example, if a 10-mm margin is specified, a
20-mm margin will be inserted (a margin of 10 mm will be
placed on each side of the fold).
✽
✽✽
Portrait
Landscape
✽ Folding Edge
✽✽ Margin
5. Click OK to return to the Layout menu, then click OK to save
your settings.
161
Printing with Windows
6. Make sure that paper is loaded in the sheet feeder and send
the print job from your application.
7. Instructions for printing the inside pages will be displayed
while the outside pages are output. Follow the on-screen
instructions for reloading the paper, or refer to the illustration
in the previous section titled “Standard double-sided
printing” on page 156.
Note:
❏ The paper may curl during printing due to the amount of ink
used. Should this occur, slightly curl the sheets in the opposite
direction prior to reloading them into the printer.
6
6
6
6
❏ Align the sheet stack by tapping its edges against a hard, flat
surface prior to reloading the stack into the printer.
6
❏ Follow the instructions provided when reloading the printouts.
Paper jams or improperly placed binding margins may occur if
the printouts are not reloaded correctly.
6
6
❏ In the event of a paper jam, refer to “Paper Does Not Feed
Correctly” on page 313.
8. Once the paper is reloaded, click Resume to print the inside
pages.
6
6
9. Once printing is complete, fold the sheets and bind them
together using a stapler or other binding method.
6
Making Multi-Page settings
Selecting the Multi-Page check box allows you to choose between
the N-up and Poster settings. Refer to the appropriate section
below.
Printing with Windows
162
6
6
Making N-up settings
Select N-up as the Multi-Page setting on the Layout menu to print
two or four pages of your document on one sheet of paper.
When N-up is selected, you can make the following settings:
163
2 Pages
4 Pages
Prints two or four pages of your document on a
single piece of paper.
Page Order
Opens the Print Layout dialog box, where you
can specify the order in which the pages will be
printed. Some settings may be unavailable,
depending upon the Orientation selection on
the Paper menu.
Print page frames
Prints frames around the pages printed on each
sheet.
Printing with Windows
Making Poster settings
A single document page can be enlarged to cover 4, 9, or 16
printed sheets of paper. Select Poster as the Multi-Page setting to
print a poster-size image.
6
6
6
Click the Settings button to adjust the way your poster will print.
The Poster Settings dialog box opens.
6
6
6
6
6
6
6
You can make the following settings.
Print Cutting
Guides
Check this box to turn the cutting guide options on.
Overlapping
Alignment Marks
Slightly overlaps the images and prints alignment
markers so that they can be aligned more precisely.
Printing with Windows
164
6
6
Trim Lines
Prints border lines on the images to guide you when
trimming the pages.
If you only want to print a few of the panels without printing the
entire poster, click the panels that you do not wish to print, then
click OK to close the Poster Settings dialog box.
Making Watermark settings
To print a watermark on your document, click anywhere in the
Watermark list box on the Layout menu and select a watermark.
165
Printing with Windows
You can also add your own text-based or image-based
watermarks to the Watermark list. To add a watermark, click the
Add/Del button. The following dialog box appears.
6
6
6
6
6
6
Refer to the appropriate section below to finish creating a custom
watermark.
6
6
Creating an image-based watermark
6
Follow the steps below to create an image-based watermark.
1. Select BMP.
2. Click the Browse button to specify the bitmap file you want
to use, then click OK.
3. Type a name for your watermark in the Name box, then click
Save. Click OK to return to the Layout menu.
6
6
6
Printing with Windows
166
Creating a text-based watermark
Follow the steps below to create a text-based watermark.
1. Select Text.
2. Type your text in the Text box. The text that you enter will
also be used as the watermark name.
3. If you want to change the watermark name, type a new name
in the Name box, then click Save. Click OK to return to the
Layout menu.
Adjusting the appearance of watermarks
Follow the steps below to adjust the appearance of watermarks
when printed.
1. Select a watermark in the Watermark list box on the Layout
menu.
2. Click the Settings button. The following dialog box appears.
167
Printing with Windows
3. Make sure that the appropriate watermark is selected in the
Watermark list box, then make Color, Position, Density, Size,
Font, Font Style, and Angle settings. (For details, see online
help.) Your settings are reflected in the display at the left side
of the dialog box.
4. When you are finished making settings, click OK.
6
6
6
Using the Printer Utilities
6
EPSON printer utilities allow you to check the current printer
status and to perform some printer maintenance from your
computer.
To use the utilities, click the Utility tab in the printer software, then
click the button for the utility that you want to use. For
information on how to access the printer software, see “Accessing
the printer software” on page 131.
6
6
6
6
6
6
6
6
Printing with Windows
168
Note:
❏ The letter in parentheses after the utility name indicates the shortcut
key for that utility. Press Alt and the letter on the keyboard to open
that utility.
❏ Do not use the Nozzle Check, Head Cleaning, or Print Head
Alignment utilities if your printer is connected to your computer
through a network.
❏ Do not use the Nozzle Check, Head Cleaning, or Print Head
Alignment utilities while printing is in progress; otherwise, your
printout may be marred.
Refer to the appropriate section below.
EPSON Status Monitor 3
EPSON Status Monitor 3 provides you with printer status
information, such as the amount of ink remaining, and checks for
printer errors.
This utility is only available when both of the following conditions
are met:
❏ The printer is connected directly to the host computer via the
parallel or USB port.
❏ Your system is configured to support bidirectional
communication.
169
Printing with Windows
Nozzle Check
The Nozzle Check utility checks the print head nozzles for
clogging. Check the nozzles if you notice print quality has
declined and after cleaning to confirm that the print head nozzles
have been cleared. If the nozzle check indicates the print head
needs cleaning, you can access the Head Cleaning utility directly
from the Nozzle Check utility. For details, see “Checking the Print
Head Nozzles” on page 283.
6
6
6
6
Head Cleaning
The Head Cleaning utility cleans the print head. You may need
to clean the print head if you notice print quality has declined.
Use the Nozzle Check utility first to confirm that the print head
needs to be cleaned. You can access the Nozzle Check utility
directly from the Head Cleaning utility. For details, see “Cleaning
the Print Head” on page 285.
6
6
6
Print Head Alignment
The Print Head Alignment utility can be used to improve the print
quality of your documents. The alignment of the print head may
need to be adjusted if vertical lines should appear out of
alignment or if white or black banding noise should appear in
your documents. Use this utility to realign the print head.
Through this utility the printer will output two different types of
test patterns that are used to check the print head alignment.
6
6
6
6
6
Printing with Windows
170
The following images are examples of the first test patterns that
will be output by the printer.
From each pattern on the printed test sheet, choose the vertical
line that is aligned best. For each pattern, select the corresponding
line number from the appropriate drop-down list box in the Print
Head Alignment dialog box, then click Next to put the new
settings into effect.
171
Printing with Windows
Note:
If you cannot find a line which is aligned correctly, select the number of
the line which is the closest to being correct and click Realignment.
The lines you selected will be reset to the center (number 8) position and
the alignment test sheet will be printed again.
6
6
6
6
6
6
6
6
6
6
6
6
Printing with Windows
172
The following images are examples of the second test patterns that
will be output by the printer.
From each pattern on the printed test sheet, choose the least
grainy one. For each pattern, select the corresponding pattern
number from the appropriate drop-down list box in the Print
Head Alignment box, then click Finish to put the new settings into
effect.
173
Printing with Windows
Note:
If you cannot find a smooth pattern, select the number for the pattern
that is the least grainy and click Realignment. The gap adjustment
sheet will be printed again. If you can select a smooth pattern and do not
need to print the test pattern again, clear check boxes #1 ~ #3 on the right.
6
6
6
6
6
6
6
6
6
6
6
6
Printing with Windows
174
Printer and option information
This utility allows the printer driver to confirm printer
configuration information. It also provides specific information
regarding certain characteristics of the printer, such as the Printer
ID.
Printer driver settings with Automatic Roll Paper Cutter
If you attach the cutter, make the following settings in the printer
driver before using it. If you do not make these settings, the Auto
Cut mode is not available.
175
Printing with Windows
1. Select the Auto Cutter Attached check box.
6
6
6
6
6
Note:
After you attach the cutter, make sure to adjust the cutting position to
improve its precision. In addition, if you use different Paper Type/Paper
Width roll paper, it is recommended that you use the Auto Cut mode
after adjusting the cutting position. Refer to the “Cutting position
adjustment with Automatic Roll Paper Cutter” on page 176 for more
details about the cutting position adjustment.
6
6
Cutting position adjustment with Automatic Roll Paper
Cutter
6
After you attach the cutter, make sure to adjust the cutting
position to improve its precision.
Note:
❏ Before doing the following, it is necessary to turn the printer on and
set the roll paper. Refer to “Loading the roll paper” on page 33 for
more details about the roll paper setting.
❏ If you want to maintain a precise cutting position, it is recommended
that you adjust the cutting position each time you change the type
or size (width) of roll paper.
Printing with Windows
6
176
6
6
6
1. After making sure that the Auto Cutter Attached check box
is selected, click the Auto Cutter Adjustment button. The
Auto Cutter Adjustment dialog box opens.
Note:
If the Auto Cut Adjustment button is not available, make sure that
the Auto Cutter Attached check box is selected. If it is not
selected, the Auto Cutter Adjustment button is not available. In
addition, you cannot use the cutter.
2. After making sure that the roll paper is set, click the Print
button. The cutting position adjustment pattern is printed and
cut off.
177
Printing with Windows
3. By using the cut roll paper, check the most precisely printed
number among the color boundaries.
6
6
6
4. Select the number of the most precisely printed color
boundary from the list box. Click Finish to enable the
adjustment.
6
6
6
6
Printer information acquisition
Depending on the configuration of your system, the information
displayed in the Printer and Option Information dialog box may
be updated automatically, or may need to be entered manually.
If a message appears in the Current Settings window prompting
you to enter settings, or if you change the printer configuration,
follow the steps below to make the necessary settings manually.
6
6
6
6
6
Printing with Windows
178
1. Click the Settings Sheet button in the Printer and Option
Information dialog box to print out information about your
printer and options. A4 or Letter size paper must be loaded
in your printer to use this utility. You will see a printout
similar to the one below.
2. Make sure the settings in the utility match the information on
the printed Settings Sheet. If they do not match, correct the
settings on the screen to match the information on the settings
sheet.
3. Click OK to exit this menu and save your settings.
Speed & Progress
You can make settings related to print speed and progress in this
dialog box.
179
Printing with Windows
The available settings are listed below.
Note:
The specific features available in the printer software vary depending on
the printer model and the version of Windows that you are using.
6
6
High Speed Copies
To print multiple copies of your document faster, select High
Speed Copies. This speeds up printing by using your hard disk
space as a cache when printing multiple copies of your document.
6
6
Show Progress Meter
To display the Progress Meter every time you print, select Show
Progress Meter.
6
6
EPSON Printer Port (for Windows Me, 98 and 95 only)
For printer models that use the parallel port, you can speed up
the data transfer rate by selecting EPSON Printer Port.
6
Parallel port users can further increase print speed by enabling
DMA transfer, as explained in “Enabling DMA transfer” on page
265.
6
Always spool RAW datatype (for Windows XP, 2000 and NT
4.0 only)
6
Select this check box to have Windows NT-based clients spool
documents using the RAW format instead of the EMF (metafile)
format (Windows NT-based applications use the EMF format by
default).
6
Try using this option if documents spooled in EMF format do not
print correctly.
Printing with Windows
180
6
6
Spooling RAW datatype requires less resources than EMF, so
some problems (“Insufficient memory/disk space to print”,
“Slow print speed”, etc.) can be solved by selecting the Always
spool RAW datatype check box.
Note:
When spooling RAW datatype, print progress as displayed by the
Progress Meter may differ from actual print progress.
Monitoring Preferences
Click this button to open the Monitoring Preferences dialog box,
where you can make settings for EPSON Status Monitor 3.
181
Printing with Windows
You can make the following settings:
Select
Notification
6
Displays the current error notification settings.
Select the check boxes of the error types for which you
want to receive notification. Also select the Alert check
box if you want to be notified of error messages with an
audio alert.
6
Note:
Click the Default button to revert all Select Notification
settings to their defaults.
6
Select
Shortcut Icon
Select the Shortcut Icon check box and choose an icon
type to have a shortcut icon placed in your Windows
taskbar. You can click the shortcut icon in the taskbar to
open EPSON Status Monitor 3, or right-click the icon to
access some of the printer utilities.
6
Allow
monitoring of
shared
printers
Select this check box to allow monitoring of a shared
printer by other computers.
6
6
6
Getting Information Through Online Help
Your printer software has an extensive online help feature, which
provides you with instructions on printing, making printer driver
settings, and using printer utilities.
Refer to the appropriate section below.
6
6
Accessing help from your application
Open the File menu and choose Print or Print Setup. Then, click
Printer, Setup, Options, or Properties. (Depending on your
application, you may need to click a combination of these
buttons.) Click Help at the bottom of the Main, Paper, Layout, or
Utility menu for help related to the items on that menu.
Printing with Windows
6
182
6
6
You can get specific help related to any item on a menu by
right-clicking the item and then clicking the What’s This?
command.
Accessing help from the Windows Start menu
Click the Start button, point to Programs (for Windows Me, 2000,
NT 4.0, 98 and 95) or All Programs (for Windows XP) and EPSON
(for Windows Me, 98 and 95) or EPSON Printers (for Windows XP,
2000 and NT 4.0), then click EPSON Stylus Photo 950 Help. The
help contents window opens.
183
Printing with Windows
Chapter 7
Checking Printer Status and Managing
Print Jobs for Windows
7
7
7
Using the Progress Meter
When you send a print job to the printer, the Progress Meter
opens, as shown in the illustration below.
7
7
7
7
7
The Progress Meter indicates the progress of the current print job
and provides printer status information when bidirectional
communication between the printer and computer is established.
This meter also displays helpful tips for better printing and error
messages. Refer to the appropriate section below.
7
7
7
7
Checking Printer Status and Managing Print Jobs for Windows
184
Epson Printing Tips
Tips for getting the most out of your EPSON printer software
appear in the text box at the bottom of the Progress Meter
window. A new tip appears every 30 seconds. For more details
on the tip which is currently displayed, click the Details button.
Error messages
If a problem occurs during printing, an error message appears in
the text box at the top of the Progress Meter window. For more
detailed information, click Technical Support to access the
Problem Solver HTML manual.
When the ink runs low or out, a How to button appears below
the text box. Click How To and EPSON Status Monitor 3 will lead
you step-by-step through the cartridge replacement procedure.
185
Checking Printer Status and Managing Print Jobs for Windows
Using EPSON Spool Manager
7
EPSON Spool Manager is similar to Windows Print Manager. If
it receives two or more print jobs at one time, it holds them in the
order that they were received (with printers on a network this
may be called a print queue). When a print job reaches the top of
the line, the EPSON Spool Manager sends the job to the printer.
From the Spool Manager, you can view print status information
about the print jobs which have been sent to your printer. You can
also cancel, pause, and resume selected print jobs.
Note:
EPSON Spool Manager is not available for Windows XP, 2000 or
Windows NT.
7
7
7
7
After you send a print job, an EPSON Stylus Photo 950 button
appears on the taskbar. Click this button to open the EPSON Spool
Manager.
7
7
7
7
7
Using EPSON Status Monitor 3
EPSON Status Monitor 3 displays detailed information on the
printer status.
7
7
Checking Printer Status and Managing Print Jobs for Windows
186
Note:
Before using EPSON Status Monitor 3, be sure to read its README
file. To open this file, click Start, point to Programs and then to EPSON
or EPSON Printers, then click EPSON Stylus Photo 950 Readme.
Accessing EPSON Status Monitor 3
Here is the way to access EPSON Status Monitor 3:
Open the printer software, click the Utility tab, then click the
EPSON Status Monitor 3 button.
When you access EPSON Status Monitor 3, the following window
appears.
Viewing information in EPSON Status Monitor 3
EPSON Status Monitor 3 provides the following information.
187
Checking Printer Status and Managing Print Jobs for Windows
❏ Current Status:
EPSON Status Monitor 3 provides you with detailed printer
status information, a graphic display, and status messages. If
the ink runs low or out, the How to button appears in the
EPSON Status Monitor 3 window. Clicking How to displays
ink cartridge replacement instructions and moves the print
head to the ink cartridge replacement position.
❏ Ink Levels:
EPSON Status Monitor 3 provides a graphic display of the
amount of ink remaining, and an estimate of the number of
pages that can be printed before ink runs out.
❏ Ink Cartridge Information
You can view information about the ink cartridges that are
currently installed in the printer by clicking the Information
icon.
❏ Technical Support
You can access the Problem Solver HTML manual from
EPSON Status Monitor 3. If you encounter a problem, click
Technical Support in the EPSON Status Monitor 3 window.
7
7
7
7
7
7
7
7
7
7
7
7
Checking Printer Status and Managing Print Jobs for Windows
188
Chapter 8
Using the Printer Software for Macintosh
Printer Software Introduction
The printer software which comes with your printer includes a
printer driver and printer utilities. The printer driver lets you
choose from a wide variety of settings to get the best results from
your printer. The printer utilities help you check the printer and
keep it in top operating condition.
The printer driver settings and utilities appear in the following
dialog boxes.
Dialog Box
Settings and Utilities
Print
Media Type, Mode, Copies, Pages, Color
Page Setup
Paper Size, Paper Source, No Margins, Auto Cut,
Orientation, Rotate by 180 degrees, Double-Sided
Printing, Reduce or Enlarge, Printable Area
Layout
Fit to Page, Watermark, Multi-Page, Print Order
Utility
EPSON Status Monitor, Nozzle Check, Head Cleaning,
Print Head Alignment, Printer Information, Configuration
(dialog box)
These dialog boxes can be accessed as described below.
189
Dialog Box
How to Access
Print
Click Print on the File menu of your application or click
Options in the Page Setup dialog box.
Page Setup
Click Page Setup on the File menu of your application
Layout
Click the
Layout icon button in the Print dialog box
Using the Printer Software for Macintosh
Utility
Click the
dialog box
Utility icon button in the Print or Page Setup
In addition, you can access the dialog boxes below from the Print
dialog box.
Dialog Box
How to Access
Background
Printing
Click the
Background Printing icon button in the Print
dialog box
Preview
Click the
Preview icon button in the Print dialog box
and then click Preview
Save File
Click the
Preview icon button in the Print dialog box
until the Print button changes into the Save File button
and then click the Save File button.
In addition to the printer software information in this guide, you
can get more details by clicking the help icon in any of the dialog
boxes in the printer software.
If you encounter any problems when using the printer software,
refer to the EPSON Technical Support Web Site. To access the Web
site from the printer software CD-ROM, insert the CD in the
CD-ROM drive and double-click the EPSON icon, then select
Technical Support Web Site and click
.
8
8
8
8
8
8
8
8
8
Making Settings in the Print Dialog Box
You can make Media Type, Mode, Color, Copies, and Pages
settings in the Print dialog box. From this dialog box, you can also
access other dialog boxes, from which you can set the print time,
preview the document before printing, and save spool data as a
file. Refer to the appropriate section below.
8
8
8
Using the Printer Software for Macintosh
190
Making the Media Type setting
The Media Type setting determines what other settings are
available, so you should always make this setting first.
In the Print dialog box, select the Media Type setting that matches
the paper that is loaded in the printer. To find out what media
type you are using, find your media in the list below, and refer to
the corresponding media type under which it is grouped (shown
in larger type). For some media, there are several Media Type
settings from which to choose.
191
Using the Printer Software for Macintosh
Plain Paper
8
Plain paper
Envelopes
EPSON Premium Ink Jet Plain Paper (A4)
EPSON Bright White Ink Jet Paper (A4)
8
S041214
S041442
8
360 dpi Ink Jet Paper
EPSON 360 dpi Ink Jet Paper (A4)
S041059
EPSON Iron-On Cool Peel Transfer Paper (A4)
S041154
8
8
Photo Quality Ink Jet Paper
EPSON Photo Quality Ink Jet Paper (A4)
S041061
EPSON Photo Quality Ink Jet Cards (A6)
S041054
EPSON Photo Quality Ink Jet Cards (5 × 8”)
S041121
EPSON Photo Quality Ink Jet Cards (8 × 10”)
S041122
8
8
EPSON Photo Quality Self Adhesive Sheets (A4) S041106
EPSON Ink Jet Note Cards A6 (with envelopes)
S041147
EPSON Ink Jet Greeting Cards 5 × 8”
(with envelopes)
S041148
EPSON Ink Jet Greeting Cards 8 × 10”
(with envelopes)
S041149
8
8
8
Matte Paper-Heavyweight
EPSON Matte Paper-Heavyweight (A4)
S041256
EPSON Double-Sided Matte Paper
S041569
8
8
Using the Printer Software for Macintosh
192
Photo Paper
EPSON Photo Paper (A4)
S041140
EPSON Photo Paper (4 × 6”)
S041134
EPSON Photo Paper (100 × 150 mm)
S041255
EPSON Photo Paper (200 × 300 mm)
S041254
EPSON Panoramic Photo Paper (210 × 594 mm)
S041145
EPSON Photo Paper Cards (A4)
S041177
Premium Glossy Photo Paper
193
EPSON Premium Glossy Photo Paper (A4)
S041287
EPSON Premium Glossy Photo Paper
(100 mm × 8 M)
S041303
EPSON Premium Glossy Photo Paper
(210 mm × 10 M)
S041377
EPSON Premium Semigloss Photo Paper (A4)
S041332
EPSON Premium Semigloss Photo Paper
(100 mm × 8 M)
S041330
EPSON Premium Semigloss Photo Paper
(210 mm × 8 M)
S041336
Using the Printer Software for Macintosh
Photo Quality Glossy Film
EPSON Photo Quality Glossy Film (A6)
S041107
EPSON Photo Quality Glossy Film (A4)
S041071
EPSON Photo Stickers 16 (A6)
S041144
EPSON Photo Stickers 4 (A6)
S041176
8
8
8
ColorLife Photo Paper
EPSON ColorLife Photo Paper (A4)
8
S041560
Ink Jet Transparencies
EPSON Ink Jet Transparencies (A4)
8
S041063
8
CD-R
CD-R
8
Note:
The availability of special media varies by location. For the latest
information on media available in your area, contact EPSON customer
services. See “Regional Customer Services” on page 351 for details.
8
8
Making the Ink setting
The Ink setting allows you to print in color or black-and-white.
Click Color to print in color, or Black to print in black-and-white
or grayscale.
8
8
8
Using the Printer Software for Macintosh
194
Making the Mode setting
The Mode settings in the Print dialog box give you three levels of
control over the printer software, as explained below:
Automatic
This mode provides the quickest and easiest way to
start printing. See “Using the Automatic mode” on
page 196 for details.
PhotoEnhance
This mode lets you choose from a variety of
image-correction settings specially designed for
photos. See “Using the PhotoEnhance mode” on
page 196 for details.
Custom
This mode lets you choose from a list of ready-made
or personalized settings suited to the kind of
document that you want to print. When Custom is
selected, the Advanced button is enabled, allowing
you to access the Advanced dialog box. See “Using
the Custom mode” on page 198 for details.
In addition to making comprehensive Mode settings that affect
overall print quality, you can also modify individual aspects of
your printout using the settings contained in the Page Setup and
Layout dialog boxes. See “Making settings in the Page Setup
dialog box” on page 206 or “Making Settings in the Layout Dialog
Box” on page 220 for details.
195
Using the Printer Software for Macintosh
Using the Automatic mode
When Automatic is selected as the Mode setting in the Print
dialog box, the printer software takes care of all detailed settings
based on the current Media Type and Ink settings. To make the
Ink setting, see “Making the Ink setting” on page 194. To make
the Media Type setting, see “Making the Media Type setting” on
page 191.
8
8
8
8
8
Note:
Depending on the media selected in the Media Type list (while
Automatic is selected), a slider appears to the right of the Mode options
that lets you choose Quality, Speed or the middle level. Select Quality
when print quality is more important than speed.
8
8
8
Using the PhotoEnhance mode
The PhotoEnhance mode provides a variety of image-correction
settings that you can apply to your photos before printing.
PhotoEnhance does not affect your original data.
8
8
8
8
Using the Printer Software for Macintosh
196
Note:
❏ This mode is only available when printing 32-bit color data.
❏ Printing with PhotoEnhance selected may increase the time
required for printing, depending on your computer system and the
amount of data contained in your image.
You can select from the following settings.
Standard
This setting provides standard image correction for most
photos. Try this first.
People
This setting is best for photos of people.
Nature
This setting is best for outdoor scenery such as
mountains, skies, and oceans.
Soft Focus
This setting makes your photos look as if they were taken
with a soft-focus lens.
Sepia
This setting applies a sepia tone to your photos.
Selecting PhotoEnhance also enables the Digital Camera
Correction check box. Select this check box when you are
printing photos taken with a digital camera to give your printed
images the smooth, natural appearance of photographs taken
with a film camera.
197
Using the Printer Software for Macintosh
Using the Custom mode
Selecting Custom as the Mode option enables the Custom Settings
list, from which you can choose a ready-made setting designed
for printing text and graphs. Or, you can select ColorSync, a
color-matching method. You can also create and save your own
custom settings. For details on making your own custom settings
see “Making Advanced settings” on page 199.
8
8
8
8
8
8
By default, you can choose from the following:
Color-matching
method
Description
8
Advanced Photo
2880
This method enhances the realistic appearance of
your printouts.This setting is useful for printing photos
input with a digital device such as a digital camera
or scanner.
8
Economy
This setting is best for printing drafts of text.
ColorSync
This method automatically adjusts printout colors to
match the colors on your screen.
When you select a custom setting, other settings such as Print
Quality, Halftoning, and Color Management are made
automatically. Changes to these settings are reflected in the
display at the left side of the Print dialog box.
8
8
8
Follow the steps below to select a custom setting.
Using the Printer Software for Macintosh
8
198
1. Select Custom as the Mode setting in the Print dialog box.
This enables the Custom Settings list, located to the right of
the Custom radio button.
2. From the Custom Settings list, select the most appropriate
setting for the type of document or image that you want to
print.
3. Confirm that the Media Type and Ink settings in the Print
dialog box are correct. For details, see “Making the Ink
setting” on page 194 or “Making the Media Type setting” on
page 191.
Making Advanced settings
The settings in the Advanced dialog box give you complete
control over your printing environment. Use these settings to
experiment with new printing ideas or to fine-tune a range of
print settings to meet your individual needs. Once you are
satisfied with your new settings, you can give them a name and
add them to the Custom Settings list in the Print dialog box.
Follow the instructions below to make Advanced settings.
199
Using the Printer Software for Macintosh
1. Select Custom as the Mode setting in the Print dialog box and
then click Advanced. The Advanced dialog box opens.
8
8
8
8
8
2. Select a Media Type setting that is appropriate for the media
loaded in the printer. For details, see “Making the Media Type
setting” on page 191.
3. Choose Color or Black as the Ink setting.
8
8
8
4. Specify a Print Quality setting.
5. Make other settings as necessary. For details, see online help.
Note:
❏ The PhotoEnhance feature only affects images, not text or
graphs. For example, if Monochrome is selected from the
Tone list (enabled when PhotoEnhance4 is selected), only
the images in a document will be printed in monochrome. Any
colored text or graphs in the same document will be printed in
color.
❏ Some settings may be unavailable, depending on the Media
Type, Ink, and Print Quality settings that you make.
Using the Printer Software for Macintosh
200
8
8
8
8
6. Click OK to apply your settings and return to the Print dialog
box. To return to the Main menu without applying your
settings, click Cancel. To save your Advanced settings,
proceed to the next section.
Saving and deleting your settings
To save your Advanced settings in the Custom Settings list, click
Save Settings in the Advanced dialog box. The Custom Settings
dialog box appears.
Type a unique name (up to 16 characters) for your settings in the
Name text box, then click Save. Your Advanced settings will be
added to the Custom Settings list. You can save up to 10 different
custom settings.
Note:
❏ You cannot apply the names of EPSON ready-made settings or
color-matching methods to your custom settings.
❏ You cannot delete the ready-made settings or color-matching
methods from the Custom Settings list.
To delete a setting from the Custom Settings list, select it in the
Custom Settings dialog box and click Delete.
Using your saved settings
To use your saved settings, select Custom as the Mode setting in
the Print dialog box, then select your setting in the Custom
Settings list.
201
Using the Printer Software for Macintosh
If you change the Media Type or Ink settings while one of your
customized settings is selected in the Custom Settings list, the
selection shown in the list returns to Custom Settings. The
customized setting that was previously selected is not affected by
the change. To return to your customized setting, simply reselect
it in the list.
Making the Copies setting
To make the Copies setting, enter the number of copies that you
want to print in the Copies text box.
Making the Pages setting
To make the Pages setting, select either All or Range. If you select
Range, enter the appropriate range of pages in the Range text
boxes.
8
8
8
8
8
8
Setting the print time
8
You can specify the time that you want the printer to begin
printing your document. Follow the steps below.
1. Click the
Background Printing icon button in the Print
dialog box. The Background Printing dialog box opens.
8
8
8
8
2. Select On as the Background Printing option, if necessary.
Using the Printer Software for Macintosh
202
8
3. Select Urgent, Normal, Print at, or Hold as the Print Time
option.
If you select Print at, use the arrows beside the date and time
boxes to specify the date and time that you want to print the
document.
Note:
Make sure that the computer and printer are turned on at the date
and time you specify.
4. Click OK. The Background Printing dialog box closes.
5. In the Print dialog box, make sure that your print settings are
as you want them, then click Print.
Note:
You can check or change the priority of print jobs using the EPSON
Monitor3 utility. See “Using EPSON Monitor3” on page 245 for
details.
Previewing your printout
The Preview feature allows you to see how your document will
look before actually printing it. Follow these steps to preview
your document.
1. Make your printer driver settings.
2. Click the
Preview icon button in the Print dialog box. The
Print button changes into a Preview button.
Note:
Use the
Preview icon button to toggle between the
Print,
Preview, and
Save File modes. Click the icon button to select
the mode that you want. For information on the Save File mode, see
“Saving spool data as a file” on page 205.
203
Using the Printer Software for Macintosh
3. Click the Preview button. The Preview dialog box opens and
displays a preview of your document.
8
8
8
8
8
8
The Preview dialog box contains several icon buttons that you
can use to perform the following functions.
Edit
Watermark
Click this button to select, move, and
resize watermarks.
Zoom
Click this button to enlarge or reduce
the size of the previewed page.
Show/Hide
Printable Area
Click this button to display or hide the
borderlines which indicate the
printable area. The printer cannot
print anything which is outside of this
area.
Show/Hide
Watermark
Settings
Click this button to open the
Watermark Edit dialog box, where
you can add watermarks to the
document and change any of the
current watermark settings.
Using the Printer Software for Macintosh
204
8
8
8
8
8
8
Add page
Click these buttons to add or remove
selected pages from the list of pages
to be printed.
Remove page
4. If you are satisfied with the previewed image, click Print.
If you are not satisfied with the appearance of the image, click
Cancel. The Preview and Print dialog boxes close with the
current print settings preserved. Open the Print dialog box
again to make additional changes to the print settings.
Saving spool data as a file
You can save spool data as a file using the
Save File icon button
in the Print dialog box. This feature lets you use the saved spool
data to print the document at a later time simply by
double-clicking the saved file. Follow the steps below.
Note:
Use the
Preview icon button to toggle between the
Print,
Preview, and
Save File modes. Click the icon button to select the
mode you want.
1. Make your printer driver settings.
2. Click the
Preview icon button in the Print dialog box
repeatedly until the Print button changes into the Save File
button.
205
Using the Printer Software for Macintosh
3. Click the Save File button. The following dialog box appears.
8
8
8
4. Select the location where you want to save the file, then type
a file name in the Save As text box and click Save.
5. When you want to print the document, double-click the file
to open EPSON Monitor3, make sure that the correct
document is selected, then click the
Resume button to send
the data to the printer.
Making settings in the Page Setup dialog box
In the Page Setup dialog box, you can change the paper size,
specify the paper orientation, print on both sides of the paper,
rotate your document by 180 degrees, reduce or enlarge your
printout, and adjust the printable area.
8
8
8
8
8
8
8
8
8
Using the Printer Software for Macintosh
206
Choose Page Setup from the File menu of your application. The
Page Setup dialog box will appear.
You can make the following settings in the Page Setup dialog box:
Paper Size
Select the paper size that you want to use. If you
want to define a custom paper size, see “Defining a
custom paper size” on page 211.
Paper Source
Select the paper source you wish to use from the
following selections:
Auto Sheet Feeder:
Select this to leave a 3-mm margin on both the right
and the left sides of the paper. This option is
available when printing on normal paper.
Roll Paper:
Select this to leave a 3-mm margin on both the right
and the left sides of roll paper.
Manual Feed:
Select this to print on a matte board or CD-R loaded
in Front Sheet Feeder.
207
Using the Printer Software for Macintosh
No Margins
Check this box when you want to print with no
margins.
Sheet Feeder:
Select this to leave no margins on all four sides of the
paper. This option is available only when printing
with paper that is in the Paper size list.
Roll Paper:
Select this to leave no margins on all four sides of the
roll paper. This option is available only when printing
with paper that is on the Paper size list.
You can use the following media with this feature:
Photo Paper:
Panoramic, A4, 100 × 150 mm
Matte Paper-Heavyweight:
A4
8
8
8
8
8
Index Card:
5 × 8”
Note
If your application has margin settings, make sure
they are set to zero before printing.
When using this feature with Roll Paper, you need to
use your image-editing software to make the image
4 mm wider than the roll paper.
8
8
Printing with this feature selected takes longer than
for normal printing.
8
Because this feature enlarges the image to a size
slightly larger than the paper size when Sheet Feeder
is selected as the Paper Source setting, the portion
of the image that extends beyond the edges of the
paper will not be printed.
8
Print quality may decline in the top and bottom
areas of the printout, or the area may be smeared
when printing on media other than listed above. We
recommend printing a single sheet to check quality
before printing large jobs.
You cannot use this feature with the following
media: Photo Quality Glossy Film, Ink Jet
Transparencies, Iron-On Cool Peel Transfer Paper,
360 dpi Ink Jet Paper, CD-R.
Using the Printer Software for Macintosh
208
8
8
8
Auto Cut
If the cutter is attached, you can select the types of
cutting.
Not Cut:
No cutting with the cutter is done.
Single Cut:
The paper is cut at the boundary between images
(the boundary between pages). However, the
cutting position may shift slightly.
Double Cut:
If you have selected Single Cut and are unhappy
with the gap of the cutting position, select Double
Cut. In this mode, the space between images is
extended and the paper is cut twice inside this
space. By cutting twice, an 18 mm slip of paper is
left. Double Cut is selectable only when printing with
No Margins selected.
Note:
Use the cutter after you attach it and adjust the
cutting position. Refer to the “Cutting position
adjustment with Automatic Roll Paper Cutter” on
page 233 for more details about the cutting position
adjustment.
Auto Cut is selectable after the cutter is attached
and Roll Paper is selected as the Paper Source
setting.
If Auto Cut is not available even when Roll Paper is
selected as the Paper Source, the Auto Cutter
Attached setting has not been made in the printer
driver. Refer to the “Printer driver settings with
Automatic Roll Paper Cutter” on page 232 and
make the setting.
209
Orientation
Select Portrait (tall) or Landscape (wide) to change
the orientation of your printout. To print close to the
bottom of the page, select the Rotate by 180
degrees check box.
Double-Sided
Printing
Select the Double-Sided check box to print on both
sides of the paper. Select the Folded Booklet check
box to make single-fold booklets. For details, see
“Printing on both sides of the paper” on page 214.
Reduce or Enlarge
Use this setting to reduce or enlarge the size of your
image between 25% and 400%.
Using the Printer Software for Macintosh
Printable Area
Use this option in the Printable Area Box to adjust the
total area available for printing when Sheet Feeder
and Manual Feed Slot is selected as the Paper
Source setting. Standard and Maximum are only
available when Automatic Sheet Feeder is selected.
This feature is not available when No Margins or Roll
Paper is selected.
To center the printout, select Centered. To increase
the printable area at the bottom edge from 14 mm
to 3 mm, select Maximum.
Note:
The print quality may decline at the edges of the
printout when Maximum is selected as the Printable
Area setting. Before printing large jobs using this
setting, print a single sheet to confirm quality.
When Maximum is selected, make sure that the
paper loaded in the sheet feeder is not curled.
Do not select Maximum while using Premium Glossy
Photo Paper. If you select Maximum when printing
on Premium Glossy Photo Paper, your printout may
be smeared in the expanded area (between 14 mm
and 3 mm from the bottom edge).
8
8
8
8
8
8
8
8
8
8
8
8
Using the Printer Software for Macintosh
210
Roll Paper Option
The Roll Paper Option settings are only available
when Roll Paper is selected as the Paper Source
setting. These features are not available when
Automatic Sheet Feeder or Manual Feed is
selected.
The settings are as described below.
Banner Mode:
Select this mode when you want to print multi-page
data as continuous data on the roll paper, rather
than as individual pages. When this check box is
selected, the Save roll paper check box is enabled.
Cut Sheet Mode:
Select this mode when you want to print multi-page
data as individual pages, rather than as continuous
data. When this check box is selected, the Print
page frame check box is enabled.
Save roll paper:
Select this check box when you want to save roll
paper. When this check box is selected, the blank
portion of the last page of your document is not fed
through the printer. This feature is only available
when Not Cut and Banner Mode are selected, and
not available when cutting with the cutter.
Print page frame:
Select this check box to print a line on the roll paper
between pages in a multi-page document to
indicate where the paper should be cut. This feature
is useful when it is unclear where the page breaks
should be. This feature is only available when Not
Cut and Cut Sheet Mode are selected, and not
available when cutting with the cutter.
Defining a custom paper size
You can define a custom paper size. To do so, you can either create
a new paper size, or base your custom paper size on a pre-existing
paper size. Refer to the appropriate section below.
211
Using the Printer Software for Macintosh
Creating a new paper size
If the appropriate paper size is not included in the Paper Size list
in the Page Setup dialog box, follow the steps below to define a
new custom paper size.
1. In the Page Setup dialog box, click Customize. The following
dialog box appears.
8
8
8
8
8
8
8
2. To define a new paper size, click New. The dialog box updates
to allow you to enter a name for the new size.
8
8
8
8
8
3. Type a unique name for the paper size in the Paper Size list.
Using the Printer Software for Macintosh
212
4. Specify the measurement unit as either inch or cm.
5. Enter the width and the height of your paper by typing the
text in the appropriate box.
6. Specify the margins by typing in the Margin input boxes or
by manipulating the preview image.
7. Click OK. You return to the Page Setup dialog box.
You can define up to 100 paper sizes. The paper size names you
create will appear in the Paper Size list in the Page Setup dialog
box.
To delete a custom paper size, click Customize in the Page Setup
dialog box, select the paper size from the list in the Custom Paper
dialog box, and click Delete.
Copying a pre-existing paper size to use as a template
Follow the steps below to copy an existing paper size to use as a
template.
1. Select the existing paper size to copy and click Copy.
2. Specify the measurement unit as either inch or cm.
3. Specify the margins by typing in the Margin input boxes or
by manipulating the preview image.
4. Click OK.
213
Using the Printer Software for Macintosh
Printing on both sides of the paper
The EPSON Stylus Photo 950 supports double-sided printing.
There are two types of double-sided printing available. Standard
double-sided printing allows you to print the odd-numbered
pages first. Once these pages are printed, they can then be
reloaded to print the even-numbered pages onto the opposite side
of the paper. Folded Booklet double-sided printing allows you to
make single-fold booklets. Refer to the appropriate section below.
Note:
❏ The double-sided printing feature is not available when the printer
is accessed over a network, or is used as a shared printer.
❏ Depending on the media type, stacks of up to 30 sheets can be loaded
into the sheet feeder during double-sided printing.
8
8
8
8
8
❏ Only use media types which are suitable for double-sided printing.
Otherwise, the printout quality may deteriorate.
8
❏ Depending on the type of paper and the amount of ink used to print
text and images, ink may bleed through to the other side of the paper.
8
❏ The surface of the paper may be smeared during the double-sided
printing.
8
Standard double-sided printing
Follow the steps below to print odd and even numbered pages
onto opposite sides of the sheet.
8
8
8
8
Using the Printer Software for Macintosh
214
1. Select the Double-Sided Printing check box in the Page Setup
dialog box. For information on accessing the Page Setup
dialog box, see “Making settings in the Page Setup dialog
box” on page 206.
2. Click the Margins button. The following dialog box will
appear.
3. Specify the edge of the paper where the binding will be
placed. You can choose between Left, Top, and Right.
4. Specify the width of the binding margin using the Binding
Margin text box. You can specify any width from 3 mm to 30
mm.
Note:
The actual binding margin may vary from specified settings
depending on your application. Experiment with a few sheets to
examine actual results prior to printing the entire job.
215
Using the Printer Software for Macintosh
5. Click OK to return to the Page Setup dialog box, then click OK
to save your settings.
6. Load paper in the sheet feeder, then send the print job from
your application. Instructions for generating the
even-numbered pages will be displayed while the
odd-numbered pages are output.
8
8
8
7. Follow the instructions to reload the paper, or reload the
paper as shown in the illustration below.
Note:
❏ The paper may curl during printing due to the amount of ink
used. Should this occur, slightly curl the sheets in the opposite
direction prior to reloading them into the printer.
❏ Align the sheet stack by tapping its edges against a hard, flat
surface prior to reloading the stack into the printer.
8
8
8
❏ Follow the instructions provided when reloading the printouts.
Paper jams or improperly placed binding margins may occur if
the printouts are not reloaded correctly.
8
❏ In the event of a paper jam, refer to “Paper Does Not Feed
Correctly” on page 313.
8
8
8
8
8
Using the Printer Software for Macintosh
216
8. Once the paper is reloaded, click Resume to print the
even-numbered pages.
Folded Booklet double-sided printing
You can also make single-fold booklets using the double-sided
printing feature. To create a single-fold booklet, the pages that
appear on the outside (after the booklet is folded) are printed first.
The pages that will appear inside the booklet can then be printed
after the paper is reloaded into the printer as shown in the
illustration below.
✽
2
1
3
4
5
6
7
8
10 12
9 11
Single-fold booklet
✽ Binding Edge
217
Using the Printer Software for Macintosh
A booklet can be created by printing pages 1 and 4 on the first
sheet of paper, pages 5 and 8 on the second sheet of paper, and
pages 9 and 12 on the third sheet of paper. After these sheets are
reloaded into the sheet feeder, you can then print pages 2 and 3
on the back of the first sheet of paper, pages 6 and 7 on the back
of the second sheet of paper, and pages 10 and 11 on the back of
the third sheet of paper. The resulting pages can then be folded
and bound together into a booklet.
Use the following steps to create a booklet as described above.
1. Select the Double-Sided Printing check box in the Page Setup
dialog box, then select the Folded Booklet check box.
8
8
8
8
2. Click the Margins button. The Margins dialog box will
appear.
8
3. Specify the edge of the paper where the binding will be
placed. You can choose from Left, Top, and Right.
8
Note:
When Portrait is selected as the Orientation setting in the printer
driver, Left or Right binding positions are available. The Top
binding position is supported when Landscape is selected as the
Orientation setting.
8
4. Specify the width of the binding margin using the Binding
Margin text box. You can specify any width from 3 mm to 30
mm. The specified margin width will be used on both sides
of the fold. For example, if a 10-mm margin is specified, a
20-mm margin will be inserted (a margin of 10 mm will be
placed on each side of the fold).
8
8
8
8
8
Using the Printer Software for Macintosh
218
✽
✽✽
Portrait
Landscape
✽ Folding Edge
✽✽Margin
5. Click OK to return to the Page Setup dialog box, then click OK
to save your settings.
6. Make sure that paper is loaded in the sheet feeder and send
the print job from your application.
7. Instructions for printing the inside pages will be displayed
while the outside pages are output. Follow the on-screen
instructions for reloading the paper, or refer to the illustration
in the previous section titled “Standard double-sided
printing” on page 214.
Note:
❏ The paper may curl during printing due to the amount of ink
used. Should this occur, slightly curl the sheets in the opposite
direction prior to reloading them into the printer.
219
Using the Printer Software for Macintosh
❏ Align the sheet stack by tapping its edges against a hard, flat
surface prior to reloading the stack into the printer.
8
❏ Follow the instructions provided when reloading the printouts.
Paper jams or improperly placed binding margins may occur if
the printouts are not reloaded correctly.
8
❏ In the event of a paper jam, refer to “Paper Does Not Feed
Correctly” on page 313.
8
8. Once the paper is reloaded, click Resume to print the inside
pages.
9. Once printing is complete, fold the sheets and bind them
together using a stapler or other binding method.
8
8
8
Making Settings in the Layout Dialog Box
You can modify the page layout of your document using the
printer driver settings located in the Layout dialog box. To open
this dialog box, click Print on the File menu of your application,
then click the
Layout icon button in the Print dialog box.
8
8
8
8
8
8
Using the Printer Software for Macintosh
220
The Layout dialog box allows you to automatically match the
document size to the paper size, print two or four pages on a single
sheet of paper, print poster-size images by enlarging one page to
cover several sheets, place watermarks on documents, or specify
the printing order for your print job. Refer to the appropriate
section below.
Making the Fit to Page setting
You can proportionally enlarge or reduce the size of the image to
make it fit a selected paper size. To do this, select the Fit to Page
check box, then select the paper size in the Output Paper Size list.
Making Watermark settings
To print a watermark on your document, select the Watermark
check box in the Page Layout dialog box.
221
Using the Printer Software for Macintosh
Select the watermark that you want to print from the Name list,
then specify its position, size, color, and intensity. You can change
the position and size of the watermark by dragging it with your
mouse in the preview window at the left.
8
8
8
8
8
8
8
You can also add your own text-based or image-based
watermarks to the Name list. Follow these steps.
1. Click the Add/Del button beside the Name list. The following
dialog box appears.
8
8
8
8
8
Using the Printer Software for Macintosh
222
2. To use an image file as a watermark, click the Add PICT
button. Specify the desired image file, then click Open.
To create a text-based watermark, click the Add Text button.
Type the text in the Text box, select a font and a text style, then
click OK.
223
Using the Printer Software for Macintosh
3. The image file name or the watermark text appears in the
Mark Name list in the Watermark dialog box. To change the
name of an image watermark, click it in the list, then type a
new name. When a text watermark is selected in the Name
list, you can edit the text or change the font and text style by
clicking the Edit Text button.
8
8
8
8
8
4. Click OK to add your watermark to the Name list in the Page
Layout dialog box.
8
8
Making Multi-Page settings
Selecting the Multi-Page check box allows you to choose between
the N-up and Poster settings. Refer to the appropriate section
below.
8
8
8
8
8
Using the Printer Software for Macintosh
224
Making N-up settings
Select N-up as the Multi-Page setting in the Layout dialog box to
print two or four pages of your document on one sheet of paper.
When N-up is selected, you can make the following settings:
225
2 Pages
4 Pages
Prints two or four pages of your document on a
single piece of paper.
Page Order
Allows you to specify the order in which the
pages will be printed on the sheet of paper.
Print page frames
Prints frames around the pages printed on each
sheet.
Using the Printer Software for Macintosh
Making Poster settings
A single document page can be enlarged to cover 4, 9, or 16
printed sheets of paper. Select Poster as the Multi-Page setting to
print a poster-size image.
8
8
8
8
8
8
8
You can make the following settings.
8
1 page covers xx sheets
Specifies how many printed sheets of paper
the enlarged document page is to cover. You
can select 4, 9, or 16 pages.
Overlapping Alignment
Marks
Slightly overlaps the images and prints
alignment markers so that they can be
aligned more precisely.
Trim Lines
Prints border lines on the images to guide you
when trimming the pages.
8
Panel Selection
Click the panels you do not need to print, then
click the OK button to print the remaining
panels.
8
8
8
Using the Printer Software for Macintosh
226
If you only want to print a few of the panels without printing the
entire poster, click Panel Selection, then click the panels that you
do not wish to print, and then click OK. Only the panels that you
did not click will be printed.
Making Print Order settings
You can specify the printing order for your print job. When
printing multiple copies of your document, select Collate to print
one complete document set at a time. Select Reverse Order to
print your documents in reverse order, starting with the last page.
Using the Printer Utilities
EPSON printer utilities allow you to check the current printer
status and to perform printer maintenance from your computer.
To use the utilities, click the
Utility icon button in the Print or
Page Setup dialog box, then click the button for the utility that
you want to use.
227
Using the Printer Software for Macintosh
Note:
Do not use the Nozzle Check, Head Cleaning, or Print Head Alignment
utilities while printing is in progress; otherwise, your printout may be
marred.
8
Refer to the appropriate section below.
8
8
EPSON StatusMonitor
The StatusMonitor utility monitors the printer status. If it detects
a printer error, it will inform you with an error message.
8
You can also use this utility to check how much ink is remaining
before printing.
8
To use the StatusMonitor, click the EPSON StatusMonitor button
in the Utility dialog box. For details, see “Using EPSON
StatusMonitor” on page 242.
8
8
Nozzle Check
The Nozzle Check utility checks the print head nozzles for
clogging. Check the nozzles if you notice print quality has
declined and after cleaning to confirm that the print head nozzles
have been cleared. If the nozzle check indicates the print head
needs cleaning, you can access the Head Cleaning utility directly
from the Nozzle Check utility. For details, see “Checking the Print
Head Nozzles” on page 283.
8
8
8
8
8
Using the Printer Software for Macintosh
228
Head Cleaning
The Head Cleaning utility cleans the print head. You may need
to clean the print head if you notice print quality has declined.
Use the Nozzle Check utility first to confirm that the print head
needs to be cleaned. For details, see “Cleaning the Print Head” on
page 285.
Print Head Alignment
The Print Head Alignment utility can be used to improve the print
quality of your documents. The alignment of the print head may
need to be adjusted if vertical lines should appear out of
alignment or if white or black banding noise should appear in
your documents. Follow the on-screen instructions for using this
utility.
Through this utility the printer will output two different types of
test patterns that are used to check the print head alignment.
229
Using the Printer Software for Macintosh
The following images are examples of the first test patterns that
will be output by the printer.
8
8
8
8
8
8
8
From each pattern on the printed test sheet, choose the vertical
line that is aligned best. For each pattern, select the corresponding
line number from the appropriate drop-down list box in the Print
Head Alignment dialog box, then click Finish to put the new
settings into effect.
8
Note:
If you cannot find a line which is aligned correctly, select the number of
the line which is the closest to being correct and click Realignment.
The lines you selected will be reset to the center (number 8) position and
the alignment test sheet will be printed again.
8
8
8
8
Using the Printer Software for Macintosh
230
The following are examples of the second test patterns that will
be output by the printer.
From each pattern on the printed test sheet, choose the least
grainy one. For each pattern, select the corresponding pattern
number from the appropriate drop-down list box in the Print
Head Alignment box, then click Finish to put the new settings into
effect.
231
Using the Printer Software for Macintosh
Note:
If you cannot find a smooth pattern, select the number for the pattern
that is the least grainy and click Realignment. The gap adjustment
sheet will be printed again. If you can select a smooth pattern and do not
need to print the test pattern again, clear check boxes #1 ~ #3 on the right.
8
8
8
8
8
8
Printer and option information
This utility allows the printer driver to confirm printer
configuration information.
8
Printer driver settings with Automatic Roll Paper Cutter
8
If you attach the cutter, make the following settings in the printer
driver before using it. If you do not make these settings, the Roll
paper Auto Cut mode is not available.
8
8
8
8
Using the Printer Software for Macintosh
232
1. Select Auto Cutter Attached check box.
Note:
After you attach the cutter, make sure to adjust the cutting position
to improve its precision. In addition, if you use different Paper
Type/Paper Width roll paper, it is recommended that you use the
Auto Cut mode after adjusting the cutting position. Refer to the
“Cutting position adjustment with Automatic Roll Paper Cutter”
on page 233 for more details about the cutting position adjustment.
Cutting position adjustment with Automatic Roll Paper
Cutter
After you attach the cutter, make sure to adjust the cutting
position to improve its precision.
Note:
❏ Before doing the following, it is necessary to turn the printer on and
set the roll paper. Refer to “Loading the roll paper” on page 33 for
more details about the roll paper setting.
❏ If you want to maintain a precise cutting position, it is recommended
that you adjust the cutting position each time you change the type
or size (width) of roll paper.
233
Using the Printer Software for Macintosh
1. After making sure that the Auto Cutter Attached check box
is selected, click the Auto Cutter Adjustment button. The
Auto Cutter Adjustment dialog box opens.
8
8
8
8
8
Note:
If the Auto Cutter Adjustment button is not available, make sure
that the Auto Cutter Attached check box is selected. If it is not
selected, the Auto Cutter Adjustment button is not available. In
addition, you cannot use the cutter.
2. After making sure that the roll paper is set, click the Print
button. The cutting position adjustment pattern is printed and
cut off.
8
8
8
8
8
8
8
Using the Printer Software for Macintosh
234
3. By using the cut roll paper, check the most precisely printed
number among the color boundaries.
4. Select the number of the most precisely printed color
boundary form the list box. Click Finish to enable the
adjustment.
5. Click OK to close Auto Cutter Adjustment dialog box.
Configuration
Click this button to open the Configuration dialog box, where you
can change the method by which the StatusMonitor utility notifies
you when the printer status changes. For details, see “Using the
Configuration Settings dialog box” on page 243.
235
Using the Printer Software for Macintosh
Using Desktop Printing
8
With the Desktop Printing function, you can print easily by
dragging and dropping the file on a desktop printer icon or by
selecting a file on the desktop and choosing Print.
To setup the Desktop Printing function, follow the instructions
below.
Note:
You need Mac OS 8.5.1 or later to use the Desktop Printing function.
8
8
8
8
Installing the driver for Desktop Printing
1. Make sure that the printer is off. Turn on your Macintosh and
insert the printer software CD in the CD-ROM drive.
2. Double-click the Install Software folder to open it. Then
double-click the Installer icon.
8
8
3. Click Continue.
4. Choose Custom Install in the Installer and check the box for
Desktop Printing Printer Driver Package.
8
8
8
8
8
Using the Printer Software for Macintosh
236
5. Click Install.
6. Follow the on-screen instructions to install the driver.
Printing with the Desktop Printing function
To print with the Desktop Printing function, use one of the
following methods:
❏ Drag and drop the file you want to print on the printer icon
that appears on the desktop. This printer is automatically set
as the default printer. Then the application in which the file
was created opens and the Print dialog box appears.
❏ If the printer that you want to use for Desktop Printing is set
as the default printer, select the file you want to print on the
desktop, then choose Print from the File menu. The
application in which the file was last saved opens and the
Print dialog box appears.
❏ If the printer that you want to use for Desktop Printing is set
as the default printer, open the file you want to print, then
choose Print from the File menu in the application. The Print
dialog box appears.
For information on using the Print dialog box, see “Making
Settings in the Print Dialog Box” on page 190.
Note:
Printing with the Desktop Printing function may take longer.
To set the default printer, use one of the following methods:
❏ Select Chooser from the Apple menu and click the icon for
the printer you want to use. The printer becomes the default
printer and the Desktop Printing function becomes available.
237
Using the Printer Software for Macintosh
❏ Select the printer icon on the desktop. Then select Set Default
Printer from the Printing menu on the menu bar.
❏ Click the Printer icon on the control bar, then select the printer
from the printer list.
Note:
The following items are unavailable when printing with the Desktop
Printing function.
❏ Setting a print time from the Print dialog box
8
8
8
8
❏ Previewing your printout
8
❏ Saving spool data
❏ EPSON Monitor 3
If an error occurs, click Cancel to stop printing, or clear the error
and then click Continue to resume printing. Because you cannot
start the Ink Cartridge Replacement Utility during printing, the
How to button does not appear when ink is out. To replace an
empty ink cartridge, cancel printing and use the printer’s control
panel. For more information, see “Replacing an Empty Ink
Cartridge” on page 271.
8
8
8
8
Managing print jobs using the Desktop Printer
window
Using the Desktop Printer window, you can manage print jobs as
described below. To open the Desktop Printer window,
double-click the printer icon on the desktop.
8
8
8
Using the Printer Software for Macintosh
238
❏ Use the buttons below to hold, resume, set the print time, and
delete print jobs. Select the print job that you want to manage,
then click the appropriate button.
Hold
Pauses printing and keeps the current
print job at the top of the print queue
Resume
Resumes printing
Print time
Set the print time
Delete
Stops printing and deletes the print job
from the print queue
Setting the print time
The printer can be set to start printing at a specific time. Follow
the steps below to set the print time.
1. Click the
icon button in the Desktop Printer window. The
Set Print Time dialog box opens.
2. Select Urgent, Normal or At Time, as the Print Time option.
If you select At Time, use the arrows beside the date and time
boxes to specify the date and time that you want to print the
document.
239
Using the Printer Software for Macintosh
Note:
Make sure that the computer and printer are turned on at the date
and time you specify.
3. Click OK.
8
8
Using the Printing menu
8
You can stop printing, resume printing and set the default printer
from this menu.
8
Follow the instructions below:
1. Click the printer icon on the desktop. Printing appears on the
menu bar.
2. Open the Printing menu. The screen shown below appears.
8
8
8
8
3. Choose Start Print Queue to resume printing, Stop Print
Queue to stop printing, or Set Default Printer to select the
printer as the default printer.
8
8
Getting Information Through Online Help
Your printer software has an extensive online help feature, which
provides you with instructions on printing, making printer driver
settings, and using the printer utilities.
Using the Printer Software for Macintosh
240
8
8
To access online help, choose Print or Page Setup from the File
menu of your application. Then, click the
Help icon button.
241
Using the Printer Software for Macintosh
Chapter 9
Checking Printer Status and Managing
Print Jobs for Macintosh
9
9
9
Using EPSON StatusMonitor
EPSON StatusMonitor monitors the printer. If it detects a printer
error, it will inform you with an error message.
9
When the ink runs low or out, a How to button appears. Click
How to and EPSON StatusMonitor will lead you step-by-step
through the ink cartridge replacement procedure.
9
9
9
9
9
You can also use this utility to check ink levels before printing.
When open, EPSON StatusMonitor displays the amount of ink
remaining at the time it was opened. To update the ink level
information, click the Update button.
Accessing EPSON StatusMonitor
9
9
Follow the steps below to access EPSON StatusMonitor.
Checking Printer Status and Managing Print Jobs for Macintosh
9
242
1. Click Print or Page Setup on the File menu of your
application. The Print dialog box opens.
2. Click the
StatusMonitor icon button or click the
Utility
icon button and then the EPSON StatusMonitor button in the
Utility dialog box. The StatusMonitor dialog box opens.
Using the Configuration Settings dialog box
To change the way that the StatusMonitor utility monitors your
printer, or to change the way that your printer handles print jobs,
follow the steps below.
1. Click Print or Page Setup on the File menu of your
application.
2. Click the
243
Utility icon button.
Checking Printer Status and Managing Print Jobs for Macintosh
3. Click the Configuration button. The Configuration Settings
dialog box appears.
9
9
9
9
9
In the Configuration Settings dialog box, you can make the
following settings:
9
Error notification
Choose the method by which EPSON
StatusMonitor will notify you in case of an
error.
9
Warning
Choose the method by which EPSON
StatusMonitor will notify you if a warning
message becomes necessary.
9
Temporary Spool folder
Specify the folder in which print data will be
temporarily spooled.
Temporary High Speed
Copies folder
Specify the folder in which multiple-copy
print data will be temporarily stored.
Data will be sent to the
printer after being stored
on your disk.
Select this check box to prevent horizontal
banding in printouts that contain images by
having the computer temporarily store
image data on its hard drive. The computer
will then send the image data to the printer
as a whole rather than as rectangular
bands.
Check for errors before
starting to print.
9
9
9
Select this check box to have the printer
check for errors before starting to print.
Checking Printer Status and Managing Print Jobs for Macintosh
9
244
Check the ink level
before starting to print.
Select this check box to have the printer
check the ink levels before starting to print.
Using EPSON Monitor3
After you send a print job to the printer, you can use the EPSON
Monitor3 utility to check, cancel, or change the priority of print
jobs that are queued for printing. This utility also shows the status
of the job currently being printed.
Accessing EPSON Monitor3
To access EPSON Monitor3, follow these steps.
1. First, turn on Background Printing in the Chooser or in the
Background Printing dialog box.
2. Send a print job to the printer.
3. Select EPSON Monitor3 from the Application menu at the
right end of the menu bar. The EPSON Monitor3 dialog box
opens.
245
Checking Printer Status and Managing Print Jobs for Macintosh
Note:
You can also open EPSON Monitor3 by double-clicking the EPSON
Monitor3 icon in the Extensions folder.
9
9
Managing print jobs using EPSON Monitor3
Using EPSON Monitor3, you can manage print jobs as described
below:
9
❏ Use the buttons below to hold, resume, and delete print jobs.
Select the print job that you want to manage, then click the
appropriate button.
9
9
Hold
Pauses printing and keeps the current
print job at the top of the print queue
Resume
Resumes printing
9
Delete
Stops printing and deletes the print job
from the print queue
9
❏ Click Stop Print Queue to stop printing. Click Start Print
Queue to resume printing.
9
❏ Use the buttons below to start the printer utilities.
9
Print head
cleaning
Starts the Print Head Cleaning utility
StatusMonitor
Starts EPSON StatusMonitor, which
displays the amount of ink remaining
❏ Double-click a file in the list to preview it (this function is
disabled when you are printing the ESC/P command file).
❏ Double-click Copies to change the number of copies of the
selected print job that will be printed.
Checking Printer Status and Managing Print Jobs for Macintosh
246
9
9
9
❏ Click the Show details arrow to open an extension at the
bottom of the EPSON Monitor3 dialog box similar to the one
below. The extension displays detailed information on the
selected document’s printer software settings.
Changing the priority of print jobs
To change the priority of print jobs in a print queue, follow the
steps in this section.
Note:
You can also change the priority of print jobs whose print times were
previously set in the printer software’s Background Printing dialog box.
1. In the Document Name column, select the print job for which
you want to change the priority.
247
Checking Printer Status and Managing Print Jobs for Macintosh
2. Click the Show details arrow to open an extension at the
bottom of the EPSON Monitor3 dialog box, similar to the one
below.
9
9
9
9
9
9
3. From the Priority list, select Urgent, Normal, Hold, or Print
Time.
Note:
If you select Print Time, a dialog box opens where you can specify
the date and time that the document will print. Make sure that your
printer and computer are turned on at the specified time.
9
9
9
9
9
9
Checking Printer Status and Managing Print Jobs for Macintosh
248
Chapter 10
Setting Up Your Printer on a Network
For Windows Me, 98, and 95 Users
This section tells you how to set up your printer so that other
computers on a network can use it.
First, you need to set up the printer as a shared printer on the
computer to which the printer is connected. Then, you must add
the printer to each computer that will access it through the
network.
Note:
This section describes how to use your printer as a shared printer on a
network. To connect your printer directly to a network without setting
it up as a shared printer, consult your network administrator.
Setting up your printer as a shared printer
To share a printer with other computers on a network, follow the
steps below to configure the computer to which the printer is
connected.
1. Click Start, point to Settings, then click Control Panel.
2. Double-click the Network icon.
3. Click the File and Print Sharing button.
249
Setting Up Your Printer on a Network
4. Select the I want to be able to allow others to print to my
printer(s) check box and click OK.
10
10
10
10
5. In the Network dialog box, click OK.
10
6. In the Control Panel, double-click the Printers icon.
Note:
❏ If a dialog box requesting the insertion of the Windows Me, 98
or 95 CD-ROM appears, insert the CD in the CD-ROM drive
and follow the on-screen instructions.
❏ If a dialog box requesting that you to restart your computer
appears, do so. Then, open the Printers folder, and continue
from step 7.
7. Select the icon for your printer in the Printers folder, then click
Sharing on the File menu.
10
10
10
10
10
10
10
Setting Up Your Printer on a Network
250
8. Select Shared As, then type the printer information as
required and click OK.
Accessing the printer through a network
To use your printer from other computers on a network, you must
first add the printer to each computer that will access it. Follow
the steps below.
Note:
Your printer must be set up as a shared resource on the computer to
which it is directly connected before you can access it from another
computer. For instructions, see “Setting up your printer as a shared
printer” on page 249.
1. Click Start, point to Settings, and click Printers.
2. Double-click the Add Printer icon. The Add Printer Wizard
opens.
251
Setting Up Your Printer on a Network
3. Click Next.
10
4. Select Network printer, then click Next.
10
10
10
10
5. On the next screen, click Browse.
10
6. Double-click the icon of the computer that is directly
connected to the printer. Then, click the icon for the
appropriate printer.
10
10
10
10
10
10
7. Click OK and follow the on-screen instructions.
Setting Up Your Printer on a Network
252
Note:
To monitor the status of a shared printer, you must install EPSON
Status Monitor 3 on each computer that will access the printer. See
“Installing EPSON Status Monitor 3” on page 253 for
instructions.
Installing EPSON Status Monitor 3
To monitor the status of a printer accessed through a network,
you must install EPSON Status Monitor 3 on each computer that
will access the printer. Follow the steps below.
1. Insert the printer software CD in the CD-ROM drive. If the
Installer dialog box does not appear, double-click SETUP.EXE
in the CD-ROM.
2. Select Install EPSON Status Monitor 3, and click
.
3. Follow the on-screen instructions.
For Windows XP, 2000 and NT 4.0 Users
This section tells you how to set up your printer so that other
computers on the network can use it.
Note:
❏ This section is written for small network users only. If you are on a
large network and would like to share your printer, consult your
network administrator.
❏ To install software programs in Windows 2000/NT 4.0, it is
necessary to log on as a user with administrative privileges (a user
who belongs to the Administrators group).
253
Setting Up Your Printer on a Network
❏ To install software programs in Windows XP, it is necessary to log
on with a Computer Administrator account. You cannot install
software programs if you log on as a Limited account user. After
you install Windows XP, the user account is set as a Computer
Administrator account.
First, you need to set up the printer as a shared printer on the
computer to which the printer is connected. Then, you must add
the printer to each computer that will access it through the
network.
10
10
10
10
Setting up your printer as a shared printer
To share a printer with other computers on a network, follow the
steps below to configure the computer to which the printer is
connected.
Note:
The images that are provided in the following section pertain to Windows
2000.
1. For Windows 2000 and NT 4.0 users, click Start, point to
Settings, and click Printers.
10
10
10
10
For Windows XP users, click Start, then click Control Panel,
then click Printers and Other Hardware, then click Printers
and Faxes.
2. Right-click the icon for your printer, then click Sharing.
3. Select Shared as (for Windows NT 4.0 users, select shared)
then type a name for the shared printer.
10
10
10
10
Setting Up Your Printer on a Network
254
Note:
Do not use spaces or hyphens in the printer name.
If you want Windows XP, 2000 or NT 4.0 to automatically
download printer drivers to computers that are running
different versions of Windows, click Additional Drivers and
select the environment and the operating systems for the
other computers. Click OK, then insert the printer software
CD in the CD-ROM drive. Select WINNT40 for Windows
NT 4.0 or WIN9X for Windows Me, 98 or 95. Click OK to install
the additional drivers.
4. Click OK, or click Close if you installed additional drivers.
Accessing the printer through a network
To use your printer from other computers on a network, you must
first add the printer to each computer that will access it. Follow
the steps below.
255
Setting Up Your Printer on a Network
Note:
Your printer must be set up as a shared resource on the computer to
which it is directly connected before you can access it from another
computer. For instructions, see “Setting up your printer as a shared
printer” on page 254.
1. For Windows 2000 and NT 4.0 users, click Start, point to
Settings, and click Printers.
For Windows XP users, click Start, then click Control Panel,
then click Printers and Other Hardware, then click Printers
and Faxes.
2. Double-click the Add Printer icon. The Add Printer Wizard
opens.
3. Click Next.
10
10
10
10
10
10
4. Select Network printer, then click Next.
10
10
10
10
10
5. On the next screen, click Next.
10
Setting Up Your Printer on a Network
256
6. Double-click the icon of the computer that is directly
connected to the printer. Then, click the icon for the
appropriate printer.
7. Click Next and follow the on-screen instructions.
Note:
❏ Depending on the operating system and the configuration of the
computer to which the printer is connected, the Add Printer
Wizard may prompt you to install the printer driver from the
printer software CD-ROM. In this case, click the Have Disk
button and follow the on-screen instructions.
❏ To monitor the status of a shared printer, you must install
EPSON Status Monitor 3 on each computer that will access the
printer. See “Installing EPSON Status Monitor 3” on page 257
for instructions.
Installing EPSON Status Monitor 3
To monitor the status of a printer accessed through a network,
you must install EPSON Status Monitor 3 on each computer that
will access the printer. Follow the steps below.
257
Setting Up Your Printer on a Network
1. Insert the printer software CD in the CD-ROM drive. If the
installer dialog box does not appear, double-click SETUP.EXE
in the CD-ROM.
2. Select Install Software, and click
.
3. Click Advanced and select only EPSON Status Monitor 3,
then click Install.
4. Follow the on-screen instructions.
10
10
10
10
For Macintosh Users
This section tells you how to set up the printer so that you can use
it on an AppleTalk network. By setting up your printer as a shared
printer, your local printer is connected to the network and can be
used by other computers.
First, you need to set up the printer as a shared printer on the
computer to which the printer is connected. Then, you must
specify the network path to the printer from each computer that
will use it, and install the printer software on those computers.
10
10
10
10
10
Setting up your printer as a shared printer
To share a printer with other computers on an AppleTalk
network, follow the steps below to configure the computer to
which the printer is connected.
10
1. Turn on the printer.
10
10
Setting Up Your Printer on a Network
258
2. Choose Chooser from the Apple menu and click the icon for
your printer. Then, select the port to which the printer is
connected.
3. Click the Setup button. The Printer Sharing Setup dialog box
opens.
4. Select the Share this Printer check box, then type the printer
name and password information as necessary.
5. Click OK. The name of the shared printer appears in the port
list in the Chooser.
6. Close the Chooser.
259
Setting Up Your Printer on a Network
Accessing the printer through a network
To access your printer from other computers on a network, follow
the steps in this section for each computer that will access the
printer.
10
10
1. Turn on your printer.
10
2. Install the printer software from the printer software
CD-ROM.
3. Choose Chooser from the Apple menu. Then, click the
appropriate printer icon and select the printer port that you
want to use from the Select a printer port list.
Note:
Only printers that are connected to your current AppleTalk zone
are available.
10
10
10
10
10
10
10
10
10
Setting Up Your Printer on a Network
260
If the following dialog box appears, enter the password for
the printer, then click OK.
4. Select the appropriate Background Printing radio button to
turn background printing on or off.
5. Close the Chooser.
261
Setting Up Your Printer on a Network
Chapter 11
11
Increasing the Print Speed
11
General tips
Just as printing at a high resolution requires more processing time
than printing at a low resolution, printing in color takes longer
than printing in black-and-white because the volume of data in a
color document is much greater. For this reason, it is important
to be selective in your use of color if you also require a fast print
speed.
However, even if your document requires the highest resolution
and extensive use of color—for example, when you are printing
a camera-ready composite that includes color photographs—it
may still be possible to optimize the print speed by adjusting other
printing conditions. Keep in mind that changing some conditions
to increase the print speed may also lower print quality.
The following table shows the factors that inversely affect print
speed and print quality (increasing one will decrease the other).
Print quality
Print speed
Printer
software
settings
Data
characteristics
11
11
11
11
11
11
Lower
Faster
Higher
Slower
Menu or
dialog
box
11
Print Quality
Economy,
Normal
Photo
Advanced
dialog box
11
High Speed
On
Off
Finest Detail
Off
On
Image size
Small
Large
Resolution
Low
High
Increasing the Print Speed
11
–
11
262
The table below shows the factors related to print speed only.
Print speed
Printer
software
settings
Hardware
resources
Software status
Faster
Slower
Menu or
dialog box
Ink
Black
Color
Advanced
dialog box,
Main menu
(Windows),
Print dialog
box
(Macintosh)
Flip Horizontal*
Off
On
Advanced
dialog box
Collate*
Off
On
Reverse Order*
Off
On
Paper menu
(Windows),
Layout
dialog box
(Macintosh)
System speed
Faster
Slower
HDD Through
put 12
Large
Small
Memory free
space
Large
Small
Running
applications
One
Many
–
–
* Varies depending on the application that you are using.
** Grayscale means using black ink only to print varying shades of gray, ranging
from pure black to pure white.
263
Increasing the Print Speed
Using the Speed & Progress dialog box
(Windows only)
11
Windows users can make certain print speed settings in the Speed
& Progress dialog box. Click the Speed & Progress button on
your printer software’s Utility menu. The following dialog box
appears.
11
11
11
11
11
11
11
11
The settings related to print speed are listed below.
Note:
The specific features available in the printer software vary depending on
the printer model and the version of Windows that you are using.
11
11
High Speed Copies
To print multiple copies of your document faster, select High
Speed Copies. This speeds up printing by using your hard disk
space as a cache when printing multiple copies of your document.
Increasing the Print Speed
264
11
EPSON Printer Port
For printer models that use the parallel port, select this check box
to enable the EPSON printer port, which is optimized for EPSON
printers, instead of the Windows default printer port. This speeds
up the data transfer rate to EPSON printers. Parallel port users
can further increase print speed by enabling DMA transfer, as
explained below.
Enabling DMA transfer
If your computer has a parallel port which supports ECP mode,
you can enable DMA transfer to speed up printing. See your
computer manual to determine if it supports ECP mode and DMA
transfer.
To determine whether you need to enable DMA transfer, compare
the message below the EPSON Printer Port check box to this table,
and take the recommended action.
265
Message
Action
High Speed (DMA)
Transfer enabled.
DMA transfer is already enabled. Click OK
to close the dialog box.
For higher data transfer
rates, use DMA Transfer.
Follow the steps below this table to enable
DMA transfer.
Increasing the Print Speed
Message
Action
(No message)
Your system's parallel port setting does not
allow DMA transfer. However, if you change
the parallel port setting to ECP or Enhanced
using your computer's BIOS Setup program,
you may be able to use DMA transfer.
Consult your computer manual or
computer manufacturer for instructions.
Once you change the parallel port setting,
follow the steps below this table to enable
DMA transfer.
Note:
Before you run the BIOS Setup program,
uninstall the printer software using
Add/Remove Programs in the Control
Panel. After running the BIOS Setup
program, reinstall the printer software.
11
11
11
11
11
If you want to enable DMA transfer, follow the steps below.
1. For Windows Me, 2000, NT 4.0, 98 and 95 users double-click
the My Computer icon on your desktop and then Control
Panel.
For Windows XP users, click Start, then click Control Panel.
2. For Windows Me, 2000, NT 4.0, 98 and 95 users double-click
the System icon and click the Device Manager tab.
For Windows XP users, click Performance and
Maintenance, then click System, then click Hardware tab,
then click Device Manager.
3. Double-click the Ports (COM & LPT) icon and then the LPT1
icon. If your printer is connected to a port other than LPT1,
double-click the appropriate port icon.
11
11
11
11
11
11
11
Increasing the Print Speed
266
4. Click the Resources tab, then clear the Use automatic
settings check box. Write down the Input/Output Range
settings shown in the resource settings box.
5. Select a basic configuration setting from the Setting based on
list that uses the same Input/Output Range settings as those
you wrote down in Step 4, and make sure that the Direct
Memory Access channel and Interrupt Request numbers are
allocated and displayed. Confirm also that the Conflicting
device list text box shows No conflicts.
6. Click OK to save the settings.
7. Reopen the Speed & Progress dialog box to verify whether
DMA transfer has been enabled.
Note:
You may not be able to use DMA transfer on some computers even
after you make the settings explained above. Consult your computer
maker for information on the DMA transfer capability of your
computer.
267
Increasing the Print Speed
Using Port Configuration (Windows NT 4.0 only)
Note:
Port settings are complicated and should only be made by an experienced
user with administrative privileges.
If your computer has a parallel port that supports ECP mode, you
can make certain print speed settings in the Port Configuration
dialog box. Before making settings, make sure that ECP mode has
been selected in your computer settings. For details about ECP
mode, see your computer manual.
To access the Port Configuration dialog box, click the Start button,
point to Settings, and click Printers. Then, select your printer and
click Properties on the File menu. The printer driver opens. Click
the Ports tab, then click Configure Port. The following dialog box
appears.
11
11
11
11
11
11
11
11
11
11
11
Click the LPT port tab for the port to which your printer is
connected, then click the Port Configuration button.
Increasing the Print Speed
11
268
Note:
If your printer is connected to LPT1, only the LPT1 tab is available.
The available settings are as follows:
Resource settings (IRQ and DMA)
If you have connected your printer to LPT2 or LPT3, making IRQ
and DMA settings here may speed up printing. Click Change
setting and input the same configuration numbers for IRQ and
DMA which you have made with your expansion board. See your
computer documentation to determine the settings for IRQ and
DMA.
Use DMA transfer
Using DMA transfer to send print data to the computer may help
speed up printing. If the Use DMA Transfer check box is not
enabled, you must first enable DMA transfer in your computer
settings. For details, see your computer documentation.
269
Increasing the Print Speed
Chapter 12
12
Printing with PRINT Image Matching
12
How is PRINT Image Matching used?
The PRINT Image Matching function can be utilized if this
EPSON printer is used to print images from input devices, such
as digital cameras, loaded with the PRINT Image Matching
function. Print commands are attached to image data for printing
if photos are taken with an input device loaded with the PRINT
Image Matching function.
Note:
❏ See the relevant input device instruction manual for details
concerning the use of devices loaded with the PRINT Image
Matching function.
12
12
12
❏ Please check with the input device manufacturer to determine
whether it is loaded with the PRINT Image Matching function.
12
12
Media for which PRINT Image Matching is
enabled
12
PRINT Image Matching is enabled when the following media are
used:
Plain Paper/EPSON Premium Ink Jet Plain Paper/
EPSON Bright White Ink Jet Paper/EPSON Photo Paper/
EPSON Matte Paper-Heavyweight/
EPSON Premium Glossy Photo Paper/
EPSON Premium Semigloss Photo Paper/
EPSON ColorLife Photo Paper
Printing with PRINT Image Matching
12
270
12
12
12
Chapter 13
Replacing Ink Cartridges
Replacing an Empty Ink Cartridge
This printer uses ink cartridges equipped with IC chips. The IC
chips accurately monitor the amount of ink used by each
cartridge. Even if a cartridge is removed and later reinserted, ink
reserves can be measured and fully utilized. Please note that some
ink will be consumed during reliability-confirmation operations
each time the cartridge is inserted into the printer.
You can replace an ink cartridge using the printer’s control panel
or using the Status Monitor utility. Refer to the appropriate
section below for instructions.
w
Warning:
❏ Keep ink cartridges out of the reach of children. Do not allow
children to drink from or otherwise handle the cartridges.
❏ Be careful when you handle the used ink cartridges, as there
may be some ink surrounding the ink supply port. If ink
should come into direct contact with your skin, wash the area
thoroughly with soap and water. If ink should come into
direct contact with your eyes, flush them immediately with
water. If you should feel discomfort or if vision is impaired,
see a doctor immediately.
271
Replacing Ink Cartridges
c
Caution:
❏ EPSON recommends the use of genuine EPSON ink
cartridges. Other products not manufactured by EPSON
may cause damage to your printer not covered by EPSON's
warranties.
❏ Leave the old cartridge installed in the printer until you have
obtained a replacement. Otherwise, ink remaining in the
print head nozzles may dry out.
❏ Do not refill the ink cartridges. The printer calculates the
amount of ink remaining using an IC chip on the ink
cartridge. Even if the cartridge is refilled, the amount of ink
remaining will not be recalculated by the IC chip and the
amount of ink available for use will not change.
Note:
❏ You cannot continue printing with one ink cartridge empty, even if
the other cartridges still contain ink. Before printing, replace the
empty cartridge.
❏ In addition to the ink used during document printing, ink is
consumed during the print head cleaning operation, during the
self-cleaning cycle which is performed when the printer is turned
on, and during ink charging when the ink cartridge is installed in
the printer.
❏ The amount of ink consumed will vary among colors depending on
the media you use, the printer driver settings you make, and the data
you print.
For more information about ink cartridges, see “When handling
the ink cartridges” on page 11.
13
13
13
13
13
13
13
13
13
13
13
13
Replacing Ink Cartridges
272
Using the printer's control panel
The printer’s indicator lights will inform you when it is time to
obtain a replacement ink cartridge and when it is time to replace
an empty cartridge.
This table describes the status of the lights on your printer and
the required actions they may indicate.
Lights
Action
F
H
Obtain a replacement black (T0331), cyan (T0332),
magenta (T0333), yellow (T0334), light cyan (T0335) or
light magenta (T0336) ink cartridge.
O
H
Replace the empty ink cartridge.
O = on, F = flashing
To replace an ink cartridge using the H ink button, follow the steps
below.
1. Make sure that the printer is on. The P power light should be
on, but not flashing.
2. Press the H ink button. The print head moves to the ink
cartridge check position, the P power light begins to flash,
and the H ink out light begins to flash or remains on.
273
Replacing Ink Cartridges
Note:
Do not press the H ink button for more than three seconds. The print
head cleaning command will be initiated if the H ink button is
pressed for more than three seconds.
13
13
13
13
13
c
Caution:
Do not move or force the print head by hand, as this may
damage the printer. Always press the H ink button to move
the print head.
3. Open the printer cover. Make sure that the ink cartridge that
needs to be replaced is indicated by the _ mark.
13
13
13
13
13
13
13
Replacing Ink Cartridges
274
4. Press the H ink button again. If multiple ink cartridges are
empty, the print head will move to indicate each of the empty
ink cartridges as described in step 3. Otherwise, the print head
will automatically move to the ink cartridge replacement
position.
5. Open the cartridge cover. Pinch the sides of the ink cartridge
that you want to replace.
The illustration shows
replacement of the
black ink cartridge.
6. Lift the cartridge out of the printer and dispose of it properly.
Do not take the used cartridge apart or try to refill it.
275
Replacing Ink Cartridges
7. Remove the new ink cartridge from its protective bag. Place
the ink cartridge vertically into the cartridge holder. Then,
push the ink cartridge down until it clicks into place. Do not
apply excessive force to the cartridge.
13
13
13
13
13
13
13
13
13
13
13
13
Replacing Ink Cartridges
276
c
Caution:
❏ Be careful not to break the hooks that are on the side of
the ink cartridge when you remove it from the package.
❏ Do not remove or tear the label on the cartridge;
otherwise, ink will leak.
❏ Do not remove the green IC chip from the side of the
cartridge. Installing a cartridge without an IC chip can
damage the printer.
❏ Do not touch the green IC chip on the side of the
cartridge. This can damage the ink cartridge.
Do not touch this part
❏ If an ink cartridge should be removed temporarily from
the printer, be sure to protect the ink supply area of the
ink cartridge from dirt and dust. Store the ink cartridge
in the same environment as the printer. When storing
the cartridge, be sure that it stands as shown in the
illustration above (the label that identifies the color of the
ink cartridge should be displayed on the top of the
cartridge). The valve in the ink supply port is designed
to contain any excess ink that may be released. However,
careful handling is recommended. Do not touch the
supply port of the ink cartridge or its surrounding area.
❏ Be sure to always install an ink cartridge into the printer
immediately following the removal of an old ink
cartridge. Failure to promptly install the ink cartridge
277
Replacing Ink Cartridges
may cause the print head to dry out and render it unable
to function properly.
8. When you are finished replacing the cartridge, close the
cartridge cover.
9. Close the printer cover, then press the H ink button. The
printer moves the print head and begins charging the ink
delivery system. This process takes about one minute to
complete. When the ink charging process is finished, the
printer returns the print head to its home position. The
P power light will stop flashing and remain on, and the H ink
out light will turn off.
13
13
13
13
13
13
13
13
c
Caution:
The P power light will continue to flash while the printer is
charging ink. Never turn off the printer while this light is
flashing.
Note:
If the ink end error occurs after the print head moves to its home
position, in ink cartridge may not be installed properly. Press the
ink button again, and reinstall the ink cartridge until it clicks into
place.
Replacing Ink Cartridges
278
13
13
13
13
Using the Status Monitor
You can monitor the remaining ink levels and view on-screen
instructions for replacing a low or empty ink cartridge using the
EPSON Status Monitor 3 (for Windows) or EPSON Status Monitor
(for Macintosh).
When an ink cartridge is low or empty, click the How to button
in the EPSON Status Monitor window. Follow the on-screen
instructions to replace the cartridge.
For more information on using EPSON Status Monitor, see
“Using EPSON Status Monitor 3” on page 186 for Windows, or
“Using EPSON StatusMonitor” on page 242 for Macintosh.
Replacing an Ink Cartridge
Using the printer’s control panel
In some circumstances, you may need to replace an ink cartridge
before it is empty.
If the H ink out light is flashing or is on, replace the empty ink
cartridge as described in “Replacing an Empty Ink Cartridge” on
page 271.
To replace an ink cartridge before the H ink out light flashes or the
Status Monitor notifies you that the cartridge is empty, follow the
instructions in this section.
c
279
Caution:
Do not remove the cartridge from the printer until you are ready
to replace it with the other one.
Replacing Ink Cartridges
1. Make sure that the printer is on. The P power light should be
on, but not flashing.
2. Press the H ink button. The print head will move to the ink
cartridge replacement position, and the P power light will
begin to flash.
Note:
Do not press the H ink button over three seconds. Otherwise the
printer starts cleaning the print head.
c
Caution:
Do not move or force the print head by hand, as this may
damage the printer. Always press the H ink button to move
the print head.
3. Open the printer cover.
4. Open the cartridge cover. Pinch the sides of the ink cartridge
that you want to replace, lift the cartridge out of the printer
and dispose of it properly.
w
Warning:
If ink should come into direct contact with your skin, wash
the area thoroughly with soap and water. If ink should come
into direct contact with your eyes, flush them immediately
with water. If you should feel discomfort or if vision is
impaired, see a doctor immediately. Do not take the used
cartridge apart or try to refill it.
5. Remove the new ink cartridge from its protective bag. Place
the ink cartridge in a vertical orientation into the cartridge
holder. Push the ink cartridge down until it clicks into place.
Do not apply excessive force to the cartridge.
13
13
13
13
13
13
13
13
13
13
13
13
Replacing Ink Cartridges
280
c
Caution:
❏ Be careful not to break the hooks on the side of the ink
cartridge when you remove it from the package.
❏ Do not remove or tear the label on the cartridge;
otherwise, ink will leak.
❏ Do not remove the green IC chip from the side of the
cartridge. Installing a cartridge without an IC chip can
damage the printer.
❏ Do not touch the green IC chip on the side of the
cartridge. This can damage the ink cartridge.
Do not touch this part
❏ Whenever an ink cartridge is removed, be sure to protect
the ink supply area from dirt and dust. Store the ink
cartridge in the same environment as the printer. When
storing the cartridge, be sure that it stands as shown in
the illustration above (the label that identifies the color
of the ink cartridge should be displayed on the top of the
cartridge). Although the valve of the ink supply port is
designed to prevent spills and contamination, special
care is recommended. Do not touch the ink supply port
or its surrounding area.
❏ Be sure to always install an ink cartridge into the printer
immediately following the removal of the current ink
cartridge. If the ink cartridge is not installed promptly,
281
Replacing Ink Cartridges
the print head may dry out rendering it unable to print.
13
6. When you are finished replacing the cartridges, close the
cartridge and the printer cover.
7. Press the H ink button. The print head will move and the ink
delivery system will begin to charge. This process takes about
one minute to complete.
When the ink charging process is finished, the printer returns
the print head to its home position, the P power light stops
flashing and remains on.
13
13
13
13
13
13
13
13
13
13
13
Replacing Ink Cartridges
282
Chapter 14
Maintenance
Checking the Print Head Nozzles
If you find that the printed image is unexpectedly faint or dots in
the printed image are missing, you may be able to identify the
problem by checking the print head nozzles.
You can check the print head nozzles from your computer using
the Nozzle Check utility in the printer software, or from the
printer itself by using the printer’s control panel buttons.
Using the Nozzle Check utility
Refer to the appropriate section below to use the Nozzle Check
utility.
Note:
Do not use the Nozzle Check utility while printing is in progress;
otherwise, your printout may be marred.
For Windows users
Follow the steps below to use the Nozzle Check utility.
1. Make sure that A4 or Letter size paper is loaded in the sheet
feeder.
2. Access the printer software. For instructions, see “Accessing
the printer software” on page 131.
3. Click the Utility tab and click the Nozzle Check button.
283
Maintenance
4. Follow the on-screen instructions.
14
For Macintosh users
Follow the steps below to use the Nozzle Check utility.
14
1. Access the Print or Page Setup dialog box and click the
Utility icon button, then click the Nozzle Check button in
the Utility dialog box.
2. Follow the on-screen instructions.
14
14
Using the control panel buttons
Follow the steps below to check the print head nozzles using the
control panel buttons.
1. Turn off your printer.
2. Make sure that A4 or Letter size paper is loaded in the sheet
feeder.
3. To turn on the printer, hold down the m paper (➀ in the
illustration below) button and the P power button (➁ in the
illustration below).
14
14
14
14
14
14
14
14
Maintenance
284
4. Release the P power button first. When the nozzle check
starts, release the m paper button.
The printer prints a nozzle check pattern. Below are sample
printouts.
Good sample
Print head needs to be cleaned
The above sample is in black and white, but the actual test prints in color
(CMYK).
If the nozzle check page does not print satisfactorily, there is a
problem with the printer. This could be a clogged ink nozzle or a
misaligned print head. See the next section for details on cleaning
the print head. For information on aligning the print head, see
“Aligning the Print Head” on page 291. The nozzle check page
also indicates the amount of ink remaining in each cartridge. The
percentages that appear on the nozzle check page will reflect an
approximate value.
Cleaning the Print Head
If you find that the printed image is unexpectedly faint or dots in
the printed image are missing, you may be able to solve these
problems by cleaning the print head, which ensures that the
nozzles are delivering ink properly.
285
Maintenance
You can clean the print head from your computer using the Head
Cleaning utility in the printer software, or from the printer itself
by using the printer’s control panel buttons.
Note:
❏ Print head cleaning consumes some ink. To avoid wasting ink, clean
the print head only if print quality declines; for example, if the
printout is blurry or the color is incorrect or missing.
❏ Use the Nozzle Check utility first to confirm that the print head
needs to be cleaned. This saves ink.
❏ When the H ink out light is flashing or on, you cannot clean the print
head. You must replace the appropriate ink cartridge first.
❏ Do not start the Head Cleaning or Nozzle Check utility while
printing is in progress; otherwise, your printout may be marred.
14
14
14
14
14
14
Using the Head Cleaning utility
Refer to the appropriate section below to use the Head Cleaning
utility.
14
14
For Windows users
Follow the steps below to clean the print head using the Head
Cleaning utility.
1. Make sure that the printer is turned on and the H ink out light
is off.
Note:
If the H ink out light is flashing, you cannot clean the print head.
You need to replace the appropriate ink cartridge first.
2. Access the printer software. For instructions, see “Accessing
the printer software” on page 131.
Maintenance
286
14
14
14
14
3. Click the Utility tab and click the Head Cleaning button.
4. Follow the on-screen instructions.
The P power light flashes while the printer performs the
cleaning cycle.
c
Caution:
Never turn off the printer while the P power light is flashing.
Doing so may damage the printer.
5. When the P power light stops flashing, click Print Nozzle
Check Pattern in the Head Cleaning dialog box to confirm
that the head is clean and to reset the cleaning cycle.
Below are nozzle check patterns:
Good sample
Print head needs to be cleaned
The above sample is in black and white, but the actual check pattern prints
in color.
If the nozzle check page does not print satisfactorily, you may
need to repeat the head cleaning and print the nozzle check
pattern again.
287
Maintenance
If print quality hasn’t improved after repeating this procedure
four or five times, turn the printer off and leave it alone overnight.
Then do the nozzle check again, and repeat the head cleaning if
necessary.
If the print quality still has not improved, some of the ink
cartridges may be old or damaged and may need to be replaced.
To replace an ink cartridge before it is empty, see “Replacing an
Ink Cartridge” on page 279.
If print quality remains a problem after replacing the ink
cartridges, contact your dealer.
14
14
14
Note:
To maintain print quality, we recommend printing a few pages at least
once every month.
14
14
For Macintosh users
Follow the steps below to clean the print head using the Head
Cleaning utility.
1. Make sure that the printer is turned on and the H ink out light
is off.
2. Access the Print or Page Setup dialog box and click the
Utility icon button, then click the Head Cleaning button.
3. Follow the on-screen instructions.
Caution:
Never turn off the printer while P power light is flashing.
Doing so may damage the printer.
Maintenance
14
14
14
14
The P power light flashes while the printer performs the
cleaning cycle.
c
14
288
14
14
4. When the P power light stops flashing, click the
Confirmation button in the Head Cleaning dialog box to
print a nozzle check pattern and to reset the cleaning cycle.
Use the check pattern to confirm that the head is clean. Refer
to page 148 to see a sample of the nozzle check pattern.
If print quality has not improved after repeating this procedure
four or five times, turn the printer off and leave it alone overnight.
Then do the nozzle check again, and repeat the head cleaning if
necessary.
If the print quality still has not improved, some of your ink
cartridges may be old or damaged and may need to be replaced.
To replace an ink cartridge, see “Replacing an Ink Cartridge” on
page 279.
If print quality remains a problem after replacing the ink
cartridges, contact your dealer.
Note:
To maintain print quality, we recommend printing a few pages at least
once every month.
Using the control panel buttons
Follow the steps below to clean the print head using the control
panel buttons.
1. Make sure that the P power light is on and the H ink out light
is off. Then, hold down the H ink button for three seconds.
289
Maintenance
Note:
If the H ink out light is flashing or on, do not clean the print head.
Cleaning the print head will start the ink cartridge replacement
process. If you do not intend to replace an ink cartridge, press the
H ink button again to return the print head to its home position.
14
14
14
14
14
The printer starts cleaning the print head and the P power
light begins flashing.
c
Caution:
Never turn off the printer while the P power light is flashing.
Doing so may damage the printer.
2. When the P power light stops flashing, print a nozzle check
pattern to confirm that the head is clean and to reset the
cleaning cycle.
If print quality has not improved after repeating this procedure
four or five times, turn the printer off and leave it alone overnight.
Then do the nozzle check again, and repeat the head cleaning if
necessary.
14
14
14
14
14
If the print quality still has not improved, some of your ink
cartridges may be old or damaged and may need to be
replaced.To replace an ink cartridge before it is empty, see
“Replacing an Ink Cartridge” on page 279.
Maintenance
14
14
290
If print quality remains a problem after replacing the ink
cartridges, contact your dealer.
Note:
To maintain print quality, we recommend printing a few pages at least
once every month.
Aligning the Print Head
If you notice a misalignment of vertical lines or horizontal
banding, you may be able to solve this problem from your
computer using the Print Head Alignment utility in your printer
software. Refer to the appropriate section below.
Note:
Do not start the Print Head Alignment utility while printing is in
progress; otherwise, your printout may be marred.
For Windows users
Follow the steps below to align the print head using the Print
Head Alignment utility.
1. Make sure that A4 or Letter size plain paper is loaded in the
sheet feeder.
2. Access the printer software. For instructions, see “Accessing
the printer software” on page 131.
3. Click the Utility tab, then click the Print Head Alignment
button.
4. Follow the on-screen instructions to align the print head.
291
Maintenance
For Macintosh users
Follow the steps below to align the print head using the Print
Head Alignment utility.
1. Make sure that A4 or Letter size plain paper is loaded in the
sheet feeder.
2. Access the Print or Page Setup dialog box and click the
Utility icon button, then click the Print Head Alignment
button.
3. Follow the on-screen instructions to align the print head.
14
14
14
14
14
Cleaning the Printer
14
To keep your printer operating at its best, clean it thoroughly
several times a year as follows.
1. Unplug the printer’s power cord.
14
14
2. Remove any paper from the sheet feeder.
3. Use a soft brush to carefully clean away all dust and dirt from
the sheet feeder.
14
4. If the outer case or the inside of the sheet feeder is dirty, clean
it with a soft, clean cloth dampened with mild detergent. Keep
the printer cover closed to prevent water getting inside.
14
5. If the inside of the printer accidentally gets soiled with ink,
wipe it off with a damp cloth.
14
w
Warning:
Be careful not to touch the gears inside of the printer.
Maintenance
14
292
c
Caution:
❏ Never use alcohols or thinners to clean the printer; these
chemicals can damage the components as well as the case.
❏ Be careful not to get water on the printer mechanism or
electronic components.
❏ Do not use a hard or abrasive brush.
❏ Do not spray the inside of the printer with lubricants.
Unsuitable oils can damage the mechanism. Contact your
dealer or a qualified service person if lubrication is needed.
Transporting the Printer
If you need to transport your printer, carefully prepare and repack
it as described below using the original box (or a similar box that
the printer fits snugly into) and packing materials. Follow the
steps below.
c
Caution:
❏ When storing or transporting the printer, don’t tilt it, stand
it on its side or turn it upside down. Otherwise ink may leak
from the cartridge.
❏ Leave the ink cartridges installed. Removing the cartridges
dehydrate the print head and may prevent the printer from
printing.
1. Open the printer cover and make sure that the print head is
in the home (far right) position. If not, turn on the printer and
wait until the print head returns to the home position. Close
the printer cover, then turn off and unplug the printer.
2. Disconnect the interface cable from the printer.
293
Maintenance
3. Remove the paper from the sheet feeder and remove the paper
support.
4. Open the printer cover again. Secure the ink cartridge holder
to the printer with tape as shown below, then close the printer
cover.
14
14
14
14
14
14
5. Push in the output tray.
14
6. Attach the protective materials to both sides of the printer.
14
7. Repack the printer and power cord in the original box.
8. Keep the printer level during transport.
14
Updating and Uninstalling Software
14
See this section when upgrading your Windows operating
system, updating the printer software in Windows XP,
Windows Me, Windows 2000 or Windows NT 4.0, or when
uninstalling the printer driver from Windows or Macintosh.
Maintenance
14
14
294
Updating to Windows Me or 98
If you have upgraded your computer’s operating system from
Windows 95 to Windows Me or 98, you must uninstall your
printer software and then install it again. See “Uninstalling the
printer driver” on page 295 for instructions.
Updating the printer software in Windows XP, Me,
2000 or NT 4.0
When you update the printer software in Windows XP, Me, 2000
or NT 4.0 please be sure to uninstall the previous printer software
before you install the new software. Installing over the existing
printer software results in a failure to update. See “Uninstalling
the printer driver” on page 295 for details on uninstalling the
printer software.
Uninstalling the printer driver
For Windows
Note:
❏ To uninstall software programs in Windows 2000/NT 4.0, it is
necessary to log on as a user with administrative privileges (a user
who belongs to the Administrators group).
❏ To uninstall software programs in Windows XP, it is necessary to
log on with a Computer Administrator account. You cannot
uninstall software programs if you log on as a Limited account user.
1. Turn off the printer and disconnect the cable from the printer.
2. For Windows Me, 2000, NT 4.0, 98 and 95 users, click the Start
button and select Settings, then choose Control Panel.
295
Maintenance
For Windows XP users, click the Start button, then choose
Control Panel.
14
3. Double-click the Add/Remove Programs icon and select
EPSON Printer Software from the list. Then, click the
Add/Remove button. For Windows XP and 2000, click
Change/Remove.
14
4. Select the EPSON Stylus Photo 950 icon and click OK.
14
5. Select OK.
Note:
If you are using the USB port to connect the printer in Windows Me or
98, you need to uninstall an additional USB component. Select EPSON
USB Printer Device from the list in the Add/Remove Programs utility,
then click the Add/Remove button and click OK when a message
prompts you to restart the computer. If EPSON USB Printer Device
does not appear in the Add/Remove Programs list, double-click
EPUSBUN.EXE on the printer software CD-ROM, then follow the
on-screen instructions.
For Macintosh
1. Turn on your Macintosh and insert the software CD in the
CD-ROM drive. The EPSON printer software disk will open
automatically.
2. If separate folders containing installer icon for several
languages appear, double-click the folder for your preferred
language. Double-click the Installer icon in Disk 1 folder
inside Printer Driver folder.
14
14
14
14
14
14
14
14
14
Maintenance
296
3. After the initial screen, click Continue. The following dialog
box will appear.
4. Select Uninstall from the pull-down menu at the top left, then
click Uninstall.
Uninstalling EPSON Print CD
For Windows
1. For Windows Me, 2000, NT 4.0, 98 and 95 users, click the Start
button and select Settings, then choose Control Panel.
For Windows XP users, click the Start button, then choose
Control Panel.
2. Double-click the Add/Remove Programs icon and select
EPSON Print CD from the list. Then, click the Add/Remove
button. For Windows XP and 2000, click Change/Remove.
3. Select Remove, then click OK.
For Macintosh
Drag the EPSON Print CD folder with all files in it from the hard
disk into the trash.
297
Maintenance
Chapter 15
15
Troubleshooting
15
Diagnosing the Problem
If you are connecting via the USB interface and are having
difficulty printing, the problem may be related to your USB
connection. Refer to “Correcting USB Problems” on page 320 for
details.
If your problem is not USB related, troubleshooting printer
problems is best handled in two easy steps: first diagnose the
problem, then apply likely solutions until the problem is fixed.
The information that you need to diagnose and solve most
common problems is provided by online problem solving, the
printer’s control panel, the EPSON Status Monitor utility, or by
running a printer operation check. Refer to the appropriate
section below.
If you have a specific problem relating to print quality, a printout
problem not related to print quality, or a paper feeding problem,
or if the printer does not print at all, refer to the appropriate
section in this chapter.
To solve a problem, you may need to cancel printing. For details,
see “Cancelling Printing” on page 325.
15
15
15
15
15
15
15
15
15
Online problem solving
You can use online problem solving to diagnose and solve most
of the problems you may encounter. Refer to the appropriate
section below.
Troubleshooting
298
15
For Windows users
The Problem Solver HTML manual provides you with tips to help
solve any problems you may encounter when using your printer.
If you encounter a problem, access the Problem Solver in one of
the following ways:
❏ From the Windows Start menu
Click Start, point to Programs (For Windows Me, 2000,
NT 4.0, 98 and 95 users) or All Programs (For Windows XP
users) and then to EPSON, then click ESP950 Problem Solver.
❏ From Status Monitor 3
Click Technical Support in the Status Monitor 3 dialog box.
❏ From your printer software
Click Technical Support on the Main menu of the printer
software.
If you cannot solve your problem using the Problem Solver,
contact Technical Support for assistance by clicking the
Technical Support Web Site link in the Problem Solver.
For Macintosh users
EPSON's Technical Support Web Site provides help with
problems that cannot be solved using the troubleshooting
information in your printer documentation.
To access Technical Support, insert the CD in the CD-ROM drive
and double-click the EPSON icon, then select Technical Support
Web Site and click .
299
Troubleshooting
Error indicators
You can identify many common printer problems using the lights
on your printer’s control panel. If your printer stops working and
the lights are on or flashing, use the following table of panel light
patterns to diagnose the problem, then follow the recommended
corrective measures.
Lights
O
m
F
m
Paper out
Load paper in the sheet feeder,
then press the m paper button.
Printer will resume printing and the
light will turn off.
Paper jam
Paper has jammed in the
printer.
Press the m paper button to eject
the jammed paper. If the error
does not clear, open the printer
cover and remove all of the paper
inside, including any torn pieces.
Then, reload the paper in the
sheet feeder and press the
m paper button to resume
printing.
Automatic Roll Paper Cutter error
The roll paper cannot be
cut with the cutter.
F
H
Remove the roll paper from the
printer. See “Removing Roll Paper
from the Printer” on page 51 for
details.
Ink low
The ink cartridge is nearly
empty.
15
15
Problem and Solution
No paper is loaded in the
printer.
15
Obtain a replacement black
(T0331), cyan (T0332), magenta
(T0333), yellow (T0334), light cyan
(T0335), light magenta (T0336) ink
cartridge. To determine which
cartridge is nearly empty, check
the ink level using EPSON Status
Monitor 3 (Windows) or EPSON
StatusMonitor (Macintosh).
Troubleshooting
300
15
15
15
15
15
15
15
15
15
F
H
Different ink color
The color of the installed
ink cartridge is different
from the previous one.
O
H
Remove the ink cartridge and
install the same color ink cartridge
as the previous one.
Ink out
The ink cartridge is
empty or not installed.
Replace the black (T0331), cyan
(T0332), magenta (T0333), yellow
(T0334), light cyan (T0335), light
magenta (T0336) ink cartridge
with a new one. If the ink end error
occurs after the print head moves
to its home position, the ink
cartridge may not be installed
properly. Reinstall the ink cartridge
until it clicks into place. See
“Replacing Ink Cartridges” on
page 271 for details.
Wrong cartridge
The currently installed ink
cartridge is not
compatible with the
printer.
O
O
P
H
Replace the incompatible
cartridge using the appropriate
black (T0331), cyan (T0332),
magenta (T0333), yellow (T0334),
light cyan (T0335), light magenta
(T0336) ink cartridge. See
“Replacing Ink Cartridges” on
page 271 for details.
Incorrectly installed ink cartridge
The ink cartridge is not
installed correctly.
If the print head is at the home
position, press the H ink button to
move the print head to the ink
cartridge replacement position.
Remove and reinsert the ink
cartridge. Then continue with ink
cartridge installation.
If the print head is at the ink
cartridge replacement position,
remove and reinsert the ink
cartridge. Then continue with ink
cartridge installation.
301
Troubleshooting
FP
Fm
OH
Carriage error
The print head carriage
is obstructed by jammed
paper or other foreign
material and cannot
return to the home
position.
Turn off the printer. Open the
printer cover and remove any
paper or other obstructions from
the paper path by hand. Then,
turn the printer back on.
If the error does not clear, contact
your dealer.
Unknown printer error
FP
Fm
FH
An unknown printer error
has occurred.
Turn off the printer and contact
your dealer.
O = on, N = off, F = flashing
15
15
15
15
15
EPSON Status Monitor
The EPSON Status Monitor utility provides status messages and
a graphic display showing the current status of the printer.
If a problem occurs while printing, an error message appears in
the Progress Meter window.
When the ink is out, click the How To button in the EPSON Status
Monitor or Progress Meter window and EPSON Status Monitor
will lead you step-by-step through the cartridge replacement
procedure.
15
15
15
15
Running a printer operation check
If you are unable to determine the source of the problem,
performing a printer operation check can help you determine
whether the problem comes from the printer or the computer.
To print a printer operation check page, follow these steps.
Troubleshooting
15
302
15
15
1. Make sure both the printer and computer are turned off.
2. Disconnect the cable from the printer’s interface connector.
If you use the parallel interface, unlock the wire clips on both
sides of the interface connector and remove the ground
connector, if necessary. Then, disconnect the cable from the
printer’s interface connector.
3. Make sure that A4 or Letter size paper is loaded in the sheet
feeder.
303
Troubleshooting
4. Hold down the m paper button and press the P power button
to turn on the printer. Then, release only the P power button.
When the printer starts the operation check, release the
m paper button.
15
15
15
15
15
The printer prints an operation check page which includes the
version of your printer’s ROM, the ink counter code, and a nozzle
check pattern.
Compare the quality of the printed check page with the sample
shown below. If there are no print quality problems, the printer
itself is fine and the problem probably lies with the printer
software settings, the application settings, the interface cable (be
sure to use a shielded cable), or the computer itself.
15
15
15
15
15
The above sample is in black and white, but the actual check page prints
in color (CMYK).
15
15
Troubleshooting
304
If the check page does not print satisfactorily, there is a problem
with the printer. For example, if bands appear in the check pattern
as shown below, this could mean a clogged ink nozzle or a
misaligned print head.
The above sample is in black and white, but the actual check pattern prints
in color.
Print Quality Problems
If you are having print quality problems, try the solutions offered
in this section.
Horizontal banding
Try one or more of these solutions:
❏ Make sure that the printable side of the paper is face up in the
sheet feeder.
❏ Run the Head Cleaning utility to clear any clogged ink
nozzles.
❏ Run the Print Head Alignment utility.
❏ Clear all customized settings by selecting Automatic as the
Mode setting on your printer software’s Main menu
(Windows) or in the Print dialog box (Macintosh).
305
Troubleshooting
❏ Check the H ink out light. If the light is flashing, replace the
appropriate ink cartridge. See “Replacing Ink Cartridges” on
page 271.
❏ Make sure that Maximum is not selected as the Printable Area
setting in your printer software. When this setting is selected,
banding may occur in the expanded area.
❏ Make sure that the Media Type selected in the printer
software is appropriate for the type of media loaded in the
printer.
❏ Make sure the MicroWeave check box is selected when
available in the Advanced dialog box. For Windows users, see
“Making Advanced settings” on page 142 for details. For
Macintosh users, see “Making Advanced settings” on page
199.
Vertical misalignment or banding
15
15
15
15
15
15
Try one or more of these solutions:
15
❏ Make sure that the printable side of the paper is face up in the
sheet feeder.
15
❏ Run the Print Head Alignment utility.
15
❏ Clear the High Speed check box in the Advanced dialog box.
For Windows users, see “Making Advanced settings” on page
142 for details. For Macintosh users, see “Making Advanced
settings” on page 199.
15
❏ Run the Head Cleaning utility to clear any clogged ink
nozzles.
❏ Make sure that the Media Type setting selected in the printer
software is appropriate for the type of media loaded in the
printer.
Troubleshooting
15
306
15
❏ Make sure the MicroWeave check box is selected when
available in the Advanced dialog box. For Windows users, see
“Making Advanced settings” on page 142 for details. For
Macintosh users, see “Making Advanced settings” on page
199.
Incorrect or missing colors
Try one or more of these solutions:
❏ Change the Color setting in your printer software to Color.
For instructions, see “Using the Automatic mode” on page
138 for Windows or “Using the Automatic mode” on page 196
for Macintosh.
❏ Adjust the color settings in your application or in your printer
software’s Advanced dialog box. For instructions, see
“Making Advanced settings” on page 142 for Windows or
“Making Advanced settings” on page 199 for Macintosh.
❏ Run the Head Cleaning utility. If colors are still incorrect or
missing, replace the color ink cartridge. If the problem
persists, replace the black ink cartridge. See “Replacing Ink
Cartridges” on page 271 for details.
❏ Do not use ink cartridges beyond the expiration date printed
on the cartridge package. Also, if the printer has not been used
for a long time, replace the ink cartridges. See “Replacing Ink
Cartridges” on page 271.
Blurry or smeared printout
Try one or more of these solutions:
❏ Make sure that you are using the appropriate printer driver
for your printer.
307
Troubleshooting
❏ Use only paper recommended by EPSON.
❏ Make sure that the printer is on a flat, stable surface that
extends beyond the printer base in all directions. The printer
will not operate properly if it is tilted.
❏ Make sure that your paper is not damaged, dirty, or too old.
Also, make sure that the printable side of the paper is face up
in the sheet feeder.
❏ Make sure that your paper is dry and that the printable side
is facing up. Also, make sure that you are using an acceptable
paper type. See “Paper” on page 336 for specifications.
❏ Clear all customized settings by selecting Automatic as the
Mode setting on your printer software’s Main menu
(Windows) or in the Print dialog box (Macintosh).
❏ If the paper is curled toward the printable side, flatten it or
curl it slightly toward the opposite side.
❏ Set the adjust lever to the ^ position, and make sure that the
Media Type setting in your printer driver is correct.
15
15
15
15
15
15
15
❏ Remove each sheet from the output tray as it is printed,
especially if you are using transparencies.
❏ If you are printing on glossy media or transparencies, place a
support sheet (or a sheet of plain paper) beneath the stack. Or,
load only one sheet at a time.
❏ Do not touch or allow anything to come into contact with the
printed side of transparencies or paper with shiny finishes.
After printing, documents that are printed on transparencies
or glossy media should not be handled for a few hours to
allow the ink to set.
❏ Run the Head Cleaning utility.
Troubleshooting
15
308
15
15
15
15
❏ Run the Print Head Alignment utility.
❏ Load and eject dry paper several times. If the problem
persists, ink may have leaked inside the printer, so wipe the
inside of the printer with a soft, clean cloth.
Wipe here
w
Warning:
Be careful not to touch the gears inside the printer.
Print quality does not improve after head
cleaning
If the quality of your printouts remains poor even after repeatedly
cleaning and aligning the print head, one or some of the ink
cartridges may be old or damaged and should be replaced.
To replace an ink cartridge before the Status Monitor notifies you
that the cartridge is empty, see “Replacing an Ink Cartridge” on
page 279.
Printout Problems Not Related to Print Quality
If one of the following problems has occurred, try the solutions
listed for the problem.
309
Troubleshooting
❏ Incorrect or garbled characters
15
❏ Incorrect margins
❏ Inverted image
15
❏ Blank pages print
15
❏ Printout has smears on the bottom edge
❏ Printing is too slow
15
Incorrect or garbled characters
15
Try one or more of these solutions:
❏ Make sure that you are using the appropriate printer driver
for your printer.
15
❏ Select your printer as the default printer in Windows.
15
❏ Windows Me, 98, and 95 users can clear any stalled print jobs
from the Spool Manager. For instructions, see “Using EPSON
Spool Manager” on page 326.
15
❏ Turn off the printer and computer. Make sure that the
printer’s interface cable is securely plugged in.
15
❏ If you are using Windows NT 4.0, try uninstalling the EPSON
Printer Port. Click Start, point to Programs and then to
EPSON Printers, then click EPSON Printer Port Uninstall.
Follow the on-screen instructions.
15
Incorrect margins
15
15
Try one or more of these solutions:
Troubleshooting
310
❏ Check the margin settings in your application. Make sure that
the margins are within the printable area of the page. See
“Paper” on page 336 for specifications.
❏ Check the settings on the Paper menu (Windows) or in the
Page Setup dialog box (Macintosh). Make sure the settings are
appropriate for the paper size you are using.
Inverted image
Clear the Flip Horizontal check box in the printer software, or turn
off the “Mirror” setting in your application. For instructions, see
online help for the printer software or for your application.
Macintosh users can refer to “Making Advanced settings” on
page 199 for details.
Blank pages print
Try one or more of these solutions:
❏ Make sure that you are using the appropriate printer driver
for your printer.
❏ Windows users can make sure that their printer is selected as
the default printer.
❏ Check the settings on the Paper menu (Windows) or in the
Page Setup dialog box (Macintosh). Make sure the settings are
appropriate for the paper size you are using.
❏ Run the Head Cleaning utility to clear any clogged nozzles.
After trying one or more of these solutions, run a printer operation
check to check your results. See “Running a printer operation
check” on page 302 for details.
311
Troubleshooting
Printout has smears on the bottom edge
❏ If the paper is curled toward the printable side, flatten it or
curl it slightly toward the opposite side.
❏ Set the adjust lever to the ^ position and clear the High
Speed check box in the Advanced dialog box of the printer
driver. The Advanced dialog box is accessible through the
Main menu (Windows) or the Print dialog box (Macintosh)
when Custom is selected as the Mode setting. To turn this
option off, you may also need to change the Print Quality
setting.
15
15
15
15
15
Printing is too slow
Try one or more of these solutions:
❏ Make sure that the Media Type setting in your printer
software is correct. For instructions, see “Making the Media
Type setting” on page 133 for Windows or “Making the Media
Type setting” on page 191 for Macintosh.
❏ Select Automatic as the Mode setting on your printer
software’s Main menu (Windows) or in the Print dialog box
(Macintosh) and then move the slider to Speed. For
instructions, see “Using the Automatic mode” on page 138 for
Windows or “Using the Automatic mode” on page 196 for
Macintosh.
❏ Close any applications that you are not using at the moment.
❏ If you upgraded from Windows 95 to Windows 98, uninstall
the printer software using Add/Remove programs in the
Control Panel, then install the software again.
15
15
15
15
15
15
15
Troubleshooting
312
❏ For printer models that use the parallel port, you can enable
DMA transfer if your computer supports ECP mode. See
“Enabling DMA transfer” on page 265.
Paper Does Not Feed Correctly
If one of the following problems has occurred, try the solutions
listed for that problem.
❏ Paper does not feed
❏ Multiple pages feed
❏ The paper jams
❏ Paper is not ejected fully or is wrinkled
❏ Paper does not feed correctly when using the double-sided
printing feature
Paper does not feed
Remove the stack of paper and make sure of the following:
❏ The paper is not curled or creased.
❏ The paper is not too old. See the instructions that came with
the paper for more information.
❏ The number of sheets in the paper stack does not exceed the
limit specified for that media. See “Loading capacities for
EPSON special media” on page 18 for details.
❏ The paper is not loaded above the arrow on the edge guide.
313
Troubleshooting
❏ Paper is not jammed inside the printer. If it is, remove the
jammed paper.
❏ The ink cartridges are not empty. Replace cartridges as
necessary. See “Print quality does not improve after head
cleaning” on page 309.
After trying the solutions above, load the paper again. Make sure
that you follow any special loading instructions that came with
your paper. See also “Paper Handling” on page 14.
15
15
15
15
Multiple pages feed
❏ Make sure that the paper stack fits under the arrow mark
located on the inside surface on the left edge guide.
❏ Make sure that the left edge guide is flush against the left edge
of the paper.
15
15
❏ If the paper is curled or folded, flatten it or curl it slightly
toward the opposite side.
15
❏ Remove the stack of paper and make sure that the paper is
not too thin. See “Paper” on page 336. Fan the edges of the
stack to separate the sheets, then reload the paper.
15
❏ If too many copies of a document are being printed, check the
Copies setting on the printer software’s Paper menu
(Windows) or in the Print dialog box (Macintosh) and in your
application. For instructions, see “Making Settings on the
Paper Menu” on page 148 for Windows or “Making Settings
in the Print Dialog Box” on page 190 for Macintosh.
15
15
15
15
Troubleshooting
314
The paper jams
Shut down the computer, then press the m paper button to eject
the jammed paper. If the error does not clear, open the printer
cover and remove all of the paper inside, including any torn
pieces. Then, reload the paper in the sheet feeder and press
m paper button to resume printing.
Note:
If you cannot remove a foreign object easily by yourself, do not use force
and do not disassemble the printer. Call your dealer for assistance.
If your paper jams frequently, make sure of the following:
❏ The paper is smooth, not curled or wrinkled.
❏ The paper is of high quality, loaded with the printable side up.
❏ The paper stack was fanned before loading.
❏ The paper is not loaded above the arrow on the left edge
guide.
❏ The number of sheets in the paper stack does not exceed the
limit specified for that media. See “Loading capacities for
EPSON special media” on page 18 for details.
❏ The left edge guide is adjusted to fit your paper.
❏ Make sure that the printer is on a flat, stable surface that
extends beyond the printer base in all directions. The printer
will not operate properly if it is tilted.
Paper is not ejected fully or is wrinkled
Try one or more of these solutions:
315
Troubleshooting
❏ If the paper does not completely eject, press the m paper
button, then open the printer cover and remove the paper.
Also, check the Paper Size setting in your application or
printer software.
❏ If the paper is wrinkled when it comes out, it may be damp
or too thin. Load a new stack.
Note:
Store any unused paper in its original package in a dry area. See “Paper”
on page 336 for specifications.
Paper does not feed correctly when using the
double-sided printing feature
15
15
15
15
15
If multiple pages are simultaneously misfed into the printer when
using the double-sided printing feature, remove the paper as
instructed in “Multiple pages feed” on page 314. If the paper that
was fed in error has not been creased or wrinkled, it may still be
usable. Reload only the usable paper properly into the printer.
15
If a paper jam should occur while using the double-sided printing
feature, remove the paper as instructed in “The paper jams” on
page 315. If multiple print jobs have been sent to the printer when
the paper jam occurs, check the page settings in your application
and confirm that the paper is loaded properly to ensure that no
pages are skipped and that the document is printed correctly.
15
15
15
15
CD-R Tray does not feed correctly
15
Make sure of the following:
❏ The front sheet feeder was set before setting the CD-R tray.
❏ The CD-R tray is inserted properly along the right side of the
front sheet feeder.
Troubleshooting
316
15
❏ The edge guide is set properly along the side of the CD-R tray.
❏ The CD-R tray is inserted firmly until the hollow of the CD-R
tray and the hollow of the front sheet feeder join.
❏ The adjust lever was switched from the position to the
position after inserting the CD-R tray.
❏ The m paper button was pressed after switching the adjust
lever.
Printer Does Not Print
If the printer does not print, see if the status of your printer’s lights
is listed below, then try the solutions listed.
❏ All lights are off
❏ Lights came on and then went out
❏ Only the power light is on
❏ The m paper out light is flashing or on
❏ One of the ink out lights is flashing or on
❏ Ink out lights are on and the other lights are flashing
All lights are off
Try one or more of these solutions:
❏ Press the P power button to make sure that the printer is on.
317
Troubleshooting
❏ Turn off the printer and make sure that the power cord is
securely plugged in.
❏ Make sure that your outlet works and is not controlled by a
wall switch or timer.
Lights came on and then went out
15
15
15
The printer’s voltage may not match the outlet rating. Turn off the
printer and unplug it immediately. Then, check the printer labels.
If the voltage does not match, DO NOT PLUG YOUR PRINTER
BACK IN. Contact your dealer.
Only the power light is on
15
15
15
Try one or more of these solutions:
15
❏ Turn off the printer and computer. Make sure that the
printer’s interface cable is securely plugged in.
❏ Make sure that there is no packing material in the printer.
15
❏ Turn off the printer and the computer and disconnect the
printer’s interface cable. Then, print an operation check page.
See “Running a printer operation check” on page 302.
15
If the check page prints correctly, make sure that the printer
software and your application are installed correctly.
15
❏ If you are trying to print a large image, your computer may
not have enough memory to print. Try printing a smaller
image.
15
15
Troubleshooting
318
❏ Windows Me, 98, and 95 users can clear any stalled print jobs
from the Spool Manager. For instructions, see “Using EPSON
Spool Manager” on page 326.
❏ If you are using Windows NT 4.0, try uninstalling the EPSON
Printer Port. Click Start, point to Programs and then to
EPSON Printers, then click EPSON Printer Port Uninstall.
Follow the on-screen instructions.
❏ If the printer sounds like it is trying to print, but is unable to,
run the Head Cleaning utility.
If this does not work, replace the ink cartridges. See
“Replacing Ink Cartridges” on page 271 for instructions.
Paper out light is flashing or on
Check EPSON Status Monitor 3 (for Windows) or EPSON
StatusMonitor (for Macintosh) to find the cause of the error, then
try one or more of these solutions:
❏ If the m paper out light is on and there is no paper in the
printer, load paper into the sheet feeder.
❏ If the m paper out light is on and there is no paper in the
printer, load paper into the sheet feeder.
❏ If the H ink out light is flashing, a low supply of ink is
indicated. Obtain a replacement cartridge of the appropriate
type. To determine which cartridge requires replacement, see
“Replacing Ink Cartridges” on page 271.
❏ If the H ink out light is on and the ink cartridge is empty,
replace the appropriate ink cartridge. To determine which ink
cartridge is empty, see “Replacing Ink Cartridges” on page
271.
319
Troubleshooting
Error light is on and power light is flashing
Follow the steps below.
15
1. Press the m paper button, then remove any paper from the
printer.
15
2. Turn the printer off. Check for and remove any foreign objects
or pieces of paper from inside the printer. Also, make sure
that there is sufficient space around the vent on the back of
the printer to allow proper ventilation. Remove any objects
blocking the vent. Then, turn the printer back on.
15
Note:
If you cannot remove a foreign object easily by yourself, do not use
force and do not disassemble the printer. Call your dealer for
assistance.
15
3. If the error does not clear, contact your dealer.
15
15
15
Correcting USB Problems
15
If you are having difficulty using your printer with a USB
connection, check the issues listed below, and take any
recommended actions.
15
15
USB connections
USB cables or connections can sometimes be the source of USB
problems. Try one or both of these solutions:
❏ Use the USB cable (C83623✽) recommended in “System
Requirements” on page 348.
Troubleshooting
15
15
320
❏ For best results, you should connect the printer directly to the
computer’s USB port. If you must use multiple USB hubs, we
recommend that you connect the printer to the first-tier hub.
Windows operating systems
Your computer must be a Windows XP, Me, 98, or 2000
pre-installed model, or a Windows 98 pre-installed model that
was upgraded to Windows XP or Me. You may not be able to
install or run the USB printer driver on a computer that does not
meet these specifications, or that is not equipped with a built-in
USB port.
For details about your computer, contact your dealer.
Printer software installation
Incorrect or incomplete software installation can lead to USB
problems. Take note of the following, and perform the
recommended checks to ensure proper installation.
Checking printer software for Windows Me and 98
If you canceled the plug-and-play driver installation in Windows
Me or 98 before the procedure was complete, the USB printer
device driver or the printer software may be incorrectly installed.
Follow the directions below to ensure that the driver and the
printer software are installed correctly.
Note:
The screens shown in this section are for Windows 98. Windows Me
screens may differ slightly.
1. Click the Start button, point to Settings, and click Printers.
Make sure that the icon for your printer appears in the Printers
window.
321
Troubleshooting
Select the icon for your printer, then click Properties on the
File menu.
15
15
15
15
15
15
2. Click the Details tab.
15
15
15
15
15
15
Troubleshooting
322
If EPUSBx: (EPSON Stylus Photo 950) is displayed in the Print
to the following port list box, then the USB printer device
driver and printer software is installed correctly. If the correct
port is not displayed, proceed to the next step.
3. Right-click the My Computer icon on your desktop, then
click Properties.
4. Click the Device Manager tab.
If your drivers are correctly installed, EPSON USB Printer
Devices should appear on the Device Manager menu.
323
Troubleshooting
If EPSON USB Printer Devices does not appear on the Device
Manager menu, click the plus (+) sign beside Other devices to
view the installed devices.
15
15
If USB Printer, EPSON Stylus Photo 950 appears under Other
devices, the printer software is not installed correctly. Proceed
to step 5.
If neither USB Printer nor EPSON Stylus Photo 950 appears
under Other devices, click Refresh or unplug the USB cable
from the printer, then plug it into the printer again. Once
you’ve confirmed that these items appear, proceed to step 5.
5. Under Other devices, select USB Printer, EPSON Stylus Photo
950 and click Remove. Then, click OK.
15
15
15
15
15
15
15
15
15
15
Troubleshooting
324
When the following dialog box appears, click OK, then click OK
to close the System Properties dialog box.
6. Uninstall the printer software as explained in “Uninstalling
the printer driver” on page 295. Then turn off the printer,
restart your computer, and reinstall the printer software as
explained in the Setup sheet packed with your printer.
Cancelling Printing
If you encounter problems while printing, you may need to cancel
printing. To cancel printing, follow the instructions in the
appropriate section below.
For Windows Me, 98, and 95 users
It is possible to cancel printing using either the Progress Meter or
EPSON Spool Manager. Refer to the appropriate section below.
325
Troubleshooting
Using the Progress Meter
15
When you send a print job to the printer, the Progress Meter
appears on your computer screen.
15
15
15
15
15
Click the Stop button to cancel printing.
Using EPSON Spool Manager
EPSON Spool Manager is similar to Windows Print Manager. If
it receives two or more print jobs at one time, it holds them in the
order that they were received (with printers on a network this
may be called a print queue). When a print job reaches the top of
the line, the EPSON Spool Manager sends the job to the printer.
From the Spool Manager, you can cancel print jobs. You can also
view print status information about the print jobs which have
been sent to your printer, as well as pause and resume or restart
selected print jobs.
15
15
15
15
15
15
Troubleshooting
326
After you send a print job, an EPSON Stylus Photo 950 button
appears on the taskbar. Click this button to open the EPSON Spool
Manager.
To cancel a print job, select the job in the list, then click Cancel.
For Windows XP, 2000 and NT 4.0 users
When you send a print job to the printer, the Progress Meter
appears on your computer screen.
Click the Stop button to cancel printing.
327
Troubleshooting
For Macintosh users
The procedure for canceling printing for Macintosh varies
depending upon whether background printing is on or off. Refer
to the appropriate section below.
When background printing is on
15
15
15
Follow the steps below to cancel a print job.
1. Select EPSON Monitor3 from the application menu.
15
2. Press the P power button to turn off the printer.
15
15
3. In the Document Name list, select the document which is
printing, then click the
Stop icon button to cancel the print
job.
15
15
15
15
15
15
When background printing is off
Follow the steps below to cancel a print job.
Troubleshooting
328
1. Press the P power button to turn off the printer.
2. Hold down the J command key on your keyboard and press
the period (.) key to cancel the print job.
329
Troubleshooting
Chapter 16
16
Options and Consumable Products
16
Options
16
The following options are available for your printer.
16
Interface cables
EPSON supplies the following interface cables for your printer.
However, you can use any interface cable that meets these
specifications. See your computer manual for any additional
requirements.
❏ Parallel Interface Cable (shielded) C83602✽ from D-SUB
25-pin (computer) to 36-pin Amphenol 57 Series (printer)
❏ USB Interface Cable (shielded) C83623✽ from Series A 4-pin
(computer) to series B 4-pin (printer).
Note:
❏ The asterisk (✽) is a substitute for the last digit of the product
number, which varies by location.
16
16
16
Caution:
Use only interface cables which meet the specifications listed
above. Using other cables not covered by EPSON warranties may
cause the printer to malfunction.
Options and Consumable Products
16
16
❏ Depending on your geographic location, this cable may not be
supplied.
c
16
330
16
16
Network adapter
EpsonNet 10/100 Base Tx Ext. Print Server model C82378✽
Note:
❏ Network adapter availability varies by location.
❏ The asterisk (✽) is a substitute for the last digit of the product
number, which varies by location.
Consumable products
The following ink cartridges and EPSON special media are
available for your printer.
Ink cartridges
You can use the following cartridges with your printer.
Black ink cartridge
T0331
Color ink cartridge
Cyan
Magenta
Yellow
Light cyan
Light magenta
T0332
T0333
T0334
T0335
T0336
Note:
The product numbers of ink cartridges may vary by location.
Media types
EPSON offers specially-designed media for ink jet printers to
meet most high-quality printing needs.
331
Options and Consumable Products
Note:
For the latest information on media available in your area, contact
EPSON customer services. See “Regional Customer Services” on page
351 for details.
16
16
16
16
16
16
16
16
16
16
16
16
Options and Consumable Products
332
Plain Paper
Plain paper
Envelopes
EPSON Premium Ink Jet Plain Paper (A4)
EPSON Bright White Ink Jet Paper (A4)
S041214
S041442
360 dpi Ink Jet Paper
EPSON 360 dpi Ink Jet Paper (A4)
S041059
EPSON Iron-On Cool Peel Transfer Paper (A4)
S041154
Photo Quality Ink Jet Paper
EPSON Photo Quality Ink Jet Paper (A4)
S041061
EPSON Photo Quality Ink Jet Cards (A6)
S041054
EPSON Photo Quality Ink Jet Cards (5 × 8”)
S041121
EPSON Photo Quality Ink Jet Cards (8 × 10”)
S041122
EPSON Photo Quality Self Adhesive Sheets (A4) S041106
EPSON Ink Jet Note Cards A6 (with envelopes)
S041147
EPSON Ink Jet Greeting Cards 5 × 8”
(with envelopes)
S041148
EPSON Ink Jet Greeting Cards 8 × 10”
(with envelopes)
S041149
Matte Paper-Heavyweight
333
EPSON Matte Paper-Heavyweight (A4)
S041256
EPSON Double-Sided Matte Paper
S041569
Options and Consumable Products
Photo Paper
EPSON Photo Paper (A4)
S041140
EPSON Photo Paper (4 × 6”)
S041134
EPSON Photo Paper (100 × 150 mm)
S041255
EPSON Photo Paper (200 × 300 mm)
S041254
EPSON Panoramic Photo Paper (210 × 594 mm)
S041145
EPSON Photo Paper Cards (A4)
S041177
16
16
16
16
Premium Glossy Photo Paper
EPSON Premium Glossy Photo Paper (A4)
S041287
EPSON Premium Glossy Photo Paper
(100 mm × 8 M)
S041303
EPSON Premium Glossy Photo Paper
(210 mm × 10 M)
S041377
16
16
16
EPSON Premium Semigloss Photo Paper (A4)
S041332
EPSON Premium Semigloss Photo Paper
(100 mm × 8 M)
S041330
16
EPSON Premium Semigloss Photo Paper
(210 mm × 8 M)
S041336
16
16
16
16
Options and Consumable Products
334
Photo Quality Glossy Film
EPSON Photo Quality Glossy Film (A6)
S041107
EPSON Photo Quality Glossy Film (A4)
S041071
EPSON Photo Stickers 16 (A6)
S041144
EPSON Photo Stickers 4 (A6)
S041176
ColorLife Photo Paper
EPSON ColorLife Photo Paper (A4)
S041560
Ink Jet Transparencies
EPSON Ink Jet Transparencies (A4)
CD-R
CD-R
Note:
The availability of special media varies by location.
335
Options and Consumable Products
S041063
Appendix A
A
Printer Specifications
A
Printing
Printing method
A
A
On-demand ink jet
Nozzle configuration Monochrome (black) 192 nozzles
(96 × 2)
Color (cyan, magenta, yellow, light cyan,
light magenta) 480 nozzles
(96 [each color] × 5)
Resolution
Maximum 2880 dpi × 1440 dpi
Print direction
Bidirectional with logic seeking
256 KB
Input buffer
A
A
A
A
Paper
Note:
Since the quality of any particular brand or type of paper may be changed
by the manufacturer at any time, EPSON cannot attest to the quality of
any non-EPSON brand or type of paper. Always test samples of paper
stock before purchasing large quantities or printing large jobs.
A
A
A
A
Printer Specifications
336
Paper specifications
Single sheets:
Size
A4 (210 mm × 297 mm)
A5 (148 mm × 210 mm)
A6 (105 mm × 148 mm)
Paper types
Plain bond paper, special paper
distributed by EPSON
Thickness
(for plain bond
paper)
0.08 mm to 0.11 mm (0.003 to 0.004 inch)
Weight
(for plain bond
paper)
64 g/m² (17 lb) to 90 g/m² (24 lb)
Envelopes:
Size
No. 10 (104.8 mm × 241.3 mm)
DL (110 mm × 220 mm)
C6 (114 mm × 162 mm)
132 mm × 220 mm
Paper types
Plain bond paper, air mail
Thickness
0.16 mm to 0.52 mm (0.006 to 0.02 inch)
Weight
45 g/m² (12 lb) to 75 g/m² (20 lb)
Index Cards:
Size
A6 (105 mm × 148 mm)
5 × 8” (127 mm × 203 mm)
8 × 10” (203 mm × 254 mm)
Paper types
337
Printer Specifications
Special paper distributed by EPSON
Index Cards:
Size
A
A6 (105 mm × 148 mm)
8 × 10” (203 mm × 254 mm)
5 × 8” (127 mm × 203 mm)
A
Paper types Special paper distributed by EPSON
A
Transparencies, Photo Quality Glossy Film:
Size
A4 (210 mm × 297 mm)
A6 (105 mm × 148 mm) for glossy film
A
Paper types Special paper distributed by EPSON
A
Self Adhesive Sheets:
Size
A4 (210 mm × 297 mm)
Paper types Special paper distributed by EPSON
A
Matte Paper-Heavyweight:
Size
A
A4 (210 mm × 297 mm)
Paper types Special paper distributed by EPSON
A
Photo Paper:
Size
A4 (210 mm × 297 mm)
Panoramic (210 mm × 594 mm)
100 mm × 150 mm
200 mm × 300 mm
4 × 6" (113.6 mm × 175.4 mm)
A
A
Paper types Special paper distributed by EPSON
A
A
Printer Specifications
338
Premium Glossy Photo Paper:
Size
A4 (210 mm × 297 mm)
100 mm × 8 m
210 mm × 10 m
Paper types Special paper distributed by EPSON
Premium Semigloss Photo Paper:
Size
A4 (210 mm × 297 mm)
100 mm × 8 m
210 mm × 10 m
Paper types Special paper distributed by EPSON
ColorLife Photo Paper:
Size
A4 (210 mm × 297 mm)
Paper types Special paper distributed by EPSON
Photo Stickers:
Size
A6 (105 mm × 148 mm) with 4 or 16 frames
Paper types Special paper distributed by EPSON
CD-R:
Size
12 cm
8 cm
Note:
❏ Poor quality paper may reduce print quality and cause paper jams
or other problems. If you encounter problems, switch to a higher
grade of paper.
❏ Do not load curled or folded paper.
339
Printer Specifications
❏ Use paper under normal conditions:
Temperature 15 to 25°C (59 to 77°F)
Humidity 40 to 60% RH
A
A
Printable area
A
Single sheets (including panoramic size) and index cards
Normal
A
No Margins✽✽
A
B -L
A
B -R
A
C
A
Envelopes
A
A
A
A
A
Printer Specifications
340
A:
The minimum top margin is 3.0 mm (0.12”).
B-L:
The minimum left margin is 3.0 mm (0.12”).
B-R:
The minimum right margin is 3.0 mm (0.12”).
C:
The minimum setting of the bottom margin is 14.0
mm (0.55”).
When printing near the minimum bottom margin,
some colors may not be printed properly. If this
occurs, try increasing the bottom margin.
✽:
You can extend the minimum bottom margin to
3 mm by selecting Maximum as the Printable Area
setting on the printer software's Paper menu
(Windows) or in the Page Setup dialog box
(Macintosh). However, print quality may decline in
the expanded area. Before printing large jobs using
this setting, print a single sheet to confirm printout
quality.
✽✽:
When printing with the No Margins feature, print
quality may decline in the top and bottom areas of
the printout, or the area may be smeared.
Note:
Always load paper into the sheet feeder short edge first. Load
envelopes flap edge first with the flap side down.
341
Printer Specifications
Ink Cartridges
A
Black ink cartridge (T0331)
A
Color
Black
Print capacity*
570 pages (A4, ISO/IEC 10561 Letter
Pattern at 360 dpi)
Cartridge life
2 years from production date
(within 6 months after opening package, at
25°C [77°F])
Temperature
Storage:
-30 to 40°C (-22 to 104°F)
A
A
1 month at 40°C (104°F)
Transit:
-30 to 60°C (-22 to 140°F)
A
1 month at 40°C (104°F)
120 hours at 60°C (140°F)
A
Freezing:**
-15°C (5°F)
Dimensions
A
12.7 mm (W) × 71.2 mm (D) × 66.5 mm (H)
A
A
A
A
A
Printer Specifications
342
Color ink cartridge
Cyan (T0332), Magenta (T0333), Yellow (T0334), Light Cyan
(T0335), Light Magenta (T0336)
Color
Cyan, magenta, yellow, light cyan and light
magenta
Print capacity*
440 pages (A4, 360 dpi, 5% duty each color)
Cartridge life
2 years from production date
(within 6 months of opening the package at
25°C [77°F])
Temperature
Storage:
-30 to 40°C (-22 to 104°F)
1 month at 40°C (104°F)
Transit:
-30 to 60°C (-22 to 140°F)
1 month at 40°C (104°F)
120 hours at 60°C (140°F)
Freezing:** -18°C (-0.4°F)
Dimensions
12.7 mm (W) × 71.2 mm (D) × 66.5 mm (H)
* The figure given is based upon continuous printing after ink cartridge
replacement. The actual print capacity may vary, depending on how often
you use the print head cleaning function and how often you turn the printer
on.
** Ink thaws and is usable after approximately 3 hours at 25°C (77°F).
343
Printer Specifications
c
Caution:
❏ EPSON recommends the use of original EPSON ink
cartridges only. Other products not manufactured by
EPSON may cause damage to your printer not covered by
EPSON's warranties.
❏ Do not use an ink cartridge if the date on the package has
expired.
❏ Do not refill the ink cartridge. Upon installation of the ink
cartridge, the printer will calculate the capacity of the ink
cartridge through an IC chip. The calculations will not be
readjusted if ink is later added to the cartridge.
A
A
A
A
A
A
A
A
A
A
A
A
Printer Specifications
344
Mechanical
Paper feed method
Friction
Paper path
Sheet feeder, top entry
Sheet feeder capacity* Max. 150 sheets at 65.8 g/m² (17 lb) paper
Dimensions
Storage
Width: 515 mm (20.3 inches)
Depth: 332.8 mm (13.1 inches)
Height: 209 mm (8.2 inches)
Printing
Width: 515 mm (20.3 inches)
Depth: 663 mm (26.1 inches)
Height: 299 mm (11.8 inches)
Weight
7.4 kg (16.31 lb) without the ink
cartridges
* Legal size plain paper and special media may be loaded in the sheet feeder
in stacks up to 6 mm in thickness.
345
Printer Specifications
Electrical
Input voltage range
A
120 V Model
220-240 V Model
99 to 132 V
198 to 264 V
Rated frequency range
50 to 60 Hz
Input frequency range
49.5 to 60.5 Hz
Rated current
Power consumption
0.3 A (Max 0.6 A)
A
A
0.2 A (Max 0.3 A)
Approx. 12 W (ISO10561 Letter Pattern)
Approx. 3 W in standby mode
Note:
Check the label on the back of the printer for the voltage of your printer.
A
A
A
A
A
A
A
A
A
Printer Specifications
346
Environmental
Temperature
Operation:
10 to 35°C (50 to 95°F)
Storage:
-20 to 40°C (-4 to 104°F)
1 month at 40°C (104°F)
Transit:*
-20 to 60°C (-4 to 140°F)
120 hours at 60°C (140°F)
Humidity
Operation:
20 to 80% RH
Storage:*,**
5 to 85% RH
* Stored in a shipping container
** Without condensation
Standards and Approvals
U.S. model:
Safety
UL 1950
CSA C22.2 No.950
EMC
FCC Part 15 Subpart B Class B
CSA C108.8 Class B
European model:
Low Voltage Directive 73/23/EEC
347
Printer Specifications
EN 60950
EMC Directive 89/336/EEC
EN 55022 Class B
EN 55024
EN 61000-3-2
EN 61000-3-3
A
A
A
System Requirements
Refer to the appropriate section below for the minimum and
recommended computer system requirements necessary to use
EPSON Stylus Photo 950 printer.
A
A
For Windows computers
To use your printer, you need Microsoft® Windows® XP,
Windows® Millennium Edition, Windows® 98, Windows® 95,
Windows® 2000 or Windows NT® 4.0 installed and the printer
must be connected via a shielded, twisted-pair parallel cable. If
you want to connect your printer to a USB port, you need a
Windows 98 or Windows 2000 pre-installed PC equipped with a
USB port and the printer must be connected via a standard,
shielded USB cable.
A
Your computer should also meet the following system
requirements.
A
Minimum System Requirements
Recommended System
Pentium 233 MHz for Windows XP
Pentium III 600 MHz or higher
Pentium 150 MHz for Windows Me
A
A
A
A
Pentium for Windows 98, 95 and NT 4.0
Pentium 133 MHz processor for Windows
2000
A
Printer Specifications
348
64 MB for Windows XP
128 MB RAM or more for
Windows XP
32 MB RAM for Windows Me
32 MB RAM for Windows 98, 95 and NT
4.0
64 MB RAM for Windows 2000
64 MB RAM for Windows Me
64 MB RAM or more for
Windows 98, 95 and NT 4.0
64 MB RAM or more for
Windows 2000.
50 MB hard disk space for Windows XP
20 MB hard disk space for Windows Me,
98 and 95
40 MB hard disk space for Windows 2000
and NT 4.0
50 MB hard disk space or more
for Windows Me, 98 and 95
100 MB hard disk space or
more for Windows XP, 2000
and NT 4.0
SVGA monitor for Windows XP
SVGA or better for Windows XP
VGA monitor for Windows Me, 98, 95,
2000 and NT 4.0
VGA or better monitor for
Windows Me, 98, 95, 2000 and
NT 4.0
Your computer dealer can help you update your system if it does
not meet these requirements.
For Macintosh computers
To connect the EPSON Stylus Photo 950 printer to Apple®
Macintosh® computers, you must use a USB cable.
Your Macintosh must also meet the following system
requirements.
349
Minimum System Requirements
Recommended System
Mac OS 8.5.1
Mac OS 9.1 or later (except for Mac
OS X)
18 MB of available memory
36 MB of available memory or more
20 MB of available memory when
background printing is turned on.
60 MB of available memory or more
when background printing is turned
on.
Printer Specifications
Note:
❏ The amount of available memory varies according to the number and
kind of applications that are open. To see how much memory is
available, choose About This Computer from the Apple menu and
refer to the memory size (listed in kilobytes) under “Largest Unused
Block” (1,024K=1 MB).
❏ The memory requirements above are for printing on Letter size
paper. These requirements may vary depending on the size of the
paper, the type of application you are using, and the complexity of
the document that you want to print.
In addition to these system and memory requirements, you need
18 MB of free hard disk space to install your printer software. To
print, you also need extra hard disk space amounting to about
twice the size of the file that you want to print.
A
A
A
A
A
A
A
A
A
A
A
A
Printer Specifications
350
Appendix B
Customer Support
Technical Support Web Site
EPSON's Technical Support Web Site provides help with
problems that cannot be solved using the troubleshooting
information in your printer documentation. If you have a Web
browser and can connect to the Internet, access that site at:
http://w3.epson.com.tw/imaging/service/42/index.htm
Regional Customer Services
If your EPSON product is not operating properly and you cannot
solve the problem using the troubleshooting information in your
product documentation, contact customer support services for
assistance. If customer support for your area is not listed below,
contact the dealer where you purchased your product.
Customer support will be able to help you much more quickly if
you give them the following information.
❏ Product serial number
(The serial number label is usually on the back of the product)
❏ Product model
❏ Product software version
(Click About, Version Info, or similar button in the product
software)
❏ Brand and model of your computer
351
Customer Support
❏ Your computer operating system name and version
B
❏ Names and versions of the software applications you
normally use with your product
B
B
B
B
B
B
B
B
B
B
B
Customer Support
352
Glossary
The following definitions apply specifically to printers.
application
Software that helps you carry out a particular task, such as word processing or
financial planning.
ASCII
American Standard Code for Information Interchange. A standardized coding
system for assigning numerical codes to letters and symbols.
banding
The horizontal lines that sometimes appear when printing graphics. This occurs
when the print head is misaligned. See also MicroWeave.
bit
A binary digit (0 or 1), which is the smallest unit of information used by a printer
or computer.
brightness
The lightness or darkness of an image.
buffer
The portion of the printer's memory used to store data before printing it.
byte
A unit of information consisting of eight bits.
characters per inch (cpi)
A measure of the size of text characters, sometimes referred to as pitch.
CMYK
Cyan (blue-green), magenta, yellow, and black. These colored inks are used to
create the subtractive system array of printed colors.
color matching
A method of processing color data so that colors displayed on a computer screen
closely match colors in printouts. A variety of color-matching software is
available.
353
Glossary
ColorSync
Macintosh software that is designed to help you get WYSIWYG (what you see is
what you get) color output. This software prints colors as you see them on your
screen.
cpi
See characters per inch (cpi).
default
A value or setting that takes effect when the equipment is turned on, reset, or
initialized.
dithering
A halftoning method in which dots are arranged in an orderly pattern. Dithering
works best when printing images with solid colors, such as charts and graphs.
DMA
Direct Memory Access. A data transfer feature that bypasses a computer’s CPU
and allows direct communication between a computer and peripheral devices
(like printers), and between one peripheral device and another.
dpi
Dots per inch. The dpi measures the resolution. See also resolution.
drive
A memory device, such as a CD-ROM, hard disk, or floppy disk drive. In
Windows, a letter is assigned to each drive for easy management.
driver
Software that sends instructions to a computer peripheral to tell it what to do.
For example, your printer driver accepts print data from your word processor
application and sends instructions to the printer on how to print this data.
Together, the printer driver and printer utilities are referred to as "printer
software". See also printer software.
economy printing
Printing in which images are printed with fewer dots to save ink.
Edge Smoothing
Improves the print quality of lower-resolution images by smoothing jagged
edges and lines. This setting will not affect high-resolution images or text.
Glossary
354
error diffusion
Error diffusion blends individual colored dots with the colors of the surrounding
dots to create the appearance of natural colors. By blending colored dots, the
printer can achieve excellent colors and subtle color gradation. This method is
best suited for printing documents that contain detailed graphics or photographic
images.
ESC/P
Abbreviation for EPSON Standard Code for Printers, the system of commands
your computer uses to control your printer. It is standard for all EPSON printers
and is supported by most applications for personal computers.
ESC/P 2
The enhanced version of the ESC/P printer command language. Commands in
this language produce laser-like features, such as scalable fonts and enhanced
graphics printing.
Finest detail
This printer software setting automatically makes your printouts sharper and
clearer, especially for text. Be aware that this may increase the time required for
printing.
font
A style of type designated by a family name.
grayscale
A scale of shades of gray from black to white. Grayscale is used to represent colors
when printing with black ink only.
halftones
Patterns of black or colored dots used to reproduce an image.
high speed printing
Printing in which the print head prints images in both directions as it moves back
and forth. This provides faster printing.
ICM (Image Color Matching)
The color matching method used by Windows Me, 98, 95, and 2000 to match the
colors in your printout with the colors displayed on your screen.
initialization
Returns the printer to its defaults (fixed set of conditions). This happens every
time you turn on the printer or reset the printer.
ink cartridge
Contains the ink that your printer uses to print.
355
Glossary
ink jet
A method of printing in which each letter or symbol is formed by precisely
spraying ink onto paper.
interface
The connection between the computer and the printer. A parallel interface
transmits data one character or code at a time. A serial interface transmits data
one bit at a time.
interface cable
The cable that connects the computer to the printer.
local printer
The printer connected to the computer’s port directly by an interface cable.
media
Materials upon which data is printed, such as envelopes, plain paper, special
paper, and transparency film.
memory
The part of the printer’s electronic system that is used to store information (data).
Some information is fixed and is used to control how the printer operates.
Information that is sent to the printer from the computer is stored in memory
temporarily. See also RAM and ROM.
MicroWeave
Printing in which images are printed in finer increments to reduce the possibility
of banding and to produce laser-like images. See also banding.
monochrome
Printing which uses only one color of ink, usually black.
nozzles
Fine tubes in the print head through which ink is sprayed onto the page. Print
quality may decline if the print head nozzles are clogged.
operation check
A method for checking the operation of the printer. When you perform a printer
operation check, the printer prints the ROM version, code page, ink counter code,
and a nozzle check pattern.
parallel interface
See interface.
port
An interface channel through which data is transmitted between devices.
Glossary
356
printable area
The area of a page on which the printer can print. It is smaller than the physical
size of the page due to margins.
printer driver
See driver.
printer software
The printer software which comes with your printer includes a printer driver and
printer utilities. The printer driver lets you choose from a wide variety of settings
to get the best results from your printer. The printer utilities help you check the
printer and keep it in top operating condition. See also driver and utilities.
printer utilities
See utilities.
PRINT Image Matching
This system enables stunning printing to be achieved easily though the
combination of a digital camera loaded with the PRINT Image Matching function
and a printer that supports such matching. Print commands are attached to photo
data during digital camera photography and the printer adheres to these
commands to print photos with the color match that optimally fulfills the
objectives of the digitally composed shots.
print queue
When your printer is connected to a network, a waiting line in which print jobs
that are sent to the printer while it is busy are stored until they can be printed.
RAM
Random Access Memory. The portion of the printer's memory used as a buffer
and for storing user-defined characters. All data stored in RAM is lost when the
printer is turned off.
reset
To return a printer to its defaults by turning the printer off and then back on.
resolution
The number of dots per inch used to represent an image.
ROM
Read Only Memory. A portion of memory that can only be read and cannot be
used for data storage. ROM retains its contents when you turn off the printer.
357
Glossary
RGB
Red, green, and blue. These colors, in phosphors irradiated by a cathode ray tube
(CRT) monitor's electron gun, are used to create the additive array of screen
colors.
serial interface
See interface.
spool
The first step in printing, in which the printer software converts the print data
into codes that your printer understands. This data is then sent directly to the
printer or to the print server.
spool manager
The software that converts print data into codes that your printer understands.
See also spool.
sRGB
The color management method used to maintain color consistency between
devices which adhere to the sRGB standard.
Status Monitor
The software that allows you to check the printer’s status.
subtractive colors
Colors produced by pigments that absorb some colors of light and reflect others.
See also CMYK.
USB interface
Universal Serial Bus interface. Enables the user to connect up to 127 peripheral
devices (such as keyboards, mice, and printers) to the computer through a single,
general-purpose port. The use of USB hubs allows you to add additional ports.
See also interface.
utilities
Software that allows you to monitor and maintain your printer. Together, utilities
and the printer driver are referred to as "printer software". See also printer
software.
WYSIWYG
What-you-see-is-what-you-get. This term is used to describe printout that looks
exactly like it appears on screen.
Glossary
358
359
Glossary