
1
Summer-Fall 2007
AL Guidelines
State Reporting
Information in this document is subject to change without notice. Student and school data used herein are fictitious
unless otherwise noted.
The contents of this document are the property of STI. This information is intended for users of the STI suite of products
only. Reproduction or redistribution of these materials to anyone other than STI customers or users of STI Software is
prohibited without prior written consent from STI.
© 2000-2007 Software Technology, Inc. All rights reserved.
Microsoft, Windows, Word and Internet Explorer are registered trademarks or trademarks of Microsoft Corporation in
the United States and other countries.
Other product and company names herein may be the trademarks of their respective owners.
Software Technology, Inc.
4721 Morrison Drive, Suite 200
Mobile, AL 36609-3350
1-877-844-0884
This document was last modified on July 18, 2007. Any subsequent changes made to the STI applications described
herein will be discussed in the release notes that accompany each product’s update.
Contents
Overview
1
About this Document ................................................................................................................. 1
STIOffice
2
System Setup ............................................................................................................................. 2
System File/Information.............................................................................................. 2
Attendance Setup......................................................................................................... 4
Attendance System File............................................................................................... 5
Calendar Setup ............................................................................................................ 6
Attendance State System File ...................................................................................... 7
Discipline Data (for SIR Reporting)............................................................................ 8
Standardized Codes ................................................................................................... 12
STIOffice Data Entry for LEAPS Reporting ........................................................................... 16
Teacher Demographic Data ....................................................................................... 16
Reporting Vacancies.................................................................................................. 17
Course Data Entry/Edit.............................................................................................. 17
Trade School Teachers .............................................................................................. 23
Itinerate Teachers ...................................................................................................... 23
Student Demographic Data...................................................................................................... 24
LEP Students ............................................................................................................. 24
User File Setup .......................................................................................................... 26
Alabama Required Data........................................................................................................... 27
Required Fields.......................................................................................................... 27
Entry/Withdrawal Records ........................................................................................ 28
Special Schools........................................................................................................................ 28
School Number 3999................................................................................................. 28
School Number 4999 (Child Count – Shared Services) ............................................ 29
Auditing School Data at the Local School Level..................................................................... 30
Error Report............................................................................................................... 30
Correcting Data Errors .............................................................................................. 30
Uploading Data to the District Database ................................................................................. 31
STIDistrict
32
STIDistrict Setup ..................................................................................................................... 32
District System File ................................................................................................... 32
Importing Data......................................................................................................................... 32
Auditing School Data at the District Level.............................................................................. 32
Monitoring Uploads .................................................................................................. 32
Running Conflict Report and Cleaning Data............................................................. 33
About STIState Enrollment Features ....................................................................................... 33
Entry/Withdrawal Records ........................................................................................ 33
Enrolling a Student.................................................................................................... 33
Withdrawing a Student .............................................................................................. 37
Summer-Fall 2007 AL Guidelines
STI_0718071630
Contents • iii
Home Room / Grade Level Changes ......................................................................... 40
Creating the SDE Export ......................................................................................................... 41
SDE Export Approval.............................................................................................................. 43
Approval Process Business Rules.............................................................................. 43
Running the Export Approval.................................................................................... 44
LEAPS Export ......................................................................................................................... 44
LEAPS Export Process Guidelines............................................................................ 45
LEAPS Security ........................................................................................................ 45
Importing Valid Schools File .................................................................................... 46
Financial Data Export................................................................................................ 46
Teacher Schedule Export........................................................................................... 47
Importing Teacher Schedule Data ............................................................................. 48
Student Incident (SIR) Export ................................................................................................. 49
Approval Process....................................................................................................... 50
Error Checking in Accordance with the State Department of Education................................. 50
Addressing Errors / Data Correction........................................................................................ 50
STISETSWeb
51
Setting Up STISETSWeb ........................................................................................................ 51
System Policy .......................................................................................................................... 51
Utilities Desktop | System File .................................................................................. 51
Utilities Desktop | Progress Periods .......................................................................... 52
Security Groups ....................................................................................................................... 52
Security Groups Defined ........................................................................................... 53
Security Group Edit Commands................................................................................ 53
Other Security Group Items....................................................................................... 54
Employee File.......................................................................................................................... 54
Codes ....................................................................................................................................... 55
Location, Diagnosis, Service Type Codes................................................................. 55
District and State Codes ............................................................................................ 55
Student Maintenance ............................................................................................................... 56
Create Student Folder ................................................................................................ 56
Delete a Student......................................................................................................... 57
Caseload Assignment ................................................................................................ 57
Mass Caseload Assignment ....................................................................................... 57
Archive Students ....................................................................................................... 58
Un-Archive Students ................................................................................................. 59
Change Student Numbers or School.......................................................................... 60
Enrolling Private and Preschool Children in Alabama ............................................................ 61
Enrolling Private School Students............................................................................. 61
Enrolling Pre-School Students................................................................................... 62
Child Count.............................................................................................................................. 63
Child Count Error Report .......................................................................................... 63
Child Count Error Codes ........................................................................................... 64
Child Count Export ................................................................................................... 65
Student List.............................................................................................................................. 66
STIOffice Integration............................................................................................................... 66
Single Profile for Each Installation ........................................................................... 67
Multiple Profiles for Each Installation ...................................................................... 68
Index
iv • Contents
STI_0718071630
71
Summer-Fall 2007 AL Guidelines
Overview
About this Document
The purpose of this document is to help districts and schools in Alabama use STI
products to collect and report data required by the state. Items in this document are
subject to change as updates to the STI program become available. After installing
an update to STIOffice or any other STI program, users should review the
information contained in the update notes to view any changes caused by the update.
Summer-Fall 2007 AL Guidelines
STI_0718071630
Overview • 1
STIOffice
System Setup
System File/Information
To set up the core system information, select Utilities | System Utilities |
System File/Information.
The fields described below will directly affect the way data is handled in Alabama
schools. Some additional information may need to be completed, however; please
see the STIOffice User Manual and the Quick Reference Guide entitled STIOffice –
Getting Starting for further details. These documents are available on the
Documentation page of the STI Support site at http://support.sti-k12.com/ (user
name and password required).
The system file must be set up as follows:
School Information tab
2 • STIOffice
STI_0718071630
•
Code: Enter the state-assigned number for the school here. This is
required for the STIDistrict district accumulator to function correctly.
•
Name: Enter the school's name in this field.
•
School Number: Enter the school’s state-assigned number.
Summer-Fall 2007 AL Guidelines
•
District Number: Enter the school’s state-assigned number.
•
Term Information: Enter the number of terms in the school year,
along with a description of each term (Semester 1, Semester 2, etc.). A
term is defined as the shortest amount of time a class lasts, or the
shortest amount of time for which credit is awarded.
•
Periods: Enter the number of class periods in a single school day. If
periods vary according to grade level, enter the greatest number of
periods here.
•
School Year: This field will display the current school year. If this is
incorrect, please contact STI for instructions on how to change this.
Never manually change these years yourself, as this could cause other
problems in STIOffice.
o
Grades: Enter the range of grade levels for your school. For
example, the range for a PK: 6th Grade school could be set as 0: 6.
This would result in students in Kindergarten through Grade Six
receiving entry dates and codes; PK students, designated for state
purposes as grades 98: 99, would not be given entry dates and
codes and would therefore be exempt from state attendance
reporting.
System Information Tab
In this tab, the user may activate the data entry preventative feature, which will
prevent users from making “forced changes” to student demographic records. To do
this:
Summer-Fall 2007 AL Guidelines
•
Check the boxes beside Grade, Home Rm and Trans Code under the No
Changes section.
•
Click OK to save.
STI_0718071630
STIOffice • 3
Note: Users logged in as @@@ (Administrator) will still have the ability to force
data changes at the warning screen that issues the Grade or home room changes
should be made in Withdrawal/Entry prompt. Click OK to force change.
Attendance Setup
Attendance Codes
To set up attendance codes, go to Utilities | Code Maintenance | Most Codes.
There are currently no state mandated codes required for attendance reporting.
•
At the bottom of the second column, bullet Attendance under Student
Attend.
•
Codes for Excused and Unexcused absences and tardies are entered
here.
•
You may Insert, Change or Delete attendance codes.
•
In the Check In/Out bullet, codes used for checking students in or out
of school are entered.
Note: Attendance codes and check in/out codes must have the correct Class defined
(either Excused or Unexcused). If any of these codes are given the incorrect Class,
students will likely have incorrect attendance records. To view a code’s Class,
highlight the code and click the Change button.
4 • STIOffice
STI_0718071630
Summer-Fall 2007 AL Guidelines
Attendance System File
Verify that the following dates have been entered correctly in the STIOffice
Attendance System File. To view this file, select Utilities | Attendance | System
File.
Alabama requirements state a student is marked absent for the day if miss more than
51% of the entire school day. The value entered in the Allday Percentage field
MUST be 51.00%. There are no state standards for Halfday, Tardy or Period
percentages.
Summer-Fall 2007 AL Guidelines
•
Terms and Dates: Enter the beginning and ending dates for each
term. The first day of school should be the beginning date for the first
term, and the last day of school should be the ending date for the last
term.
•
Day Types: Listed here are any types of school days your school
might incur during the year that are different from a regular school day.
Day Types might include Early Dismissal Day, Pep Rally Day, etc.
Your school will always have a Regular Day.
•
Default Daily Codes: Assign the default Excused and Unexcused
codes and then enter the percentage of time missed (this should be a
numerical value; for example, enter 50 to indicate 50 percent) that will
result in an absence if using Check In/Out.
•
Attendance Period: Enter the attendance period during which
teachers will post daily attendance from STIClassroom, if applicable.
•
Change Daily At, Change Period to Match: Checking this box
will notify the system to change period codes to match the daily codes
whenever the latter are changed.
STI_0718071630
STIOffice • 5
•
Change Consecutive Abs: Check this box to allow users the option
to change consecutive absences when modifying individual students’
records for consecutive absences.
•
Excused CI/CO=Excused Absence: Check this box to
automatically make Default Daily Absence codes equivalent to
Excused Checkin or Checkout codes.
•
Period At for Schedule Only: Select this option to assign period
attendance only for students who have scheduled classes in the selected
period.
Calendar Setup
Calendar Codes
•
Before setting up the school calendar, you must first have Calendar
Codes entered. To do this, go to Utilities | Code Maintenance |
Calendar Codes.
Attendance Calendar
To access the calendar, select Utilities | Attendance | Calendar.
6 • STIOffice
STI_0718071630
Summer-Fall 2007 AL Guidelines
•
The Attendance Calendar should be set with attendance days only.
Non-attendance days, such as holidays, teacher work days or weather
days, should be deleted from calendar.
•
Asterisks (*) should never appear in the calendar.
•
When assigning a Calendar Code to a day in the calendar, the Occasion
field is the day of the week for a Regular Attendance Day. Only enter
days into the calendar on which students ATTEND school.
Attendance State System File
To access the Attendance State System File, select Utilities | Attendance | State
System File.
The State System File shows the 20-day school attendance reporting calendar month
breakdown.
•
First Column: Enter the beginning date of each attendance month.
•
Second Column: Enter the number of school days in each month.
The total number of days in each month must be 20 in Alabama, except
for the last month, which will include the number of days remaining in
the state-approved calendar.
•
Third Column: The last day of each attendance month appears here.
After entering the starting date and number of days in an attendance
month, press the Tab key and the ending date field will automatically
be populated.
Note: If an incorrect date displays, this indicates an error in the calendar.
•
Summer-Fall 2007 AL Guidelines
Fourth Column: After the Monthly Attendance Register report has
been run for a particular month, check the box in the Closed column
next to that month. This will prevent users from changing any
attendance records for that month.
STI_0718071630
STIOffice • 7
•
Report Orders: Indicate the order in which Monthly Attendance
Register reports are to print (by Grade or Home Room). Once the first
month’s attendance has been run, the Report Orders setting cannot be
changed.
•
Last Run Date(s): This field shows the last date(s) on which the
Monthly Attendance Register report was run.
•
Include Discipline in Closed Months: Check this box to restrict
users from entering/modifying discipline information for months that
have already been closed.
Important Note: The date ranges entered in this screen will determine the dates used
by STIDistrict for monthly reporting. These date ranges are also used in STIOffice
for the monthly Teacher’s Report as well as the Principal’s Report. There are many
fields and therefore many dates to be entered here, and it is important that users pay
close attention when entering each attendance month's date range.
Discipline Data (for SIR Reporting)
Any discipline record that results in a SIR disposition will be reported to the state.
These records will automatically create a corresponding Incident record in
STIOffice. Before you enter any incidents, verify that the setup information below is
correctly set up in the system.
Incident Locations
In STIOffice, select Utilities | Code Maintenance | Most Codes. Then click
Locations under Incidents. The following items should be displayed here:
•
OFF: Off Campus
•
ON: On Campus
•
TRANS: In Transport
Incident User Defined Fields
In STIOffice, select Utilities | Discipline | Incident User Field Definition. The
following items should be displayed here:
8 • STIOffice
STI_0718071630
Summer-Fall 2007 AL Guidelines
•
Field 1: Parent Involved; Type: Checkbox.
•
Field 2: Corporal Punishment; Type: Checkbox.
Discipline Infractions
In STIOffice, select Utilities | Code Maintenance | Discipline Infractions. A
school may use its own Infraction Codes, but each Infraction Code must have a valid
State Code (selected from a list) attached to it. Users will be unable to record
discipline until ALL infractions have been linked to state codes.
IMPORTANT NOTE: For Discipline SIR Reporting, if you are going to use any
Discipline Infraction that is linked to state codes of S1-S58, you must use a valid SIR
Disposition of SIR1- SIR12. If you use an Infraction code and do not use a SIR
Disposition, the Infraction code must be linked to S99 (For local use only – not
reported to the State).
Summer-Fall 2007 AL Guidelines
•
To attach a State Code to your Discipline Infractions, highlight an
Infraction in the list and click Change.
•
Click the drop-down list in the State Code field and choose the Valid
State Code to attach to that Discipline Infraction.
STI_0718071630
STIOffice • 9
Discipline Dispositions
In STIOffice, select Utilities | Code Maintenance | Most Codes. Then click
Dispositions under Discipline (1st choice in 4th column). Additionally, the user
should double-click each of these SIR dispositions and make sure Yes is selected
under Create Incident.
The following codes must be listed:
•
SIR1: Out of School Suspension
•
SIR2: Alternative Placement
•
SIR3: Expelled
•
SIR4: Expelled, Services Provided
•
SIR5: Removed by Hearing Officer to Out-of-School Suspension
•
SIR6: Alternative Setting (Spec Ed only)
•
SIR7: Corporal Punishment
•
SIR8: Permanent Expulsion
•
SIR9: Removed by Hearing Officer to Alt. School
•
SIR10: Removed by Hearing Office to Alt. Setting-Spec Ed
•
SIR11: In-School Suspension (Full day increments ONLY)
•
SIR12: Suspended - Pending
Incidents
When a discipline infraction is entered for an incident-level disposition, the incident
will be created automatically.
If the disposition is NOT SIR7 and corporal punishment is involved, the Corporal
Punishment box should be checked on the Incident screen. If the disposition is SIR7,
it is not necessary to check the Corporal Punishment box on the Incident screen.
Incidents may also be entered by selecting Discipline Incidents under the Daily
menu. Relevant fields on the Incident screen include:
10 • STIOffice
STI_0718071630
Summer-Fall 2007 AL Guidelines
1.
Incident Date and Time
2.
Parent Involved
3.
Location (must be one of the three Incident Locations described above;
this is a REQUIRED FIELD).
4.
School Sponsored Event
5.
Law Violation
6.
Board Violation
7.
Call to Police
8.
Infraction
9.
Notes
10. Corporal Punishment
After the incident record has been created, select it in the Discipline Incidents menu
and click the Participants button. Then do the following:
Summer-Fall 2007 AL Guidelines
•
Click Insert and enter any Participants, Witnesses and/or Victims in
the Incident, designating each participant as Student, Teacher/Staff or
Other. When either Student or Teacher/Staff is selected, click the
Ellipsis button to insert the individual(s).
•
Witnesses should consist of non-teachers reporting the incident.
•
Next, click the Students button in the Discipline Incidents menu
(again, you should make sure the newly-created incident record
remains selected before clicking the button) and do the following:
o
Click Insert and enter student perpetrators of the incident. This
will create a normal discipline infraction that may also be viewed
by clicking the Discipline button in either the Student Desktop or
Add/Edit Student Information menus.
o
The appropriate Dispositions listed above will need to be entered
here for affected students. The Starting / Ending Disposition Dates
will be used to determine the length of suspensions, placements or
expulsions.
STI_0718071630
STIOffice • 11
Standardized Codes
The codes listed below are used when collecting data in STIOffice. To view, create
or edit a code, select Utilities | Code Maintenance | Most Codes. Then click
the code type in the list and use the Insert, Change or Delete buttons to add,
modify or remove codes (where applicable).
Race Codes
Code
Description
A
Asian
B
Black
H
Hispanic
I
Indian
W
White
N
No Response
Lunch Codes
Lunch Codes are pre-loaded into STIOffice. Lunch Codes cannot be modified. Only
state-defined Lunch Codes may be used.
Code
Description
1
Free
2
Reduced
3
Paid
Note: A student’s Lunch Code status is reported to the state in the 40 Day ADM
report as whatever the student’s code is on the 40th day of attendance. Be sure to
enter the student’s codes on or before the 40th day.
LEP Codes
LEP Codes now come preloaded with STIOffice. LEP Codes may not be modified.
Only state-defined LEP Codes may be used. Any codes used prior to version 10.0
were deleted.
Code LEP Description
12 • STIOffice
1
LEP1 - First academic year in US school
2
LEP2 - 2nd academic year or more in US school
3
FLEP1 – Exited the LEP program and is in 1st year of monitoring
4
FLEP2 - Exited the LEP program and is in 2nd year of monitoring
5
FLEP – Students have successfully completed 2 years of monitoring and are no
longer LEP
6
LEP – Waived Title III services
STI_0718071630
Summer-Fall 2007 AL Guidelines
Entry/Withdrawal Codes
Note: All state-defined codes now come pre-loaded and cannot be modified. All
previous codes have been deleted.
The following table is the complete list of the valid Entry/Withdrawal Codes
provided by ALSDE:
Code
Summer-Fall 2007 AL Guidelines
Description
Code Type
E
Entry
Entry
R
Re-Entry
Entry
D01
Did not pass High School
Graduation Exam prior to
October in fall following
completion of program of
study
Dropout Withdrawal
D02
Academic difficulties
Dropout Withdrawal
D03
Marriage
Dropout Withdrawal
D04
Pregnancy
Dropout Withdrawal
D05
Employment
Dropout Withdrawal
D06
Physical Illness
Dropout Withdrawal
D07
Language Difficulty
Dropout Withdrawal
D08
Dislike of school experience
Dropout Withdrawal
D09
Needed at Home
Dropout Withdrawal
D10
Parental influence
Dropout Withdrawal
D11
Student Staff Relations
Dropout Withdrawal
D12
Relationship with fellow
students
Dropout Withdrawal
D13
Entered Military Service
Dropout Withdrawal
D14
Behavior Problem
Dropout Withdrawal
D15
Other Known Reason
Dropout Withdrawal
D16
Reason Unknown
Dropout Withdrawal
WA1
Transfer within System
(Public School)
Other Withdrawal
WA2
Transfer within System
(Private School)
Other Withdrawal
WA3
Transfer within System
(Church School)
Other Withdrawal
WA4
Change Grade Level
Other Withdrawal
WA5
Changing Home Room
Other Withdrawal
WB1
Transfer within State (Public
School)
Other Withdrawal
WB2
Transfer within State
(Private School)
Other Withdrawal
WB3
Transfer within State
(Church School)
Other Withdrawal
WC1
Transfer Out of State
Other Withdrawal
WD2
Deceased
Other Withdrawal
STI_0718071630
STIOffice • 13
Code
Description
Code Type
WD3
Disciplinary Action
Other Withdrawal
WD6
Expelled Student (NonPermanent)
Other Withdrawal
WG1
Mid Year Graduate
Other Withdrawal
•
•
Definition of a Dropout: A dropout is a student who was enrolled in
the school some time during the previous year (July 1 – June 30) and
was not enrolled by October 1 of the current school year and has not
graduated from high school or completed the state-approved graduation
requirements for a diploma, and does not meet any of the following
exclusionary conditions:
o
Transfer to another public school system, private school, private
tutor, church school, or state-approved educational program (as
defined by the Adult Education Agency). See Code of Alabama
16-28-1 for clarification.
o
Temporary absence due to suspension or school-excused illness.
o
Left the United States.
o
Death.
Detailed guidelines for coding dropouts can be located on the SDE
Web site at the following address:
http://www.alsde.edu/datacol/dropout.asp
SIR Dispositions
For Discipline SIR Reporting, if, you are going to use any Discipline Infraction that
is linked to state codes of S1-58, you must use a valid SIR Disposition of SIR1SIR12. If you wish to use any Infraction code and do not use a SIR Disposition, that
Infraction code must be linked to S99 (For local use only, not reported to the state).
Code
14 • STIOffice
Description
SIR1
Out of School Suspension
SIR2
Alternative Placement
SIR3
Expelled
SIR4
Expelled, Services Provided
SIR5
Removed by Hearing Officer to Out of
School Suspension
SIR6
Alternative Setting (Spec Ed only)
SIR7
Corporal Punishment
SIR8
Permanent Expulsion
SIR9
Removed by Hearing Officer to Alt. School
SIR10
Removed by Hearing Office to Alt. SettingSpec Ed
SIR11
In-School suspension
SIR12
Suspended - Pending
STI_0718071630
Summer-Fall 2007 AL Guidelines
Special Education Codes
Special Education data will be maintained exclusively by use of STISETSWeb.
Special Education Codes are preinstalled. Special Ed Codes may not be modified.
Only state-defined Special Ed codes may be used.
Code
LRE Code Descriptions- To be used for children 6 - 21 Years of
Age ONLY
01
100%-80% of the day inside the general education environment.
03
79% - 40% of the day inside the general education environment
04
Less than 40% of the day inside the general education environment
05
Private School (Parent Placed) MUST also enter secondary LRE code
06
Separate School –Public Day School greater than 50% of the day
07
Separate School – Private Day School greater than 50% of the day
08
Homebound
09
Hospital
10
Public Residential School greater than 50% of the day
11
Private Residential School greater than 50% of the day
40
Short Term Detention (Community or Residential) or Correctional Facilities
Code
LRE Code Descriptions- To be used for children 3 – 5 Years of Age ONLY
12
At least 80% of time inside Regular Early Childhood Program or Kindergarten
13
At least 40% of time inside Regular Early Childhood Program or Kindergarten
14
Home: Not attending a Special Education Program or Regular Early Childhood
Program or Kindergarten
15
40% - 79% of time inside Regular Early Childhood Program or Kindergarten
16
Residential Facility: Attending a Special Ed. Program – Not attending Regular
Early Childhood Program or Kindergarten
17
Separate School: Attending a Special Ed. Program – Not attending Regular Early
Childhood Program or Kindergarten
18
Separate Class: Attending a Special Ed. Program – Not attending Regular Early
Childhood Program or Kindergarten
19
Service Provider Location: Not attending a Special Ed. Program, Regular Early
Childhood Program or Kindergarten
Code Exceptionality Code Descriptions
AUT
Summer-Fall 2007 AL Guidelines
Autism
DD
Developmentally Delayed
ED
Emotional Disturbance
GT
Gifted
HI
Hearing Impairment
MD
Multiple Disabilities
MR
Mentally Retarded
OHI
Other Health Impairment
OI
Orthopedic Impairment
SLD
Spec Learning Disability
STI_0718071630
STIOffice • 15
Code Exceptionality Code Descriptions
SLI
Speech or Language Impaired
VI
Visual Impairment
TBI
Traumatic Brain Injury
@A
Active in Special Education
STIOffice Data Entry for LEAPS Reporting
Teacher Demographic Data
The following data must be entered for each teacher who is to be included in state
reporting. This data is required if the district intends to produce the LEAPS export
file using STIDistrict.
16 • STIOffice
STI_0718071630
•
First, Last Name: Enter the teacher's first and last names in the
appropriate fields. The middle name is optional.
•
Social Security Number: Enter the teacher's Social Security
Number here.
•
Employee Type: Any employee who has an employee type of
Teacher must be attached to at least one section of the master schedule,
either directly or as an Additional Teacher.
Summer-Fall 2007 AL Guidelines
Reporting Vacancies
Teacher vacancies should also be reported to the state via the LEAPS file. To create
a demographic record for a teacher vacancy at the school, enter the following
information:
•
First, Last Name: Enter Staff1 as the first name, and Staff as the last
name. If there are multiple vacancies at a school, enter Staff2 for the
second vacancy, Staff3 for the third, etc.
•
Social Security Number: A unique number must be assigned to
each vacant position within the district. Someone at the district level
should maintain the list of available numbers, and those already
assigned. The list of numbers to be used may be generated using the
following formula:
o
First digit will be a 9.
o
Second and Third digits will be the last two digits of the
school year. For example, during the 2007-2008 school year, the
second and third digits will be 08.
o
Fourth through Sixth digits will be the three digit system code
(District Number).
o
Seventh through Ninth digits will be incremental numbers
starting at 000.
o
Example: The first teacher vacancy number assigned for District
Number 123 would be 908123001.
Course Data Entry/Edit
Data Entry in Valid Courses
•
Select Courses | Valid Courses.
Course Info Tab
Summer-Fall 2007 AL Guidelines
o
All active courses listed in the Valid Course File must be given a
State Course Number. State Course Numbers are preinstalled and
are now selected via a drop-list.
o
Course Num: This does not have to be the state issued course
number.
o
State: Select the appropriate state-issued course number.
o
Course Name: Give each course a name, using the state-supplied
list as a guide.
STI_0718071630
STIOffice • 17
Master Builder Info Tab
18 • STIOffice
STI_0718071630
o
The Funding Method field (in the Master Builder Info tab) has
been removed. A new Class Type drop-list has replaced this field.
The Class Type field is provided primarily for the purpose of
designating a class as Dual Enrollment or Distance Learning.
o
Valid Class Types are preloaded under Most Codes and cannot
be changed or deleted.
o
The 10.0 update will set the value of Class Type to Standard Class
for all existing active courses.
Summer-Fall 2007 AL Guidelines
Data Entry in the Master Schedule
OPTION 1: The first option is to manually enter the State Number into Master
Schedule records. This option is best if you have only a few sections in the Master
Schedule that must be updated to include the State Course Number. To use this
method:
•
Go to Courses | Master Schedule.
•
Select the State Course Number from the drop-list in the State field.
•
Click OK to save.
OPTION 2: If there are many sections of one course that need to be populated with
the same State Course Number, the user may wish to copy the Valid Course State
field to the Master Schedule State field. For this procedure to work, the State field
must be properly filled out for the course in the Valid Course record.
IMPORTANT NOTE: This process will mass-update records in STIOffice. All users
must exit any instances of STIOffice and STIClassroom before this procedure is
done. Also, it is recommended that the user make a good backup of the STIOffice
data before proceeding.
To use this method:
Summer-Fall 2007 AL Guidelines
•
Select Courses | Valid Courses.
•
Choose a course and enter the State Course Number into the State field.
•
Click OK to save
STI_0718071630
STIOffice • 19
After doing the above, you will need to mass-update the Master Schedule Records by
using the Support Utility (SXZ) program within STIOffice. To do this:
•
Select Utilities | System Utilities | Support Utility. This feature
must be enabled by an Administrator before it may be used. To enable
the utility:
o
Open Utilities | System Utilities | System File/Information.
o
Click the System Information 2 tab.
o
Check the Allow Access to Support Utility (SXZ) box.
o
Click OK to save changes. Exit and restart STIOffice.
•
When the Support Utility is first opened, a warning screen will be
displayed. Enter the System Password here and click OK.
•
Select Programs | Scheduling | Adjust Master Schedule.
•
For Year to Use, select Regular.
•
Check the Alternate Number box.
•
Click Apply and exit the Utility program.
A new required field for Teacher Role has been added to the program. The 10.0
update will set the value of this field to 1st Primary for all sections (both current and
new year). Valid Teacher Roles have been loaded under Most Codes and cannot be
changed or deleted.
20 • STIOffice
STI_0718071630
Summer-Fall 2007 AL Guidelines
A new field called Teacher Role has been added to the Schedule Table, with the
following allowable values:
Teacher Role
Summer-Fall 2007 AL Guidelines
Explanation
1st Primary Teacher in Classroom
Teacher who provides primary instruction to
class in subject[s] taught during class period
– requires HQT endorsement
2nd Primary Teacher in Classroom
Teacher who provides primary instruction to
class in subject[s] taught during class period
– requires HQT endorsement
Special Education Collaborative Teacher
Teacher who assists primary teacher by
providing help to special education students
in a general education classroom – needs
collaborative teacher endorsement but does
not need subject area HQT endorsement
Distance Learning Facilitator
Teacher or aide who facilitates class in a
distance learning setting by taking roll,
maintaining order, and executing other such
supervision functions.
Resource Teacher
A teacher who provides supplemental
assistance to the primary teacher.
Long Term Substitute
A “Teacher” employed on a temporary basis
due to an extended absence or early
departure of a regular teacher.
Dual Enrollment Instructor
Used as a place holder for College or
University instructor for Dual Enrollment
classes.
Career Tech Facilitator
Used as a place holder for career tech
personnel to account for secondary students
who are enrolled in secondary subjects at a
postsecondary institution.
Special Assignment Non-Classroom
Used as a place holder for personnel to
account for scheduling office assistants,
library assistants, study hall, and other nonclassroom assignments.
STI_0718071630
STIOffice • 21
•
Teacher Role Special Assignment Non-Classroom can only have Class
Type Non-Academic Special Assignment assigned to it.
•
Roles 1st Primary Teacher in Classroom, Distance Learning Facilitator,
Long Term Substitute, Dual Enrollment Instructor, Career Tech
Facilitator and Special Assignment Non-Classroom are valid for the
teacher attached to the Master Schedule.
•
Role 1st Primary Teacher in Classroom is the only role invalid for
Additional Teachers (subject to other defined business rules).
•
Distance Learning Facilitator can only have Class Types Distance
Learning Class – ACCESS – WEB-based, Distance Learning Class –
ACCESS – Receive IVC, Distance Learning Class – ACCESS – Send
IVC, Distance Learning Class – IVC within LEA or Distance Learning
Class – Web-based LEA purchased.
•
Dual Enrollment Instructor can only have Dual Enrollment Class Type
of Distance Learning Class – Dual Enrollment Class taken from a
college or university, Dual Enrollment Class taken from a college or
university or Career Tech Dual Enrollment class taken from a
postsecondary institution.
Collaborative Teachers
22 • STIOffice
STI_0718071630
•
Collaborative teachers are those teachers who assist another teacher in
the same classroom. Collaborative teachers should be entered into
STIOffice via the Additional Teachers button in the Master
Schedule record for the class. Teachers entered in this area will also
have access to the primary teacher gradebook.
•
Existing teachers who were marked as Collaborative Teachers prior to
the 10.0 update will be updated to Special Education Collaborative. All
other ADDITIONAL teachers will be designated as 2nd Primary.
•
Every collaborative Special Education teacher must have a Teacher
Role of Special Education Collaborative Teacher.
Summer-Fall 2007 AL Guidelines
•
This method of reporting is not used for cases in which a teacher pulls
students from their regularly scheduled classes into a separate
classroom for remediation, tutoring, etc. A separate Master Schedule
record (a separate section of a course) should be created in STIOffice
for these instances. The appropriate State Course Number must be
entered into the State field for this class. Students should not be
scheduled into these classes.
Trade School Teachers
Data for some teachers, such as Trade School teachers, may be most easily inserted
directly into the LEAPS Editor in the STIDistrict Workstation. A good example of
this is when the Trade School course is taught at the trade school, but the schedules
for students who attend the course are entered at the high schools at which the
students are enrolled.
Itinerate Teachers
Itinerate teachers are teachers who teach in multiple schools. Records for these
teachers may be handled in one of two ways:
Summer-Fall 2007 AL Guidelines
•
The financial record for the teacher may be entered once, with an
Assigned School value of 0001. In this case, all schedule records for the
teacher are entered for school 0001 as well.
•
Multiple financial records may be created for the teacher, with one
record per school where the teacher has courses scheduled. In this case,
the schedule records for the teacher are entered for each corresponding
school number.
STI_0718071630
STIOffice • 23
Student Demographic Data
LEP Students
All students who have Limited English Proficiency must be flagged for the AYP
Report. LEP Codes now come preloaded in STIOffice. LEP Codes may not be
changed or deleted. Only state-defined LEP Codes may be used.
A list of the state-approved LEP Codes is located in the section “LEP Codes” on
page 12.
•
24 • STIOffice
STI_0718071630
After the Language Proficiency codes have been entered, go to
Students | Add/Edit Student Information and select a student
who has Limited English Proficiency.
Summer-Fall 2007 AL Guidelines
•
Click Change and then click the More button at the bottom of the
demographic screen. In the bottom left of the screen, select one of the
codes from the LEP/Former LEP drop-list. The LEP Exit Date field
will only activate if one of the LEP exit codes is selected
•
NOM PHLOTE: Select this checkbox if the primary language spoken
at home is not English, but the student does not require any English
language development.
Free/Reduced Lunch Report
To generate a report of your Free and Reduced Lunch students, select Students |
Student Reports | Free/Reduced Lunch Report.
It may be helpful to run this report close to the time at which the AYP Report is due,
to confirm the status and number of students who qualify for Free and Reduced
Lunch. Select a Filter, enter a date for the Code As Of line, highlight the lunch codes
to print, and select any other information that might apply.
Tracking Lunch Code Changes
To track a student’s Lunch Code changes, select the student in Students |
Add/Edit Student Information and click the Options button. Then click Code
Changes.
•
Select Lunch from the drop-down list.
•
Here you may view all Lunch Code changes that have occurred for a
particular student this year.
•
You may also make any corrections to Date Changes by highlighting a
date and clicking the Change button.
CNP Eligibility Report
To run the CNP Eligibility Report, go to Utilities | Alabama | CNP Eligibility.
•
Summer-Fall 2007 AL Guidelines
Click the Ellipsis button and choose the location of the text file that
contains the CNP eligibility information for your students.
STI_0718071630
STIOffice • 25
•
Check Post Students Found as Free and choose the Free code from the
drop-list.
•
Check any other desired options and then click Apply to run the report.
User File Setup
The User File fields described below are specific to the state of Alabama and come
preinstalled with the program. It is recommended that users check this information in
the program to verify that it is correct.
To view these options, select Utilities | Students | User File Definition. Under
Select a File on the left side of the screen, make sure 1. Al Info is selected (it should
be highlighted by default whenever the User File Definition screen is opened). Then
look for the following information:
Other Information in User File 1
26 • STIOffice
STI_0718071630
•
String Prompt 3 - Exit Type: This information should be entered
only for students who will graduate / exit school (generally seniors
only). This information should only be entered during the 9th month and
selections made from the drop-list provided.
•
String Prompt 4 – Summer Comp: If the student is a Summer
Completer, select the appropriate code from the drop-list provided.
•
Date Prompt 1 – Enroll Spec Ed: The date the student was
originally enrolled in Special Ed should be entered here.
•
Checkbox 1 – IDE Act: Mark this box if applicable.
•
Checkbox 2 – Deaf/Blind R: Mark this box if the student is on the
Deaf/Blind Registry.
•
Checkbox 3 – Adv. Diploma: Select this box for any student in
grade 9 through 12 who is attempting to earn an advanced diploma.
•
Checkbox 4 – Career Tech: Mark this box to indicate that the
student is receiving a Career Tech Diploma.
Summer-Fall 2007 AL Guidelines
•
Checkbox 5 – Career Adv: Mark this box to indicate that the
student is receiving an Advanced Career Diploma.
Alabama Required Data
All schools should enter data in STIOffice for a student as described below:
Note: The information detailed below comprises the minimal data that should be
entered. For the sake of thorough record-keeping, the user should enter as much
additional information as is available for all students.
•
Number: A unique Student Number should be given to each student in
the district. In many cases, this number is the same as the student’s
Social Security Number.
•
SSN# (Social Security Number): Completing this field is optional for
SDE Reporting. However, if the Social Security Number is not used as
the Student Number, or if the Social Security Number begins with a 0
(zero), this field is mandatory.
•
Name: Enter the legal name for each student in the name fields
provided. First and Last Names are required; entering a middle name is
optional.
•
Grade: The student's current grade level should show in the Grade
field on the demographics screen.
•
Race: Use the drop-down list to select the student’s race.
•
DOB: Enter the student’s date of birth here.
•
Sex: Bullet the student’s gender.
•
Lunch: Select the Free, Reduced or Paid lunch code for each student.
This data is used by the SDE in calculating E-Rate Funding. Lunch
code descriptions may be viewed by selecting Utilities | Code
Maintenance | Most Codes | Student | Lunch.
Required Fields
Some data fields have been automatically set as required by the program. When a
field is required, the user will be unable to save a record unless that field has a value
entered.
The user may designate certain additional fields as required. To do this, select
Utilities | System Utilities | System File/Information. Click the System
Information 2 tab and enter information in the Set Required Fields section as
follows:
Summer-Fall 2007 AL Guidelines
•
File: Student will be selected here by default.
•
Field: Click the drop-down list to view all fields that may be set as
required. To mark a field as required, simply select it here and then
click the Ellipsis button to the right. The field name will appear in the
Required Fields list below.
•
Required Fields: All items listed here will be considered as required
data in STIOffice. To remove an item from the required list, select it
here and press the Delete key.
STI_0718071630
STIOffice • 27
Entry/Withdrawal Records
All students (including pre-school students) must have entry records to be counted
for attendance, and when any student withdraws from school, a withdrawal record
must also be created. Students should be enrolled or withdrawn using the STIState
Enrollment program. For instructions, see “About STIState Enrollment Features” on
page 33.
Special Schools
School Number 3999
This school number is used to report a residential facility school within the district.
This data is needed for the 40 Day ADM Report that is produced using the
STIDistrict Workstation. For this school, you will need to install and configure the
STI applications as described below.
STIOffice
This program must be installed and configured to manage the data for the school as
follows.
•
System File: When creating the System File for this school, enter the
following values:
o
Code = 3999
o
School Number = 3999
o
District Number = Your District Number
•
Attendance System File: The Attendance System File must be
created to show the Starting Date of the school year, as well as the
Ending Date of the school year. There is no need to configure this file
for attendance records; however, it must exist just to show the start and
end dates for the school year.
•
Attendance Calendar: The Attendance Calendar must exist for this
school just as it does for all other schools. This is required so that
students may be enrolled or withdrawn on dates in the calendar.
•
Student Demographic Data: Student data is not reported to the
state for this school. Instead, the system will report how many beds are
used at the school. Use STIOffice to create a “student demographic
record” for each bed to be reported to the state. Special rules do exist,
however, regarding the entry of this data. For example, the Student
Number for each bed is a number derived by a formula created by the
State Dept. of Education. Similar rules apply to the First Name, Last
Name and other fields found in the demographic record. Check with the
AL SDE for details on how this data is to be entered.
•
Entry Records: Every student/bed to be reported to the state should
have an entry date of the first day of the school year.
STIDistrict Net
STIDistrict Net must be installed and configured to upload this data to the district
database.
28 • STIOffice
STI_0718071630
Summer-Fall 2007 AL Guidelines
School Number 4999 (Child Count – Shared
Services)
This school number is used to report Special Education students who are not enrolled
in a “regular” school within the district, but are not in the residential facility. School
systems providing Special Education services for another school system (public or
private – including home-schooled students) should use School Code 4999 (Child
Count – Shared Services). STISETSWeb’s Child Count Report requires students to
have both demographic records and entry records before the students may be
included in the report. Since some students who are served by Special Ed in a district
are not actually enrolled into one of the “regular” schools, the district should install a
separate instance of STIOffice for this school. For this school, you will need to
install and configure the following three STI applications as described below.
STIOffice
This program must be installed and configured to manage the data for the school as
follows:
•
System File: When creating the System File for this school, enter the
following values:
o
Code = 4999
o
School Number = 4999
o
District Number = Your District Number
•
Attendance System File: The Attendance System File must be
created to show the Starting Date of the school year, as well as the
Ending Date of the school year. There is no need to configure this file
for attendance records; however, it must exist just to show the start and
end dates for the school year.
•
Attendance Calendar: The Attendance Calendar must exist for this
school just as it does for all other schools. This is required so that
students may be enrolled or withdrawn on dates in the calendar.
STIDistrict Net
STIDistrict Net must be installed and configured to upload this data to the district
database.
STIDistrict Enrollment
STIDistrict Enrollment must be installed and used for this school in order to enter
and withdraw students.
STIOffice Integration
Configure the STIOffice Integration application to connect to this school’s data, as is
done for “regular” schools in the district.
Summer-Fall 2007 AL Guidelines
STI_0718071630
STIOffice • 29
Auditing School Data at the Local School Level
All schools should periodically run the Error Report in STIOffice to identify data
problems.
Error Report
To generate this report, select Daily | Attendance Reports | State Reports |
Prepare SDE File and check the Check for Errors Only box. Choose your report
options and enter the Attendance and Lunch Codes used by your school.
After the report has been generated, do the following:
•
Correct any problems listed on the report.
•
Re-run the report to verify that the errors have been corrected.
Correcting Data Errors
All data correction should be performed at the local level in STIOffice. Each school
is responsible for correcting errors/omissions that are reported by the STIOffice
Error Report and those errors reported to the school by the district.
30 • STIOffice
STI_0718071630
Summer-Fall 2007 AL Guidelines
Uploading Data to the District Database
The STIDistrict Net application is installed on one computer at each school. This
program is used to upload data from the local school's STIOffice database to the
STIDistrict database. In most cases, the program is configured to upload
automatically each day according to a schedule determined by the district. In some
cases, however, the district may choose to have the school manually initiate the
upload each day.
Note: If your school serves preschool students, verify that you are uploading those
students via STIDistrict Net. Remember that grades should be separated by a “pipe”
symbol (example: 97|98|99). For more information, please see the STIDistrict Net
User Manual, available on the Documentation page of the STI Support site at
http://support.sti-k12.com (login name and password required).
To manually upload data to the district database, right-click the yellow FTP icon at
the bottom right corner of the screen.
There are two upload options:
Summer-Fall 2007 AL Guidelines
•
The option labeled Upload will perform a "regular" upload to the
district database. This will send only those records that have been
added, changed or deleted from the STIOffice database since the
previous upload.
•
Choose the Upload All option and STIDistrict Net will perform a
complete upload of all data in the STIOffice database to STIDistrict.
This option takes more time.
STI_0718071630
STIOffice • 31
STIDistrict
STIDistrict Setup
The STIDistrict application is installed at the district’s central office and is used to
create the data files sent to the state.
To set up STIDistrict core system information, select File | District Setup. Data
should be entered as follows:
District System File
•
Year 1 / Year 2: Example: Enter 2007 as Year 1, and 2008 as Year 2
to indicate the 2007-2008 academic year.
•
District Number: Enter the district number assigned to your district
by the state.
Importing Data
The STIDistrict server at the district office runs the STIDistrict Import Engine
program. The function of the Import Engine is to add data received via school
uploads into the STIDistrict database.
If the Import Engine is not running, NO DATA will be updated in the district
database.
To start the STIDistrict Import Engine, click the Windows Start button, then select
STIDistrict Import Engine under STI Applications.
Important Note!: Do not attempt to create reports in STIDistrict while the Import
Engine is in the process of importing data. You should always wait until all data has
been imported before generating any report.
Auditing School Data at the District Level
A user at the district level should perform each of the procedures described below:
Monitoring Uploads
All school data uploads should be monitored to verify that the schools are uploading
data as scheduled. To do this, look at the date on the School Desktop in the
STIDistrict Workstation program by selecting File | School Desktop. Whenever a
school does not upload according to schedule, someone at the school should be
instructed to manually initiate an upload.
32 • STIDistrict
STI_0718071630
Summer-Fall 2007 AL Guidelines
If a school has problems uploading data and assistance is needed, please contact STI
Support at 877-844-0884.
Running Conflict Report and Cleaning Data
The Conflict Report lists students whose records have various types of data errors at
the district level. Run these reports frequently, and have someone at the school level
correct any problems via STIOffice.
Any data changes that are made at the school will be imported into the district
database during the next school data upload.
About STIState Enrollment Features
Districts in states that use the STIState database have the ability to extend the
STIDistrict Enrollment program to allow student data to move throughout the state,
in addition to throughout the district.
The data that follows a student who transfers into any school within a district will
still be determined by the STIDistrict Enrollment setup in the district’s STIDistrict
Workstation program. The other setup options found in the STIDistrict
Workstation/Enrollment Settings will also remain under district control.
The data that follows any student who transfers into a school from OUTSIDE the
district will be determined by the state.
Please note that after enabling the STIState Enrollment features, users may
experience slight delays in transaction processing time. The delay will be a result of
the added time needed to process transactions with the state database.
Entry/Withdrawal Records
Every student (including pre-school students) must have an entry record. If the
student withdraws from school, a withdrawal record must also be created. To enroll
or withdraw a student, use the STIDistrict Enrollment program.
Note: You must use STIDistrict Enrollment to insure the integrity of your
STISETSWeb and STIOffice data. If you enroll students any other way, there will be
a delay in the Student’s SIS Status.
Enrolling a Student
To enroll a student:
Summer-Fall 2007 AL Guidelines
•
Open the STIDistrict Enrollment Program and log in using the user
name and password assigned.
•
Click the Plus button.
STI_0718071630
STIDistrict • 33
•
Enter the name or any other available information about the student and
then click on the Search District button.
•
If the student is not listed at another school within the district, click on
the Search State button. If the student is listed, highlight the
student’s name and click Select.
•
If the student is not listed at any other school in the district or in the
state, click on the New button. Enter the data required for the student,
and assign an entry code and date.
Note: Only enter a new student if the student cannot be found by clicking the
Search District and Search State buttons.
34 • STIDistrict
STI_0718071630
Summer-Fall 2007 AL Guidelines
Data fields listed on the new student screen are described below.
Summer-Fall 2007 AL Guidelines
•
Number: A unique student number should be given to each student in
the district. In many cases, this number is the same as the student’s
Social Security Number.
•
SSN# (Social Security Number): Completing this field is optional
for SDE Reporting. However, if the Social Security Number is not used
as the Student Number, or if the Social Security Number begins with a
0 (zero), this field is mandatory.
•
Name: Enter the legal name for each student in the name fields
provided. First and Last Names are required; entering a Middle name is
optional.
•
Grade: The student's current grade level should show in the Grade
field on the demographics screen.
•
Race: Use the drop-down list to select the student’s race.
•
DOB: Enter the student’s date of birth here.
•
Sex: Bullet the student’s gender.
•
Lunch: Select the Free, Reduced, or Paid lunch code for each student.
This data is used by the SDE in calculating E-Rate Funding. Lunch
code descriptions may be viewed by selecting Utilities | Code
Maintenance | Most Codes | Student | Lunch.
•
State: This number is automatically generated by the STIDistrict
Enrollment program. School users are not to enter any data into this
field.
•
Entry / Time / Code: Enter the Entry Date, Time and Code for the
new student entering the school district.
STI_0718071630
STIDistrict • 35
Note: The Type of record created – Entry or Withdrawal – is automatically
determined based upon the student’s current status as either an Enrolled or
Withdrawn student. Enrolled students may be withdrawn; or Withdrawn students
may be re-entered. This automatically prevents the user from duplicating either
procedure.
36 • STIDistrict
STI_0718071630
•
To delete an entry record for a student (ex: accidentally enrolled the
wrong “John Smith” into your school) you would click on the Plus sign
to Enroll a student. Search and highlight the student’s record. Then
click Delete Entry.
•
If the student’s record needs to be removed completely from STIOffice,
the user will check the checkbox labeled Delete Student. If the user
just needs to edit the entry code or date and re-enter the student,
uncheck the Delete Student checkbox. Then re-enroll the student. If
the student has only an entry code for the year (ex: has not transferred
from another school all year) you will not be able to delete the entry.
The student must be set inactive to remove the entry code.
Summer-Fall 2007 AL Guidelines
Note: When STIState is in use, the menu options to enroll and withdraw students in
the STIOffice program are automatically disabled.
Also Note: In cases where a student record moves from one district into another,
where the new district uses the Auto-Numbering feature in STIDistrict
Enrollment, the student number will change to the next available number in the new
district’s database.
Withdrawing a Student
To withdraw a student:
Summer-Fall 2007 AL Guidelines
•
Open the STIDistrict Enrollment Program and log in using the user
name and password assigned.
•
Click the Minus button.
•
Enter the name of the student and click Search.
STI_0718071630
STIDistrict • 37
•
38 • STIDistrict
STI_0718071630
•
Highlight the student in the list provided and then click on the
Withdraw button.
•
Enter the appropriate withdrawal date and code and then click the
Withdraw button.
If you wish to delete a withdrawal date and code for a student, this can be
accomplished by clicking the “minus” sign and searching for the student
name.
Summer-Fall 2007 AL Guidelines
•
Select the student and click the Delete Withdrawal button. A
window will appear prompting you to choose a new withdrawal code.
•
If you wish to remove the withdrawal, the Code field should be left
blank. This information will update the school, district and state
databases immediately.
For more detailed instructions on using STIDistrict Enrollment, please refer to the
STIDistrict Enrollment AL User Manual, located on the Documentation page of the
STI Support site at http://support.sti-k12.com/home.asp (user name and password
required).
Summer-Fall 2007 AL Guidelines
STI_0718071630
STIDistrict • 39
Home Room / Grade Level Changes
If a student changes home rooms or grade levels during the school year, you should
enter this in STIDistrict Enrollment by withdrawing the student and then re-entering
the student into the new home room and/or grade on the same day.
Valid Grade Levels
In STIOffice, the Grade Level codes given to students are as follows:
Grade Level Code
Description
97
Pre-school Students Age 2
98
Pre-school Students Age 3
99
Pre-school Students Ages 4 & 5
0
Kindergarten Students
1
Grade 1
2
Grade 2
3
Grade 3
4
Grade 4
5
Grade 5
6
Grade 6
7
Grade 7
8
Grade 8
9
Grade 9
10
Grade 10
11
Grade 11
12
Grade 12
Setting Up Grade Levels for SIR Report
The Alabama SDE requires that the grade level for a preschool student be reported as
PK and for a kindergarten student to be reported as 0K (zero K) in the various
required state reports. Therefore, each district must edit the district’s Grade Level
form in the STIDistrict Workstation. To do this:
40 • STIDistrict
STI_0718071630
•
Open the STIDistrict Workstation and select File | District Setup
Menu | Grade Levels.
•
Select All schools on the list.
•
Click the Grade Levels Definition tab.
Summer-Fall 2007 AL Guidelines
•
Highlight Grade 99 in the System Grade Levels box on the far left of
the form. Then edit the Display Grade to read PK.
Note: If there are no grade levels displayed in the System Grade Levels box at the left
of the form, type 99 into the System Grade field, then type PK into the Display
Grade field and then click the Add button.
•
Click the Save button. Repeat this for Grades 97 and 98, if your
system uses those grade levels for pre-school students.
•
Using the same method, assign a Display Grade value of 0K (zero K)
for Grade 0, Kindergarten.
•
To verify that your preschool and kindergarten grade levels will be
exported correctly to the SDE, click the View GradeLevels Report
button.
Creating the SDE Export
This section covers the collections of Fall Attendance, AYP Graduation Exam
AYPARMT, and 9 Month reports. To generate any of these reports, your schools must
enter all of the required student data (including, but not limited to SSN, Lunch Code,
Entry/Withdrawal Records and Attendance Records) as defined in the AL Guidelines
document available from the Documentation page of the STI Support site at
http://support.sti-k12.com/documentation/default.asp (login and password required).
To produce the file, open the STIDistrict Workstation program and then select
Report | Alabama Reports | SDE Export.
If errors exist, an error report will be displayed after the export has run. All errors
should be corrected in STIOffice and the export should then be generated again.
Repeat this process until all errors have been corrected.
Also, the option to print Fall Attendance Report (SDE ADM) should be selected
when running this export. Before the data file is sent to the state, someone in the
district should approve that the values on this report are correct, as this report reflects
the data being submitted to the state.
Report Options
•
Summer-Fall 2007 AL Guidelines
Use School # Field as School Code: Select this code to report the
value of the School Number field from the local school system file
STI_0718071630
STIDistrict • 41
instead of using the School Code as the School Number reported within
the SDE export file.
•
Student Number=SSN: Select this box if schools use the students’
Social Security Numbers as their student numbers.
•
Include Diploma Types: Diploma Types are reported in the 9th
Month Collection only. Be sure to select this option before building the
9th Month Collection.
•
Select Grades: Select the grade levels to include in the export file.
Since all grade levels are selected by default, de-select any grade levels
to be excluded from the report.
•
Sort Order: Student records will be listed in this order on both the
export file and on the printed report. Select a field to sort by, and then
set that field's sorting priority by highlighting it and using the up and
down arrows to raise or lower the priority level.
•
Print SDE File Content List: Select this box to print a list of the
students who will be included in the export file. This report will display
all the data for each student that will be reported to the state.
•
Print Fall Attendance Report (SDE ADM): Select this box to print
a report that summarizes the data exported to the file. This report
includes totals for lunch counts, and also an Average Daily Membership
report based on the data in the export file. This report should be
printed and the data on the report should be approved before the
file is sent to the state.
SDE Report Setup
Select the SDE Report Setup tab to choose the following options as desired for your
district.
42 • STIDistrict
STI_0718071630
•
Number of Attendance Days in Year: Enter the number of
attendance days in your school year.
•
Attendance Days on Report: Enter the total number of attendance
days to include in the report.
•
Starting Attendance Day in Report: Always enter the number 1
into this field.
Summer-Fall 2007 AL Guidelines
Note: If running for Fall, the user should enter the day number of the first in-school
day after Labor Day as the Starting Day. The value entered for Attendance Days on
Report should be 20.
•
Suspend Codes: List all codes used in the district to indicate that a
student was absent due to suspension from school. Use commas to
separate multiple codes.
Note: All students receiving free lunch should be coded with a Lunch value of 1 in
STIOffice. Also, please note that students are exported in this report using their
lunch statuses on the last day of the report. For example, if when running the report
the user enters 45 as the Attendance Days on Report, the student’s lunch status as of
the 45th day after Labor Day will be reported.
Suggestion: In the weeks leading up to the due date for any export file, build the file
several times. Check the file for errors and to make sure all students are being
reported.
SDE Export Approval
After running the SDE Extract and verifying that the data is correct, the user must go
through an approval process. The user must have run the SDE Extract. If no data is
found, processing will not continue.
Approval Process Business Rules
1.
Summer-Fall 2007 AL Guidelines
Snapshot
•
Coordinator of specific collection (LEAPS, Attendance, SIR, etc.)
validates desired data once it has been received at the district
server from the schools.
•
Coordinator creates an “official” snapshot of the desired data via a
drop-down selection for the collections.
o
Extract process creates tables to house the data.
o
Attendance Extract – Creates student enrollment detail.
STI_0718071630
STIDistrict • 43
2.
Notification of Readiness
•
3.
4.
5.
Coordinator informs Superintendent that the snapshot is ready for
review and approval.
Review and Signoff
•
Superintendent or designated approving authority (DAA) reviews
the data for accuracy.
•
Coordinator makes any necessary adjustments at the appropriate
source level (STIOffice, Financial package) and re-runs the
Extract.
•
Superintendent or DAA “approves” the official Extract.
Upon approval by Superintendent:
•
Data is “locked” from any further editing or manipulation.
•
Data is replicated to the SDE.
Validate and Process
•
SDE validates the extract.
Running the Export Approval
•
To begin the process, go to Reports | Alabama Reports | SDE
Export Approval.
•
A message will display to verify that the user wishes to continue on
with the Approval process.
•
Once an approval is performed, users cannot “re-approve” the data.
This may only be done if ALSDE resets the approval flag for the
collection that needs to be resubmitted.
LEAPS Export
Two LEAPS Export files will be generated and submitted to the state. A Financial
file will be generated that includes payroll data. A Teacher Schedule file will be
generated that will include schedule information for employees in the district who
teach students.
44 • STIDistrict
STI_0718071630
Summer-Fall 2007 AL Guidelines
LEAPS Export Process Guidelines
•
Financial data is entered via the McAleer Accounting application and
then exported to a file. This file is then imported into the STIDistrict
Workstation as described in this document. The financial data MUST
be imported prior to the teacher schedule data.
Note: When data is imported, if any data has errors, the records will not save to the
holding tables. If data was previously imported successfully, it will not be
overwritten
•
Schools must enter teacher demographic data and schedule data as
described in the STIOffice data entry section of this document. This
data will be uploaded to the district database as normally scheduled.
The data needed for the Teacher Schedule Export is then imported into
a separate data table as described in the section “Importing Teacher
Schedule Data” on page 48.
•
Valid State Course Numbers must be entered into the State field of the
Master Schedule record for every section of a course to be reported.
•
All errors reported by STIOffice error reports or the error report
generated by the LEAPS Export in STIDistrict must be corrected prior
to submitting files to the state.
LEAPS Security
To limit a user’s ability to select specific buttons or reports (such as reports that
show sensitive financial data), the administrator should edit security permissions for
that user’s User Group.
Summer-Fall 2007 AL Guidelines
•
Log in to the program as an Administrator (@@@).
•
Select Report | Alabama Reports | LEAPS.
•
Right-click on the Key
Set Security.
•
Select the User Group(s) for which you wish to remove this option,
using the pull-down menu in the lower left corner of the Security:
Report Options screen.
•
De-select the button in the list provided to make the option invisible to
the users in the selected group.
STI_0718071630
icon displayed on the form and select
STIDistrict • 45
Importing Valid Schools File
Prior to performing any of the steps that follow in this document, the district must
import a data file into its database that contains a listing of approved school numbers
as identified by the SDE. This document is a text file that can be downloaded on our
updates site under the District Workstation portion of the updates site. Alabama
reports that are run from the STIDistrict Workstation, including LEAPS, will use this
data to validate school numbers.
To import this file:
•
Select Report | Alabama Reports | Import Valid School And
System Codes.
•
Browse to locate the file provided by STI, called
AL_Valid_Schools_5.txt.
•
Click the Process button to import the data into the database.
Financial Data Export
The user must produce an export file from the McAleer Financial application. The
file will need to be saved to a location that is accessible to the STIDistrict
Workstation user who will be generating the LEAPS Exports.
•
Select Report | Alabama Reports | LEAPS.
•
Select Financial Data | Import Data.
Important Note!
A warning will appear notifying the user that importing data will overwrite existing
data. Please keep in mind that any edits to your financial data that has been done
within the STIDistrict Workstation (any added or changed records) will be lost when
importing.
46 • STIDistrict
STI_0718071630
Summer-Fall 2007 AL Guidelines
•
Click the Browse button, then locate the file produced by the McAleer
export. The filename should be leaps999.txt (where 999 would actually
be your district number).
•
Click the Process button after locating the file. If errors occur during
data import, an error report will be produced.
•
Correct any errors found in the McAleer data, and repeat the above
steps.
**Important Note: The financial data MUST be imported prior to the teacher
schedule data.
Verify Imported Data
•
Run a report to verify that the imported data is correct by selecting
Report | Alabama Reports | LEAPS | Reports | Faculty List.
•
Share this report with the appropriate personnel in order to verify
accuracy.
Exporting the Data
If report data errors have been corrected, the user should run the Faculty List Report
again to verify accuracy and completeness of the data. After the Faculty List Report
has been verified for accuracy, the user should export the data. To do this:
•
Select Report | Alabama Reports | LEAPS | Financial Data |
Export Data.
•
Choose the schools to be included on the export (typically All Schools),
then click OK.
•
After exporting the data, the Administrator must approve the Financial
Data Collection.
Approval Process
Now that the data is ready to be submitted to the state, the user must follow the
following procedures:
•
Select Report | Alabama Reports | Leaps | Financial Data |
Approve.
•
Follow the screens to approve the data.
Note: Once an approval is performed, users cannot “re-approve” the data. This may
only be done if ALSDE resets the approval flag for the collection that needs to be
resubmitted.
Teacher Schedule Export
This section provides information on how to produce the Teacher Schedule Export
file.
**Important Note: The financial data MUST be imported prior to the teacher
schedule data. If no financial record exists for a teacher in the district database, no
schedule data will be imported for that teacher.
Summer-Fall 2007 AL Guidelines
STI_0718071630
STIDistrict • 47
•
Schools must enter data in STIOffice as per data entry guidelines in this
document. Specifically, teachers must have Social Security Numbers
and they must have schedules.
•
Each section of any course taught at a school must have the appropriate
State Course Number recorded in the in the State field of the Master
Schedule record. Data will be uploaded to STIDistrict as scheduled, to
be used in the STIDistrict Workstation.
Importing Teacher Schedule Data
After data has been imported into the STIDistrict database, specific elements of the
data must be extracted into new tables in the district database designed specifically
for LEAPS reporting. First term schedules only will be imported. To do this:
•
Select Report | Alabama Reports | LEAPS | Schedule Data |
Import Data.
•
A warning prompt will appear to inform the user that importing data
will erase all previously imported schedule data.
•
After the import has finished, click OK.
•
If errors exist, correct and re-import the Schedule data
Verifying Imported Data
•
Run a report to verify that the imported data is correct by selecting
Report | Alabama Reports | LEAPS | Reports | Worksheet.
•
Share this report with the appropriate personnel in order to verify
accuracy.
•
A listing of teachers and the courses in their scheduled will be
displayed. You may filter this list to include only selected teachers or
courses by completing any of the data at the top of the form and then
clicking on the Filter button.
Printing the Schedule Data Report
Running the Schedule Data Export will produce an Error Report if errors exist in the
data. This report should be generated frequently during the process to determine
what errors need to be corrected. To do this:
48 • STIDistrict
STI_0718071630
•
Select Report | Alabama Reports | LEAPS | Schedule Data |
Export Data. If errors exist in the data, an error report will be
produced.
•
If errors exist, correct them in STIOffice and then Upload to
STIDistrict (via typical process, using STIDistrict Net and the
Summer-Fall 2007 AL Guidelines
STIDistrict Import Engine). Then re-import the Schedule data using the
LEAPS menu options in the STIDistrict Workstation.
Exporting the Schedule Data File to Produce Error Report
After all edits and corrections have been made to the schedule data, and after reports
have been run to verify that the data is complete and correct, the district will need to
export the data to a file and then send to SDE.
•
Select Report | Alabama Reports | LEAPS | Schedule Data |
Export Data.
•
The program will display the filename to be created and the path to
which the file will be saved. The user may modify this information if
necessary. By default, the filename will be schedoutNNN.txt, where
NNN is the district or system number.
Note about Block Schedule Type:
A value is exported to show whether a schedule is for Block schedule or not. This is
a calculated value, not data that is entered directly within STIOffice. The basic
formula for determining whether a school has block schedule or not is as follows: If
the number of terms offered in a school plus the number of periods in a day equals 8,
then courses report from that school as Block. For all other values, the school is
reported as Not Block.
Approval Process
Now that the data is ready to be submitted to the state, the user must follow the
procedures described below:
•
Select Report | Alabama Reports | Leaps | Schedule Data |
Approve.
•
Follow the screens to approve the data.
Note: Once an approval is performed, users cannot “re-approve” the data. This may
only be done if ALSDE resets the approval flag for the collection that needs to be
resubmitted.
Student Incident (SIR) Export
The SIR export produces a report that will be submitted AL SDE through an
approval process. The users will no longer submit a file to SDE.
To create the SIR Export from your STIDistrict Workstation:
Summer-Fall 2007 AL Guidelines
•
Select Report | Alabama Reports | Student Incident (SIR) Export.
•
Select the schools to be included on the export. Typically this will be all
schools.
•
Select the date range for data to be included in the export. By default, the
dates should be 7/1 through 7/1.
•
Select the collection period to use for the report.
•
To view the report, please select the option to Display Printed Report.
STI_0718071630
STIDistrict • 49
If errors exist, an error report will be produced. Have schools edit the data to correct
errors, then repeat the process until no errors exist.
Approval Process
As of the latest update, the SIR Export will no longer create an export file. The data
will be added to a table and the user will then approve that the data is valid.
•
To do this, go to Reports | Alabama Reports | SIR Export
Approval.
Note: Once an approval is performed, users cannot “re-approve” the data. This may
only be done if ALSDE resets the approval flag for the collection that needs to be
resubmitted.
Error Checking in Accordance with the State
Department of Education
To repeat a recommendation provided in a note above:
STI recommends that Alabama school districts build state-required files several
times prior to each file’s due date. Check the files for errors and to make sure all
students are being reported.
Addressing Errors / Data Correction
Data errors reported back to the district from the state level should be corrected at the
school level, via STIOffice. After the errors have been corrected, the schools should
perform a data upload to the district, which will then need to rebuild the file(s) and
re-send them to the state.
50 • STIDistrict
STI_0718071630
Summer-Fall 2007 AL Guidelines
STISETSWeb
Setting Up STISETSWeb
There are several steps involved in setting up STISETSWeb:
•
Define System Policy.
•
Define Security Groups.
•
Build your Employee File.
•
Define Codes.
•
Manage Student Data.
The program is set up once and thereafter maintained by a system administrator. This
document provides the basic instructions required for administrators or managers to
maintain their STISETSWeb systems. For further information, please see the
STISETS Web User Manual, available on the Documentation page of the STI
Support site at http://support.sti-k12.com (login and password required).
System Policy
The Utility Desktop houses several options that enhance the operation of the
software. STISETSWeb has a System File option located under Utility Desktop. It is
recommended that only one user have access to the SETS Web System File. This
area of the program should be kept under high security. This area should also be set
up prior to the first day of school (or before using the STISETSWeb program).
Utilities Desktop | System File
Summer-Fall 2007 AL Guidelines
•
Daily Student Update: Before you run your first nightly upload, STI
recommends that you remove the check from the Create Gen Ed
Caseload box, which will be checked by default. This checkbox is
located in the Daily Student Update tab. Be sure to click Save to save
the change.
•
Scheduled Time: The administrator must set a scheduled time each
day for the students in STISETS Web to have their STIOffice
demographic data updated. This time must be AFTER your STIDistrict
(Daisi import) uploads are complete.
•
Show Student SSN: Your district must determine whether student
Social Security Numbers are to display within the student folder. In the
Other Settings tab, check the Show Student SSN box to display Social
Security Numbers. These numbers will only be seen in the Student
Folder on the Services tab.
•
Inactivity Timeout: This feature is in the Other Settings tab.
Inactivity logout time may be set here, up to 15 minutes. If the
STI_0718071630
STISETSWeb • 51
workstation remains inactive for this length of time, the user will
automatically be logged out.
•
Child Count Date: Enter the appropriate Child Count date (generally
recognized as Dec. 1st) in the Child Count Date field. Select the Save
Tab feature to save the date in the program.
•
Security Policy Settings Tab: This tab is used to maintain
passwords on an administrative level. The following options may be
edited here:
o
Password Expiration Days: This allows for a password to expire in
a given number of days. In a typical setup, the system will require
that a user change his/her password every 30 to 90 days.
o
Remembered Passwords: This is a setting that allows several
previously used passwords to be remembered. Users cannot use the
same password once their password expires.
o
Lock Out Minutes: This is the number of minutes you can attempt
signing on. If someone tries to log on unsuccessfully for this
amount of time, it will lock their account. The user will have to go
to the administrator to have the account unlocked.
o
Lock Out Threshold: This is the number of times you can attempt
to log in with an incorrect password. If someone tries to login
unsuccessfully this number of times, it will lock their account. The
user will have to go to the administrator to have the account
unlocked.
Utilities Desktop | Progress Periods
Progress periods are used by System Administrators to set the current progress
reporting periods for the entire district. Progress periods are used in conjunction with
the STISETSWeb Progress Report, found on the Reports Desktop. Progress periods
must be set up prior to reporting progress on any student. To add or edit progress
periods, do the following:
•
Click Insert to add a new progress period.
o
Outline the progress reporting periods as needed.
o
Enter the date in MM/DD/YYYY Format.
o
Remember, progress periods must not overlap.
•
Select an existing record and click Change to modify it.
•
Select an existing record and click Delete to remove it.
Security Groups
The security model for STISETS Web is very robust, allowing administrator to set
security assignment for employees who serve students in multiple schools. This will
enable speech therapists, gifted teachers, etc., to access their caseloads from one
work login. After initial security groups have been assigned, supervisors will have
the option to add or remove rights as needed for individual employees. Since
student-by-student security assignment is allowed, supervisors have many options
available for securing confidentiality of student records.
52 • STISETSWeb
STI_0718071630
Summer-Fall 2007 AL Guidelines
Security groups are defined by the user’s level of access to the program. This screen
allows the administrator to view Groups, Users in each Group and Group Set-Up. As
a group is highlighted in the left box, the users in the selected group are displayed in
the right box.
IF USERS ARE NOT ASSIGNED SECURITY GROUPS, THEY WILL HAVE
NO OPTIONS UPON LOGGING INTO THE PROGRAM.
Security Groups Defined
Six security groups are pre-installed:
•
Managers: Employees assigned to this security group have full access
to the software for managing records in their school only. Managers
have full access over student records. In other words, Managers have
full access to manage the STISETSWeb software in their school.
•
Teachers: This security group was designed for classroom teachers,
providing the ability to manage all students in the teacher’s caseload.
Whether employees serve in the capacity of case manager, related
service provider, Special Education teacher, psychometrist, etc., all
student records may be managed from one work area.
•
General Ed Teachers: This group will be created if the Create Gen
Ed Teachers box was checked on the system file. This Group has read
only rights by default. During the creation of this group, any general ed
teacher who teaches special education students will be placed in this
group. The general ed teachers’ User Name will be their STIOffice
User Code appended by their school number. A default password of
“Pass” will be assigned with the option to change upon logging in to
the program.
•
Administrators: Administrators have full user access for all schools
in the district. Typically, board office personnel would be assigned this
security group.
•
Medicaid: Employees assigned to this security group have full access
to the Medicaid Desktop.
•
State Users: Assignment of this Security Group allows view-only
access to the program. Typically, State Department Representatives
would be given this group.
Security Group Edit Commands
The following options may be helpful when working with security groups:
•
Summer-Fall 2007 AL Guidelines
Copy: Creates a duplicate group of the group selected. If you need to
create a new group, you may look at the existing groups and determine
which group has rights that are most similar to the group you wish to
STI_0718071630
STISETSWeb • 53
create. Select a group and click the Copy button to copy the current
permissions from the model group. You must rename the new group.
•
Print: Allows you to print the effective permissions for a selected
group. If you wish to view the current rights for a group, select the
group and click the Print button.
•
Members: Adds or removes users from the highlighted Security
Group list. This is also a good way to view the current members of a
selected group.
Other Security Group Items
•
Effective Permissions: A tool for viewing individual user
permissions. No modifications to permissions are allowed from this
menu option.
•
Edit Permissions: A tool for locking down and editing permissions
for entire groups of users. This will allow the System Administrator to
edit the permissions of a particular group more precisely.
•
Object Types: Three different classifications of security in STISETS
Web.
•
Groups: Group whose permissions are to be viewed. For more
information on this, please refer to the STISETS Web User Manual,
available for download under Documentation | User Manuals on
the STI Support site at http://support.stik12.com/documentation/default.asp (user name and password
required).
Employee File
Employee information may be entered in one of two ways. Begin by expanding the
Utilities Desktop. The options that are available are shown below.
54 • STISETSWeb
•
You must first verify that the teacher does not exist in you system. You
do this by Searching for the employee before inserting a new record,
or by Importing a teacher.
•
To import an employee, click Import. This will copy information from
the employee file that has been uploaded to the District database from
STI_0718071630
Summer-Fall 2007 AL Guidelines
the local school STIOffice program. Since demographic information
will be automatically copied over, this option will save time.
•
o
After clicking Import, search for the employee by entering the
Teacher Number, Last Name or First Name.
o
Once the desired employee’s name has been highlighted, click OK.
To add new employees who do not exist in the local school employee
file, click the Insert button. After clicking Insert, complete
appropriate information on the screen. Click OK to save the
information.
Codes
The Code Desktop houses all the codes used in the software; i.e., all codes displayed
in drop-down lists throughout the program.
Location, Diagnosis, Service Type Codes
Location codes are used with Services. This will populate the drop-down list for
Service locations.
•
•
Click Insert or Change to access the following fields:
o
Name: Title of the location.
o
Description: Any notes you have on this location.
o
Expiration (optional): The last date on which this location will be
used.
Click Delete to remove a selected location.
District and State Codes
To access this menu option, click the plus sign beside Code Desktop and then
select District Codes. Most codes are NOT editable because they are defined by
the State. Currently, the only code files that are editable are:
Summer-Fall 2007 AL Guidelines
•
Automatic Test Administered
•
Eligibility Name of Assessment
•
Language
•
Staff-Student Relationship
STI_0718071630
STISETSWeb • 55
•
Staff Type
When a code needs to be edited, the user should first modify the State Code and then
modify the District Code.
Example
To customize the pick list of Assessment names, select Utilities and then go to the
sub category Code Desktop.
•
Select State Codes.
•
Select Eligibility Name of Assessment category.
•
o
Insert, and then enter, Code, Name and Description. Disregard
the Federal Codes.
o
Click OK to save changes.
Select District Codes and select Eligibility Name of Assessment
category.
o
Insert and then enter the Code, Name and Description Now select
the code you previously entered into state codes from the State
Code drop-down box.
Student Maintenance
Create Student Folder
Creating a Student Folder introduces a student to the Special Education process. As
forms are completed in the program, the dates are written to the folder. The purpose
of the folder is to house the most current information on Special Education students.
Note: If a student record is not in STIDistrict Workstation, the student will not be
listed in STISETSWeb.
56 • STISETSWeb
•
Assign Case Manager: By default, the person logged in is assigned
as the Case Manager. To change the default, click the blue plus icon
near the upper left corner of the Case Manager field.
•
After entering data in the appropriate field, click Search.
•
Highlight the name of the desired student and either double-click on the
name or click Import
STI_0718071630
Summer-Fall 2007 AL Guidelines
Delete a Student
Occasionally it becomes necessary to delete a student record. Deleting a student from
the STISETSWeb database does not delete the student from the STIDistrict database
or the STIOffice program; the only record deleted is the student’s Special Education
Folder record.
Note: Students who have completed forms cannot be deleted.
•
Select Delete a Student from the Utilities Desktop.
•
After the desired criteria have been entered, click Search.
•
Highlight the name of the student to be deleted and click the Delete
button on the lower right. After deletion, the program will return to the
User Desktop.
Caseload Assignment
The purpose of the Caseload Assignment section is to create the Special Education
relationship(s) between staff members and particular students. The student listed at
the top of the screen is the student you are working with. A staff member may be
associated with a student in multiple ways. All assignments are performed here
except assignment of a Case Manager.
•
Select the Caseload Assignment menu from the Utilities Desktop.
•
Make note of the student name displayed at the top of the screen. This
is the student to whom you are assigning teachers.
•
Click Insert.
•
Click the blue plus icon to search for an employee. Select the
appropriate name and click OK to continue. Click the down arrow to
select this employee’s relationship to the student. Then click OK to
save.
Note: The types of relationships are pulled from the District Code field (StaffStudent Relationship). This is one of the few editable codes.
Mass Caseload Assignment
This utility is used to change relationships from one staff member to another. This
should be done at the start of school or end of the year when students are moving
from schools or grades.
Summer-Fall 2007 AL Guidelines
STI_0718071630
STISETSWeb • 57
Mass Caseload Assignment is a two-step process.
•
The user must first decide which students are to be moved from their
current teachers.
•
The user should decide which teacher will receive these students.
This area is best understood if the process is approached as follows: Find all students
having ____teacher, with ____ relationship; or find all grade__ students. Then assign
those students to ___ staff member with the new relationship of _____.
To mass-move a caseload or relationship, perform the following steps:
•
In Find Students, search for the students to be moved by: school, grade,
LRE, and /or Exceptionality.
•
Once the search criteria have been fulfilled, click the Search button.
•
Notice there is one more search option, called Assign To. Use this
feature to define the staff member to whom the selected students are to
be assigned. The relationship must be defined as well. DO NOT click
Assign at this point.
•
Select the student from the search box below. When the box beside the
appropriate student has been checked, click Assign.
•
Continue this process until all students have been moved to the
appropriate staff member.
Archive Students
This feature is provided to allow users to file away students who are no longer
receiving services in a district. Please note that the Archival process is an End of
Year procedure. The basic action performed during this process is the selection of
students followed by the mass-exiting of the selected students.
•
58 • STISETSWeb
STI_0718071630
Please note that Archiving automatically changes the Exit Reason.
Archiving does NOT change the status of the student folder.
Summer-Fall 2007 AL Guidelines
o
First search the students as done previously.
o
Check the non-STIOffice checkbox to select students who are not
in the STIOffice program.
•
Click Search to continue.
•
Continue to the Archive Students box. Select the Exit Reason and select
an Exit Date.
•
Check the box next to each applicable student’s name. Then click OK.
Un-Archive Students
This utility is used to bring students back from Archived status. It is recommended
that this procedure only be used as the Special Education director has outlined within
your district. To un-archive a student:
Summer-Fall 2007 AL Guidelines
•
First locate the students to un-archive.
•
Click in the checkbox to un-archive a student or click in the checkbox
to the right of Un-archive to select all students. To select multiple
checkboxes, hold down the Shift key on the keyboard as you click on
each box.
•
After all boxes have been selected, click the Un-Archive button to the
right of the search results field.
STI_0718071630
STISETSWeb • 59
Change Student Numbers or School
This tool should only be used by a System Administrator. This tool is used to change
a student’s existing Student Number or school in STISETSWeb to match that in
STIOffice. Student Numbers are entered as a numeric combination, no alphabetical
or special characters are permitted.
60 • STISETSWeb
•
Select the appropriate student using Select a Student.
•
Go to Utilities Desktop | Change Student Number.
•
Read the Warning screen that appears.
•
To continue, adjust the New Student Number or New School as
necessary.
STI_0718071630
Summer-Fall 2007 AL Guidelines
Enrolling Private and Preschool Children in Alabama
Note: All newly created schools must have a profile created in STIOffice Integration.
Enrolling Private School Students
School Number 4999 (Child Count – Shared Services)
This school number is used to report Special Education students who are not enrolled
in a “regular” school within the district, but are not in the residential facility. School
systems providing special education services for another school system (public or
private – including home-schooled students) should use School Code 4999 (Child
Count – Shared Services). STISETS Web’s Child Count Report requires students to
have both demographic and entry records before the students may be included in the
report. Since some students who are served by Special Ed. in a district are not
actually enrolled into one of the “regular” schools, the district should install a
separate instance of STIOffice for this school. This school will require installation
and configuration of the STI applications described below.
STIOffice
This program must be installed and configured to manage the data for the school as
follows:
•
System File: When creating the System File for this school, enter the
following values:
o
Code = 4999
o
School Number = 4999
o
District Number = Your District Number
•
Attendance System File: The Attendance System File must be
created to show both the Starting Date and Ending Date of the school
year. There is no need to configure this file for attendance records;
however, it must exist in order to show the start and end dates for the
school year.
•
Attendance Calendar: The Attendance Calendar must exist for this
school just as it does for all other schools. This is required so that
students may be enrolled or withdrawn on dates in the calendar.
STIDistrict Net
STIDistrict Net must be installed and configured to upload this data to the district
database.
STIDistrict Enrollment
STIDistrict Enrollment must be installed and used for this school in order to enter
and withdraw students.
Summer-Fall 2007 AL Guidelines
STI_0718071630
STISETSWeb • 61
STIOffice Integration
Configure the STIOffice Integration application to connect to this school’s data, as is
done for “regular” schools in the district.
•
Install STIOffice (the School Number must be set to 4999), STIDistrict
Net and STIEnrollment on a computer where the private school
students will be enrolled.
•
Use the STIDistrict Enrollment Program to enroll these students. These
student records will then thus be populated in the STIDistrict database,
which will allow the creation of a folder in STISETSWeb.
Enrolling Pre-School Students
Special Education students must be reported for Child Count at the school they
attend regardless of age consideration except when the school does not have a
preschool program.
If a school does not have a preschool program and services for preschool children are
provided in other locations (i.e., Child Care Center or Home), those preschool
students may be coded to School Code 0000.
If you do have a preschool program in your district:
•
Use the STIDistrict Enrollment Program to enroll these students into
the school that performs this service. These student records will thus be
populated in the STIDistrict database, which will allow the creation of
a folder in STISETSWeb.
If you DO NOT have a preschool program in your district:
•
Install STIOffice (the School Number must be set to 0000), STIDistrict
Net and STIEnrollment on the computer on which the preschool school
students will be enrolled.
•
Use the STIDistrict Enrollment Program to enroll these students. These
student records will then thus be populated in the STIDistrict database,
which will allow the creation of a folder in STISETSWeb.
Reminder: The following grades must be uploaded with district net:
Grade
62 • STISETSWeb
Description
97
Pre-School Students Age 2
98
Pre-School Students Age 3
99
Pre-School Students Ages 4 & 5
STI_0718071630
Summer-Fall 2007 AL Guidelines
Child Count
Child Count information is drawn from the student folder within STISETSWeb. For
further details, see the STISETSWeb Child Count Quick Reference Guide, available
on the Documentation page of the STI Support site at http://support.sti-k12.com.
The following fields are Child Count fields in STISETSWeb:
•
Exceptionality
•
Least Restrictive Environment
•
Most Recent Date Enrolled in Special Education in This LEA
•
Date of Initial IEP Meeting
•
Date of Eligibility Determination -
•
Referral Date
•
Date of 90-Day Transition Meeting
•
Implementation Date of First IEP Developed for Child
Remember: The Child Count Date must be set under Utilities Desktop |System
File. Enter the appropriate Child Count date (generally recognized as Dec. 1st) in the
Child Count Date field in the system file. Select the Save Tab feature to save the date
in the program.
Child Count Error Report
Summer-Fall 2007 AL Guidelines
•
Open the Child Count Desktop and select the Error List sub-menu to
check for Child Count Errors. Here the user may generate reports and
create a Child Count File to Data Collection at SDE.
•
Use the filter options to select the parameters of the Error Report.
•
Select the option to run the Child Count Error Report by School or by
an individual Staff Member.
STI_0718071630
STISETSWeb • 63
•
Select the type of report to run: by Error, Warning or Both; and choose
the print option provided.
•
X = Error for the designated Code Field
•
W = Warning for the designated Code Field
Child Count Error Codes
64 • STISETSWeb
•
A: Invalid Primary Code: This error occurs when the Primary
Disability that is selected is age specific and no longer applies to the
student’s current age (e.g. when a child is marked as Developmental
Delay and is over the age of 8).
•
B: Blank Primary Code: This error occurs when the Primary
Disability field is left blank.
•
C: Gender Code Invalid: This error occurs when the Gender Code
that reports from STIOffice is blank on the Student Desktop.
•
D: Invalid Race Code: This error occurs when the Race Code that
reports from STIOffice is blank on the Student Desktop.
•
E: LRE age 6-21 Invalid Code: This error occurs if the LRE code
for the specified age range is invalid (e.g. it is not a code of the 01-11
range). This error will also occur if the LRE code is left blank.
STI_0718071630
Summer-Fall 2007 AL Guidelines
•
F: LRE age 3-5 Invalid Code: This error occurs if the LRE code for
the specified age range is invalid (e.g. it is not a code of the 12-17
range). This error will also occur if the LRE code is left blank.
•
G: Date Enrolled Blank or > Dec. 1st: This error occurs when the
Date of the child’s enrollment in Special Education is left blank or the
date of enrollment exceeds the current year’s Child Count Date.
•
H: Gifted cannot be IDEA funded: This error occurs if Gifted is
selected as the Primary Disability and the IDEA box is checked.
•
I: Missing 90-Day Transition Meeting: This error occurs if the
Transition from EI Program box is checked but no date has been
defined for the 90-Day Transition Meeting.
•
J: Invalid Age for Grade: This error will occur if the student’s age
is too great for the current grade placement.
•
K: Invalid Primary Code DD age > 8: This error will occur if a
student has a Primary Exceptionality of Developmentally Delayed
when the age is greater than 8.
•
L: Date of Birth > Date of Enrollment: This error can occur if the
Date of Enrollment is left blank. The enrollment date must always be
greater than the date of birth.
•
M: Missing Secondary LRE Code: This error can occur if a
student is marked for an LRE of 05 (Private School: Parent Placed) but
no Secondary LRE is selected.
•
N: Eligibility Date Expired: This error can occur if the Reevaluation date expires on or before the date of Child Count.
•
Z1: Invalid SSN: This error can occur if the Social Security number is
left blank.
•
Z2: Invalid Student ID.: This error can occur if the Student
Identification number is left blank.
Child Count Export
Under the Child Count Desktop, choose Export. Then select Text and click on the
Download button. A dialog box will display. Select Save to save the file to your
computer. The file name defaults to ChildCount.txt. This file will be attached to an email and sent to the state department. Follow any instructions you may have received
from your state on sending this file.
Summer-Fall 2007 AL Guidelines
STI_0718071630
STISETSWeb • 65
Student List
The Student Listing in Child Count includes students that are active, do not have
errors, and are eligible for Child Count. These students will be included in the Export
file.
•
For Group By, select to filter the listing: By LRE; By Exceptionality,
LRE; By Grade, Exceptionality, LRE; or By School, Grade,
Exceptionality, LRE.
•
Use the drop-down tree menu directly below Group By to see how
many students appear within each parameter of the selected group.
•
To print the Child Count Student List, click the Print button.
STIOffice Integration
The STIOffice Integration program is a communication tool that passes
information between STISETSWeb and STIOffice. STIOffice Integration will
transfer attendance and discipline information that has been posted in STIOffice into
STIDistrict. The program will also post Special Education fields 1, 2 and 5 from
STISETSWeb into STIOffice. These fields are: LRE; Exceptionality; and Status
Codes.
66 • STISETSWeb
STI_0718071630
Summer-Fall 2007 AL Guidelines
Single Profile for Each Installation
The diagram above illustrates the data flow implemented in this type of installation.
If you have an installation scenario similar to the one above, perform the following
steps during installation:
Summer-Fall 2007 AL Guidelines
•
Install STIOffice Integration on each data server.
•
Create one profile during installation
•
For the datapath statement of the profile, point to the local ssts2 folder.
•
Enter the daisi connection information.
•
Save the profile and finish the installation.
•
If STIOffice Integration is installed at the local school, but not on the
data server, the service may not start. If this is the case, please see the
section “Troubleshooting with Event Log” in the STISETSWeb –
STIOffice Integration – Installation and Troubleshooting Quick
Reference Guide for more information.
STI_0718071630
STISETSWeb • 67
Multiple Profiles for Each Installation
The diagram above illustrates the data flow implemented in this type of installation.
If you have an installation scenario similar to the one above, perform the following
steps during installation:
•
Install STIOffice Integration on one centrally located server.
•
During the installation, create a profile for each individual school.
•
Use a UNC path with the data server IP address for the datapath.
•
Enter the daisi connection information.
•
Insert a profile for each school.
•
Once you have entered all your profiles, you may finish the installation.
Windows 9x: the Console Application
STIOffice Integration runs as a Console Application. If running properly, the
Console Application says:
STIOffice Integration.
Software Technology, Inc.
Running…
Press ENTER to Exit.
68 • STISETSWeb
STI_0718071630
Summer-Fall 2007 AL Guidelines
Windows 2000 or XP: the Service
On a Windows NT machine, STIOffice Integration runs as a Service. If running
properly, the Services Control Panel will allow you to stop or restart the service.
Verifying that STIOffice integration is Working
To verify that STIOffice Integration is running, click on the Office Integration tab
within the STISETSWeb program. The Office Integration tab is a support tool
provided for administrators to manage each school’s STIOffice Integration service.
This tab displays the school, school number, the date on which Office Integration
was last run and the name of the computer hosting the Office Integration service.
Summer-Fall 2007 AL Guidelines
STI_0718071630
STISETSWeb • 69
Enrolling Pre-School Students 62
Enrolling Private and Preschool Children in Alabama
61
Enrolling Private School Students 61
Entry/Withdrawal Records 28, 33
Error Checking in Accordance with the State
Department of Education 50
Error Report 30
Index
F
Financial Data Export 46
H
Home Room / Grade Level Changes 40
A
About STIState Enrollment Features 33
About this Document 1
Addressing Errors / Data Correction 50
Alabama Required Data 27
Approval Process 50
Approval Process Business Rules 43
Archive Students 58
Attendance Setup 4
Attendance State System File 7
Attendance System File 5
Auditing School Data at the District Level 32
Auditing School Data at the Local School Level 30
I
Importing Data 32
Importing Teacher Schedule Data 48
Importing Valid Schools File 46
Itinerate Teachers 23
L
LEAPS Export 44
LEAPS Export Process Guidelines 45
LEAPS Security 45
LEP Students 24
Location, Diagnosis, Service Type Codes 55
C
M
Calendar Setup 6
Caseload Assignment 57
Change Student Numbers or School 60
Child Count 63
Child Count Error Codes 64
Child Count Error Report 63
Child Count Export 65
Codes 55
Correcting Data Errors 30
Course Data Entry/Edit 17
Create Student Folder 56
Creating the SDE Export 41
Mass Caseload Assignment 57
Monitoring Uploads 32
Multiple Profiles for each Installation 68
O
Other Security Group Items 54
Overview 1
R
Reporting Vacancies 17
Required Fields 27
Running Conflict Report and Cleaning Data 33
Running the Export Approval 44
D
Delete a Student 57
Discipline Data (for SIR Reporting) 8
District and State Codes 55
District System File 32
S
School Number 3999 28
School Number 4999 (Child Count - Shared Services)
29
SDE Export Approval 43
E
Employee File 54
Enrolling a Student 33
Summer-Fall 2007 AL Guidelines
STI_0718071630
Index • 71
Security Group Edit Commands 53
Security Groups 52
Security Groups Defined 53
Setting Up STISETSWeb 51
Single Profile for Each Installation 67
Special Schools 28
Standardized Codes 12
STIDistrict 32
STIDistrict Setup 32
STIOffice 2
STIOffice Data Entry for LEAPS Reporting 16
STIOffice Integration 66
STISETSWeb 51
Student Demographic Data 24
Student Incident (SIR) Export 49
Student List 66
Student Maintenance 56
System File/Information 2
System Policy 51
System Setup 2
T
Teacher Demographic Data 16
Teacher Schedule Export 47
Trade School Teachers 23
U
Un-Archive Students 59
Uploading Data to the District Database 31
User File Setup 26
Utilities Desktop | Progress Periods 52
Utilities Desktop | System File 51
W
Withdrawing a Student 37
72 • Index
STI_0718071630
Summer-Fall 2007 AL Guidelines


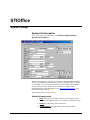


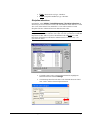
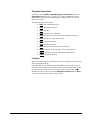


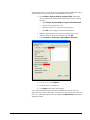
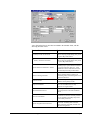

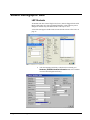

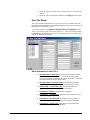


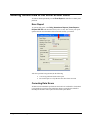

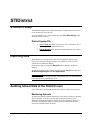
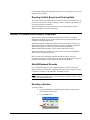


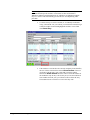

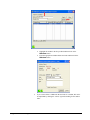

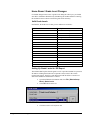

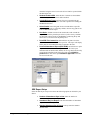

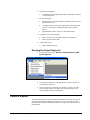


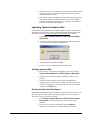


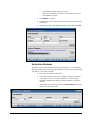

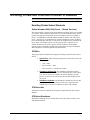


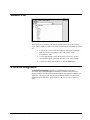

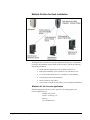


![取扱説明書[SR-PB3] (7.92 MB/PDF)](http://vs1.manualzilla.com/store/data/006564474_3-9096ece736f82097959a7db1e9b3608e-150x150.png)