1
Low Power and Embedded
Systems - Workbook 3
Introduction
In this workbook we will make a precise timer, and we will attach a Liquid Crystal Display (LCD) to the
microcontroller via an interface board.
Supporting material
atmega644p.pdf
Latest: http://www.atmel.com/Images/doc8272.pdf Local copy:
http://www.cl.cam.ac.uk/teaching/1213/P31/docs/atmega644p.pdf
Data sheet for the Atmel ATMEGA644P used in these exercises.
You will need to refer to this frequently. Within these workbooks this
will be referred to as 'the datasheet' The section numbers referred to
in these workbooks refer to revision 8272C of the datasheet dated
06/11.
serial_lcd_schematic.pdf
http://www.cl.cam.ac.uk/teaching/1213/P31/docs/
serial_lcd_schematic.pdf
Schematic for LCD interface PCB.
serial_lcd_pcb.pdf
http://www.cl.cam.ac.uk/teaching/1213/P31/docs/
serial_lcd_pcb.pdf
Printed Circuit Board layout for LCD interface PCB, for reference
only.
lcd_interface_micro.c
http://www.cl.cam.ac.uk/teaching/1213/P31/code/
lcd_interface_micro.c
Microcontroller implementation for the LCD interface PCB, for
reference only.
Interrupt Vector Table
http://www.nongnu.org/avr-libc/user-manual/
group__avr__interrupts.html
Table of interrupt vector names for ATMEL AVR series
microcontrollers.
An on-line version of this guide is available at:
workbook3.html [http://www.cl.cam.ac.uk/teaching/1213/P31/workbook3.html]
Exercise 1 - Precise timing
The _delay_ms() function used in workbook 1 is useful, especially during testing, but it does not take
account of time spent servicing interrupts. To get precise timing, it is necessary to use a timer.
The ATMEGA644P has three timers. Timer0 and Timer2 are 8 bit, and Timer1 is 16 bit. Have a look at
sections 14 to 16 in the datasheet to get an overview of what the timers can do. The requirement of this
exercise is to take our ADC samples at exactly 1 second intervals.
1
Low Power and Embedded
Systems - Workbook 3
One mode which can be selected for a timer is to count from zero up to a value held in an 8 bit register:
OCR0A for Timer0, OCR2A for Timer2, or a 16-bit register, OCR1A for Timer1. When the timer reaches
the value held in the compare register it immediately resets the counter to zero, issues an interrupt,
and continues counting from zero. This mode is referred to as CTC mode, and is the one we will use
in this exercise.
One second is rather a long period with a master clock of 8 MHz, so the 16 bit timer will be the appropriate
one to use.
Even so, at full clock rate this would only give a maximum period of 2^16/(8 x 10^6), or approx 8.1
milliseconds. A divider prescaler can be introduced between the 8 MHz master clock and the timer input,
which makes it possible to greatly increase the maximum time period achievable by the 16 bit counter.
The prescaler divider value P, is selectable in a number of powers of 2, up to a maximum value of 2^16.
As we have seen, with a 16 bit timer, the maximum period we can create is about 8.1 ms. We need
to choose a prescaler so the maximum count (2^16) gives a period greater than 1 second. The best
match from the prescaler values available (see section 15.11.2) is 256. Dividing by a higher number
would reduce the resolution of the timer.
- Dividing the 8MHz clock by 256 gives a clock period of 32uS
- To get a 16 bit timer period of 1s, the 16 bit timer register has to be set to 1/32us = 31250, or in
hexadecimal 0x7A12
These can be written as a 16 bit value in either decimal OCR1A = 31250 or in hex OCR1A =
0x7A12 , or if written as two 8 bit values they must be written high byte OCR1AH first (0x7A) then
Low byte OCR1AL (0x12).
1. Take a copy of your code from workbook2 exercise3 to use as a starting point for this exercise.
2. Add an initialisation block for the timer just as you did for the ADC. Since interrupts are being
used, this block must be executed before interrupts are enabled.
3. Within the initialisation block set TCCR1A for normal port operation with WGM11,WGM10 both
zero
4. Set TCCR1B for CTC mode, with the prescaler set to divide by 256, and the top of count set by
the Output Compare register OCR1A (mode 4, not mode 12 in the table).
5. Set TCCR1C = 0 (Force Output Compare is not being used).
6. Set TIMSK1 to generate an interrupt on Timer1 Output Compare Match A .
7. Also within the initialisation block set OCR1A = 31250. This 16 bit assignment will work correctly,
the compiler will make sure the bytes are written in the correct order.
8. Set TCNT1 = 0 to clear Timer1.
That completes the initialisation of Timer1.
2
Low Power and Embedded
Systems - Workbook 3
1. Add a timer1 interrupt service routine to start an ADC conversion when the
timer reaches the count value. Look up the appropriate ISR vector name from:
Interrupt Vector Table [http://www.nongnu.org/avr-libc/user-manual/
group__avr__interrupts.html]. Make sure you choose Timer/Counter1 Compare
Match A for the ATMEGA644P.
Start the ADC conversion by setting the ADSC bit in ADCSRA (see datasheet section 22.9.2)
in the timer ISR. Do not set the auto trigger bit ADATE.
You do not need to clear the timer counter register, or take any action to clear the timer interrupt.
In CTC mode the timer interrupts will come at the correct intervals as the timer clear is carried
out in hardware.
2. Create 3 global, 8 bit variables (that is, declared outside main() and outside any ISR or functions.
It is normal to declare these right at the top of your code).
adch will hold the hight byte of the latest adc reading.
adcl will hold the low byte of the latest adc reading.
gotadcvalue will be used as a flag to mark whether there is an ADC value ready to be sent.
Declare gotadcvalue as volatile. It must be declared volatile because it will be changed
in one section of code (the interrupt routine), but tested in a loop in main. Without the keyword
volatile , the compiler would optimise the loop test and never see that the variable had changed.
3. When the ADC conversion completes, in the ADC interrupt handler, change the state of
gotadcvalue, and capture the readings into adcl and adch, adcl first.
Note that we do not try to send the ADC value from within the interrupt routine - it would take too
long. Since only one interrupt can be active at a time, they must be kept as short as possible.
Calculate the time needed to transmit the largest ADC value possible via serial at 19200 baud,
including any trailing space or return characters. What happens if this exceeds 1 second?
4. It is easy to remove an ISR, but forget to disable the interrupt, or alternatively get the wrong
ISR name. Without a suitable ISR, the microcontroller will execute random code.
To avoid this problem, add the following to your program.
// catch all interrupt handler. Note double underscore in the name.
ISR (__vector_default) {
// or ISR(BADISR_vect) {
}
5. Remove the _delay_ms() functions from the main loop.
Move the LED on and LED off to the timer interrupt routine. Change the LED state each
interrupt, giving a 0.5Hz flash rate.
The main loop will reduce to something like:
3
Low Power and Embedded
Systems - Workbook 3
while (1) {
if (gotadcvalue == 1) {
USART0_transmit_uint8(adch) ;
USART0_transmit(0x0A) ;
USART0_transmit(0x0D) ;
gotadcvalue = 0 ;
}
}
Program the device with your revised code, and power up the device.
It should work exactly as Workbook 2 Exercise 3, except the 0.5 Hz should be precise. Check
using an oscilloscope.
Optionally change the code to transmit the ADC reading as a 16 bit value.
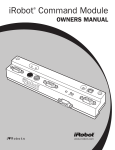
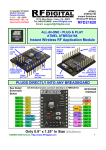
Exercise 2 connecting an LCD
So far the only output from the microcontroller has been via a serial data connection, or by flashing
an LED. In this exercise you will add an interface to an LCD controller and display. There are a wide
range of these alphanumeric displays on the market, with different size and backlight options, but nearly
all use either a Hitachi or Seiko controller. These controllers are almost identical in operation, but
the initialisation is fiddly, requiring a set of commands with minimum periods between them. The LCDs
themselves run from a 5V supply,
To speed up development for you and to reduce the number of IO pins required, a small PCB is provided
which takes a clock and data signal and does the interfacing to the LCD for you.
There is also a supporting library to make the LCD easier to use.
For your interest, links to the schematic diagram, Printed Circuit Board, and associated C code for the
library are available in the supporting material section at the start of the worksheet.
1. Copy your C code and Makefile from workbook2 exercise2 (the Caeser cipher) into the directory
called workbook3/exercise2.
2. Power up, reprogram the device and check that the LED flashes once per second.
4
Low Power and Embedded
Systems - Workbook 3
Hardware connections.
1. You will need to fit a 4 way pin header to the prototyping board. Make sure that the thin pins
on the header are the ones fitted into the breadboard.
Looking at the LCD interface board with the push switch at the top, the connections are 5V, CLK,
DATA, GND, top to bottom. You need to connect PD7 from your microcontroller to the DATA
line, and PD6 to the CLOCK line, so you can now choose a suitable place on the prototyping
board to make the wiring up easy.
Wire up the connections to the 4 pin LCD interface board.
2. Connect the LCD interface board to your microcontroller using one of the 4 way leads supplied,
and to the LCD using the 16 way ribbon cable.
3. Check the supply to the LCD is correct, and power up the board. The LCD display should show
'TEST'. You may need to adjust the contrast potentiometer to see it clearly.
Software.
To use the LCD, it is necessary to incorporate a library of low level drivers which take care of
communicating via the LCD interface board. For flexibility, this library allows you to connect the LCD
via any two lines on the same port of your microcontroller. For this exercise we will use PD6 and PD7
on PORTD.
For code portability the library uses generic names for controlling these pins, and these need to be
defined and the definitions made visible to both the library function and the main C program. This is
done as follows:
5
Low Power and Embedded
Systems - Workbook 3
1. Define the following in a file config.h in the workbook3/exercise2 directory:
#define
#define
#define
#define
LCD_DDR DDRD
LCD_PORT PORTD
LCD_DATA PD7
LCD_CLK PD6
#define F_CPU
8E6
2. Copy both serial_lcd.h and serial_lcd.c from http://www.cl.cam.ac.uk/
teaching/1213/P31/code/ to the workbook3/exercise2 directory
3. Change your port direction initialisation function to define LCD_DATA and LCD_CLK as
outputs. Remember to use |= not =, or you risk overriding previous definitions. Use the generic
names, not the pin names to make code maintenance easier in future, for example:
// this works independently of which pins on PORTD are used.
LCD_DDR |= (1<<LCD_DATA) | (1<<LCD_CLK);
4. Add the following to your C program:
#include <config.h>
#include <serial_lcd.h>
5. Add the following to your copy of the serial_lcd.h file:
#include <config.h>
6. Modify the Makefile so that serial_lcd.c is compiled and linked, by changing the line:
exercise2.elf: exercise2.o
to:
exercise2.elf: exercise2.o serial_lcd.o
7. In main, within the while(1) loop add a test function, something similar to:
LCD_display_char('j');
6
Low Power and Embedded
Systems - Workbook 3
Test your modified code:
1. Use make clean to remove any legacy .o files, and to force a recompile. If you change config.h,
then make will not see a change to the timestamp of the .c files, and will not recompile them.
You need to run make clean to remove the .o files, which forces a complete recompile, in
this case. Program your device, and check it works as expected. You may need to press the
reset switch on the LCD interface board to give it a clean start.
2. If you encounter problems, check that the LED is flashing, and that the Caeser cipher is working.
If those work fine, look at LCD_CLK and LCD_DATA with an oscilloscope set to use a 10uS
per division timebase.
3. Refer to serial_lcd.h, and try out the other functions which the library provides, for example
LCD_display_bin, scroll_lcd_left().
The following section will prove very useful in the future, but can be skipped if you are behind schedule.
Once you have the LCD working, make your own 4 way cable using the crimp tool and parts
provided. You should find this straightforward. Try your cable with the LCD.
Now have a go at using the Insulation Displacement (IDC) Connectors and large blue machine
to make a 16 way lead, and test that. The key to a successful connection is keeping the ribbon
cable square to the connector, whilst avoiding squashed fingers.
Before the class next week, create a display of your crsid which scrolls smoothly and readably in one
of the four directions.
Show it to one of the demonstrators at the beginning of next weeks session.
You will need to think about your choice of mini-project, in particular if you want to try something which
isn't on the suggestions list then talk to Ian Wassell or Brian Jones as soon as possible, to check that
what you propose is suitable, and also that it is possible to get the parts required in time for you to
start in week 5.
7
8