1
Faghihi Hospital – Medical Engineering Ward
ﺑﺴﻤﻪ ﺗﻌﺎﻟﻲ
داﻧﺸﮕﺎه ﻋﻠﻮم ﭘﺰﺷﻜﻲ و ﺧﺪﻣﺎت ﺑﻬﺪاﺷﺖ و درﻣﺎن اﺳﺘﺎن ﻓﺎرس
ﻣﺮﻛﺰ آﻣﻮزﺷﻲ درﻣﺎﻧﻲ ﺷﻬﻴﺪ دﻛﺘﺮ ﻓﻘﻴﻬﻲ
واﺣﺪ ﻣﻬﻨﺪﺳﻲ ﭘﺰﺷﻜﻲ
91-92
1
Faghihi Hospital – Medical Engineering Ward
ﺻﻔﺤﻪ
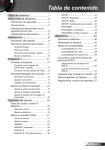
ﻓﻬﺮﺳﺖ
3 ............................................................................................... NEUROWERK دﺳﺘﮕﺎه ﻧﻮار ﻣﻐﺰ
.
2
Faghihi Hospital – Medical Engineering Ward
دﺳﺘﮕﺎه ﻧﻮار ﻣﻐﺰ
3
Faghihi Hospital – Medical Engineering Ward
Introduction
When compiling this User Manual, particular importance was attached to a clear and
readily understandable description of the individual applications.
The User Manual is intended to enable effective use of the NEUROWERK system and of
the application possibilities it offers.
The User Manual is an integral part of the measuring system. It should always be
kept in the immediate vicinity of the system. Careful adherence to the User
Manual is imperative, as a condition for proper use and correct handling of the
measuring system.
The manufacturer reserves the right to implement modifications for technical
improvement of the system without prior notice.
Please read this User Manual carefully before you install and start up the system. The
system must only be used by persons whose training, knowledge and practical
experience constitute a guarantee for proper handling; these persons must have been
instructed accordingly on proper handling of the system in accordance with the
contents of this User Manual. Such instruction must only be given by persons who, by
way of their knowledge and practical experience, are suitably qualified to provide
instruction on the handling of the system.
Exact examination results and safe, trouble-free operation are only guaranteed if the
system is operated in accordance with the Instruction Manual.
Description of the NEUROWERK CENTER
Turning on the isolating transformer (green switch on the instrument trolley) connects
the operating voltage for the measuring system.
After the processor unit (PC) and the monitor have been turned on, all internal settings
are made automatically, and the NEUROWERK CENTER will appear on the WINDOWS
user interface.
Both NEUROWERK EEG and NEUROWERK EMG are started from the
NEUROWERK CENTER.
4
Faghihi Hospital – Medical Engineering Ward
5
Faghihi Hospital – Medical Engineering Ward
Memory monitoring
When the NEUROWERK CENTER is started, the memory capacity is checked.
Once a certain limit value is reached, the status is displayed by way of traffic-light-style
symbols on the screen.
EEG - Archiving urgently necessary
EMG - No archiving necessary
Server - Memory capacity sufficient (otherwise: relocate data or expand memory)
Patient data
Patient data are included and changed exclusively in the NEUROWERK CENTER.
If you click on [PATIENT F2], you will return from any examination back to the
NEUROWERK CENTER.
6
Faghihi Hospital – Medical Engineering Ward
Create new patient
Clicking on [NEW F4] enables you to enter a patient in the database.
Entering of the data always starts with the name. To switch to the next field, use the
TAB key or click directly on the appropriate field.
The data fields highlighted red ("Last name", "First name", "Date of birth") are
mandatory. The date of birth is to be specified without spaces, dots or dashes. The year
must be entered with 4 digits.
Clicking on [ACCEPT Insert] accepts your input. You are then asked to confirm the
data once more.
The data are only saved if you respond to the confirmation query by clicking on [Yes]
or by pressing [Enter].
Find patient data
If you click on [FIND F7], the system expects the input of a name.
As soon as you enter the initial letter of a patient, the first patient starting with the this
letter is displayed. The search becomes more selective with each further letter.
7
Faghihi Hospital – Medical Engineering Ward
Change patient data
Incorrect or incomplete patient data can be changed with [CHANGE F5].
The new data are accepted by clicking on [ACCEPT Insert].
If you click on [CANCEL Esc], a confirmation warning is nevertheless displayed.
Delete patient
It is possible to delete a patient at any time provided no tracing has yet been stored for
this patient.
To this end, select the patient in the list and click on [DELETE].
This function is additionally password-protected. The password can be requested from
the SIGMA Medizin-Technik service team.
GDT interface
Patients can be imported into the patient data from a surgery system via a GDT
interface; this function is an option.
These patient data are displayed in the [JOB LIST].
The patient is selected in the surgery system. The EEG or EMG tracing is started from
there.
In the NEUROWERK database, the patient is called automatically, and all values are
entered in the database.
8
Faghihi Hospital – Medical Engineering Ward
After saving of the EEG or EMG examination, the EEG number or the EMG measured
values are transferred to the surgery system.
HL7 interface
Patients can be imported into the patient data from a hospital management information
system (HMIS) via a HL7 interface; this function is an option.
The HMIS data are acquired and processed automatically in the background by way of
the SIGMA Medizin-Technik HL7 server.
Clicking on the HL7 button opens the converted HL7 database.
The search term is entered in the upper field. Depending on which field is selected
(red tick), patients can be selected by last name, first name, patient number, ... .
9
Faghihi Hospital – Medical Engineering Ward
The patient is accepted into the NEUROWERK database with a double-click.
Acquiring tracings
Tracings are records of bioelectrical potentials. Various methods can be used for
recording.
To start a tracing, first select a patient (see B.2.1 Create new patient or B.2.2 Find
patient data).
After you have created/selected a patient, click on [METHOD] or press [F3] to open
the "Method selection" window.
The different methods which can be selected depend on the configuration of your
NEUROWERK system.
Select a method (EEG, AEP, NLG, ...) with a left-click in the "Method selection" window.
Then start the desired program with a double-click.
From the tracing programs, it is always possible to return to the NEUROWERK CENTER
by clicking on [PATIENT F2] or [EXIT F12].
The selection of the methods can be limited to EEG or EMG in the FILTER window.
10
Faghihi Hospital – Medical Engineering Ward
Evaluating tracings
Clicking on [EVALUATE F6] opens the "Tracing" window.
To start an evaluation, select the desired patient either by clicking on [FIND F7] or by
scrolling in the patient list.
All tracings for the selected patient are displayed.
Right-clicking on a tracing number immediately displays all information for this
tracing. As an option, it is also possible to start an HRV analysis.
Double-clicking on the tracing number opens the appropriate evaluation program.
11
Faghihi Hospital – Medical Engineering Ward
Tracing attributes
The table beneath FILTER displays the attributes for each individual tracing.
R-
Report already created - Y / N (Y = Yes / N = No)
A-
Tracing was evaluated and can be archived - Y / N
No. - Number of examination
EEG
EMG
1st and 2nd digits
-
Year
3rd digit
-
Code letter
4th to 8th digits
-
Consecutive number
1st digit
-
Code letter
2nd and 3rd digits
-
Year
4th and 5th digits - Month
6th and 7th digits - Day
8th to 13th digits - Time
Tracing date -
Date of examination
Method -
Displays the method and program
Information -
Information on the tracing
Archive no. -
Number of the archive CD / DVD
Filter
If you click on [FILTER F6], you can filter the tracings according to certain criteria.
12
Faghihi Hospital – Medical Engineering Ward
User –
Selection of a user (displays the tracings assigned to the corresponding user)
Date -
Displays all tracings from the selected date
Unreported only -
Displays the tracings with an "N" in column "R"
Unarchived only -
Displays the tracings with an "N" in column "A"
Display tracings
[LIST F8] displays all tracings for the selected patient.
Display reports directly
If a report has already been created for a tracing, it is possible to open this report
directly. To do so, highlight a tracing and click on [FINDING F9] to display the report
directly.
Display tracings without database
If particular tracings (e.g. external EEGs) are not entered in the database, they can be
opened from any external source by clicking on [FILES F10].
Closing NEUROWERK CENTER
Clicking on [x] closes the NEUROWERK CENTER immediately.
Clicking on [EXIT F12] opens the window for supplementary programs.
Clicking on [HELP F1] opens the NEUROWERK CENTER online help.
13
Faghihi Hospital – Medical Engineering Ward
Clicking on [PATIENT F2] reopens the NEUROWERK CENTER.
If you click on [SETUP F11], you can enter basic settings in the NEUROWERK CENTER.
Clicking on [EXIT F12] closes everything.
Data transfer
With the NEUROWERK systems, you can also record tracings locally (without
networking).
It is then possible to transfer data back to the central database.
Click on [EXIT] in the NEUROWERK CENTER. This opens the window for supplementary
programs.
With [Start F6], all files are copied to an intermediate archive.
Clicking on [Exit F12] displays the administration window.
If you click on [Patient F2], you will return to the NEUROWERK CENTER, and all data
are accepted.
14
Faghihi Hospital – Medical Engineering Ward
Management of the second line
The spare parts catalog and service information can be called in the second line.
Various supplementary programs can also be started, depending on the selected
method (list box on the right).
EEG
EMG
Archiving [A] Archiving of the EEG data
EEG Manual [D] NEUROWERK EEG Operator's Guide
Scheduler [C] EEG cropping program
Export [E] Export of EEGs by way of viewer software
Montedit [M] EEG montage editor
Update [U] Loads the latest software updates
Archiving [A] Archiving of the EMG data
Operator's Guide [C]
NEUROWERK EMG Operator's Guide
Archiving
Archiving of the data is necessary if the appropriate status is displayed by the trafficlightstyle symbols when the NEUROWERK CENTER is started.
The "Archiving" menu is opened by clicking on [Exit F12] in the NEUROWERK CENTER.
A mouse click in the list on the right selects whether EEG or EMG data are to be
archived.
Clicking on [Archiving A] starts the program.
Now insert the archive medium (DVD-R).
If you click on [Check F5], the memory status is displayed.
15
Faghihi Hospital – Medical Engineering Ward
You can now select whether you want to perform the archiving with video and report
files. The saving of all data in the annual archive can be deselected. Clicking on "Yes" in
the "Delete automatically" field deletes all data after archiving.
The volume of all data to be saved is displayed in the "Total memory" field. The data
volume can be specified according to the tracing date by way of the slider. Right-click
on the slider to move it to the right or left. The remaining capacity of the archive
medium is displayed in the lower bar diagram.
Yellow
mark Archiving economical from here
Red mark
archived
Maximum memory capacity reached - no more files can be
Green mark
Medium memory capacity reached
(limit value applies to a DVD or CD)
Clicking on [Start F6] creates an archiving medium with the specified archive number.
16
Faghihi Hospital – Medical Engineering Ward
If all data are transferred to the target medium, you are asked whether you want to
delete the original data.
In that case, all data of the server drive are compared once more with the data on the
DVD / CD and - if identical - deleted from the server.
Finalise the DVD / CD, protect it against overwriting, and eject.
17
Faghihi Hospital – Medical Engineering Ward
Label the medium with the specified name.
Scheduler
If a selection was saved in the "EEG Evaluation", the SCHEDULER program must be
started at the end of the evaluation.
This program creates a new EEG file from the selection,
e.g. an EEG crop with number "00A00025K001.eeg" is created on the basis of the EEG
with number "00A00025.eeg" and assigned to the same patient in the database.
In addition, the video files belonging to the EEG are cropped.
This data reduction can be used to select shorter relevant sequences from long-term
EEGs or video-EEGs, for example.
When you start the "Scheduler", all jobs are cropped and new EEG files are created.
The processing can be stopped by clicking on the [Pause] button.
The cropping jobs are to be found in the "Scheduler" folder. Once all jobs have been
processed successfully, the jobs are moved to the "Ready" folder, and the program can
be quit with [x].
If deletion of the original data was selected in the evaluation, the deletion must also be
confirmed in the "Scheduler".
Converting measurement data
EEGs can be converted into the EDF format by clicking on [Convert measurement
18
Faghihi Hospital – Medical Engineering Ward
data].
One or several EEG files can be selected by clicking on [Add].
If you click on [Create jobs for conversion], the data are transferred to the
"Scheduler" and converted to the EDF format.
Export
This program can be used to transfer selected EEGs and a viewer (evaluation) to a CD, a
chosen directory or to other PCs.
19
Faghihi Hospital – Medical Engineering Ward
The path for the saving of selected EEGs and the viewer can be defined with [...] in the
top-right corner.
Highlight the desired EEG by left-clicking and move it to the right-hand column by
clicking on the arrow button.
Once all the required EEGs have been moved to the field on the right, click [Start] to
start the transfer.
The ready-to-use viewer CD can then be started on any PC and the EEGs can be
provided with reports.
Clicking on [Update] installs the new software.
(A backup of the old version is made after the update [Date].)
Montage editor
When you start the program, you are first asked whether the existing montages are to
be taken over.
If you answer "Yes", all existing montages are accepted.
You can then modify these montages or add further montages.
CAUTION:
If you answer "No", you can subsequently create new montages.
Saving these montages will overwrite / delete all previous montages.
20
Faghihi Hospital – Medical Engineering Ward
All previously created montages are displayed. The montage editor is handled via the
buttons at the top of the program window. These buttons have the following
meanings:
21
Faghihi Hospital – Medical Engineering Ward
Creating a new montage
Click with the left mouse button on the "Create a new montage" icon to add a new
montage to your system. You must first assign a name to the new montage. This name
will then be displayed in the selection lists of the EEG recording and evaluation
software (e.g. Montage 1).
When you confirm with OK, the following window is displayed with an empty
electrode layout:
22
Faghihi Hospital – Medical Engineering Ward
You must now decide which recording type is to be used. You can choose between:
Bipolar interconnection
Add the individual channels by clicking on the first electrode in the electrode layout
and then on a second electrode. The interconnection is transferred to the table are
indicated by a red line between the selected electrodes. The spot at the end of the line
symbolises the direction of the interconnection.
When channels are added, they are initially added at the bottom of the table. If a
channel is to be moved to a different position, click in the grey field with the channel
designation. Hold the mouse button pressed and drag the channel to the desired
position.
The polygraphic channels (ECG, RESP, EOG1 and EOG2) are inserted by clicking on the
electrodes.
To remove a channel, click in the grey field in front of the channel designation to
activate the channel concerned. Then click on the button "Delete connection".
This function is also performed if both electrodes of the interconnection are clicked on
again.
The button "Delete all connections" permits you to remove all interconnections.
Click on the button "Accept" to save your changes.
Averaged reference, Linked ears, Source and Unipolar
Click on a channel to be added to the montage. The system comp
letes the second
entry in the table (AVR, A12, QUE or UNI) automatically.
All other functions are analogous to those under Bipolar interconnection.
Editing montages
If you wish to modify an existing montage, double-click on the corresponding layout.
A window is opened in which you can add or delete channels.
23
Faghihi Hospital – Medical Engineering Ward
To add a channel, click on the first electrode in the electrode layout and then on a
second electrode. The interconnection is transferred to the table are indicated by a red
line between the selected electrodes. When channels are added, they are initially
added at the bottom of the table. If a channel is to be moved to a different position,
click in the grey field with the channel designation. Hold the mouse button pressed
and drag the channel to the desired position.
To remove a channel, click in the grey field in front of the channel designation to
activate the channel concerned. Then click on the button "Delete connection".
Click on the button "Accept" to save your changes.
Click with the left mouse button on the button "Save" to accept all changes to your
EEG system.
Creating a new primary montage
CAUTION:
This setting is applicable only for DB25-2.
For DB36, new primary montages are created via SET in the recording
program.
24
Faghihi Hospital – Medical Engineering Ward
Click with the left mouse button on the "Create a new primary montage" icon to create
a new primary montage for your system or to edit an existing primary montage.
First select the primary montage to be created or edited and enter the corresponding
name.
All electrodes contained in this primary montage are listed in the table and indicated
with coloured markings in the electrode layout.
To delete an electrode, click on the corresponding coloured electrode in the electrode
layout. The selected element is deleted from the table and is now displayed grey.
Proceed in a similar manner to add an electrode to the primary montage, by clicking
on an electrode with is not yet displayed in colour.
Click on the Accept button to save the changes.
25
Faghihi Hospital – Medical Engineering Ward
Short user manual EEG archiving
The SIGMA Plpro EEG is supervising the capacity of the hard disc and the
intermediate archive automatically. If the following message is shown,
you should start the archiving procedure as soon as possible.
Caution!
During the archiving procedure it is not allowed to work with the EEG system. No EEG recording or
reviewing should be done in the entire network. All users have to leave the EEG program!
1. Please insert formatted DVD/CD-R.
2. In MANAGER mouseclick on ADMINISTRATION or press button F4. The program DATAMAN is running.
26
Faghihi Hospital – Medical Engineering Ward
3. Mouseclick on Archive Data or press button F4. The archiving software is started.
4. The actual filling level (see “storage information”) need to be below 100%.
If the filling level is higher, click to an EEG of the right side and move the file to the left column (“move
file”).Go ahead with this procedure until the filling level is below 100%. With „close“ and restart of the
archiving software, this shifting becomes valid. After archiving, this EEG´s need to be moved to the
right column!
27
Faghihi Hospital – Medical Engineering Ward
5. Start EEG archiving with click on „ARCHIVE“
6. After archiving on DVD/CD, the following message will appear:
Caution!
Dont press OK immediately.
7. First, please press „EJECT“ button at the DVD/CD drive.
In the following menu, please click to „This disc will be used on other computers or devices“ and „Protect disc
so that it cannot be written to again” and “Always show this dialog when ejecting a disc”. Quit with “Eject”.
8. Please insert DVD/CD again and only if the medium is readed (drive Stopps blinking) press buttom „OK“.
28
Faghihi Hospital – Medical Engineering Ward
The DVD/CD is readed and compared with the EEG (archive) directory on the hard disc. All matched EEG´s
are deleted from the hard disc. In case of any faulty EEG, it will be shown on the screen.
9. Eject DVD/CD and label.
Short User Manual EEG Recording
1. In MANAGER mouseclick on RECORDING
or push button F2
2. Choose the name of the patient
If this patient is not existing in the database, you may input the name by pushing the
buttom
29
Faghihi Hospital – Medical Engineering Ward
It is shown simulataneously at the headbox wether the electrode impedances are
above or below the threshold level e. g. 10 kOhm)
30
Faghihi Hospital – Medical Engineering Ward
Be aware that bad electrode impedances may cause bad EEG records.
By clicking to the buttom “ready”, all measured impedance values are stored and the
measurement is terminated.
Enter now EEG-related information, if neccessary. Choose EEG technician and doctor, if
desired.
31
Faghihi Hospital – Medical Engineering Ward
13. Click to „save” in order to save the EEG on the hard disc. EEG will be inserted into the
data base.
14. Click to „continue“ in order to continue with EEG recording, if necessary.
15. Click to NEW or push button F2 if you like to continue with the next patient. Click to
END or push button F12 if you like to terminate the recording program.
Short User Manual EEG Scheduler
shortened into relevant sequences.
1. Defining segments
Mark the interested EEG segment (analyse section) with pushed left
mouse button. Click to „add analyse section“ which will be marked green.
Several segments can be defined in this way.
2. Storing the analyse sections
If all sections are marked, click to the first panel in the area „analysis sections“.
32
Faghihi Hospital – Medical Engineering Ward
Then, click with the right mouse buttom into the EEG window and choose „safe analysis section“ . The sections
will be composed to another so called child EEG.
If the EEG is recorded together with video, the video is cutted like this. There is the possibility to delete the
original EEG and video. By clicking to the buttom “send job”, the cutting job will be sent to the database.
For safety reasons, a password is requested (ask your service engineer).
Caution! After finishing of the review program, the program SCHEDULER need to be started.
Only this program cuts and deletes the EEG´s and videos.
3. Scheduler
This program composes a child EEG from the analysis sections. E. g. from the EEG with number
00A00025.eeg, a child EEG with the number 00A00025K001.eeg is generated and assigned to the same patient.
Video files which are belonging to the EEG are cutted also.
33
Faghihi Hospital – Medical Engineering Ward
By starting the SCHEDULER, all jobs are executed and new EEG files (childs) are written into
the database. All cutting jobs are lokated in the ”scheduler directory”. After finishing the
cutting jobs, all files are now in the “ready directory”. The program can be terminated with
“X”.
If “delete original data” was choosen in the review software, you need to confirm this also in the scheduler
software. Click to “Erase” and mark „into recycle bin“.
Short User Manual: Scheduler
1. Start NEUROWERK CENTER
2. Patient and EEG selection
Choose a patient by entering the patient’s name and “search”
34
Faghihi Hospital – Medical Engineering Ward
.
Double click to the requested EEG on the right hand site of the display.
Defining/ deleting sections
Mark the interested EEG segment (analyse section) with
pushed left mouse button. Click to „add analyse section“
which will be marked green.
Do a left click to the mark of the section (the little flag on
the upper site of the section) then a right click and “delete
event mark”.
35
Faghihi Hospital – Medical Engineering Ward
Save section
Do a right click into the EEG then a left click
on „Save analysis section” if one of the
sections is selected.
If no section is selected mark a new little
section with pushed left mouse button.
Then do a left click on “save analysis
section”. The new little section will not be
saved.
If the EEG is recorded together with a video,
the video is also cutted. Original EEG an
video can be deleted with the help of a service password.
By clicking to the button “send job”, the cutting job will be sent to the database.
ATTENTION
The program SCHEDULER need to be started. Only this program cuts and
deletes the EEGs and videos.
5. Scheduler
36
Faghihi Hospital – Medical Engineering Ward
By starting the SCHEDULER, all jobs are executed and new EEG files (child EEGs) are
written into the database.
The erase of the original files must be confirmed again.
After cutting all jobs the SCHEDULER can be closed by „x“ in the right upper corner.
37