Download LC1006 LC2810
Transcript
LC1006
LC2810
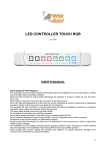
User's manual
RF controller for RGB strips and LED lamps.
Radiocontroller to control the switch on, switch off,
colour and brightness of light
WARNINGS
The security of the device is guaranteed only with
the proper use of the following instructions,
therefore it is necessary to keep them with care.
Suitable only for indoor installation (IP20).
Disconnect the unit from the power supply before
attempting any operation in contact or inside the
unit, and when not in use.
Due to the high technological level of this unit,
any service maintenance should be performed by
specialised operators. Please contact your Arena
Luci dealer for any operation.
Do not attempt to dismantle and modify the
device.
Allowed to be mounted directly on inflammable
surfaces.
Always ensure that the structure to which you are
attaching the device is secure and is able to
support the weight of each unit.
The installation of LED modules (including power
supplies) should be done according to current
technical rules and regulations.
The installation should be performed only by a
qualified operator.
Before connecting the device, make sure that the
output voltage of the power supply matches the
voltage allowed by the device.
INSTALLATION
Remove the cover from the output connectors of the
RGB controller and connect the LED devices to the
proper terminals.
The terminal block allows you to connect the three
lines red, green, blue of lighting devices, respect the
anode-cathode polarity of LEDs. Connect the
positive power line of LED device to the "+" terminal,
connect the negative power line of the single colour
to the "-" terminal.
The terminal block can accept wire section between
0.5 and 1 .5 mm 2; for the fixing remove about 6-7
mm of insulation from the wires.
Close the cover on the output connectors, passing
the cables through the roundings at the edge of the
body.
POWER SUPPLY
The choice of power supply for the RGB controller
shall be made according to the supply voltage and
the total power absorption of all equipments
connected to the same group of LED lighting; once
obtained this value, you can choose among the
wide range of power supply units offered by Arena
Luci.
It is advisable to leave a margin of at least 25%
lower than the driving capability of the supply unit.
Remove the lid from the input connectors of the
RGB controller and connect the input terminals to
LC1 006 + LC281 0
the supply line, checking that the power supply those directed to other receivers.
output voltage is compatible with the specifications Connect the power supply to the mains outlet to turn
of the controller.
on the RGB controller.
Connect the power supply outputs marked "+V" and Turn on the remote controller by pressing the central
"-V" to the power terminals of the controller marked power button.
with a "+" and "-", being careful not to reverse the Press the learn button on the body of the RGB
two wires: a wrong polarity can permanently controller and then press and hold one of the zone
damage the device. For multiple connections it is keys (1 to 4) on the remote controller, the indicator
recommended to use wires with cross-section of at besides the learn button on the receiver will blink
least 4mm 2 or more based on the calculation of four times to indicate the association between
voltage drop.
transmitter and the controller's receiver.
From this moment the light of one controller / area is
controlled by the function keys on the remote
controller; since all four areas share the same
control buttons, if there are multiple receivers /
areas in function press the button area first before
you begin your adjustments.
When the receiver gets a correct command
addressed to him, the red light besides the learn
button lights up.
Basic operation
Turn on the remote by pressing the power button.
The power indicator lights up.
Always make sure that the remote controller is not
Close the cover on the power supply connectors, in standby state, otherwise it will not send any
passing the cables through the roundings on the commands to the dimmer.
edge of the body.
To turn on and off all the lights of the various zones
Connect the power supply to the mains outlet, in a moment, you can press the power button on the
paying attention to the right polarity L-N-E labelled remote controller: in this mode, it is not necessary to
on the wiring terminals (colours brown = L, blue = press the zone key before the power button to send
N, yellow / green = E).
its code to the controller.
The remote controller LC281 0 works with three To turn on and turn off the lights for only one
1 .5V AAA batteries (not included).
controller / zone, press and hold the corresponding
The first time you turn on the power supply, the zone key (1 to 4) on the remote controller, and after
RGB controller will bring the light of the LED a few seconds the light will be switched on or off.
devices at maximum power, while the next re- To control the lights connected to a particular
ignitions the RGB controller will bring the light to the controller (or several units having all the same
state it was when power was removed. However, identification code), press first the corresponding
you can always leave the AC adapter connected to zone key on the remote before you start making
the mains and turn on and off the lights with the adjustments.
remote controller.
To control in the same way the lights connected to
more controller whose were assigned different
REMOTE CONTROLLER LC2810
codes, press in sequence (eg.: 1 , 2, 4 or 2, 3, 4) the
The remote LC281 0 allows you to control up to 4 corresponding zone keys on the remote controller
zones / controllers independently.
before starting the adjustments.
Insert the batteries in the rear door, the light To set the colour of the light, swipe the tip of the
indicator will be illuminated. After 1 5 seconds of finger on the colour touch wheel until you see the
inactivity the remote controller automatically goes desired colour.
into standby to save energy, turning off the indicator. To adjust the brightness, press the corresponding
The light indicator flashes slowly every second to buttons "B+" and "B-": the brightness is adjustable
indicate low batteries and the need to replace them.
on 8 levels, from minimum to maximum, press the
To turn on the remote, press the central power key "B+" once to increase the level of light intensity,
button.
press the key "B-" once to decrease the level of light
Before you can use the remote controller with the intensity. It is not possible to continuously adjust the
RGB controller, it is necessary to associate the brightness if you hold down the buttons.
same address to both the transmitter and receiver. To adjust the colour saturation, push the "increase"
The address is a numeric code that is uniquely and "decrease" saturation: there are 1 8 levels of
assigned to each RGB controller that allows it to adjustment, from full colour to white. After setting
"listen" to the digital data for colour control and the tone with the colour wheel, press the key
perform only the data directed to it and neglect "decrease" once to insert the third chromatic
2/4
USER'S MANUAL
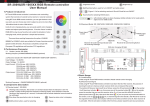
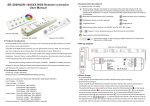
Electrical connection schematic diagram
component and move by one level the colour
toward white, press the "increase" key once to
remove the third chromatic component and move by
one level to the colour toward a more saturated tint.
It is not possible to continuously adjust the colour if
you hold down the buttons.
Automatic operation
You can program a sequence and store it in the
transmitter and then send it to the various activated
dimmers.
The programmable sequence is only one. When
you save a new automatic sequence in the
transmitter, the pre-existing sequence is
overwritten. It can happen that there is a dimmer
that is performing an automatic sequence during the
programming of a new sequence: the dimmer will
continue to run the old sequence until you send
again to that dimmer the command to perform the
automatic sequence, and the old sequence will be
replaced.
You can program up to 1 0 steps in the automatic
sequence.
These steps can be chosen in two ways: by tapping
the colour wheel, matching the colours to be
displayed (random effect), or by swiping the finger
on the colour wheel to cover a certain angle
(rainbow effect, the 1 0 steps are equally sampled
within the range of colours that you have covered
with the movement of the finger).
To program the automatic sequence, follow these
steps: press the central programming key "P" on the
remote controller. Set the colour to be stored as
described above, ie touching the colour wheel in
correspondence of the colours you want, you can
store a maximum of 1 0 steps, in case of exceed
only the last 1 0 will be stored; or swiping your finger
on the wheel, in this case the 1 0 points will be
sampled by the transmitter itself. Press the program
button "P" to complete the process and store the
sequence.
In order to run the sequence on a single dimmer
press the corresponding zone key on the remote
3/4
LC1 006 + LC281 0
and then the execution key "M".
sequence press the zone key (from 1 to 4, or
In order to run the sequence on several dimmers whichever you need), and use the buttons "B+" and
having all the same code, press the corresponding "B-" as shown above. Each time you press the
zone key on the remote and then the execution key brightness adjustment buttons the sequence moves
"M". All the units will start the sequence in to the first step and then restarts.
contemporary, with the same duration of the steps.
To adjust the execution speed of the sequence
In order to run the sequence on more dimmers to press the corresponding buttons "S+" and "S-": the
which were assigned different codes, press in speed is adjustable on 1 6 levels, from minimum to
sequence (eg.: 1 , 2, 4 or 2, 3, 4) the corresponding maximum, press the key "S+" once to increase the
zone keys on the remote controller and then the speed by one level, press the key "S-" once to
execution key "M". All the units will start the decrease the speed by one level. It is not possible
sequence, with the same duration of the steps, but to continuously adjust if you hold down the buttons.
with a slight delay between one and the other: in As in the basic operation, you can turn off the lights
fact, the transmitter sends the control signal to the during the execution of the automatic sequence,
various dimmers in a sequential manner, first the both for single dimmer and for groups. Next time
code 1 , then the 2 , 3 and 4, giving rise to the you turn the receiver on, the automatic sequence is
activation delay.
not picked up, but the lights will go to the last colour
To adjust the brightness during the execution of the displayed before the sequence was launched.
TECHNICAL SPECIFICATIONS
Power supply
1 2 V-36 V DC
Current
3x5A max
Power
1 2V: 1 80W max - 24V: 250W max
Channels
3 outputs for RGB control
Distance
Receiving range 20 metres (clear field)
Material
Policarbonate
Colour
RGB Controller: white - Radiocontroller: black
Weight
RGB Controller: 0.1 kg - Radiocontroller: 0.05 kg (batteries excluded)
Dimensions
RGB Controller: 1 78x46x20 mm - Radiocontroller: 1 20x55x1 7 mm
Protection
IP20
Suitable to be fitted on normally inflammable surfaces
Applied standards
Please note that as part ofArena Luci's ongoing commitment to continuous product development, specifications are subject to change without
notice. Whilsteverycare is taken in the preparation ofthis manualArena Lucireserves the rightto change specifications in the course ofproduct
improvement. The publishers cannotbe heldresponsible forthe accuracyofthe information herein, oranyconsequence arisingfrom them.
WARRANTY CONDITIONS
The unit is guaranteed for 24 months from the date of
purchase against defects in workmanship or materials
that compose it.
This warranty does faults due to incorrect or improper
use of the device.
The warranty is immediately void if the unit has been
tampered with or opened by unauthorized personnel.
The warranty provides, at the discretion of Arena Luci,
repair or replacement of faulty equipment.
The serial number and model of the device are required
to obtain information or assistance from the dealer. We
4/4
invite you to transcribe them in time: for any request of
information or services, this will result in a quick and
effective operation.
CE RULES
The device meets the essential requirements of the EMC
Directive 89/336/EEC, 93/68/EEC, BT73/23/EEC.
The device complies with the standard EN 5041 9 on the
restriction of use of hazardous substances in electrical
and electronic equipment (RoHS) and meets the
requirements of Directive 2002/96/EC on Waste Electrical
and Electronic Equipment (WEEE).
The European Directive 2002/96/EC on Waste Electrical and Electronic Equipment (WEEE), requires that old lighting fixtures must not
be disposed in the normal unsorted municipal waste stream. Old appliances must be collected separately in order to optimise the
recovery and recycling of the materials they contain and reduce the impact on human health and the environment.The crossed out
“wheeled bin”symbol on the product reminds that when you dispose the appliance it must be separately collected. Consumers should
contacttheirlocalauthorityorretailerforinformation concerningthe correctdisposaloftheiroldappliance.







![У]о:(mЧєь{Сr˙„~®M −Ї‹ОЄ* hˇОˆt](http://vs1.manualzilla.com/store/data/006000975_1-aa867c7069e2492e9edc151c99229eb0-150x150.png)
