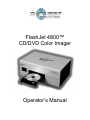
1
FlashJet 4800™
CD/DVD Color Imager
Operator’s Manual
COPYRIGHT___________________________________________________
Copyright © 2002-2008 R-Quest Technologies, LLC.
All rights reserved. This manual and the software described in it are
copyrighted with all rights reserved. No part of this publication may be
reproduced, transmitted, transcribed, stored in a retrieval system or translated
into any language in any form by any means without the written permission of
R-Quest Technologies, LLC.
TRADEMARKS_________________________________________________
R-Quest, CopyQuest, FlashJet 4800, and Powered By R-Quest are
trademarks of R-Quest Technologies, LLC. Other brand names and product
names are trademarks or registered trademarks of their respective
companies. R-Quest Technologies, LLC. may also claim other names, words
or phrases contained in this manual as trademarks.
PIRACY / ILLEGAL COPYING_____________________________________
The TCP series copiers are designed to help you easily reproduce material for
which you own the copyright or have obtained permission from the copyright
owner to make copies. Unless you own the copyright or have permission from
the copyright owner to make copies, you may be violating copyright law and
be subject to payment of fines, damages and / or other remedies. R-Quest
Technologies, LLC. accepts no responsibility for the use or misuse of this
equipment for illegal purposes. If you are uncertain about your rights, contact
your legal advisor.
WARRANTY___________________________________________________
R-Quest Technologies, LLC. (hereinafter “R-Quest”) warrants its Products to
be free from defects in materials and workmanship under normal and proper
usage for the period of one year from the date of shipment from R-Quest. .
THIS WARRANTY IS IN LIEU OF AND EXCLUDES ALL OTHER
REPRESENTATIONS MADE, BOTH EXPRESS AND IMPLIED, INCLUDING
WITHOUT LIMITATION, THE IMPLIED WARRANTIES OF
MERCHANTABILITY AND FITNESS FOR A PARTICULAR PURPOSE.
R-Quest further warrants that the goods sold are as described, but no
promise, description, affirmation of fact, sample model or representation, oral
or written shall be part of an order, unless set forth in these terms and
conditions, or are in writing and signed by an authorized representative of RQuest. This warranty does not apply to any Product which has been subject
to misuse, negligence, accident or normal wear and tear - or to any Product
which has been modified or repaired, improperly installed, altered, or
disassembled -except according to R-Quest’s written instructions.
3
This warranty is subject to the following further conditions:
1) This warranty is limited to the electronic and mechanical performance only, as
expressly detailed in the Product specifications and NOT to the imbedded
software, firmware or to third party software.
2) This warranty shall not apply to any Products which are stored, or utilized, in
harsh environmental or electrical conditions outside R-Quest’s written
specifications.
3) This warranty is applicable only to Products shipped from R-Quest
subsequent to January 19, 2008.
4) This warranty shall be valid only if the Product was purchased by the End
User from an authorized R-Quest Distributor/Reseller.
5) Heavy use (per recorder or printer, 12,000 discs / 100 cartridges) may require
consumable items such as printers or recorders to be serviced within the
warranty period. Parts replaced in the course of a service are warranted to
be free of defects in material and workmanship for a period of ninety (90)
days, or until the expiration of the original warranty (whichever is the later),
and are subject to the same service interval requirements.
6) Removal of the R-Quest Label or Serial number from the product will void this
warranty.
7) Inkjet Printers Only: Use only the appropriate genuine HP cartridges in the
FlashJet 4800 and Si1000 printers. Using, or attempting to use cartridge
refills or attempting to ‘bulk ink’ the printers will void this warranty.
Purchaser’s Remedies
If an R-Quest Distributor or an End User desires to make a warranty Claim,
the Distributor or End User shall, if requested by R-Quest, ship the Product to
R-Quest’s authorized service facility, postage or freight prepaid. R-Quest
shall, at its option, take one of the following two courses of action for any
Products which R-Quest determines are defective in materials or
workmanship:
1) Repair or replace the Product and ship the Product to the End User or to the
authorized R-Quest Distributor, postage or freight prepaid; or
2) Replace with a new product and ship the product to the End User or to the
authorized R-Quest Distributor, postage or freight prepaid.
PURCHASER’S REMEDIES SHALL BE LIMITED EXCLUSIVELY TO THE
RIGHT OF REPLACEMENT OR REPAIR AS PROVIDED AND DOES NOT
INCLUDE ANY LABOR COST OR REPLACEMENT AT END USER’S SITE.
4
R_QUEST SHALL NOT BE LIABLE FOR ANY CONSEQUENTIAL DAMAGES
RESULTING FROM ANY BREACH OF THIS WARRANTY, INCLUDING
WITHOUT LIMITATION, ANY DAMAGES RESULTING FROM PROPERTY
DAMAGE, PERSONAL INJURY OR BUSINESS INTERRUPTION.
Governing Law and Venue
The sale and purchase of Products covered hereby and all terms and
conditions of this Warranty shall be governed by the laws of the State of
California, and any disputes hereunder shall be venued in the El Dorado
County District Courts in California.
If Your Product Requires Support
If your product requires servicing, you should first contact the place of
purchase and request support. If the service request cannot be completed by
the place of purchase, you should contact R-Quest directly using one of the
following methods:
E-Mail: [email protected]
Telephone: (530) 621 9166
Fax: (530) 621 3144
Before shipping any item to R-Quest, first obtain an RMA (Return Material
Authorization) Number from R-Quest support. This number must be placed on
the outside of the product packaging where it can be easily found otherwise
the item will be refused and returned at the sender’s expense.
All products returned to R-Quest under warranty MUST be in original R-Quest
supplied packaging. If you do not have the original packaging, new packaging
can be supplied for a charge. Please contact R-Quest for the cost of
replacement packaging, which may vary based on the product, and your
location. Your warranty will be voided if original R-Quest packaging are not
used.
Within the first 30 days of warranty, R-Quest will cover the cost of shipping to
the R-Quest factory via UPS Ground or other similar transportation method;
otherwise you are responsible for the cost of shipping the product to R-Quest.
During the warranty period, R-Quest will cover the cost of returning the
repaired product to you via UPS Ground or other similar transportation
method. If you require a more urgent transportation method, upgrades can be
arranged for a charge, which in all cases must be pre-paid.
5
TABLE OF CONTENTS
SYSTEM DESCRIPTION.............................................................................................................................8
OPERATING ENVIRONMENT................................................................................................................................9
ARE YOU NEW TO CD/DVD PRINTING?.............................................................................................10
Can I use my existing label designs? ...................................................................................................11
UNPACKING AND INSPECTING ...........................................................................................................14
BOX CONTENTS ........................................................................................................................................18
INSTALLING THE IMAGER ...................................................................................................................19
IMAGER PREPARATION ........................................................................................................................21
CHECKING IMAGER-TO-AUTOLOADER ALIGNMENT ................................................................23
INITIAL CD/DVD PRINTING CHECK ...................................................................................................24
CD/DVD LABEL CREATION ...................................................................................................................26
OPTIMIZING PRINT QUALITY SETTINGS ........................................................................................27
IMAGER-TO-AUTOLOADER ALIGNMENT .......................................................................................29
To adjust Imager-to-Autoloader Alignment: .......................................................................................32
CHECKING INK LEVEL ..........................................................................................................................33
DISC LABEL CENTERING (IMAGER CALIBRATION) ....................................................................34
SETTING PRINT LIMITS AT THE INSIDE AND OUTSIDE DIAMETER ............................................................................38
SUPPORT FOR 80MM CD/DVDS AND BUSINESS CARDS .....................................................................................38
TROUBLESHOOTING ..............................................................................................................................39
The ink stays wet: .................................................................................................................................39
The Imager gives tray errors after a disc is inserted: .........................................................................39
The Imager is not being recognized by the Autoloader: .....................................................................39
My labels are not centered on the discs: .............................................................................................39
The Imager is printing in areas of the discs that are not coated: .......................................................40
The Imager does not accept my *.prn files: ........................................................................................41
The black areas of my labels are too wet: ...........................................................................................41
Printing takes too long: .......................................................................................................................41
Print quality is not acceptable: ...........................................................................................................41
SYSTEM DESCRIPTION.............................................................................................................................8
OPERATING ENVIRONMENT................................................................................................................................9
ARE YOU NEW TO CD/DVD PRINTING?.............................................................................................10
Can I use my existing label designs? ...................................................................................................11
UNPACKING AND INSPECTING ...........................................................................................................14
BOX CONTENTS ........................................................................................................................................18
6
INSTALLING THE IMAGER ...................................................................................................................19
IMAGER PREPARATION ........................................................................................................................21
CHECKING IMAGER-TO-AUTOLOADER ALIGNMENT ................................................................23
INITIAL CD/DVD PRINTING CHECK ...................................................................................................24
CD/DVD LABEL CREATION ...................................................................................................................26
OPTIMIZING PRINT QUALITY SETTINGS ........................................................................................27
IMAGER-TO-AUTOLOADER ALIGNMENT .......................................................................................29
To adjust Imager-to-Autoloader Alignment: .......................................................................................32
CHECKING INK LEVEL ..........................................................................................................................33
DISC LABEL CENTERING (IMAGER CALIBRATION) ....................................................................34
SETTING PRINT LIMITS AT THE INSIDE AND OUTSIDE DIAMETER ............................................................................38
SUPPORT FOR 80MM CD/DVDS AND BUSINESS CARDS .....................................................................................38
TROUBLESHOOTING ..............................................................................................................................39
The ink stays wet: .................................................................................................................................39
The Imager gives tray errors after a disc is inserted: .........................................................................39
The Imager is not being recognized by the Autoloader: .....................................................................39
My labels are not centered on the discs: .............................................................................................39
The Imager is printing in areas of the discs that are not coated: .......................................................40
The Imager does not accept my *.prn files: ........................................................................................41
The black areas of my labels are too wet: ...........................................................................................41
Printing takes too long: .......................................................................................................................41
Print quality is not acceptable: ...........................................................................................................41
7
System Description
Your new R-Quest FlashJet 4800 CD/DVD Imager incorporates a commercial
grade HP print engine. It provides outstanding color or black and white printing
on CDs or DVDs intended for use with inkjet printers. Unlike many competitive
CD/DVD printers, your FlashJet 4800 uses standard HP #56, #57, and #58 print
cartridges that are available from your local office supply store. You do not have
to pay a premium for private labeled ink cartridges!
CD/DVD labels can be created using virtually any graphics program, or via the
TrueNet Label Designer. You will have to set the page size and label image
location properly. You may print CD/DVD labels either before or after duplication,
but we recommend printing after duplication. Remember, you can only print on
CDs or DVDs intended for inkjet printing.
We strongly discourage using adhesive labels on non-printable CD/DVDs with
the FlashJet 4800 Imager, or any other R-Quest printing or duplication
equipment. Damage caused by using adhesive labels will not be covered under
warranty.
You can use existing CD/DVD label files with your new FlashJet 4800 CD/DVD
Imager as long as the FlashJet 4800 Imager driver is installed on your PC. The
label files are processed through our driver to create an appropriate *.prn file.
You cannot use label files that have been “ripped” (processed) for any other
printer. Consult your TrueNet manual for additional details.
R-Quest TrueNet Networking Software provides a number of unique advantages
for the creation and use of CD/DVD labels. A basic label editor is built in for
users who do not have dedicated CD/DVD label software, or a preferred graphic
program. Label files can be stored as *.prn files ripped for a specific printer,
stored as an*.rpt (R-Quest Print Template) file that is not printer specific, or
ripped for the printer on the target duplication system without being stored. You
do not have to specify which printer is on a given R-Quest Autoloader System.
TrueNet will automatically create the proper *.prn file when the job is assigned to
a duplication system.
8
The appearance, durability, and drying time of the discs you produce will depend
primarily upon the brand of printable CDs or DVDs you use. Printable CDs and
DVDs are available in a wide range of prices, surface colors, and surface
treatments. We have had excellent results using discs from all of the major
manufacturers, so we do not restrict you to specific CD or DVD brands.
The R-Quest FlashJet 4800 CD/DVD Imager does not support printing on jewel
case inserts. The discs are so attractive you will not want to hide them! Like all of
our products, the FlashJet 4800 Imager is sophisticated, but not complicated.
The Quick Start sections of this manual will have you printing discs a few
minutes after your Imager is installed.
Operating Environment
Your FlashJet 4800 Imager should be used in a climate-controlled environment
free of dirt, dust, excess humidity, excessive heat, and electro-magnetic
interference. Excessive dust and dirt can contaminate printed discs. Excessive
humidity can extend ink curing time, and may also adversely affect printed
surface durability.
Maintaining a proper operating environment will also assure maximum life of
your FlashJet 4800 Imager. It should be noted that the same contaminates that
adversely affect your new R-Quest Imager will also adversely affect the quality of
the discs you produce.
Use only HP #56, #57, and #58 Inkjet Cartridges in your FlashJet 4800 Imager.
Using non-HP cartridges, or refilling HP cartridges, will void your warranty.
R-Quest is concerned about the environment. We encourage you to properly
recycle used ink cartridges. Your office supply source should be able to assist
you with ink cartridge recycling.
The DC Power Supply should not be placed on the floor where it could be
subjected to physical abuse, moisture, or water damage. Place the DC Power
Supply on a table top surface near your Imager.
Keep the CD/DVD Tray inside the Imager unless you are loading or unloading
discs. The FlashJet Tray mechanism is designed for continuous commercial use,
but it can be damaged by abuse when it is extended outside the Imager’s
enclosure.
9
Are you new to CD/DVD
Printing?
Most computer users are familiar with inkjet printing on paper, but many people
have no experience with the differences between printing on paper and printing
directly on CDs or DVDs with inkjet compatible coatings. This section of the
manual gives you a brief overview of CD/DVD printing.
Most early CDs, and many current CDs, are CD Audio discs which play at a
relatively slow rotating speed we call 1X. (For the technically curious, Audio CDs
rotate at a speed that varies from about 600 rpm at their inner diameter where
playback starts to about 300 rpm at their outer diameter where playback ends.)
Applying pre-printed, or post printed, self-adhesive paper labels became a low
cost and popular way for end users to identify and decorate discs they recorded
themselves. An argument can even be made that a properly applied label helped
protect the delicate metalization layer it covered. As optical disc technology
advanced, more discs were used for data recording and recovery, and rotational
speeds increased to improve data transfer rates.
Some current drives rotate at speeds as high as 50X. At these high rotational
speeds the balance of the disc is critical. An off-center label, or a label not fully
bonded in place, may cause the disc to wobble. It is this wobbling that creates
the noise you sometimes hear, especially in laptops. In a worst case scenario the
disc, or even a drive, may be damaged by a wobbling disc. Many optical disc
drive manufacturers forbid the use of self-adhesive labeled discs in their
products.
The solution to this problem is to use optical discs with an inkjet-compatible
coating, and an inkjet Imager that accommodates optical discs. Although
conceptually identical to inkjet printing on paper, printing aesthetically pleasing
and functional labels on CDs and DVDs requires a few additional considerations.
These considerations include:
• What type or brand of discs should I use?
• Can I use my existing label designs?
• What is “ripping”?
10
•
•
•
•
Can I use my existing label program(s)?
Are there any special handling considerations for inkjet-printable discs
before and/or after printing?
Can I use third party ink cartridges, or refill my empty HP ink
cartridges?
When should I use HP #56, HP #57, or HP #58 ink cartridges?
What type or brand of discs should I use?
The appearance, durability, and drying time of the discs you produce will depend
primarily upon the brand of inkjet-printable CDs or DVDs you use. Inkjet-printable
CDs and DVDs are available in a range of prices, surface colors, and surface
treatments. We have had excellent results using discs from all of the major
manufacturers, so we do not restrict you to specific CD or DVD brands. Feel free
to experiment with the various print quality settings available in our TrueNet
Label Designer and Imager driver to maximize the appearance of the labels you
create and print. There are no hard and fast rules. Each vendor’s printable
coating will respond differently to the quality settings available.
Special Notes:
•
•
•
•
•
You must use inkjet-printable CDs and/or DVDs with your R- Quest
FlashJet Imager.
Do not try to print on CDs or DVDs intended for use with thermal
Imagers.
Inkjet ink will not print properly, or cure properly, on disc surfaces
intended for thermal Imagers.
Do not try to print on ordinary CDs or DVDs that do not have an
inkjet compatible coating. Inkjet ink will not print properly, or cure
properly, on ordinary CDs and/or DVDs.
Do not use CDs or DVDs with self adhesive labels in your R- Quest
FlashJet Imager, or in any R- Quest Duplication or Printing
equipment.
Can I use my existing label designs?
You can use existing label designs as long as the FlashJet Imager driver is
installed on your PC. You cannot use existing *.prn files “ripped” for a different
printer. (See the next paragraph for a brief description of “ripping”.) To use an
existing label design you must:
1. Open a saved version of your label file using the graphics program that
created it.
2. Select File | Print.
3. Select the R-Quest FlashJet 4800 as your Printer.
11
4. Mark the “Print to File” check box and click the “Print” button.
5. Type a name for your label and include “.prn” at the end of the file name,
then click OK.
It may not be obvious where the *.prn file is outputted, so use the Windows
Search function, if necessary, to locate it.
What is “ripping”?
RIP is an acronym for Raster Image Processor. A Raster Image Processor
translates a label file’s data (bitmap images, vector graphics, fonts, JPEGs, etc.)
into a rasterized (bitmapped) file unique to a specific type of Imager. Actually, all
Imager drivers convert (RIP) the native graphic files they process to print
properly with their Imager’s hardware. The ripping operation adds specific
information to the label file that tells the print head where and how to place its
dots of ink. When you use an Imager attached to your computer, the ripping
operation is handled automatically by the Imager driver. In most cases you may
not even be aware of the ripping operation. Ripping becomes a consideration
when you must transfer a label file to a printing and/or duplication and printing
system for use during an automated printing process. The ripped label file you
transfer using either a network or a disc will typically be called a *.prn file.
Can I use my existing label program(s)?
Yes, you should be able to use virtually any CD/DVD Labeling or graphics
software to produce labels for your R- Quest FlashJet Imager, as long as the
FlashJet Imager driver is installed on your PC.
Are there any special handling considerations for inkjetprintable discs before and/or after printing?
All CDs and DVDs should be handled only by their edges to minimize
contamination and damage. CDs and DVDs should also be carefully stored in
their original packaging until they are used. Their storage environment should
avoid exposure to extreme humidity. The coating that allows inkjet printing on
CDs and DVDs is typically not as durable as the disc surface to which it is
applied. Any scuffs or markings in this coating may affect print quality. In
addition, humidity may soften this coating, and/or slow down the curing process.
To minimize the adverse affects of humidity, we suggest you remove your CDs
and DVDs from storage and place them in the duplication environment at least
24 hours before they are used. Even after the ink has cured, touching the label
surface may leave a mark on your label. Handle CDs and DVDs by their edges.
Can I use third party ink cartridges, or refill my empty HP ink
cartridges?
12
The short answer is NO! Using third party ink cartridges, or refilling empty HP ink
cartridges, will void your warranty. You may buy replacement HP #56, #57, or
#58 cartridges from any source you choose.
When should I use HP #56, HP #57, or HP #58 ink cartridges?
Your R- Quest FlashJet Imager has two ink cartridge holders, but it can use
three different HP ink cartridges: #56 Black, #57 Tri-color, or #58 Photo. The
table below shows acceptable ink cartridge combinations:
To Print:
#57 Holder:
Best Graphic Images
#57
Photographic Quality
#57
Basic Graphics w/o Black #57
Monochrome Black Empty*
#56**
#56/58 Holder:
#56**
#58
Empty*
Notes: *= You can leave a cartridge in the holder for these operations.
If you are going to print large areas of black use the #56 cartridge instead
of the #58 cartridge. Although this may have a small effect on image
quality, it will reduce the amount of ink on the surface of the disc. This will
expedite curing and minimize the possibility of label handling damage.
**= Although we refer to the #56 cartridge as Black, it produces excellent
grey scale images.
13
Unpacking and Inspecting
Before you remove the FlashJet Imager from its shipping carton, make sure you
have cleared a suitable installation site. You may place it directly on your new RQuest Automated Printing or Publishing System.
Carefully remove your FlashJet 4800 from its shipping carton and verify that all
parts are present. If there are missing or damaged parts contact R-Quest or an
authorized distributor immediately to correct any mis-packed or missing parts.
Remove the cardboard Accessories Tray that fits into the two foam inserts. The
Accessories Tray contains the AC Power Cord, DC Power Supply, and Ink
cartridges.
14
Using the handles provided in the foam inserts, remove the Imager with the left
and right foam packing details attached. Place the Imager and foam details on a
suitable work surface and slide the foam details off of the Imager. After you
remove the plastic bag, you are ready to install the Imager. There are no external
pieces of tape or internal shipping fasteners to remove.
Let’s take a quick tour of your new R-Quest FlashJet 4800 Imager. The
photographs below highlight the unit’s controls, access doors, and connections.
15
16
17
Box Contents
Your shipping carton should contain the following items, in addition to this
manual.
•
•
•
•
•
•
•
The FlashJet 4800 Imager.
An AC Power Cord.
A DC Power Supply.
Two inkjet cartridges (#56 and #57)
A CD-R containing test label files, two Imager alignment files, and the
FlashJet 4800 Imager driver.
Lots of shipping material which should be placed back in the carton and
saved. Use this custom packaging if you ever have to transport the
system to another location, or return it for maintenance or repair. Shipping
this system in unauthorized packaging may void warranty coverage.
A warranty card which should be filled out and returned as soon as you
verify your Imager is functioning properly.
The FlashJet 4800 Imager can be used with TrueNet Networking software and
hardware. Consult your TrueNet Operators Manual for additional information on
the use of this Imager, and the features of TrueNet CD/DVD Label Designer
Software.
NOTE:
If your FlashJet 4800 is damaged during shipment, please contact the freight
carrier first, and then contact your distributor or R-Quest.
You need to save your packaging materials so that if the need arises you can
return your Autoloader for service. Sending a unit to R-Quest without the
original packaging will void the warranty. This packaging was designed
specifically for shipping your Autoloader. Other packaging may not be as
suitable. If you have already disposed of your packaging materials, you can
receive a new set from R-Quest for a fee.
18
Installing the Imager
The FlashJet 4800 Imager primarily is used and supported on R-Quest Printing
or Automated Publishing Systems. These instructions therefore only cover
installation on an R-Quest Autoloader already prepared for a FlashJet 4800
Imager.
The two large chrome pins on the Imager Mounting Plate go into two holes in the
Imager Bottom Plate. The two smaller black pins should not be removed. They
will not interfere with the
FlashJet Imager.
The Printer Support Plate on
duplication systems with two
bays of recorders will be on a
slight angle. You still use the tall
chrome pins as shown above.
(Consult your Duplication
System Operators Manual for
details.)
Install the Parallel Port, Ethernet
Port, and Tray Control Cables
on your new R-Quest
Automated Printing or Publishing System as shown in the photo below.
19
Connect the Parallel Port, Tray Control, and DC Power cables to the Imager as
shown below. Note the Front-to-Rear Adjustment Knob which you may use later
for Imager alignment. We recommend that you place the Imager’s DC Power
Supply module on the table top near the unit, rather than the floor, to protect it
from damage.
20
Imager Preparation
Once the Imager is properly located on its mounting plate, you can plug the DC
Power Supply into an AC receptacle and turn the Imager on.
To turn the Imager ON, press the
Button. The Imager will perform a
power on self test. The Imager is ready when the power on LED stops flashing
and stays on.
21
When the Imager is ready, open the ink cartridge access door and wait until the
ink cartridge carriage stops moving. The FlashJet 4800 Imager holds two HP Ink
Cartridges. The left ink cartridge holder always holds an HP #57 Tri-Color ink
Cartridge. The right ink cartridge holder may hold either an HP #56 Black ink
Cartridge, or an HP #58 Photo ink cartridge. If you are printing graphic images
and text with black text and/or objects, install a #56 Black ink cartridge in the
right ink cartridge holder. If you are printing photographic images and want the
best possible color rendition, install a #58 Photo ink cartridge in the right ink
cartridge holder. The photographs below show the proper way to open and close
the ink cartridge holders.
After both ink cartridges are installed, close the Ink Cartridge Access Door. The
Imager will check the Ink Cartridge Holders to make sure both cartridges are
properly installed. When the ink cartridge check is successfully completed, the
Power ON Light will be on constantly and the Ink Cartridge Light will be off.
22
Checking Imager-to-Autoloader
Alignment
If you ordered a complete system, your new R-Quest Automated Printing or
Automated Publishing System was aligned and tested at the factory before it was
shipped. This initial alignment check will let you know if Imager alignment has
shifted due to shipping and/or handling abuse. If you are installing a new
FlashJet Imager on an existing system, you must check Imager-to-Autoloader
alignment. If your system does not meet the alignment requirements presented
below, refer to the Advanced Imager Operations – Imager-to-Autoloader
Alignment section of this manual.
To check Imager-to-Autoloader alignment, perform the following sequence from
the Autoloader’s control panel and LCD display:
•
•
•
•
•
•
•
•
•
•
Make sure the Imager is ON, and the Power Light is ON continuously.
From the main menu screen, scroll down to Utilities Menu and press Enter.
From the Utilities Menu, scroll down to Loader Utilities and press Enter.
From the Loader Utilities menu, scroll down to Loader Utilities again and press
Enter.
From the Loader Utilities sub menu, scroll down to Calibrate and press Enter.
Place a few CDs or DVDs in the first supply hopper of the Autoloader. (Refer to
the Autoloader’s Operators Manual if you are not sure which supply hopper is
accessed first.) You do not have to use printable discs for this alignment check.
Scroll down from Calibrate to Insert Printer and press Enter. A disc should be
transferred from the supply hopper to the Imager tray, and the tray should close.
Scroll down from Insert Printer to Accept Printer and press Enter. The inserted
disc should be transferred from the Imager tray to the accept hopper, and the
tray should close.
Scroll up from Accept Printer to Insert Printer and press Enter. Another disc
should be transferred from the supply hopper to the Imager tray, and the tray
should close.
Scroll down from Insert Printer to Reject Printer and press Enter. The inserted
disc should be transferred from the Imager tray to the reject area in front of the
CD/DVD Recorders, and the tray should close.
23
If all of these operations are completed successfully, the Imager is properly
aligned to the Autoloader. If any of these operations are not completed
successfully, refer to the Advanced Imager Operations – Imager-to-Autoloader
Alignment section of this manual.
Initial CD/DVD Printing Check
The purpose of this check is to make sure your FlashJet 4800 ink cartridges are
properly installed, the CDs and/or DVDs you are using are compatible with the
inkjet printing process, and you are able to transfer appropriate label files to your
new automated system. One or more Test Label image files have been supplied
on the CD-R that came with the Imager.
1. If they are not already ON, turn ON the FlashJet 4800 Imager and R-Quest
Autoloader.
2. From the main menu on the LCD Display, scroll down to the Start Print only
menu selection and press Enter.
3. At the Read New Print File? prompt, press No. One or more Test Label files
may already be loaded on your system’s HDD. If there is a Test Label file on
your system, skip step 4 and proceed to step 5. If there are no Test Label
files on your system, proceed to step 4.
4. Press the Stop key to return to the main menu’s Start Print Only prompt, and
press Enter. At the Read New Print File? prompt, press Yes, and follow the
on-screen instructions to load Test Label files on your system’s HDD.
5. Place one or more printable CDs or DVDs in the first supply hopper of your
R-Quest Autoloader. (Consult your system’s Operator Manual if you are not
sure which supply hopper is used first.)
6. Select one of the Test Label files displayed on the LCD screen and press
Enter.
7. At the “Quantity?” Prompt, use the Up Arrow key to select “1”, and press
Enter.
24
8. The Test Label file will be printed and the printed disc will be placed in the
accept hopper. If the label was properly printed, your system is ready for use.
If there is a problem with the test label, refer to the appropriate section of the
Advanced Imager Operations portion of this manual.
25
CD/DVD Label Creation
Basic labels can be created using the TrueNet Label Editor. (Refer to the
TrueNet Operator Manual for detailed instructions.) If the Imager driver is
installed, you can also output *.prn files using the “Print to File” function of
virtually any graphics application. (Refer to the Windows Driver Quick Start
Guide for detailed instructions.) There are a few key concepts to keep in mind as
you prepare and use label files with the FlashJet 4800 CD/DVD Imager:
•
You cannot use any *.prn files that were “ripped” for a printer other than a
R-Quest FlashJet 4800 Imager. All *.prn files are printer specific.
•
The FlashJet 4800 will automatically adjust its print settings based upon
the ink cartridges you have installed, but the label files you create may
require additional Print Quality setting changes to optimize the
appearance of your CD/DVD labels. The two main factors affecting Print
Quality are the inkjet compatible coating on the CDs or DVDs you use,
and the content of your label. This is why it is important to test your labels
using the CDs or DVDs you plan to use for each printing project.
•
If your label design includes large areas of black, or black text, we suggest
you use the #56 Black rather than the #58 Photo inkjet cartridges. This will
minimize both ink cost and ink curing time.
•
There are many advantages to using R-Quest TrueNet Networking with
your FlashJet 4800 CD/DVD Imager:
•
TrueNet knows what type of printer is installed on each autoloader
in your network. It will automatically “rip” a label file or template to
match each Printing, or Duplication and Printing, system on your
network as the job is processed.
•
Labels may be stored as printer specific, “ripped”, *.prn files, or
non-printer specific “templates”, *.rpt files. Template files can be
easily modified to incorporate content changes.
26
•
With TrueNet, label files can be stored on any HDD in the network.
This includes HDDs in networked PCs. Label files do not have to
be loaded on each autoloader’s HDD.
Optimizing Print Quality
Settings
FlashJet 4800 CD/DVD Imagers will select default Print Quality settings based
upon the ink cartridges it detects in its two ink cartridge holders. For example,
the Print Quality settings when a #56 Black cartridge is in the right hand holder
will not be as “high” as they would be if a #58 Photo cartridge was detected. If
the Imager’s default settings provide acceptable label quality with the media you
are using, you do not have to change anything. If you want to optimize your
label’s Print Quality follow the procedure described below. (The procedure
depicted below is based upon the TrueNet Label Editor.)
27
When you create your labels using the TrueNet Label Designer, print quality
optimization controls are available in the Printer Set-up menu (accessed by
selecting Print from the File menu). There are four Print Media and four Print
Quality options to choose from. In general, each group of options is ranked from
lowest quality at the top of each sub-menu to highest quality at the bottom of
each sub-menu. It should also be noted that the FlashJet 4800 Imager will
modify its internal settings based upon the ink cartridges installed in its holders.
The Print Media and Print Quality settings actually alter inkjet print resolution and
vary the quantity of ink deposited on the disc’s coating. Increasing inkjet print
resolution generally improves the appearance of a label at the expense of print
time. Higher quality images typically take longer to print. (This could be a
consideration if you are duplicating discs that have a small amount of content on
an autoloader system with 4 or more recorders.) Increasing the amount of ink
deposited also tends to improve label quality, but too much ink may saturate the
coating and never cure properly. Uncured ink is subject to handling damage and,
even worse, may transfer to the “lens” surface of an adjacent disc.
28
Because inkjet-compatible coatings vary from manufacturer to manufacturer, lot
to lot, and media type to media type, we unfortunately cannot provide any firm
guidelines. Based upon extensive testing with CDs and DVDs from many
manufacturers, we recommend that you:
•
Avoid setting Print Media to “Plain” because we do not recommend the
paper labels this setting was intended for.
•
Set Print Media to Premium.
•
Set Print Quality to Normal.
•
Use #57 Tri-color and #56 Black cartridges for labels that contain graphics
and text. The #56 Black cartridge also creates exceptional grey scale
images.
•
Use #57 Tri-color and #58 Photo cartridges for labels that contain
photographs.
•
Do a test print using discs from the lot you intend to use in production.
•
Modify these basic settings, as required, to optimize label aesthetics,
curing time, and duplication system throughput.
Imager-to-Autoloader Alignment
In order to reliably handle CDs and DVDs, the Robot Arm, Robot Arm Tower,
and FlashJet 4800 Imager must be properly aligned. If you purchased a
complete R29
Quest Duplication System, your unit was aligned and extensively tested prior to
being shipped. If there was no shipping damage, your system should function
properly after you install the Imager. A properly aligned system should handle
thousands of discs without a problem, so the easiest way to verify alignment is to
run your system. If your system does not handle new, name brand, CDs and/or
DVDs reliably, perform the alignment check and adjustment procedure described
below.
If you purchased your Imager separately from the autoloader it is being used
with, you should check, and if necessary adjust, Imager-to-Autoloader Alignment
before you use the system. The alignment check and adjustment procedure that
follows should also be used periodically to maintain reliable disc handling.
To check Imager-to-Autoloader Alignment:
1. From the main menu, scroll down to Utilities Menu and press Enter.
2. Scroll down to Loader Utilities and press Enter.
3. Scroll down to Loader Utilities and press Enter. (Yes! You do this twice.)
4. Scroll down to Calibrate and press Enter. (Every manual loader sequence
should start with a Calibrate to make sure the Robot Arm and Robot Arm
Tower start from their Home position.)
5. Place a small stack of new, name brand, CDs or DVDs in the first supply
hopper. (Refer to your Autoloader’s Operators Manual if you are not sure
which supply hopper is used first.)
6. Scroll down to Load and press Enter. (The Robot Arm should pick up a disc
and return to the Calibrate position.)
7. Scroll up to Extended Diags and press Enter.
8. Scroll down to Set Printer and press Enter. (The Robot Arm should move to
its Imager setting)
9. Open the Imager tray by pressing the Tray Open button on the Imager’s
front panel. (Do not disturb the disc on the Robot Arm.)
Your Imager tray, as viewed from above, should look like the photograph in
Figure 1 below, and the LCD Display should look like the photograph in Figure 2
below.
30
Figure 1 – Top View of the Imager Tray
Figure 2 – Imager-to-Autoloader Adjustment Screen
31
While carefully watching the disc in the Robot Arm, press the Down Arrow key
one step at a time until the disc is lowered to a position just above, or slightly in
contact with, the Imager tray. Examine the clearance between Clamps A, B, and
C as shown in Figures 3 and 4 below.
Examine the three clamp locations carefully. (Remember, the edge of the disc
may be clear.) The clearance between the disc and Clamp A should be at least
0.020” – the thickness of a 0.5 mm mechanical pencil lead. The clearance
between the disc and Clamps B and C should be at least 0.030” – the thickness
of a 0.7 mm mechanical pencil lead. If these clearance requirements are met,
disc alignment is acceptable. If these requirements are not met, repeat the check
procedure making sure that the disc does not get disturbed during Robot Arm
positioning. If the requirements are still not met, proceed to the alignment section
that follows.
To adjust Imager-to-Autoloader Alignment:
There are two interrelated adjustments that control Imager-to-Autoloader
alignment, Robot Arm Location and Imager Front-to-Rear Location. The Robot
Arm can be rotated about the center of the Robot Arm Tower by pressing the
Left Arrow or Right Arrow Keys. The disc will move along a circular path when
the Robot Arm’s location is adjusted. The Imager can be moved Front-to-Rear by
turning the black adjustment knob located on the right side of the Imager
support. Carefully try both of these adjustments to get the feel of their effect on
disc location. If the disc is accidentally forced into one of the Imager Tray’s brass
clamp cylinders it may slip in the Robot Arm’s disc clamp. If this happens, you
should repeat the alignment check procedure to restore the disc to its nominal
position.
When the clearance requirements are met, press Enter to store the new Robot
Arm Location. The Imager’s Front-to-Rear Adjustment Knob retains its position
due to internal friction. There is no lock mechanism on this adjustment.
32
Repeat the check procedure to verify the adjustment now meets its
requirements.
Checking Ink Level
The ink level of the cartridges installed in the FlashJet 4800 can be checked
using autoloader utilities. It should be noted that the percent remaining shown is
a conservative estimate. The cartridge may still print properly for a while, even if
the level shown is 0%.
1. From the top level of the main menu, scroll down to Utilities Menu and press
Enter.
2. From the top level of the Utilities Menu, scroll down to Printer Utilities and
press Enter.
3. From the top level of the Printer Utilities menu, scroll down to Printer Ink
Level and press Enter. The display will show the approximate % of ink
remaining in each cartridge.
33
Disc Label Centering (Imager
Calibration)
Your FlashJet 4800 CD/DVD Imager was calibrated before it was shipped to you.
It should not require initial calibration, unless it was subjected to shipping abuse.
To check disc label centering, you will print a CD/DVD with a special print file that
creates alignment scales in both Left-to-Right and Up-and-Down directions. You
will then rotate the printed disc 180 degrees and use a second special print file to
print a Cursor on each of the alignment scales. The position of the Cursor on
each of the alignment scales tells you how well your Imager is aligned, how
much correction is needed, and in which direction the correction should be
made. The two special files are supplied on a CD-R that comes with each
Imager. (If you purchased your Imager as part of a complete autoloader system,
the files should already be on your unit’s HDD.)
To check Imager calibration:
1. From the main menu, scroll down to Utilities Menu and press Enter.
2. From the Utilities Menu, scroll down to Printer Utilities and press Enter.
3. From the Printer Utilities menu, scroll down to Manual Print and press Enter.
FJAL1.PRN and FJAL2.PRN should be displayed.
4. Open the Imager tray by pressing the Tray Open button on the Imager’s
control panel.
5. Insert a printable CD/DVD making sure the disc is contacting the brass
clamps in the front of the tray.
6. The LCD Display cursor should be at FJAL1.PRN. Press Enter. When the
Tray Open/Close Light begins flashing, press the Tray Close button.
Alignment scales will be printed, and the Imager tray will open.
34
7. Note the arrow that is part of the alignment pattern printed on the disc.
Rotate the disc so this arrow points directly into the Imager. (This provides
the 180 degree disc rotation we mentioned earlier.) Make sure the disc is
touching the two brass clamps in the front of the tray.
8. The LCD Display will change to again show the Manual Print utility. Press
Enter and the display will change to the two alignment files. Scroll down to
FJAL2.PRN, press Enter and then press the Tray Close button. Two
alignment Cursors will be printed, and the tray will open. The completed
alignment disc can now be evaluated.
An alignment disc printed by a perfectly aligned Imager is shown in the photos
below, and key alignment features are identified. If the disc you printed looks like
this, your Imager is properly aligned.
35
If either Cursor, or both Cursors, is/are not in the center of their alignment
scales, your Imager needs to be calibrated. Refer to the charts and procedure on
the pages that follow.
36
The alignment pattern gives you two pieces of information. The Cursor location
tells you which way you have to move and the vernier scale tells you how far you
have to move.
37
To adjust Imager calibration:
1. From the main menu, scroll down to Utilities Menu and press Enter.
2. From the Utilities Menu, scroll down to Printer Utilities and press Enter.
3. The top item in the Printer Utilities menu is Image Alignment. Press Enter.
4. The four items in the Image Alignment menu correspond to the four
directions shown on the printed alignment disc. For example, to make a
change of 200 RIGHT, scroll down to the Move Right selection and press
Enter.
5. Use the four Arrow keys on the keypad to enter the alignment amount of
200. Press Enter when the correct alignment amount is displayed.
6. Use the same procedure if an UP/DOWN correction is also required. When
the correction factors have been entered, you should repeat the calibration
check to verify your alignment adjustment. (See page 33 for the alignment
check procedure.)
38
Setting print limits at the Inside and Outside Diameter
You can adjust the inside and outside diameters of the label your FlashJet 4800
will print using TrueNet’s Label Editor. To adjust the print range inside or outside
diameter, use the Options pull down menu and select Settings. The following
settings are available:
• Display Units – Preferred unit of measurement. Available options are Inches
and millimeters.
• Disc Size – Templates for most standard and mini-disc media.
• Disc Margin – Sets the width of the disc's non-printable, clear outer edge.
• Disc Center Ring Diameter – Sets the distance from the center hole to the
stacking ring (a raised ring around the hub of the disc to accommodate
stacking). This area is often non-printable.
• Disc Center Ring Width – Sets the width of the stacking ring.
• Hub Size – If you use hub-printable media, this will be the diameter of the
center hole. If your media is not hub-printable, this will be the diameter of
the non-printable hub (this includes the diameter of the center hole).
Refer to the TrueNet Operators Manual for additional details.
Support for 80mm CD/DVDs and Business Cards
Adapters are available for your FlashJet 4800 Imager that will accommodate
many types of business card media. Contact your dealer, distributor, or R-Quest
for more information.
39
Troubleshooting
The answers to many questions may be found in this Troubleshooting Guide. In
order to keep this troubleshooting guide concise, the reader may be referred to
the appropriate sections in the manual.
Troubleshooting Guide Index:
The ink stays wet:
1. The CD/DVDs are not coated for inkjet printing. Replace the media.
2. The CD/DVDs are intended for THERMAL rather than INKJET printing.
Replace the media.
3. Too much ink is being applied to the discs. Try different Print Quality
settings. Refer to the “Optimizing Print Quality Settings” section of this
manual.
The Imager gives tray errors after a disc is inserted:
1. The most likely cause is Imager-to-Autoloader Alignment. Refer to the
“Initial CD/DVD Printing Check” section this manual.
The Imager is not being recognized by the Autoloader:
1. Are all of the cables properly installed? See the “Imager Preparation”
section.
2. Was the Imager ON when the Autoloader was turned ON?
My labels are not centered on the discs:
1. Was your label artwork centered when you processed it through the
TrueNet Label Designer?
2. Your Imager may not be properly calibrated. Refer to the “Disc Label
Centering” section of this manual.
40
The Imager is printing in areas of the discs that are not coated:
1. Adjust the labels inside and/or outside diameter limits using the Options –
Settings feature of TrueNet’s Label Designer. Refer to of the TrueNet
Manual for further details.
41
The Imager does not accept my *.prn files:
1. All *.prn files are Imager specific. You can only use *.prn files created for
the FlashJet 4800 Imager.
The black areas of my labels are too wet:
1. This usually happens when the #58 Photo cartridge is used for labels with
large areas of black, and the Print Quality settings are not optimized. Try
replacing the # 58 Photo cartridge with a #56 Black cartridge.
2. If the problem persists, try adjusting the Print Quality settings. Refer to the
“Optimizing Print Quality Settings” section of this manual.
Printing takes too long:
1. In general, higher quality printing increases printing time. Try adjusting the
Print Quality settings. It should be noted that sometimes “lower quality”
settings will produce excellent results with significant reductions in printing
time. Refer to the “Optimizing Print Quality Settings” section of this
manual.
Print quality is not acceptable:
1. If the printing is faint, or off color, one of your cartridges may be out of ink.
Check ink level. Refer to the “Disc Label Centering” section of this
manual.
2. If the printing is not flowing or curing properly, the coating may not be inkjet
compatible. Try a different media.
3. Many print quality problems result from the compatibility of the CD/DVDs
inkjet coating. It may not be simply a manufacturer issue. For example, a
manufacturer’s silver media may not work well with a particular label file,
inkjet Imager type, or print quality setting, but their white media may do an
exceptional job. The key to a consistent print process is finding media that
meets your quality and cost objectives. You may find optimum results
using white discs from one manufacturer and silver discs from a different
manufacturer.
4. To avoid unpleasant surprises in production, test print each new lot of
media with the label file you plan to print. This gives you the opportunity to
optimize print settings and/or spot a compatibility problem before it affects
your production schedule.
42
Powered By R-Quest
FlashJet 4800 Imager Manual
Part Number 900-00052-01 Revision 106
Copyright © 2002-2008 R-Quest Technologies, LLC
All rights reserved.
www.r-quest.com
43