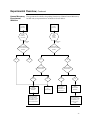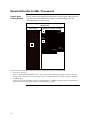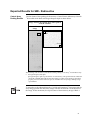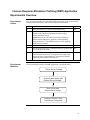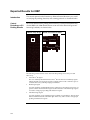
1
ProtoArray® Applications Guide General information, technology overview, and applications using the ProtoArray® Human and Control Protein Microarray Rev. date: 28 January 2010 Manual part no. 25-1025 Corporate Headquarters Invitrogen Corporation 1600 Faraday Avenue Carlsbad, CA 92008 T: 1 760 603 7200 F: 1 760 602 6500 E: [email protected] For country-specific contact information visit our web site at www.invitrogen.com User Manual ii Table of Contents General Information.................................................................................................................................... v Introduction .................................................................................................................................1 Overview .......................................................................................................................................................1 ProtoArray® Human Protein Microarray..................................................................................................4 ProtoArray® Control Protein Microarray ..................................................................................................7 Methods .....................................................................................................................................11 Before Starting ............................................................................................................................................11 Protein-Protein Interaction (PPI) Application ............................................................................ 12 Experimental Overview.............................................................................................................................12 Guidelines for Probing the ProtoArray® Microarray.............................................................................14 Preparing the Protein Probe......................................................................................................................18 Protein-Protein Interaction––Probing Procedure...................................................................................20 Scanning and Data Analysis .....................................................................................................................28 Scanning and Data Analysis, Continued ................................................................................................29 Expected Results for PPI............................................................................................................................30 Troubleshooting..........................................................................................................................................32 Kinase Substrate Identification (KSI) Application.................................................................... 35 Experimental Overview.............................................................................................................................35 Working with Radioactive Material.........................................................................................................38 Guidelines for Probing the ProtoArray® Microarray.............................................................................39 Preparing the Protein Kinase ....................................................................................................................40 Kinase Substrate Identification—Probing Procedure............................................................................41 Image Acquisition and Processing...........................................................................................................49 Expected Results for KSI ...........................................................................................................................51 Troubleshooting..........................................................................................................................................54 Small Molecule Identification (SMI - Fluorescent) Application............................................. 56 Experimental Overview.............................................................................................................................56 Guidelines for Probing the ProtoArray® Microarray.............................................................................57 Preparing the Small Molecule Probe .......................................................................................................58 Small Molecule Interaction––Probing Procedure ..................................................................................59 Scanning and Data Analysis .....................................................................................................................66 Scanning and Data Analysis, Continued ................................................................................................67 Expected Results for SMI - Fluorescent...................................................................................................68 Troubleshooting..........................................................................................................................................69 Tritium Radiolabeled Small Molecule Identification (SMI - Radioactive) Application.... 71 Experimental Overview.............................................................................................................................71 Guidelines for Probing the ProtoArray® Microarray.............................................................................72 Tritium Radiolabeled Small Molecule Interaction––Probing Procedure............................................73 Image Acquisition and Processing...........................................................................................................79 iii Expected Results for SMI - Radioactive...................................................................................................81 Troubleshooting..........................................................................................................................................82 Ubiquitin Ligase Profiling Application ....................................................................................... 84 Experimental Overview.............................................................................................................................84 Guidelines for Probing the ProtoArray® Microarray.............................................................................85 Ubiquitin Ligase––Probing Procedure ....................................................................................................86 Scanning and Data Analysis .....................................................................................................................92 Scanning and Data Analysis, Continued ................................................................................................93 Expected Results for Ubiquitin Ligase ....................................................................................................94 Troubleshooting..........................................................................................................................................95 Immune Response Biomarker Profiling (IRBP) Application .................................................. 97 Experimental Overview.............................................................................................................................97 Guidelines for Probing the ProtoArray® Microarray.............................................................................98 Immune Response Biomarker Profiling—Probing Procedure .............................................................99 Scanning and Data Analysis ...................................................................................................................105 Expected Results for IRBP.......................................................................................................................106 Troubleshooting........................................................................................................................................107 Antibody Specificity Profiling Application.............................................................................. 109 Experimental Overview...........................................................................................................................109 Guidelines for Probing the ProtoArray® Microarray...........................................................................110 Antibody Specificity Profiling Application––Probing Procedure .....................................................111 Scanning and Data Analysis ...................................................................................................................118 Scanning and Data Analysis, Continued ..............................................................................................119 Expected Results for Antibody Specificity Profiling Applicaton.......................................................120 Troubleshooting........................................................................................................................................121 Scanning Arrays Using a Fluorescence Scanner....................................................................... 123 Data Acquisition and Analysis ...............................................................................................................126 Image Acquisition and Processing for Radioactive Assays ................................................... 129 Data Acquisition and Analysis ...............................................................................................................131 Appendix..................................................................................................................................135 Accessory Products ..................................................................................................................................135 Technical Support.....................................................................................................................................137 Purchaser Notification .............................................................................................................................138 References..................................................................................................................................................140 iv General Information Purpose of the Guide The ProtoArray® Applications Guide contains information about the ProtoArray® Human and Control Protein Microarrays. The ProtoArray® Applications Guide includes the following information: Shipping and Storage ProtoArray® technology overview Description of the ProtoArray® Microarray General guidelines for using the ProtoArray® Microarray Protocol to perform Protein-Protein Interactions (PPI) application Protocol to perform Kinase Substrate Identification (KSI) application Protocol to perform Small Molecule-Protein Interaction (SMI) profiling application for biotinylated, fluorescently labeled and radiolabeled small molecules Protocol to perform Immune Response Biomarker Profiling (IRBP) application Protocol to perform Ubiquitin ligase profiling application Protocol to perform Antibody Specificity Profiling (ASP) application Scanning and data analysis Examples of expected results Troubleshooting Each ProtoArray® Human or Control Microarray is shipped on blue ice. Upon receipt, store the microarray at –20C. An expiration date is printed on the packaging for the microarray. Use the array before expiration for best results. Contents Each ProtoArray® Microarray Box contains a mailer with one ProtoArray® Human or Control Protein Microarray. For more details on array specifications, see pages 4 and 7. Intended Use For research use only. Not intended for human or animal diagnostic or therapeutic uses. v Introduction Overview Introduction The ProtoArray® Human Protein Microarray allows rapid and efficient detection of protein interactions using a suitable protein or small molecule probe. The ProtoArray® Control Protein Microarray provides a rapid, sensitive, and efficient method to verify probing and detection protocols within a day. The ProtoArray® technology is based on the yeast protein microarray technology developed by Zhu et al., 2001 to detect molecular interactions with proteins. The ProtoArray® Human Protein Microarray contains thousands of purified proteins printed in duplicate on a nitrocellulose-coated glass slide. See below for details. Types of Microarrays Two types of ProtoArray® Microarrays are currently available. ProtoArray® Human Protein Microarray v5.0 (see page 4 for details) Contains >9,000 human proteins expressed using a baculovirus expression system, purified from insect cells, and printed in duplicate on a nitrocellulose-coated glass slide. ProtoArray® Control Protein Microarray v5.0 (see page 7 for details) Contains various controls printed in duplicate on a nitrocellulose-coated glass slide. Each human and control microarray is available for the following specific applications and includes application specific controls printed on the array: Protein-Protein Interaction (PPI) Kinase Substrate Identification (KSI) Small Molecule-Protein Interaction (SMI) Profiling, Fluorescent and Radioactive Immune Response Biomarker Profiling (IRBP) Ubiquitin Ligase Profiling Antibody Specificity Profiling (ASP) application Continued on next page 1 Overview, Continued Applications Advantages The ProtoArray® Microarray allows you to: Detect novel protein-protein interactions Validate previously observed protein-protein interactions for PPI applications (Jin et al., 2006; Satoh et al., 2006) or observed signals for KSI applications (Mah et al., 2005; Ptacek et al., 2005; Boyle et al., 2007) Confirm positive interactions using the identified interacting protein on the array as a probe in reciprocal experiments (page 29) Test various experimental conditions for the protein interactions or your kinase Rapidly perform serum profiling using a sensitive method to detect potential autoantigen biomarkers (Mattoon et al., 2005; Michaud et al., 2003) Identify potentially biologically relevant protein kinase substrates, small molecule binding partners, ubiquitin ligase substrates, and protein interactors of research or therapeutic antibodies Using the ProtoArray® Human Protein Microarrays to detect protein interactions offers the following advantages: Provides a simple, rapid, sensitive, and efficient method to identify protein interactions within a day Allows screening of your protein or small molecule of interest against thousands of human proteins representing multiple gene families such as kinases, membrane-associated proteins, cell-signaling proteins, and metabolic proteins Built-in controls printed on each array to control for background and detection Arrays compatible with most commercially available fluorescence microarray scanners for PPI, SMI (fluorescent), ASP, ubiquitin ligase profiling, and IRBP signals, or autoradiography and phosphorimaging for KSI and SMI (radioactive) signals Continued on next page 2 Overview, Continued ProtoArray® Central Portal The ProtoArray® Central Portal provides a web-based user interface to access ProtoArray® specific information including various applications, resources, and online tools. You can also use the portal to retrieve ProtoArray® Lot Specific Information (page 126) which is required for analyzing the array data and identifying statistically significant interactions. To visit the portal, go to www.invitrogen.com/protoarray. ProtoArray® Prospector The ProtoArray® Prospector software quickly analyzes the microarray data acquired from the image acquisition software and easily identifies significant hits, saving you time and effort. In addition, the software has features that allow you to modify the analysis method and compare data obtained from different microarrays of the same version number. The ProtoArray® Prospector software and manual are available for FREE to ProtoArray® Microarray users, and are accessible online at the ProtoArray® Central Portal. To download the ProtoArray® Prospector software and manual, go to www.invitrogen.com/protoarray, and click on the Online Tools link under BioMarker Discovery Resources. 3 ProtoArray® Human Protein Microarray Introduction The ProtoArray® Human Protein Microarray is a high-density protein microarray containing thousands of purified human proteins for protein interaction screening. Each human open reading frame (ORF) is expressed as an N-terminal GST fusion protein using a baculovirus expression system, purified from insect cells, and printed in duplicate on a nitrocellulose-coated glass slide. The human proteins spotted on the microarray are expressed in insect cells using an optimized process to maximize the production of soluble recombinant proteins in a high-throughput format (Schweitzer et al., 2003). Proteins are expressed at high levels in insect cells which are similar to mammalian cells with respect to protein folding and post-translational modifications such as phosphorylation and glycosylation (Bouvier et al., 1998; Hollister et al., 2002; Predki, 2003) in contrast to proteins expressed in E. coli. This allows protein interaction detection at a functional level. Details on the human microarray are described in this section. Human Microarray Specifications The ProtoArray® Human Protein Microarray specifications are listed below. Dimensions: 1 inch x 3 inch (25 mm x 75 mm) Material: Glass slide coated with a thin layer of nitrocellulose The nitrocellulose-coated slide is from GenTel® BioSciences, Inc. Thin-film nitrocellulose slides are manufactured by Gentel® Biosciences, Inc. using a proprietary surface chemistry owned by Decision Biomarkers, Inc. Thin-film nitrocellulose slides are covered by US Patent 6,861,251, 7,297,497, and 7,384,742. Each microarray has a barcode for tracking samples. The barcode number is also used to retrieve array specific information from the ProtoArray® Central Portal (page 126). Array Specifications The ProtoArray® Human Protein Microarray specifications are listed below. The proteins on the microarray are printed in 48 subarrays that are equally spaced in vertical and horizontal directions. For details on the subarray layout, and human protein and control spots on the ProtoArray® Human Protein Microarray, go to the ProtoArray® Central Portal at www.invitrogen.com/protoarray. Total Subarrays: 48 (4 columns x 12 rows) Subarray Size: 4,400 μM x 4,400 μM Subarray Dimensions: 22 rows x 22 columns Median Spot Diameter: ~110 μM Spot Center to Center Spacing: 200 μM Distance Between Subarrays: 100 μM Replicates per Sample: 2 Total Human Proteins on v5.0 Array: >9,000* ® * Refer to ProtoArray Central Portal for exact number of human proteins printed on the microarray. Continued on next page 4 ProtoArray® Human Protein Microarray, Continued Array Content The majority of the human protein collection is derived from the human Ultimate™ ORF (open reading frame) Clone Collection available from Invitrogen (see orf.invitrogen.com for more information). Each Ultimate™ ORF Clone is full insert sequenced and is guaranteed to match the corresponding GenBank® amino acid sequence. Some of the human proteins printed on the array represent the human protein kinase collection derived from full insert sequenced clones but are not Ultimate™ ORF Clones. Some of the kinases from the kinase collection have been cloned as catalytic domains rather than full-length proteins. About 313 proteins printed on the array are derived from the purified protein kinase collection available from Invitrogen. Approximately 40 additional proteins printed on the array are purified cytokines available from Invitrogen. Approximately 28 proteins, peptides, and nucleic acids that have been demonstrated to be antigens in a variety of autoimmune diseases are also printed on the array. New content for ProtoArray® v.5.0 arrays was enriched for proteins relevant to disease processes, for a total of >6,100 potential drug targets printed on the array. For accession number and amino acid sequence for each protein as well as information on peptides and nucleic acids printed on the array, download the Protein Content List from www.invitrogen.com/protoarray as described on page 126. Expression and Purification of Human Proteins Almost all clones used to generate the human protein collection are entry clones consisting of a human ORF cloned into a Gateway® entry vector. Each entry clone is subjected to an LR recombination reaction with a Gateway® destination vector to generate an expression clone. The expression clone is then used to express the protein (as an N-terminus GST-fusion protein in some clones) using the Bac-to-Bac® Baculovirus Expression System available from Invitrogen. For more information on the Bac-to-Bac® Baculovirus Expression System, visit www.invitrogen.com. The LR reaction mix obtained after performing the LR reaction is transformed into competent DH10Bac™ E. coli to generate a recombinant bacmid. The high molecular weight recombinant bacmid DNA is isolated and transfected into Sf9 insect cells to generate a recombinant baculovirus that is used for preliminary expression experiments. After the baculoviral stock is amplified, the high-titer stock is used to infect Sf9 insect cells for expression of the recombinant protein of interest. The expressed proteins are purified by affinity chromatography under highthroughput conditions optimized to obtain maximal protein integrity, function, and activity. Following purification, each protein is assayed for purity and expected molecular weight. Continued on next page 5 ProtoArray® Human Protein Microarray, Continued Printing the Human ProtoArray® The purified human proteins are printed on nitrocellulose-coated slides in a dust-free, and temperature and humidity controlled environment to maintain consistent quality of the microarrays. The arrays are printed using an automated process on an arrayer that is extensively calibrated and tested for printing ProtoArray® Human Protein Microarrays. Maintaining Stringent Quality Control ProtoArray® Human Protein Microarrays are produced using rigorous production and quality control procedures with an integrated data management system to ensure consistent results and maximize inter- and intra-lot reproducibility. Pre-Printing Quality Control Prior to production, the arrayer and supporting components are tested and adjusted to production specifications. The quality and performance of pins is critical and all pins are extensively tested and calibrated. To maintain protein stability and function, arrays are printed at 6ºC under controlled environmental conditions. Post-Printing Quality Control After production each microarray is visually inspected for obvious defects that could interfere with the experimental results. The presence of each control and human protein spot is assessed by fluorescent scan of a representative number of arrays and acquisition of signals due to fluorescence of the printing buffer. Signal-to-background ratios (SBR) are determined for each spot, and spots with a SBR less than 3 are labeled “missing.” The probability that the control or human protein spot is missing from the entire lot is then calculated. The percentage of missing spots is estimated as the average missing probability of all the spots. That estimation must indicate that at least 95% of spots are present. Consistent print quality is determined for all sub-arrays prior to starting the printing of each array lot. Proteins of a particular type or class are distributed randomly across all sub-arrays, and therefore several spots missing from a single sub-array is essentially no different from random spots missing across several sub-arrays. The control features are functionally qualified by probing with control proteins to detect the appropriate interactions. Control Proteins 6 Various proteins and controls are printed on each ProtoArray® Human Protein Microarray to verify detection conditions and background. See page 9 for details. ProtoArray® Control Protein Microarray Introduction The ProtoArray® Control Protein Microarray contains various controls printed on a nitrocellulose-coated glass slide. The ProtoArray® Control Protein Microarray allows you to validate probing procedures prior to probing the ProtoArray® Human Protein Microarray. If you are first time user of the ProtoArray® Technology, we recommend that you probe a ProtoArray® Control Protein Microarray prior to probing the ProtoArray® Human Microarray. If you are using in vitro biotinylated protein probes for detection, we recommend that you also probe a Control Microarray with your biotinylated probe to validate the biotinylation of your protein probe and determine background levels. Details on the ProtoArray® Control Protein Microarray are described in this section. Important Control Microarray Specifications Do not use the ProtoArray® Control Protein Microarray for detecting novel protein interactions with your probe of interest. The Control Microarray contains only a defined set of control proteins and does not contain the entire set of protein content printed on the ProtoArray® Human Protein Microarray. The ProtoArray® Control Protein Microarray specifications are listed below. Dimensions: 1 inch x 3 inch (25 mm x 75 mm) Material: Glass slide coated with a thin film of nitrocellulose The nitrocellulose-coated slide is from GenTel® BioSciences, Inc. Thin-film nitrocellulose slides are manufactured by Gentel® Biosciences, Inc. using a proprietary surface chemistry owned by Decision Biomarkers, Inc. Thin-film nitrocellulose slides are covered by US Patent 6,861,251, 7,297,497, and 7,384,742. Each microarray has a barcode for tracking samples. The barcode number is also used to retrieve array specific information from the portal (page 126). Continued on next page 7 ProtoArray® Control Protein Microarray, Continued Control Array Specifications The ProtoArray® Control Protein Microarray specifications are listed below. The proteins on the microarray are printed in 48 subarrays that are equally spaced in vertical and horizontal directions. For details on the subarray layout and control spots on the ProtoArray® Control Protein Microarray, go to the ProtoArray® Central Portal at www.invitrogen.com/protoarray. Total Subarrays: 48 (4 columns x 12 rows) Subarray Size: 4,400 μM x 4,400 μM Subarray Dimensions: 22 rows x 22 columns Median Spot Diameter: ~110 μM Spot Center to Center Spacing: 200 μM Distance Between Subarrays: 100 μM Replicates per Sample: 2 Printing ProtoArray® The control proteins are printed on nitrocellulose-coated slides in a dust-free and temperature and humidity controlled environment to maintain consistent quality of the microarray. The arrays are printed using an automated process on an arrayer that is extensively calibrated and tested for printing the ProtoArray® Control Protein Microarray. Maintaining Stringent Quality Control The ProtoArray® Control Protein Microarrays are produced using rigorous production and quality control procedures with an integrated data management system to ensure consistent results with every array and maximize inter- and intra-lot reproducibility. Pre-Printing Quality Control Prior to production, the arrayer and supporting components are tested and adjusted to production specifications. The quality and performance of pins is critical and all pins are extensively tested and calibrated. To maintain protein stability and function, arrays are printed at 6ºC under controlled environmental conditions. Post-Printing Quality Control After production each microarray is visually inspected for obvious defects that could interfere with the experimental results. The arrays are also functionally qualified by probing control proteins to detect the appropriate interactions. Continued on next page 8 ProtoArray® Control Protein Microarray, Continued Control Proteins Various proteins and controls are printed on each ProtoArray® Human Protein and Control Protein Microarray to allow you to verify reagents, background, and detection conditions used during probing. The table below lists the controls printed on each ProtoArray® Microarray. Protein Function Control Spots required for PPI, SMI - Fluorescent, IRBP, ASP, and Ubiquitin Ligase Data Analysis Alexa Fluor® Antibody (Rabbit anti-mouse IgG Antibody labeled with Alexa Fluor® 647, Alexa Fluor® 555, and Alexa Fluor® 488) Serves as a positive control for fluorescence scanning and for orientation of the microarray image. Bovine Serum Albumin (BSA) A negative control for non-specific protein interactions. Biotinylated Anti-mouse Antibody A positive control for interaction with streptavidin-labeled detection reagent. Anti-biotin Antibody (mouse anti-biotin antibody) Detects biotin labeled protein probes and serves as a control for anti-mouse antibody detection reagent. BioEase™ V5 Control Protein (biotinylated, V5-tagged control protein) A positive control for detection with the Anti-V5-Alexa Fluor® 647 Antibody and the strepavidin-labeled detection reagent. Also used as an optional normalization control for immune response serum profiling when anti-V5 antibody is added to the detection reagent. Human IgA Protein Gradient A positive control for immune response serum profiling of IgA antibodies. Interacts with Alexa Fluor® 647 anti-human IgA. Anti-Human IgA Antibody Gradient (goat anti-human IgA) A positive control for the immune response serum profiling application. Interacts with serum IgA antibodies which are then bound by Alexa Fluor® 647 anti-human IgA. Human IgG Protein Gradient A positive control for the immune response serum profiling application. Interacts with Alexa Fluor® 647 goat anti-human IgG. Anti-Human IgG Antibody Gradient (goat anti-human IgG) A positive control for the immune response serum profiling application. Interacts with serum IgG antibodies which are then bound by Alexa Fluor® 647 goat anti-human IgG. Mdm2 Serves as a control substrate for ubiquitin ligase profiling. Yeast calmodulin (Cmd1p) or human calmodulin (CALM2) A positive control for protein-protein interaction application and interacts with the Array Control Protein. Refer to the lot specific .GAL file for the specific identity of the protein. GST Protein Gradient Serves as a negative control and signals are used by ProtoArray® Prospector software for background and statistical significance calculations. Continued on next page 9 ProtoArray® Control Protein Microarray, Continued Protein Function Control Spots required for KSI and SMI - Radioactive Data Analysis Alignment Control Kinase (PKCeta) Kinases autophosphorylate and produce signals which are used for orientation of the microarray image; also serves as a positive control for the radiolabel and assay conditions. Control Kinase Substrate (MAPKAP) A substrate for the Control Kinase (MAPK14 p38 alpha) used to verify assay conditions. The Control Kinase phosphorylates the Control Kinase Substrate. Estrogen Receptor Alpha Binds to tritiated estradiol to produce marker signals which are used for orientation of the microarray image for the radiometric small molecule profiling application. CAMK2A (Calcium/calmodulin- A human protein kinase that is used as a positive control for the dependent protein kinase II alpha) small molecule profiling application. Array Control Protein An Array Control Protein is supplied with each ProtoArray® Control Protein Microarray for PPI and allows you to verify probing and detection protocols. The Array Control Protein is a recombinant yeast calmodulin kinase (Cmk1p) expressed with a N-terminal BioEase™-V5-tag and purified from E. coli. V5 Epitope Tag The V5 epitope tag is a 14 amino acid (GKPIPNPLLGLDST) epitope derived from the P and V proteins of the paramyxovirus, SV5 (Southern et al., 1991). The V5-tag is expressed as a fusion to calmodulin kinase protein and is useful in detection of the protein. The Anti-V5 Antibody available from Invitrogen (page 135) recognizes the 14 amino acid sequence and allows detection of Array Control Protein containing the V5 epitope. BioEase™ tag The BioEase™ tag is a 72 amino acid peptide derived from the C-terminus (amino acids 524-595) of the Klebsiella pneumoniae oxalacetate decarboxylase -subunit. Biotin is covalently attached to a single biotin binding site (lysine 561) of the oxalacetate decarboxylase -subunit (Schwarz et al., 1988). When fused to the Array Control Protein, the BioEase™ tag is sufficient to facilitate in vivo biotinylation of the protein by E. coli cellular biotinylation enzymes. The Array Control Protein interaction is detected using a streptavidin detection system. Control Kinase For control KSI experiments using the ProtoArray® Control Protein Microarray, a Control Kinase is required. The Control Kinase is available from Invitrogen (page 135). You can also probe the Control Microarray using your kinase of interest. See page 40 for probing options. The Control Kinase is a recombinant human MAPK14 p38 alpha purified from insect cells. 10 Methods Before Starting Introduction General guidelines for using the ProtoArray® Microarrays are described below. Review this section before starting the probing procedure. Choose the appropriate probing protocol based on the application that you wish to perform: Application Protein-Protein Interaction (PPI) 12 Kinase Substrate Identification (KSI) 35 Small Molecule Identification (SMI - Fluorescent) 56 3 71 Ubiquitin Ligase Profiling 84 Immune Response Biomarker Profiling (IRBP) 97 H Labeled Small Molecule Identification (SMI - Radioactive) Antibody Specificity Profiling (ASP) Important Guidelines Page no. 109 Since proteins are sensitive to various environmental factors, each array is produced in an environment-controlled facility to ensure protein integrity and maintain consistency. To obtain the best results and avoid any damage to the array or array proteins, always handle the ProtoArray® Microarray with care using the following guidelines: ProtoArray® Microarrays can only be used once. Do not re-use the array or re-probe the same array with another probe. Always wear clean gloves while handling the microarray. Do not touch the surface of the array. Damage to the array surface can result in uneven or high background. Maintain the array and reagents at 2–8°C during the experiment unless otherwise specified. Prevent condensation on the array by equilibrating the mailer containing the array at 4C for at least 15 minutes prior to removing the array. Immerse the array immediately in blocking solution equilibrated at 4C. Condensation on the array may reduce protein activity or alter spot morphology. Perform array experiments at a clean location to avoid dust or contamination. Filter solutions if needed. Particles invisible to the eye can produce high background signals and cause irregular spot morphology. Do not allow the array to dry out during the experiment. Cover the array completely with the appropriate reagent during all steps of the protocol. Always dry the array prior to scanning. Scan the array on the same day at the end of the experiment. Do not dry the array using compressed air or commercial aerosol sprays. 11 Protein-Protein Interaction (PPI) Application Experimental Overview Experimental Outline The experimental outline for performing the PPI application using the ProtoArray® Human Protein Microarray v5.0 to identify potential protein-protein interactions is described below. See next page for the experimental workflow. Step Action Page no. 1 Express your protein of interest as a fusion protein in an expression vector containing the desired tag at the N-or C-terminus of the protein and purify the protein. OR In vitro biotinylate your protein of interest using a method of choice. 18 2 Block ProtoArray® Human Protein Microarray with 5 mL Blocking Buffer. 24 3 Probe the ProtoArray® Human Microarray with the protein probe and perform detection using a suitable detection system. Optional: If you are a first time user of the ProtoArray® Human Protein Microarray, perform a control probing using a ProtoArray® Control Microarray to verify probing and detection protocols. 26 4 Dry the microarray. 27 5 Scan the microarray using a suitable microarray scanner and save an image of the array. 28 6 Download the protein array lot specific information (.GAL file) from ProtoArray® Central Portal to acquire and analyze the data using ProtoArray® Prospector to identify significant protein-protein interactions. 28 Continued on next page 12 Experimental Overview, Continued Experimental Workflow The experimental workflow for performing the PPI application using the ProtoArray® Microarray with your protein probe labeled with a suitable tag is shown below. Purify protein Protein probe with a suitable tag Quantify protein Probe Proteome Array Do I have enough protein Observe Alexa Fluor® Ab signals No Yes No Confirm presence of the tag Yes See troubleshooting Protein has the tag Yes Observe protein interactions No No Probe another protein array with higher probe concentration Yes Confirm interaction by performing reciprocal interaction with another protein array or using another method of choice 13 Guidelines for Probing the ProtoArray® Microarray Introduction An appropriate detection system is required to perform the protein-protein interaction application (see below). Various options are available for performing the probing procedure (see next page for details). An experimental workflow for probing the human and control microarray is shown on pages 16–17. Detection Methods Fluorescence detection is used to detect protein-protein interactions on ProtoArray® Microarrays. Fluorescent detection offers high sensitivity, low background, and signal stability. Select the appropriate detection method based upon the nature of your probe. Epitope Tag To detect an epitope tag on your protein probe, use a labeled antibody specific to the tag. The antibody can be directly labeled with a fluorescent dye or detected through a secondary antibody conjugated to a fluorescent dye. Biotin Label To detect a biotin label on your protein probe, use streptavidin conjugated to a fluorescent dye for signal amplification and increased sensitivity. Alexa Fluor® Detection Important The Alexa Fluor® detection system available from Invitrogen (page 135) is the recommended fluorescent detection method. The Alexa Fluor® 647 fluorophore is brighter and more stable than other commercially available dyes such as Cy5™ dyes and is more sensitive for detecting interactions on protein arrays. We have demonstrated that detection with Alexa Fluor® 647 produces approximately 2-fold higher signal/background ratios than Cy5™ detection. When performing fluorescence detection, it is important to avoid exposing the array to light after probing with a fluorescent detection reagent. If performing direct labeling, always verify that labeling does not affect the binding affinity of the antibody. Although Alexa Fluor® 555 or Cy3™ dyes can be used for detection, using them may result in higher background signals. Continued on next page 14 Guidelines for Probing the ProtoArray® Microarray, Continued Control Protein Microarray Probing Options Human Protein Microarray Probing Options If you are a first time user of the ProtoArray® Human Protein Microarray, we recommend that you probe a ProtoArray® Control Protein Microarray available from Invitrogen (page 135) prior to probing the human microarray. The ProtoArray® Control Protein Microarray contains various controls and protein interactors printed on the array to allow you to validate probing and detection protocols. Probing options can be performed individually, or in tandem, and include: Probing with the Array Control Protein supplied with the ProtoArray® Control Protein Microarray (positive control). The result from the positive control helps to determine signals specific to your probe. Probing with your protein probe of interest to help you determine background signal and possible array surface interactions. Probing with your biotinylated protein probe to verify level of biotinylation and presence of free biotin from the labeling process. The recommended protein probe concentration range for probing the ProtoArray® Human Protein Microarray is 100 nM–10 μM for biotinylated proteins, and 10 nM–1 μM for V5-tagged proteins. A number of options are available for probing the ProtoArray® Human Protein Microarray with the protein probe of interest using pre-made reagents (from ProtoArray® Human Protein Microarray v5.0 PPI kits), or your own buffers and detection reagents as described below. Review the information below, before proceeding with the probing procedure. Probing options can be performed individually, or in tandem, and include: Probing with your protein probe to detect novel interactions. Probing with only the detection reagent (negative control). The negative control allows you to determine signals specific to your probe. Probing with the Array Control Protein supplied with the ProtoArray® Control Protein Microarray (positive control). The result from the positive control helps to determine signals specific to your probe. Probing with different probe concentrations to determine the optimal amount of probe for your assay. Start with an initial probe concentration. If the initial signal is strong with low background, confirm the initial results with a second array using the same experimental conditions. If the initial results indicate weak signal or an unacceptable signal-to-noise ratio, probe a second array with a different probe concentration as described below: Probe first array…. And…. Then Probe Second Array…. With 10 nM probe Weak signal With 1–10 μM probe With 10 μM probe High background With 10–100 nM probe Continued on next page 15 Guidelines for Probing the ProtoArray® Microarray, Continued Control Microarray Experimental Workflow The experimental workflow for probing ProtoArray® Control Protein Microarray with Array Control Protein using a fluorescent detection system is shown below. Array Control Protein Control Array Observe Alexa Fluor® Ab and Control Protein Signals No See Troubleshooting Yes Probe Human Protein Array Continued on next page 16 Guidelines for Probing the ProtoArray® Microarray, Continued Human Microarray Experimental Workflow The experimental workflow for probing the ProtoArray® Human Protein Microarray is shown below. 17 Preparing the Protein Probe Introduction Before using the ProtoArray® Human Protein Microarray, you need your purified protein of interest to probe the microarray. The protein of interest must contain a suitable tag (see below). You may purify proteins using a method of choice. You can use proteins purified from E. coli, yeast cells, or higher eukaryotes to probe the ProtoArray® Human Protein Microarray. The amount of protein and quality of protein required for probing are described in this section. Protein Tags The protein of interest can be tagged using an epitope tag or a biotin label. Using an epitope tag at the N- or C-terminus of the probe allows the use of the recombinant fusion protein directly as a probe without any further modification wherein the tag is used as the marker for detection of interactions. The recommended epitope tag is the V5-epitope tag at the N-or C-terminus of the protein to obtain the best results. Epitope tags such as FLAG, myc, or HA can also be used for probing the microarray in conjunction with an appropriate labeled antibody. Note: Do not use an anti-GST antibody or anti-polyhistidine antibody for detecting interactions on a ProtoArray® Protein Microarray, as the majority of proteins on the array are GST tagged, with some that are also polyhistidine tagged. The extremely high affinity of the biotin-streptavidin interaction makes biotin-protein conjugation an attractive method for probe labeling. Small amounts of the protein can be efficiently in vitro biotinylated in a simple procedure. The biotinylated protein probe is detected using a streptavidin detection system. Generating Tagged Protein Probe Epitope Tag To generate your protein probe with an epitope tag, you need to express your protein of interest as a fusion protein in an expression vector containing the desired epitope tag at the N- or C-terminus of the protein. A variety of vectors with different tags are available from Invitrogen for expression of your protein of interest. For more information about these products, refer to our website (www.invitrogen.com) or call Technical Support (page 137). The recommended epitope tag for use with the ProtoArray® Human Protein Microarray is the V5 epitope tag. Biotin Tag You may use any method to in vitro biotinylate your protein of interest. We recommend using the Biotin-XX Microscale Protein Labeling Kit from Invitrogen (see page vi) for efficient in vitro biotinylation of your protein of interest. The kit includes reagents and buffers for in vitro biotinylation and removal of free biotin. The FluoReporter® Biotin Quantitation Assay Kit (see page vi) can be used to assess the number of biotin labels on the protein. Continued on next page 18 Preparing the Protein Probe, Continued Protein Amount and Quality Purify the protein using native conditions. Proteins should be >90% pure as determined by Coomassie® staining. Check the presence of the tag using western detection or ELISA. Note: To ensure that the tag is accessible under native conditions used for probing microarrays, perform ELISA of your protein probe with the tag. Check the functionality of the protein probe using a method of choice. Make sure the protein probe is soluble and active in buffers used for probing the microarray. The recommended protein concentration range for probing each human protein microarray is 100 nM–10 μM (for biotinylated proteins) and 10 nM–1 μM for V5-tagged proteins. If you are using in vitro biotinylated proteins for probing: Resuspend the purified protein probe in a buffer (≤50 mM) that does not contain any primary amines such as ammonium ions, Tris, glutathione, imidazole, or glycine. If the buffer contains primary amines, sufficiently dialyze the protein probe against 50 mM HEPES buffer, pH 7.4 containing 100 mM NaCl, or PBS. Determine the approximate molecular weight of your protein. The protein must be >15 kDa to avoid loss during removal of free biotin. For proteins purified using metal chelating column chromatography (ProBond™ resin or Ni-NTA resin), perform dialysis against two changes of PBS to significantly lower the imidazole concentration. Low concentrations (<0.1%) of sodium azide or thimerosal in the protein solution have no effect on the biotinylation reaction. 19 Protein-Protein Interaction––Probing Procedure Introduction After purifying the protein probe and verifying the presence of the tag or label on the protein, probe the ProtoArray® Human Protein Microarray using your protein probe. Instructions are included in this section to probe the ProtoArray® Human Protein Microarray using your own buffers, see page 21-22 for buffer recipes. Experimental Outline Materials Needed 1. Block the ProtoArray® Human Protein Microarray. 2. Probe with your tagged protein probe. 3. Perform detection using an appropriate detection system. 4. Dry the array for scanning. ProtoArray® Human or Control Protein Microarray v5.0 (page 135) Blocking Buffer and Washing Buffer (page 21-22 for recipes) Protein probe containing a suitable tag in Blocking Buffer (page 21 for recipes) Appropriate -Alexa Fluor® 647 conjugate or equivalent (page 135); keep on ice in dark until immediately before use Antibody against the epitope tag for an epitope tagged protein probe Ice bucket Forceps and deionized water 10X Synthetic Block (see page 135) Clean, covered 4-chamber incubation tray (Greiner, Cat. No. 96077307), chilled on ice LifterSlip™ coverslips (Thermo Scientific, Cat. No. 25X60I-2-4789) Shaker (capable of circular shaking at 50 rpm, place the shaker at 4ºC) Microarray slide holder and centrifuge equipped with a plate holder (Optional) Incubation Trays The microarray is placed in an incubation tray during the blocking and washing steps. To obtain the best results, all incubations of the ProtoArray® with various solutions are performed in a 4-chamber, covered incubation tray (Greiner, Cat. no. 96077307). Coverslips LifterSlip™ coverslips (Thermo Scientific, Cat. no. 25X60I-2-4789) hold a small reagent volume to minimize the amount of valuable probe used and prevent evaporation of reagents. If you are using any other coverslip, be sure the coverslip is able to completely cover the printed area (20 mm × 60 mm) of the glass slide and the coverslip is made of non-protein binding material. Untreated glass coverslips are not recommended. Continued on next page 20 Protein-Protein Interaction––Probing Procedure, Continued MEND ION AT RECOM Using Your Own Buffers Preparing Blocking Buffer If you are preparing your own buffers, follow the guidelines listed below for buffer preparation to obtain the best results with microarrays. The buffer recipes are listed below. Always use ultra pure water to prepare reagents and buffers You may use non-ionic detergents and reducing agents during probing to minimize non-specific interactions If the protein interaction requires certain co-factors, be sure to include the co-factors in the probing buffer during probing Prepare the Blocking Buffer and Washing Buffer fresh prior to use. Use the recipes described below to prepare your own buffers. Recommended buffers are listed below for blocking and washing the arrays. You can perform array probing using the recommended buffers and then based on your initial results optimize the buffer formulation. Blocking Buffer* (final concentration) 50 mM HEPES pH 7.5 200 mM NaCl 0.08% Triton® X-100 25% Glycerol 20 mM Reduced glutathione 1 mM DTT 1X Synthetic Block 1. Prepare 5 mL of buffer for each microarray. For 100 mL Blocking Buffer prepare fresh reagents as follows: 1 M HEPES pH 7.5 5 mL 5 M NaCl 4 mL ® 10% Triton X-100 50% Glycerol 2. 3. 4. 800 μL 50 mL Glutathione powder 610 mg 10X Synthetic Block 10 mL Adjust pH to 7.5 with NaOH. Add 100 μL of 1 M DTT. Add water to 100 mL. Mix well (do not vortex) and store on ice until use. * Blocking Buffer without 10X Synthetic Block and DTT may be prepared the day before the assay. Store stock at 4°C for no more than 24 hours. Continued on next page 21 Protein-Protein Interaction––Probing Procedure, Continued Preparing Washing Buffer Washing Buffer (final concentration) 1X PBS 1X Synthetic Block 0.1% Tween 20 1. Prepare 60 mL of buffer for each microarray. For 1,000 mL Washing Buffer prepare fresh reagents as follows: 10X PBS, pH 7.4 100 mL 10X Synthetic Block 100 mL 10% Tween 20 Deionized water 2. Preparing Protein Probes 01 mL to 1,000 mL Mix well and store on ice until use. ProtoArray® Human Protein Microarray To probe the microarray, you need 120 μL of your protein probe containing a suitable tag. The recommended protein probe concentration range for probing the ProtoArray® Human Protein Microarray is 100 nM–10 μM (for biotinylated proteins) and 10 nM–1 μM (for V5-tagged proteins). Dilute the probe to the recommended starting concentration in Washing Buffer. Mix well (do not vortex) and store on ice until use. ProtoArray® Control Protein Microarray For V5-tag detection Mix 1.2 μL Array Control Protein included with the array to a final volume of 120 μL with Washing Buffer. Mix well (do not vortex) and store on ice until use. For biotin detection Mix 12 μL Array Control Protein included with the array to a final volume of 120 μL with Washing Buffer. Mix well (do not vortex) and store on ice until use. Continued on next page 22 Protein-Protein Interaction––Probing Procedure, Continued Preparing Antibody/ Streptavidin Solution ProtoArray® Human Protein Microarray The protein probe is detected using a primary or secondary fluorescent conjugate. Any primary antibody specific to the protein probe can be used for detection, but optimal conditions may need to be independently developed. Primary antibodies can be labeled using the Alexa Fluor® 647 Protein Labeling Kit (Invitrogen, Cat. no. A-20173). Prepare 5 mL of antibody or streptavidin solution for each array to be probed. Primary biotin detection: Prepare 1 μg/mL Streptavidin-Alexa Fluor® 647 Conjugate in Washing Buffer Primary V5-epitope detection: Prepare 1 μg/mL Alexa Fluor® 647 Anti-V5 Antibody in Washing Buffer Secondary V5-epitope detection: Use 1 μg/mL Anti-V5 Antibody in Washing Buffer for primary antibody Use 1 μg/mL Alexa Fluor® 647 Goat Anti-Mouse diluted to 1 μg/mL in Washing Buffer for secondary antibody ProtoArray® Control Protein Microarray The Array Control Protein is detected using a primary or secondary fluorescent conjugate. Prepare 5 mL of antibody or streptavidin solution for each array to be probed. Primary detection: Prepare 1 μg/mL Streptavidin-Alexa Fluor® 647 Conjugate or Alexa Fluor® 647 Anti-V5 Antibody in Washing Buffer Secondary V5-epitope detection: Use 1 μg/mL Anti-V5 Antibody in Washing Buffer for primary antibody Use 1 μg/mL Alexa Fluor® 647 Goat Anti-Mouse diluted to 1 μg/mL in Washing Buffer for secondary antibody Continued on next page 23 Protein-Protein Interaction––Probing Procedure, Continued Since most of the human proteins printed on the microarray contain a GST (Glutathione-S-Transferase) fusion tag and some proteins also contain polyhistidine (6x) tag, do not use an anti-GST antibody or anti-polyhistidine antibody for detecting interactions on a ProtoArray® Human Protein Microarray. We strongly recommend that you probe the ProtoArray® Human Protein Microarray with only your detection reagent to detect signals resulting due to interactions between the detection reagent and proteins printed on the array. Due to the large variety of protein probes and detection systems that can be used for probing the ProtoArray® Human Protein Microarray, it is not possible to have a single probing protocol that is suitable for all proteins and detection systems. Use the probing procedure from this section as a starting protocol and based on your initial results, empirically determine the probing protocol by optimizing the probe concentration, buffer formulation, incubation time, or detection reagents. Optimization of probing protocol can be easily and rapidly achieved using multiple ProtoArray® Human Protein Microarrays. Before starting the probing procedure, make sure you have all items on hand especially buffers (pages 21-22), probes in Washing Buffer (page 22), LifterSlip™ coverslips (see page 20) and incubation tray (see page 20). Make sure the buffers are cold. Store buffers on ice until use. Place an incubation tray on ice to chill until use. Review Important Guidelines on page 11 prior to starting the probing procedure. Important Before Starting Blocking Step Instructions for blocking the microarray are described below: 1. Remove the mailer containing the ProtoArray® Control Protein Microarray from storage at –20C and place immediately at 4C (be sure to use the microarray before the expiration date printed on the box). 2. Allow the array to equilibrate in the mailer at 4°C for at least 15 minutes prior to blocking. Failure to do so may result in condensation on the array. Continued on next page 24 Protein-Protein Interaction––Probing Procedure, Continued Blocking Step, continued Protocol continued from the previous page. 3. Place one microarray with the barcode facing up into each well of a chilled 4-chamber incubation tray such that the barcoded end of the microarray is near the end of the tray marked with an indented numeral (see figure 1a, below). 1a The indentation in the tray bottom is used as the site for buffer removal (see figure 1b, arrow). 1b 4. Using a sterile pipette, add 5 mL Blocking Buffer (page 21) equilibrated to 4°C into each chamber with an array. Avoid pipetting buffer directly onto the array surface. Gently rock the tray to ensure each array is completely immersed in Blocking Buffer. 5. Incubate the tray for 1 hour at 4°C on a shaker set at 50 rpm (circular shaking). 6. After incubation, aspirate Blocking Buffer by vacuum or with a pipette. Position the tip of the aspirator or pipette into the indentation at the end of the tray (see figure 1b) and aspirate the buffer from each well (see figure 2). Tilt the tray so that any remaining buffer accumulates at the base of the well at the numbered end of the tray and aspirate. Important: Do not position the tip on, or aspirate from the microarray surface as this can cause scratches. Immediately proceed to adding the next solution to prevent any part of the array surface from drying. 2 7. Proceed immediately to Probing the Array. Continued on next page 25 Protein-Protein Interaction––Probing Procedure, Continued Probing the Array Instructions for probing the microarray are described below: 1. Remove array from the 4-well tray by inserting the tip of forceps into the indentation at the numbered end of the tray and gently prying the array upward (see figure 3, below). Pick up array with a gloved hand taking care to only touch the array by its edges. Gently dry the back and sides of the array on a paper towel to remove excess buffer. Note: To ensure that the array surface remains wet, do not dry more than 2 arrays at a time before adding the diluted probe and LifterSlip™ coverslip. 3 2. Pipet 120 μL of the probe in Washing Buffer (page 22) on top of array without touching the array surface. The liquid should spread over the surface of the array. 3. Carefully lower a LifterSlip™ coverslip over the printed area of the array using forceps, as shown below (figure 4, below). 4 The raised edges of the LifterSlip™ should face the surface of the array (shown inverted on figure 5, below). If air bubbles are observed under the LifterSlip™ gently raise the LifterSlip™ and slowly lower it again. Raised edges 5 4. Incubate for 90 minutes at 4°C keeping the 4-well tray flat with the array facing up (no shaking). 5. Add 5 mL cold Washing Buffer, and remove the LifterSlip™ with forceps, taking care not to scratch the array surface with the LifterSlip™ or forceps. Wash 5 minutes with gentle agitation. Remove Washing Buffer by aspiration (see Step 5 of Blocking Step for details). Continued on next page 26 Protein-Protein Interaction––Probing Procedure, Continued Probing the Array, continued Protocol continued from the previous page. 6. 7. Repeat wash steps 4 more times. Add 5 mL of primary antibody or Alexa Fluor® 647 conjugate (see Preparing Antibody/Streptavidin Solution) Note: Always add diluted antibody at the numbered end of the 4-well tray, allowing the liquid to flow across the array surface. Avoid direct contact with the array and if at all possible, avoid applying the antibody solution directly onto the array. 8. Incubate for 90 minutes at 4oC with gentle circular shaking (~50 rpm). 9. Remove primary antibody by aspiration (see Blocking Step). 10. Wash with 5 mL fresh Washing Buffer for 5 minutes with gentle agitation. Remove Washing Buffer by aspiration (see Blocking Step). 11. Repeat wash step 4 more times. 12. Add 5 mL of Alexa Fluor® 647 conjugated secondary antibody diluted in Washing Buffer (if necessary). Note: This step is not needed if performing detection using a labeled primary antibody or Streptavidin-Alexa Fluor® 647 Conjugate. 13. Incubate for 90 minutes at 4oC with gentle circular shaking (~50 rpm). 14. Remove secondary antibody by aspiration (see Blocking Step). 15. Wash with 5 mL fresh Washing Buffer for 5 minutes with gentle agitation. Remove Washing Buffer by aspiration (see Blocking Step). 16. Repeat wash step 4 more times. 17. Proceed to Drying the Array, below. Drying the Array 1. Remove the array from the 4-chamber incubation tray (see page 26, Step 1). 2. Place the array in a slide holder (or a sterile 50 mL conical tube, if you do not have a slide holder). Ensure the array is properly placed and is secure in the holder to prevent any damage to the array during centrifugation. Briefly dip the slide holder containing the arrays into room temperature distilled water three times to remove salts. If you are not using a slide holder, dip the array into a 50 mL conical tube filled with room temperature distilled water three times. 3. Dry the ProtoArray® Microarray by centrifugation. Centrifuge the array at 200 × g for 1–2 minutes at room temperature in the slide holder (if using a centrifuge equipped with a plate rotor) or 50 mL conical tube (if using a swinging bucket rotor). Verify that the array is completely dry. 4. After drying, store the arrays vertically or horizontally in a slide box protected from light. Avoid prolonged exposure to light. To obtain the best results, scan the array within 24 hours of probing. 5. Proceed to Scanning and Data Analysis, next page. 27 Scanning and Data Analysis Introduction Once you have probed the ProtoArray® with your protein probe, scan the microarray using a suitable microarray scanner. After scanning and saving an image of the array, download the protein array lot specific information from the ProtoArray® Central Portal. Use the lot specific information to acquire and analyze the data to identify protein-protein interactions. Materials Needed Imaging hardware A suitable scanner is required to scan the ProtoArray® Microarray. The scanner specifications are listed page 123. For a list of scanners to use with ProtoArray® Microarrays see page 124. Data acquisition software We recommended GenePix® Pro v6 or later (Molecular Devices Corporation) or ScanArray® Acquisition Software (PerkinElmer, Inc.) as microarray data acquisition software for analysis of images. Scanning the Array Data Acquisition and Analysis For detailed instructions on scanning the microarray refer to Scanning Arrays Using a Fluorescence Scanner (page 123). 1. Insert array into the fluorescence microarray scanner. 2. Adjust scanner settings. 3. Preview the microarray and adjust settings, if needed. 4. Scan the microarray. 5. Save image data. 6. Export and analyze results. For detailed instructions on Data Acquisition and Analysis refer to page 126. 1. To acquire data from the scanned image, use the barcode on the array to download the .GAL file from ProtoArray® Central as described on page 126. 2. Use the .GAL file and suitable microarray data acquisition software to acquire pixel intensity values for all features on the array. 3. Analyze data with ProtoArray® Prospector using the guidelines on page 128 to determine significant signals with the controls and your protein probe. Continued on next page 28 Scanning and Data Analysis, Continued Analyzing ProtoArray® Prospector Results After data analysis, ProtoArray® Prospector presents a summary of the analyzed data in a table format (see ProtoArray® Prospector manual for details). The proteins that score as positive in the experiment are proteins that satisfy the basic program options. Review the information on page 30, Expected Results, to help with data interpretation. We recommend validating the interactions as described below. The Next Step After identifying a positive interaction on the ProtoArray® Human Protein Microarray, you may validate the protein interaction using the ProtoArray® Technology or other methods. Using the ProtoArray® Technology, validate the protein-protein interactions by performing experiments with additional arrays to ensure: Reproducibility: Probe protein arrays using a similar or a different probe concentration to observe similar interactions. Specificity: Probe protein arrays with the detection reagent used to visualize the interactions and also different proteins containing the tag to identify interactions specific to your protein probe of interest and also identify any non-specific interactions. Reciprocal Interactions: Determine reciprocal interactions using a purified protein probe (see below). Other methods for validating protein-protein interactions include: Detecting Reciprocal Interactions Yeast Two-Hybrid Systems (page 135) Co-immunoprecipitation Gel-shift assay The ProtoArray® Human Protein Microarray is ideal for detecting reciprocal protein-protein interactions since proteins are purified under native conditions and the microarrays are manufactured under highly controlled conditions to ensure maximum protein function. Once you have identified a positive interaction, if your original protein probe is present on the ProtoArray® Human Protein Microarray v5.0, you can use the identified interacting protein from the array as a probe for probing another human microarray. For example, perform an initial probing with calmodulin as a probe with a ProtoArray® Human Protein Microarray to detect the interacting protein, calmodulin kinase. Then perform the reciprocal interaction with another human microarray using calmodulin kinase as the probe to detect the interacting protein, calmodulin. The ability to observe reciprocal interactions suggests that the proteins maintain a properly folded state on the array. Continued on next page 29 Expected Results for PPI Control Array Probing Results Results obtained after probing the ProtoArray® Control Protein Microarray v5.0 with the Array Control Protein (i.e., BioEase™-V5-tagged biotinylated calmodulin kinase) are shown below. Control Array probed with 50 μg/mL Array Control Protein and Streptavidin-Alexa Fluor® 647 Conjugate Array image Boxed Area shown in detail Alexa Fluor® Ab Biotin Ab Control Array probed with 5 μg/mL Array Control Protein and Anti-V5-Alexa Fluor® 647 Antibody Array image Boxed Area shown in detail Alexa Fluor® Ab Alexa Fluor® Ab Alexa Fluor® Ab Calmodulin* Alexa Fluor® Ab Alexa Fluor® Ab V5 Control Protein Alexa Fluor® Ab *Feature is Cmd1p or CALM2, depending on the array lot. Refer to the lot specific .GAL file for the specific identity of the protein. Calmodulin* V5 Control Protein *Feature is Cmd1p or CALM2, depending on the array lot. Refer to the lot specific .GAL file for the specific identity of the protein. The following control features can be observed after probing a ProtoArray® Protein Microarray: Alexa Fluor® Ab signal This is an antibody labeled with Alexa Fluor® 647. The fluorescent antibody signals indicate that the array has been properly scanned, and are used as reference spots to orient the microarray and help assign spot identities. Anti-biotin Ab signal Biotinylated proteins bind to the Anti-biotin antibody printed on the microarray. BioEase™ (biotin) V5 Control Protein signal The Anti-V5-Alexa Fluor® 647 Antibody binds to a control protein (V5 Control) containing an N-terminal V5 tag printed on the microarray. The signals indicate that the antibody is functional and probing is performed properly. The signal is also used to check the background. The Streptavidin-Alexa Fluor® 647 conjugate also binds to the biotinylated V5-tagged control protein (V5 Control) printed on the microarray. The signals indicate that the probing is performed properly. Biotin Ab signal A biotinylated anti-mouse antibody is printed on the microarray. The Streptavidin-Alexa Fluor® 647 conjugate and the mouse Anti-V5-Alexa Fluor® 647 antibody binds to the biotinylated anti-mouse antibody. Continued on next page 30 Alexa Fluor® Ab Expected Results for PPI, Continued Human Array Probing Results Results obtained after probing the ProtoArray® Human Protein Microarray v5.0 with the Array Control Protein (i.e., BioEase™-V5-tagged biotinylated calmodulin kinase) are shown below. Human Array probed with 50 μg/mL Array Control Protein and Streptavidin-Alexa Fluor® 647 Conjugate Array Image Boxed Area shown in detail Alexa Fluor® Ab Biotin Ab Alexa Fluor® Ab V5 Control Protein Array image Boxed Area shown in detail Alexa Fluor® Ab Alexa Fluor® Ab Alexa Fluor® Ab Alexa Fluor® Ab Calmodulin* Human Array probed with 5 μg/mL Array Control Protein and Anti-V5-Alexa Fluor® 647 Antibody Alexa Fluor® Ab *Feature is Cmd1p or CALM2, depending on the array lot. Refer to the lot specific .GAL file for the specific identity of the protein. Calmodulin* V5 Control Protein 1b Alexa Fluor® Ab *Feature is Cmd1p or CALM2, depending on the array lot. Refer to the lot specific .GAL file for the specific identity of the protein. List of control features continued from the previous page. Calmodulin signal The Array Control Protein (BioEase™-V5-calmodulin kinase) binds to the calmodulin (Cmd1p or CALM2) printed on the array. The signal is used to verify the probing procedure. Refer to the lot specific .GAL file for the specific identity of the protein. Note: The Array Control Protein contains an N-terminal BioEase™ and V5 epitope tag. The BioEase™ tag facilitates in vivo biotinylation of the protein during expression. To orient the results obtained from the .GAL file and ProtoArray® Prospector with the array image, position the microarray image such that the barcode is at the bottom of the image. In this orientation, the top left corner of the microarray image is Block 1. 31 Troubleshooting Introduction The table below provides some solutions to possible problems you might encounter when using the ProtoArray® Microarray for the PPI application. Review the expected results section (page 30) to verify the probing, detection, and scanning procedures are performed correctly. Based on the initial results, you may need to optimize the probing and detection protocol by optimizing the probe concentration, buffer formulation, incubation time, or detection reagents. Problem Cause Solution Poor or incomplete transfer Monitor the transfer of pre-stained protein standard bands to determine the transfer efficiency. Insufficient exposure time Increase the exposure time. Epitope tag not present or cleaved Confirm the presence of the tag by sequence analysis and ensure the tag is cloned in frame. Perform all purification steps at 4C and use protease inhibitors to prevent proteolytic cleavage of the tag. Protein Probe No signal after western detection using an antibody against the protein Poor or no biotinylation for your protein probe Incorrect buffers used or the Make sure the protein is in a buffer that does not biotinylation reaction is not contain any primary amines such as ammonium performed correctly ions, Tris, glutathione, imidazole, or glycine. Make sure the biotinylation reaction was performed correctly using the specified molar ratios and at pH ~8.0. Check that the calculations and serial dilutions are performed correctly. Additional biotinylated bands observed Protein has low lysine content or lysine residues are not readily available for biotinylation Perform the biotinylation reaction at a higher molar ratio. You may express your protein as fusion to a tag that contains lysine. Protein impurities present that undergo biotinylation and may cause high background during probing Purify protein to remove impurities and perform biotinylation to ensure the absence of additional biotinylated bands. Continued on next page 32 Troubleshooting, Continued Problem Cause Solution Protein Array Results Weak or no signal with protein probe Epitope tag not present or not accessible Confirm the presence of the tag by western detection. Ensure the tag is accessible under native conditions by performing an ELISA. Poor biotinylation of protein See previous page for details. probe Low probe concentration Perform probing with higher probe concentration or increase the incubation time. Incorrect probing procedure Follow the recommended protocol for probing on page 26. Be sure all incubations are performed at 4C. Prepare the Blocking Buffer and Washing Buffer fresh as described on page 21-22. Do not allow the array to dry during the probing procedure. Avoid prolonged exposure of detection reagents labeled with a fluorescent dye to light. High background Incorrect scanning or imaging Scan the array at suitable wavelength for the detection system used and place the array in the slide holder such that the proteins on the array are facing the laser source. Decrease stringency Decrease the number of washes. Perform probing and washing in the absence or lower concentration of detergent or salts. Improper blocking Prepare the Blocking Buffer fresh as described on page 21. Improper washing To obtain the best results, perform the recommended washing steps. Prepare the Washing Buffer fresh as described on page 22. Array dried during probing Do not allow the array to dry during probing. Array not dried properly before scanning Dry the array as described on page 27 before scanning. High probe concentration Decrease the probe concentration or decrease the incubation time. Antibody cross-reactivity Probe a protein array using only the antibody without the protein probe to detect crossreactivity with the antibody only. Continued on next page 33 Troubleshooting, Continued Problem Cause Solution Uneven background Uneven blocking or washing During the blocking or washing steps, ensure the array is completely immersed in blocking solution or Washing Buffer, and use at least 5 mL buffer in the Incubation tray to cover the array completely with buffer. Improper washing To obtain the best results, perform the recommended washing steps. Prepare the Washing Buffer fresh as described on page 22. Portions of array have dried Do not allow the array to dry during probing. Improper array handling Always wear gloves and avoid touching the surface of the array with gloved hands or forceps. Take care while inserting the array into the Incubation tray to avoid scratching the array surface. Protein probe not applied properly Apply the probe solution and LifterSlip™ or equivalent coverslip to the array as described in the manual. To avoid drying of the array surface, make sure the coverslip covers the printed area of the array and adjust the coverslip, if needed. Probe or detection reagents contain precipitates Centrifuge the probe or detection reagents to remove precipitates prior to probing the array. 34 Kinase Substrate Identification (KSI) Application Experimental Overview Experimental Steps The recommended experimental steps for KSI application are outlined below. Detailed experimental workflow is shown on the next page. Step Action Page no. 1 Purify your protein kinase of interest using a method of choice or purchase the protein kinase of interest from Invitrogen. 40 2 Block ProtoArray® Human Protein Microarray with 5 mL KSI Blocking Buffer. 46 3 Probe the ProtoArray® Human Protein Microarray with the protein kinase of interest in the presence of radiolabeled ATP. Optional: If you are a first time user of the ProtoArray® Human Protein Microarray, perform a control probing using a ProtoArray® Control Protein Microarray to verify the assay protocol. 47 4 Dry the microarray. 48 5 Expose the microarray to X-ray film or phosphor screen for 3 hours. 48 6 Scan the developed X-ray film or phosphor screen and save an image of the array. 49 7 Download the protein array lot specific information (the .GAL file) from ProtoArray® Central Portal to acquire and analyze the data using ProtoArray® Prospector to identify protein kinase substrates. 49 Continued on next page 35 Experimental Overview, Continued Control Microarray Experimental Workflow The experimental workflow for probing a ProtoArray® Control Protein Microarray for KSI with the Control Kinase is shown below. Control Kinase Control Protein Array Observe Alignment Control Kinase and Control Kinase Substrate Signals No Yes See Troubleshooting Probe Human Protein Array Continued on next page 36 Experimental Overview, Continued Human Microarray Experimental Workflow The experimental workflow for probing ProtoArray® Human Protein Microarray for KSI with your protein kinase of interest is shown below. Protein Microarray Protein Microarray Kinase Buffer only (no kinase ) User Supplied Kinase (50 nM) Radiolabeled ATP Radiolabeled ATP Observe Signals at Alignment Control Kinase Locations Observe Signals at Alignment Control Kinase Locations No Yes No Yes Observe Substrate Phosphorylation Observe Substrate Phosphorylation Yes Identify Phoshorylated Substrates Probe another protein microarray with the same , higher , or lower concentration of your kinase or another kinase No See Troubleshooting No Yes Probe another protein microarray with higher concentration of your protein kinase Identify Phosphorylated Substrates Probe another protein microarray with the same , higher , or lower concentration of your kinase or another kinase 37 Working with Radioactive Material Introduction This section provides general guidelines and safety tips for working with radioactive material. For more information and specific requirements, contact the safety department of your institution. Use extreme caution when working with radioactive material. Follow all federal and state regulations regarding radiation safety. For general guidelines when working with radioactive material, see below. General Guidelines Important 38 Follow these general guidelines when working with radioactive material. Do not work with radioactive materials until you have been properly trained. Wear protective clothing, vinyl or latex gloves, and eyewear, and use a radiation monitor. Work in areas with equipment and instruments that are designated for radioactive use. Plan ahead to ensure that all the necessary equipment and reagents are available and to minimize exposure to radioactive materials. Monitor work area continuously for radiation contamination. Dispose of radioactive waste properly. After you have completed your experiments, monitor all work areas, equipment, and yourself for radiation contamination. Follow all the radiation safety rules and guidelines mandated by your institution. Any material in contact with a radioactive isotope must be disposed of properly. This includes any reagents that are discarded during the probing procedure (e.g. washes). Contact your safety department for regulations regarding radioactive waste disposal. Guidelines for Probing the ProtoArray® Microarray Introduction Instructions are included in this section for probing a ProtoArray® Protein Microarray using your protein kinase or the Control Kinase and radiolabeled ATP. Various options are available for performing the probing procedure (see below). Experimental workflows for probing are shown on pages 36–37. Control Protein Microarray Probing Options If you are a first time user of the ProtoArray® Human Protein Microarray, we recommend that you probe a ProtoArray® Control Protein Microarray available from Invitrogen (page 135) prior to probing the human microarray. The ProtoArray® Control Protein Microarray contains various controls and protein interactors printed on the array to allow you to validate probing and detection protocols. Probing options can be performed individually, or in tandem, and include: Probing with MAPK14 p38 alpha (positive control). The result from the positive control helps to determine signals specific to your probe. Human Protein Microarray Probing Options Probing with your kinase of interest with [-33P]ATP to help you determine background signal and possible array surface interactions. The recommended protein kinase concentration for probing the ProtoArray® Human Protein Microarray is 50 nM. A number of options are available for probing the human microarray with the protein kinase of interest using pre-made reagents (from ProtoArray® Human Protein Microarray v5.0 KSI kit), or your own buffers and detection reagents as described below. Review the information below, before proceeding with the probing procedure. Probing options can be performed individually, or in tandem, and include: Probing with your kinase of interest at 50 nM with [-33P]ATP to identify potential substrates. Probing with only the buffer and no kinase (negative control) in the presence of radiolabeled [-33P]ATP. The negative control allows you to determine signals specific to your probe. Probing with MAPK14p38 alpha (positive control). The result from the positive control helps to determine which signals are specific to your kinase. Probing with different probe concentrations to determine the optimal amount of probe for your assay. Start with an initial probe concentration. If the initial signal is strong with low background, confirm the initial results with a second array using the same experimental conditions. If the initial results indicate weak signal or an unacceptable signal-to-noise ratio, probe a second array with a different probe concentration as described below: Probe first array…. And…. Then Probe Second Array…. With 10 nM probe Weak signal With 50–100 nM probe With 50 nM probe High background With 1–10 nM probe Continued on next page 39 Preparing the Protein Kinase Introduction Before using the ProtoArray® Human Protein Microarray for KSI, you need to purchase or purify the protein kinase of interest to probe the microarray. You may purify the protein kinase using any method of choice. You can use proteins purified from E. coli, yeast cells, or higher eukaryotes to probe the ProtoArray® Microarray. A large variety of highly purified protein kinases are available from Invitrogen. For details, visit www.invitrogen.com or contact Technical Support (page 137). The amount of protein and quality of protein required for probing are described below. Protein Amount and Quality 40 Purify the protein kinase under native conditions. Proteins should be > 90% pure as determined by Coomassie® staining. Check the activity of the protein kinase after purification using a method of choice. Dilute the kinase for use during probing in the Kinase Buffer (see recipe on page 44). Make sure the protein kinase is soluble and active in buffers used for probing the microarray (see recipe on page 44). Use ~120 μL of your purified protein kinase at a recommended final protein concentration of 50 nM to probe each ProtoArray® Microarray. Kinase Substrate Identification—Probing Procedure Recommended Workflow The recommended workflow for probing the ProtoArray® Human Protein Microarray is described below. The recommended protein kinase concentration for probing each array is 50 nM. 1. Probe two ProtoArray® Human Protein Microarrays simultaneously as follows: Probe the first array using your kinase (supplied by the user) at 50 nM in the presence of radiolabeled [33P]ATP to identify potential substrates Probe the second array using only buffer and no kinase (negative control) in the presence of radiolabeled [33P]ATP to determine which signals are specific to your kinase If you are using a ProtoArray® Control Protein Microarray, probe the control microarray as follows: Probe the control array using the Control Kinase (MAPK14 p38 alpha) available separately from Invitrogen, see page 135) at 50 nM in the presence of radiolabeled [33P]ATP to verify the probing protocol OR Probe the control array using your kinase of interest 50 nM in the presence of radiolabeled [33P]ATP to assess the performance of your kinase with the array surface and control proteins printed on the array. 2. After the probing procedure, expose arrays to X-ray film or a phosphor screen for 3 hours. 3. Acquire the array image to produce a 16-bit TIFF file. The array image can be acquired by scanning the phosphor screen using a phosphorimager or develop the X-ray film and scan the X-ray film using a scanner. 4. Process the microarray images, and acquire and analyze data using ProtoArray® Prospector (recommended). Do not use [32P]ATP for the assay, use [33P]ATP as the use of [33P]ATP supports increased signal resolution during data acquisition. While [32P]ATP can be used for the assay, data quantitation with [32P]ATP is not supported. Incubation chambers are not suitable for use in the probing portion of the KSI application. A container that seals tightly is required to prevent any leakage of radioactive material during the washing steps. Do not use cold ATP for the kinase probing steps. If your kinase is stored in a buffer containing ATP, make sure the final concentration of cold ATP is less than 100 nM during the kinase probing step. Avoid adding more than 10% (v/v) of the kinase sample to 120 μL of Kinase Buffer. Addition of more than 10% of the kinase to the Kinase Buffer can decrease assay performance. Important Continued on next page 41 Kinase Substrate Identification—Probing Procedure, Continued Materials Needed ProtoArray® Human or Control Protein Microarray v5.0 Note: You need to purchase an additional ProtoArray® Human or Control Protein Microarray v5.0 if you are using the recommended workflow for probing the array. [33P]ATP (3,000 Ci/mmol, 10 μCi/μL) 0.5% SDS, KSI Blocking Buffer, and Kinase Buffer (page 43-44 for recipes) 0.45 μm filters (Millipore SLHVR25LS) Clean, covered 4-chamber incubation tray (Greiner Cat. no 96077307), chilled on ice Protein Kinase supplied by the user in Kinase Buffer (page 44) Incubator set to 30C Sterile 50 mL conical tubes Coverslips (VWR Cat. no. 48404-454) Ice bucket Deionized water Shaker X-ray film or phosphor screen (provide at least 50 μM resolution) and instrumentation to acquire the image (provide at least 50 μm resolution) X-ray film cassette Clear plastic wrap Microarray slide holder and centrifuge equipped with a plate holder (Optional) Coverslips You will need coverslips that are able to completely cover the printed area (20 mm × 60 mm) of the glass slide and hold a small reagent volume to minimize the amount of valuable probe used and prevent evaporation of reagents. We recommend using glass coverslips (VWR, Cat. no. 48404-454). Using Your Own Buffers If you are preparing your own buffers, follow the guidelines listed below for buffer preparation to obtain the best results with microarrays. The buffer recipes are listed on the next page. Always use ultra pure water to prepare reagents and buffers You may use non-ionic detergents and reducing agents during probing to minimize non-specific interactions If the kinase assay requires certain co-factors, be sure to include the co-factors in the kinase buffer during probing Continued on next page 42 MEND ION AT RECOM Kinase Substrate Identification—Probing Procedure, Continued Preparing 0.5% SDS To perform the washing and probing steps, we recommend using a sterile 50 mL conical tube. Incubation trays or other hybridization chambers may not be suitable for use as you need a container that seals tightly to prevent any leakage of radioactive material during the washing steps. Do not use any cold ATP for the kinase probing steps. If your kinase is stored in a buffer containing ATP, make sure the final concentration of cold ATP is less than 100 nM during the kinase probing step. Avoid adding more than 10% (v/v) of your protein kinase sample to 120 μL of Kinase Buffer. Addition of more than 10% of your kinase to the Kinase Buffer can decrease the assay performance. Prepare 80 mL of 0.5% SDS for each microarray. For 200 mL 0.5% SDS prepare the following reagents fresh from 10% SDS as follows: 10% SDS Ultrapure water Total Volume 10 mL 190 mL 200 mL Mix well and store at room temperature until use. Preparing KSI Blocking Buffer KSI Blocking Buffer (final concentration) 1X PBS 1% BSA 1. Prepare 5 mL of buffer for each microarray. For 100 mL KSI Blocking Buffer prepare fresh reagents as follows: 10X PBS, pH 7.4 10 mL 30% protease free BSA* 3.3 mL Deionized water to 100 mL 2. Mix well (do not vortex). 3. Sterile filter the buffer using a 0.45 μm filter to remove any particulate material and store on ice until use. After preparing KSI Blocking Buffer, immediately return the remaining 30% BSA to –20C. Continued on next page 43 Kinase Substrate Identification—Probing Procedure, Continued Preparing Kinase Buffer Kinase Buffer* (final concentration) 100 mM MOPS, pH 7.2 1% Nonidet P40 (NP 40) 100 mM NaCl 1% BSA 5 mM MgCl2 5 mM MnCl2 1 mM DTT 1. 2. 3. Prepare 120 μL Kinase Buffer with 1 mM DTT for each microarray. For 1 mL Kinase Buffer prepare fresh reagents as follows: 10% NP-40 100 μL 1 M MOPS, pH 7.2 100 μL 5 M NaCl 20 μL 30% protease free BSA 33 μL 1 M MgCl2 5 μL 1 M MnCl2 5 μL 1 M DTT** 1 μL Deionized water to 1 mL Sterile filter the buffer using a 0.45 μm filter to remove any particulate material and store on ice until use. Add 33 nM [33P]ATP at step 2 of Probing Procedure. * Kinase Buffer without [-33P]ATP may be prepared before the assay. Store stock at –20°C. ** After preparing the Kinase Buffer with DTT, immediately return the remaining Kinase Buffer and 1 M DTT to –20C. Calculating the Protein Molar Concentration To calculate the molar concentration of your protein kinase, use the protein concentration and molecular weight of your protein kinase for the calculation using the formula listed below. Protein Concentration (μM) = [Protein concentration in mg/mL] × [1/(protein molecular weight in grams × 10-6)] Example: For a kinase (50,000 Da) at a protein concentration of 0.5 mg/mL, the μM protein concentration is: μM = [0.5 mg/mL] × [1/(50,000 × 10-6)] μM = 10 Continued on next page 44 Kinase Substrate Identification—Probing Procedure, Continued Preparing the Kinase You need 120 μL Kinase Buffer with 1 mM DTT containing the Control Kinase or your kinase to probe one ProtoArray® Microarray. Note: Prepare dilutions of the kinase in the Kinase Buffer. Component Kinase Kinase Buffer with 1 mM DTT Control Kinase 50 nM to 120 μL User Kinase 50 nM to 120 μL Mix well (do not vortex) and store on ice until use. Immediately return the remaining kinase to –80C. Note: Concentration is influenced by activity of kinase and level of kinase autophosphorylation. Too much kinase may result in a high background or dark ProtoArray® Protein Microarray, and too little kinase will result in no additional spots relative to a kinase-free control (ProtoArray® Protein Microarray, kinase buffer and [33P]ATP lacking kinase). Before Starting Before starting the probing procedure, make sure you have all items on hand especially buffers (see pages 43-44), kinase in Kinase Buffer (see above), and coverslips. Make sure the kinase in Kinase Buffer and Kinase Buffer are cold and stored on ice until use. Place a 50-mL conical tube on ice to chill the tube until use. Do not store the 0.5% SDS solution on ice. Store the 0.5% SDS solution at room temperature. Review Important Guidelines on page 11 and Working with Radioactive Material on page 38, prior to starting the probing procedure. 45 Kinase Substrate Identification—Probing Procedure, Continued Blocking Step Instructions for blocking the ProtoArray® Microarray are described below: 1. Remove the mailer containing the ProtoArray® Microarray from storage at –20C and place immediately at 4C (be sure to use the microarray before the expiration date printed on the box). 2. Allow the array to equilibrate in the mailer at 4°C for at least 15 minutes prior to blocking. Failure to do so may result in condensation on the array. 3. Place one microarray with the barcode facing up into each well of a chilled 4-chamber incubation tray such that the barcoded end of the microarray is near the end of the tray marked with an indented numeral (see figures 1a and 1b, below). 1a 1b 4. Using a sterile pipette, immediately add 5 mL KSI Blocking Buffer into each chamber containing an array. Avoid pipetting buffer directly onto the array surface. 5. Incubate the tray for 1 hour at 4°C on a shaker set at 50 rpm (circular shaking). 6. After incubation, remove array from 4-chamber incubation tray using forceps. Insert the tip of the forceps into the indentation at the numbered end of the tray and gently pry the array upward (see figure 2, below). Using a gloved hand, pick up the microarray by holding the array by its edges only. Tap to remove excess liquid from array surface. 2 7. Proceed immediately to Probing the Array. Continued on next page 46 Kinase Substrate Identification—Probing Procedure, Continued Probing the Array Instructions for probing the microarray are described below: 1. Place the ProtoArray® Microarray in a 50 mL conical tube with one-third of the slide extended outside of the tube (see figure below). The barcode should be outside the tube, face up. 2. If probing two microarrays as outlined in the Recommended Workflow (page 41): Add 1 μL of [33P]ATP (3,000 Ci/mmol, 10 μCi/μL) to 119 μL of kinase (0.1–100 nM) in Kinase Buffer (see recipe on page 44) to obtain a final [33P]ATP concentration of 33 nM for one ProtoArray® Protein Microarray Add 1 μL of [33P]ATP (3,000 Ci/mmol, 10 μCi/μL) to 119 μL of Kinase Buffer (see recipe on page 44) without kinase Note: Once the ATP is added to the kinase, use the kinase-ATP mixture immediately for probing the array. Do not store the prepared kinase-ATP mixture on ice for more than 2 minutes prior to use on the array. 3. Pipet mixture gently onto the surface of the ProtoArray® Protein Microarray within the conical tube without touching the array surface. First Human Microarray: add 120 μL Kinase Buffer containing 50 nM your kinase and 33 nM [33P]ATP (Step 2) Second Human Microarray: add 120 μL Kinase Buffer containing 33 nM [-33P]ATP (Step 2) with no kinase For Control Microarrays add 120 μL Kinase Buffer containing 50 nM either your kinase of interest or 50 nM Control Kinase with 33 nM [33P]ATP (Step 2) 4. Using forceps, carefully lay a glass coverslip on the surface of the array without trapping any air bubbles. Align the coverslip flush with the top edge of the array to ensure the printed area of the array is completely covered. If necessary, gently adjust the coverslip to remove any air bubbles. 5. Gently slide each array with a coverslip into the conical tube with the printed side (barcode) of the array facing up. Cap the conical tube. 6. Place each conical tube horizontally on a flat surface in an incubator set to 30C such that the printed side of the array is facing up and the tube is as level as possible. If needed, tape the tube to the flat surface to avoid any accidental disturbances. 7. Incubate the array in the tube for 1 hour at 30°C without shaking. Remove the tubes from the incubator. 8. Using a sterile pipette, add 40 mL 0.5% SDS (page 43) by dispensing the SDS down the sides of the tube. Avoid pipetting SDS directly onto the array surface. Continued on next page 47 Kinase Substrate Identification—Probing Procedure, Continued Probing the Array, Continued Protocol continued from the previous page. 9. Incubate the array in SDS for 1 minute at room temperature without shaking. Gently move the array in the tube to dislodge the coverslip. Do not remove the coverslip with forceps if the coverslip does not float away from the array. 10. Using forceps, carefully remove the dislodged coverslip without touching the array surface. Discard the coverslip appropriately as radioactive waste. 11. Cap the conical tubes and incubate arrays in 0.5% SDS for 15 minutes at room temperature. Note: Perform all washing steps with SDS and water without shaking to prevent any spillage of radioactive waste. 12. Decant the 0.5% SDS. Discard the wash properly as radioactive waste. 13. Slowly add 40 mL 0.5% SDS to the tube (dispense SDS as described in Step 8), cap the tube, and incubate for 15 minutes at room temperature. 14. Decant the 0.5% SDS. Discard the wash properly as radioactive waste. 15. Add 40 mL ultrapure water to the tube (dispense water as described in Step 8), cap the tube, and incubate the array for 15 minutes at room temperature. 16. Decant the water. Discard the wash properly as radioactive waste. 17. Add 40 mL ultrapure water to the tube, cap the tube, and incubate the array for 15 minutes at room temperature. 18. Decant the water. Discard the wash properly as radioactive waste. 19. Proceed to Drying and Exposing the Array, below. Drying and Exposing the Array 1. Remove the array from the tube at the end of the probing procedure. Briefly tap one edge of the array gently on a laboratory wipe to drain excess buffer. 2. Place each array in a slide holder (or a sterile 50 mL conical tube, if you do not have a slide holder). Ensure the array is properly placed and is secure in the holder to prevent any damage to the array during centrifugation. 3. Dry the array using a table top centrifuge. Centrifuge the array at 200 × g for 1–2 minutes at room temperature in the slide holder (if using a centrifuge equipped with a plate rotor) or 50 mL conical tube (if using a swinging bucket rotor). Verify that the array is completely dry. Ensure the array is properly placed and is secure in the holder to prevent any damage to the array during centrifugation. 4. Place the array in an X-ray film cassette. Cover the array with a single layer of clear plastic wrap. You can check for radioactivity on the array using a Geiger counter. 5. Overlay the array with an X-ray film or a phosphor screen (at least 50 μM resolution). Be sure the phosphor screen was erased prior to exposure. 6. Expose the arrays for 3 hours. 7. Proceed to Image Acquisition and Processing, next page. 48 Image Acquisition and Processing Introduction Once you have exposed the ProtoArray® Microarray to X-ray film or phosphor screen, scan the film or phosphor screen to acquire a TIFF image that is required for microarray data analysis. To make the image compatible with the microarray data acquisition software, process the image using ProtoArray® Prospector Imager or Adobe® Photoshop® image analysis software as described on page 130. Materials Needed Imaging hardware A standard desktop flatbed image scanner that provides at least 50 μM resolution (>600 dpi) to scan the X-ray film OR A phosphorimager that provides at least 50 μM resolution to acquire the image from a phosphor screen (see page 129 for phosphorimagers that have been tested with ProtoArray® Microarrays) Data acquisition software We recommended GenePix® Pro v6 or later (Molecular Devices Corporation) or ScanArray® Acquisition Software (PerkinElmer, Inc.) as microarray data acquisition software for analysis of images. Scanning the Array Data Acquisition and Analysis For detailed instructions on scanning the microarray refer to Image Acquisition and Processing for Radioactive Assays (page 129). 1. Develop the X-ray film or process the phosphor screen according to the manufacturer’s recommendations. 2. Scan the X-ray film on a standard scanner or scan the phosphor screen on a phosphorimager to generate a 16-bit TIFF image file. 3. Process the image using ProtoArray® Prospector Imager. 4. Save the adjusted microarray image. For detailed instructions on Data Acquisition and Analysis refer to page 131. 1. Acquire an image (.tiff) from the phosphor screen. 2. Use the barcode information on the array to download the .GAL file from ProtoArray® Central as described on page 132. 3. Use the .GAL file and ProtoArray® Prospector to acquire pixel intensity values for all features on the array and analyze data to determine significant signals. Continued on next page 49 Image Acquisition and Processing, Continued ProtoArray® Prospector Results After data analysis, ProtoArray® Prospector presents a summary of the analyzed data in a table format (see ProtoArray® Prospector manual for details). The proteins that score as positive in the experiment are proteins that satisfy the basic program options. We recommend reproducing the results using ProtoArray® Technology or other methods as described below. The Next Step After identifying potential kinase substrates on the ProtoArray® Human Microarray, you may reproduce the result using: The ProtoArray® Technology with additional arrays to ensure: Reproducibility: Probe the human array using a similar or a different kinase concentration to address reproducibility. Specificity: Probe a human array with different kinase to identify substrates specific to your protein kinase of interest. OR A solution assay as described briefly below: To verify substrate phosphorylation in solution, perform solution assays in the presence of radiolabeled ATP using the purified protein kinase and potential kinase substrate using the probing conditions described in this manual. Be sure to include appropriate positive and negative control reactions. Analyze the results using SDS-PAGE and autoradiography. A true positive signal identified on the array should also produce positive results using the solution assay while a false positive signal identified on the array should not produce any positive results using the solution assay. 50 Expected Results for KSI Introduction The controls printed on the ProtoArray® Microarray are useful in verifying the probing and scanning protocols as described below. Control Alignment Control Kinases Description Alignment Control Kinases are printed on the microarray Control Kinase Substrate The Control Kinase substrate is printed on the microarray. GST Protein Gradient A GST protein gradient is printed on the array Function The Alignment Control Kinases (PKCeta) autophosphorylate during the labeling reaction. The signals are used as reference spots to orient the microarray image and help assign spot identities The Control Kinase (MAPK14 p38 alpha; included in the complete kit) phosphorylates the Control Kinase (MAPKAP) substrate producing a signal. Detects non-specific binding to GST and serves as a negative control. The signals are also used for background calculation by ProtoArray® Prospector software Verification Proper probing and scanning procedures Proper probing and scanning procedures Negative Control ProtoArray® Human Protein Microarrays are designed for kinase substrate identification. After performing the KSI assay and identifying potential kinase substrates, we recommend that you validate the observed substrate phosphorylation using another method such as in vitro solution assay. Using ProtoArray® Human Protein Microarrays, we have typically observed a true positive rate of ~80% for serine-threonine protein kinases. A true positive signal is defined as a phosphorylation signal observed on a protein microarray that is validated as a substrate using an in vitro solution assay. The kinase substrate identification assay depends on various factors such as the buffer composition, kinase activity/concentration, assay conditions, ATP concentration, protein sequence, and the amount of protein on the array. It is possible that some proteins reported in literature as substrates for the kinase may not be identified as kinase substrates on the array. When comparing the kinase substrate data obtained from ProtoArray® experiments to kinase annotated substrates as reported in the literature, it is important to review the experimental conditions used for identifying a protein as a substrate for the kinase. In many cases, proteins annotated in the literature as kinase substrates have been identified using in vivo based approaches, which are not always conclusive. Sometimes the identified signals on the array may be due to the interaction of an array protein with radiolabeled ATP or autophosphorylated protein kinase, thereby causing false positive results. To minimize the number of false positive signals arising due to non-specific interaction and to decrease the number of signals not arising from protein kinase phosphorylation of array proteins, wash the kinase-treated microarray with denaturing SDS as described in the assay protocol. Continued on next page 51 Expected Results for KSI, Continued Control Array Probing Results Results obtained after probing the ProtoArray® Control Protein Microarray v5.0 with the Control Kinase and radiolabeled ATP are shown below. Signal spots without captions represent features exhibiting autophosphorylation. Image showing the Control Array when probed with labeled ATP only (negative control) Control Array Image Boxed area shown in detail Image showing the Control Array when probed with 120 nM Control Kinase Control Array Image Boxed area shown in detail Alignment Control Kinase (PKCeta) Alignment Control Kinase (PKCeta) Control Kinase Substrate (MAPKAP) Alignment Control Kinase (PKCeta) Alignment Control Kinase (PKCeta) The following control features can be observed after probing a ProtoArray® Protein Microarray: Alignment Control Kinase Signal Alignment Control Kinase (PKCeta) on the arrays autophosphorylate during the labeling reaction. The signals at Alignment Control Kinase locations indicate that the probing procedure and scanning is performed properly, and are used as reference spots to orient the microarray image and help assign spot identities. Control Kinase Substrate Signal The Control Kinase substrate is printed on the microarray. The Control Kinase phosphorylates the Control Kinase substrate producing a signal. These signals indicate proper probing and scanning procedures. To orient the results obtained from the .GAL file and ProtoArray® Prospector with the array image, position the microarray image such that the barcode is at the bottom of the image. In this orientation, the top left corner of the microarray image is Block 1. Continued on next page 52 Expected Results for KSI, Continued Human ProtoArray® Probing Results The results obtained after probing the ProtoArray® Human Protein Microarray v5.0 with 50 nM Control Kinase is shown below. The Control Kinase phosphorylates the Control Kinase substrate printed on the array. A negative control image of the ProtoArray® Human Protein Microarray v5.0 is also shown below. Signal spots without captions represent features exhibiting autophosphorylation. Image of the Human Microarray when probed with labeled ATP only (negative control) Human Array Boxed area shown in Image detail Alignment Control Kinase (PKCeta) Image of the Human Microarray when probed with 50 nM Control Kinase Human Array Image Boxed area shown in detail Alignment Control Kinase (PKCeta) Control Kinase Substrate (MAPKAP) Alignment Control Kinase (PKCeta) Alignment Control Kinase (PKCeta) 53 Troubleshooting Introduction Problem Weak or no signal with your protein kinase The table below provides some solutions to possible problems you may encounter when using the ProtoArray® Microarray for the KSI application. Cause Solution Kinase of interest is not active or is inactivated by the assay buffer Check the activity of the kinase after purification using a method of choice. Ensure the kinase is active under the conditions used for probing. Avoid repeated freezing-thawing of your kinase. Low specific activity of the kinase Perform probing with higher kinase concentration, higher kinase specific activity, or increase the incubation time. Avoid repeated freezing-thawing of your kinase. Incorrect scanning or imaging For X-ray film, develop the film and acquire the image using a standard scanner. For phosphor screen, acquire the image using a phosphorimager. Follow the manufacturer’s recommendations on using the scanner or phosphorimager to scan the array correctly. Be sure to use a scanner or phosphorimager that provides at least 50 μM resolution and generates 16-bit TIFF image files. Incorrect assay conditions Perform incubation of the array at 30C during the probing procedure. Use freshly prepared Kinase Buffer for best results. Poor incorporation of radiolabel Use fresh [33P]ATP. Be sure to check the array using a Geiger counter to verify that the radioactive signal is obtained after the probing procedure. Kinase-ATP mixture not added immediately to the array After preparing the kinase-ATP mixture, immediately add the mixture to the array. Do not store the prepared kinase-ATP mixture on ice for more than 2 minutes prior to use on the array. Kinase specific substrates are not present on the array Use another kinase. Continued on next page 54 Troubleshooting, Continued Problem High background Cause Solution Improper blocking Prepare the KSI Blocking Buffer fresh as described on page 43. Improper washing For the best results, perform the recommended washing steps using 0.5% SDS and water as outlined in the protocol. Array dried during probing or washing Do not allow the array to dry during probing or washing procedure. Ensure the coverslip completely covers the printed area of the array. During the incubation step at 30C, make sure the 50-mL conical tube is capped to minimize drying. During all wash steps, ensure the array is completely covered in buffers. Array not dried properly before scanning Dry the array as described before scanning. High kinase concentration Decrease the kinase concentration/specific activity or decrease the incubation time. Uneven background Uneven blocking or washing During the blocking or washing steps, ensure the array is completely immersed in buffers and use at least 40 mL buffer in the 50-mL conical tube to cover the array completely with buffer. Improper washing To obtain the best results, perform the recommended washing steps. Prepare the 0.5% SDS solution fresh as described on page 43. Portions of array have dried Do not allow the array to dry during probing. Improper array handling Always wear gloves and avoid touching the surface of the array with gloved hands or forceps. Take care while inserting the array into the tube to avoid scratching the array surface. Radiolabeled ATP or Centrifuge the [33P]ATP or buffer to remove buffer contains precipitates precipitates prior to probing the array. Poor spot resolution Incorrect scanner or phosphorimager used Be sure the scanner or phosphorimager is capable of providing at least 50 μM resolution. Improper handling of arrays Be sure to allow the mailers with arrays to equilibrate at 4C for at least 15 minutes prior to use. Improper covering of arrays Properly cover the array with a single layer of clear plastic wrap without any creases. -- It is normal for signals from duplicate spots to merge sometimes. The merging of spots does not affect data analysis. Signals from duplicate spots are merged 55 Small Molecule Identification (SMI - Fluorescent) Application Experimental Overview Experimental Steps The recommended experimental steps for SMI application with Alexa Fluor® 647 labeled or biotinylated small molecules are outlined below. Step Action Page no. ® 1 Block ProtoArray Human Protein Microarray with 5 mL SMI Assay Buffer. 62 2 Probe ProtoArray® Human Protein Microarray with 120 μL of small molecule in SMI Assay Buffer. Optional: If you are a first time user of the ProtoArray® Human Protein Microarray, perform a control probing using a ProtoArray® Control Microarray to verify probing and detection protocols. 63 3 Dry the microarray. 65 4 Scan slide with fluorescence microarray scanner. 66 5 Download the protein array lot specific information (the .GAL file) from ProtoArray® Central Portal to acquire and analyze the data using ProtoArray® Prospector to identify small molecule interactions. 66 Continued on next page 56 Guidelines for Probing the ProtoArray® Microarray Human Protein Microarray Probing Options The recommended small molecule probe concentration for probing the ProtoArray® Human Protein Microarray is at least 2.5 μM. A number of options are available for probing the ProtoArray® Human Protein Microarray with your own buffers and detection reagents as described below. Review the information below, before proceeding with the probing procedure. Probing options can be performed individually, or in tandem, and include: Probing with your small molecule probe to detect novel interactions. Probing with only the detection reagent (negative control). The negative control allows you to determine signals specific to your probe. Probing with different probe concentrations to determine the optimal amount of probe for your assay. Start with an initial probe concentration. If the initial signal is strong with low background, confirm the initial results with a second array using the same experimental conditions. If the initial results indicate weak signal or an unacceptable signal-to-noise ratio, probe a second array with a different probe concentration. 57 Preparing the Small Molecule Probe Introduction Before using the ProtoArray® Human Protein Microarray, your small molecule of interest must contain a suitable tag to probe the microarray. The amount and quality of your small molecule required for probing are described in this section. Small Molecule Tags The small molecule of interest can be tagged using a reactive Alexa Fluor® dye or a biotin label. Using amine- or sulhydryl-reactive Alexa Fluor® dyes, small molecules with the appropriate functional group can be directly labeled for use as a probe. We recommend the use of reactive Alexa Fluor® 647 to obtain the best results. The extremely high affinity of the biotin-streptavidin interaction makes biotin-protein conjugation an attractive method for probe labeling. The biotinylated small molecule probe is detected using a streptavidin detection system. Generating Tagged Small Molecule Probe Alexa Fluor® Tag To label your small molecule probe with an Alexa Fluor® tag, your small molecule of interest must be contain the appropriate functional group which will allow labeling with a reactive Alexa Fluor® dye. A variety of reactive Alexa Fluor® 647 dyes are available from Invitrogen for labeling of your small molecule of interest. For more information about these products, refer to our website (www.invitrogen.com) or call Technical Support (page 135). Biotin Tag You may use any method to biotinylate your small molecule of interest. To label your small molecule probe with a biotin tag, your small molecule of interest must contain the appropriate functional group for labeling. Important When performing fluorescence detection, it is important to avoid exposing the array to light after probing with a fluorescent detection reagent. If performing direct labeling, always verify that labeling does not affect the binding affinity of the antibody. Although Alexa Fluor® 555 or Cy3™ dyes can be used for detection, using them may result in higher background signals. Continued on next page 58 Small Molecule Interaction––Probing Procedure Introduction After preparing the small molecule probe and verifying the presence of the tag or label, probe the ProtoArray® Human Protein Microarray using your small molecule probe. Instructions are included in this section to probe the ProtoArray® Human Protein Microarray using buffer recipes provided in this manual (see page 60 for buffer recipes). Experimental Outline Materials Needed 1. Block the ProtoArray® Human Protein Microarray. 2. Probe with your tagged small molecule probe. 3. Perform detection using an appropriate detection system. 4. Dry the array for scanning. ProtoArray® Human or Control Protein Microarray (page 135) Buffers (see next page) Small molecule probe containing a suitable tag in SMI Assay Buffer (next page) Alexa Fluor® 647 conjugated streptavidin or equivalent (page 135); keep on ice in dark until immediately before use (if using biotinylated small molecule) Antibody against the epitope tag for an epitope tagged small molecule probe Ice bucket Deionized water Clean, covered 4-chamber incubation tray (Greiner Cat. no. 96077307), chilled on ice LifterSlip™ coverslips (Thermo Scientific, Cat. no. 25x60I-2-4789) Microarray slide holder and centrifuge equipped with a plate holder (Optional) Incubation Trays The microarray is placed in an incubation tray during the blocking and washing steps. To obtain the best results, all incubations of the ProtoArray® with various solutions are performed in a 4-chamber, covered incubation tray (Greiner, Cat. no. 96077307). Coverslips LifterSlip™ coverslips (Thermo Scientific, Cat. no. 25x60I-2-4789) hold a small reagent volume to minimize the amount of valuable probe used and prevent evaporation of reagents. If you are using any other coverslip, be sure the coverslip is able to completely cover the printed area (20 mm x 60 mm) of the glass slide and the coverslip is made of non-protein binding material. Untreated glass coverslips are not recommended. Continued on next page 59 Small Molecule Interaction––Probing Procedure, Continued MEND ION AT RECOM Using Your Own Buffers Preparing SMI Assay Buffer Follow the guidelines listed below for buffer preparation to obtain the best results with microarrays. The buffer recipes are listed below. Always use ultra pure water to prepare reagents and buffers You may use non-ionic detergents and reducing agents during probing to minimize non-specific interactions If the protein interaction requires certain co-factors, be sure to include the co-factors in the probing buffer during probing Prepare SMI Assay Buffer fresh prior to use. Use the recipes described below to prepare your own buffers. Recommended buffers are listed below for blocking and washing the arrays. You can perform array probing using the recommended buffers and then based on your initial results optimize the buffer formulation. SMI Assay Buffer (final concentration) 50 mM Tris-HCl pH 7.5 5 mM MgSO4 0.1% Tween 20 10X Synthetic Block 1. Prepare 30 mL buffer for each microarray when using Alexa Fluor® labeled probes, and 50 mL of buffer for each microarray when using biotin labeled probes. For 1,000 ml SMI Assay Buffer, prepare fresh reagents as follows: 1 M Tris-HCl pH 7.5 1 M MgSO4 10% Tween 20 10X Synthetic Block Deionized water 2. Preparing Small Molecule Probes 50 mL 5 mL 10 mL 100 mL to 1,000 mL Mix well (do not vortex) and store on ice until use. ProtoArray® Human Protein Microarray To probe the microarray, you need 120 μL of your small molecule probe with a suitable tag. The recommended small molecule probe concentration for probing the ProtoArray® Human Protein Microarray is at least 2.5 μM. If the small molecule is dissolved in an organic solvent such as ethanol or DMSO, the final organic solvent concentration should be less than 1% DMSO by volume or 5% ethanol by volume. Dilute the probe to the recommended starting concentration in SMI Assay Buffer. Mix well (do not vortex) and store protected from light on ice until use. Continued on next page 60 Small Molecule Interaction––Probing Procedure, Continued Preparing Streptavidin Solution Before Starting The biotinylated probe is detected using an Alexa Fluor® 647 fluorescent conjugated streptavidin. Prepare 5 mL of streptavidin solution for each array to be probed. Biotin detection: Prepare 1 μg/mL Streptavidin-Alexa Fluor® 647 Conjugate in SMI Assay Buffer Before starting the probing procedure, make sure you have all items on hand especially buffers (previous page), probes in SMI Assay Buffer (see page 60), LifterSlip™ coverslips (see page 59) and incubation tray (see page 59). Make sure the buffers are cold. Store buffers on ice until use. Place an incubation tray on ice to chill until use. Review Important Guidelines on page 11 prior to starting the probing procedure. We strongly recommend that you probe the ProtoArray® Human Protein Microarray with only your detection reagent to detect signals resulting due to interactions between the detection reagent and proteins printed on the array. Due to the large variety of probes and detection systems that can be used for probing the ProtoArray® Human Protein Microarray, it is not possible to have a single probing protocol that is suitable for all probes and detection systems. Use the probing procedure from this section as a starting protocol and based on your initial results, empirically determine the probing protocol by optimizing the probe concentration, buffer formulation, incubation time, or detection reagents. Optimization of probing protocol can be easily and rapidly achieved using multiple ProtoArray® Human Protein Microarrays. Important Continued on next page 61 Small Molecule Interaction––Probing Procedure, Continued Blocking Step Instructions for blocking the microarray are described below: 1. Immediately place the mailer containing the ProtoArray® Human Protein Microarray v5.0 at 4C upon removal from storage at –20C and equilibrate the mailer at 4C for at least 15 minutes prior to use. 2. Place ProtoArray® Human Protein Microarrays with the barcode facing up in the bottom of a 4-chamber incubation tray such that the barcode end of the microarray is near the tray end containing an indented numeral (see figure 1a). The indent in the tray bottom is used as the site for buffer removal (see figure 1b, arrow). 1a 1b 3. Using a sterile pipette, add 5 mL SMI Assay Buffer into each chamber. Avoid pipetting buffer directly onto the array surface. 4. Incubate the tray for 1 hour at 4ºC on a shaker set at 50 rpm (circular shaking). Use a shaker that keeps the arrays in one plane during rotation. Rocking shakers are not to be used because of increased risk of cross-well contamination. 5. After incubation, aspirate SMI Assay Buffer by vacuum or with a pipette. Position the tip of the aspirator or pipette into the indented numeral and aspirate the buffer from each well (see figure 2). Tilt the tray so that any remaining buffer accumulates at the end of the tray with the indented numeral. Aspirate the accumulated buffer. 2 Important: Do not position the tip or aspirate from the microarray surface as this can cause scratches. Immediately proceed to adding the next solution to prevent any part of the array surface from drying which may produce high or uneven background. 6. Proceed immediately to Probing the Array. Continued on next page 62 Small Molecule Interaction––Probing Procedure, Continued Probing the Array with Alexa Fluor® Labeled Probe 1. Remove the slide from the 4-well tray using forceps (see figure 3, below) and tap on a paper towel to remove excess fluid. Place on a flat surface. Insert the tip of the forceps into the indented numeral and gently pry the edges of the slide upward. Pick up the slide with a gloved hand taking care only to touch the slide only by its edges. Tap the slide on its side to remove excess fluid but avoid drying of the array. Place on a flat surface or benchtop. 3 2. Pipet 120 μL of the small molecule diluted in SMI Assay Buffer (page 60) on top of the array without touching the array surface with the pipette tip dropwise. Gently rock the slide about 15–30 seconds for solution to spread. 3. Using forceps, carefully lay the LifterSlip™ coverslip on the array to cover the printed area without trapping any air-bubbles. If bubbles are observed, gently lift the LifterSlip™ and slowly lower the slip again. Replace slide in the 4-well tray and cover with lid. 4. Incubate 90 minutes at 4C. 5. Add 5 mL SMI Assay Buffer, incubate without agitation and remove LifterSlip™. After about a minute or so, the LifterSlip™ should float off of the ProtoArray® Human Protein Microarray. Once this occurs, use the forceps to carefully remove the LifterSlip™. Discard the slip. Alternatively, remove the array and LifterSlip™ from the well and tilt the slide to allow the LifterSlip™ to slip off the surface. Replace the array back into the incubation tray. 6. Wash with 5 mL SMI Assay Buffer with gentle agitation for 5 minutes. Aspirate SMI Assay Buffer. Repeat wash step three times. 7. Remove the array from the 4-well tray using forceps. 8. Proceed to Drying the Array. Continued on next page 63 Small Molecule Interaction––Probing Procedure, Continued Probing the Array with Biotin Labeled Probe 1. Remove the slide from the 4-well tray using forceps by inserting the tip of the forceps into the indented numeral and gently prying the edges of the slide upward. (see figure 3, below). Pick up the slide with a gloved hand taking care only to touch the slide only by its edges. Tap the slide on its side to remove excess fluid but avoid drying of the array. Place on a flat surface or benchtop. 3 2. Pipet 120 μL of the small molecule diluted in SMI Assay Buffer (page 60) on top of the array without touching the array surface with the pipette tip dropwise. Gently rock the slide about 15–30 seconds for solution to spread. 3. Using forceps, carefully lay the LifterSlip™ coverslip on the array to cover the printed area without trapping any air bubbles. If bubbles are observed, gently lift the LifterSlip™ and slowly lower the slip again. Replace slide in the 4-well tray and cover with lid. 4. Incubate 90 minutes at 4C. 5. Add 5 mL SMI Assay Buffer, incubate without agitation and remove LifterSlip™. After about a minute or so, the LifterSlip™ should float off of the ProtoArray® Human Protein Microarray. Once this occurs, use the forceps to carefully remove the LifterSlip™. Discard the slip. Alternatively, remove the array and LifterSlip™ from the well and tilt the slide to allow the LifterSlip™ to slip off the surface. Replace the array back into the incubation tray. 6. Wash with 5 mL SMI Assay Buffer with gentle agitation for 5 minutes. Aspirate SMI Assay Buffer. Repeat wash step three times. 7. Add 5 mL streptavidin Alexa Fluor® 647 diluted in SMI Assay Buffer. Add streptavidin Alexa Fluor® 647 at the indented numeral end of the 4-well tray and allow the liquid to flow across the slide surface. To prevent local variations in fluorescence intensity and background, avoid direct contact with the slide. 8. Incubate for 30 minutes at 4C with gentle shaking (~50 rpm). 9. Remove streptavidin Alexa Fluor® 647 solution by aspiration. 10. Wash with 5 mL SMI Assay Buffer with gentle agitation for 5 minutes. Aspirate SMI Assay Buffer. Repeat wash step three times. 11. Remove the array from the 4-well tray using forceps. 12. Proceed to Drying the Array. Continued on next page 64 Small Molecule Interaction––Probing Procedure, Continued Drying the Array 1. To remove the array from the 4-chamber incubation tray, insert the tip of forceps into the indented numeral end and gently pry the array upward (see Step 1, page 64). Using a gloved hand, pick up the microarray by holding the array by its edges. 2. Place the array in a slide holder (or a sterile 50 mL conical tube, if you do not have a slide holder). Ensure the array is properly placed and is secure in the holder to prevent any damage to the array during centrifugation. Briefly dip the slide holder containing the arrays into room temperature distilled water three times to remove salts. If you are not using a slide holder, dip the array into a 50 mL conical tube filled with room temperature distilled water three times. 3. Centrifuge the array in the slide holder or 50 mL conical tube at 200 × g for 1 minute in a centrifuge (equipped with a plate rotor, if you are using the slide holder) at room temperature. Verify the array is completely dry. After slides have been probed and dried, they can be stored either vertically or horizontally 4. After drying, store the arrays vertically or horizontally in a slide box protected from light. Avoid prolonged exposure to light as it will diminish signal intensities. To obtain the best results, scan the array within 24 hours of probing. 5. Proceed to Scanning and Data Analysis, next page. 65 Scanning and Data Analysis Introduction Once you have probed the ProtoArray® with your small molecule, scan the microarray using a suitable microarray scanner. After scanning and saving an image of the array, download the protein array lot specific information from the ProtoArray® Central Portal. Use the lot specific information to acquire and analyze the data to identify small molecule interactions. Materials Needed Imaging hardware A suitable scanner is required to scan the ProtoArray® Microarray. The scanner specifications are listed page 123. For a list of scanners to use with ProtoArray® Microarrays see page 124. Data acquisition software We recommended GenePix® Pro v6 or later (Molecular Devices Corporation) or ScanArray® Acquisition Software (PerkinElmer, Inc.) as microarray data acquisition software for analysis of images. Scanning the Array For detailed instructions on scanning the microarray refer to Scanning Arrays Using a Fluorescence Scanner (page 123). 7. Insert array into the fluorescence microarray scanner. 8. Adjust scanner settings. 9. Preview the microarray and adjust settings, if needed. 10. Scan the microarray. 11. Save image data. 12. Export and analyze results. Data Acquisition and Analysis For detailed instructions on Data Acquisition and Analysis refer to page 126. 4. To acquire data from the scanned image, use the barcode on the array to download the .GAL file from ProtoArray® Central as described on page 126. 5. Use the .GAL file and suitable microarray data acquisition software to acquire pixel intensity values for all features on the array. 6. Analyze data with ProtoArray® Prospector using the guidelines on page 128 to determine significant signals with the controls and your protein probe. Continued on next page 66 Scanning and Data Analysis, Continued Analyzing ProtoArray® Prospector Results After data analysis, ProtoArray® Prospector presents a summary of the analyzed data in a table format (see ProtoArray® Prospector manual for details). The proteins that score as positive in the experiment are proteins that satisfy the basic program options. Review the information on pages 68, Expected Results, to help with data interpretation. We recommend validating the interactions as described below. The Next Step After identifying a positive interaction on the ProtoArray® Human Protein Microarray, you may validate the small molecule interaction using the ProtoArray® Technology or other methods. Using the ProtoArray® Technology, validate the small molecule interactions by performing experiments with additional arrays to ensure: Reproducibility: Probe protein arrays using a similar or a different probe concentration to observe similar interactions. Specificity: Probe protein arrays with the detection reagent used to visualize the interactions and also different small molecules containing the tag to identify interactions specific to your small molecule probe of interest and also identify any non-specific interactions. In addition, competition assays may be performed to determine if the interactions can be competed by excess unlabeled small molecule. OR Interactions observed on the ProtoArray® Human Protein Microarray can be validated using solution-phase assays. Continued on next page 67 Expected Results for SMI - Fluorescent Control Array Probing Results Results obtained after probing the ProtoArray® Control Protein Microarray v5.0 with Alexa Fluor® 647 labeled staurosporin (a known binding partner for calmodulin kinase) is shown below. Control Array probed with Alexa Fluor® 647 labeled Staurosporin Array Image Boxed Area shown in detail Alexa Fluor® Ab Alexa Fluor® Ab Alexa Fluor® Ab CAMK2A Alexa Fluor® Ab The following control features can be observed after probing a ProtoArray® Protein Microarray: Alexa Fluor® Ab signal This is an antibody labeled with Alexa Fluor® 647. The fluorescent antibody signals indicate that the array has been properly scanned, and are used as reference spots to orient the microarray and help assign spot identities. CAMK2A signal Staurosporin is a known binding partner for calmodulin kinase (CAMK2A), and binds to the calmodulin kinase printed on the array. The signal is used to verify the probing procedure. 68 Troubleshooting Introduction The table below provides some solutions to possible problems you might encounter when using the ProtoArray® Microarray for the SMI - Fluorescent, application. Review the expected results section (pages 68) to verify the probing, detection, and scanning procedures are performed correctly. Based on the initial results, you may need to optimize the probing and detection protocol by optimizing the probe concentration, buffer formulation, incubation time, or detection reagents. Problem Cause Solution Epitope tag not present Confirm the presence of the tag by appropriate assay. SMI Array Results Weak or no signal with protein probe Poor biotinylation of protein Make sure the small molecule is in a buffer that does not contain any primary amines such as probe ammonium ions, Tris, glutathione, imidazole, or glycine. Make sure the biotinylation reaction was performed correctly using the specified molar ratios and at pH ~8.0. Check that the calculations and serial dilutions are performed correctly. Low probe concentration Perform probing with higher probe concentration or increase the incubation time. Incorrect probing procedure Follow the recommended protocols for probing on pages 63 and 64. Be sure all incubations are performed at 4C. Prepare the SMI Assay Buffer fresh as described on page 60. Do not allow the array to dry during the probing procedure. Avoid prolonged exposure of detection reagents labeled with a fluorescent dye to light. Incorrect scanning or imaging Scan the array at suitable wavelength for the detection system used and place the array in the slide holder such that the proteins on the array are facing the laser source. Decrease stringency Decrease the number of washes. Perform probing and washing in the absence or lower concentration of detergent or salts. Continued on next page 69 Troubleshooting, Continued Problem Cause Solution SMI Array Results High background Uneven background Improper blocking Prepare the SMI Assay Buffer fresh as described on page 60. Improper washing To obtain the best results, perform the recommended washing steps. Prepare the SMI Assay Buffer fresh as described on page 60. Array dried during probing Do not allow the array to dry during probing. Array not dried properly before scanning Dry the array as described on page 65 before scanning. High probe concentration Decrease the probe concentration or decrease the incubation time. Uneven blocking or washing During the blocking or washing steps, ensure the array is completely immersed in SMI Assay Buffer, and use at least 5 mL buffer in the incubation tray to immerse the array completely with buffer. Improper washing To obtain the best results, perform the recommended washing steps. Prepare the SMI Assay Buffer fresh as described on page 60. Portions of array have dried Do not allow the array to dry during probing. Improper array handling Always wear gloves and avoid touching the surface of the array with gloved hands or forceps. Take care while inserting the array into the incubation tray to avoid scratching the array surface. Protein probe not applied properly Apply the probe solution and LifterSlip™ or equivalent coverslip to the array as described in the manual. To avoid drying of the array surface, make sure the coverslip covers the printed area of the array and adjust the coverslip, if needed. Probe or detection reagents contain precipitates Centrifuge the probe or detection reagents to remove precipitates prior to probing the array. Continued on next page 70 Tritium Radiolabeled Small Molecule Identification (SMI Radioactive) Application Experimental Overview Experimental Steps The experimental outline for performing SMI application using the ProtoArray® Human Protein Microarray with tritium radiolabeled small molecules is shown below. Step Action Page no. 1 Block ProtoArray® Human Protein Microarray with 5 mL Tritium SMI Assay Buffer with gentle agitation at 4°C. 76 2 Probe ProtoArray® Human Protein Microarray with 100 μL of 3H labeled small molecule in Tritium SMI Assay Buffer. Optional: If you are a first time user of the ProtoArray® Human Protein Microarray, perform a control probing using a ProtoArray® Control Protein Microarray to verify the assay protocol. 77 3 Dry the microarray. 78 4 Expose the microarray to tritium-sensitive phosphor screen phosphor screen for ~16 days. 78 5 Scan phosphor screen with phosphorimager. 79 6 Download the protein array lot specific information (the .GAL file) from ProtoArray® Central Portal to acquire and analyze the data using ProtoArray® Prospector to identify small molecule substrates. 79 Continued on next page 71 Guidelines for Probing the ProtoArray® Microarray Introduction The ProtoArray® tritium labeled small molecule profiling application has adequate sensitivity to identify target protein interactions with a Kd of ~10μM. The minimum specific activity of the small molecule should be at least 10 Ci/mmol, and weaker interactions may require higher specific activities. The radioactivity of the 3H-ligand in the probing solution should be at least 10–50 nCi/μL (final activity), and the 3H-ligand concentration should be ~100 nM–1μM in the solution used to probe the arrays. Various options are available for performing the probing procedure upon the amount of validation required for probing and detection results. Control Protein Microarray Probing Options If you are a first time user of the ProtoArray® Human Protein Microarray, we recommend that you probe a ProtoArray® Control Protein Microarray available from Invitrogen (page 135) prior to probing the human microarray. The ProtoArray® Control Protein Microarray contains various controls and protein interactors printed on the array to allow you to validate probing and detection protocols. Probing options can be performed individually, or in tandem, and include: Probing with 3H estradiol (positional mapping reagent). The result from the positional mapping reagent can serve as a positive control to help determine signals specific to your probe. Probing with your tritiated small molecule of interest to help you determine background signal and possible array surface interactions. For details on running a ProtoArray® Control Protein Microarray refer to the protocol for the KSI application, page 35. Human Protein Microarray Probing Options The recommended small molecule probe activity range for probing the ProtoArray® Human Protein Microarray is 50 pCi/μL –50 nCi/μL, with weaker interactions requiring activity of 10–50 nCi/μL. A number of options are available for probing the human microarray with a small molecule of interest using your own buffers and detection reagents as described below. Review the information below, before proceeding with the probing procedure. Probing options can be performed individually, or in tandem, and include: Probing with your tritiated small molecule of interest to identify potential substrates. Probing with 3H estradiol (positional mapping reagent). The result from the positional mapping reagent can serve as a positive control to help determine signals specific to your probe. Probing with different probe concentrations to determine the optimal amount of probe for your assay. Start with an initial probe concentration. If the initial signal is strong with low background, confirm the initial results with a second array using the same experimental conditions. If the initial results indicate weak signal or an unacceptable signal-to-noise ratio, probe a second array with a different probe concentration. Continued on next page 72 Tritium Radiolabeled Small Molecule Interaction––Probing Procedure Introduction After preparing the small molecule probe and verifying the presence of the label, probe the ProtoArray® Human Protein Microarray using your small molecule probe. Instructions are included in this section to probe the ProtoArray® Human Protein Microarray using buffer recipes provided in this manual (see page 74 for buffer recipes). Experimental Outline Materials Needed Coverslips 1. Block the ProtoArray® Human Protein Microarray. 2. Probe with your radiolabeled small molecule probe. 3. Perform detection using an appropriate detection system. 5. Dry the array for exposing. ProtoArray® Human or Control Protein Microarray (page 135) Tritium SMI Assay Buffer (page 74) Estradiol, [2,4,6,7,16,17-3H(N)] (Perkin-Elmer, Cat. no. NET517) Radiolabeled small molecule probe containing a suitable tag in Tritium SMI Assay Buffer (see next page) Ice bucket Deionized water Clean, covered 4-chamber incubation tray (Greiner Cat. no. 96077307), chilled on ice Coverslips (VWR Cat. no. 48404-454) Exeter™ Conservation Board (Light Impressions 3500) or thick filter paper Microarray slide holder and centrifuge equipped with a plate holder (Optional) You will need coverslips that are able to completely cover the printed area (20 mm x 60 mm) of the glass slide and hold a small reagent volume to minimize the amount of valuable probe used and prevent evaporation of reagents. We recommend using glass coverslips (VWR Cat. no. 48404-454). Continued on next page 73 Tritium Radiolabeled Small Molecule Interaction––Probing Procedure, Continued MEND Follow the guidelines listed below for buffer preparation to obtain the best results with microarrays. The buffer recipes are listed below. Always use ultra pure water to prepare reagents and buffers You may use non-ionic detergents and reducing agents during probing to minimize non-specific interactions If the protein interaction requires certain co-factors, be sure to include the co-factors in the probing buffer during probing Prepare Tritium SMI Assay Buffer fresh prior to use. Freshly prepared buffers are best for blocking slides. Do not store Tritium SMI Assay Buffer for more than 24hrs. Use the recipes described below to prepare your own buffers. Recommended buffers are listed below for blocking and washing the arrays. You can perform array probing using the recommended buffers and then based on your initial results optimize the buffer formulation. ION AT RECOM Using Your Own Buffers Preparing Tritium SMI Assay Buffer Tritium SMI Assay Buffer (final concentration) 50 mM Tris-HCl pH 7.5 5 mM MgSO4 0.1% Tween 20 100 mM NaCl (Optional)* 1% BSA or Casein (Optional)* 2. Prepare 125 ml buffer for each microarray. If using the optional Tritium SMI Assay Buffer with NaCl, prepare an additional 40 ml of buffer without NaCl for each microarray. For 1,000 ml Tritium SMI Assay Buffer, prepare fresh reagents as follows: 1 M Tris-HCl pH 7.5 1 M MgSO4 10% Tween 20 5 M NaCl (Optional) 30% protease free BSA (Optional) OR Casein, Hammarsten Grade (Optional)** Deionized water 3. 50 mL 5 mL 10 mL 20 mL 33.4 mL 10 g to 1,000 mL Mix well (do not vortex) and store on ice until use. * Assay performance with the optional blocking reagents is small molecule specific, and can be determined through pilot experiments on Control arrays. ** To prepare 1% Casein dissolve the casein in Tritium SMI Assay Buffer, and heat solution at 50°C until casein is completely dissolved. Do not exceed 60°C. Do not microwave. Continued on next page 74 Tritium Radiolabeled Small Molecule Interaction––Probing Procedure, Continued Preparing Small Molecule Probes ProtoArray® Human Protein Microarray To probe the microarray, you need 100 μL of your tritiated small molecule probe for each array. The recommended activity range for the final concentration of your small molecule probe is 50 pCi/μL –50 nCi/μL, with weaker interactions requiring an activity of 10–50 nCi/μL. We recommend that the tritiated small molecule stock activity be at least 1μCi/μL with a specific activity of at least 10 Ci/mmol, and that a minimum of 60 μCi be available to perform each small molecule-protein interaction experiment. If the tritiated small molecule is dissolved in an organic solvent such as ethanol or DMSO, the final organic solvent concentration should be less than 1% DMSO by volume or 5% ethanol by volume. To avoid non-specific interactions and/or high background, we further recommend that the final concentration of tritiated small molecule be no higher than 1 μM. Dilute the probe to the recommended starting concentration in Tritium SMI Assay Buffer. Mix well (do not vortex) and store on ice until use. 3 H Estradiol Add the positional mapping reagent 3H Estradiol to 100 μL of your small molecule probe at a final concentration of 40 pCi/μL. Before Starting Important Before starting the probing procedure, make sure you have all items on hand especially buffers (previous page), probes in Tritium SMI Assay Buffer (previous page), and coverslips. Make sure the buffers are cold. Store buffers on ice until use. Review Important Guidelines on page 11 and Working with Radioactive Material on page 38, prior to starting the probing procedure. Incubation chambers are not suitable for use in the probing portion of the SMI radioactive application. A container that seals tightly is required to prevent any leakage of radioactive material during the washing steps. Continued on next page 75 Tritium Radiolabeled Tritium Radiolabeled Small Molecule Interaction––Probing Procedure, Continued Blocking Step Instructions for blocking the microarray are described below: 1. Immediately place the mailer containing the ProtoArray® Human Protein Microarray v5.0 at 4C upon removal from storage at –20C and equilibrate the mailer at 4C for at least 15 minutes prior to use (be sure to use the microarray before the expiration date printed on the box). 1a 2. Place ProtoArray® Human Protein Microarrays with the barcode facing up in the bottom of a 4-chamber incubation tray such that the barcode end of the microarray is near the tray end containing an indented numeral (see figure 1a, and 1b). 1b 3. Using a sterile pipette, add 5 mL Tritium SMI Assay Buffer into each chamber. Avoid pipetting buffer directly onto the array surface. 4. Incubate the tray for 1 hour at 4ºC on a shaker set at 50 rpm (circular shaking). 5. After incubation, remove ProtoArray® Protein Microarrays from Tritium SMI Assay Buffer. To remove array from the 4-chamber incubation tray, insert the tip of forceps into the indented numeral end and gently pry the array upward (see figure 2). Using a gloved hand, pick up the microarray by holding the array by its edges only. Tap to remove excess liquid from slide surface. 6. 2 Proceed immediately to Probing the Array. Continued on next page 76 Tritium Radiolabeled Tritium Radiolabeled Small Molecule Interaction––Probing Procedure, Continued Probing the Array 1. Place each microarray horizontally in a separate sterile 50 mL conical tube with about 1/3 of the array extended outside of the tube as shown in the figure below. The barcoded end of the array should protrude from the tube, face up. 2. For each ProtoArray® Protein Microarray, add 100 μL of probing mixture including the 3H-labeled compound of interest and the positional mapping reagent 3H-estradiol and pipet the mixture gently onto the surface of the ProtoArray® Protein Microarray. Note: Optimal probing concentration is influenced by the affinity of the tritium labeled small molecule for its protein target. Generally, the tritium labeled ligand should be probed at the highest achievable concentration due to the limited sensitivity of detection of the tritium signal. 3. Gently place a coverslip over the surface of the ProtoArray® Protein Microarray using forceps, taking care to avoid capturing bubbles. 4. Position the ProtoArray® Protein Microarray with coverslip within the conical tube with the printed side of the array facing up. Cap the tube. Place the tube on a flat surface such that the printed side of the array is facing up and the tube is as level as possible. If needed, tape the conical tube on the flat surface to avoid any accidental disturbances. 5. Incubate the array at 4C for 90 minutes without shaking. 6. Remove conical tube containing ProtoArray® Protein Microarrays from incubator and add 40 mL Tritium SMI Assay Buffer to the tube. 7. Incubate the array in buffer for 30 seconds at room temperature. The glass coverslip will float off. Do not remove the coverslip with forceps if it is not dislodged from the array. 8. Using forceps, carefully remove the dislodged coverslip without touching the array surface. Discard the coverslip appropriately as radioactive waste. 9. Decant the Tritium SMI Assay Buffer. Be sure to dispose of the radioactive waste properly. 10. Add 40 mL of fresh Tritium SMI Assay Buffer to the tube. Incubate the array for 30 seconds at room temperature. Decant buffer. Repeat wash step one more time. Be sure to dispose of the radioactive waste properly. 11. If Tritium SMI Assay Buffer with NaCl is used, complete one additional wash with Tritium SMI buffer lacking NaCl. 12. Proceed to Drying the Array. Continued on next page 77 Tritium Radiolabeled Small Molecule Interaction––Probing Procedure, Continued Drying the Array 1. Remove the array from the chamber at the end of the probing procedure. Tap one edge of the array gently on a laboratory wipe for a few seconds to drain any buffer. 2. Place each array in a slide holder (or a sterile 50 mL conical tube, if you do not have a slide holder). Ensure the array is properly placed and is secure in the holder to prevent any damage to the array during centrifugation. 3. Centrifuge the array in the slide holder or 50 mL conical tube at 200 × g for 1 minute in a centrifuge (equipped with a plate rotor, if you are using the slide holder) at room temperature. Verify the array is completely dry. 4. Using transparent tape, adhere the slides to an 8X10 ExeterTM Conservation Board (or thick filter paper of similar size). Only tape the top and bottom edges of the slide without covering any array area. The adhesion helps to prevent unwanted movement during the long exposure time and also helps to prevent the tritium from transferring on to the screen. Place ProtoArray® Protein Microarrays in X-ray film cassette and directly overlay with a tritium-sensitive phosphor screen. Note: The tritium-sensitive phosphor screen will eventually be damaged due to tritium contamination. Directly washing the screen with methanol can remove some contamination. However, for critical experiments, we recommend the use of a new screen or a screen which has been verified to be free of contaminants by pre-exposure in an empty cassette for several days followed by scanning and imaging. 5. Expose ProtoArray® Protein Microarrays to the phosphor screen for 16 days. Note: For best results, we recommend scanning the screen after a minimum of 16 days of exposure. However, tritium signals have been observed within 24 hours of exposure for some radioligands. 6. 78 Proceed to Image Acquisition and Processing next page. Image Acquisition and Processing Introduction Once you have exposed the ProtoArray® to the phosphor screen, scan the phosphor screen to acquire a TIFF image that is required for microarray data analysis. Materials Needed Imaging hardware A phosphorimager that provides at least 50 μM resolution to acquire the image from a phosphor screen (see page 129 for phosphorimagers that have been tested with ProtoArray® Microarrays) Data acquisition software We recommended GenePix® Pro v6 or later (Molecular Devices Corporation) or ScanArray® Acquisition Software (PerkinElmer, Inc.) as microarray data acquisition software for analysis of images. Scanning the Array Data Acquisition and Analysis For detailed instructions on scanning the microarray refer to Image Acquisition and Processing for Radioactive Assays (page 129). 1. Develop the phosphor screen according to the manufacturer’s recommendations. 2. Scan the phosphor screen on a phosphorimager to generate a 16-bit TIFF image file. 3. Process the image using ProtoArray® Prospector Imager. 4. Save the adjusted microarray image. For detailed instructions on Data Acquisition and Analysis refer to page 131. 1. Acquire an image (.tiff) from the phosphor screen. 2. Use the barcode information on the array to download the .GAL file from ProtoArray® Central as described on page 132. 3. Use the .GAL file and ProtoArray® Prospector to acquire pixel intensity values for all features on the array and analyze data to determine significant signals. Continued on next page 79 Image Acquisition and Processing, Continued ProtoArray® Prospector Results After data analysis, ProtoArray® Prospector presents a summary of the analyzed data in a table format (see ProtoArray® Prospector manual for details). The proteins that score as positive in the experiment are proteins that satisfy the basic program options. We recommend reproducing the results using ProtoArray® Technology or other methods as described below. The Next Step After identifying potential small molecule interactions on the ProtoArray® Human Microarray, you may reproduce the result using: The ProtoArray® Technology with additional arrays to ensure: Reproducibility: Probe the human array using a similar or a different small molecule concentration to address reproducibility. Specificity: Probe protein arrays with different radiolabeled small molecules to identify interactions specific to your small molecule probe of interest and also identify any non-specific interactions. In addition, competition assays may be performed to determine if the interactions can be competed by excess unlabeled small molecule. OR Interactions observed on the ProtoArray® Human Protein Microarray can be validated using solution-phase assays. 80 Expected Results for SMI - Radioactive Results obtained after probing the ProtoArray® Control Protein Microarray v5.0 with 3 H estradiol which binds to Estrogen Receptor alpha is shown below. Control Array Probing Results Image showing the Control Array when probed with 3H estradiol Control Array Image Boxed area shown in detail ER alpha ER alpha The following control features can be observed after probing a ProtoArray® Protein Microarray: Estrogen Receptor (ER) alpha Estrogen Receptor alpha is spotted twice on each subarray. The specific interaction between 3 H estradiol and ER alpha indicate that the probing procedure and scanning is performed properly, and are used for reference spots to orient the microarray image and help assign spot identities. To orient the results obtained from the .GAL file and ProtoArray® Prospector with the array image, position the microarray image such that the barcode is at the bottom of the image. In this orientation, the top left corner of the microarray image is Block 1. Continued on next page 81 Troubleshooting Introduction Problem Weak or no signal with your small molecule The table below provides some solutions to possible problems you may encounter when using the ProtoArray® Microarray for the SMI - Radioactive applications. Cause Solution Low specific activity of the small molecule Perform probing with higher small molecule concentration, higher small molecule specific activity, or increase the incubation time. Incorrect scanning or imaging For phosphor screen, acquire the image using a phosphorimager. Follow the manufacturer’s recommendations on using the scanner or phosphorimager to scan the array correctly. Be sure to use a scanner or phosphorimager that provides at least 50 μM resolution and generates 16-bit TIFF image files. Incorrect assay conditions Perform incubation of the array at 30C during the probing procedure. Use freshly prepared Tritium SMI Assay Buffer for best results. Poor incorporation of radiolabel Be sure to check the array using a Geiger counter to verify that the radioactive signal is obtained after the probing procedure. Small molecule specific Use another small molecule. substrates are not present on the array Poor spot resolution Incorrect phosphorimager used Be sure the phosphorimager is capable of providing at least 50 μM resolution. Improper handling of arrays Be sure to allow the mailers with arrays to equilibrate at 4C for at least 15 minutes prior to use. Improper covering of arrays Properly cover the array with a single layer of clear plastic wrap without any creases. Continued on next page 82 Troubleshooting, Continued Problem High background Cause Solution Improper blocking Prepare the Tritium SMI Assay Buffer fresh as described on page 74. Improper washing For the best results, perform the recommended washing steps using Tritium SMI Assay Buffer as outlined in the protocol. Array dried during probing or washing Do not allow the array to dry during probing or washing procedure. Ensure the coverslip completely covers the printed area of the array. During the incubation step at 30C, make sure the 50-mL conical tube is capped to minimize drying. During all wash steps, ensure the array is completely covered in buffers. Array not dried properly before scanning Dry the array as described before scanning. High small molecule concentration Decrease the small molecule concentration/specific activity or decrease the incubation time. Uneven background Uneven blocking or washing During the blocking or washing steps, ensure the array is completely immersed in buffers and use at least 40 mL buffer in the 50-mL conical tube to cover the array completely with buffer. Improper washing To obtain the best results, perform the recommended washing steps. Prepare Tritium SMI Assay Buffer fresh as described on page 74. Portions of array have dried Do not allow the array to dry during probing. Improper array handling Always wear gloves and avoid touching the surface of the array with gloved hands or forceps. Take care while inserting the array into the tube to avoid scratching the array surface. Reagents or buffer contains Centrifuge the reagents or buffer to remove precipitates precipitates prior to probing the array. Signals from duplicate spots are merged -- It is normal for signals from duplicate spots to merge sometimes. The merging of spots does not affect data analysis. 83 Ubiquitin Ligase Profiling Application Experimental Overview Experimental Steps The recommended experimental steps for probing ProtoArray® Human Protein Microarray with a ubiquitin ligase to identify interactors and/or substrates of E2/E3 ubiquitin ligase modifying enzymes are outlined below. Step Action Page no. ® 1 Block ProtoArray Human Protein Microarray with 5 mL Blocking Buffer. 90 2 Prepare ubiquitin ligase mixture(s) and incubate at 30oC for 5 minutes. 87 3 Probe ProtoArray® Human Protein Microarray with 100 μL ubiquitin ligase mixture. Optional: If you are a first time user of the ProtoArray® Human Protein Microarray, perform a control probing using a ProtoArray® Control Microarray to verify probing and detection protocols. 91 4 Dry the microarray. 91 5 Scan slide with fluorescence microarray scanner. 92 6 Download the protein array lot specific information (the .GAL file) from ProtoArray® Central Portal to acquire and analyze the data using ProtoArray® Prospector to identify potential substrates. 92 Continued on next page 84 Guidelines for Probing the ProtoArray® Microarray Human Protein Microarray Probing Options A number of options are available for probing the ProtoArray® Human Protein Microarray with your own buffers and detection reagents as described below. Review the information below, before proceeding with the probing procedure. Probing options can be performed individually, or in tandem, and include: Biotin Tagged Ubiquitin Probe Probing with your ubiquitination enzymes to detect novel interactions. Probing with only the detection reagent (negative control). The negative control allows you to determine signals specific to your probe. Probing with different probe concentrations to determine the optimal amount of probe for your assay. Start with an initial probe concentration. If the initial signal is strong with low background, confirm the initial results with a second array using the same experimental conditions. If the initial results indicate weak signal or an unacceptable signal-to-noise ratio, probe a second array with a different probe concentration. While it is possible to generate your own biotin-tagged probe, we recommend using LanthaScreen™ Biotin-Ubiquitin (Invitrogen, Cat. no. PV4379 or PV4380). Because the lysine residues are unmodified during the labeling process, these labeled ubiquitin reagents are readily incorporated into ubiquitin-protein conjugates and poly-ubiquitin chains. 85 Ubiquitin Ligase––Probing Procedure Introduction Probe the ProtoArray® Human Protein Microarray using your ubiquitination enzymes. Instructions are included in this section to probe the ProtoArray® Human Protein Microarray using buffer recipes provided in this manual (see pages 87-88) for buffer recipes). Experimental Outline Materials Needed 1. Block the ProtoArray® Human Protein Microarray. 2. Probe with your ubiquitin ligase mixture. 3. Perform detection using an appropriate detection system. 4. Dry the array for scanning. ProtoArray® Human or Control Protein Microarray (page 135) Biotin-Ubiquitin (Invitrogen, Cat. no. PV4379 or PV4380) Blocking Buffer and Assay Buffer (see pages 87-88) Ubiquitin ligase mixture in Assay Buffer (see next page) Energy Regeneration Solution (Boston Biochem, Cat. no. B-10) Streptavidin Alexa Fluor® 647 (2 mg/mL) (Invitrogen, Cat. no. S-32357) Ice bucket Deionized water Clean, covered 4-chamber incubation tray (Greiner Cat. no. 96077307), chilled on ice LifterSlip™ coverslips (Thermo Scientific, Cat. no. 25x60I-2-4789) Microarray slide holder and centrifuge equipped with a plate holder (Optional) Incubation Trays The microarray is placed in an incubation tray during the blocking and washing steps. To obtain the best results, all incubations of the ProtoArray® with various solutions are performed in a 4-chamber, covered incubation tray (Greiner, Cat. no. 96077307). Coverslips LifterSlip™ coverslips (Thermo Scientific, Cat. no. 25x60I-2-4789) hold a small reagent volume to minimize the amount of valuable probe used and prevent evaporation of reagents. If you are using any other coverslip, be sure the coverslip is able to completely cover the printed area (20 mm x 60 mm) of the glass slide and the coverslip is made of non-protein binding material. Untreated glass coverslips are not recommended. Continued on next page 86 Ubiquitin Ligase––Probing Procedure, Continued MEND ION AT RECOM Using Your Own Buffers Preparing Ubiquitin Ligase Mixture Follow the guidelines listed below for buffer preparation to obtain the best results with microarrays. The buffer recipes are listed below. Always use ultra pure water to prepare reagents and buffers You may use non-ionic detergents and reducing agents during probing to minimize non-specific interactions If the protein interaction requires certain co-factors, be sure to include the co-factors in the probing buffer during probing Prepare buffers fresh prior to use. Freshly prepared blocking buffer is best for blocking slides. Use the recipes described below to prepare your own buffers. Recommended buffers are listed below for blocking and washing the arrays. You can perform array probing using the recommended buffers and then based on your initial results optimize the buffer formulation. Ubiquitin Ligase Mixture To probe the microarray, you need ~100 μL of your ubiquitin ligase mixture with labeled ubiquitin for each array. We recommend the following concentrations as a starting point: 1. Add 0.1 mg/mL Biotin-Ubiquitin 2. Add ubiquitin conjugating enzymes 100 nM ubiquitin activating enzyme E1 10–100 nM ubiquitin conjugating enzyme E2 10–250 nM ubiquitin ligase enzyme E3 3. Add 1X Energy Regenerating Solution (Boston Biochem Cat. no. B-10) or 20 mM ATP in Assay Buffer. 4. Mix well (do not vortex) and store on ice until use. Preparing Streptavidin Solution Prepare 5 mL of Streptavidin-Alexa Fluor® 647 Conjugate in Assay Buffer at 1 μg/mL for each array to be probed. Preparing 0.5% SDS Prepare 15 mL of 0.5% SDS for each microarray. For 200 mL of 0.5% SDS prepare the following reagents fresh from 10% SDS as follows: 10% SDS Ultrapure water Total Volume 10 mL 190 mL 200 mL Mix well and store at room temperature until use. Continued on next page 87 Ubiquitin Ligase––Probing Procedure, Continued Preparing Blocking Buffer Blocking Buffer (final concentration) 50 mM HEPES, pH7.5 200 mM NaCl 0.08% Triton® X-100 25% Glycerol 20 mM Reduced glutathione 1 mM DTT 1% BSA 1. Prepare 5 mL of buffer for each microarray. For 100 mL Blocking Buffer prepare fresh reagents as follows: 1 M HEPES, pH7.5 5 mL 5 M NaCl 4 mL ® 10% Triton X-100 800 μL 50% Glycerol 50 mL Glutathione powder 2. 3. 4. 610 mg Adjust pH to 7.5 with NaOH. Add 100 μL of 1 M DTT and 1.67 mL of 30% BSA prior to use. Fill to 100 mL with deionized water. Mix well (do not vortex) and store on ice until use. Note: Do not store Blocking Buffer containing BSA for more than 24 hrs. Preparing Assay Buffer Assay Buffer (final concentration) 50 mM Tris-HCl, pH 7.5 50 mM NaCl 5 mM MgSO4 0.1% Tween 20 1 mM DTT 1% BSA 1. Prepare 50 ml of buffer for each microarray. For 1,000 mL Assay Buffer prepare fresh reagents as follows: 1 M Tris-HCl, pH 7.5 5 M NaCl 1 M MgSO4 50 mL 10 mL 5 mL 10% Tween 20 10 mL 2. Add 1 mL of 1 M DTT and 33.3 mL 30% BSA prior to use. 3. Fill to 1,000 mL with deionized water. Mix well (do not vortex) and store on ice until use. Continued on next page 88 Ubiquitin Ligase––Probing Procedure, Continued Before Starting Before starting the probing procedure, make sure you have all items on hand especially buffers (see page 88), probes, LifterSlip™ coverslips (see page 86) and incubation tray (see page 86). Make sure the buffers except are cold. Store buffers on ice until use. Place an incubation tray on ice to chill until use. Review Important Guidelines on page 11 prior to starting the probing procedure. We strongly recommend that you probe the ProtoArray® Human Protein Microarray with only Biotin-Ubiquitin and your detection reagent to detect signals resulting due to interactions between the detection reagent and proteins printed on the array. You may also want to probe an array in the absence of the E3 ligase. Due to the large variety of protein probes and detection systems that can be used for probing the ProtoArray® Human Protein Microarray, it is not possible to have a single probing protocol that is suitable for all proteins and detection systems. Use the probing procedure from this section as a starting protocol and based on your initial results, empirically determine the probing protocol by optimizing the probe concentration, buffer formulation, incubation time, or detection reagents. Optimization of probing protocol can be easily and rapidly achieved using multiple ProtoArray® Human Protein Microarrays. Important Blocking Step Instructions for blocking the microarray are described below: 1. Immediately place the mailer containing the ProtoArray® Human Protein Microarray v5.0 at 4C upon removal from storage at –20C and equilibrate the mailer at 4C for at least 15 minutes prior to use. 2. Place ProtoArray® Human Protein Microarrays with the barcode facing up in the bottom of a 4-chamber incubation tray such that the barcode end of the microarray is near the tray end containing an indented numeral (see figure 1a). The indent in the tray bottom is used as the site for buffer removal (see figure 1b, arrow). 3. 1a 1b Using a sterile pipette, add 5 mL Blocking Buffer into each chamber. Avoid pipetting buffer directly onto the array surface. Continued on next page 89 Ubiquitin Ligase––Probing Procedure, Continued Blocking Step, continued Instructions for blocking the microarray are described below: 4. Incubate the tray for 1 hour at 4ºC on a shaker set at 50 rpm (circular shaking). Use a shaker that keeps the arrays in one plane during rotation. Rocking shakers are not to be used because of increased risk of cross-well contamination. 5. Prepare 100 μL of ubiquitin ligase probe mixture (page 87) and incubate at 30C for 5 minutes. 6. After incubation, aspirate Blocking Buffer by vacuum or with a pipette. Position the tip of the aspirator or pipette into the indented numeral and aspirate the buffer from each well (see figure 2). Tilt the tray so that any remaining buffer accumulates at the end of the tray with the indented numeral. Aspirate the accumulated buffer. 2 Important: Do not position the tip or aspirate from the microarray surface as this can cause scratches. Immediately proceed to adding the next solution to prevent any part of the array surface from drying which may produce high or uneven background. 7. Probing the Array with Ubiquitin Ligase Mixture Proceed immediately to Probing the Array. 1. Pipet 5 mL of Assay Buffer (page 88) on top of the barcode without touching the array surface. 2. Incubate 3 minutes at 4C with gentle shaking (~50 rpm). 3. Remove the array from the 4-well tray by inserting the tip of the forceps into the indented numeral and gently prying the edges of the slide upward (see figure 3). Pick up the slide with a gloved hand taking care only to touch the slide only by its edges. Tap the slide on its side to remove excess fluid but avoid drying of the array. Place on a flat surface or benchtop. 3 4. Pipet 100 μL of ubiquitin ligase probe mixture onto the array dropwise. Make sure the pipette tip does not touch the surface of the array. Gently rock the slide about 15–30 seconds to spread the solution and then using forceps gently overlay the LifterSlip™ (white rails on the slip facing the array). Be careful to not trap bubbles during this step. If bubbles are observed, lift the slip with forceps and slowly lower the slip again. 5. Incubate for 90 minutes at 30C in a humidified chamber (or a sealed plastic bag with a wet paper towel), keeping the 4-well tray on a flat surface with the arrays facing up (no shaking). Continued on next page 90 Ubiquitin Ligase––Probing Procedure, Continued Probing the Array with Ubiquitin Ligase Mixture, continued 6. Add 5 mL Assay Buffer to incubation tray and incubate without agitation. After about a minute or so, the LifterSlip™ should float off of the ProtoArray® Human Protein Microarray Once this occurs, use the forceps to carefully remove the LifterSlip™. Discard the slip. Alternatively, remove the array and LifterSlip™ from the well and tilt the slide to allow the LifterSlip™to slip off the surface. Replace the array back into the incubation tray. 7. Remove Assay buffer by aspiration (see Figure 2). 8. Wash with 5 mL 0.5% SDS with gentle agitation for 5 minutes. Aspirate 0.5% SDS (see Figure 2). Repeat wash step two more times. 9. Wash with 5 mL Assay buffer with gentle agitation for 5 minutes. Aspirate Assay Buffer (see Figure 2). Repeat wash step one more time. 10. Add 5 mL streptavidin Alexa Fluor® 647 diluted in Assay Buffer at 1 μg/mL. Add streptavidin Alexa Fluor® 647 at the indented numeral end of the 4-well tray and allow the liquid to flow across the slide surface. To prevent local variations in fluorescence intensity and background, avoid direct contact with the slide. 11. Incubate for 45 minutes at at 4C with gentle shaking (~50 rpm). 12. Remove streptavidin Alexa Fluor® 647 solution by aspiration. 13. Wash with 5 mL Assay Buffer with gentle agitation for 5 minutes. Aspirate Assay Buffer. Repeat wash step four more times. 14. Remove the array from the 4-well tray using forceps. 15. Proceed to Drying the Array. Drying the Array 1. Remove the array from the 4-well tray using forceps. by inserting the tip of forceps into the indented numeral end and gently prying the array upward (see figure, previous page). Using a gloved hand, pick up the microarray by holding the array by its edges. 2. Place the array in a slide holder (or a sterile 50 mL conical tube, if you do not have a slide holder). Ensure the array is properly placed and is secure in the holder to prevent any damage to the array during centrifugation. Briefly dip the slide holder containing the arrays into room temperature distilled water three times to remove salts. If you are not using a slide holder, dip the array into a 50 mL conical tube filled with room temperature distilled water three times. 3. Centrifuge the array in the slide holder or 50 mL conical tube at 200 × g for 1 minute in a centrifuge (equipped with a plate rotor, if you are using the slide holder) at room temperature. Verify the array is completely dry. After slides have been probed and dried, they can be stored either vertically or horizontally. 4. After drying, store the arrays vertically or horizontally in a slide box protected from light. Avoid prolonged exposure to light as it will diminish signal intensities. To obtain the best results, scan the array within 24 hours of probing. 5. Proceed to Scanning and Data Analysis, next page. Continued on next page 91 Scanning and Data Analysis Introduction Once you have probed the ProtoArray® with your ligase probe, scan the microarray using a suitable microarray scanner. After scanning and saving an image of the array, download the protein array lot specific information from the ProtoArray® Central Portal. Use the lot specific information to acquire and analyze the data to identify specific ubiquitination targets. Materials Needed Imaging hardware A suitable scanner is required to scan the ProtoArray® Microarray. The scanner specifications are listed page 123. For a list of scanners to use with ProtoArray® Microarrays see page 124. Data acquisition software We recommended GenePix® Pro v6 or later (Molecular Devices Corporation) or ScanArray® Acquisition Software (PerkinElmer, Inc.) as microarray data acquisition software for analysis of images. Scanning the Array Data Acquisition and Analysis For detailed instructions on scanning the microarray refer to Scanning Arrays Using a Fluorescence Scanner (page 123). 1. Insert array into the fluorescence microarray scanner. 2. Adjust scanner settings. 3. Preview the microarray and adjust settings, if needed. 4. Scan the microarray. 5. Save image data. 6. Export and analyze results. For detailed instructions on Data Acquisition and Analysis refer to page 126. 1. To acquire data from the scanned image, use the barcode on the array to download the .GAL file from ProtoArray® Central as described on page 126. 2. Use the .GAL file and suitable microarray data acquisition software to acquire pixel intensity values for all features on the array. 3. Analyze data with ProtoArray® Prospector using the guidelines on page 128 to determine significant signals with the controls and your protein probe. Continued on next page 92 Scanning and Data Analysis, Continued Analyzing ProtoArray® Prospector Results After data analysis, ProtoArray® Prospector presents a summary of the analyzed data in a table format (see ProtoArray® Prospector manual for details). The proteins that score as positive in the experiment are proteins that satisfy the basic program options. Review the information on page 94, Expected Results, to help with data interpretation. We recommend validating the interactions as described below. The Next Step After identifying potential ubiquitin ligase substrates on the ProtoArray® Human Microarray, you may reproduce the result using: The ProtoArray® Technology with additional arrays to ensure: Reproducibility: Probe the human array using a similar or a different concentration of ubiquitination enzymes to address reproducibility. Specificity: Probe a human array with a different ubiquitin ligase or in the absence of the E3 ligase to identify substrates specific to your ubiquitin ligase of interest. OR Perform solution-based assays to assess ubiquitination of candidate substrates in vitro. Continued on next page 93 Expected Results for Ubiquitin Ligase Control Array Probing Results Results obtained after probing the ProtoArray® Control Protein Microarray v5.0 with ATP, Biotin-Ubiquitin, and purified E1 and E2 ubiquitination enzymes is shown below. Control Array probed with Mdm2 purified E1 and E2 ubiquitination enzymes and Streptavidin-Alexa Fluor® 647 Conjugate Array Image Boxed Area shown in detail Alexa Fluor® Ab Mdm2 Alexa Fluor® Ab Alexa Fluor® Ab Alexa Fluor® Ab The following control features can be observed after probing a ProtoArray® Protein Microarray: Alexa Fluor® Ab signal This is an antibody labeled with Alexa Fluor® 647. The fluorescent antibody signals indicate that the array has been properly scanned, and are used as reference spots to orient the microarray and help assign spot identities. Mdm2 signal In the presence of ATP, Biotin-Ubiquitin, and purified E1 and E2 ubiquitination enzymes, the Mdm2 substrate printed in each subarray is ubiquitinated. The signal is used to verify the probing procedure. To orient the results obtained from the .GAL file and ProtoArray® Prospector with the array image, position the microarray image such that the barcode is at the bottom of the image. In this orientation, the top left corner of the microarray image is Block 1. 94 Troubleshooting Introduction The table below provides some solutions to possible problems you might encounter when using the ProtoArray® Microarray for the Ubiquitin Ligase profiling application. Review the expected results section (page 94) to verify the probing, detection, and scanning procedures are performed correctly. Based on the initial results, you may need to optimize the probing and detection protocol by optimizing the probe concentration, buffer formulation, incubation time, or detection reagents. Problem Cause Solution Ubiquitination Array Results Weak or no signal with protein probe Epitope tag not present or not accessible Confirm the presence and accessibility of the tag by appropriate assay. Poor biotinylation of protein Make sure the small molecule is in a buffer that does not contain any primary amines such as probe ammonium ions, Tris, glutathione, imidazole, or glycine. Make sure the biotinylation reaction was performed correctly using the specified molar ratios and at pH ~8.0. Check that the calculations and serial dilutions are performed correctly. Low probe concentration Perform probing with higher probe concentration or increase the incubation time. Incorrect probing procedure Follow the recommended protocols for probing on page 90. Be sure all incubations are performed at 4C. Prepare the Assay Buffer fresh as described on page 88. Do not allow the array to dry during the probing procedure. Avoid prolonged exposure of detection reagents labeled with a fluorescent dye to light. Incorrect scanning or imaging Scan the array at suitable wavelength for the detection system used and place the array in the slide holder such that the proteins on the array are facing the laser source. Decrease stringency Decrease the number of washes. Perform probing and washing in the absence or lower concentration of detergent or salts. Continued on next page 95 Troubleshooting, Continued Problem Cause Solution Ubiquitination Array Results High background Uneven background Improper blocking Prepare the Blocking Buffer fresh as described on page 88. Improper washing To obtain the best results, perform the recommended washing steps. Prepare 0.5% SDS solution fresh as described on page 87. Array dried during probing Do not allow the array to dry during probing. Array not dried properly before scanning Dry the array as described on page 91 before scanning. High probe concentration Decrease the probe concentration or decrease the incubation time. Uneven blocking or washing During the blocking or washing steps, ensure the array is completely immersed in Blocking Buffer or Assay Buffer, and use at least 5 mL buffer in the incubation tray to cover the array completely with buffer. Improper washing To obtain the best results, perform the recommended washing steps. Prepare 0.5% SDS solution fresh as described on page 87. Portions of array have dried Do not allow the array to dry during probing. Improper array handling Always wear gloves and avoid touching the surface of the array with gloved hands or forceps. Take care while inserting the array into the Incubation tray to avoid scratching the array surface. Protein probe not applied properly Apply the probe solution and LifterSlip™ or equivalent coverslip to the array as described in the manual. To avoid drying of the array surface, make sure the coverslip covers the printed area of the array and adjust the coverslip, if needed. Probe or detection reagents contain precipitates Centrifuge the probe or detection reagents to remove precipitates prior to probing the array. Continued on next page 96 Immune Response Biomarker Profiling (IRBP) Application Experimental Overview Experimental Outline Experimental Workflow The experimental outline for performing IRBP application using the ProtoArray® Human Protein Microarray with serum samples is shown below. Step Action Page no. 1 Block the ProtoArray® Human Protein Microarray 102 2 Probe the ProtoArray® Human Protein Microarray with the diluted serum sample and perform detection using a suitable detection system. Optional: If you are a first time user of the ProtoArray® Human Protein Microarray, perform a control probing using a ProtoArray® Control Microarray to verify probing and detection protocols. 103 3 Dry the microarray. 104 4 Scan the microarray using a suitable microarray scanner and save an image of the array. 105 5 Download the protein array lot specific information (the .GAL file) from ProtoArray® Central Portal to acquire and analyze the data using ProtoArray® Prospector to identify significant protein-protein interactions. 105 The experimental workflow for IRBP application is described below. Dilute Serum Sample Probe Human Array with Diluted Serum Sample Scan Array and Acquire Array Image Analyze Results Using ProtoArray® Prospector 97 Guidelines for Probing the ProtoArray® Microarray Human Protein Microarray Probing Options A number of options are available for probing the ProtoArray® Human Protein Microarray with your own buffers and detection reagents as described below. Review the information below, before proceeding with the probing procedure. Probing options can be performed individually, or in tandem, and include: 98 Probing with your serum or plasma probe to detect novel interactions. Probing with only the detection reagent (negative control). The negative control allows you to determine signals specific to your probe. Probing with different serum or plasma concentrations to determine the optimal amount of sample for your assay. Start with an initial sample concentration. If the initial signal is strong with low background, confirm the initial results with a second array using the same experimental conditions. If the initial results indicate weak signal or an unacceptable signal-to-noise ratio, probe a second array with a different serum or plasma concentration. Immune Response Biomarker Profiling—Probing Procedure Introduction Instructions are included in this section for probing the ProtoArray® Human Protein Microarray for IRBP using your diluted serum or plasma sample. Follow the guidelines provided in this section. Important Experimental Outline Materials Needed Use the probing procedure from this section as a starting protocol. Based on your initial results, you may need to optimize the probing protocol by varying serum or plasma concentrations. 1. Block the ProtoArray® Human Protein Microarray with Blocking Buffer. 2. Probe the array with diluted (1:500) human serum or plasma. 3. Perform detection using Alexa Fluor® 647 goat anti-human IgG. 4. Dry the array for scanning. 5. Scan the array with a fluorescence microarray scanner to obtain an array image. 6. Download the protein array lot specific information from ProtoArray® Central portal and acquire the image data using microarray data acquisition software. 7. Analyze results using ProtoArray® Prospector data analysis software available from www.invitrogen.com/protoarray. ProtoArray® Human Protein Microarray v5.0 Human serum or plasma sample (dilute the sample 1:500 in Washing Buffer, store on ice until use) Blocking Buffer and Washing Buffer (see page 101 for recipes) 10X Synthetic Block (see page 135) Alexa Fluor® 647 Goat Anti-Human IgG (Invitrogen Cat. no. A21445) Clean, covered 4-chamber incubation tray (Greiner Cat. no 96077307), chilled on ice Forceps and deionized water Shaker (capable of circular shaking at 50 rpm, place the shaker at 4ºC) Microarray slide holder and centrifuge equipped with a plate holder (Optional) Continued on next page 99 Immune Response Biomarker Profiling—Probing Procedure, Continued Sample Preparation The IRBP application has been optimized for use with human serum and plasma samples (fresh or frozen). Avoid repeated freeze-thaw cycles with samples. Prior to use, process the sample to remove any aggregates by centrifugation (12,000 × g for 30 seconds on a microcentrifuge), if necessary. We recommend using a 1:500 dilution of the serum or plasma sample in Washing Buffer to maximize signals while minimizing false positive and false negative results. Based on your initial results, you may need to optimize the sample dilution to obtain optimal performance. Incubation Trays To obtain the best results, all incubations of the ProtoArray® with various solutions are performed in a 4-chamber, covered incubation tray (Greiner, Cat. no. 96077307). Do not use LifterSlip™ or any other coverslip for the IRBP application. Using Your Own Buffers Follow the guidelines listed below for buffer preparation to obtain the best results with microarrays. The buffer recipes are listed on the next page. Always use ultra pure water to prepare reagents and buffers You may use non-ionic detergents and reducing agents during probing to minimize non-specific interactions Continued on next page 100 Immune Response Biomarker Profiling—Probing Procedure, Continued Preparing Blocking Buffer Blocking Buffer (use 5 mL buffer per microarray) 50 mM HEPES, pH 7.5 200 mM NaCl 0.08% Triton® X-100 25% Glycerol 20 mM Reduced glutathione 1X Synthetic Block 1 mM DTT 1. Prepare 100 mL Blocking Buffer fresh as follows: 1 M HEPES, pH 7.5 5 M NaCl 4 mL 10% Triton® X-100 800 μL 50% Glycerol 50 mL Reduced glutathione 10X Synthetic Block Deionized water Preparing Washing Buffer 5 mL 610 mg 10 mL to 100 mL 2. Mix reagents, adjust pH to 7.5 with NaOH and add 100 μL of 1 M DTT prior to use. 3. Use buffer immediately and store any remaining buffer at 4ºC for <24 hours. Washing Buffer (use 60 mL buffer per microarray) 1X PBS 0.1% Tween 20 1X Synthetic Block 1. Prepare 1,000 mL Washing Buffer fresh as follows: 10X PBS 10% Tween 20 10X Synthetic Block Deionized water 100 mL 10 mL 100 mL to 1,000 mL 2. Mix reagents and cool to 4°C. 3. Use buffer immediately. Remaining buffer can be stored at 4ºC for <24 hours. 101 Immune Response Biomarker Profiling—Probing Procedure, Continued Before Starting Blocking Step Before starting the probing procedure, make sure you have all items on hand especially buffers (see page 101), serum or plasma sample diluted in Washing Buffer, and incubation tray (see page 100). Make sure the buffers are cold and stored on ice until use. Place an incubation tray on ice to chill until use. Review Important Guidelines on page 11 prior to starting the probing procedure. Instructions for blocking the microarray are described below: 1. Immediately place the mailer containing the ProtoArray® Human Protein Microarray v5.0 at 4C upon removal from storage at –20C and equilibrate the mailer at 4C for at least 15 minutes prior to use. 2. Place ProtoArray® Human Protein Microarrays with the barcode facing up in the bottom of a 4-chamber incubation tray such that the barcode end of the microarray is near the tray end containing an indented numeral (see figure 1a). The indent in the tray bottom is used as the site for buffer removal (see figure 1b, arrow). 1a 1b 3. Using a sterile pipette, add 5 mL Blocking Buffer into each chamber. Avoid pipetting buffer directly onto the array surface. 4. Incubate the tray for 1 hour at 4ºC on a shaker set at 50 rpm (circular shaking). 5. After incubation, aspirate Blocking Buffer by vacuum or with a pipette. Position the tip of the aspirator or pipette into the indented numeral and aspirate the buffer from each well (see figure 2). Tilt the tray so that any remaining buffer accumulates at the end of the tray with the indented numeral. Aspirate the accumulated buffer. 2 Important: Do not position the tip or aspirate from the microarray surface as this can cause scratches. Immediately proceed to adding the next solution to prevent any part of the array surface from drying which may produce high or uneven background. 6. Proceed immediately to Probing the Array. Continued on next page 102 Immune Response Biomarker Profiling—Probing Procedure, Continued Probing the Array 1. Add 5 mL Washing Buffer at the indented numeral end of the 4-chamber incubation tray without touching the array surface. Incubate the tray for 5 minutes at 4ºC on a shaker set at 50 rpm (circular shaking). 2. Aspirate the buffer using vacuum or pipette as described on the previous page (Step 5). 3. Add 5 mL serum or plasma diluted (1:500) in Washing Buffer at the indented numeral end of the 4-chamber incubation tray without touching the array surface. Allow the sample to flow across the array surface. Avoid pipetting sample directly onto the array surface. 4. Incubate the tray for 90 minutes at 4ºC on a shaker set at 50 rpm (circular shaking). Aspirate the sample using vacuum or pipette as described on the previous page (Step 5). Wash each array with 5 mL Washing Buffer with gentle shaking on a shaker set at 50 rpm for 5 minutes at room temperature. Aspirate the Washing Buffer as described on the previous page (Step 5). Repeat Step 6 four more times using fresh Washing Buffer each time to obtain a total of 5 wash steps. During the wash steps, mix 2.5 μL Alexa Fluor® 647 goat anti-human IgG antibody with 5 mL Washing Buffer per array to obtain a final antibody concentration of 1 μg/mL. Store on ice until use. Optional: add Alexa Fluor® 647-labeled anti-V5 antibody diluted in Washing Buffer to 0.1 μg/mL. Signals from the V5 Control Protein gradient printed in each subarray can be used for sample-independent (external) normalization of the IRBP data using the ProtoArray® Prospector software (see ProtoArray® Prospector manual for details). Add 5 mL Alexa Fluor® 647 antibody solution from Step 8 to the incubation tray at the indented numeral end of the tray without touching the array surface. Allow the solution to flow across the array surface. Avoid pipetting solution directly onto the array surface. 5. 6. 7. 8. 9. 10. Incubate the tray for 90 minutes at 4ºC on a shaker set at 50 rpm (circular shaking). 11. Aspirate the antibody solution as described on the previous page (Step 5). 12. Wash each array with 5 mL Washing Buffer with gentle shaking on a shaker set at 50 rpm for 5 minutes at room temperature. Aspirate the Washing Buffer as described on the previous page (Step 5). 13. Repeat Step 12 four more times using fresh Washing Buffer each time to obtain a total of 5 wash steps. 14. Proceed immediately to Drying the Array. Continued on next page 103 Immune Response Biomarker Profiling—Probing Procedure, Continued Drying the Array 104 1. To remove the array from the 4-chamber incubation tray, insert the tip of forceps into the indented numeral end and gently pry the array upward (see figure below). Using a gloved hand, pick up the microarray by holding the array by its edges. 2. Place the array in a slide holder (or a sterile 50 mL conical tube, if you do not have a slide holder). Ensure the array is properly placed and is secure in the holder to prevent any damage to the array during centrifugation. Briefly dip the slide holder containing the arrays into room temperature distilled water three times to remove salts. If you are not using a slide holder, dip the array into a 50 mL conical tube filled with room temperature distilled water three times. 3. Centrifuge the array in the slide holder or 50 mL conical tube at 200 × g for 1 minute in a centrifuge (equipped with a plate rotor, if you are using the slide holder) at room temperature. Verify the array is completely dry. 4. After drying, store the arrays vertically or horizontally in a slide box protected from light. Avoid prolonged exposure to light. To obtain the best results, scan the array within 24 hours of probing. 5. Proceed to Scanning and Data Analysis, next page. Scanning and Data Analysis Introduction Once you have probed the ProtoArray® with your serum or plasma sample, scan the microarray using a suitable microarray scanner. Instructions are included in this section to scan the microarray using a fluorescence microarray scanner. Materials Needed Imaging hardware A suitable scanner is required to scan the ProtoArray® Microarray. The scanner specifications are listed page 123. For a list of scanners to use with ProtoArray® Microarrays see page 124. Data acquisition software We recommended GenePix® Pro v6 or later (Molecular Devices Corporation) or ScanArray® Acquisition Software (PerkinElmer, Inc.) as microarray data acquisition software for analysis of images. Scanning the Array Data Acquisition and Analysis For detailed instructions on scanning the microarray refer to Scanning Arrays Using a Fluorescence Scanner (page 123). 1. Insert array into the fluorescence microarray scanner. 2. Adjust scanner settings. 3. Preview the microarray and adjust settings, if needed. 4. Scan the microarray. 5. Save image data. 6. Export and analyze results. For detailed instructions on Data Acquisition and Analysis refer to page 126. 1. To acquire data from the scanned image, use the barcode on the array to download the .GAL file from ProtoArray® Central as described on page 126. 2. Use the .GAL file and suitable microarray data acquisition software to acquire pixel intensity values for all features on the array. 3. Analyze data with ProtoArray® Prospector using the guidelines on page 128 to determine significant signals with the controls and your protein probe. Note: Set the Application in ProtoArray® Prospector to Immune Response Profiling for serum samples, or to Immune Response Profiling with Plasma for plasma samples. ProtoArray® Prospector Results After data analysis, ProtoArray® Prospector presents a summary of the analyzed data in a table format (see ProtoArray® Prospector manual for details). The proteins that score as positive in the experiment are proteins that satisfy the basic program options. We recommend that candidate biomarkers be validated in a follow-on experiment using ProtoArray® or other methods. There are several appropriate assay formats including ELISA, Luminex, and immunoblotting. Continued on next page 105 Expected Results for IRBP Introduction The controls printed on the ProtoArray® Human Protein Microarray are useful in verifying the probing, detection, and scanning protocols as described below. Control ProtoArray® v5.0 Probing Results The results obtained after probing the ProtoArray® Control Protein Microarray v5.0 for IRBP with 1:500 diluted human serum and Alexa Fluor® 647 goat antihuman IgG antibody are shown below. Human Array Image Boxed Area shown in detail Human IgG Alexa Fluor® Ab Alexa Fluor® Ab Alexa Fluor® Ab Anti-human IgG Alexa Fluor® Ab V5 Control Protein The following control features can be observed after probing a ProtoArray® Protein Microarray: Alexa Fluor® Ab signal This is an antibody labeled with Alexa Fluor® 647. The fluorescent antibody signals indicate that the array has been properly scanned, and are used as reference spots to orient the microarray and help assign spot identities. Human IgG Signal A protein gradient of purified human IgG is printed on each subarray and serves as a positive control when anti-human IgG is used for detection. The Human IgG signals are used to verify proper probing and detection reagents. Anti-human IgG Signal A protein gradient of goat anti-human IgG is printed on each subarray. The IgG from human serum binds to the anti-human IgG on the array and is used to verify proper probing and detection reagents. 106 Troubleshooting Introduction The table below provides some solutions to possible problems you may encounter when using the ProtoArray® Human Protein Microarray for IRBP. Review the expected results section (page 106) to verify the probing, detection, and scanning procedures are performed correctly. Problem Cause Solution Weak or no signal with serum sample Low serum concentration Perform probing with higher serum concentration or increase the incubation time. Incorrect probing procedure Follow the recommended protocol for probing. Be sure all incubations are performed at 4C. Prepare the Blocking Buffer and Washing Buffer fresh as described on page 101. Avoid prolonged exposure of detection reagents labeled with fluorescent dye to light. High background Incorrect scanning or imaging Scan the array at suitable wavelength for the detection system used and place the array in the slide holder such that the proteins on the array are facing the laser source. Decrease stringency Decrease the number of washes. Perform probing and washing in the absence or lower concentration of detergent or salts. Improper blocking Prepare the Blocking Buffer fresh as described on page 101. Improper washing To obtain the best results, perform the recommended washing steps. Prepare the Washing Buffer fresh as described on page 101. Array dried during probing Do not allow the array to dry during probing. Array not dried properly before scanning Dry the array before scanning. High serum concentration Decrease the serum concentration or decrease the incubation time. Antibody cross-reactivity Probe a protein array using only the secondary antibody without the serum sample to detect cross-reactivity with the antibody only. Continued on next page 107 Troubleshooting, Continued Problem Cause Solution Uneven background Uneven blocking or washing During the blocking or washing steps, ensure the array is completely immersed in blocking solution or Washing Buffer and use 5 mL buffer in the each chamber of the Incubation Tray to cover the array completely with buffer. Improper washing To obtain the best results, perform the recommended washing steps. Prepare the Washing Buffer fresh as described on page 101. Portions of array have dried Do not allow the array to dry during probing. Improper array handling Always wear gloves and avoid touching the surface of the array with gloved hands or forceps. Take care while inserting or removing the array from the Incubation Tray to avoid scratching the array surface. Serum sample or detection Centrifuge the serum sample or detection reagents contain precipitates reagents to remove precipitates prior to probing the array. 108 Antibody Specificity Profiling Application Experimental Overview Experimental Steps The experimental outline for performing antibody specificity profiling service application using the ProtoArray® Human Protein Microarray with untagged antibodies and detecting interactions with Alexa Fluor® 647-labeled secondary antibody is shown below. Step Action Page no. ® 1 Block ProtoArray Protein Microarray with 5 mL Blocking Buffer. 115 2 Probe with 120 μL primary antibody diluted in Washing Buffer with no agitation. Optional: If you are a first time user of the ProtoArray® Human Protein Microarray, perform a control probing using a ProtoArray® Control Microarray to verify probing and detection protocols. 116 3 Dry the microarray. 117 4 Scan slide with fluorescence microarray scanner. 118 5 Download the protein array lot specific information (.GAL file) from ProtoArray® Central Portal to acquire and analyze the data using ProtoArray® Prospector to validate antibody specificity. 118 Continued on next page 109 Guidelines for Probing the ProtoArray® Microarray Human Protein Microarray Probing Options A number of options are available for probing the ProtoArray® Human Protein Microarray with your own buffers and detection reagents as described below. Review the information below, before proceeding with the probing procedure. Probing options can be performed individually, or in tandem, and include: 110 Probing with your antibody probe to detect novel interactions. Probing with only the detection reagent (negative control). The negative control allows you to determine signals specific to your probe. Probing with different antibody concentrations to determine the optimal amount of antibody for your assay. Start with an initial antibody concentration. If the initial signal is strong with low background, confirm the initial results with a second array using the same experimental conditions. If the initial results indicate weak signal or an unacceptable signal-to-noise ratio, probe a second array with a different antibody concentration. Antibody Specificity Profiling Application––Probing Procedure Introduction Instructions are included in this section to probe the ProtoArray® Human Protein Microarray using an unlabeled primary antibody, followed by an Alexa Fluor® 647 labeled secondary antibody. If you are preparing your own buffers, see page 113 for buffer recipes. Experimental Outline 1. Block the ProtoArray® Human Protein Microarray. 2. Probe with your primary antibody. 3. Perform detection using Alexa Fluor® 647 labeled secondary antibody. 4. Dry the array for scanning. ProtoArray® Human or Control Protein Microarray v5.0 (page 135) Blocking Buffer and Washing Buffer (see page 113) 10X Synthtic Block (page 135) Primary antibody diluted in Washing Buffer (see page 113) Appropriate -Alexa Fluor® 647 conjugated secondary antibody (page 135); keep on ice in dark until immediately before use Ice bucket Forceps and deionized water Clean, covered 4-chamber incubation tray (Greiner Cat. no. 96077307), chilled on ice LifterSlip™ coverslips (Thermo Scientific, Cat. no. 25x60I-2-4789) Shaker (capable of circular shaking at 50 rpm, place the shaker at 4ºC) Microarray slide holder and centrifuge equipped with a plate holder (Optional) Materials Needed Incubation Trays The microarray is placed in an incubation tray during the blocking and washing steps. To obtain the best results, all incubations of the ProtoArray® with various solutions are performed in a 4-chamber, covered incubation tray (Greiner, Cat. no. 96077307). Coverslips LifterSlip™ coverslips (Thermo Scientific, Cat. no. 25X60I-2-4789) hold a small reagent volume to minimize the amount of valuable probe used and prevent evaporation of reagents. If you are using any other coverslip, be sure the coverslip is able to completely cover the printed area (20 mm x 60 mm) of the glass slide and the coverslip is made of non-protein binding material. Untreated glass coverslips are not recommended. Continued on next page 111 Antibody Specificity Profiling Application––Probing Procedure, Continued MEND ION AT RECOM Using Your Own Buffers Antibody Concentration Follow the guidelines listed below for buffer preparation to obtain the best results with microarrays. The buffer recipes are listed on the next page. Always use ultra pure water to prepare reagents and buffers You may use non-ionic detergents and reducing agents during probing to minimize non-specific interactions If the protein interaction requires certain co-factors, be sure to include the co-factors in the probing buffer during probing Prepare the Blocking Buffer and Washing Buffer fresh prior to use. Use the recipes described below to prepare your own buffers. Recommended buffers are listed below for blocking and washing the arrays. You can perform array probing using the recommended buffers and then based on your initial results optimize the buffer formulation. The recommended primary antibody concentration range for probing each array is 0.1–10 μg/mL. Dilute concentrated antibody in Washing Buffer. Secondary Alexa Fluor® 647 conjugates should be diluted to 1 μg/mL in Washing Buffer. Continued on next page 112 Antibody Specificity Profiling Application––Probing Procedure, Continued Preparing Blocking Buffer Blocking Buffer* (final concentration) 50mM HEPES pH 7.5 200 mM NaCl 0.08% Triton® X-100 25% Glycerol 20 mM Reduced Glutathione 1 mM DTT 1X Synthetic Block 1. Prepare 5 mL of buffer for each microarray. For 100 mL Blocking Buffer prepare fresh reagents as follows: 1 M HEPES pH 7.5 5 mL 5 M NaCl 4 mL ® 10% Triton X-100 800 μL 50% Glycerol 50 mL Glutathione Powder 610 mg 10X Synthetic Block 10 mL 2. Adjust pH to 7.5 with NaOH. 3. Add 100 μL of 1 M DTT 4. Add water to 100 mL. Mix well (do not vortex) and store on ice until use. * Blocking Buffer without Synthetic Block and DTT may be prepared the day before the assay. Store stock at 4°C for no more than 24 hours. Preparing Washing Buffer Washing Buffer (final concentration) 1X PBS 1X Synthetic Block 0.1% Tween 20 1. Prepare 60 mL of buffer for each microarray. For 1,000 mL Washing Buffer prepare fresh reagents as follows: 10X PBS 10X Synthetic Block 10% Tween 20 Deionized water 2. 100 mL 100 mL 10 mL to 1,000 mL Mix well (do not vortex) and store on ice until use. Continued on next page 113 Antibody Specificity Profiling Application––Probing Procedure, Continued Before Starting Before starting the probing procedure, make sure you have all items on hand especially buffers (see pages 113), antibodies in Washing Buffer, LifterSlip™ coverslips (see page 111) and incubation tray (see page 111). Make sure the buffers are cold. Store buffers on ice until use. Place an incubation tray on ice to chill until use. Review Important Guidelines on page 11 prior to starting the probing procedure. We strongly recommend that you probe the ProtoArray® Human Protein Microarray with only your detection reagent to detect signals resulting due to interactions between the detection reagent and proteins printed on the array. Due to the large variety of protein probes and detection systems that can be used for probing the ProtoArray® Human Protein Microarray, it is not possible to have a single probing protocol that is suitable for all proteins and detection systems. Use the probing procedure from this section as a starting protocol and based on your initial results, empirically determine the probing protocol by optimizing the probe concentration, buffer formulation, incubation time, or detection reagents. Optimization of probing protocol can be easily and rapidly achieved using multiple ProtoArray® Human Protein Microarrays. When performing fluorescence detection, it is important to avoid exposing the array to light after probing with a fluorescent detection reagent. Important If performing direct labeling, always verify that labeling does not affect the binding affinity of the antibody. Although Alexa Fluor® 555 or Cy3™ dyes can be used for detection, using them may result in higher background signals. Continued on next page 114 Antibody Specificity Profiling Application––Probing Procedure, Continued Blocking Step Instructions for blocking the microarray are described below: 1. Immediately place the mailer containing the ProtoArray® Human Protein Microarray v5.0 at 4C upon removal from storage at –20C and equilibrate the mailer at 4C for at least 15 minutes prior to use. 2. Place ProtoArray® Human Protein Microarrays with the barcode facing up in the bottom of a 4-chamber incubation tray such that the barcode end of the microarray is near the tray end containing an indented numeral (see figure 1a). The indent in the tray bottom is used as the site for buffer removal (see figure 1b, arrow). 1a 1b 3. Using a sterile pipette, add 5 mL Blocking Buffer into each chamber. Avoid pipetting buffer directly onto the array surface. 4. Incubate the tray for 1 hour at 4ºC on a shaker set at 50 rpm (circular shaking). Use a shaker that keeps the arrays in one plane during rotation. Rocking shakers are not to be used because of increased risk of cross-well contamination. 5. After incubation, aspirate Blocking Buffer by vacuum or with a pipette. Position the tip of the aspirator or pipette into the indented numeral and aspirate the buffer from each well (see figure 2). Tilt the tray so that any remaining buffer accumulates at the end of the tray with the indented numeral. Aspirate the accumulated buffer. 2 Important: Do not position the tip or aspirate from the microarray surface as this can cause scratches. Immediately proceed to adding the next solution to prevent any part of the array surface from drying which may produce high or uneven background. 6. Proceed immediately to Probing the Array. 115 Antibody Specificity Profiling Application––Probing Procedure, Continued Probing the Array 1. Pipette 120 μL of primary antibody diluted in Washing Buffer (page 113) on top of the array without touching the array surface with the pipette tip. The liquid quickly spreads over the nitrocellulose coating. 2. Carefully lay the LifterSlip™ on the array to cover the printed area without trapping any air bubbles. The white raised edges of the lifter slip should face the array. Gently adjust the LifterSlip™ to remove any air bubbles. Do not allow any part of the array surface to dry before adding the next solution as it will cause high and/or uneven background. 3. Incubate the array in the tube for 90 minutes at 4°C without shaking. 4. Wash with 5 mL Washing Buffer for 5 minutes using gentle agitation (~50 rpm). Carefully remove the LifterSlip™ with forceps without touching the array surface. Discard the LifterSlip™. Remove Washing Buffer by aspiration (see Blocking Step). 5. Repeat wash steps 4 more times. 6. Add 5 mL secondary antibody diluted in Washing Buffer to the indentation at the numbered end of the incubation tray and allow the liquid to flow across the slide surface. To avoid local variations in fluorescence intensity and background, avoid direct contact with the array. Do not pour the antibody solution directly on the slide. 7. Incubate the array in the tube for 90 minutes at 4°C with gentle circular shaking (~50 rpm). 8. Remove secondary antibody by aspiration (See Blocking Step). 9. Wash with 5 mL Washing Buffer for 5 minutes using gentle agitation (~50 rpm). Remove Washing Buffer by aspiration (see Blocking Step). Repeat wash four more times. 10. Proceed to Drying the Array. Continued on next page 116 Antibody Specificity Profiling Application––Probing Procedure, Continued Drying the Array 1. Remove the array from the 4-well tray by inserting the tip of the forceps into the indented numeral and gently prying the edges of the slide upward (see figure below). Pick up the slide with a gloved hand taking care only to touch the slide only by its edges. Tap the slide on its side to remove excess fluid but avoid drying of the array. Place on a flat surface or benchtop. 2. Place the array in a slide holder (or a sterile 50 mL conical tube, if you do not have a slide holder). Ensure the array is properly placed and is secure in the holder to prevent any damage to the array during centrifugation. Briefly dip the slide holder containing the arrays into room temperature distilled water three times to remove salts. If you are not using a slide holder, dip the array into a 50 mL conical tube filled with room temperature distilled water three times. 3. Centrifuge the array in the slide holder or 50 mL conical tube at 200 × g for 1 minute in a centrifuge (equipped with a plate rotor, if you are using the slide holder) at room temperature. Verify the array is completely dry. After slides have been probed and dried, they can be stored either vertically or horizontally. 4. After drying, store the arrays vertically or horizontally in a slide box protected from light. Avoid prolonged exposure to light as it will diminish signal intensities. To obtain the best results, scan the array within 24 hours of probing. 5. Proceed to Scanning Arrays, next page. 117 Scanning and Data Analysis Introduction Once you have probed the ProtoArray® with your antibody, scan the microarray using a suitable microarray scanner. After scanning and saving an image of the array, download the protein array lot specific information from the ProtoArray® Central Portal. Use the lot specific information to acquire and analyze the data to identify specific antigen targets. Materials Needed Imaging hardware A suitable scanner is required to scan the ProtoArray® Microarray. The scanner specifications are listed page 123. For a list of scanners to use with ProtoArray® Microarrays see page 124. Data acquisition software We recommended GenePix® Pro v6 or later (Molecular Devices Corporation) or ScanArray® Acquisition Software (PerkinElmer, Inc.) as microarray data acquisition software for analysis of images. Scanning the Array Data Acquisition and Analysis For detailed instructions on scanning the microarray refer to Scanning Arrays Using a Fluorescence Scanner (page 123). 1. Insert array into the fluorescence microarray scanner. 2. Adjust scanner settings. 3. Preview the microarray and adjust settings, if needed. 4. Scan the microarray. 5. Save image data. 6. Export and analyze results. For detailed instructions on Data Acquisition and Analysis refer to page 126. 1. To acquire data from the scanned image, use the barcode on the array to download the .GAL file from ProtoArray® Central as described on page 126. 2. Use the .GAL file and suitable microarray data acquisition software to acquire pixel intensity values for all features on the array. 3. Analyze data with ProtoArray® Prospector using the guidelines on page 128 to determine significant signals with the controls and your protein probe. Continued on next page 118 Scanning and Data Analysis, Continued Analyzing ProtoArray® Prospector Results After data analysis, ProtoArray® Prospector presents a summary of the analyzed data in a table format (see ProtoArray® Prospector manual for details). The antibodies that score as positive in the experiment are proteins that satisfy the basic program options. Review the information on page 120, Expected Results, to help with data interpretation. We recommend validating the interactions as described below. The Next Step After identifying a positive interaction on the ProtoArray® Human Protein Microarray, you may validate the protein interaction using the ProtoArray® Technology or other methods. Using the ProtoArray® Technology, validate the antibody-protein interactions by performing experiments with additional arrays to ensure: Reproducibility: Probe protein arrays using a similar or a different probe concentration to observe similar interactions. Specificity: Probe protein arrays with the detection reagent used to visualize the interactions and also different antibodies to identify interactions specific to your antibody of interest and also identify any non-specific interactions. There are several additional appropriate assay formats for validation of antibody-protein interactions including ELISA, Luminex, and immunoblotting. Continued on next page 119 Expected Results for Antibody Specificity Profiling Applicaton Control Array Probing Results Results obtained after probing the ProtoArray® Control Protein Microarray v5.0 with a rabbit anti-PKCeta antibody followed by detection with Alexa Fluor® 647 labeled secondary antibody is shown below. Control Array with rabbit anti-PKCeta antibody and Alexa Fluor® 647 anti-rabbit IgG Array Image Boxed Area shown in detail Alexa Fluor® Ab PKCeta Alexa Fluor® Ab Alexa Fluor® Ab PKCeta Alexa Fluor® Ab The following control features can be observed after probing a ProtoArray® Protein Microarray: Alexa Fluor® Ab signal This is an antibody labeled with Alexa Fluor® 647. The fluorescent antibody signals indicate that the array has been properly scanned, and are used as reference spots to orient the microarray and help assign spot identities. PKCeta signal The rabbit anti-PKCeta antibody binds to the PKCeta control feature that is spotted twice in each subarray. The signals indicate that the antibody is functional and probing is performed properly. The signal is also used to check the background. 120 Troubleshooting Introduction The table below provides some solutions to possible problems you may encounter when using the ProtoArray® Human Protein Microarray for the ASP application. Review the expected results section (page 120) to verify the probing, detection, and scanning procedures are performed correctly. Problem Cause Solution Weak or no signal with antibody Low antibody concentration Perform probing with higher antibody concentration or increase the incubation time. Incorrect probing procedure Follow the recommended protocol for probing. Be sure all incubations are performed at 4C. Prepare the Blocking Buffer and Washing Buffer fresh as described on pages 113. Avoid prolonged exposure of detection reagents labeled with fluorescent dye to light. High background Incorrect scanning or imaging Scan the array at suitable wavelength for the detection system used and place the array in the slide holder such that the proteins on the array are facing the laser source. Decrease stringency Decrease the number of washes. Perform probing and washing in the absence or lower concentration of detergent or salts. Improper blocking Prepare the Blocking Buffer fresh as described on page 101. Improper washing To obtain the best results, perform the recommended washing steps. Prepare the Washing Buffer fresh as described on page 113. Array dried during probing Do not allow the array to dry during probing. Array not dried properly before scanning Dry the array before scanning. High antibody concentration Decrease the antibody concentration or decrease the incubation time. Antibody cross-reactivity Probe a protein array using only the secondary antibody without the antibody sample to detect cross-reactivity with the secondary antibody only. Continued on next page 121 Troubleshooting, Continued Problem Cause Solution Uneven background Uneven blocking or washing During the blocking or washing steps, ensure the array is completely immersed in blocking solution or Washing Buffer and use 5 mL buffer in the each chamber of the incubation tray to cover the array completely with buffer. Improper washing To obtain the best results, perform the recommended washing steps. Prepare the Washing Buffer fresh as described on page 113. Portions of array have dried Do not allow the array to dry during probing. Improper array handling Always wear gloves and avoid touching the surface of the array with gloved hands or forceps. Take care while inserting or removing the array from the incubation tray to avoid scratching the array surface. Antibody sample or detection reagents contain precipitates Centrifuge the antibody sample or detection reagents to remove precipitates prior to probing the array. 122 Scanning Arrays Using a Fluorescence Scanner Introduction Once the ProtoArray® Microarray has been probed, the array is scanned to aquire fluorescent signal. In this section, guidelines are provided for selecting a suitable fluorescence microarray scanner, and instructions are given on scanning the microarray for the PPI, SMI - Fluorescent, IRBP, ASP, and Ubiquitin Ligase profiling applications. Non-Fluorescent Scanners If you have used a non-fluorescent detection system such as chemiluminescence or radioactivity, an imaging system with a CCD camera such as the Alphaimager™ Imaging System (for chemiluminescence detection) or a phosphorimager scanner such as the PerkinElmer Cyclone phosphor imaging system (for detecting radioactivity) is required to capture the signal. Follow the manufacturer’s recommendations to scan the microarray. Materials Needed A suitable fluorescence microarray scanner is needed to scan the ProtoArray® Microarray. A list of scanners that can be used with ProtoArray® Microarrays can be found on the next page. The scanner specifications are listed below. To acquire ProtoArray® data from the image, the appropriate microarray data acquisition software is needed. The recommended microarray data acquisition software for analysis is GenePix® Pro v6 or later (Molecular Devices Corporation) or ScanArray® Acquisition Software (PerkinElmer, Inc.). Experimental Outline 1. 2. 3. 4. 5. 6. Scanner Specifications The fluorescence microarray scanner specifications required to image the ProtoArray® Microarray are listed below. Array Compatibility Detection Insert array into the fluorescence microarray scanner. Adjust scanner settings. Preview the microarray and adjust settings, if needed. Scan the microarray. Save image data. Export and analyze results. Size Thickness Light and Detector Orientation Scanned Area Focus Excitation Detection limit Resolution Dynamic Range Output Standard 1" x 3" or 25 mm x 75 mm microscope slides 1 mm Facing array 22 mm x 73 mm Auto focus or adjustable (± 200 μm) Depends on the fluorophore used for detection 0.1 fluor/μM2 ≤10 μM >3 orders of magnitude 16-bit TIFF Continued on next page 123 Scanning Arrays Using a Fluorescence Scanner, Continued Recommended Scanners The following scanners are compatible for scanning ProtoArray® Human Protein Microarray: GenePix® 4000A (Molecular Devices Corporation) GenePix® 4000B (Molecular Devices Corporation) GenePix® Professional 4200A (Molecular Devices Corporation) GenePix® Personal 4100A (Molecular Devices Corporation) ScanArray® Lite (PerkinElmer, Inc.) ScanArray® Express (PerkinElmer, Inc.) ScanArray® Express HT (PerkinElmer, Inc.) LS Series Laser Scanner (Tecan Group AG) The following scanners may be compatible with ProtoArray® Human Protein Microarray: AlphaArray® Reader (Alpha Innotech Corporation) arrayWoRx®e 4-Color Biochip Reader (Applied Precision, LLC) SpotLight™ (TeleChem International, Inc.) The following scanners are not compatible with ProtoArray® Human Microarray: GeneChip® Scanner 3000 (Affymetrix, Inc.) DNA Microarray Scanner (Agilent Technologies, Inc.) Additional scanner recommendations can be found under the Resources link under BioMarker Discovery Resources at www.invitrogen.com/protoarray. Continued on next page 124 Scanning Arrays Using a Fluorescence Scanner, Continued Scanning Procedure A brief procedure for scanning the ProtoArray® Microarrays with a fluorescence microarray scanner is described below. For details on using a specific scanner or non-fluorescent scanner, refer to the manufacturer’s manual supplied with the scanner. The scanning time for each array is ~7–8 minutes. 1. Start the appropriate array acquisition and analysis software on the computer connected to the fluorescence microarray scanner. 2. Open the microarray enclosure on the scanner. 3. Place the ProtoArray® Microarray in the holder such that the nitrocellulosecoated side of the array faces the laser source and barcode on the array is closest to the outside of the instrument. 4. Close the microarray enclosure on the scanner. 5. Set the following settings to image the microarray: 6. Wavelength: Choose the appropriate wavelength based on the fluorophore used for detection (for Alexa Fluor® 647, use 635 nm) PMT Gain: 600 Laser Power: 100% Pixel Size: 10 μM Lines to Average: 1.0 Focus Position: 0 μM Perform a preview to quickly scan the microarray. Adjust the PMT Gain, if needed. Note: The image should have very few saturated (white) spots to keep the majority of feature signals within the linear range of the scanner. 7. Select the area of the array to scan in detail (include the barcode in the area for documentation purposes) and then scan the array to create a highresolution image. 8. After acquiring the image, save the image to a suitable location as ’multiimage TIFF file’. Be sure the barcode is included in the name of the image. 9. Open the microarray enclosure and remove the microarray from the holder. 10. Proceed to Data Acquisition and Analysis, next page. 125 Data Acquisition and Analysis Introduction After scanning and saving an image of the array, download the protein array lot specific information from the ProtoArray® Central Portal. Use the lot specific information to acquire and analyze the data to identify protein-protein interactions. Note: To familiarize yourself with the array and subarray layout, you may download a file showing the subarray layout from ProtoArray® Central. To access ProtoArray® Lot Specific Information see below. Important GAL File While downloading the lot specific information files, ensure that you are downloading files that are associated with the specific barcode on your array. Since lot specific information files are updated frequently based on recently available sequence or protein information, make sure that you download the latest version of the lot specific information files. The .GAL (GenePix Array List) files describe the location and identity of all spots on the protein microarray and are used with the microarray data acquisition software to generate files that contain pixel intensity information for all features on the array. The .GAL files are available for downloading from the ProtoArray® Lot Specific Information available on ProtoArray® Central, see below. Note: The .GAL files are text files that contain the data in a format specified by GenePix® Pro Microarray data acquisition software. If you are using any other microarray data acquisition software, you can use data from the .GAL files to generate files that are compatible with your microarray data acquisition software. ProtoArray® Central The ProtoArray® Central Portal provides a web-based user interface to retrieve ProtoArray® Lot Specific information. This information (.GAL file) is required for acquiring the array data. If the scanner computer is connected to the Internet, connect to the portal. If the scanner computer is not connected to the Internet, download the array-specific information to portable media as described below and then transfer the information onto the scanner computer. 1. Connect to the portal at www.invitrogen.com/protoarray and then click on the ProtoArray® Lot Specific Information link (see arrow) under BioMarker Discovery Resources. 2. The ProtoArray® Lot Specific Information page is displayed. Continued on next page 126 Data Acquisition and Analysis, Continued ProtoArray® Central, continued Protocol continued from previous page 3. Enter the array barcode in the Input Barcode Number box (see arrow). Click on the Search button. 4. For each input barcode, the following files are displayed: .GAL file (LotNumber.gal): This file is essential for data acquisition by the software and defines spot locations and identities of all protein spots on the array. The file also includes the detected protein concentration information in relative fluorescent units for each spot. Protein Information File (LotNumber_info.txt): This file contains a listing and description of human proteins on the array. Protein Sequence File (LotNumber_seq.txt): This tab-delimited text file lists the GenBank® accession number, Ultimate™ ORF Clone ID number (if available), FASTA header, and amino acid sequence of the ORF for each array protein. Control Data File (LotNumber_control.txt): This file contains a description of control spots on the array. Slide Information File (LotNumber_slide.txt): This file contains a listing of all barcodes associated with a specific lot of arrays. Note: The file size for some files such as the Protein Sequence File may be larger than 1 MB. Continued on next page 127 Data Acquisition and Analysis, Continued Data Acquisition Data acquisition software is used to obtain pixel intensity information for each spot/feature on the array. Information on additional parameters may be recorded depending on the type of software used for data acquisition. 1. Start the microarray data acquisition software on the computer and open the saved image (.tiff) from Step 8, page 125. 2. To acquire data from ProtoArray® experiments, For GenePix® Pro Software, download the .GAL files from ProtoArray® Central for protein arrays which defines the array grid required by the microarray data acquisition software. For other microarray data acquisition software, use data from the .GAL files from ProtoArray® Central for protein arrays to generate files that are compatible with your microarray data acquisition software to define the array grid. Scroll through the image to ensure that the grid is in the proper location for each subarray. Adjust the subarray grid, if needed. Utilize the automatic spot finding function of the image acquisition software program, if desired. 3. After the grid is properly adjusted and all of the features are aligned, acquire the pixel intensity data for each feature by clicking the Analyze button in GenePix® Pro, and save/export the results as a .GPR (GenePix® Results) file for data analysis using ProtoArray® Prospector (next page). Note: If you wish to perform data analysis using Microsoft® Excel, save/export the results with an .xls extension or rename the .tab or .gpr file using the .xls extension. Data Analysis Using ProtoArray® Prospector The ProtoArray® Prospector software quickly analyzes the data acquired from the image acquisition software and easily identifies statistically significant interactors, saving you time and effort. In addition, the software has features that allow you to modify the analysis method and compare data obtained from different arrays. The ProtoArray® Prospector software and manual are available free-of-charge to ProtoArray® Microarray users. To download the ProtoArray® Prospector software and manual, go to www.invitrogen.com/protoarray, and click Online Tools link under BioMarker Discovery Resources. The ProtoArray® Prospector software currently accepts the output files (.GPR) generated by the GenePix® Pro microarray data acquisition software, and analyzes the data using specified algorithms to generate a list of human proteins showing significant interactions with the probe. If .GPR files are not available, consult the ProtoArray® Prospector User Manual for guidelines to format a results file that is compatible for import into ProtoArray® Prospector. 128 Image Acquisition and Processing for Radioactive Assays Introduction Once you have exposed the ProtoArray® Microarray to X-ray film or phosphor screen, scan the film or phosphor screen to acquire a TIFF image that is required for microarray data analysis. To make the image compatible with the microarray data acquisition software, process the image using ProtoArray® Prospector Imager or Adobe® Photoshop® image analysis software as described on the next page. Materials Needed Scanning the X-ray film You need a standard desktop flatbed image scanner that provides at least 50 μM resolution (>600 dpi) to scan the X-ray film after developing the film to produce a 16-bit TIFF files. Scanning the Phosphor Screen You need a phosphorimager that provides at least 50 μM resolution to acquire the microarray image from the phosphor screen to produce a 16-bit TIFF file. The following phosphorimagers have been tested with the ProtoArray® Microarrays: Cyclone® Storage Phosphor System (PerkinElmer, Inc.) Typhoon™ Imager (Amersham Biosciences) Data acquisition software To acquire ProtoArray® data from the image, you need ProtoArray® Prospector Imager 5.0 or higher. The latest version of Prospector Imager is included with ProtoArray® Prospector, and can be downloaded at www.invitrogen.com/protoarray. Microarray data acquisition software such as GenePix® Pro (Molecular Devices Corporation) or ScanArray® Software (PerkinElmer, Inc.) are also suitable for data acquisition. Experimental Outline Scanning Guidelines 4. Develop the X-ray film or process the phosphor screen according to the manufacturer’s recommendations. 5. Scan the X-ray film on a standard scanner or scan the phosphor screen on a phosphorimager to generate a 16-bit TIFF image file. 6. Process the image using ProtoArray® Prospector Imager. 7. Save the adjusted microarray image. After exposing the X-ray film or phosphor screen to the ProtoArray® Microarray, scan the film or phosphor screen to obtain a 16-bit TIFF image file that is required for microarray data analysis. Brief scanning guidelines are described below. For details, refer to the manufacturer’s recommendations on using the scanner or phosphorimager. 1. Remove the X-ray film or phosphor screen from the cassette. Keep the array covered in clear plastic wrap in the dark for use later if a longer exposure time is needed. 2. Develop the X-ray film. 3. Scan the X-ray film using a standard scanner or scan the phosphor screen using a phosphorimager to obtain a 16-bit TIFF file. Include the barcode in the area for maintaining a record and scan the array to provide a high-resolution image (~50 μM). 4. Save the image file to a suitable location. Continued on next page 129 Image Acquisition and Processing for Radioactive Assays, Continued Image Processing Using ProtoArray® Prospector Imager The ProtoArray® Prospector Imager allows image processing for data analysis. 1. Go to www.invitrogen.com/protoarray, and then click on the Online Tools link to download and install the ProtoArray® Prospector installation package including ProtoArray® Prospector Imager. 2. Start ProtoArray® Prospector Imager on the computer. 3. Open the microarray image (.tiff) acquired in Step 4, previous page. 4. Perform the following adjustments to the image (refer to ProtoArray® Prospector Imager manual for detailed instructions): Invert the data (convert the image from white background with black spots to black background with white spots which is required for analysis). Rotate the image such that the array image is vertical and the barcode is located at the bottom Crop a fixed rectangular area (600 × 1800 pixel, if scanned at 600 dpi) from each image (.tiff) file corresponding to the array. If the spots are not aligned vertically, rotate the crop rectangle by holding the Ctrl key and rotating the selection angle with the mouse. First rotate and align the rectangle against the Alignment Control Kinase (PKCeta) spots, release the Ctrl key and move the rectangle to cover the whole array area. Crop the image using the Crop button. If needed, adjust the image contrast/brightness in Imager for better visualization, which will not affect the final saved image. Note: If the image is scanned at a different dpi, set the fixed rectangular area accordingly. For example, if the image is scanned at 1200 dpi, set the fixed rectangular area to 1200 × 3600 pixel to cover the 1” × 3” array area. Image Processing Using Adobe® Photoshop® 5. Save the cropped and resized image (.tiff) file with a new name to a suitable location. Be sure the barcode is included in the name of the image. 6. Download lot-specific information from ProtoArray® Central, see 132. 1. Start Adobe® Photoshop® on the computer. 2. Open the microarray image (.tiff) acquired in Step 4, previous page. 3. Perform the following adjustments to the image: Crop a fixed rectangular area (1” × 3”) from each image (.tiff) file corresponding to the array. If the spots are not aligned vertically, rotate the image to correctly align the spots. Invert the data (convert the image from white background with black spots to black background with white spots). Resize the image file to 2550 × 7650 pixels (constrained proportions). Important: Do not adjust the image quality (such as contrast or level) which can compress the dynamic range of the data set and affect data analysis. 4. Save the cropped and resized image (.tiff) file with a new name to a suitable location. Be sure the barcode is included in the name of the image. 5. Proceed to Data Acquisition and Analysis, next page. 130 Data Acquisition and Analysis Introduction Download the protein array lot specific information (the .GAL file) from ProtoArray® Central Portal. Use the lot-specific information to acquire and analyze the data to identify potential kinase substrates as described in this section. Note: To familiarize yourself with the array and subarray layout, you may also download a file showing the subarray layout from ProtoArray® Central. To access the file, go to www.invitrogen.com/protoarray and click Online Tools. Important GAL File While downloading the lot specific information files, ensure that you are downloading files that are associated with your specific barcode on the array. Since lot specific information files are updated frequently based on recently available sequence or protein information, make sure that you download the latest version of the lot specific information files. The .GAL (GenePix® Array List) files describe the location and identity of all spots on the Human and Control Microarrays and are used with the microarray data acquisition software to generate files that contain pixel intensity information for feature/spot and non-features of the slide. The .GAL files are available for downloading from the ProtoArray® Lot Specific Information available on ProtoArray® Central, see below. Note: The .GAL files are text files that contain the data in a format specified by GenePix® Pro Microarray data acquisition software. If you are using any other microarray data acquisition software, you can use data from the .GAL files to generate files that are compatible with your microarray data acquisition software. Materials Needed To acquire ProtoArray® data from the image, you need ProtoArray® Prospector Imager 5.0 or higher. The latest version of Prospector Imager is included with ProtoArray® Prospector, for download at www.invitrogen.com/protoarray. Microarray data acquisition software such as GenePix® Pro (Molecular Devices Corporation) or ScanArray® Software (PerkinElmer, Inc.) are suitable for data acquisition. Continued on next page 131 Data Acquisition and Analysis, Continued ProtoArray® Central The ProtoArray® Central Portal provides a web-based user interface to retrieve ProtoArray® Lot Specific information. This information (.GAL file) is required for acquiring the array data. If the scanner computer is connected to the Internet, connect to the portal. If the scanner computer is not connected to the internet, download the array-specific information to portable media as described below and then download the information onto the scanner computer. 1. Connect to the portal at www.invitrogen.com/protoarray and then click on the ProtoArray® Lot Specific Information link (see arrow) under BioMarker Discovery Resources. 2. The ProtoArray® Lot Specific Information page is displayed. 3. Enter the array barcode in the Input Barcode Number box. Click on the Search button. 4. For each input barcode, the following files are available for downloading: .GAL file (LotNumber.gal): This file is essential for data acquisition by the software and defines spot locations and identities of all protein spots on the array. The file also includes the detected protein concentration information for each spot. Protein Information File (LotNumber_info.txt): This file contains a listing and description of the human proteins on the microarray. Protein Sequence File (LotNumber_seq.txt): This tab-delimited text file lists the GenBank®accession number, Ultimate™ ORF Clone ID number (if available), FASTA header, and amino acid sequence of the ORF for each array protein. Control Data File: (LotNumber_control.txt): This file contains a description of control spots on the array. Slide Information File (LotNumber_slide.txt): This file contains a listing of all barcodes associated with a specific lot of arrays. Note: The file size for some files such as the Protein Sequence File may be larger than 1 MB. Continued on next page 132 Data Acquisition and Analysis, Continued Data Acquisition Data acquisition software is used to obtain pixel intensity information for each spot/feature on the array. Information on additional parameters may be recorded depending on the type of software used for data acquisition. 1. Start the ProtoArray® Prospector Imager, GenePix® Pro Software, or equivalent microarray data acquisition software on the computer. 2. Open the saved image (16-bit TIFF file) from Step 4, page 130. Note: If the image is not saved as a 16-bit TIFF file, GenePix® Pro software is unable to open the file (image). 3. Acquire data from ProtoArray® experiments as follows, For ProtoArray® Prospector Imager, download the .GAL files from ProtoArray® Central, which defines the array grid required by the microarray data acquisition software. Load the .GAL file into Imager using the Array List button. Make adjustments to the blocks as described in the Imager manual. Use spots corresponding to the Alignment Control Kinase (PKCeta) as reference spots to orient the microarray image. Scroll through the image to ensure that the grid is in the proper location for each subarray. Adjust the subarray grid manually, if needed. After the grid is adjusted properly and all features are aligned, save the Project and analyze the results. Imager automatically opens the Analyzer component of ProtoArray® Prospector for data analysis, and allows you to select the KSI application and specify the experimental conditions. Analyzer then performs the data analysis and shows a summary of results (see ProtoArray® Prospector manual for details). For GenePix® Pro Software, download the .GAL files from ProtoArray® Central, which defines the array grid required by the microarray data acquisition software. Analyze the data and save/export the results as a .GPR (GenePix® Results) file for data analysis using ProtoArray® Prospector (see next page). The results contain the pixel intensity information for each spot/feature on the array and information on additional parameters depending on the type of software used for data acquisition. Note: Do not use the automatic feature finding function in GenePix® while acquiring data from a radiometric assay. For other microarray data acquisition software, use data from the .GAL files from ProtoArray® Central to generate files that are compatible with your microarray data acquisition software to define the microarray grid. Note: If you wish to perform data analysis using Microsoft® Excel, save/export the results with an .xls extension or rename the .tab or .gpr file using the .xls extension. Continued on next page 133 Data Acquisition and Analysis, Continued Data Analysis Using ProtoArray® Prospector The ProtoArray® Prospector Analyzer software quickly analyzes the data acquired from the ProtoArray® Prospector Imager or image acquisition software and easily identifies statistically significant hits, saving you time and effort. The Analyzer software is designed to analyze data and identify potential protein binding partners with a low false positive rate as compared to performing manual calculations using a spreadsheet program. In addition, the software has features that allow you to modify the analysis method and compare data obtained from different microarrays. The ProtoArray® Prospector software and manual are available for FREE to ProtoArray® users. To download the ProtoArray® Prospector software and manual, go to www.invitrogen.com/protoarray, and click on the Online Tools link. Install ProtoArray® Prospector to install ProtoArray® Prospector Imager and Analyzer. The ProtoArray® Prospector software also accepts the output files (.GPR) generated by the GenePix® Pro microarray data acquisition software, and analyzes the data using specified algorithms to generate a list of human proteins that bind the small molecule. If .GPR files are not available, consult the ProtoArray® Prospector manual for guidelines to format a results file that is compatible for import into Prospector. 134 Appendix Accessory Products The table below lists additional products available separately from Invitrogen. For more information about these products, visit www.invitrogen.com or contact Technical Support (page 137). Additional Products Product Quantity Catalog no. ProtoArray® Human Protein Microarray v5.0 1 array 20 arrays PAH052501 PAH0525020 ProtoArray® Control Protein Microarray v5.0 1 array PA10057 ProtoArray Human Protein Microarray v5.0 PPI Kit for V5-tagged proteins 1 kit PAH0525013 ProtoArray® Human Protein Microarray v5.0 PPI Kit for biotinylated proteins 1 kit PAH0525011 ProtoArray® Human Protein Microarray v5.0 KSI Kit for kinase substrate identification 1 kit PAH0525065 10X Synthetic Block 75 mL PA017 Blocking Buffer Kit 1 kit PA055 Array Control Protein 40 μL 451096 Alexa Fluor® 647 Anti-V5 Antibody for ProtoArray® 80 μL 451098 Streptavidin-Alexa Fluor® 647 Conjugate (2 mg/mL) 0.5 mL S-32357 10 μg PV3304 1 kit B30756 ® ProtoArray Products ® Control Kinase (MAPK14, Active) Biotin-XX Microscale Protein Labeling Kit and FluoReporter Biotin Quantitation Assay Kit Alexa Fluor® 647 Protein Labeling Kit ® 1 kit A-20173 ® 0.5 mL A-21236 ® Alexa Fluor 647 Goat Anti-Human IgG (H+L) 0.5 mL A-21445 Anti-V5 Antibody 50 μL R960-25 Anti-V5-HRP Antibody 50 μL R961-25 Anti-V5-AP Antibody 50 μL R962-25 Phosphate Buffered Saline (PBS), 1X 500 mL 10010-023 1 kit PQ10002-01 1 kit PQ10001-01 Alexa Fluor 647 Goat Anti-Mouse IgG (H+L) ™ ProQuest Two-Hybrid System ™ ® ProQuest Two-Hybrid System with Gateway Technology Continued on next page 135 Accessory Products, Continued Vectors A variety of vectors with different tags at the N- or C-terminus is available for expression and purification of your protein of interest. The recommended tag for use with the ProtoArray® Human Protein Microarray is the V5 epitope tag. For more information about these products, visit (www.invitrogen.com) or call Technical Support (page 137). Accessing Clones Since the majority of human proteins printed on the array are derived from the Ultimate™ ORF Clone Collection or purified proteins (protein kinases) available from Invitrogen, it is very easy to order the clone or purified protein corresponding to the protein identified on the array and validate the interaction. Visit www.invitrogen.com/clones to access our clone collections. Each Ultimate™ ORF Clone is full insert-sequenced and guaranteed to match the corresponding GenBank® amino acid sequence. Contact Technical Support (page 137) to order the purified protein kinases printed on the array or to request information about custom production of additional proteins present on the array. 136 Technical Support Web Resources Visit the Invitrogen Web site at www.invitrogen.com for: Technical resources, including manuals, vector maps and sequences, application notes, MSDSs, FAQs, formulations, citations, handbooks, etc. Complete technical support contact information Access to the Invitrogen Online Catalog Additional product information and special offers For more information or technical assistance, call, write, fax, or email. Additional international offices are listed on our Web page (www.invitrogen.com). Contact Us Corporate Headquarters: 5791 Van Allen Way Carlsbad, CA 92008 USA Tel: 1 760 603 7200 Tel (Toll Free): 1 800 955 6288 Fax: 1 760 602 6500 E-mail: [email protected] Japanese Headquarters: LOOP-X Bldg. 6F 3-9-15, Kaigan Minato-ku, Tokyo 108-0022 Tel: 81 3 5730 6509 Fax: 81 3 5730 6519 E-mail: [email protected] European Headquarters: Inchinnan Business Park 3 Fountain Drive Paisley PA4 9RF, UK Tel: +44 (0) 141 814 6100 Tech Fax: +44 (0) 141 814 6117 E-mail: [email protected] Certificate of Analysis The Certificate of Analysis provides detailed quality control information for each product. Certificates of Analysis are available on our website. Go to www.invitrogen.com/support and search for the Certificate of Analysis by product lot number, which is printed on the box. MSDS Material Safety Data Sheets (MSDSs) are available on our website at www.invitrogen.com/msds. Limited Warranty Invitrogen (a part of Life Technologies Corporation) is committed to providing our customers with high-quality goods and services. Our goal is to ensure that every customer is 100% satisfied with our products and our service. If you should have any questions or concerns about an Invitrogen product or service, contact our Technical Support Representatives. All Invitrogen products are warranted to perform according to specifications stated on the certificate of analysis. The Company will replace, free of charge, any product that does not meet those specifications. This warranty limits the Company’s liability to only the price of the product. No warranty is granted for products beyond their listed expiration date. No warranty is applicable unless all product components are stored in accordance with instructions. The Company reserves the right to select the method(s) used to analyze a product unless the Company agrees to a specified method in writing prior to acceptance of the order. Invitrogen makes every effort to ensure the accuracy of its publications, but realizes that the occasional typographical or other error is inevitable. Therefore the Company makes no warranty of any kind regarding the contents of any publications or documentation. If you discover an error in any of our publications, please report it to our Technical Support Representatives. Life Technologies Corporation shall have no responsibility or liability for any special, incidental, indirect or consequential loss or damage whatsoever. The above limited warranty is sole and exclusive. No other warranty is made, whether expressed or implied, including any warranty of merchantability or fitness for a particular purpose. 137 Purchaser Notification Limited Use Label License No. 5: Invitrogen Technology The purchase of this product conveys to the buyer the non-transferable right to use the purchased amount of the product and components of the product in research conducted by the buyer (whether the buyer is an academic or for-profit entity). The buyer cannot sell or otherwise transfer (a) this product (b) its components or (c) materials made using this product or its components to a third party or otherwise use this product or its components or materials made using this product or its components for Commercial Purposes. The buyer may transfer information or materials made through the use of this product to a scientific collaborator, provided that such transfer is not for any Commercial Purpose, and that such collaborator agrees in writing (a) not to transfer such materials to any third party, and (b) to use such transferred materials and/or information solely for research and not for Commercial Purposes. Commercial Purposes means any activity by a party for consideration and may include, but is not limited to: (1) use of the product or its components in manufacturing; (2) use of the product or its components to provide a service, information, or data; (3) use of the product or its components for therapeutic, diagnostic or prophylactic purposes; or (4) resale of the product or its components, whether or not such product or its components are resold for use in research. Invitrogen Corporation will not assert a claim against the buyer of infringement of patents owned or controlled by Invitrogen Corporation which cover this product based upon the manufacture, use or sale of a therapeutic, clinical diagnostic, vaccine or prophylactic product developed in research by the buyer in which this product or its components was employed, provided that neither this product nor any of its components was used in the manufacture of such product. If the purchaser is not willing to accept the limitations of this limited use statement, Invitrogen is willing to accept return of the product with a full refund. For information on purchasing a license to this product for purposes other than research, contact Licensing Department, Life Technologies Corporation, 5791 Van Allen Way, Carlsbad, California 92008. Phone (760) 603-7200. Fax (760) 6026500. Email: [email protected]. Limited Use Label License No. 125: GST This product is the subject of WIPO patent WO8809372 and foreign equivalents to be used for scientific investigation and research and for no other purpose whatsoever. Licenses for commercial use of the above mentioned patents must be negotiated directly with Amrad Corporation, 576 Swan Street, Richmond, Victoria Australia 3121, Phone: 61 3 9208 4000. Continued on next page 138 Purchaser Notification, Continued Limited Use Label License No. 221: Microarrays of Biological Samples This product may be covered by one or more of U.S Patent numbers 5,807,522, and 6,110,426 licensed exclusively to Incyte Corporation. The purchase of this product conveys to the buyer (whether employed in academia, government, not-for-profit entity or a for-profit entity) the limited, non-exclusive, nontransferable right (without the right to resell, repackage, or further sublicense) under these patents to use this product for research and development purposes. No other license is granted to the buyer whether expressly, by implication, by estoppel or otherwise. In particular, the purchase of this product does not include or carry any right or license to use, develop, or otherwise exploit this product commercially. This product is sold pursuant to authorization from Incyte Corporation and Incyte Corporation reserves all other rights under these patents. For information on purchasing a license for purposes other than research and development, please contact Incyte Corporation, Corporate Licensing, Route 141 and Henry Clay Boulevard, Wilmington, DE 19880. Phone 302-498-6825, Fax 302-498-2707. Limited Use Label License No. 240: Protein Array Content The purchase of this product conveys to the buyer (whether employed in academia, government, not-for-profit entity or a for-profit entity) the limited, non-exclusive, non-transferable right (without the right to resell, repackage, or further sublicense) to use this product solely for its own research and development purposes. No other license is granted to the buyer whether expressly, by implication, by estoppel or otherwise. In particular, the purchase of this product does not include or carry any right or license to use, develop, or otherwise exploit this product commercially, such as the generation of commercial databases or the provision of clinical diagnostics or for testing the binding or activity of a small molecule or antibody against a protein for the purposes of identifying potential pharmacological and/or therapeutic action. This product is sold pursuant to authorization from Incyte Corporation and Incyte Corporation reserves all other rights under patents owned by Incyte Corporation. For information on purchasing a license under patents owned by Incyte Corporation for use of this product for purposes other than research and development, please contact Incyte Corporation, Corporate Licensing, Route 141 and Henry Clay Boulevard, Wilmington, DE 19880. Phone 302-498-6825, Fax 302-498-2707. Limited Use Label License No. 295: Polypeptides Expressed in Yeast This product is the subject of one or more of U.S. Patent Nos. 5,618,676, 5,854,018, 5,856,123, 5,919,651 and foreign equivalents. Rights to use this product are limited to research use only. Rights are available from Washington Research Foundation to practice under the above-referenced patents for any use by contacting Washington Research Foundation, 2815 Eastlake Avenue East, Suite 300, Seattle, Washington 98102. Tel: 206-336-5600. Fax: 206-336-5615. 139 References Bouvier, M., Menard, L., Dennis, M., and Marullo, S. (1998) Expression and Recovery of Functional G-proteincoupled Receptors Using Baculovirus Expression Systems. Curr. Opin. Biotechnol. 9, 522-527 Boyle, S. N., Michaud, G. A., Schweitzer, B., Predki, P. F., and Koleske, A. J. (2007) A Critical Role for Cortactin Phosphorylation by Abl-Family Kinases in PDGF-Induced Dorsal-Wave Formation. Current Biology 17, 44551. Hollister, J., Grabenhorst, E., Nimtz, M., Conradt, H., and Jarvis, D.L. (2002) Engineering the Protein N-glycosylation Pathway in Insect Cells for Production of Biantennary, Complex N-glycans. J. Biochemistry 41, 15093-15104 Jin, F., T., H., A., M. G., M., S., F., P. P., S., F., and J., H. (2006) A Pooling-deconvolution Strategy for Biological Network Elucidation. . Nature Methods 3, 161-162 Mah, A. S., Elia, A. E., Devgan, G., Ptacek, J., Schutkowski, M., Snyder, M., Yaffe, M. B., and Deshaies, R. J. (2005) Substrate Specificity Analysis of Protein Kinase Complex Dbf2-Mob1 by Peptide Library and Proteome Array Screening. BMC Biochem 6, 22-33 Mattoon, D., Michaud, G., Merkel, J., and Schweitzer, B. (2005) Biomarker Discovery Using Protein Microarray Technology Platforms: Antibody-antigen Complex Profiling. Expert Rev Proteomics 2, 879-889 Michaud, G. A., Salcius, M., Zhou, F., Bangham, R., Bonin, J., Guo, H., Snyder, M., Predki, P., and Schweitzer, B. (2003) Analyzing Antibody Specificity With Whole Proteome Microarrays. Nature Biotechnol 21, 1509-1512 Predki, P. (2003) Functional Protein Microarrays - Ripe for Discovery. Curr. Opin. Chem. Biol. 8, 8-13 Ptacek, J., Devgan, G., Michaud, G., Zhu, H., Zhu, X., Fasolo, J., Guo, H., Jona, G., Breitkreutz, A., Sopko, R., McCartney, R., Schmidt, M., Rachidi, N., Lee, S. J., Mah, A., Meng, L., Stark, M., Stern, D., De Virgilio, C., Tyers, M., Andrews, B., Gerstein, M., Schweitzer, B., Predki, P., and Snyder, M. (2005) Global Analysis of Protein Phosphorylation in Yeast. Nature 438, 679-684 Satoh, J., Nanri, Y., and Yamamura, T. (2006) Rapid Identification of 14-3-3-binding Proteins by Protein Microarray Analysis. J. Neurosci. Methods 152, 278-288 Schwarz, E., Oesterhelt, D., Reinke, H., Beyreuther, K., and Dimroth, P. (1988) The Sodium Ion Translocating Oxalacetate Decarboxylase of Klebsiella pneumoniae. J. Biol. Chem. 263, 9640-9645 Schweitzer, B., Predki, P., and Snyder, M. (2003) Microarrays to Characterize Protein Interactions on a WholeProteome Scale. Proteomics 3, 2190-2199 Southern, J. A., Young, D. F., Heaney, F., Baumgartner, W., and Randall, R. E. (1991) Identification of an Epitope on the P and V Proteins of Simian Virus 5 That Distinguishes Between Two Isolates with Different Biological Characteristics. J. Gen. Virol. 72, 1551-1557 Zhu, H., Bilgin, M., Bangham, R., Hall, D., Casamayor, A., Bertone, P., Lan, N., Jansen, R., Bidlingmaier, S., Houfek, T., Mitchell, T., Miller, P., Dean, R. A., Gerstein, M., and Snyder, M. (2001) Global Analysis of Protein Activities Using Proteome Chips. Science 293, 2101-2105 ©2010 Life Technologies Corporation. All rights reserved. Trademarks referenced herein are registered trademarks or trademarks of Life Technologies Corporation. Any registration or trademark symbols used herein denote the registration status of trademarks in the United States. Trademarks may or may not be registered in other countries. Adobe® Photoshop® is a registered trademark Adobe Systems Incorporated. AlphaImager™ is a trademark of Alpha Innotech Corporation. Coomassie® is a registered trademark of Imperial Chemical Industries, PLC. Cy5™ is a trademark of Amersham Biosciences. GenePix® is a registered trademark of Molecular Devices Corporation. GenTel® is a registered trademark of GenTel Biosciences, Inc. LifterSlip™ is a trademark of Thermo Scientific. Microsoft® is a registered trademark of Microsoft Corp. ScanArray® is a registered trademark of PerkinElmer, Inc. 140 Corporate Headquarters Invitrogen Corporation 5791 Van Allen Way Carlsbad, CA 92008 T: 1 760 603 7200 F: 1 760 602 6500 E: [email protected] For country-specific contact information, visit our web site at www.invitrogen.com User Manual