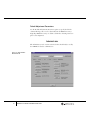
1
GEMTools 2.5
™
Installation and Administration Guide
GEMTools 2.5 Installation and Administration Guide. Document Date: 10 January 2001
© 2001 Incyte Genomics, Inc. All Rights Reserved. This guide and its contents are the confidential property of Incyte Genomics, Inc. Nothing herein is to be disclosed in any way without the prior express written permission of Incyte Genomics, Inc.
Incyte, the Incyte logo, and LifeSeq®are registered trademarks and LifeExpress, ZooSeq, GEMTools, and GEM are trademarks of Incyte Genomics, Inc.
All other products or services mentioned in this manual are the trademarks or service marks of their respective companies or organizations.
Contents
About Incyte Genomics, Inc.
Customer Support
1
vii
viii
Requirements
1
System Configuration
1
Database Requirements
Client Software Requirements
1
2
Recommended Hardware
2
2
Software Installation
7
Introduction
7
Installation Overview
3
8
Preparing the Operating System
8
Installing Microsoft SQL Server
10
Installing GEMTools Server
12
Installing GEMTools Client
19
Upgrading GEMTools Client
20
Upgrading GEMTools Client
20
Configuring the GEMTools Server
20
Uninstalling GEMTools Client
22
Uninstalling GEMTools Server
22
Customer Support
23
Utilities
25
Changing Your Password
26
Databases
27
Changing Your Database
Creating a New Database
Deleting Databases
27
28
28
Contents
iii
Companies
Defining a New Company
Users
Choosing a Default Database
Adding New Users
Editing User Profiles
Removing Users
Privileges
Adding Privileges
Removing Privileges
Preferences
Web Browser
Default Adjustment Parameters
Administrator
Synchronize Databases
Internet Download
Import Sequences
Transfer
Web Links
Clone Source
Sort Builder
Object Types
4
GEMTools™ Server Reference
29
31
31
31
32
32
33
33
34
35
35
36
36
37
38
40
41
43
45
46
48
51
GEMTools Shared Directory
51
GEMTools Client Distribution Software
52
Objects
52
Configuration Objects
Customer Databases
Access Privileges
Access Privileges for GEM Microarrays Direct Customers
iv
29
52
53
54
55
Users
56
Companies
57
GEMTools™ Installation and Administration Guide
GEMTools Server Installation
57
SQL Server Temporary Database
Database and Device Creation
GEMTools SQL Server Login
Configuring SQL Server for Optimal Performance
GEMTools Client Distribution Configuration File
External Application Interface
57
57
58
59
60
61
LifeSeq-to-GEMTools Gateway
Using the LifeSeq-to-GEMTools Gateway
5
Microsoft SQL Server Reference
63
65
67
Installing Microsoft SQL Server
67
Starting SQL Server
67
Administering SQL Server
68
Databases and Database Devices
69
Devices and Databases in SQL Server 2000
and SQL Server 7.0
Devices and Databases in SQL Server 6.5
6
69
69
Backing up Databases
70
Resizing a Database
71
Restoring a Database
71
Transaction Log
72
Truncating the Transaction Log
73
ODBC Reference
Configuring Open Database Connectivity (ODBC)
75
75
ODBC Data Source Parameters
75
Adding an ODBC Data Source
76
Deleting a Data Source
82
Glossary
Index
85
87
Contents
v
About Incyte Genomics, Inc.
Incyte Genomics, Inc. is a leading provider of an integrated platform of
genomic technologies designed to aid the understanding of the molecular
basis of disease. Incyte develops and markets genomic databases, genomic
data management software, microarray-based gene expression services, and
related reagents. For more information visit www.incyte.com.
Palo Alto and Fremont, California
Incyte Genomics, Inc.
3160 Porter Drive
Palo Alto, California 94304
Main: 1 650-855-0555
Sales & Support: 1 800-430-0030 toll free in the U.S.
1 314-427-3222 for international calls
E-mail: [email protected]
Fax:
1 650-855-0762
6519 Dumbarton Circle
Fremont, California 94555
Tel: 1 510-739-2100
Fax: 1 510-739-2200
St. Louis, Missouri
4678 World Parkway Circle
St. Louis, Missouri 63134
Tel: 1 314-427-3222
Toll Free Tel: 1 800-430-0030
Fax: 1 314-427-3324
About Incyte Genomics, Inc.
vii
Cambridge, United Kingdom
Incyte Genomics, Ltd.
100 Hills Road
Botanic House
Cambridge CB2 1FF
United Kingdom
Tel: (44) 1223 454900
Fax: (44) 1223 454999
214 Cambridge Science Park
Milton Road
Cambridge CB2 1FF
United Kingdom
Tel: (44) 1223 424 877
Fax:(44) 1223 424 855
Joint Venture
diaDexus, LLC
3303 Octavius Drive
Santa Clara, CA 95054
Tel: 1 408-496-6600
Fax: 1 408-496-5777
Customer Support
If you have any questions or would like more information about our
training programs, contact our customer support at:
Incyte Technical Support
4678 World Parkway Circle
St. Louis, Missouri 63134
Tel: 1 800-430-0030 toll free in the U.S.
Fax: 1 888-919-3324 toll free in the U.S.
E-mail: [email protected]
viii
GEMTools™ Installation and Administration Guide
1
1
Requirements
System Configuration
The Incyte GEMTools™ software is a powerful set of integrated tools for
managing and analyzing gene expression information. GEMTools software
provides a complete enterprise solution based on relational database
technology and the Microsoft Windows operating system. The GEMTools
software uses ODBC compliant client-server technology and is designed to
integrate with Microsoft SQL Server 2000, SQL Server 7.0, and Microsoft
SQL Server 6.5.
Note: The GEMTools database can also be integrated with extended
bioinformatics systems using Oracle database technology.
The GEMTools software can be deployed on systems ranging from a standalone laptop installation to a worldwide network of thousands of
GEMTools workstations.
In a multi-user client-server installation, the GEMTools shared database
and housekeeping software reside on a central server running Windows
2000 or Windows NT. GEMTools client software is installed on networked
computers and are able to access the GEMTools data through the network.
In a standalone system, the GEMTools server and client components are
installed on the same computer.
Database Requirements
The GEMTools 2.5 server requires database server software to operate.
Standard installations use Microsoft SQL Server 2000, Microsoft SQL
Server 7.0, or Microsoft SQL Server 6.5.
Requirements
1
Microsoft SQL Server 2000 and Microsoft SQL Server 7.0 can be
installed on:
• Windows 2000 Server and Advanced Server
• Windows 2000 Professional
• Windows NT 4.0 Server
• Windows NT 4.0 Workstation
• Windows 95, 98, and ME (SQL Server Personal/Desktop Edition
only)
Microsoft SQL Server 6.5 can be installed on:
• Windows NT Server 4.0
Client Software Requirements
The GEMTools analysis software client can be run on:
• Windows 2000 Professional, Server, and Advanced Server
• Windows NT 4.0 Server and Workstation
• Windows 95, 98, and ME
Recommended Hardware
Before you install GEMTools, review the recommended components
shown in Table 1-1.
Table 1-1. Recommended
GEMTools Database Server
Configuration
2
Component
Description
Server
IBM or compatible server
CPU
Intel Pentium II or higher (300 MHz or higher)
Motherboard
Intel-compatible motherboard
Multiprocessor
Support
Yes
GEMTools™ Installation and Administration Guide
Component
Description
Memory Installed
128 MB
Hard Drive Controller
Ultra/Fast SCSI or EIDE
System Hard Drive
9 GB, Ultra/Fast SCSI or EIDE
GEMTools Hard Drive
Controller
Ultra/Wide SCSI (for enhanced performance)
GEMTools Hard Drive
Configuration
Ultra/Wide SCSI (see Database Size Estimates
Table 1-2) to estimate the hard drive capacity required
for the GEMTools database)
(RAID controller recommended)
Video Adapter
PCI Video Adapter with at 4 MB Video RAM
SVGA Display
Monitor
1280 x 1024, 65 K colors minimum
PCI Network Adapter
Fast-Ethernet 100BaseT or 10BaseT
CD-ROM Drive
8x or faster CD-ROM SCSI drive (SCSI
recommended)
Floppy Drive
1.44 MB
Modem
US Robotics 56 kbps or faster
Keyboard and Mouse
PS-2 Keyboard and Mouse
Color Printer
Tektronix 450 Phaser Printer (for high quality
printing)
Operating System
Microsoft Windows 95, 98, ME, NT, or 2000 with an
adequate number of connection licenses
Web Browser
Microsoft Internet Explorer 4.01 or Newer
Database Software
Microsoft SQL Server 7.0 with Service Pack 2 or
Microsoft SQL Server 2000 with an adequate number
of connection licenses
GEMTools 2.5 requires Microsoft SQL Server. If you do not currently
own a copy of Microsoft SQL Server 7 or SQL Server 2000, a 120 day
evaluation of the product is available from Microsoft. Please visit
www.microsoft.com/sql for more information.
Requirements
3
Table 1-2. Database Size
Estimates
Table 1-3. Recommended
GEMTools Client Workstation
Configuration
4
GEM™ microarrays/
year
Database growth/year (MB)
Recommended hard
disk capacity (GB)
20
500
2
100
700
4
500
3,500
7
1,000
7,000
14
5,000
35,000
70
10,000
70,000
140
Component
Description
Workstation
IBM compatible workstation
CPU
Intel Pentium II or higher (300 MHz or faster)
Motherboard
Intel-compatible motherboard
Multiprocessor
Support
Yes
Memory Installed
128 MB
Hard Drive Controller
Ultra/Fast SCSI or EIDE
Hard Drive
4 GB Ultra/Fast SCSI
Video Adapter
PCI Video Adapter with 4 MB Video RAM
SVGA Display
Monitor
1280 x 1024, 65 K colors minimum
PCI Network Adapter
Fast-Ethernet 100BaseT or 10BaseT
CD-ROM Drive
8x or faster CD-ROM (SCSI recommended)
Floppy Drive
1.44 MB
Modem
US Robotics 56 kbps or faster
Keyboard and Mouse
PS-2 Keyboard and Mouse
Operating System
Microsoft Windows 95, NT, ME, or 2000
GEMTools™ Installation and Administration Guide
Component
Description
Web Browser
Microsoft Internet Explorer 4.01 or Newer
Database Software
Microsoft SQL Server 7.0 with Service Pack 2 or
Microsoft SQL Server 2000
GEMTools 2.5 requires Microsoft SQL Server. If you do not currently
own a copy of Microsoft SQL Server 7 or SQL Server 2000, a 120 day
evaluation of the product is available from Microsoft. Please visit
www.microsoft.com/sql for more information.
Requirements
5
2
2n
Software Installation
Introduction
This chapter provides information on installing and configuring the
software necessary to use GEMTools™ software. It describes the necessary
prerequisites, provides step-by-step instructions, and includes configuration
information.
The following items are required to use GEMTools:
• Microsoft Windows 2000, NT, ME, 98, 95
• Microsoft SQL Server 2000, SQL Server 7.0, SQL Server 6.5
• Microsoft Internet Explorer 4.0 or higher (for electronic download of
data)
• GEMTools Server™ in electronic or CD format
• Data files for GEM data in electronic or CD format
Depending upon the type of system you are using, you may install the SQL
Server and the GEMTools Server software and databases on any of the
following:
• Server computer running Windows NT Server 4.0
• Workstation computer running Windows NT Workstation 4.0
• Desktop computer running Windows 2000 Server or Advanced Server
• Workstation computer running Windows 2000 Professional or Windows
NT Workstation 4.0
• Desktop computer running Windows ME (Millennium Edition),
Windows 98, or Windows 95
Software Installation
7
You may install the GEMTools client software on a computer running
Windows 2000 Server or Advanced Server, Windows NT Server 4.0,
Windows NT Workstation 4.0, Windows ME, Windows 98, or
Windows 95.
Installation Overview
While the details of installation will vary depending upon which
operating system you are using, the same general steps will be used in
every installation:
1. Prepare operating system.
2. Install Microsoft SQL Server.
3. Install GEMTools Server.
4. Install GEMTools Client.
5. Configure GEMTools Server.
Preparing the Operating System
You may need to install additional service packs or other software to
operate Microsoft SQL Server. In addition, you will need to enable file
sharing for use with Windows 95/98.
Windows 2000 or Windows NT
1. Check the GEMTools system requirements to ensure GEMTools will
work properly with your system. Refer to “Requirements” on page 1
for more information.
2. Log on as the local administrator or domain administrator.
3. Install Latest Operating System Service Pack if required
• Service Pack 1 (or newer) for Windows 2000
• Service Pack 6 (or newer) for Windows NT
8
GEMTools™ Installation and Administration Guide
4. Verify your Network Interface Card (NIC) is operating properly and
connected to the network.
Standalone Installation Without a Network Connection
For a standalone installation without a Network Card or if the computer
is disconnected from the network, you can simulate network connectivity
using the Microsoft Loopback Adaptor.
1. In Control Panels, select Add New hardware.
2. Select Add/Troubleshoot Device.
3. Select Add New Device.
4. Choose Network Adaptors category.
5. Under Manufacturers select Microsoft, and under Network Adaptor,
select Microsoft Loopback Adaptor.
Windows ME, 95, or 98
1. Check the GEMTools system requirements to ensure GEMTools will
work properly with your system. Refer to “Requirements” on page 1
for more information.
2. Enable file sharing (see the next page).
File sharing must be enabled to use GEMTools on Windows 95 and
Windows 98.
➪ To enable file sharing:
1. From the Start Menu, select Settings ➜ Control Panel.
2. Double-click the Network icon to open the Network window.
3. Click File and Print Sharing to open the File and Print Sharing
window.
Software Installation
9
Figure 2-1. File and Print
Sharing Window
4. Select the checkbox to give others access to your files and click OK.
Note: You may be asked to provide your Windows 95 or Windows 98
Installation CD to complete the enabling of file sharing.
Installing Microsoft Internet Explorer
In order to use the GEMTools Internet Download feature, Internet
Explorer 4.0 or newer must be installed on the GEMTools machine that
will be performing the Internet download. Internet Explorer adds
essential components to the Windows operating system required for data
decryption and web server communication.
Note: If you are a domestic customer we recommend installation of
the 128-bit security version of Internet Explorer.
Internet Explorer is available for free on the Web at:
www.microsoft.com/windows/ie/download
Follow the on screen instructions to download and install Internet
Explorer.
Installing Microsoft SQL Server
Installing Microsoft SQL Server for use with GEMTools requires
approximately 450 MB of hard drive space for a complete installation.
Refer to “Installing Microsoft SQL Server” on page 67 for more
information.
10
GEMTools™ Installation and Administration Guide
➪ To install Microsoft SQL Server:
1. Install Microsoft SQL Server using the Installation Wizard.
• SQL Server 2000:
Use the server edition with Microsoft Windows 2000 or Windows
NT.
Use the personal edition with Microsoft Windows 2000 Professional,
NT Workstation, Windows ME, 95, or 98.
• SQL Server 7.0:
Select the edition of SQL Server 7.0 you wish to install:
Use the standard edition with Microsoft Windows 2000 or Windows
NT.
Use the desktop edition with Microsoft Windows 2000 Professional,
NT Workstation, Windows ME, 95, or 98.
• SQL Server 6.5:
Upgrade SQL Server 6.5 to Service Pack 5a, if it is not already
upgraded.
Service Pack 5a is available online from Microsoft at:
http://support.microsoft.com/support/downloads/
2. For Windows ME/98/95:
Configure the SQL Server Auto-start option.
To configure the auto-start option:
From the Start menu, select Programs ➜ Microsoft SQL 7.0 Service
Manager to open the SQL Service Manager window.
Software Installation
11
Figure 2-2. SQL Server
Service Manager window
Select the auto-start service option and close the window.
Note: The GEMTools Server installation will automatically set the
auto-start option when using Windows 2000 and Windows NT.
Refer to “Starting SQL Server” on page 67 for more information.
3. Restart the computer if prompted.
Installing GEMTools Server
1. Run setup.exe from the server directory on the GEMTools CD-ROM
or run GEMTools25x.exe if GEMTools was downloaded from the
Internet.
The Welcome window of the installation wizard opens.
Note: You can obtain the latest version of GEMTools server and
release notes on the web at http://microarray.incyte.com/gemtools/
update.asp
2. Click Next to continue the installation;
The Software License Agreement opens.
3. Review the Software License Agreement and click Yes to continue
the installation.
12
GEMTools™ Installation and Administration Guide
The GEMTools Registration window opens.
Figure 2-3. GEMTools
Registration Window
4. Enter your Server Product Registration Key.
To obtain a server registration key for new installations call our
Customer Service (see “Customer Support” on page 23). If you have
previously installed GEMTools on your computer, your current
registration key remains valid.
Provide the customer service representative with the product
identification numbers displayed in the GEMTools Registration
window. The representative will provide you with a registration key
needed to install GEMTools on your workstation. It is important that
you write down this registration key for future reference.
5. Enter the license key provided to you by your Incyte customer service
representative or the temporary license key you received via e-mail
after downloading the GEMTools evaluation software from the web
site.
Note: GEMTools evaluation licenses will expire after 30 calendar days.
Software Installation
13
You can obtain a server registration key for new or upgraded
installations by calling customer support at 1-800-430-0030 or sending
an e-mail with your request to [email protected].
Figure 2-4. Site License
Registration Window
6. Enter your Site License key, if you purchased a site license.
This key allows unlimited GEMTools client installations. If you do
not have a site license, leave this entry blank. If you obtain a site
license key, GEMTools client registration is not required.
7. Click Next to go to the GEMTools Server Setup window.
This window allows you to create a directory for the GEMTools
server, share, and client software.
14
GEMTools™ Installation and Administration Guide
Figure 2-5. GEMTools Server
Server Setup Window
Click Browse to open a window that will allow you to set a new
location for the database.
This location should have sufficient disk space and good I/O
performance. This location is the directory for the GEMTools Server
software, Database Devices, and GEMTools Client software
distribution. The directory will be accessible as a Windows Network
Shared Directory after installation.
For the highest levels of performance, the GEMTools data directory
should reside on a SCSI disk device, ideally a RAID (Redundant
Array of Inexpensive Disks) device with 3 or more disks.
Software Installation
15
Figure 2-6. GEMTools
Database Configuration
Window
8. Click Next.
9. For new installations, specify the size of the Production and Sequence
databases.
Recommended sizes appear automatically.
10. Click Next to open the Database Login Information window.
Figure 2-7. GEMTools
Database Login Information
Window
16
GEMTools™ Installation and Administration Guide
11. Enter the data source (GEMTools) and SQL administrator login (SA)
for your local SQL Server machine and click Next.
The ODBC Client Network Protocol window opens.
Figure 2-8. ODBC Client
Network Protocol Window
12. Select a default ODBC Client Network Library and click Next.
Tip: TCP/IP is recommended and usually will provide the highest
level of performance.
Note: On SQL Server 6.5, you must enable this protocol in the SQL
Server Setup utility.
Software Installation
17
Figure 2-9. GEMTools Web
Browsing Default Settings
Window
13. SQL Server 6.5 only. Server configuration:
Optional Temporary Database Configuration: The GEMTools Server
Setup will give statistics on your Temporary Database and allow you
to configure it if desired. Refer to “SQL Server Temporary Database”
on page 57 for more information.
Optional SQL Server Optimization: GEMTools can optionally
configure the memory settings and other parameters of your SQL
Server. See “Configuring SQL Server for Optimal Performance” on
page 59 for more information.
Note: Microsoft SQL Server 2000 and Microsoft SQL Server 7.0 are
self-optimizing.
14. Specify the default web browser to be used by GEMTools clients at
your site. GEMTools supports the Internet Explorer and Netscape
Navigator web browsers.
15. Enter the LifeSeq® server installation if Incyte LifeSeq is installed at
your site and then click Next.
18
GEMTools™ Installation and Administration Guide
If you have an Incyte LifeSeq server at your site, enter the full path
name to the server, for example, lifeseq.company.com. This entry is
used to configure your default LifeSeq web links. Your site may
require additional changes to these links. Links can be edited using
the GEMTools client (see the GEMTools Analysis Manual for more
information).
16. Click Next to complete the Server installation.
17. You will be prompted to install the GEMTools Client software.
Choose Yes to install the Client.
Installing GEMTools Client
You will need to install the GEMTools client software before you can
finish creating databases and loading data in the GEMTools server
software.
Note: The GEMTools client setup software is installed during the
installation of the GEMTools server software.
1. Run the setup.exe program from the Setup directory on the
GEMTools Server. This directory is located at
\\<SERVER>\GEMTools\Setup, where <SERVER> is the name of
your Server.
If your company does not have a site license, setup will require a
product registration key. Call customer service for your registration
key. The registration key is unique to each system.
Provide the customer service representative with the product
identification numbers displayed in the GEMTools Registration
window. The representative will provide you with a registration key
needed to install GEMTools on your workstation. It is important that
you write down this registration key for future reference.
2. Follow the on-screen instructions to complete the installation.
Software Installation
19
Upgrading GEMTools Client
The GEMTools installation software automatically checks to see if an
earlier version of GEMTools is installed. If it detects an earlier version of
GEMtools, the installation software will allow you to upgrade the
software.
Upgrading GEMTools Client
The GEMTools installation software automatically checks to see if an
earlier version of GEMTools is installed. If it detects an earlier version of
GEMtools, the installation software will allow you to upgrade the
software.
Configuring the GEMTools Server
All administration of the GEMTools Server is performed using the
GEMTools client software. The GEMTools Server administrator can
create new databases, create user accounts, and assign access privileges for
each GEMTools user.
When you first run GEMTools, you must configure the GEMTools
Server by:
1. Creating a customer database.
2. Creating a company.
3. Creating users and assigning privileges to them.
4. Loading GEM data into the database.
20
GEMTools™ Installation and Administration Guide
➪ To configure the GEMTools Server:
1. Run GEMTools by selecting the GEMTools shortcut icon through the
Start Menu on the Windows taskbar. This icon is located in
Start\Programs\Incyte GEMTools\GEMTools.
2. Log on using the GEMTools administrator account. The default
username and password for the administration account is:
UserName: GEMTools
Password: gemtools
Note: GEMTools passwords are case sensitive.
Important: For security reasons, you should change the administrator
password after installation is complete (see step 6).
This is the GEMTools administrator account.
3. Create your customer database. You will need to enter the Utilities
window and create a new database. Contact your customer
representative for the database ID that uniquely identifies your
database among all the databases that Incyte maintains and supports.
Refer to “Creating a New Database” on page 28 for more
information.
4. Create a company. After the database is created, you will need to add
your company information to the database. Select the Companies tab
in the Utilities Window. Create a new company and enter your
company information. Refer to “Defining a New Company” on
page 29 for more information.
5. Create users. Select the Users tab from the Utilities window to create
new users. Assign appropriate privileges to users as needed. Refer to
“Adding New Users” on page 31 and to “Editing User Profiles” on
page 32 for more information.
Software Installation
21
6. Change the GEMTools password to secure your GEMTools server.
(Click Change Password at the top of the Utilities window.) Refer to
“Changing Your Password” on page 26 for more information.
7. Use the Synchronize utility to load data from a CAB file into the
GEMTools database. Refer to “Synchronize Databases” on page 37
for more information.
Uninstalling GEMTools Client
➪ To uninstall the GEMTools Client software:
1. From the Start menu, select Control Panels.
2. Double-click the Add/Remove Programs icon.
3. Select GEMTools 2.5 Client from the software list.
4. Click Add/Remove.
5. Click OK.
Uninstalling GEMTools Server
Warning: Uninstalling GEMTools Server completely will remove all
GEM data and experiment information.
1. Remove the GEMTools Databases using SQL Enterprise Manager.
The following databases must be removed.
• Customer database
• Demonstration
• GEMConfig
• GEMProduction
• GEMAnnotation
22
GEMTools™ Installation and Administration Guide
• GEMSequence
Refer to the SQL Server documentation for information on using
Enterprise manager.
2. Uninstall GEMTools Server using Add/Remove Programs as
described in the procedure for uninstalling the client software, above.
3. Remove the GEMTools Server Directory (usually C:\GEMTools).
Customer Support
Incyte offers training and support to its licensed users and user
organizations. Additionally, GEMTools administration training is
available to your Information Technology staff. It is useful to have a
phone line connected to your workstation modem for application
support.
If you have any questions or would like information about our training
programs, you may contact customer support at:
4678 World Parkway Circle
St. Louis, Missouri 63134
Tel: 1 800-430-0030 toll free in the U.S.
Fax: 1 888-919-3324 toll free in the U.S.
E-mail: [email protected]
The latest updates and information about the GEMTools software is
available on Incyte’s web site. Visit www.incyte.com for the latest
information.
Software Installation
23
3
3
Utilities
Use the Utilities window to perform various administrative tasks. Six tabs
give you access to all the maintenance units:
• Databases
• Companies
• Users
• Privileges
• Preferences
• Administrator
The specific administrative tasks you have access to depend on the access
privileges that you have been granted.
• To open the Utilities window, click Utilities on the GEMTools™ software
main screen.
Utilities
25
Changing Your Password
The Logon Information window displays the name of the current
database and user.
• To open the Change Password window, click Change Password on the
Utilities window.
Figure 3-1. Change Password
Window
➪ To change your password:
1. Type in your new password in the New Password text box.
2. Type in your new password again in the Re-enter Password text box
for verification.
3. Click OK.
26
GEMTools™ Installation and Administration Guide
Databases
The Databases tab allows you to change the current database, view
database information, create new databases, and delete existing databases.
Figure 3-2. Utilities Window:
Databases Tab
Changing Your Database
➪ To change your current database:
1. Click on a database name in the Databases list.
2. Click Apply.
The Databases list displays only the databases to which you have access. If
other windows are open when you switch databases, these windows close
to resynchronize the data. Confirmation message windows give you the
opportunity to save any changes you have made to these windows before
they are closed.
Utilities
27
Creating a New Database
➪ To create a new database:
1. Click New.
The Create Customer Database window opens.
2. Specify parameters, such as database name, database ID, database
size, logfile size, and administrator password.
Note: You must contact the Incyte Microarray Division for the Incyte
database ID.
Databases you create in this way appear as a selectable item in the Default
Database drop down list, as described in the Users section.
The next time you log in to GEMTools, this database is automatically
selected for you.
Deleting Databases
➪ To delete the current database:
1. Click Delete.
2. Click Yes at the Prompt;
or click No to exit without deleting.
➪ To change your default database:
1. Click the Users tab of the Utilities window.
2. Select a new database from the Default Database drop down list.
28
GEMTools™ Installation and Administration Guide
Companies
Use the Companies tab to view company information, create new
company profiles, and delete existing company profiles. When you select
a company name, you can only view the associated company information
or delete the company profile. You cannot change the company name
associated with the current user profile.
Figure 3-3. Utilities Window:
Companies Tab
Defining a New Company
➪ To define a new company profile:
1. Click New in the Companies window to open the New Company
window.
Utilities
29
Figure 3-4. New Company
Window
2. Enter the requested information in the fields in this window.
Note: At least one company must be created before creating users.
Company profiles that have been created in this window appear in the
Company drop down list in the Create New User window, as described
in the Users section. When multiple companies exist, users can only see
other users who belong to their company.
30
GEMTools™ Installation and Administration Guide
Users
Use the Users tab to view user information, create new user profiles, edit
or delete existing user profiles, and define a default database for a user.
Figure 3-5. Utilities Window:
Users Tab
Choosing a Default Database
The default database is the database that is automatically selected when a
user logs in. You may select any database that a user has the privilege to
access from the Default Database drop down list.
Adding New Users
➪ To add a new user:
1. Click New to open the Create New User window.
Utilities
31
2. Specify logon name, password, personal information, and privileges
for the new user.
Editing User Profiles
➪ To edit a user profile:
1. Select a name from the Users list on the Utilities window. This
populates the text boxes in the neighboring User Information section.
2. Click Edit.
You may edit the logon name, password, personal information, and
privileges for the user.
3. Click OK.
Removing Users
➪ To delete a user:
1. Select a name from the Users list. This populates the text boxes in the
neighboring User Information section.
2. Click Delete to remove this user from the database.
3. Click Yes in the dialog box to complete deletion.
32
GEMTools™ Installation and Administration Guide
Privileges
Use the Privileges tab to add and remove a user’s access privileges.
Privileges can restrict access to selected databases, or to certain program
functions.
Refer to “Access Privileges” on page 54 for more information about user
privileges.
Figure 3-6. Utilities Window:
Privileges Tab
Adding Privileges
➪ To add privileges:
1. Select users from the All Users list.
To add privileges to multiple users at once, select multiple users from
the list.
Utilities
33
• To select more than one contiguous item, click on the first item in
the list and Shift-click on the last item in the list. This action selects
all items between the first and last items clicked.
• To select more than one noncontiguous item, Ctrl-click each item.
2. Select one or more items in the Available Privileges list.
Note: Refer to the GEMTools Server reference for description of
available GEMTools privileges, see the section “Access Privileges” on
page 54.
3. Click Add to grant those privileges to the selected user.
4. Click Apply.
Note: To cancel a privilege modification operation before any changes
have been made, click Cancel.
Removing Privileges
➪ To remove privileges:
1. Select a user from the All Users list.
2. Select on one or more items in the Granted Privileges list.
3. Click Remove to remove those privileges from the selected user.
4. Click Apply.
To cancel a privilege modification operation before any changes have
been made, click Cancel.
Note: You cannot remove privileges from multiple users by selecting
more than one user from the All Users list.
34
GEMTools™ Installation and Administration Guide
Preferences
Use the Preferences option to define a web browser and adjust the default
parameters for unbalanced GEM microarrays.
Figure 3-7. Utilities Windows:
Preferences Tab
Web Browser
GEMTools supports Microsoft Internet Explorer and Netscape
Navigator. When GEMTools is installed, your site administrator selects
the default web browser for new client installations. An administrator
will need to install the browser if it is not already installed on the client
workstation.
Utilities
35
Default Adjustment Parameters
Use the Default Adjustment Parameters option to specify the default
element filtering values used to adjust unbalanced GEM microarrays.
Typically, GEM microarrays are balanced with these default parameters
prior to data shipment.
Administrator
The Administrator tab contains useful tools that should only be used by
the GEMTools database administrator.
Figure 3-8. Utilities Window:
Administrator Tab
36
GEMTools™ Installation and Administration Guide
Synchronize Databases
Use the synchronization feature to import a differential update file into
your database. Our microarray facility ships new data to you in electronic
format on a regular basis.
Figure 3-9. Synchronize Window
Browse
button
➪ To synchronize your database:
1. Click the browse button (denoted by the ellipsis) to search for and
select the <file>.cab file created by the Transfer Utility. Your local
CD-ROM drive is selected by default.
2. Click Start to import the differential update file into your database.
Before the update takes place, GEMTools verifies the integrity of the data
import file. GEMTools also performs a security check to ensure the
import file can only be imported into an authorized destination database.
If an error occurs, please report it to our customer service department.
The transfer utility inserts rows into the current database and outputs a
<file>.log file containing the outcome of each record insertion. The
synchronization feature automatically updates the statistics of all
GEMTools table indexes and truncates database logs.
Note: Backup the database before a synchronization. The log is
truncated prior to synchronization.
Utilities
37
Round Trip Confirmation
The log file is named <file>.log and resides in the Transfer subdirectory.
This file contains information about each record imported into the
database. The log file must be returned to the microarray facility after
import for processing.
If an import fails for a particular record, an ODBC or SQL error message
is recorded in the log file. Insertion errors should not occur, since
transferred records are marked in the Incyte microarray database to
prevent automatic retransfer. GEM, plate, probe, and plate group objects
can only be created at the microarray facility (to prevent record primarykey conflicts).
Internet Download
The Download button provides access to the Incyte Microarray Data
Delivery system, which allows secure shipment of GEM microarray data
via the Internet. This web-based system is designed to eliminate the need
for CD-based data delivery and allows a customer to download new data
as soon as it is available.
The Incyte Microarray Data Delivery system implements web-based data
distribution with automatic encryption/decryption as well as other
security measures.
➪ To download data from the Incyte web server:
1. Click Download (in the Administrator tab of the Utilities window).
The Connect to Web Server window opens.
38
GEMTools™ Installation and Administration Guide
Figure 3-10. Connect to Web
Server Window
2. Enter your password and click OK.
The Download from Internet window opens when you have access to
the secure web server at the microarray facility.
Note: Please contact Incyte customer service to receive your password
and web access account.
Figure 3-11. Download from
Internet Window
Utilities
39
3. Select the file or files you wish to transfer from the list and click
Download.
Note: You can use Select All to select all files.
The progress of the download will be displayed on the Progress bar.
Each customer datafile will be automatically removed from the Web
Server upon electronic confirmation that the data transfer has been
completed successfully.
Refer to the Incyte Microarray Data Delivery Access Agreement for
more information about using the Internet download feature.
Import Sequences
You can import FASTA formatted sequence information files into the
GEMTools database using data files provided by Incyte. Sequence
information is also available via web links to Incyte’s LifeSeq® software.
See “Web Links” on page 43.
To import sequences into GEMTools:
1. Click on Import Sequences (in the Administrator tab of the Utilities
window).
2. Click the browse button (denoted by the ellipsis) to search for and
select the <file>.seq file.
3. Click Import.
40
GEMTools™ Installation and Administration Guide
Figure 3-12. Import
Sequences Window
Transfer
The Transfer button allows you to transfer GEM microarray data from
one database to another. This feature can be particularly useful when
controlling the access of different users to particular sets of data.
Clicking on the Transfer button opens the Data Transfer window, which
allows you to select data to be transferred and destination databases for
that data.
Figure 3-13. Data Transfer
Window
Utilities
41
The Object Type drop down list and the Find button allow you to select
from the following types of data:
Table 3-1. Types of Data You Can
Transfer from One Database to
Another
For this object type:
Clicking Find opens this window:
GEM
Multiple GEM Selection window (described in
GEMTools Analysis User Manual).
Probe
Multiple Probe Selection window (described in
GEMTools Analysis User Manual)
Plate
Multiple Plate Selection window (described in
GEMTools Analysis User Manual)
Gene Group
Find Gene Groups window
GEM Group
Find GEM Groups window
The Find Gene Groups window displays a list of the available gene
groups.
Figure 3-14. Find Gene Groups
Window
➪ To select desired Gene Groups for transfer:
1. Select the desired Gene Group from the Gene Groups list.
Note: To select multiple groups, Ctrl-click on the desired items.
2. Click OK.
42
GEMTools™ Installation and Administration Guide
The Find GEM Groups window works in the same manner as the Find
Gene Groups window.
➪ To transfer microarray data to a new database:
1. Click Transfer to open the Data Transfer window.
2. Locate the objects you wish to transfer using the Object Type drop
down list and the Find button.
3. Remove unwanted objects using the Remove All and Remove
buttons.
4. Select a destination database from the Destination Database box.
5. Click Transfer to transfer the data to the destination database; or
click Close to close the window without transferring data.
Web Links
Use the Web Links window (accessed from the Web Links button on the
Utilities window) to manage custom links to external databases or
database search engines that are accessible via the World Wide Web.
Note: Only a person with GEMTools Administrator privileges may
create new web links.
Utilities
43
Figure 3-15. Utilities: Web Links
Window
Creating New Links
➪ To create a new link:
1. Click New.
2. Enter a name for the link in the Link Name text box.
Deleting Links
➪ To delete an existing link:
1. Click Delete.
2. Click OK.
If a link requires arguments for CGI scripts, you can specify the
arguments in the Search Pattern text box. The search pattern acts as a
template with one or more argument holders — “%s” — which will be
substituted by the values of the columns at run time.
In the example below, the search template for Entrez takes one variable
argument that is filled by the gene’s identification number.
44
GEMTools™ Installation and Administration Guide
Example:
Gene Name: GeneX. Identification Number: AB00005
Search template: htbin-post/Entrez/
query?form=4&db=n&term=%s&dispmax=20
At execution time: htbin-post/Entrez/
query?form=4&db=n&term=AB00005&dispmax=20
The number of selected columns should match the number of times “%s”
is contained in the search pattern, and the order of the columns (top
down) should correspond to their substituted location in the search
pattern. The columns can be ordered using the up and down arrow keys.
Clone Source
Use the Clone Source window to identify where a clone was obtained.
Figure 3-16. Clone Source
Window
Utilities
45
Creating a New Source
➪ To create a new clone source:
1. Click Clone Sources on the Utilities window.
2. Click New.
3. Enter the source name in the text box.
4. Click OK.
Modifying a Source Name
➪ To modify the name of a clone source:
1. Select the source from the Clone Sources list.
2. Make changes in the Source Name text box.
3. Click Apply.
Deleting a Source Name
➪ To delete a clone source:
1. Select the source from the Clone Sources list.
2. Click Delete.
3. Click Yes.
Note: Clone sources assigned by Incyte are read-only and cannot be
deleted.
Sort Builder
Use the Sort Builder window (accessed from the Sort Builder button on
the Utilities window) to build a customized order for sorting that can be
used in the Element Display window.
46
GEMTools™ Installation and Administration Guide
Figure 3-17. Sort Builder Window
Creating a New Sort Order
➪ To create a new sort order:
1. Click New.
2. Enter a name for the sort order in the text box and click OK.
3. Select the desired criteria from the Available Fields section of the
window.
4. Click Add to move the criteria to the Selected Fields section of the
window.
5. Specify the ascending/descending order by clicking on the drop down
menus to the right of the Order column entries. If you do not specify,
the default order is used.
Utilities
47
Figure 3-18. Order Drop Down
Menu
6. Click Apply.
Deleting a Sort Order
➪ To delete a sort order:
1. Select a sort order from the Sort Order menu.
2. Click Delete.
3. Click Yes.
Note: Sort orders assigned by Incyte are read-only and cannot be
deleted.
Object Types
Use the Object Types window to create new object types, and delete and
modify existing object types.
48
GEMTools™ Installation and Administration Guide
Figure 3-19. Object Types
Window
Creating New Types
➪ To create a new object type:
1. Click New Type...
2. Enter the new object type in the text box.
3. Click OK.
Modifying an Object Name
➪ To modify the name of an object type:
1. Select the object name from the Type list.
2. Make changes in the Object Type Name text box.
3. Click Apply.
Deleting an Object
➪ To delete an object:
1. Select the object from the Type list.
2. Click Delete Type.
Utilities
49
3. Click Yes.
Note: Object types assigned by Incyte are read-only and cannot be
deleted.
50
GEMTools™ Installation and Administration Guide
4
4
GEMTools Server Reference
™
This chapter contains supplemental information useful when installing and
administering GEMTools.
GEMTools Shared Directory
The GEMTools Server Setup automatically creates a Windows shared
directory on the GEMTools server. The name of this shared directory is
GEMTools and can be found in the Windows Network Neighborhood.
The GEMTools shared directory primarily contains the Client Distribution
and Element Images. It may also be used for the storage of import and
export files.
By default, the shared directory is created with access for “Everyone”. All
users of GEMTools must have Read access to the GEMTools shared
directory and Read permission to all directories in the GEMTools Server
tree.
If you decide to change the permissions to the shared directory, make
certain that any users performing GEMTools administration (especially
database creation and Synchronization) have Full access. In addition, the
User Account for the SQL Server Service MSSQLServer must also have
Full access (Full Control).
If you have Windows NT User groups at your site, you may want to change
the permissions to the directory to read-only for certain user groups.
GEMTools™ Server Reference
51
GEMTools Client Distribution Software
A copy of the Setup.exe program for installing GEMTools Client
software is installed in the Setup directory on the GEMTools Server
when the GEMTools Server software is installed. The Setup.exe program
can be used to install GEMTools Client on the server computer and on
workstation computers connected to the server through a network. Refer
to “Installing GEMTools Client” on page 19 for more information.
The Client Distribution Software is updated automatically when the
GEMTools Server is installed or upgraded. Clients are automatically
informed of updates after GEMTools Server has been upgraded. Refer to
“GEMTools Client Distribution Configuration File” on page 60 for more
information.
Objects
GEMTools supports three object types:
• Configuration objects (used internally by GEMTools software)
• Databases
• Privileges
Configuration Objects
Configuration object entries contain information regarding standard
GEMTools databases and server location.
Table 4-1. Description of
Configuration Objects
52
Object Name
Description
GEMToolsServer
Network name of GEMTools Server
GEMToolsData
Physical location of GEMTools shared directory
GEMConfig
GEMConfig database
GEMProduction
GEMProduction database
GEMTools™ Installation and Administration Guide
Object Name
Description
GEMAnnotation
GEMAnnotation database
GEMSequence
Gene Sequence tracking database
Customer Databases
All customer databases possess the same database schema. In addition,
each database has the following directory structure:
Figure 4-1. Database Structure
Table 4-2. Database Directory
Structure
Subdirectory
Usage
Analysis
Element Image files (<GEMBarcode>*.par), Element-Well
statistics (<GEMBarcode>*.wst), and Grid files
(<GEMBarcode>*.grd)
Build
SQL database creation scripts and database/device deletion
scripts
Export
Reports and Analysis Export files
Fab
Fabrication Request files (<PlateGroupBarcode>.plt) and
GEM Geometry/Element-Well Mapping files
(<PlateGroupBarcode>.pix)
GEMData
Database and log file devices
GEMTools™ Server Reference
53
Subdirectory
Usage
Scan
GEM images of Cy3 (<GEMBarcode>.1) and Cy5
(<GEMBarcode>.2) channels.
Transfer
Database Synchronization files (differential updates)
Access Privileges
Privileges are required for users to have access to various features of the
GEMTools user interface. Users may have any combination of access
privileges.
Table 4-3. Definition of GEMTools
Access Privileges
54
Privilege Name
Access
Write Access
Modify any available information
Create User
Create, edit, and delete users
Create Database
Create and delete databases
Create Company
Create and edit companies
View Processing
View plate and/or probe processing information
Transfer
Use data-transfer utilities:
a) Import – (at Client site)
b) Export – (at Incyte microarray site)
c) GEMStore (at Incyte microarray site)
Create Genes
Create, edit, and remove genes from the database
Assign Genes
Make gene/well associations on plates
Import Genes
Import genes from gene import file
Edit Gene Hierarchy
Edit gene hierarchies
Edit Project Hierarchy
Edit project hierarchies
Site Configuration
Edit web links and custom sorts
Edit Classifications
Edit Clone Sources and object types
Edit Sequences
Add, edit, and remove clone sequence information
Generate PMD
Create data files for import into LifeExpress™ RNA
SNP Admin
Enter any number of arraying tips in the Arrayer
Parameters dialog box
GEMTools™ Installation and Administration Guide
Privilege Name
Access
Element Validation
Edit all fields in the Element Adjustments dialog box
MicroArrays Direct
Access GEM Microarrays Direct functionality. You must
be granted the specific privilege (e.g., Create Probes) to
use specific functionality.
Note: Upon installation, the GEMTools user possesses a complete set
of privileges for a particular site. Access to privileges and databases
can be restricted on a user-by-user basis.
Refer to “Privileges” on page 33 for more information.
Access Privileges for GEM Microarrays Direct Customers
The following table lists the access privileges available for GEM
Microarrays Direct customers. Refer to the GEMTools Direct Manual for
more information about GEM Microarrays Direct functionality for GEM
Microarrays Direct.
Table 4-4. Definition of GEMTools
Access Privileges for GEM
Microarrays Direct Customers
Privilege Name
Access
Manufacturing
Assign probes to GEM microarrays for
hybridizations. Requires Read/ Write privileges.
Image Analysis
Scan and analyze GEM microarrays. Track and
enter image related issues.
Print Labels
Print labels for probes or plates in a range defined by
the user.
Edit Processing
Process probe production and track the
development through the following states:
• Arrival (tissue)
• Total RNA,
• Poly A RNA
• Sample Recovery
• Probe
Track issues related to Probe Processing.
GEMTools™ Server Reference
55
Privilege Name
Access
View Processing
View Probe Processing dialog box.
Create Probes
Create new labeled probes for Cy3 or Cy5 or non
labeled probes.
GEM Direct
View GEM microarray status and find GEM
microarrays on the status bar. View Probe status.
Perform batch analysis of GEM microarrays.
Calibrate scanner PMTs.
Users
At installation time, GEMTools creates a SQL Server user account
named GEMTools to manage GEMTools database creation and deletion.
The GEMTools client software uses this account internally whenever
making transactions against GEMTools databases. In addition,
GEMTools maintains a separate user list. Each user possesses a profile
containing the following information:
• Login name
• Password
• First name
• Middle name
• Last name
• Default database
• Phone number
• E-mail address
• Company
Each user can be assigned a particular set of access privileges.
56
GEMTools™ Installation and Administration Guide
Companies
Users other than the GEMTools user must belong to a single company.
GEMTools maintains a company profile containing the following
information: address, contact name, contact phone, customer
representative name, customer representative phone number, and notes.
Refer to “Companies” on page 29 for more information.
GEMTools Server Installation
This section provides information for use by advanced administrators to
manually configure the GEMTools installation.
SQL Server Temporary Database
SQL Server requires a temporary database for storage of temporary
tables and information. Microsoft SQL Server 7.0 creates and optimizes
this database automatically. On SQL Server 6.5, a temporary database,
“TEMPDB” is created on the master device. By default, this database is
only 2 MB, which is insufficient for proper GEMTools operation.
For SQL Server 6.5, a temporary database of at least 300 MB is
recommended for the GEMTools Server. The GEMTools Server Setup
can automatically expand your temporary database at install time.
Alternately, an advanced system administrator may choose to expand
their temporary database manually prior to GEMTools Server
installation for maximum control.
Database and Device Creation
The GEMTools Server automatically creates all databases and devices
needed for its operation at installation time. The setup program also
creates the complete database schemas. The following schemas,
GEMTools™ Server Reference
57
databases, and associated devices are created during GEMTools Server
Setup:
1. GEMConfig – Database and Server Configuration, Users, Security
(Config.SQL).
2. GEMAnnotation – Annotation Dictionary Database
(Annotation.SQL).
3. GEMProduction – Database for Production Related Information
(Production.SQL).
4. GEMSequence – Sequence Related information for Gene Clones
(Sequence.SQL).
5. CustomerDatabase – created using the GEMTools Client Interface
(CustomerTemplate.SQL).
The build and drop scripts for the databases and devices are available on
the GEMTools server \\SERVER_NAME\GEMTools\Config\Build.
The database schema scripts in parenthesis above are stored on the
GEMTools server in the \\SERVER_NAME\GEMTools\Config
directory.
GEMTools SQL Server Login
The GEMTools Server Setup creates a single SQL Server login called
GEMTools.
This standard authentication login is used by the GEMTools client
software to access the GEMTools databases. In addition, the GEMTools
login is the owner (dbo) of all GEMTools databases. See the GEMTools
Security architecture section for more information.
The GEMTools SQL Server Login is different from the GEMTools
Administrator User Account used to log into the GEMTools client
58
GEMTools™ Installation and Administration Guide
software. Only use the GEMTools client software Utilities Window to
change the GEMTools administrator password.
Caution: Do not use SQL Enterprise Manager to change the
GEMTools SQL user password. This could make all clients unable to
access the GEMTools server. Contact Incyte Customer Service if the
GEMTools password is accidentally changed. Refer to “Customer
Support” on page viii for more information.
Restoring Database Ownership
If you transfer or restore a GEMTools-related database from a backup,
GEMTools user ownership must be restored.
➪ To restore database ownership:
1. Using SQL Enterprise Manager, open the SQL Query Window.
2. Switch to the database that needs its ownership updated using the
Combo Box.
3. Execute the stored procedure sp_changedbowner using the following
syntax:
sp_changedbowner GEMTools, true
Configuring SQL Server for Optimal Performance
Microsoft SQL Server 2000 and SQL Server 7.0 are self-optimizing.
However, setting up a maintenance schedule using enterprise manager
will keep your database running most efficiently. See the SQL Server
Administration guide for more information.
GEMTools Server will automatically configure your SQL Server 6.5
installation for optimal performance. GEMTools Server Setup follows
Microsoft’s recommendations for a properly tuned server. The Setup
program detects information about your server (such as system memory)
and sets the configuration parameters appropriately.
GEMTools™ Server Reference
59
If you are an advanced administrator, you may choose to configure these
parameters manually using SQL Enterprise Manager. If you reconfigure
your server hardware (by adding memory for example) you should run
the GEMTools server setup and select “Automatic” optimization to
reconfigure SQL Server 6.5.
GEMTools Client Distribution Configuration File
The Client Distribution Setup Software contains an information file that
is referenced during Client Setup. This file is found in
\\SERVER_NAME\GEMTools\Setup and is configured during the
Server Setup process. The configuration file is named SETUP.INI.
In general you should have no need to edit this file, but the contents are
provided for your reference. The file format and contents are listed
below.
[Startup]
AppName=GEMTools Client 2.5.0
FreeDiskSpace=2290
[Security]
SiteLicense=XXXXXXXXX
[Auto]
DATAServer=Server_Name
NetLibrary=TCPIP
Version=2.5.0
Build=Build_Number
Internet]
TransferServer=transfer.incyte.com
60
GEMTools™ Installation and Administration Guide
External Application Interface
GEMTools Web Links
GEMTools Web Links allows GEMTools to interface with external
Web-based applications including Incyte’s LifeSeq® products. Gene
Information available in GEMTools can be used to access online
databases and other web reference sources on your company’s intranet or
on the Internet.
Default Web Links are pre-configured in GEMTools for select web sites.
These links can be edited using the Web Link editor accessed through
the Administrator Tab on the Utilities Window. Refer to “Web Links”
on page 43 for more information.
The default set of GEMTools Web Links is listed below:
LifeSeq Gene-By-Gene (Incyte Clone ID)
URL:
http://www.incyte.com/gxg/
Search Pattern: idsearchbase.jsp?PartnerId=GemTools&querytype=
cloneid&id=%
Search Fields: Incyte Clone ID
Description:
Links to Incyte’s LifeSeq Gene-by-Gene Database.
Prior registration is required to view the
contents of this publicly accessible database.
ZooSeq™ Rat (Incyte Clone ID)
URL:
http://<LIFESEQ SERVER>/
Search Pattern: cgi-bin/ZooSeq5/GeneQueryResults?QueryMethod=
Clone+ID&Data=%s
Search Fields: Clone ID
Description:
Links to Incyte’s ZooSeq Rat Database.
LifeSeq Public (Incyte Clone ID)
URL:
Search Pattern:
Search Fields:
Description:
http://www.incyte.com/
ilifeseq/cid?Data=%s&QueryMethod=Clone+ID
Clone ID
Links to Incyte’s LifeSeq Public Database. Prior
registration is required to view the contents of
this publicly accessible database.
GEMTools™ Server Reference
61
SeqServer - Sequence Information (5' Sequence ID)
URL:
http://<LIFESEQ SERVER>/
Search Pattern: cgi-bin/SeqServer/SeqServer?source=LS&module=
mretrieve&qid=%s
Search Fields: 5' sequence ID
Description:
Links to Incyte’s SeqServer using the 5' Incyte
Sequence ID.
SeqServer - Sequence Information (3' Sequence ID)
URL:
http://<LIFESEQ SERVER>/
Search Pattern: cgi-bin/SeqServer/SeqServer?source=LS&module=
mretrieve&qid=%s
Search Fields: 3' sequence ID
Description:
Links to Incyte’s SeqServer using the 3' Incyte
Sequence ID.
LENS: Clone Information (CloneID)
URL:
http://www.cbil.upenn.edu/LENS*/lens
Search Pattern: ?id_value=%s&id_type=image_id&page=id_query&
method=queryResults
Search Fields: Clone ID
Description:
Links to the LENS (Linking ESTs and their
associated Name Space) database using the
I.M.A.G.E Clone ID.
NCBI GenBank Entrez (3' gi Number)
URL:
http://www.ncbi.nlm.nih.gov/
Search Pattern: entrez/query.fcgi?cmd=Retrieve&db=Nucleotide&
list_uids=%s
Search Fields: 3' gi Number
Description:
Links to National Center for Biotechnology
Information (NCBI)’s Entrez retrieval system by
the 3' gi Number.
NCBI GenBank Entrez (Accession Number)
URL:
http://www.ncbi.nlm.nih.gov/
Search Pattern: entrez/query.fcgi?cmd=Search&db=Nucleotide&
term=%s
Search Fields: Accession Number
Description:
Links to National Center for Biotechnology
Information (NCBI)’s Entrez retrieval system by
the Accession Number.
62
GEMTools™ Installation and Administration Guide
NCBI GenBank Entrez (5' gi Number)
URL:
http://www.ncbi.nlm.nih.gov/
Search Pattern:
entrez/query.fcgi?cmd=Retrieve&db=Nucleotide&
Search Fields:
Description:
list_uids=%s
5' gi Number
Links to National Center for Biotechnology
Information (NCBI)’s Entrez retrieval system by
the 5' gi Number.
LifeSeq Gold (Incyte CloneID)
URL:
http://<LIFESEQ SERVER>/
Search Pattern: cgi-bin/LifeSeqGold/GeneQueryResults?QueryMethod=
Clone+ID&Data=%s
Search Fields: Incyte Clone ID
Description:
Links to Incyte's LifeSeq Gold database by the
Clone ID. Prior database subscription is required.
LifeSeq-to-GEMTools Gateway
Description
The LifeSeq-to-GEMTools gateway provides a communication
mechanism between LifeSeq and GEMTools, making it possible to view
LifeSeq query output in GEMTools.
The LifeSeq-to-GEMTools Gateway takes advantage of the external
application hook in LifeSeq called User-Defined Links, which allows the
output of any query to be relayed to another web application. GEMTools
Server includes a Perl script that generates a web page based on the UserDefined Links output that calls GEMTools via COM Automation.
Requirements
The LifeSeq-to-GEMTools gateway requires that you access LifeSeq
using Internet Explorer 3.x or newer on a Windows 95, Windows 98, or
Windows NT workstation that already has the GEMTools client
software installed.
GEMTools™ Server Reference
63
Installation
To install the LifeSeq-to-GEMTools gateway, you must edit the LifeSeq
Configuration File to include GEMTools as an external user application
and install the gateway scripts.
1. Edit your LifeSeq Configuration.
2. Locate the /cgi-bin directory of your LifeSeq server.
In the /cgi-bin directory you need to edit the LifeSeq.conf file to
configure LifeSeq’s User-Defined Links feature.
3. At the end of the LifeSeq.conf file add this line.
UserApplication1 URL=http://<LIFESEQ_SERVER>/cgi-bin/
GEMTools.cgi&NAME=GEMTools
Note: Replace the text <LIFESEQ_SERVER> with your LifeSeq
Server’s domain name. If there are additional User Applications
defined, change UserApplication1 to UserApplication2 or
UserApplication3 respectively. LifeSeq currently supports up to three
user-defined applications.
4. Copy the Gateway scripts.
Copy the GEMTools Gateway Perl scripts available on your
GEMTools server installation to the CGI executable directory on your
LifeSeq web server.
The two Perl Scripts are located in the
\\GEMTOOLS_SERVER\GEMTools\gateway directory:
• GEMTools.cgi
• Cgi-lib.pl
Copy these files to the /cgi-bin directory of your LifeSeq server using
FTP or another file copying method.
64
GEMTools™ Installation and Administration Guide
Using the LifeSeq-to-GEMTools Gateway
Note: Using the gateway, you can automatically select only those
clones that are available in the GEMTools database and annotated
with an Incyte Clone ID.
➪ To use the LifeSeq-to-GEMTools Gateway, use Internet Explorer to
navigate to the LifeSeq web page.
1. Select the Clones of Interest in LifeSeq and select External
Applications.
2. Open the web browser and navigate to the LifeSeq application.
3. Select Clone Information and enter the Clone IDs of your desired
Incyte clones.
4. Click on External Apps and select the clones you wish to view in
GEMTools.
5. Invoke the LifeSeq-to-GEMTools Gateway.
6. Click GEMTools.
If it is not already running, the GEMTools client is launched now and
you are prompted to log in.
The GEMTools Analysis window opens. Any genes in the GEMTools
database that correspond to the Incyte Clone ID are entered under
Element Search Criteria.
GEMTools™ Server Reference
65
5
5
Microsoft SQL Server Reference
Installing Microsoft SQL Server
You must have domain administrator account privileges to install Microsoft
SQL Server 7.0 or 6.5.
Installing Microsoft SQL Server for use with GEMTools™ 2.5 software
requires approximately 450 MB for a complete installation:
• Approximately 100 MB of disk space for Microsoft SQL Server files
• Approximately 50 MB of free space for a master database
• Approximately 300 MB for the temporary database
GEMTools databases will also be installed and will grow depending upon
GEM usage.
You should also plan to have extra space for the database log device. The log
device should be approximately 25% of the estimated GEMTools database
size and preferably reside on dedicated hard drive(s). You must manually
confirm that enough disk space is available.
Starting SQL Server
Because Microsoft SQL Server is integrated with the Windows NT Service
Control Manager, it can be started and stopped as a service, either locally or
remotely. It can be manually started, stopped, paused, and continued using
SQL Enterprise Manager, SQL Service Manager, the Services application in
the Control Panel, or the NET START command.
Microsoft SQL Server Reference
67
SQL Server can be started automatically as a service when Windows
starts. On Windows NT, GEMTools server automatically configures the
SQL Server Service to start automatically. On Windows 95 and Windows
98, you can specify this option during SQL Server installation. After
installation, you can change the autostart option by using SQL Enterprise
Manager.
Refer to the Microsoft SQL Server documentation for more information.
Administering SQL Server
Use the SQL Server Enterprise Manager to administer SQL Server 2000,
SQL Server 7.0, and SQL Server 6.5. The first time you start SQL
Enterprise Manager, the Register Server window appears.
You must provide the name of one or more SQL Servers that you will be
managing using SQL Enterprise Manager. Each time you enter a new
server name, you must complete the login information.
After you enter a server name, select either Use Standard Security or Use
Trusted Connection. This choice determines the type of security that will
be used for the connection when SQL Enterprise Manager connects. If
you selected Use Standard Security, in the Login ID box type the login ID
of a valid administrative account (such as sa) for that server; and in the
Password box type the password for that login ID. If you selected Use
Trusted Connection, the login ID and password are unnecessary.
Once you have registered a server, it appears in the Server Manager
window each time you start SQL Enterprise Manager. You can
immediately begin to perform tasks for that server using SQL Enterprise
Manager.
68
GEMTools™ Installation and Administration Guide
Databases and Database Devices
GEMTools requires that database devices and databases be created
during installation.
• Devices are operating system files used to store databases, transaction
logs, and their backups.
• Databases are storage space for data and schema design that is allocated
on a device.
One device can store many databases, and a database can be stored across
more than one device.
Note: GEMTools database creation scripts are available for advanced
users. See “Database and Device Creation” on page 57 for more
information.
See the Microsoft SQL Server reference manual for information about
manually creating databases. You can also use the Utilities window in the
GEMTools client software to create GEMTools databases.
Devices and Databases in SQL Server 2000
and SQL Server 7.0
When you install GEMTools with SQL Server 7.0, the databases and
devices are built simultaneously. The databases and devices will expand
automatically as required.
Devices and Databases in SQL Server 6.5
When you install SQL Server 6.5, these devices are created:
• The MASTER database device.
• The MSDBDATA and MSDBLOG database devices.
Microsoft SQL Server Reference
69
• The MSDBDATA device is used by the msdb (scheduling) database,
and the MSDBLOG device is used by its transaction log.
• Three dump devices: DISKDUMP, DISKETTEDUMPA, and
DISKETTEDUMPB.
When you install GEMTools with SQL Server 6.5, the databases and
devices required for operation are created. Advanced users can control
the size of the devices and databases, as described in “Resizing a
Database” on page 71.
Backing up Databases
You should back up a database after you create it, and then maintain a
regular backup schedule to ensure smooth recovery in case of database or
media failure. SQL Enterprise Manager allows you to set and maintain a
schedule of automatic backups. Scheduling can be accomplished at the
same time you define a backup. You can also back up manually at any
time.
If a transaction log is on a separate device from its database, you can back
up the transaction log separately. You should back up a transaction log
more frequently than its database.
You should maintain regular backups of the master database, the msdb
(scheduling) database, all user databases, and (if the server is configured
as a replication distributor) the distribution database.
Note: Database backup software utilities, such as VERITAS Backup
Exec, make the process of backing up data much easier.
➪ To back up a database or a transaction log using Enterprise Manager:
• See the SQL Server Administration Guide.
70
GEMTools™ Installation and Administration Guide
Resizing a Database
When any database is filled to capacity, the database and device should be
expanded. On SQL Server 7.0, databases grow in size automatically. On
SQL Server 6.5, you can use Enterprise Manager to increase the size of a
database device and then expand the database onto the newly expanded
device. Alternately, you can use the DISK RESIZE and ALTER
DATABASE statements to increase the size of a database using Transact
SQL.
The following example increases the Customer database to 200 MB. The
database size for the device is specified in 2K pages. Therefore, multiply
the number of megabytes * 512 to compute the proper size.
DISK RESIZE NAME = ‘customer_dev1’, SIZE = 102400
Then use the ALTER DATABASE statement to expand the database
into the expanded device. The size here is specified in megabytes.
ALTER DATABASE customer ON customer_dev1 = 200
Refer to the SQL Server documentation for more information about
resizing a database.
Restoring a Database
With SQL Server 2000, SQL Server 7.0, and 6.5, you can back up and
restore databases and individual tables. In SQL Enterprise Manager, a
table restore can only be performed from a table backup or from a full
database backup.
Restoring a table is useful in a disaster recovery situation where restoring
the entire database may be a poor solution.
For example, suppose one table is corrupt and has no foreign keys and no
columns that are based on other tables. Restoring only this table would
correct your database with the least amount of work.
Microsoft SQL Server Reference
71
Full database and transaction log backups remain the basis of a proper
backup strategy.
Refer to the Microsoft SQL Server documentation for more information
on restoring a database.
Important: After you restore GEMTools database, you MUST change
the database owner to be GEMTools. This can be done using the
sp_changedbowner stored procedure.
Transaction Log
A database transaction log records all committed changes made to the
database since the last full backup. Transactions logs can be useful for
data recovery.
The system administrator (SA) is responsible for maintaining the
transaction log, which requires the following steps:
1. Placing the transaction log onto a separate database device from its
database. (This is recommended for all user databases.)
2. Monitoring the transaction log with the sp_spaceused and sp_helpdb
system procedures, or the DBCC SQLPERF (LOGSPACE)
statement.
3. Backing up the transaction log.
4. Keeping the transaction log at a reasonable size (when the log is in a
separate database device) by regularly using the DUMP
TRANSACTION statement or backup utility.
Note: Databases may be set to use the option Truncate Log on
Checkpoint to automatically truncate log information periodically.
For robust server operation this setting is typically not recommended.
Please consult the SQL Administration guide for advantages and
disadvantages to this approach.
72
GEMTools™ Installation and Administration Guide
A transaction log can be backed up separately from the database if it is
stored on a separate database device. If it is, then it is important to back
up the transaction log frequently. A transaction log dump, like a database
dump, can take place while the database is active.
Typically, transaction logs are backed up more often than databases. A
transaction log might be backed up once a day, and a database might be
backed up once a week. Backing up a transaction log takes less time and
uses less storage space than backing up a database. (Do not back up a
transaction log unless the database has already been backed up at least
once.)
Refer to the Microsoft SQL Server documentation for more information
about maintaining a transaction log.
Truncating the Transaction Log
Truncating a transaction log removes the inactive portion of the log. If
the transaction log becomes full, GEMTools will fail. Hence, it is
important to monitor transaction log usage and truncate it as necessary.
You usually truncate a transaction log after you have backed up an entire
database.
SQL Server 2000 and SQL Server 7.0 automatically expands database
transaction logs. GEMTools will automatically truncate transaction logs
each time data is imported. However, if you are running low on disk
space, or are running SQL Server 6.5, you may need to manually truncate
the transaction logs.
Refer to the Microsoft SQL Server documentation for more information
on truncating a transaction log.
Microsoft SQL Server Reference
73
6
6
ODBC Reference
Configuring Open Database Connectivity (ODBC)
The information presented in this chapter is provided for reference only to
aid in troubleshoooting and for developing customized or test
configurations.
GEMTools™ client software installs the latest ODBC drivers at installation
time and automatically configures the GEMTools data source.
ODBC Data Source Parameters
A variety of parameters control the operation of the ODBC Data Sources.
The parameters shown in Table 6-1 need to be set for the SQL Server
ODBC data sources used with GEMTools.
Table 6-1. ODBC Data Source
Parameters
Parameter
Description
Data Source Name
Unique identifier for the data source
Description
An optional description of the data source
Server
Name of server for the data source
Authentication
Method used to identify the user using a login
account
Client Configuration
Network library used to communicate with SQL
Server
The remaining options should be set to the default values:
• Default database
• Temporary stored procedures
ODBC Reference
75
• ANSI quoted identifiers
• ANSI nulls, paddings, and warnings
• Use of Failover SQL Server
• Language of SQL Server System Messages
• Perform Translation for character data
• Use Regional settings
• Long Query Time
• Log ODBC driver statistics to the log file
Adding an ODBC Data Source
➪ To create a new ODBC data source:
1. From the Start menu, select Control Panel.
2. Double-click the ODBC icon to open the ODBC Data Source
Administration window.
3. Click the System DSN tab.
76
GEMTools™ Installation and Administration Guide
Figure 6-1. ODBC Data Source
Administrator Window
This window provides access to utilities that can be used to create a
Data Source or to change the configuration of a previously created
data source.
4. Click Add.
The Add Data Source window appears.
Note: You can also change the configuration of a previously created
data source by selecting the data source in the System Data Sources
list and clicking Configure.
ODBC Reference
77
Figure 6-2. Create New Data
Source Window
5. From the list of installed drivers, select SQL Server, and then choose
Finish.
Screen 1 of the Data Source Wizard appears.
Figure 6-3. Screen 1 of the
Data Source Wizard
78
GEMTools™ Installation and Administration Guide
This wizard allows you to set the parameters for the data source. As
you complete the settings in each screen, click Next to go to the next
step in the installation.
6. Enter a name for the data source.
Note: The GEMTools data source is created automatically upon
installation.
7. Enter a description of the data in the data source.
8. Enter the name of a SQL Server on your network.
You can select a server from the list or enter the server name.
9. Click Next to go to Screen 2 of the Data Source Wizard.
This screen allows you to set the authentication method and other
parameters.
Figure 6-4. Screen 2 of the
Data Source Wizard
ODBC supports Windows NT and standard SQL server
authentication. GEMTools requires SQL server authentication to
operate properly.
ODBC Reference
79
10. Check the option for standard SQL Server authentication when
manually configuring a data source.
11. Uncheck the box next to “Connect to SQL Server to obtain default
settings...”
GEMTools does not require the additional configuration options
offered by this setting.
12. Click Client Configuration to open the Add Network Library
Configuration window.
Figure 6-5. Add Network
Library Configuration Window
This window allows you to select the SQL Server Net-Library DLL
that the SQL Server driver uses to communicate with the network
software. A default SQL Server installation supports TCP/IP sockets
and named pipes. TCP/IP may improve performance and provide
improved network connectivity over a wide area network.
13. Click Next to open Screen 3 of the Data Source Wizard.
80
GEMTools™ Installation and Administration Guide
Figure 6-6. Screen 3 of the
Data Source Wizard
Uncheck the box next to “Create temporary stored procedures for
prepared SQL statements and drop the stored procedures:” and
Screen 4 of the Wizard should be left at their default settings.
14. Click Next on Screen 3 to open Screen 4.
15. Click Finish on Screen 4 to open the ODBC Microsoft SQL Server
Setup window.
ODBC Reference
81
Figure 6-7. ODBC Microsoft
SQL Server Setup Window
This window allows you to test the parameter settings and set the
settings for the data source.
Note: If you attempt to test the data source, a correct GEMTools
installation will generate a “failed” result because no default login was
specified in the previous configuration step.
16. Click OK to return to the Setup window.
17. Click OK in the Setup window to to close the window and set the
new parameters.
Deleting a Data Source
You are not required to delete any data source if you uninstall
GEMTools. However, if you would like to delete a data source, you can
use the Data Sources window.
82
GEMTools™ Installation and Administration Guide
➪ To use the Data Sources window:
1. Select the data source you want to delete from the Data Sources list.
2. Choose the Delete button, and then choose the Yes button to confirm
the deletion.
ODBC Reference
83
A
Glossary
Accession Number. Reference to the primary key identifier in the Public
Domain GenBank database.
Annotation. A functional description of a clone, which may include
identifying attributes such as locus name, keywords, and Medline
references.
Clone ID. The clone identification number.
Clone Source Name. The vendor of the clone (e.g., Incyte, IMAGE
Consortium).
Data fields. Fields in a file that the data import utilities can place in a
database.
Delimiter. A character used to separate items of data in a delimited text file.
The delimiter designates where one item ends (e.g., a field in a record) and
where the next begins. The delimiters used in GEMTools import files are
the tab character and the comma.
Devices. Fields in a file that the data import utilities can place in a database.
Field. An item of data in a file.
GEM Microarrays Direct. A program in which the customer hybridizes and
analyzes GEM microarrays at their own facilities.
ODBC (Open Database Connectivity). An interface providing a common
language for applications to access a database on a network.
RAID. Redundant Array of Inexpensive Disks.
Schema. A description of a database, defining the fields and the
relationships between fields in the database.
Glossary
85
Index
A
adding
user privileges 33
users 31
administrator privileges
authentication 79
43
B
backup
see database
C
CGI scripts 44
Change Password window 26
changing
password 26
client configuration 79
client registration key
see registration key
Clone Source window 45
company
defining new 29
profile 57
configuration objects 52
creating databases 28
customer support viii, 23
D
data integrity
for database 37
data source 17
see ODBC data source
database
backing up 37, 70
changing the current 27
changing the default 28
customer 53
deleting 28
restoring 71 to 72
selecting a default 31
structure 53
synchronizing 37
database devices 69
default adjustment parameters
defining
company 29
deleting
databases 28
ODBC data source 82
users 32
devices, database 69
36
H
hard disk capacity 4
hardware recommendations
for client workstation 4
for server configuration 2 to 4
I
E
editing
user profiles 32
element
definition of 85
element data
sorting
creating custom sort order
Enterprise Manager 68
Entrez 44
46
import sequences 40
Incyte Genomics
locations of vii
installation
see software installation
installing GEMTools server 12
installing Internet Explorer 10
Internet download 38
K
key
F
file sharing
GEMTools Client software
installation 19
requirements
hardware 4
operating software 2
GEMTools Server software installation
see software installation
GEMTools Web Links
see Web Links
see registration key
9
G
GEM Microarrays Direct 85
GEM Microarrays Direct Customers
Access Privileges for 55
L
LifeSeq Server
gateway 63 to 65
description 63
installation 64
Index
87
requirements
using 65
location 19
for GEMTools
users 33
63
33 to 34
M
registration key
client 19
server 13
removing
user privileges
Microsoft SQL Server 67 to 73
installation 10 to 12, 67
required disk space 67
requirements 1 to 2
starting 11 to 12, 67
34
S
N
80
O
Object Type window 48
objects 52 to 55
configuration 52
customer databases 53 to 54
ODBC data source 1, 75
adding 76 to 82
deleting 82
parameters 75 to 76
authentication 79
changing 77
description 79
drivers 78
network library 17, 80
server 79
testing 82
operating system
MS SQL Server requirements
P
password
changing 26
plate types
creating new 48
privileges 54
access 54 to 55
88
41
U
R
network library
Transfer
1
schema 57, 58
scripts 58
security 37
server
selecting for ODBC 79
server registration key
see registration key
Site License key 14
software installation 7 to 22
configuring GEMTools Server 20
to 22
changing password 22
creating company 21
creating customer database 21
creating users 21
loading database 22
installing GEMTools Client 19
installing GEMTools server 12 to
19
MS SQL Server 10 to 12
overview 8
preparing operating system 8 to 10
Sort Builder window 46
Synchronize utility 22
Synchronize window 37
T
transaction log 72 to 73
backup 70
truncating 73
GEMTools™ Installation and Administration Guide
uninstalling GEMTools Client 22
uninstalling GEMTools Server 22
users
adding new 31
adding privileges 33
editing profiles 32
profiles of 56
removing 32
removing privileges 34
Utilities window 25 to 50
Administrator tab 36 to 50
Change Password window 26
Companies tab 29 to 30
Databases tab 27 to 28
Preferences tab 35 to 36
Privileges tab 33 to 34
Users tab 31 to 32
W
web browser, changing default
Web Links 61 to 63
Web links
creating 44
deleting 44
Web Links window 39
35