1
BUS/KNX modular controller
for dimming - DALI protocol
Catalogue number(s): 0 0
26 35
5. MENU OPERATION AND STRUCTURE (continued)
5. MENU OPERATION AND STRUCTURE (continued)
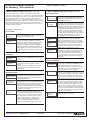
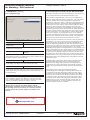
GROUP PARAMETERS
SCENE ASSIGNMENT
GROUP
PARAMETERS
GROUP: 01
PARAMETERS
GROUP: 01
PARAMETERS
GROUP: 12
ON-VALUE: 100
GROUP: 12
MIN VAL: 0
GROUP: 12
MAX VAL: 100
GROUP: 12
DURATION: 10s
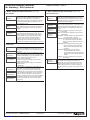
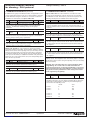
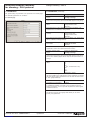
The Prg/Set button can be pressed briefly to go
from the GROUP PARAMETERS main menu
to the submenu. In this menu, it is possible to
set the various parameters in each group. As a
general rule, the group parameters must be set
in the ETS software when commissioning the
KNX bus. The parameters should only be set
directly on the device when quickly changing
individual parameters. Caution: Whenever ETS is
downloaded, it deletes all the manual parameter
settings in the device!
To scroll through the various groups, press
the Move button briefly. The first line of the
screen indicates the group currently selected.
Pressing and holding down the Prg/Set button
sets the device to programming mode. The
parameter type and its value are then displayed
on the second line of the screen. The following
parameters can be modified directly on the
device:
• Initial (ON) value: 0 to 100%
in steps of 5%
• Minimum dimming value: 0 to 40%
in steps of 5%
• Maximum dimming value: 50 to 100%
in steps of 5%
• Dimming time for dimming from
0 to 100%: 5 to 60 s.
In programming mode, the selected parameter
can be modified by pressing the Move button
briefly. Pressing the Prg/Set button briefly saves
the setting value and, at the same time, enables
programming mode automatically for the next
group parameter.
This means that, for example, only the maximum
dimming value parameter needs to be modified,
the user should first enter the initial value and
the minimum dimming value (level 2 menu).
Press the ESC button (or wait 30 seconds) to go
back to the higher menu level.
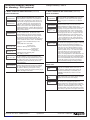
SCENE
ASSIGNMENT
SCENE01 XXX
XXXXXXXXXX
SCENE03 −−−
XXXX−−−−XX
SCENE03 −−−
XXXX−−−−XX
GROUP TEST
GROUP
TEST
GROUP: 6
TEST
GROUP: 6
—>off
Technical data sheet: S000064593EN-1
CONTENTS
Updated on:
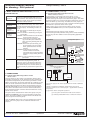
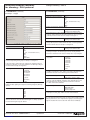
The Prg/Set button can be pressed briefly to go
from the SCENE ASSIGNMENT main menu to
the submenu. In this menu, the DALI groups
can be assigned to a maximum of 16 different
scenes
To navigate from one scene to another, press
the Move button briefly. The first line of the
screen indicates the number of the scene
currently selected. Symbols indicate which of the
16 groups is assigned to this scene. An "X" in
the corresponding place means that the group
is assigned to the scene. The – symbol means
that the group has not been assigned. The four
characters following the scene number on the
first line represent, from left to right, groups 1 to
4. The 12 characters on the second line of the
screen correspond, in ascending order from left
to right, to groups 5 to 16.
Pressing and holding down the Prg/Set button
sets the device to programming mode. A flashing
cursor on the first X indicates that Group 1 is
currently selected. By pressing the Move button
briefly, the user can choose whether or not to
assign this group to the selected scene (toggle
between symbols X and -). To move the cursor
to the next Group, press the Prg/Set button
briefly. Once you have gone through all 16
groups, the configuration is saved and taken into
account as soon as the scene is reprogrammed.
Press the Prg/Set button to go back to the higher
menu level automatically. Press the ESC button
(or wait 30 seconds) to go back to the higher
menu level without saving the changes made.
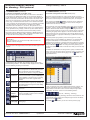
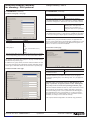
The Prg/Set button can be pressed briefly
to go from the GROUP TEST main menu to
the submenu, which allows all the groups to
be switched individually or collectively (ALL
CHANNELS: Broadcast) in order to test the
installation
To go from one channel to another, press the
Move button briefly. The active channel number
appears on the first line of the display
Pressing and holding down the Prg/Set button
sets the device in programming mode. To
choose whether the selected channel should be
enabled or not, press the Move button briefly. To
perform the selected operation, press the Prg/
Set button briefly. Press the ESC button (or wait
30 seconds) to go back to the higher menu level.
Created on: 15/06/2012
5/14