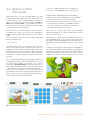
1
TigerBooks Media GmbH (Ed.) TigerCreate User Manual Volume 1.0 Note Disclaimer We’ve spent a lot of time trying to make this user manual as accurate as possible. However, should you discover any omissions or inaccuracies, please inform us by mail or email. TigerBooks Media GmbH reserves the right to make changes to the product and the manual at any time and without prior notice, without changing the subject of the agreement itself or deviating from it. Liability is limited to intent and gross negligence. TigerBooks Media GmbH shall be liable for intentional and negligent dereliction of duty for damages resulting from injury to life, body and health. TigerBooks Media GmbH assumes no liability for consequential damages and does not guarantee the contents of this user manual. TigerBooks Media GmbH Technical Support TigerCreate Poppenbütteler Chaussee 53 22397 Hamburg [email protected] TigerBooks Media GmbH, Hamburg 2014 All rights reserved About This User Manual This user manual acts as an introduction to creating interactive e-books with TigerCreate. Chapter 1 provides an overview of the possibilities and advantages offered by TigerCreate. In Chapter 2 you will get a first impression of how TigerCreate works, Chapter 3 details the user interface and the entire production process, while Chapter 4 takes you through exercises designed as a step-by-step guide to common tasks. The examples in this user manual are available to download on the TigerCreate website. We hope you have fun working with TigerCreate and wish you every success with your projects. The TigerCreate-Team Contents 1. Chapter Introduction . . . . . . . . . . . . . . . . . . . . . . . . . 9 1.1 About TigerCreate . . . . . . . . . . . . . . . . . . . . . . . . 9 1.1.1 What TigerCreate Can Do . . . . . . . . . . . . . . . . . . 9 1.1.2 The End Product – Export Format . . . . . . . . . . . 9 1.1.3 What You Need Besides TigerCreate . . . . . . . . . 9 1.1.4 Terms Used in This User Manual . . . . . . . . . . 10 1.2 Installing TigerCreate. . . . . . . . . . . . . . . . . . . . 11 1.2.1 System Requirementso . . . . . . . . . . . . . . . . . . . 11 1.2.2 Installing and Registering TigerCreate . . . . . . 11 1.2.3 Updates . . . . . . . . . . . . . . . . . . . . . . . . . . . . . . . 12 2. Chapter Getting to Know TigerCreate . . . . . . . . . . 13 2.1 The Interface. . . . . . . . . . . . . . . . . . . . . . . . . . . 13 2.1.1 The Toolbar . . . . . . . . . . . . . . . . . . . . . . . . . . . . 2.1.2 The Assets List . . . . . . . . . . . . . . . . . . . . . . . . . . 2.1.3 The Properties List . . . . . . . . . . . . . . . . . . . . . . 2.1.4 The Workspace . . . . . . . . . . . . . . . . . . . . . . . . . . 13 14 14 14 2.2 Starting Projects . . . . . . . . . . . . . . . . . . . . . . . . 15 2.2.1 Defining a New E-Book Project . . . . . . . . . . . . 2.2.2 A Project’s Directory Structure . . . . . . . . . . . . . 2.2.3 What Types of Assets Are There? . . . . . . . . . . . 2.2.4 What File Formats Are Allowed? . . . . . . . . . . . 2.2.5 Adding Assets to a Project . . . . . . . . . . . . . . . . 2.2.6 How TigerCreate Manages Data . . . . . . . . . . . . 15 16 16 16 16 17 2.3 Creating Your First E-Book. . . . . . . . . . . . . . 18 2.3.1 Editing Your First Scene . . . . . . . . . . . . . . . . 18 2.3.2 Two More Scenes – And Then … . . . . . . . . . . 19 3. Chapter Working with TigerCreate . . . . . . . . . . . . . 21 3.1 The Interface in Detail . . . . . . . . . . . . . . . . . . 21 3.1.1 Controls and Navigation: The Toolbar . . . . . 3.1.1.1 Program Interface Appearance Options . . . . 3.1.1.2 Controlling Scenes . . . . . . . . . . . . . . . . . . . . . 3.1.2 The Asset List . . . . . . . . . . . . . . . . . . . . . . . . . 3.1.2.1 Book Navigator . . . . . . . . . . . . . . . . . . . . . . . 3.1.2.2 Scene Navigator . . . . . . . . . . . . . . . . . . . . . . . 3.1.3 The Properties List . . . . . . . . . . . . . . . . . . . . 3.1.3.1 Generic Properties . . . . . . . . . . . . . . . . . . . . 3.1.3.2 Transformation Properties . . . . . . . . . . . . . . 3.1.3.3 Bezier Properties . . . . . . . . . . . . . . . . . . . . . . 3.1.3.4 Animation Properties . . . . . . . . . . . . . . . . . . . 3.1.3.5 Button Properties . . . . . . . . . . . . . . . . . . . . . . 3.1.3.6 Text Properties . . . . . . . . . . . . . . . . . . . . . . . . 3.1.3.7 Sprite Sheet Animations Navigator . . . . . . . . 21 21 21 24 24 25 26 26 27 28 28 30 30 31 3.1.4 The Curtain Rises – The Stage . . . . . . . . . . . 32 3.1.4.1 Aspect Ratio . . . . . . . . . . . . . . . . . . . . . . . . . . 34 3.2 Creating Interactivity. . . . . . . . . . . . . . . . . . . . . . . 35 3.2.1 Creating a New Scene . . . . . . . . . . . . . . . . . . 35 3.2.2 Animations . . . . . . . . . . . . . . . . . . . . . . . . . . . 35 3.2.2.1 What Types of Animation Are There? . . . . . . 35 3.2.2.2 Working with the Timeline . . . . . . . . . . . . . . 3.2.2.3 Animation Properties . . . . . . . . . . . . . . . . . . . 3.2.2.4 Bezier Curves . . . . . . . . . . . . . . . . . . . . . . . 3.2.2.5 Sprite Sheet Animations . . . . . . . . . . . . . . 3.2.3 Creating and Editing Text Boxes . . . . . . . . . . 3.2.4 Buttons . . . . . . . . . . . . . . . . . . . . . . . . . . . . . . 3.2.5 Sounds . . . . . . . . . . . . . . . . . . . . . . . . . . . . . . . 39 43 45 45 47 48 50 3.3 Creating Multilingual E-books . . . . . . . . . . . 51 Exercise 9: Using Assets as Free Objects . . . . . . . . . . . . . . . . . . . 82 Exercise 10: Using Narrative Text and Word Highlighting . . . . . . . 83 Exercise 11: Multilingual E-books . . . . . . . . . . . . . . . . . . . . . . . . . . 86 Exercise 12: Using Scratch and Draggable Assets . . . . . . . . . . . . . 88 3.3.1 Preparing Assets for Several Languages . . 51 3.4 Games as Part of E-books . . . . . . . . . . . . . . . 53 3.4.1 Puzzle . . . . . . . . . . . . . . . . . . . . . . . . . . . . . . . . 3.4.2 Memo . . . . . . . . . . . . . . . . . . . . . . . . . . . . . . . . 3.4.3 Doodle . . . . . . . . . . . . . . . . . . . . . . . . . . . . . . . 3.4.4 Integrating Games into an E-Book . . . . . . . . 53 55 56 56 3.5 Testing and Publishing . . . . . . . . . . . . . . . . . . 57 3.5.1 Export Formats . . . . . . . . . . . . . . . . . . . . . . . . 57 3.5.2 The Publishing Dialog . . . . . . . . . . . . . . . . . . . 57 3.5.3 Notes on Exporting for TigerBooks . . . . . . . 58 3.5.4 Notes on Exporting for iBooks . . . . . . . . . . . . 58 3.5.5 Notes on Exporting as a Standalone Application . . . . . . . . . . . . . . . . . . . . . . . . . . . . 58 3.5.5.1 Exporting as a Standalone iOS App . . . . . . . . 58 3.5.5.2 Exporting as a Standalone Android App . . . . 60 4. Chapter Practical Exercises Step by Step . . . . . . . 63 Exercise 1: Start Animations . . . . . . . . . . . . . . . . . . . . . . . . . . . . . . 63 Exercise 2: Nested Start Animation . . . . . . . . . . . . . . . . . . . . . . . . 66 Exercise 3: Type A Touch Animations (Repeatable) . . . . . . . . . . . . 69 Exercise 4: Type B Touch Animations (Non-repeatable) . . . . . . . . 71 Exercise 5: Assets Found in Both Start and TouchAnimations . . . . . . . . . . . . . . . . . . . . . . . . . . . . . . . . . . 72 Exercise 6: Complex Touch Animations . . . . . . . . . . . . . . . . . . . . 75 Exercise 7: Animations with Bezier Curves . . . . . . . . . . . . . . . . . 78 Exercise 8: Using a Sprite Sheet Animation. . . . . . . . . . . . . . . . . . 80 5. Appendix . . . . . . . . . . . . . . . . . . . . . . . . 91 5.1 Shortcuts. . . . . . . . . . . . . . . . . . . . . . . . . . . . . . . . . 91 5.2 Links. . . . . . . . . . . . . . . . . . . . . . . . . . . . . . . . . . . . . 92 5.3 I nitializing iOS Simulator Using the Xcode Program. . . . . . . . . . . . . . . . . . . . . . . . . . . . . . . . . . 92 5.4 Index. . . . . . . . . . . . . . . . . . . . . . . . . . . . . . . . . . . . . 94 1. Chapter Introduction This introduction will give you your first taste of TigerCreate and start laying the groundwork for creating your own book projects. 1.1 About TigerCreate In this chapter we’ll show you what TigerCreate can do, what formats you can create, and which tools are best for the job. We’ll also clear up what we mean by certain phrases in this user manual. 1.1.1 What TigerCreate Can Do TigerCreate allows you to quickly and easily create interactive adventure books that can be sold either as e-books or standalone apps on all major platforms, turning printed picture books into play-along animated tales. TigerCreate opens up a whole range of design possibilities, whether its animations, sounds or background information – diverse interactive elements and additional games can be easily integrated into stories, too. Even producing multilingual e-books is effortless with TigerCreate. TigerCreate supports you every step of the way. A TigerCreate license gives you the flexibility to design titles to suit your every need. You determine the platform you want your e-books to be released on. TigerCreate is a product of TigerBooks Media GmbH, whose developers have years of experience in the field of digital children’s and youth media. TigerCreate is developed in cooperation with major platform holders, to ensure each application is closely geared towards the children’s and youth book industry. 1.1.2 The End Product – Export Formats Using TigerCreate, content can be created effortlessly for various platforms. Current exportable formats include: •TigerFormat (ePub for the TigerBooks platform) •iBook Store format for iOS devices (iPad and iPhone) and Mac OS X Mavericks •Standalone iOS app format (for iPhone and iPad) •Standalone Android app format (for Google Play, Amazon Kindle HD, Samsung Apps, etc.) With support for further formats and platforms planned. The size of your e-books mainly depends on the amount of sound and graphics you use, their size and the number of scenes. The average size of an e-book in ePub format is between about 20 and 70 MB. 1.1.3 What You Need Besides TigerCreate To work with TigerCreate, you need assets. These could be text, images or sound – anything you want to incorporate into your e-book. A program for editing pictures is required, in which you can create everything that moves and export them as PNG files. For processing sounds, you’ll need a simple sound-editing tool, as suming you haven’t already bought your sounds from external service providers. Introduction | 1.1 About TigerCreate 7 for games, too. Sounds can be split into general sounds (noises) and narration files (that read the text). Some assets (images, sounds, games and any label data) are stored in a separate folder in the project folder. Additionally required software: •Xcode (for standalone Apple iOS app export) •Android SDK (for standalone Android app export) •iBooks (for iBook previews on the Mac, comes with OSX 10.9 and later) The development environment Xcode is available for free on the Apple App Store, and lets you test individual scenes or entire e-books using its built-in iOS Simulator. Separate instructions for this can be found in the appendix. 1.1.4 Terms Used in This User Manual E-Book •E-Book: An e-book generally refers to an electronic book, which can be either a conversion of a printed book or an original production. Depending on the format and rights management, e-books can be viewed and read on many different devices – e-book readers, smartphones, computers, tablets and many more. Within the context of TigerCreate, an e-book refers to an interactive format (initially independent of a specific platform), which can be played on all suitable e-book readers. Even if TigerCreate allows you to export as a standalone app, this is still referred to hereafter as an e-book. •App: An app refers to a standalone program (short for “application”). Unlike the ePub format, an e-book published as an app requires no further software to run – it’s all already contained within the app. Exported with specific settings for their respective target platform, apps are usually offered via an online store (such as the Apple App Store or Google Play). •Projekt: Throughout this user manual, the word project refers to an e-book during production. When creating a new project, a project folder is created, under the same name as your e-book. All data (games, images, sounds and scenes) for the project will be stored in this folder. •Szene: A scene is a digital ‘page’ of an e-book. Scenes are usually interactive and represent a passage of time. Each scene corresponds to a separate file in the project folder. •Assets: Assets are the ingredients of an e-book; they are the actors in a scene. Throughout this user guide, asset refers to any type of file that can be part of an interactive e-book, usually images, texts and sounds, but also any graphics and sound 8 Introduction | 1.2 Installing TigerCreate •Button: A button is a transparent area within a scene that defines where and how interactions take place – such as triggering animations or sounds, for example. Buttons aren’t visible in the exported e-book, although a flashing indication graphic (Hint) can be used to show where clickable areas are (more on this in Chapter 3.5 Testing and Publishing). •Animation: Finally, animation is used to mean everything that changes within a scene. This could be movements that occur by themselves or that are triggered by interactions, the rotation or scaling of an image, and the movement, appear ance or disappearance of a graphic. advice tip example link 1.2 Installing TigerCreate In this section, we’ll go through the technical requirements, installation and registration processes of TigerCreate, and cover the details of our update offer. 1.2.1 System Requirements TigerCreate runs on Apple computers and requires the following: •Mac OSX 10.10.x Yosemite •min. 8 GB memory (RAM) Fig. 2: Start dialog •a 2.5 GHz Intel Core i5 processor (or later) •a display resolution of at least 1280 × 800 pixels Please note that the plug-in “Default Folder X” is not compatible with TigerCreate. It should be disabled to prevent problems in TigerCreate. 1.2.2 Installing and Registering TigerCreate To install TigerCreate, open the installation file TigerCreate.dmg by double-clicking on it. Then drag the TigerCreate icon to your Applications folder, as shown below. Fig. 3: Create New Interactive Book dialog The registration dialog will then be displayed (see below). Enter your email address and license key, then confirm by clicking Register. Fig. 1: Installing TigerCreate Start TigerCreate by double-clicking the correspond ing icon in your Applications folder. The following start window will appear. Select the option Create a new book. Enter a name for a new e-book in the dialog window below and add a language by clicking the (+)-sign under Languages. Confirm by clicking the Create Book button. Fig. 4: Registration dialog Please note that an Internet connection is required for registration. Introduction | 1.2 Installing TigerCreate 9 1.2.3 Updates When connected to the Internet, the program will regularly search for the latest updates. This search can also be started manually, via TigerCreate → Check for Updates from the menu. Please note: Make sure you create backup copies of your e-book projects every time you update the software, and before you continue your work. Quit TigerCreate following the download and use a program on your computer, such as Time Machine, to create a backup of your projects before you restart TigerCreate! 10 Introduction | 1.2 Installing TigerCreate 2. Chapter Getting to Know TigerCreate In this chapter we will introduce you to the program interface, taking you through all the essential steps with an example. 2.1 The Interface The program interface can be summarized as follows: •Assets are managed on the left. •Settings for these are applied on the right. •The scene is controlled at the top. •And the action takes place in the middle. The individual areas are introduced in more detail in Chapter 3. Fig. 5: Overview of the program interface 2.1.1 The Toolbar Using the Toolbar, you can change settings for the program interface, the current e-book project and the current scene. Essentially, you have the following options: •Book Settings: settings for your e-book •Test Book: test your e-book •Publish Book: publish your e-book in various formats •Edit/Preview: switch between editing and previewing a scene •Animation: show or hide the Timeline •Play/Pause, Rewind: controls for playing, stopping, resetting, etc. the scene •Scene Options: options for the current scene, including selecting a background image and creating a preview icon •Language selection: for multilingual e-books • Options: settings for the Workspace grid •+ – : zoom functions for the Workspace Fig. 6: Toolbar Getting to Know TigerCreate | 2.1 The Interface 11 Fig. 7: Assets List, left Book Navigator view, right Scene Navigator view 2.1.2 The Assets List The Assets List can be found on the left side of the program interface and has two different views: •Book Navigator: shows all assets in the respective project’s subfolders (images, sounds, etc.) as well as scenes that have already been created. •Scene Navigator: only shows the assets used in the current scene. In addition to external images, these can also include internally generated assets such as text boxes, buttons, or Bezier curves. You can switch between the Book Navigator and Scene Navigator views using the icons above the Assets List. 2.1.3 The Properties List The Properties List can be found on the right side of the program interface. By default (when nothing is selected) only two icons are displayed at the top: Properties Navigator and Sprite Sheet Animations Navigator. You can switch between them. When an asset is selected, its properties and settings are displayed in the Properties Navigator. All assets have common properties such as a Name, Position, and Scaling while other properties depend on the type of asset. The Sprite Sheet Animations Navigator will be discussed in detail in Chapter 3. Here is a short list of the individual areas (a more detailed description can be found in Chapter 3) •Generic Properties: basic properties (e.g. name) •Transformation Properties: position, scale, rotation, anchor and opacity •Bezier Properties: for paths 12 Getting to Know TigerCreate | 2.1 The Interface Fig. 8: Collapsed Properties List •Animation Properties: including repeatability, links to sounds or paths • Button Properties: links to animations and actions •Text Properties: text entry, with a choice of font, size and color 2.1.4 The Workspace Everything visible in a scene can be found on the Stage – the space taken up by a scene in the finished e-book. The size of the Stage for all scenes can be set in the Book Settings. You can use the buttons on the Toolbar to zoom in and out of the Workspace for close up work. TigerCreate also offers an adjustable background grid to help you align your assets more easily (under Options in the Toolbar). Here’s something worth keeping in mind. As described above, the main screen is divided into two main chunks – the Stage, a rectangle which effectively represents a page in the e-book, complete with background image, and the Workspace, a gray surround. Everything found in the Workspace is not yet visible on the stage, but is still included in the scene – it’s just outside the visible stage area. This distinction is particularly important when an asset appears in a scene on a time delay (a car drives into the scene) or leaves the scene at some point (car leaves the scene). When we refer to the ‘Stage’ in the following sections, we’re including the Workspace around it, too. At its most basic, a scene is composed of a background and a foreground. The background is an image in JPEG format, set with the Toolbar (Scene Options), and can be changed at any time. This is then fixed to the Stage, and cannot be moved, scaled or rotated. If the background image is smaller than the Stage size settings, it will be repeated (tiled). If the selected image does not match the dimensions of the Stage it is automatically scaled and might appear distorted (see figure). The foreground of a scene is made up of all the assets you place in the scene. For example: •images that can be animated, •sounds (not visible) associated with animations, •text and •interactive elements used to trigger actions, such as buttons Now let’s have a look at how we put this all into practice with our first example. Fig. 9: Background image too small (above) and too large (below) Getting to Know TigerCreate | 2.1 The Interface 13 2.2 Starting Projects In this section, we’ll show you how to set up a new project and fill it with life. We’ll also look at how the software manages data so your assets are always where you want them to be. new project. But for these initial steps we’ll be using an existing project, so close this dialog by clicking Cancel. 2.2.1 Defining a New E-Book Project To work with TigerCreate, we can either open an exist ing project or create a new one. We’ll start by taking a look at the dialog window for creating a new e-book project. Start TigerCreate and click on the Create a new Book button in the start dialog. Alternatively, if TigerCreate is already open, you can select the command New Book from a popup menu by right-clicking the Book Navigator on the left. In the Book Settings dialog that appears, there are three mandatory fields: •Book Name: enter a name for your e-book (this name can be changed later). •Scene Size: select one of the preset sizes (currently a choice between landscape and portrait formats). •Languages: select at least one language, which you can add to the project by clicking the (+)-symbol. All the other fields are optional, and include informa tion about the author, rights and content. Fig. 11: Book Settings dialog 2.2.2 A Project’s Directory Structure Let’s leave TigerCreate for a moment and take a look at the folder structure of an example project. In the “TigerCreate Examples” folder you’ll find the project folder “First Steps”, which contains the following subfolders of assets: •Games, containing the empty folders doodle, memory and puzzle. •Images, with a few images in various image formats inside. •Scenes, which contains three files, Scene_01.mytbs through Scene_03.mytbs. •Sounds containing several sounds in MP3 format. TigerCreate automatically creates this folder structure with the above subfolders for each new project. The names of these folders cannot be changed and no subfolders can be created inside them. 2.2.3 What Types of Assets Are There? •To create an e-book, you’ll need at least images and text. •Images are divided into background images and animated graphics that make up the foreground. Fig. 10: Start screen Finally, when you click Create Book at the bottom-right, you will be asked to choose a save location for your •Sounds make a scene livelier, whether they’re atmospheric sounds, music or narration files. •Buttons are created to add interactivity. These are transparent buttons that trigger the actions of 14 Getting to Know TigerCreate | 2.2 Starting Projects certain assets (to start an animation, play a sound, etc.). •Paths can be used to give a graphic more realistic movement. Paths are set up in the form of so-called Bezier curves. Please remember the following conventions for file names: • No umlauts, special characters, parentheses or hyphens should be used. • The only allowed characters are “A” to “Z”, “a” to “z”, “0” to “9” and underscores “_”. • We advise naming your assets so you can tell which scene they are used in. An image with the name “S03_boy_arm_left.png” is easier to identify than “arm_1.png”, and itʼs much more obvious where the sound “S13_narration. mp3” fits into a scene than one called “Goodnight my little one.mp3”. Neither the book name nor the project name may contain any special characters, including parentheses “(” and “)”. 2.2.4 What File Formats Are Allowed? •All background images should be in JPEG format, preferably the same size as the stage. •The graphics that you then want to place in the foreground, whether animated or not, must be PNG files with a transparent background. We recommended that you keep your image files as small as possible to keep scene loading times to a minimum. It's a good idea to crop graphics so they don't contain any extra empty space, or use tools such as http://pnggauntlet.com/ or websites like http://tinypng.com to shrink images, such as PNG files, down, without sacrificing the quality. Another way of adding assets is through the Assets List within the program itself: }} Select the Book Navigator view. }} Right-click on the Assets List. A pop-up menu will then appear with the option to Add Files to (name of your e-book). }} Then navigate to the desired directory in the file selection dialog. •Sounds should be in MP3 format, whether they are music, sounds or voice recordings. }} Select the assets you want to add and click Add to Book. •However, before pasting them, make sure no control or formatting characters are being copied over. One option is to paste them into the TextEdit program, and from there select Format → Convert to plain text. Then paste the text into an empty text box in TigerCreate. Any formatting will be largely ignored, as special tags (bold or italics, for example) aren’t possible in text boxes. However, if you need different fonts, styles or sizes, you can create several text boxes and split the text between them (for example, heading and body text). }} TigerCreate will then copy all the selected assets, automatically sorting them into the correct folders. Please note that there are assets that are generated directly in TigerCreate and managed there, such as text fields and buttons. These won't appear in the project folder, but can only be found in the Scene Navigator of the corresponding scene. 2.2.6 How TigerCreate Manages Data 2.2.5 Adding Assets to a Project All the assets that you need for your e-book are stored in the project folder or in its subfolders. Make sure you place all the images you want to use in the Images folder and all sounds in the Sounds folder. To use one of the three games, Doodle, Memo or Puzzle, the corresponding folders (in the Games folder) need to be filled with images. (More on this in Chapter 3.4 Games as Part of E-books.) You’ve so far learned that you files are located in the project folder and its subfolders. TigerCreate saves links to the assets used (images and sounds) in each scene. Therefore, it is important not to move, delete or rename these assets later. If TigerCreate cannot find an image when opening a scene, a red box will appear in its place. Missing sounds are labeled as “missing sound file” in the Properties List, and when the scene is played, a spoken sound will indicate the missing file. That being said, you should always view a project as a whole – that a project’s data belongs together and should stay together. If you need to pass on scenes from a project for editing or corrections, we recom- Getting to Know TigerCreate | 2.2 Starting Projects 15 mend copying the entire project folder. From there, you can delete any data you are certain isn’t needed. We suggest following the same procedure for back-ups, backing up the whole project folder rather than individual scenes. If you see a red rectangle with the words Missing image when opening a scene, the corresponding image has either been deleted or renamed. Proceed as follows: • Select the red rectangle. • You will find the original filename under Image in the Generic Properties (Chapter 3.1.3 The Properties List). • Look for the image in Book Navigator (Chapter 3.1.2 The Assets List). • Select Show in Finder from the context menu (right mouse button), and the image will then be shown in the Finder. • Rename the file, changing it back to its original name. • After several seconds, the link will update and the image will be displayed correctly once more. choose the folder “First Steps” from the example files, then “Scene_01.mytbs” from the “Scenes” folder. TigerCreate will then open this scene in a new window, with the name of the scene and title of the book along the top, in this case “Scene_01 – First Steps”. }} Click Book Settings in the top-right. The Settings dialog will open, where only the name of the e-book, the Stage format and the language German have been entered so far. }} Complete the details with your name under Author, and enter today’s date. We can also enter an optional description for our project under Description. }} Right-click the Book Cover field and choose Select File. }} Then select the image “Cover_small.jpg” from the “First Steps” project folder in the dialog window and confirm it. This will be the cover image of your e-book as shown in the various app stores, such as the Tigerbooks app. }} Close the Book Settings dialog by clicking OK. 2.3.1 Editing Your First Scene As we can see, some things have already been set up in the open scene. The preview lets us take a look at the current state of our scene. }} Click the Preview button. Now we can watch as the owl scratches its head occasionally, and feathers fall to the ground – one of them again and again. }} Stop the animation by clicking Play/Pause and set it back to the beginning. To do this, click the button on the far left of the Control Bar. }} Switch to edit mode by clicking Edit. }} Expand the Animation Properties palette in the Properties Bar (on the right). Fig. 12: Scene 01 in its initial state 2.3 Creating Your First E-Book Now let’s move on to the practical work. For this, we’ll use the example project First Steps found in the “TigerCreate Examples” directory – all the files are included inside. }} Start TigerCreate (if you haven’t done so already). }} Select Open Book or Scene in the start dialog and }} Select the three feathers above the owl individually and note the differences in the Animation Properties – in the Repetitions field, two of the feathers have the value 1, while the third has the value 0. }} Now enter a 1 for the third feather. This will alter it so the animation is only played once. Watch the difference in the Preview mode, as all three feathers now remain on the ground. }} Select the text in Edit mode and scroll down the Properties Bar to Text Properties. }} Click the option Speech in the pop-up menu and choose “Scene_01__text01EN.mp3” from the list. You can sample the sound by clicking the Play button next to the sound’s name. 16 Getting to Know TigerCreate | 2.3 Creating Your First E-Book }} Select the transparent rectangle below the background picture. }} Move it in front of the owl and drag the sizing handles so the owl is mostly covered. }} Open the Button Properties palette in the Properties Bar. }} Click the option Click Sound from the pop-up menu and choose the sound “S01_Aua.mp3” from the list. Sample the sound by clicking the Play button next to the sound’s name. }} Switch back to Preview mode. The text will now be read aloud, the feathers will all remain on the ground and a rectangle will appear around the owl, which plays a sound when it’s clicked. }} Save the scene (Menu File → Save…) and close it. Congratulations! You have just changed an animation’s settings, moved and scaled a button and linked several assets to a sound. The rectangle marking the button is visible in Preview mode, but it wonʼt be shown in the e-book. tion X) and 471 (Position Y). }} Select the fox’s head. Enter 2 in the Z Order box, and set its position to (784, 200). }} When indicating the anchor point (Anchor X, Anchor Y), click the center square in the bottom row and the values will change to 0.5 and 1. This moves the head’s anchor point. }} Enter the value 345 (degrees) for Rotation, thereby tilting the fox’s head towards the owl. }} Select the image for the breath action and set its Position to (615, 350). }} Expand the Animation Properties palette and set the file “SO2_Breath.mp3” under Sound, activating the Loop Sound option. }} Make sure you save from time to time. }} Switch to the Scene Navigator view in the Assets List. }} Click the (+)-symbol and select “Text” from the pop-up menu. A transparent text box will then appear in the center of the Workspace with “Untitled Text” written in white. }} Name the text box “Text01” in the Generic Properties. }} Move the text box to the position (150, 50) and open the Text Properties palette. }} Click on the white box next to Color and set the color to black. }} Change Line Spacing to 32. }} Change the Alignment from Center to Align Left. }} Then enter the following text into the field on the palette: “Just blow on it, this help”, says the fox with a yelp. }} For a line break place the cursor after the comma and press the OPTION+ENTER buttons on the keyboard. }} Under Speech, add the sound file “Scene_02_ text01EN.mp3”, making sure to listen to a sample of the sound first. Fig. 13: Scene 02 in its initial state }} Test the scene in Preview mode and save it. 2.3.2 Two More Scenes – And Then … Open “Scene_02.mytbs” of the First Steps project. Notice how little has been set up, and that once the scene starts, the owl only moves its head every now and then. }} Switch to the Book Navigator view in the Assets List and open the Images folder. }} One after the other, drag the following images onto the Workspace: “S02_Fox”, “S02_FoxHead” and “S02_Breath”. }} Open the Generic Properties and Transformation Properties palettes in the Properties List. }} Select the fox and enter the value 1 in the Z Order field. Then set its position to the values 852 (Posi Now you’ve added assets into a scene and manipulated their properties (name, Z order, position, rotation etc). You’ve also set up and formatted a new text box, and linked it to a narration file. In the third and final example scene, “Scene_03.mytbs”, there’s quite a lot in place already, but it’s still missing a background. This example will help familiarize you with the lines marking the size and position for the background image. Incidentally, the smaller white rectangle marks the section that is shown on the smaller display of an iPhone 4. More Getting to Know TigerCreate | 2.3 Creating Your First E-Book 17 Fig. 14: Scene 03 in its initial state }} Open “Scene_03.mytbs” using either the Open dialog or, if the previous scene is still open, using the Book Navigator, where the scene can be found in the Scenes folder. }} Click the Scene Options button in the Toolbar and select “Scene_03.jpg” under Background. The background image will be automatically adjusted to the Workspace and fill the Stage. }} Select the text box and set the narration file “Scene _03__text01EN.mp3” to it via Text Properties, found under Speech. Listen to a sample of the sound. }} Select the owl. Notice how the surrounding rectangle is tilted slightly to one side. }} Move the anchor point to the bottom edge, in between the owl’s feet. }} Click Animation in the Toolbar and activate the round Record button to the left of it. The Timeline will show an icon of the owls. }} Click the small triangle to the left of the owl icon in the Timeline. If necessary, stretch the Timeline downwards. }} There are already so-called key frames at frames (images) 1 and 90 in the Rotation row. Scroll far enough through the Timeline so that you can click in the Rotation row. This creates a new key frame. }} Click above this key frame in the scale bar to position the Slider at frame 45. }} Open Transformation Properties and enter the value 5 for Rotation. The owls will now tilt to the other side. }} Close the Timeline again by clicking the Animation button. }} Click the (+) symbol in the Scene Navigator and create a button using the pop-up menu. }} Give the button the name “Owl_Button” in the Name field of the Generic Properties and scale it so that it is big enough to cover both owls. }} Open Button Properties in the Properties List. }} Click the (+)-symbol and select the owls from the list (“S03_Owls”). Fig. 15: Publishing dialog }} Click the field End Frame and enter the value 90 if this hasn’t already been entered. }} Enter the value 2 in the Repetitions field. }} Add “s03_mom.mp3” to Click Sound. }} Test the scene in Preview mode and save via the menu File → Save. In this scene you have created an animation with key frames. You have also created a button and linked it to this animation. You will find the completed scene in the folder “TigerCreate Examples/First Steps/Scenes”. Add the suffix “_complete” to the name. For the following steps, it is essential that the development environment Xcode has already been installed on your computer and that its iOS Simulator has been started at least once. This is necessary so that TigerCreate can find the path to the iOS Simulator. You will find instructions in the appendix about installing the iOS Simulator with Xcode. Fig. 16: Tigerbooks interface 18 Getting to Know TigerCreate | 2.3 Creating Your First E-Book }} Click the Test Book button in the Toolbar. The Publishing dialog will appear. }} Click the Scene Options button: your scenes are listed here. You can keep the order they’re in, or change it using drag and drop. Scenes without a checkmark next to Publish will be ignored. }} Click the Test Book button. A progress bar indicates that your book is being prepared. iOS Simulator will open in the background and run the Tigerbooks app. }} Choose a style and then click the “Meins” (My Books) button. }} Then select your e-book “First Steps” to load it in the Tigerbooks app. You can test all of its features there. Fig. 17: Tigerbooks interface (excerpt) Getting to Know TigerCreate | 2.3 Creating Your First E-Book 19 3. Chapter Working with TigerCreate In this chapter we’ll take a closer look at the program interface and look in detail at the use of interactivity. Then we’ll deal with multilingual books and the integration of games. Toward the end of the chapter, we will focus on testing and publishing. 3.1 The Interface in Detail Let’s look at the individual areas of the program in detail: Toolbar, Assets List and Properties List. Fig. 19: Interface settings 3.1.1.2 Controlling Scenes We’ll go from left to right describing the scene control buttons. Fig. 18: Breakdown of the program interface 3.1.1 Controls and Navigation: The Toolbar The buttons on the right of the Toolbar affect the appearance of the program interface, while the buttons in the middle of the bar affect the current scene. 3.1.1.1 Program Interface Appearance Options To the far right, below the Book Settings, you will find three buttons that zoom in and out of the Workspace. Under Options, you’ll find the setting for the Stage grid. This section allows you to turn off the grid and change the size of the grid, while with the option Snap To Grid you can ensure that your assets are placed and moved depending on the grid size and anchor point of the asset. •Edit and Preview: TigerCreate offers you two different views: Edit mode and Preview mode. The difference between the two views lies in the fact that you only see the Stage and the Control Bar in Preview mode, and that assets behave slightly differently – in preview mode, animations will start based on the parameters you’ve set, and buttons can be tested. Preview mode allows you to test a scene quickly, but it should not be used as a re placement for testing in the iOS Simulator or on a test device. In Edit mode you can create scenes, place assets on the Stage and adjust the required settings in Properties. You can also create animations and link them to sounds, edit texts and create buttons. A quick change to Preview mode will show you the current state of your e-book. •Animation-the Timeline: Use the Animation button to show or hide the Timeline(s). If no asset is currently selected, you will see an empty Timeline 20 Working with TigerCreate | 3.1 The Interface in Detail Fig. 20: Scene control buttons with a number scale ascending from left to right. The numbers represent frames, or the images in the scene. A transparent, vertical bar – called the Slider – marks the current position. Click farther to the right in the Timeline and the Slider will jump there. If you’ve already created animations (see Chapter 3.2 Creating Interactivity), the assets on the Stage will also change as you move along the Timeline. Each scene has a fixed total length (number of frames) and a speed (FPS) that apply to all the animations in the scene. Each asset in the scene has its own Timeline. This cannot be longer than the entire scene, but it can be run independently of other assets and their Time lines – for example, if an animation is very short, but is controlled by a button. Finally, when you select an asset, you will see only a section of the total Timeline – namely, the one that applies to the selected asset. To the bottom-left of the Timeline is a scale with a small Slider. This allows you to change the scale of the Timeline. The farther right you move it, the more frames (images) are shown in the Timeline. Existing key frames (see below) are visible in every view. To the right of this scale, the length of the scene (Total Frames) and the speed (FPS) are shown. The default scene length is 120 frames – this corresponds to the total number of frames in the scene. To change this, click the number field and enter a new value. The length set here has an impact on how far you can scroll to the right in the Timeline. The current limit is 120. An example of this: In the third scene from Chapter 2.3 we had two bugs and a small owl being comforted by its mom. While the bugs moved by themselves – one of them over 30 frames, the other over 55 frames – nothing happened with the two owls at first. Their animation takes up 90 frames in the Timeline, but it is linked to a button. Only when this is triggered does the owl animation start, regardless of the current positions of the two bugs, and is played twice (2 x 90 = 180 frames). The total length of the scene is only 120 frames. Fig. 21: Timeline To the right of the overall length is the speed of the scene, the default being 24 FPS; this stands for Frames Per Second, and determines how fast a scene runs. The total number of frames combined with the number of Frames Per Second determines the duration of a single play through of the scene. So, in our example 120 ÷ 24 = 5 seconds. The current position of the Slider in the Timeline is displayed in the Current Frame field. Move the Slider along the Timeline to see how the value shown changes. The Show Current Frame button helps you find your place if you’ve scrolled to a position in the Time line that no longer shows the Slider (Example: the Slider is currently at frame 10, but the section of the Timeline shows frames 120 to 190). Clicking this button moves the Timeline so the position of the Slider is visible. You can use the Current Frame field to quickly jump to a specific position in the Timeline. Enter the number of the frame that you want to be shown (e.g. 325), and confirm by pressing the ENTER or RETURN key. The Timeline will automatically jump to this position. Select an asset on the Stage or in the Scene Navigator and the view of the Timeline changes: an icon of the selected asset appears and an arrow next to it can be used to expand the Timeline down – the lines for Position, Rotation, Scale and Opacity appear one below the other. To help keep track of your position, every fifth frame in the Timeline is shaded in gray. Animations are created between these lines – and so you can easily see which parameters of an asset can be changed. These are: •Its position on the Stage (Position) •Its rotation around its own (movable) anchor point (Rotation) •Its size scaling (Scale) •And its opacity (Opacity) The small padlock symbol allows you to lock individual settings. This is especially useful if you want to select and copy specific sections of the Timeline – for example, all key frames for Rotation (see Chapter 3.2 for more on this). If the selected asset is already animated, you will find so-called key frames in the Timeline – frames where one of the four parameters has been changed. To think about this in a simpler way, imagine that certain settings of an asset are stored in these key frames (for Working with TigerCreate | 3.1 The Interface in Detail 21 Timeline, thus resetting the scene to its original state. The remaining two buttons are particularly interesting: Step Back and Step Forward. In Preview mode they are of no significance, but in Edit mode, when you’ve selected an asset whose Timeline contains key frames, these buttons can be used to move the Slider from key frame to key frame, moving all other animated assets with it accordingly. Fig. 22: An asset’s Timeline example, a rotation by an angle of 30 degrees). The exact procedure for creating animations is discussed in detail in Chapter 3.2. However, at this point we would like to draw your attention to the small, round button to the left of Animation: this RECORD button must be active in order to place key frames in the Timeline. Scene Options By clicking the Scene Options button, you will see a selection dialog containing several options: •Generic (configure navigation buttons): By default, buttons will appear in your e-book for turning to the next or previous page, letting you move linearly from scene to scene. For each scene, you can set whether these buttons are shown. For example, you may want to hide the default buttons if you want to offer the option to jump to between different scenes using custom buttons. •Text Blade (text display): Text Blade can be activated for the entire project under "Book Settings" - "Use Text Blade". You can then determine individually for each scene whether the text will be displayed constantly or will slide in using a button at the bottom of the screen. If you use the Text Blade feature, the scene can only contain one text box. •Background: All images in JPEG format in the project’s Images folder are sorted alphabetically and listed as icons. You can select or change the background of your scene by clicking one of them. The background image is then fixed to the stages and can be neither moved, scaled nor rotated. Fig. 23: Timeline with key frames and active Record button If you select several assets in the Assets Bar at the same time in the Scene Navigator view, you will see the selected assetsʼ Timelines one under the other. This can be helpful when simultaneously setting key frames for multiple assets. •Play & Co.: The Control Bar: The control bar shows some familiar symbols: the Play button, which changes to Pause once it’s been activated and the scene starts, and Replay (or Rewind, far left), which jumps back to the beginning of the • Ambient Sound: Select an atmospheric sound for your scene using the pop-up menu. This sound is repeated automatically. (You will find more on the subject of background sounds in Chapter 3.2.5 Sounds) •Screenshot (create thumbnail): By default, the Tigerbooks app has a navigation bar available within an e-book in which all of the scenes are shown in the form of small icons. By tapping one of these icons, you can jump from scene to scene through the book. For this feature is it necessary to create a screenshot of each scene. These screenshots also act as preview images in the finder and selection dialogs, helping you to find scenes more easily. As a scene’s visuals can change dramatically as it unfolds – for example, it could be completely dark at the beginning before Fig. 24: Control bar 22 Working with TigerCreate | 3.1 The Interface in Detail even if your current scene does not contain any language-dependent content." •Language Selection: Tigerbooks supports multilingual e-books. If you have selected more than one language in Book Settings (something which you can also go back and do while working on a project), you can switch between languages at any time in the Toolbar. The selected language affects existing text boxes as well as any sounds or images containing language-related information (for example, the text on a sign). For instance, if you have entered a text box in a scene with the name “MyText01” and filled it with English text, after switching to German, a text box with the same name will be shown in the same position, with only the contents “Untitled Text”. Now enter your German text in here and switch a couple of times between German and English to check that the corresponding texts are shown with the same formatting. Fig. 25: Scene Options: Choosing a background image You will find out about adding sounds and images to multilingual e-books in Chapter 3.3 Producing Multilingual E-books. 3.1.2 The Assets List Fig. 27: Book Navigator and Scene Navigator selection Fig. 26: Scene Options: Creating a screenshot becoming brighter and brighter – it’s not always best to use the first frame as its screenshot. Therefore, to take a better screenshot, move the Slider to a point in the Timeline that is more typical of that scene, open Scene Options and click the Save Current Scene View As Screenshot button. TigerCreate also takes language-dependent elements (text and images) into account for scene previews, so switch languages under "Scene Options" and create a screenshot for each language The Assets List offers two views – the Book Navigator and Scene Navigator – which you can switch between using icons along the top of the window. The width of the list itself can be adjusted, which can be helpful if you have files with long names: if you hold the mouse over the right edge of the list, the cursor will change and you can set the width of the list by clicking and dragging. 3.1.2.1 Book Navigator The Book Navigator shows the structure of the project folder, and offers direct access to all external images, sounds, available scenes and assets assigned to games. The search field along the top allows you to find an asset quickly. As soon as you enter the first character, TigerCreate starts searching and only shows folders matching your search. The name of the current e-book project is shown di- Working with TigerCreate | 3.1 The Interface in Detail 23 • Delete: deletes the selected item (asset or subfolder) from both the Assets List and the project folder. If you accidentally delete an asset that you have used in a scene, it will remain in the scene and in Scene Navigator! It will just no longer be available for all scenes via the Assets List. Fig. 28: Book Navigator rectly below the search field, and to the right of it is an icon that opens the Book Settings dialog window. The Slider at the bottom of the list scales the size of the preview icons, which can be helpful when searching for individual images. If you expand the Sounds list, all sounds will be shown; clicking the small Play icon to the left of the sound’s file name will play the sound. If you expand the Scenes list, you can double-click any available scene to open it in a new window. Right-clicking on the Assets List will open up a pop-up menu, which, depending on whether you’ve clicked an asset, a folder or the background, will offer you various options: • Show In Finder: shows the asset or folder in the Finder • Open: is only shown for scenes and opens the selected scene in a new window • New Scene: opens a new window with an empty scene • New Book: opens the Book Settings dialog window for a new project • New Folder: creates a new “Untitled” subfolder, which is also created in the Finder • Add Files to …: opens the Open or Selection dialog and allows you to select one or more assets from a folder, which will then be copied to the project folder and shown in Book Navigator. Please follow the conventions for filenames here, too – do not use umlauts or special characters, and make sure the name for your assets reflects the scene they are to be used in. 3.1.2.2 Scene Navigator In contrast to the Book Navigator, the Scene Navigator only shows the assets used in the current scene. As well as external images, this includes internally created assets – such as text boxes, buttons and Bezier curves. Sounds used in a scene are not listed in Scene Navigator as they are added via the Properties List instead. You’ll find out more about the Properties List in the foll owing section, as well as in Chapter 3.2 Creating Interactivity. If you want an asset to appear more than once on a Stage, simply drag another copy from the Book Navigator in to the scene. It will then appear in the Scene Navigator with “_1” at the end of its name. This is a second instance of the asset. This will be automatically updated if the asset altered later (e.g. a small correction to an image). Assets that have been added to the Scene from the Book Navigator are shown in the Scene Navigator. You can also click on the (+)-symbol in the Scene Navigator and create a new button, text box or Bezier curve, which is then added to the scene and shown on the Stage. Next to the (+) symbol is a (-) symbol, which deletes the selected item from the current scene – pressing the Backspace key has the same effect. Images and sounds are always linked to external files in the project folder. Remember that once an asset has been added to a scene, it will remain in the scene, even if the asset is moved or deleted from the project folder. To the left of each asset in Scene Navigator are two icons: a stylized eye and a small padlock symbol that is open by default. If you click it, the corresponding asset will be locked, and then cannot be selected or moved on the Stage. This protection is particularly useful if several assets are packed close together or overlap, as you can lock all the assets that could be moved accidentally. However, a locked asset can still be edited, if you select it in either the Scene Navigator or the Timeline and the Properties List. Clicking on the padlock again unlocks the asset. If you click on an asset's eye symbol the asset will become temporarily invisible on the Stage. At first you will still see it selected, but as soon as you click on something else the asset will disappear. This only ap- 24 Working with TigerCreate | 3.1 The Interface in Detail 3.1.3 The Properties List The Properties Navigator display changes according to context. If nothing is selected either on the Stage or in the Scene Navigator, the Properties Navigator will remain empty. Depending on the type of asset that is selected, different properties are displayed that can be changed for this asset. Let's take a look at these properties. 3.1.3.1 Generic Properties Generic Properties are properties that are common to all assets. This includes: Fig. 29: Scene Navigator with locked and nested assets plies in Edit mode and is very useful when there are a lot of assets close to or on top of one another. This has no effect on how the assets will be displayed later in the ebook. It’s possible to combine several assets together – to nest them. This is useful if, for example, you have a butterfly in a scene whose wings move independently of each other. In order to move the whole thing along the flight path, it’s easier to nest the individual parts together and move it as one, rather than having to rotate or scale each bit individually. (In the examples and tutorials, we’ll refer to this as a parent-child relationship between the assets involved). Such nests can be created easily by dragging one asset onto another in the Scene Navigator. The dragged object may seem to disappear, but the target object will now have a little triangle icon to the left of its name – if you click on it, the icon will expand downwards and all its child assets will be displayed below. The target object is always the main asset (hence parent). Nested objects may be linked to each other, but they still retain their own Timelines. Theoretically, nesting can be made several layers deep, but it then becomes increasingly difficult to keep track of which parent controls which child object. We’ll cover this in more detail in Chapter 3.2.2 Creating Interactivity, as well as in the practical exercises in Chapter 4. Fig. 30: Properties List – Generic Properties Working with TigerCreate | 3.1 The Interface in Detail 25 The name of an asset and its arrangement on the Stage come under the Generic Properties. From the outset each asset has a name, but, for example, it may be useful to change the name of a bird you use in several scenes to something different each time – such as “Bird” in one scene, and “Bird_2” or “Bird_B” in others, as there may be several birds in these scenes that you want to differentiate between. For this reason, the name of an asset can be changed from scene to scene. This can also come in handy for assets that are produced in the scene itself. By default, the first button is given the name “UntitledButton”, followed by “UntitledButton_1” and so on for each additional button. In most cases, changing the name is helpful. For example, if you are using several Bezier curves in a scene, it’s easier to set them if one is called “Bird_flight” and the other “Throw_curve”, instead of just “UntitledBezier” and “UntitledBezier_1”. When changing names, make sure you avoid umlauts and special characters (including hyphens), other than underscores. This applies to the names of both internal and external assets. While TigerCreate is fairly tolerant of them, the iOS Simulator will have its revenge later, in the form of compatibility issues. This feature doesnʼt work in Edit or Preview mode and is only shown in the iOS Simulator or on a device! Image shows the path to a linked asset. If you have renamed an image in a scene under Name, you can see the original file name here. 3.1.3.2 Transformation Properties Transformation Properties shows the current values of a selected asset on the Stage. These include: •horizontal (X) and vertikal (Y) position in pixels, calculated from the top-left corner of the stage, If you enter a value manually, always use a decimal point and not a comma for non-integer values, e.g. “0.5”. You can scale an asset directly on the Stage by dragging the handle points. Holding down the SHIFT key at the same time lets you scale an object while keeping its relative proportions intact. The Z Order of assets is one of the most important properties. This is used to set what lies farther forward on the Stage (higher Z value) and what sits farther back. For assets with the same Z Order value, their order within Scene Navigator determines which asset lies in front. • Buttons, texts and Bezier curves donʼt have Z Order values of their own. They are always on the top level (although this is shown slightly differently in Preview mode). • As buttons donʼt have a Z Order value, they cannot overlap each other! At their most basic, they define a rectangle that triggers an action, and if two buttons overlap, you canʼt be sure which button youʼre trying to Generic Properties also contains one of TigerCreate’s special features – the option Can Scratch, which lets an asset be erased in an e-book. This means that when you cover a part of the background with a graphic and set it as Can Scratch, the user can use their finger to gradually erase the covering graphic to revel what lies beneath (after a certain percentage, the remainder of the asset will disappear completely). Why not give it a try? Fig. 32: Properties List – Transformation Properties •Scaling, where a value of 1 corresponds to one hundred percent, and negative values mirror the asset horizontally and/or vertically, •Rotation in degrees around the asset’s (movable) anchor point, •the current value of the anchor point (set to the center by default; the values 0/0 correspond to the top-left and 1/1 to the bottom-right), 26 Working with TigerCreate | 3.1 The Interface in Detail image will move along this path. Bezier curves are most useful if an asset isn’t just moving along a straight line from A to B, such as with the flight of a bird or the trajectory of an object thrown from a catapult. In Bezier Properties, you can choose whether the path you created should be ‘closed’ or open’, have clearly defined start and end points, or run repeatedly. By clicking the Reverse Points button, you can switch the start and end points around, reversing the direction in which the path runs. You’ll learn more about using and manipulating Bezier curves in Chapter 3.2 Creating Interactivity. 3.1.3.4 Animation Properties Animation Properties lets you set a whole host of options: Fig. 33: An asset’s anchor point is crucial for rotation, among other things In Edit mode, assets with opacity = 0 are still shown faintly for practical reasons, but are not visible in Preview mode or the e-book. •and the Opacity (0 = completely transparent and therefore invisible, 255 means opaque or completely filled). Four of these five values can be changed in the Time line using key frames. However, as the anchor point has an overarching influence on the asset, you can’t change the anchor point at a certain point in the Timeline without it affecting the times before and after, too. As such, an asset’s anchor point applies for the entire duration of the scene – and if you move the point, it may have a serious effect on the flow of the asset’s anima tion, particularly if it involves a rotation! 3.1.3.3 Bezier Properties Bezier curves are paths with anchor points, which can be used to change the shape of a path. If you link one of these paths to an image (see Animation Properties), the Fig. 35: Properties List – Animation Properties Fig. 34: Properties List – Bezier Properties Working with TigerCreate | 3.1 The Interface in Detail 27 In the Repetitions field, you can set how many times an animation will run – this could range from once (value = 1) to an infinite number of repetitions (remember: an animation isn’t just moving a distance, but could also be a rotation, scaling, etc.). By default, animations are set to play in an endless loop with a repetitions value of 0. You can assign a sound to an animation. Regardless of whether the animation runs automatically or is started by clicking a button, the sound you set will play at the same time as the animation. The length of the sound is not restricted by the animation, but will start in sync. For example, if an animation is only 2 seconds long, but the sound is 5 seconds, the sound will be played for the entire 5 seconds. But if you set the animation to run 5 times under Repetitions (with the total running time of the animation then being 10 seconds), the sound will still only play once and won’t start over when it reaches the end (i.e. after 5 seconds). This means that you should consider how many times your animation will run and how long it is in advance. For example, you may find you need to edit the sound and make it longer. Using the Loop Sound setting, you can make a sound play in an endless loop. This can be used with background noises to help create the atmosphere for a scene. Be wary though, as a sound set on loop cannot be stopped during a scene! It's easiest to link a continuous atmosphericbackground sound (Loop) for a scene via "SceneOptions" —> "Ambient Sound". If you want a sound to start after a delay (example: an apple falls from a tree, and about a second later, hits someone on the head, causing them to shout “Ouch!”), you should insert a pause (silence) before the actual sounds (the hit and ouch). (More on this in Chapter 3.2 Creating Interactivity). The Path option will assign an available path, in the form of a Bezier curve, to an asset. This is useful if you want to connect two or more points with something other than a completely straight line. Additional options also let you set: •whether a path always runs from start to finish, or if it constantly runs back and forth in an A – B – A – B – A etc pattern (Ping Pong), •whether the asset is aligned with the path, i.e. if it assumes its angle and/or rotation (Orientation). You can set the start angle (relative to the start of the path) in the number field. •the speed (the number of frames in the Timeline) Fig. 36: Animation on a path at which the assigned path runs (Path Duration). For this, simply enter the number of frames the asset should take to complete its path. Anstelle eines einzelnen Assets kann auch ein sogeIn place of a single asset, a so-called Sprite Sheet can also be animated. This is a sequence of images, i.e. a fixed sequence of individual frames that make up an animation. You can find out more about Sprite Sheet Animations in the description of the Sprite Sheet Ani mations Navigator in this chapter and in Chapter 3.2 Creating Interactivity. The Draggable option prevents an asset from starting automatically and instead specifies that it can be dragged along a path, so long as the path has already been defined. This can be done in one of two ways – either by using key frames in the Position section of the asset’s Timeline (with at least two key frames, A and B, between which the asset can be moved back and forth), or by creating a Bezier curve (also see Chapter 3.2 Creating Interactivity/Bezier Curves) and assigning it to the asset as a path (see Path and Bezier Properties above). The asset can then be lead along this path using a finger. Finally, you can free an asset entirely from its Timeline to make a Free Object by activating the Free option (this can only be done with images). Free Objects are assets that can be moved across the Stage without a path or key frames. They also cannot be controlled by buttons. A free object has physical properties such as gravity and friction. Once it has been touched, it will then fall under the influence of gravity and will bounce depending on the set parameters. In Type you can choose between Box and Ball, which set how your asset will act during collisions. Box makes it act in a more rectangular way, while Ball is a rounder shape, which allows for more rotation upon impact. The actual shape of the asset is not taken into account upon collision. 28 Working with TigerCreate | 3.1 The Interface in Detail You can influence the physical properties of an asset using Friction and Elasticity, to set its rebound behavior. A sound can be set to be played upon impact, using the On Collision option. The On Collision sound feature is not supported in the current version of the TigerBooks App. 3.1.3.5 Button Properties Buttons are used to create interactivity – which generally means playing animations (or part of them) that are linked to a specific event (tapping a defined button). In Button Properties, you can set which animation(s) a selected button controls. For this, either click the (+)- A button can trigger several animations simultane ously. An example: Example for this: The beginning of a scene is in half-darkness. There is a single button, A, on the Stage positioned above a lamp. When you tap button A, the lamp should turn on (animation 1: it gets brighter). Immediately afterwards, a cat’s tail moves behind an armchair (animation 2: tail moves), and when you tap the tail, a “Meow” can be heard (for this – animation 3 – a second button, B, is moved onto the stage for the “Meow”). Strictly speaking, a fourth anima– tion takes place, as button A, which triggers all of this, can only be used once to turn on the light, so button A needs to disappear from the scene. All of these animations (even the fourth) can be assigned to button A in Button Properties, as described above. It should be noted that, alongside Repetitions, i.e. the number of times an animation is played, the Start Frame and End Frame, which form the beginning and the end of the sequence, can be specified and edited, too. In essence, this means that you can use buttons to control the individual parts of an animation. An example of this: Imagine a bee flying from flower A to flower B, then over to flower C and finally back to flower A, briefly landing at all three points before flying on. For the single “bee” animation, you can either create three key frames and move them more or less linearly from point A to B to C to A or draw the entire path as a closed Bezier curve containing all three points. If you then start this as an automatic animation, the bee will fly back and forth once, several times or repeatedly between the three points, depending on the repetitions you set. However, if you set up three buttons, assigning the “bee” animation to each of them, tapping button A could play the first part of the animation (from flower A to flower B), button B the second part (flower B to flower C) and button C the final third (back to flower A). Fig. 37: Properties List – Button Properties symbol and select an asset from the pop-up menu or click and hold the point to the right of it (Drag Point) and drag this on to an asset on the Stage, which will then be added automatically to the Button Properties. Finally, you can also link a button to its own sound. This is used in the example above of the cat whose tail is peeking out from behind the sofa – you tap the tail and the linked button B plays a “Meow” sound effect. If you linked the sound to the cat’s tail animation in Animation Properties instead, it would start immediately. The Working with TigerCreate | 3.1 The Interface in Detail 29 sound can be played again and again by tapping the button. 3.1.3.6 Text Properties For text boxes you can set the following properties: You will find more on the subjects of Word Highlighting and label data in Chapter 3.2 Creating Interactivity. In the current version 1.5 of the TigerBooks app, Word Highlighting only works with black as the text color, and the highlighting set to blue. • Font • Size • Line Spacing • Color • Alignment: (align text left, center text, align text right) The Text Properties palette can also be used for text entry and editing. However, the size of the box can make this a bit inconvenient, so it may be helpful to create longer texts in a word processing program or copy and paste the text from the original book into the text entry field. You can insert line breaks into a text box by pressing the Option+RETURN keys. Used on its own, the RETURN key updates the text box displayed on the Stage to reflect what you’ve entered. Unfortunately, it is not possible to format individual sections of a text, i.e. to highlight individual words in bold or italics. Like buttons and Bezier curves, text boxes c annot be given a Z Order value. This is because text boxes are always at the front, and cannot be obscured by graphical assets. 3.2.2.6 Text Image Animations Text Image transforms your text into a high resolution PNG-Grafik which can be animated. It has the same animation options like other animation objects (Rotate, Opacity, Scale, Position). Under Text Properties any font can be chosen for a Text Image. It is not possible to word highlight the text though. Fig. 38: Properties List – Text Properties • Highlighting: the color for the Word Highlighting function) Word highlighting is the name given to the highlighting of individual words as they are read aloud. For the narration itself, a narration file is added through the Speech option. A pop-up menu shows all the files in the Sound folder, and you can sample each sound by using the play button next to its name. In order to use the Word Highlighting function, besides a narration file, a text box needs markings (so-called label data) that control the point at which words in the text are highlighted. These key frames are created in the Timeline of the text box. Two further buttons (Import…/Export Highlight Data) allow them to be exported or imported as text lists (extension .txt), letting you and your colleagues share the load during production. You can learn more about the Text Image tool as part of our Tutorial Series: Text Image https:// youtu.be/RKZMv7sBVBM 3.1.3.7 Sprite Sheet Animations Navigator You can open the Sprite Sheet Animations Navigator by selecting the icon at the top right of the Properties List. A Sprite Sheet Animation is an image sequence – a fixed sequence of individual frames – which are treated as a single asset. For example, imagine a dog drawn in several phases of movement. By placing all of these phases of motion on top of each other and only showing one image at a time (Opacity), the dog appears to run on the spot. Now if you were to move the Sprite Sheet from A to B in the Timeline with key frames, the dog would appear to run across the Stage. However, animations such as this can be very memory intensive and should be used sparingly. In the case of the dog example, this means that even though you only 30 Working with TigerCreate | 3.1 The Interface in Detail Fig. 40: Dog image sequence (extract) The Sprite Sheet Animations Navigator is used both for creating Sprite Sheets and managing them. When you open the palette for the first time, there is no Sprite Sheet Animation available. Create a new Sprite Sheet Animation using the (+)-symbol. If you have several Sprite Sheets, select the one that you would like to edit in the upper section of the palette, and set its properties in the lower section: •the name used to manage the Sprite Sheet •how many frames it runs through in a cycle (i.e. the speed of the sequence) •whether the sequence runs endlessly (Loop) or for a certain number of (Repetitions) •which individual frames belong to this Sprite Sheet. You can access all of the images in your project via either the (+)-symbol in the lower section of the palette, or you can drag them directly from the Book Navigator into the palette. By changing the order of the images in the list, you can set the order in which the individual phases are shown. You can also sort images within the list or, if necessary, delete them. (The individual phases of a Sprite Sheet Animation do not appear in the Scene Navigator.) Fig. 39: Sprite Sheet Animations Navigator ever see one state, all the other states are still present, only hidden, and still need to be moved to reflect the distance the dog travels. On top of that, the states are visible and invisible changes each time. With more complex animations with a number of individual frames, you will soon start to reach performance limits. An example use of Sprite Sheets: Imagine the flickering flame of a candle. Draw three or four different states for this and create a Sprite Sheet out of the image sequence (you will learn how to do this next). Then create a background image with ten, twenty or even more candles (without flames) and place your flame Sprite Sheet on each candle. As the flame flickers in the same position, far less memory is taken up than with the dog animation, even when thirty candles are burning at the same time. •Within the list, you can determine the number of frames each image phase uses, effectively setting how long it remains on the screen before the next phase is shown. This is in relation to the total length of one cycle set earlier. If you have several Sprite Sheets in a scene, it makes sense to give them descriptive names to distinguish them from other assets (e.g. Flame-Sprite, Dog-Walk, etc.). Directly below the list of available Sprite Sheets is a Slider, which can be used to enlarge the preview icons. If you click the play arrow on the icon, the preview will be animated – this gives you an impression of how your Sprite Sheet Animation will look. Working with TigerCreate | 3.1 The Interface in Detail 31 3.1.4 The Curtain Rises – The Stage The Stage is where all the action takes place in your ebook. The size of the Stage is set for all the scenes in an e-book in the Book Settings. Regardless of the set height and width, you can use the (+) and (–) buttons on the Toolbar to zoom in and out of the section of the Stage you’re currently working on. Hold down the right mouse button to move the visible section of the Stage. Use the adjustable background grid (Options) and the Snap To Grid feature to help align your assets. Essentially, a scene is always composed of a background and a foreground. Around the actual Stage it self is the Workspace, which you use in Edit mode. The scene background is an image in JPEG format, which can be chosen and changed in the Toolbar (Scene Options). This background image is fixed to the Stage and cannot be moved or scaled. If a background image is smaller or larger than the Stage area it will be automatically scaled, which leads to unattractive effects (also see Chapter 2.1.4 The Workspace). Fig. 41: Scene view: The background image fills the stage area. The Stage and (gray, gridded) surround make up the Workspace If there is no associated background image, the Stage’s limits are shown by a rectangular border. Inside this is a smaller white rectangle, which can be moved up and down (in landscape format) or left and right (in portrait format), using a handle (top-left). This illustrates the different screen sizes of various tablets and smart phones. The adjustable Stage formats relate to the 4:3 format of the iPad, with the smaller rectangle represents the area that will be filled on a current iPhone. In practice, this means that you always have to expect a loss along the edges on iPhone and Android devices — either on the sides or along the top and bottom, depending on the orientation. Setting a so-called Safe Zone with the help of the white rectangle allows you to determine which section of each screen will be displayed on narrower displays. Fig. 43: Workspace and Stage Assets on the Stage The foreground of a scene is made up of all the assets belonging to that scene: PNG files, which can be animated, sounds (not visible), text and possibly interactive elements such as buttons, which are used to trigger actions. All the assets that you place outside of the Stage’s border or past the edge of the background image are not visible in the scene. This can be put to good use if an object appears on a time delay or should only be triggered once and then disappear – simply move it from the Stage to the Workspace around it! When you select an asset on the Stage, it is surrounded by a transparent rectangle with eight scaling points around the outside. These can be used to change the asset’s size – hold the SHIFT key lets you scale it whilst keeping the proportionality between the sides. In the center of the rectangle is the anchor point of the asset, the point around which the asset rotates. In the following figure, see how the rotation differs depending on the position of the anchor. In many cases, the anchor point is best left at the center, but sometimes you may find it easier to move it. In Fig. 42: Section of the Stage 32 Working with TigerCreate | 3.1 The Interface in Detail the following example, we want the owl to be able to move its wing. The wing itself is elongated and shouldn’t rotate around its center, and should, if possible, stay attached to the neck at the top. So we simply move the anchor point to there. You can see a comparison of the effects of rotating about different anchor points in the middle and right images. If you would like to select more than one asset on the Stage at the same time, there are several options: •hold the Command key and click on all the assets around all of assets you wish to select on the Stage, and then let go, •or select all of the desired assets while holding down the Command key in the Scene Navigator. You can then access them on the Stage. Back and Forth on the Stage There’s usually more to a scene than just a background and foreground. The foreground itself can consist of different levels, too – there’s a ‘farther forward’ and a ‘farther back’, and sometimes levels in between. If you drag several images into a scene one after another, the most recently dragged image will lie in front of the others, partially covering them. The order in which you import them determines the initial arrangement, back – farther forward – front, even if it isn’t the correct one. This can be changed via the Z Order, found under the Generic Properties. The Z Order value of each asset determines what lies farther forward on the Stage (higher value) and what lies farther back. For assets with the same Z Order value, their order in the Scene Navigator list determines which asset sits closer to the front. Buttons cannot overlap! As they define an area which triggers an action, if two rectangles overlap, there is no way of knowing which button is being clicked – and therefore no way of knowing which action should take place. Text boxes, buttons and Bezier curves are all exceptions and cannot be given Z Order values – they are, by default, always in front of other assets. If you still want to cover some text temporarily, you must create it as a graphic and place it as such. Furthermore, Free Objects always sit on the topmost level, and, despite how it may appear in TigerCreate, Free Objects cannot be covered up in the TigerBooks app either (also see Chapter 3.2 Creating Interactivity). Fig. 44: Anchor point, placed centrally or on the top-left on the Stage you want to select, one after another, •hold the mouse button and drag a rectangle Fig. 46: Left, the bee lies in front of the flower with the owl Fig. 45: Moving the anchor point to achieve realistic movement behind it. By changing the Z Order values, the owl comes farther forward and the flower moves farther back (right) Working with TigerCreate | 3.1 The Interface in Detail 33 3.1.4.1 Aspect Ratio All projects are set up in a fixed 4:3 aspect ratio. As mentioned in chapter X all background images need to be JPGs in 1024x768 for landscape books or 768x1024 for portrait books. Because we never know on which devices the book will be shown (4:3 like iPad or NEXUS 9, 3:2 like iPhone 4S, 16:10 like Kindle Fire, 16:9 like most Android devices and iPhone 5, 6, etc.) there is a blue colored 16:9 rectangle on the stage which can be adjusted for each scene. Everything inside the rectangle is shown on all devices, so all important content, text and buttons must be placed within this area. • On any 16:9 device you are able to see everything within the blue rectangle, anything outside is cropped • On a 3:2 device all the content within the rectangle is shown as well as some more outside • On 4:3 devices you are able to see everything As you can see we added some content to the background and the tree etc. (in this example we layered the background, the bushes, the tree and the hippo to get a nice parallax effect when moving each layer separately). Now it looks good on 4:3 as well as in the ratio 16:9. The art of preparing a scene is to decide how to set up the 4:3 background. You could take a 4:3 part of the original image or choose a 16:9 part of the picture with the most important assets for the scene. And sometimes a little more work is needed and some borders need to be retouched on the original image, using Photoshop. This will help the 4:3 background image to still look good when viewed on 16:9 devices. Here are three example images: Same scene in 16:9, the content outside of the rectangle is cut away but all the important assets are still visible. You can adjust the aspect ratio in the TigerCreate Preview Mode (Aspect Ratio Selector in the upper left corner) and doing this you can test how the scene looks like on each device. Attention when exporting bookstore iBooks: Because iBooks behaves differently than the single apps or Tigerbooks all 4:3 books are really shown as 4:3 in iBooks. On 16:9 devices like the iPhone 6 the iBooks app automatically adds bars to the left and right of the content that is fully displayed in 4:3. This is the original illustration as shown in the book. And now … let the game on the Stage begin! In the following section, we’ll deal with animations in detail. 3.2 Creating Interactivity When we talk about interactivity, we’re describing the feedback between the user and the medium, when an e-book ‘reacts’ to the reader and an event takes place. For example, if I tap on a location on the screen, an event is triggered and something happens. Interactivity in TigerCreate is created through transparent buttons, which link actions to individual assets. We’ll cover this in more detail over the course of this chapter. 3.2.1 Creating a New Scene Think of a scene as a delicious menu that you want to prepare – the script is your recipe, the assets are the all ingredients you need, and TigerCreate is the wellequipped kitchen in which you are cooking. And animations and interactivity add that extra bit of spice. To create a new scene, an e-book project must already exist to add it to. A new project can be created in the start window by clicking the Create a new book button, which opens up the Book Settings window. Alternatively, you can select Open Book or Scene in the start window. If you point TigerCreate to an existing project folder, a new (empty) scene will be created. The name of the e-book is shown at the top of the window and the scene is automatically linked to the project’s assets folder. If a project is already open, a new scene can be created via the menu File → New. Basically, you build a scene by •linking a background image to the scene, •creating animations out of them •and linking them to buttons, sounds, paths, etc. If you are using an existing template (e.g. from a book), the following method has been proven to work well: }} Save a copy of this file in JPEG format, with just the background in view. Name it “Scene_01.jpg”, for example. }} Then, save a second version (also as a JPEG) exactly as the original scene appears (e.g. “Scene_01_complete.jpg”). }} Now use the complete view as the scene’s background to make the pixel-perfect placement of the actors (assets) as easy as pie. }} Finally, switch the complete view for the actual background, with your assets now in their correct positions. One of the meanings of the Latin word animare means, to ‘enliven’ something, breathing life into it. While we don’t want to go quite that far, it serves as a good metaphor for what we want to achieve – giving the illusion of life by moving things. So, in our case, animation refers to a type of movement: •This can be a linear movement between two or more points, i.e. a distance traveled by an asset (usually an image). •Over this distance, there could also be a difference in speeds, with either an acceleration or deceleration occurring. •If we’re not taking the shortest route from A to B, but instead travelling along a curve, we can speak of a path animation – where an asset is moving along a path. •If the asset remains at its starting point the entire time, perhaps turning on its own axis – this is called a rotation. •Even a change in the size of an asset, a scaling, is an animation. If the scaling doesn’t occur proportionally, we could also call it a distortion. •An animation doesn’t necessarily have to include a movement – an asset could also fade out gradually until its invisible, or slowly fade into view. Both of these are changes in opacity. An animation is a visible change to an asset that takes place on the Timeline. •placing assets on the Stage, }} Separate the template into a background image and a number of (free) foreground assets using an image-editing program. 3.2.2 Animations What all of these options have in common is a visible change. 3.2.2.1 What Types of Animation Are There? In the previous section, we covered the forms an animation could take (movement, rotation, scaling etc.). Now we’ll focus on the aspect of how, when or why an animation runs. For this, we’ll look at two basic types of animations that you’ll come across in your e-books in TigerCreate – self-starting and dependent animations. Nested animations are also of interest, which can occur in both self-starting and dependent animations. Self-Starting Animations (Start Animations) Every animation that you create in TigerCreate begins its life as a self-starting animation. As soon as a scene is loaded, all of the animations start at the same time and will replay indefinitely when they reach their end (within the Timeline) – these are their default settings, which you can change if you need to. Working with TigerCreate | 3.2 Creating Interactivity 35 As an example, let’s look at the opening scene of a children’s book, where the cover is animated (“The Owl and the Lump” by Tanja Jakobs and Susanne Weber). What should happen in this scene? •At the beginning of the scene, you see the owl still without its bump, and the title isn’t yet visible. •The title text should now appear. •The butterfly on the left should beat its wings. •A couple of seconds after the title has appeared, the bump should appear on the owl’s head, •When the bump is visible, the owl should scratch its head. •The small ladybug should jump on the spot when you tap it. Each of these is an individual animation. While reading through this list, think about which animations should start by themselves and which should repeat. Let’s look together: •The title text should appear by itself, the animation should only play once, and it should stay on the screen afterwards (or perhaps disappear again after a certain amount of time). •The bump on the owl’s head should also grow on its own (i.e. is self-starting) and, once it’s there, should definitely stay put. However, this animation would need to be on a time delay, rather than starting straight away! Fig. 47: Cover of “The Owl and the Lump” Dependent Animation (Touch Animation) In contrast to self-starting animations, dependent animations – as the name suggests – are dependent on an external event to trigger them. This external event is usually (see exceptions below) a tap on a transparent button. This button is often located right over the animated image. However, in theory a button could be anywhere on the Stage, as the only deciding factor is the link between the button and the animation. • Whether the owl scratches itself once, five times or again and again doesn’t really matter – but what does matter is that it only starts once the bump has appeared. That means this animation is also self-starting, following a delay. Buttons are only active in Preview mode. If you create an animation and link it to a button, the animation will still be self-starting in Edit mode. But once you switch to Preview mode, it will only start when the button is triggered. Buttons are displayed differently in different modes: • as transparent areas in Edit mode, • only their borders are shown in Preview mode, • they are invisible in the iOS Simulator and on the end device. •On the other hand, the butterfly must be fluttering the whole time; otherwise it would fall to the ground. This is a classic start animation, as it starts fluttering on its own and should continue to do so while we’re in this scene. •The ladybug should do nothing at all unless it’s tapped. This means there must be a button that causes the ladybug animation to start and sets how many times it runs. You can see that self-starting, endless animations are not used very often. Luckily, it’s easy to change how an animation behaves using a combination of the parameters in the Animation Properties palette and the dependencies of buttons. To summarize: the first category of animations are self-starting animations or start animations, but these can then be divided further depending on whether they run once, several times or endlessly. From the moment an animation is linked to a button (in Button Properties), it is no longer self-starting (but rather dependent). Another way of making an animation independent is the Draggable option (see Animation Properties). This lets the asset be moved across the Stage with a finger, provided an animation path has been created, using either key frames in the Timeline or by assigning a path to it (keyword: Bezier curve). In this case, the animation is also no longer self-starting, but rather dependent on the external event of clicking and dragging. 36 Working with TigerCreate | 3.2 Creating Interactivity Dependent animations that are linked to buttons can be divided based on how many times they can be triggered – they could be triggered only once (regardless of how many times the animation actually occurs), several times or an infinite number of times. The small ladybug from the example above should jump up and down a couple of times and then return to its starting position so we can make it jump over and over again. We call these types of repeatable animations Type A Touch Animations. In contrast, if you can cause an apple to fall from a tree by tapping it, it should really stay on the ground rather than return to the tree. This animation is dependent (as it is linked to a button), but can only be triggered once. We call these one-time animations Type B Touch Animations. How we can make sure an animation is only played once will be explained later in the chapter. Itʼs also possible to link one animation to multiple buttons. The same animation – letʼs say an apple falling on our owlʼs head – could be triggered by clicking a button directly on the apple, one on the tree or one on our owlʼs head. In this way, different sounds can also be linked to an animation. Youʼll find more on this in the section about buttons. Nested Animations Nested animations aren’t a type of animation, but rather a special feature which (with limitations) is independent of whether the animations are self-starting (i.e. start animations) or dependent (touch). Now let’s go back to our owl example, where the little butterfly in the image should flutter the entire time. For this, there are several different approaches you could take. You could draw the butterfly in several phases and show and hide these phases alternately. This is effectively a Sprite Sheet Animation and thus may run into difficulties if the butterfly needs to fly along a path rather than flutter on the spot (see the Sprite Sheet Animations section in this chapter for more on this). Alternatively, you could split the butterfly into its component parts – two wings and a narrow body – and move (rotate and/or squash) the wings independently. Strictly speaking, these are now two individual ani mations, and if the butterfly needs to fly through the air, too, you’ll need to create a third animation for the body before synchronizing all three parts on a flight path. This is where nested animations come into play. They make it possible to combine several assets into one by nesting their animations. The advantage of this is that you now only have one “butterfly” asset to align to a flight path, even if it’s technically made of multiple assets (Wing A, Wing B, Body). Both here and in the examples that follow in these tutorials, we refer to this as a p arent-child relationship between the individual assets. Nests can be created as follows: }} In the Scene Navigator, drag the one asset on to the other while holding down the mouse button, until the border of the target object appears. }} Release the mouse button and the object you drag across will seem to disappear, but if you look at the target object, it will now have a little triangle icon to the left of its name. If you click this triangle, the icon will expand downwards and all the child assets will then be displayed. }} The target object is always the parent asset; we call it parent. Nested objects may be linked to each other, but they still keep their own Timelines. In our example, this means that if you drag the two wings onto the body in the Scene Navigator, the body becomes the parent object, and the two wings the child objects. Now select one of the wings in Edit mode and you will only see the Timeline for this wing. If you move the wing on the Stage, it may have a strange effect on the appearance of the butterfly as a whole, but it has no immediate effect on the other two parts. Independent Dependent Self-starting Not self-starting (Start Animation – starts immediately after loading) (Touch Animation – starts upon triggering a button) Type A Can be triggered repeatedly Run animation once Run several times Endless (loop) Run once Run several times Type B Can only be triggered once Run once Run several times Table: Overview of animation types Working with TigerCreate | 3.2 Creating Interactivity 37 Fig. 48: Scene Navigator: nested objects The Timelines of all the assets in a nested animation are dependent on each other. If, for example, the wings in your Timeline are animated for 8 frames, but the path animation for the parent butterfly object has 80 frames, the wings animation will automatically be repeated until the longest animation finishes, in this case until the Timeline reaches 80 frames. You must ensure that the total duration of the animation is an integer multiple of the consti tuent animations, otherwise you could cause the animation to jump when it reaches its end – especially with repeated endless animations. If you select the body of the butterfly (i.e. the parent object), only its Timeline is shown, but moving the parent object on the Stage will automatically move both of the child objects, too! A Bezier curve can also be linked to the parent object S02_Butterfly as its trajectory (Path) in the Animation Properties, along which the entire butterfly moves, wings included. Or – to use another image – imagine a mother duck with her chicks swimming behind her. You only have to guide the mother duck and the chicks will follow automatically. In theory, you can make nests several layers deep, but it then becomes increasingly difficult to keep track of which parent object controls which child object. We’ll cover this in more detail in the practical tutorial examples. It’s possible to control only one part of a nested anima- tion using a button. For example, if the parent object runs endlessly as a start animation, a child object can be linked to a button. It will then move with the parent object, but its own Timeline will only be played once the button is triggered. An example of this: A car (the parent object) drives across the Stage. Two people are sitting in the car (the child objects) – as the car drives, the people are moved along with it. If you tap the child in the backseat, they bounce on the spot and throw their arms up in the air. This child object, “Kid”, is linked to a button, which is also moved with the car as a child object. Incidentally, this way of carrying a button along with a nested animation is called a relative animation. Disadvantages of Nested Animations However, there are two disadvantages of nested animations that shouldn’t be overlooked. The parent object automatically receives the lowest Z Order, and thus is always the farthest back on the Stage in relation to the other the nested assets. In the case of our butterfly this isn’t particularly important, but it can be a problem at times. But luckily, there is a work around (the method is only described here are it will be discussed again specifically in the practical exercises in Chapter 4). Instead of using a visible object (in our example, the butterfly’s body), we can use an invisible object as the parent object instead, effectively acting as a dummy object. All the visible assets will then have a child relationship to it. This dummy parent needs to either be small enough that it is always covered by the assets on top of it, or is simply an empty PNG file, such as a 30 × 30 transparent 38 Working with TigerCreate | 3.2 Creating Interactivity conds = number of frames ÷ speed in FPS). One Timeline, Many Timelines? Each asset has its own Timeline. This means that when you activate the Animation button, either an empty Timeline or, if an asset is currently selected, the Timeline of that asset will expand. All assets in a scene will obey the same common timing for that scene, with the same length (number of frames) and the same speed (Frames Per Second) Fig. 49: Animation Properties: Assigning path animation box, which remains invisible from the start. Another disadvantage of nested animations is that they can be a bit more awkward to use with buttons. Remember: when linking an animation to a button, the animation is dependent on the button event and doesn’t start by itself. In our example, this would mean that the butterfly would fly around without beating its wings until the button is pressed. You need to do more than just link the parent object to the button. All parts of the nested animation need to be linked in Button Properties for the entire duration of the parent objectʼs animation! To explain this, weʼll stick with our butterfly example: Without a link to a button, the wings only need to be animated for 5 to 10 frames in their Timelines (wings open and close). During the animation of the parent object on a path, the wingbeating animation will be automatically repeated. Fig. 50: Nesting with an empty PNG as the parent object. One wing is now behind the butterfly, the other in front. applying to all (asset) Timelines. And they all start playing at the same time, as soon as the scene has loaded. The following can be controlled using key frames in each Timeline and through the Properties List: •where an asset is located at the beginning of the scene, •whether it is visible at the start of the scene, •if and when, or as a result of what event, it appears and moves, •how fast it moves and where it moves to, •how long it moves for, 3.2.2.2 Working with the Timeline All the assets that appear in a scene must be present at the start of the scene, even if they don’t move or aren’t visible right away. As such, each asset needs to be in the first frame of the Timeline. However, they could start outside of the Stage’s visible rectangle – think of it as theater stage, with the actors waiting on the wings before gradually joining the scene. Using the Timeline, you can control when an asset appears or changes. In the initial examples, you’ve already done some work with the Timeline. Here we want to go over the different aspects of working with the Timeline one by one. As discussed earlier, the Timeline shows the progress of each animation or asset in the form of individual images we call frames. The length of an animation can be calculated from the number of frames (length in se- •how long it remains visible in the scene. If you select several assets at the same time, either on the Stage or in the Scene Navigator, each of their Timelines will be shown one under the other. This gives you a better overview of how the assets act at the same time, whether they’re the two arms of a character or the wings of our example butterfly. You can see where the key frames are in each Timeline, and you can move or delete them, as well as adding in new ones. Placing and Editing Key Frames Key frames are marked positions in the Timeline that represent a fixed state of a property (position, rotation, scaling, opacity), showing that a change has taken place. However, such transformations don’t occur suddenly when the key frame is reached – key frames are used to specify the start and end values of a transformation. TigerCreate interpolates what lies between, automatically calculat ing each intermediate value. Working with TigerCreate | 3.2 Creating Interactivity 39 Key frames don’t have to represent a transformation though. They can also be used to hold a state temporarily, such as keeping an asset in its starting position for approx. two seconds before moving, for example. There could be key frames at frame 1 and frame 40 with identical values, and as such, nothing would change between these two. Only the key frame following that would contain different position coordinates, thereby telling the asset to move. Without key frames, the transformations of a property would affect the entire Timeline! If we move an asset without having any key frames in the Position row, then it won’t just change the position at this point in the Timeline, but for the entire duration of the Timeline, too. An example: In the figure below, the little snail disappears behind a stone. For this, two key frames have been created, marking the start and end points of the movement. In frame 1 (left) the snail can still be seen, and on the right in frame 15, the snail has completely disappeared behind the stone. The middle image shows one of the intermediate states calculated by TigerCreate. In order to create key frames, the Record button next to the Animation button must be pressed. However, existing key frames can be moved along the Timeline even if the Record button has been switched off (more about this below). You can tell if the Record button is active by the color of the Slider: During recording, the transparent bar is red; when not in record mode, it is blue. If the Record button is active, you can create new key frames simply by clicking in an asset’s Timeline. The first key frame then adopts the current value of the asset’s property (position, rotation, scaling, opacity). Each further key frame that you then create adopts the value of the frame where the Slider is currently posi tioned –the value that is currently visible on the Stage. In the following figure, you can see two key frames, with the Slider at frame 1. If you create further key frames in the Timeline (in the Position row), they will automatically adopt the x and y coordinates from frame 1. To change these values, move the Slider to the corresponding key frame (alternatively, click in the time scale above). If you now move the asset on the stage, the new coordinates will be linked with the current key frame and all the frames between will be given intermediate positions.. Make sure you create a key frame at frame 1 for each property you want to change during the animation! Fig. 51: If two assets are select at the same time, both Timelines are shown. But what happens if the Slider is positioned between two key frames when you move the asset on the Stage? First, the asset will change its position on the Stage. However, if you move the Slider within the Timeline or start the scene with the Play button, the asset will immediately jump to its previous position once more – essentially, changes that do not take place in key frames are not applied. This only applies if the Record button is active! If the Record button is not active, you can change the animation for the entire Timeline by doing this. Fig. 52: Timeline with key frames If you move the Slider beyond the last key frame in the Timeline, the asset will automatically jump back to the 40 Working with TigerCreate | 3.2 Creating Interactivity Fig. 53: Interpolation of a movement position of frame 1. At the end of the sequence, it will start again from the beginning (just as they repeat automatically when being played back, unless you have changed this setting). Right-click on a key frame, and a pop-up menu will ppear with the following options: a • Copy Key: copies the current key frame. You can use it elsewhere within the Timeline, transferring with it the values of the original frame. This can be done repeatedly. •Cut Key: cuts the selected key frame from its position. You can then place it back into the Timeline at another position (can also be done over and over). •Paste Key (may be grayed out if not applicable): places a previously copied or cut key frame into the selected position, transferring the values of the original key frame with it. This can be done repeatedly. Fig. 54: Timeline with key frames •Delete All {Position} Keys: deletes all key frames for this asset in the corresponding property – for example, all Position key frames. using drag and drop. To do this, left-click and hold one of the selected key frames in the Timeline, and move the entire selection left or right. If you don’t want to copy/cut/delete the key frames for all lines, you can protect these lines by closing the padlock icon. These key frames will then remain unaffected. If the Record button is inactive, it’s possible to copy, cut or delete entire sections of the Timeline. This is useful, if you need a section of an animation to appear several times in the Timeline (keyword: butterfly wing beats). The copied parts of a Timeline are not tied to a specific asset. This means you can apply an animation to a different asset by copying several key frames, or even the entire Timeline, from one asset to another. •Delete Key: deletes the selected key frame. •To do this, hold down the mouse button and drag a rectangle around the key frames that you want to select, and then let go. One Asset, Several Animations, Many Timelines? An animation always ends with its final key frame, even if its Timeline is as long as the entire scene. But what if one asset needs to have more than one different movement/transformation/animation? •Then right-click on one of the selected key frames and use the pop-up menu to choose your option. You can also move several selected key frames at once Working with TigerCreate | 3.2 Creating Interactivity 41 Fig. 55: Drag rectangle, release and choose Copy Keys For example: Let’s take a bee as an example, buzzing and h overing in the air over a few flowers. You can also try this example as a practical e xercise in Chapter 4 Practical Exercises. Depending on whether we click flower A or flower B (there are buttons A and B), the bee needs to fly to it, land on it to collect nectar and then return to its original position. If it flies to flower A, we want it to make a different buzzing noise to when it flies to flower B. So how many Timelines do we need? The answer is one! The Bee asset has only one Timeline, with key frames in different sections forming both animations. In both cases, the start and end point the same – hovering above the flowers. • The flight to flower A and back could, last 100 frames. At frames 1 and 100, the bee is at the starting point, at frame 50 it’s on the flower, and from frame 60 it’s on its way back to the start. • The flight to flower B then begins at frame 101, it reaches flower B by 170 and it’s back at its original position at frame 220. • Button A plays the section from frames 1 to 100 (with sound 1) and button B plays the section from frames 101 to 220 (with sound 2). 3.2.2.3 Animation Properties Using Animation Properties, you can control how an animation behaves: •Whether it runs once, several times or is repeated endlessly (with the latter corresponding to the value 0 in Repetitions, the default setting). •Whether a sound is played with the animation, and whether this is played once (regardless of the length of the animation!) or is repeated endlessly Fig. 56: The key frames for Rotation are protected, and so remain unselected If you want to have two or moreanimations in the same Timeline, you must remember the following: the END frame of one (touch) animation cannot be the same as the START frame of the next (touch) animation! In the example above, animation A ends on frame 100, animation B is first controlled from frame 101. 42 Working with TigerCreate | 3.2 Creating Interactivity re are no jumps in the movement. In practical terms, this means that the final frame in the Timeline needs to show the asset in the same state (position, rotation, etc.) as in the first frame. Therefore, it makes sense – if you already know an animation is going to be repeated – to copy the key frames from frame 1 place them at the end. For example: a butterfly should fly from flower A to flower B and back, and then start over at flower A again. Place the butterfly on flower A and create a key frame at frame 1 for Position. Think about how fast or slowly the butterfly should fly to flower B: at a speed of 20 FPS, 4 seconds correspond to 80 frames in the Timeline. If we assume it will take roughly 160 Frames to fly there and back, we can create a new key frame at frame 160 with the same position as frame 1. Whatever the butterfly does between frames 1 and 160 – you can vary its speed or change its trajectory, mirror it using negative scaling etc – it will always return to its starting position at the end. And when this animation runs endlessly as a start animation, there won’t be any jumps. Fig. 57: One Timeline, two animation sequences (Loop Sound). •Whether the asset should move along an existing path (a Bezier curve), ignoring the Position key frames in the Timeline. You can set the speed of this in Path Duration and influence its behavior while on the animation path with the Ping Pong and Orientation options. Before linking the asset to the path, youʼll need to move it to the start point of the Bezier curve (or move the start point of the curve to the assetʼs anchor point) so that the asset starts its animation in the correct place. •Whether you replace the individual asset with a complex Sprite Sheet Animation, which (unlike a nested animation) allows for a fixed sequence of animation frames. •Whether it is self-running or can be guided with a mouse (or with a finger) (Draggable). •Whether it can be dragged freely across the screen as a Free Object, independent of Timelines, paths and buttons. For more information on these individual options, refer to Chapter 3.1 The Interface in Detail. You can also find more about Sprite Sheet Animations there, as well as on the following pages. These are not the only ways of affecting an animation – you can turn an animation into a (dependent) touch animation using Buttons and Button Properties. In doing so, the animation is no longer self-running and, depending on the settings, only a part of the Timeline may be played. Repeating Animations In Animation Properties, under Repetitions, you set whether an animation should run once (1), several times (x) or even in an endless loop (0). If an animation is repeated, you need to make sure the- Of course, not every animation is suited to repetition. An apple falling from a tree should only fall once – in such cases, it’s important to enter a 1 in the Repetitions field. Adding Sound There are two ways of linking a sound to an animation. The first is via the Animation Properties, where you can link a sound directly under Repetitions. Much like you can set whether the animation runs once, several times or endlessly, you can set whether a linked sound is played once or repeated endlessly. For example, you could have a car drive across the Stage once as a start animation and have a background sound play at the same time – your sound can then be repeated endlessly, even after the Car animation has finished. This works the other way round, too – you could have an endless start animation of a child swinging back and forth on a swing, but only have their cries heard for the first 5 –10 seconds. If you give both the animation and sound the same number of repetitions (i.e. once or endless), you should make sure the sound and animation are the same length, especially if they are both then repeated, otherwise it may drift out of synchronization. The second way of linking a sound to an animation is via a button. In Button Properties you can set a sound to play when a button is pressed. This is the only setting available here, meaning the sound will be played just once each time the button is pressed. The sound always starts at the same time as the animation. If you don’t want the sound to be heard until Working with TigerCreate | 3.2 Creating Interactivity 43 Fig. 59: Animation Properties – Free Object rolled by buttons. They are given physical properties such as gravity, friction, elasticity and bounce dependent on the settings in Animation Properties. These set how it behaves when it hits the edges of the screen or another Free Object (also see Chapter 3.1). Initially, a Free Object rests in the scene, in the position where it was placed. As soon as it is touched, it falls due to its ‘gravity’ and will hit the edges of the screen, moving in a way that depends on the parameters we set. By quickly dragging the Free Object, we can give it some momentum, affecting its movement speed and flight duration. If you switch on the Free option, you can turn the selected asset into a Free Object. It will then ignore any key frames in its Timeline. Fig. 58: Animation Properties later (example: when an apple falls from a tree, the sound should only be heard when the apple lands), you’ll need to extend the sound by inserting a silence at the beginning. If, on the other hand, the animation shouldn’t start until after the sound has started playing, (example: you hear fire truck sirens but can’t see anything at first), a pause needs to be created at the beginning of the animation. To do this, we can use identical key frames – if we create a key frame at both frame 1 and frame 40 with the same position coordinates, the asset won’t move for the first two seconds. Remember: It's best to incorporate an atmospheric background sound that plays on an endless loop as an "Ambient Sound" under "Scene Options". You will find more on the subject of sound later in this chapter. Turning Assets into Free Objects A Free Object is an asset that you can tap, push and pull across the screen. Free Objects can be moved freely across the Stage, i.e. without fixed paths or key frames, and cannot be cont- In Type you can choose between Box and Ball, which sets the type of outline used for the shape during collisions. Box creates a more angular shape, while Ball is much rounder, more mobile and rotates upon impact. The actual outline of the asset is ignored. You can also change the physical properties Friction and Elasticity, which influence the object’s bouncing behavior. The option On Collision allows you to link a sound to the collision, which is played each time the object bounces. The On Collision Sound feature is not supported in the current version of the TigerBooks app. A Free Object cannot be covered by other assets in the finished e-book. Free Objects are always on the topmost layer of images, regardless of the order settings in TigerCreate. However, this is shown differently both in the Edit and Preview modes. Use Free Objects thoughtfully and sparingly. As fun as it is pushing and bouncing an object around an area for the first time, the effect is soon lost if it is used poorly or too often. Free Objects are mainly suitable for image elements that have a function in the scene but do not destroy the structure of the scene when they leave their 44 Working with TigerCreate | 3.2 Creating Interactivity ful name in Generic Properties so it can be easily found and used. For example, “Flight_curve” and “Bee_flight” are much easier to identify than “UntitledBezier”. An approximately semi-circular base line will appear on the center of the Stage with two end points (called anchor points, not to be confused with the general anchor point that most assets have) and handles for changing its size. Between the start and end points on the curve there is a little arrow showing the direction of movement. Press the Ctrl key on your keyboard and the appear ance of the selected Bezier curve will change. The surrounding semi-transparent rectangle is then shrunk to border the new curve, and the curve itself changes color, while the manipulators jump to the now thicker end points: Fig. 60: Using Free Objects positions. In the following figure, we could turn the feathers on the ground into Free Objects, but the helpful mouse and our owl should be off limits. }} Drag the anchor points with the mouse (while still holding down the ctrl key) to change the curve. 3.2.2.4 Bezier Curves Bezier curves are paths with anchor points that can be used to change the shape of the path. They are not visible in the finished e-book, as they simply serve as an animation path for an asset. An asset linked to a Bezier curve as a path in Animation Properties will move along this path or can be pulled along it with a finger (if the option Draggable is activated in Animation Properties). Bezier curves are especially useful when an asset shouldn’t just move in a straight line from A to B, but should follow a curved line of some sort. Think, for example, of the parabolic shape of the curve created when something is thrown or jumps. In instances where the use of key frames could be awkward, Bezier curves can deliver much more elegant results with little effort. You can create a new Bezier curve by clicking Bezier above the (+)-symbol in the Scene Navigator: Bezier curves, along with buttons and text boxes, are assets that are linked to a scene but not listed in the Book Navigator. However, you can still copy a Bezier curve you’ve created and use it in another scene. }} Click within the rectangle surrounding the curve (while holding down the ctrl key) to create another anchor point. Manipulators will then also appear there. We recommend giving the new Bezier curve a meaning Fig. 61: Creating new assets }} Click the manipulators’ handles and drag them up and down to see how the curve changes. }} Click on the curve itself (while holding down the ctrl key) to create a new anchor point along the path. }} Activate the Closed option in Bezier Properties to link the start and end points together. This creates a closed curve that will be followed in a circle, without interruption. The start and end points are retained, however. }} Click the Reverse Points option to change the direction of the path, switching the start and end points. }} If you link an asset to a Bezier curve, there will be more options for the alignment and orientation of the asset (see Animation Properties above). 3.2.2.5 Sprite Sheet Animations Sprite Sheet Animations are image sequences made up Fig. 62: Bezier curve with anchor points Working with TigerCreate | 3.2 Creating Interactivity 45 Fig. 63: Dog image sequence (extract) of individual image phases, but which are essentially treated as a single asset. A complex change, such as the flickering of a fire, that cannot be achieved through simply scaling or rotating, can be designed and used as a sequence of different states. Think, for instance, of a running dog that is drawn in several phases of movement. If you lay the images on top of each other and only show one of them at a time (Opacity), the dog will appear to run on the spot. If such a Sprite Sheet is moved from A to B using the Timeline and key frames, the dog appears to run from A to B. Sprite Sheet Animations are created using the Navigator of the same name, which can be opened using the right icon above the Properties List. You can create a new Sprite Sheet using the (+)-symbol, which you should try to give a descriptive name. Your new Sprite Sheet begins life as an empty shell that you need to fill with images piece by piece – these images are usually various states of a graphic. All the image phases you use should be the same size, even if some images take up less space. Where necessary, leave enough space for the actual image. Start with the largest state, as this determines the size format (height and width). Place the individual phases over each other in your image-editing program in the order they should appear, and export each individual image as consecutively numbered PNG files (e.g. Flower001.png, Flower002.png etc). A major advantage of a Sprite Sheet is that, despite having many frames, it is using just one asset. Once created, it can be easily transferred and used multiple times. Imagine a meadow full of (identical) flowers, whose blossoms should open. Instead of creating an animation for each flower, in which the various images from bud to blossom fade in and out, we can create a Sprite Sheet containing the sequence. You can then link this Sprite Sheet to each individual flower in Animation Properties and perhaps control single or multiple flowers using buttons. However, such animations can become very comprehensive and adversely affect performance when many image phases are being used and moved at the same time. As such, they should be used sparingly. Bear in mind that while you only ever see one state in the series of images, the hidden states are also stored in the memory and need to be moved at the same time. On top of that, there’s also the constant hiding and showing which eats up resources, too. You can potentially get round the problem of Sprite Sheet Animations described above by not physically moving the Sprite Sheet at all, but rather shifting the environment around it. For example, the dog runs on the spot, but the bushes and hedge move behind him while a lantern moves in front of him, thus creating the illusion of a moving dog. Fig. 64: Sprite Sheet Animations Navigator 46 Working with TigerCreate | 3.2 Creating Interactivity Add the newly created Sprite Sheet images at the bottom of the Sprite Sheet Navigator: The (+)-symbol shows a list of all the images you can choose from. Once there are images in your Sprite Sheet, you will be able to watch a preview in the upper section by clicking the ▶ symbol on the preview icon. If necessary, enlarge the view using the zoom Slider. Alternatively, you can also drag images directly from Book Navigator into the list view, which makes it possible to select several images at once. The images will appear within the sequence in the order they are shown in the list, from top to bottom. You can move individual images in the list to rearrange them or delete any images you don’t need. This is also where you determine the number of frames (i.e. how long) each image phase is shown for. If several images need to have the same frame length, you can select multiple images (SHIFT or COMMAND key) and enter the common value in the field below (confirm the entry with RETURN or ENTER). The sum of the individual frames sets the total length of the Sprite Sheet Animation shown in the upper area. Furthermore, you can set how many times the entire sequence is repeated – once, several times or in an endless loop. Sprite Sheet Animations that you use in a scene are automatically available in all scenes – because of this, it’s best to give them helpful names. Once you’ve made your Sprite Sheet Animation, you’ll need to link it to an asset. In our example above with the flowers, this would mean there are one or more flower assets on the “Meadow” background still in a closed state, while some are open. It is recommended that you always use the first frame of the Sprite Sheet, as it is already used when the scene is loaded. Select a flower and link it to the Sprite Sheet Animation you created in Animation Properties. The value entered in the Sprite Sheet Navigator will then be automatically applied to the Repetitions field, and any changes you made to the asset in Animation Properties will not be taken into account. If you link a sound to the asset, this will be repeated automatically if the length of the Sprite Sheet Animation is longer than the length of the sound (so if the sound is 2 seconds long, but the Sprite Sheet Animation is 3 seconds, the sound will be played twice). But, if the sound uses the Loop setting (i.e. endless repetition) it will be ignored once your asset has been added to the Sprite Sheet Animation – the length of the Sprite Sheet Animation has the final say when it comes to controlling the asset. If you link the asset to a button, the Sprite Sheet Animation will only start when the button is pressed. 3.2.3 Creating and Editing Text Boxes Text boxes, like buttons and Bezier curves, belong to the scene’s internal assets. They are created in Edit mode in the scene and do not appear in the Book Navigator. You can create a new text box using the (+)-symbol in the Scene Navigator. Text boxes in TigerCreate are always completely transparent and are shown with out a frame or scrollbars. You cannot enter a Z Order value for text boxes. Text boxes are always on the top level and cannot be covered by other assets. However, if you would like to temporarily cover some text or make it ʻinvisibleʼ, you will have to create it as a graphic in your image-editing program – then you can handle it as you would any other image. However, bear in mind you will not be able to use Word Highlighting if you do this. All the properties that a text box can have are set in Text Properties (also see Chapter 3.1 The Interface in Detail): •font, size and color, •line spacing, •text alignment (aligned left, centered, aligned right),and •the color for the Word Highlighting function (more on this in the next section). Not every font on your computer will be installed on the devices that will view your completed e-book. TigerCreate therefore limits the avai- lable fonts. If possible, choose fonts that you are sure are supported on the end devices, otherwise unrecognized fonts will be replaced by default fonts on the target device. You can usually find a list of supported fonts on the device manufacturerʼs website – for example, for iOS, at http://www. iosfonts.com. Text entry and editing is also done in Text Properties. As this is limited to a small box, it might be helpful to create longer blocks of text in a simple text-editing program, or to copy finished text from your book template into the text field directly. You can insert line breaks into the text field by holding Working with TigerCreate | 3.2 Creating Interactivity 47 down the Option key and pressing RETURN. If you press the RETURN key on its own, the text box display on the Stage will be updated to reflect what you entered in the box. Unfortunately, it is not possible to format individual parts of a text, i.e. to emphasize certain words in bold or italics. If, for example, you need chapter head ings to have a different appearance, place them in a separate text box. If you have more than one text box in a scene and the text is to be narrated, pay attention to the order: for example, titles should be read first. When deciding on the order of narrations for text boxes, their positions in the Scene Navigator is most important – the textbox at the top of the list will be read first! Create longer text in a simple word-processing programm or by copying the finished text from the book template. the Edit and Preview modes. You have the option of importing and exporting these Highlight selections as text files. There are two more buttons for this in Text Properties – Import Highlight Data and Export Highlight Data. This lets you split the work on scenes – one person can create the animations, while another person places the key frames for Word Highlighting. Word Highlighting in the TigerBooks app currently only works with black as the text color, and the highlights color set to blue. In cases where black text doesn’t work against the background, proceed as follows: }} In a graphics or image-editing program, create a plain rectangle graphic in white, gray or another lighter color lighter than your background. }} Import this asset into your scene and place it behind the text box. As the graphic is single-colored, you can scale it to whatever size you require. }} Set its opacity level so that the text is legible but the background doesn’t show through. If you ever have too little space on the Stage to show text in full, you can choose to make the text box automatically scrollable. Set the size of the text box on the Stage, and if the amount of text exceeds this space, the text in the e-book within this rectangle can be moved up and down without the needing to show scrollbars. Word highlighting only works with text in text boxes and not in graphics. Unfortunately, Word Highlighting cannot be used in scrollable text boxes, where the complete text isn’t always on display. To make it clear to the user that there is a scroll ing text, we recommend placing a small arrow graphic next to the text box, or resizing the text box so that the line at the bottom is cut off. Buttons are essentially invisible rectangles on the Stage that trigger an action when the screen is tapped. But- 3.2.4 Buttons Word Highlighting Word highlighting is the name of a feature that highlights individual words during narration. For this, a text box also needs to have a narration file linked to it, as well as some defined label data. These are key frame positions that control the point at which each word in the text is highlighted as the narration file plays. Label data (also called Highlight Data) can be created either in an external program or in TigerCreate itself: }} Select the text box. }} Link a narration file to it in Text Properties. }} Open the Timeline and activate the Record button (found to the left of the Animation button). }} Move the Slider right along the Timeline or press the Play-Button ▶ to listen to the narration. The audio file is shown in the Timeline in the form of a curve. }} Place your first key frame at frame 1 or 2. After placing your first key frames, you will see single words highlighted in color in the text box. Now move along slowly to make these selections more precise. You can test the Highlight function in both Fig. 65: Too much text? No problem tons can control complex animations or simply just play a sound. Strictly speaking, when you scroll through the pages of an e-book, you are tapping buttons that have been given arrow icons. Buttons, along with text boxes and Bezier curves, belong to the assets tied to a scene. They always sit on the uppermost level. Buttons are created in the Scene Navigator and only appear there and on the Stage, but not 48 Working with TigerCreate | 3.2 Creating Interactivity In this case, two different buttons – A and B – control the Timeline of one asset. The bus has just one Timeline: let’s say from frame 1 to 100, it drives into the scene and stops at the bus stop, and between frame 101 to frame 200 it drives off again. Button A controls the “Bus” asset for the first 100 frames and also plays sound 1 (driving noises and doors opening). Button B also controls the “Bus”, but only plays frames 101 to 200 along with sound 2 (doors closing and driving off noises). Fig. 66: Creating key frames for Word Highlighting in the Book Navigator. Just like other assets they are part of the scene from the beginning, have their own Timelines and can also be animated. An example of this: the owl from our example scenes lifts a wing when it is tapped (animation 1) and in doing so, hits a flower, which then bends (animation 2). When the flower falls, it startles a little ladybug, which jumps out of the way (animation 3). These are three animations that run one after the other, all controlled by a single button. Technically speaking, the scene is actually more complex. For one, the waiting people should no longer be visible once the bus drives away and, at the very least, must be made invisible by button B. You should only be able to trigger button B when the bus reaches the stop, which means that it needs to be brought in after, via button A. Finally, button A has to disappear when the bus reaches the bus stop, so button A needs to be removed by button B. You can set which animation(s) a selected button controls in Button Properties. To link an asset to the button, click the (+)-symbol and select an asset from the popup menu. Alternatively, click and hold the Drag Point on the right to link the button to an asset on the Stage. A button can be linked to one or several animations at the same time – in practice this means it controls several assets. (Button Properties are also described in Chapter 3.1 The Interface in Detail.) Linking an animation to a button changes the a nimation type: a self-starting animation (start animation) becomes a dependent one (touch animation). This means it no longer starts on its own, but when the button linked to it is tapped instead. Along with Repetitions (how many times an animation is played when the button is pressed), you can also set the Start Frame and End Frame of an animation sequence in Button Properties. This means that you can also control individual sections of an animation using buttons. An example of this: Imagine a scene at a bus stop where people are waiting for the bus. If you tap the schedule (button A), the bus comes into the picture from the right, complete with engine noises, and stops. If you now tap the bus (button B), you can hear typical sounds of people, foot steps and closing doors, and the bus drives on. Fig. 67: Button Properties with Drag Point Now how can we make sure that a button doesn’t always remain on the Stage, perhaps even making it disappear once it has been pressed? (Once the bus starts driving, the button that started it can’t remain there.) To get a Type B Touch Animation (an animation that can be triggered just once), the associated button (A) needs to be taken out of the scene once it has been tapped. Working with TigerCreate | 3.2 Creating Interactivity 49 3.2.5 Sounds Fig. 68: Chain reaction, controlled by one button In our example, this means that button B sits off Stage at frame 1 (there is a key frame at frame 1) – you shouldn’t be able to trigger it. There’s also another key frame with the same position at frame 100. At frame 101, we have a key frame where the position of the button has moved to be exactly over the bus (two frames are enough here as the button doesn’t have to float in gently, but just needs to appear). When button A is pressed, this starts frames 1 to 100 of the “Bus” asset and then frames 1 to 101 of button B. This ensures that button B remains off the Stage for the first 100 frames, and that it appears when the bus arrives. However, once button B has been pressed, it should disappear immediately. So we place another key frame in frame 102 of button B’s Timeline. Here, the button has the same position as in the first frame (off the Stage). If you now tap button B this controls the “Bus” asset from frame 101 to frame 200 via Button Properties and also plays sound 2. But, it also controls itself with frames 101 to 102 (its removal)! Thus, a button doesn’t just control assets like images and their animations, but they can control other buttons and even themselves (their own Timelines). • A button can control one or more animations. • A button can control an animation in whole or in part (from … to …). • Several buttons can control different parts of an animation. • Buttons have a Timeline, can be animated and can be controlled by other buttons. • A button can act self-referentially, i.e. can control its own Timeline. • Buttons cannot overlap each other! Sounds – whether music, noises and narration – play an important role in making scenes livelier. The picture of a meadow with flowers can be made more atmospheric with background noises (meadow, spring), while a collision noise makes a falling object seem more convincing. Even the pressing of a button or the turning of pages can be accentuated with sound. To use sounds, place all them in the Sounds subfolder of your project folder, in MP3 format. In the following, we can differentiate between background sounds, animation sounds and narration sounds, which read text aloud. Background sounds can form an effective atmospheric soundtrack. Generally, you don’t need more than about 30 seconds, which can then be played repeatedly in a loop. It’s best to avoid individual sounds that may stand out, such as a phone ringing or a distinctive honking, Fig. 69: Arrangement of buttons at the start of the scene Fig. 70: Arrangement of the buttons during the scene and make sure that you have a good transition between the end of the sequence and the beginning. An animation sound reinforces the effect of an animation, making it much more vivid and memorable. For example, what would a bouncing kangaroo be without a “boing-boing” noise? Remember that a sound starts playing at exact moment the linked animation begins, 50 Working with TigerCreate | 3.2 Creating Interactivity which may not always be what you want. For example, a falling apple has to hit the ground first before a collision sound can be played. In such cases, you’ll need to ‘lengthen’ the sound by inserting a pause (or ‘silence’) before the actual sound in a sound-editing program. Also bear in mind that only one sound can be linked to an animation at any one time. So, if you want to emphasize the falling of the apple with a climactic sound, which can be heard before the actual collision, you’ll need to merge both sounds – the falling and the colli sion – together into a single sound file. In some circumstances, an animation sound can re place an animation. If we place buttons over several birds sitting in a tree, and each button is linked to a different birdcall, you don’t need to have each bird move to make the scene believable. Similarly, a lion that opens its mouth but has no sound come out is less believable than a lion that doesn’t move but lets out a roar when it is tapped. You can link a sound directly to an asset (see Animation Properties) and choose whether it is played once or in an endless loop from there. This setting is independent of the number of repetitions you set for the animation! Alternatively, you can link a sound to a button as a Click Sound (see Button Properties). The sound is then played whenever the button is pressed and it runs once each time. Narration sounds are used to read aloud existing text or to provide additional information when tapping parts of the image. If you want to use the Word Highlighting feature – which highlights each word as it is read aloud – there is no way of getting around voice recordings. Pay close attention to the matching of the text shown on screen to what is being read aloud. Create a narration file for each text box and link them to the corresponding text boxes in Text Properties (see Text Properties). Then select the text box on the Stage and place key frames in its Timeline separating each word. Take into account the different volumes used – during creation. 3.3 Creating Multilingual E-books TigerCreate supports multilingual e-books. Languages are selected in Book Settings, which can be opened using the button at the top of the screen (also see Chapter 2.2 Starting Projects). While working in Edit mode, you can switch between languages using the language selection button (to the right of the Control Bar). The current language is shown there. If there is more than one text box in a scene and the text is to be read aloud, pay attention to their order. The text box at the top of the Scene Navigator is read first! TigerCreate saves you a lot of work here, as you only have to create each scene once! The big advantage to this is that you only have to make any corrections to individual animations once, and not separately for each language version. 3.3.1 Preparing Assets for Several Languages Multilingualism can affect the following types of assets: •Text in scenes •Text in graphics (for example, on a sign or in the title of your book) •Sounds containing spoken text •Highlight data for Word Highlighting All the sound files that you need for different language versions are placed together in the project’s Sounds folder and are given the same name, with a countryspecific code placed on the end. An example: Your sound for scene 5 might be called “S05_Narration.mp3”. It’s name in English would be “S05_NarrationEN.mp3”, the German “S05_NarrationDE.mp3”and the Italian“S05_NarrationIT.mp3”. Essentially, you do the same with language-specific graphics. It’s important to use the same names plus the distinguisher at the end; so for example: “S01_Car EN.png”, “S01_CarDE.png”, “S01_CarIT.png” etc. To include a different cover image for each language version select one of the integrated languages in the "Book Settings" window and link the corresponding image in JPEG format in the "Book Cover" field. Working with TigerCreate | 3.3 Creating Multilingual E-books 51 If, for example, you assign a narration sound to a text box in the English version, none of the sounds with other endings (DE, IT, etc.) are shown in the pop-up menu! TigerCreate filters these names out for you. First, work on your scenes in one language. Create text boxes and fill them with the text for the selected language. Narration files are linked to text boxes in Text Properties, and you can create key frames for Word Highlighting in the Timeline (or you can import external label data). You can read about this in the section about text boxes earlier in this chapter. When using text boxes for several languages, bear in mind that texts in different languages sometimes vary considerably in length. There fore, test whether the text box shows all the text for each language you use. If the text isnʼt shown in its entirety in a particular language, the text box will automatically be turned into a scrolling text box on the end device (but this means Word Highlighting wonʼt be possible). If you are working with language-specific graphics, you donʼt have to use exactly the same size format. If, for example, you have a sign with a square supermarket logo, the German version of this could be a rectangular sign. The key thing to note is that the position of the anchor point will change as the shape changes, so you may need to place the anchor point in the center or the top-left instead, depending on how the sign fits into the Scene. TigerCreate does everything else for you. And, as several languages are selected in Book Settings, the corres ponding language buttons will appear automatically in the e-book in the form of country-specific icons. Once your scene has been built in English (for example) and has been saved, see what happens when you switch the language to German using the language selection. If you are using multilingual graphics in the scene, they will be replaced automatically. In the place of your filled text box, you will find an empty one (“Untitled Text”), which is already linked to the German narration file. The text box’s Timeline will also contain no key frames. Now place the German text into the text box and insert the relevant key frames for the German language version. Save and switch back to the English version using the language selector. And we can see that it’s all still there. Fig. 71: Book Settings: Adding languages 52 Working with TigerCreate | 3.3 Creating Multilingual E-books 3.4 Games as Part of E-books To select a complete puzzle piece in template A: }} select the corresponding layers in all the layer With TigerCreate, you can integrate games into your e-books that help expand the story and enrich the e-book. There are three standard games, of which you can use a maximum of two per e-book: a Puzzle, a Memo game and a Doodle – a coloring picture where only the outlines are drawn. We advise using designs from the book for all of the games. At the moment, you need to prepare all these games externally and to place the files into the appropriate puzzle, memory and doodle subfolders of the Games folder. In the following, we’ll cover how the games work and how we prepare them. 3.4.1 Puzzle The Puzzle game comes in two difficultly levels – one with 12 pieces and one with 24. A piece of the puzzle is dragged from the border around the edge to the center puzzle, and locks into place when it’s in the right position (with a tolerance of a few pixels). When the puzzle is complete, a sound is played. The game can be left at any time. }} folders while holding down the Command key, }} and click (while still holding down the Command key) the layer icon of the last selected layer. }} This will make the same selection across all of the (selected) layers, and the corresponding puzzle piece will show as selected. (Note: The design layer doesn’t have to be selected.) Now select the menu option Edit → Copy Merged [SHIFT-Command-C] to copy the puzzle piece across all the selected layers. Now paste the copied piece into template B, into the corresponding layers. If you click the layer icon in template B first, while holding down the Command key, the pasted piece will be placed exactly over the existing one. To keep the existing layer name (which corresponds to the name of the PNG it will be exported as!), merge the pasted layer with the one below it (menu option Merge Down, Command-E). To be on the safe side, it’s better to delete the content of the existing lower layer in ad- You can download an Adobe Photoshop® template for creating puzzle pieces from the downloads section of the TigerCreate website. From there, the selected image motif (840 × 540 pixels) is copied, along with several layers (with different layer effects) and saved as a single PNG file. This process needs to be done twice – once for each of the different sizes of the puzzle pieces (for both difficulty levels; 12 large and 24 small pieces). All puzzle pieces and the aforementioned completion sound are placed into the puzzle folder. Fig. 73: Puzzle piece Fig. 72: Puzzle, Memo and Doodle Working with TigerCreate | 3.4 Games as Part of E-books 53 Fig. 74: 12-piece puzzle with layer folders Fig. 75: Selecting an individual puzzle piece on all layers while holding down the Command key 54 Working with TigerCreate | 3.4 Games as Part of E-books Fig. 76: Individual puzzle pieces in template B vance. The fact that the layer name is preserved during export is useful, as it means any potential typing errors are avoided. Once all puzzle pieces have been pasted into template B, either export each layer as a transparent PNG (with the layer name) or use the automated function (e. g. File → Scripts → Export Layers to Files), to export all layers in one go. For the puzzle game to work in your e-book, it’s important that all the pieces of both sizes are in the puzzle folder and keep their default names: Puzzle12_1_1. png, Puzzle12_1_2.png, Puzzle12_1_3.png etc. pre-loaded with the black border for the playing cards. From there, all the cards are exported in PNG format. To ensure that the cards are placed and assigned correctly, they need to be named according to a pattern: •card_4_4_1.png, card_4_4_2.png, up to card_4_4_8.png for the game with 8 pairs. •card_5_6_1.png, card_5_6_2.png, up to card_5_6_15.png for the game with 15 pairs. 3.4.2 Memo In Memo, the aim of the game is to find pairs of matching cards. There are two difficulty levels, with 8 and 15 pairs to be found respectively. In preparation, you’ll need to choose 15 different designs from your artwork. These should contain too many small details as the individual playing cards have limited space, at 145 × 145 pixels (for the version of the game with 8 pairs) and 115 × 115 pixels (with 15 pairs). Again, it’s much easier to use a Photoshop template Fig. 77: Memo piece Working with TigerCreate | 3.4 Games as Part of E-books 55 3.4.3 Doodle 3.4.4 Integrating Games into an E-book Doodle is a coloring picture, where the outline is a lready drawn in. You can choose between various tools and colors, and closed areas can be instantly filled with color, too. Creating a Doodle template: When you publish your e-book, you can select which game(s) you wish to add in the Game Options section of the Publishing dialog. With Doodle you can also decide whether the outlines of the template should always stay in the foreground, or whether they can be painted over. }} Choose a design and scale or crop it to 976 × 638 pixels. }} Trace the relevant lines in a vector-based graphics program. }} Pay attention to closed lines: closed areas can be filled with a single tap using a paint bucket tool. }} Don’t work in too much detail – remember you’ll need to be able to color areas with a finger tip. }} Save the finished images (only the outline without the template) as a transparent(!) PNG file, and name it “background.png”, copying it into the My Project / Games / doodle folder. Fig. 79: Publishing dialog, Game Options Fig. 78: Coloring picture 56 Working with TigerCreate | 3.4 Games as Part of E-books 3.5 Testing and Publishing format — for example, as the last scene in the ebook. This chapter describes the testing and publishing process of e-book, along with platform-specific configuration options. 3.5.1 Export Formats TigerCreate creates various export formats for all major distribution platforms. This means that an ePub can be generate for Apple iBooks, an IPA file for the Apple App Store or an Android APK file for the other various app stores. And, of course, there’s the TigerFormat for the TigerBooks app! The content owner is responsible for the uploading the files to the respective platforms. This means they must open customer or developer account with Apple, Google, Amazon or Samsung and reach distribution agreements with these partners. The currently supported formats are: If your ebook is only for testing and not for final publication, the TigerCreate logo is added to all scenes (iBooks format and standalone applications) as a kind of watermark. To test an e-book or individual scene, click the Test Book button (or Publish Book, if applicable). The follow ing dialog window will then open: •In the top-left, you can choose the target Device: iPad or iPhone, •To the right of that, the target platform (Publish For): TigerBooks, iBooks or Standalone Application (iOS or Android). •Tigerformat (ePub for the TigerBooks platform) •iBook Store format for iOS devices (iPad and iPhone) and Mac OSX Yosemite •iOS standalone app format (for iPhone and iPad) •Android standalone app format (for Google Play, Amazon Kindle HD, Samsung Apps, etc.) Fig. 80: Publishing dialog, Scene Options •Further formats are planned to serve other platforms in the future. If you choose TigerBooks as the export format, an open ePub format is generated, which you can use for test ing. Alongside this, an encrypted, and thus protected, version will be generated, which you can publish on the TigerBooks platform. The size of your e-book depends heavily on the number and size of the graphics and sounds you use. Sizes between approx. 20 and 70 MB are common for an ePub file. 3.5.2 The Publishing Dialog Whether you want to test your e-book in the iOS Simulator or publish an already tested e-book, the easiest way is via the Publishing dialog, and the steps involved are almost identical for both functions – testing and publishing. The main difference is that the dialog windows for the publishing process are expanded, asking where the generated files should be saved. If you want your ebook to include publishing information, add an extra scene for this regardless of the export The middle section is divided into: •Scene Options: Place a check next to Publish for each scene you want to test (default: all scenes are published). Set the order of the scenes in the e-book by changing their positions – the top scene is played first and the bottom is played last. •Hint Options: in the finished e-book, buttons are highlighted with a hint graphic, which flashes repeatedly, dependent on the settings you chose, so that the user knows where the clickable areas are. Right-click (Select File …) to import a graphic (approx. 30 × 30 pixels, PNG format) into the Hint Icon field and configure the following options: •how often the graphic flashes, •how long it flashes for, •how long it takes before the graphic flashes for the first time, •how long after pressing a button before the next hint appears, •how many times the hint graphic flashes on a button, •the length of the pause before the flashing from button to button restarts, Working with TigerCreate | 3.5 Testing and Publishing 57 In order to use the iOS Simulator, youʼll need to have installed and setup Appleʼs Xcode development environment, which can be download from Appleʼs App Store for free. See Chapter 2.3 and the separate instructions for Xcode in the appendix for more information. 3.5.3 Notes on Exporting for TigerBooks Fig. 81: Publishing dialog, Hint Options •whether the hint graphic is shown during an animation •and if/how the hint graphic changes. Essentially, hint animations work in a series. All buttons are run through once and then the hint series starts again from the beginning. For scenes with a large number of buttons lying off the Stage, a hint series can, in the worst case scenario, take so long that no hints are seen for a considerable amount of time. •Game Options: As previously described, here is where you can add one or two of the three standard games – Puzzle, Memo or Doodle – to your e-book, each of which will need to have been prepared in advance. Before you get to see your e-book in the Simulator, the TigerBooks app needs to be started. Choose one of the four different themes and click the “Meins” (My Books) button on the interface to see the books you have created. The Simulator is also launched when you choose to Publish your e-book – this is so you can have a final look at it to check everything. 3.5.4 Notes on Exporting for iBooks Exporting to the iBooks format requires you to enter a valid ISBN number. (Its validity will be checked.) You’ll also be asked to enter your company name in the Publisher field. The iBooks format requires OS X 10.9.x to be running on your computer, as this is the only version that can open the iBooks format. 3.5.5 Notes on Exporting as a Standalone Application To generate a standalone app, you first need to configure some settings and enter some information. 3.5.5.1 Exporting as a Standalone iOS App TigerCreate can generate iOS apps for iTunes, which can then run on iPhone, iPod & iPad. This process is more complex and neither TigerCreate nor TigerCreate Support can offer any help here. TigerCreate is merely a tool to create the finished files – the certification of the app, App Store management, distribution etc. is your own responsibility. Fig. 82: Publishing dialog, Game Options Once you have configured all of the settings, click the Test Book button. If your book is only for testing and not for final publication, the TigerCreate logo is added to all scenes (iBooks format and standalone applications) as a kind of watermark. For the export to work, you’ll need to have the Xcode software (see Chapter 2.3). Once it’s installed, start Xcode and select the option Xcode –> Open Developer Tools –> iOS Simulator from the menu, or follow the instructions in the appendix. You’ll need to have the latest version of Xcode installed. The above step to install the iOS Simulator must be repeated following each Xcode update. To publish apps on iTunes, you’ll need to create a deve- 58 Working with TigerCreate | 3.5 Testing and Publishing loper account with Apple for iOS development. You will find information on this on the Apple website (see appendix). 8) Either drag and drop or right-click on the image area to choose graphics for the Loading Screen (size 2048 x 1536 pixels) You can also find information about the entire process of publishing apps for iOS on the Apple website (in English and very extensive) as well as on various sites on the internet (see appendix). Also the icon, 152 × 152 pixels in size, is set here, too (the other sizes are calculated automatically). To export as an iOS app, select the option “Standalone iOS Application” in “Publish For”. You should then set the following settings: 1) Choose the save location for the finished app (“*.app” file). 9) Enter the path to the file “Imprint.html” here. In this file you can enter publishing information, formatted in HTML. This page is shown as the last scene in the app. You can find more information about the iOS Export in our TigerCreate Tutorial Series "Export for iOS Part 1 & 2" (see chapter 5.2 "Links") 2) Select all the scenes that should be included in the app. 3) Voiceover Time: This is a value, in seconds, you can enter to adjust the start time of Word Highlighting throughout the entire book. The default value is “0”. A value of “1.5” would mean that all words are highlighted with a 1.5-second delay. “-1”, on the other hand, means all words are highlighted a second earlier. This setting is useful if, for example, the same length silence has been added or removed from all the narra tion text in the book. 4) Application Name: This appears under the app icon on all iOS devices. Currently, the name cannot contain umlauts or accented and special characters! 5) The Target is the target platform, and should be set to “Simulator” when testing a book with “Test Book”. When publishing with the “Publish Book” option, select “Device” so that the app file is generated. It can then be copied to the test device (for example, an iPad). Again, Xcode will support you with this. 6) The version number of the app must correspond to the version number given by iTunes Connect, otherwise the app cannot be uploaded to iTunes Connect using the Application Loader. Only version numbers with numbers and decimal points can be used, e.g. “1.0”, “1.1”, “2.8.6” etc. 7) Here you select the Provisioning Profile created for this app. This can be created and downloaded in the Apple iOS Dev Center, in the iOS Certificates, Identifiers & Profiles section. After downloading it, double-click to install it in Xcode, and it will then appear in the list in TigerCreate. Fig. 83: iOS Publishing dialog Enter the Bundle Identifier for the app. This is the “App ID”, for example, “de.oetinger.polarbearinappen”. If this is a wildcard provisioning profile (which can be valid for several apps), simply enter a “*”here. Working with TigerCreate | 3.5 Testing and Publishing 59 3.5.5.2 Exporting as a Standalone Android App TigerCreate can create apps for the Google Play An droid app store. You will require a developer account for Google Play for this. You can find detailed information about this on the internet (see Appendix 6.2). First select the path to the SDK directory in the ADT Bundle for Mac Android SDK under TigerCreate —> Preferences —> General. You will also find a link to a tutorial video for Android SDK integration in this menu. To create an APK file for Android, select “Standalone Android Application” in the “Publish For” box. You will then see the following options: 1) Choose the save location for the finished app (“*. APK” file). 9) Enter the parameters you made when creating the “keystore” file here: •Key Password •Keystore Password •Keystore Alias 10) To prevent the app from being illegally copied and distributed, you can set a license key. Once the app has been created in the Google Play Developer Console, the license key can be copied from All Applications → Services& APIs → OUR LICENSE KEY FOR THIS APPLICATION. This is a Base64-encoded, RSA public key for your binary file. Make sure you remove all spaces once the license key has been copied into the field in TigerCreate. 2) Select all the scenes that should be included in the app. 3) Voiceover Time: A value, in seconds, can be entered here to adjust the start time of Word Highlighting throughout the entire book. The default value is “0”. “1.5” would mean that all words are highlighted with a 1.5 second delay. On the other hand, a “-1” means all the words are highlighted a second earlier. This setting is useful if, for example, the same length silence has been added/removed from all the narration text in the book. 4) Application Name: This appears under the app icon on Android devices. At this moment in time, the name cannot contain umlauts or special characters! 5) The version name can only contain numbers and decimal points, e.g. “1.0”, “1.1”, “2.8.6” etc. 6) The version code can only contain whole numbers, e.g. “1”, “2”, “5”, “17654”, etc., and this code must be increased by at least 1 with each update. 7) Enter the package name for this app here. As it needs to be unique, general practice is to enter a domain name in reverse order, and add the app’s name to the end, for example:“com.mydomain.apps.mybook”. 8) The path to the “keystore” file. This needs to be created in accordance with the following instructions: http://developer.android.com/tools/publishing/appsigning.html#releasemode When creating the “keystore” file, the following parameters must be set: •Key Password •Keystore Password •Keystore Alias Make sure you save all of this data! Fig. 84a: Android Publishing dialog 60 Working with TigerCreate | 3.5 Testing and Publishing 11) Place the icon, 144 × 144 pixels in size, here (the remaining sizes will be calculated automatically). Import the graphic for the splash screen (this appears immediately after launching the app) either by drag and drop or by right-clicking the image area (for example, a PNG with 1280 × 720 pixels). Set an individual loading screen in “Loading Screen” (for example, a PNG with 1280 × 720 pixels). This is shown when the splash screen disappears. 12) Enter the path to the file “Imprint.html” here. You can enter publishing information in this file, in HTML format. This page is shown as the last scene in the app. 13) The final step is to select the path to the SDK directory in the Android SDK “ADT Bundle for Mac”. You can find more information about the Android Export in our TigerCreate Tutorial Series "Export for Android Part 1 & 2" (see chapter 5.2 "Links") Fig. 84b: General Settings Working with TigerCreate | 3.5 Testing and Publishing 61 4. Chapter Practical Exercises Step by Step In this chapter, we’ll be concentrating a number of practical example exercises. You will be building a mixture of whole and part scenes with step-by-step guidance, before testing them out. Each exercise builds on the last, so it is recommended that you work through them in order. All of the scenes belong to the project “TigerCreate_ Tutorials”, which you have downloaded along with the program. You can also find a counterpart for every scene in there, which shows the finished scene – these files have the suffix “_complete” added to the end of their names. Exercise 1: Start Animations What Happens in this Scene You will create two start animations – one that runs once and one that runs endlessly. Remember: start animations are independent of other events, and start as soon as the scene is loaded. What You are Practicing in this Scene •Adding assets into a scene and placing them on the Stage. •Configuring assets’ properties. •Changing the background. •Creating and controlling simple animations using the Timeline. •Linking a sound to an animation. •Creating a screenshot for the scene preview. }} Open the file “TigerCreate_Tutorials/Scenes/ Scene_01.mytbs”. There is already a background image showing the finished scene, which makes the exact placement of assets much easier. }} Make sure you are working in Edit mode. If necessary, click the Edit button at the top to switch. }} Click the Book Navigator icon on the right and then click on the triangle to the left of the Images symbol. }} Look for the following in the list and drag them into the Workspace, whilst holding down the left mouse button: “TitleEN.png”, the story’s title text, “S01_Wing.png”, one of the owl’s wings, which we’ll make wave “S01_Mask_Wing.png”, a covering graphic. To save time when searching, you can enter the name of the image youʼre looking for in the Search field at the top. Often just entering the first few letters is enough to find the asset you need! }} Place the individual assets on the Stage so that they align with the background image. Fig. 85: Practice example 1, fully assembled }} Click on the "Scene Options" button at the top and select "Scene_01.jpg" from the list under "Background." This is the actual background for the scene. }} Assign new names to your assets – select each of the assets individually on the Stage, and enter the names “Title” for the title text, “Wing” for the wing and “Concealer” for the concealing graphic in the Name field to the right of the Properties List, under Generic Properties. These names are only used within the scene; the names of the files in the project folder will remain unchanged. Names cannot contain umlauts or special characters! }} Assign each graphic a value for its Z Order: Select the graphics individually on the Workspace and enter a number in the Z Order field in Generic Properties, starting with 1. The higher the value, the farther forward the asset will lie. See what happens when you place the assets on top of each other. Set the Z Orders for the “Wing” and “Concealer” assets so that the side of the wing is covered. }} Move the wing’s anchor point – by default, this is set to the center. Click on the wing’s anchor point and move it slightly to the left and right – notice how the wing rotates around the anchor point. Now move the anchor point as shown in the figure below. }} Grab the anchor point again and rotate the wing a little from left to right. Then reset the rotation value back to 0 in Transformation Properties (in the Properties List). Fig. 87: Creating key frames }} Select the “Title” asset on the Stage and click the Animation button. The Timeline will then drop down and the icon of the selected asset will appear on the left. If necessary, enlarge the space taken up by the Timeline by moving the cursor to the bottom edge of the Timeline. Once the cursor changes, drag the line down. }} Click the little Record button at the top, to the left of Animation. You can only create animations when this is active. Note that the color of the Slider in the Timeline changes from blue to red. }} Click frame 1 in the Position row of the “Title” asset’s Timeline. This places a key frame here, which saves the asset’s current position on the Stage. Place another key frame at frame 50 in the same way. (If necessary scroll along the Timeline or change its scale using the zoom function at the bottom of the Timeline.) To jump quickly to a specific frame in the Time line, enter the number of this frame in the Current Frame field along the bottom of the Timeline and press the ENTER (or RETURN) key. }} Now move the Slider to frame 1 in the Timeline (it shows the current position) if it isn’t there already. Enter the value –100 in the Position Y field in the Transformation Properties. }} Move the Slider back and forth along the top, between frames 1 and 50, and watch how the title graphic moves down into the picture. }} Move the Slider to frame 1 in the Timeline and click frame 40 in the Position row to place another key frame there (this will then adopt the value of the key frame at frame 1). Fig. 86: Moving the anchor point }} Move the Slider back and forth along the top, between frames 1 and 50, and watch how the title Fig. 88: Jumping around the Timeline using the Current Frame field graphic is only lowered onto the Stage after frame 40. This is done so that the animation doesn’t start as soon as the scene begins, but rather after a two-second delay (speed: 20 FPS, so 40 frames = 2 sec). }} Start the scene using the Play button: after two seconds, the title text will move into the scene from above, but no sooner than it’s arrived, it disappears, only to return again another two seconds later. In other words, the animation is repeated endlessly. }} Stop the scene by clicking the Play button again. }} Ensure that the “Title” asset is selected and enter the value 1 in the Repetitions field in the Animation Properties (in the Properties List). The animation is now only played once. }} Now attach a sound. Link this animation to the sound "s01_title.mp3" below the Repetitions field Fig. 89: Animation of the title text under Animation Properties. }} Start the scene again: after two seconds, the title is lowered in from above and remains there. }} Now select the “Wing” asset. An icon for this asset appears in the in the top left of the Timeline. It currently has no key frames. }} Click frame 1 in the Rotation row to place a key frame. Place further (identical) key frames at frames 10, 12, 22, 30, 40 and 60. The wing should always be in its starting position at these frames. The entire duration of the animation covers 60 frames as this is where the final key frame is placed. }} Now place a new key frame at frame 4 and move the Slider to this position in the Timeline. }} Enter the value 347 for Rotation in Transformation Properties. Leave the Slider at frame 4 and create further key frames at frames 6, 16, 18, 34 and 36. Exercise 2: Nested Start Animations What Happens in this Scene You will create a nested start animation: a butterfly beating its wings while flying around. Another nested animation is already set up in the scene. What You are Practicing in this Scene •Changing the length of the Timeline. •Adding assets to a scene and placing them on the Stage. •Configuring an asset’s properties. Fig. 90: Animating the wing These will then automatically adopt the values from frame 4. It is important that you always place the Slider on the key frame you want to edit when creating animations. Otherwise, you may end up accidentally making changes to the wrong key frame (i.e. the frame where the Slider is currently placed). }} Move the Slider along the Timeline to watch the wing’s animation (rotation). Then start the scene by pressing Play. The wing animation is continuously repeated, and due to the irregular placement of the key frames, the animation appears erratic. }} Drag the Slider to frame 50 in the Timeline (when the title is shown on the Stage) and create a preview image of this view. To do this, click the Scene Options button to the left of the language selection. Select Save Current Scene View As Screenshot at the very bottom of the menu. •Adding a background sound. •Creating and controlling simple animations using the Timeline. }} Open the file “TigerCreate_Tutorials/Scenes/ Scene_02.mytbs”. Some assets have already been placed in this scene. Add the following assets from the Book Navigator: “S02_Butterfly.png”, “S02_ WingFront.png” and “S02_WingBack.png”. }} Rename these assets in the scene. Select each image individually and change their names, under Generic Properties to “Butterfly”, “WingFront” and “WingBack”. Remember: Names cannot contain umlauts or special characters! }} Set the Z Order values for the arrangement of the assets to 1 for the butterfly, 2 for the back wing and 3 for the front wing. }} Collapse the Timeline (by clicking Animation). Switch to Preview mode and test your scene. If you make any more adjustments later, make sure you test them, too. You will find the finished scene saved as “Scene_01_ complete.mytbs” in the Scenes folder. Fig. 91: Practice example 2 Fig. 92: Nested animation: butterfly }} Place the butterfly’s body at the position (790, 75) and move the wings close to the body (see figure). }} Select both wings in the Scene Navigator and drag them onto the butterfly. Hold down the mouse button until the butterfly is outlined in dark blue in the Scene Navigator, then release. The two wings may appear to disappear, but a small triangle will appear next to the butterfly – if you click it, you can see that you have now turned the wings into dependent objects belonging to the butterfly, and the butterfly is the parent object. Fig. 94: Key frames for the rotation of the wings }} Select just the front wing and open the Timeline. Position the Slider at frame 1 and enter the value 40 for the Rotation. Repeat this for the key frame at frame 7. }} Start the scene (in either the Edit or Preview mode) and watch the movement of the wings. If necessary, correct the set values. }} Select the butterfly and open the Timeline. }} Change the number of Total Frames in the Time line from 120 to 140. Set the speed (FPS) to 20. 20 FPS (Frames per Second) is generally good for an animation. The number of pictures and the length of the scene depend on what you want to happen in the scene. If you are using a lot of short animations, you can leave it on 20 FPS. But if you want to let a snail crawl slowly through your scene, you need a lot more frames. Fig. 93: Wings as child objects of the butterfly }} Select each wing individually and move their anchor points to the bottom of each wing. }} Select both wings again and open the Timeline by pressing the Animation button. Hold the mouse button down and drag the bottom border down far enough so that there is enough space to unfold both Timelines under each other. }} Activate the Record button (next to Animation) and place key frames for both wings at frames 1, 4 and 7 in the Rotation row. }} Select just the back wing and open the Timeline. Position the Slider at frame 1 and enter the value 320 for the Rotation. Repeat this for the key frame at frame 7. }} Place key frames in the Position row at frames 1 and 140. These are the start and end points of the butterfly animation. As the wing animations take up 7 frames, this works out as an integer multiple: 140 ÷ 7 = 20. When the butterfly makes one complete lap of its flight path, its wings will move exactly 20 times. }} Place another key frame (Position) at frame 70. Move the Slider to this frame or use the Current Frame field followed by the RETURN key. }} Drag the butterfly onto the Stage, towards the flower. This determines how far it moves from its starting position during flight before returning. Note that the (nested) wings will move with it automatically. }} Start the scene. The butterfly, along with its wings, will fly in a straight line from its starting position to the destination you have just set, and then back again (backwards). }} As you don’t want the butterfly to fly backwards, you’ll need to change its direction – place key frames in the Scale row at frames 1, 70 and 71. }} Position the Slider at frame 71. Change the value for the Scale Width in Transformation Properties from 1 to -1. This will mirror the butterfly (includ ing its nested wings!). }} Leave the Slider at frame 71 and place another key frame for Scale at frame 140. This will then automatically adopt the values from frame 71 (i.e. -1). }} Start the scene to test how the butterfly moves. Save the scene. }} To make its flight look better, you could place additional key frames for the Position row where you can change the height of the butterfly’s flight, for example. You can see another nested animation on the left hand side of the scene, with the interaction between the flower and the caterpillar. The caterpillar is moving in a cycle of 50 frames (Rotation) and moves with the flower as its child object. The flower moves over 100 frames, i.e. 2 × 50 frames, to avoid causing the movement of the caterpillar to stutter. You will find the finished scene saved as “Scene_02_ complete.mytbs” in the Scenes folder. Fig. 95: Mirroring an asset with Scale Width = -1 Exercise 3: Type A Touch Animations (Repeatable) What Happens in this Scene You will create two animations and turn them into dependent animations using buttons: the owl blinks its eyes and the ladybug shows off its jumping skills. What You are Practicing in this Scene •Positioning assets on the Stage. •Configuring assets’ properties. •Creating animations. }} Leave the Slider at frame 1. Place additional key frames at frames 8, 13 and 40. They will then adopt the value of key frame 1 (Opacity = 0). }} Start the scene by pressing the Play button and watch what happens – the owl blinks at irregular intervals. You can refine the winking if you like, by moving key frames or by adding additional ones. }} Stop the scene and move the Slider back to frame 1 (alternatively, click the Rewind button or enter a 1in the Current Frame field and press RETURN). Select the ladybug in the bottom left. Remember: The position of the Slider determines which key frame you are making changes to. •Creating buttons and linking them to animations. }} Open the file “TigerCreate_Tutorials/Scenes/ Scene_03.mytbs”. }} All of the necessary images are already available in this scene: “S06_Eyes_Closed.png” and “Bug_a. png”. To make things easier, you should name these “EyesShut” and “Ladybug” respectively. }} The ladybug needs to hop from the mushroom on the left, on to the back of the other ladybug and back again. Place key frames in the Position row at frames 1 and 65 – this defines the length of the animation; the start and end point. }} Place another key frame at frame 30 and move the Slider to it. Move the ladybug so that it is sitting on the back of the other (see figure). }} Place both of the assets as shown in the following figure: Fig. 96: Positioning of the assets •Select the asset “EyesShut”, open the Timeline and activate the Record button in order to create animations. The Slider changes color from blue to red. •Place key frames in the Opacity row at frames 1, 3, 7, 14 and 38. Move the Slider to frame 1. •Change the Opacity value (Transformation Properties) for the key frame at frame 1 to 0 – this means the eyelids are (almost) completely transparent. In Edit mode, even completely transparent images are shown faintly so that they can easily be found again. Fig. 97: Position of the ladybug at key frame 30 }} Place another key frame at frame 40, which will automatically adopt the position of key frame at frame 30. The ladybug should therefore remain on the other ladybug for a duration of 10 frames before jumping back. }} Move the Slider back and forth along the Timeline: so far, the ladybug just floats slowly from left to right, and back again from frame 40. We’ll change that now. }} Drag the Slider to frame 15, place a key frame and move the ladybug up, to decide how high it should jump. }} Move the Slider back and forth along the Timeline. The ladybug now jumps until frame 15 and lands at frame 30. To make this look a little more rea listic, you can move the key frame at frame 15 farther to the right – then the ladybug will take slightly longer jumping than the landing. }} Now leave the Slider on the key frame (15), mark ing the highest point, and create another key frame at frame 55. This means the ladybug will then adopt the same position as in frame 15. Move the Slider back and forth along the Timeline to test the movement. }} Move the Slider back to frame 1 to see the ladybug back in its starting position. }} Create two buttons using the (+)-symbol in the Scene Navigator. Name them “Button_Ladybug” and “Button_Owl”. }} Scale the rectangle for “Button_Ladybug” so that it is big enough to cover the ladybug, and the rectangle for “Button_Owl” covers the owl. You cannot (and donʼt need to) set a Z Order value for buttons as they always lie on the top layer of graphics, i.e. right at the front. }} Select "Button_Owl." Link it to the animation "EyesShut" using the plus sign under "Button Properties." Enter the values 1 and 40 for the start and end frames respectively if these values have not already been entered. }} Link “Eula_A.mp3” as a Click Sound. Then switch to Preview mode and test the button. While the ladybug animation starts by itself, the owl will now only blink when the button is clicked. }} In Edit mode, select “Button_Owl” and link it to the Fig. 98: Size and position of the two buttons “EyesShut” animation in Button Properties. Enter the values 1 and 65 for the start and end frames respectively. }} Link “s03_boing.mp3” as a Click Sound. Then switch to Preview mode and test the button. You will find the finished scene saved as “Scene_03 complete.mytbs”in the Scenes folder. Exercise 4: Type B Touch Animations (Non-repeatable) What Happens in this Scene You will create an animation controlled by a button: a mouse will disappear behind a stone when the button is pressed. The button then also disappears so that the animation can only be triggered once. What You are Practicing in this Scene •Positioning assets on the stage. •Configuring assets’ properties (Z Order, etc.). •Creating an animation and linking a sound to it. •Creating a button and linking it to itself, among other things. }} Position the Slider at frame 40. Now move the mouse so that it completely disappears behind the stone. Move the Slider back and forth along the Timeline to see how the mouse hides. }} Create several key frames in the Rotation row, starting at frame 1 and ending at frame 30. Posi tion the Slider over each one in turn and change the Rotation values so that the mouse moves a little during the first 30 frames. }} Link the mouse animation to the sound “S04_ mouse.mp3” (“Nanu?”) in Animation Properties. }} Rewind the scene using the Rewind button and start it again with the Play button. The mouse will repeatedly disappear behind the stone, only to appear again afterwards. The linked sound is only played once. }} Create a button via the (+)-symbol in Scene Navigator and name it “Button_Mouse”. Place it over the mouse and make it a bit bigger. }} Open the file “TigerCreate_Tutorials/Scenes/ Scene_04.mytbs”. }} Drag the images“S04_Stone.png” and “S04_Mouse. png” from the Book Navigator into the scene. }} Set the Z Order values for the mouse to 1 and for the stone to 2. This causes the stone to sit farther forward. }} Place the stone asset exactly over the stone in the background, and place the mouse so it is half- covered by the stone, as shown in the figure. The stone will then conceal the mouse, so the mouse can hide behind it. }} Select the mouse, open the Timeline and activate the Record button so that you can create animations. }} Create key frames at frames 1, 30 and 40 in the Position row. Fig. 100: Position of the button over the mouse and stone }} Link the button to the “Mouse” animation. Add “S04_mouse” via the (+)-symbol in Button Properties. Enter the values 1 and 40 for the start and end frames respectively, as the mouse animation runs for 40 frames. }} Test the scene in Preview mode: the button causes the mouse to hide. Click it again and the mouse suddenly appears and then disappears again. }} Now we’ll ensure the animation can only be played once and that the mouse then stays behind the stone. Switch back to Edit mode open the button’s Timeline. Fig. 99: Placement of the mouse behind the stone }} Create two key frames at frames 1 and 2 in the Position row. Place the Slider at frame 2 and move the button off the Stage (for example, Position X = 1050). Move the Slider back and forth between frames 1 and 2 to see how the button disappears from the scene. Exercise 5: Assets Found in Both Start and Touchanimations What Happens in this Scene A couple of ladybugs are enjoying themselves in the meadow. Another one hops in and sits down, but when you tap it, it jumps into the air – again and again. This is an unusual case as the ladybug begins as a start animation that runs once as it enters the scene, but then switches to a repeatable touch animation (i.e. Type A) when it jumps. For this to work, we use a little trick … What You are Practicing in this Scene •Integrating assets into a scene and customizing them •Creating animations (both start and touch animations) •Duplicating assets •Creating and linking buttons Fig. 101: When pressed, the button controls its own Timeline }} Now add the button’s animation using the (+)-symbol in Button Properties. Enter the values 1 and 2 for the start and end frames. The button now con trols not only the mouse animation, but also its own Timeline. }} Switch back to Preview mode, rewind the scene and play it. Now when you click the button, the mouse animation is played, while at the same time, the button disappears from the picture and cannot be clicked again. You will find the finished scene saved as “Scene_04_ complete.mytbs”in the Scenes folder. Fig. 102: The finished scene }} Open the file “TigerCreate_Tutorials/Scenes/ Scene_05.mytbs”. In it, two ladybugs are already having fun in the meadow and are animated. First change the speed by opening the Timeline using the Animation button, and change the value of FPS from 24 to 20 frames per second. }} Import the third ladybug: drag the image “S04_ Bug” from the Book Navigator into the scene. }} Change its name in Generic Properties to “TouchLadybug” and place the ladybug in the spot, as shown in the figure: Position X = 533, Position Y = 642, Rotation = 15. Fig. 103: Three ladybugs in the meadow, one is animated }} This is the touch animation, and should only run once – so set the value for the Repetitions in the Animation Properties to 1. }} Create a button by clicking the (+)-symbol in the Scene Navigator and selecting Button from the pop-up menu. Drag the button over the ladybug and rename it “Button A”. Then link it to the animation “TouchLadybug” in Button Properties, and click the Use all frames button so the entire animation is used. Fig. 104: Starting position for the touch animation }} First, create the touch animation. From this start ing position, the ladybug should jump on the spot, into the air (if you like, you can also make it do a somersault) and land back in the same position for the animation to be repeated. Open the Time line and activate the Record button. The Slider changes color from blue to red. }} How high you want the ladybug to jump, and whether you want it to do a somersault, will determine the number of frames we’ll need. Place key frames at frames 1 and 25 in the Position bar. These are the ladybug’s start and end positions, and the animation lasts just over 1 second. }} Place another key frame at frame 12 and move the Slider to it, then move the ladybug up – this will be the highest point of its jump. If you also want the ladybug to do a somersault at the same time, place additional key frames for the Rotation: it will need to keep its starting value (15 degrees) at frames 1 and 25. Then weʼll need to place several key frames around the highest point }} Start the scene in Preview mode and test whether the animation runs properly when triggered by the button. If you aren’t happy, carry out any corrections. }} Now we come to the second part: as the ladybug shouldn’t be on the Stage from the beginning, it will need to hop in to the scene first. However, as one asset cannot be part of a start and touch animation at the same time (because the animation cannot start until the linked button is clicked), we’ll need a second, identical ladybug. }} Select “TouchLadybug” on the Stage. Then use the Edit → Copy and Edit → Paste options from the menu to duplicate the ladybug. It will appear in the Scene Navigator with the name“TouchLadybug_1” – change this name to “StartLadybug”, and move it to exactly the same position on the Stage as the first ladybug (Position (533, 642)). }} Open the Timeline, activate the Record button and move the key frame at frame 25 (or the last one in your animation) to frame 50. At frame 50, the start animation should end and the original ladybug should have arrived at the position of the touch animation. As you have duplicated the touch animation, any key frames for the Rotation will have been copied, too. Delete these if necessary by right-clicking any one of the key frames and selecting the option Delete All Rotation Frames. }} Move the Slider to frame 1 and move the (Start) Ladybug off the Stage to the left, slightly above the flower in the left of the image. The ladybug should start from there and jump across the three flowers. }} Move the Slider along the Timeline to frames 10, 25 and 35 and place key frames there for the Position row. In doing so, move the ladybug from one flower to the next. Create further key frames in between to make it hop from flower to flower. Fig. 105: Animation with somersault }} Move the Slider back and forth along the Timeline to get an idea of the animation will work. Then, set the value for the Repetitions (Animation Properties) to 1, so the start animation only plays once. Fig. 107: Placing the concealer graphic Fig. 106: Starting position of the ladybug }} When the “StartLadybug” reaches its end position, it should disappear and you should see the “TouchLadybug” in its place. To do this, create key frames for “StartLadybug” at frames 1, 50 and 51 in the Opacity row, and set the Opacity to 100% for all frames (value for Opacity = 255). Then, move the Slider to frame 51 and set the Opacity to 0 (in Transformation Properties), making the “Start Ladybug” invisible there. Remember: Even if an asset is completely transparent (Opacity = 0), it still shows up as slightly visible in Edit mode for ease of use. However, in Preview mode it will no longer be visible. }} Start the scene to watch the results so far. As you may be able to see, there’s still something wrong – the “TouchLadybug” is still constantly in the picture. Really it should only appear once the “StartLadybug” has been and gone. As we cannot directly influence the Timeline (remember: the Timeline of the “TouchLadybug” is dependent on “Button A”), we’ll need to use a little trick – we’ll simply hide the “TouchLadybug” instead! }} Drag the image “S05_Mask” from the Book Navigator to the Stage and place it exactly over the “TouchLadybug”. The image is a copy of a section of the background image and so can be placed perfectly. }} To make sure the image only covers the “Touch Ladybug” but not the “StartLadybug” (which should land in the same place before disappearing), we can set the different values for the Z Order of each asset. The “TouchLadybug” should be the farthest back, so is given a Z Order = 1. The “StartLadybug” should be the farthest forward, sitting in front of the concealer graphic, so we give the “StartLadybug” a Z Order = 3, and the concealer a Z Order = 2. }} Finally, we need to make sure the concealer dis appears when it’s no longer needed. At the start of the scene is should cover up the “TouchLadybug”, and once the “StartLadybug” has arrived and disappeared (at frame 51), it too should disappear to reveal the “TouchLadybug”. }} Open the Timeline for the concealer. Create key frames at frames 1, 50 and 51 in the Opacity row. From 1 to 50, the concealer should be visible (Opacity = 255), and invisible at frame 51 (Opacity = 0). And as this animation only runs once, set the Repetitions value in Animation Properties to 1. }} Test the scene in Preview mode. Rewind it using the Rewind button in the Control Bar and start it with the Play button. Then save your scene. You will find the finished scene saved as “Scene_05_ complete.mytbs” in the Scenes folder. Exercise 6: Complex Touch Animations For a change, this tutorial will involve two scenes. You’ll build the first one as an exercise. The second is then a variation of the first, which you can try out. What Happens in this Scene Two buttons control various parts of an animation or a Timeline. Remember the example with the bus that should stop at the bus stop and then drive on? We’ll apply this example to the following: A button lies on top of a flower. When pressed, a bee flies toward the flower and lands on it. Another click makes the bee fly away. The interesting thing is that, to do this, two buttons have to appear in the scene alternately before disappearing. Fig. 108: Starting position of the bee off the Stage What You are Practicing in this Scene •Creating animations. •Creating buttons and linking them to segments of a Timeline. •Linking sounds to buttons. •Animating and controlling buttons (either by other buttons or by themselves). }} Open the file “TigerCreate_Tutorials/Scenes/ Scene_06.mytbs”. }} First add a background sound: The easiest way is via "Scene Options." Link the file "s06_atmo.mp3" under Ambient Sound }} The assets required for this scene, “Flower” and “Bee” are already added, and the flower is already linked to a background sound. For simplicity’s sake, we’re taking the bee as a whole this time (i.e. without a nested animation for the wings. You have practiced this in Exercise 2 with the butterfly and will repeat this in Exercise 7, amongst others.). }} First change the total length and speed of the scene in the Timeline: set the Total Frames to 200 and the speed to 20 FPS. }} We’ll start with the bee’s flight. Place the bee off the Stage at the position (1100, 200) and open the Timeline. Then activate the Record button so you can create animations, as always. }} Create a key frame for the bee at frame 1 in the Position row to save this starting position. Create another one at frame 70. Move the Slider there and then move the bee so that it is sitting on the Fig. 109: Intermediate position on the flower flower. Move the Slider between frames 1 and 70 to check the movement. Create further key frames between frame 1 and 70 and change the bee’s position to make its linear movement seem more varied. }} At the end, once the button has been pressed, the bee should leave the scene again. Create a new key frame at frame 180, move the Slider there and move the bee off the stage to the left, to position (-100, 100). Create further key frames between frames 70 and 180 to change the position at these add some variety to its flight path. }} Now we have the following animation for the bee: in the first 70 frames, it flies in from the right and lands on the flower, from frame 71 it continues flying to the left and is completely off the Stage at frame 180. Now we will control this animation using buttons. Remember: If you want to control two or more animations in the same Timeline, you need to make sure that the END frame of the first animation is not the same as the START frame Fig. 110: The buttons’ starting positions of the next animation! Fig. 111: Button A off the Stage }} Use the (+)-symbol in the Scene Navigator to create two buttons, which you can name “Button_FlowerA” and “Button_FlowerB” (to keep things brief, we’ll simply refer to these as button A and button B in the following). Place button A over the flower, and button B off the Stage. }} Button A should cause the bee to fly to the flower. Link button A to the bee in the Button Properties and enter the values 1 and 70 for the start and end frames respectively, so that only this part of the animation is played. Also link the sound “S05_ bumble.mp3” to the button. Test the scene in Preview mode – only once button A is pressed does the bee fly towards the flower. Switch back to Edit mode. }} Button B should cause the bee to fly on. Link button B to the bee, too, and enter the values 71 and 180 for the start and end frames. Also link button B to the same sound as before, so the bee buzzes again. }} Now we have to make sure that button A disapp ears when the bee is on its way to the flower, and that button B lies over the flower when the bee is sitting there. }} Open the Timeline for button A and create key frames for the Position row at frames 1 and 2. Move the Slider to frame 2 and move button A from the flower. }} Open the Timeline for button B and create key frames for frames 1, 69 and 70. Move the Slider to frame 70 and move button B over the flower. This means the button remains off the Stage until frame 69 and appears at frame 70 at the same Fig. 112: Button Properties for Button A time the bee lands on the flower. }} To control the movement of the two buttons, select button A again. Select “Button_FlowerA” and “Button_FlowerB” in the Button Properties. Set the start and end values for “Button_FlowerA” to 1 and 2. Set the start and end frame values for “Button_ FlowerB” to 1 and 70. }} Test the scene in Preview mode. When you click button A, the bee starts to fly and button A disapp ears. When the bee reaches the flower, button B appears there, too. Click it and the bee flies on. However, button B remains on the flower – if you click it, the bee will “magic” itself back on to the flower. So we also need to ensure that button B also disappears once it’s been pressed. }} Open the Timeline for button B in Edit mode and create a new key frame at frame 71. Move the Slider there and move button B back to its original starting position, above the Stage. Now link button B to itself in Button Properties and set 70 and 71as its start and end frames respectively. Thus, the button not only starts the second part of the bee animation, but also controls itself. }} If you test the scene again, button B disappears once it has been pressed, and the bee flies slowly out of the picture, never to be seen again. Finally, what we’re missing is the return of button A at the right time, so we can restart the scene. }} So, open the Timeline for button A in Edit mode, move the Slider to frame 2. Create two key frames at frames 159 and 160, and these will both copy the position of frame 2, i.e. off the Stage. Set the Slider to frame 160 and move button A back over the flower (as in frame 1). }} Select button B again and link it to button A in the Button Properties, giving Button A the values 2 and 160 for the start and end frames respectively. This means button B then controls button A – when button B it is pressed, it triggers the animation of button A, from frame 2 to frame 160, moving it back into the scene. }} Test the scene in Preview mode. Button A starts the bee and disappears instantly. When the bee lands on the flower, button B appears there. Click button B and the bee flies on. Button B disappears and button A appears again. }} Save the results and compare it with the fully built scene. You will find the finished scene saved as “Scene_06a_ complete.mytbs” in the Scenes folder. “Scene_06b.mytbs” is a variation of the above scene. The bee here is in the picture from the beginning, float ing about several flowers, with buttons on two of the Fig. 113: Two buttons control different parts of the bee timeline flowers: – button A causes the bee to fly to the left flower and then return after a short time, – button B makes the bee fly over to the flower on the right. The bee has a fixed starting position for both parts of the animation, which it always goes back to. The difference between this and “Scene_6a.mytbs” is that the order in which the buttons can be pressed can be chosen freely. To start with, both buttons are on the Stage. When one of the buttons is pressed, the other button is only switched out of the scene temporarily, until the bee returns to its starting position (otherwise there would be a jump if the second animation is started during the first). All of the animations are already set up – just the links to the buttons are missing. Try to complete the scene and compare it with the completely built scene in “Scene_06b_complete.mytbs”. Exercise 7: Animations with Bezier Curves What Happens in this Scene Several bees are buzzing around a honey pot, and a bear wants to shoo them away. You’ll be creating nested animations, including Bezier curves for the bees’ flight, and linking them all together. What You are Practicing in this Scene •Integrating assets into a scene. •Moving anchor points. •Creating nested animations. •Creating and editing Bezier curves. •Linking assets to Bezier curves as paths. }} Open the file “TigerCreate_Tutorials/Scenes/ Scene_07.mytbs”. }} You’ll need the following assets: “S06_BaerArm. png”, “S06_Mask”, “S08_Bee”, “S08_Bee_A_R” and “S08_Bee_A_L”. Drag them from the Book Navigator in to the Stage and they will all be automatically added to the Scene Navigator. }} Start with the bear. Place its arm and move the anchor point to the top-right. }} Cover the arm with the concealer image. Give the concealer a higher Z Order value so that the arm partially disappears behind it. }} Open the Timeline for the arm. Create several key frames in the Rotation row at frames 1, 20, 40 and 55. Fig. 115: Bee with nested wings as child objects }} Position the Slider to frame 20 and enter the value 340 for the Rotation. }} Move the Slider to frame 40 and enter the value 12 for the Rotation. }} Start the scene with the Play button: the owl blinks from time to time (this was already set up in the scene). The bear now lifts and lowers its arm. If you like, you could extend and refine the arm animation by placing further key frames and altering the rotation. }} Click the padlock icon to the left of the icons for the arm and concealer in the Scene Navigator to lock their position on the stage and prevent them from being accidentally moved. }} Move the bee close to the honey pot and place its wings on it. }} Now nest the bee and its wings: select both wings in the Scene Navigator (while holding the Command key) and drag them onto the bee icon (also in Scene Navigator) until its highlighted. }} Animate the wings: select the wings individually and move each one’s anchor point to the bottom tip of the wing. }} Then select both wings again, open the Timeline and place key frames for the Rotation at frames 1, 4 and 7. Fig. 114: Moving the anchor point Fig. 116: Nesting in Scene Navigator }} Scale the curve’s height and width by pulling its handles. }} Hold down the ctrl key: the color of the Bezier curve will change, and the handles then appear on the anchor points instead, and can be used to mani pulate the curve. }} Push or pull the anchor points to change the curve. }} Pull one of the handles to see how the curve changes shape. }} Click (while holding down the ctrl key) anywhere in the rectangle around the curve to place additional anchor points. Fig. 117: Moving the anchor point }} Select the left wing. Enter the value 340 in the Rotation field (Transformation Properties) (for the key frames at frames 1 and 7) and 30 (for the key frame at frame 4). }} For the right wing, enter the value 30 in the Rota tion field (for the key frames at frame 1 and 7) and 0 (for the key frame at frame 4). Move the Slider along the Timeline to test the movement of the wings. }} Next, create a Bezier curve to represent the flight path for the bee: click the (+)-symbol in the Scene Navigator and choose Bezier. A curve will then appear in the center of the Stage with two highlighted points: blue is the starting point, and white is the end point, while the little arrow on the curve shows the direction of travel. Give it the name “BeeFlight_A”. }} Click the Reverse Points button on the right in the Bezier Properties section if you want to swap the start and end points, thus changing direction. A closed path has, as before, start and end points, but both points sit in the same place. An asset starts along the closed path from the start point, and will stop at the end point if the animation isnʼt played in a loop. }} Then activate the Closed option in Bezier Properties to close the curve. }} Link the bee to the curve you just created – select the bee and move it to the start point of the curve (or move the curve towards the bee, so that its starting point is on top of the bee). Assign the edited curve under Path in the Animation Properties. Enter the value 100 for the Path Duration, as the bee will then require 100 frames to fly along the entire curve once. }} Link the sound file “S05_bumble.mp3” to the bee and activate Loop Sound so the sound is played continuously. }} Start the scene and watch how the bee flies. Correct or extend parts of the flight path as necessary. Adjust the speed by changing the value for Path Duration. }} When you are satisfied with the flight path, simply move the Bezier curve off the Stage. Then it will no longer bother you as a visible curve but will remain at the flight path. Fig. 118: New Bezier curve as the flight path The anchor points that are part of a Bezier curve should not be confused with the anchor points that serve as the centre of rotation for most assets! }} Select the bee in the Scene Navigator and copy it (menu Edit → Copy). Then select Edit → Paste to create a duplicate of the bee in the Scene Navigator – which both its nested wings and animation copied along with it! In this way, you can create several copies of an asset without having to nest and animate it each time. }} So that your bees don’t all fly around the same flight path in sync, either create more Bezier curves, which you can then link to one or several bees, or give the bees different values for Path Duration so they fly around at different speeds. Bear in mind that you linked a looped sound to the first bee. This is also linked to each copy – make sure you delete any superfluous links! }} To make the scene more varied, we can select individual bees and change their Scale Width values to -1 in the Transformation Properties – this will mirror the bees. Exercise 8: Using a Sprite Sheet Animation What Happens in this Scene In this scene, you’ll be painting the town red – red with black spots! You’ll be setting some ladybugs in motion using a simple Sprite Sheet Animation. Sprite Sheet Animations are useful if you don’t want to change the physical properties of an image (size, position, rota tion), but rather its appearance, with several different states of an image in a sequence of individual frames. In our example, we’re dealing with various views of a ladybug drawn in a few individual frames. What You are Practicing in this Scene •Creating a Sprite Sheet Animation from several frames. •Linking assets with a Sprite Sheet Animation. •Controlling assets with buttons. •Adding sounds. }} Open the file “TigerCreate_Tutorials/Scenes/ Scene_08.mytbs”. Fig. 119: Bees with Bezier curves }} First create a new Sprite Sheet Animation. All the images that you need for this are already in the project folder. Open the Sprite Sheet Animations Navigator in the Properties List. }} Save the results and watch the completed scene. You will find the finished scene saved as “Scene_07_ complete.mytbs” in the Scenes folder. Fig. 120: Creating a new Sprite Sheet Animation }} There’s already a Sprite Sheet Animation (“Bugs”) in there. Create a new one by clicking the (+)symbol, and change the name from “Untitled SheetAnim” to “Ladybug_Sprite”. }} Click the (+)-symbol farther down and select “Bug_a.png” from the list of images that appears. The image is added to the animation. }} Click your “Ladybug_Sprite” at the top of the Sprite Sheets list again – notice how the icon changes. Fig. 122: Animation preview feature Fig. 121: Sprite Sheet Animation Move the Zoom Slider below a little to the right to enlarge the preview, so you can see the small Play arrow in the centre. If you want to use a lot of individual images for a Sprite Sheet Animation, open the Book Navigator view on the left, select all the assets that you need and drag them, while holding down the mouse button, to the right and into the list of frames. If necessary, you can then change the order of them there. }} Add the following frames using the (+)-symbol: “Marini_b.png”, “Marini_c.png” and “Marini_d. png”. Then click the Play button in the preview to watch the sequence of the images. }} As the image sequence is still too slow, adjust the number of frames for each image. Select each of the images in the list (i.e. Marini_a to _d) and change the number of frames from 20 to 3. Either enter the number in the FPS field below or doubleclick on the numbers to the right of their names. }} Activate the Loop option and then click the Play button in the preview again. This is what your little animation will look like – now you can use this for several assets. Fig. 123: Adjusting the number of frames per image If you want to set several images to have the same frame length, select them all in the list and enter the value into the FPS field below. It will then be applied to all of the selected images. }} You will need several instances of the only asset in the scene so far. Duplicate it: select “Marini_a”, click on Edit → Copy and then Edit → Paste from the menu. Repeat this several times and place the individual ladybugs on the Stage. To give it a bit of variety, mirror some of them (Scale Width = -1) or tilt them slightly to the side (Rotation). }} Now select each ladybug individually and link them to the “Ladybug_Sprite” Sprite Sheet you created in the Animation Properties. Exercise 9: Using Assets as Free Objects What Happens in this Scene You’ll recognize this scene from before: it’s the owl, the bear and the honey pot, but this time, there’s only one bee flying around. However, this time, we have a few of our owl’s lost feathers that come into play. You’ll turn these into freely movable objects, known as Free Objects. Fig. 124: Placing the Sprite Sheet Animation on the Stage What You are Practicing in this Scene •Adding assets in to a scene. •Linking a background sound to a scene. You will find the finished scene saved as “Scene_08_ complete.mytbs” in the Scenes folder. •Turning assets into Free Objects and giving them different properties. }} Open the file “TigerCreate_Tutorials/Scenes/ Scene_09.mytbs”. You can see that several animations have already been created: the owl blinks its eyes (a looping start animation) and the bee flies excitedly around the honey (also a looping start animation, following a Bezier curve path). Fig. 125: Scene with Free Objects }} First add a background sound: select the asset “EyesShut” and link it to the sound“s06_atmo.mp3” (in the Animation Properties). Tick the Loop Sound option so it plays in an endless loop. }} Drag the images “FeatherA”, “FeatherB” and “FeatherC” from the Book Navigator in to the Stage, and place them on the ground between the owl and the bear. Exercise 10: Using Narrative Text with Word Highlighting What Happens in this Scene The owl is still upset about its bump, a little mouse waves a band-aid and some text is spoken. You will do a bit of animating, link a text box to a narration file and use Word Highlighting for the first time. Fig. 126: Feathers as Free Objects What You are Practicing in this Scene •Creating start animations that run once. •Creating and formatting text boxes. As the feathers are being used as Free Objects, there is no need to give them Z Orders. Despite how they may appear in Preview mode, Free Objects always lie on the top layer of images in the e-book. }} Select “FeatherA” and open the Animation Properties (in the Properties List) and activate the Free option. Select “Box” for Type and enter the values 100 for Friction and 0 for Elasticity. Start the scene in Preview mode and tap the feather – notice how it sinks slowly and heavily to the ground. Move the feather to the top edge of the Stage and let it go – see how it falls heavily to the ground and lies there. }} Select “FeatherB” in Edit mode, and as before, activate the Free option. This time, set the Type to “Ball”, the Friction value to 0, and Elasticity to 100. In Preview mode, the now feather sinks to the ground when it is tapped, but then bounces up and down, seemingly endlessly. If you throw the feather against the side of the screen with some force, it’ll bounce back and forth across the picture like a rubber ball. •Linking text with a narration file and placing key frames for Word Highlighting. }} Open the file “TigerCreate_Tutorials/Scenes/ Scene_10.mytbs”. All the required images are already in the Workspace and the owl is linked to a background sound (see Animation Properties). The speed has been set to 20 frames per second (FPS). }} The mouse is already animated – start the scene and watch the animation. The mouse with the band-aid is made up of separate arms and legs, a torso and the band-aid. Except the legs, everything is already animated: moved, rotated and scaled. }} First you need to animate the owl. It should peek in to the scene from the right. Place the owl on the right so that it is almost completely off the Stage, and move its anchor point from the middle to the bottom-right. }} Open the Timeline and activate the Record button. (The Slider changes color from blue to red.) Place key frames for the Position and Rotation at frames 1 and 20. Move the Slider to frame 1 and rotate the owl by approximately 12 degrees. }} Now that you’ve seen two extremes, enter medium values for “FeatherC”. Select “FeatherC”, set the Type to “Ball” and the Friction and Elasticity values to 25. }} Test the scene again in Preview mode and note the different behavior of each of the three feathers. Once they’ve been tapped and activated in the scene as Free Objects, they all behave differently, even when interacting with each other. Depending on their properties, they either bounce off each other or push each other away. You will find the finished scene saved as“Scene_09_ complete.mytbs” in the Scenes folder. Fig. 127: The finished scene Fig. 130: End positions of the feathers on the ground Fig. 128: Place and rotate the owl with shifted anchor point }} Move the Slider to frame 20 and move the owl far enough left that its head is now completely visible on the Stage (Rotation = 0). Start the scene by pressing the Play button and alter the settings if necessary. }} Create several intermediate key frames to make the feather look like it is floating gently down – to do this, move the Slider along the Timeline, creating key frames for the Position and Rotation, and move the feather to the left or right at these key frames. By varying the rotation at the same time, you can make your feather’s fall look more realistic, as it twirls down to the ground. }} Test the Animation via the Rewind and Play buttons. Set the Repetitions value (in the Animation Properties) to 1, so the animation won’t be repeated, and correct any of key frames’ values if need be. }} Repeat the same steps for the other feathers: determine the start and end frames, create key frames at those points and place the feather(s). Refine the movement with key frames between them. Repetitions = 1 prevents the animation from being repeated. }} Now we come to the new part of the exercise. You’re creating a text box, formatting it and linking it to a narration. Click the (+)-symbol in the Scene Navigator and select Text to create a text box in the center of the Stage. Move it upwards and to the left, to the position (90, 45), and scale it using the handles or entry fields (Transformation Properties) to approx. 300 pixels wide and 90 pixels high. Change the name to “Text01”. Fig. 129: End frame of the owl animation }} Now animate the three feathers on the top right. They should enter the picture from the right with the owl and float down from the owl’s head. This happens much more slowly, taking between 70 and 120 frames for the animation of each feather. }} For example, for “FeatherA”, start by defining the start and end points of the animation. Open the Timeline and place key frames for the Position and Rotation at frames 1 and 110. At frame 1, place the feather off the Stage, above the owl. At frame 110, the end point, move the feather onto the grass. Fig. 131: Placing and formatting a new text box }} Open Text Properties in the Properties List. Enter the following settings: • Font: Arial • Size: 24 • Line Spacing: 30 • Color: Black }} Move the Slider along the Timeline: you’ll hear the narration sound, and see how the Word Highlighting row fills in as it plays. Now place key frames at frames 2 and 13. Move the Slider again and watch how the individual words of the text change color. Place additional key frames for the remaining text. • Highlighting: Blue • Alignment: Align Left }} Enter the text below into the Edit field: “I’m the expert in the house!”, pips the little furry mouse. Fig. 133: Key frames for Word Highlighting Generally, you can assume that the pauses between words are at the positions where the volume level line is at its lowest. However, it's not a perfect way of judging pauses, as it may reflect the narrator's way of speaking, or the recording itself. You will quickly get used to selecting Word Highlights though. }} Start the scene in Preview mode and check how both the animations and Word Highlighting run. Save your scene and compare it with the pre-made scene. Fig. 132: Formatting, text entry and linking to a narration file For a line break, use the keyboard combination Option + RETURN (or ENTER). }} Link the sound “Scene_10__text01.mp3” via the Speech option and test it by pressing the Play button. }} Open the text box’s Timeline. Unlike other assets, there’s only one row, Word Highlighting, which contains a simple representation of the narrator’s volume level. The first key frame at frame 2 instead of 1 en sures that the first word is highlighted when the narrator starts. A key frame at frame 1 would cause the first word to be highlighted from the start. You will find the finished scene saved as“Scene_10_ complete.mytbs” in the Scenes folder. Exercise 11: Multilingual E-books Here you will try your hand at creating multilingual scenes. This can effect texts, sounds (if they contain speech) and images. What Happens in this Scene The owl has received an invitation by mail. You will provide the owl with a letter, which due to the writing on it, needs to be switched when the language is changed. Additionally, you will be creating a text box and filling it with both languages. What You are Practicing in this Scene •Adding assets to a scene. •Creating and editing text boxes. Fig. 134: The letter’s position and anchor point }} Create two more key frames at frames 10 and 30, and rotate the letter at each by about 5 to 10 degrees, once to the left and once to the right. Start the scene by clicking the Play button and watch how the wing and letter move. If necessary, correct the animation. }} Open the file “TigerCreate_Tutorials/Scenes/ Scene_11.mytbs”. Make sure the language is set to “German”. }} First, link a background sound to the scene. To do this, select the owl’s wing and open the Animation Properties. Select the file “s05_atmo.mp3” under Sound. Activate the Loop Sound option to make the sound is play in an endless loop. }} Open the Book Navigator and drag the image “S11_ PostDE.png”from the Images folder in to the scene. Notice how there is also an image named “S11_ PostEN.png”, which is the English variant of this asset. Also note that the name is shortened to “S11_Post” in the Scene Navigator – the “DE” ending is automatically removed! }} Place the letter under the wing, as shown in the figure below, and move the anchor point up towards the owl’s shoulder. }} Now nest the wing and the letter so that both can be animated together. Drag the wing onto the letter in the Scene Navigator until the letter is outlined in blue, then release. The wing is now a (nested) child object of the letter. }} Select the letter and open the Timeline (activating the Record button, as before). Create key frames at frames 1, 20 and 40 in the Rotation row. These key frames will then contain the letter’s starting position. Fig. 135: Rotation of letter and wing }} Create a text box: click the (+)-symbol in Scene Navigator and select Text. Move the text box to the upper left corner of the Stage, roughly to the position (70, 60). Rename the text box “Text01”. }} Open the Text Properties in the Properties List. Make the following settings: • Font: Arial • Size: 20 • Line Spacing: 28 • Color: Black • Alignment: Align Left }} Enter the following text into the Edit field below: „Heut’ bekommt die Eule Post. Im Brief, da steht ganz klein: Ich lade Dich für Sonntag zu mir nach Hause ein.“ Use the key combination Option + RETURN (or ENTER) for a line break. }} At this point, we’re going without a narrator. Watch the scene in Preview mode. This is your German version: you have a text box with German text, as well as an image with German text. }} Now switch to the English version: click the button for the language selection in the Toolbar (where it currently says “German”) and change it to “English”. The letter that the owl is holding onto automatically switches to the English version. This is because two versions of the image have been created, which TigerCreate can automatically assign thanks to the “DE” and “EN” endings of their file names. Fig. 137: The completed scene in English }} The text box is now shown as being empty (“Untitled Text”), but it’s been placed in the same position and has the same formatting – even its name is identical. So, you only need to replace the contents with the text for the English version (in Text Properties), as follows: „Today, the owl got mail. The letters were very small: I invite you to my home, On a Sunday the date shall fall.“ Fig. 138: The completed scene in German Start the scene in Preview mode and switch the lan guage while the scene is playing. Then save. You can find the finished scene saved as“Scene_11_ complete.mytbs” in the Scenes folder. Fig. 136: After switching the language to English Exercise 12: Using Scratch and Draggable Assets What Happens in this Scene To finish, you’ll be looking at the Scratch and Draggable functions: assets that can be ‘erased’ and moved. In the example scene, we have a couple of ladybugs, which are more or less hidden at the start: they’re hid ing behind some plants. However, the user can free them by erasing a few leaves or moving a flower aside. What You are Practicing in this Scene •Placing and animating assets. •Using the Scratch and Draggable functions. Fig. 139: Scene in its initial state }} Open the file “TigerCreate_Tutorials/Scenes/ Scene_12.mytbs”. }} Place both assets “S12_scratch” and “S12_Flower” as shown in the following figure }} The ladybugs are all on top because they have a higher Z Order value, so change the Z Order for the flower and the leaves to at least a 2. }} Select the asset “S12_scratch” and set the option Can Scratch in the Generic Properties. This will make the asset erasable, letting the user rub it away bit by bit. Unfortunately, this option wonʼt work in Preview mode – only in the iOS Simulator and the finished e-book. }} Before turning the flower into a draggable element, select the different ladybugs one after the other in the Scene Navigator. Link the individual ladybugs to the previously created Sprite Sheet Animation “Bugs” in the Animation Properties, under Sprite Sheet. This will make the ladybugs move from the start, making them a little easier to spot in their hiding places.. Fig. 140: Placing the hidden assets }} Select the flower and move its anchor point so that it sits in the center of the flower. Activate the option Draggable in the Animation Properties: this will turn the flower into a moveable element. However, you still need a path or a track in the Timeline for it to move along. }} Open the Timeline. Activate the Record button so you can place key frames. (The Slider changes color from blue to red.) Create key frames in the Position row at frames 1 and 50. Move the Slider to Fig. 141: Moving the flower frame 50, and move the flower so that the ladybug hidden behind it is visible. Move the Slider along the Timeline to see how the flower is shifted. }} Test the scene – not just in Preview mode, if pos sible. As we mentioned, the Can Scratch option only works in the iOS Simulator. You’ll find the finished scene saved as“Scene_12_complete.mytbs” in the Scenes folder. 5. Appendix In the appendix, you will find useful Shortcuts to make using TigerCreate easier, helpful reference links and some help with using Xcode. 5.1 Shortcuts Zeichenerklärung: ⌘ Command key ⎇ Option key ⇧ Shift key ↩ Return or ENTER key ⇥ Tab key ⌫Backspace General: ⌘-NCreates a new file if a scene is already open, otherwise a project selection dialog window appears. ⌘-OOpens a scene selection dialog window. ⌘-W Closes the current scene. ⌘-S Saves the current state of a scene. ⇧- ⌘-SAllows you to save a scene under a new name. ⌘-ZUndoes your last action. ⇧- ⌘-ZRedoes an action. ⌘-XCuts the selected object(s). ⌘-C Copies the selected object(s). ⌘-V Pastes previously copied or cut object(s). ⌫ Deletes selected objects from a scene. ⌘-A“Select all” – selects all the assets in a scene. ⎇- ⌘-T Hides/shows the Toolbar. ⌘-M Minimizes a scene’s window. ⌘-1Changes the Assets List view to the Book Navigator. ⌘-2Changes the Assets List view to the Scene Navigator. ⌘-3Changes the Properties List view to the Properties Navigator. ctrl-Taste … Shows the anchor point of Bezier curves. Within the Timeline: ⎇- ⌘-C Copies the selected key frames in the asset’s Timeline. ⎇- ⌘-X Cuts the selected key frames in the asset’s Timeline. ⎇- ⌘-V Pastes previously copied or cut key frames. ⎇- ⌘-⌫ Deletes the selected key frames in the asset’s Timeline. Appendix | 5.1 Shortcuts 91 5.2 Links TigerCreate website: www.tigercreate.com Information about Xcode: https://developer.apple.com/technologies/mac/#xcode Information for developing for iOS: https://developer.apple.com/programs/ios/ Information about the publishing process for apps on iOS: u.a. http://www.ralfebert.de/ios/app-store-distribution/ Also see our Tutorial Videos: 5.3 Initializing iOS Simulator Using the Xcode Program To test scenes created with TigerCreate directly on your computer, you’ll need the iOS Simulator. This is part of Apple’s own development environment, Xcode, which you can download for free from the AppStore. You don’t need Xcode for producing e-books. However, you will need to start the program once and run the iOS Simulator found inside, so that TigerCreate can find the path to the Simulator. To do this, we have the following step by step instructions: "Export for iOS Part 1" https://youtu.be/7v28dcooH_Q "Export for iOS Part 2" https://youtu.be/x0imW8_bA88?list=PLjj7UjjDO56MJ8 ACaQM3Uww7T7088ea91 Information about opening a developer account with Google Play: https://support.google.com/googleplay/android-developer/answer/113468?hl=de&ref_topic=3450781 “ADT Bundle for Mac” for installing the “Android SDK”: http://developer.android.com/sdk/index.html http://developer.android.com/sdk/installing/bundle.html Instructions for generating the path to the "keystore" file (Export for Android): http://developer.android.com/tools/publishing/app-signing.html#releasemode Also see our Tutorial Videos: "Export for Android Part 1" https://youtu.be/FhDKVpM2i1A?list=PLjj7UjjDO56MJ8AC aQM3Uww7T7088ea91 "Export for Android Part 2" https://youtu.be/Mgxtjbu6lz0?list=PLjj7UjjDO56MJ8AC aQM3Uww7T7088ea91 92 Appendix | 5.2 Links 1. Following installation, start Xcode and click on the “Create a new Xcode project” button. We’ll proceed as if we want to develop a new program for the iOS operating system. 2. Select “iOS” as the operating system and choose “Empty Application” as the template for the new project. Then click the “Next” button. 3. Enter dummy names into all the fields and select “Universal” as the device, so you won’t need to repeat these steps for the iPhone Simulator, too. Then, click the “Next” button. 4. Select a target directory for your new program – we recommend the Desktop, as once you quit Xcode, you won’t need the created folder anymore. Wait for the Xcode interface to build itself and then select Product → Run. This will start the iOS Simulator (in the background) as well as the program you have just created in it, which will do nothing as it has no content. But it doesn’t matter, as we’ve already completed the most important step: Xcode has created the path to iOS Simulator in your operating system, where TigerCreate can find it. 5. Quit the Simulator. Quit Xcode. That’s it. The folder you created with your Xcode project data can now be deleted. Appendix | 5.3 Initializing iOS Simulator Using the Xcode Program 93 5.4. Index Android standalone app export [Link to Chapter 3.5.5.2] 60 Animation [Link to the corresponding subsection of Chapter 3.1.1.2 and Chapters 1.1.4, 3.2.2, 3.2.2.1] 10, 21, 35 Animation Properties [Links to Chapters 3.1.3.4, 3.2.2.3] 28, 43 App [Link to Chapter 1.1.4] 10 Assets [Links to Chapters 1.1.4, 2.2.3, 2.2.5, 3.1.2, 3.1.4] 10, 16, 24, 32 Aspect Ratio 34 Nested Animations [Link to Chapter 3.2.2.1] 35 Bezier curves [Link to Chapter 3.2.2.4] 44 Bezier Properties [Links to Chapters 3.1.3.3] 28 Book Navigator [Link to Chapter 3.1.2.1] 24 Button Properties [Links to Chapters 1.1.4, 3.1.3.5] 10, 29 Buttons [Link to Chapter 3.2.4] 48 Scene [Links to Chapters 2.3.1, 2.3.2, 3.1.1.2, 3.1.2.2, 3.2.1, 1.1.4] 10, 18, 19, 21, 25, 35, Scene Navigator [Link to Chapter 3.1.2.2] 25 Scene Options [Link to the corresponding subsection of Chapter 3.1.1.2 and to Chapter 3.5.2.1] 21, 23 Sounds [Link to Chapter 3.2.2.3, 3.2.5] 43, 50 Sprite Sheet Animations [Link to Chapter 3.2.2.5] 45 Sprite Sheet Animations Navigator [Link to Chapter 3.1.3.7] 31 Stage [Link to Chapter 3.1.4] 32 Standalone app export [Link to Chapter 3.5.5] 58 Start animations [Link to Chapter 3.2.2.1] 35 System requirements [Link to Chapter 1.2.1] 11 Doodle [Link to Chapter 3.4.3] 56 E-book [Link to Chapter 1.1.4] 10 Edit [Link to the corresponding subsection of Chapter 3.1.1.2] 21 Export formats [Links to Chapters 1.1.2, 3.5.1] 9, 57 File formats [Link to Chapter 2.2.4] 16 Free Objects [Link to the corresponding subsection of Chapter 3.2.2.3] 43 Game Options [Link to Chapter 3.5.2.3] 58 Games [Links to Chapters 3.4, 3.4.4] 53, 56 Generic Properties [Link to Chapter 3.1.3.1] 26 Hint Options [Link to Chapter 3.5.2.2] 57 iBooks export [Link to Chapter 3.5.4] 58 Installation [Link to Chapter 1.2.2] 11 iOS standalone app export [Link to Chapter 3.5.5.1] 58 Key frames [Link to Chapter 3.2.2.2] 39 Language [Link to the corresponding subsection of Chapter 3.1.1.2and to Chapter 3.3] 21, 51 Memo [Link to Chapter 3.4.2] 55 Play [Link to the corresponding subsection of Chapter 3.1.1.2] 21 Preview [Link to the corresponding subsection of Chapter 3.1.1.2] 21 Project [Link to Chapter 1.1.4] 10 Publish [Link to Chapter 3.5.2] 57 Publishing [Link to Chapter 3.5.2] 57 Puzzle [Link to Chapter 3.4.1] 53 Registration [Link to Chapter 1.2.2] 11 Testing [Link to Chapter 3.5] 57 Text boxes [Link to Chapter 3.2.3] 47 Text Properties [Link to Chapter 3.1.3.6] 30 TigerBooks [Link to Chapter 3.5.3] 58 TigerFormat [Link to Chapter 1.1.2] 9 TigerFormat export [Link to Chapter 3.5.3] 58 Timeline [Link to Chapter 3.2.2.2] 39 Timeline [Link to the corresponding subsection of Chapter 3.1.1.2] 21 Toolbar [Links to Chapters 2.1.1, 3.1.1] 13, 21 Touch animations [Link to Chapter 3.2.2.1] 35 Transformation Properties [Link to Chapter 3.1.3.2] 27 Updates [Link to Chapter 1.2.3] 12 Word Highlighting [Link to Chapter 3.2.3] 47 Xcode [Links to Chapters 1.1.3, 5.3] 9, 92 Z Order (Chapter 3.1.3.1) 26 94 Appendix | 5.4. Index