Download Aberlink CMM Camera
Transcript
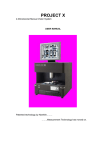
CAMERA MANUAL
Aberlink 3D Vision System
User Manual
Patented technology by Aberlink……..
……..Measurement Technology has moved on.
INDEX
INTRODUCTION TO THE CAMERA.............................................................. 1
1.0 CAMERA AND PROBE SWAPPING PROCEDURE................................ 2
1.1 SET UP A CAMERA OFF-SET IN ‘PROBE STATUS WINDOW’ ........................... 2
1.2 CHANGING FROM CAMERA TO PROBE HEAD ............................................... 3
1.3 CHANGING FROM PROBE HEAD TO THE CAMERA ........................................ 4
2.0 CAMERA SETTINGS................................................................................ 5
3.0 USING THE CAMERA WITH ABERLINK 3D CMM
SOFTWARE ......... 6
4.0 TAKING MEASUREMENTS USING THE CAMERA IMAGE ................... 8
4.1
LIGHTING ..................................................................................... 8
5.0
THE CAMERA IMAGE WINDOW................................................... 12
6.0
BASIC FUNCTIONS – MOVING, FOCUSING, ZOOMING ................ 14
6.1
MOVING IN X AND Y........................................................................... 14
6.2
MOVING IN Z (FOCUS) ....................................................................... 14
6.2.1 Auto Focus.................................................................................... 15
6.3
ZOOMING IN AND OUT ........................................................................ 15
6.3.1 Panning......................................................................................... 16
7.0
THE MEASUREMENT TYPE BUTTONS ....................................... 17
7.1 EDGE DETECTION
........................................................................ 17
7.2 CENTRE LINE DETECTION
7.3 MOUSE POINTS
7.4 SMART EDGE
............................................................. 17
........................................................................... 17
.............................................................................. 18
................................................................... 18
7.5 CROSS HAIR POINTS
7.5.1 Using the cross hairs as a protractor to measure angles. ............. 18
8.0
THE MEASUREMENT FUNCTIONS.............................................. 20
EDGE DETECTION ........................................................................................ 20
8.1 CIRCLES, LINES OR ARCS (AUTO SELECT)
............................. 21
......................................... 21
8.1.1 Measuring using Edge Detection
8.1.1.1 Measuring Lines (auto selected) ................................................ 21
8.1.1.2 Measuring Arcs (auto selected).................................................. 23
8.1.1.3 Measuring Circles (auto selected).............................................. 26
8.1.2
8.2
MEASURING USING CENTRE LINE DETECTION
CIRCLES
........................... 29
.................................................................................... 31
8.2.1 MEASURING CIRCLES USING EDGE DETECTION
-I-
............................ 31
8.2.2 MEASURING CIRCLES USING CENTRE LINE DETECTION
................ 31
8.2.3
MEASURING CIRCLES USING MOUSE POINTS
8.2.4
MEASURING CIRCLES USING THE SMART EDGE FUNCTION
8.3.1 MEASURING LINES USING EDGE DETECTION
............................ 31
............................... 35
8.3.2 MEASURING LINES USING CENTRE LINE DETECTION
.................... 35
8.3.3
MEASURING LINES USING MOUSE POINTS
8.3.4
MEASURING LINES USING THE SMART EDGE FUNCTION
8.4.1 MEASURING ARCS USING EDGE DETECTION
................................ 35
............. 35
............................... 37
8.4.2 MEASURING ARCS USING CENTRE LINE DETECTION
.................... 37
8.4.3
MEASURING ARCS USING MOUSE POINTS
8.4.4
MEASURING ARCS USING THE SMART EDGE FUNCTION
................................ 37
8.5.1 MEASURING POINTS USING EDGE DETECTION
............. 37
............................. 39
8.5.2 MEASURING POINTS USING CENTRE LINE DETECTION
8.5.3 MEASURING POINTS USING MOUSE POINTS
......... 34
................. 41
................................ 41
8.5.4 MEASURING POINTS USING THE SMART EDGE FUNCTION
8.6.1 MEASURING PEAK POINTS USING EDGE DETECTION
............. 41
.................... 42
8.6.2 MEASURING PEAK POINTS USING CENTRE LINE DETECTION
......... 43
.......................... 44
8.7.1 MEASURING A CURVE USING EDGE DETECTION
8.7.1.1 Measuring a Curve that is larger than the Field of View of the
Camera .................................................................................................. 47
8.7.2 MEASURING A CURVE USING CENTRE LINE DETECTION
............... 50
8.8
THE ONE EDGE FEATURE
................................................... 51
8.8.1 Measuring with the One Edge Feature using Edge Detection
......................................................................................................... 51
8.8.1.1 If the One Edge Feature does not recognise the correct shape. 56
8.8.2 Measuring with the One Edge Feature using Centre Line Detection
......................................................................................................... 56
8.9
THE ALL EDGE POINTS FUNCTION
.................................... 57
.............. 57
8.9.1 Measuring All Edge Points using Edge Detection
8.9.1.1 Erasing unwanted Measurement Points..................................... 61
8.9.2
Measuring All Edge Points using Centre Line Detection
8.10
THE THREAD MEASURE FUNCTION
8.11
THE SCREEN RULER FUNCTION
-II-
. 62
............................... 63
..................................... 66
9.0 EDGE DETECTION CONTROLS
................................................ 68
9.1 AVERAGING SIDE AND AVERAGING F/B ................................................... 69
9.2 STEP SIZE ............................................................................................. 70
9.3 EDGE PERCENT ..................................................................................... 71
9.5 THREAD FLANK % ................................................................................. 73
9.6 MIN CONTRAST ...................................................................................... 73
9.7 COLOURS – EDGE POINTS AND MEASUREMENT TOOLS ............................ 73
9.8 FOCUS BOXES ....................................................................................... 74
9.9 DETECTION GRAPH ................................................................................ 74
10.0 CAMERA CONTROLS
.............................................................. 76
10.1 BASIC CAMERA CONTROLS .................................................................. 76
1 Brightness Slider................................................................................. 76
2 Contrast Slider .................................................................................... 76
3 % Used ............................................................................................... 76
4 Auto Button ......................................................................................... 77
5 Advanced Button................................................................................. 77
10.2 ADVANCED CAMERA CONTROLS ........................................................... 77
6 Exposure Slider................................................................................... 78
6 Exposure Slider................................................................................... 78
7 Gain Slider .......................................................................................... 78
8 Lock Colours / Individual Colours........................................................ 78
9 Auto Gain / Exposure settings............................................................. 78
10 Auto Focus........................................................................................ 78
11.0
TOGGLE VIDEO FEED
.......................................................... 79
12.0
SHOW EDGE PIXELS
............................................................ 80
14.0 SAVE IMAGE
............................................................................ 82
15.0 EDITING CAMERA / LIGHT CONTROLS ON MEASURED FEATURES
...................................................................................................................... 82
15.1 EDITING FEATURES .............................................................................. 83
16.0 CALCULATING THE CAMERA OFF-SET ........................................... 84
17.0 CAMERA SETUP ................................................................................. 86
16.1 SETTING SCALES ................................................................................. 87
16.1.1 To setting up scales .................................................................... 88
16.2 SETTING UP OFFSETS (REPEATABLE MANUAL / AUTO ZOOM ONLY)........... 90
16.2 SETTING UP Z ROTATION (Z ROT) ......................................................... 92
18.0 CHANGE HISTORY.............................................................................. 94
-III-
INTRODUCTION TO THE CAMERA
Aberlink’s CCD camera system offers a non-contact measurement facility on
a CMM, a telecentric lens gives distortion free images on the monitor and
automatic edge detection allows the camera to be used either in manual or
CNC mode.
The lens is adjustable so that the working distance can be varied between
130mm to infinity, at 400mm from the work piece the field of view is a huge
35mm.
A fully controllable 16 LED light ring is built into the camera and a clever
magnetic, kinematic design allows the probe and the camera to be changed in
just seconds.
-1-
1.0 Camera and Probe swapping procedure
1.1 Set up a camera off-set in ‘Probe Status Window’
Firstly create a camera off-set within the ‘Probe Status Window’, this will allow
you to measure parts using the camera.
To do this:1. Click on the ‘Star’ drop down menu and select the camera option
2. If you have tool rack installed select the zero option from the Stylus
Rack area of the window.
3. Click on the ‘Add’ button to enter the camera into the ‘datumed
Positions’ section.
4. Right hand click mouse on the line and select ‘Edit ‘ this will open the
edit window, at this point you need to enter a Z offset, the Z offset is
the distance from the focal point of the camera to the bottom of the quill
(the plate where the camera attaches to the quill) a typical Z offset
could be some thing like –266 mm.
-266
-2-
Z Quill
USB Camera
To attain the Z offset for
the camera, focus the
image on the granite then
measure from the table
(focal point) to the base of
the quill (top of camera)
with a rule. A typical Z
offset would be some
thing like –266 mm.
If you manually change
the focal position to
change the field of view by
using the setting ring on
the camera it would be
necessary re-measure the
Z offset. It is necessary to
do this because the focal
point has changed
To attain the focal point
of the camera move the
camera up and down in
the Z axis until you have
a sharp image in the
camera window.
5. Click ‘OK’ and answer ‘No’ to the next question you should now have
a camera off-set in Probe Status window.
1.2 Changing from Camera to Probe head
To replace the camera with the probe head, close the camera window using
the ‘camera button’ in the top row of icons and open the Probe Status
Window, select the probe off-set you wish to use.
A message box will appear asking you to replace the camera with the probe
head. Before you close the message box replace the camera with the probe
head, when you have done that, click ‘OK’.
-3-
You are now ready to measure with the contact probe.
1.3 Changing from Probe head to the Camera
To replace the probe head with the camera open the Probe Status Window,
select the camera off-set.
A message box will appear asking you to replace probe head with the camera
Follow the prompt, and change devices, the LED’s in the light ring will flash as
the drivers are being loaded, after this a second message box will appear
asking you if you wish to open the camera window click ‘YES’.
-4-
2.0 CAMERA SETTINGS
Aperture adjustment
ring :- this ring sets
the camera aperture it
is nominally set at 2.8
You can slide this ring up and down the lens
body to change the camera
focal point, this increases or decreases the
field of view, this means as you increases the
field of view you can see more of the work
piece in the camera window if you decrease
the field of view you will see less.
This the focal point
fine adjustment ring
use this to fine adjust
the field of view
Fully controllable 16
LED light ring
-5-
3.0 USING THE CAMERA WITH ABERLINK 3D CMM
SOFTWARE
The Aberlink 2D Vision Software has been written to be extremely intuitive,
based around a graphical interface, operating under a Windows operating
platform.
In normal use there are 2 primary windows. Firstly there is the Aberlink Main
Screen, which looks like this:
and then there will be the Camera Image window:
(which may initially be black if no lighting is switched on - see section 3.0)
-6-
Measurements are performed by using the various measuring tools, which are
situated within the Camera Image window. For all measured features a
graphical representation of the feature is then created in the view area of the
Main Screen. Dimensions of size, form, distance between features and
geometric tolerances can all be called up within this view. These functions are
covered in chapter 17 – Bringing Up Dimensions on the Screen.
Typically, for all systems with one monitor, the Camera Image window will be
used over the top of the Main Screen. The Camera Image window can be
used maximised, or to access the Main Screen it can either be minimised, or
when floating it can be adjusted to any convenient size (grab and drag the
bottom, right hand corner of the window), as follows:
Click and drag on blue bar to
re-position Camera Image window.
Click and drag this corner to
re-size Camera Image window.
The Camera Image window can also be closed as with normal Windows
functionality. To open the Camera Image window simply click on the Camera
Icon:
Switch Camera On/Off
-7-
4.0 TAKING MEASUREMENTS USING THE CAMERA IMAGE
4.1
LIGHTING
The camera is supplied complete with two controllable light sources in a ring
light around the Camera.
This consists of 8 white LEDs and 8 Ultra violet LEDs which can be lit in any
contiguous pattern with their intensity, position and number controlled. The 8
white LEDs will typically be used for lighting the top surface of a component
being measured. By changing the direction of lighting from one side or
another the clarity of any 3D edges on a component can be optimised.
The 8 Ultra violet LEDs when used in conjunction with an Aberlink back light
plate can be used to backlight the component.
This will typically be used for silhouetting a component when measuring
around the outside, or any holes or transparent features within the
component.
Note that any light settings used during the inspection of a component will
automatically be recalled if using the Play function to measure further
components of the same type.
You can switch between top lighting (white light) and back lighting (Ultra violet
light) by clicking on the Light Control icon with the right hand mouse button.
You can get more control over the intensity and direction of the light ring by
clicking on the Light Control icon with the left hand mouse button, this brings
up the following light ring control window:
-8-
……………which can be conveniently sized and positioned on the screen, for
example as follows:
To turn on the top light, right click on the ring light graphic below.
The pattern of LEDs lit will be represented by light grey dots. Unlit LEDs will
be shown as dark grey. The number in the top, left hand corner of the window
denotes the percentage power being applied to the LED’s, which is
proportional to their intensity (brightness). To increase the intensity of the
LEDs use the slider bar at the bottom of the window:
-9-
Moving the slider bar to the right increases the intensity of the lit LEDs, and as
the intensity of the LEDs increases, so the colour of the lit LEDs will become
lighter. At 100% intensity they will appear white.
To increase the number of lit LEDs, use the slider bar on the right hand side
of the window:
Moving the slider bar upwards increases the number of LEDs lit, and moving it
downwards decreases the number lit.
To change the position of the lit LEDs left click and hold mouse button on the
ring and drag around the light ring to a new position:
To turn the Light Ring off right click again on the light ring graphic.
-10-
To turn the ultra violet backlight on, right click on the backlight icon at the
bottom, left hand corner of the window.
The number in the top, left hand corner of the backlight graphic denotes the
percentage power being applied to the 8 ultra violet LEDs, which is
proportional to its intensity (brightness). To increase the intensity of the
backlight use the slider bar at the bottom of the window; note this light will be
invisible to the naked eye, but visible as blue light against the Aberlink back
light stage.
Moving the slider bar to the right increases the intensity of the backlight, and
as the intensity of the backlight increases, so the colour of the square at the
middle of the icon will become lighter. At 100% intensity it will appear white.
To turn the backlight off, right click again on the backlight graphic.
The third part of the Light Control window is designed to control a through-thelens light source, which is fitted to some camera systems; (not on the USB
camera)
If you click the OK button, the Light Control window will close, keeping the
light settings previously set.
If you choose the cross in the top right hand corner of the window to close it,
both light sources will be turned off.
-11-
5.0 THE CAMERA IMAGE WINDOW
The camera image window can be brought up by clicking on the camera icon:
The Camera Image window can be maximised, to run full size over the top of
the Aberlink 2D software, minimised when wanting to use the functionality of
the Aberlink Main Screen or made any size in between and positioned
conveniently by dragging the corner of the window, so that the camera image
and Aberlink Main Screen can be used at the same time:
All the measurement tools are available from the Camera Image window and
it is therefore worthwhile taking a few minutes to become familiar with the
buttons available.
18
17
20
19
22
21
24
23
26
25
28
27
30
29
31
32
1
2
3
4
5
6
7
8
9
10
11
12
13
14
15
16
33
34
Line, Circle or Arc Measurements
5
1
Point Measurements
2
Circle Measurements only
6
Peak Point Measurements
3
Line Measurements only
7
Curve Measurement
1
4
Arc Measurements only
8
-12-
One Edge Feature
9
All Edge Points
22
Light Control
10
Thread Measurement
23
Camera Resolution – high / low
11
Screen Ruler
24
Save Image
12
Manual Focus (not used)
25
Edge Detection
13
Auto Focus Point Measurement (not used)
26
Centre Line Detection
14
Auto Focus – Up
27
not used
15
Z axis focus adjust
28
Mouse Point Measurement
16
Auto Focus – Down
29
not used
17
Edge Detection Controls
30
Smart Edge Feature
18
Camera Controls
31
Escape
19
Zoom and Pan
32
Zoom
20
Toggle Video Feed
33
Set Up
21
Show Edge Pixels
34
Re-size Camera Image window
-13-
6.0 BASIC FUNCTIONS – MOVING, FOCUSING, ZOOMING
6.1
Moving in X and Y
You can use the Hand wheels or the joystick to move the cmm in X and Y
direction
6.2
Moving in Z (Focus)
The camera can be moved up and down under motorised control, over a
distance of 125mm (Project X), to provide focusing of the camera.
-14-
To move the camera upwards, click and hold on the bar above the letter ‘Z’.
To move the camera downwards, click and hold below the letter ‘Z’.
The further away from the letter ‘Z’ that you click the faster the camera will
travel, ie. close to the ‘Z’ will be fine adjustment and far away from the ‘Z’ will
be fast travel.
6.2.1 Auto Focus
Clicking on the ‘+’ sign at the top of the Z focus bar will cause the camera to
hunt in an upwards direction to find an optimum focus.
Clicking on the ‘-’ sign at the bottom of the Z focus bar will cause the camera
to hunt in a downwards direction to find an optimum focus.
Note that the ‘Esc’ button can be pressed at any time to stop the auto focus
process.
6.3
Zooming in and out
There are 2 controls for zooming in and out, as follows:
Firstly the slider bar above will zoom in and out, centred on the middle of the
field of view.
The second tool that can be used for zooming is the Zoom and Pan function:
When this button is pressed, a left mouse click on the image will zoom in,
centred about the position selected.
Similarly a right mouse click will zoom out, centred about the position
selected.
You can zoom in or out as many times as you like.
-15-
Please note that the Zoom and Pan button is latching. Whilst pressed, no
measurements can be performed on the image, (as the mouse buttons now
perform the zoom and pan functions). Therefore the button must be pressed
again to turn this function off before any measurements can be performed.
6.3.1 Panning
Another function of this button is to allow panning around the image. The field
of view of the camera is approximately 16mm across diagonal corners. If you
are zoomed in, so that only part of the field of view is visible in the image
window, it is possible to pan around the full field of view by left clicking and
dragging the image.
This function allows you to quickly view the full field of view, without the need
to move the X and Y adjustment wheels.
Please note that the Zoom and Pan button is latching. Whilst pressed, no
measurements can be performed on the image, (as the mouse buttons now
perform the zoom and pan functions). Therefore the button must be pressed
again to turn this function off before any measurements can be performed.
-16-
7.0 THE MEASUREMENT TYPE BUTTONS
Before starting to perform measurements, select the Measurement Type
required by clicking the appropriate button, as follows:
7.1 Edge Detection
When this button is selected the software will determine a single edge
between different colours, or shades of colour, on the image within the area
that user defines by their measurement selection box.
This is the usual format used when measuring the edge of features on a
component.
7.2 Centre Line Detection
This button is used for automatically determining the centre line between two
edges on the image that are within the area defined by the user in the
measurement selection box.
A typical use for this function would be when measuring very thin features, for
example the lines on a graticule. It may be very difficult for the user to select
one side of the line or the other, simply because it is very thin. Therefore
using this tool they can drag the measurement selection box to cover both
sides of the line, and the software will automatically produce the centre line
between the two edges.
7.3 Mouse Points
It is possible to perform measurements without using the software’s automatic
edge detection tools. If the Mouse Points button is pressed the measurements
performed will use points selected by the user by clicking with the mouse on
the image.
This may be useful if the component being measured cannot be lit in such a
way as to produce well-defined edges.
-17-
7.4 Smart Edge
This function allows for a combination of automatic edge detection, but only at
specific positions as defined by the user. Similar to the Mouse Points function
above, when using this function the measurements performed will only use
points defined by the user when clicking on the image. However, rather than
carefully having to click on the exact position where they want the point taken,
this function fires a tool to detect an edge point in the area around where the
image was selected.
This will allow faster measurement, as the user only has to select
approximately where the point is to be taken. It does, however, still require a
reasonably good visible edge for the software to detect.
The area over which the tool searches for the edge point can be defined in the
Detection Tools window.
7.5 Cross Hair Points
It is possible to perform measurements without using the software’s automatic
edge detection tools. If the ‘cross hair’ button is pressed the measurements
performed will use points selected by the user.
To do this align the cross hairs over the feature you wish to measure, to
record the position of the point under the cross hairs simply click the left hand
mouse button.
This may be useful if the component being measured cannot be lit in such a
way as to produce well-defined edges.
7.5.1 Using the cross hairs as a protractor to measure angles.
Clicking on the edge
with the R/H mouse
button aligns the cross
hairs to the edge
Read the angle of
the cross hairs here.
Clicking in the centre
with the R/H mouse
button re-sets the cross
hairs to 90 Deg.
It is also possible to use the cross hairs as a protractor to measure angles.
-18-
To do this click on the screen with the right hand mouse button and the cross
hair will turn to align them selves with the point you just clicked the angle of
the cross hair is show in the top right hand side of the camera window
Dashed lines
If you right hand click on the cross hair icon you can choose between dashed
or solid cross hairs.
-19-
8.0 THE MEASUREMENT FUNCTIONS
The Measurement Functions described below must be used in conjunction with a
Measurement Type button, as described in the previous chapter.
Not all of the Measurement Type buttons are relevant to all of the Measurement
Functions, so the table below has been compiled to show compatibility:
Edge
Detection
Circles, Lines or Arcs
Circle Measure
Line Measure
Arc Measure
Point Measure
Peak Point Measure
Curve Measure
One Edge Feature
All Edge Points
Thread Measure
-20-
Centre Line
Detection
Mouse
Points
Smart
Edge
8.1 CIRCLES, LINES OR ARCS (auto select)
This function allows the measurement of circles, lines or arcs, which will be
determined automatically by the software. The user is therefore able to
measure all three types of shape in sequence without the requirement to
select a different Measurement Function button when changing from one type
of measurement to another.
8.1.1 Measuring using Edge Detection
Make sure the Edge Detection measurement type button is selected.
8.1.1.1 Measuring Lines (auto selected)
To measure a Line on the image click on the edge at one end of where you
require the measurements to be taken. A line will now become attached to the
image at the position selected. Now click on the edge at it other extreme,
which will fix the other end of the line. Now as you move the mouse away
from the line a selection box will be created, as shown below.
When you have created the box to the desired size, (enclosing the entire
edge, but only the edge being measured), click again. This will automatically
fire the Line Tool and any edge within the selection box will be measured.
Momentarily the measured points will be displayed as crosses on the image.
-21-
A Line Measure window will then appear, showing the measured points
together with the best fit line through the points:
The number of points taken is shown in the top, left hand corner. The i,j,and k
values relate to the direction vector for the line and L is its length. The length
is shown in grey because it simply shows distance between the two points
selected on the image. It does not relate to any specific size on the
component.
The graphical picture of the line shows the measured points represented as
red circles. The blue line is the best-fit line through these points. The
straightness value for the line is shown underneath the graphic view, together
with a slider bar for changing the scale at which the errors are displayed in the
graphical representation.
-22-
Clicking ‘Retake’ will erase the last measured point
Clicking ‘Clear’ will erase all the measured points, but leave the Line Measure
window open.
Clicking ‘Delete will erase all the measured points, and close the Line
Measure window. (This is irreversible).
Clicking ‘OK’ will accept the measurements. The Line Measure window will be
closed and a representation of the line will be drawn within the Main Screen.
Clicking ‘Set Ref’ before selecting OK will cause the representation of the line
drawn in the Main Screen to be aligned to the closest axis, either X or Y.
It is possible to recall the measured points shown on the grabbed image by
using the Show Edge Pixels button – see chapter 12
It is also possible to make the points appear on the image and adjust the
Edge Detection tools prior to taking the measurement, by using the Edge
Detection Controls – see chapter 9
For more information about the Measurement windows, and what functionality
is available within the windows, see chapter 20, The Measurement Windows.
8.1.1.2 Measuring Arcs (auto selected)
To measure an Arc on the image click on the edge at one end of where you
require the measurements to be taken. A line will now become attached to the
image at the position selected. Now click on the edge somewhere in the
middle of the arc that you are measuring. The line will attach itself to this point
and if you move the mouse away in a direction perpendicular to the line, a
rectangular selection box will be created, in exactly the same way as though a
line were being measured.
-23-
However, if you now move the mouse in a direction around the arc, the
software will automatically realise that an arc is being measured and the line
will now snap to the form of an arc, allowing the user to click on the image a
third time at the end of where they want the arc to be measured.
Now as you move the mouse away from the arc drawn, an arc shaped
selection box will be created:
When you have created the selection box of the desired size, (enclosing the
entire edge, but only the edge being measured), click again. This will
automatically fire the Arc Tool and any edge within the selection box will be
measured.
Momentarily the measured points will be displayed as crosses on the image:
-24-
A Circle Measure window will then appear, showing the measured points
together with the best fit circle through the points:
Note that arcs are simply sections of a circle and will be represented on a
Circle Measure window.
The number of points taken is shown in the top, left hand corner. The X,Y and
Z values relate to the centre point of the circle (arc), and D is its diameter.
-25-
The graphical picture of the circle shows the measured points represented as
small red circles. The larger blue circle is the best-fit circle through these
points. The roundness value for the arc is shown underneath the graphic
view, together with a slider bar for changing the scale at which the errors are
displayed in the graphical representation.
Clicking ‘Retake’ will erase the last measured point
Clicking ‘Clear’ will erase all the measured points, but leave the Circle
Measure window open.
Clicking ‘Delete will erase all the measured points, and close the Circle
Measure window. (This is irreversible).
Clicking ‘OK’ will accept the measurements. The Circle Measure window will
be closed and a representation of the arc will be drawn within the Main
Screen. Note that if an arc covers more than 180o then it will be represented
as a full circle on the Main Screen.
Clicking ‘Set Ref’ before selecting OK will cause the centre of the arc / circle
to be set to X=0 and Y=0.
It is possible to recall the measured points shown on the grabbed image by
using the Show Edge Pixels function – see chapter 12
It is also possible to make the points appear on the image and adjust the
Edge Detection tools prior to taking the measurement, by using the Edge
Detection Controls – see chapter 9.
For more information about the Measurement windows, and what functionality
is available within the windows, see chapter 20, The Measurement Windows.
8.1.1.3 Measuring Circles (auto selected)
Circles are measured in exactly the same way as arcs, except that if after the
second click you now move the mouse in a direction around the circle, that
covers more than 180o of the circle, the software will automatically realise that
a circle being measured and the line will now snap to the form of a circle,
allowing the user to click on the image a third time in order to define the circle
to be measured.
-26-
Now as you move the mouse away from the circle drawn, an circular selection
box will be created:
When you have created the selection box of the desired size, (enclosing the
entire edge, but only the edge being measured), click again. This will
automatically fire the Circle Tool and any edge within the selection box will be
measured.
Momentarily the measured points will be displayed as crosses on the image:
-27-
A Circle Measure window will then appear, showing the measured points
together with the best fit circle through the points:
-28-
The number of points taken is shown in the top, left hand corner. The X,Y and
Z values relate to the centre point of the circle, and D is its diameter.
The graphical picture of the circle shows the measured points represented as
small red circles. The larger blue circle is the best-fit circle through these
points. The roundness value for the circle is shown underneath the graphic
view, together with a slider bar for changing the scale at which the errors are
displayed in the graphical representation.
Clicking ‘Retake’ will erase the last measured point
Clicking ‘Clear’ will erase all the measured points, but leave the Circle
Measure window open.
Clicking ‘Delete will erase all the measured points, and close the Circle
Measure window. (This is irreversible).
Clicking ‘OK’ will accept the measurements. The Circle Measure window will
be closed and a representation of the arc will be drawn within the Main
Screen.
Clicking ‘Set Ref’ before selecting OK will cause the centre of the circle to be
set to X=0 and Y=0.
It is possible to recall the measured points shown on the grabbed image by
using the Show Edge Pixels function – see chapter 12
It is also possible to make the points appear on the image prior to firing the
measurement tool, and then adjust the Edge Detection tools prior to taking the
measurement, by using the Edge Detection Controls – see chapter 9.
For more information about the Measurement windows, and what functionality
is available within the windows, see chapter 20, The Measurement Windows.
8.1.2 Measuring using Centre Line Detection
This measurement type is used when measuring thin features, where it may
be difficult to create a selection box that measures only one side of the
feature, such as a thin line on a graticule. Therefore, when using this feature
create the measurement selection box so that it covers both sides of the
feature that you are measuring.
-29-
Now when you fire the measurement tool both edges will be measured and
the centre line between the edges automatically created.
Momentarily the measured points will be displayed as crosses on the image:
And then a Measurement window will open exactly as before.
Centre Line measurements for Arcs and Circles may be done in exactly the
same way.
-30-
8.2
CIRCLES
8.2.1 Measuring Circles using Edge Detection
Make sure the Edge Detection measurement type button is selected.
When the Circle Measure function is selected, the software will allow the
measurement of circles by clicking on the image in 3 positions and then
defining a measurement selection box, exactly as when using the auto select
function described in section 8.1.1.3 above.
However, when using this function the user can only measure circles, and the
software will always require the image to be selected in three positions and a
circular selection box created.
Arcs and Lines cannot be measured using this function.
8.2.2 Measuring Circles using Centre Line Detection
The centre line between the inside diameter and outside diameter of a circle
can be measured automatically using this function, in exactly the same way
as described in section 8.1.2 above.
8.2.3 Measuring Circles using Mouse Points
The Mouse Point function can only be used when using the Circle, Line, Arc
or Point Measure functions.
When this button is pressed automatic edge detection is no longer used.
The user must click on the image at exactly the position that they wish to take
a point.
(As of version 30.10.20 the tip of the mouse selection arrow is used to define
the exact position)
When using the Circle Measure function, a Circle Measure window will
automatically open, showing that one point has been selected:
-31-
Click again on the image at different positions around the circle to take further
points. After the third point the software is able to calculate the required circle,
and a graphical representation will be shown as follows:
The X,Y and Z values relate to the centre point of the circle, and D is its
diameter. The graphical picture of the circle shows the measured points
represented as small red circles. The larger blue circle is the best-fit circle
through these points.
However, the software can always construct a perfect circle through three
measurement points, and therefore at this stage the roundness value for the
circle will be blank.
-32-
You can add as many points as you like to the circle by clicking on the image,
but as soon as there are more than three points, the roundness value of the
circle will be shown underneath the graphic view:
The slider bar adjacent to the roundness value is used for changing the scale at which the errors
are displayed in the graphical representation.
Clicking ‘Retake’ will erase the last measured point
Clicking ‘Clear’ will erase all the measured points, but leave the Circle
Measure window open.
Clicking ‘Delete will erase all the measured points, and close the Circle
Measure window. (This is irreversible).
Clicking ‘OK’ will accept the measurements. The Circle Measure window will
be closed and a representation of the arc will be drawn within the Main
Screen.
Clicking ‘Set Ref’ before selecting OK will cause the centre of the circle to be
set to X=0 and Y=0.
Having clicked OK, it is possible to recall the measured points shown on the
grabbed image by using the Show Edge Pixels function – see chapter 12.
-33-
8.2.4 Measuring Circles using the Smart Edge function
The Smart Edge function can only be used when using the Circle, Line, Arc or
Point Measure functions.
When this button is pressed, the feature selected will be measured by using
discreet points selected by the user (similar to Mouse Points, described
above). However, when using this function, the operator does not have to
select the points exactly. Simply click approximately in the area where you
would like a point to be taken. The software will then scan the adjacent area
to find an edge, and then take a point on that edge. Momentarily five crosses
will flash on the screen, as follows:
The two yellow and two green crosses define the area searched for an edge.
The cross in the middle of these represents the point taken on the edge.
The size of the area scanned (within the crosses) can be set in the Detection
Tools Window – see chapter 9.4, Select Size.
When using the Circle Measure function, a Circle Measure window will
automatically open, exactly as when using the Mouse Points function. Do not
OK the Circle Measure window until a minimum of three points have been
taken, as above.
-34-
8.3
LINES
8.3.1 Measuring Lines using Edge Detection
Make sure the Edge Detection measurement type button is selected.
When the Line Measure function is selected, the software will allow the
measurement of lines by clicking on the image in 2 positions and then defining
a measurement selection box, exactly as when using the auto select function
described in section 8.1.1.1 above.
However, when using this function the user can only measure lines, and the
software will always require the image to be selected in two positions and a
rectangular selection box created.
Circles and Arcs cannot be measured using this function.
8.3.2 Measuring Lines using Centre Line Detection
The centre line between the left and right hand edges of a line can be
measured automatically using this function, in exactly the same way as
described in section 8.1.2 above.
8.3.3 Measuring Lines using Mouse Points
The Mouse Point function can only be used when using the Circle, Line, Arc
or Point Measure functions.
When this button is pressed automatic edge detection is no longer used.
The user must click on the image at exactly the position that they wish to take
a point in exactly the same way as described when measuring a circle in
section 8.2.3 above.
8.3.4 Measuring Lines using the Smart Edge function
The Smart Edge function can only be used when using the Circle, Line, Arc or
Point Measure functions.
When this button is pressed, the feature selected will be measured by using
discreet points selected by the user (similar to Mouse Points, described
above). However, when using this function, the operator does not have to
-35-
select the points exactly. Simply click approximately in the area where you
would like a point to be taken. The software will then scan the adjacent area
to find an edge, and then take a point on that edge.
This function is exactly as has been described when measuring circles in
section 8.2.4 above.
-36-
8.4
ARCS
8.4.1 Measuring Arcs using Edge Detection
Make sure the Edge Detection measurement type button is selected.
When the Arc Measure function is selected, the software will allow the
measurement of arcs by clicking on the image in 3 positions and then defining
a measurement selection box, exactly as when using the auto select function
described in section 8.1.1.2 above.
However, when using this function the user can only measure arcs, and the
software will always require the image to be selected in three positions and a
arc shaped selection box created.
Circles and Lines cannot be measured using this function.
8.4.2 Measuring Arcs using Centre Line Detection
The centre line between the inside diameter and outside diameter of a section
of a circle can be measured automatically using this function, in exactly the
same way as described in section 8.1.2 above.
8.4.3 Measuring Arcs using Mouse Points
The Mouse Point function can only be used when using the Circle, Line, Arc
or Point Measure functions.
When this button is pressed automatic edge detection is no longer used.
The user must click on the image at exactly the position that they wish to take
a point in exactly the same way as described when measuring a circle in
section 8.2.3 above.
8.4.4 Measuring Arcs using the Smart Edge function
The Smart Edge function can only be used when using the Circle, Line, Arc or
Point Measure functions.
When this button is pressed, the feature selected will be measured by using
discreet points selected by the user (similar to Mouse Points, described
above). However, when using this function, the operator does not have to
-37-
select the points exactly. Simply click approximately in the area where you
would like a point to be taken. The software will then scan the adjacent area
to find an edge, and then take a point on that edge.
This function is exactly as has been described when measuring circles in
section 8.2.4 above.
-38-
8.5
POINTS
This function allows the user to define a line on the image, and the software
will take a measurement point at the position where this line crosses an edge
on the image.
8.5.1 Measuring Points using Edge Detection
Make sure the Edge Detection measurement type button is selected.
To measure a specific Point on the image click on the image at the position
where you require the measurements to be taken. A line will now become
attached to the image at the position selected that will extend in both
directions away from the point as the cursor is moved. Move the cursor so
that the line cuts the edge of the image at the position that the Point is to be
measured. Ideally the line should be at approximately 90o to the edge, and its
length should cut one edge only:
When you have created the line of the required size and position, (cutting the
edge at the position desired), click again. This will automatically fire the Point
Tool and the point where the line cuts the edge will be measured. Momentarily
the measured point will be displayed as a cross on the image:
-39-
A Point Measure window will then appear, showing the measured point:
Clicking ‘Retake’ or ‘Clear’ will erase the measured point.
Clicking ‘Delete’ will erase the measured point, and close the Point Measure
window. (This is irreversible).
-40-
Clicking ‘OK’ will accept the measurement. The Point Measure window will be
closed and a representation of the point will be drawn as a blue dot on the
Main Screen.
Clicking ‘Set Ref’ before selecting OK will cause the Point to be set as X=0
Y=0.
It is possible to recall the measured point shown on the grabbed image by
using the Show Edge Pixels function – see chapter 12.
It is also possible to make the point appear on the image and adjust the Edge
Detection tools prior to taking the measurement, by using the Edge Detection
Controls – see chapter 9.
For more information about the Measurement windows, and what functionality
is available within the windows, see chapter 20, The Measurement Windows.
8.5.2 Measuring Points using Centre Line Detection
The centre point between two edges can be measured automatically using
this function, in exactly the same way as described in section 8.1.2 above.
8.5.3 Measuring Points using Mouse Points
When this button is pressed automatic edge detection is no longer used.
The user must click on the image at exactly the position that they wish to take
a point in exactly the same way as described when measuring a circle in
section 8.2.3 above.
8.5.4 Measuring Points using the Smart Edge function
The Smart Edge function can only be used when using the Circle, Line, Arc or
Point Measure functions.
When this button is pressed, Points can be measured by clicking directly on
the image (similar to Mouse Points, described above). However, when using
this function, the operator does not have to select the points exactly. Simply
click approximately in the area where you would like a point to be taken. The
software will then scan the adjacent area to find an edge, and then take a
point on that edge.
This function is exactly as has been described when measuring circles in
section 8.2.4 above.
-41-
8.6
PEAK POINTS
This function allows the user to define a box on the image, and the software
will automatically determine the nearest or furthest point on any edge within
the box, perpendicular to the orientation of the box. This may be useful, for
instance, for determining the highest point on a gear tooth.
8.6.1 Measuring Peak Points using Edge Detection
Make sure the Edge Detection measurement type button is selected.
To measure a Peak Point on the image click twice on the image to define a
line perpendicular to where the peak point is to be measured. Now move the
cursor so that it creates a box encompassing the Peak Point to be measured:
Now click again. This will automatically fire the Peak Point Tool and the
highest point on the edge, perpendicular to the selection box, will be
measured. Momentarily the measured point will be displayed as a cross on
the image:
-42-
A Point Measure window will then appear, showing the measured point in
exactly the same way as for an ordinary point, as described in section 8.5.1
above.
8.6.2 Measuring Peak Points using Centre Line Detection
The centre Peak Point (between two edges) can be measured automatically
using this function, in exactly the same way as described in section 8.1.2
above.
The Mouse Point and Smart Edge functions cannot be used for automatically
determining a Peak Point.
-43-
8.7
THE CURVE MEASURE FUNCTION
This function allows the user to automatically trace around an edge, taking a
series of points on the edge of the feature.
This function allows complex shapes to be measured.
If the edge being measured is larger than the field of view of the camera, the
user will be guided to move the camera around to the required position, hence
large shapes can be measured.
The density of points taken can be defined by adjusting the Step Size in the
Edge Detection Tools. The number selected relates to pixels per point.
8.7.1 Measuring a Curve using Edge Detection
Make sure the Edge Detection measurement type button is selected.
To measure a Curve around an edge, click on the image at the position where
you want to start the scan. A line will now become attached to the image at
the position selected that will extend in both directions away from the point as
the cursor is moved. Move the cursor so that the line cuts the edge of the
image at the position required. Ideally the line should be at approximately 90o
to the edge, and its length should cut one edge only. When you have created
the line of the required size and position, click again. This will define the start
position for the Curve:
Now click on the image to one side of the start position. This click will define
the direction that the software will trace around the edge.
-44-
Click here, to define scanning
clockwise around the shape.
(Alternatively clicking to the
left of the start point would
define scanning anticlockwise around the shape.)
Finally click again on the image at the position at which you wish to finish the
scan.
Click here, to define the end
of the scan – the Curve will
now trace around the entire
outside of the shape in a
clockwise direction from
the start position until it
h this point.
The Curve Measure tool will then be automatically fired, and the points on the
edge will temporarily appear as the edge is traced around:
-45-
When the Curve Measure is completed the Curve Measure Window will
automatically appear:
The number of points taken is shown in the top, left hand corner. The L value
shows the length between the first and last scanned points and D is the length
divided by 3.141 (ie. would be the diameter for a circular trace)
-46-
The graphical picture of the Curve shows the measured points represented as
small green circles.
Clicking ‘Retake’ will erase the last measured point
Clicking ‘Clear’ will erase all the measured points, but leave the Curve
Measure window open.
Clicking ‘Delete will erase all the measured points, and close the Curve
Measure window. (This is irreversible).
Clicking ‘OK’ will accept the measurements. The Curve Measure window will
be closed and a representation of the curve will be drawn within the Main
Screen, represented as a series of points. Dimensions can be taken directly
between the points by simply clicking on them. Circles and lines can also be
constructed through these points. Also DXF Files can be imported and the
measured points ‘best fitted’ to the DXF file, with the error of each point
shown graphically – see chapter 32, DXF Files.
Clicking ‘Set Ref’ before selecting OK has no relevance for a Curve Measure.
It is possible to recall the measured points shown on the grabbed image by
using the Show Edge Pixels function – see chapter 12.
It is also possible to make the points appear on the image prior to firing the
measurement tool, and then adjust the Edge Detection tools prior to taking the
measurement, by using the Edge Detection controls – see chapter 9.
Note that Curves do not have to be around a complete shape – they will
simply trace between the start and end defined by the user.
For more information about the Measurement windows, and what functionality
is available within the windows - see chapter 20, The Measurement Windows.
8.7.1.1 Measuring a Curve that is larger than the Field of View of the Camera
If the edge being measured is larger than the field of view of the camera, the
user will be automatically guided to move the camera around the shape as
required.
Define the Start, Direction and End Point for the curve, as described above:
-47-
3. Click here to define
end of scan
1. Create line cutting the edge to
define the start position
2. Click here to define
direction to scan
The Curve Measure tool will then be automatically fired, and the points on the
edge will temporarily appear as the edge is traced until it reaches the edge of
the field of view.
At which point the Camera Image window will be minimised and the Main
Screen will be shown as follows:
-48-
The Field of View for the camera is shown as a pink box with pink crosshairs
showing its centre.
A pink square represents the target to where the camera must be moved in
order for it to measure the first feature. The XY display also shows how far the
camera must be moved in each direction to get to the centre of the target.
(Note that the zoom functions may have to be used in order to see the Field of
View and Target boxes, as shown above)
Move the camera using the hand wheels so that the centre of the crosshairs is
within the pink target box.
When the crosshairs are within the target area, the rectangle representing the
Field of View (and the crosshairs), and the XY readouts, will temporarily turn
green. If the operator pauses the camera within the target area, they will then
change to red in colour, the target square will disappear and the readouts will
change to say ‘STOP’ and ‘ARRESTO’. The Camera Image window will then
automatically reappear and the next part of the Curve will be measured.
Continue in this manner until the Curve gets back to the end point previously
defined, at which point the Curve Measure Window will automatically appear,
as described above:
-49-
8.7.2 Measuring a Curve using Centre Line Detection
The Curve Measure function can be used to scan around the centre line
between two edges by using this function, in exactly the same way as
described in section 8.1.2 above.
The Mouse Point and Smart Edge functions cannot be used for measuring a
Curve.
-50-
8.8
THE ONE EDGE FEATURE
The One Edge Feature can be used to measure a circle, line or arc as a
single feature using just one click on the image.
The software will scan the edge within an area adjacent to the mouse click in
order to determine what shape is being measured, and then extend the scan
in both directions either until it reaches the edge of the field of view of the
camera, or blends in to another shape.
8.8.1 Measuring with the One Edge Feature using Edge Detection
Make sure the Edge Detection measurement type button is selected.
Click on the image of the edge that you wish to measure. The software will
then scan the adjacent area to find an edge and determine what type of a
shape it is. Momentarily two yellow and two green crosses will appear on the
image, showing the area being scanned.
The edge will then be measured in both directions away from the initial
scanned area either until it reaches the edge of the field of view, or else the
feature blends into a different feature.
In the example below the image was clicked on the straight edge on the left
hand side of the image:
The two green and two yellow crosses determine the area over which the edge is
scanned adjacent to the initial mouse click. (The size of this area is configurable
in Detection Controls window, using the Select Size slider – see chapter 9.4).
The software will determine what shape is being measured from the scan within
the area defined by the crosses. It will then continue the scan for that shape in
both directions.
-51-
In the example above, the edge within the initial area was determined to be a
line. Continuing downwards from this area the scan continued to fit a line all the
way to the edge of the image. Continuing upwards, the scan continued until the
line started to blend in with radius at the top.
When the scan of the line is complete, the Line Measure window will
automatically appear:
If happy with the results click OK to accept the Line measurement.
Now click once on the arc at the top of the image:
Once again, two green and two yellow crosses will be displayed showing the
area over which the edge is scanned adjacent to the initial mouse click. The
-52-
software will recognise the shape to be an arc and continue its scan to the left
until the arc blends with the straight line previously measured, and to the right
and it blends into the next radius.
Again when it finishes its scan the Measurement window will automatically
open:
Once more click OK to accept the measurement.
It is possible that a piece of dirt or a discontinuity in the shape will bring the
scan of the shape to a premature end. For example, if the hole is now
selected, as follows:
Here you can see that the whole circle was not scanned as it was disrupted
by the uneven surface. When the Measurement window pops up it will look
like this:
-53-
Now to fill in the missing part of the scan simply leave the Measurement
Window open and click on the image again in the area that has been missed
out. Any new points scanned will now be added to the previous points:
and the Measurement Window will now look like this:
-54-
Again click OK to accept the measurement.
Note – that if the discontinuity was within the original area
scanned, then the software would take into account the fit of the
measurement points within that area and apply it to the whole
scan. Hence, if you noticed the discontinuity before you started,
then clicking near to it would allow the whole circle to measured
with just one scan.
Repeat the process for the second arc, and therefore using the One Edge
Feature, the image shown above can be measured with just four mouse
clicks:
-55-
8.8.1.1 If the One Edge Feature does not recognise the correct shape
Should the software not recognise the correct shape when using the One Edge
feature, then try changing the size of the initial area scanned by adjusting the
‘Select Size’ slider within the Detection Tools window.
For Example, if the initial scanned area is small, then it will be possible to confuse
a large arc with a straight line.
The general principle is to use the largest possible selection area that will grab
only the edge required.
8.8.2 Measuring with the One Edge Feature using Centre Line Detection
The One Edge feature can be used to detect the centre line between edges,
in exactly the same way as described in section 8.8.1 above.
The Mouse Point and Smart Edge functions are not applicable when
measuring using the One Edge function.
-56-
8.9
THE ALL EDGE POINTS FUNCTION
As with the Curve function, described in section 8.7 above, the All Edge Points
feature will trace around edges within the field of view. However, rather than
having to define a start, direction and end on one specific edge, this function
will grab all edges within the field of view with just a single mouse click:
The All Edge Points feature works particularly well when the edges being
measured are clearly defined.
The density of points taken can be defined by adjusting the Step Size in the
Edge Detection Tools. The number selected relates to pixels per point.
8.9.1 Measuring All Edge Points using Edge Detection
Make sure the Edge Detection measurement type button is selected.
Position the camera so that the edges required are within the field of view.
Note that when using this function all edges within the field of view will be
measured even if the camera image window is zoomed in so that the whole
field of view is not visible on the monitor.
Now click once anywhere on the image.
The Curve Measure tool will then be automatically fired, and the points on the
edge will temporarily appear as the edge is traced around. A Curve
Measurement window will then open as follows:
-57-
If you then wish to add more edge grabs into the same unit, simply move the
image to the next position required:
and click once on the image again:
-58-
and continue as many times as required:
The number of points taken is shown in the top, left hand corner. Note, on this inspection 2,834
points have been taken.
-59-
The graphical picture of the Edges shows the measured points represented
as small green circles.
Clicking ‘Retake’ will erase the last measured point
Clicking ‘Clear’ will erase all the measured points, but leave the Curve
Measure window open.
Clicking ‘Delete will erase all the measured points, and close the Curve
Measure window. This is irreversible.
Clicking ‘OK’ will accept the measurements. The Curve Measure window will be
closed and a representation of the measured edges will be drawn within the Main
Screen, represented as a series of points. Dimensions can be taken directly
between the points by simply clicking on them. Circles and lines can also be
constructed through these points –see chapter 21, Constructing Features.
Note that DXF Files can also be imported and the measured points ‘best
fitted’ to the DXF file, with the error of each point shown graphically – see
chapter 32, DXF Files.
Clicking ‘Set Ref’ before selecting OK has no relevance for a Curve Measure.
For more information about the Measurement windows, and what functionality
is available within the windows – see chapter 20, The Measurement Windows.
-60-
8.9.1.1 Erasing unwanted Measurement Points
You will see that there were a few ‘stray’ points on the measurements taken
above. These can be erased as follows:
1) Within the graphical view in the Measurement window, right click on an
individual point and select ‘Erase’ from the drop down menu.
2) Right click in the graphical view in the Measurement window and select
‘Erase all in View’. Then drag a box enclosing any points that need to
be deleted as follows:
The following window will then appear giving the opportunity to abort the
erasing of selected points:
Note that right clicking in the graphical view and selecting ‘Expand’ will make
the graphical view fill the whole screen. This may make it simpler to select the
desired points:
-61-
Right click and select ‘Shrink’ to return to the normal view of the Measurement
window.
8.9.2 Measuring All Edge Points using Centre Line Detection
The All Edge Points function can be used to detect the centre line between
edges by using this function, in exactly the same way as described in section
8.9.1 above.
The Mouse Point and Smart Edge functions are not applicable when
measuring All Edge Points.
-62-
8.10
THE THREAD MEASURE FUNCTION
The Thread Measure function will grab the edge of any threads defined within
a box selected on the image, and analyse the edges to report the angle of the
thread, the radii and the pitch between the threads.
The Thread Measure function is only applicable when using Edge Detection.
Make sure the Edge Detection measurement type button is selected.
Position the camera so that a minimum of three threads is visible within the
Camera Image window. Usually the best definition of the edge of the threads
will be achieved by using the backlight to obtain a silhouette:
Now drag a box to enclose the threads to be measured:
-63-
The Thread Measure tool will then be automatically fired, and the points on
the edge of the thread appear as they are traced around. A results window will
then open as follows:
The graph at the top of the Thread Form window represents the pitch of the
threads measured. The top value is the largest measured value, the bottom
value is the smallest measured value, and the middle value represents the
mean value for all the threads measured.
The lead, trail and total angle of the thread are also reported.
As of version 30.10.51 these measurements cannot be printed out in the form
of an inspection report, however, when you click OK on the Thread Form
window, a Line Measurement window will automatically open, depicting the
pitch line for the thread.
-64-
Clicking OK will accept these measurements and a representation of the line
will be drawn in the graphics area of the Main Screen.
Hence by repeating the measurement on the other side of the thread will
allow the effective diameter of the thread to be measured:
-65-
8.11
THE SCREEN RULER FUNCTION
The Screen Ruler function is a quick tool for measuring the distance between
two clicks made on the Camera Image.
Measurements can only be made between two points within the field of view
of the camera
For example, if the user wanted to do a quick measurement across the
diagonals of the square shown in the image below, they must simply click on
the image accordingly.
…..to here
(click 2)
Distance required
from here…. (click 1)
This will bring up the measurement results as follows:
-66-
The measurements reported are the X distance, the Y distance, and the
distance in 2-dimensions (XY).
These reults cannot be printed out in the form of an inspection report – they
are a quick check only.
-67-
9.0 EDGE DETECTION CONTROLS
The (Edge) Detection Controls allow the user to modify the default values
used for automatically detecting edges. This can be done prior to taking
measurements, so the user can see the effect of changing the tool values has
on the measurement points before accepting the points.
Clicking on the detection controls button will open the following window:
Whilst this window is open you can continue to take measurements in the
normal way, however, the measurement points will remain flashing on the
screen:
-68-
It is then possible to adjust the Detection Tools and see on the screen what
effect this has on the measurement points, as follows:
When you are happy with the measurement points shown on the screen,
simply click on the ‘Measure’ button to fire whichever measurement type tool
is selected.
9.1 Averaging Side and Averaging F/B
When automatically detecting an edge the software investigates the intensity
of light at each pixel within the range selected. A typical graph may look as
follows:
By averaging the intensity of adjacent pixels this graph could be smoothed as
follows:
-69-
In cases where the edge of an image is not clearly defined, increasing the
averaging effect may improve the ability to determine the position of the edge.
In general, if you have a good quality edge or are trying to measure a tight
radius, then the averaging should be kept low. For poor quality edges or if the
edge is quite straight, then higher averaging may help.
The software provides 2 slider bars to adjust the averaging effect. Averaging
Side will adjust it in a side-to-side direction (left to right across the screen),
and Averaging F/B will adjust it in a forwards and backwards direction (up and
down the screen).
9.2 Step Size
The Step Size will affect the number of points taken for a measurement. The
number shown relates to the number of camera pixels between each point,
hence the smaller the number, the more measurement points will be taken.
One measurement point
taken every 6 pixels
One measurement point
taken every 39 pixels
-70-
9.3 Edge Percent
In the Intensity v Pixel Position graphs shown above, you can see that,
especially when averaging is applied, that the step between dark and light is
represented by a sloping line. The Edge Percentage function determines at
what percentage along this line that the measurement point is actually taken.
For Example, 50% would mean that the point is taken exactly half way along
the line.
As you adjust the Edge Percentage tool you will see the points move on the
screen:
Edge Percent = 3
Edge Percent = 100
Edge Percent = 50
-71-
9.4 Select Size
The Select Size will define the area selected either when using the Smart
Edge measurement type, or the One Edge measurement function.
The bigger the number selected, the bigger the search area will be.
Select Size = 20
Select Size = 130
When using the Smart Edge measurement type this defines how close the
user has to click to an edge on the image in order for the software to
automatically take a point.
The Select Size is quite an important tool when using the One Edge
measurement function. Using this function, the software analyses the edge
being measured within the selected area, and therefore it is possible if the
area is too small to mistake a large arc for a straight line. Increasing the size
of the Selection Area will help the software determine which type of feature is
being measured.
-72-
9.5 Thread Flank %
This setting is relevant when using the Thread Measure tool. The Thread
Flank percentage defines the straight part of the thread that is used to
determine the flank angle:
9.6 Min Contrast
The Min Contrast setting is only relevant when using the Play Function to
measure repeat components in semi-automatic format, see chapter 30.
When doing repeat measurements on components, the contrast required for
the software to detect an edge will be this percentage of the contrast achieved
when the program was originally created.
9.7 Colours – Edge Points and Measurement Tools
The colour of both the measurement points and the measurement tools can be
chosen to suit the user and component being measured. Clicking on the
appropriate ‘Set’ button will bring up a colour palette allowing the user to
select their desired colour.
Having made adjustments to the Edge Detection tools, when you are happy
with the measurement points shown on the screen, simply click on the
‘Measure’ button to fire whichever measurement type tool is selected.
The OK button will close the Set Up window.
-73-
9.8 Focus Boxes
The focus section of the camera set up window is used to set up and adjust
the auto focus function.
Image Box 1 is used to set the course feed & range.
Image Box 2 is used to set the fine feed & range.
Direction :- ?
Traverse :- this is how far the camera moves when auto focus
Turn Around :- if the camera reaches this point without focusing it reverse
direction to focus in the opposite direction.
9.9 Detection Graph
Under the detection graph there is are a number of options which change the
way the camera detects an edge you can bias it toward the strongest pixel or
the sharpest pixel in the image.
You also have the options of picking the first, second, third or last edge shown
in the image.
Example
If you were measuring a circle with a chamfer the first peak in the graph is
where the chamfer meets the top face the second peak in the graph is where
the chamfer meets the bore to measure the bore diameter you need to select
the second option.
-74-
This point would be the
second peak in the graph
This point would be the first
peak in the graph
First:- this is the first peak in the graph.
Second:- this is the second peak in the graph.
Third:- this is the third peak in the graph.
Last:- this is the last peak in the graph.
Default:- this is the default setting for point detection.
Strongest:- this option use’s the strongest camera signal for point detection.
Sharpest :- this option use’s the sharpest part of the image for point
detection
-75-
10.0 CAMERA CONTROLS
The brightness and contrast of the Camera Image can be controlled using the
tools in the Camera Control window:
10.1 Basic Camera Controls
1
2
3
5
4
1 Brightness Slider
The brightness can be adjusted using this slider to achieve the optimum
image on the screen. (The Auto function must be switched off for the slider to
work)
2 Contrast Slider
The brightness can be adjusted using this slider to achieve the optimum image
on the screen. (The Auto function must be switched off for the slider to work)
3 % Used
92 % of Image from camera
By setting the ‘% Used’ to 92%
this rouge pixel is filtered out
of the image
(This could be a bright stop on
the part)
100 % of Image from camera
This slider allows you to filter out pixels from the very ends of the camera
histogram.
A setting of a 100% best for a shadowgraph type application, were the image
is very much black or white.
A setting between 100 %_ 90 % is best for a video camera type application
were you have a lot of different shades in the image.
-76-
4 Auto Button
The contrast and brightness can be adjusted automatically to find the
optimum setting by clicking on the ‘Auto’ button. This is done iteratively and so
will take a few seconds.
Due to the iterative nature of this automatic setting, the software will not
search over the full range available. It is therefore necessary to either have
the contrast and brightness set approximarely correctly prior to using it,
alternatively you may have to click ’Auto’ more than once.
Note If auto button is swicth off when the camera window is open it is
posible there will be no image in the window. This is because some of
the setting are incorrect readjust the setting or click on the auto button.
5 Advanced Button
Clicking this button displays the advanced camera functions.
10.2 Advanced Camera Controls
When measuring difficult parts under tricky light condition it may be necessary
to use the advanced camera controls allow you to micro-manage the camera
to get the best image in the camera window.
6
7
8
9
10
-77-
6 Exposure Slider
6 Exposure Slider
With this slider you can manually adjust the exposure.
7 Gain Slider
With this slider you can manually adjust the camera gain.
8 Lock Colours / Individual Colours
A colour camera see three images a blue one a red one and green one by
combining these together you get a colour image as seen in the camera
window.
There two alternative in how the camera processes this colour information.
Lock Colours:- if you click this option all three images are process together
giving good colour representation in the camera window.
Individual Colours:- if you click this option the images are process
individually this can help you measurement the part, but can give you false
colours in the camera window. (if you had a lot of red light shining on the part
stopping you measuring it you could filter out the red light and only use the
blue and green light to measure the part)
UV Balance:- If you click this option the camera switches to ultra violet mode
making it sensitive to light from the ultra violet LEDs in the light ring.
9 Auto Gain / Exposure settings
You can choose how the auto function works by click on these buttons.
Adjust Gain:- If you select this option you can manually adjust the exposure
and the software will automatically adjust gain
Adjust Exposure:- If you select this option you can manually adjust the gain
and the software will automatically adjust exposure.
Adjust Gain / Exposure:- If you select this option the software will
automatically adjust both gain and exposure.
Note:- Adjust Gain / Exposure is the default setting for the camera
10 Auto Focus
Exposure (mSec):- This sets the exposure when auto-focussing
Turn Around :- When the software auto-focuses it will travel a set distant in
one direction before reversing direction. The set distant is entered in this box.
-78-
11.0 TOGGLE VIDEO FEED
When using the Camera Image window to take measurements, as soon as
the image is clicked on, the software grabs that image in order to perform the
edge detection functions. To the user this may not be obvious, as the grabbed
image will be the same as the live image and in exactly the same position.
When the measurement is completed the software automatically reverts to the
live image.
If the user wishes to revert to the last grabbed image at any point, they can do
so using the Toggle Video Feed button. When the grabbed image is shown
you will not be able to see the image change when moving the machine in X,Y
or Z.
To revert back to the live image, simply click on the Toggle Video Feed button
again.
-79-
12.0 SHOW EDGE PIXELS
It is possible to review the last measurement points taken by using the Show
Edge Pixels button. Clicking on this button will bring back the last grabbed
image and show the measurement points taken as crosses on the image.
To revert back to the live image, simply click on the Show Edge Pixels button
again.
-80-
13.0
CAMERA RESOLUTION
The Camera can be run in high resolution
or low resolution
depending on the camera type. Clicking on the icon will toggle between the
two.
Using high resolution the full number of pixels (3M) on the camera are used.
This improves the quality of the image, but may slow down the speed at which
measurements and calculations can be performed.
Using Low resolution the software uses every other pixel on the camera.
Hence the quality of the image will be slightly inferior, but measurements and
calculations will be performed faster.
-81-
14.0 SAVE IMAGE
The camera image may be saved as either a bitmap file (.bmf) or as a Tif file
by clicking on the Save Image file.
This will bring up the following window:
Allowing the user to name and save the image file.
15.0 Editing camera / light controls on measured features
Once features have been measured it is possible to edit the camera or light
controls and re-measure. Already explained in chapter 9.0 Edge Detection
Controls you can control step size, edge percentage etc.
These edits apply for the next measured feature only, as it is only special
circumstances for which you would apply them. Applying different edge
percent rules to other features could give incorrect measurements. Therefore
the defaults are reset after the measurement.
-82-
15.1 Editing Features
The camera information
is stored here. Left click
here then right click to
bring up menu and
choose show camera
settings
To change settings, right click on the feature to bring up the feature measure
window. Then using the camera image window, focus on the part and change
light and or edge detection settings to how you want it.
Next right click on the camera line again and this time click on Record
Camera Settings.
-83-
16.0 Calculating the Camera off-set
If you use both the camera and the probehead to measure a component you
need to off set (calibrate) the camera to match the probehead .
To do this:You measure the same circles twice once with the camera and once with the
probehead .
You should now have two circles in the graphic window slightly off set to each
other.
Measure one circle with the
Camera
Measure other circle with the
probehead.
To automatically generate the X,Y,Z off-sets to align the camera with the
probehead click on the camera icon below the star probe in the stylus section
of the Probe Status window.
You will now see a message box asking if you wish to apply the off-set.
If you click on ‘NO’ you apply the off-set to the camera if you Click on ‘YES’
you apply the off-set to the probehead.
Click ‘NO’ to apply the off-set to the camera.
-84-
The camera
now has an
X,Y,Z off-set
which aligns it
to the
probehead
allowing you
measure parts
with both
camera & probe
at the same
time.
As the camera is now align to the probehead it is now possible to measure
components with both camera & prodehead at the same time.
Measure one circle with the
Camera
Measure other circle with the
probehead.
If you now re-measure two circles with the camera & probehead they will be
super-imposed on top of each other.
-85-
17.0 CAMERA SETUP
When setting a machine up to a camera, three things must be done.
Set Scales
Set Offsets (when using variable zoom camera)
Set Z Rot
Firstly the camera needs to be calibrated so the scale is correct.
The offsets compensate for camera movement around a perpendicular axis,
within the camera housing (If the camera has a number different zooms fixed
zoom levels the software must have the same number of zoom level in the
Zoom box at the side of the camera window).
Lastly the Z Rot (Z rotation) has to be checked and if necessary altered, to
compensate for physical misalignment of the camera to the machine axis.
To activate camera click on icon situated to the right of the top toolbar.
To reveal set scales / offset window click on the ‘SetUp’ button
the bottom of the camera window
If using the USB camera with one
magnification delete additional
zooms by right clicking here and
click Decrease zooms.
(you only need one for the USB
camera)
Click on setup button to
set values, follow
prompts. Set scales
first
-86-
at
To calibrate you will need something, which is calibrated and easily
measurable i.e. clear defined edges, for example a graticule with a known
circle diameter.
If you are if you are using a camera with a repeatable mechanical zoom you
need to set up a number of zoom levels in the set-up box equal to the number
of zoom levels on the camera.
To increases to number of Zoom levels in the zoom window click on it and
selecting the increases zoom option from the menu.
16.1 Setting scales
Adjust the camera picture using the largest size possible so that all of image
remains in view. Ideally about 2/3rds the size of camera image. See
screenshot above. Whilst adjusting please note that the camera works in
pixels, to measure size. Therefore if you are using a camera with a repeatable
mechanical zoom as the zoom level is changed, the number of pixels will
change. The camera must be calibrated for each mechanical zoom level.
With the USB camera it is possible to adjust the field of view / magnification
from between 130 mm to infinity by using the sliding ring on the camera body,
by adjusting the camera so its focuses at 400 mm from the work piece the
field of view will be a huge 35mm.
-87-
Note
If you change the field of view / magnification using the sliding ring on
the camera body you must re-set the scale use the ‘set scale’ button.
This is important if you do not re-set the scale any features you have
measure will be wrong.
16.1.1 To setting up scales
Click on set scales button (calibrate box, lower right)
Click on zoom level 1 (setup box upper right for the USB camera there is only
one zoom level)
Click next
Enter actual diameter of circle in actual diameter box i.e. 1.00mm
Click next.
Measure the 1.00mm circle.
-88-
Click on edge of circle at 3 equally spaced positions, by the third click the
circle should overlap the image, left mouse click, now determine the edge
detection area by moving the mouse, left click to measure.
If you are using a camera with a mechanical zoom you must repeat the above
for each zoom level of camera. Remember to change zoom level in setup box
each time by clicking in zoom section of the setup window .
-89-
16.2 Setting up Offsets (repeatable manual / auto zoom only)
Note
The camera must be calibrated( set scale ) for each mechanical zoom
levels.
Click on set offsets
Choose a circle that can be displayed at 2/3 size of display screen at about
X200 magnification. Centre the image, it is helpful to use the cross hairs radio
icon – see screen shot below
Cross hair at full X200 magnification
Click on zoom level 1, change from cross hair to circle, measure circle.
-90-
Click on next zoom level, adjust cameras zoom level, measure circle again
Repeat for each zoom level used, remember to change camera zoom level.
Click ‘Finish’
Message will appear saying calculated offsets for zoom positions 1,2,…
Calculated offsets message
Click ok.
-91-
16.2 Setting up Z Rotation (Z Rot)
This compensates for physical mis-alignment between the machine z axis and
the mounting of the camera.
To do this measure a small circle (approx 1.000mm) with the camera in each quadrant
of the image. Avoid positioning the circle to far into the corner so to avoid lens
distortion.
2. Measure circle 2 in the
top right hand quarter of
the camera view then
move the camera in the Y
Axis
1. Measure circle 1 in the
top left hand quarter of the
camera view then move the
camera in the X Axis
X axis
Y axis
X axis
4. Measure circle 4
in the bottom left
hand quarter of the
camera view. You
have now finished
measuring.
3. Measure circle 3
in the bottom right
hand quarter of the
camera view then
move the camera in
the X Axis
In the Aberlink software you should now see four circles superimposed on
each other if they are not you need to set the camera Z rotation.
If the 4 circles are
not superimposed
over each other
like this the Z
rotation needs resetting
-92-
If the 4 circles are
superimposed over
each other like this
the Z rotation is OK
To set the Z rotation go to the Tech section in set-up Details.
Click on the ‘Vision’ tab.
With the four circles still visible in the software Click on the ‘set button’
This will enter a Z rotation into the Z rotation window.
After you have click
the ‘set’ button the
camera rotation will
appear here.
To check the Z rotation is correct re-measure the four circles, If the 4 circles
are superimposed over each within 0.010mm then the Z rotation is OK.
-93-
18.0 CHANGE HISTORY
Date of Change
23/10/07
29/10/07
17/12/07
11/01/08
14/04/08
23/07/09
23/11/09
15/12/09
Description of Change
Changed index
Setting up a camera off-set add
Aligning probe head & camera add
Cross Hairs button & angle mode
added
Camera set-up chapter added
Chapter 9.9 Detection graph added
Chapter 1.1 How to set up a Z offset
has been added.
Chapter 4.1 Camera light ring
updated to include the ultra violet
backlight, and dashed cross-hairs –
checked cw.
Chapter 15 inserted, for editing
camera/ light settings for previously
measured features.
-94-
Version
Changed
by
30.20.85 CJH
30.20.85 CJH
30.20.87 CJH
30.20.87 CJH
30.20.92 CJH
30.22.23 CJH
30.24.15 C.J.H
30.24.15 C.J.W


