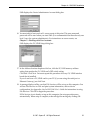
1
SYSTEM ADMINISTRATOR’S GUIDE System Manager Client/Server Version 3.02 Square D, POWERLOGIC, POWERLINK, MICROLOGIC, LIFE-GARD, and Square D Company. System Manager is a Trademark of Square D Company. Other names are trademarks or service marks of their respective companies. are Registered Trademarks of © 1997 Square D Company, all rights reserved. This bulletin may not be copied in whole or in part, or transferred to any other media, without the written permission of Square D Company. Contents Contents Chapter 1—Before You Begin ............................................................................................................ 1 What’s New ..................................................................................................................................... 1 What You Should Know Before You Begin ..................................................................................... 2 System Requirements .................................................................................................................... 3 Historical Logging and Hard Disk Requirements ...................................................................... 3 Additional Hardware Requirements ................................................................................................ 4 Start With the SMS-Info.txt File ...................................................................................................... 5 Chapter 2—Introduction to SMS ....................................................................................................... 6 Register Your Software Now ........................................................................................................... 6 Software Version Support Agreement ....................................................................................... 6 Overview ......................................................................................................................................... 6 Instruction Materials ....................................................................................................................... 7 Notational Conventions ............................................................................................................. 7 Add-On Modules ............................................................................................................................. 8 Online Help System ........................................................................................................................ 8 Technical Support ........................................................................................................................... 8 Chapter 3—The PC Communications Interface ............................................................................... 9 POWERLOGIC Ethernet Gateway ................................................................................................. 9 SY/LINK Board ............................................................................................................................... 9 RS-232 (Serial) Connections ........................................................................................................ 10 Chapter 4—SMS-3000 Installation .................................................................................................. 11 Security Keys ................................................................................................................................ 11 No Key Found .......................................................................................................................... 11 Planning the Installation ............................................................................................................... 11 System Architecture ...................................................................................................................... 12 The Server ............................................................................................................................... 12 The Client ................................................................................................................................ 12 The Database .......................................................................................................................... 13 Hardware Issues ...................................................................................................................... 14 Network Security Administrator Privileges .................................................................................... 14 Installation Types .......................................................................................................................... 15 NT Requirements .......................................................................................................................... 16 System Backup and Making an Emergency Repair Disk ............................................................. 16 Installation Checklist ..................................................................................................................... 17 New Installation, Client/Serve ....................................................................................................... 18 Ethernet Gateway .................................................................................................................... 25 SMS-3000 Startup ................................................................................................................... 25 Upgrade Installation, Client/Server ............................................................................................... 25 Restoring the Data Files .......................................................................................................... 28 © 1997 Square D All Rights Reserved Bulletin 3080IM9602R11/97 New Installation, Client ................................................................................................................. 29 Ensuring Correct Client Registration ....................................................................................... 29 SMS Startup ............................................................................................................................ 35 Upgrade Installation, Client .......................................................................................................... 35 New Installation, DDE Server ....................................................................................................... 37 Upgrade Installation, DDE Server ................................................................................................ 43 Custom Installation ....................................................................................................................... 45 Ethernet Gateway .................................................................................................................... 48 Reinstalling SMS .......................................................................................................................... 48 Uninstalling SMS .......................................................................................................................... 49 Running the Translation Utility ...................................................................................................... 49 Three Scenarios ...................................................................................................................... 50 Converting Version 3.0 or 3.01 System Data .......................................................................... 50 The Translation Procedure ...................................................................................................... 51 Interactive Graphics Add-On Module (GFX-1000) ........................................................................ 57 Where to Next? ............................................................................................................................. 58 Chapter 5—Working with User Accounts ....................................................................................... 59 Adding User Accounts .................................................................................................................. 59 Changing User Accounts .............................................................................................................. 61 Deleting User Accounts ................................................................................................................ 62 Chapter 6—Working with the SMS Database ................................................................................. 63 Organization of the SMS Database .............................................................................................. 63 How SMS Rolls Historical Files .................................................................................................... 63 Hard Disk Memory Allocation ....................................................................................................... 65 Hard Disk Usage Formulas ..................................................................................................... 66 Waveform storage disk requirements: ..................................................................................... 66 Working with System/Setup Data ................................................................................................. 66 Establishing Log Restrictions .................................................................................................. 67 Managing the Size of System/Setup Data (PLSystem.mdb Database) ........................................ 68 Deleting Setup Data. ............................................................................................................... 68 Purging the Alarm and Event Logs .......................................................................................... 68 Backing Up/Compacting the System/Setup Database ............................................................ 68 Managing the Size of the Historical Database .............................................................................. 69 Setting Up an Automatic Historical Database ......................................................................... 69 Setting Up a Manual Historical Database ............................................................................... 71 Managing Multiple System/Setup Databases ............................................................................... 72 Deleting Historical Data ................................................................................................................ 72 Troubleshooting Rollover Problems .............................................................................................. 72 Appendix A—RS-232 Connections ................................................................................................. 73 Index ................................................................................................................................................... 75 © 1997 Square D All Rights Reserved Chapter 1—Before You Begin Chapter 1—Before You Begin System Manager 3000 Software (SMS-3000) is a client/server application that runs on the Microsoft Windows NT operating system. The server portion of SMS-3000 is called the POWERLOGIC network server. The client portion can run on either Windows 95 or Windows NT. Additional client software (SMS-1000) can be purchased to run on separate PCs, thus expanding the capabilities of the SMS system. SMS-3000 is a versatile power monitoring and control system that can support over 1,000 devices. Some of its other features are: • unlimited unique user accounts • predefined and customizable real-time and historical data displays • logging and trending user-selectable quantities • multilevel network alarming with task execution • easy display of our patented waveform capture • interactive graphic screen development What’s New Since the first release of SMS-3000, we have also released the following: • standalone products SMS-1500, PMX-1500, and SMS-121. These products do not support network clients, but in all other functionality are like SMS-3000. • client products, SMS-1000, PMX-1000, and GFX-1000. These products connect to SMS-3000. In addition to being a SMS-3000 client, GFX-1000 can be used as an addon to any standalone product or to the SMS-1000 client. • enhancements to the run-time performance of the entire SMS-3000 product family • modifications to the historical data collection and storage system. Log databases are now automatically split into smaller databases, determined by a user-defined “rollover period.” These new files can be easily backed up, removed, or restored using Windows Explorer or File Manager; difficult-to-use archiving tools are no longer required. Hard drive memory usage is also substantially reduced. – SMS defaults to the Microsoft Access database for the history database, but you can now use other ODBC databases as the history database. For complete instructions on using the new SMS database, see Chapter 6—Working with the SMS Database. © 1997 Square D All Rights Reserved 1 Bulletin 3080IM9602R11/97 What You Should Know Before You Begin This bulletin assumes that you know how to use Microsoft Windows NT and are familiar with Windows terminology. If you need help using Windows NT, refer to the Microsoft Windows NT documentation that you received with your software. In particular, before you install SMS-3000, you must consider these issues: • Install Windows NT on the machine that will run the POWERLOGIC network server. Then install Windows NT or Windows 95 on any machine that will run additional clients. Note: Do not install Windows NT or Windows 95 in any directory that already contains any version of Windows. If you do so, you may be unable to install SMS. • Establish a functional LAN with NT user accounts and network access permission. Perform this step before installing SMS-3000. You must be an administrator on the machine where you install SMS. 1. Network Access Permission. Each PC user who will connect to the POWERLOGIC network server must first have access rights set up at the PC that will be accessed (that is, the POWERLOGIC network server PC or database PC). Access the setup through Windows NT Administrative Tools > User Manager. The user will be assigned to at least one NT Group. Make sure that one of these groups has been assigned the privilege to access the PC over the network. For more information on establishing access permission, see the Microsoft Windows NT documentation. 2. Network Drive Shares. When the system and historical databases are installed during SMS-3000 installation, the default directory location is c:\SMS-3000\Database. You can change the location, placing the database anywhere within your network, but wherever it is located, you must share the database directory at the PC in which it resides. To do this, select c:\SMS-3000\Database from the File Manager, then select Disk > Share As. Give the directory a share name, and assign permission for any group(s) or individuals within groups. You must perform this procedure before you complete the SMS client installation. 3. Connecting Network Drives. You must be able to connect to the SMS PLSystem.mdb database from the client PC. This means that one drive on the client PC must be mapped to the database directory. To do this, select File Manager > Disk > Connect Network Drive; then select the name of the PC at which the database is installed and the share name given to the database (share names are discussed in the next paragraph). You must perform this procedure before you start the SMS client installation. • Screen savers, other than blank, use up large amounts of system resources. On the POWERLOGIC network server, they should not be used. 2 © 1997 Square D All Rights Reserved Chapter 1—Before You Begin • If you are using the POWERLOGIC Ethernet Gateway, test TCP/IP connectivity on the Windows NT or Windows 95 operating system before using SMS. As part of the test, use the DOS PING command: – After TCP/IP is installed, access the command prompt (Start > Programs > Command Prompt) – Use the PING command to check communication with IP locations (PING computer name). – If you do not receive replies during the test, the TCP/IP protocol is not properly installed on the operating system. For instructions on installing TCP/IP, see your Microsoft Windows NT documentation. • If remote clients are to be installed, share the SMS-3000 directory. • If remote clients are to be installed, the POWERLOGIC network server and database must be accessible over the network. Thus, the POWERLOGIC network server cannot be turned off. In addition, when configuring Windows NT, you need to pay attention to these three items: System Requirements To run SMS-3000 software, you must have a computer which meets or exceeds the minimum requirements in the table on the next page. The specifications in parentheses “( )” are recommended for superior performance. The hard disk requirements for Windows, a swap file, the software, and logging memory should also be considered when choosing a computer. For customers in the U.S., Square D can provide a computer which includes all hardware and software required to meet your operating needs. Please call the Engineering Services Group at (615) 287-3400 for details. Historical Logging and Hard Disk Requirements The amount of hard disk space used by historical logging can vary greatly and thus is hard to estimate; however, a system with 50 devices can easily add 1 to 1.5 MB per day in historical data. Consider the following factors when planning the amount of space to allow on the PC that contains your history files: • the number of devices you are logging, and the logging intervals • the number of quantities per device • the frequency of your database rollover • the location of the historical data (moving it to an archive directory on another PC will free up space on the PC that contains the remaining historical data) For more information, see Chapter 6—Working with the SMS Database. © 1997 Square D All Rights Reserved 3 Bulletin 3080IM9602R11/97 The following table lists the minimum system requirements. Minimum System Requirements Operating System Display Mode Model RAM Hard Disk Program Size SY/LINK Card RS-232 Port Network Card Modem Sound Card 3.5" Drive CD Drive Windows NT/95 SMS-3000➀ SMS-1000 PMX-1500 PMX-1000 SMS-1500 GFX-1000 SMS-121 Windows NT➁ Windows NT➁ Windows 95 Windows 95 VGA VGA (recommend Super VGA) (recommend Super VGA) 486/66 Pentium (recommend Pentium) 32M 32M 500M➂ 500M ➂ 50M 4 50M 4 optional required ➄ ➄ 14.4 or 28.8 (optional) optional optional 6 6 recommended recommended ➀ SMS-3000 operates on Windows NT only. ➁ Windows NT, version 4.0 or higher, required in SMS-3000. The other applications run on Windows NT 4.0 or Windows 95. ➂ This figure takes into account only what SMS will use. Any additional applications 4 must be considered separately. The amount of space taken up by SMS on the hard disk depends on whether logging data is stored on the same computer. See chapter 6 for a discussion of memory usage. SMS uses about 8M; the additional is due to system components. ➄ Required in SMS-3000, to support network clients; optional in other products. 6 Required unless CD drive is available. Additional Hardware Requirements Circuit Monitor Firmware. SMS-3000 is optimized to run with version 16.000 (or higher) circuit monitor firmware. Although other firmware versions can be used, they may not be fully supported due to the firmware functionality enhancement. Therefore, to ensure that all SMS-3000 features will perform as documented, we strongly recommend that you upgrade your circuit monitor firmware before running SMS-3000. Note: If you do not have the system upgrade kit, which allows you to upgrade circuit monitors over the network, you may order this kit through your local Square D field sales representative or your Groupe Schneider sales representative. Ask for part number CM-2000U. 4 © 1997 Square D All Rights Reserved Chapter 1—Before You Begin Modems. All devices in a network daisychain must use the same word length. If you use serial communications, we recommend that you use a modem that supports an 11-bit word length: 1 start bit, 8 data bits, 1 stop bit, and 1 parity bit. All POWERLOGIC monitoring devices support 11-bit word length. In some cases, you could use a modem that supports a 10-bit word length. The Series 2000 Circuit Monitor and power meter both use 11-bit or 10-bit word length. If you want to use a 10-bit modem, call the Technical Support Center at (615) 287-3400. Note: Precede this number with your country code if you are outside of the United States. Start With the SMS-Info.txt File Read the SMS-INFO.TXT file included on the program CD before you install SMS. You can open this “readme” file using any program capable of reading a standard ASCII text file, such as the Notepad program included with Windows. This file contains important last-minute information not included in this instruction bulletin. © 1997 Square D All Rights Reserved 5 Bulletin 3080IM9602R11/97 Chapter 2—Introduction to SMS Register Your Software Now After installing your software, fill out the registration card that was included in your installation package; send it in today. Or just print out the faxme text file, located in the SMS-3000 folder. When you register your software, you receive the following benefits: • notice of software product upgrades • 6 months free technical phone support (See Technical Support later in this chapter) • information on POWERLOGIC® products • information on POWERLOGIC® training schools • free subscription to POWERLOGIC® Solutions newsletter Software Version Support Agreement An optional software agreement is available. If you choose to purchase this agreement, you will receive, at no additional cost, all updates and upgrades that are released during the agreement period. For information, contact your Square D field sales office or your Groupe Schneider sales representative. Overview 6 X X X © 1997 Square D X X X X X X X X X X X X X X X X X X All Rights Reserved Manual Control X X X X X X X X X Waveform Cap X X X Alarming X X Logging/ Trending Circuit Monitor Power Meter MICROLOGIC Circuit Breaker Model 85 Trnsfrmr Temp Cntrl SY/MAX PLC Digitrip 810D Trip Unit Digital Relay POWERLINK AS Panelboard POWERLOGIC Compatible Table Display Setup Device Resetting Device Data System Manager Software 3000 (SMS-3000) is compatible with existing circuit monitors, power meters, product interfaces for MICROLOGIC circuit breakers, LIFEGARD Model-85 transformer temperature controllers, and SY/MAX programmable logic controllers (PLCs). The following table lists the features that SMS supports, by device: X X X X Chapter 2—Introduction to SMS Overview (cont.) U.S. only: For help in integrating other devices into SMS, contact POWERLOGIC Engineering Services at (615) 287-3400. This group can also help you integrate other monitoring systems and network products into SMS. Instruction Materials There are two bulletins included in this package: • SMS-3000 System Administrator’s Guide, which covers system setup, installation, security, and other topics that the system administrator usually oversees • SMS-3000 User’s Manual, which describes most of the functions of the SMS features These bulletins provide all of the information you will need to operate SMS-3000. You can read them in their entirety, or use them as reference. To locate information on a specific topic, refer to the table of contents or the index. In addition, there is a complete copy of each bulletin, in a .pdf format, on the software CD. To view these manuals, open the file named 302ug.pdf for the user’s guide or 302ag.pdf for the System Administrator’s Guide. These files are in the DOCS subdirectory on the CD. Notational Conventions This bulletin uses the following notational conventions: • Bullets—Bulleted lists, like this one, provide information but not procedural steps. • Multiple Step Procedures—Each procedure is presented as a numbered list of steps. • Angle brackets (>)—Angle brackets are used to denote a sub-menu for a command in a menu. For example, in the Setup menu, under the “PC Interface” command, there is a sub-menu that contains the “SY/LINK Cards” command. This is written as “PC Interface > SY/LINK Cards.” • SMS/SMS-3000—This version of the System Manager Software is named SMS-3000. However, throughout this bulletin, the software will usually be called simply SMS. Note: All screen examples used in these manuals were captured using Microsoft Windows NT, version 4.0. If you are using a different version of Windows, the screens you see may differ from these examples. © 1997 Square D All Rights Reserved 7 Bulletin 3080IM9602R11/97 Chapter 2—Introduction to SMS Add-On Modules You can expand the functionality of SMS-3000 by using add-on modules. Square D currently offers two add-on modules that enhance the capabilities of SMS-3000. They are: • Interactive Graphics Interface (GFX-1000) • System Manager Software, client only (SMS-1000) The SMS bulletins do not provide detailed instructions for using these packages with SMS-3000. For instructions on using the add-on modules, see the instruction bulletins included with the modules. Online Help System SMS provides an online help system to aid you in using the program. The help system describes all SMS commands. To view an index of help topics, click Help > SMS 3000 Help on the SMS main menu. The Help Topics window displays. You can also access help information through Help buttons on the dialog boxes. Technical Support When you register your software, you are entitled to 6 months of free technical phone support. If you have any questions about this instruction bulletin, or other POWERLOGIC products, contact the POWERLOGIC Technical Support Center. The hours are Monday—Friday, 7:30 AM–4:30 PM (CST). The fax number is available 7 days a week, 24 hours a day. Phone: (615) 287-3400 Fax: (615) 287–3404 BBS: (615) 287-3414 E-mail: [email protected] Precede telephone numbers with your country code if you are outside the United States. Before you call, have the product serial number ready. The serial number is located on the back of the software CD jewel case or on the label of your original program diskettes. Or, if SMS is installed, click Help > About SMS-3000… to display the serial number. 8 © 1997 Square D All Rights Reserved Chapter 3—The PC Communications Interface Chapter 3—The PC Communications Interface SMS can be used with either a standard PC ethernet network board, a SY/LINK Network Interface Board (Class 8010 Type SFI-510) mounted in the computer or with serial port connections, Ethernet Gateway, or all three. All of these types of communications interface can be used at the same time. POWERLOGIC Ethernet Gateway SMS can communicate via the standard PC ethernet card using the TCP/IP protocol with the POWERLOGIC Ethernet Gateway interface modules connecting the POWERLOGIC compatible devices to the ethernet local area network. After the POWERLOGIC Ethernet Gateway protocol drivers are installed, they will be available as standard connection type in the SMS PC Interface dialog box. SY/LINK Board The SY/LINK board is a circuit board that mounts in a long expansion slot of a personal computer. The computer must have an “AT” bus structure, and a spare long expansion slot. The SY/LINK board manages SY/MAX or SY/NET network communication. For detailed instructions on installing the SY/LINK board in your computer, refer to the SY/LINK instruction bulletin that came with your SY/LINK board. The SY/LINK board memory addresses can be configured during the install or added later through the SMS configuration utility. Each of these configuration methods requires that the NT user has administrator privileges. Multiple SY/LINK boards can be used at the same time; having multiple SY/LINK boards will improve system performance (due to the multi-tasking capabilities of SMS). Note: The SY/LINK board has a DIP switch that sets the memory address range. The default switch setting is CA00. In most cases, this address setting is acceptable. On rare occasions, this address range may conflict with the address range assigned to the video card (or other system component) in your computer. If this happens, you will need to change the address setting on the SY/LINK board. Refer to the SY/LINK instruction bulletin for instructions on changing the address switch setting. Multiple SY/LINK boards will require the use of different memory addresses. © 1997 Square D All Rights Reserved 9 Bulletin 3080IM9602R11/97 RS-232 (Serial) Connections SMS can communicate via the serial port of a personal computer. When communicating via the serial port, a converter is required to convert the signal to the RS-422/RS-485 signal required by circuit monitors. Two examples of this connection are: • connecting to a daisy chain of circuit monitors (directly) • connecting to a SY/MAX port on a PNIM or NIM Connections using the Optical Communications Interface (OCI-2000) may be made without conversion to RS-485. Appendix A—RS-232 Connections illustrates two examples of systems that use serial communications and an RS-232/RS-485 converter. Note: SMS-3000 supports multiple communication ports. The number is limited only by the number of communication ports that the PC can physically support. 10 © 1997 Square D All Rights Reserved Chapter 4—SMS-3000 Installation Chapter 4—SMS-3000 Installation Security Keys Each copy of SMS-3000 software is shipped with a hardware security key. You must install the security key on the LPT1 parallel port of the POWERLOGIC network server computer before you can use SMS. To ensure that the security mechanism is properly registered, be sure to install the key before starting the installation process. Note: Only the server PC requires a security key. Client software does not require a key, but a software serial number must be entered at installation. The serial number is printed on a sticker on the back of the software CD jewel case. Once installed, a client does not need to use a unique serial number to connect, but the POWERLOGIC server will not let more clients log on than are specified by the installation. SMS-3000 allows one connection for a client and one connection for DDE per unique serial number (per each client purchased.) If two client packages are installed, you can connect two concurrent clients and two concurrent DDE servers (DDE does not have to be on the same PC as the server or any other client). See the Client Installation section in chapter 4 for the complete client installation procedure. To install the security key, complete the following steps: 1. If a cable is plugged into the LPT1 port, unplug it. 2. Plug the male end of the security key into the LPT1 port (server installation only). To ensure that it will be recognized, the software key must be behind any other keys. 3. Using a small screwdriver, tighten the screws on the sides of the key. 4. If you unplugged a cable from the LPT1 port in step 1, plug it into the security key. If the key is not plugged in, SMS displays the message “No key found.” No Key Found If you attempt to run the program and the security key is not installed, SMS displays the message “No key found” in the active alarms list. If this message appears, exit the program. Install the security key as described above and restart. Planning the Installation There are several factors that you must consider before you attempt to install SMS. You must take into account hardware issues, such as how many computers you will be using and how they will connect with devices. You also need to determine naming conventions, routing, and device numbers for hardware. For additional information about designing your system, refer to the Power Monitoring and Control System Planning Guide (order no. 3000CT9601). A .pdf copy of this manual is in the Documents folder on the installation CD. © 1997 Square D All Rights Reserved 11 Bulletin 3080IM9602R11/97 System Architecture Ethernet Gateway Client PCs Kil Mega Kil Mega o AMMETER (A) o VOLTMETER, L-L (V) o VOLTMETER, L-N (V) [CT:5] [PT:120] [Sys. Type] o WATTMETER (W) [Dmd. Int.] o VARMETER (VAr) [WH/Pulse] o VA METER (VA) [Address] o AMMETER (A) 3-PHASE A (A-B) PHAS [Reset] [CT:5] [PT:120] [Sys. Type] o WATTMETER (W) [Dmd. Int.] o VARMETER (VAr) [WH/Pulse] [Address] o FREQUENCY METER (Hz) [Nom. Freq.] o DEMAND AMMETER (A) o DEMAND POWER (W) o DEMAND POWER (VA) [Reset] [Reset] o VA METER (VA) METERS o WATTHOUR METER MIN [Rst. Min/Max] MAX [Set Password] ALARM [Accept] [Setup] o VARHOUR METER [Reset] A (A-B) o AMMETER (A) PHAS o VOLTMETER, L-L (V) o VOLTMETER, L-N (V) [Reset] ALARM [Setup] o WATTHOUR METER o VARHOUR METER MOD Ethernet LAN Internet [Sys. Type] [Address] o DEMAND POWER (VA) MIN MAX [PT:120] [Dmd. Int.] [WH/Pulse] o FREQUENCY METER (Hz) [Nom. Freq.] o DEMAND AMMETER (A) METERS [Rst. Min/Max] [Set Password] [Accept] [CT:5] o WATTMETER (W) o VARMETER (VAr) o DEMAND POWER (W) [Reset] [Reset] o VA METER (VA) o AMMETER (A) 3-PHASE A (A-B) o VOLTMETER, L-L (V) PHAS o VOLTMETER, L-N (V) B (B-C) C (C-A) N Modems to/from remote sites Kilo Mega Kilo Mega o AMMETER (A) o VOLTMETER, L-L (V) o VOLTMETER, L-N (V) o WATTMETER (W) o VARMETER (VAr) o VA METER (VA) [CT:5] [PT:120] [Sys. Type] [Dmd. Int.] [WH/Pulse] o AMMETER (A) 3-PHASE A (A-B) PHASE [Reset] [Reset] o DEMAND POWER (VA) o WATTHOUR METER o VARHOUR METER o WATTMETER (W) o VARMETER (VAr) o VA METER (VA) POWERLOGIC Network Server [Reset] [Reset] [CT:5] [PT:120] [Sys. Type] [Dmd. Int.] [WH/Pulse] 3-PHASE A (A-B) PHASE B (B-C) C (C-A) N [Address] o POWER FACTOR METER [Baud Rate] SELECT METER [Value] o FREQUENCY METER (Hz) [Nom. Freq.] o DEMAND AMMETER (A) [Reset] o DEMAND POWER (W) [Reset] o DEMAND POWER (VA) [Reset] METERS o WATTHOUR METER MIN [Rst. Min/Max] MAX o THD, VOLTAGE (%) [Set Password] ALARM o K-FACTOR [Accept] [Setup] o THD, CURRENT (%) o VOLTMETER, L-L (V) o VOLTMETER, L-N (V) B (B-C) C (C-A) N [Address] o POWER FACTOR METER [Baud Rate] o FREQUENCY METER (Hz) [Nom. Freq.] o DEMAND AMMETER (A) o DEMAND POWER (W) o VARHOUR METER SELECT METER [Value] [Reset] [Reset] [Reset] METERS MIN [Rst. Min/Max] MAX o THD, VOLTAGE (%) [Set Password] ALARM o K-FACTOR [Accept] [Setup] o THD, CURRENT (%) MODE MODE [Reset] SELECT METER [Value] [CT:5] [PT:120] [Sys. Type] o WATTMETER (W) [Dmd. Int.] [WH/Pulse] [Address] o FREQUENCY METER (Hz) [Nom. Freq.] o DEMAND AMMETER (A) o DEMAND POWER (VA) [Reset] [Reset] o VARMETER (VAr) o DEMAND POWER (W) [Reset] [Reset] o VA METER (VA) 3-PHASE A (A-B) PHAS B (B-C) C (C-A) N o POWER FACTOR METER [Baud Rate] o POWER FACTOR METER [Baud Rate] SELECT METER [Value] [Reset] o THD, VOLTAGE (%) o K-FACTOR o THD, CURRENT (%) MOD Kil Mega Kil Mega 3-PHASE B (B-C) C (C-A) N o POWER FACTOR METER [Baud Rate] SELECT METER [Value] [Reset] [Reset] o VOLTMETER, L-L (V) o VOLTMETER, L-N (V) B (B-C) C (C-A) N o POWER FACTOR METER [Baud Rate] o FREQUENCY METER (Hz) [Nom. Freq.] o DEMAND AMMETER (A) o DEMAND POWER (W) o DEMAND POWER (VA) o WATTHOUR METER o VARHOUR METER o THD, VOLTAGE (%) o K-FACTOR o THD, CURRENT (%) Ethernet Gateway METERS o WATTHOUR METER MIN o THD, CURRENT (%) [Rst. Min/Max] MAX o THD, VOLTAGE (%) [Set Password] ALARM o K-FACTOR [Accept] [Setup] o VARHOUR METER MOD [Reset] SELECT METER [Value] [Reset] [Reset] [Reset] [Reset] METERS MIN o THD, CURRENT (%) [Rst. Min/Max] MAX o THD, VOLTAGE (%) [Set Password] ALARM o K-FACTOR [Accept] [Setup] MOD Modem to laptop at remote site Modem to remote device network Local device network Kilo Mega Kilo Mega o AMMETER (A) o VOLTMETER, L-L (V) o VOLTMETER, L-N (V) o WATTMETER (W) o VARMETER (VAr) o VA METER (VA) [CT:5] [PT:120] [Sys. Type] [Dmd. Int.] [WH/Pulse] o AMMETER (A) 3-PHASE A (A-B) PHASE o DEMAND POWER (W) o DEMAND POWER (VA) o WATTHOUR METER o VARHOUR METER [Reset] o WATTMETER (W) o VARMETER (VAr) o VA METER (VA) [Reset] [CT:5] [PT:120] [Sys. Type] [Dmd. Int.] 3-PHASE A (A-B) PHASE B (B-C) C (C-A) N [Address] o FREQUENCY METER (Hz) [Nom. Freq.] o DEMAND AMMETER (A) o DEMAND POWER (W) o DEMAND POWER (VA) [Reset] [Reset] [WH/Pulse] o POWER FACTOR METER [Baud Rate] SELECT METER [Value] [Reset] METERS o WATTHOUR METER MIN [Rst. Min/Max] MAX o THD, VOLTAGE (%) [Set Password] ALARM o K-FACTOR [Accept] [Setup] o THD, CURRENT (%) o VOLTMETER, L-L (V) o VOLTMETER, L-N (V) B (B-C) C (C-A) N [Address] o POWER FACTOR METER [Baud Rate] o FREQUENCY METER (Hz) [Nom. Freq.] o DEMAND AMMETER (A) o VARHOUR METER [Reset] SELECT METER [Value] [Reset] [Reset] [Reset] [Reset] METERS MIN [Rst. Min/Max] MAX o THD, VOLTAGE (%) [Set Password] ALARM o K-FACTOR [Accept] [Setup] o THD, CURRENT (%) MODE MODE remote device network The figure above gives a simplified illustration of the parts of the SMS-3000 system. The Server The POWERLOGIC network server communicates with monitoring devices, retrieves information, and serves the requested data to client applications. The server detects alarm conditions, logs historical data, notifies client applications of these conditions, and initiates automatic tasks like e-mail and auto-uploads of CM-2000 onboard data. In SMS installations, the server is the gateway through which information is captured, entered, and retrieved. Data can be located virtually anywhere: on the same PC as the server, on another PC within the facility, or at a remote location accessed via a WAN or the Internet. The Client A client application is the user interface for SMS. It is through the client that the user enters information into the system and requests data, such as reports, waveform captures, meter displays, and interactive graphics diagrams. The Microsoft NT Workstation permits ten concurrent database shares, which means the POWERLOGIC network server is limited to ten active clients at one time. The 12 © 1997 Square D All Rights Reserved Chapter 4—SMS-3000 Installation POWERLOGIC network server tracks the number of connected clients. (You can have as many clients as you wish in the system, but only ten can actively connect with the server at one time.) However, if the Windows NT Server operating system is installed, the system is no longer limited to ten database shares; with the NT Server system, an unlimited number of connections is allowed. However, there is likely to be a limit to the number that your PC can support without affecting performance. A client can reside on the PC with the server (server and client installation), but you can also distribute clients around your LAN. The POWERLOGIC network server tracks the number of installed applications with unique serial numbers. For each client application, the server allows one SMS and one DDE server to connect. The DDE server can be installed on any PC, independent of either the POWERLOGIC network server or any client. Interactive Graphics (GFX) and the DDE server are separate clients. The DDE server must be installed on each PC that will receive DDE data. To ensure that the POWERLOGIC network server registers clients and correctly counts client connections, there are several steps that must be followed before or during client installation. These steps are covered in the New Installation, Client section later in this chapter. The Database SMS data is stored in two separate databases: • System/setup information (including the alarm and event logs) is stored in the PLSystem.mdb file (default location is SMS-3000 > Database). This database should be installed on the same PC as the POWERLOGIC network server. However, if there are multiple clients, client computers will need access to the database information. Thus, the database drive must be a shared drive. See What You Should Know Before You Begin in chapter 1 or the Windows NT documentation if you need help in sharing the database drive. • Historical data is stored in one or more historical files (for example, History.mdb). The default location for history files is SMS-3000 > Database. If you use the default SMS database system (which is stored as a Microsoft Access record set), historical data can be rolled over from the original history file to a series of files, based in time intervals. For a complete explanation of historical data management, see Chapter 6 —Working with the Database. For client/server installations, you must decide which PC will have the server software and which PC(s) will be clients. Most installations will have the server and a client installed on a PC that is accessible to the system administrator. Clients will then be placed in logical places where data needs to be entered or retrieved. © 1997 Square D All Rights Reserved 13 Bulletin 3080IM9602R11/97 Periodically, you will need to compact the PLSystem.mdb database, especially after having purged alarm and event logs. See Chapter 6 — Working with the SMS Database for instructions on compacting the database. Hardware Issues When there are multiple PCs and devices, it’s best to plan the design of your system in advance. In this way, you can avoid such confusion as trying to retrieve data, only to find that the device names are duplicated or meaningless. These are some basic hardware issues you should consider: • Hardware Names: Because your system PCs will appear in lists throughout SMS, you need to give them names that will be meaningful to system users. For example, it would be more useful to name PCs by their locations (PC-Plant Mgr, PC-Accounting) than by a number or type. The same is true of circuit monitors or any other device that appears many times in your system. • Logical Groups: Because you will be able to gather information by device groups, names that tie that device to its group (for example, mains, feeders, paint line, warehouse) will make displays and reports easier to follow. • System Schematic: To design the best system for your needs, a system schematic, drawn in advance, will help you make the best choices and avoid later system difficulties. For additional information about designing your system, refer to the Power Monitoring and Control System Planning Guide (order no. 3000CT9601). U.S. only: if you need help planning your installation, call the Engineering Services Group at (615) 287-3400. This group provides technical help, from planning the installation to providing a complete “turnkey” system. Network Security Administrator Privileges The installation program will write to the Windows NT registry provided the user who installs the software has NT administrator rights. When the software is installed (and if SY/LINK is installed), the SY/LINK driver becomes an automatic device driver in the NT registry. After the program is installed, NT administrator privileges are no longer required. 14 © 1997 Square D All Rights Reserved Chapter 4—SMS-3000 Installation Installation Types The following paragraphs discuss the three types of installations that can be performed. They are: ▼ ▼ Server and Client Client ▼ Server • Client/Server: server, client, database, and DDE are installed at the same time. Accepting the default, they all reside on the same PC. This installation is used when you install SMS on one computer only or when you install the server with the first of multiple clients. • Client: the server and client(s) reside on different computers; you are installing a client and DDE. Use this installation to install SMS on multiple computers, when you want client access in different locations of the installation site. ▼ DDE Server Server • DDE Server: the POWERLOGIC network server and DDE server reside on different computers; you are installing the DDE server. (With each client, you receive a separate DDE server, which can be installed with the client or on a separate PC; however, keep in mind that a Microsoft NT Workstation limits you to ten separate connections.) Use this installation when you want to run the DDE server on a dedicated PC or on the same PC with another client. In this installation, the POWERLOGIC network server will send requested information to the DDE server. The DDE server can, in turn, serve it to an application installed on the same PC (such as Microsoft Excel). Database ▼ Server Client © 1997 Square D • Custom: a special installation, used to install individual system components. Caution: This installation type is for advanced use only. All Rights Reserved 15 Bulletin 3080IM9602R11/97 NT Requirements Before you attempt to install the SMS software, be sure the following have been done. These points are also covered in What You Should Know Before You Begin in chapter 1, and in detail in the Microsoft Windows NT documentation. 1. Physically install the hardware adapters. Install ethernet adapters, modems, and SY/LINK boards first. 2. Install Windows NT, including network protocols such as TCP/IP or NetBEUI. (The hardware network adapters must be installed inside the PC for the protocols to be bound to the adapters.) Install Windows NT on the PC that will be a server for SMS-3000. Install Windows NT or Windows 95 on all client PCs. 3. Establish the NT administrator user access (used for installation only). 4. Share the drives of each PC that will be a server or database. 5. Plan ahead to know the PC and device names you will use. 6. a. Close all applications that are running on the PC, including Microsoft Office and the Office toolbar, before you begin the SMS installation. b. Install SMS (see the appropriate installation section, following). c. If you are using the PowerLogic Ethernet Gateway, physically install all network adapter cards or modem card. If you are not using the Gateway, skip to step 6. d. Install software adapters (Control Panel > Network > Adapters). If there is no network card, install the MS Loopback Adapter. e. Add TCP/IP protocol (Control Panel > Network > Protocol). f. Run the PowerLogic Ethernet SMS driver installation on the server PC. g. Add the PowerLogic Ethernet Gateway Protocol (Control Panel > Network > Protocols). Then restart the PC. 7. Set tasking priorities to mid-boost (foreground more responsive that background). Use the performance feature (Control Panel > System > Performance) or follow the prompts you will see during client/server installation. If set improperly, clients will have tasking priority instead of the server, making response times slow. System Backup and Making an Emergency Repair Disk You should always have a recent backup copy of system setup information. For this reason, we recommend that you back up the PLSystem.mdb database after every new installation and before every upgrade installation. This backup includes all system setup information, such as device setups, user accounts, and the alarm and event logs. It does not include historical logging information. Instructions for making a backup copy of PLSystem.mdb are found in Chapter 6 —Working with the SMS Database. 16 © 1997 Square D All Rights Reserved Chapter 4—SMS-3000 Installation Use the emergency repair disk utility (rdisk) to protect Windows configuration information on your hard disk; do not use rdisk to make SMS backups. With rdisk, you copy (to diskette) the following configuration information: Windows NT system files, system configuration, and startup environment variables. If this configuration information becomes damaged, you can use the floppy to restore it to your hard drive. It is a good idea to run rdisk after you install any application. To run rdisk, access it at c:\Winnt40\system32\rdisk.exe. Use the Create Repair Disk option to create the repair disk. If you need to restore information to your hard disk, use the Update Repair Info option. Installation Checklist To ensure that you successfully install SMS-3000 and that all features run properly, follow this checklist. Before Installation ____ Network adapters are installed with protocols. ____ Operating system is installed. ____ Communication network (LAN) is functional. ____ NT user accounts and permissions are assigned. ____ Network drives and database shares are assigned. After Installation ____ SMS-3000 is installed, including the POWERLOGIC network server and client(s). ____ The POWERLOGIC network server and clients are started. ____ Under Control > Diagnostics > Connected Clients, verify that all users are connected. ____ Assign user accounts, giving SMS user names and passwords that are different from those used in Windows NT user accounts. ____ Database allocation is set up for alarm and event logging. See Establishing Log Restrictions in chapter 6. ____ Make a backup copy of the system setup database (default = PLSystem.mdb) which is under SMS-3000 > Database. Copy this database information to disk, so you will have a clean copy of your database. It’s a good idea to perform this backup periodically, whenever you make any changes to such things as device setups, functions, and alarms. ____ After all historical data translations are complete, remove the translation utility shortcut (SMS-3000 Translation) from the Programs menu. Also remove the SMS-3000 Configuration shortcut from the Programs menu. These files are not controlled by SMS security and can be accessed by any PC user. To delete the shortcuts, follow these steps: • Click Start > Settings > Taskbar. • Click the Start Menu Programs tab, then click Advanced... . • Click Profiles > All Users > Start Menu > Programs > SMS-3000. • Delete SMS-3000 Configuration and SMS-3000 Translation items. © 1997 Square D All Rights Reserved 17 Bulletin 3080IM9602R11/97 New Installation, Client/Server Use this installation procedure if you are installing SMS-3000 for the first time. You will use this procedure if you are upgrading from EXPlorer software (EXP-550 or EXP-500) or System Manager Plus (SMS-770 or SMS-700). If you are upgrading a previous SMS-3000 installation, see the section Upgrade Installation, Client/Server, later in this chapter. Notes: Always close any open applications before installing SMS. To install the server, client, DDE, and database on one computer, follow these steps: 1. Insert the CD into the CD-ROM drive of the computer that is to be server/client. Note: If you do not have a CD-ROM drive on this computer, you can request floppies for the installation by returning the “3-1/2" Disks Request Form” card in your installation package. Installation instructions will be in a readme file on disk 1. 2. Click Start > Run... to open the Run dialog box. Click Browse... and scroll to D:\setup.exe. SMS temporarily displays a message telling you that an SMS Wizard is being retrieved to help with the installation. 3. SMS displays the System Manager Software information dialog box: 4 Read the information on the screen. Click Next. 18 © 1997 Square D All Rights Reserved Chapter 4—SMS-3000 Installation SMS displays the software license screen: 5. Read the license agreement in the box. You are asked whether you agree with the terms of the license agreement. Click No if you do not accept the terms of the agreement; the Exit Setup dialog box displays. You cannot continue with installation if you click No at this prompt. Click Yes to accept the terms of the agreement. SMS displays the Registration dialog box: 6. Type your name, company, and the serial number, which is on a sticker on the back of the software CD jewel case. Click Next. © 1997 Square D All Rights Reserved 19 Bulletin 3080IM9602R11/97 SMS displays the Registration Confirmation dialog box, verifying the information you entered on the previous dialog box: 7. Read to ensure that this information is correct. Click No to return to the previous dialog box; correct the information. Click Yes to continue with the installation. SMS displays the Setup Options dialog box: 8. Click Client/Server. SMS displays the SMS-3000 Destination path dialog box. It lists the default location for the installation files: c:\SMS-3000. 20 © 1997 Square D All Rights Reserved Chapter 4—SMS-3000 Installation 9. To change the directory, click Browse and choose the new directory. When the correct destination directory displays, click Next. Note: Remember that the subdirectory named Database must be shared for clients to be able to access it. SMS displays the prompt Confirm Newly Selected Directory. 10. If the directory is incorrect, click No and correct the directory name. When the directory name is correct, click Yes. If the directory does not already exist, you are prompted to reconfirm the name. Click Yes to accept the directory name. SMS displays the Check Setup Information dialog box: 11. Scroll through the settings to verify that the setup information is correct for your installation. To change any settings, click Back to display the dialog box with the incorrect data. After correcting the data, repeat the information you entered in the remaining steps 12. When the settings are correct, click Next. SMS displays the setup window while installation is in progress. When installation is complete, the SMS-3000 folder is created. Note: To stop the installation process, click Cancel. The Exit Setup dialog box displays. Click Resume to continue the installation. Or click Exit Setup to cancel the installation. (When you are ready to resume the installation, you must start with step 1.) © 1997 Square D All Rights Reserved 21 Bulletin 3080IM9602R11/97 If your PC’s tasking priorities are not correctly set, SMS displays a message recommending that you set “the performance boost for foreground application medium (Foreground application more responsive than background). Would you like to change this now?” 13. Click Y to change the setting now. If you click N, you must change the setting manually. Selecting N gives priority to the foreground (the client). This can cause the background task (POWERLOGIC network server) to perform too slowly, thus slowing the system response time. SMS displays the SMS-3000 Configuration dialog box: 14. In the Select the POWERLOGIC Network Server box, select the name of the PC on which the server is being installed. For the client/server installation, accept the default (the computer at which the installation is taking place). If the PC names do not display, you can type the PC name that you used when setting up your network. If there are no ethernet cards installed in this PC, type a period (.) instead of the PC name. The client/server will operate on this PC and will not try to make a network connection In the Select the PowerLogic system setup database box, select the path (drive, PC, directory) where the SMS system setup database (PLSystem.mdb) is installed. For the client/server installation, accept the default (SMS-3000\Database\PLSystem.mdb). You can click Browse to locate the database. The Advanced button is used to access the ODBC Data Source Administrator dialog box, for configuring ODBC. For help using this dialog box, contact the Power Management Operation Technical Support department at (615) 287-3400. The default installs all SMS files on one PC. All activities (including logging) will be performed here and all associated files will be stored here. This can quickly fill the available space. See Chapter 6—Working with the SMS Database for more information about hard disk allocation. For more information about sharing and mapping drives, see the Microsoft Windows documentation. 15. Click Next. 22 © 1997 Square D All Rights Reserved Chapter 4—SMS-3000 Installation SMS displays the Create Administrator Account dialog box: 16. You must add at least one level-1 user account at this point. This user name and password will be used when you start SMS. (It is recommended that there be only one level-1 user: the system administrator). For instructions on user accounts, see Chapter 5—Working with User Accounts. SMS displays the SY/LINK Setup dialog box: 17. In the Address location dropdown list box, click the SY/LINK memory address setting that matches the SY/LINK card’s DIP switch setting. Click Add. Click Next. You must repeat this procedure for every SY/LINK interface board that is installed. If you do not have a SY/LINK card in your PC (if you are using the serial port or Ethernet Gateway), just click Next. 18. A message displays telling you that File Services will be set up on this computer. You will use File Services to view and print system information, such as device configuration. See Appendix A in the SMS-3000 User’s Guide for instructions in using File Services. Click OK to begin the procedure. If File Services is not already set up on this computer, the setup procedure runs automatically. When setup is complete, acknowledge the message by clicking OK. © 1997 Square D All Rights Reserved 23 Bulletin 3080IM9602R11/97 Note: After File Services File Services has been correctly installed, the following dialog box could display. You must click Restart Windows, not Exit Setup. Continue with step 19. If File Services is already set up on this computer, the setup process begins, but is replaced by the File Services Setup dialog box: Click Exit Setup. In response to the Are you sure? prompt, click OK. In response to the prompt telling you that the File Services setup was interrupted, click OK. (Your original installation of File Services has not been deleted.) 19. SMS displays a message: • telling you that SMS-3000 Setup is finished copying files • reminding you to upgrade all instances of SMS client, server, and interactive graphics software products to the new version • telling you to use the Translation Utility to convert previous SMS historical information; for instructions, see Using the Translation Utility, later in this chapter. Setup is complete. Before you can run SMS-3000, you must restart your computer. To restart, click Yes, then click Finish. Note: When you see the message Press spacebar now to invoke hardware profile/last known good menu, do not press the spacebar. If you do, you will reset the NT Registry so that it does not recognize the last hardware driver that was installed (Ethernet Gateway, SMS security key, or SY/LINK). This means you will have to reinstall SMS. 24 © 1997 Square D All Rights Reserved Chapter 4—SMS-3000 Installation Ethernet Gateway If you are using the Ethernet Gateway, you need to install it at this time. Refer to the Ethernet Gateway instruction manual, order no. 3050IM9601R3/97, for installation instructions. For TCP/IP and Ethernet Gateway tests, see What You Should Know Before You Begin in chapter 1. SMS-3000 Startup After you have installed SMS-3000, follow these steps to start running the program. 1. Restart the PC, if you did not do so during installation. 2. Locate the server and client icons. They are located in the Destination path established during installation (default: c:\SMS-3000\Bin). Double-click the server icon. Or, click the Start button on the Windows taskbar, point to the Programs folder, the SMS-3000 folder, then the server icon. 3. When prompted, enter the user ID information that you added during installation. 4. Double-click the client icon. Or, from the Windows taskbar, point to the Programs folder, the SMS-3000 folder, then the client icon. 5. When prompted, enter the user ID information that you added during installation. SMS starts the program and displays the SMS main window. Upgrade Installation, Client/Server Use this procedure to install an upgrade from a previous version of SMS-3000 client/server software. Before you install this upgrade, first make a backup copy of your system data (default = c:\SMS-3000 > Database > comms.mdb). Do not uninstall the previous version. If you do, you must reinstall the previous version then install the new version in the same directory. To ensure that SMS can convert the old database to version 3.02, you must install the new version in the directory that contains the old version. © 1997 Square D All Rights Reserved 25 Bulletin 3080IM9602R11/97 During the installation of the upgrade software, the old comms.mdb database is converted into two parts: • PLSystem.mdb, containing all system setup information in version 3.02 format. • History.mdb, an empty history file that will include historical log data from old SMS versions as well as from the new version. After SMS installation, the old SMS-3000 data remains in the comms.mdb file. You will use the translation utility to convert it to a new format, which will be placed in History.mdb for use with the new version of SMS-3000. New historical data is generated according to a schedule you establish. See Chapter 6—Working with the SMS Database for instructions on setting this schedule. The History.mdb file is placed in the same directory as the old comms.mdb. Notes: Always close any open applications before installing SMS. To install the server, client, and database on one computer, follow these steps: 1. Insert the CD into the CD-ROM drive of the computer that is to be client/server. Note: If you do not have a CD-ROM drive on this computer, you can request floppies for the installation by returning the “3-1/2" Disks Request Form” card in your installation package. Installation instructions will be in a readme file on disk 1. 2. Click Start > Run... to open the Run dialog box. Click Browse... and scroll to D:\setup.exe. SMS temporarily displays a message telling you that an SMS Wizard is being retrieved to help with the installation. 3. Because a version of SMS already exists on this PC, SMS displays a message telling you that a previous installation has been detected, and that you should copy the SMS database (comms.mdb) to a backup location before you run this installation. If you have not already made a backup copy of comms.mdb, click N to exit the installation. Make the backup copy before you continue with the installation. An upgrade procedure handout, included with your software shipment, contains more details about this procedure. If you have already made the backup copy of comms.mdb, or when you return to this step, click Y to the prompt. 4. SMS displays the setup window while installation is in progress. During this time, SMS converts the previous database (comms.mdb) into a format that the new SMS version can use. System setup data is placed in a new file, called PLSystem.mdb. Historical data stays in comms.mdb; it is not usable until you run the translation utility to convert it to the new version format. For instructions on using the translation utility, see Running the Translation Utility, at the end of this chapter. 26 © 1997 Square D All Rights Reserved Chapter 4—SMS-3000 Installation When installation is complete, the SMS-3000 folder is created. Note: To stop the installation process, click Cancel. The Exit Setup dialog box displays. Click Resume to continue the installation. Or click Exit Setup to cancel the installation. (When you are ready to resume the installation, you must start with step 1.) 5. If your PC’s tasking priorities are not correctly set, SMS displays a message recommending that you set “the performance boost for foreground application medium (Foreground application more responsive than background). Would you like to change this now?” Click Y to change the setting now. If you click N, you must change the setting manually. Selecting N gives priority to the foreground (the client). This can cause the background task (POWERLOGIC network server) to perform too slowly, thus slowing the system response time. 6. A message displays telling you that File Services will be set up on this computer. You will use File Services to view and print system information, such as device configuration. See Appendix A in the SMS-3000 User’s Guide for instructions on using File Services. Click OK to begin the procedure. If File Services is not already set up on this computer, the setup procedure runs automatically. When setup is complete, acknowledge the message by clicking OK. Note: After File Services File Services has been correctly installed, the following dialog box could display. You must click Restart Windows, not Exit Setup. Continue with step 7. © 1997 Square D All Rights Reserved 27 Bulletin 3080IM9602R11/97 If File Services is already set up on this computer, the setup process begins, but is replaced by the File Services Setup dialog box: Click Exit Setup. In response to the Are you sure? prompt, click OK. In response to the prompt telling you that the File Services setup was interrupted, click OK. (Your original installation of File Services has not been deleted.) 7. SMS displays a message: • telling you that SMS-3000 Setup is finished copying files • reminding you to upgrade all instances of SMS client, server, and interactive graphics software products to the new version • telling you to use the Translation Utility to convert previous SMS historical information; for instructions, see Using the Translation Utility, later in this chapter. Setup is complete. Before you can run SMS-3000, you must restart your computer. To restart, click Yes, then click Finish. Note: When you see the message Press spacebar now to invoke hardware profile/last known good menu, do not press the spacebar. If you do, you will reset the NT Registry so that it does not recognize the last hardware driver that was installed (Ethernet Gateway, SMS security key, or SY/LINK). This means you will have to reinstall SMS. Restoring the Data Files If you backed up a previous database before installation, you need to restore the data to the current database location. To do this, locate the temporary file in which the backed up files are stored (c:\temp\PLSystembkp.mdb or whatever file you changed it to). Rename this file PLSystem.mdb and drag it to the database directory where SMS-3000 resides. 28 © 1997 Square D All Rights Reserved Chapter 4—SMS-3000 Installation New Installation, Client Use this procedure to install SMS-1000 client software for the first time on a PC separate from the POWERLOGIC network server. Notes: Always close any open applications before installing SMS. Checklist Follow these steps to correctly install the client: • Install the POWERLOGIC network server • Install the client • Start the POWERLOGIC network server • Start the client Ensuring Correct Client Registration In order for the POWERLOGIC network server to register the number of client connections allowed, you must follow this procedure: Before client installation: • Turn the server PC on and log it into Windows NT. Install the POWERLOGIC network server and database; if you wish, you can launch the POWERLOGIC network server at this time. • Complete all database shares and PC user accounts (NT User Manager). For instructions, see What You Should Know Before You Begin in chapter 1. • Map one drive on the client PC to the database (PLSystem.mdb) directory. • If you are using a LAN, it must be operating properly, and all database shares and network privileges must be assigned. If this point is not followed, the number of concurrent clients will not be registered in the POWERLOGIC network server; client users may see an error message that communication could not be established because the allowable client connections were exceeded. Before or during client installation: • Map the client PC to the network drive for the SMS database (default = PLSystem.mdb). To set up your computer as an SMS client, follow these steps: 1. Insert the CD into the CD-ROM drive of the computer that is to be a separate client. Note: If you do not have a CD-ROM drive on this computer, you can request floppies for the installation by returning the “3-1/2" Disks Request Form” card in your installation package. Installation instructions will be in a readme file on disk 1. 2. Click Start > Run... to open the Run dialog box. Click Browse... and scroll to D:\setup.exe. A message displays telling you that an SMS Wizard is being retrieved to help with the installation. © 1997 Square D All Rights Reserved 29 Bulletin 3080IM9602R11/97 3. SMS displays the System Manager Software information dialog box: 4. Read the information on the screen. Click Next. SMS displays the software license screen: 5. Read the license agreement in the box. You are asked whether you agree with the terms of the license agreement. Click No if you do not accept the terms of the agreement; the Exit Setup dialog box displays. You cannot continue with installation if you click No at this prompt. 30 © 1997 Square D All Rights Reserved Chapter 4—SMS-3000 Installation Click Yes to accept the terms of the agreement. SMS displays the Registration dialog box: 6. Type your name, company, and the serial number, which is on a sticker on the back of the software CD jewel case. Click Next to continue the installation. SMS displays the Registration Confirmation dialog box, verifying the information you entered on the previous dialog box: 7. Read to ensure that this information is correct. Click No to return to the previous dialog box; correct the information. Click Yes to continue with the installation. © 1997 Square D All Rights Reserved 31 Bulletin 3080IM9602R11/97 The Setup Options dialog box displays (this dialog does not display if you are using SMS-1000 software to install the client): 8. Click Client. SMS displays the SMS-3000 Destination path dialog box. It lists the default location for the client data files: c:\SMS-3000: To change the directory, click Browse and enter the new directory. When the correct destination directory displays, click Next. If the directory does not already exist, the prompt Confirm Newly Selected Directory displays. Click Yes to accept the directory name. 32 © 1997 Square D All Rights Reserved Chapter 4—SMS-3000 Installation The Check Setup Information dialog box displays: 9. Scroll through the settings to verify that the setup information is correct for your installation. To change any settings, click Back to display the dialog box with the incorrect data. After correcting the data, repeat the information you entered in the remaining steps. 10. When the settings are correct, click Next. SMS displays the setup window while installation is in progress. When installation is complete, the SMS-3000 folder is created. Note: To stop the installation process, click Cancel. The Exit Setup dialog box displays. Click Resume to continue the installation. Or click Exit Setup to cancel the installation. (When you are ready to resume the installation, you must start with step 1.) When installation is complete, the SMS-3000 Configuration dialog box displays: 11. In the Select the POWERLOGIC Network Server box, select or type the name of the PC on which the server is being installed. Scroll through the choices in the box below to locate the PC, or type the PC name that you used for the server when setting up your network. In the Select the PowerLogic system setup database box, select the path (drive to which you’ve mapped for the database directory, PC, directory) where the SMS system setup database (PLSystem.mdb) is installed. You can click Browse to locate the database. © 1997 Square D All Rights Reserved 33 Bulletin 3080IM9602R11/97 The Advanced button is used to access the ODBC Data Source Administrator dialog box, for configuring ODBC. For help using this dialog box, contact the Power Management Operation Technical Support department at (615) 287-3400. Note: The server PC must give privileges to the Windows NT user name in Windows before the client can access it. The database must be shared. Sharing a drive involves mapping to another drive. For information on mapping, see the Microsoft Windows documentation. A message displays telling you that File Services will be set up on this computer. You will use File Services to view and print system information, such as device configuration. See Appendix A in the SMS-3000 User’s Guide for instructions in using File Services. Click OK to begin the procedure. 12. If File Services is not already set up on this computer, the setup procedure runs automatically. When setup is complete, acknowledge the message by clicking OK. Note: After File Services File Services has been correctly installed, the following dialog box could display. You must click Restart Windows, not Exit Setup. Continue with step 13. If File Services is already set up on this computer, the setup process begins, but is replaced by the File Services Setup dialog box: Click Exit Setup. In response to the Are you sure? prompt, click OK. In response to the prompt telling you that the File Services setup was interrupted, click OK. (Your original installation of File Services has not been deleted.) 34 © 1997 Square D All Rights Reserved Chapter 4—SMS-3000 Installation 13. SMS displays a message: • telling you that SMS-3000 Setup is finished copying files • reminding you to upgrade all instances of SMS client, server, and interactive graphics software products to the new version • telling you to use the Translation Utility to convert previous SMS historical information; for instructions, see Using the Translation Utility, later in this chapter. Setup is complete. Before you can run SMS-3000, you must restart your computer. To restart, click Yes, then click Finish. Note: When you see the message Press spacebar now to invoke hardware profile/last known good menu, do not press the spacebar. If you do, you will reset the NT Registry so that it does not recognize the last hardware driver that was installed (Ethernet Gateway, SMS security key, or SY/LINK). This means you will have to reinstall SMS. SMS Startup Complete startup instructions are listed in SMS-3000 Startup, at the end of the section New Installation, Client/Server. Upgrade Installation, Client Use this procedure to install an upgrade to a previous version of SMS-3000 client software. Note: Always close any open applications before installing SMS. Checklist Follow this checklist, in the order listed, to ensure a correct upgrade: • Upgrade the POWERLOGIC network server • Translate historical data (see Running the Translation Utility, later in this chapter) • Upgrade the client • Start the POWERLOGIC network server then the client To upgrade client software on one computer, follow these steps: 1. Insert the CD into the CD-ROM drive of the computer that is to be server/client. Note: If you do not have a CD-ROM drive on this computer, you can request floppies for the installation by returning the “3-1/2" Disks Request Form” card in your installation package. Installation instructions will be in a readme file on disk 1. 2. Click Start > Run... to open the Run dialog box. Click Browse... and scroll to D:\setup.exe. © 1997 Square D All Rights Reserved 35 Bulletin 3080IM9602R11/97 SMS temporarily displays a message telling you that an SMS Wizard is being retrieved to help with the installation. 3. SMS displays the setup window while installation is in progress. When installation is complete, the SMS-3000 folder is created. Note: To stop the installation process, click Cancel. The Exit Setup dialog box displays. Click Resume to continue the installation. Or click Exit Setup to cancel the installation. (When you are ready to resume the installation, you must start with step 1.) 4. A message displays telling you that File Services will be set up on this computer. You will use File Services to view and print system information, such as device configuration. See Appendix A in the SMS-3000 User’s Guide for instructions in using File Services. Click OK to begin the procedure. If File Services is not already set up on this computer, the setup procedure runs automatically. When setup is complete, acknowledge the message by clicking OK. Note: After File Services File Services has been correctly installed, the following dialog box could display. You must click Restart Windows, not Exit Setup. Continue with step 5. If File Services is already set up on this computer, the setup process begins, but is replaced by the File Services Setup dialog box: Click Exit Setup. In response to the Are you sure? prompt, click OK. In response to the prompt telling you that the File Services setup was interrupted, click OK. (Your original installation of File Services has not been deleted.) 36 © 1997 Square D All Rights Reserved Chapter 4—SMS-3000 Installation 5. SMS displays a message: • telling you that SMS-3000 Setup is finished copying files • reminding you to upgrade all instances of SMS client, server, and interactive graphics software products to the new version • telling you to use the Translation Utility to convert previous SMS historical information; for instructions, see Using the Translation Utility, later in this chapter. Setup is complete. Before you can run SMS-3000, you must restart your computer. To restart, click Yes, then click Finish. Note: When you see the message Press spacebar now to invoke hardware profile/last known good menu, do not press the spacebar. If you do, you will reset the NT Registry so that it does not recognize the last hardware driver that was installed (Ethernet Gateway, SMS security key, or SY/LINK). This means you will have to reinstall SMS. New Installation, DDE Server Use this procedure to install the DDE Server for the first time. Note: Always close any open applications before installing an SMS application. The client/server installation also installs DDE. The DDE server makes a logical connection, over the network, to the POWERLOGIC network server. The POWERLOGIC network server provides data to the DDE application, which serves it to third-party applications (that contain DDE links.) Note: Any application that receives data from the DDE server must be installed on the same PC as the DDE server. These application must have DDE links established within them. For more information, see the SMS-3000 User’s Guide, Chapter 18—Using Dynamic Data Exchange. To install the DDE server on a separate computer, follow these steps: 1. Insert the CD into the CD-ROM drive of the computer where the DDE server is to be installed. Note: If you do not have a CD-ROM drive on this computer, you can request floppies for the installation by returning the “3-1/2" Disks Request Form” card in your installation package. Installation instructions will be in a readme file on disk 1. 2. Click Start > Run... to open the Run dialog box. Click Browse... and scroll to D:\setup.exe. A message displays telling you that an SMS Wizard is being retrieved to help with the installation. © 1997 Square D All Rights Reserved 37 Bulletin 3080IM9602R11/97 SMS displays the System Manager Software information dialog box: 3. Read the information on the screen. Click Next. SMS displays the software license screen: 4. Read the license agreement in the box. You are asked whether you agree with the terms of the license agreement. Click No if you do not accept the terms of the agreement; the Exit Setup dialog box displays. You cannot continue with installation if you click No at this prompt. Click Yes to accept the terms of the agreement. 5. Type your name, company, and the serial number, which is on a sticker on the back of the software CD jewel case. Click Next. 38 © 1997 Square D All Rights Reserved Chapter 4—SMS-3000 Installation SMS displays the Registration Confirmation dialog box, verifying the information you entered on the previous dialog box: 6. Read to ensure that this information is correct. Click No to return to the previous dialog box; correct the information. Click Yes to continue with the installation. SMS displays the Setup Options dialog box: 7. Click DDE Server. © 1997 Square D All Rights Reserved 39 Bulletin 3080IM9602R11/97 SMS displays the SMS-3000 Destination path dialog box. It lists the default location for the installation files: c:\SMS-3000. 8. To change the directory, click Browse and choose the new directory. When the correct destination directory displays, click Next. Note: Remember that the subdirectory named Database must be shared for clients to be able to access it. SMS displays the prompt Confirm Newly Selected Directory. 9. If the directory is incorrect, click No and correct the directory name. When the directory name is correct, click Yes. If the directory does not already exist, you are prompted to reconfirm the name. Click Yes to accept the directory name. SMS displays the Check Setup Information dialog box: 10. Scroll through the settings to verify that the setup information is correct for your installation. To change any settings, click Back to display the dialog box with the incorrect data. After correcting the data, repeat the information you entered in the remaining steps. When the settings are correct, click Next. 40 © 1997 Square D All Rights Reserved Chapter 4—SMS-3000 Installation SMS displays the setup window while installation is in progress. When installation is complete, the SMS-3000 folder is created. Note: To stop the installation process, click Cancel. The Exit Setup dialog box displays. Click Resume to continue the installation. Or click Exit Setup to cancel the installation. (When you are ready to resume the installation, you must start with step 1.) 11. When installation is complete, the SMS-3000 Configuration dialog box displays: In the Select the POWERLOGIC Network Server box, select or type the name of the PC on which the server is being installed. Scroll through the choices in the box below to locate the PC, or type the PC name that you used for the server when setting up your network. In the Select the PowerLogic system setup database box, select the path (network drive to which you’ve mapped for the database directory, PC, directory) where the SMS system setup database (PLSystem.mdb) is installed. You can click Browse to locate the database. The Advanced button is used to access the ODBC Data Source Administrator dialog box, for configuring ODBC. For help using this dialog box, contact the Power Management Operation Technical Support department at (615) 287-3400. Note: The server PC must give privileges to the Windows NT user name in Windows before the client can access it. The database must be shared. Sharing a drive involves mapping to another drive. For information on mapping, see the Microsoft Windows documentation. 12. A message displays telling you that File Services will be set up on this computer. You will use File Services to view and print system information, such as device configuration. See Appendix A in the SMS-3000 User’s Guide for instructions in using File Services. Click OK to begin the procedure. If File Services is not already set up on this computer, the setup procedure runs automatically. When setup is complete, acknowledge the message by clicking OK. © 1997 Square D All Rights Reserved 41 Bulletin 3080IM9602R11/97 Note: After File Services File Services has been correctly installed, the following dialog box could display. You must click Restart Windows, not Exit Setup. Continue with step 13. If File Services is already set up on this computer, the setup process begins, but is replaced by the File Services Setup dialog box: Click Exit Setup. In response to the Are you sure? prompt, click OK. In response to the prompt telling you that the File Services setup was interrupted, click OK. (Your original installation of File Services has not been deleted.) 13. SMS displays a message: • telling you that SMS-3000 Setup is finished copying files • reminding you to upgrade all instances of SMS client, server, and interactive graphics software products to the new version • telling you to use the Translation Utility to convert previous SMS historical information; for instructions, see Using the Translation Utility, later in this chapter. Setup is complete. Before you can run SMS-3000, you must restart your computer. To restart, click Yes, then click Finish. Note: When you see the message Press spacebar now to invoke hardware profile/last known good menu, do not press the spacebar. If you do, you will reset the NT Registry so that it does not recognize the last hardware driver that was installed (Ethernet Gateway, SMS security key, or SY/LINK). This means you will have to reinstall SMS. 42 © 1997 Square D All Rights Reserved Chapter 4—SMS-3000 Installation Upgrade Installation, DDE Server Use this procedure to install an upgrade to a previous version of DDE server software. Note: Always close any open applications before installing SMS. Checklist Follow this checklist, in the order listed, to ensure a correct upgrade: • Upgrade the POWERLOGIC network server. • Translate historical data (see Running the Translation Utility, later in this chapter). • Upgrade the client. • Start the POWERLOGIC network server then the client. To install the DDE server on one computer, follow these steps: 1. Insert the CD into the CD-ROM drive of the computer that is to be the DDE server. Note: If you do not have a CD-ROM drive on this computer, you can request floppies for the installation by returning the “3-1/2" Disks Request Form” card in your installation package. Installation instructions will be in a readme file on disk 1. 2. Click Start > Run... to open the Run dialog box. Click Browse... and scroll to D:\setup.exe. SMS temporarily displays a message telling you that an SMS Wizard is being retrieved to help with the installation. 3. SMS displays the setup window while installation is in progress. When installation is complete, the SMS-3000 folder is created. Note: To stop the installation process, click Cancel. The Exit Setup dialog box displays. Click Resume to continue the installation. Or click Exit Setup to cancel the installation. (When you are ready to resume the installation, you must start with step 1.) 4. A message displays telling you that File Services will be set up on this computer. You will use File Services to view and print system information, such as device configuration. See Appendix A in the SMS-3000 User’s Guide for instructions in using File Services. Click OK to begin the procedure. If File Services is not already set up on this computer, the setup procedure runs automatically. When setup is complete, acknowledge the message by clicking OK. © 1997 Square D All Rights Reserved 43 Bulletin 3080IM9602R11/97 Note: After File Services File Services has been correctly installed, the following dialog box could display. You must click Restart Windows, not Exit Setup. Continue with step 5. If File Services is already set up on this computer, the setup process begins, but is replaced by the File Services Setup dialog box: Click Exit Setup. In response to the Are you sure? prompt, click OK. In response to the prompt telling you that the File Services setup was interrupted, click OK. (Your original installation of File Services has not been deleted.) 5. SMS displays a message: • telling you that SMS-3000 Setup is finished copying files • reminding you to upgrade all instances of SMS client, server, and interactive graphics software products to the new version • telling you to use the Translation Utility to convert previous SMS historical information; for instructions, see Using the Translation Utility, later in this chapter. Setup is complete. Before you can run SMS-3000, you must restart your computer. To restart, click Yes, then click Finish. Note: When you see the message Press spacebar now to invoke hardware profile/last known good menu, do not press the spacebar. If you do, you will reset the NT Registry so that it does not recognize the last hardware driver that was installed (Ethernet Gateway, SMS security key, or SY/LINK). This means you will have to reinstall SMS. 44 © 1997 Square D All Rights Reserved Chapter 4—SMS-3000 Installation Custom Installation Use the custom installation procedure to install SMS-3000 to meet your unique needs. For example, if you want to install your database on a PC that is separate from the server and clients, use this option. If you need help performing a custom installation, call the Power Management Operation Technical Support Center at (615) 287-3400. Notes: A custom installation should only be performed by advanced Windows users. Always close any open applications before installing SMS. To perform a custom installation, follow these steps: 1. Insert the CD into the CD-ROM drive of the computer that is to be server/client. Note: If you do not have a CD-ROM drive on this computer, you can request floppies for the installation by returning the “3-1/2" Disks Request Form” card in your installation package. Installation instructions will be in a readme file on disk 1. 2. Click Start > Run... to open the Run dialog box. Click Browse... and scroll to D:\setup.exe. A message displays telling you that an SMS Wizard is being retrieved to help with the installation. SMS displays the System Manager Software information dialog box: 3. Read the information on the screen. Click Next. © 1997 Square D All Rights Reserved 45 Bulletin 3080IM9602R11/97 SMS displays the software license screen: 4. Read the license agreement in the box. You are asked whether you agree with the terms of the license agreement. Click No if you do not accept the terms of the agreement; the Exit Setup dialog box displays. You cannot continue with installation if you click No at this prompt. Click Yes to accept the terms of the agreement. SMS displays the Registration dialog box: 5. Type your name, company, and the serial number, which is on a sticker on the back of the software CD jewel case. Click Next. 46 © 1997 Square D All Rights Reserved Chapter 4—SMS-3000 Installation SMS displays the Registration Confirmation dialog box, verifying the information you entered on the previous dialog box: 6. Read to ensure that this information is correct. Click No to return to the previous dialog box; correct the information. Click Yes to continue with the installation. SMS displays the Setup Options dialog box: 7. Click Custom. © 1997 Square D All Rights Reserved 47 Bulletin 3080IM9602R11/97 SMS displays the SMS-3000 Custom Installation dialog box. X X X Database Only Description The client application that connects to a server DDE Server POWERLOGIC network server Microsoft Windows NT and Windows 95 driver for SY/LINK cards MS Access database used for client/server data and setup information Open database connectivity; mandatory for client, server, or database DDE Server Component SMS-3000 Client SMS-3000 DDE Server SMS-3000 Server Files SY/LINK Driver ACCESS Database ODBC Files and DAO Client Only Custom Installation Components Client/Server 8. Select the components that you want to include. The following table describes each component. X ➀ X X X X X X ➀ Although the database only requires the three last components, you might want to consider adding the DDE server to the database PC. It can share data with other applications on the same PC. 9. Click the components that correspond with the type of installation you want. 10. For the components that you selected, make sure you properly configure server and database locations. 11. After installation is complete, you must restart your computer. Note: When you see the message Press spacebar now to invoke hardware profile/last known good menu, do not press the spacebar. If you do, you will reset the NT Registry so that it does not recognize the last hardware driver that was installed (Ethernet Gateway, SMS security key, or SY/LINK). This means you will have to reinstall SMS. Ethernet Gateway If you are using the Ethernet Gateway, you need to install it at this time. Refer to the Ethernet Gateway instruction manual, order no. 3050IM9601R3/97, for installation instructions. Reinstalling SMS If you want to reinstall SMS for any reason, you do not need to uninstall first. Instead, run Setup.exe (on the SMS CD). The install program will detect the existing installation. You do not need to enter the serial number, SY/LINK address, or user ID. You do not need to back up the databases. 48 © 1997 Square D All Rights Reserved Chapter 4—SMS-3000 Installation Uninstalling SMS If you want to uninstall SMS, follow the steps below. For all uninstall operations, use the Add/Remove Programs feature (Control Panel > Add/Remove > Install/Uninstall). 1. If you have the Ethernet Gateway installed, uninstall it first. 2. Uninstall File Services. If there is a GFX add-on on the PC, you do not need to uninstall it; the SMS uninstall procedure will do it automatically. 3. Uninstall SMS. During the uninstall procedure, SMS asks if you want to back up the database. This backup includes all .mdb extension database files that are in the database directory. The default location is c:\temp\SMSBKP, but you can change this location. You can use SMSBKP, after you install again, to restore all of your database information, such as device setups, user access, and logging information. Running the Translation Utility You’ll use the translation utility to convert (translate) old data into a format that can be used by the new version of SMS-3000. You will translate data from the following sources: • From SMS-770 (including EXP-500/550, SMS-700/770), you can translate system setup information and historical data. • From SMS-3000, you can translate historical data (the SMS upgrade installation automatically converts the system setup information). The translation procedure breaks down log data into small data files, organized within date ranges that you define during translation. Because the process of translating historical data can be rather lengthy, you may want to consider translating the SMS-3000 historical data in batches. This is described in detail in the instructions that follow. Note: Data beyond “tomorrow” will not be translated. If you try to run the translation utility with data that has a future date (such as year 2000 data), the translation time will be much longer than estimated in the table on the next page. To avoid this problem, delete the data: • shut down SMS and the POWERLOGIC network server • open the database in Access • open the table LOG_SAMPLES • find and delete all instances of future data © 1997 Square D All Rights Reserved 49 Bulletin 3080IM9602R11/97 Use the following table to estimate the amount of time and space required to perform a translation. Time and Space Requirements for Translation Translation Time Required System Files History Logs Drive Space Required New History Log Files SMS-770 Upgrade to SMS-3000 v. 3.02 From < 1 minute to several minutes, depending on the number of devices in the system 2 minutes/MB or faster➀ 3.5 times the sum of the SMS-770 file sizes➀ SMS-3000 v. 3.0/3.01 Upgrade Possibly > 10 minutes, if comms.mdb is > 250 MB 2 minutes/MB or faster➀ 2/3 times the file size of the SMS-3000 v. 3.0/3.01 comms.mdb ➀ ➁ ➀ If you select the daily rollover option, the translation time will be 4–5 times longer, and the process will create 7 times the number of databases that would b e created in a weekly rollover. ➁ Although the final size is 2/3 times the comms.mdb, during translation you need to have available approximately 3 times the size of the comms.mdb. Three Scenarios The translation utility supports three scenarios, described in the following paragraphs. If your SMS system does not fit into one of these scenarios, please contact Technical Support for help in running the translation utility. See chapter 2 for instructions on contacting Technical Support. The three scenarios are: • v. 3.0/3.01 to v. 3.02: You have upgraded SMS-3000 from version 3.0 or version 3.01 to version 3.02. You are translating version 3.0 or version 3.01 historical data. Version 3.0 or version 3.01 had only one database (named comms.mdb) installed on the server PC; it contained all system and historical data. • SMS-770 to v. 3.02: You have upgraded SMS-770 to SMS-3000, version 3.02. During translation, you will first translate the SMS-770 system files, then you will translate SMS-770 historical data. • SMS-700 to v. 3.0/3.01 to v. 3.02: You had previously upgraded SMS-770 to SMS-3000 (version 3.0 or version 3.01). Your SMS-770 system files were translated into version 3.0 or version 3.01. You have also upgraded SMS-3000 to version 3.02. You are translating version 3.0 or version 3.01 historical data. Version 3.0 or version 3.01 had only one database (named comms.mdb) installed on the server PC; it contained all system and historical data. You may have both SMS-770 and version 3.01 historical data to translate. 50 © 1997 Square D All Rights Reserved Chapter 4—SMS-3000 Installation Converting Version 3.0 or 3.01 System Data If you have installed a previous version of SMS-3000 (version 3.0 or 3.01), the system data in the comms.mdb file must be converted to the new format before you can run the translation. SMS converts this data automatically during installation. Comms.mdb is automatically converted into two files: • PLSystem.mdb, which will contain all setup information and the alarm and event logs • History.mdb, which will contain historical data (after it is translated) You can perform a translation in individual steps, or by following a guided translation procedure that includes all of the steps. Translation done out of order can cause some history data to be inaccessible to SMS. To ensure the proper order of translation, we recommend that you follow the guided translation, which is described in the following pages. If you choose to perform the translations individually, you must follow the order below. 1. Convert SMS-770 system files into the new version’s format. Note that the term “SMS-770” includes EXP-500/550 as well as SMS-700/770 files. If multiple SMS-770 system files are to be translated, place each .syk file with its asosciated history log files in a separate directory; leaving all .syk files in one common directory will cause delays. 2. Translate SMS-3000 historical data logs into the current format. 3. Translate SMS-770 historical data logs into the current format. Note that the term “SMS-770” includes EXP-500/550 as well as SMS-700/770 files. The flow chart on the next page also outlines the proper order. The Translation Procedure To begin translating data, access the translation utility (Start > Programs > sms-3000 > SMS-3000 Translation). In response to the message telling you to shut down the POWERLOGIC network server, make sure the server is shut down, then click OK. The Historical Data Translation Utility dialog box displays: To begin the guided translation, click Guided Translation, then click Continue... . © 1997 Square D All Rights Reserved 51 Bulletin 3080IM9602R11/97 Start Shut down all PowerLogic applications before using the translation utility Do you have SMS-770 system files to translate? N Do you have SMS-3000 historical data to translate? Y N Translate SMS-770 system files Y Translate SMS-3000 historical data Do you have SMS-770 historical data to translate? N Y Translate SMS-770 historical data Finish 52 © 1997 Square D All Rights Reserved Chapter 4—SMS-3000 Installation 1. Converting SMS-770 System Data a. SMS displays the prompt: Do you have SMS-770 system files to translate? If you do not have SMS-770 system files to translate, click No; skip to step 2. If you have been using SMS-770 and have not upgraded to a version of SMS-3000, click Yes; continue with step 1b. SMS displays the Select System to Translate dialog box: b. Select the SMS-770 system file (.syk extension ) to be translated. (If there are multiple system files, select only one. You will repeat this procedure for each SMS-770 .syk system.) If this system includes POWERLOGIC-compatible devices, SMS displays the PowerLogic Compatible Device dialog box: c. As each device name displays, click the appropriate SMS-3000 device type. Click OK. SMS translates the data for that device into the device type file you choose. The translation utility allows you to reassign a POWERLOGIC-compatible device type to its appropriate device type. You should do this now to ensure that history data will stay intact with the device. © 1997 Square D All Rights Reserved 53 Bulletin 3080IM9602R11/97 When all of the data for this system is translated, SMS displays the Translate SMS/EXP to SMS/PMX 3.02 dialog box: d. If there are additional SMS-770 systems to translate, click Translate... . Return to the beginning of step 1. If there are no more SMS-770 systems to translate, click Close. e. After translating the SMS-770 system files, SMS displays the prompt Do you have SMS-770 historical data to translate? If not, click No to return to the Historical Data Translation dialog box. Click Quit. If yes, click Yes. Skip to step 3 to translate SMS-770 historical data. 2. Translating SMS-3000 Historical Data SMS displays the prompt: Do you have SMS-3000 3.0/3.01 historical data to translate? If no, click No; skip to step 3. If yes, click Yes. SMS displays a prompt telling you that you need to contact Technical Support if you have more than one SMS-3000 database to convert. Click OK. a. If you have multiple SMS-3000 databases, click Cancel at the next prompt, then contact Technical Support for help. Instructions for contacting Technical Support are in chapter 2. 54 © 1997 Square D All Rights Reserved Chapter 4—SMS-3000 Installation SMS displays the SMS-3000 v3.0/v3.01 to v.3.02 History Log Translation dialog box: b. Locate the directory that contains the historical data (SMS-3000\Database\comms.mdb). Click the Browse button (...) to select the directory. This field defaults to the directory where PLSystem.mdb resides. c. Select the start date for the data to be translated. This field defaults to the first date for which there is data to be translated. The Ending Date displays the first date for which there is already historical data that is correctly formatted. Choose a starting date that is appropriate for the amount of data you have to translate. If you have several months of data to translate, you might want to translate the data in batches. If translating in batches, you must translate data in reverse chronological order, entering the most recent data first. (See Batch Translation Example, below. d. Select the rollover option you will use. This sets the range for your older history data to be split into separate files. We recommend weekly files. Batch Translation Example Assume that you are installing the new version of SMS-3000 on October 1. You have been running an older version of SMS-3000 since June 1, so you have historical files to translate from June 1 through October 1. If you chose to translate this information in one-month batches, you would enter data as follows: Translation Batch First Second Third Fourth Start Date September 1 August 1 July 1 June 1 Data Included in this Batch From Septemb er 1–October 1 From Aug u st 1–August 31 From J u ly 1–July 31 From June 1—June 30 Note that, with each successive batch, the default for the ending date changes to reflect the first date that includes translated data (for the second batch, this would be September 1. You must convert all older data before collecting new data with version 3.02. © 1997 Square D All Rights Reserved 55 Bulletin 3080IM9602R11/97 e. Click Translate... . SMS displays a message telling you that the translation could take several minutes. To estimate how long it will take to translate your data, see the table Time and Space Requirements for Translation, at the beginning of this chapter. Click No to exit without translating the SMS-3000 historical files. Click Yes to continue with the translation. When you click Yes, SMS translates the files from the date range you specified. The translated files are placed in the directory that contains PLSystem.mdb. When translation is complete, SMS displays a message telling you how long it took. Click OK. SMS displays the prompt Do you have SMS-770 historical data to translate? f. To select another batch to translate, click No to return to the Historical Data Translation Utility dialog box. Click Guided Translation. Repeat the process to translate the data. 3. Translating SMS-770 Historical Data Notes: Before you translate SMS-770 historical data, you must first translate all SMS-770 system files. If there were multiple systems in SMS-770, you must have run the system translation utility for each system. You must also translate any SMS-3000 historical data before translating the SMS-770 historical data. a. When SMS displays the prompt Do you have SMS-770 historical data to translate?, click Yes to begin translating SMS-770 data. SMS displays the Translate SMS/EXP 2.2 to SMS/PMX 3.02 dialog box: b. Locate the directory that contains the SMS-770 historical data. Click the button to browse through the available directories. Select the appropriate directory. Click Open. 56 © 1997 Square D All Rights Reserved Chapter 4—SMS-3000 Installation SMS displays two messages, telling you the directory from which you are translating and the directory into which you are placing the translated files. If the From directory is incorrect, click No, and select a new system name. The To directory defaults to the location of PLSystem.mdb. SMS returns to the Translate SMS/EXP 2.2 to SMS/PMX 3.02 dialog box. c. Select the start date for the data to be translated. This field defaults to the first date for which there is data to be translated. The Ending Data displays the first date for which there is already historical data that is correctly formatted. Choose a starting date that is appropriate for the amount of data you have to translate. If you have several months of data to translate, you might want to translate the data in batches. If translating in batches, you must translate data in reverse chronological order, entering the most recent data first. See Batch Translation Example, earlier in this section. d. Select the rollover option you will use. This option sets the file size for the older history data to be stored into databases. Note: SMS-770 log files were stored in a proprietary format; they now will be in open database format, which means they will expand up to 1-1/2 times. e. Click Translate... . SMS displays a message telling you how long the translation will take. Click Yes to continue with the translation, or click No to exit without translating the SMS-770 historical files. When you click Yes, SMS translates the files from the date range you specified. The translated files are placed in the directory that contains PLSystem.mdb. SMS displays the Historical Data Translation Utility dialog box again. f. Select another batch of historical files to translate or click Quit to exit the utility. Interactive Graphics Add-On Module (GFX-1000) You can add GFX-1000 to a PC on which any other SMS application is installed, including the POWERLOGIC network server. When added with another SMS application, the GFX functions are added into the SMS menu; across a local area network, it will appear as a separate client. You must follow the rules for proper installation and client connection. The database cannot be connected to any other client or application during installation of GFX. Database shares, network drive mapping, and client installation procedures are described in the Interactive Graphic Software GFX-1000 User’s Manual (order no. 3080IM9701). © 1997 Square D All Rights Reserved 57 Bulletin 3080IM9602R11/97 Where to Next? For Understanding the SMS-3000 Interface Basic System Setup and Operation Database Management Setting Up User Accounts Setting Up Devices and Groups Setting Up Logging 58 © 1997 Square D See Chapter User’s Guide, Chapter 2 User’s Guide, Chapter 3 Chapter 6 Chapter 5 User’s Guide, Chapter 3 User’s Guide, Chapter 9 All Rights Reserved Chapter 5—Working with User Accounts Chapter 5—Working with User Accounts Each person who uses SMS must be assigned a unique user account. The system administrator defines a user account by assigning a unique user name, a password, and an access level. There are ten access levels: level 1 gives total access to the system, and levels 2 through 10 give decreasing access. Use level 1 only for the system administrator. The System Manager Access Levels table (on the next page) shows the exact access for each level. Before typing user access information, be sure to study the needs of your facility and the operators who will work with SMS. These factors will help you determine the access needed by each user. Adding User Accounts Before adding any new users, you must first have been assigned user access. To add a new user, do the following: 1. On the Setup menu, click Administrative > User Accounts… . SMS displays the User Accounts dialog box: Note that SMS assigns three default accounts. They are: Username master engineer operator Password master engineer operator In addition, there will be the account that you added during SMS installation. Once you have added the user accounts that you need for your system, you will not need to use these default accounts. To ensure security, it is a good idea to delete them. For instructions, see Deleting User Accounts at the end of this section. © 1997 Square D All Rights Reserved 59 Chapter 5—Working with User Accounts Bulletin 3080IM9602R11/97 SMS-3000 Access Levels Level Create System Create GFX (edit) Create Custom Table Open/Set Up System Save Workspace Export Online System Offline System Open Workspace Print Print Setup Exit Server Set Up PC Interface Set Up Devices Custom Quantity Set Up Groups Set Up Logging Set Up Functions/Alarms Set Up Controls Set Up User Accounts Set Up Database Mgmt Set Up Archiving Sampling Update Interval Control Outputs Overrides Resets Diagnostics Service Status Read/Write System Communication Test Silence Alarms Open Displays Acquire Waveforms Edit Historical Table Run Reports Edit Reports Acknowledge Alarms Clear Logs 60 1 x x x x x x x x x x x x x x x x x x x x x x x x x x x x x x x x x x x x x x 2 x x x x x x x x x x x x x x x x x x x 3 x x x x x x x x x x x x x x x x x x x x x x x x x x x x x x x x x x x x x x x x x x x x x x x x © 1997 Square D x x x x x 4 5 6 7 8 9 10 x x x x x x x x x x x x x x x x x x x x x x x x x x x x x x x x x x x x x x x x x x x x x x x x x x x x x x x x x x x x x x x x x x x x x x x x x x x x x x x x x x x x x x All Rights Reserved x x x x x x x x x x x x x x x Chapter 5—Working with User Accounts 2. Click Add. SMS displays the New User dialog box: 3. Enter the information in the following table: At this field… New User Table Do this… User Name Type a unique user name, using no spaces. Password Type the password that this user must enter when logging onto the system or acknowledging an active alarm. This field is optional. Confirm Password Retype the password for verification. Level Click the level of access that this user will have: the table on the previous page lists user levels and the access given to each. The default is 10 - SMS User. 4. Click OK. SMS displays the User Accounts dialog box with the new user added to that list. Click OK to add the users and to return to return to the SMS main window. If you click Cancel instead of OK, none of the entries will be saved. Changing User Accounts 1. In the User Accounts dialog box, click the user whose access you want to change. Click Configure. SMS displays the User Properties dialog box: 2. Make the desired changes to user properties, then click OK. SMS returns you to the User Accounts dialog box. Click OK to save the entries and return to return to the SMS main window. © 1997 Square D All Rights Reserved 61 Chapter 5—Working with User Accounts Bulletin 3080IM9602R11/97 Deleting User Accounts You can delete any user except the account you are using or the last remaining level-1 user account. If you attempt to delete the account that you are using, SMS displays an error message to stop you. 1. In the User Accounts dialog box, click the user whose name and password you want to delete. 2. Click Delete. SMS displays a verification message so you can be sure you’re deleting the correct accounts. 3. To delete, click Yes. The user account is deleted. Click OK to save the changes and return to the SMS main window. 62 © 1997 Square D All Rights Reserved Chapter 6—Working with the SMS Database Chapter 6—Working with the SMS Database Organization of the SMS Database SMS data is divided into separate databases: • System/setup data, which includes all system settings, and the alarm and event logs, is stored in the PLSystem.mdb file. The default location is SMS-3000 > Database. Managing the size of this file requires two activities: – deleting unused devices, alarms, and events – periodically compacting the database to remove the deleted items. Until the database is compacted, deleted items still take up space in it. • Historical data is stored in one or more historical files (for example, History.mdb). The default location for history files is SMS-3000 > Database. If you are using the default SMS database (which uses the Microsoft Access record set format), you can set SMS to automatically move older historical data into “rollover” files. These files are created based on time intervals that you determine. The rollover files offer quick and easy access to history data: because the data is spread out over several date-specific files, you will only pull up the files containing the specific data that you need. When you no longer need access to rolled-over historical data, you can delete, compress, or copy the data to another hard drive. If you need access to this old data, you can then restore it to the c:\SMS-3000\Database directory. How SMS Rolls Historical Files Once you set up an automatic historical database, SMS maintains the file structure that you determined. (See Managing the Size of the Historical Database, later in this chapter.) For example, if you set up weekly rollover on Sunday, SMS rolls data over to the Previous and archive files at the beginning (at midnight) of every Sunday. In any four-week period, using weekly rollover, the following scenario occurs: • In Week 1, SMS creates one history file named History. • In Week 2, History is rolled over and is renamed Previous. A new History file is created for Week 2. © 1997 Square D All Rights Reserved 63 Bulletin 3080IM9602R11/97 • In Week 3, Previous (Week 1 data) is rolled over to PLSYSTEM_MMDDYYYY_MMDDYYYY.mdb (an archive file that contains one week of data beginning midnight Sunday). History from Week 2 rolls over to become Previous. A new History file is created for Week 3. • In Week 4, the PLSYSTEM_MMDDYYYY_MMDDYYYY.mdb file from Week 1 is unchanged; a new PLSYSTEM_MMDDYYYY_MMDDYYYY.mdb file is created for Week 2 data. The Week 3 History file becomes Previous. A new History file is created for Week 4. The following diagram illustrates this process. The table below illustrates how history data is archived over a four-week period, beginning January 4, 1998. The default location for all history files is SMS-3000 > Database. • Week 1, the first history log file (History) is created. • Week 2, a new History file is created. History (week 1 data) rolls over to become a new file, Previous. • Week 3, a new History file is created. The History file from week 2 rolls over to become a new Previous file. The Previous file from week 2 rolls over to become the archived file PLSYSTEM_01041998_01101998.mdb. • Week 4, a new History file is created. The History file from week 3 rolls over to become a new Previous file. The Previous file from week 3 rolls over to become the archived file PLSYSTEM_01111998_01171998.mdb. The PLSYSTEM_01041998_01101998.mdb remains the same. Week 1 Week 2 History History History Week 3 History Week 4 Previous Previous PLSYSTEM_01041998_01101998.mdb Previous PLSYSTEM_01111998_01171998.mdb PLSYSTEM_01041998_01101998.mdb Upon initial setup, the first history file date range goes back 45 days to include CM-2000 data log entries up to 45 days old. Data older than that goes to the file Holding.mdb. 64 © 1997 Square D All Rights Reserved Chapter 6—Working with the SMS Database Hard Disk Memory Allocation Over time, as SMS logs data, and records alarms and events, your hard drive can fill up. The rate at which your hard disk fills (and thus, how often you need to move old history data files to a backup location) depends on many factors: • history log files (this has the biggest impact on disk space) • the number of large files (for example, waveform captures and GFX drawings) • the size of your event and alarm logs • the size of your system • the number of large files from other programs (such as PowerPoint) Because these factors vary by installation, you need to know when your hard disk is filling up, and when to move and purge data from your system. You can check disk space periodically to determine if you are filling up the disk. The following are some suggestions to help you predict and manage your hard disk usage: • If you are using Microsoft Access as your database system, set the historical database rollover period (Setup > Administrative > Historical Database) to optimize space. For example, though the default is weekly, you could change it to daily to prevent the history file from getting too large. When old historical data is not needed on the system, delete, compress, or move it to another hard drive. If you are using another database source for historical data, you may need to periodically move old records to an archive database. This is not an SMS feature; when using a manual database source, it is up to the user to manage the database. • Compact the database periodically to ensure that all files are at their minimum sizes. • Periodically use File Manager to move older archived log files and waveforms from your SMS-3000 > Export directory to a backup location away from the PC. • Limit the size of your alarm and event logs by setting the logs to FIFO. © 1997 Square D All Rights Reserved 65 Bulletin 3080IM9602R11/97 Hard Disk Usage Formulas There are two formulas that will approximate the amount of space consumed by logging, on a daily basis: 1. Hard drive space used per history template per day (# of quantities in the template +1) * 20 bytes/log sample * # of samples logged * devices assigned to template Example: Log templates are set up for 15-minute intervals, all day, with 10 quantities logged, assigned to 50 devices. In this example, hard drive space per day = (10 + 1) * 20 * 96 * 50 = 1,056,000 bytes/day, where 96 = 1440 minutes per day/15 minutes per sample 2. Growth of the PLSystem.mdb file [# of events added to the Event Log * 50 bytes/event] + [# of alarms added to the Alarm Log * 200 bytes/alarm] = Total bytes SMS uses the Microsoft Access record set as the default ODBC data source. When modifying or deleting data from the database, the data is marked for deletion, but not actually removed. This causes the database to grow until is compacted. For instructions on compacting, see Backing Up/Compacting the Database later in this chapter. PLSystem.mdb can grow quickly when a large number of setup operations are performed. Waveform storage disk requirements: Waveform Capture Disk Space Required per Waveform 60-cycle 48-cycle 36-cycle 24-cycle 12-cycle 4-cycle 300K 240K 180K 120K 60K 20K Working with System/Setup Data This section gives information about how to manage the information that is in the PLSystem.mdb file. This file includes all of the information entered when setting up your SMS system, such as devices, functions, alarms, and events. The following sections deal mainly with the alarm and event logs. These two logs can grow into very large files if you do not set reasonable restrictions, and can continue to grow even if you set them to first-in, first-out (FIFO). See the formulas on the previous page for additional information about file sizes and compacting the database. 66 © 1997 Square D All Rights Reserved Chapter 6—Working with the SMS Database Establishing Log Restrictions SMS lets you determine restrictions on the sizes of the alarm log and event log. You establish the total number of alarms that will be held in the alarm log and the total number of events that will be held in the event log. The collected data is stored in FIFO files. Notes: If you select None, instead of Total Alarms or Total Events, there is no limit to either of these files; data will continue to fill until you run out of disk space. Allowing the alarm and event log files to become extremely large will cause the system to operate very slowly, especially during system startup. Because of this, we recommend that you set both log files to FIFO. Changes made to these log restrictions will not take effect until the POWERLOGIC network server is restarted. To use this feature, follow these steps: 1. On the Setup menu, click Administrative > Alarm/Event Logs…. SMS displays the Database Settings dialog box: 2. In the Alarm Log Restrictions box, click Total Alarms (FIFO). Enter the number of alarms that you want included in the alarm log. SMS will only hold the number of specified alarms before it begins to write over the oldest alarms with new alarms. Keep in mind that a large alarm log file will slow your system down during startup. The first Alarm Date, Last Alarm Date, and Alarm Records lines include the period of time from the first to the last entry in the alarm log, and the number of records currently included in it. 3. In the Event Log Restrictions box, click Total Events (FIFO). Enter the number of events that you want included in the event log. SMS will only hold the number of specified events before it begins to write over the oldest events with new events. Keep in mind that a large event log file will slow your system down during startup. The first Event Date, Last Event Date, and Event Records lines include the period of time from the first to the last entry in the event log, and the number of records currently included in it. © 1997 Square D All Rights Reserved 67 Bulletin 3080IM9602R11/97 Managing the Size of System/Setup Data (PLSystem.mdb Database) There are three procedures that you can use to manage the size of the PLSystem.mdb file: deleting setup data that is no longer used, purging the alarm and event logs, and backing up/compacting the database. Deleting Setup Data. Examples of ways you delete unused data are when you remove devices, functions, or alarms that are no longer part of the system. Remember that you cannot delete these items if they are in use, or if they are assigned to a device. For instructions on deleting individual setup information, see the section of the instruction manuals that refers to that device or feature. Purging the Alarm and Event Logs The instructions for purging these logs are in chapter 8 of the SMS-3000 Users Guide. Remember to acknowledge all alarms before purging the logs. Backing Up/Compacting the System/Setup Database Periodically, you should back up the PLSystem.mdb database to ensure that you always have a backup copy of all system data. (This does not include the historical logging data or data uploads from circuit monitors; although this data should also be backed up. These files are discussed in the next section, Managing the Size of the Historical Database.) When you delete system setup information, some data still remains in your database. To remove leftover data, you should periodically compact the database. The default PLSystem.mdb is about 2 MB. After compacting, PLSystem.mdb will be 2–3 MB. Use the following instructions to back up and compact your database. Note that the first set are for systems that have Microsoft Access on the server PC, the second set are for systems that do not have Access. Backup/Compact (using Microsoft Access) 1. Acknowledge all alarms. 2. Display the Alarm and Event Logs. Purge them of all data. 3. Make a backup copy of PLSystem.mdb, giving it another name if desired. Store it in another directory or drive. 4. Open the backup in Access and compact it, using Access. Backup/Compact (when using another database system) 1. Copy PLSystem.mdb somewhere, renaming it if desired. PLSystem.mdb is normally 2–3 MB; if there would be little benefit in compacting, skip the remaining steps. 68 © 1997 Square D All Rights Reserved Chapter 6—Working with the SMS Database 2. With SMS running: • acknowledge alarms • purge the Event and Alarm logs 3. Shut down SMS and the POWERLOGIC network server. 4. Start the SMS Configuration utility (SMS-3000 > Bin > Cfg3000). 5. Click the Database tab; click Configure, then click Compact. 6. At the Database to Compact From dialog box, select PLSystem.mdb. Click OK. 7. At the Database to Compact To dialog box, select PLSystem.mdb again (compacting into itself. Click OK. 8. At the prompt, verify that you want to copy from and to PLSystem.mdb. 9. Go online again. If you experience no problems getting back online, overwrite the backup copy you made in step 1. When a backup PLSystem database is restored for service, the file seed.mdb must be in the directory. Managing the Size of the Historical Database Managing the size of the historical database involves several procedures: • database setup • moving historical data to archive files • copying, compressing, or deleting old archive files You do not need to go offline or stop the POWERLOGIC network server. Setting Up an Automatic Historical Database Follow these steps to establish the database system and to determine the rate at which data will move into archive files. 1. Click Setup > Administrative > Historical Database. © 1997 Square D All Rights Reserved 69 Bulletin 3080IM9602R11/97 SMS displays the Database Setup dialog box: 2. In the Database Rollover Type box, click Automatic to use the default (Microsoft Access) as your database system. 3. The File Prefix Name field defaults to PLSYSTEM, to match the system name prefix of system database (PLSystem.mdb). You can change the prefix; it can be up to 32 characters. The history file name should match the system database name. If you rename PLSystem.mdb, you should change the history file prefix to match this name. 4. In the Rollover Period box, set the appropriate period: • Click None to turn off the rollover feature. All log data will remain in the database file History.mdb. • Click Weekly to roll data once a week on a specified day. If you click Weekly, then click the Starting on day. The rollover time is midnight of the day that you select (for example, if you select Monday, the first sample begins at midnight, at the beginning of Monday). Weekly is the system default. • Click Monthly to roll data the first of every month. The first sample is taken at midnight on the first of the month. • Click Every to roll data on a schedule that you set. Enter the number of the interval, then enter the interval (days, weeks, or months). For example, if you want to roll data over every two weeks, enter 2, then select Weeks in the dropdown box. In the Starting on: box, enter the date you want the first interval to begin. 5. Click OK. SMS returns you to the SMS main window. 70 © 1997 Square D All Rights Reserved Chapter 6—Working with the SMS Database Setting Up a Manual Historical Database Notes: Before you select the manual option, you must first establish a database and ODBC connection that can be used for logging (that contains table files LOG_SAMPLES, LOG_SAMPLE_VALUES, and LOG_STATS, from seed.mdb). If you use an ODBC connection for historical logging, you must set it up on all clients if you want log data to be visible from all clients. The connections should all point to the same database source and have the same name on all clients. Example: You have three PCs (1, server/client; and 2 and 3, which are clients only). You establish an SQL server database on PC-3, and you create an ODBC connection named “SQL Database on Machine 3” that points to this database. You must also create ODBC connections named “SQL Database on Machine 3” on PC-1 and PC-2, and point them to the database on PC-3. To set up a manual historical logging system, follow these steps: 1. On the POWERLOGIC network server and all client PCs, install ODBC database drivers for databases other than Microsoft Access. 2. On the PC where the database is placed, do a complete installation of the ODBC database that you will use. 3. From the PC where the database is placed, share the database directory. 4. In the new ODBC database, duplicate the table structure of the seed.mdb file. 5. Give the POWERLOGIC network server and all client PCs connection privileges to the PC where the history data is located. 6. Set up ODBC connections on all machines. 7. In SMS, click Setup > Administrative > Historical Database to display the Historical Database dialog box. 8. In the Database Rollover Type box, click Manual (ODBC). 9. In the ODBC Source pulldown box, point to the data source for the historical database. You only need to do this once, and it can be from either the POWERLOGIC network server or a client. 10. Click OK. SMS returns you to the SMS main window. © 1997 Square D All Rights Reserved 71 Bulletin 3080IM9602R11/97 Managing Multiple System/Setup Databases The system/setup database (default = PLSystem.mdb) and its associated historical databases must be maintained in separate directories. We recommend that the system/ setup name match the historical prefix name. When you have two databases, the filenames you use uniquely identify each installation. This makes it easier to view log data. You cannot log data from Database A while using the system data from Database B. Deleting Historical Data If you are using automatic rollover: delete History, Previous, and all archive files; never delete seed.mdb. If you are using manual rollover: create a new datasource; never delete seed.mdb. Troubleshooting Rollover Problems The following list includes some individual instructions as well as some things to keep in mind to help you solve any rollover problems that may occur. • Remember that rollovers are always scheduled for midnight of a particular day (as the day begins, not as it ends). This does not ensure that the rollover will occur at midnight; it will occur with the first sample that is taken after midnight. • When the rollover is in progress, SMS should not be doing anything that will lock the databases used for historical data logging. For example, do not have history tables or trend plots open, or have reports running. Schedule reports around your expected rollover time. • Do not leave Access running with PLSystem.mdb open. • Regarding auto-uploads. When auto-uploaded samples are placed in the database, the sample’s date/time stamp is taken from the circuit monitor’s date/time. If the circuit monitor date/time is set for some time in the future, the sample can trigger a rollover. This will not harm your system, but it can put PC-based samples in a Previous.mdb instead of History.mdb. If you notice that your rollover occurs earlier than expected, these auto-uploaded samples can be the reason. 72 © 1997 Square D All Rights Reserved Appendix A—RS-232 Connections Appendix A—RS-232 Connections Overview MCI-101 Kit Example Route Statements: PC to Circuit Monitor Address 01: 30, 130, 1 PC to Circuit Monitor Address 02: 30, 130, 2 PC to Circuit Monitor Address 10: 30, 130, 10 10 02 01 MCT-485 Circuit Monitors (32 maximum on a single daisy chain) Example Addresses Female DB-9/ Male DB-25 Serial Cable (6') (Connected to the Male DB-9 RS-232 Port of PC) BELDEN 8723 (or equivalent) CAB-107 (If < 10') Or Belden 8723 with Male DB-9 Connector MCA-485 CAB-108 (2') RS-232 toRS-232 to Black Box RS-422/485 Converter Remote PC PC Network Address 30 Example If you plan to use an RS-232 serial port to connect PCs to your system, these drawings are included to help illustrate the necessary connections. Using the Optical Communications Interface When you use the Optical Communicaitons Interface (OCI-2000), use the setup route statement according to the above example. However, you will not need the converter; you will be connected to the front panel of each circuit monitor individually. 1997 Square D All Rights Reserved 73 74 1997 Square D All Rights Reserved Chain 2 Chain 1 02 10 CAB-107 (If < 10') Or Belden 8723 with Male DB-9 Connector 01 MCT-485 Example Route Statements: PC to Chain 1/Address 01: 30, 129, 29, 1 PC to Chain 1/Address 10: 30, 129, 29, 10 PC to Chain 2/Address 01: 30, 129, 28, 1 PC to Chain 2/Address 15: 30, 129, 28, 15 02 15 Circuit Monitors (32 maximum on a single daisy chain) 01 MCT-485 BELDEN 8723 (or equivalent) 8 2 CAB-108 (2') Remote PC RS-422/485 Converter RS-232 to RS-232 to Black Box MCI-101 Kit Female DB-9/ Male DB-25 Serial Cable (6') PC Network Address 30 Example (Connected to the Male DB-9 RS-232 Port of PC) CCK213 terminator CCK212 tee Belden 8723 with 2 Male DB-9 Connectors 9 2 Example Example Address Address 28 29 PNIM PNIM CC-100 101, (If < or 10') CC-100, 102 (if < 10')Or or Example Addresses CC-201 cable 2' CAB-107 MCA-485 Example Addresses MCA-485 PNIM Setup: Top port 0 PowerLogic mode Bottom port 1 SY/MAX mode Bulletin 3080IM9602R11/97 RS-232 Connections (cont.) Index Index A E Access database 1, 63 Add-on modules 8 Administrator privileges, NT Alarm log purging 68 Emergency repair disk utility 17, 48 Engineering Services Group 3, 7, 14 Ethernet gateway, POWERLOGIC 9, 16, 25, 48 Event log purging 68 9 B F Backing up the database 16, 26, 49, 65, 68 Backup, database 26 Backup, system setup 16, 26, 68 Before you begin 1 FIFO (first-in, first-out) 67 File services, installing 23, 27, 34, 36, 41, 43 Firmware, circuit monitor 4 Floppy diskettes for SMS installation 18, 26, 29, 35, 37, 43 C Circuit monitor firmware 4 Client description 12 installation, new 29 comms.mdb database 26 Compacting the database 14, 68 Converting the database during upgrade Custom installation components 48 G GFX-1000 8, 57 H 26 D Database 2 backup 26, 68 compacting 14, 68 conversion during upgrade 26 description 13 historical (History.mdb) 13, 26, 69 system setup (PLSystem.mdb) 13, 26, 63 Device compatibility 6 DIP switch setting SY/LINK board 9 Disk space used by waveforms 66 DOS PING command 3 Hard disk formulas 66 memory allocation 63, 65 Hard disk requirements 3 Hardware issues 14 Hardware security keys 11 Help system 8 Historical data deleting 72 Historical database automatic 69 manual 71 History.mdb historical database 1997 Square D All Rights Reserved 13, 26, 63 Bulletin 3080IM9602R11/97 I P Info.txt file (readme) 5 Installation client, new 29 client, upgrade 35 custom 45 DDE server, new 37 DDE server, upgrade 43 floppy diskette 18, 26, 29, 35, 37, 43 server and client, new 18 server and client, upgrade 25 Installation checklist 17 Installation types 15 Interactive graphics add-on (GFX) 57 Interactive graphics module (GFX-1000) 8 PC requirements 3 PLSystem.mdb system database 13, 26, 66, 68, 70 PowerLogic Ethernet Gateway 9, 18, 25, 48 L Screen savers how they affect SMS 2 Security keys 11 no key found 11 Serial connections 10, 73 Server description 12 Sharing a drive 2 SMS configuration utility removing the shortcut 17 SMS-3000 historical data files 54 reinstalling 48 startup 25, 35 uninstalling 49 SMS-770 historical data files 56 system files 51 SMSBKP database backup 49 Software registration 6 Software serial number 11 Software version support agreement Space requirements waveform 66 Startup SMS system 25, 35 Log restrictions alarm log 67 establishing 67 event log 67 Logs, alarm and event purging 68 M Microsoft Access database 1, 63 Modems 5 Multiple system/setup databases 72 N Network access setting up permission 2 Notational conventions 7 O ODBC 1 Online help 8 Open database connectivity (ODBC) 1 Optical communications (OCI) interface Optical communications interface (OCI) 10 73 R Readme file 5 Registration, software 6 Reinstalling SMS 48 Restoring the database 28 Rollover files historical data 63, 70 troubleshooting problems 72 RS-232 (serial) connections 10, 73 S 1997 Square D All Rights Reserved 6 Index SY/LINK board 9 DIP switch setting 9, 23 System architecture 12 System requirements 3, 4, 14 System setup data deleting 68 managing multiple databases 72 T Tasking priorities, setting 22, 27 TCP/IP protocol 16 testing 3 Technical support 8, 22, 34, 41, 45 Translation utility 26, 49 batch translations 55 removing the shortcut 17 time and space requirements 50 U Uninstalling previous SMS-3000 versions Uninstalling SMS 49 User accounts access levels 60 adding 23, 59 changing 61 deleting 62 User accounts, default 59 30 W Waveform storage disk requirements 66 Windows 95 2 Windows NT 2 configuring 3 network security administrator 14 requirements before installation 16 sharing drives 2 Windows NT group. See Windows NT: configuring Working with the SMS database 63 Working with user accounts 59 1997 Square D All Rights Reserved