Download In Vivo Calibration for ManoScan Catheters
Transcript
Quick Reference Guide
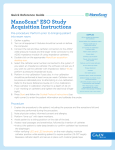
In Vivo Calibration for
ManoScan® Catheter Products
In vivo calibration establishes channel compensation for transition from
ambient temperature to body temperature and the aqueous in vivo
environment.
In vivo calibration should be performed at least once a week to promote
a weekly routine.
1. Turn on all equipment. Modules should be turned on before the computer.
2. Connect the red and blue catheter connectors to the A100/A120 module or the
large white connector if using the A200 module, or the larger connectors to the
A300 3D module if using 3D catheter.
Note: ManoShield™ AR 3D must be used when performing in vivo calibration on AR 3D probe.
3. Double-click on the appropriate ManoScan Acquisition desktop icon.
4. Select the catheter serial number connected to the system, if prompted.
5. Click Calibration on the toolbar.
6. Pressure-calibrate the catheter by pressing the Start button.
• The Close button (bottom left of Calibration window) will change from Cancel
to OK after pressure calibration is complete.
7. Click the OK button.
8. Click Calibration on the toolbar again.
9. Click the Utilities button (bottom right of Calibration window).
10.Select Calibration In vivo from the Utilities window.
• If the Calibration In vivo button is grayed out and not selectable, it means the
catheter has not been successfully pressure calibrated.
Repeat the above steps again.
• It must display Calibrated in green at the top left of the screen.
11. Follow the Guided Protocol Instructions and pop-up commands.
• T
his feature leads you through the in vivo calibration step-by-step.
Note: DO NOT JUMP AHEAD OF THE GUIDED PROTOCOL INSTRUCTIONS.
12.Select Finish when prompted.
13.Select OK to close the Utilities window.
14.Close the ManoScan Acquisition software.
15.Allow the catheter to cool down to room temperature (approximately 10 minutes)
prior to applying a ManoShield sanitary sheath and prior to performing a study.
16.To proceed with performing a study, open the ManoScan Acquisition
software, select the connected catheter and select Start at the top
right side of the toolbar.
givenimaging.com
The risks of catheter insertion into the nasal passage associated with ManoScan® ESO high resolution manometry include
discomfort, nasal pain, minor bleeding, runny nose, throat discomfort, irregular heartbeat with dizziness and perforation. In
rare instances, the catheter may be misdirected into the trachea causing coughing or choking, or the catheter may shift up or
down causing false results.
The risks of ManoScan® AR high resolution manometry include perforation or bleeding of the intestinal wall. Patients with
previous rectal surgery, bowel inflammation or bowel obstruction may have a higher risk for iatrogenic bowel perforation.
Medical, endoscopic or surgical intervention may be necessary to address any of these complications, should they occur.
These systems are not compatible for use in an MRI magnetic field. Please refer to the respective product user manual or
givenimaging.com for detailed information.
Copyright ©2001-2013 Given Imaging Ltd. GIVEN, GIVEN & Design, PILLCAM, PILLCAM & Logo, RAPID, RAPID ACCESS,
BRAVO, BRAVO PH SYSTEM, DIGITRAPPER, MANOSCAN, MANOSHIELD, MANOVIEW, GASTROTRAC, GEROFLEX,
VERSAFLEX, ACCUTRAC, ACCUVIEW, POLYGRAF ID, SMARTPILL, MOTILIGI, SMARTBAR, and THE MEASURE OF GI HEALTH
are Trademarks and/or Registered Trademarks of Given Imaging Ltd., its subsidiaries and/or affiliates in the United States
and/or other countries. All other company or product names are the trademarks or registered trademarks of their respective
holders. All rights not expressly granted are reserved.
5-001-869


