1
SchuyLab
User’s Manual
Schuyler House
26027 Huntington Lane Unit F
Valencia, CA 91355
Sales:
(800) 706-0266 (phone)
(661) 702-1824 (Fax)
Technical
Support: (888) 724-8952
Web:
http://www.schuylerhouse.com
This page left blank
Acknowledgments
This book was compiled from years of experience and
materials gathered from members of Schuyler House, both
past and present, and from many of our customers who
suggested, and helped us develop many of the features
available.
Any and all names are fictitious and bear no
resemblance to any persons, places, clinics or hospitals.
Karen A. Allen
Janet L. Chennault
Bruce Miller
Therese Griffin
This page left blank
Table of Contents
Sec. 1 - Overview................................................................................11
Laboratory Information System.........................................................11
Life with Your LIS..............................................................................12
Care and Feeding of an LIS..............................................................12
Sec. 2 - Navigating in SchuyLab.......................................................15
Navigating the Graphic Seas............................................................15
The Graphic Interface.......................................................................15
Navigation Methods..........................................................................15
Taking Your Bearings.......................................................................18
Landmarks........................................................................................19
Signing onto the System...................................................................21
The Main Menu Screen ....................................................................22
The Patient Processing Screen........................................................24
The Devices Screen..........................................................................27
The Worksheet Functions Screen....................................................28
The Report Printing Screen..............................................................30
The Special Features Screen...........................................................34
The System Tools Screen.................................................................35
Sec. 3 - Daily Operations...................................................................38
Entering/Selecting a Patient or Specimen........................................38
Ordering Tests..................................................................................43
Entering Results................................................................................48
Viewing Results................................................................................67
Printing Reports................................................................................69
The Report Printing Menu Screen...................................................69
Enhanced Functions for Hospital Labs or Large Medical Groups....77
Sec. 4 - Tests and Panels...................................................................81
Setting up your Tests........................................................................81
Test Definition...................................................................................81
Panel Definition...............................................................................109
Reflex Testing.................................................................................114
Trigger Tests...................................................................................123
Allergy Tests...................................................................................125
Screen Definition.............................................................................129
Alias Definition................................................................................138
Sec. 5 - Worksheets..........................................................................148
Overview.........................................................................................148
Master Worksheet...........................................................................148
Create or Access Worksheets........................................................161
Routine Print...................................................................................161
Selecting a Single Worksheet.........................................................162
To Generate a New Worksheet......................................................162
Retrieve an Existing Worksheet......................................................163
Editing and Printing the Worksheet................................................164
Entering Results..............................................................................166
Transmitting Loadlists to Bi-Directional Devices............................168
Manual Worksheets........................................................................171
Worksheet Barcodes.......................................................................172
Sec. 6 - Quality Control....................................................................173
Overview.........................................................................................173
QC Setup........................................................................................174
Adding a New Lot Number to a Control..........................................184
Parallel Testing...............................................................................187
How to Use QC...............................................................................190
QC on an Online Interface..............................................................192
Online Analysis...............................................................................197
Input QC..........................................................................................200
Scan QC..........................................................................................201
Update QC......................................................................................202
Levey-Jennings Report...................................................................204
QC Detail Report.............................................................................206
Summary Report.............................................................................207
Sec. 7 - Reports and Printing .........................................................208
Types of Reports.............................................................................208
Personalizing the Patient Report....................................................209
Logs................................................................................................225
Demographics.................................................................................234
Graphic Reports..............................................................................244
Result Summary Report..................................................................252
Turn Around Time Report...............................................................257
Setup of TAT...................................................................................257
Daily Use.........................................................................................260
Draw List.........................................................................................261
Printer Setup...................................................................................268
Sec. 8 - 6Managerial Functions.......................................................274
Security in SchuyLab......................................................................274
The Online Instrument Interface.....................................................279
Configuring the Device Interface....................................................280
Non-numeric Test Values...............................................................286
Configure the Test Values Received from an Online Instrument...288
Parameter ID Numbers...................................................................291
Patient ID Numbers.........................................................................291
The Specimen ID number...............................................................293
Defining New Patient Types ..........................................................296
Defining or Updating Bill Types......................................................298
Optional Processing........................................................................300
SOP (Standard Operating Procedures)..........................................301
Annotation (Remark Codes and Note Codes)................................302
Doctor Records...............................................................................310
Clients.............................................................................................316
Doctor Report..................................................................................321
Client Report...................................................................................322
Doctor Request Forms....................................................................323
ICD-9-CM Codes............................................................................324
Default Screens..............................................................................327
Sec. 9 - 7Maintenance......................................................................330
Cleanup...........................................................................................330
Patient Files....................................................................................331
Common Problems.........................................................................336
Troubleshooting..............................................................................339
Backup............................................................................................346
Restoring Data................................................................................349
Sec. 10 - 7Features...........................................................................350
Reporting the Results.....................................................................350
How to Bill with SchuyLab...............................................................351
Exporting Medical Information........................................................351
Other Features................................................................................352
Appendices.......................................................................................354
Appendix: Barcodes and Labels.....................................................355
What is a Barcode?.........................................................................355
General information on using Barcodes ........................................356
SchuyLab's use of Barcodes..........................................................358
Barcode Formats............................................................................361
Labels..............................................................................................363
Appendix: Batch Requisitions........................................................370
The Top Section..............................................................................370
The Middle Section.........................................................................372
The Bottom Section........................................................................373
Match to Patient ID.........................................................................374
Appendix: Cytology..........................................................................375
Setup...............................................................................................375
The Cytology Report.......................................................................380
Appendix: Export..............................................................................384
To Set up the SchuyLab Export Function.......................................384
ASCII – Fixed Length and Delimited...............................................388
ASTM 1238 / 1394..........................................................................395
HL7..................................................................................................397
DBASE IV........................................................................................398
To Use the SchuyLab Export Function...........................................404
Test List...........................................................................................410
Appendix: SchuyLab Medical Necessity ......................................411
Medical Necessity Alerts.................................................................411
Medical Necessity Setup.................................................................416
Create a New Link..........................................................................416
Import a Medical Necessity Database ...........................................419
Update a Medical Necessity Link....................................................419
Delete a Medical Necessity Link.....................................................421
Other Sections of Medical Necessity..............................................421
Appendix: Messages........................................................................423
Reading Mail...................................................................................423
Sending new mail............................................................................425
Setup and Tools..............................................................................428
Saving and Deleting Messages......................................................433
Appendix: Microbiology...................................................................435
Setting Up Cultures as Tests..........................................................435
Setting Up Sensitivities as Tests....................................................438
Setting Up the Isolate Test.............................................................440
Other Tests.....................................................................................443
Setting Up Sensitivity Panels..........................................................444
Setting Up Isolate Panel.................................................................445
Setup Microbiology.........................................................................446
Entering Microbiology Results........................................................448
Microbiology Annotation (Result Codes)........................................454
Appendix: Multi-Facility..................................................................456
Set Up Facilities..............................................................................457
Daily Processing.............................................................................464
Appendix: Refer Tests.....................................................................468
Using the Refer Tests Module........................................................468
Loading the Electronic Interface.....................................................470
Appendix: Remote Printing.............................................................485
Hardware requirements..................................................................485
Setting up Remote Printing.............................................................485
General problems and possible solutions.......................................489
Appendix: SchuyFax........................................................................493
Report Queues................................................................................493
Update Client..................................................................................494
SchuyFax Set up.............................................................................496
Using the SchuyFax Module...........................................................499
Index..................................................................................................504
This page left blank
Sec. 1 - Overview
Laboratory Information System
The questions to ask regarding a laboratory information system are: What is the
purpose of an LIS? What does it do? (These questions can be put together as “Why
bother?”)
What is the purpose of an LIS? Why do you want one? If you’re asking this
question, you probably feel the presence of a computer in the laboratory is an
intrusion rather than an asset. When cells were counted on a hemocytometer and
glucoses were boiled in a pot over a Bunsen burner, doctors made rare use of the lab,
and there was time for a technologist to write results on a slip by hand. Now,
massive numbers of laboratory tests are an integral part of every diagnosis and
routine health check, and we find ourselves processing data rather than finding out
what Mrs. Aldridge’s glucose is running today.
As physicians have increased their laboratory utilization, and modern instruments
have grown faster and more versatile, the bottleneck in the lab has become taking the
information from the various sources and producing a single coherent report showing
the patient’s condition. This is where an LIS can prove its worth. With instruments
directly online to the computer system, transcription error is reduced to virtually zero.
Patient records are maintained in a permanent computer file. QC can be monitored
automatically. And the physician receives a single printed report with patient values
and normal ranges.
The purpose of the laboratory information system, then, is to render coherent the
stream of data arriving from the various instruments and bench procedures, and free
the technologist for matters demanding human judgment and discretion.
As with any new industry, computers have progressed through several stages in their
development. The early lab systems, some of which are still in use, were expensive
and cumbersome to work with. In the decade since the advent of the computer to the
home market, the industry has evolved from a discipline intelligible to a select few,
to programs that children can use to do their homework. Unfortunately, the medical
market has lagged behind in this process.
SchuyLab was designed by a medical technologist/computer programmer team to
bridge this technological gap. The graphic interface, now standard in home use and
word processing systems, is state-of-the-art in computer software. The PC and PC
network are the most powerful and adaptable hardware setups available. It is this
hardware/software system, combined with extensive experience in both the computer
and medical laboratory fields that Schuyler House places at your disposal with the
SchuyLab Laboratory System.
11
Life with Your LIS
When you install an Information System in your lab, it creates a format and
organization for your daily work flow. What you’ve had up to this point is a room
full of instruments, like chattering children perched on the benches around the room.
The teacher walks in. Now it’s time for the students to sit down at their desks, get
the day’s assignments, and begin working.
Let us stretch this metaphor just a little further. The teacher has to know what
today’s assignments are before she can hand them out. [Likewise, SchuyLab has to
have today’s specimens entered into it first before the tests are run on the
instruments.] The teacher has to be present to receive the work when the students are
done with the assignments. [The computer has to be on and logged on when tests are
run on online instruments. Many instruments can re-transmit data that has been
previously performed, but many of them cannot. You don’t want to have to manually
input a whole morning’s run because someone forgot to flick a switch and type in
their initials.]
Physically, you need space for your PC, room to the right of it for the mouse pad (if
you’re right-handed), and room for two other types of things: a place to organize
requisitions, and one or more racks for the specimens. Here’s the routine: bring in a
pile of specimens and slips and set them down by the PC. Look through the
requisitions and sort them, if necessary, into logical order. (I.e., STATs first, each
doctor’s patients together, by time of draw, each ward together, ICU first.) Take the
first slip and enter the information into SchuyLab. When SchuyLab assigns a
specimen number, find the tubes that go with that requisition (yes, even extra tubes),
and put that specimen number prominently on the tubes. Sort them into the various
racks; put the slip in a separate pile. Go on to the next specimen.
When you’ve entered all of the specimens you want to run, print out worksheets and
worklists, load your specimens on the various instruments in the appropriate order,
and tell the instrument to begin. (If you have bar-coding, skip the previous sentence:
just stick the specimens in the instrument any which way, punch Run and walk off.)
When the tests are completed, use any of the methods detailed in Sec. 3 - Daily
Operation (Online, Worksheet, or Manual) to enter the results. Print out your patient
reports.
Care and Feeding of an LIS
While SchuyLab tries to make running your lab as easy a job as possible, there are
some aspects of the system for which you, the human operator, are responsible.
Refer to the Recommended Checklist for a list of procedures which should be
performed on a regular basis in order to keep the work flow in your lab progressing
smoothly.
12
When we first install your system, we set up the time interval after which Cleanup
can occur (see Cleanup in Sec. 9: Maintenance for more details on this process). But
we still need you to push the button to initiate this process. If you notice SchuyLab
starting to slow down and beginning to feel as if someone had poured molasses in the
keyboard, you probably need to run Cleanup.
Many labs wish to keep a printout of their results in a notebook for easy reference.
SchuyLab has two condensed-format printouts which can help you with this task:
Data Log and Accepted Log. (Refer to Sec. 7 - Reports and Printing in SchuyLab
for more information.)
These two log formats deal with the tests you have done. Outstanding Tests helps
you keep track of the tests which have been ordered but for which no results have
been accepted. The send-out to your reference lab that should have been back a
month ago, that CEA that came in five minutes after you started the CEA run last
Friday, the Oh-no!-Did-you-run-the-Sed-Rate-on-Mrs.-Benedict? from this
morning... Print the Outstanding Tests report every day and go over it to make sure
you know the whereabouts of all the tests and specimens mentioned on it. SchuyLab
offers many other Demographic Logs and reports that can come in handy for running
your lab. Please see them in Sec. 2, page 17, The Report Printing Screen.
The last item you need to know about the daily operation of your LIS is Back Up.
We have two pieces of advice about this procedure. The first is: Do It Daily.
Schuyler House has provided you with good quality equipment in good operating
order, but there’s no escape from Murphy’s Law. Having your patient data backed
up daily is just plain good sense. The second piece of advice is: keep a recent backup
copy of your database somewhere offsite. It has been our experience that this should
be a copy of the weekly backup. We’ve had experience recently with doctors losing
all of their patient files as a result of earthquake damage to their office building.
Keeping a backup set of data offsite is completely unnecessary 99.44% of the time.
In that last 0.56%, it’s invaluable. This is an inexpensive form of insurance you can
take to protect the data available to your clients about their patients. The Daily and
Weekly backups save the same information; a copy of all your reports, all your
databases and all other information in your SchuyLab system. If you system goes
down for any reason and your database has become corrupted beyond repair, we can
restore most of your information if you have made your backups.
13
Recommended Checklist
Daily:
•
•
•
Print Outstanding Test log
Print Data Log or Accepted Log (if required)
Do Daily Backup
Weekly:
•
Cleanup Database
•
Do Weekly Backup
•
Rotate one backup disk off-site
14
Sec. 2 - Navigating in SchuyLab
Navigating the Graphic Seas
The concept behind SchuyLab is to build the finest tool we can for the management
of a laboratory; a tool that you can use however you prefer. That idea is an integral
part of Schuyler House’s approach to computer management of laboratory resources.
While SchuyLab can be used in a variety of ways, the mouse/trackball “point and
click” method is the best way to move through the system. If you’ve used Windows
or a Macintosh computer, you really don’t need to read any further: you already
know how SchuyLab works. If you’ve never used a graphic interface, read on.
What do you mean by a “mouse”?
A mouse is a palm-sized, hand-held object, which is moved around in contact with a
desktop or pad. As you move the mouse, the mouse pointer (an arrow or an I-bar)
moves around on the computer screen in a corresponding fashion. When you are
pointing at the button you want to push or the field you want to type in, push the first
(leftmost) button on the mouse, and the action or field will be activated. (The
cursor, a blinking vertical line, appears in the active field.)
There are other devices that accomplish the same purpose as a mouse. These include
the trackball, where you move a roller ball with your thumb to move the pointer; and
the touchpad, where you drag your fingertip across a touch-sensitive surface to move
the pointer. These devices, and others, are available at computer stores.
The Graphic Interface
Many Laboratory Information Systems require you to move line by line through a
series of decisions until you reach the workspace you want to use. Changing your
mind or performing several tasks at once is a very time-costly process, since you
have to backtrack through those same decisions to get to a different workspace. This
is analogous to driving a car through a city, having to turn down first one street then
another to get to your destination. If you get lost or want to go somewhere else, you
have to drive back down those same streets again.
By comparison, a graphic interface is like piloting a helicopter. Now you can fly
over the intervening streets to stop here and there without having to retrace your
route. Using the mouse in SchuyLab lets you ‘hop’ from one task to another with
just a couple of “clicks”.
Navigation Methods
15
You can use the following methods to work with SchuyLab:
1. Mouse (or equivalent device)
2. Special use keys on the keyboard
3. Hot keys
Using the Mouse
The Main Menu is a set of seven icons displayed down the left side of the screen.
These represent the categories of tasks you will perform while using SchuyLab. To
use the mouse to go from one type of task to another, simply move the pointer to the
center of one of the icons and click the first (left) mouse button. What you will
generally see is another selection of icons in the center screen area. Point to the icon
that represents the task you want to perform, and click again.
If you’ve been typing information into a screen (such as Patient Demographics), and
you want to skip around to a different field or push the Cancel button at the bottom,
just move the pointer to your desired location and click the button. If you are in an
Order Tests screen, point at the test or panel you wish to order and -- You’ve got it! -click the button.
In a scroll box or a list box, you can use the mouse to move up or down in the list in
one of four ways:
1) by clicking on the slide bar on the right side of the scroll bar, above or below the
slider (the slider will advance a page in the list);
2) by clicking on the “up” or “down” arrows at the top and bottom of the slide bar the
slider will advance a single line in the list;
3) by pointing at the slider and holding down the mouse button to ‘grab’ it. While
you hold the button down, you can ‘drag’ the slider up or down the slide bar. Release
the mouse button to display the new section of the list;
4) many of the newer mouse have what looks like a small wheel between the two
buttons. By moving this wheel either up or down, the scroll bar will move in a
corresponding manner.
You can also select the items you want in the scroll box by highlighting one or more
of them with the pointer.
16
Special Use Keys on the Keyboard
This table describes the Tab, Shift/Tab, Arrow keys, and Function keys F1 through
F10.
Key
Tab
Purpose
Press Tab to move the cursor to the next data
entry field or the next icon.
Shift/Tab
Hold down the Shift key and press Tab to move
the cursor backwards to the previous field or
icon.
Arrow Keys
Press the arrow keys to move the cursor in the
(The four keys with arrows only direction that the arrow is pointing. (These keys
[no numbers] on them.)
do not operate in all circumstances.)
Enter
Press Enter to activate the current default
selection. The default selection has an extra
heavy line around the edge of the button.
Space Bar
Press the Space Bar to activate the current
highlighted selection. (If this is the same as the
current default selection, either the Space Bar
or Enter will work.)
F1
Press F1 to access the Online User’s Manual
(the electronic version of the book you’re now
reading).
F2
Press F2 to access Patient Selection.
F3
Press F3 to access Specimen Selection.
F4
Press F4 to display the Device Access menu.
F5
Press F5 to display the Worksheet Functions
menu.
F6
Press F6 to display the Report Printing menu.
F7
Press F7 to display the Special Features menu.
F8
Press F8 to display the System Tools menu.
17
F9 Cancel
Press F9 to cancel the current function without
saving your work, and return to the previous
step.
F10 Done
Press F10 to save your work and close the
current function.
Esc
Will close the current open box, usually NOT
saving any changes you have made. This key is
sometimes the only way to close a box, such as
Remark Codes in Enter or Alter Results.
Hot Keys
In addition to the special use keys mentioned above, you will notice that there are
letters which are underlined and capitalized on buttons, icon names and field names,
such as List active or Patient Name. These are the Hot Keys. Hold down the Alt
key and press the underlined letter to access the field or function, or perform the
command.
Mixing it Up
These different methods of using SchuyLab are not either/or options. You may select
a menu by its special use key, choose one of its functions by its hot key, and then use
the mouse to manipulate data. We encourage you to experiment with all three
methods, and use them in combination, as you find them most convenient.
Taking Your Bearings
Schuyler House’s graphic interface is proprietary and unique. As a Windows-based
program, it shares many features with the Windows graphic interface; if you’re
familiar with Windows, you should have little problem with SchuyLab. There are a
few items worthy of note, however.
The Active Box
The SchuyLab graphic interface starts with a display of the main screen of the system
... the “Main Menu”. The icons along the left side of the Main Menu summon the
other menus: Patient Selection, Specimen Selection, Device Access, Worksheet
Functions, Report Printing, Special Features, and System Tools. Each of these
menus have icons of their own.
When an icon on a menu is selected, one of two things will happen: either the entire
active screen changes to a new screen, or a smaller ‘sub-screen’ will appear,
overlying part of the background. This is called a “box”. Most boxes come with
18
buttons: when you use the mouse to click on a button, you accomplish some
function. Very often, another box appears, partially overlying the first box. (Some
tasks require three or four boxes in succession.)
The point here is that only the uppermost box is active. Clicking on one of the
buttons in an underlying box has no effect. The boxes are color-coded to help you
tell which is active: the inactive boxes have gray bars at their top edges, while the
active box has a bright blue bar.
To return to a previous box, you must have finished with the active box. Click the
mouse on the Done, or Cancel, or OK button (whichever is appropriate for the box
in question).
Since SchuyLab runs on Windows, you can also click on the “Close” button, the Xin-a-square in the upper right hand corner of the box. This automatically cancels that
box, which vanishes from the screen, and the box immediately underneath will
become active (The same thing can be done by pressing the Esc key on the
keyboard). Be aware, though, that the Close button has the same effect as
SchuyLab’s Cancel button: any work you did in the active box may not be saved.
Scroll bars
If you’ve worked with other graphic interfaces, you’re probably familiar with scroll
bars. These are the vertical gray bars on the right side of a box or window, with a
square area called a “slider”. When a list of items (tests, instruments, results, etc.) is
too large to fit in the enclosed space, the scroll bar lets you ‘scroll’ up or down the
list. By clicking on the up or down arrows at either end of the scroll bar, you can
move up or down the list, one line at a time.
The slider tells you where you are in the list: if it’s at the top of the scroll bar, you’re
at the top of the list. If you position the pointer on the slider, hold down the mouse
button, in a scroll box or a list box, you can use the mouse to move up or down in the
list in one of four ways:
1) by clicking on the slide bar on the right side of the scroll bar, above or below
the slider (the slider will advance a page in the list);
2) by clicking on the “up” or “down” arrows at the top and bottom of the slide
bar the slider will advance a single line in the list;
3) by pointing at the slider and holding down the mouse button to ‘grab’ it.
While you hold the button down, you can ‘drag’ the slider up or down the
slide bar. Release the mouse button to display the new section of the list;
4) many mice have what looks like a small wheel between the two buttons. By
moving this wheel either up or down, the scroll bar will move in a
corresponding manner.
Landmarks
19
In your use of SchuyLab, you quickly become familiar with your accustomed routes
through the system. There may, however, be aspects of SchuyLab you’ll find handy
in accomplishing less frequently performed tasks. Here is a pictorial tour of the
system to remind you of some of its capabilities, and how you can access them.
Starting the Programs
The SchuyLab LIS actually contains two separate programs, both of which need to be
running when you use the system. The first, obviously, is the SchuyLab program
itself. The other is called the Connection Manager, or simply Connect. This is the
special software that connects SchuyLab to its device interfaces: the analyzers, any
modems or barcode printers you may have, etc. This program helps the instruments
(Cx7, IMx, barcode printer, auto faxing, etc.) talk, or send information to SchuyLab.
The Connect icon will be on any stations that have instruments attached, that have a
fax modem (for those systems that have the Fax feature) or that in some way is
interfaced with other systems.
When you first turn on the power to your computer, the Windows operating system
will start. After it’s completely on, there will be icons on the Windows desktop.
We’re interested in two of them: the SchuyLab icon and the Connect icon. They’ll
look pretty much like this:
Before you “open” SchuyLab, double click on the Connect icon. Once it’s running,
you can minimize it – that is, reduce it in size to the task bar on the bottom of the
screen – by clicking on the Minimize button on the blue task bar. That’s the little
square with an underline, in the upper right corner of the Connect box. You can find
more on the Connection Manager in Section 9 - Maintenance.
Now double-click on the SchuyLab icon to start SchuyLab. Depending on how your
computer was set up, simply by double clicking on the SchuyLab icon, Connect
Manager will automatically start but always look in your tool bar to see if it has.
Remember, your instruments will NOT communicate with SchuyLab unless
Connection Manager is opened.
20
Signing onto the System
The first thing you’ll see when SchuyLab comes on the computer screen is the signin box. To begin accessing SchuyLab’s functions, sign onto the system.
Every SchuyLab user must be assigned an ID -- usually his/her initials -- and a
password known only to them. The password may be letters or numbers, or any
combination, and up to eight characters in length.
In the Id entry field, type your initials. Using the Tab key or the mouse, move the
cursor to the Password entry field and type in your password. (A row of asterisks
will appear, in place of the characters being typed.) Then select OK to gain entry to
the SchuyLab system.
Once you’ve signed onto the system, your user ID will be displayed in the upper right
corner of the SchuyLab screen, just above the date and time. This lets everyone
know who’s signed onto that SchuyLab station. Moreover, that ID will be attached
to every change made to a patient’s results along with the time and date of the action.
SchuyLab thus records permanently who ordered tests, who accepted the results, who
went back and altered those results, etc.
When you’re done using SchuyLab for a while, select F9 or F10 repeatedly until the
“Please Sign On” box reappears. Then you can leave. SchuyLab will still be
running, but this forces the next user to sign on.
21
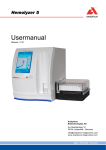
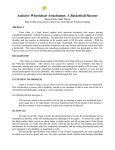
The Main Menu Screen
This will be the starting point screen you see after you sign in. This could be
considered the brain of the SchuyLab system. From here you can access patients,
create / print worksheets and take care of any other lab business. Following is a brief
description of each of the icons.
F2. Patient
Select this icon to enter a new patient into SchuyLab, or to access a patient who is
already in the system.
F3. Specimen
Select this icon to enter a new specimen into SchuyLab, access a specimen already in
the system, or to enter a new patient via the specimen number entry route.
F4. Devices
All your instruments that are interfaced to SchuyLab are visible as icons when you
select this option. Consider each separate instrument as an “in-box” for the data that
22
has been transmitted from that device; this is the icon you select to access that
information.
F5. Worksheet
Select this icon to set up, compile, print, or do anything you need to that pertains to
worksheets.
F6. Print
This is the icon to choose to print anything out, particularly daily logs, demographic
reports, &c. It’s also where you can print out patient reports in formats other than the
default format chosen by your lab.
F7. Features
The other icons deal with functions that are a part of the standard SchuyLab
configuration. The Features menu contains options that are individually loaded onto
your lab’s system, according to your personal needs.
F8. Tools
This icon summons the functions that build, set up, or maintain the basic SchuyLab
operations: Test Definitions, Doctor Records, Clean-up Database, etc.
23
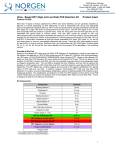
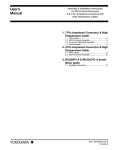
The Patient Processing Screen
This screen is the heart of the system. You can reach it via F2. Patient or F3.
Specimen. All the icons on this screen apply to the patient whose demographics are
in the nameplate area.
Order Tests
Select this icon to order tests on a new specimen, or to add or remove tests on a
specimen already in the system.
Enter Results
Select this icon to manually enter results on tests, which have been ordered on the
patient. Only tests without accepted results appear on this screen; once a result has
been entered and accepted that test result can only be changed under Alter Results.
Print Results
Selecting this icon will print out a patient report in the format selected as ‘default’ by
your laboratory. See Sec. 7, Reports and Printing for more information.
24
View Results
This icon is designed for use by non-laboratory personnel, or when the doctor’s on
the phone asking about results. It allows test results to be viewed only, without
permitting changes. Only accepted results are visible on this screen; tests without
accepted results are listed as “Pending”. Normal values, special ranges, and notes are
also accessible through this screen.
Alter Results
Select this icon to change already accepted results on a patient. This option requires
a separate security clearance.
Change Demographics
Select this icon to alter information on the patient. There are also additional entry
fields for more detailed patient information (phone number, address, &c).
Change Spec. Info
Select this icon to alter information on the specimen (draw date, type of specimen,
&c.).
Merge Patient
If you have the same patient entered twice (e.g., under two different spellings of the
name), SchuyLab lets you merge the two files of data into one. This option requires
a separate security clearance.
Delete Patient
Select this icon to entirely remove a patient from the system. A patient with
specimens may not be removed until the specimens are deleted. This function
requires a special security clearance.
Delete Specimen
Select this icon to delete a specimen on a patient. This is also a necessary prelude to
deleting a patient. Again, this function requires a special security clearance.
25
Cumulative/Specimen Report
This icon prints a patient report in whichever format is not ‘default’ for your
laboratory (that is, the opposite of Print Results). Usually, the default is set to be a
single-specimen report; this icon then prints a cumulative report, showing the last
four to six specimens.
Send Home Report
This icon prints a “send-home” report for the patient -- that is, a report with no
abnormal results flagged, and the normal ranges omitted. A report, in other words,
that you can send home with the patient without causing panic.
Historical Results
Select this icon to view the most recent result of each test ever ordered on the patient.
If he had a PSA done six months ago, a Chem panel run last Tuesday, and a
Hemogram done this morning, all of those results would be simultaneously available
under this option. In short, this is the icon to select when the doctor asks you, “When
was the last time I ran a PSA on Mr. Drinkwater?”
Reassign Specimen
This icon permits a wrongly assigned specimen to be assigned to its correct owner.
(That is, if specimen #123 wasn’t from John Smith, but from Joan Smith, the
specimen record and test results can be moved from his file to hers.) Once again, this
function requires a special security clearance.
Graphic Report
This icon prints the patient’s cumulative results as a graph, with the normal range
marked by parallel lines. Any single test with numerical results can be graphed here.
SchuyLab also permits you to define special-purpose graphs that combine several
tests (e.g., Glucose and %A1c) on a single plot. The actual values of the tests are
printed then printed in columns below the graph.
Bill Patient
This icon allows the lab to print out an invoice to be given to the patient when they
leave the lab instead of mailing it to them. This button is only available if you have
the Billing module.
26
The Devices Screen
F4, Devices is the screen that you will use to accept the majority of your results. This
screen displays the instruments that are interfaced to SchuyLab. See Section 3, Daily
Operations on how to accept results through F4, Devices.
27
The Worksheet Functions Screen
In this screen, you can create, change, print your worksheets and accept the results.
Define Master
Select this icon to set up a new worksheet master or to alter a worksheet master
already in existence. You only have to do this one time; once the worksheet has been
defined, go to Select Worksheet to create a new “copy” of the Master Worksheet for
daily use.
Select Worksheet
This icon lets you do two things: You can have SchuyLab draw up a new worksheet,
with today’s tests. Or you can select a worksheet that was already compiled (last
week, say), for viewing, data entry, or printing.
Print Worksheet
Once you’ve selected a worksheet (new or old), use this icon to print it out.
28
Append to Worksheet
Select this icon to add new specimens to a worksheet without rearranging the order of
the tests you’ve already set up.
Enter Results
Test results can be manually entered directly through a worksheet. Once accepted,
the results are sent directly to the patients’ files without having to access each patient
individually.
Delete Worksheet
Select this icon to remove worksheets from the system, if you wish it done sooner
than SchuyLab would through its Clean-Up Database function.
View Worksheet
Select this icon to look at your worksheet before you print it out.
Edit Worksheet
You can look at your worksheet through View Worksheet, but if you want to do
anything to it, select this icon. You can delete that patient whose tube broke in the
centrifuge, add or subtract tests from the patients thereon, or move the patients
around and put them in a different order.
Alter Results
Select this icon to call up the original worksheet and re-enter or change the results.
Routine Print
Worksheets that are compiled daily (or more) can be designated “Routine”
worksheets. Selecting this icon will automatically compile and print all the
worksheets so designated.
Manual Worksheet
29
This feature allows you to build a worksheet, choosing each sample in turn, rather
than have them pre-assigned by the Master Worksheet.
Worksheet Barcode
The worksheet barcode will print out barcodes for the samples on the worksheet in
the order they appear on the worksheet.
The Report Printing Screen
This is the screen from where you can print your various logs and reports or keep
track of the daily work of the lab.
Patient Report
Select this option to print out all of the results on all of the specimens that a patient
has in the system. The report will print in the in the Cumulative Report format, even
if your lab has opted for Specimen Report as its default format. This is a print only
option.
Specimen Report
30
Select this icon to print out a report of one or more specific specimens. The reports
will print in a Specimen Report format, even if your lab has opted for Cumulative
Report as its default format. This is a print only option.
Graphic Report
Prints cumulative patient results on a graph, then prints the data for individual results
in columns below the graph.
Print Labels
Select this icon to print out labels for a range of specimens. If your SchuyLab system
includes the bar-code option, the labels will be bar-coded; otherwise, they’ll be a
series of sequential accession numbers.
Reprint
CLIA regulations state that you must have a copy of all reports, both final and
preliminary. SchuyLab stores those reports for you. To reprint a report that has
already been printed, select Reprint. SchuyLab will display the Reprint Report box,
listing all the reports that have been printed today, latest report first. Type in another
date to list the reports printed on that day. Select the reports you want to reprint.
Data Log
Prints out, by specimen range, a condensed format log of all the patients, tests, and
results.
Order Log
Prints out, by specimen range, the procedures ordered on each patient, in the
arrangement in which they were ordered.
Critical Log
Prints out, by specimen range, the tests in the system whose results are ‘critical’, i.e.,
falling outside the critical ranges set up as part of Test Definition.
Accepted Log
31
Prints out, in condensed format, all patients, tests, and results that have entered the
system since you last selected this option.
Restricted Log
Requires a special security clearance to access this information. A test which is
flagged as “Restricted” will not print out on any log except this one.
Outstanding Tests
Prints out, by specimen or a date range, the tests in the system whose result is
“Pending”.
Draw List
Prints out, by specimen, date, location or client range, the accessions that have been
marked as “To be drawn”. Barcode labels can also be printed at the same time as the
draw list.
(This log is active only on SchuyLab systems with the “Indrawn
Accessions” option activated under Optional Processing.)
Batch Reports
Select Batch Reports and SchuyLab lists all the patients with accepted or annotated/
revised results which have not yet been printed. The type of report is noted alongside
each individual report entry. You may print some or all of the reports listed.
Miscellaneous Reports
This is where any custom reports created for your lab will be found. Additionally,
there are two reports found by default in this option, an error log report and patient
demographics. The Error Log report lists all of the system errors that have occurred
since the report was last cleared. Schuyler House personnel may occasionally need
to print this report as a diagnostic or troubleshooting tool. The Patient Demographics
report does the same thing as the Client Demographics report.
Print Control
Allows print jobs currently in one of the printing queues to be monitored or canceled.
Test Tally
32
Prints a report of how many of each test or panel has been ordered, within a given
specimen or date range. This can also be sorted by department.
Test Values
Prints out, by specimen or date range, a report containing all results (within a range
of values) of a single test. Both the test and the range of values are selected by the
user and can be further sorted by the gender and age of the patients.
Demographics Report
Prints a configurable report of all patients and their demographics (date of birth,
doctor’s name, &c). The report can be limited to a given date range or specimen
range.
Client Demographics
Prints a configurable report of all patients and their demographics, sorted by the
names of their client group. The report can be limited to a given date range or
specimen range.
Billing Demographics
Prints a configurable report of all patients and their demographics, sorted by Bill
Type. (That is, all the Medicare patients, for instance.) The report can be limited to a
given date range or specimen range.
33
The Special Features Screen
Unlike the other screens, the Special Features screen will vary from system to
system. Some of these icons, such as Billing, represent options that must be
purchased for your system. Others, such as Batch Requisitions, may be added for
labs whose workloads may require them. In any case, the icons and functions shown
here are specific to individual labs; they are intended to perform strictly delimited
tasks. See Section 10, Features for more details on all the SchuyLab features
available.
34
The System Tools Screen
The tools in this screen help you customize your SchuyLab. This is where you set
which tests you add, the panel set-up, what order tests are printed out, what is printed
on the result form and many other things. This screen requires a certain security
clearance for most of the buttons.
Set-Up
The Set-Up functions define the initial conditions for the SchuyLab system: the
values and ranges for the individual tests, the computer ports, the translation tables
for the instruments, the default entries for the patient and specimen screens, and
many more.
Clean-up Database
Selecting this icon will clear out from memory all the of the electronic ‘scratch
paper’ the system creates on a daily basis. Too much of this electronic clutter will
slow the system down. This function does not affect patient results.
35
Security Levels
The users’ access to the SchuyLab system, including passwords, authorization levels,
and permissions, is controlled through this icon.
Time & Date
Allows the user to change the time and date on the system (for single-station
systems).
Printer Setup
Selects the printer from the Windows Printer Setup, and the printing queue it serves.
Archive
SchuyLab permanently stores its database on the computer’s hard disk, which is sized
to meet the customer’s expected needs. As such, the Archive function has not yet
been implemented.
Full Report
Prints out a report on a single accession or patient, complete with all of the test
orders, results, deletions, dates, the initials of the user who accepted the results, &c.
Remark Codes
Permits the user to reduce the most commonly used test comments to a numbered
list, (up to 255 for patients, 255 for QC, and another 255 for Billing) so they don’t
have to be typed every time.
Doctor Records
This icon is for keeping and maintaining the files on each individual doctor, the
medical groups to which they may belong, and the requisition forms specialized for
them.
Manual Differential
36
At present this can be used as only a counter. It does not download the results into
the SchuyLab system.
Note Codes
Notes may be added to patients’ names, specific specimens, specific tests, test values,
test results, &c. Note Codes are templates for any of these notes. Note Codes are
used when the text of the note is often repeated (i.e., many result notes will say much
the same thing), but unlike Remark Codes, the notes created from the Note Code
templates can be edited and personalized.
Diagnose Problems
This feature is used to help determine any number of problems you may be having
with your computer(s), your instrument(s) or a system error that sometimes pops up.
For more information see Sec. 9, Maintenance.
Match Patients
This search function permits the patient files to be compared, and similarities (and
differences) noted. It’s used for cleaning up the patients’ files, getting rid of
duplicate entries.
37
Sec. 3 - Daily Operations
Entering/Selecting a Patient or Specimen
You walk up to the SchuyLab station with a set of orders in your hand. (You may or
may not already have a specimen to go with the orders.) The question you ask
yourself is: Do these orders represent a specimen that is already in the system (i.e., is
there a SchuyLab specimen number associated with these orders?) or is this a case of
add-on orders to previous work, or morning draws that have been accessioned?
A. If there is NO specimen number for the order: select F2. Patient.
SchuyLab displays the Select Patient box. You can search for a patient by
either their name, by their ID#, by DOB or their client (or medical group). You
do NOT have to fill in all the boxes below, just enough to locate the patient
you’re interested in.
One of the following scenarios will now take place:
Type in the patient’s name, Last name, First name, (or the first few letters of it) and
select OK. SchuyLab recognizes the patient name and now displays the Which
Patient screen. If this is a new patient, you can then choice the New Patient box,
otherwise select the patient you want from the list given you and SchuyLab displays
the Patient Processing screen, with the patient’s demographics in the nameplate area.
•
38
Type in the patient’s name, Last name, First name, (or the first few letters of
it) and select OK. SchuyLab displays a list of patients whose names begin
with those letters. Select the correct patient from the list. SchuyLab displays
the Patient Processing screen, with the patient’s demographics in the
nameplate area.
•
Type in the patient’s name, Last name, First name, (or the first few letters of
it) and select OK. If SchuyLab cannot find any patients whose names match
the letters you’ve typed in, the Input New Patient box is displayed. Complete
the fields in the box and select OK. SchuyLab displays the Patient
Processing screen.
If any patient in the system matches all the criteria listed, the Patient Processing
screen will be displayed with that patient’s name and demographics in the nameplate
area.
If the patient’s name doesn’t appear in the list box: SchuyLab displays the Input
New Patient box with the patient’s name as you typed it.
Complete the fields in the box as appropriate.
Patient’s Name
Patient’s Last name followed by their first name and, if
necessary, middle initial. SchuyLab will automatically
capitalize the first letter of each name.
Patient ID#
This can be auto-generated by SchuyLab or assigned by the
lab. For more information see Sec. 8, Managerial Functions.
Birth Date
It is suggested that you enter the patient’s date of birth. In
case of two or more patients with the same name, this will
help you identify which patient you look up.
39
Age
SchuyLab will enter the age for you (after you have entered
the DOB).
Gender
U – Unknown
M – Male
F – Female
Location
(optional) This box can be used to further identify where the
patient is. Do they come from another draw station or (in
the case of hospitals) from the ER?
Other ID
(optional) If your lab is generating its own medical records,
this can be the patient’s social security number or another
ID number.
Bill Type
(optional) Whether you use the SchuyLab billing or not, you
can make the type of payment for the patient. You can set it
up for cash, insurance, Medicare, etc.
Patient Type
(optional) This box is usually used in vet labs, but can be
adapted if a patient’s permanent condition affects tests
results.
Doctor
This would be the patient’s primary doctor, which may not
be the doctor ordering this set of tests.
Client
The client is the person or group that is responsible for
paying for the tests. This can be the doctor or the medical
group / clinic he works with.
Note: Your SchuyLab system may be configured to automatically generate patient
ID numbers. If so, skip over the Patient ID field. To override this function, or if
your system doesn’t auto-generate patient IDs, type a number in this field.
When you’ve completed the fields, select OK. If you are auto-generating a patient
ID, SchuyLab displays the number and highlights the field. Select OK again to
approve the number. SchuyLab displays the Patient Processing menu screen. As you
select patients you will notice that the last (up to five) patients viewed since you
logged on will be displayed at the bottom of the Select Patient box.
B. If there is a specimen number for the order: select F3. Specimen.
SchuyLab displays the Select Specimen box.
40
One of the following scenarios will now take place:
•
Type the specimen number in the entry field and select OK. SchuyLab
recognizes the specimen number and displays the Patient Processing screen,
with the patient’s demographics and the specimen information in the
nameplate area.
•
Type the specimen number in the entry field and select OK. Not finding that
specimen number anywhere in the system, SchuyLab displays the Input
Specimen box. Enter the patient’s name or ID, and alter or complete the rest
of the fields as appropriate. Select OK. SchuyLab displays the Patient
Processing screen, with the patient’s demographics and the specimen
information in the nameplate area.
•
Select OK without typing in a number. SchuyLab displays the Input
Specimen box. If your SchuyLab system is configured to automatically
allocate specimen numbers, the next available specimen number will be
displayed in the Specimen ID field; otherwise, manually enter the appropriate
specimen number in that field. Enter the patient’s name or ID, and alter or
complete the rest of the fields as appropriate. Select OK. SchuyLab displays
the Patient Processing screen, with the patient’s demographics and the
specimen information in the nameplate area.
•
Selecting List Active will give a list of the hundred or so most recent
specimens in the database. If you can’t remember the exact specimen ID
number, you may be able to select it from this list. (We can’t very well list
all the active specimens in the database, or we might tie up the system until
the next Ice Age.)
As you select accessions you will notice that the last (up to five) accessions viewed
since you logged on will be displayed at the bottom of the Select Patient box.
41
Patient Entry Quick List
To select a patient already
in the system:
1. Push F2
2. Enter part of patient
name or ID#
3. Select name from list
box
4. SchuyLab displays the
Patient Processing
menu
To enter a new patient:
1. Push F2
2. Enter part of patient name
or ID#
3. Where patient name does
not appear in list box, select
New Patient
4. Enter patient demographics
5. SchuyLab displays the
Patient Processing menu
To select a specimen already
in the system:
1. Push F3
2. Enter specimen number
3. SchuyLab displays the
Patient Processing menu.
The Patient Processing Menu Screen
The functions on this menu screen apply only to the patient whose name appears in
the nameplate at the top of the screen. If you select Order Tests, you will order tests
on that patient; if you select Print Results, you will print results for that patient.
42
Ordering Tests
Once you’ve entered or selected a patient and displayed the Patient
Processing menu screen, the next step is to order tests for the patient. Select the
Order Tests icon on the menu screen.
If you have NOT already selected a specimen number: SchuyLab displays a list
of specimens for the patient unless this is the patient’s first time.
The Which Accession? box lists all the specimens for that patient, giving the
specimen ID, date and time for each, and the tests and panels ordered on that
specimen. To choose a specimen from the list, point-and-click with your mouse (or
highlight the correct specimen number and press the spacebar).
If the appropriate specimen is not on the list, select New Specimen. SchuyLab
displays the Input Specimen box. (If there are no specimens on file for the patient,
SchuyLab displays the Input Specimen box automatically.)
43
Complete the fields in the box. One item to note:
When you first bring up this box, the initials of the person who drew and received the
specimen, will default to the operator initials who has signed on the SchuyLab station
when the specimen is entered (as above). The Draw and Receive date and time can
then be entered as any other date (01/02/06 or 010206) or can be put in as -n or +n
which means that many days in the past or future ( i.e. -2 means two days ago, +2
means two days from now), +0 or -0 will translate to today. Depending on how the
SOP for your lab has been set up (Sec. 8 – Managerial Functions) the next new
specimen will display the date and time in one of three ways. If the lab manager has
chosen the Current selection, the date and time will always default to the present
date and time with each new accession. If the lab manager has chosen the (blank)
selection, the date and time will always default to a blank date and time with each
new accession. You will need to enter the date and time for each accession. If the
lab manager has chosen the Prior selection, the date and time will always default to
the date and time of the accession you just finished with.
The other fields are:
Specimen ID
44
This field may be configured to automatically generate a
specimen number. If your system is set up to auto-generate
specimen numbers, skip over this field. To override the autogenerated number, or if your system isn’t set up for auto-
generation, type a number in the field.
Patient ID
The can be auto-generated by SchuyLab or assigned by the lab.
For more information see Sec. 8, Managerial Functions.
Other ID
This box would be pertaining to the specimen you have. IF the
doctor’s office (or the other facility that sent you this specimen)
has an ID number for the specimen, you may want to reference
it here.
Labels
If you are using a barcode printer, you can specify the number
of labels you need to print, or you can use the default number
(in this case we are only printing out 1).
Specimen
Received
This field defaults to “SERUM” (or whatever had been defined
as default as part of Default Accession, in Setup) and it can be
overwritten. You can select another specimen type from the
pull-down list of types; or you can simply type your own text
(e.g., “RD, 2LAV, GR, UA”) into the field.
STAT
If this specimen is a STAT, clicking on this box will move this
specimen to the top of any worksheet you may use and also print
STAT on the barcode labels.
Remark
Codes
Remark codes are short (usually a sentence) pre-written
comments about this specimen
NOTE
The note pad gives you much more writing space than the short
sentence that the remark codes give you.
Ordering
Doctor
The ordering doctor can be different than the patient’s primary
doctor.
Diagnosis
(ICD-9)
Today, where most labs are billing to Medicare and such, it is
important to add the Diagnosis codes that the doctor should be
supplying to you on the requisition form.
Draw
Required
An accession can be ordered even before the specimen has been
received. In many hospitals (and some labs) the tests are
ordered and then a nurse will go and draw the blood. If your
lab is set up for a draw list, you can print out the list of the
patients you need to visit.
When you’ve completed the fields, select OK. If you are auto-generating a specimen
ID number, SchuyLab displays the ID number and highlights the field. Select OK
again to approve the ID number. SchuyLab displays the Order Tests screen.
45
If you have selected a specimen number: SchuyLab displays the Order Tests
screen.
The Order Tests Screen
The Order Tests screen displays the different departments or sections of tests,
arranged in a row of buttons across the top of the screen area. (These buttons are
configurable to meet your facility’s specific requirements.) The first button is the
MAIN or default selection. Under this button you will find the tests and panels your
lab orders the most often.
The rest of the screen displays the individual tests and panels defined for that
department. (When the Order Tests screen first appears, that department is the first,
or default, selection.) The larger buttons represent panels, while the smaller buttons
are separate tests. The exact arrangement of these buttons -- how many test buttons,
how many panels, where they lie on the screen -- is likewise configurable to your
taste. This is done through the Screen Definition function, as discussed in Section 8:
Managerial Fuctions.
Tests and panels that have been ordered, but not performed, appear in dark grey.
Tests that have been performed, whether the results have accepted or not, appear in
green and, until the results are deleted or unaccepted, cannot be canceled or changed
in this screen.
46
If the test you want isn’t displayed at first, select the button for the general section or
department of the tests you need to order (for example, Chem). The screen will
change to display the tests and panels for the department you selected.
To order a test or panel: Select the appropriate button. As you select a button, it
darkens and appears to recess into the screen. When you select a panel, all the
buttons for the associated tests darken, too.
To undo a selection: Select the button again to toggle the test off. You may, for
instance, select a panel button and then select an individual test to cancel it alone.
The rest of the tests in the panel remain selected.
To move to a new department: Select a different department button from the top
row. The rest of the screen displays the tests and panels for the new department.
To order a test or panel by typing: Some users prefer not to use the mouse to select
buttons and icons; they would rather type in the codes for the tests and panels being
ordered. There is a special Order Tests screen designed for such people; it’s set up
through Screen Definition, like the others, and it looks like this:
This screen has a few buttons for frequently ordered tests and panels, but its main use
is through the text windows: the rectangular window on the right, which shows
what’s already been ordered on this specimen, and the long text window at the top. If
you have an Order Tests screen configured this way, type the codes for the tests or
panels you wish to order in the long window, separated by commas, as shown in the
example. Then press the Enter key. The tests will disappear from the long text
47
window, and appear in the “tests ordered” window on the right. (The disadvantage of
this format is that it requires the user to memorize all the codes for the tests. Most
people prefer the more graphical interface.)
To undo a selection: Type the code for the test you wish to cancel, preceded by a
minus sign. (That is, if you’d ordered Albumin, and now wished to cancel the order,
type “-ALB” in the long text window, and press Enter. That test will disappear from
the “tests ordered” window; the test will have been “un-ordered”.) The rest of the
tests in the window remain unaffected.
To complete Order Test processing: When you have selected all the tests required,
select F10. Done. The system accepts the orders and returns to the Patient
Processing menu.
To cancel Order Test processing: Let’s say you’ve chosen a dozen panels,
canceled a test here or there, reordered, and suddenly decide to start over. To cancel
all the changes made in Order Tests, select F9.
Cancel. SchuyLab returns to the Patient Processing menu screen without accepting
any of the orders.
Order Tests Quick List
To select a specimen and order
tests:
Select Order Tests
Select an existing specimen
number, or enter a new one
Select the first department or
section button
Select tests or panels
Select the next department
button
Select tests or panels
When you have selected all the
required tests, push F10
To order tests for a selected specimen:
Select Order Tests
Select the first department or section button
Select tests or panels
Select the next department button
Select tests or panels
When you have selected all the required tests,
push F10
Entering Results
Once you’ve ordered all the required tests, your attention will turn to the physical
samples themselves and the laboratory instruments. When you’ve run the tests, you
can enter the results in SchuyLab.
There are three ways to enter test results into SchuyLab: Manual entry, Online entry,
and Worksheet entry.
48
Manual Entry
To manually enter a patient’s test results in SchuyLab, display the Patient Processing
menu screen. (See the procedure “1. What to Do First.”) On the Patient Processing
menu screen, select Enter Results.
If you have not selected a specimen number: SchuyLab displays the Enter Results
screen, listing all the specimens for the patient, including specimen ID (accession)
number and date. For each specimen, SchuyLab lists all the tests that have been
ordered, but no results yet entered and accepted. (Test results that have been
accepted will not appear in the Enter Results screen.)
If you have selected a specimen number: SchuyLab displays the Enter Results
screen for that specimen only, showing all tests with no results.
The Enter Results Screen
The Enter Results screen displays a set of tests in a scroll box and a column of
buttons on the right side of the screen. If you have entered this screen through F2.
Patient, all the specimens for that patient will be listed, with all the tests to be
entered (as in the example above). If you’ve entered through F3. Specimen, only the
tests for that specimen will be shown.
Highlight and select the appropriate test in the scroll box. SchuyLab displays an
entry field (a ‘window’) for the test. Type in the result, and use one of the following
keys to complete your action.
49
Key
Enter/Accept
Purpose
Press Enter or the Accept button to accept the result. SchuyLab
marks the test with an A to indicate that it is accepted, and moves
to the next test.
Accept All
This feature is not yet active.
Unaccept
Select the escape (ESC) key (the window or entry field will
disappear, and the entire line will be highlighted in white). Hitting
Enter unaccepts the test result (the A at the start of the line,
denoting an accepted result, will disappear).
Cancel Test
While holding down the Alt key, push the Delete key. SchuyLab
will ask you if you truly wish to delete that test order; select “yes”
(or just Enter).
Tab
Press Tab to move the entry field to the next test without accepting
the result.
Shift/Tab
Hold down the Shift key and press Tab to move the entry field
backwards to the previous test.
Hold
In many labs, there are techs who can not (for various reasons)
accept results, although they can enter them. Using the “Hold”
button, a tech can enter the results of a test, select the “Hold”
button and the results will be entered, but not accepted (that will
have to be done by someone with the proper clearance).
Expand
(for Trigger Tests)
The Expand button is activated only for trigger tests. Move the
entry field to a trigger test, and the lettering on the Expand button
changes from grey to black. Select Expand. This brings up the
Expanded screen with the appropriate follow-up tests. Only those
results that are actually entered will be retained in the patient’s
file; fields with no results entered will not be retained. Close the
Expanded screen is by selecting the Done button; the retained
types will appear on the screen beneath the trigger test. The
trigger test’s entry field will still be active; make sure that a result
(e.g., SeeBelow) is entered and accepted for the trigger test itself.
Escape
Press the Escape key to change the entry field back to a
highlighting cursor on the mouse, then point-and-click on any of
the tests in the scroll box.
F10. Done
Press F10. Done to save your work and close the current function.
50
Delta Check
When you enter the patient’s result on a specific test, if you have set up the Delta
Check variation (see Sec. 4, Tests and Panels,) SchuyLab flags the results if the
results exceed the range.
Let’s say you have a patient come in and one of the tests you run on him is a
Glucose. The test result is 80, so you type it in and hit the accept button. If this
patient has had this test performed before and you have a delta range set up in the
test, a box will pop up on your screen if the present results make the criteria.
As you can see, the previous 2 results are displayed. If this is something that the
doctor should be notify of, you can add a note or remark code on this test.
While we are in this screen, let’s look at the other buttons that are on the right hand
side of the screen.
Remark Code
To add a Remark Code: Select Remark Codes. SchuyLab displays the Remark
Codes box for the test.
You are able to type in the numbers for up to four Remark Codes. Each code number
designates a pre-recorded comment, the sort of annotation that would occur
frequently in your lab; they are defined by you for your purposes. There are three
different sets of Remark Codes: for patients, QC, and billing. SchuyLab keeps track
of which set of Remark Codes is appropriate for the type of entry you’re annotating.
To see a list of the patient Remark Codes, select the List button in the Remark Codes
box. SchuyLab displays a scroll box listing all the currently available Remark
Codes; you can select the one you want, and its number will automatically appear in
the first available entry field in the Remark Codes box.
Once the numbers of the desired Remark Codes are typed into their entry fields, press
Enter. SchuyLab removes the Remark Codes box and displays the numbers of the
codes you’ve selected to the right of the test result. The full text of the Remark
51
Codes does not appear in the Enter Results screen, but will appear in the patient’s
report.
To leave the Remark Codes box without entering any Remark Codes, press the
Escape (ESC) key.
If you wish to add a Result Code to the list, or modify one that’s already on the list,
you must leave the Enter Results screen. Go to F8. Tools and select Remark Codes,
as described in Section 8: Managerial Functions.
Info
To examine information on the test: Select Info. SchuyLab displays the [Test]
Info box for the test.
The box contains all the previous patient results for that test, the normal range for
that test, and the critical range and range of instrument linearity if known. This
information is derived from the ranges and flags established for the test when it was
defined.
To alter or add to the information in the box, see the section on Test Definition in
Section 4: Test and Panels.
To close the Information box, select Continue.
Note
To add a note on the test: select Notes. SchuyLab displays Input Note box.
52
Type your note in the blank box. The text is free-form: there are no tabs, and the
text will ‘wrap around’ the box here without regard for spaces or punctuation.
(SchuyLab prints notes to fit your specific note format.) Line returns may be inserted
using the “|” character, or they may be typed using the Enter key as with normal word
processors. For that reason, the Input Note box is the only part of SchuyLab where
the Enter key is not the same as Save, or Done.
It’s also possible to compose a note using Note Codes. Like Result Codes, Note
Codes are pre-recorded texts, defined by you for annotating your lab’s tests. Unlike
Result Codes, Note Codes can be combined into a single comment, with additional
words inserted between or after them.
To enter a Note Code as part of your note, type the number sign (#) followed by the
code number. The number sign must be the first character in the note if you plan to
use Note Codes.
Treat the Note Code just as though it were a phrase of text. For example, let’s say
that Note Code #10 was defined to be the phrase “This specimen was unspun on
arrival”. We type “#10 -- Please resubmit” on the note, and select Save. The note
will interpret the Note Code, and the resulting text will say “This specimen was
unspun on arrival -- Please resubmit”. Other text, characters, even line returns will
be treated just as they are on a hand-typed note.
Several Note Codes can be combined in a single note. (This is one of the advantages
of Note Codes.) Thus, you might type “#10. Also note: #21. #3 as soon as possible.”
When you select Save, the note will read something like “This specimen was unspun
on arrival. Also note: Quantity not sufficient. Please resubmit as soon as possible.”
53
If you wish to add a Note Code to the list, or modify one that’s already on the list,
you must leave the Enter Results screen. Go to F8. Tools and select Note Codes, as
described in Section 8: Managerial Functions.
Once the text has been entered, select any appropriate conditions:
“View only (Do Not Print)”: Checking this box and your note will not print out on
any patient reports.
“Lab Confidential” Checking this box and your note cannot be viewed by
anyone who does not have the security clearance of “Lab Staff”.
“Print in Bold” Checking this box will cause the note to print on the test report in
bold letters, to draw immediate attention.
To save your note and close the Input Note box, select Save. Otherwise, to close the
Input Note box without saving your note, select Cancel.
You may select that note again, to amend it if you wish; or you may write a second
note, to follow the first. There is no restriction on the number of notes that may be
added to a single test result.
Concentration or Dilution
To enter a concentration or dilution: Select the appropriate button. Enter the
dilution or concentration factor in the space provided (i.e. for a 1:2 dilution, enter 2).
SchuyLab automatically multiplies or divides any existing result by the concentration
or dilution factor. Press Enter to place the new result in the entry field.
When you have entered all the required information, select F10. Done. SchuyLab
accepts the test results, enters them into the patient’s record, and displays the Patient
Processing screen.
Using the Expand Button with Trigger Tests
Trigger tests are designed to be followed by certain other tests that aren’t directly
ordered by the physician, but which are performed after the trigger test shows a
positive result (positive in this sense as “further testing should be done”). The
follow-up tests are part of the customary processing of the specimen, yet aren’t
reported unless relevant results are obtained. There are at least four trigger tests
defined as part of SchuyLab -- Urine Casts, Urine Crystals, Manual Diff and RBC
Morphology -- but you can define additional trigger tests as you need them.
To illustrate how trigger tests work: the test for RBC Morphology is a qualitative
test, generally ordered as part of a CBC. If no abnormal cells are seen, the result is
entered as Normal, and no more needs to be done. If abnormal cells are found, the
exact types of cells are identified (spherocytes, macrocytes, or whatever) and
numbered; and the results entered into the patient record. Rather than have a separate
order for each possible type of cell, RBC Morphology is defined as a trigger test: it
allows results to be entered for only those types which need to be reported.
54
The follow-up tests for a trigger test are called from the Enter Results or Alter
Results screens. When the entry field ‘window’ is activated for a trigger test, select
the button labeled Expand. This brings up the Expand [Test Name] box with the
appropriate follow-up tests.
(How does the Expand button know which follow-up tests to display in the
Expanded box? you may ask. Well, as part of the Test Definition for this particular
trigger test, we attach the test RBCMORPH to a panel (which we’ve imaginatively
called RBCMOR). The panel RBCMOR contains the follow-up tests we wish to see
in the Expanded RBCMORPH box. The panel can be edited as we wish, including
the order in which the tests are displayed. This is explained in greater detail in the
section on Panel Definition, found in Section 4, Tests and Panels).
Follow-up results are entered in the Expand [Test Name] box in exactly the same
manner as on the Enter Results screen. Only the follow-up results that have been
actually entered will be retained in the patient’s file afterwards; tests with no results
entered will not be retained. The Expanded screen is then closed by selecting the OK
button; the retained results will appear on the screen beneath the trigger test. The
trigger test’s entry field will still be active; be sure that a result (e.g., SeeBelow) is
entered and accepted for the trigger test itself.
Entering Microbiology Results
Microbiology results are entered for culture tests (that is, any tests for which
“Culture” has been selected in Test Definition) in much the same way as other trigger
tests, using the Expand button. Microbiology requires a bit more than other trigger
tests, though: for one thing, they require some special setup procedures, which are
described in the Microbiology section (see Appendix A). Once set up, though,
Microbiology results may be entered through the Alter Results screen (we
recommend that screen, rather than the Enter Results screen, for reasons that will
become apparent momentarily).
Let’s take a concrete example. We’ve ordered a culture to be done on a given swab.
Now we want to enter the results. From the Patient Processing Screen, we select
Alter Results. SchuyLab displays the Alter Results screen. We select the culture
test to get the result entry field (the ‘window’). Notice that the entry window for a
culture test is much larger than that of other tests; it was defined that way as part of
Test Definition.
55
In the entry window, type in your result. In this case, we’ve typed “after 24 hours”.
(Had we seen no growth, we’d have typed “No growth seen” or words to that effect,
and we’d have been done.) Now select the Expand button. SchuyLab displays the
Update Culture Results box.
56
The Update Culture Results box shows the name of the culture test, and the entry
already typed. It can be changed at this point, if desired, by simply typing over it.
Coll Date,
Time, By
Collect date and time. This defaults to day and time that you
enter these results and can be changed to reflect when you
collected the specimen. All dates can be put in as -n or +n
which means that many days in the past or future, +0 or -0 will
translate to today.
Recv Date,
Time, By
Received date and time. This defaults to day and time that you
enter these results and can be changed to reflect when you
received the specimen. All dates can be put in as -n or +n
which means that many days in the past or future, +0 or -0 will
translate to today.
Source
You can specify the source of the swab in more detail. For a
wound culture, for instance, you can type “left arm”.
Stat
If this specimen is a STAT, clicking on this box will move this
specimen to the top of any worksheet you may use and also
print STAT on the barcode labels.
Note
As with all the other yellow note pads in SchuyLab, you can
type in a free-text note.
Result
Enter the numbers of the Result Codes (up to four of them) to
be appended to this test result. (A typical comment here might
be the growth medium used for the culture.)
When you’re ready to enter the name of the organism you’ve isolated, select Isolate.
SchuyLab displays the Update Isolate Results box.
57
In the ISOLATE field, enter the test code for the organism you’ve isolated. If you
don’t remember the correct code, click on the arrow next to the Organism field.
SchuyLab displays the Which Organism? box, listing all the organisms currently
defined in your system.
From this list, you may select the organism you’ve isolated in this sample. Selecting
an organism from the list removes the Which Organism? box; SchuyLab displays the
Update Isolate Results box again, with the Organism field filled.
58
Note that the Sensitivity field is already filled as well. This sensitivity panel was
linked to E. Coli during Setup. If you wish to override the defined panel and choose
another sensitivity panel, you can use the pull-down list to display the currently
defined sensitivity panels (that is, all panels with names beginning “SENS”) and
select from the list.
In the Result Codes fields, enter the numbers of the Result Codes (up to four of them)
to be appended to this test result. (A typical comment here might be the colony count
for this organism.) Or select the yellow Notes icon to type in a free-text note.
Once an organism and sensitivity are identified, select the Input button. SchuyLab
displays the Update Sensitivity box.
59
The Update Sensitivity box shows all the antibiotics on the sensitivity panel you’ve
chosen. Enter the appropriate values for the tests. Only those for which values are
entered will be accepted and appear on the report. When done, select OK.
SchuyLab returns to the Update Isolate Results box. If you’re satisfied with all that’s
been entered, select OK again. SchuyLab returns to the Update Culture Results box,
with the organism name in the Organisms Isolated field.
If you’ve isolated an additional organism, select Isolate again (as described above).
If this is the only organism found, select OK again. SchuyLab returns to the Alter
Results screen.
60
The result for the culture, the organism isolated, and the antibiotics for which results
were entered, are all displayed. They can be accepted into the patient’s file in the
normal manner.
Now, what if you’d found an additional organism? It can be entered in the same way
as the first organism: Through the Update Culture Results box. You may still be
there, as described above, after having entered your first organism (you presumably
knew how many organisms you’d isolated when you started). Or, if you’re back in
the Alter Results screen, simply select the culture test, as though you were updating
its result, then select Expand.
Select Isolate. SchuyLab again displays the Update Isolate Results box. In the
Organism field, enter the code for the second organism you’ve isolated, just as you
did for the first organism. Select the Input button to enter the sensitivity results.
Repeat the same steps as with the first organism. You may repeat the process for as
many organisms as you’ve identified on your sample. When complete, select F10.
Done to accept the results into the patient’s file.
61
Manual Result Entry Quick List
To manually enter results:
On the Patient Processing screen, select Enter Results
Select a test
Select the appropriate button to display information, modify, or annotate the test
Type in the result and press Enter
SchuyLab accepts the result and moves the entry field to the next test
Online Entry
One of the strengths of SchuyLab is its ability to interface directly with a wide
variety of lab instruments. In some cases, communication across the SchuyLab
interface is bi-directional: The instrument receives specimen numbers and test
instructions from SchuyLab, and transmits test results in return. Other instruments
can communicate with SchuyLab in one direction only, sending test results to the
SchuyLab system. Either way, the test results are received directly from the
instrument, reducing possible human error in data entry.
SchuyLab stores the data it receives from an instrument in an instrument log. The
results are not automatically accepted into the patient’s file. Think of the Device
Interface as a ‘holding area’ for the instrument’s test results: nothing happens to
those results until you, the user, take some action. You can accept, reject, alter, or
annotate results, individually or en masse, in a set of data you receive on a specimen.
SchuyLab also tells you if you’ve already accepted results for these tests, so that you
can decide whether to keep the old results or accept the new.
Accessing the Device Interface:
To access the interface for a particular instrument: Select F4. Devices.
SchuyLab displays the Device Access menu screen, with icons for each of your
online instruments.
62
The Device Access Menu Screen
(The instrument icons appearing in the illustration were chosen as typical. Your
Device Access screen will show the icons for your instruments.)
SchuyLab will “BOLD” the name of a device that has results waiting for you to
accept or delete them. Select the appropriate icon. SchuyLab displays the
[Instrument] Results screen, with the test results for the oldest outstanding specimen.
63
The [Instrument] Results Screen
The [Instrument] Results screen displays three fields across the top of the screen:
specimen number, patient ID, and patient name. If the instrument transmits this
information, it appears in these fields. If SchuyLab recognizes the specimen number,
it displays the associated patient’s nameplate above the screen, and places checks in
the check boxes before the ordered tests.
If the test results are unacceptable: Select Delete to delete them and display the
next set of results.
If the test results are not the ones you want to view: Select Prior or Next until
SchuyLab displays the set of results you want. This process does not alter the
status of the results you bypass, which remain in the [Instrument] Results screen to
be approved or deleted later.
If the test results are reasonable: Check the patient ID and patient name on the
screen against the information in the nameplate. If the specimen number is
incorrect, these fields will not match.
If the specimen information and patient nameplate are correct: Review the
results.
If the specimen information and patient nameplate do not match, or there is no
patient nameplate: The specimen number may be incorrect, or invalid. Type
64
over the incorrect number with the correct number and select Reassign. SchuyLab
displays the nameplate for the matching patient. Now you can review the results.
If there is no specimen number, but there is a patient ID and/or patient name:
Select Reassign. SchuyLab displays the nameplate for the matching patient, and
the Select Specimen box. Highlight the correct specimen number and press the
spacebar. Now you can review the results.
If there is no specimen information: type the specimen number in the first window
and select Reassign. SchuyLab displays the nameplate for the matching patient.
Now you can review the results.
Reviewing Test Results
The [Instrument] Results screen displays a check box and test name for each test the
instrument performed on the specimen. Tests ordered in SchuyLab have checks in
the boxes. If a test was not ordered in SchuyLab but was performed by the
instrument, the test name appears without a check in the box. Clicking the right
button on the mouse in that check box will order that test on the specimen, without
having to go back to the Patient Processing screen; or you can select the Order
button to order all the unchecked tests.
When you accept the results by clicking the Accept button, only the tests with
checked boxes are accepted. Test results with unchecked boxes are discarded.
If the name of the test appears in green, it means that SchuyLab already has an
accepted result for that test, on that specimen. If the test name does not have a check
box (with or without a check) in front of it, that test has not yet been setup for use in
your system. The test name will be followed by a question mark, to emphasize the
point that SchuyLab doesn’t recognize it. The test will need to be translated, as
outlined in Sec. 8, Managerial Functions.
To toggle a checkbox on or off: Select the check box with the right mouse button.
Checked boxes toggle off; unchecked boxes toggle on.
65
To annotate, alter, or accept a result: Select the check box with the left mouse
button. SchuyLab displays a result box, with the test code at the top.
The box shows the check box and current value of the test, as well as the previously
accepted value (if the test name appeared in green)and all prior results (if there are
any); any result flags that were transmitted by the instrument; a yellow “note” icon
for adding free-text notes; and four Result Code fields.
Add or remove the check mark on the check box, to accept or refuse the test result. If
there is a previous test result, checking the box will replace the previous result with
the new result.
When all the information in the box is acceptable, select OK.
Some of the test results may appear in blue or red, or be followed by letters and
symbols. These colors and symbols are defined below.
Color/Symbol
Red, H
Blue, L
Red, CH
Blue, CL
Blue flag
66
Definition
High
Low
Critical High
Critical Low
There is an instrument message for this test.
When you have completed your review, select Accept to accept the results and
display the next set of results. SchuyLab accepts the checked test results and sorts
them, with any notations, into the patient’s file.
Accepting Online Results Quick List
1. Push F4
2. Select the appropriate instrument icon
3. Examine the information
If results are
If results are not the ones
acceptable:
you want to view:
1. Review the
1. Modify the specimen
results
number, patient ID, or
2. Remove the
patient name to link the
check mark from
correct patient to the
any individual
data
test(s) you do not
want to accept
OR
3. Select Accept
4. SchuyLab
2. Select Prior or Next to
displays results
display different results
for the next
patient.
If results are not
acceptable:
1. Select Delete
2. SchuyLab displays
results for the next
patient.
Worksheet Entry
Certain instruments and bench tests which are not online to SchuyLab can be run
most efficiently on a worksheet format. SchuyLab gives you the option of entering
the results from these tests in the same format as the worksheet you used to run them.
The first step in this process is to select the specific worksheet you need. To select a
specific worksheet and accept the results see Sec. 5, Worksheets.
Viewing Results
Once test results are accepted, they can be reviewed in any of several ways. (One
quick way involves the Print Results icon, and will be discussed in that section,
below.) Probably the best way is through the View Results icon. This feature allows
the user to see the results in the same order as they’d appear on the printed report -but with no danger of accidentally altering or deleting a result. View Results is ideal
for clerks, receptionists, and other users who shouldn’t have result-editing authority.
To view patient results:
From the Patient Processing menu screen, select View Results.
67
SchuyLab displays the View Results screen.
The results are listed in the same order as on printed reports, with the same headings.
Abnormal values are flagged; annotated results are displayed after the test and its
information.
To see the full information on a result, select that value. SchuyLab displays the
[Name of Test] box.
68
The current test value is shown in the blue bar at the top of the box, next to the name
of the test. (In this example, the test is Potassium, and the value is 5.2). Results from
previous specimens on this patient, if any, are shown in the area labeled “Prior
values”. The Normal Range, Critical Range, and the range of instrument linearity (if
defined) are all shown. When you’ve seen all you need, select Continue. SchuyLab
returns to the View Results screen.
When you’re finished viewing the results, select either F9. Cancel or F10. Done.
Either one will return you to the Patient Processing menu screen; since nothing can
be changed in the View Results screen, there’s no danger of accidentally saving an
erroneous entry or deleting a valid one.
Printing Reports
There are several ways of printing a patient’s report. Reports may be printed with
some or all test results pending (a preliminary report), or with all the results accepted
(a final report). You can print a single report, or a batch of reports; if you print a
single report, it won’t be removed from the batch file unless your lab has specified
that option (which most labs do).
Printing a single report is generally done from the Patient Processing Screen. The
other print functions are accessible through F6. Print.
Patient Reports
From the Patient Processing screen: Select Print Results. SchuyLab prints a report in
the default format your lab has selected, for the patient whose nameplate appears at
the top of the screen. If your system has several print queues, you can select the
printer that will print the report.
From anywhere else: Select F6. Print. SchuyLab displays the Report Printing menu
screen.
The Report Printing Menu Screen
69
Patient Report: Select Patient Report to print out a cumulative report of
the data available on the selected patient, even if your lab has opted for
specimen-style reports as their default format.
From the Report Printing menu screen, select Patient Report. SchuyLab displays
the Select Patient box.
Move the cursor to the Patient’s Name field, type in the first few letters of the
patient’s name and press Enter. SchuyLab displays a list of patients whose names
70
begin with those letters. Select the correct patient from the list. SchuyLab displays
the Cumulative Patient Report box.
If you simply press Enter (or the OK button), SchuyLab prints a single-page
cumulative report, showing the most recent specimens (four to eight, depending on
format). If you check the box labeled “Print Full History of Patient” before doing so,
however, SchuyLab prints a report on all the active specimens for the patient.
AcceSsion Report: Select AcceSsion Report to print out a series of
specimen style reports, even if your lab has opted for cumulative reports as their
default format.
From the Report Printing menu screen, select AcceSsion Report. SchuyLab displays
the Accession Reports box.
Type the range of Accession numbers in the field and select OK (or press Enter).
SchuyLab prints a separate report of test results for each Accession.
71
Print Patient Report Quick List
From Patient Processing:
1. Select Print Report
2. SchuyLab prints a
(default format) report
on the patient
From F6. Print:
1. Select Patient Report
2. Enter or select patient name
3. SchuyLab prints a cumulative report on the patient
Batch Reports
While printing a single report is all well and good, you will generally prefer to print
all your reports at one time ... probably at the end of the day, after results have been
accepted. And naturally, you’d prefer to push only one button to get all these reports
to print. Batch Printing comes close.
To print a batch of reports:
Select F6. Print. SchuyLab displays the Report Printing menu
screen.
Select Batch Reports. SchuyLab displays the Print Patient Reports box.
The Print Patient Reports box lists all the patients with accepted or annotated/revised
results which have not yet been printed. The type of report (preliminary or final) is
noted alongside each individual report entry as is what kind of report it is (result or
graphic).
72
To batch-print reports: There are three ways to print your reports. One way is to
highlight one or more reports and select Print to print the selected reports, or select
Print All to print all the test results on the list from the first screen.
Secondly, you may wish to print only a certain range of reports, or otherwise qualify
the selection (without individually highlighting the reports you want). In that case,
select Select. SchuyLab displays the Select Reports box.
Enter the search criteria, which may be any combination of the following:
•
•
•
select a range of Accession numbers, or a range of dates (All dates can be put
in as -n or +n which means that many days in the past or future, +0 or -0 will
translate to today.);
select Preliminary or Final Reports (at least one!), or both;
select a specific client whose patients you want reported.
Then select OK. SchuyLab returns to the Print Patient Reports box, with the
specified reports highlighted. Select Print to print, or Cancel to cancel.
The third way is to select the Print All button on the first screen. This will select and
print all reports (preliminary and final) in the list.
To delete reports: Highlight one or more reports and select Delete. SchuyLab
removes it from the Print Patient Reports list. (Printing a report via the Print Patient
Reports box will delete it from the list automatically.)
Print Control Functions
73
CLIA requires that the lab have available a copy of the original result printed out for
the doctor. And for many labs that creates a problem as storage is at a premium.
SchuyLab will store that “original” for you on the hard drive, in fact SchuyLab
makes a copy of everything you have printed, including worksheets and log files.
You can then at a later date access these reports through the Report Printing menu.
The Report Printing menu screen has two icons that control the actual printing
operations of the system. One is the Reprint icon, and the other is the Print Control
icon.
Reprint: To reprint a report that has already been printed, select
Reprint. SchuyLab displays the Reprint Report box, listing all the reports that
have been printed that day, latest report at the top.
Highlight the report(s) you wish to reprint. From the Queue list box, select the
printer queue you wish to print on (the default queue will be displayed initially).
Then select OK. SchuyLab reprints those reports, exactly as they were first printed.
To reprint a report that had been printed on a previous day, type the date the report
was printed in the Date field, then select the List button. SchuyLab lists all the
reports printed on that date, latest report at the top. Again, highlight the reports you
want, then select OK. SchuyLab reprints those reports, exactly as they were first
printed. (The value of this is apparent when the report includes something like “date
printed”. The Reprint feature reprints the report with its original date, not today’s
date.)
74
Print Control: To see what’s currently in the printer queue (that is, the
reports waiting to be sent to the printer), select Print Control. SchuyLab
displays the Print Control box.
The Queue field shows the default queue for your system; the large area lists the
reports waiting in that queue. To see what’s in another queue (if your system has
more than one printer), select that queue from the Queue pull-down list.
To make changes to print jobs in a queue, highlight the reports you wish to change.
The ‘grayed’ buttons labeled Copy, Move and Delete will become active.
• If you wish to simply not print those reports, select Delete. SchuyLab
deletes them from the printing queue; those reports will now not print.
• If you wish to move the print job to another printer, select Move (if you want
this print job to print on another printer) or
•
Copy (if you also wish it to print on the current printer as well). SchuyLab
displays a dialog box, asking which queue you wish to Copy/Move to.
75
Choose the appropriate new queue from the pull-down list, then select Ok.
SchuyLab returns to the Print Control box, with the printing jobs moved or copied.
When done with Print Control, select OK. SchuyLab returns to the Report Printing
Menu Screen.
Reports for Record Comparison
In addition to the patient reports, there are some reports that should be printed on a
daily basis. These reports are useful for keeping track of requisitions: they permit
comparison between what was ordered, what was accepted, and what remains
pending for that day. The reports are the Data Log, the Order Log, the Accepted
Log, and the Outstanding Tests log. All of these reports are accessed through F6.
Print, the Report Printing menu screen.
Data Log: This is a condensed format log of all the patients, tests, and
results, by Accession range. It lists individual tests: that is, if a CBC was
ordered on Accession #10001, the Data Log will show that Accession with a
WBC, RBC, Hemoglobin, &c, along with any accepted results.
Order Log: This is a log, by Accession range, of the tests ordered on
each patient, in the arrangement that the doctor ordered them. That is, if a
CBC was ordered on Accession #10001, the Order Log will show that Accession
with a CBC, not the individual tests therein.
Accepted Log: This is a log, in condensed format, of all patients, tests,
and results that have been entered into the system since you last selected this
option. Because no Accession range may be specified, the Accepted Log must be
printed regularly, preferably daily.
76
Outstanding Tests: This is a log, by Accession range, of the tests whose
results are pending. For any given period, the Outstanding Tests log plus the
Accepted Log should equal the Order Log (or the Data Log).
The procedures for printing these reports are detailed in Section 8: Reports and
Printing. Again, we emphasize that, in an ideal laboratory, these reports will be
printed every day.
Additionally, there is a report you may need to print on a daily basis, depending on
the type of work your lab performs. This is the Restricted Log.
Restricted Log: This is a log of all tests whose results are marked as
“restricted”. These tests do not print out on the other logs. Only users with the
proper security clearance can access this function.
Print Reports Quick List
To print a report
(general):
1. Push F6
2. Select a report
icon
3. Enter a AcceSsion
number, range, or
name, if necessary
4. SchuyLab prints
out a report in that
format
To print a batch
report:
1. Push F6
2. Select Batch Report
3. Select Print All to
print all the accepted
test results since the
last batch report
To reprint a report:
1. Push F6
2. Select Reprint. SchuyLab
displays list of reports
3. Enter the date of the
report you want to reprint
4. Select the report you wish
to print
Enhanced Functions for Hospital Labs or Large
Medical Groups
Many of the additions to SchuyLab were designed for these groups, including
capabilities for interfacing to HIS or OIS software. We now have a working and
adaptable HL7 interface, a growing standard in the field of Electronic Medical
Records. However, in addition to these Information System developments, many
new features allow for more Demographics information and a more comprehensive
Draw List Report.
The following changes are only available to Labs with the Hospital Lab
configuration. To update your configuration, follow the following steps:
Go to F8: Tools,
77
Set-Up,
PArameter ID Definition,
Optional Processing.
Place a check in the Hospital Lab option. If you would like to make use of the
Draw List Report described in Sec. 7, Reports and Printing, you must also place a
check in the Undrawn Accessions option.
Once you have made these changes, you will need to exit out of SchuyLab and sign
back in. The following improvements will then be available to you.
New Demographics Information
Now when you view Change Demographic in the Patient Processing screen, you
will notice several new fields. Here is a picture of the new Patient Demographics
screen:
78
The Location: field is now listed as Unit: and has been moved. This can be used to
describe a Nursing Unit or facility within the Hospital. For instance, this patient is
part of the Geriatric Center of the Example Medical Group. In addition, four more
fields—Room:, Bed:, Class:, and Service:—have been added to allow you to further
designate where the patient is staying in your building as well as what type of
services the Patient is receiving.
Class: is a single character field and was added for Hospital Information System
interfaces. When using HL7 (the interface that most HIS’s use), there are only three
options that are used: I (In-Patient), O (Out-Patient), and E (Emergency Room).
However, if you don’t use an HL7 interface or plan to ever in the future, the Class:
field can be used to designate other classes of Patients like Home Health, etc.
Service: field can store up to six characters and can be used to determine if the
patient is being seen for Orthopedic Surgery, Physical Rehabilitation, etc.
Also, an Admit Date: and a Dischg Date: field have been added to record whether
the patient is currently checked into your facility, or during what time period they
received In Patient services from you.
How can these changes be used to enhance the services of your Medical Group?
Well, in addition to the ability to store this extra information, your Specimen and
Patient Reports can be configured to print this information as Demographics. Also,
the Location: or Unit: field can now be linked to a Printer Queue. In previous
versions, if you wanted to have ER patient reports print automatically to the
Emergency Room and ONC patient reports print to the Oncology Ward, you would
have to configure two separate Clients—“Example Medical Group – ER” and
79
“Example Medical Group – Oncology”. Now with SchuyLab, you only have to set
up the one “Example Medical Group” client, and setup each Location you would like
a report to print to. Sec. 7, Reports and Printing goes into deeper detail on how to set
this up.
80
Sec. 4 - Tests and Panels
Setting up your Tests
When you order tests in SchuyLab, the system displays a screen with buttons
for the tests and panels available to you. Schuyler House personnel configure this
screen to the requirements of your facility during initial set-up. As your
instrumentation and requirements change, you may want to alter this screen to meet
your new needs.
The first step is to define your lab’s tests: all the other processes depend on tests.
Once you’ve defined your tests, arrange them into panels. The tests and panels you
develop constitute the Order Tests screens that you use in your daily work. A test
may belong to more than one panel (for instance, Cholesterol may appear in your
Chem 18 panel, your Lipids panel, and your Cardiac Profile panel).
The following sections, listed below, describe, in order, the steps by which you’ll
establish tests in SchuyLab:
1. Test Definition
2. Panel Definition
3. Screen Definition
4. Alias Definition
5. Print Group Definition
6. Configuring the Online Interface
Test Definition
You must define your tests before you initiate any of the other processes that depend
upon them. Test definitions are the building blocks to customize your system.
1.
2.
3.
4.
To define a new test:
Select F8. Tools. SchuyLab displays the System Tools menu.
Select Set-Up. SchuyLab displays the Setup menu.
Select Test & Panel Definition. SchuyLab displays the Define Tests menu.
Select Test Definition. SchuyLab displays the Update Tests box, listing the
existing tests.
81
Each test has a test code, up to eight characters long -- which appears on the buttons
in the Order Tests screen -- and a test name to be printed on the patient’s report. By
default, the Update Tests box sorts the tests by code, in alphabetical order; if you
wish to sort tests by their names, select the Name button at the bottom of the Update
Tests box.
82
5. Select New. SchuyLab displays the Define New Test box.
Complete the fields following the guidelines below, using the mouse or the Tab key
to advance through the fields.
Code:
The test code appears on the button in the Order Tests screen and in
the Enter Results screen. Type up to eight characters for the test
code; for best results, use only letters, numbers, and the underline
“_” character. You may not duplicate another test code or panel
code.
Name:
The test name is printed on the patient report. Type up to 16
characters for the test name. You may use letters, numbers and
characters.
Dept:
Pull down the scroll list box and select the department or area for
the test (e.g., Chem, Hemo). Or type the name of a new
department, if the current list doesn't include it.
83
Inst:
(optional) Pull down the scroll list box and select the instrument
that performs the test (e.g., Coulter, Demand). Or type the name of
a new instrument, if the current list doesn’t include it.
Facility
(optional) If some of the tests you have in this list are facility
specific, a list of facility names are in the pull down box and they
can be marked for that specific lab (you must have the Multi
Facility module). Likewise, this can also be used for reference lab
tests. For more information see the sections on Multi-Facility and
Reference Labs in Appendix.
Full
Description
(optional) Type the complete test name. This is usually for your
internal documentation, but some reports print the Full Description
routinely.
Note
(optional) Select the yellow notepad to record notes or user
comments concerning the test. This is where you would type a
message to print out each time this test is reported.
Dec:
Type the number of decimal places in which to express the test
results. The default is zero (0).
Units:
Pull down the scroll list box. SchuyLab will display a list of
different forms of units. Select the appropriate units for this test
and SchuyLab displays the units in the box next to the arrow. If
you can not locate the unit you want to use, you can type in the
units in the blank spot at the top of the pull down list.
Sample
Many labs, as they grow larger, turn to automation to process more
specimens. You can dictate the specimen type needed for each test
by choosing from the list in the pull down box. This will add a
letter suffix to the back of the accession number (i.e. 0112060152S)
to indicate which label goes on which tube (S = Serum). At
present, choices are: W BLOOD, SERUM, URINE, PLASMA,
CSF.
Suffix
This is the field to use when you're running a given test on multiple
samples of the same type
Expand
If this test is a trigger test (more about trigger tests further in this
section), this is where you tie it to the panel you choose to expand it
to.
84
TAT:
Turn Around Time. The TAT is the measurement of the interval
between two designated points in the processing of a specimen that
is used to measure the efficiency of laboratory.
Procedure:
Type in a unique procedure code number (e.g., the CPT code) to
enable this test to be reported and priced on the various
demographics reports. (If your system has the SchuyLab Billing
Module installed, the Procedure field will be a read-only window;
you’ll enter the procedure number through the Billing button,
described below.)
Amount:
Type in a dollar amount for this test, to be reported and priced on
the various demographics reports. (If your system has the
SchuyLab Billing Module installed, the Amount field will be a
read-only window; you’ll enter the price through the Billing button,
described below. Only one price can be entered in the standard
system.)
Billing...
This button is active only on systems with the Billing Module
installed. Selecting this button permits you to define procedure
codes and prices, according to the different schedules defined in
Billing. For more information, consult the SchuyLab Billing
Manual.
Rmk:
Type in the number of a defined Remark Code appropriate to this
test. This comment will then print out each time this test is
reported.
Workload:
This feature is not yet completed.
Normal
Ranges
Enter the normal ranges for this test. This would be the lowest
possible number (or the normal value) to the highest. Anything
below or over these ranges would then be considered Abnormal by
SchuyLab and be reported as such. If the “normal” is a word (i.e.
Negative), it can be placed in either box and most other words used
would be considered abnormal.
Critical
Ranges
Also known as Panic Values.
85
Linear
Range
Type the low and high values given by the instrument manufacturer
for the linear range of the test methodology and particular
instrument. If you switch to a different methodology, even on the
same instrument, you must update this range. This range also
appears in the information box on the Enter Results screens, as
some instruments send out results beyond their linear range; it does
not appear on the patient report.
Absurd
Range
This represents a range beyond which the likelihood of entry error
is high. For example, a K of 5.0 is Normal, a K of 6.0 is Critical, a
K of 16.0 is above Linearity, and a K of 50.0 is Absurd (the tech
probably meant to type “5.0”, not “50”).
Ranges...
Select Ranges to set detailed ranges for ranges that differiate with
gender, age, and patient type or Critical Ranges, Interpretive
ranges. SchuyLab displays the Ranges for [Test name] box.
The Ranges Box
To add a new normal value range
Normal ranges can be different between men and women as in the RBC test or even,
between ages as in child versus adult. In these tests, you can set the parameters that
SchuyLab will then report out.
1. Select the Normal tab.
2. Select New. SchuyLab displays the Add Range box.
86
3. Select the specific characteristic(s) for the range you want to enter. You can
define the range by Patient Type, if they’re defined for your system, Gender
(Unknown, Male, Female, or * for both), Age Range, or a combination of the
above.
4. Type the low (Minimum) and high (Maximum) values for the selected
characteristics. Type in a comment, in the Comment area, if you wish to
have one associated with this range.
5. Select OK. SchuyLab displays the new range in the Ranges box.
6. Select New again to enter another range.
7. When you have entered all the ranges for that test, select OK.
To add a new critical value range
Much like the normal ranges, the critical ranges for tests can also be set up for
specific parameters.
1. Select the Critical tab.
2. Select New. SchuyLab displays the Add Range box.
87
3. Select the specific characteristic(s) for the range you want to enter. You can
define the range by Patient Type, if they’re defined for your system, Gender
(Unknown, Male, Female, or * for both), Age Range, or a combination of the
above.
4. Type the low (Minimum) and high (Maximum) values for the selected
characteristics.
5. Select OK. SchuyLab displays the new range in the Ranges box.
6. Select New again to enter another range.
7. When you have entered all the ranges for that test, select OK.
To add a new interpretive value range
Interpretive ranges can be set up for a variety of tests. Many test, such as HIV,
Rubella or Hepatitis, has a reportable result of Negative or Positive. But your
instrument may send a numbered value to SchuyLab. In this case, you need to set up
the interpretive ranges that any value from one number to this number is reported as
Negative, etc.
Likewise, if your lab is performing Cytology tests, you can also set up many results
to print out extensive notes on those results (for more information on Cytology tests
and reporting see the Cytology section in the Appendix).
1. Select the interpretive tab. SchuyLab displays the Range box for the specific
test. As you can see from this example, we have already set up a number of
interpretive results. As interpretive ranges can be confusing, let’s assume
that none of these exist and we are creating from new.
2. Select New.
88
3. Select the specific characteristic(s) for the range you want to enter. You can
define the range by Patient Type, if they’re defined for your system, Gender
(Unknown, Male, Female, or * for both), Age Range, or a combination of the
above.
4. Type the low (Minimum) and high (Maximum) values for the selected
characteristics and how this range is to be reported out. In this case, we are
using 501 as both values. To get the appropriate note to print with this result,
click on the yellow note pad and type it in.
89
5.
6.
7.
8.
Select Save.
Select OK. SchuyLab displays the new range in the Ranges box.
Select New again to enter another range.
When you have entered all the ranges for that test, select OK.
To add a new plot value
First, what is a plot value range? A plot range will print where the patient’s result
fall within the middle of the reference ranges. For example, the normal ranges for
NA are 135 – 145 mEq/l and we will set our plot for between 120 and 160.
1. Select the Plot tab.
2. Select New. SchuyLab displays the Add [TEST] Plot Range box.
90
3. Select the specific characteristic(s) for the range you want to enter. You can
define the range by Patient Type, if they’re defined for your system, Gender
(Unknown, Male, Female, or * for both), Age Range, or a combination of the
above.
4. Type the low (Minimum) and high (Maximum) values for the selected
characteristics.
5. Select OK. SchuyLab displays the new range in the Ranges box.
6. Select New again to enter another range.
7. When you have entered all the ranges for that test, select OK.
To have the plot print on the result form you will need to add a space for it on the
result form. Go to F8:Tools, Setup, Report Setup, Patient Report, Accession
Report, Setup, Results and add a column for Result Graph. You can place the
graph anywhere on the report (before or after the results for instance). When you
print out the result report it will look similar to this:
The “O” on the graph shows where the results are to the middle of the plot range we
set.
To update a range that’s already defined
Select the range in the Ranges for [Test name] box. SchuyLab displays the Update
Range box. Select the heading to update and then make the necessary changes and
select OK. SchuyLab returns to the Define New Test box.
91
Values...
To set non-numeric results (“pos”, “neg”, “yellow”, etc..) for the
test, select Values. SchuyLab displays the Values Box. Once
values have been selected, they may be entered as ranges and used
as patient results.
1. Select Values. SchuyLab displays the Values for [Test name]
box.
The Values Box
2. To add new values to the list of authorized responses, select
Standard. SchuyLab displays the Add Values box. Multiselect the values you want to add to the test.
The Add Values Box
92
3. When you have highlighted all the new values, select OK.
SchuyLab returns you to the Values for [Test name] box, and
displays the values you have selected as a list in that box.
4. If the test value you need is not on the standard list, you can
create your own custom values. To do this, select Custom.
SchuyLab displays the Add Custom Value box. In the Value
field, type the test value you wish to create. Select OK.
Note: If your lab makes extensive use of Cumulative
Reports, we strongly recommend using only values from
the Standard list as Custom values do not print on
Cumulative Reports due to space.
5. If you have selected non-numeric values, but still wish to
accept numeric results for that test, select the Numeric
check box. (That is, if you want to be able to accept either
“trace” or “5” as a valid result, select the Numeric check
box before adding “trace” as a test value.) Or, if you wish
to accept ratios or ranges as results, select the box labeled
“N:N”, N-N”, or “N/N”, as appropriate.
93
6. For Microbiology tests, and some other tests, the test result
may be longer than the eight-character maximum in the
standard Add Values list. For those tests, you can define
the test to be a free-form text value. To do this, in the box
labeled “Text”, type in the length of text (maximum of 32
characters) you want the result to be. (Note that choosing
a value in the Text box overrides any selection from the
Add Values list and can not be flagged as an abnormal.)
7. To add a result code, note, key stroke, or flag to a value, or
to delete a value, select that value from the list displayed
in the Values for [Test name] box. SchuyLab displays the
Update Value box.
The Update Value Box
•
•
•
•
94
To delete the value, select Delete.
To link that value with a remark code, type the number of that code in the
space labeled ARC. If so designated, that code will print out on the report
each time that value is selected as a test result.
To print a message each time that value occurs as a test result, select the note
icon in this box, and type your message.
To enable this value to be entered by typing a single keystroke, enter that
keystroke in the Key field. (Be careful in choosing your keystroke: for
instance, if you choose “N”, that letter won’t be available for “Negative” or
“None”.)
• To flag your value and print it in a contrasting color
bold for laser printers), select one of the values in
listbox labeled “Flag”.
L = low/blue
H = high/red
CL = critical low/blue
CH = critical high/red
< = less than/blue
> = greater than/red
a = (abnormal)/purple (color only; no letter flag)
A = abnormal/purple
(or
the
(or
the
8. When you have made all the specifications, select OK.
SchuyLab returns to the Add Values box. To annotate
another value, select it from the picklist and continue as
above. When you are done, select OK. SchuyLab returns
you to the Update Test [Test Name] box.
Options...
Select Options to control how test results are accessed,
displayed and printed. SchuyLab displays the Options for
[Test Name] box.
95
In the scroll bar labeled “Type”, select “standard” unless the
test is for Microbiology, Cytology or Allergens. In those
cases, select “Culture”, Isolate”, etc. as appropriate.
In the scroll box labeled “Report”, select “standard”.
•
To be able to report out test results using both the
graphic and the standard report format, leave the checkbox
labeled “Only” unchecked. (If you wish to use just one
kind of report, select that type of report and check the
“Only” checkbox.)
Footnotes - causes notes on this test to print as footnotes at
the bottom of the printing group (in Specimen format
reports). Notes print by default immediately after the test
results they annotate. (Notes will always print as footnotes
on Cumulative reports.)
Non-printing test - configures this test as one which does not
print out on any report such as part of a calculation or for
billing purposes only.
96
Microbiology - denotes this test as a Microbiology test,
accessing Microbiology result codes. (Specimen report
format only)
Do not print if blank - configures this test so that, should the
test results be blank (or if the space key is hit and then that
“result” is accepted), the test will not print out.
Restricted - suppresses viewing and printing for all users
without the proper security clearance.
Flag Values - labels results outside normal and within critical
ranges.
Automatically Order active only for calculated tests.
When a calculation is typed in the “Derivation” field (as
described below), this box becomes active, with a check in
the box: the calculated test is then automatically ordered
whenever its component tests are ordered. To stop this, and
require the calculated test to be explicitly ordered, remove
the check mark.
Result when ordered - requires the user to enter a result as
soon as the test is ordered. (For instance, “Urine Volume”
might be needed to calculate other tests; it can be entered
when the tests are ordered.)
Billing Only – A Billing Only test doesn’t require a result;
once ordered, it’s immediately “done” (i.e. not pending)
and can show up on invoices, etc. A Billing Only test
could be a charge for a blood draw, a STAT test or a house
visit. In this case, you would create a test called DRAW
(STAT, HOUSE, etc.) and mark it as a Billing Only AND
also select the “Non-Printing Test” option test. This way it
would not print on the patients results form, but would
show up on the billing side as a charge. A Billing Only test
will print out on the patient’s results unless otherwise
marked.
Result unaffected by dilution - Screening tests, such as
Hepatitis, usually use test results as Positive or Negative.
Sometimes your instrument gives a numerical result that
has to be interpreted, and we don’t want the results skewed
by a dilution factor.
Note that this option is rarely used with today’s modern
instruments
Not directly orderable – Any test with this box marked, will
not show up on the test list under Screen Definitions or in
the picklist in the Free Text ordering. This test will still be
ordered if it is part of a panel.
97
SchuyLab displays a check mark on the options you have
chosen.
When you have selected all the appropriate options, select OK.
SchuyLab returns to the Update Test [Test Name] box.
Panels...
Select Panels to include the test as part of any panels, or to see
which panels include this test. SchuyLab displays the Define
Panels with [Test Name] box.
If the test is already part of one (or more) of your panels, those
panels will be listed here. If you wish to now define a new panel
that will include this test, select New. SchuyLab displays the
Define New Panel box.
98
The test will already be listed in the new panel. Add other tests
and panels, as described below, and give the new panel a code
and name. Select OK to return to the Define Panels with [Test
Name] box.
When finished, select Done. SchuyLab returns to the Update
Test [Test Name] box.
Same Ranges Many tests, such in Allergy testing, use the same ranges as a
as Test
single reference methodology (i.e.”IgE”). Instead of creating or
typing in the ranges for each test, you can let SchuyLab know this
test using the same ranges as another test. You enter the test code
of the first test by clicking on the arrow and scrolling down to the
test or, simply typing in the test code. NOTE: The test you use as
reference must come first in the test list.
Delta Check
Interval
The normal variation between successive tests for a patient,
expressed as a value or a percentage. If a patient's test results
exceed this range, SchuyLab flags the results.
The number of days within which the delta check is valid. If this
number is left at “0”, defaults to checking against the most recent
result (or the last time this test was performed).
99
LOINC
LOINC (Logical Observation Identifiers, Names and Codes) is a
public-use set of codes and names for electronic reporting and
comparison of clinical laboratory test results. These codes are
methodology-based, to allow for distinction between similar tests
and/or comparison of identical tests. If you wish to use a LOINC
code for a test, enter it in this field.
As an example, say you have two analyzers, both running LDH,
but using different methodologies. Those LDH results should not
be compared with each other; the tests would have different
LOINC codes. On the other hand, you might have two tests with
different names in SchuyLab but the same LOINC code: their
results could be compared with each other, or plotted on the same
graph.
Derivation
If the test is mathematically derived from other (measured) test
information (e.g., A/G Ratio), type the formula to calculate the
test result. The formula can use numbers, test codes, parentheses,
and the symbols ‘+’ (add), ‘-’ (subtract), ‘*’ (multiply), and ‘/’
(divide). You can also use “^” to show raising to an exponent
(necessary in calculating INR).
Do not include a complete
equation (that is, don’t use the equals (=) sign). The test codes
used in this field must exactly match the test codes defined in
SchuyLab.
As an example, to set up the BUN/Crea ratio so that SchuyLab
will calculate it automatically, find the codes for BUN and
Creatinine -- presumably, “BUN” and “CREA”. Then type
“BUN/CREA” in the Derivation field for this test.
Effective
Date:
After your lab has been using SchuyLab for a while, you may
determine that your “normal” ranges need to be adjusted, or you
may change instruments that have different ranges than you’ve
been using. Instead of making a new test to reflect the range
changes, by entering a date in this box, SchuyLab will begin
using the new ranges, yet still reference the old ranges when
necessary.
100
TAT:
The Turn Around Time (TAT) is an interval between two
designated points in the processing of a test. It is used in a
clinical setting to measure the efficiency of the laboratory. The
actual length of this time interval is compared to a target time that
is placed on the individual test or globally set in SchuyLab, and a
report is generated to show how frequently this target is achieved.
The definition of the designated beginning and ending points is
fluid, and may change within a facility as well as between
facilities. It is generally used by a laboratory for two purposes:
to troubleshoot internal processes or to document laboratory
efficiency.
Absurd
Range
This will alert you to typing or entry errors that can sometimes
occur, that are either outrageous or near impossible. For
example, for some reason the Dimension is not transmitting over
to SchuyLab and you need to enter the results manually. As you
are working your way down the list on the patient, you misread
the results and type in a value of “50” for the Potassium test.
Normally this result would have been flagged as an abnormal
high and you would have gone on to the next test. But that would
be an impossible result for a Potassium and now you will be
prompted by a message:
This message would also appear if you accepted a “?” as a result.
NOTE: You will need to have values in the Absurd Ranges
boxes for this to work. If there are no values, the Potassium of
“50” would be flagged as a high abnormal.
6. Select OK. SchuyLab returns to the Update Tests box.
7. Select Done.
To Update a Test
1. Select a test from the Update Test scroll box. SchuyLab displays the Update Test
[Test name] box.
2. Alter fields, as required.
3. When you have finished your updates, select OK.
4. Select Done.
101
Using Test Numbers
Although it is become more and more outmoded, some labs use a number code to
identify the tests and panels they use. These numbers are NOT procedure or CPT
code numbers, but numbers the lab has assigned each test or panel they perform. If
your lab is one of those and wishes to continue using that method, SchuyLab has
made it easier. The first step is telling SchuyLab that you will be using numbers as
code;
Go to
F8: Tools
Set-Up
PArameter ID Definition
Optional Processing
This will bring up the Select Systems Options box. Check the box for Use test
numbers.
Now your SchuyLab is set up to accept numbers as a test or panel code. Next go to
the Update Test Box and you can see the box in which to enter the test number.
102
Using Samples and Suffixes
Chemistry analyzers will usually permit a given test to be defined once. Thus, for
instance, the test for Creatinine can only be defined once on a given analyzer. In
reality, there are several tests for Creatinine – Serum Creatinine, Urine Creatinine,
24-hour Urine Creatinine – all of which have their own units and normal ranges, and
all of which are defined as separate tests in SchuyLab. But the analyzer knows only a
single test, Creatinine; it can only be ordered once on a given specimen.
Other examples might be the multiple Glucose tests for a Glucose Tolerance panel;
morning and evening Cortisol levels; peak and trough Vancomycin levels; and so
forth. In each case, we want all the tests ordered on a single accession, so the results
can be on one report. They must therefore be defined as separate tests in SchuyLab,
but somehow run as the same test on the analyzer – with the test results accepted in
their proper places.
Until now, the only solution was to manually enter the results. With the new changes
to Test Definition, it's possible to run barcoded samples on the analyzer and have the
results be properly sorted in SchuyLab.
When the tests are now ordered, if the sample type or a specific suffix are part of the
Test Definition, a letter is appended to the Accession ID for that test only. Barcodes
103
are then generated for each of the suffixed Accession IDs, in addition to the "base"
Accession ID.
Thus, if John Smith had an Accession ID of 12345, and we ordered a CBC, Lytes,
Fasting Glucose, and 2-hr Post-Prandial Glucose, then the CBC, Lytes and Fasting
Glucose would be attached to 12345, but the 2-hr PP Glucose would be attached to
12345A. When printed, the barcodes would include any suffixes.
On the analyzer, the barcodes are scanned and a query sent to SchuyLab. Because of
the suffix to the Accession ID, the analyzer will assume we have two separate
accessions. Thus it will run the Lytes and Fasting Glucose on 12345, but not the 2-hr
PP Glucose; and it will run the 2-hr PP Glucose on 12345A, but nothing else.
When the analyzer sends the results to SchuyLab, SchuyLab ignores the suffixes and
recombines the results into a single Accession ID, 12345, which is displayed in
F4.Devices as usual. It can then be accepted and the results printed.
To set up the new Test Definitions:
Go to F8.Tools > Set Up > Test and Panel Definition > Test Definition. SchuyLab
displays the Update Tests list box. Select a test from the list. In the example
illustrated below, we've chosen the 1-hr Glucose test from a Glucose Tolerance
panel.
104
The two new fields are Sample and Suffix. Both are blank by default, and can be left
that way if the test in question is unique on the analyzer. Only if the analyzer runs
several tests (as defined on SchuyLab) under the same name do we need to use the
Sample or Suffix fields.
Select the Sample field, and you'll see a pull-down list of possible samples. This list
is fixed within the software; each one adds its own special suffix letter to an
Accession ID. This is the field to use when you're running a given test on different
specimen types: choose the type that's appropriate for this test. (For example, if your
lab ran both Serum and Urine Creatinine, you would set the Sample fields on those
tests to Serum and Urine, respectively.)
When you've chosen the correct Sample type, select OK. SchuyLab returns to the
Update Tests box.
105
Select the Suffix field, and you'll see a pull-down list of possible single-letter
suffixes. This list is fixed within the software; the list will not include the suffixes
that have been assigned to the Sample types. This is the field to use when you're
running a given test on multiple samples of the same type: choose a letter for each
successive test. (For example, if your lab ran Glucose Tolerance, then you might
leave the Fasting Glucose suffix blank, assign the suffix "A" to the 1-hr Glucose, the
suffix "B" to the 2-hr Glucose, and so on. Similarly, for peak and trough drug tests,
assign the "A" suffix to the peak test and the "B" suffix to the trough test.)
When you've chosen the correct Sample type, select OK. SchuyLab returns to the
Update Tests box.
Adding the suffixed tests to Device Setup
All the tests with Sample and Suffix fields must be added to the Test Translation
index in Device Setup. This way, no matter which version of the test is ordered in
SchuyLab, the analyzer will receive the test order it expects.
Go to F8.Tools > Set Up > Device Setup. SchuyLab displays the Update Device
Tests list box. Select the analyzer name from the list of analyzers.
106
Using the Add button, add the suffixed tests to the list, translating them to the
analyzer's code for that test. In the above example, the ACE analyzer runs all
Glucose Tolerances under one test code, "GLU". So we must make sure that not only
random Glucose (such as used in the Basic Metabolic Panel), but Fasting Glucose, 1hr Glucose, &c, are all on the Test List, and all are matched to the ACE's test code
"GLU".
When using suffixed tests and barcodes, it's not necessary to Sequence the tests on
the Test List. They can be in any sequence you wish.
When the tests are all translated properly, select OK.
Printing a Report of Test Definitions
Once you’ve defined all the tests for your system, you may well want to have a hard
copy for review. You can print out the settings on a single test by selecting Test
Definition, selecting that test from the list in the Update Tests box, and selecting the
Print button.
It is also possible, and usually preferable, to print a full report of all tests, listing all
ranges, derivations, acceptable values, and so forth. This is done through the Test
Report icon.
107
To print a report of all test definitions:
Select F8. Tools.
Select Set-Up.
Select Test & Panel Definition.
Select Test Report.
SchuyLab displays the Print Test Report box.
Choose in what order you want the tests to print: by test code, by name, or (in
systems where tests have order numbers) by number. Then select Print. SchuyLab
prints a list of all the currently defined tests in your system and shows the code name,
CPT billing code, normal ranges, critical ranges, comments and derivations if any..
108
Test Definition Quick List
To add a new test:
1. Press F8. Tools
2. Select Set-Up
3. Select Test & Panel
Definition
4. Select Test Definition
5. Select New. SchuyLab
displays the Define New
Test box. Complete the
fields in the box.
6. Select OK.
To update a test:
1. Press F8. Tools
2. Select Set-Up
3. Select Test & Panel Definition
4. Select Test Definition
5. Select a test from the Update
Tests box.
Alter values, as
required.
6. Select OK.
Panel Definition
After you’ve defined your tests, they can be arranged to form panels. SchuyLab
permits you to define your panels to suit your lab’s need, including personalized
panels for individual doctors. Panels can be assembled from tests, as already defined;
and once a few “building block” panels are created, they can be assembled into other
panels. (The CBC and Complete Metabolic panels are good examples of these.) For
many billing purposes, it is an absolute requirement that if a panel can be defined as a
smaller panel plus added tests, it must be done that way. There is no limit to the
number of panels you can use, or to the number of tests and panels in a given panel.
To Create a New Panel
1.
2.
3.
4.
Select F8. Tools. SchuyLab displays the System Tools menu.
Select Set-Up. SchuyLab displays the Setup menu.
Select Test & Panel Definition. SchuyLab displays the Define Tests menu.
Select Panel Definition. SchuyLab displays the Update Panels box, listing the
existing panels.
109
Each panel has a code, up to eight characters long -- which appears on the
buttons in the Order Tests screen -- and a panel name to be printed on your lab’s
internal reports. By default, the Update Panels box sorts the panels by code, in
alphabetical order; if you wish to sort panels by their names, select the Name
button at the bottom of the Update Panels box.
5. Select New. SchuyLab displays the Define New Panel box. Complete the fields
in the box, following the guidelines below. Press Tab to advance through the
fields, or use the mouse to move the cursor.
110
Code
The panel code appears on the button in the Order
Tests screen. Type up to eight characters for the
panel code; use only letters, numbers, and the
underline “_” character. You may not duplicate
another test code or panel code.
Name
The panel name is printed on reports. Type up to 16
characters for the panel name. You may use both
letters and numbers. Try to avoid using a test name
as the name of your panel.
Procedure #
Type in a unique billing number (e.g., the CPT code)
to enable the Billing module to charge for this panel
as a procedure.
Full
Description
(optional) Type the complete panel name. This name
is stored for reference only and doesn't appear on any
screens or reports.
111
Billing...
This button is active only on systems with the Billing
Module installed. Selecting this button permits you
to define procedure codes and prices, according to the
different schedules defined in Billing. For more
information, consult the SchuyLab Billing Manual.
CPT
If you are to bill this panel as a panel, then check this
box. For more information, see the SchuyLab Billing
Manual.
6. Select Add Test(s) to add tests to the panel, or select Add Panel(s) to add a
panel to the panel. SchuyLab displays the Add Test(s) to Panel box, listing all
the existing tests. (Or the Add Panel(s) to Panel box, listing all the existing
panels.)
7. Highlight the tests or panels you want to add to your panel. Select Done.
SchuyLab returns to the Define New Panel screen and displays the codes and
names of the tests or panels you selected in the scroll box.
8. Optionally, you may want to arrange the tests in a certain order on the panel.
(This may be important for your internal reports, or if the panel in question is
accessed by a trigger test. It does not affect the order in which results are printed
on a patient report; for that see, Report Order, below.) To arrange the panel’s
entries in order, select Sequence. SchuyLab displays the Panel Sequence box.
112
Click on a test you’d like to move (it will be highlighted in grey), then click
where you’d like that test to be. When the sequence is to your liking, select
Done.
9. When you have selected all the required tests and panels, and arranged them as
you like, select OK. SchuyLab displays the Update Panels screen with the new
panel.
10. To add another panel, select New and continue as above.
11. When all the required panels have been completed, select Done.
To Update a Panel
1. Select a panel from the Update Panels scroll box.
2. SchuyLab displays the Update Panel [Panel name] box.
3. Add tests or panels, as required.
Note: If you wish to remove a component from a panel, select the component to
be removed. SchuyLab will ask you to confirm that you wish to remove that test
or panel. Select Yes. The component is then removed from the scroll box.
(Select Cancel if you’ve changed your mind, and don’t want to remove that test.
Note that selecting Enter will default to No.) Remember, the Delete button
deletes the entire panel.
4. Select OK.
Printing a Report of Panel Definitions
Once you’ve defined all the panels for your system, you may well want to have a
hard copy for review. You can print out a full report of all panels, listing their
component tests and panels.
113
Select F8. Tools.
Select Set-Up.
Select Test & Panel Definition.
Select Panel Definition. SchuyLab displays the Update Panels box.
Select the Print button.
SchuyLab displays the Print Panel Report? box.
Choose in what order you want the panels to print: by test code, or by name. Then
select Print. SchuyLab prints a list of all the currently defined panels in your system.
Panel Definition Quick List
To add a new panel:
1. Select F8 Tools. SchuyLab displays
the System Tools menu.
2. Select Set-Up. SchuyLab displays
the Setup menu.
3. Select Test & Panel Definition.
SchuyLab displays the Define Panels
menu.
4. Select Panel Definition. SchuyLab
displays the Update Panel box,
listing the existing panels.
5. Select New. SchuyLab displays the
Define New Panel box. Complete
the fields in the box.
6. Select OK.
Reflex Testing
114
To update a panel:
1. Select F8 Tools. SchuyLab
displays the System Tools menu.
2. Select Set-Up. SchuyLab displays
the Setup menu.
3. Select Test & Panel Definition.
SchuyLab displays the Define
Panels menu.
4. Select Panel Definition.
SchuyLab displays the Update
Panels box. Select a panel from
the scroll box.
5. Alter entries, as required.
6. Select OK.
The purpose of Reflex Testing is for SchuyLab to automatically order a test when
certain conditions are met. Those conditions can include the results of other tests, the
patient's diagnosis, and the use of a specific remark code. Reflex testing is legal as
long as the laboratory explicitly describes to their doctors the conditions under which
the automatic ordering of tests occurs. It is recommended that a laboratory
frequently review and advise their doctors of these policies.
When used wisely, reflex testing provides a more complete clinical picture to the
physician and avoids days of elapsed time while add-on tests are performed.
SchuyLab allows you to setup many tables, each of which can generate Reflex tests
according to different criteria. SchuyLab will soon be able to attach these various
tables to clients, allowing each client to select their own parameters for the testing
they want to have done.
While Reflex testing is a powerful module, it's setup is located in Test & Panel
Definition, not in Features. Select Reflex to bring up a list of the various reflex
testing tables that the SL system has defined on it.
The Standard Table is the default.
115
Click on the Standard Table and you will see it only has a Glycohemoglobin test in
its list.
116
Click on the entry and SL shows you the list of reflex tests that have been defined.
Select Add to make a new entry to the table, or click on one of the existing lines to
modify it. In this table, we have a Glycohemoglobin test.
The test you select in the pull-down box is the test that will be reflexively ordered
when the conditions you set have been met. In this example, Glycohemoglobin
(GLYCOHGB), is automatically ordered by SL when the fasting glucose
(GLUFAST) test result is equal to or over 140 or the random glucose (GLUCOSE)
test result is over 200.
To Set Up a New Reflex Test
Go to
F8: Tools
Set-Up
Test & Panel Definition
RefleX
Standard Table
Select Add and select the test you want to be reflexively ordered to be visible in the
pull down box.
117
In this case, let’s have a Serum HCG automatically ordered if the Urine HCG is
positive. Next select Value and under “Test”, select the Urine HCG.
In the Value field type “Pos” and click OK.
Now select Gender, then select F(emale).
118
When you click OK, you have now have defined a set of conditions under which the
Serum HCG is automatically ordered. If the patient is a Female, and the results of
her urine pregnancy test are positive, SchuyLab will automatically order a
confirmatory serum pregnancy test.
Let us add some more complexity to this: Suppose we also want to do a serum HCG
if the urine test is negative and the doctor suspects an ectopic pregnancy. Select
Value again, but this time say that the value is negative.
Then select the AND button
119
Select the ICD9 button and put in a range of ICD9 codes that reflect the diagnosis of
an ectopic pregnancy.
Now the full picture for the reflex ordering of the serum pregnancy test is revealed to
be that the patient is Female and either the urine test is positive or the urine
pregnancy test is negative and the diagnosis codes that accompany it reflect the
probability of an ectopic pregnancy.
120
If you want the reflex test to appear as a result of a Remark code, then list the code
that triggers the test in Remark.
You can specify that the Remark must be placed on a specific test, or allow it to be
put on any test. The Remark cannot be placed on an Accession or on a Patient and
acts as a trigger for a reflex test. The test upon which the Remark is placed must be
Accepted before the reflex test will be triggered.
Another example of a situation where you would want a reflex action is if the MCV
is <70, and you suspect that your instrument is reading microcytic RBC's as platelets,
you want to generate a manual platelet count. (Yes, you could conceivably trigger
this off a Remark code too.)
121
Lastly by using the parentheses and the "AND" and "OR" conjunctions, you can
make a complex set of rules to generated a test reflexively.
122
If the patient is female, and her urine pregnancy is negative and her diagnosis
indicates an ectopic pregnancy, then a serum pregnancy test is ordered. Or if Remark
code 100 (Lower right quadrant pain) is appended to a test result, then the serum
pregnancy would also be ordered.
Trigger Tests
Trigger, or expanding, tests are tests that may or may not result in more tests.
Confused? OK, let’s look at a CBC. You run the CBC instrument and the results
come back that you need to look at a slide of the patient’s blood, or you need to
perform a Manual Diff. Back in Sec. 3, Daily Operations, you learned how to accept
the results for a Trigger test. But how is it set up? First we can identify which tests
we want in the panel.
123
As you can see, we have set up a panel called DIFF and it lists the tests included in
the panel. Now we need a test that we can use to call for this panel. Let’s call it
MANDIFF;
124
The only difference in this test and any other is in the Expand box. We enter the
name of the panel (DIFF) that it is tied to. Under Values, the results are Normal or
See Below. The Manual Diff is just one of the tests that are setup for you already in
SchuyLab. The others are U_CASTS (Urine Casts) and U_CRYST (Urine Crystals),
but you can set up many of your own.
Allergy Tests
In the course of installing SchuyLab in laboratories that performed Allergy testing,
we implemented several changes that were necessary to handle some of their
specialized needs.
The main difficulty that we discovered was that Allergy testing often required the
setup of up to 1,000 different Allergens (and possibly more if a lab tests for multiple
Immunoglobins). This puts pressure on several areas like Worksheets and Report
Groups that were designed for a smaller load. And in addition, each of these tests
would have the same range. Since the setup could be fairly complicated for each
Allergen—setting up several non-standard values and interpretative ranges—
configuring these tests might take a small army to complete in a timely fashion.
Right now there is only one army that has the schedule to work it, and no one wants
to hire the French. And then having to update the values for 1,000 different tests if
125
the Interpretative Ranges change or different values are implemented is an equally
intimidating and time consuming task.
SchuyLab is now capable of accommodating these needs.
Go to
F8: Tools
Set-Up
Test & Panel Definition
Test Definition
Click New, and you will see the Define New Test window appear.
Same Ranges as Test: You can select a test from this list – so long as it’s listed
before the test you’re defining – and all the Range fields and the Ranges? button will
be grayed out. All ranges—Normal, Critical, Linear, Interpretative, etc. – for this test
will be taken from that selected test.
Configuring Allergy Tests
There are two steps in configuring Allergy tests: setting up the Reference Range test
and setting up the Allergen tests. The Reference Range test will never be ordered or
printed out on a report; however, it will be used by the Allergen tests to define all
their Ranges. Also, if the need comes to update the Interpretative Ranges or such,
this change can be made in one place without having to change the settings on 1,000
different Allergen tests.
126
The Reference Range test is setup like any other test—define a Code:, a Name:,
number of Decimal places, Units, Normal Range, Values…, Interpretative
Ranges, etc. For the Reference Range test to work, this test must be listed before all
the Allergen tests that reference it. We therefore recommend using the # (Shift + 3)
or * (Shift + 8) characters at the beginning of the Test Code to make sure it appears at
the top of your Test List. If you ever need to update the Reference Range test, you
will need to exit out of SchuyLab and log back in before the changes will be applied
to all the Allergen tests.
The second step is to organize all your Allergen tests. These too follow the same
guidelines set up in the SchuyLab User Manual—you will need to create a Code:, a
Name:, etc. Make sure to put enter the Dec: and Units: fields; these will print out on
your report. In the Same Ranges as Test: field, select the Reference Range test you
set up earlier. Once you have selected a test for this field, the Range fields and
Ranges… button will be grayed out and inaccessible.
127
Because of the large quantity of tests used by SchuyLab in Allergy Laboratories,
other changes were implemented in areas like Worksheets (which can now handle up
to 200 tests per worksheet) and Report Order.
Printing Large Numbers of Tests
Because, in allergy testing, the Printing Groups can also be very large, a new feature
has been added to Printing Groups. If two groups in a row have exactly the same
name and both print, the groups will be merged together. (The second iteration of the
Group name will be omitted.) Obviously, if either group prints by itself it will keep
its own Group name. This allows very large groups to be built out of separate subgroups.
128
In the example given above, “FOOD1” and “FOOD2” would merge. The report
would show a single Printing Group with the heading “FOOD ALLERGENS by
IgE”.
Screen Definition
Once tests and panels are defined, they must be made available for users to order
them. This is done through the Screen Definition function. It configures the Order
Tests screens to meet your lab’s needs and requirements.
To Configure a New Order Tests Screen
1.
2.
3.
4.
Select F8. Tools. SchuyLab displays the System Tools menu.
Select Set-Up. SchuyLab displays the Setup menu.
Select Test & Panel Definition. SchuyLab displays the Define Tests menu.
Select Screen Definition. SchuyLab displays the Define Tests Screens screen,
with a horizontal row of buttons. Some will be labeled already, denoting your
currently defined screens; others will be blank. These buttons can represent
departments, functions, or group headings for logical collections of panels and
tests. Each button can be configured to display a screen of buttons representing
panels and tests.
5. Select a blank button. SchuyLab displays the Input Test Screen box. Complete
the fields in the box, following the guidelines below. Press Tab to advance
through the fields.
129
Code
Type up to four characters for the department or function name
to appear on the button for this screen. You should use only
letters, numbers, and the underline “_” character.
Screen
Description
(optional) Type the complete department or function name. This
name is stored for reference only and doesn’t appear on any
screens or reports.
Format
Select one of the screen formats displayed in the Format section
of the box. Consider the contents of the screen: how many tests
and panels do you want, and in what proportion?
#1
#2
#3
#4
#5
130
This format has room for up to 10 panels and up to 40
tests.
This format has room for up to 7 panels and up to 44
tests.
This format has room for no panels and up to 15 tests.
This format has room for no panels and up to 55 tests.
This format has room for up to 20 panels and up to 25
tests.
#6
#7
#8
#9
#10
This format has room for up to 15 panels and up to 25
tests, and also permits freeform entry for orders.
This format has room for up to 30 panels and up to 10
tests.
This format is used on systems with numbered tests and
panels. It has room for up to 10 panels and up to 4 tests,
and also permits freeform entry for orders.
This format allows for 33 check boxes (instead of
buttons) and free form text.
This format allows for 66 check boxes that can be used
for either tests or panels.
6. Select OK. SchuyLab displays a screen of blank buttons in the selected format.
7. To fill in the panels, select one of the large panel buttons. SchuyLab displays the
Select a Panel scroll box. Scroll down the list of panels until you see the panel
you wish. Select that panel. SchuyLab now displays the Code for that panel on
the button. Select the next panel button, and continue as above.
To remove the panel from a button, simply select that button again and the code
will be removed. Once the button is blank, you may select another panel for it.
To move a panel from one button to another, select the button with the panel,
using the left mouse button. The panel code will be removed. Then select a
blank button, using the right mouse button. The same panel code will now be on
the new button.
8. To fill in the tests, select one of the small test buttons. SchuyLab will display a
Select a Test scroll box. Scroll down the list of tests until you see the test you
wish. Select that test. SchuyLab now displays the Code for that test on the
button. Select the next button, and continue as above.
To remove the test from a button, simply select that button again and the code
will be removed. Once the button is blank, you may select another test for it.
To move a test from one button to another, select the button with the test, using
the left mouse button. The test code will be removed. Then select a blank
button, using the right mouse button. The same test code will now be on the new
button.
Note: To see if the test and panel buttons work properly in conjunction with
each other when the panel is selected, you must exit this screen and go to the
Order Tests function. Trying to test your panel buttons on this screen will only
succeed in deleting them.
9. When the order screen is configured to your satisfaction, select F10. Done.
SchuyLab returns to the Define Tests menu screen.
Client Panels
When selecting panels to be placed on the Order Tests screens, you may have noticed
five panels labeled “Client#1”, “Client#2”, up through “Client#5”. These are called
131
“client panels”. They are not panels, per se: if you select the Panel Definition icon,
you won’t find them listed. Instead, these are placeholders for panels. They’re put
on the Order Tests screen to designate panels assigned to a particular client -- and
won’t appear for any other client.
Let me give an example. Suppose that Clinica General has a special panel for
arthritis. You would define this panel (calling it “CG_ARTH”, or some such) exactly
as you would any other panel. But you only want this panel to be ordered for patients
from Clinica General -- not for patients from, say, St. Joseph’s Clinic. In that case,
you’d assign CG_ARTH to be the first panel for Clinica General; this is done as part
of the definition of that client (described under Section 8, Managerial Functions).
Then, in Screen Definition, you’d select the “Client#1” client panel for one of the
Order Tests screens.
Now, whenever a patient is identified as belonging to Clinica General, that button
will show CG_ARTH when ordering tests. But for patients from St. Joseph’s, the
button remains blank. In this way, personalized panels will only be available to the
customer for whom they were defined.
Further details for setting up Client Panels will be found under Doctor Records,
below.
Examples of Formats for Order Tests Screens
Here follow some examples of the screen formats, which are selected by number in
the Input Test Screen box.
132
Format #1
Format #2
133
Format #3
Format #4
134
Format #5
Format #6
135
Format #7
Note the use of client panels in this example.
Format # 8
136
Format # 9
Format # 10
137
Alias Definition
If humans were perfect, all the tests and panels for your lab would have been
perfectly defined from the very start, and never need to be changed. Humans, sad to
say, aren’t perfect. For any of a number of reasons -- clarity, or esthetics, or to avoid
conflict -- the code assigned to a test or panel might need to be changed. But
SchuyLab uses those codes to keep track of what’s been ordered on a specimen.
Changing a test code, when that test has been ordered for a patient, might result in the
test never being performed -- with all the administrative tangle that would ensue.
To correct this, SchuyLab permits aliases to be defined for each test and panel. If
you make changes to a test code through the Test Definition icon, SchuyLab will
automatically ask you if you want to save the old test code as an alias.
If you’ve used your SchuyLab system for any length of time at all, select Yes!
Otherwise, any specimens with that test ordered under the old code will be orphaned:
the computer thinks that test is still pending, but you won’t be able to access it, or
cancel it, because its code isn’t in the SchuyLab database. (The only time it’s safe to
forego an alias when changing a test code is if you’ve just finished defining the test -that is, when no orders anywhere in the database include that test.)
Manually entering an alias for a test or panel
Despite the above warning, you may someday accidentally change a test code
without saving the old code as an alias. (As noted above, humans aren’t perfect.)
You can still manually enter the alias, so that SchuyLab will be able to translate the
new test code into the old test code for those specimens still using the old test code.
To enter an alias for a test or panel:
Select F8. Tools.
Select Set-Up.
Select Test & Panel Definition.
Select Alias Definition.
SchuyLab displays the Update Test Alias box, listing all the current aliases for tests
and panel codes.
138
To add a new alias, select +Test (for test codes) or +Panel (for panel codes).
SchuyLab displays the Add Alias box.
In the Test field, pull down the list of currently defined tests and select the one for
which you wish to add an alias. In the Alias field, type in the alias (for instance, the
old code for that test). When done, select OK. SchuyLab returns to the Update Test
Alias Box.
To alter an alias that’s already been defined, select it from the Update Test Alias List.
SchuyLab displays the Update Alias box, which is identical to the Add Alias box
except that its fields are already filled. Make the appropriate changes and select OK.
SchuyLab returns to the Update Test Alias Box.
When you’re done with the Update Test Alias Box, select OK. SchuyLab returns to
the Test Definition menu screen.
139
Report Order (printing groups)
The test, panel, and screen definitions, already discussed, establish the internal
configuration of the SchuyLab system you use everyday in your lab. However, their
arrangement has nothing to do with the format and look of your patient reports. For
that, you use the Report Order icon. This icon controls the arrangement and order of
printing groups, which are printed on the report.
It may be useful at this point to emphasize what printing groups are not. They aren’t
related in any way to the panels and screens you’ve thus far set up; they aren’t related
in any way to your worksheets; they aren’t related in any way to how you order,
process, or bill tests. Their sole purpose is to arrange the format of the patient
reports.
As a concrete example, if you have a panel personalized for Dr. Green, which you
have imaginatively named DR_GRN, you will not automatically have a section on
your final report labeled DR. GREEN’S PANEL. Conversely, having a printing
group called CHEMISTRY doesn’t mean that there is, or needs to be, a panel by that
name. (It may prevent confusion if you avoid giving your printing groups the exact
same names as your panels. If the panel you set up in Panel Definition is called Lipid
Panel, consider calling the printing group LIPID STUDIES. It will help you keep the
method of ordering distinct in your mind from the manner of reporting.)
There is always a choice in creating a software program: the choice between a light
switch and a Boeing 747. The light switch, you see, is a very simple mechanism,
which involves very little training time. But the only thing you can do with a light
switch is turn the lights on or off. On the other hand, the 747 is a wonderful
mechanism. You can fly all over the world in it! Carry passengers and cargo! Show
movies! Unfortunately, it’s extremely complex and involves a large amount of
training. What everyone wants in a software tool is something as simple as a light
switch, but as versatile as a 747. It is rather difficult to do this.
To attempt to resolve the light switch-or-747 problem, we’ve arranged layers of
complexity in SchuyLab, most of which are invisible to the casual user, and we’ve
set up system defaults that produce the effects most people want. For example, most
people will want the Cholesterol results to print out in a group titled CHEMISTRY if
it’s the only lipid test ordered (say, as part of a Chem 18 panel). If a Chem 18 panel
and a Lipid Panel were both ordered, however, most people would want the
Cholesterol results to appear under the LIPID STUDIES title (along with the
Triglycerides, HDL, LDL, etc..), and not appear in the CHEMISTRY section of the
report.
To allow this to happen automatically, SchuyLab has established a printing protocol
that relies on the sequence in which the groups are arranged in the report. If a test
appears in several printing groups, it will print out in every group that contains it.
However, if the “Do not print duplicate tests” check box is selected for that first print
140
group, but the next group with that test is active, then the test will be printed there
instead. Had we done that for the Cholesterol test, described above, then the test
results for Cholesterol would be “stolen” from the CHEMISTRY heading and printed
in the LIPID STUDIES heading; had we not selected the “Do not print duplicated
tests” check box in the Chemistry group, Cholesterol would print out in both the
CHEMISTRY and LIPID STUDIES headings.
In order for the group on a report to “steal” a test from one above it, the lower group
must first be activated. What activates a group is the presence of a test which
belongs entirely to that group. In the example given of the LIPID STUDIES printing
group, Cholesterol, and probably Triglycerides, belong both to the CHEMISTRY
heading and to the LIPID STUDIES heading. But HDL, LDL and VLDL are not
listed as members of any printing group other than LIPID STUDIES. When
SchuyLab becomes aware of the fact that one of these tests needs to print, the LIPID
STUDIES group is activated, to give these tests a heading under which to print.
Once activated, the LIPID STUDIES group, being below the CHEMISTRY group on
the page, will “steal” Cholesterol and Triglycerides from the latter group to complete
its own set of tests.
Create or Change a Printing Group
Select F8. Tools.
Select Set-Up.
Select Test & Panel Definition.
Select Report Order.
SchuyLab displays the Update Report Order box.
141
The Update Report Order box displays all the printing groups currently defined for
the system. They’re listed in the order in which they print out on the patient report.
To change that order, select the Sequence button. SchuyLab displays the Group
Sequence box, with the printing groups listed.
Select the printing group you want to move (SchuyLab will highlight it in dark grey),
then move the cursor to the spot on the list you want it to be and click the mouse.
Repeat as desired. When you’re satisfied with the order, select Done.
To Establish a New Printing Group
From the Update Report Order box, select New. SchuyLab displays the Define New
Group box.
142
Complete the fields in the box as described below.
Code
Type up to eight characters for the code name for this group.
This code will appear in lists and scroll boxes. You should use
only letters, numbers, and the underline “_” character.
Name
This is the heading that will print out on the report itself.
Panel
Your lab may wish to have a panel’s test results print under the
header of that panel’s name, if the doctors expect the results that
way. By selecting a panel in this field, you tie this printing group
to that panel; the group will be used whenever the panel is
ordered.
143
Add Tests
Select the button Add Tests to display the Add Tests(s) to Group
box, containing a list of all the tests configured in your system.
Scroll through this box, highlighting the tests you wish to have
appear under this heading on the report. When you’ve selected
the tests, select Done. SchuyLab will display a list containing
those tests you just selected. If you wish to add more tests, select
the Add Tests button again and repeat the above procedure.
If you wish to remove a test: from the Define New Group box,
select the test you wish to remove. SchuyLab will ask you to
confirm this action. Answer Yes and the test will be removed
from the group.
Sequence
Notes:
Beginning
End
Select the Sequence button to arrange the order of tests as they
will print in this group on the report. SchuyLab displays the
Sequence box, listing the tests in the group. To change the
position of a test relative to the other tests in the group, select that
test. A dark grey bar will highlight it. Point the cursor to the
position you wish that test to occupy and click the first button on
the mouse. The test you selected will be moved to that position.
Continue until the tests are in the correct order. Select Done.
Select the yellow notepad to record notes or user comments
/ concerning this report group. This is where you would type a
message to print out each time this test is reported. If you choose
the beginning note pad, the note will print before that group is
printed. If you ass the note at the end, it will print after the report
group.
Notice that there are four check boxes in the Define New Group box.
• Requires separate page
Selecting this option inserts a page break in the patient report just before this
printing group, causing it to be printed on its own page.
• Requires full width of report
In order to discuss this option, you first have to consider how your Specimen
Report currently looks. Do the group headings always extend all the way across
the page?
[If you aren’t sure, you can find out by checking under F8. Tools, Set-Up, Report
Setup, Patient Report. In the Setup Patient Report box you will find four reports;
Cumulative, Accession, Send Home and Microbiology. If the form type under
Accession is “RPTSPEC2”, select the Setup. If the screen displayed by SchuyLab
has an entry field labeled “2 Column Threshold”, the number in that field
determines whether your reports ever shift between one and two column formats.
If the number in that field is “0”, your reports always extend all the way across the
144
field. If there is a number other than zero in that field (usually 14 or 16), then that
sets the number of test results below which the group occupies a single column. If
the entry field does not exist, or the name under the Accession Report is something
else, then you have a customized report.]
Checking this check box mandates that this group will always extend all the way
across the page, with each test occupying a separate line, overriding alternatives set
at other points in SchuyLab. Its most commonly checked for Microbiology and for
Hormone Studies, which have a large number of notes and specialized ranges.
• Do not print duplicated tests
We’ve already dealt with this option to some extent in the overview of this section,
so you’ll have to put up with some repetition. Here are the printing rules:
#1. A test will print out in the first group to which it’s assigned.
#2. If the test is assigned to more than one group, it will print out in all of them by
default.
#3. If the “Do not print duplicated tests” check box is checked, the test will not print
out in that group if it’s also in another group further down on the page.
#4. If several groups contain that test, and they all have the “Do not print duplicated
tests” check box checked, the test will print out in the bottommost group.
#5. If several groups contain that test, and all except one has the “Do not print
duplicated tests” check box checked, the test will print out in that one group, no
matter where it is located on the page.
#6. What causes a group to come into being (and be printed on the patient report) is
the presence of a test which is proprietary to that group.
• Use Microbiology format
This format is used on cultures and places an blank line between the test name and
the isolate(s) found on the Patient result form. For more information see Appendix,
Microbiology
When all is arranged satisfactorily, select OK. SchuyLab returns to the Update
Report Order box. Select Done to return to the Define Tests menu screen and from
there you can simply click on the next icon and get to work.
Panel Specific Print Groups
Remember in the beginning of this section where we said that print groups are not
related in any way to the tests and panels you’ve set up? Well, we lied, sort of.
Panel Specific Print Groups are panels that can be attached to a specific Printing
Group. The Printing Group prints *only if* that panel has been ordered. So if, to
take an example, the Lipids Printing Group has the Lipid Panel to trigger it, then if
you order the Lipid Panel, that group prints – and if you order each individual test
that belongs to that panel, it won’t. The tests print elsewhere, presumably in
Chemistry. We say “presumably” because, to guarantee that every test prints every
145
time, any test in a Panel-Triggered Printing Group is duplicated in the default
printing group.
To set up the trigger panel print group go to the Update Report Order (F8, Tools,
Setup, Test & Panel Definition, Report Order). We will use the LIPID panel as
our example so choose the LIPID STUDIES group and you will see a box under
“Panel”. Click on the arrow and scroll down until you locate LIPID, click on it and it
fills in the panel box.
There is one more thing you will need to know about Panel Specifics. If you should
have the Export feature, your Panel Specifics do not print. If you have not listed
those tests under another print group (i.e. Chemistry), your test will print at the end of
the report. On the other hand, if you have a report group called (for example) Lipid
Studies; your Lipid Panel will print under that heading, whether you have ordered the
panel or the individual tests.
There is one final way to print panel names. But you need to understand that it will
affect the entire report. Go to F8, Tools, Setup, Parameter ID, Optional Processing.
146
When you mark the box “Report by Panels” your result form will print using the
panel names instead of the generic headings such as Chemistry, Hematology, etc.
Another thing to note, this will NOT change any old reports. They will only print in
the original format.
147
Sec. 5 - Worksheets
Overview
Worksheets form an indispensable part of your daily routine. They serve three main
purposes. First, for test results that must be entered by hand, worksheets are an easy,
efficient means of entering the results for a large number of specimens. Second, for
instruments that have uni-directional (one-way) interfaces with SchuyLab,
worksheets can be used as checklists: they present the specimen ID numbers to be
entered at the instrument, and they help you track which specimens have been done.
Finally, for instruments with bi-directional interfaces with SchuyLab, worksheets can
be used as loadlists: they can transmit names, specimen ID numbers, and orders
directly to the instrument.
Master Worksheet
SchuyLab comes equipped with many master worksheets already available to you.
You can customize them to your lab’s needs by selecting the worksheet you want to
change and then making the changes (add or delete tests, change printing format or
the process for example). But there are always those tests that you do that you will
need to track (for example ESR, or Sed Rates)
Go to
F5: Worksheet
Define Master
Select New
You will see the Define New Worksheet Master window.
148
Complete the fields as follows:
Worksheet
This is the name of your worksheet. There is a maximum of
8 characters.
Title
This is a more complete name of the worksheet.
Device
Which instrument do you intend to use with this worksheet?
Head, Test,
Foot
These are notes that can be printed out each time you select
and print this worksheet.
Head – will print below the worksheet information
(worksheet name, number, date, etc.). This can
contain information such as the expiration date of
your controls.
Test – This can be used in Microbiology (for example) to
define more tests for a culture.
Foot – Anything that can be included in the head note, could
also be put in the foot note area. It would then be
printed at the bottom of each page of the worksheet.
Allow all tests
for the device
An option that was implemented for Allergy
testing. In the example above, the Device field is set to
“ACE”. In this instance, any test whose Device: field
matches “ACE” will be included on the Worksheet. If this
option is used, the Tests fields on the Worksheet should be
left empty. This allows larger worksheets that will include
149
more tests than could be configured normally. However,
this option is really only necessary if the worksheet requires
more than 300 tests on it. Also, in an Allergy testing lab,
this also makes constructing your Worksheet Masters much
easier than the alternative of selecting the 1,000 tests that
need to appear on the worklist.
Format
Chose from Checklist, Worklist, Test List, Packed List,
Load List, Line by Test, Spreadsheet or Line by Accession.
Max/Work
sheet
Has two criteria you can use to limit how many
specimens appear on your worksheets.
•
Spec limits the total number of specimens at a time, and
now, because of the improved memory capabilities of
Windows, can be set as high as 9999. An entry of 0
implies no limit.
•
Tests limit the worksheet size by the number of ordered
tests that appear on it. This is handy on instruments
like the Tosoh AIA series that requires a place on the
specimen chain for a reagent cup for each test to be
performed. If a specimen has enough tests that it
exceed this limit, it will be placed on the next worksheet,
rather than breaking it across two.
Accession IDs
Standard – The accession number that you are using for
your lab. This could be a date based number
(i.e. 050125002) or a straight number (i.e. 002).
Daily Number – Special purpose, do not use
Specimen – This is to make use of sub numbers of the main
accession (specimen) number where you may
have 2 – 3 samples of the same specimen (as in
some Microbiology).
Test /
Description
Shows the test code and test description of the tests for this
worksheet.
Sort
SchuyLab can sort your accessions by either their accession
number or will list any Stats first.
Process
Three options available
Independent - With an Independent Worksheet, your
accessions will not be repeated on a new
worksheet, even if the results have not been
accepted.
150
Cumulative -
Only for
ordered tests
With a Cumulative Worksheet, your
accessions will be repeated on a new
worksheet, unless the results have been
accepted.
Accessions - When you create an Accession Worksheet, a
window will pop up for you to enter an
accession number range. This worksheet
will only include un-resulted tests for
specimens within this range, thus giving you
greater control over what you want to
appear on your work lists. Also this can be
quite handy for building Recheck
worksheets, so you find out what tests are
still pending from only the specimens you
ran this morning. At the same time the
specimen range would prevent tests that you
still needed to run this afternoon from
showing up.
Can be used for worksheets where Controls are included.
This option prevents tests that don’t have any patient
orders from appearing on the work list. For example, you
run PSA, TSH, and Free T4 on your Chemistry Analyzer.
However, you receive orders for these tests maybe once or
twice a week. On days when you have no orders, you don’t
want to waste reagents on running Controls for these tests.
This option prevents the worksheet from printing when
there are no tests ordered.
Lot Number
Adds the line named “Lot #” that a tech can write the QC
lot number on.
Sign Off
Adds a line for the Tech to sign (if your lab uses this item).
Routine
When this box is marked and there are tests pending, this
worksheet will be printed (along with all other worksheets
marked) when you click on the ROutine Print button.
Standards and
Calibrators
When this box is marked, SchuyLab will leave space at the
top of the worksheet for the calibrators. This should only
be used if this worksheet is to be transmitted as a loadlist.
Formats
The format determines what your worksheet look like. Following is how each format
prints out.
151
Worklist
The worklist prints the accession number, patient’s name and and a list the tests.
Depending on how many tests are in your worksheet determines where the tests are
listed, either across the top (as in the first picture) or down the side of the paper, with
the accessions and patient;s name across the top (as in the second picture). The lines
under the test(s) (as in the first picture) or under the patient’s name (as in the second
picture) indicates the test has been ordered and gives you room to write down the
results. You could use this format for those instruments that are NOT interfaced to
SchuyLab.
152
Checklist
153
The checklist prints the accession number, patient’s name and lists the tests across
the top of the page. The line under the test(s) means that that test has been ordered.
This is used to check that you have all the accessions and can be used to place them
in the proper order on your instrument.
154
Load List
The Load List prints only the accession number and the patient’s name. This list is
used as a guide to loading the instrument.
155
Packed List
The Packed List prints the accession number, patient’s name and the test(s) with lines
to write the results in. This differs from the Worklist in that only the tests ordered are
listed instead of all the tests for this worksheet.
156
Spreadsheet
The spreadsheet format was developed for the tech who wants to have lots of space to
write the results and notations on the worksheet. The test names are listed across the
top of the page with lines under the ordered tests. In the two pictures below, think of
them as side by side so you would have one long piece of paper.
157
Test List
The Test List prints the accession number, patient’s name and lists the tests that have
been ordered.
158
Line by Test
The Line by Test prints the test name, the accession number, patient’s name, age, the
source of the specimen, received date and up to two prior results (if the master
worksheet is specified for that). It also prints the patient’s doctor and any comments
for this specimen. As you can see, SchuyLab prints out all of one test before it prints
the next.
159
Line by Accession
The Line by Accession prints the test name, the accession number, patient’s name,
age, the source of the specimen, received date and up to two prior results (if the
master worksheet is specified for that). It also prints the patient’s doctor and any
comments for this specimen. As you can see, SchuyLab prints out one test on one
line, but the difference from Line by Test, is it prints all the tests for the same
accession before it goes to the next.
160
Create or Access Worksheets
Routine Print is used to generate all the worksheets that have been
defined as “routine” -- that is, the ones you know you’re most likely to see every
day. Selecting this icon causes SchuyLab to automatically find the “routine”
Master Worksheets, generate new worksheets based on those masters, and print
out the worksheets, if there are tests pending ... while you get a cup of coffee.
Select Worksheet is used to select a single worksheet -- one at a time,
rather than in bulk. The Select Worksheet icon actually covers two different
types of worksheet management processes:
•
Generate a New worksheet. This uses an existing Master Worksheet as a
template to create a new worksheet, with the test and patient data currently
entered into the system.
•
Retrieve an available worksheet. This permits the user to access a worksheet
that had previously been generated either by the Routine Print icon or the Select
Worksheet icon.
Once you select a worksheet, its designation appears in the nameplate area of the
screen. The other icons on this screen may be applied to that worksheet: Print,
Append, Enter, Delete, View.
Routine Print
1. Select F5. Worksheet. SchuyLab displays the Worksheet Functions menu
screen.
2. Select Routine Print. SchuyLab displays a dialog box, asking if you want to
print ALL routine worksheets.
3. Select Yes. SchuyLab begins printing the routine worksheets for the day.
161
Selecting a Single Worksheet
1. Select F5. Worksheet. SchuyLab displays the Worksheet Functions menu
screen.
2. Select Select Worksheet. SchuyLab displays the Worksheet ID box.
3. Decide whether you want to generate a new worksheet or retrieve an alreadyexisting worksheet from the system.
To Generate a New Worksheet
1. Select New. SchuyLab displays the Worksheet Master box.
2. Select one of the entries in the box.
[Worksheet Designation] box.
162
SchuyLab displays the Create
3. At this point you may choose to change the format of the worksheet from the
default format defined as part of this Master Worksheet. If so, select the new
format from the Format pull-down scroll box.When you have completed the
fields (optional) and made any changes you wish in the format (also
optional), select OK. SchuyLab returns you to the Worksheet Functions
screen, and displays the designation of the worksheet in the nameplate area.
4. To print the worksheet you’ve just generated, select the Print Worksheet
icon. SchuyLab asks you if you truly want to print your worksheet (and
gives you one last chance, for that print job only, to alter the format). Select
Yes.
Retrieve an Existing Worksheet
1. Select List. SchuyLab displays the Available Worksheets box.
163
2. Select one of the entries in the box. SchuyLab returns you to the Worksheet
Functions Screen, and displays the designation of that worksheet in the
nameplate area.
OR:
1. Type the designation of the worksheet you wish to select into the field
marked “ID”.
Use the full designation, including the date (e.g.,
“CHEM4.0320.1” for the first Chem4 worksheet generated on March 20).
2. Select OK.
3. SchuyLab returns you to the Worksheet Functions Screen, and displays the
designation of that worksheet in the nameplate area.
Editing and Printing the Worksheet
You may occasionally need to edit a worksheet, for the purposes of a particular run,
before transmitting it to the instrument. To do this, select the Edit Worksheet
button. SchuyLab displays the [Name of Worksheet] box, listing all the specimens
on that worksheet, with the patients’ names.
From this box, you can edit the worksheet. If, for instance, you needed to change the
sequence of specimens (bearing in mind that the instrument will run them in the same
sequence as they appear on the worksheet), select the Sequence button. SchuyLab
displays the Sequence Worksheet box.
164
You can re-sequence any of the specimens. Simply click the mouse on the specimen
you wish to move, then click at the spot you want it to be. When the sequence is
satisfactory, select Done.
If you needed to order or cancel tests on a specimen, or if you wanted to delete the
specimen from the worksheet, select that specimen from the list. SchuyLab displays
the box for that specimen.
All the tests on the worksheet master are listed. Those tests that were ordered for this
specimen are marked with asterisks on the left. Selecting an unordered test will order
it, and place an asterisk next to it. Selecting an ordered test cancels it (i.e., removes
the asterisk). When done, select OK. SchuyLab returns to the [Name of Worksheet]
box.
165
To remove the specimen from the worksheet entirely, select Delete. SchuyLab
returns to the [Name of Worksheet] box.
Select OK to return to the Select Loadlist box. If you wish to print the edited
worksheet before sending it to the instrument, select the Print button.
Daily Worksheet Quick List
1.
2.
Select F5. Worksheet. SchuyLab displays the Worksheet Functions screen
Select Select Worksheet. SchuyLab displays the Worksheet ID box
To generate a new worksheet :
To retrieve
worksheet :
an
already
existing
1. Select New
5. Select List
2. Select one of the entries in the Worksheet 6. Select one of the entries in
Master box.
Available Worksheets box.
3. Complete the fields in the Create 7. SchuyLab returns you to
[Worksheet] box. Select OK
Worksheet Functions Screen,
4. SchuyLab returns you to the Worksheet
displays the designation of
Functions screen, and displays the
worksheet in the nameplate area
designation of the worksheet in the
nameplate area
the
the
and
that
Entering Results
Certain instruments and procedures which are not online to SchuyLab can be run
most efficiently on a worksheet format. SchuyLab gives you the option of entering
the results from these tests in the same format as the worksheet you used to run them.
The first step in this process is to select the specific worksheet you need. The
worksheet must already have been created, using the procedures described above.
1. Select F5. Worksheet. SchuyLab displays the Worksheet Functions screen.
2. Select Enter Results. SchuyLab displays the Worksheet ID box.
166
3. Select List (or type the designation of the worksheet you wish to select into
the ID field and select OK). SchuyLab displays the List of Available
Worksheets box.
4. Select one of the entries from the list. SchuyLab displays the Results for
Which Tests? box. (If you enter a worksheet ID, SchuyLab displays this box
directly.)
5. The top of the Results for Which Tests? box shows how many lines -- that is,
how many specimens -- are on the worksheet. If a worksheet is very large -say, 400 tests values to be entered -- there may not be enough memory in
your computer to load all the lines of your worksheet. If you wish to enter
results into a large worksheet, it’s best to do it a few specimens at a time. To
do this, type the range of specimens (e.g., 1 to 10, or 11 to 20) into the entry
167
fields. Of course, if you’re dealing with a reasonably sized worksheet, leave
the Worksheet Lines fields as they are.
6. Select one or more tests that you want to enter at this time (the rest remain
available for later entry), or select All. SchuyLab displays the Enter
Worksheet Results screen.
Each “line” on the worksheet consists of the specimen number, date and time,
and the patient’s name, followed by the tests covered by the worksheet. Enter
results on this screen exactly as you would for manual entry. (Review Sec. 3,
Daily Operations)
Worksheet Result Entry Quick List
To enter results from a worksheet:
1. Select F5
2. Select Enter Results
3. Enter the appropriate worksheet
3. Select one or more tests, or select All
4. Enter the result
5. SchuyLab accepts the result and moves the entry field to the next test
Transmitting Loadlists to Bi-Directional Devices
Many of the more advanced lab instruments employ a bi-directional interface -- that
is, in addition to sending results to SchuyLab, the instrument is able to receive orders
168
from SchuyLab. This has the great advantage that orders needn’t be input twice
(once for SchuyLab, again for the instrument). The patients’ names, specimen ID
numbers, and the tests to be done are transmitted to the instrument; the tests are then
run, and the results are transmitted back.
The transmission from SchuyLab is done using a worksheet. Once you’ve created
the worksheet for this day’s tests, it can be sent as a loadlist via SchuyLab’s Device
Access menu screen.
There is some variation in the protocol used, depending on which instruments you
have; but the following is by far the most typical procedure:
Through the F5. Worksheet menu screen, create a new worksheet for the tests to be
run on the instrument that day. This procedure has been described above.
From the F4. Devices menu screen, select the icon for the instrument in question.
SchuyLab displays the [Instrument] Online Results screen:
SchuyLab’s bi-directional interfaces are usually denoted by a worksheet icon on the
right side of the screen (just above the Delete button). This icon transmits the
worksheet (loadlist) to the instrument.
Select the worksheet icon. SchuyLab displays the Select Loadlist box.
169
Select the Select button to summon a list of worksheets. SchuyLab displays the
Available Worksheets box.
Select the worksheet you’ve just compiled for today’s run. SchuyLab returns to the
Select Loadlist box. The name of the worksheet you've just selected will be in the
field labeled Worksheet.
If you need to edit or print the worksheet before transmitting it to the instrument,
follow the instructions in the section below.
In the field labeled Cup, type the number of the cup you wish to correspond to the
first specimen on the worksheet. Generally speaking, the first specimen will be in the
first cup, but your lab procedures may vary. Some instruments identify cups using
170
trays or sectors; if so, enter the tray and cup number together (for instance, "2/01" to
start with tray 2, cup 1).
When all is ready, select OK. SchuyLab will send the worksheet over immediately,
or when the test run is started, depending on the instrument.
The Worksheet Function screen also has two icons: Manual Worksheets and
Worksheet Barcodes.
Manual Worksheets
Manual Worksheets further increases the versatility of worksheets by
allowing you to select exactly which specimens you want to appear on the work
list and what order they appear in. In many ways, this improves the capabilities
that already existed with Edit Worksheet, but makes the process much easier
and intuitive. When you click Manual Worksheet, the Worksheet ID window
appears. If you decide to create a New worksheet, it will create a blank tablet
for you to select which specimens you want. If you look up an existing
worksheet, it will allow you to add on additional specimens easily.
The Building [Worksheet Title] window appears. In the Accession: field you can
type in the Accession Number you want to include and then click the Add… button
to put in on the worksheet. If leave the Accession: field blank and click Add… the
Select Specimen window (Same as pressing F3: Specimen) and you can choose a
specimen from the List Active button as well. Once you have selected all the
171
specimens you want, you can change their order by clicking Sequence, or click the
Specimen entry itself and order additional tests, remove procedures from the work
list, or even cancel the specimen itself.
Worksheet Barcodes
Worksheet Barcodes allows you to print Barcode labels for every
specimen on a Worksheet, and can be useful for any procedure that requires
Secondary tubes. You will see Print Worksheet Barcodes screen. Select which
Barcode printer you want to send the labels to (if you have multiple bar code
printers), and the number of copies of each label. Click OK, and they will print
out.
These barcodes still work like any other specimen barcode. If they are used on an
instrument, the machine will run every test that it is interfaced to run, even if it does
not appear on the Worksheet you used to print the Barcode Labels. For example, you
build a Glycohemoglobin worksheet and print out barcode labels for all of your
secondary tubes. When you place those tubes on the instrument, the machine will
run every test ordered on the specimen that it is capable (HGB_A1c and NA and K
and…).
172
Sec. 6 - Quality Control
Overview
Quality Control (along with its elder siblings, Quality Assurance and Quality
Management) is a complex topic to delineate. How do you explain to a computer
that your shipment of new controls has been delayed by a blizzard, but, in the back of
a fridge you found a couple of bottles of a control you’d been using six months ago?
You want to go back to that set of control values and reinstate them as your active
control for the next four days. Situations like this are easy for a human to
understand, but difficult to describe to a computer. Fortunately, other aspects of QC,
those which people find most cumbersome (so-called “number crunching”), are easy
for a computer to accomplish.
At Schuyler House we’ve created a QC system capable of handling complex patterns
of quality control management without intruding those capabilities on users whose
QC needs are simpler.
It works like this:
You define a control in SchuyLab. You tell SchuyLab that this control, “C”, has two
levels, called Lo and Hi. SchuyLab creates QC files marked “CLo” and “CHi”. All
levels of a control together constitute a control set.
Now you need to tell SchuyLab what tests you wish to run on this control set. Since
the same test can be run on more than one instrument, these tests are defined in terms
of a device. That way, SchuyLab can maintain independent QC records for a given
test run on multiple instruments. (QC requirements for a test may vary widely
between instruments. A Glucose may be stable in your main analyzer for 24 hours,
but may need to be recalibrated every 2 hours on the backup machine.).
Once you’ve selected the tests to be run on this control, enter the Lot Numbers and
Expiration Dates for your current lot of the control. SchuyLab automatically creates
files with that lot number for all the tests on all the devices that use that control.
Now you enter the actual test ranges for the control set. You can choose one of three
formats for entering the ranges: High & Low values, Mean & SD, or Mean +/-.
When you enter the ranges themselves, SchuyLab displays the numbers in columns
on the left side of the screen. The data for the ongoing analysis of your accumulated
results are displayed in the columns on the right side of the screen. When a control
set is newly defined, of course, those columns are blank, but each time QC results are
entered into the system, they’re added to the columns. Those accumulated results
can, if you wish, be used as the new test ranges at a later time, using the Baseline
173
function. (This is valuable for parallel testing, for very-long-term statistical bases,
and several other uses.)
Ideally, you want the QC from your online instrumentation to sort itself neatly into
the appropriate files, even if you have several control sets going at the same time.
Unfortunately, the analyzer sometimes has an unalterable on-board name for QC.
For that reason, we’ve created Aliases. An alias allows you to make a one-to-one
correspondence between the name an analyzer sends over and the name you call a
control in SchuyLab. (Unlike adding the instrument names to SchuyLab, this
prevents confusion if you run the control on more than one device, each of which has
its own name for a control.)
The QC Functions of SchuyLab
Select F7. Features. SchuyLab displays the Special Features menu screen.
Select QC. SchuyLab displays the Quality Control menu screen.
QC Setup
The first step in Quality Control is the setup. All the controls, their levels, their lot
numbers and expirations, and their ranges, must be defined before any QC results can
be accepted. This is done through QC Setup.
From the Quality Control menu screen, select QC Setup. SchuyLab displays the
Quality Control Setup menu screen.
174
There are five steps to defining a control in SchuyLab. The first two steps, once
done, need never be repeated for that particular control. The last three must be
repeated for every new lot received.
Select Control
1. Select Control. SchuyLab displays the Select Control box.
2. In the field labeled Control, type the name of the new control. (We advise
choosing a name that’s both descriptive and short: “CBCQC” for instance.)
Select OK. SchuyLab displays the Define Control box.
175
3. In the Levels field, enter the number of levels of the control (from 1 to 4
levels).
4. In the Level Identifiers fields (L1 through L4), enter the names for each level
of that control (We recommend using I, II, III, IV or Lo, Norm, High, etc.).
5. When you have completed the fields, select OK. SchuyLab returns to the
Update Control box.
6. Select OK. SchuyLab returns to the Quality Control Setup menu screen.
Select Device
1. Select Device. SchuyLab displays the Select Device & Control scroll box,
showing all Control-Device sets which have been established.
To link a device to a new set of controls, select New. SchuyLab displays the Device
Name box, with two scroll fields: one listing all the controls in the system (the one
176
you’ve just defined will already be there), the other listing all the device interfaces in
your system.
Select a control and a device from their respective lists
displays the Define Control Device box.
Select OK. SchuyLab
2. Complete the fields as follows:
Frequency
Enter the interval of hours that the controls need to be run for all of
the tests listed. You can leave this box blank if you don’t want to
apply the frequency Click on a single test to override the default
frequency and have a separate run frequency.
Westgard
Select the checkboxes for 1-2S and 1-3S.
177
QC must
be valid. . .
If this box is checked, a patient’s results can be accepted if QC is
out, but only if the tech signed in has the “Override QC” clearance.
If this box is NOT checked, then the patient’s result can be accepted
by any tech signed in.
Add
Select Add to display the Add test(s) to device scroll box.
Select those tests on which you wish to run this control.
Select Done. SchuyLab displays the selected tests in the Test field.
If you select OK without adding any tests, SchuyLab will
automatically fill in all tests in the Device4 Setup (Test Translation
Table)
Delete
To remove a test from the control, simply select the test.
Sequence
Select Sequence to change the order of the tests, if necessary. (We
recommend putting them in the same order as they appear in the
documentation that comes with each new lot.) SchuyLab displays
the Test Sequence box.
To move a test, click on the test, move the mouse pointer to the line
on which you want the test to appear, and click again to insert the
test at that point.
Select Done to return to the Define Control Device box.
3. Select OK. SchuyLab returns to the Quality Control Setup menu screen.
Select New Lot
1. Select New Lot. SchuyLab displays the Select Control Box.
2. Select List. SchuyLab displays the Control? box. Select the appropriate
control. SchuyLab displays the Define Set box. (A control set consists of a
single lot of each level of a control.)
178
3. In the Status scroll box, select the status of this particular control set as
follows:
Select Active: if you are setting up a currently active lot (which you’ll do
if you’re setting up QC for the first time).
Select Test:
if you are doing parallel testing on a set of controls, or
putting in a lot number you’ll begin using at a later date.
The two other Status levels, Closed and Archive, are not used in defining a New Lot.
A lot should be set to Closed if you’ve finished that lot of controls and are activating
a new one (i.e., when you’ve just finished parallel testing). You could do this
yourself, but SchuyLab will do it for you automatically: whenever you have an
Active control lot, and a new Active lot is defined, SchuyLab automatically closes
the first Active lot and assigns the current date as the End Date. Because SchuyLab
will NOT delete any of the QC you’ve entered, you can end up with a long list of
closed QC lots. If you set the status from Closed to Archive, SchuyLab will remove
these from many of the QC lists. Like many other lists in SchuyLab, you can always
go back and look at those Archived lots should you need to.
4. The Beginning Date automatically defaults to the current date. You can
override the date, if necessary. Leave the End Date blank; that doesn’t get
entered until the next lot is activated.
5. You must enter the Lot Numbers and the Expiration Dates for all levels.
6. Select OK. SchuyLab returns to the Quality Control Setup menu screen.
Select Set
1. Select Set. SchuyLab displays the Select Control box.
2. Select List. SchuyLab displays the Control? box. Select the control from the
list. SchuyLab displays the Select [Control Name] Set box.
179
3. Select the control set. (For a new control, such as described here, there’ll
only be one set.) SchuyLab displays the Update Set box.
4. This is your last chance to correct the lot numbers, expiration dates, status
etc., for this lot. The main purpose, however, is to set the values for the
ranges of each level of the control.
5. Select the Values button for one of the control levels listed. SchuyLab
displays the Update/Review Current Values box.
180
Complete the fields as follows:
By Range selects the format of your control data:
Select Low
if your Control value sheet expresses your controls as a range
High:
of values (e.g., “12-32”).
Select Mean
SD:
if your Control value sheet expresses the information as a
mean and a Standard Deviation (e.g., “22, SD 5”).
Select Mean
+/-:
if your Control value sheet expresses the data as a mean and a
plus-or-minus of that mean (e.g., “22 ± 10”).
SchuyLab automatically reformats the screen to accommodate your selection.
Select one of the test names. SchuyLab displays the [Test Code] box.
181
Enter the data for that test’s control range in the pop-up box. Select the Ok button in
that pop-up box.
Select the next test name. Enter the data for that test. Select Ok.
Continue until you have entered data on all of the tests.
Baseline
Select this button to copy your Accumulated results into
Current values. This option permits you to begin a new lot of
controls using the manufacturer’s values, establish the norms
specific to your reagents and instrumentation during parallel
testing, then copy the site-specific accumulated values into
your Current file, replacing the manufacturer’s figures with
your own. Baseline data is typically revised when a lot is
changed from Test to Active status.
Copy
When updating the QC values for a set of controls, you can
copy the values from either the prior set of that control
(assuming there is one) or the current level of another device
of the same type (assuming there is one). If neither option is
available, the copy button will be grayed out.
When done, select OK.
6. Select the Values button for the next level. Proceed as above.
182
7. When you have set values for all levels, select OK to return to the Quality
Control Setup menu screen.
Select Alias
Some instruments transmit control values across an interface with a heading that is
both specific and inalterable. The Alias function exists to establish a one-to-one
relationship between the instrument’s name for the control and your name for it.
(Unlike using the interface names, this prevents confusion when different instruments
have different headings for the same control. And who wants to call a control
“D38X9311” anyway?!)
1. Select Alias. SchuyLab displays the Update Control Alias List box, listing
all the aliases currently defined in QC Setup.
2. Select Add Alias. SchuyLab displays the Add Alias box.
3. In the Alias field, type the heading that comes across the interface. In the
Actual Level scroll box, select the name and level of the control.
183
Note: Each control/level on the Actual Level list is shown twice: once as you’ve
defined it (control name + level name), and again with a number appended. The
entry without the number is the generic QC file for that control, with no other
restrictions; the entry with the number is the specific QC file for that control set.
(The first set of that control, which we’ve just defined, is set #1; thus, in the example,
we see NEWQC-A1 for that specific subset, abnormal level, and NEWQC-A for the
full control of the same level.) If your lab uses standard control procedure, with only
a single lot number in use at a time, select the entry without the number appended. If
you have several specific lots accepting QC results (e.g., you’re doing parallel
testing, with an Active and a Test lot), or if your lab keeps only lot-specific QC
results, select the entry with the number appended.
4. Select OK to return to the Update Control Alias list box.
5. Repeat the above steps for all levels of each control. You can also establish
multiple aliases for a given control level (in case you have several means of
inputting those QC values).
6. When you’ve finished, select Done. SchuyLab returns to the Quality Control
Setup menu screen.
Adding a New Lot Number to a Control
Once the SchuyLab system has been accepting QC results for a while, the time will
come when your original lot expires, and a new lot will have to be defined. The
procedures are exactly the same as described above (except of course that you don’t
have to re-define the control itself, or connect it to a device). Defining a new lot
begins, appropriately enough, with the New Lot icon.
Select New Lot
1. Select New Lot. SchuyLab displays the Select Control Box.
184
2. Select List. SchuyLab displays the Control? box. Select the appropriate
control. SchuyLab displays the Define Set box.
Notice how the Set field automatically advances: if the previous set had been
#1, this one will be #2.
In the Status scroll box, select the status of this particular control set. Select;
Active
if you are immediately using this lot in production.
Test
if you are doing parallel testing on a set of controls, or
entering a lot number you’ll begin using at a later date.
Note: If you already have an Active lot of the control, and you define another lot as
Active, SchuyLab automatically closes the first Active lot and assigns the current
date as its End Date.
3. The Beginning Date automatically defaults to the current date. You can
override the date, if necessary.
4. You must enter the Lot Numbers and the Expiration Dates for all levels.
5. Select OK. SchuyLab returns you to the Quality Control Setup menu screen.
Select Set
1. Select Set. SchuyLab displays the Select Control box.
2. Select List. Select the control from the list.
3. SchuyLab displays the Select [Control Name] Set box.
185
There will be at least two control sets listed: all the previous lots, plus the new lot
you’ve just defined. Select the new lot from the list. SchuyLab displays the Update
Set box.
4. Select the Values button for one of the control levels listed. SchuyLab displays
the Update/Review Current Values box. Enter the ranges for that level,
following the same instructions as given in QC Setup, above. Select OK.
5. Select the Values button for the next level. Proceed as above.
6. When you have set values for all levels, select OK to return to the Quality
Control Setup menu screen.
Select Alias
When defining a new lot for a currently existing control, it is only necessary to
update the Alias if (a) the previous lot had an alias, and (b) that alias was specific to
the previous lot. If this particular control doesn’t use an alias (because QC results
aren’t accepted through an online interface), or if you store QC results in the nonspecific file for that control (that is, the control name without a number appended),
skip this section.
1. Select Alias. SchuyLab displays the Update Control Alias List box.
2. Select the alias for the previous lot from the list. SchuyLab displays the
Update Alias box. The Alias field will contain the instrument’s name for that
control level, and (if nothing has been changed on the device) should be left
as is. In the Actual Level scroll box, pull down the list of control levels.
186
Only Active and Test control sets will be displayed in the Actual Level list. Select
the name and level of the new control lot (in the example above, the old lot has a 1
appended, and the new lot will have a 2 appended; select the new lot). Select OK to
return to the Quality Control Setup menu screen.
Parallel Testing
Parallel Testing a New Lot Number of a Control already in SchuyLab
Parallel testing is a special case of introducing a new lot of a control. It allows you to
accumulate data for the new lot, while still accepting QC results for the current lot.
The procedure is exactly the same as Adding a New Lot Number, described above.
Select New Lot
1. Select New Lot. SchuyLab displays the Select Control box.
2. Select List. SchuyLab displays the Control? box. Select the appropriate
control. SchuyLab displays the Define Set box.
187
3. In the Status scroll box, select Test to do parallel testing on a set of controls.
4. The Beginning Date automatically defaults to the current date. You can
override the date, if necessary.
5. You must enter the Lot Numbers and the Expiration Dates for all levels.
Select OK. SchuyLab returns to the Quality Control Setup menu screen.
Select Set
1. Select Set. SchuyLab displays the Select Control box.
2. Select List. Select the control from the list.
3. SchuyLab displays the Select [Control Name] Set box. Select the control set.
SchuyLab displays the Update Set box. There will be at least two control
sets listed: all the previous lots, plus the new lot you’ve just defined. Select
the new lot from the list. SchuyLab displays the Update Set box.
4. Select the Values button for one of the control levels listed. SchuyLab
displays the Update/Review Current Values box. Enter the ranges for that
level, following the same instructions as given in QC Setup above. Select
OK.
5. Select the Values button for the next level. Proceed as above.
6. When you have set values for all levels, select OK to return to the Quality
Control Setup menu screen.
7.
Select Alias
Parallel testing is where the use of aliases becomes particularly important. By
defining two aliases, one for the currently Active control set and another for the Test
control set, you can easily run the parallel tests without having to worry about
misfiling results.
188
1. Select Alias. SchuyLab displays the Update Control Alias List box.
2. Select Add Alias. SchuyLab displays the Add Alias box.
1. In the Alias field, type either
a. the name you wish your techs to give the control you're parallel
testing when they put it on the analyzer, or
b. the name you know the analyzer will send it across as, irrespective of
whatever your techs call it.
In the Actual Level scroll box, select the name and level of the control.
Note: As noted above, each control/level on the Actual Level list is shown several
times: once as defined, and with several control/level subsets with an integer
appended. (The first set of the control has a 1 appended, the second set has a 2, and
so on.) Only lots that are defined as Active or Test status (not Closed) will be listed.
These subsets exist so that the Alias information can interact with the
control/level/lot number status.
Let’s say that you are working with a rather smart analyzer. You tell this analyzer
that the first two cups of a run are the working controls (which it may call
“CONTROL 1” and “CONTROL 2”, and which you’ve aliased to your SchuyLab
controls “NEWQC-N1” and “NEWQC-A1”). But a new set of controls came in
yesterday, and you want to begin parallel testing them today. So you tell the analyzer
189
that in the next two cups you have put “Test N” and “Test A”. Cannily, you go to
your QC Alias function, and assign the alias “Test N” to Actual Level “NEWQCN2”, and “Test A” to the Actual Level “NEWQC-A2”. Now these subsets of the
control automatically accumulate all the accepted QC data which comes across the
interface under those names.
Some analyzers have designations that they automatically assign to QC. What if
there is such a designation set aside for a lot number being parallel tested? The first
answer is that, if such a designation exists, you ought to use it. The second answer is
that instruments which are sufficiently sophisticated to have made provision for
parallel testing, generally let you input a name for your controls. The third answer (I
warned you that QC is a complex topic!) is that you can always create a patient called
“TestDude, LevelI”, order the appropriate tests on the patient, and when the results
get to the interface, reassign them as the alias “Test L”. They will then be sorted into
the correct files.
Select Set again
Once you’ve got enough QC results from the testing phase to be considered
statistically significant, you can replace the lot manufacturer’s ranges with the mean
and standard deviations you’ve compiled through parallel testing. This is done
through Set.
1. Select Set. SchuyLab displays the Select Control box.
2. Select List. Select the control from the list.
3. SchuyLab displays the Select [Control Name] Set box. Select the control set.
SchuyLab displays the Update Set box. There will be at least two control
sets listed: all the previous lots, plus the test lot. Select the test lot from the
list. SchuyLab displays the Update Set box.
4. Select the Values button for one of the control levels listed. SchuyLab
displays the Update/Review Current Values box. Select Baseline. This
copies the statistical data from the right side of the box to the left side. Select
OK.
5. Select the Values button for the next level. Proceed as above.
6. When you have set values for all levels, change the Status of the set from
Test to Active and select OK to return to the Quality Control Setup menu
screen.
How to Use QC
By and large, you can treat your QC values as you do your patient results. Controls
that are run on instruments on line are accepted into QC files in the same manner that
a patient result is sorted into the patient’s files. Sets of results that are entered by
worksheet, can have the controls entered at the same time. Controls can also be
entered manually. In short, for each method of entering patient results, there’s an
analogous method for entering QC results.
190
Fine, you say to yourself, but I don’t want to know how QC is like patient data. I
turned to this heading to learn how QC differs from patient data.
Fair enough. Let’s do a quick overview of the QC module in SchuyLab:
Select F7. Features.
Select QC.
SchuyLab displays the Quality Control menu screen.
The icons visible in the Quality Control menu screen can be classed according to four
separate function categories:
Setup
QC Setup
This is where the controls, lots, and ranges are defined for QC. It’s discussed more
completely in Sec. 8, Managerial Functions.
Input and Review
191
Lot Edit,
On-Line Analysis,
Input QC,
Scan QC
Update QC
Input QC is used for manual entry of QC values; it works like the Enter Results icon
in the Patient Processing screen. Lot Edit, On-Line Analysis and Scan QC permits
the QC data to be reviewed (Lot Edit through a spreadsheet of numbers, On-Line
Analysis through Levey-Jennings graphs), and individual data points to be annotated,
altered, or excluded from statistics. Update QC allows you to alter previous results
of QC.
Print QC Reports
Levey-Jennings,
Detail Report,
Summary
These icons print the QC data in report form: Levey-Jennings Report does so
graphically, Detail Report numerically and Summary prints the Accumulated
Baseline Values. In other words, what On-Line Analysis and Lot Edit display on the
screen, Levey-Jennings Report and Detail Report print onto paper.
QC on an Online Interface
When QC data come across an instrument interface to appear on the F4. Devices
screen, it resembles a patient specimen. The name of the control, as defined in
SchuyLab, occupies the nameplate area, and the name the instrument uses for that
particular control level occupies one of the entry fields. When a sample labeled as a
control is sent across the interface, whether or not SchuyLab can identify which
control and level is indicated, the Control button in the upper right hand corner of the
screen is automatically selected (turns dark grey).
To accept QC via an online interface
1. Select F4. Devices.
2. Select a device icon. SchuyLab displays the oldest set of data available from
that instrument.
3. If the values displayed are for a control:
192
•
If the QC results are valid, select Accept. SchuyLab sorts these
results into their appropriate QC files.
•
If the QC results are not valid, select Delete. SchuyLab deletes that
set of values and displays the next set.
•
If the QC set contains some results you wish to retain, and some you
do not, use the right mouse button to toggle the checkmarks off or
on. Select Accept. Those tests with checkmarks will be entered into
their appropriate QC files. (The tests without checkmarks will be
deleted.)
(This matches how individual patient results are accepted, or not, via the online
interface. For a more detailed discussion, see Sec. 3, Daily Operations.)
Note: If you accept QC values flagged as more than 2, or more than 3, standard
deviations (“>2” or “>3”), those values should be annotated. This can be done at the
online interface, using the left button of the mouse or it can be done using the Lot
Edit icon in the Quality Control menu screen.
Troubleshooting Online QC
Occasionally you will have a control sample visible, yet the nameplate will be blank,
and SchuyLab won’t let you accept the results. A lot of the results are flagged as
“High” or “Low”, too, though the values themselves are right on the mean. Yet you
know you ran the correct control. What’s happened? What does it mean?
What has happened is that the instrument sent the control values (perfectly good
control values, too) across the interface with a name attached that SchuyLab didn’t
recognize. It’s as if you taught your dog to fetch your slippers ... then gave him the
command in German. He’d just sit there, staring at you with big brown eyes, waiting
for you to make sense. (You could wait a long time for your slippers to arrive.)
SchuyLab knows that it has been sent a set of results. The instrument may even have
“told” SchuyLab that this data sample represented a control. But SchuyLab looked in
its QC file and didn’t find anything with that exact name. So it compares the test
results to the patient ranges (which is why you get so many flags), and sits there,
waiting for you to tell it how to make sense of the information.
The most likely cause of this problem is
The Alias box in QC Setup (which translates the control name transmitted by the
instrument into the control name you’ve defined in SchuyLab) does not have the
control name actually transmitted by the instrument.
There are a couple of aspects to this problem. Some instruments allow the operator
to input a QC name. Sometimes, the name the operator typed is the same name the
instrument actually uses as a label when the data is sent across an interface.
Sometimes, it isn’t (even though the name the operator input appears in the screen
display of the instrument itself!). The easy answer is this:
193
•
If the instrument does transmit the control name the operator puts in, then
stick a post-it note to the instrument directing the techs to use the names
you’ve put in SchuyLab.
•
If the instrument does not transmit the control name the operator puts in, or if
it doesn’t allow you the option of assigning your controls a name, then copy
down the exact text that appears in the entry field on the interface screen
(include capitalization, blank spaces, and punctuation marks). Go to the Add
Alias box [Select F7. Features; select QC; select QC Setup; select Alias;
and either then select the line that should have the name of that control, or
select Add Alias to add it] and retype in the text you’ve just copied.
After you have made your corrections, check back in the Online Interface screen. If
you have corrected the problem, the nameplate area will contain the QC ID.
Temporary fix
If you know the SchuyLab name for a level of a control, but are not authorized to
alter QC, you can retype the correct name in the entry field on the interface screen
itself (in place of the incorrect name). After you have corrected the name, select
Reassign. If your ‘fix’ is correct, the QC control name will appear in the nameplate
area. Review the data, and accept or delete it, as discussed above. Occasionally the
instrument will send the correct QC name to the wrong entry field. Try typing the
name in a different field (usually the first), then Reassign the QC specimen and
review it, as above.
Lot Edit
Often, you will want to review a series of QC results, modifying or annotating
individual values. This can be done when accepting the QC results via the online
interface, as described above, or it can be done through the On-Line Analysis
function -- but these are more convenient for editing one or two values. For editing a
series of values, the Lot Edit function is best. It displays the actual numeric data of
your controls, in columns by test and date.
Select F7. Features.
Select QC.
SchuyLab displays the Quality Control menu screen.
To annotate or alter a QC value for a given lot
1. Select Lot Edit. SchuyLab displays the Select Lot box.
194
If you wish to see all the QC lots, including those you have set to Archive,
then mark the box in the left hand corner.
2. Select one of the lots in the list box. SchuyLab displays the results for that
specific lot and level, in a ‘spreadsheet’ format.
3. The tests comprising the control are listed along the top; the dates and times
for each control run are listed down the left side. Point and click at one of
the QC results on the screen. (The entire row of QC data will light up when
195
you point to any position on it. That’s okay; it does that to show you where
you are. But SchuyLab knows which of the individual values in that row you
are actually pointing the cursor at.)
SchuyLab displays the [Code name of the test] box.
•
The QC result is shown in the first field. To alter that QC result,
retype the entry.
•
To exclude that result from the statistical analysis of your QC, check
the box marked “Exclude from Statistics”.
•
To annotate the QC result, you can enter the numbers of Result
Codes (up to four of them) in the fields labeled “Result Codes”
(these are also called Remark Codes). (These will be the Result
Codes that have been reserved for QC, and not those reserved for
patient results. To see how the separate lists of Result Codes are
defined, see Sec. 8, Managerial Functions.) Or, select the note icon
to add a free text notation to the QC value.
•
If you check the Exclude from Statistics checkbox on a QC result, it
will appear ‘grayed out’ on the spreadsheet. The statistics at the
bottom of the screen (“N”, or number of values; mean, standard
deviation, and “%CV”, or coefficient of variance) will shift
accordingly.
•
If you add a Note or a Result Code to a QC result, the background
behind the annotated figure will turn yellow.
4. Select OK. SchuyLab returns you to the Lot Edit screen.
5. Select another value. Proceed as above.
6. When you have finished correcting and annotating your QC values, select
F10. Done. SchuyLab returns you to the Quality Control menu.
196
Online Analysis
When you want a comprehensive view of how your QC has been running on a
specific test or set of tests, this is the option to select. Online Analysis displays a
Levey-Jennings type graph of all the levels of your control at the same time. You can
quickly flip through a series of tests, glancing at the QC on each of them, or you can
minutely examine one portion of the graph on one bothersome test, obtaining specific
data on the individual data points, or zooming in to expand a cluster of points.
Select F7. Features.
Select QC.
SchuyLab displays the Quality Control menu screen.
To display the control levels for a specific test
1. Select On-Line Analysis.
screen.
SchuyLab displays the Levey-Jennings chart
2. In the first scroll box, select the instrument-control pair you wish to observe
(in this case, the CBC controls for the CellDyn 1600).
3. The second scroll box contains all of the sets of that control pair which
SchuyLab has in its memory. The system will automatically default to your
197
active set of controls. For instance, say that you had run four different lot
numbers of Monitrol in Chemistry, since you began using SchuyLab. They
might be numbered in the system as:
1 (a Closed set)
2 (a Closed set)
3 (your Active set)
4 (a new set, undergoing parallel testing and in Test status)
While all of these sets are available for your examination in the LeveyJennings graph, the system will default to set #3, which is your Active set of
controls. If you wish to examine a set other that the active set, select the set
you wish to observe.
4. The third scroll box contains a list of tests which are performed on the
instrument-control pair you have selected. Select a test from this list.
5. At the bottom of the screen are up to four checkboxes (depending on the
number of levels your control has). Next to some of these boxes are labels
for the levels of your control, and the mean and 2SD range for each level.
Checking the box next to a level will display the controls for that level on the
Levey-Jennings graph. You may examine all the control levels for a given
test at the same time, or, by toggling the checkboxes on and off look at the
levels one at a time.
198
•
On the graph, the solid green line represents the mean, the solid blue
lines the ± 2SD limits, and the broken blue lines the ± 3SD limits.
The levels of the control are displayed in yellow, pink, light blue,
and (should there be a fourth control) brown.
•
To calculate the trending characteristics of a level, select the Trend
button. A dashed line of the same color as the control appears,
showing the average slope of the graph. (It’s best to do trends one
level at a time, or the screen gets awfully crowded. Pretty, but not
particularly helpful.)
•
To display the numeric value of a particular point on the graph, point
and click at a dot. The numeric value for that point, and the time and
date it was run, appears in the box at the lower-right section of the
screen (near the Trends button). If you aren’t exactly on a dot,
SchuyLab will select the nearest point.
•
Once you’ve chosen a specific point on the graph, and its values are
displayed on the lower-right box, you can edit or annotate that point,
or exclude it from your statistics. Just select the box where the
values are displayed. SchuyLab displays a pop-up box for that test,
just as in Lot Edit. And, just as in Lot Edit, you can add notes or
Result Codes, change the result value, or exclude it from the
database.
•
To expand a section of the graph if the data points are too close
together to resolve individually, point the cursor at the middle of that
area and click the middle button on the mouse. SchuyLab will
“zoom” you in to that section of the graph. To “zoom out” again,
click the right button on the mouse.
•
To flip through all the tests on an instrument-control set, point the
cursor at the test scroll box at the top of the screen and click the
right button on your mouse. Each click will advance the scroll box
to the next test. The middle button will scroll backwards test by test.
6. Select F10. Done to exit this screen. SchuyLab returns you to the Quality
Control menu screen
199
Input QC
Most of your QC will be entered into SchuyLab by worksheet or online. There will
be instances, however, when you need to enter a set of QC values manually as a
separate function. This is done in a manner similar to the manual entry of patient
results, but applies solely to Quality Control data.
Select F7. Features.
Select QC.
SchuyLab displays the Quality Control menu screen.
To input a specific set of QC values
1. Select Input QC. SchuyLab displays the Input QC Results box.
2. From the Device & Control scroll box, select the device-control pair for the
data you wish to enter.
3. In the Level scroll box, select the level of control you wish to input. The
default is “ALL”, meaning all levels defined for that control; you can also
select an individual level.
4. Enter the date and time the QC was performed in the fields labeled Run Date:
and Time:. You may also add a note to this QC run (for instance, the
technologist who ran the QC).
5. Select Input. SchuyLab displays the Enter QC Results screen, containing
the tests defined for this instrument-control pair. (It looks remarkably like
the Enter Results screen for patient processing, doesn’t it?)
200
Point and click on one of those tests and enter the values. As you accept the
values, SchuyLab will flag them as >2SD or >3SD. Values exceeding 2SD
should be annotated. Select Result Codes to apply a predefined comment to
the value, or select Notes to add a free-text entry.
6. When you’ve entered all QC results for that level of control, select F10.
Done. SchuyLab returns you to the Quality Control menu.
Scan QC
Scan QC will show you the most recent run of each level of control on each of your
instruments. Each instrument is listed and has a colored indicator light next to it.
201
This light reflects the least favorable result of all the levels (notice the light next to
the instruments name. In this case, the light is Orange). If you have fifty tests that
you run on this instrument and all of them are in control, except one, which is >3SD,
the instrument light would be red. Red is also used for expired controls. The orange
light means that your QC has not been run within the Frequency time period you
entered (if you entered a frequency). The control will also be marked “TO” (Timed
Out) to indicate the type of error (notice the T4 test). A yellow light indicates the
control is out of limits by >2SD and a green light means things are good.
Update QC
Update Qc or Lot Edit? You can alter results; attach notes or remarks in either spot.
So what’s the difference? In Lot Edit, you choose the QC you’re interested in by
scrolling thru a long list. In Update QC it is a little easier to find the lot you need.
1. Select Update QC. SchuyLab displays an Alter QC Results box.
202
2. In the first scroll box, select the instrument-control pair you wish to alter (in
this case, the CBC controls for the CellDyn 1600).
3. The second scroll box contains all of the levels for this control. You choose
which level you wish to alter (in this case, we are looking at level 1).
4. The third scroll box contains a list of run dates and times (in case you run
more than one QC a day) for the instrument-control pair you have selected.
Select a run date and time from this list. SchuyLab displays the Alter QC
Results screen, containing the tests defined for this instrument-control pair.
(It looks remarkably like the Enter Results screen for patient processing,
doesn’t it?)
Point and click on the result you want to alter and enter the new value. As
you accept the value, SchuyLab will flag them as >2SD or >3SD if
necessary. Values exceeding 2SD should be annotated. Select Result Codes
203
to apply a predefined comment to the value, or select Notes to add a free-text
entry.
5. When you’ve altered all QC results for that level of control, select F10.
Done. SchuyLab returns you to the Quality Control menu.
Levey-Jennings Report
This option allows you to print out a graph such as the one you viewed in On-Line
Analysis.
Select F7. Features.
Select QC.
SchuyLab displays the Quality Control menu screen.
To print a Levey-Jennings graph
1. Select Levey-Jennings Report.
Jennings Graphs box.
SchuyLab displays the Print Levey-
2. From the Device & Control scroll box, select the device-control pair you
wish to print.
204
3. From the Set scroll box, select the control’s set number you wish to print.
(The currently Active set is shown by default.)
4. Input the date range the report is to cover.
5. Select the test or tests to be printed. (If no tests are highlighted, nothing will
print! This is the most common mistake made when printing this report.)
Select Setup
6. There are four checkboxes. The first, “Patterned Lines”, should be checked
if you don’t have a color printer. It directs the printer to use different line
styles (solid, dotted, dashed, etc.) for the lines on the graph. Otherwise, the
lines are printed in three different colors. Check Graph Only if you want
only the graph to print (not the Run Date, Level or Value). (The remaining
two checkboxes are not functional at this time: “Separate Levels” is always
“off”, and “Separate Pages” is always “on”.)
7. To specify the queue and font for this QC report, SchuyLab displays the
Configure Report box. In the scroll boxes, select the appropriate queue (that
is, printer) and font. (If you have only one printer, the choice is easy. This
option becomes more important when you grow to a networked system with
several printers.)
8. By setting the Height of Graph, you are now able to print one to four graphs
on the same sheet of paper. The taller the graph height, the fewer graphs on
one page. Select OK. SchuyLab returns you to the Print Levey-Jennings
Graphs box.
9. When you have configured the report to your satisfaction, select Print to
print the report.
205
QC Detail Report
This option allows you to print out a set of numeric values, such as you viewed in Lot
Edit, for all the tests of a particular level of a control.
Select F7. Features.
Select QC.
SchuyLab displays the Quality Control menu screen.
To print a set of QC values
1. Select Detail Report. SchuyLab displays the Print QC Detail box.
2. From the Device & Control scroll box, select the device-control pair you
wish to print.
3. From the Set scroll box, select the control’s set number you wish to print.
(The currently Active set is shown by default.)
4. Input the date range the detail report is to cover.
5. In the box labeled “Levels:”, select the level or levels of the control to be
printed. (If none of the levels are selected, nothing will print! This is the
most common mistake made when printing this report.)
6. To specify the queue and font for this QC report, select Setup. SchuyLab
displays the Configure Report box. In the scroll boxes, select the appropriate
queue (that is, printer) and font. (If you have only one printer, the choice is
easy. This option becomes more important when you grow to a networked
system with several printers.) Select OK. SchuyLab returns you to the Print
QC Detail box.
206
When you have configured the report to your satisfaction, select Print to print the
report.
Summary Report
One of the things that many of our clients have asked us for was a way to print out
the Accumulated Baseline Values for their QC Lots. SchuyLab now has a report that
will do exactly that.
If we go to F7: Features, QC, we will see an icon, called:
Summary Report
This report prints out the Baseline values for the QC lots, in conjunction with an
accumulated range. Typically, these ranges would be (1) the range for this month,
and (2) the range for the entire lot. (The second range could be for the prior month,
or whatever other interval you choose.)
207
Sec. 7 - Reports and Printing
Types of Reports
SchuyLab offers you many ways to print your necessary daily reports and forms.
Following is a brief overview of those reports. We will get into more detail of setting
these reports up and customizing them to fit your needs further in this section.
Patient Report
This is the most common form that you will be using. With this you will report the
results of the patients test including any notes and comments
Cumulative Report
The Cumulative report will print the last 5 – 6 results for all the tests that have been
run. It places them side by side, so at a glance the doctor can see if there are any
trends or drastic changes.
Graphic Reports
Prints cumulative patient results on a graph, and then prints the data for individual
results in columns below the graph. The most common graphic report is, of course,
the PSA. But you can print out the graphic report for a patient’s Glucose, or WBC.
Any test that has the results stored in SchuyLab can have a graph of the results
printed.
Reprint
CLIA requires that a laboratory be able to produce on demand all reports that were
printed on a patient, including their intermediary forms. This means that you cannot
just ‘generate’ a copy of the current finalized results of a patient: If a partial or
preliminary report was sent to the ER, you have to be able to substantially replicate
this preliminary report. In the past, this required the lab to store a huge number of
documents in file boxes. SchuyLab remembers everything that it's sent to a printer,
and can fulfill this CLIA requirement. The reports are kept electronically, in date
order. You type in a date and SchuyLab shows all of the reports printed on that date
– select the correct report, and you have essentially a copy of the exact report that
printed out five or ten years ago. (If you've bought a new printer in the interim, there
may be a change in font, but this is permissible under CLIA regulations.) The
208
security of the Reprint information, like any part of your database, depends on the
integrity of your backup procedures.
Logs
Most of the logs in SchuyLab will print out, by specimen range, a log of patient
names, tests and/or panels ordered, in some cases, the results of those tests or any
“critical” values.
Demographics
Prints a report of all patients and their demographics (date of birth, doctor’s name,
&c). The report can be limited to a given date range or specimen range.
Draw List
Prints out by specimen range, the accessions that have been marked as “To be drawn”
(This log is only used on SchuyLab systems with the “To be drawn” option
activated).
Statistics
These reports will print out a Test Tally (how many tests you have performed in a
certain length of time) report or a Test Value report. A Test Value report can show
you statistics on a specific group of people using a specific test (but more on that
later).
Personalizing the Patient Report
Although we have set up a result form for you, using your specifications, you may
decide to change it by going to a preprinted form or just changing the information
printed. First you will need to determine which form you are using as SchuyLab has
three “templates” already for you to use.
Select F8, Tools.
Select Setup.
Select Report Setup.
Select Patient Report.
Select Setup under Accession Report.
209
In the box under the word “Form” is the name of the form you are using. It may be a
variation of your lab’s name (WHTCLIF) or if your report prints your lab name and
information in the center of the page, it may be named CENTER.
210
When you have the form name, you can cancel out of these screens until you are back
in Report Setup.
Select F8, Tools.
Select Setup.
Select Report Setup.
Select Forms.
Select your form (in this case, we will be using WHTCLIF1).
211
This form is made of three main parts; Header, Body and Footer. The Header
contains your lab’s name, address, etc. and any other information concerning your lab
(i.e. lab director’s name). Also included in the header is the patient information
(name, record #, Doctor’s name, etc) and accession information (specimen #, draw
date, print date, etc). The Body of your form contains the test name, the results and
other information concerning the results. We will cover the body in more detail later
in this section. The Footer can contain such information as a place for the tech to
sign, the signature of who reviews the results, page number and an “End of Report”
message.
Select your form and you see the Update [form name] box. We suggest that you
rename this form. If, for what ever reason, this new form does not work, you will
have the old form to fall back on (i.e. WHTCLIF is the original form, new form is
WHTCLIF1). To rename, simply highlight the name and type in the new one.
SchuyLab will save the old one and the new one – as long as they have different
names.
Name
This is the name of your form in eight characters.
Description
This is a description of your form. It can be the complete name
of your lab (Whitecliffe Labs) or a description of the form (i.e.
centered, pre-printed, etc.).
Overlay
If you have Autofaxing and plan to use a fax overlay, this is
where you type in the path or place the fax is stored on your
computer.
These four boxes should always be checked.
Record Types
212
Header
This button takes you to where you create or change the header
of your report.
Footer
This button takes you to where you create or change the footer
of your report.
Delete
This will delete the form.
Print
This feature is not finished
Top Margin at:
This will set the beginning of your form from the top of your
paper. It is measured in units where 720 units equals 1 inch.
Break Body at:
This will determine how far down the paper your results will
print before it goes to a next page. It is measured in units
where 720 units equals 1 inch.
Begin footer
at:
This will set the beginning of your footer from the top of your
paper. It is measured in units where 720 units equals 1 inch.
We will be using two words that you need to know; Line and Column. A Line is the
information that goes across the paper. It may be made up of one, two or more
Columns. A Column is a block of information such as the patient’s name or the
accession number.
Let’s look at the text that creates the header. Click on the Header button and you will
see:
213
Add Line
This is how you add a line of information to your result
form.
Re-arrange Lines
This works in the same way as sequencing the tests in a
panel.
Each of the items in the “Update [NAME] Header” box is a full line of the header. If
the information contained on this line is from SchuyLab Database (i.e. patient’s
name, accession number, etc.) then it is described (i.e. 120 ALL PtNm DrNm Loc).
If it is text that you added (Lab name and address) it will not show until you click on
that line (it looks like: 120 F ). Now, let’s select the first line in the Update [form
name] box and look at this line. This line consists of two columns of information;
Skip and Text.
Each line has the following settings:
Print on pages:
This line of text is presently set to be printed only on the
first page of the result form (should you need a second or
third page). If you wish it to be printed on every page,
check the boxes Middle and Last also.
Point size:
You have two choices of point size, or size of your letters,
100 (which is equal to 12 characters per inch), 120 (which is
equal to 10 characters per inch), or if you use “0”, it will use
the point size from the previous line.
214
Advance ___
Units…:
The height of your lines is determined by the number of
units per line. We recommend 120 units to a line (720 units
equals 1 inch). Fewer will move the lines closer together,
with less “white space” between lines, more will increase the
space.
Re-arrange
Columns:
Lets say that your present report has the patient’s name,
medical ID and telephone number all on the same line. You
want to change the order so it’s the medical ID, patient
name and then telephone number. Clicking on the button
allows you to do that for each line. This works in the same
way as sequencing the tests in a panel.
Delete:
Click here to delete this entire line of text.
Add Column:
This creates your header information that you will type in
and SchuyLab will fill in automatically.
As it sometimes happens, the name of your lab has changed, so you need to change it
on the results forms. In the Update Line box, click on the line that has the name of
your lab in it, in this case the second block or column.
Simply highlight the text in the text box and type in the new name. Select OK when
you are done.
Adding a new line or column
There may come a time when you need to add another line of laboratory information.
To add a line in the Update [form name] box, select Add Line. This opens the
215
Define Line box. If this line of information is for only the first page, remove the
check marks from the Middle and Last boxes.
Select Add Column and the Column Type box appears:
Skip
Adds spaces between columns or at the beginning of
the line.
The amount of space depends on the number
of spaces you call for.
Text
This is a free text area. You can type up to
approximately 80 characters in a line without skips.
Patient ...
This includes all patient information you may want on
the result form from patient’s name, address, phone
number, etc.
Accession…
Includes any all information for the accession including
Received, draw, print date and time, other specimen numbers,
sources, etc.
Doctor…
This includes all the doctor’s information you may
want on the result form from doctor’s name, address, phone
number, etc.
Client…
This includes all Client information you may want on
the result form from Client’s name, address, phone
number, etc.
Primary Dr…
In some cases, you would want the primary doctor and
the ordering doctor listed on the result form. This field
provides the primary doctor’s information.
Current Date
This adds the current date to your form, separate from
the accession date.
Current time
This adds the current time to your form, separate from
the accession time.
Page Number
Adds the page number of your form.
Report Status
Prints on the report whether this is a preliminary or final copy.
Duplicate
If your result form had been printed out previously, this will
add the word “Duplicate” to inform those reading it that is not
the original.
216
These definitions are all well and good, but how do you use them? Let us add the
name of the director of the lab under the address of the lab. Go into the header of
your report (see above if you’ve forgotten already) and select Add Line. This opens
the Define Line box;
Select Add Column and select Text;
217
A blank Text box opens;
Width You can set the length of your text by typing in the number of characters you
need; or if you leave it blank, enter your text and SchuyLab will count the
number of characters for you. If you are using the center justification, you
should type in the number of characters for the entire line (either 80 or 92,
depending on the point size of the letters).
The remaining buttons work much like those in your Word program; justify the text
(left, right or centered), bold, underscore, italicize or expand the text to fill the space.
Move your cursor into the box below the “Enter column text” and type in the text you
what (i.e. Lab Director - John E. Smith M.D., PhD, FFA).
Select OK. Next we need to place this line in the proper place of the header. The
line you just made was added to the end of the header list, we want it to be just below
the phone / fax number for the lab. You will need to rearrange the lines (much like
sequencing the tests in a panel). Select Re-arrange Lines and scroll down to the last
line, select the line (it will turn a dark grey), scroll up to the line you want the new
line to go and click there. Select Done, OK, OK, and Done. You have successfully
changed your report.
Reporting the Results
Remember when we said there are three parts to your report, the Header, the Footer
and the Body. The body is where we set up the test names, normal and abnormal
ranges, reference ranges, etc. Let’s look at the Body:
Go to F8:Tools, Setup, Report Setup, Patient Report, Accession Report, Setup,
Results;
218
This box also looks very much like the header boxes. You can add a column, rearrange the lines, delete this setup, etc.
Text
Same as the Report Text (see Pg. 9)
Test
You can choose one of five ways to have the test name
printed out;
CODE: Using the test code (i.e. IGE).
NAME: Using the test name (i.e. IMMUNOGLOBILIN).
DESCRIPTION: Using the full name or description of the
test (i.e. IMMUNOGLOBILIN E (IgE) RANGES).
DO NOT USE: As this says “Do Not Use”.
NUMBER: Uses the test number instead of name.
Result
Results can be reported out in many ways.
VALUE: All the results will be printed in a single column
whether the result are normal or not.
NORMAL: Many report forms have two or three columns.
In this column you would print the normal results of the
test.
ABNORMAL: In a two column report, this column would
print the abnormal (both high and low)
HIGH: If your report form has three columns, you would
print just the high results in this column.
LOW: If your report form has three columns, you would
print just the low results in this column.
219
DATE: This adds the date you entered the results
TIME: This adds the time you entered the results
FLAG: In some cases, you may not want the flags following
the results. In this case you can place the high / low flags to
print in any of the columns.
GRAPH: If you have set up a test(s) for printing a graph
(Sec. 4, Tests and Panels), this marks the area that the graph
will be printed out at.
BY: This will add the initials of the person logged in who
enter the results.
RAW: A Raw Value bypasses the Interpretive Range and
prints out what was actually accepted into SchuyLab. As a
byproduct of this, two results can now be printed
simultaneously on the same test. (One is the actual datum
accepted into SL; the other is the Interpretive Result. This
could, for instance, also be used for MIC’s and for anything
else where you want the doctor to get a number-then-whatit-means.)
Skip
Same as in the header setup it will add spaces between fields.
You set up the body of your report the same way you set up the header, by lines and
columns.
Results on Patient Reports
Many of the results fields are very straight forward. Date can be printed out as
mm/dd/yyyy or dd/mm/yy or any other combination (click on pull down arrow to see
all the options). Time is the same way. One place that may be a little confusing is
how to print out the result values themselves.
When configuring the results on patient reports, there is an enigmatic field we’ll refer
to as the rcnbcf field, since that makes no sense whatsoever. Each of these letters
controls one attribute of the result. In order to determine the outcome of any
particular set of letters, however, it is necessary to also take into account the default
of each position. Below is a listing of each position and the meanings ascribed
thereto.
It should be noted that these are global commands that control the printing of reports,
and, in that context, override the individual test definitions. Even if the test has been
set to “Flag Abnormals”, any abnormals that print on a report generated with the
sixth bit set to “F” will not have any abnormal results flagged. If that same report is
re-generated on a different format of patient report, the abnormals will then flag.
(Please note that these can be simultaneously true. The Home report does not flag
abnormals at the same time that the Specimen report does.) The test definition
settings are what will show on the SL screens, however.
220
Position
General Meaning
Specific Designations
1st bit
Overrides red type
color
r = both red and blue abnormals
R = only red abnormals (no blue)
2nd bit
Critical flags
c = flags all abnormal results, inc. critical
C = flags only critical results.
3rd bit
Presence of Notes
n = no notes on results
N = notes can be present
4th bit
Bold font style
b = suppresses bold font
B = allows bold results
5th bit
Controls the presence
of color fonts
c = no color permitted
C = allows color
6th bit
Flags
f = no flags on abnormals
F = flags all abnormal results
If, for instance, you wanted a report in which abnormals were in color but not bold,
you could choose either “rcnbCf” or “RcnbCf” for your results.
After you have made the changes you what to, added what you need and re-arranged
the lines to suit you, select OK, until you are returned to one of the menus.
Prior Values Report
221
This report combines some of the features of a Cumulative Report with a specimen
report. The Current Specimen is printed in a column along the left side of the body
of the report. Then, using the standard Patient Report Results tool, additional
Accessions can be defined. Those subsequent accessions do not print out in their
entirety, but only repeat the results of tests present in the Current Specimen. For
example, if a patient had been getting a full set of Electrolytes every day for a week,
but this time had just a Na and K ordered, the report would show just the results for
those two tests for the current specimen and for all prior specimens as well (unlike
our Cumulative Report which would show all the results on prior values).
To set up this report, you use the Patient Report Results button to place more than
one accession on the report. SchuyLab knows that if there is more than one
accession defined, that the first one is the Current Specimen, and the next is the last
visit and so on. Once this definition is made, a new check box shows up on the
Configure Specimen Report box. This check box is labeled Print Prior Results, and
is defaulted ‘On’.
Go to F8:Tools, Setup, Report Setup, Patient Report, Accession Report, Setup,
Results, Add Column, Result, Result Value
As you can see, we have added another result Value to the bottom of the list. The
result value from the previous will print after the reference ranges of the tests (or to
the right of the report).
There are a few aspects of this new report:
• Notes show only on the Current Specimen, but all specimens will be flagged.
222
•
•
The Heading button can now handle more than one line (necessary in order
to define the column labels for each accession).
If you want a report to exactly repeat the current specimen along the right
side of the paper, remove the check from the Prior Results box (now, we’re
not sure WHY you would want this, but you have the option).
Custom Options in Printing Patient Reports
Formatting and Color. There are tools for formatting Patient Reports and adding
color to them. Go to F8:Tools, Setup, Report Setup, Patient Report, Accession
Report, and Setup.
Select the Groups button. You can specify the font, size, color, justification and
style of the group heading as well as a variety of rules formats, including color, size
etc.
Font
Report font is the default font you are using with your report.
You can also change the fonts to Courier, Sans Serif, Roman
and more. Click on the arrow and scroll down to choose the
font to use.
Size
Default size is the size you are using on your report, or you can
change it to 8, 10, 12, 14 or 16 pt sizes.
Color
Change the color of the report group headings.
Justification
Buttons
Enhancement
You can choose to have the report group headings centered,
right or left justified.
These include Bold, Underscore, Italicized and Expand to fit
223
Buttons
space. Again, this only affects the Group Headings.
Options
Indent characters: will move the group heading left or right
depending to number you place in the box.
Blank Line: Before or After will add a blank line either before of
after the group heading.
Keep groups together: Some of the groups may have many tests
in them (i.e. Urinalysis) and combined with other groups, may
have half of the tests on a second (or third) page. By checking
this box SchuyLab will print this group on the next page.
Rule
You have the option of adding a line to delineate the report
groups. If you use this section, it will override the justification
buttons from above.
Size: What size line would you like to use. You can choose
from .5 pt. to a solid line.
Color: Choose the color of the line from black, red, purple,
blue, etc.
Tab on Left: This will shift the group header to the right and
add a short line on the left side of the group name.
Line: Choose to have a line to accent the heading group.
Choose from either a line at the bottom of the group name, in
the center of the name, at the top or top and bottom.
Next, select the Notes button.
There are now two types of notes, Regular and Priority, each with its own formatting,
font, size, color and style. Set up your default Priority note – you can make it red if
you like, instead of just bold. When you are placing a Note on your patient or result,
224
you can now select between your two default types of Notes. Notes marked with the
Priority flag will print according to the priority format.
Logs
SchuyLab is a wonderful program, but it’s neither omniscient nor telepathic. Errors
will crop up occasionally, despite everything. Most will be data entry errors, pure
and simple: a CBC was ordered on a urine sample, or a patient’s name was
misspelled. Some will be caused by changes made elsewhere in the system: for
instance, a test may be ordered on a specimen but never done, because it didn’t
appear on the worksheet -- because yesterday, that test was edited out of the
worksheet master. Finally, there may be system glitches, such as a device that runs a
test but somehow fails to transmit the result to SchuyLab.
For all these reasons, it’s useful to spend some time every day in data management.
There are four reports, in particular, that make it easy to check on whether the
database includes everything it should: the Accepted Log, the Data Log, the Order
Log, and the Outstanding Orders report.
Accepted Log
The Accepted Log is meant to be printed on a daily basis. This function
prints out all the patient test results that have been accepted since the last time
you printed an Accepted Log or you can specify a date. It’s still important not
to let the results accumulate too long: make it a habit to print the Accepted Log
every day.
To print the Accepted Log:
1. Select F6. Print. SchuyLab displays the Print menu screen.
2. Select Accepted Log. SchuyLab displays a dialog box, asking if you want to
print all accepted orders since the last Accepted Log was printed or you can
set the date. You also have the choice of printing by Accession number or by
Patient name (select Sort By :).
225
3. Select OK. SchuyLab prints the Accepted Log and returns to the Print menu
screen.
4. If you need to change the printing parameters for the Accepted Log, select
Setup. SchuyLab displays Configure Report box.
Queue
In the pull-down box, select the printer queue to be used.
Font
In the pull-down box, select the font for the report (Draft is the
default, and is normally used). Select the desired print size of
10, 12, or 15 CPI (Characters per Inch)
Dashes as
Separators
Check this box if you want a dashed line between entries on the
report.
Print client
number
Check this if you want the client’s ID number for each entry to
be printed. (These are default.)
226
Exclude
Undrawn
Accessions
If your lab uses the Draw List function, you have the option of
excluding any tests or panels that have been ordered, but the
specimens haven’t been drawn yet.
Show Date
Select whether you want the date printed for each specimen to
be the date the specimen was drawn, or the date it was received
by the lab.
Indent
Enter the size of the left margin for the report, in number of
spaces from the left. The default is zero (0) spaces.
When Setup is complete, select OK. SchuyLab returns to the Accepted Log box.
5. Select OK. SchuyLab will now print your log with the changes (if any) you
have specified.
Data Log
Whereas the Accepted Log prints only the accepted tests, Data Log
prints all tests ordered, accepted or not. It prints out all of the patient test
results for the range of accession numbers or a date range you designate.
To print the Data Log:
1. Select F6. Print. SchuyLab displays the Print menu screen.
2. Select Data Log. SchuyLab displays the Data Log box.
227
OR
3. In the Accession Range fields, enter the first and last specimen numbers to
appear on the printout. If these entry fields are left blank, SchuyLab will
prompt you to add a range.
228
In the Date Range fields, enter the date range to appear on the printout. It
can a single date (2/4/04 – 2/4/04) or a range of dates (2/4/04 – 2/8/04). If
these entry fields are left blank, SchuyLab will prompt you to add a range.
All dates can be put in as -n or +n which means that many days in the past or
future, +0 or -0 will translate to today..
4. The Department entry field is optional. If you select the name of a
department (e.g., “CHEM”) from the pull-down list, SchuyLab will print
results only for tests defined as belonging to that department. (Specifying the
department for any given test is done through the Test Definition icon, via
F8. Tools, Setup, and Test Definition.) If the field is left blank, SchuyLab
prints all test results for the given specimen range.
5. If you need to change the printing parameters for the Data Log, select Setup.
SchuyLab displays Configure Report box.
You can then configure this report in the same way the Accepted Log can be
configured.
When Setup is complete, select OK. SchuyLab returns to the Print Data Log
box.
6. Select OK. SchuyLab prints out the Data Log.
Order Log
The Order Log prints out all the tests that have been ordered, exactly as
they were ordered. Individually ordered tests are listed individually; panels are
listed as panels. (That is, if you ordered a CBC on Mr. Tsepesh, the Order Log
would show that a CBC panel had been ordered, not that a WBC, RBC, &c.,
had been ordered.) The Order Log lets you compare the orders received from
physicians and clients with what was actually ordered in the SchuyLab system.
It should be run after any batch of specimens has been entered, for ready
comparison.
Note that, for any given range of specimens, the combined entries in the Outstanding
Tests log and the Accepted Log should exactly match the Order Log. Once ordered
(and therefore in the Order Log), each test should either have been run and accepted,
(which would put it in the Accepted Log) or else still be pending (which would put it
in the Outstanding Tests log). This provides a useful cross-check of the system.
To print the Order Log:
1. Select F6. Print. SchuyLab displays the Print menu screen.
2. Select Order Log. SchuyLab displays the Order Log box.
229
OR
In the Accession Range fields, enter the first and last specimen numbers to
appear on the printout. If these entry fields are left blank, SchuyLab will
prompt you to add a range.
230
In the Date Range fields, enter the date range to appear on the printout. It
can a single date (2/4/04 – 2/4/04) or a range of dates (2/4/04 – 2/8/04). If
these entry fields are left blank, SchuyLab will prompt you to add a range.
All dates can be put in as -n or +n which means that many days in the past or
future, +0 or -0 will translate to today.
3. The Department entry field is left blank, SchuyLab prints all test orders for
the given specimen range.
4. If you need to change the printing parameters for the Order Log, select Setup.
SchuyLab displays Configure Report box.
You can then configure this report in the same way the Accepted Log can be
configured.
5. When Setup is complete, select OK. SchuyLab returns to the Order Log
box.
6. Select OK. SchuyLab prints out the Order Log.
Outstanding Tests
The Outstanding Tests log prints out all of the pending tests -- that is,
tests that have been ordered, but with no results accepted. This log enables you
to keep track of tests which might otherwise ‘slip between the cracks’ and
disappear. This log should be run each day and (except for batched tests,
sendouts, and multi-day microbiology tests) should be sparse. You should know
the rationale for each test appearing on this log.
1. Select F6. Print. SchuyLab displays the Print menu screen.
2. Select Outstanding Tests. SchuyLab displays the Outstanding Tests box.
231
OR
3. For this log, you do not need to enter an accession range or a date range. If
these fields are left blank, SchuyLab will go thru its files and find any and all
tests that have not been resulted and accepted.
Or, in the Accession Range fields, enter the first and last specimen numbers
to appear on the printout.
232
In the Date Range fields, enter the date range to appear on the printout. It
can a single date (2/4/04 – 2/4/04) or a range of dates (2/4/04 – 2/8/04). All
dates can be put in as -n or +n which means that many days in the past or
future, +0 or -0 will translate to today. If these two fields are left empty,
SchuyLab will print all tests that are still pending. We suggest you use this
method so nothing gets forgotten.
4. The Department entry field is optional. If you select the name of a
department (e.g., “CHEM”) from the pull-down list, SchuyLab will print
results only for tests defined as belonging to that department. (Specifying the
department for any given test is done through the Test Definition icon, via
F8. Tools, Setup, and Test Definition.) If the field is left blank, SchuyLab
prints all pending tests for the given specimen range.
5. If you need to change the printing parameters for the Outstanding Tests,
select Setup. SchuyLab displays Configure Report box.
You can then configure this report in the same way the Accepted Log can be
configured.
When Setup is complete, select OK. SchuyLab returns to the Outstanding
Tests box.
233
6. Select OK. SchuyLab prints out the Outstanding Tests log.
Error Logs
Nothing in this life is perfect (although we strive for it). And there may be times
when, despite everything we try to do if a problem occurs with your SchuyLab, we
just can’t find the solution to the problem. In that case, there is a report we will ask
you to print out and fax to us. That can be found under F6, Print, Miscellaneous
Reports, RPTERROR.
This is a cumulative report, that is, it keeps track of everything ever done in
SchuyLab and is NOT deleted when you run a Cleanup. If you click on the Setup
button, a configure box opens. If the box for “Delete after printing” is NOT checked,
every time you need to print out this report, it will bigger and bigger. It is suggested
that this box be checked.
Demographics
Demographic reports are specialized laboratory management reports either predefined or customized to your own needs, to see who is sending what to you and how
your lab is doing. Your SchuyLab system comes with three or four demographics
reports already prepared for you. If you are a manager, you can specify what you
would like printed then turn the every day printing jobs over to a tech. If you are
comfortable with computers, you can also customize the reports to your lab, or use
the default heading setups that SchuyLab has provided.
Demographics Report
234
One report you may consider is the basic patient demographics report, which prints a
report of all patients and their demographics (date of birth, doctor’s name, &c). This
report must have a specified date range or specimen range put in the appropriate
boxes.
Client Demographics
Or perhaps if you would like to see how many patients a local clinic has been sending
you. You can print a report for one client or for all of them. (That is, all the patients
belonging to the St. John Medical Group, for instance.) This report must have a
specified date range or specimen range put in the appropriate boxes
Billing Demographics
235
You can help your billing department by printing a report of all patients and their
demographics, sorted by bill type of patient. (That is, all the Medicare patients, for
instance.) The report is limited to a given date range, specimen range or Bill Type.
Miscellaneous Reports
In this area we can find the Patients Demographics and a variety of other reports you
may have made. The Patients Demographics report deals with a single patient and
lists the accession number, what was ordered and the results of the tests. Any other
reports you create will be found in this area.
Let us look at a demographics report and see how we can make it fit our needs.
Remember, depending on your computer skills, you have the option to use the default
setups we have, or you can change the heading and body of the report.
Select F6, Print.
Select Demographics Report.
236
Select Setup.
SchuyLab displays the Demographics setup box.
Queue
You can choose to always print at your default printer (in this
case our default printer is called PRINTER), to another printer
in the network (if you have a network printer connected) or to
fax the report (again, if you have the SchuyFax module) by
clicking on the arrow to the right and selecting the correct
printer from the list.
Font
Report font is the default font you are using with your report.
You can also change the fonts to Courier, Sans Serif, Roman
and more. Click on the arrow and scroll down to choose the
font to use.
Sequence for
reporting
detail entries:
You can print a report, in numerical order by Accessions,
numerical order by Patient ID or alphabetical order by Patient
Name, that will list the accession number, patient name, tests
ordered, etc, depending on what options you chose.
Separator:
You have a choice of four ways to separate each patient’s
information; Blank Line, dashes, 1 pt. line (rule) or 1 pt. double
237
line (rule).
Print Options:
What patient information do you want in the report?
Summary: (does not contain any individual patient information)
Patient ID, Address:
Other ID, Client:
Drawn, Received, Printed
Etc. Once you have selected the options you want, an assistant
should be able to generate the report for you by entering either
the accession range or the date range.
Heading?:
If you are setting up a customized report, you can add the
headings that you want to use; Free Text, Current date and
time, age number, etc. IF you use the heading area, it will
override the default headings.
Body?:
If you are setting up a customized report, you can add the fields
that you want to use; Patient Name, ID, address, Accession ID,
Doctor Name etc. IF you use the Body area, it will override the
default headings.
Some additional parameters have been added to our Reports, both the pre-defined
reports in F6 Print and the user-defined formats that are created in Setup, Report
Setup, and Reports.
•
•
Selection now includes the new item: Location
Exclude Undrawn is a stated option that limits the report to only those
accessions that have actually been collected. Accessions marked “Draw
Required” will not be included.
Creating a Customized Demographics Report
So, SchuyLab has provided you with four wonderful and informative reports, but as
the manager you want to see what each doctor is passing your way. So what do you
do? OK, let’s create a new demographics report. Just a note, to get into the Setup
area of SchuyLab, you MUST have security clearance. If the Setup button is grayed
out, you do not have proper clearance.
Go to F8:Tools, Setup, Report Setup, Reports, New Report
238
As you can see, we have named our new report DOCTORS, and under Type;, we
have chosen Demographic. This tells SchuyLab what kind of report we are creating.
Select Setup?
This is where we configure our report. What do we want printed? Do you want the
patient’s name, the list of orders, and any charges? We can go with the minimum
and add more details later if you find you want more information.
239
Very important note: under Selection, select Doctor (as this is a doctor’s report).
Otherwise SchuyLab will not know what kind a report you want. Some of the other
selections we can choose from are:
Client
Bill Type
A Client Demographics will print out any information you
need by Client’s name. You can print for an individual
client, or for all of them. This demographic report is already
set up for you.
A Billing Demographics report will print out your patients
by how they are billed. This demographic report is already
set up for you.
Salesrep
This report will print out a report by the sales rep ID in the
Client Record.
Drawn By
This report will print out a report by who’s ID is in the
Drawn By box of each accession.
Location
This report will print out a report by the Location in the
Patient’s Demographics Record.
Single Patient
This report will print the tests ordered and the results for a
single patient, for a specific date or accession range.
Or any
combination of
the above
You can also print a report that is sorted by Client and
Doctor, Client and Bill Type, Client and Drawn by, and
many other combinations.
Now, when you go under F6, Print, Miscellaneous Reports and select DOCTORS,
type in the doctor’s name or ID number and fill in either the Accession Range or the
Date Range.
240
Using the default heading setting, the report we get looks like:
As you can see this doctor has only sent three patients our way in a little over three
months. Perhaps it’s time it re-negotiate the contract?
New Patient Report
Another form of Demographic report is the New Patient Report. This can be used to
print out a list of new patients, in order of accession, for each of the doctors.
Setup
First is setting up what you want printed on the report.
Go to F8:Tools, Setup, Report Setup, Reports, New Report
In the Report List, scroll down until you see a report named NEWPAT. This is the
New Patient’s report and it has already been setup for you, but let’s take a look at it.
241
As you can see, it is set up as the other demographics reports. Now go into Setup…
For this report, we’ve chosen to list the patient name, ID#, address, what was ordered
and a summary of what is ordered.
242
Manually Print Report
Select F6, Print
Select Miscellaneous Report
Select NEWPAT
Insert either the accession or date range for the report and click OK. Here is an
example of what the report will look like.
Automatically Print Report
243
You can have this report print with every new patient instead of a single report of all
new patients for a specific time period . If you go into the Update Client records (F8,
Tools, Doctor Records), you will find a box that you can check to turn this feature on.
Note that it MUST be checked for every client.
Graphic Reports
Graphics reports aren’t just for PSAs anymore. In fact any test that can be resulted
(using numeric results only) can now be graphed. This means that a patient who is
diabetic can have a graph of their Glucose results over the last month, year, or even
multi years. A patient undergoing Chemo or Radiation therapy can have the white or
red blood cell results graphed.
There are two forms of the graphic report. The simplest is the single test graph which
you can print from the F6, Print menu. When you click on the Graphic Report icon,
SchuyLab asks you to enter the patient you are interested in.
OR
you can go to the patient’s file (F2, Patient) and click on the Graphic Report icon
there.
244
Either way, SchuyLab will open the Graphic Report box. Under Report/Test, choose
the test you want to graph.
SchuyLab will then print out a graphic report for that test, for that patient. The
second form of graphic reports is the multi-test graph. In many cases the doctor may
want to see both the PSA and the PAP report in graphic form for his male patients.
There are two rules to remember in creating a multi-test graph.
1. You can only have two different units in a graph. Most of the tests you have
also have units tied to them.
2. You are limited to six tests. Just remember that any more than three or four
tests and the graphs can get difficult to see.
Set Up
Go to F8:Tools, Setup, Report Setup, Reports, New Report
245
Name your report (in this case let us name it CARDIAC and use this as the
description also).
The type of report will be a graphic.
Select Setup?
Queue
This will set the default printer for this report. You have the
option of printing to any printer on your network (if you have
a network).
Font
This will set the font style of your report. The options you
have are:
Draft ( uses a draft font for your report), Courier, Prestige,
246
Script, San Serif, Roman, Bold PS and Orator.
Form
This form will take advantage of your result form headings.
But you must select your report form. If this box is left blank,
SchuyLab will then go to the report heading under F8, Tools,
Setup, Reports, Headings.
Spacing
You can choose between 6 LPI (Lines per inch) or 8LPI.
Maximum
results to
graph
If you leave this number at “0”, SchuyLab will include as
many points as possible. Of course, this also means that if you
have a patient that has been coming in for many years, you
can have many points to look at. If you want to set the
number to a more reasonable (let’s say 20), SchuyLab will
then only graph the last 20 times this (or these) test(s) was
performed.
Graph
Width /
Height
While you can change the width and height of the graph, many
parts of the graph is hard-coded, or unchangeable. If you do
make changes, your graph may not look correct.
+Tests
This is how you add the tests for your graph. There is a limit
of 6 tests maximum.
Left / Right
You can further customize the graph by specifying which test
values are shown where. As you can see in the picture below,
we have set this graph up with the Cholesterol ranges to print
on the left side, the HDL ranges on the right.
247
248
We can also custom the axis’s;
249
Axis Type
A Linear axis is the kind most of us are used to seeing.
The “tick” marks are evenly spaced along the axis, and
the interval between them is constant: e.g., 1, 2, 3, 4, 5, or
5, 10, 15, 20, 25. This is most useful when the results
being plotted fall into a limited range, and you want to
see the tiny details.
A Logarithmic axis still has evenly spaced tick marks, but
instead of each one increasing by an added number (1 or
5, in the above examples), they increase by a multiplied
factor: e.g., 1, 10, 100, 1000, or 1, 30, 100, 300. This is
most useful when the results being plotted fall into a very
large range, and you want to be sure to get them all on
the graph.
A Linear-Logarithmic axis starts out Linear up to some
defined number, and is Logarithmic for values above
that. This is used when you want to see the tiny details
when the results have a low value, but still want the
results on the graph if they’re very high. PSA is like
that: we want the results Linear in the range of 0.0 to 4.0
(for normal patients, or patients being watched for
prostate problems), but Logarithmic for results > 4.0
(and PSA can get really high for cancer patients). The
tick marks along the axis generally look like 0, 1, 2, 3, 4,
10, 30, 100, 300, 1000.
Sequence
250
Axis
Labels
How the axis’s are to be labeled:
Legend Test – the name of the test
Color – if your printer prints in color, what color do you
want it to be.
Labels – With each test you graph, you can also set how
the range is shown. In the above Cholesterol test, the
normal ranges are 0 – 200. Our graph is to show ranges
up to (and exceeding) 350. We don’t need numbers
showing every 10 points, so we have set our labels for
every 50 points. On the other hand, our other test (HDL)
is showing the points between 0 – 120, so in this case we
can set the labels for every 10 points.
Axis Range
Just like setting the normal ranges on a test, you can set
the minimum value (usually “0”) to the maximum value
to be reported. In the case of the above graph, the CHOL
has a reportable range from 0 – 350.
Use this button to place the tests in the reportable order.
+Test(s)
Click on this button to add the test(s) to the graph
After you have set everything up or at least added the tests, select OK. Go to F2,
Patient, select the patient you want the graph on (we’re using Test, Patient) and in the
patient screen select Graphic Report.
To view the report, select “screen” in the Queue and your graphic report looks like:
251
Result Summary Report
This is a Patient Demographics style report that is created in Reports like the other
user-designed Demographics Reports. Its purpose is to print a strictly formatted
report containing only a subset of the tests available at your lab. If you want a report
containing only the Sodiums, or just the A1C and Glucose results, this is the report to
use. Like similar reports, once it is designed and created in the Report utility (which
has a high security clearance), it is routinely generated in F6: Print, Miscellaneous
Reports. Unlike the other reports, the Result Summary will require more setting up.
The new Result Summary report is set up under F8:Tools, Setup, Report Setup,
Reports, New Report. Name the report; fill in the description and under Type:
select RESULT SUMMARY.
252
This report derives from the demographic report, so some of the mechanisms should
be familiar. The main difference is that it allows you to select a subset of tests, and
to have more options to configure your report graphically. As you can see, we have
also named this report and put in a description.
Select OK;
If in the Selection box, Location is selected as the parameter used in sorting the
information, a field appears in the Result Summary box allowing you to specify
253
which location (ER, ICU, etc.). A single location can be selected or all (in the
selected accession/date range).
Many of these sections you have seen in the previous pages. Let us focus on those
areas that haven’t been seen before. To continue setting up the Result Summary,
select the Tests. . . button. You will add the tests for this summary report by
selecting those tests from the list that will pop up. This is a list of all the tests you
have listed in your SchuyLab system. Simply “highlight” the test(s) in the list that
you need for this report and then select OK.
The Result Summary Report takes more setting up than the other reports and there
are only a few default headings to use. There is a default heading presently of your
lab’s name (this is set up in the Headings area under Report Setup), the name of this
report (that is the description) and either Accession Range or Date Range. If this is
all you require, you don’t need to add anything else. If you do want to customize the
report, in the Setup box, there is a HEADING block, which could contain such
254
additional information as your lab’s name and address. Options you can add in the
heading are:
Text
Add a comment about the report, or anything else you
may want (The lab’s name, address, etc).
Current Date / Time
Prints the current date and time of the report
Page Number
Prints the page number
Report Status
Prelim (if any results are still pending) or Final will be
printed on report.
Duplicate
Duplicate will be printed if this is a duplicate of the
original report.
The PATIENT block is no different than you have seen in SchuyLab’s other report
utilities. You can print out your own comment line, any and all patient information,
the client’s information, primary doctor and more (see previous section). The
PATIENT block can be configured separate from the RESULT block, although
patient information can be used in the RESULT block also. Under Print Option if
you put a check mark in the Combine Patients box, this will allow the PATIENT
block to be omitted if multiple results for the same patient are present.
The RESULT block is similar to the Results block under Patient Results Form, but
has a new feature – Index:. You will see a similar box when you set up any of the
RESULTS (High, Normal, etc) in this report. How this works is you can match the
Glycohemoglobin test (for example) to the Glycohemoglobin result by specifying
which result go to which test. You will still need to specify the test add, but the
result printed will be linked to that test.
255
Select Result?
Select Add Line
Select Add Column
Select Test and then Test Name. The Index box should contain the name or code of
the first test you want printed.
Select OK
Select Add Column
Select Result and then Result Value. The Index box should contain the name or
code of the first test you want printed.
Repeat the above for as many tests you want the summary to print.
Two final areas we need to look at; Print Options and Layout Test By:
Print Options
This will customize your report yet further, what is printed, how it is printed.
Size
You can print at either 10 or 12pt.
Separator:
You can separate the patients with a blank line, dashes, a
single line or a double line.
Abnormal Results
only
Will print only the abnormals.
Summary Only
(must also check Statistics) As is says – summary only. This
will not list the header, patients or the results, just totals.
Statistics
This can be used alone. It will print out the patient and the
results
Separate Pages
This will print a separate page for each patient.
Combine Patients
If a patient has more than one accession, it will be combines
so that patient is only printed once. To ensure that all the
accession for one patient is listed, under “Sequence for
Reporting . . .” choose Patient Name or Patient ID. All the
results will then be printed under the patient’s name.
Keep Accessions
Together
This will keep all accession together much like “Keep
groups together” in the result form.
256
Layout Test By:
There are two ways of handling the tests: You can lay them out (or print them) by test
name (default) or by a sequence number. If you choose sequence, the column box
will have #1, #2, #3 etc instead of the test names. This may be necessary for
restricted tests such as HIV or HEPATITIS. Also, and more importantly, it will pack
the tests present for a given accession so that #3 is the third test, in list sequence, that
is actually present. If you use this, it will put the empty boxes at the back of the list.
Turn Around Time Report
The Turn Around Time (TAT) is an interval between two designated points in the
processing of a test. It is used in a clinical setting to measure the efficiency of the
laboratory. The actual time value of this time interval is compared to a target time
that is placed on the individual test or globally set in SchuyLab, and a report is
generated to show how frequently this target is achieved. The definition of the
designated beginning and ending points is fluid, and may change within a facility as
well as between facilities. It is generally used by a laboratory for two purposes:
1. The lab manager uses this report to troubleshoot the internal processes of the
laboratory, generally the 'analytical' phase of testing. She compiles statistics on the
performance of tests and looks for bottlenecks and processing problems.
2. Someone outside the lab, a doctor or administrator, asks for a TAT report on a
specific test or for a particular department. Usually this report includes pre- and postanalytical time, and can even be a 'brain-to-brain' report that includes intangibles
such as the time it took for a doctor to get around to reading the results.
SchuyLab's TAT is setup so that it can be used for either of these purposes (as far as
possible; we don't have the telepathy module written yet). Our default setup is to the
analytical perspective, and it is best that the report be initially configured in that
manner. SchuyLab provides a way of adding a 'fudge factor' for pre- and postanalytical time that is then added to the basic analytical TAT report.
Let me begin with a description of how to set up the TAT report for the analytical of
laboratory testing. I will then show you how to add on time for the other phases.
You may, of course, elect to include either or both the pre- and post- analytical
phases in your default setup – SchuyLab will let you do this – but once you
understand how the fields are used, you can proceed to customize it yourself.
Setup of TAT
The Turn Around Time report is first constructed in the Reports icon (F8, Tools
->Setup -> Report Setup -> Reports). Select "New Report" and pull down the "Type"
list to the new 'Turnaround' format. Please note: You can create several versions of
257
the TAT report, each for its own purpose and with its own parameters. As with any
report created in this Reports icon, the TAT report is accessed for daily use through
the Miscellaneous Reports icon in F6, Print.
Select Setup and you will see a unique set of options for the TAT report.
The "Queue" and "Font" you are familiar with from other SchuyLab reports; they
may be left on 'default' or set for your lab's needs.
258
The "Selection" dropdown list enables you to look at just a subset of this report. For
instance, you could run the TAT report for the accessions drawn by a particular
phlebotomist, or for only the ER location, or just for Dr. Brown's patients.
The "Sequence for detail entries" dropdown box allows you some 'fine tuning' as to
whether the entries under your primary sort criteria are listed in accession order, by
patient ID, or alphabetically by patient name.
The "Separator" option allows some graphic formatting for how your report appears.
The heart of the TAT report are the fields that are marked "Start when" "End when"
and "Default TAT (min)". There are many points at which you could begin
measuring a turn around time, only some of which are available to SchuyLab. Most
of the entries in the "Start…" and "End…" drop-down lists are self explanatory.
Select an entry for each of these fields to define the limits of your TAT report.
There is one entry labeled 'Available' in the "Start when" list that is not selfexplanatory: There is no explicit time value in SchuyLab, or in medical literature per
se, that defines the 'Available' time; this is a concept unique to SchuyLab – but one
that you may find useful. If you have calculated turn around times in the past, you
are aware that the normal workflow of the laboratory is "ordered -> drawn ->
received -> processed -> resulted". There are situations, however, where this
sequence is not accurate. An add-on test is drawn and received before it is ordered,
for example and an order placed through an EMR or HIS is received by the LIS, then
a phlebotomist is sent to draw it. How do you then use any of these criteria to mark
the starting point of your TAT? That's where 'Available' comes in. 'Available' means
that the specimen has been ordered and drawn and received in the lab. In other
words, all of the criteria have been met that are prerequisites for actually running the
test. If you are using the TAT to measure the analytical phase of laboratory work,
then 'Available' marks the beginning of that phase.
The "Default TAT…" field is a good field to use initially, if you don't know what
your TAT's are, and are trying to establish a reasonable TAT for your tests. It allows
you to put one time into SchuyLab, without having to enter/ change the times in of
the individual tests. Obviously, this field will be the dominant field in the TAT for a
reference laboratory, where their promotional literature states something to the effect
that, "We guarantee that 80% of our tests will be reported within 24 hrs of their
receipt in our lab." In that case, there is no real need to distinguish among the
various tests – they just need to be done in one day. The entry in this field must be in
minutes. This field is used for calculation only if there is no entry placed in the TAT
field on an individual test (more on that later).
The "Additional Time…" field is another Schuyler House innovation. You have just
set up the TAT's on 200 individual tests to mark the analytical phase of testing. You
go to a meeting, and a doctor turns to you and says, "I'd be curious to see what the
turn around time is from the time of ordering on the charts." Do you have to go back
into SchuyLab and retype all of those individual TAT's ? No. You think to yourself,
"Hmm. The interval between the time the doctor orders a test and the time the
259
specimen gets to the lab is going to be about the same for all tests." You talk to some
of the nurses on the wards and decide that it is about 40 minutes. You put "40" into
the "Additional Time" field and SchuyLab happily adds 40 minutes to all of the times
you have put in the individual tests (or in the default). You can then run your report
for the curious doctor.
Setup TAT on individual tests:
On each individual test, the TAT (once again, in minutes) can be entered in the
appropriate field. From then on, SchuyLab uses that individual time for the TAT of
that test, rather than the default time that is entered in the setup of the report.
Daily Use
As with all reports created in the Reports icon, the TAT report(s) appear in the list
under the Miscellaneous Reports.
260
Select that report from the list and enter the range of dates or accession numbers for
your report. You may have an additional field, depending on the criteria by which
you are sorting the report (in the "Selection" list mentioned above). In the example
below, I can enter the initials of a particular phlebotomist.
Selecting the Setup button takes you to the setup menu shown above, and allows you
to modify the report accordingly.
To run this report on a daily basis, simply enter the appropriate range and criteria and
select "OK".
Draw List
261
The Draw List feature has been a part of SchuyLab for many years now, but not
many places make use of it or are even aware of its capabilities. What does the Draw
List do?
In Hospitals, Medical Groups, and even some Physician Offices, a Patient may be
admitted for a prolonged stay. The Draw List allows the staff to Accession a group
of Specimens, without actually drawing the sample, and dating them for the day after
(or days after, or hours after) the time they were entered in SchuyLab. You can then
print a list of every Patient who needs to have blood drawn, as well as what tests they
are going to have performed on them.
For instance, at the Example Medical Group, George Harris has been admitted to the
Critical Care Ward following a heart attack. After surgery, the doctor wants to
monitor his stability and has several Lab tests performed on the patient. Even though
the blood hasn’t been collected yet, the lab staff orders the specimen and marks it to
be drawn that night. When the Lab Staff arrive that evening, they print out a copy of
the Draw List for each ward, so they know which patients need to have blood drawn
and what type of samples they are going to draw. In addition, their barcode printer
prints out a series of labels for each specimen on their list, so as they are collecting,
they can label the samples immediately. When they return to the Lab, they process
the samples, and prepare them to be run.
So how do you make use of this tool?
Well, first make sure that your lab is configured for Undrawn Accessions (See
Optional Processes in Sec.8, Managerial Functions to set this up).
When you are ordering tests for a sample that has not been collected, you will follow
a slightly different procedure than usual. Once you have reached the Patient
Processing screen, click Order Tests.
262
On the Input Specimen window, you will now see a 'Draw required' checkbox. If this
is a sample that's to be drawn at a future time, place a check in this box. Under the
'Draw Date and Time' fields, enter the date and time the specimen should be
collected. Under the 'Specimen Received' field, you can list what samples are to be
drawn. This will make the phlebotomist’s job easier. Click OK and order the tests as
you normally would.
• The ‘Recv Date and Time’ fields may not be set to be prior to the ‘Draw
Date and Time’. You can, however, leave the date and time blank for a
Draw required accession, as well as the 'By' field.
Checking the 'Draw required' checkbox tells SchuyLab to put this specimen on the
Draw List. However, as long as 'Draw required' is checked on this specimen, it will
not be considered an active speciment: it won't print on your Worksheets (because it
hasn’t even been collected yet), the order won't transmit across an instrument
interface, etc. See Processing Draw List Specimens below for how to finish
accessioning these specimens.
Printing Your Draw List
Go to
F6: Print
Draw List
263
You will now see the Print Draw List window. You can sort the information by
four different criteria.
Client
Allows you to pull up any Draw Required sample by Client’s
name (i.e. Goodwill Retirement Home).
Accession
Range
Allows you to pull up any Draw Required sample with in that
specimen number range.
Date Range
Will print a list of all Draw Required specimen who’s Draw
Date falls during that time frame.
Location
Range
Allows you to select all Draw Required specimens whose
Location falls alphabetically between the entered Locations.
Locations are defined in F8, Tools; Report Setup; Location.
Locations are setup by your lab and defined for your own use.
For example, if you type in CRITIC and ONC (and you have
these locations set up as such), this will print a list of every
Draw Required specimen from CRITIC (Critical Ward), ER
(Emergency Room), GERI (Geriatric Ward), and ONC
(Oncology Group). However, if you leave all of these fields
blank, it will print out every Draw Required specimen that is
in your system
264
As an example, let us print a list of all the Draw Required samples from the Critical
Ward that are scheduled to be drawn on 3/25/2004. Our date range is 032504 to
032504 and the location is CRITIC to CRITIC. We can enter “2” in the Labels:
field, which will print out 2 labels for every specimen on that Draw List (if you have
a barcode printer). That way the phlebotomist can mark each specimen as they
collect it. Once you click OK, a confirmation window will appear:
Click Yes, and your Draw List Report and its barcodes will begin to print.
On the Print Draw List screen, you will also notice the Setup… button. This allows
you to further configure your report to fit your needs.
Queue:
Allows you to change the default printer for this report
265
Font:
Allows you to change the standard font type used
Sort By:
Allows you to organize your samples, either grouping all the
draws from one Location together, or listing them by their
entered Draw Date and Time.
List Orders:
Defines whether a list of the Patient’s orders will appear and
in what format it will be displayed.
None will just print a list of the demographics information
for the accession.
By Code will also include a list of the Order Codes. By Name
will print the Order Name.
By All will print the Order Code, Name, and Full
Description of each procedure.
Locations on
Separate Pages
Will divide all the orders for each location (as you’ve set
them up), on their own page. This option can be used to
easily print out all the Draw Lists for different Units at the
same time.
Dashes as
Accession
Separators
Will place a line of dashes between each specimen, making
the report easier to read.
Print Patient
Notes
Will also include any Notes attached to the Patient.
Print Accession
Notes
Will include any Notes attached to the Specimen.
The Heading? and Body? Buttons can be used to further customize the
demographics information of your Draw List.
Processing Draw List Specimens
Once you've collected your samples from your Draw List, you will need to process
them in SchuyLab. This is a fairly simple task, but is necessary to help keep your
system running quick and efficiently.
First, you will need to look up the undrawn specimens in SchuyLab. The simplest
method for doing this is to select F3: Specimen and type in the Specimen ID number
(although you can also select List Active, or look up the Patient through F2:
Patient). Once you have reached the Patient Processing screen, click Change Spec.
info.
266
Under the Change Accession window, you will want to update the Draw Date and
Time so they accurately reflect when the sample was collected. Also, you will need
to remove the check mark from Draw Required. This will allow the specimen to
appear on your Worksheets. Click Ok, and repeat the process for the next specimen.
• If the ‘Recv Date and Time’ fields had been left blank when the specimen
was Accessioned, unchecking the 'Draw required’ checkbox will set those
fields to the current date and time. Likewise, if the 'By' field had been left
blank, unchecking the 'Draw required' checkbox will insert the current user's
initials into that field. In other words, when you clear the 'Draw required'
checkbox, SchuyLab records that fact.
On occasion, the phlebotomist will run across a patient on the Draw List from whom
they are unable to collect the samples. This can happen for a wide variety of reasons:
the patient is uncooperative; they have checked out; they are no longer at the
Location listed on the Draw List Report; etc. In this instance, they still need to be
processed in SchuyLab. This is very important as leaving large quantities of
unresulted specimens in your system will dramatically slow down building your
Worksheets and other standard SchuyLab functions. There are several ways you can
handle this.
The easiest method is to simply delete that specimen out of your system. To do this,
you will need to look up the sample as described above and you must have the
security clearance. From the Patient Processing screen, you then click Delete
Specimen. The message, “Specimen 00000006 has tests! Delete it anyway?” will
appear. Click Yes and the sample will be deleted.
267
However, this option can cause potential problems when the Doctor calls the next
day to find out what happened with George Harris’ results, and the lab no longer has
any record of the tests having been ordered.
Another option that would amend this issue would be to keep the specimen number
in your system, delete the ordered tests and attach a note stating “Unable to collect
sample. No results to be reported.” or something similar. Note Codes or Remark
Codes can be configured to make this very easy (See Sec. 8, Managerial Functions to
find out how to set these up). Once the sample is annotated, click Ok.
You will want to remove the orders from this specimen (this is the most important
part of processing the Accessions you were unable to collect). You can do this by
clicking Order Tests and unordering all the procedures, or you can go into Enter
Results and enter QNS for each test. QNS is a value that can be entered for any test,
but also prevents the procedure from being billed automatically. The first option
would not print a copy of the report automatically. The second option would print
out the report with the results listed as QNS either automatically or when you do your
Batch Print.
Printer Setup
Printer Setup is hardware-specific. Everything else that you’ve dealt
with so far has modified your LIS as a whole. If you set up a test while you were
sitting at the PC in Hematology, when you went into Chemistry, the test was
there. If you changed the date on the server, made a worksheet, or entered a
new lot number of QC, your action applied to the entire system. Printer Setup
applies to the PC you are sitting at, and the printer connected to it.
In general, you shouldn’t have to change Printer Setup unless you install a new
printer.
To Access the Setup
Select F8. Tools.
Select Printer Setup.
SchuyLab displays the Define Windows Printers box.
268
To Select a Printer Model
The box above contains all the printer models compatible with SchuyLab and that
have been installed in the Windows program of your computer. Select the name of
your printer model (i.e. HP DeskJet 970Cxi) by clinking on it with your curser.
The selected model name appears in the Update Windows Printer box. Select the
correct print queue for the station the printer is attached to, such as “Printer” and
select OK. This is now the default printer for this SchuyLab station and a green dot
will appear next to the printer name.
To Change the Current Queue
If yours is a single station, this queue should be set to PRINTER.
If your system is on a network, you may have as many printers (and printing queues)
as you have workstations to support them. Each printer is given its own queue; each
printer is driven by its own workstation. The most common setup involves two
printing queues: PATIENT, for patient reports (often on pre-printed forms), and
269
PRINTER, for all the other print jobs (e.g., worksheets, logs, and other internal
reports).
On the workstation attached to the printer used for patient reports, the queue in the
Update Windows Printer box should be set to PATIENT. On the workstation
attached to the printer used for other print jobs, the queue in the Update Windows
Printer box should be set to PRINTER.
When the current station is set to the appropriate queue, select OK.
Waiting: To see a list of the print jobs pending on this printer (or, more precisely,
this printing queue), select Waiting. SchuyLab displays the Print Control box.
As with the Print Control icon in the Printing menu screen, this box allows you to
view, move, or delete the print jobs on this printing queue. (If you have this many
print jobs pending, you’ve probably got something wrong with your printing system.
See the next item.) When you’re done with the Print Control box, select OK.
Suspend Further Print: This doesn’t act to suspend a printing job. Rather, if a
printing job is suspended for some other reason (e.g., the printer has run out of
paper), SchuyLab puts a check mark in this box.
270
Once printing has been suspended on a queue, no further jobs on that queue will print
until you remove the “suspend” flag. To do this, remove the check mark by clicking
it with the mouse, then select Ok. The station will begin to print the pending items
that were seen through the Waiting button.
Report Queues
As mentioned above, SchuyLab’s printing functions are based on printing queues:
holding areas for print jobs, each queue assigned to a specific printer. If your system
has multiple printers (including remote printers and faxes), then you will need to
define report queues to manage them.
To define or update printing queues:
From the Report Setup menu screen, select Report Queues.
SchuyLab displays the Report Queue List box.
271
To Create a New Report Queue
1. Select New Queue. SchuyLab displays the Input Report Queue box.
2. In the Name field, type the name of the new queue (up to eight characters).
The name could be based on the physical location of the printer serving that
queue (particularly for sites with Remote Printing or Faxing), or it could be
based on the type of report done through that queue (e.g., PATIENT,
BILLING, &c).
3. In the Description field, type a more complete description of the printer
queue.
4. Select OK. SchuyLab returns you to the Report Location List box.
5. To add another heading, repeat the above steps. When you are finished,
select Done.
To Update a Report Queue
1. From the Report Queue List box, select the queue you wish to update.
SchuyLab displays the Update Report Queue box.
272
2.
3.
4.
5.
Make the appropriate changes to the fields.
If you wish to delete the queue entirely, select Delete. Otherwise.....
Select OK. SchuyLab returns you to the Report Queue List box.
To update another location, repeat the above steps. When you are finished,
select Done.
273
Sec. 8 - 6Managerial Functions
Security in SchuyLab
More and more today, it is important to know who has ordered what tests for a
patient, who resulted and accepted the test results and who may have deleted or
changed a test that was ordered. It is even more important that only those authorized
to see patient information can access it, especially through your computer and
through SchuyLab.
SchuyLab is designed so that classes can be setup to only perform certain jobs, access
only certain information or make changes in the setup of SchuyLab. These classes
are then tied to the lab technician, doctor, nurse or other individual that may use
SchuyLab by their log on information.
Set Up
Select F8. Tools.
Select Security Levels.
You then have two choices;
class setup first.
Operator and
Class. Let’s look at the
The first box that pops up is Select Class. In the box under Class Name, you can type
in the class name (i.e. MANAGER, NURSE, TECH, ETC.) then select Ok, or
select the list button to show the list of classes that are already in your list.
274
By clicking on one of the classes (i.e. TECH), we can see what that class is able to
access.
By checking the various boxes, we can set the security level for each tech, class of
tech (can they accept results? Do you want them to modify tests and panels, etc?) or
even the doctors and nurses (view results only?). One thing to know, any Lab staff
(techs, manager, processors, etc.) should have the box labeled “Lab Staff” checked.
By clicking on the box labeled “List Operator” we can see just who the TECHs are.
275
Adding a New Operator
There are two different ways to add a person to the security screen. The most
common way is through the Operator button.
Select F8. Tools.
Select Security Levels.
Select Operator
In the Select Operator box, we can enter the operator’s ID (an ID is up to 4
characters) or select List. When we select List, we see a list of the people who
already have a security level. To enter a new person, select New Operator.
Id
276
Your Id is something to identify you on any reports that may
be looked at. This can be up to 4 characters, alpha-numeric
only.
Password
This can be up to 8 characters, alpha-numeric only and only
something you (and possibly the manager of the lab) will
know. You do not have to change your password unless you
want to (or you forget it).
Class
This is the class or level of security you have
Facility
This is used for Multi-Facility sites to limit
Which patient information you can see.
Last, First name
So just who is this person signed in as “XXX” ?
Telephone
Should something happen and the manager need to contact
you.
Note Pad
Works the same as all the others, although this should be a
note about this employee, such as, “can’t work 3rd Friday of
the month”.
When you have filled in all the fields, select OK and SchuyLab will ask you to verify
your password. If you enter it in correctly, you are in the system. If you don’t enter
it correctly, SchuyLab will ask you to verify it again (you’d be surprised how many
people can forget it so quickly). If you put in the ID first, the above box will appear
and you can continue filling in the boxes. When you select OK and SchuyLab will
ask you to verify your password.
Changing your password
SchuyLab now has the capability of generating new passwords without having to
delete the Operator. Now, any person who presently has a password in SchuyLab
can change their own.
At the sign in screen, sign in as you usually do using your old password.
277
Select OK;
Select F8, Tools;
Select Security Levels;
If you do not have the security level to go into this section, a box will pop up
allowing you to change your password.
In the password box, type in your new password and select OK. SchuyLab will ask
you to verify your password (just like when you first set up your password)
278
After your select OK again, you can continue to use SchuyLab, there is no need to
sign in again. Just remember the next time you do sign in to SchuyLab to use your
new password.
The Online Instrument Interface
The SchuyLab system will be ready to use when installation is complete. Part of the
installation process involves configuring SchuyLab’s device interface: the portion of
the program that reads the data coming from the lab instrument and translates it to a
readable format on SchuyLab. For normal operation, you should never need to
change the device interface. But instrument manufacturers do change their products,
and it may someday be important for you to understand the device interface and how
it works.
Let’s pretend, for the moment, that you’ve gotten a new CBC analyzer and you’ve
just attached it to your SchuyLab system. If you were to run a sample, and transmit
the results to SchuyLab, they’d appear in the F4. Devices screen looking something
like this:
279
The test codes are as they have been transmitted from the instrument. SchuyLab
doesn’t recognize any of them, so it’s appended a question mark to each test code.
(That is, the CBC machine transmitted “WBC”, and SchuyLab displays it as
“WBC?” to show that it’s confused.) Under these conditions, it’s impossible to
match the test results to a specific patient, or accept the values.
SchuyLab uses a list of aliases for each online instrument -- essentially a translation
table -- to convert the transmitted test codes into SchuyLab-defined test codes. This
list is generated through the Device Setup icon.
Even if the transmitted test codes are the same as SchuyLab’s codes (in the example
above, the WBC test has the same code on the instrument as in SchuyLab), the alias
has to be established.
Configuring the Device Interface
Select F8. Tools.
Select Set-Up.
Select Device Setup.
SchuyLab displays the Update Device Tests box.
280
The Update Device Tests box lists all the devices interfaced with your SchuyLab
system. Click the mouse on the one you want to work on. SchuyLab displays the
Update [Instrument] Test List box.
The Update [Instrument] Test List box lists all the tests for which you will need to set
up aliases. This list is made when you run either a QC for this instrument, or a
patient’s specimen. To set up the tests, select one of the tests (we will select the
WBC) and the following box opens;
281
Instrument
Name
This is the name of the test as it is sent over from the
instrument.
SchuyLab
This is the name of test as it appears in the SchuyLab test list.
It may match or be different (i.e. CREA and CREAT or WBC
and WBC).
Values
With some instruments, the results sent over may be different
than you wish reported.
For example, in some UA
instruments, they will send over ++++ and you may want it to
print out as 4+.
Select the Values button and click on the Add button. In the
above example you would add “++++” in the Device Text
section and “4+” under the Value section. Continuing adding
all the values you need for that specific test.
Flags
282
These would be flags that the instrument sends over with a
result. You can set up these flags with the appropriate
message or to be ignored. The user’s manual for your
instrument can tell you what these flags mean. There are two
places to set the flags. As in the above WBC box, these flags
would be test specific
Or if you select the flag button on the first box of the test
translation table, these are flags common to all of the tests
done by this instrument.
Do not run on
primary tubes
There are some tests (such as HDL) that can not be run with
the other test. In that case, you will need to check this box.
Automatically
order if
performed
More and more newer instruments run a variety of test
automatically. If there was anything to report, the instrument
would then send over the results. When this box is checked, if
these tests are reported out, they will be ordered.
Continue aliasing all the tests you want to result out. Many times there will be tests
that you don’t report out or the instrument may send over as part of it’s
programming. These tests will show up every time you run a specimen and although
you can just ignore them, let’s fix it so they never show up again. In Hematology,
most of the time you can ignore PDW, but your instrument will run it and report the
result. So in the Update [Instrument] Test List box, select the PDW test.
283
As you can see, under the SchuyLab box, we have typed in “IGNORE”. This tells
SchuyLab to ignore this test. Now if we were now to return to F4. Devices and select
the icon for this CBC analyzer, the screen would look like this:
The tests that have been entered through Device Setup no longer have question marks
appended. Instead, they have the check boxes that characterize normal operation.
Those tests could now be accepted. When all the tests performed by a given
instrument have aliases defined through the Device Setup icon, the instrument
interface has been configured.
You can also add to the list without running any specimens or QC by selecting the
Add button. SchuyLab will display the Add Test box.
284
1. In the [Instrument] field, type in the test code exactly as it’s sent from the
instrument. (If you don’t remember what that is, go back to the F4. Devices
screen and select the appropriate instrument icon. SchuyLab will show the
test code used by the device, with a question mark added. Be sure not to
include the question mark when typing the test code into the Add Test box!)
2. In the SchuyLab field, pull down the list of SchuyLab tests and select the
correct test code or type “IGNORE” if you don’t want the test to show. (If
the SchuyLab test code is identical to the entry in the Device field, you can
omit this step; SchuyLab will fill in the field automatically when you select
OK.)
3. When done, select OK. SchuyLab returns to the Update [Instrument] Test
List box.
4. Select the Add button to add another test to the list; repeat steps 1-3 above.
5. When you’ve added all the tests performed by that instrument, the Update
[Instrument] Test List box will look something like this:
(We’ve deliberately entered only a few of the tests performed by this CBC
analyzer, for purposes of illustration.)
6. Normally, you won’t need to worry about the sequence of the tests in the
Update [Instrument] Test List box. For most instruments, each test from the
instrument will correspond to a single test on SchuyLab, and vice versa. In
some special cases, though, you may need to put the tests in a particular
sequence. (For instance, your instrument may accept a test labeled “HDL”,
but transmit results as “HDL2” -- both of which correspond to the test code
“HDL” in SchuyLab. In that case, the HDL2 translation line must come last
on the list.) To re-sequence the tests, select the Sequence button. SchuyLab
displays the Test Sequence box. Use the mouse to select the test you want to
285
move, then click on the spot on the list where you want it to be. When the
test list is satisfactorily sequenced, select Done.
7. When the list is ready, select OK. SchuyLab returns to the Update Device
Tests box.
Select Done.
Non-numeric Test Values
The above procedure suffices for most instruments, whose test results are simple
numbers (“5.0”, “10.32”, &c.). Some test results are not simple numbers, however,
but words or phrases (for instance, “Yellow”, “1+”, or “10-20”). Alternatively, you
may want SchuyLab to translate the test result from the format the instrument uses to
the format you use -- say, when the instrument says “+++” but you want the result to
be “3+” or “Moderate”. In either case, a few more steps with the Device Setup icon
are necessary.
Let’s take the case of a urinalysis instrument. Before the alias list is built in Device
Setup, the test results sent from the instrument would look something like this:
As in our example above, with the CBC analyzer, the test codes are unrecognized by
SchuyLab, and thus have question marks appended. Now we go to F8. Tools, SetUp, and Device Setup to update the instrument test list. When we’re done, the
Update [Instrument] Test List box looks something like this:
286
With the alias list translating the device’s test codes to SchuyLab’s test codes, let us
return to F4. Devices and take another look at the results.
287
Now, for the tests we’d entered in the Device Setup table, the question marks are
gone and the check boxes are in place. But now the test value for the U_GLU test
(among others) has a question mark!
The reason is that, although SchuyLab has been instructed to translate the test codes
it receives from the instrument; it hasn’t yet been instructed to translate the test
values it receives. And in this particular case, the test values defined for U_GLU
don’t include “100”.
Configure the Test Values Received from an
Online Instrument
1. Select F8. Tools.
2. Select Set-Up.
3. Select Device Setup. SchuyLab displays the Update Device Tests box.
Click the mouse on the instrument you want to work on. SchuyLab displays
the Update [Instrument] Test List box.
4. Select the test whose values need translating. SchuyLab displays the Update
Test box.
5. Select the Values button. SchuyLab displays the Values for [Test] box.
288
This is the alias table for the values for this particular test. It translates the
values as sent by the instrument into the values defined by SchuyLab for that
test. (If the values sent by the instrument are identical to those defined in
SchuyLab, it may not be necessary to set up a translation table; it will vary
between instruments. It’s still a good idea, though.)
6. To add a value to the table, select Add. SchuyLab displays the Add Value
box.
7. In the Device Text: field, type in the test value exactly as it’s sent from the
instrument. (If you don’t remember what that is, go back to the F4. Devices
screen and select the appropriate instrument icon. SchuyLab will show the
test value used by the device, with a question mark added. Be sure not to
include the question mark when typing the test value into the Add Value
box!)
8. In the Value field, pull down the list of values defined for that test, and select
the one you wish to be equivalent to the value sent from the device. (In the
illustrated example, the urinalysis device sends “100”. The values defined
for U_GLU don’t include “100” -- it’s not a numeric test -- but do include
“1+”. We choose that to equate to “100”.) Select OK to return to the Values
for [Test] box.
9. To add another value, repeat steps 6 - 8. When done, select OK. When you
have added all the test values, the box will look like:
289
10. To add values to another test, repeat steps 4 - 9. When done, select OK.
11. Select OK to leave the Update [Instrument] Test List.
Now, when we return to F4. Devices and look at the urinalysis results, they look
something like this:
290
Now the value for U_GLU shows no question mark, and is in the format defined in
SchuyLab. It can be accepted in the usual manner.
Parameter ID Numbers
SchuyLab has a number of automatic functions that work more or less in the
background; you should seldom notice they’re even there. But each one is
configurable by your lab, in case you need to change one as your workload changes.
The configuration of these system functions is done through the Parameter ID
Definition icon.
To Change the Parameter Settings for the System
Functions
Select F8. Tools.
Select Set-Up.
Select Parameter ID Definition.
SchuyLab displays the System Parameters menu screen.
Patient ID Numbers
Each patient in a laboratory environment must be uniquely identified. As there’s
nothing to prevent two people from having the same name, the uniqueness of each
291
patient is guaranteed by associating a number with that individual. This is the patient
ID number. The number may be the patient’s Social Security Number, hospital file
number, or a number generated specifically for your lab. SchuyLab is capable of
generating its own patient ID numbers, of synchronizing with a hospital / office /
accounting system to accept their numbers, or of letting you manually enter the
patient ID number when you enter the patient into the system. The following
protocol tells you how to set the type of number you wish (i.e. SSN format: 123-456789, vs. straight numeric: 12345), the number of digits it has, and the starting point
of the sequence.
1. From the System Parameters menu screen, select Patient.
displays the Patient ID Definition box.
SchuyLab
2. Fill in the fields as follows:
Auto Generate?
Tells SchuyLab whether or not to automatically generate
patient ID numbers as each patient is entered into the
system. Select “Yes” or “No” as desired.
Prior Number
If you selected “Yes” for Auto generation, set this number
of up to 9 digits to control where the auto generated
numbering begins. For example, if you wish your
numbering to begin at “1001”, set this number to “1000”.
292
Format
Choose one of the four selections available here to
determine the types of characters which may appear in the
patient ID number. (Numbers only, numbers and letters,
numbers and dashes, any character.)
3. When completed, select OK.
Patient ID Quick List
To set or change the patient ID number
1. Select F8. Tools. SchuyLab displays the Tools menu.
2. Select Set-Up. SchuyLab displays the Set-up menu.
3. Select Parameter ID Definition. SchuyLab displays the Parameter ID menu.
4. Select Patient.
The Specimen ID number
Each specimen in a laboratory environment must be uniquely identified by its
accession number, also called the specimen ID number. (Additionally, each
specimen must be linked to a patient identifier, date and time of draw, and the
identity of person who drew the specimen. But the accession number is assigned to
that specimen and that specimen only.) SchuyLab is capable of generating its own
specimen ID number, or of letting you manually enter the specimen ID number when
you enter the specimen into the system. The following protocol tells you how to set
the type of number you wish (i.e. Year and date and number, Julian date and number,
straight numeric), the number of digits it has, and the starting point of the sequence.
1. From the System Parameters menu screen, select Accession.
displays the Specimen ID Definition box.
SchuyLab
293
2. Fill in the various fields as follows
Auto Generate?
Tells SchuyLab whether or not to automatically generate
specimen ID numbers as each specimen is entered into the
system. Select “Yes” or “No” as desired.
Prior Number:
If you selected “Yes”, set this number of up to 9 digits to
control where the auto generated numbering begins. For
example, if you wish your numbering to begin at “1001”, set
this number to “1000”.
‘n’ digits
Enter a number between 1 and 9 to control the number of
digits a specimen ID will have, whether auto generated or
manually entered.
294
Format
Choose one of the twelve selections available here to
determine the type of specimen ID number which will be auto
generated. The descriptions of the formats use the following
elements:
YY Year (two digits)
MM Month (two digits)
DD Day (two digits)
JJ
Julian date (three digits)
n
number of digits, as defined in the
‘n’ digits field
Thus, if you’ve selected the YYMMDDn format, and set ‘n’ =
3, then the accession number for the first specimen on October
26, 1995, would be “951026001”.
3. When completed, select OK.
Specimen ID Quick List
To set or change the accession (specimen ID) number
1. Select F8. Tools. SchuyLab displays the Tools menu.
2. Select Set-Up. SchuyLab displays the Set-up menu.
3. Select Parameter ID Definition. SchuyLab displays the System Parameter menu.
4. Select Accession.
CleanUp
Before the Cleanup Database icon can be used, the parameters for the various
cleanup functions have to be set. This is simply telling the computer how long to
wait before deleting the completed worksheets, orders, &c.
To Set the Cleanup Database Parameters
1. From the System Parameter menu screen, select Clean Up.
displays the Clean-up Definition box.
SchuyLab
295
2. Complete the fields in the Clean-up Definition box as follows
Delete
worksheets after
__ days
Enter two digits in the box to determine the number of days
that will elapse before completed worksheets are purged from
the system.
If you are uncertain, Schuyler House
recommends “3” as an initial setting.
Delete system
events after ___
days
Enter two digits in the box to determine the number of days
that will elapse before system events are purged from the
system. If you are uncertain, Schuyler House recommends
“3” as an initial setting
Delete specimens
after __ days
Leaving this setting at “0” means that specimen ID numbers
are never deleted. Schuyler House earnestly recommends
this setting. The one exception is for specimen ID formats
that re-use numbers (e.g., a month-day system, with no year
recorded); in that case, we recommend “350” for this setting.
Delete Device
Logs after ___
days
This option deals with the communications logs for your
online instruments. Schuyler House recommends “14” for
this setting.
Compress patient
reports after ___
days
This option deals with the data compression routine for
storing patient reports. Your setting will depend on the type
of work done in your lab; in general, “180” is a reasonable
setting.
3. When completed, select OK.
Defining New Patient Types
296
Most of your patients will be ‘normal’, or at least typical of your doctors’ medical
practice. Some labs, however, find it necessary to differentiate between types of
patients, for medical purposes. As an example, for some tests, pregnant or diabetic
patients may have different normal ranges than ‘ordinary’ people. (As another
example, veterinary reference labs have different normal ranges for cats, dogs,
horses, &c. Our examples below are based on such a lab.) For such cases, you can
define different types of patients, and each patient type can be assigned a separate
range of test values. Each new patient can then be defined as a given patient type,
through the Change Demographics function in the Patient Processing screen.
1. From the System Parameters menu screen, select Patient Type. SchuyLab
displays the Update Patient Type List box.
The box shows the list of patient types currently defined in the system. Note that,
once a patient type has been defined, it cannot be deleted from the system. (It can,
however, be made inactive. More on that in a minute.)
2. Select Add. SchuyLab displays the Add Type box.
297
3. In the Code field, type the code name (up to eight characters) for this patient
type. In the Description field, type a more complete description for your
lab’s internal use.
4. When completed, select OK.
To make a patient type inactive:
1. From the System Parameters menu screen, select Patient Type. SchuyLab
displays the Update Patient Type List box.
2. Select the patient type to be made inactive. SchuyLab displays the Update
[Patient Type] box.
3. Put a check in the check box labeled “Inactive code, no new entries”.
4. Select OK.
Defining or Updating Bill Types
Bill Types represent how your lab’s different payors pay for which bills, and in what
order. If your SchuyLab system includes the Billing Module, Bill Types are an
indispensable part of your fee schedule definition. However, even if your SchuyLab
system doesn’t include the Billing Module, Bill Types is still a valuable method of
generating administrative reports separated by category -- in this case, by type of
payor. (It might, for instance, be important for you to know what fraction of your
patients are Medicare patients.)
Once all the Bill Types are defined, each new patient can then be assigned a given
Bill Type, through the Change Demographics function in the Patient Processing
screen.
1. From the System Parameters menu screen, select Billtype.
displays the Update Bill Types box.
298
SchuyLab
2. To update a Bill Type that’s already defined, select it from the list. To create
a new Bill Type, select New Type. Either way, SchuyLab displays the Add
Bill Type box.
3. If your SchuyLab system does not include the Billing Module, you only need
to fill the Code and Name entry fields. In the Code field, type the code (up to
eight characters) for the new Bill Type. In the Name field, type a more
complete description for your lab’s internal use.
If your SchuyLab system does include the Billing Module, more extensive
entry will be needed. This is described in detail in the SchuyLab Billing
Manual. We needn’t go into it here.
299
4. When completed, select OK.
Optional Processing
There are system options that are considered ‘global’ to the SchuyLab
system: that is, how these options are set will affect your lab’s operating
procedures, how your screens will look, your reports, and much more. These
are the use of Test Numbers, and the use of Clients. These system options are
activated using the Optional Processing icon.
Since the use of these options affects your entire LIS, Schuyler House does not
recommend unsupervised changes to the parameters accessed here. If you have
any questions on whether these changes would benefit your lab, please contact
Schuyler House.
Language:
At present, you can choose English (default), Spanish, French,
German or Italian. Currently the only part of SchuyLab that
will convert to that chosen language is the F9, Cancel button
and parts of the SchuyLab copyright.
Dates:
Changing this format changes the date format for a patient’s
DOB, the draw, receive date, etc.
Many POL’s need to print a set number of labels with the new
patient’s medical record number for the various forms and
folders. You have the option to configure a report (labels or
otherwise) that will automatically generate this 'report' (labels)
for you. See Sec. 7 – Reports and Printing for more
New Patient
Report:
300
information.
Use test
Numbers:
Marking this box will allow you to use test numbers instead of
test codes.
Use Clients:
With this box marked, when you enter a new patient, instead of
SchuyLab asking for a doctor as a way to identify the patient, it
can ask for a client.
Veterinary
Lab:
Mark this box if you are a Vet Lab. The patient icon changes to
a dog instead of a profile of a person and the Patient
Demographics will include fields for breed, the name of the pet,
and spayed / neutered.
Hospital
Lab:
Mark this box will open the bed and room options in the Patient
Demographics
Undrawn
Accessions:
Allows scheduling of future draws. If checked, the Input
Specimen window will have a Draw Required option. Checking
this option will place the specimen on the Draw List. However,
the specimens will not appear on Worksheets until they have
been processed using the Processing Draw List Specimens
option.
SOP (Standard Operating Procedures)
At present these are the procedures you can choose from.
301
Use Patient
Diagnosis for
Accessions
Sometimes a patient will have a recurring condition (i.e.
diabetes, Coumadin therapy) that may be used as a
diagnosis code. If this box is checked and the diagnosis
code is attached to the patient (go to Change Demographics
and add the proper diagnosis code there), then this
diagnosis will also be included in one of the diagnosis boxes
when you order a test for a new accession.
Report results that
exceed linearity
When a linear range is specified for a test in SchuyLab,
any results which fall outside that range will be reported as
either greater-than or less-than the maximum or minimum
amount specified, with either a greater-than or a less-than
symbol after it (i.e.; >500>, or <.05<). If the "Report
Results that Exceed Linearity" option is selected however,
SchuyLab will instead report the actual result reported out
by the instrument, with a greater-than or less-than symbol
following it, as is appropriate (i.e.: 552>,or .03<).
Allow accessions
with separate
clients
Many doctors now work at more than one clinic or medical
group. When this box is marked a separate Client can be
entered upon ordering a new accession.
Default Draw
Datetime / Default
Recieve Datetime
Choose a selection of the degree of retention of the Draw
and Received Date/Time in the accessioning process. You
can choose from: Current – When you choose this
selection, the date and time will always default to the
present date and time with each new accession.
(blank) - When you choose this selection, the date and time
will always default to a blank date and time with each new
accession. You will need to enter the date and time for
each accession.
Prior - When you choose this selection, the date and time
will always default to the date and time of the accession you
just finished with.
Annotation (Remark Codes and Note Codes)
The Remark Codes and Note Codes are frequently used “canned” comments. Each
code consists of a message which is associated with a number. The difference lies in
their size and ease of use:
Remark Codes are shorter, up to 80 characters in length. Up to two Remark Codes
can be appended to an accession and up to four Remark Codes can be appended to a
test result. A single Remark Code can also be attached to a test definition, or to a
value of a test. They are easier to use, and can be categorized according to test
302
results (including Microbiology), QC, or Billing. One thing to note: if or when you
change a remark code, all past remark codes will change also.
Note Codes are much longer, and there is no limit to how many can be appended to a
test result. Their advantage is that, unlike Remark Codes, which print as separate
comments, Note Codes combine into a single block of unified (and, one hopes,
coherent) text. They are particularly useful for report with a single theme but
disparate elements, such as Cytology.
Setting up Remark Codes
SchuyLab contains three separate sets of Remark Codes: one for patient
test results, one for QC results, and one for billing. Each set can contain up to
255 user-defined comments.
When entering patient test results (or QC results), a Remark Code number may be
entered along with the result value; the message associated with that number is
thereby linked to the test result. Up to four Remark Codes may be linked to a given
patient or QC result. (The Remark Code may or may not print out on a patient
report: when you set up the Remark Code message, you decide whether or not a
particular code will print, or if it’s visible only within SchuyLab.) SchuyLab keeps
track of your place in the system, and lists the Patient Remark Codes when in the
Patient Processing Screen, the Control Remark Codes when in the QC Entry screen,
&c.
Some typical examples of Remark Codes are:
“Moderate hemolysis visible; result may be affected.”
(Prints out on patient report)
“This level is >2SD, <3SD. All other levels of this control are <2SD.”
(View only)
To Access Remark Code Functions
Select F8. Tools.
Select Remark Codes.
SchuyLab displays the Update Remark Codes box.
303
To Create a New Remark Code
1. Select the type of Remark Code (Patient, Control, or Billing) from the tabs
across the top of the box.
2. Select Add Code. SchuyLab displays the Input Remark Code box.
3. Complete the fields as follows:
Code
304
Enter any number between 1 and 255 that has not already
been used in another Remark Code. (If you accidentally
duplicate the number, when you try to exit this box,
SchuyLab will beep at you and display a message at the
bottom of the screen. Very embarrassing. Don’t let it
happen to you.)
Print on
Patient Report
Check this box if you want the Remark Code to print on the
patient report. (You’ll want this about 99% of the time; but
there are cases where you want a Remark Code to be for your
lab’s internal use only.)
Print as a
Footnote
By default, Remark Codes print immediately after the test
they annotate. Check this box if you want the Remark Code
to print at the bottom of the page, instead. (This box is
checked in addition to the Print on Patient Report box, not in
its stead!)
Microbiology
Check this box if the Remark Code is to be used with
Microbiology or Culture results.
Priority
These remark codes will be printed in the format you have
chosen for Priority message (i.e. red, bold, etc).
Comment
Type the message you wish to have associated with this
Remark Code. The message may be up to 80 characters in
length. The message is not formatted, and will automatically
‘wrap around’ to the next line.
4. Select OK. SchuyLab returns you to the Update Remark Codes screen.
5. To add another code, repeat the above steps. When you are done, select
Finished.
To Update a Remark Code
1. Select the type of Remark Code (Patient, Control, or Billing) from the tabs
across the top of the box. Then select one of the entries from the list box.
SchuyLab displays the entry in the Update Remark Code box.
305
2. Make the appropriate changes to the check boxes and the Comment entry
field. (The Code field is grayed out; it cannot be changed. You can’t change
the number of a Remark Code once it’s defined; you can only delete it.)
3. If you wish to delete the Remark Code entirely, select Delete. Otherwise.....
4. Select OK. SchuyLab returns you to the Update Remark Codes screen.
5. To update another code, repeat the above steps. When you are done, select
Finished.
To Print a List of Your Remark Codes
1. Select the type of Remark Code (Patient, Control, or Billing) from the tabs
across the top of the box.
2. Select the Print button. SchuyLab prints out a list of all Remark Codes of
that type currently defined in the system. When done, select Finished.
Setting up Note Codes
SchuyLab can keep up to 999 separate Note Codes, which can be
combined in any permutation into a seamless note for annotating test results. A
bit more thought as to format may be needed to use Note Codes to their fullest
potential.
Typical examples of Note Codes might be:
A header for a Cytology report, with other Note Codes representing
paragraph-long results.
“This test was performed at:”, with other Note Codes representing different
send-out labs.
To Access Note Code Functions
Select F8. Tools.
Select Note Codes.
SchuyLab displays the Update Note Codes box.
306
To Create a New Note Code
1. Select Add Code. SchuyLab displays the Input Note Code box.
2. In the Code field, type in the number of this Note Code (between 1 and 999)
that has not been used by another Note Code.
3. Select the Note icon (the yellow square). SchuyLab displays the Input Note
box.
307
NOTE: Many of these buttons are NOT used for the creation of a “canned” note, but
for updating or adding a note to results or tests.
Icons in upper
As you can see from the icons in the upper right corner, the
right hand corner customary word-processing icons for Spelling, Cut, Copy and
Paste are present . A spell-checking program and Cut and
Paste buttons has been added. No longer will you be hassled
by having to keep the 12 volumes of the Oxford English
dictionary next to your computer to make sure you spelled
Flebotemy correctly. These icons operate the same way in
SchuyLab that they do in a word processing program. In
order for Spellcheck to function, the following files must be
loaded into the SchuyLab directory: ssceam2.clx, accent.tlx,
correct.tlx, ssceam.tlx, tech.tlx, userdic.tlx. If there is a
problem with your program, Technical Support can help you
resolve it.
View only
When this box is checked, this note will not be printed on the
result form. It is strictly for viewing only.
Lab Confidential
When this is checked, only those people with a designation as
Lab Staff can see this note.
Priority
When this box is checked, any note will be printed in bold
according to the default settings in the report setup area (see
Sec. 7, Printing and Reports).
Prior
Add
When this button is NOT grayed out, there is a prior note.
Occasionally you may have to add another note to a result, or
308
test, separate from a note that may be already attached (i.e.
there is a note on the test and you need to add a note about
the results). You add a note by clicking on this button.
Update
You may have a few notes that already have information in
them, but they need to be updated (i.e. a note that says “called
Dr. ____ on _____”). To update this a note, click on this
button and fill in the blanks, or other information that is
needed.
Next
Much like Add, Next can be used in adding another note to a
test or result following the first note.
Cancel
Clicking onto this button will cancel the note you were
entering.
Save
This will save your note and display or print it as you have
dictated.
4. Type in your note in the large text area. You may use letters, numbers, and
any text characters. The note will be free-form, automatically wrapping
around at the end of a line; or you may use the Enter key as a carriage return
(the only place in SchuyLab where the Enter key has this function).
5. When the text is complete, select Save. SchuyLab returns to the Input Note
Code box.
6. Select OK. SchuyLab returns to the Update Note Codes box.
To Update a Note Code
1. From the Update Note Codes box, select the Note Code you wish to update.
SchuyLab displays the Update Note Code box.
2. Select the Note icon (which has writing on it, so you know it’s in use as a
Note Code). SchuyLab displays the Display Note box.
309
3. To alter the text of the Note Code, select the Update button. SchuyLab
displays the Update Note box. Type in the corrected text, and select Save.
SchuyLab returns to the Update Note Code box.
4. Select OK. SchuyLab returns to the Update Note Codes box.
To Print a List of Your Note Codes
1. From the Update Note Codes box, select Print. SchuyLab prints a list of all
Note Codes currently in the system.
2. When done, select Finished.
Doctor Records
Of course, no medical laboratory is complete without doctors to send specimens and
ask for tests. Some labs service individual doctors, some service groups of doctors,
and many, service both. SchuyLab can keep the records of your lab’s clientele in its
database; the name of a doctor and/or a client group can be attached to each patient.
The client groups are also used by SchuyLab for setting up printing queues, billing,
and a number of other tasks.
To Access the Doctor and Client Group Database
Select F8. Tools.
Select Doctor Records.
SchuyLab displays the Doctor Records menu screen.
310
To Enter a New Doctor into the System
SchuyLab maintains a list of the individual doctors serviced by your lab. The
doctor’s name may be entered as part of a patient’s demographics; and most patient
report formats print the doctor’s name at the top of the form.
1. Select Update Doctor. SchuyLab displays the Select Doctor box. You can
enter the doctor’s name and go directly to the doctor’s record or just click on
OK and it will go to the Which Doctor? Box listing all the doctors currently
in the system.
2. Select New Doctor to enter a new doctor. SchuyLab displays the Input New
Doctor box.
311
3. Complete the information in the box:
(All of the information fields in this box either default to a selection or are optional.
[Well, it’s really a good idea to enter the doctor’s name, if nothing else.] If you don’t
wish to enter complete information on the doctor, skip over the rest of this box and
select OK.)
ID
SchuyLab will enter the next number in sequence for your new
doctor. Let it do this. If you wish to alter the default number to
a different number, you may do so after you input this doctor
into the system. If you try to do so now, while you are first
putting the doctor in, SchuyLab will not retain an altered doctor
ID number, but will revert to the one that the system issued.
To give the doctor a specific number: Enter the doctor’s
information, select OK. Re-select the doctor from the list,
change the ID number, and select OK. Now the number is
changed to the one you want.
Title
312
You may select “MD” or “DO” or any other on the list or you
may select “
” (blank).
Currently
Active
Last, First, MI
This field is not in use at this time.
Medical
Group
(Optional)
Do you wish to keep track of clients as well as doctors? The
answer to this question depends upon the structure and customs
of your laboratory rather than the capabilities of SchuyLab.
This entry field provides a means of distinguishing between Dr.
Riley as an individual practitioner and Dr. Riley (at a different
address, and possibly with different SOP’s) as a member of
Northwest Medical Group.
If you do not feel a great and pressing need to keep track of
medical groups, skip this field.
If you do wish to keep track of medical groups, enter all or part
of the name of the medical group. When you select OK,
SchuyLab will either recognize the group as one already entered
in the system, or will give you the opportunity to enter
information on it.
Address, City,
St, Zip,
Telephone,
Fax
Self-explanatory, we hope.
Queue
If you want to fax a result to a doctor instead of setting him up
as a client, you add the queue name (fax ) here and add the fax
number for this doctor. On more information on SchuyFax see
Appendix – SchuyFax.
Supervising
Physician
This field allows a nurse or intern to order tests and receive the
resulting report under the supervision of a doctor. Enter the RN
or Intern as if he were a doctor, but in the Supervising Physician
field put the name of the appropriate MD. The doctor in the
Supervising Physician field must already exist as a doctor in
SchuyLab. The doctor’s name and PIN will appear on the
HCFA form in the Billing module, but not on the Patient Report.
Restricted OK
When this box is checked, any restricted test results (i.e. HIV,
Hepatitis) will be allowed to be faxed.
Extra Copy
When this box is checked, an extra copy of the results will be
printed.
Doctors are entered last name first, then first name and if you
want, middle initial.
313
Provider,
License,
UPIN, SSAN
(Optional)
These fields may be filled with the information you wish to keep
on this doctor, if you have it. (If your system uses the Billing
Module, these are no longer optional; they become mandatory.)
NPI
National Providers Identification
Delete
This button will delete the record
Cancel
Clicking onto this button will cancel the record you were
entering.
OK
This will save your record.
4. Select OK. SchuyLab returns you to the Update Doctors list box.
5. Repeat for the next doctor. When all the doctors are entered, select OK.
SchuyLab returns to the Doctor Records menu screen.
To Update a Doctor Record
1. Select Update Doctor. SchuyLab displays the Update Doctors box.
2. Select the doctor whose record you wish to update. SchuyLab displays the
Update Doctor Record box (exactly the same as the Input New Doctor box).
3. Make the modifications you wish to the doctor information.
4. Select OK. SchuyLab returns you to the Update Doctors list box.
5. Select OK. SchuyLab returns to the Doctor Records menu screen.
To Delete a Doctor from the System
1. Select Update Doctor. SchuyLab displays the Update Doctors box.
2. Select the doctor whose record you wish to update. SchuyLab displays the
Update Doctor Record box (exactly the same as the Input New Doctor box)..
3. Select Delete. If no patients have been assigned to that doctor, SchuyLab
deletes that doctor’s record and returns to the Doctor Records screen. If
patients have been assigned to that doctor, SchuyLab displays the Transfer
Patients box, asking you to name a doctor to whom those patients are to be
reassigned.
314
4. Enter the new doctor’s name or ID number in the entry field. (If you can’t
remember the exact spelling, enter the first letter of the new doctor’s
surname. SchuyLab will display a list of all doctors whose names start with
that letter. Select from the list.) Select Ok.
OR
Leave the New Doctor’s Name field blank. SchuyLab displays a dialog box,
asking if you wish all the patients of this doctor set to blank doctor.
Select Yes.
5. SchuyLab deletes the doctor record and returns you to the Update Doctors
list box.
6. If the doctor you are deleting does not have any patients, SchuyLab displays
a dialog box, asking if you are sure you want to delete this doctor.
Select Yes.
7. SchuyLab deletes the doctor record and returns you to the Update Doctors
list box.
8. Select OK. SchuyLab returns to the Doctor Records menu screen.
315
Clients
Clients (also called “Client Groups” or “Medical Groups”, or just “Groups”) deal
with groups of physicians, as well as the organizational side of individual physicians.
(That is, Dr. Price may be listed as a Doctor, but The Office of Dr. Price, A Licensed
California Corporation, would be listed as a Client.) Like the doctor, the client is
entered as part of a patient’s demographics. Many billing and reporting functions
access the client’s name, rather than the doctor’s name.
To enter a new client
1. Select Update Client. SchuyLab displays the Select Client box.
2. Type in the name of the new client and select Ok. SchuyLab displays the
Input Client Record box if the name is new (which we’re assuming here), or
the Update Client Record box if the name is already in the system.
OR
Without typing anything in the entry field, select Ok. SchuyLab displays the
Which Client? Box, listing all the Clients currently defined on your
SchuyLab System.
316
Select New Group to enter a new client. SchuyLab displays the Input Client
Record box.
3. Complete the information in the box:
ID
SchuyLab will enter the next number in sequence for your
new client. If you wish to alter the default number to a
different number, you may do so before you input this
group into the system. If the number you choose is already
in use, SchuyLab will not accept this record and give you
an error message at the bottom of the screen.
Fee Schedule
(Optional; used in conjunction with the SchuyLab Billing
Module)
You may assign a fee schedule to a specific client. Patients
defined as “PHYSIC” Bill Types, whose demographics
include this client, will now automatically bill to the
defined fee schedule.
Account
This field is not in use at this time.
317
Sales
(Optional)
Some labs keep track of the sales people who bring in new
clients. Some identifier (initials, a number, whatever) can
be typed into this field to denote the salesperson who
brought in this client. (Generally, it’s only for your own
internal records, though some of the reporting features in
the SchuyLab Billing Module use the sales person’s ID.)
Report
This field is not in use at this time.
Queue
(Optional)
This field selects the printer queue for the test reports of the
patients associated with this client. By default, it will be
the printer queue normally used at your lab for patient
reports. However, if you have several printer queues (most
especially, if you have either the Remote Printer or Fax
feature), you can assign any of the queues to this client’s
patient reports.
Copies
(Optional)
By default, SchuyLab prints a single copy of a test report at
a time. Typing in a larger number in this field will print
that number of copies for all of the patient reports for this
group.
Copy to:
(Optional)
If, in addition to the normal patient report queue defined in
Queue, you would like patient reports to simultaneously
print on another printer, select that printer’s queue here.
Client Name:
Enter the name of the client, as you wish it to appear on
reports and invoices.
Address, City, St,
Zip, Telephone (1
& 2), Fax
Self-explanatory.
Active?
This field is not in use at this time.
Individual
In some cases, an individual doctor may also be considered
a “client”. This box checked will let you know that there is
only one doctor attached to this client.
318
Provider, Tax ID#
(Optional)
These fields may be filled with the information you wish to
keep on this client group, if you have it. (If your system
uses the Billing Module, these are no longer optional; they
become mandatory.)
NPI
National Provider Identification
Responsible
Physician:
This physician is the responsible party for the clinic /
medical group.
Print “New
Patient” Reports
If this box is checked, when a new patient is entered in the
system, a “New Patient” report will print out for this client.
For more information see Sec. 7 – Printing and Reports.
Special Panels
Each client may have assigned special panels, to be ordered
for the patients of that client and no other. The panels must
first be defined through Panel Definition (see Sec. 4 – Tests
and Panels).
To assign the special panels to this client, select Add.
SchuyLab displays the “Add Panel(s) to Panel” box. Select
the panels (up to five of them) that are this client’s special
panels. Select Done.
Once the panels are selected, they must be put in the proper
sequence: the first panel to be “Client#1” on the Order
Tests screen, the second panel to be “Client#2”, &c. To do
this, select Seq. SchuyLab displays a list of the special
panels for this client. Re-order the panels by selecting a
panel you want to move, then clicking the mouse where
you want the panel to be. When finished, select Done.
4. Select OK. SchuyLab returns you to the Doctor Records menu screen.
Access by Group
Ideally, an individual doctor will be attached to a specific client when originally
entered into the system. In the real world, you may need to attach a doctor -- or a
series of doctors -- to a client sometime after they’ve all been entered. Or, you may
want to see a list of which doctors are connected to a specific client. For either of
these tasks, use the Access by Client icon.
To access a doctor via the client name
1. Select Access by Client. SchuyLab displays the Select Client box.
319
2. Type in the name (or client ID number) of the client you want to access, and
select Ok.
OR
Without typing a client name, simply select Ok. SchuyLab displays a list of
the currently defined clients.
Select a client from the list.
3. If there are no doctors associated with the client, or if there’s only one,
SchuyLab displays the Update Doctor Record box, with the medical group’s
name already entered; fill in or update the remaining fields accordingly. If
there are several doctors associated with the client, SchuyLab displays the
Which Doctor? box, showing all the doctors associated with that client.
320
4. At this point, you can select one of the doctors on the list, to update the
system. Or you can select New Doctor to add another doctor to the list.
Either way, SchuyLab displays the Update Doctor box, with the medical
group entry area already filled in. Complete the information in this box and
select OK.
Import Clients
You may be one of the many labs that have added the SchuyLab system to your
existing lab. If so, you already have a large client list that needs to be entered into
the SchuyLab database. This can easily be done by a Schuyler House employee
through Import Clients. The first step is for you to send us the database of client
information in a comma delimited file or an HL7 file in the following format: id,
name, addr1, addr2, city, state, zip, phone1, phone2, fax, provider, note. We will
then convert it for you and install it onto your system when we first setup your
computer. This is NOT a function that can be used over and over again on your
SchuyLab system, but only once when we first set up your computers.
Doctor Report
This icon prints out a record of all the doctors who have been entered in SchuyLab.
The doctors can be in either numerical or alphabetic order.
To print a list of doctors
Select F8. Tools.
Select Doctor Records.
Select Doctor Report.
321
SchuyLab displays a dialog box, asking how you want the report to print.
If you want the report to list the doctors in numerical order (by Doctor ID), select
Number. If you want the report to list the doctors in alphabetical order (by last
name), select Name. Then select Print. SchuyLab prints out a list of all the doctors
in your system.
Client Report
This icon prints out a record of the clients that have been entered in SchuyLab. The
clients can be in either numerical or alphabetic order.
To Print a List of Clients
Select F8. Tools.
Select Doctor Records.
Select Client Report.
SchuyLab displays a dialog box, asking how you want the report to print.
If you want the report to list the clients in numerical order (by Client ID), select
Number. If you want the report to list the clients in alphabetical order, select Name.
Then select Print. SchuyLab prints out a list of all the clients in your system.
322
Doctor Request Forms
This icon personalizes the laboratory requisition forms that are distributed to your
clients, so that they will order tests from your lab rather than someone else’s. Use
this option to print on the forms the name and address of the doctor to whom they
will be sent (ten to fifty forms are generally personalized at one time). You may also
add client-specific comments: for instance, if Dr. Green has two unique panels
unlike anyone else’s (say, a Dr. Green Panel and a Dr. Green Pediatric Panel), these
may be printed on the Comment section of your requisition for Dr. Green. This
generally makes a favorable impression on doctors and their staffs, since they no
longer have to have to mark the individual tests and profiles that constitute these
orders; now they can just mark the “Dr. Green Panel” instead. (Obviously, you will
want to set up corresponding panels in SchuyLab labeled “GREEN” and
“GRNPED”.)
NOTE: Only one Doctor Request form template exists at any one time. SchuyLab
does not retain a list of the individual doctor’s request form configuration.
1. Select Request Forms. SchuyLab displays the Print Request Forms box.
2. Enter the client’s name (or client ID number). SchuyLab will use this name
to access the client's address as it’s listed in their record. (Make sure the
address is listed in the client’s records.) Also, make sure you have the name
spelled right (that is, as it’s listed in SchuyLab).
3. Enter the number of copies you wish to print.
4. Select Setup. SchuyLab displays the Setup Request Forms box.
323
5. Select the Queue and Font from the options available. (If you are uncertain,
leave them on the default settings)
6. For “Client’s Name and Address” set the location on the form where the
doctor’s name and address will print:
• set the number of lines down from the top of form to the start of the
name/address area
• set the number of columns from the left of the form to the start of the
name/address area (each character or space = one column)
7. For “Comment Position”, set the location on the form where the four lines of
comment begin to prints:
• set the number of lines down from the top of the form to the comment
area
• set the number of columns from the left of the form to the comment area
(each character or space = one column)
• type the text of the comment in the lines provided
8. Select OK. SchuyLab returns you to the Print Request Forms box.
9. Load the test requisition forms into the printer.
10. Select Test. SchuyLab will print out one test copy of the personalized form.
Make any necessary adjustments. Select Test again.
11. When the requisition test print is correct, select OK. SchuyLab will
personalize the number of copies you specified in Step 3, and return you to
the Doctor Records screen.
ICD-9-CM Codes
The International Classification of Diseases, 9th Revision, is used by many
physicians for coding ailments, symptoms, and illnesses in a neat, readily understood
format. They are required for certain types of Billing (e.g., Medicare), but may also
324
prove useful to labs that don’t use the SchuyLab Billing Module. You can define
your own ICD-9 codes, according to your lab’s needs.
To Define or Update ICD-9 Codes
Select F8. Tools.
Select Set-Up.
Select ICD9.
SchuyLab displays the Update ICD-9 Codes box, listing in numerical order the
grouping of ICD-9 codes by type of ailment.
To Create a New ICD-9 Code
1. Select the group ICD-9 code to be added to. SchuyLab displays the Update
ICD9 [grouping] box.
325
2. Select Add Code. SchuyLab displays the Add ICD-9 Code box.
3. In the Code field, type the numeric ICD-9 code. In the Description field,
type a brief description of the code.
4. Select OK. SchuyLab returns to the Update ICD-9 Codes box.
5. To add another code, repeat the above steps. When done, select Finished.
To Update or Delete an ICD-9 Code
1. Select the ICD-9 code to be changed. SchuyLab displays the Update ICD-9
Code box.
326
2. Select the code you which to change or delete
3. If you want to delete this code, select Delete. Otherwise....
4. Change the fields as appropriate. When done, select OK.
Default Screens
The default options allow the user to define information on patients and accessions,
which will be mirrored in the corresponding fields during data entry. In other words,
these screens permit you to define the defaults (if any) for your patients and
specimens.
Some suggestions for the default patient field might be: defining the area code, state,
and zip code for your location; defining the gender for your typical patient (very
useful for, say, gynecology clinics); automatically entering the name of the doctor
who provides 90% of your work.
Some suggestions for the default accession field might be: defining the typical type
of specimen (e.g., serum and blood); making all specimens STAT by default.
Note that these default fields may be altered in the course of patient entry; the values
are not ‘locked in’ but may be typed over if they need to be changed.
327
To Define the Default Patient Screen
Select F8. Tools.
Select Set-Up.
Select Default Patient.
Demographics screen.
SchuyLab displays the (default) Patient
1. Select a field that you wish to predefine. Type the information in that field
(or select an item from a scroll box).
2. Select another field, and proceed as above.
3. When you have completed all the fields you wish to have defaulted, select
F10. Done. SchuyLab returns you to the Setup menu.
To Define the Default Accession Screen
Select F8. Tools.
Select Set-Up.
Select Default Accession. SchuyLab displays the (default) Patient
Demographics screen.
328
4. Select a field that you wish to predefine. (The date and time fields cannot be
predefined.) Type the information in that field (or select an item from a
scroll box).
5. Select another field, and proceed as above.
6. When you have completed all the fields you wish to have defaulted, select
OK. SchuyLab returns you to the Setup menu.
329
Sec. 9 - 7Maintenance
Cleanup
As SchuyLab is used to perform work in the laboratory, it creates files and
indexes for greater efficiency in handling information. These files and indexes may
be considered as ‘scratch paper’ which the system uses for a while. Additionally,
worksheets will be created by the techs, the information on them accepted into the
patients’ records, and the (now redundant) worksheet left in memory. Eventually,
this electronic clutter can impede the functioning of SchuyLab, causing a noticeable
slowdown in processing.
Another sort of electronic clutter is the patients’ reports for a given date. These are
considered permanent files, since the Reprint icon in the Printing menu screen must
always have access to them; they therefore take up space on your computer’s hard
disk drive. Eventually, after months or years of operation, all the hard disk memory
may be filled, with no room for new files.
The Cleanup Database icon solves both these potential problems. First, it removes
the ‘scratch’ copies from the system. There will be no patient information lost by
this process. Cleanup will not discard any document until (1) all the results on it
have been accepted, (2) a hard copy of that result has printed out on a data log
function (if your lab selects that option), and (3) the tests have been billed (if the
Billing Module is in use).
Second, it uses a data compression algorithm to rewrite the patient report files into a
more compact format, so they take up much less space on the hard disk. Again, no
information is lost by this process, and it doesn’t take any longer to read the
compressed files
Before using Cleanup Database, check to be sure that the Cleanup Parameters are set
the way you want them. These are described in Section 8: Management, under the
heading of Parameter ID Definition.
Using Cleanup
Once the parameters are set, you can begin using the Cleanup Database function. We
recommend that you cleanup your database once a week; make it a habit. At the very
minimum, it should be done as often as the smallest interval set in the Cleanup
parameters (that is, if the smallest interval is 5 days, use Cleanup Database at least
once every 5 days). If your lab has a heavy use of worksheets or is a high volume
lab, you may consider using Cleanup Database more often.
To activate cleanup:
330
Select F8. Tools.
Select the Clean-up Database icon.
SchuyLab performs cleanup.
SchuyLab will display a dialog box like the one below, inquiring whether you want
an individual cleanup (Select Yes) or just to clean up all items (completed
worksheets, data logs, whatever) (Select All).
This process
may
take
seconds
or
minutes, depending on how often you run Cleanup and how large your database is.
Patient Files
As noted several times, SchuyLab is not the computer on Star Trek. (We’re good,
but we’re not that good.) There will be times when you’ll need to correct data entry
mistakes. A large category of such mistakes involve the patients’ files: names, dates
of birth, gender, &c. They may also involve mistakes in assigning specimens to
specific patients.
Any corrections to patient files may be done through the icons in the Patient
Processing Screen, accessed through F2. Patient or F3. Specimen. There is also the
Match Patients database search engine, available through F8. Tools. Many of these
functions require the user to have a special security clearance.
Reassign Specimen
A straightforward error occurs when a specimen is mislabeled as belonging to
someone else -- that is, the tube of serum entered as being drawn from Ms. Doe was
actually drawn from Mr. Roe. In such a case, it is easy to transfer the specimen to its
rightful owner.
To reassign a specimen
1. Select F3. Specimen.
2. Enter the specimen ID number to be reassigned, and select OK. SchuyLab
displays the Patient Processing Screen.
3. Select Reassign Specimen. SchuyLab displays the Select Patient for
[specimen ID number] box.
331
4. Enter the name of the patient to whom the specimen is reassigned, or the
patient ID number if you know it.
5. Select OK. SchuyLab reassigns the specimen to its proper file.
Merge Patient
The second most common data entry mistake is to enter a single person into the
SchuyLab database twice -- for instance, once as Joseph Smith (the first time he came
to the office), and again as Joe Smith (the second, less formal visit). Two patient
files can be combined using the Merge Patient icon.
To merge two patient files into a single file
1. Select F2. Patient.
2. Enter the patient’s name of the file you wish to keep, and select OK.
SchuyLab displays the Patient Processing Screen.
3. Select Merge Patient. SchuyLab displays the Select Patient to Merge box.
332
4. Enter the name or patient ID of the patient for whom the file will be merged
-- that is, the file you don’t want to keep.
5. Select OK. SchuyLab will ask if you want to keep the old patient name as an
alternate. Say Yes or No, according to your lab’s protocols. SchuyLab
merges the two files into one.
Delete Specimen
There may even come a time when you are forced to delete a specimen from the
system entirely: a specimen that never should have been entered. This is done
through the Delete Specimen icon. Once a specimen is deleted, it cannot be
undeleted; you must reconstruct the specimen record as though it were a new
specimen.
To delete a specimen from the system
1. Select F3. Specimen.
2. Enter the specimen ID number to be deleted and select OK. SchuyLab
displays the Patient Processing Screen.
3. Select Delete Specimen. SchuyLab displays a dialog box, informing you
that the specimen may have tests, and asking if you really want to delete it.
333
4. Select Yes.
5. SchuyLab deletes the specimen from the SchuyLab database.
Delete Patient
Finally, the patient file itself can be deleted. This is the most radical change that can
be made to the SchuyLab database. It requires that you delete all the specimens that
belong to the patient before the patient file can be deleted. We do not recommend
this as a casual procedure! Once a patient file is deleted, it cannot be undeleted; you
must reconstruct the patient file as though it were for a new patient.
To delete a patient file from the system:
1. Select F2. Patient.
2. Enter the patient’s name of the file you wish to delete, and select OK.
SchuyLab displays the Patient Processing Screen.
3. Make sure that all the patient’s specimens are already deleted. Otherwise,
SchuyLab will not let you delete the patient file.
4. Select Delete Patient. SchuyLab displays a dialog box, giving the name and
patient ID number to be deleted, and asking if you really want to delete it.
5. Select Yes.
6. SchuyLab deletes the patient from the database.
Match Patient
As mentioned above, the Merge Patient function permits you to combine two patient
files. However, that presupposes you know which two patient files to combine.
SchuyLab has a database search engine, called Match Patient, that sorts the patients
according to the first few letters of the last and first names. It then gives you the
choice of which file is merged into the other.
To use the Match Patient function
1. Select F8. Tools.
334
2. Select Match Patients. SchuyLab displays the Select Match Options box.
3. Set the parameters of the database search. The minimum criteria are the first
few characters (the number of which you can specify; 20 and 15 are the
defaults) of the patient’s last name and first name. To specify the other
criteria, select the check boxes next to the field in question.
4. To start the search at a specific patient name, type the last name in the Begin
With Last Name field. If this field is left blank, the search will start at the
beginning of the alphabet.
5. Select OK. SchuyLab displays the Match Patients screen when it finds a
match in the database.
335
6. Search criteria are shown in green where they match one another. Where the
two files’ search criteria differ, the differences are shown in red.
7. Select one of the two buttons labeled “Merge to this patient”: the left button
if you want to merge to (that is, keep) the patient file on the left, the right
button if you want to merge to the patient file on the right. SchuyLab will
then merge the two files, and proceed to the next database match.
8. If the two files are indeed for different people who happen to have the same
name (there are a lot of John Smiths in the world!), select Next. SchuyLab
will proceed to the next database match.
9. When done, select F10. Done.
Common Problems
(that will never happen to you, but just in case)
Here are some of the situations that have come up in the course of doing customer
support. Instead of extending the length of the answers with the technical
descriptions of a procedure, we have referenced the section in the User’s Manual
where those explanations may be found. We’ll begin with some of the simpler
questions:
My AST prints out on reports as “SGOT”. I want to change it to print as “AST
(SGOT)”. How do I do this?
336
Go to F8. Tools, Setup, Test & Panel Definition, and Test Definition, and select
the test SGOT. In the field labeled ‘Name’, type in “AST (SGOT)”. Select OK.
Notice that you only need to change the test name to change the report. You don’t
need to change the test code as well. In fact we recommend you do NOT change the
test code. You can create a major problem if you do. [See Section 4]
I tried to change the test code for Uric Acid from URIC to UA. SchuyLab wouldn’t
let me do this.
SchuyLab won’t let you use the same code for two different tests, or for a test code
and a panel code. My guess is that “UA” is already in use as the code for the
Urinalysis panel. If that’s the case, then either change the code for that panel, or
think up another code to use for Uric Acid (or leave it as URIC). If you don’t have a
conflict with Urinalysis, then you’ll have to look elsewhere for the problem. You can
scan up and down the scroll box to see what other test has “UA” as its code; or you
can select Test Report, which will print you a list of all the tests in your data base.
(You can likewise print a list of all your panels by selecting Panel Definition, then
selecting the Print button.) When you find the source of the conflict, change its code
(i.e., say Yes to the alias question). Now you’ll have freed up the code to use for
Uric Acid. [See Section 4]
My calculations don’t work.
The most common mistake made in setting up calculations in SchuyLab is not getting
the test codes exactly right. For example, if you have a test called “T3U” that you
want to use in a calculation, and it’s entered in the equation as “TU”, SchuyLab
won’t know what to do. Don’t laugh! That’s the most frequently made error in
calculations. Although SchuyLab will check your calculations when you first enter
them, to make sure that they use valid test codes, those calculations don’t get updated
if you change a test code. If you have a calculation which had been doing just fine,
then suddenly doesn’t work anymore, you might check whether any test codes have
been changed recently.
Another potential problem with calculations occurs when the test code includes
characters other than letters, numbers, and the underline. This rarely causes problems
-- unless that code is used in a calculation. In which case, a dash will be read as a
minus sign, a slash as a divide sign, &c. If you have used a space (instead of an
underline) in the test code, the calculation will stop when it reaches that space.
Should that happen, change your test codes (aliasing as appropriate), then re-enter the
calculation. [See Section 4]
The wrong normal range is printing out by my Triglyceride results. I’ve checked in
the Test definition, and the range is correct there.
There are two places to look in such an instance: Go into Test Definition and select
Triglycerides. On the Triglycerides test screen, select the button labeled Ranges.
337
Specific ranges for age, gender, and patient type are listed under the tabs marked,
Normal, Critical or Interpretive. Is there a specific range set up which could be
conflicting with what you expect these ranges to be? SchuyLab will override a
general range with one that is more specific. If there’s a range set up for 20-40 year
old female patients, that could be the range that you spotted when you expected the
standard normal range. Modify or delete your specific ranges to your satisfaction.
If you check in Ranges and don’t find any ancillary data, but you still have an
unexpected range printing out, there is another place to check. I know it sounds odd,
but are you sure that you have only one Triglycerides test set up? I’ve seen situations
where there are two tests, “TRIG” and “TRG”. Everyone thinks that TRIG is what’s
being ordered and reported, but ’way back when the system was set up, TRG was
what actually got put on the screens and panels. The point here is that you should
check the other tests to see if you have any partial duplicates which are causing
problems. How do I find out if this has happened? Print out the Test Report. This
will give you a hard copy of all the tests and ranges in your data base. Examine the
report for possible conflicts, and delete or modify redundant tests and ranges.
Deleting a test is a very comprehensive change to make. When you delete a test, you
will want to check your screens and your worksheets to insure that the correct tests
are still represented in those sections. If you delete a test that has outstanding
orders on it, alias the test so that SchuyLab knows with which test to replace the
one that’s been deleted. [See Section 4]
I can’t get “Lipid Panel” to print out on my reports, but I know I set it up. When I
went back into SchuyLab to check ... it was right there. But it still doesn’t print.
How do I get “Lipid Panel” to appear on my report?
SchuyLab has three places where tests are arranged into groups. Sometimes you’re
thinking of one place, but actually looking at a different section.
Remember:
“Panels” (cf. Panel Definition) control how you order tests.
“Worksheets” (cf. Define Master) set up how you run tests.
“Printing Groups” (cf. Report Order) determine what your reports look like.
How you set things up in Panels and Worksheets has no effect whatever on what
appears on your reports. So go into Report Order. Check and see if you have
“Lipid Panel” defined as a Printing Group. If it’s not there, create it. If it is there,
check the tests that print out under that heading. If your lipid tests are listed under
that heading and everything seems in order, turn off the “Do not print duplicate
reports” checkbox. Create a ‘dummy’ patient who has only lipid tests ordered, and
print out the report. Your Lipid Panel should print. [See Section 4]
I can’t accept my controls into SchuyLab any more. They used to work. What went
wrong?
338
The name that identifies the control when it comes across the interface has probably
changed. The two most common reasons for this are: 1) a change in lot number, or 2)
an operator who is putting in a different name for the control at the instrument end of
the interface.
Some instruments don’t give you a choice in what they send to SchuyLab as a QC
designation. Hematology instruments seem particularly inclined to do this. Even
when you’ve put all the data on Lot #Q52304 and #Q52305 in the QC module,
SchuyLab doesn’t know what to do when an instrument that has been sending “204”
(last month’s number) all of a sudden starts sending “304”. Dumb machine. Take a
careful look at what is actually sent across as a QC designation. Write it down. Go
into your QC module and establish aliases using those designations. You should now
be able to accept QC. (If your Hemo instrument acts this way, you’ll have to do this
each time you change lot number.)
Another situation sometimes occurs when the operator can control the designation
that an instrument uses. When the input is operator dependent and the operator types
in “Bytrol” instead of “Bitrol”, sure ’nuf -- SchuyLab won’t recognize it. The easiest
thing to do here is to point-and-click at the offensive “Bytrol” to highlight it, and
retype “Bitrol” in its place. If the data hasn’t been recognized as a control, then mark
it as such by using the little ‘Control’ button in the upper right corner of the screen.
Select Reassign. SchuyLab should then be able to correctly identify your control.
Accept the results. (If your ham-handed tech mistypes the controls every morning,
you may want to consider setting up an alias so that SchuyLab knows that Bytrol and
Bitrol are the same. You can have several aliases for a single control.) [See Sec. 6 –
Quality Control]
Troubleshooting
Despite everything, there will be times when the system Just Won’t Work. You’ve
asked all your technicians, you’ve looked here in the manual; you’ve even tried
reading tea leaves -- It Just Won’t Work. When that happens, there are still some
things you can do.
First and foremost, of course, is calling the Schuyler House Technical Support
Hotline. In the course of diagnosing your problem, we may ask you to use some of
the troubleshooting functions of SchuyLab. The most useful of these are Full Report
and Diagnose Problems, both of which are accessed through the System Tools menu
screen, via the F8. Tools icon.
Full Report
The Full Report is a complete listing of all the activity on a patient’s file: for
instance, what tests were ordered; what values were accepted; and the time, date, and
SchuyLab user ID of each action. You can access a full report either by the patient’s
name, which will give you a full report of every accession in their record, or you can
specify a single accession.
339
Print the Full Report by Patient’s Name
1. Select F8. Tools.
2. Select Full Report. SchuyLab displays the Print Full Report box.
3. Enter the patient’s ID number. If you do not know the patient’s ID number,
click on the Select button to enter the patient’s name (Last, First).
4. Select Ok. SchuyLab displays the patient’s ID number.
340
5. Select OK. SchuyLab prints the Full Report for that patient (or change the
queue to view on the screen or print elsewhere).
Print the Full Report by Accession Number
1. Select F8. Tools.
2. Select Full Report. SchuyLab displays the Print Full Report box.
3. Enter the accession number you wish to view. Or if you are not positive of
the accession number you can click on the Select button next to Accession to
bring up the select accession box.
341
Type in the Accession number or select the List Active button. When you
have chosen the accession you want to look up, SchuyLab also fills in the
patient’s ID number.
4. Select OK. SchuyLab prints the Full Report for that accession only (or
change the queue to view on the screen or print elsewhere).
Diagnose Problems
The Diagnose Problems feature is used to help determine any number of problems
you may be having with your computer(s), your instrument(s) or a system error that
sometimes pops up.
1. Select F8. Tools.
2. Select Diagnose Problems.
Problems box.
342
SchuyLab displays the Diagnose System
Test Instrument Interfaces
SchuyLab consists of two separate programs; SchuyLab and Connect Manger.
Connect Manager is the program that enables your computer to talk to your
instruments, your bar code printer or the modem for auto faxing. It monitors the data
streams between SchuyLab and the instruments, and records the last messages
transmitted and received. Connect Manager (or Connect) is always on the station to
which the instruments are physically attached.
Let’s pretend that you get a call from a doctor wondering why he has not received
any faxes from you today, or perhaps when you go to F4, Devises, there are no
results although you just ran a CBC.
1. Select the icon labeled “Test Instrument Interfaces”. If the first box that pops
up looks like this:
343
you may have forgotten to start (or re-start) Connect manager. Ninety-five
percent of your instrument problems will be solved when you select “Yes”.
Your auto faxing will begin faxing; your bar code printer will begin spitting
out the 5 sets of the same accession number labels because you kept telling
SchuyLab to print, and your instruments will begin sending results over to
SchuyLab.
But what if Connect is up and running and you are still having problems?
Test Instrument Interface will then bring the Connect Manager box up.
This box shows which instruments are physically connected to this station
(computer). In this case, we will look at the modem only. The yellow
exclamation mark shows us there is a problem. Click on the exclamation
mark and it opens the Modem box.
344
As you can see, the message says “Unable to open port”. This means that for
some reason, the modem was left “open” the last time it was used. Re-boot
the station to close the port.
2. If there doesn’t seem to be a problem, or there is not an exclamation mark,
click on the COM of the instrument that is giving you problems to open the
port box. The remainder of the screen will display the diagnostic
information:
Serial COM (x):
Shows the Com port the instrument is connected to and gives
the baud rate, parity, bits and stop bit settings on the SchuyLab
port for this instrument.
CTS:
Determines whether the Control-To-Send is on or off.
Input, Output:
Gives the date, time and length of the most recent messages
sent to and from the instrument and SchuyLab.
If an error in transmission occurred, gives the date and time.
Error:
Close this box by clicking on the “X” in the upper right hand corner and
MINIMIZE Connection Manager by clicking on the “-“ box in the upper
right hand corner.
3. When done, select Ok.
345
4. Select Done to return to the System Tools menu screen.
Validate Database
The SchuyLab program is made up of many databases, all working and linked to each
other. Occasionally, something many happen to one of the records, perhaps a
lightning storm in the area or a bad electrical connection, in which case SchuyLab
can not connect a patient with an accession. When you select Validate Database,
SchuyLab runs a special program to fix this problem. This should not be done
without calling SchuyLab Technical Support first.
Print Configuration
If you have more than 1 station, or if you have recently added another workstation,
you may have trouble with each station “talking” to each other. In this case
SchuyLab Technical Support will assist you in printing out a Configuration Report
and faxing it to them for evaluation.
Update Registration
Schuyler House has implemented a registration program with SchuyLab. The only
time you should have to update your registration is if we have made changes to your
system, if you add another station, or any other major program change. In either
case, you would be prompted by SchuyLab, when you sign on to call Tech Support
for an update.
Backup
Backing up your patient database (or, more succinctly, doing backup) is simply a
form of insurance, to keep your records safe in case of accident. For that reason,
backup should be done every day, and a copy of recent data kept off site. You should
have several media forms (zip disks, cds, tapes, flash memory, etc.) for backup
purposes, and never use the same one twice in a row (if the system crashes while you
are doing backup, you’ve just lost your most recent set of data).
Let me tell you a true story: Once upon a time, there was a lab. This lab had six
backup tapes. However, for some reason or other, for several months they had been
backing up every day on the same tape. One day their computer’s motherboard
started going bad. Seeing that something was going wrong, they hurriedly grabbed
up a tape (yes, the same tape) and began a backup on it. At that point, their
346
motherboard went bonkers and wrote every sixteenth bit in the database to “1”. It did
this to the hard drive and to the backup tape, effectively trashing all of their data for
the last three months. They were very sad. Now they use many backup tapes in
sequence. They learned from their mistake. You should, too.
Backup is not done in SchuyLab, but from your desktop. Schuyler House supplies a
media backup batch file program for the purpose and we usually have 2 versions of
backup for you; Daily and Full. Both versions can be saved to a zip disk or you can
use any CD burner program to burn a fresh CD each time. Even if you have a back
up program for your server (if your SchuyLab is attached to a network) we HIGHLY
suggest that you still make a daily backup of your SchuyLab database via our
programs (NOTE: SchuyLab database CANNOT be read except by a SchuyLab
program). Schuyler House Technical Support can help you set up where the batch
files are copied to so you can save to a zip disk or save to a file to burn to a CD later.
Backing up on the zip disk
1. Go to the station that has the zip disk drive. There should also be an icon on
this station called “Backup”. Put your zip disk into the drive slot, double
click on the icon and SchuyLab does the rest.
2. When the backup is complete, you will be prompted to remove the zip disk.
Please remove the disk and place it in a safe place.
Back up to a CD:
You may also save your backup information to a CD Rom if you have a CD writer /
drive in your computer. Schuyler House does not recommend any particular CD
Program as they all do the same basic thing. You will first have to run the backup
batch file and have saved it to somewhere in your SchuyLab folder. Again Schuyler
House Technical Support can help you set up where the batch files are copied to.
As with most window icons, double click on the CD Program of your choice, we
have named ours CD BACKUP.
347
You will want to make a data CD, to possibly share or archive your computer’s files,
documents, pictures, spreadsheets, etc. Under “select Source Files”, scroll down to
the SchuyLab folder and “click” on it. Click on the ADD button and the Backup
folder is added to the project list. Click on the Red button to start burning.
348
Restoring Data
In the event of catastrophic failure, such as your motherboard going bad or your hard
disk crashing, Schuyler House personnel can restore your system and all the data up
to and including your most recent backup. Do not attempt to do this on your own.
Call us: Our first task is to troubleshoot the cause of the failure, and then to repair or
replace the faulty hardware component(s), then reload your database. Schuyler
House will answer emergency calls 24 hours a day, 7 days a week.
349
Sec. 10 - 7Features
Have you thought of how you are going to send the results to the doctors? Or, how
you plan to bill the various clients or medical groups for the tests you have run. Your
SchuyLab system comes with the QC module but other features are available. From
the main menu screen, click on F7 Features to see what features your lab already has.
To find out more about all these features, see the appendix at the back of this book.
Reporting the Results
Whether you plan to mail or fax the results over to the patient’s doctor, SchuyLab has
a number of ways to do so. Following is just a brief description of those features.
Auto Faxing
The SchuyLab Fax Module will fax patient reports directly from SchuyLab to your
clients’ fax machines. It can be set up to do this automatically when a report is final,
whenever you print in Batch; or you can fax a single report at a time.
350
Remote Printing
Your system is set up with its required printers, reports and invoices are printing
nicely to the correct locations, and all is right with the world. Now, you need to print
something from your computer station to the lab next door, the boss’s office across
the street, or a client across town. That’s where Remote Printing comes in. Much
like Faxing, you can print when the patient’s report is finalized, when you batch print
or manually send it to the remote printer queue. Specific hardware (printers or
printing attachments) is necessary as is a dedicated phone line.
How to Bill with SchuyLab
SchuyLab offers you a number of ways to bill by using paper, electronically or by
exporting the information to another management system.
Billing
The SchuyLab Billing Module is an optional feature of the SchuyLab system. What
makes the Billing Module special? It permits the user to bill the procedures ordered
for the patients -- without having to enter the patients’ names and tests a second time.
The information entered on the patient during the course of laboratory analysis
automatically becomes part of the billing record: name, patient ID, doctor’s name,
and of course the tests and procedures performed. Yet at the same time, the Billing
Module is sufficiently independent from the laboratory setup that special pricing or
billing protocols can be inserted painlessly, without interfering with the lab tests
themselves.
Exporting Medical Information
EXport
SchuyLab’s patient database is kept in a proprietary format, which generally can’t be
interpreted by other LIS or MIS systems. The SchuyLab Export function was
devised to translate patient records (demographics and test results) into other formats,
and write those records to a file. The file can be on a diskette, on your computer’s
hard drive, or (if your station is networked) on the network server’s drive. If you
save to a diskette, the diskette can then be taken to another computer, and the results
read in.
351
Other Features
Batch Requisitions
If your SchuyLab is a multi-station network, and your specimens tend to arrive in
large batches, one or two times a day, you will often have numerous techs entering
the requisitions simultaneously. Batch Requisitions streamlines large-volume, multitech specimen entry.
Import
This is generally a manually triggered utility that a site can use to import patient
demographics from another system on a daily or weekly basis. This is used in cases
when the site decided it is not worthwhile to establish a dynamic interface.
IMport
When we install a SchuyLab system at a new site, the customer sometimes has a
prior LIS or an office system that has the historical records of his work. If the format
of the other system’s records is co-operative, Schuyler House can do a one-time data
dump to bring those records into SchuyLab.
Barcodes and Labels
If your major analyzers can read barcodes and you have a substantial specimen load,
the Barcode module will increase both your efficiency and the quality of your patient
results – perhaps more than any other single module. Barcodes increase specimen
integrity by improving the readability and accuracy of the labels and diminish tech
time and operator error by allowing host query by the instruments. You should verify
that your instruments have the capability to read barcodes before you decide on this
module.
QC
Maintaining Quality Control is a part of the work you do every day in the lab. You
need to track the set values of any given test and, on occasion, print out these values.
The QC module, which is a standard feature in SchuyLab, can do this for you and
more. See the Daily Operations section of your SchuyLab manual for more details in
setting up and using QC.
352
Medical Necessity
Now days it is important to know which tests the various government agencies will
pay for and those they won’t. Medical Necessity is designed to help catch these
mistakes, alerting you to tests and diagnoses that have nothing to do with one
another, and allowing you to check and see if you have entered the ICD-9 code
correctly. It is designed to advise you of potential problems before the Medicare
claim returns, denied.
Microbiology
SchuyLab’s Microbiology feature has been enhanced for smoother operation and
increased entry of results. It permits the user to define the organisms that may be
entered for any bacteriological sample. Sensitivities are now custom tailored to each
organism. Results are entered for the culture, the organism, and the antibiotics, and
fully annotated in each instance. Finally, we have removed the upper limit on the
number of organisms that may be identified and reported on a single specimen.
CytoloGy
The Cytology Module offers a demographics style report with the ability for entering
the interpretative ranges based on the Bethesda System for reporting cervical
cytology. It offers a report that will monitor and provide statistics for those aspects
of Pap Smear testing which need to be monitored for legal and technical purposes.
SchuyNet Control
The Internet is the contemporary way to speed laboratory results to your doctors.
SchuyNet allows your doctors to access their patients’ laboratory reports as soon as
the lab has released the results. Wherever your physician client is, he can log onto a
secure connection on any PC and review his most recent lab data – or look up prior
information.
MessaGes
SchuyLab Text Messaging allows the users on a SchuyLab system to send messages
to one another. Messages can be sent to all users, or to specific individuals. It’s not
e-mail – it only works within the SchuyLab system, on SchuyLab stations within
your lab – but it works similarly to e-mail.
353
Appendices
354
Appendix: Barcodes and Labels
Positive patient identification is necessary if the results obtained by the laboratory are
relevant to a patient's prognosis. Each time a sample is relabeled, aliquoted, or
manually identified there is a chance for error. Primary tube analysis of bar-coded
samples provides the best system for achieving an unbroken linkage between the test
results and the patient who actually provided the specimen.
In addition to patient care, using barcodes in a laboratory can save personnel time
measured in FTE's. Also, many instruments of modern design do not function well
without bar-coded tubes; laborious 'work-arounds' are necessary if technologist
attempt to run these instruments without barcodes.
What is a Barcode?
The standard UPC barcode that you are accustomed to seeing pasted to the apple you
are buying at the grocery store is made up of black and white parallel lines. These
lines encode digits in blocks of seven units; adjacent lines (and white spaces) of the
same color merge to form 4 different widths of line (or space) thickness. These lines
of varying width comprise the barcode that you routinely see. (There are other
barcode systems using dots and concentric circles, but the discussion of these is
beyond our scope here.)
All that is contained in these barcodes are the numbers and letters of an identification
sequence. In laboratory work, this sequence is usually the Accession number, though
it can also be the Patient ID. The barcode does not contain the patient name, the list
of tests ordered, or any other information. That information can be transmitted as a
result of a query based on a barcode, but it is not in the barcode itself. The
information content of the human-readable portion of the barcode label changes from
format to format; the content of the barcode itself stays the same (checksums aside –
more on that later).
(NB: There is a reason for using this method: If the barcode itself contains testing
information, this information cannot be easily be changed. For instance, if the
barcode were to contain the test 'Glucose', then you would be in trouble when the
doctor added on the rest of the CMP. By just using the barcode to contain the
Accession number, "42", then the information linked to that number can be altered at
will – "42" could mean just a Glucose one minute, and a whole CMP the next. This
allows for the dynamic flexibility needed in a laboratory environment.)
355
Laboratory use of barcodes and labels
The automatic generation of labels, with or without barcodes, is typically used by a
laboratory in one of three ways, depending on their individual needs and workflow.
Labels only, no barcodes
In this instance, the laboratory has chosen labels for the sake of positive patient
identification and legibility. The lab does not have any instruments that can make
use of barcodes, or perhaps they are a specialty lab that performs exotic manual tests.
Nonetheless, they have had experience with trying to read hand-written labels, and
the lab has decided to have SchuyLab print human-readable labels.
Barcodes for Unidirectional Instruments
Many instruments, archetypically hematology instruments, can read a barcode and
transmit it with the test results. These instruments generally perform a single test or
panel, so there is no selection of test options. In this case, barcodes substitute for the
tech standing next to the instrument, typing in accession numbers: the tubes are
placed in a rack, and the test(s) are performed as the barcodes are scanned by the
instrument.
Barcodes for Host-query instruments
Barcodes come 'into their own' with a host-query instrument, because in these cases
the barcode substitutes not only for the time the technologist stands by the
instrument, typing in numbers, it also makes it unnecessary for the tech to send a
worksheet to the instrument, or otherwise program it with orders. Instead, the
instrument reads the barcode and 'asks' SchuyLab what tests should be performed on
that specimen. SchuyLab answers with a list of tests; the instrument performs those
specific tests and transmits the results back.
General information on using Barcodes
The placement and orientation of the barcode label on the tube has some specific
requirements.
Unfortunately, CLIA and your facility may have additional
requirements, which can make it difficult to make everyone happy. If labels are
printed subsequent to the patient being drawn, slightly offsetting the barcode label, so
that the hand-written label partially shows beneath it, can satisfy all parties. If the
labels are printed prior to the phlebotomy, then the phlebotomists are usually asked to
initial the label. Please check the regulations of your facility and licensing agency
before setting a policy for the placement of the label.
356
In order for an instrument to read the barcode, you need to orient the barcode
longitudinally on the tube. Hold the tube such that the open end points left. Hold the
label so that you can read the printed name and information in a normal fashion.
Maintaining the relative positions of label and tube, adhere the label to the tube.
(Don't laugh: we have had instances where the barcode didn't work because the techs
were applying the labels 90 degrees off the proper alignment.)
If your instrument has trouble reading the barcode, look to see where the barcode
reader is positioned in the instrument. Watch it as it reads, or tries to read, a barcode.
Often you can see a red line where the laser is scanning the tube. Do you have the
barcode placed too high on the tube? Too low? If the barcode reader on that
instrument has not been used before, it may need cleaning or adjustment.
Some instruments are very particular about the amount of 'white space' they need
around a barcode. 'White space' is the blank space immediately before and after the
barcode. If you have selected a long SchuyLab Accession number format, and you
notice that the barcode fills the entire label, from edge to edge, you may have a
problem with some instruments being able to read the barcode. Test for this by
under-lapping a label before and after a test label that has a barcode on it. Make sure
you have about a quarter of an inch white space before and after the label. (You can
always put some white-out where the labels overlap, to make sure the edges are not
read as a 'bar'.) If the instrument can now read the label, you can switch to a barcode
format that provides more white space, get bigger labels or select a smaller, more
concise, format for your Accession number. (Fortunately, SchuyLab has a variety of
formats, and it is easy to change. Please contact Technical Support before you do
this, since changing the format of your Accession number could have consequences
to other aspects of your laboratory work.)
Changing your Accession format or buying bigger labels could be an inconvenience
to your work or finances. What else could you do? You could switch your barcode
format from ‘checksum' to 'non-checksum'.
Looking at the Formats (below), you will notice that (almost) every format comes in
two 'flavors': checksum and non-checksum. What does that mean? Checksumming
is a method of verifying the digits in an accession number. Let's say that your
accession number is 123456. That number, checksummed, could be 1+2+3+4+5+6=
21. But "21" has two digits…let's add them together: 2+1 = 3. Your checksummed
accession number then becomes 1234563. (This is a very simple example of a
checksumming algorithm.) If the instrument and SchuyLab are both set to
'checksum' the accession numbers, then they will both look for that "3" at the end of
the accession number. If they don't find the correct number, then they know that
something is wrong and that the number has been mis-scanned.
Obviously, both the instrument and the LIS must 'agree' on whether or not
checksumming is being used. Otherwise, there is a legitimate question as to whether
the Accession number is "1234563" or "123456 with a checksum of 3". Some
357
instruments can only read unchecksummed numbers; others always assume
checksums are in use; most can be set either way in the instrument setup. Set up all
of the instruments in your lab to read the same format – obviously, if one instrument
can only read (for example) checksummed barcodes that will be the controlling factor
in your decision of what format to use.
If given the option (your instruments can handle checksumming, and your accession
number format is not too long), you should select a format that is checksummed – it
provides greater accuracy. If your barcode is perilously near the edge of the label,
though, consider going to the non-checksummed version of your barcode format.
SchuyLab's use of Barcodes
The Setup screen for barcodes is found in F7 Features. Select the Bar Code icon (this
will be present only if your lab has opted for this feature). SchuyLab displays the Bar
Code Setup screen. This screen shows system-wide options for the barcode feature
except the Queue entry, which shows the configuration of the station you are at.
Model
There are six models of barcode printers. Of these, the two that
Schuyler House actively supports are the Allegro (also called the
Fargo-Allegro, Datamax, and Intermec) and the Dymo SE300 (also
called the Dymo SE300). Please use the radio button to select your
barcode model. This sets the model for your entire system: you
cannot mix models of barcode printers (i.e. Allegro and SE300) on
the same system.
Queue
When your Bar Code Feature is installed on your SchuyLab, a
barcode printer is configured on a port on your PC. At that time,
a Queue is created that matches the name of that individual
barcode printer.
In addition, each individual workstation
358
(whether or not it has a barcode printer physically attached) has a
queue selected under the Bar Code icon in F7 Features: That is
the queue to which all of the barcodes generated on that station
will print. Click on the Waiting button to see if your barcodes are
being generated into this queue. For more information on print
queues see Sec. 7 – Reports and Printing.
Copies
This is the default number of labels that will print out per
Accession. The default number of labels printed is determined by
the lab; but the individual tech can override that number during
accessioning. The format of label also influences the number of
labels printed. If your lab has selected "3" as the default number
of labels to print each time a new Accession is created, SchuyLab
could print 3 labels, three labels for each test ordered, 3 labels for
each department, or 3 labels for each sample type. All of these are
legitimate interpretations of "3", and depend on the format of
barcode label you have selected.
If more labels are needed in the future, barcodes can be reprinted
by returning to the Patient Processing screen, selecting Change
Accession, and entering the additional number of barcodes in the
Label field.
Extras
If you need a few extra labels printed, with just the accession
number and other info, but not specified for a sample or suffix,
(and assuming that you are using a sample/suffix type label
format) you can set the default number here. This is NOT for a
single accession, but for all your orders.
Format
SchuyLab lets you select one format of barcode for your entire
system. If your laboratory selects Format 24, then all stations
print out barcodes in Format 24.
Patient
Barcodes are printed at the time an accession number is created, unless
the barcode format selected is one that has the tests listed on it. In that
case, SchuyLab waits until you have ordered the tests and pressed F10
Done – then it prints the labels.
So far, we have been describing barcodes that print when a new
Accession is entered. SchuyLab also has the ability to print our
Patient based barcodes – which is to say, barcodes that reflect the
Patient ID number rather than the Accession number.
These barcodes can only be printed through the Print Labels icon
in F6 Print. Select the "Patient" option using the radio button,
and the range of Patient ID's. The print output can be limited to
Undischarged Patients by selecting that checkbox. The sequence
359
in which the labels print can be modified by the Sort list (Patient
ID; Name; Sex, Name).
360
Barcode Formats
Checksum
Format 0
Non Checksum
Format 1 (no barcode, list of tests)
Format 2
Format 3
Format 4
Format 5
361
Format 6
Format 7
Format 8
Format 9
Format 10
Format 11
Format 12
Format 13
Format 14
Format 15
Format 16
Format 17
Format 18
Format 19
Format 20
Format 21
362
Labels
There will be times when you do not want a bar code label, or you may not have the
bar code feature. You can still print labels with the information you want and in the
amount you want.
Select F6, Print
Select Print Labels
Depending on whether you have the feature or not, you will see one of the following
screens
Without Bar Codes
With Bar Codes
If you have the Bar Code Feature, unclick the Barcode Printer box and the box will
look like:
363
Select the ‘Setup…’ button;
Queue
If you are printing labels you will need to set the printer you
want to print to.
Font
You can set the font to use on these labels, either default (or
what is already set for your reports) or change the fonts to
Courier, Sans Serif, Roman and more. Click on the arrow and
364
scroll down to choose the font to use.
Accession
If you want to print an accession range, click this box. When
you do, you open the Existing Accessions Only option (it is no
longer grayed out).
Patient
If you want to use the patient ID as the range, click on this box.
When you do, you open the Sort option (it is no longer grayed
out). If you are printing by Patient ID, please note that the
accession number will NOT print on the label.
Existing
Accessions
Only
This will enable you to print labels for ALL open accessions.
That is, any accession that has tests ordered on it. This way,
you can enter a wide range of numbers and SchuyLab will
ignore any accession number in that range that doesn’t have a
test on it.
Undischarged
Patients Only
This will enable you to print labels for ALL in house patients
That is, any accession for a patient that has NOT been sent
home (i.e. they are still in one of the hospital beds). This way,
you can enter a wide range of numbers and SchuyLab will
ignore any patient in that range that has gone home (this works
especially well for hospitals).
Sort
If you are using the Patient ID as the range, you can sort the
labels by a variety of ways: Patient ID, Name or Sex/Name.
Type Point
Size
By changing the type size, you can get more (or less)
information on each line of the label. Simply type in the
number you want. The default is 120 (which is about a font size
12).
Copies of each
label
Format
Type in the number of labels you want printed.
Labels in each
row
If you choose to design your own labels, set the number of
labels that will be printed across the page.
Rows on each
page
If you choose to design your own labels, set the number of rows
of labels that will be printed down the page.
Top Margin
If you choose to design your own labels, type a number here to
move the start of the printing down from the top of the label
(NOT the top of the paper).
You can design custom labels or choice from one of the many
Avery (or equivalent) type label already set up.
365
Left Margin
If you choose to design your own labels, you can specify how
indented the printing starts for each label.
Width of each
label
If you choose to design your own labels, this will determine the
maximum characters you print on each line of the label.
NOTE: SchuyLab will NOT give you an error message if the
amount of information you want on that line is too much for
your label size (i.e. if you have set 25 characters as the width,
but your doctor’s name is 30 characters, the doctor’s name will
run over into the next label).
Length of each
label
If you choose to design your own labels, this will determine the
maximum lines you print on each label. The scale for the length
of each label is 720 = 1 inch.
NOTE: SchuyLab will NOT give you an error message if the
amount of lines you want is too much for your label size (so if
you have 360 in this box, that gives you a label about ½ inch
long, which would be about 3 lines of information. Any more
than that and you will print on the next label below).
Label Design
Depending on whether you want patient information on the
label, or just print a series of accession numbers for the day,
you can determine what is printed and where. When you click
on Label Design button you may see a familiar screen;
You can then set up your labels, much like setting up a result
form (See Sec. 7 – Reports and Printing for more information).
Your limitations are the size of the labels you are using.
366
After you have set everything up it’s very simple to print out the labels you need.
The number range will either be the range of accessions or range of Patient ID
(depending on how you set it up).
If you have chosen to print by Patient ID (and marked Undischarged Patients
Only), your labels may look something like;
367
368
Whereas the accession label (with Existing Accessions Only marked) may look like;
369
Appendix: Batch Requisitions
Like Gaul, the Batch Requisition screen is divided into three parts. The first part is
specimen information which is occasionally changed. The second portion is
information which defines the identity of the patient, and the third division is
information which is filled in after the patient’s identity has already been established.
Let’s go over the sections individually:
The Top Section
Accession
It shows the number which will be given to the specimen you are
currently entering. The number in this field will automatically
advance to the next specimen number until you reach the end of
the batch of numbers you are entering.
STAT
Select the STAT button if the specimen you are entering is a
370
STAT. This will move this specimen to the top of any worksheet
it may be on and print “STAT” in bold on a bar code label.
Note
The Note icon in this section of the screen is used to write
comments on this particular specimen.
Remarks
Are frequently used “canned” comments that should refer to this
specimen. Each code consists of a message which is associated
with a number.
Labels
If your lab has a label or bar code printer, there will be a field
marked “Labels” in the first section of the screen. The number
in that space indicates the number of labels that the label/bar
code printer will produce for this specimen. The labels are
printed either when the OK button is pushed on the Batch Entry
screen or when F10. Done is pushed after the tests are ordered
on the specimen, depending on the configuration of your system.
Draw Date,
Time, By
Will contain the current date, time, and user initials when you
enter the Batch Entry screen for the first time. From that point
on, it will ‘remember’ the data you entered in those fields from
the previous specimen. If you override the contents of the fields,
SchuyLab will ‘remember’ the new information, and so on.
Recv Date,
Time, By
contain the current date, time, and user initials when you enter
the Batch Entry screen for the first time. From then on, they
‘remember’ prior entries. If you clock in a batch of specimens
just before midnight, these fields will continue to show the date
from the day the specimens were actually received in the lab,
rather than automatically changing the date when midnight rolls
around. They continue to show the ‘remembered’ date until
either you change it, or you exit the Batch Entry feature.
Other
Accession ID
Not all labs make use of the “Other Specimen ID” field. Use this
space to record the number given to a specimen by its source
facility. It’s OK to leave this field blank.
Specimen
Received
The box marked “Specimen Rec’d” is both a list box and an
entry field. Select the arrow to choose from among the contents
of the list box, or type directly into the field.
371
The Middle Section
This is important: The information you enter in this section is what the computer
uses to establish the identity of the patient. In this section, enter all of the
information that you are sure of; do not enter any information you are not sure of.
Let me give you an example- If you have a patient, Peter Wachowski, and you aren’t
really sure of his birth date, but you think it says “12/26/52” and you put in both of
those pieces of information, the computer will search for a patient that matches both
criteria. If it fails to find an exact match, it will assume that this is a new patient. If
you just put in the name “Wachowski, Peter”, then it will search for all of the people
by that name. Maybe it will find a Peter Wachowski who was born 12/26/57! Then
you use ancillary information in Patient Demographics to confirm that this is indeed
the same person.
Age, Birth Date. SchuyLab calculates the age from the date of birth. Enter the age
only if the date of birth is not available.
The middle section also contains a “Client” field. Enter the name (or the number) of
the facility that sent the specimen. Remember, the contents of this field will be part
of what is used to establish the identity of the patient. If you have a Peter
Wachowski from Southwest Clinic in the system and you enter another Peter
Wachowski...but from Daily Health Clinic, the entry will be treated as a new patient.
When you push the Search button, SchuyLab searches its memory for an exact
match to that patient. If SchuyLab finds a matching patient, it will fill in the
nameplate at the top of the screen. (There is more information visible in the
nameplate than you have put in the middle section of the batch entry screen.) Use
this information to confirm the identity of the patient. If you need more information,
use the Patient Demographics icon in the bottom section to look further. What do
you do if you decide that the patient SchuyLab finds isn’t the one on the requisition?
Push the Cancel button on the bottom section. This will clear the screen of what you
have typed in, without advancing the specimen number. Now you can type in a new
set of patient information and Search again. If you aren’t certain that the patient that
SchuyLab ‘finds’ is the same as the one on the requisition form in front of you, make
a new patient. Get it?
If you are sure, use the patient the system finds.
If you aren't sure, make a new patient.
Enter as many fields as you are certain of, depending on the procedures set down by
your lab. When you have entered all of the appropriate fields, push the button
labeled Search. SchuyLab will look through all of the patients in its database for a
372
match. At this point, the middle section will ‘grey out’. This keeps you from
accidentally changing significant patient data after the ID has been established.
The Bottom Section
The bottom section contains two icons, nine text fields and two buttons. All of these
icons and buttons are grayed out until a patient ID is established. When the middle
section becomes grey, the bottom section is activated.
The icons are: Order Tests and Patient Demographics. These icons behave just
like the do on the Patient Processing screen.
The Text fields are Ordering Doctor, and areas for up to eight ICD-9 codes. Today,
where most labs are billing to Medicare and such, it is important to add the Diagnosis
codes that the doctor should be supplying to you on the requisition form.
Occasionally, a doctor will write down a diagnosis instead of the ICD-9 code (i.e.
Influenza instead of 487). The List button will open the “Select ICD-9 Codes” box.
By typing in the name of the diagnosis (or part of the name) in the “Search by codes
or phrase” box , SchuyLab will list all the diagnosis’s in it’s library for you to choose
from.
373
The buttons are:
Cancel- This button clears the screen of all the information on it.
OK- This button accepts the patient and tests, advances the specimen number, and
displays an empty screen for you to enter the next specimen.
Match to Patient ID
In the Patient Name field, you can enter the patient’s name or (if known) the patient’s
ID number. When you select SEARCH, SchuyLab will look up the patient ID and
fill in the fields with the unique patient data.
374
Appendix: Cytology
Cytology Module
The Cytology Module offers a demographics style report with interpretative ranges
based off of the Bethesda System for reporting cervical cytology. It offers a report
that will monitor and provide statistics for those aspects of Pap Smear testing which
need to be monitored for legal and technical purposes.
Unlike most of the reports and utilities in SchuyLab, the Cytology module must be
set up and used exactly as described in order for it to work. There is a slight amount
of variation possible, but the manner in which it is used must be expressly as
described below.
While it is theoretically possible to set up the SchuyLab Cytology module for use
with systems other than the Bethesda system, the effective use of another system with
SchuyLab Cytology involves aspects that are inherent in the Bethesda system (such
as the fact that the numeric codes in the Bethesda system are sequenced in order of
severity), and hence do not need to be addressed in this document. This document
deals only with the setup of the Bethesda system, or a system substantially identical
to it. If your lab does not wish to use the Bethesda System, Schuyler House
personnel will recommend setting up Cytology according to this specification before
attempting technical support of this module.
Setup
The first step in setting up your Cytology Report is to establish a set of cytology tests
corresponding to the categories of the Bethesda system: “Specimen Adequacy” and
“Interpretation" (sometimes called "Result" or "Diagnosis”) are required. “Review
and Ancillary Testing” “General Categorization”, and “Educational Notes and
Suggestions” are optional headings that are recommended in the Bethesda system.
The tests "Cytologist's Initials" and "Pathologist Review" can also be valuable in
monitoring and documenting the work done.
The tests "Specimen Adequacy", "General Categorization" and "Interpretation"
should have the following results as Values in the setup of the corresponding test:
(NB: The following lists are not to be interpreted as instruction in the reading of
cytology samples. They are intended only as information to be used in the setup of
the SchuyLab Cytology module.)
Specimen adequacy
• Satisfactory for evaluation
375
•
•
•
Unsatisfactory for evaluation (specify reason)
Specimen rejected or not processed (specify reason)
Specimen processed and examined, but unsatisfactory for evaluation of
epithelial abnormalities (specify reason)
General categorization (optional)
• Negative for intraepithelial lesion or malignancy
• Epithelial cell abnormality
• Other
Interpretation/result
• Negative for intraepithelial lesion or cancer (malignancy).
• Epithelial cell abnormalities.
1. Squamous cell
• Atypical squamous cells (ASC)
• ASC of undetermined significance (ASC-US).
• ASC that cannot exclude high-grade squamous
intraepithelial lesion [HSIL] (ASC-H).
• Low-grade squamous intraepithelial lesions (LSIL)
• High-grade squamous intraepithelial lesions (HSIL)
2. Glandular cell abnormalities
• Atypical glandular cells (ACG)
• Endocervical adenocarcinoma in situ (AIS)
• Adenocarcinoma:
Next, make a new panel called Pap Smear (PAPSMEAR) that contains these above
tests. To set up the test INTERPRETATION in SchuyLab:
1.
2.
3.
4.
Select F8. Tools. SchuyLab displays the System Tools menu.
Select Set-Up. SchuyLab displays the Setup menu.
Select Test & Panel Definition. SchuyLab displays the Define Tests menu.
Select Test Definition. SchuyLab displays the Update Tests box, listing the
existing tests.
5. If INTERPRETATION is not a listed test, then you will need to create it (see
Sec. 4, Tests and Panels).
376
Under Options… button, pull down the Type: list and select the new test type, PAP
RSLT. Select OK. This is the crucial step, as it allows SchuyLab’s Cytology
Report to differentiate this test from all of the other tests in your database. Only set
the PAP RSLT option on the Interpretation /Result /Diagnosis category. Let me say
that again: There should be Only One Test in your entire database that has the PAP
RSLT type in Options, and that is the Interpretation test (or whatever you are naming
the diagnostic result of the Pap smear). (This directive can be modified under some
exceptional circumstances. Don't do this without asking Tech Support personnel
about it.)
377
Under Ranges…, select the Interpretive and input your Bethesda system
nomenclature results. Each result should be put as both the Minimum: and
Maximum:. Use a condensed text equivalent in the Report as: field. Put your
expanded text “Negative for intraepithelial lesion or malignancy” as a Note attached
to that Interpretive Range. Thus when you enter in the result 510 on the PAP_RSLT
test, the report will print the result as Negative, with an additional note immediately
below that states “Negative for intraepithelial lesion or malignancy”.
378
What your note pad looks like.
These codes have not been established by the Bethesda system, but must obey the
following rules: They must be sequential. They must be in order of increasing
severity. The example given below follows these rules. If you set up the Interpretive
Ranges as shown below, the Cytology module will function properly.
"Minimum"
"Maximum"
510
"Report as"
Note:
Negative
Negative for intraepithelial lesion or
cancer (malignancy)
520
Other
Endometrial cells present in a woman
age 40 or over
530
(ASC)
Atypical squamous cells
540
(ACG)
Atypical glandular cells
550
(ASC-US)
ASC of undetermined significance.
560
(ASC-H)
ASC that cannot exclude high-grade
squamous intraepithelial lesion [HSIL].
570
(LSIL)
580
(HSIL)
Low-grade squamous
intraepithelial lesions
High-grade squamous intraepithelial
lesions
379
590
(AIS)
Endocervical adenocarcinoma in situ
592
Adenocarcinoma
Adenocarcinoma
594
Other malignancy
Other malignancies
The Setup for this test will end up looking something like this.
You can add as many interpretive ranges as you need.
The Cytology Report
Once the Cytology tests have been properly configured, the report itself is generated
in F7: Features. This report will print out a list of all the specimens for a given
Client, along with their Result Interpretation and several additional options.
1. Select F7: Features
2. Select Cytology. This icon will be present if the module has been loaded.
3. Select Client Report. SchuyLab displays a pop-up box that is reminiscent of
the Demographics reports.
380
To individualize this report for your lab, select the Setup button.
As with the other Demographics reports, you can select among the check-boxed
options to determine what type of information you want on your report. Even more
detailed formatting can be done by selecting the Heading… or Body? buttons and
configuring your reports line-by-line, field-by-field (See Reports Setup in your
SchuyLab User’s Manual, Section 7 for more information on this topic.)
381
Many of the check options are present from the standard Demographics-style reports,
however the Cytology report has some additional choices.
Sequence for reporting detail entries: is a new list that is now found on all of the
Demographics reports. It allows you to now sort the list of specimens by Accession
ID, Patient ID, or Patient Name order. Prior to this, all such reports have generated in
the Accession order.
Patient/Accession Notes when checked will include a section for any notes that have
been attached to the patient and/or specimen.
Result Notes will print any additional notes that are attached to the
INTERPRETATION results. Some Labs will store that the result is simply AGC or
Atypical Glandular Cells. The Bethesda system requires on AGC results to “specify
endocervical, endometrial, or not otherwise specified”. These designations can be
attached as a note to the AGC result. This option allows the extra specifications to
print along with the result.
Prior Results will print any prior Pap Smear Interpretation results that the patient
has had. It will display on the report as below:
The statistics option is one of the primary reasons the Cytology module was
developed. This option tallies up the frequency of each result, and lists the count and
percentage for each Client. It will give you a total count for all your Clients at the
end of the report.
382
The last aspect of this window is the Value Range section. When you look at your
Cytology results, you want to view them in groups that relate to the type of
interpretation. To continue to follow the example given above, the Value Range of
520-550 would give you a report of all of the Epithelial Cell Abnormality results.
Modify the contents of these boxes to produce the reports you need.
383
Appendix: Export
SchuyLab’s patient database is kept in a proprietary format, which
generally can’t be interpreted by other LIS or MIS systems. The SchuyLab
Export function was devised to translate patient records (demographics and test
results) into other formats, and write those records to a file. The file can be on a
diskette, on your computer’s hard drive, or (if your station is networked) on the
network server’s drive. If you save to a diskette, the diskette can then be taken
to another computer, and the results read in.
There’s a bit of setup involved in using the Export function, which need only be done
once. Thereafter, you can translate and write patient records to diskette effortlessly
and quickly.
To Set up the SchuyLab Export Function
Select F7. Features.
Select Export. SchuyLab displays the Export Patients box.
384
Select Setup. SchuyLab displays the Export Format List box.
The Export Format List box shows the formats that have been defined on your
system’s Export feature. To edit or delete any of these formats, you would select it
from the list. For the moment, however, we’ll concentrate on creating a new format
to suit your lab’s needs.
To create a new format for your Export feature, select New Format. SchuyLab
displays the Create Export Format box.
385
Complete the fields as described below:
Name
Enter a name (up to eight characters long) for the new Export
format.
Description
Enter a more complete description for your own records.
Peer System
Type
This is used when one of the pre-programmed standard formats
(HL7 or ASTM) requires special handling to interface to another
system. The peer system can be selected to trigger this. If the
system being sent to is one of the peer systems, then it should be
selected.
Output Type
Select one of the output types:
ASTM-1238 / 1394, a standardized format;
HL7,
Fixed length ASCII, where all fields are the same size;
Delimited ASCII, where the fields can be of variable size
and are separated by so-called “delimiters”;
dBase IV format, for use with dBase spreadsheets.
Spreadsheet
Select this box if you want the fields to be arranged in the form of
a spreadsheet, with the same fields repeated on every line. This
is only available for Fixed length ASCII, Delimited ASCII or
dBase outputs, where the tests to be exported are specified (see
below).
The Pending field works for all result export methods. The text
entered in the box is what will be sent in the result field if the
result is pending. If SUPPRESS is specified, then no pending
results will be sent at all.
Pending
Reportable
Only
When this box is checked, only reportable (or printable) tests will
be exported. Any test created as a “bill only test” will not be
reported (See Sec. 4 – Tests and Panels for more about non
printing tests).
Restricted
When this box is checked, restricted test (such as HIV) will be
allowed to be exported.
By default, the Export function exports all tests in the SchuyLab system (results,
codes, prices, etc, as determined by the setup of the format). If you wish Export to
only look at specific tests, select the Tests? button. SchuyLab displays the Include
Tests box.
386
The Include Tests box will list all tests currently designated for this Export format.
(If none are listed, then all the tests are available.) To add to the list, select the Add
Tests button. SchuyLab displays the Add Test(s) box.
Select the tests you want included in the Export format, then select Done. SchuyLab
returns to the Include Tests box.
When you’re finished designating tests for the Export format, select OK. SchuyLab
returns to the Create Export Format box.
387
SchuyLab has four output types to offer you, ASCII, ASTM, HL7, DBASE.
Following is the setup for each of these formats. The most common format used is
the Fixed or Delimited ASCII format.
ASCII – Fixed Length and Delimited
The ASCII Export format is defined by the number, order, and content of the fields it
generates in each record of the report. To set these, select the Layout button.
SchuyLab displays the Layout Records box. The box show below is set for the
Delimited ASCII Format. Fixed ASCII does not contain the Separate or Quote
boxes.
If you are using the Delimited ASCII type, complete the fields as described below:
Separate
Enter the character to be used to separate fields. The
comma (,) is the default, as it’s the most common, but the vertical
stroke ( | ) is used by some software programs.
Quote
Enter the character to be used to mark the beginning and end of a
field. The double quote (“) is the default, as it’s the most
common, but the single quote (‘) is used by some software
programs.
No Empty
Checking the No Empty box will force the program to put a ""
field rather than leaving it blank. This should only be used if the
388
receiving system requires it.
The definition of the generated records is the heart of the Export function. Think of
each record as a line in a spreadsheet. A typical record might look something like
this:
“Smith”, “John”, “550-12-2222”, “1-1-58”, “WBC”, “3.8”, “L”
Each of the items in quotes is a field. Defining a record is simply telling SchuyLab
which field -- that is, what information -- do you want on the line, in what order?
How do you want it sorted?
SchuyLab will search through all the test results being Exported, one at a time, and
sort them by type of record, as described below:
Beginning
This type of record is generated once per Export, and is the first
record in the file.
Ending
This type of record is generated once per Export, and is the last
record in the file.
Patient
This type of record sorts the file by patient ID. It’s useful for
applications requiring patient information to be on a separate line.
Accession
This type of record sorts the file by accession ID. It’s useful for
applications requiring specimen information to be on a separate
line.
Result
This type of record sorts the file by test. It’s useful for
applications where each patient or accession is listed once,
followed by test information. (It’s the most commonly used
record type.)
Charges
This type of record sorts the file by charges.
It’s useful for billing applications and financial
reports.
Note that we can have several types of records in a single export format. For
instance, we can start with a Beginning record, which might simply be a line of text
with the name of the lab. That might be followed with a Patient record, then a Result
record.
Also note that the Patient and Accession records will be separate from any other
records. That being the case, they will also repeat as often as necessary. (Remember,
SchuyLab Export will search through its database in order, grabbing first the patient
information, then the specimen information, then the tests.) The software application
389
that’s intended to read the Export file must be able to parse the file correctly; if it’s
not capable of distinguishing separate lines of information, you may want to only use
the Result record type. It can be configured to include patient and accession
information.
Let’s take a typical example, and have the Export function generate a Result-type
record. (The procedures described here are applicable to any of the record types.)
Select the Result? button from the Layout Records box. SchuyLab displays the
Define Result box.
Remember that each record is made up of fields: in our example above, the line of
data had each field in quotes. We must define the fields that we want included in this
record. To do this, select Add Field. SchuyLab displays the Field Type box.
390
Different types of records will be able to access different fields (i.e., different
information), but the fields for the Result record are typical:
Skip
Inserts a blank field.
Text
Inserts a line of text. Length of the line, and its contents, are
defined by the user.
Patient...
Inserts information from the patient file: patient name, patient
ID, date of birth, etc.
Accession...
Inserts information from the specimen record: type of specimen,
draw date & time, received date & time, etc.
Test...
Inserts information about the tests ordered on the specimen: test
code, full test name, normal range, etc.
Result...
Inserts information about the results of the tests ordered on the
specimen.
Doctor...
Inserts information about the patient’s doctor: name, ID, etc.
Client...
Inserts information about the patient’s client, which may be the
doctor, his clinic, or other: name, ID, etc
Current...
Inserts information about the record you are exporting: date,
time, etc.
Let’s say, for the sake of our example, that we’re exporting test results for data
analysis in a spreadsheet. So one of our fields should be the name of the tests. We
select the line “Test...” from the Field Type box. SchuyLab displays the Test... box,
listing the fields that are associated with test definition.
391
We select the “Test Name” line from the Test... box. SchuyLab displays the Test
Name box, which defines the parameters of this field.
The Width window determines how many characters long this field will be. (For
Test Name, the Width is set to 16 by default: this is the length permitted when the
test was defined.) The next two buttons determine whether the data in this field will
be left-justified or right-justified: that is, whether the sixteen characters would read
“WBC_____________” or “_____________WBC”.
If you wish the text to be entirely in capital letters, select the CAPS check box.
Finally, there may be further choices in the definition of field. For instance, when
defining a test name, SchuyLab requires a test code (8 characters) as well as a test
name (16 characters -- the part that’s printed on the patient’s report). It also permits a
“full description”, which is intended for internal use. For the Test Name field, we
have our choice of these three items. If we select the pull-down list at the upper right
of the Test Name box, we get a list of these choices:
392
We select the form we want, then select OK. SchuyLab returns to the Define Result
box, listing the field we’ve just inserted.
On the line displaying the field, the first number is the space in the line where the
field begins (in this case, since it’s the first field, it starts in space #1). The next
number is the length of the field (in this case, 16 spaces). The next character is L or
R, showing whether the field is left-justified or right-justified; then comes the field
type (Test Name) and the exact means of display (in this case, the test code).
To add further fields to the record, we select the Add Field button, and repeat the
above steps until we have all the fields we need. When we’re done, the record will
look something like this:
393
Once the fields have been added to the record, you may need to arrange them in the
correct order. To do this, select the Re-arrange Fields button. SchuyLab displays
the Re-arrange Fields box, listing all the fields currently defined in the record.
Re-sequencing the fields is done by clicking the mouse on the item you want to
move, then clicking at the spot on the list where you want it to be. Say, for instance,
that in the above example, we want the accession ID number to be the first field on
the line. We click on the “Accession ID” line, highlighting it. Then we move the
mouse to the top of the list and click again. The accession ID moves to the top of the
list.
When the fields are correctly arranged, select Done. SchuyLab returns to the Define
Result box, with the fields in their new order.
394
When the record is satisfactory, select OK. SchuyLab returns to the Layout Records
box. Select OK again to return to the Create Export Format box. Select OK once
again to return to the Export Format List box, with the new format present. Select
Done to return to the Export Patient box. We are now ready to export data to a
diskette. Below is an example of what you may see.
ASTM 1238 / 1394
ASTM 1238 and ASTM 1394 are programmed into SchuyLab, with very little setup
on your part. We have a number of HIS types available. To choose one, click on the
arrow to the right of the box below Peer System Type
395
To finish any setup, select the Layout button. SchuyLab will display the Layout
Data box.
You will need to contact the software people for the Peer System you are using to
complete the information needed in this box.
396
When the record is satisfactory, select OK. SchuyLab returns to the Create Export
Format box. Select OK again to return to the Export Format List box, with the new
format present. Select Done to return to the Export Patient box. We are now ready
to export data to a diskette.
HL7
HL7 is a generated generic output that can be used as a default program, with or
without a specified Peer System Type.
To finish any setup, select the Layout button.
Data box.
SchuyLab will display the Layout
397
You will need to contact the software people for the Peer System you are using to
complete the information needed in this box.
When the record is satisfactory, select OK. SchuyLab returns to the Create Export
Format box. Select OK again to return to the Export Format List box, with the new
format present. Select Done to return to the Export Patient box. We are now ready
to export data to a diskette.
DBASE IV
The DBASE IV Output type is specifically for use with the dBase IV database engine
software from Ashton-Tate.
398
Let’s take a typical example, and have the Export function generate a Result-type
record. (The procedures described here are applicable to any of the record types.)
Select the Layout button from the Update Format box. SchuyLab displays the
Define Result box.
Remember that each record is made up of fields. We must define the fields that we
want included in this record. To do this, select Add Field. SchuyLab displays the
Field Type box.
399
Different types of records will be able to access different fields (i.e., different
information), but the fields for the Result record are typical:
Skip
Inserts a blank field.
Text
Inserts a line of text. Length of the line, and its contents, are
defined by the user.
Patient...
Inserts information from the patient file: patient name, patient
ID, date of birth, etc.
Accession...
Inserts information from the specimen record: type of
specimen, draw date & time, received date & time, etc.
Test...
Inserts information about the tests ordered on the specimen:
test code, full test name, normal range, etc.
Result...
Inserts information about the results of the tests ordered on the
specimen.
Doctor...
Inserts information about the patient’s doctor: name, ID, etc.
Client...
Inserts information about the patient’s client, which may be the
doctor, his clinic, or other: name, ID, etc
Current...
Inserts information about the record you are exporting: date,
time, etc.
Let’s say, for the sake of our example, that we’re exporting test results for data
analysis in a spreadsheet. So one of our fields should be the name of the tests. We
400
select the line “Test...” from the Field Type box. SchuyLab displays the Test... box,
listing the fields that are associated with test definition.
We select the “Test Name” line from the Test... box. SchuyLab displays the Test
Name box, which defines the parameters of this field.
The Width window determines how many characters long this field will be. (For
Test Name, the Width is set to 16 by default: this is the length permitted when the
test was defined.) The next two buttons determine whether the data in this field will
be left-justified or right-justified: that is, whether the sixteen characters would read
“WBC_____________” or “_____________WBC”.
If you wish the text to be entirely in capital letters, select the CAPS check box.
Finally, there may be further choices in the definition of field. For instance, when
defining a test name, SchuyLab requires a test code (8 characters) as well as a test
name (16 characters -- the part that’s printed on the patient’s report). It also permits a
401
“full description”, which is intended for internal use. For the Test Name field, we
have our choice of these three items. If we select the pull-down list at the upper right
of the Test Name box, we get a list of these choices:
We select the form we want, then select OK. SchuyLab returns to the Define Result
box, listing the field we’ve just inserted.
On the line displaying the field, the first number is the space in the line where the
field begins (in this case, since it’s the first field, it starts in space #1). The next
number is the length of the field (in this case, 16 spaces). The next character is L or
R, showing whether the field is left-justified or right-justified; then comes the field
type (Test Name) and the exact means of display (in this case, the test code).
402
To add further fields to the record, we select the Add Field button, and repeat the
above steps until we have all the fields we need. When we’re done, the record will
look something like this:
Once the fields have been added to the record, you may need to arrange them in the
correct order. To do this, select the Re-arrange Fields button. SchuyLab displays
the Re-arrange Fields box, listing all the fields currently defined in the record.
Re-sequencing the fields is done by clicking the mouse on the item you want to
move, then clicking at the spot on the list where you want it to be. Say, for instance,
that in the above example, we want the accession ID number to be the first field on
the line. We click on the “Accession ID” line, highlighting it. Then we move the
403
mouse to the top of the list and click again. The accession ID moves to the top of the
list.
When the fields are correctly arranged, select Done. SchuyLab returns to the Define
Result box, with the fields in their new order.
When the record is satisfactory, select OK. SchuyLab returns to the Create Export
Format box. Select OK again to return to the Export Format List box, with the new
format present. Select Done to return to the Export Patient box. We are now ready
to export data to a diskette.
To Use the SchuyLab Export Function
1. Select F7. Features.
2. Select Export. SchuyLab displays the Export Patients box.
404
3. From the Format pull-down list, select the format you’ve defined for the
exported file. (Once you’ve selected it, it will remain the default until you
change it again.)
4. In the Select Path window, type the name of the file the Export function is to
create. Be sure to include the drive designation, if it’s different than the
drive on which your SchuyLab system is installed. Thus, in the above
example, we’re writing the file on the computer’s 3.5” diskette drive, so we
start the path with the phrase “A:\” (the name of that drive). (Note: once
you’ve entered a path and filename, it will remain the default until you
change it again.)
5. If you wish to export records for the patients of a single Client, type that
Client’s name or Client ID number in the Select for Client field. Leaving this
field blank will cause patients records for all Clients to be exported.
6. Select the method of sorting patient records:
Accessions
Enter the beginning and ending specimen ID
(accession) numbers for the range of records you wish to
export.
Draw Dates
Enter the beginning and ending dates for the records you
wish to export.
Patient IDs
Enter the ID number of the patient(s) whose record(s) you
wish to export.
405
Changed Since
(D/T)
Enter the date and time and you will export any
changes that have been made since that date.
7. Select OK. SchuyLab exports the specified patient records into the file
named in the Select Path field.
Panel/Test Translation
In some case, the program you are exporting information to may use test codes that
are different from what you are using in SchuyLab. By setting up this translation
table, SchuyLab will translate the correct tests. Select the “Update” button.
Match Test by:
Code: Use test code
Name: Use test name
Description: Use test description
No Match, Use
Input
If the exported test name doesn’t match the one we expect, it
brings it in without translation. Otherwise no export takes
place.
Translate results
as well as request
In some cases you will need to send back the test number
instead of the code or name. This box will need to be
checked for that to work properly.
406
Just like the Test Translation Table in F8, Tools, Device Setup, you need to put in the
test code or name as it comes across (I.e. 001, 010, etc). Under the SchuyLab side
match which test this will translate to (i.e. 001 = K, 010 = NA).
Doctor Translation
In some case, the program you are exporting information to may use codes for each
doctor. By setting up this translation table, SchuyLab will translate these codes for
you. When you select the “New…” button,
Systems use the
Same IDs
IDs match between both systems
407
Automatically
Build Table
Automatically build a translation table
Automatically
Change Name
If the doctor’s name changes, trust that the other system
has the correct name.
Automatically Add
Doctors
If the other system sends over a new doctor, add them to
the list.
Automatically
Assign IDs
If you choose to automatically add doctors, the system will
auto automatically assign ID numbers.
If the doctor you enter is not in SchuyLab, the Add Doctor box will open.
Insurance Translation
In some case, the program you are exporting information to may use codes for each
insurance carrier. By setting up this translation table, SchuyLab will translate these
codes for you.
408
Systems use the
Same IDs
IDs match between the systems
Automatically Build
Tables
Automatically build a translation table
Automatically
Change Name /
Address
If the company name or address changes, update the
SchuyLab list.
Automatically Add
Companies
If the other system sends over a new company, add it to
the SchuyLab list
Automatically
Assign IDs
Assign IDs to any new company.
409
If the company name you enter is not in SchuyLab, the Add Company box will open.
Test List
Export of Test List. The Export feature now has a test export tab as well as a patient
export. This is currently only able to export some specific formats. More will be
added.
410
Appendix: SchuyLab Medical Necessity
Medical Necessity
Everyone makes mistakes. Mistakes are inevitable, but one can avoid having to
deal with the consequences of a particularly messy one by catching it before it
does damage. One particularly painful error deals with Medicare, and the
payors of your lab's tests. Medicare requires every test run on a patient to
correspond to the diagnosis given by the patient's doctor, to be sure that the lab
is not charging unnecessary tests. Medicare (and other insurance payers) uses
the ICD-9 diagnostic codes of the patient to determine if the tests you run are
medically necessary. Needless to say, if someone at the lab goofs and enters a
wrong ICD-9 code the lab will not get paid.
Medical Necessity is designed to help catch these mistakes, alerting you to tests and
diagnoses that have nothing to do with one another, and allowing you to check and
see if you have entered the ICD-9 code correctly. It is designed to advise you of
potential problems before the Medicare claim returns, denied.
Medical Necessity Alerts
The Medical Necessity Alert will appear if you have just ordered a test or panel that
is not validated by any of the diagnoses presented by the doctor. It gives you the
chance to cancel the tests, override the decision (and accept the consequences), or
check the ICD-9 code for an error. Your tests will automatically be checked if you
have enabled automatic checking in Medical Necessity Setup (see Setup below for
details,) and if the patient’s bill type supports Medical Necessity. This screen will
not appear if all of the procedures you have just ordered are confirmed by the
patient’s ICD-9 codes.
411
At the top of the list is the set of ICD-9 code(s) assigned to the accession, and their
description(s). Selecting one of the codes will bring you a smaller box, allowing you
to change or delete the code (if you made a mistake when entering it:) The selected
ICD-9 code is displayed, as well as its description:
Below this box is a second box showing each of the tests you have ordered on the
specimen. The CPT code and the description of each test are listed. Under the column
ICD-9 Links, you will find either the number (1-8) of the ICD-9 code that
corresponds with this test, or an alert in red. You will not be able to select OK from
this screen until the alerts no longer appears; either by pressing cancel and removing
the test, or fixing the error with the ICD-9 code.
412
The most common alert is NOT ALLOWED. This is triggered when there seems to
be no link between the test you have ordered and any one of the ICD-9 diagnosis
codes of the patient. The other alerts are used when a match is found, but special
conditions are not met. These alerts display the number (1-8) of the ICD-9 code, as
well as one of these messages in red:
GENDER: The patient is of the wrong gender for this test. Some tests just don't
make sense when performed on a man instead of a woman, or vice versa.
NEED DOB: The test can be ordered under certain age conditions, but SchuyLab
cannot determine the patient's age. Enter a Date of Birth, and this message will
disappear.
NEED 4 DGT: SchuyLab cannot tell if there is a link between the diagnosis and the
test. You will need to enter a fourth digit onto the ICD-9 code before SchuyLab has
enough information to let you accept the test.
NEED 5 DGT: As above, but a fifth digit is required for SchuyLab to have enough
information. This error and the above error occur when there are multiple variations
of an ICD-9 code with slightly different fourth and fifth digits.
TOO OLD: The patient is too old to meet the certain age requirements of this test.
TOO SOON: This test can only be ordered once in a certain number of days for this
diagnosis, and it has not been the proper amount of time since the test was last
ordered.
TOO YOUNG: The patient is not old enough to meet the special age requirements of
this test.
Two special buttons adorn the bottom of the box. “ICD-9…” brings up the Select
ICD-9 Code box, which will make it easier to change an ICD-9 code if it was entered
in error. “OVerride” will allow you to go pass the ICD9 check and let you continue
if you have the proper security clearance.
There are close to 17,000 current entries in the ninth edition of the International
Classification of Diseases. Now perhaps your lab may not use all 17000 codes, but it
is aggravating to page through thousands of entries to find a match for the diagnosis
your doctor scribbled down. The Select ICD-9 Codes box allows you to search your
ICD-9 database by several methods to fill out up to eight diagnoses.
413
The small box at the top lists the current ICD-9 codes assigned to the patient and
their descriptions, up to a maximum of eight. Selecting one of the codes will bring
you a smaller box, allowing you to change or delete the code (if you made a mistake
when entering it:)
Below this box is the Search by code or phrase search field. If you type in the first
three digits of an ICD-9 code, the master list of ICD-9 codes will appear below
showing all the codes that begin with those three digits. The more digits you type, the
more the list narrows down. If the list contains multiple items, select one to add it to
414
the patient’s list of diagnoses. If the list has a single ICD-9 code, press the Select
button or the Enter key to place the code into the list.
This box includes a powerful search engine, in case the doctor provided a written
diagnosis instead of a code. Typing letters into the search field (the long, thin field)
will display the ICD-9 codes that begin with those letters in the box below. However,
if you do not know the exact first letters of the description, you can type a series of
words and press the Search button. You can tell SchuyLab to search for all the words
you have typed in any order, any of the words you have typed, or the complete phrase
of words by selecting one of the three radio buttons below the search field.
There is a special symbol that you can use to receive even more information from this
search program. If you were to type card into the search engine, SchuyLab would
display all the ICD-9 codes with card in the description, as well as all their subcodes. However, what if you wanted to find all the codes dealing with cardiac and
cardiovascular? Rather than typing both words out and selecting "any word", you can
type card* into the search field. The * tells SchuyLab to search for any word in the
ICD-9 description that begins with card.
Using the search engine and the ability to quickly find the correct code, you can
easily enter and update the doctor's ICD-9 codes. The box also allows you to quickly
find and fix any errors made when originally typing in the codes. The Select ICD-9
Code box can also be found in Change Demographics, under the button marked
List.
The second button, Override, will skip the Medical Necessity alert and allow you to
proceed: However, a box will pop up and prompt you to print out an Advanced
Beneficiary Notice (ABN). It is suggested that you then print out this form and have
the patient sign it.
415
Be warned, however, that there is a good chance that some insurance payors will
refuse to pay for the test if it is not medically necessary. Override will be grayed out
unless you have Override Necessity security clearance.
If you are unable to find a match in the ICD-9 list or the list of tests requested by the
doctor, Schuyler House recommends calling the doctor for the correct information.
Medical Necessity Setup
At the heart of the Medical Necessity module is a series of links between the CPT
codes of your lab's tests and the ICD-9 codes of your lab. When ordering a test, if no
link is found between the test being ordered and the ICD-9 codes that the doctor has
sent you, a medical necessity alert will appear. You must create these links before
Medical Necessity will function properly. Also, you can setup special conditions for
links where age and gender have an effect on whether or not certain tests apply.
Setting up these links will take a large amount of time; therefore, SchuyLab also
allows you to import a pre-made database that you have purchased from Schuyler
House or another provider.
Create a New Link
1. Select F7. Features. SchuyLab displays the Special Features screen.
2. Select Medical Necessity. SchuyLab displays Medical Necessity Setup.
416
This menu lists the CPT codes of your lab. If you wish to create a link for a new CPT
code, select Add CPT.... If the new CPT code does not have a matching test in your
database, the description will read "Not used in Tests/Panels."
The two check boxes below this list determine whether or not SchuyLab
automatically checks for Medical Necessity errors while ordering tests and
processing claims. If you select these boxes, SchuyLab will automatically display a
Medical Necessity Alert if it notices a claim or test that does not match the diagnosis.
If both boxes are left unchecked, you can still check Medical Necessity manually by
selecting a button in the Edit Claims screen.
Selecting a CPT code from the list will take you to a second menu, showing the
current links for the code.
The current ICD-9 code links between the selected CPT code and your lab's
diagnosis database are displayed. Each link is color coded: green dots show ranges
where the test applies to the diagnosis and can be ordered without trouble, while
yellow dots show ranges that can be ordered when special conditions are met.
Many of the CPT codes that you will use in your lab’s operation have the same set of
linkages. Instead of typing in all the same links, you can select a CPT code you wish
to duplicate from the pull-down box at the top of the menu. Note: You may not
select a CPT code if there are any linkages currently entered on the current code (you
will have to delete them all). Also, you will be unable to add new linkages to the list
without adding them to the main CPT code.
417
SchuyLab now proceeds to the Add Linkage box.
1. If you are creating the first linkage for a CPT code, you will have to type the
code in yourself. If you used an existing code, the CPT field will be filled in
and grayed out.
2. In the two ICD-9 fields, enter the first and last numbers of the ICD-9 range
linking to the CPT code. If you only wish to link one ICD-9 number to a
certain code, leave the second field blank.
3. Some tests that require certain conditions to be met before they apply to a
patients' diagnosis. Any existing conditions will be listed in the menu marked
Special Conditions; select one to update it. Each line in the menu is a single
set of conditions: if all the conditions of a single set are met, the test will be
acceptable.
4. To add gender, age, or time-based conditions, select Add Condition.
SchuyLab will display the Add Condition Box.
Select Male, Female, or Unmarked if there are any gender restrictions with
the test.
To enter a range of ages, enter the numbers to begin and end the range. You
can select years, months, or days to measure the age of your patient. To
signify that the exception applies to people at or below a certain age, leave
418
the first box blank. If the exception applies to people at or above a certain
age, leave the second box blank.
If there is no reason to run a test more than a certain frequency, enter a
number into the field marked May be used only once every ___ days. The
test will cause a medical necessity alert when it has not been the required
amount of time since the test was last ordered for this patient.
Press OK to return to the New ICD9 Code box.
5. Select OK when done. SchuyLab returns to the ICD-9 selection menu.
Pressing OK a second time will return you to Medical Necessity Setup.
Repeat steps 2-6 for all new links.
Import a Medical Necessity Database
When you purchase the Medical necessity module, you have the option of supplying
your own database of ICD9 codes, or we can load a database for you. If you should
decide to use your own, or purchase a database of codes from another source, you can
easily import that database into SchuyLab. It is suggested that you contact SchuyLab
Technical Support for assistance in this.
1. Select F7 Features. SchuyLab displays the Special Features screen.
2. Select Medical Necessity. SchuyLab displays Medical Necessity Setup.
3. Select Import. SchuyLab displays a box prompting you for the location of
the database file.
4. Enter the path of the database file and select OK. The database will be
automatically loaded into your system. Alternatively, if you do not know
exactly where to find the database, selecting Browse will allow you to search
your machine for databases.
Update a Medical Necessity Link
Medicare is constantly changing and adding codes as it sees fit. And there are many
publications that will publish those changes on a quarterly basis. As you get those
changes, you may want to take the time to update your current database.
419
1. Select F7 Features. SchuyLab displays the Special Features screen.
2. Select Medical Necessity. SchuyLab displays Medical Necessity Setup.
3. Select the desired CPT Code. SchuyLab displays the ICD-9 selection menu.
Select the desired ICD-9 code or range. SchuyLab displays the Update
Linkage box.
4. Make the desired changes.
5. If you want to update one of the link's conditions, select it in the Special
Conditions list. SchuyLab displays the Update Condition box. Make any
desired changes.
6. If there are any new conditions to the basic link, select New Condition.
SchuyLab displays the Add Condition box.
7. Set Age, Gender, and Time requirements for the condition. Select OK when
done.
8. Repeat steps 6 and 7 for all new conditions.
9. Select OK when done. SchuyLab returns to the ICD-9 selection menu.
Pressing OK a second time will return you to Medical Necessity Setup.
Repeat steps 3-8 to update another link.
420
Delete a Medical Necessity Link
1. From the Update Linkage box select Delete. SchuyLab will ask you if you
really want to delete the link.
2. Select OK. SchuyLab will return to the ICD-9 selection menu.
To Delete an Exception
1. From the Update Linkage box select the undesired condition. SchuyLab will
display the Update Condition box.
2. Select Delete. SchuyLab will ask you if you really want to delete the
condition.
3. Select OK. SchuyLab will return to the Update Linkage box.
Other Sections of Medical Necessity
Medical Necessity has an effect on several other systems, though not to the extent of
Order Tests. Here are changes to existing sections of SchuyLab:
In Security, a security clearance has been added: Override Necessity. Security
Classes with this clearance will be able to override Medical Necessity Alerts. The
Override button will be grayed out for Classes without the clearance.
In Billtype, we’ve add a checkbox labeled Medical Necessity. If this box is checked,
Medical Necessity will be active while ordering tests for patients with this bill type.
If the box is not checked, patients using this bill type are not affected (see below for
more details).
In the Billing module's Edit Claims, setting the claim from “Open” to “Ready” will
trigger a Medical Necessity Alert if there are tests that do not correspond with the
patient diagnosis. This automatic check will not occur if you have disabled Medical
Necessity while processing claims (from Medical Necessity setup.) You can check
the claims manually by selecting the new Necessity button on the right side of the
screen.
Turning Medical Necessity Off
There are times when you do not need to worry about the Medical Necessary Alert
and having to override it. If the bill type is cash and the patient is paying or the
insurance company will pay for everything (within reason of course) then how to turn
off the alert?
Select F8 Tools.
Select Setup.
Select Parameter ID Definition.
Select Bill Type.
421
Select CASH in this list.
If you wish to turn the Medical Necessity Alert off, make sure the Medical Necessity
box is NOT checked. You can do this for any of the bill types.
422
Appendix: Messages
SchuyLab Text Messaging allows the users on a SchuyLab system to
send messages to one another. Messages can be sent to all users, or to specific
individuals. It’s not e-mail – it only works within the SchuyLab system, on
SchuyLab stations within your lab – but it works similarly to e-mail.
Reading Mail
When you first log on to SchuyLab, Text Messaging tells you if there are any
messages waiting for you:
If you select No, the dialog box will simply disappear and you can continue using
SchuyLab as you normally would. The unread messages will be saved until the next
time you log onto SchuyLab or until you go into the MessaGes function and read
them through there.
If you select Yes, however, SchuyLab displays the Messages screen:
423
The Messages screen displays the dates, times, and subjects of all the messages
waiting to be read (along with the User ID of the person posting the message). The
pull-down list at the top right allows you to look at ‘unread’, ‘read’, and ‘deleted’
messages; ‘unread’ messages are the default.
To read a message, simply select that line with the mouse. SchuyLab brings up a box
with the subject of the message at the top, and the text of the message displayed.
424
At this point, selecting the OK button moves the message from ‘unread’ to ‘read’
status. SchuyLab then replaces this message with the next unread message, and so on
until all unread messages have been displayed.
If you wish to keep this as an ‘unread’ message, select Cancel.
To remove the message altogether – which, if you receive many messages daily,
would be prudent – select Delete. SchuyLab will delete the message from your
‘read’ and ‘unread’ lists. (It is still available on the ‘deleted’ list, and can be
undeleted if you’ve been too hasty.)
To send a message back to the message’s author, select Reply. SchuyLab will
display the Write Message screen.
Type your response in the large white text area, and then select the Send key. Select
Cancel if you choose not to reply at this time. (You can always reply to a message as
long as it’s among your ‘unread’ or ‘read’ messages.)
To send the message on to another SchuyLab user, select the Forward key.
SchuyLab displays the same Write screen as for replies. (In a sense, a Forward is a
Reply, but to someone other than the original author.)
Sending new mail
To send new mail to others on the SchuyLab system, you need to have the proper
security level to permit you to generate messages. This is done when Security Levels
are defined for your SchuyLab system, and is discussed in the Sec. 8 – Managerial
Functions. Assuming you have the security clearance to generate messages on
425
SchuyLab, go to F7. Features and select the MessaGes icon. SchuyLab displays the
Messages screen:
This is the same screen that was displayed when we reviewed our messages, back
when we logged onto SchuyLab. But now we’re sending a new message, so we
select the New Msg button. SchuyLab displays the Write Message box:
426
The first field, labeled “To:”, is the message’s address – in this case, the SchuyLab
user ID of the recipient. If you know the user ID of the person you’re messaging, go
ahead and type it in this field. Or select the To button to see the Address List, which
is a list of all users on your SchuyLab system:
You may select one of the users on the Address List, or more than one – as many as
you wish. The message would then be sent to all of them at once. Simply click the
mouse on each intended recipient.
There’s also the option of sending a message to all users on your SchuyLab system.
This is done by selecting the first line on the Address List, the one labeled “(ALL)”.
If your SchuyLab system has a great many users, this can be a lot easier than
selecting each individual name from the List. Finally, there’s the option of sending a
message only to those SchuyLab users that have been designated “lab staff.” This is
done by selecting the second line on the Address List, the one labeled “(LAB)”.
SchuyLab users are designated as “lab staff” when their user ID and password were
assigned to them, by your system administrator. (This will be discussed in greater
detail in the section on Setup and Tools, below.)
The next field is the subject line for the message: a quick summary of the content of
the message. This line is displayed on the Messages screen when you first take a
look at your messages, so it’s important to not leave this line blank.
In the large white area, type the text of the message you wish to send. You can type
as you would with any word processor program… you can even cut-and-paste text
from other programs into the text area. The four icon-buttons allow you to spellcheck, cut, copy, and paste text.
The first check box at the top of the Write Message box allows you to designate this
message as a Priority message. Normally, a user isn’t told of new messages until
427
she logs onto the SchuyLab system. A Priority message doesn’t wait for that: if the
recipient is currently logged onto a SchuyLab station, she’s immediately notified
when she’s sent a Priority message.
The second check box lets you Log Message – i.e., keep a permanent record of the
message having been sent. SchuyLab Messaging has incorporated into it the concept
that all messages are not of equal importance. There are messages that will read:
"Preventative Maintenance performed on the Hemo analyzer. 9AUG04. JLC"
There are also messages that will say, "There's a new pizza place that opened last
week. Do you want to try it tomorrow for lunch?"
In order to allow for this human element in its Messaging module, SchuyLab has two
statuses of messages: Logged and Unlogged. An unlogged message is a casual
communication, requiring no response. It's existence is not recorded in the
Messaging module. A logged message is an official communication: A record is
kept of all logged messages, when they are sent, and to whom they are sent. A
printout may be obtained of all logged messages under Tools. For trivial messages,
of course, this is often unnecessary; but if you’re the system administrator alerting
the staff of a problem, you may want to prove later that the message was sent to the
entire staff. Simply check this box to log the message.
When all the fields are complete, click the mouse on Send. SchuyLab sends the
message to all the users listed in the “To:” field.
If you decide, after all, that you shouldn’t send this message (I’ve written messages
like that…), click the mouse on Cancel.
SchuyLab then returns to the Messages screen.
Setup and Tools
There is only one place outside the MessaGes icon in F7. Features that needs to be
set properly for SchuyLab Text Messaging to work fully. And that is the settings for
Lab Staff and the permission to send messages.
The security levels (user ID, password, operator classes) for your SchuyLab system
are defined in F8. Tools > Security Levels. To remind you, each user is assigned to
a particular class; these classes are defined using the Class icon in Security Levels.
Each class of user can be defined at that point as “lab staff” … or not. This is the
first check box of the first column.
428
In addition, each class of user must be given (or denied) permission to send
messages. This is the fifth check box of the third column. Only users belonging to a
class with this box checked can send new mail through SchuyLab Messaging.
When you open your SchuyLab message, you may notice a bar called Tools. This is
to help organize your mailbox.
Save Sent
Messages
When this box is marked, you will save a copy of your sent
message (if you have the security to send messages).
Empty Deleted
Selecting this bar will empty your delete box or folder of all
your deleted messages.
Update Address
lists…
In SchuyLab messaging, you have the options of
sending messages to everyone, or to individuals. Using Update
Address lists… you also have the option of sending messages to
certain individuals by creating an message group.
429
Select Update Address lists…
Select Add and the Create Address List box comes up.
Type in a code name for this list (i.e. MANGRS), and fill in the description (i.e.
MANAGERS). Click the Update button and the address list box opens. Click on
those names you want included in your new list,
430
Click OK. You now have a new group of select people to send messages to.
Update Mail
Boxes…
Much like emails, you may wish to set up boxes to classify your
mail (i.e. Manager, personal, etc.).
Select the Update Mail Boxes… bar to update your mailboxes.
431
Select Add to add a new mail box.
Type in the name for the new mailbox and then select OK. Continue adding
mailboxes as you want them. When you have added all you want, select OK.
Print Logged
Messages
432
When a new message is marked as a “logged message”,
alerting the staff of a problem, you may want to prove later
that the message was sent to the entire staff. Here you can
print a log file of those messages sent showing date and time
sent, and to whom they were sent. A logged message will
also ask the recipient(s) to “answer” back that they have
received and read the message. There is one bit of setup that
must be done before you can print the logged messages.
When you select Print Logged Messages, go into Setup;
You then can set the default settings. Even if you don’t make
any changes, press the OK button. This will only need to be
done one time. If you receive an error message, you forgot to
setup this logbook.
Saving and Deleting Messages
So the boss has sent out a message to the entire lab and you want to save it in a folder
(or mailbox) just for these kinds of memos. You’ve made a new mailbox (see above)
and now what? First, bring up the message you need to save.
433
When you click on the save button, it will ask you where to save the message. By
clicking on the scroll down arrow on the right, it will give you your options. Save
your message in this mailbox and continue working. You can always move your
messages from a specific mailbox back to the “read” box, or another mailbox of your
choice.
If this is a message you don’t want to keep, you can also choice to send it to the
delete mailbox. Remember, your deleted mail will remain in the delete mailbox until
you manually tell the SchuyLab Message function to delete it.
434
Appendix: Microbiology
Microbiology
As with any good thing, some advance preparation is needed before Microbiology
can be used to its fullest potential. There are four types of Microbiology tests;
Cultures, Isolates, Quantity and Sensitivity. Most of the setup is done as part of Test
Definition and Panel Definition, with which you are already familiar; the remainder
is done in the Microbiology screen in F7. Features. Don’t worry, we’ll take it step
by step.
Setting Up Cultures as Tests
The first step in setting up Microbiology is to define the tests that will use it—that is,
the cultures (Throat Culture, Eye Culture, Urine Culture, &c.). This is done through
Test Definition:
Select F8. Tools.
Select Set-Up.
Select Test & Panel Definition.
Select Test Definition.
SchuyLab displays the Update Tests list box.
If your culture tests are already defined, select one of them. If you need to
create your culture tests, select New.
SchuyLab displays the Update Test box.
435
In the Code and Name fields, enter the appropriate code and name for the culture
you’re defining. (In the above example, we’re defining Urine Culture.)
Two further steps are necessary to complete this culture test. First, it has to be
identified as a culture test. Second, we need to define how much space you want for
your test results on this test.
To identify this test as a culture, select the Options button. SchuyLab displays the
Options for [Test] box, which defines how this particular test is reported.
436
In the Type field, select “CULTURE”. From the check boxes, select the box labeled
“Microbiology”, and put a check mark there. When complete, select OK.
To define space for your test results, select the Values button. SchuyLab displays the
Values for [Test] box, which defines non-numeric test results for this test.
437
For a Microbiology test, you probably want the power to type in whatever result you
want. In that case, in the field labeled “Text”, type in the number of characters
(maximum of 32) you wish to allot for your results. This includes letters, numbers,
and the spaces between words. You may also want to set up a list of “values” using
the Custom or Standard buttons.
When done, select OK. When the culture test is set up satisfactorily, select OK
again.
Setting Up Sensitivities as Tests
The next step in setting up Microbiology is to define the antibiotics that will be
reported as sensitivities: everything from Amikacin to Vancomycin. This is likewise
done through Test Definition:
Select F8. Tools.
Select Set-Up.
Select Test & Panel Definition.
Select Test Definition.
SchuyLab displays the Update Tests list box.
If your sensitivity tests are already defined, select one of them. If you need
to create your sensitivity tests, select New.
SchuyLab displays the Update Test box.
438
In the Code and Name fields, enter the appropriate code and name for the antibiotic
you’re defining. (In the above example, we’re defining Amikacin.)
Two further steps are necessary to complete this sensitivity test. First, it has to be
identified as a sensitivity test. Second, we need to define the possible results:
Resistant, Intermediate, or Sensitive.
To identify this test as a sensitivity test, select the Options button. SchuyLab
displays the Options for [Test] box, which defines how this particular test is reported.
In the Type field, select “SNSTVTY”. From the check boxes, select the box labeled
“Microbiology”, and put a check mark there. When complete, select OK.
To define your test results, select the Values button. SchuyLab displays the Values
for [Test] box, which defines non-numeric test results for this test.
439
Select the Standard button to bring up SchuyLab’s standardized list of non-numeric
test values. From the list, select Sensitve, Resistnt, and Intermed, then select OK.
The Values for [Test] box will display the three possible values, as in the illustration
above (to set the “normal” and “abnormal” flags see Sec. 4 – Tests and Panels).
Select OK.
When this antibiotic test is complete, select OK. Continue this on all the antibiotic
tests you intend to test with.
Setting Up the Isolate Test
The next test needed for Microbiology is the Isolate test. This is a special test that
SchuyLab needs to permit entering the Microbiology results. It, too, is set through
Test Definition:
Select F8. Tools.
Select Set-Up.
Select Test & Panel Definition.
Select Test Definition.
SchuyLab displays the Update Tests list box.
Select New. (I’m assuming you don’t already have an Isolate test defined.)
SchuyLab displays the Update Test box.
440
In the Code and Name fields, enter the appropriate code and name for the isolate test.
I recommend using “ISOLATE” as the Code, and either “Isolate:” or “Organism:” for
the Name. (Remember, the Name is what prints on the patient’s report.)
Two further steps are necessary to complete the Isolate test. First, it has to be
identified as the Isolate test. Second, we need to define how much space you want
for your test results on this test.
To identify this test as the Isolate, select the Options button. SchuyLab displays the
Options for [Test] box, which defines how this particular test is reported.
441
In the Type field, select “ISOLATE”. From the check boxes, select the box labeled
“Microbiology”, and put a check mark there. When complete, select OK.
To define space for your test results, select the Values button. SchuyLab displays the
Values for [Test] box, which defines non-numeric test results for this test.
442
In the field labeled “Text”, type in the number of characters (maximum of 32) you
wish to allot for your results. This includes letters, numbers, and the spaces between
words. Since this space is going to be filled with the name of the organism you’ve
isolated, we recommend using the full 32 characters.
When done, select OK. When the Isolate test is set up satisfactorily, select OK
again.
Other Tests
The Isolate panel can consist of up to four tests; Quantity, Gram Stain, Oxidas and
Catalas. These tests also require some special setups before they can be used. As
they are all setup the same way (after they are created), let’s look at one of them Quantity.
Select F8. Tools.
Select Set-Up.
Select Test & Panel Definition.
Select Test Definition.
SchuyLab displays the Update Tests list box.
Select New. (Assuming you don’t already have the Quantity test defined.)
SchuyLab displays the Update Test box. You will set this test up in the same manner
you have other Microbiology tests (i.e. URINE).
443
Select the Options button. SchuyLab displays the Options for [Test] box, which
defines how this particular test is reported. Under the Options button, the type of test
should be “Quantity”. If not, click on the small arrow on the right side of the box and
scroll down the Quantity.
When done, select OK. Selecting OK once again will take you out of the Update
Test Screen. After you have set up all four of these tests (if you plan to use them)
click on Done and you are out of the Test Definition Screen.
Setting Up Sensitivity Panels
The next step in setting up your Microbiology is to define the sensitivities appropriate
to your lab. Sensitivities are set up as panels, in which you place the antibiotic tests;
this is done through Panel Definition. You will certainly want separate sensitivities
for Gram Positive and Gram Negative organisms; you may also want to set up a
separate sensitivity for Urine and other special cases.
To set up sensitivity panels:
Select F8. Tools.
Select Set-Up.
Select Test & Panel Definition.
Select Panel Definition.
SchuyLab displays the Update Panels list box.
444
If your sensitivity panels are already defined, select one of them. If you need
to create your sensitivity panels, select New.
SchuyLab displays the Update Panel [Panel name] box.
In the Code field, type the code for the sensitivity panel you’re defining. SchuyLab
is programmed to recognize any panel beginning with the letters “SENS” as a
sensitivity panel, so be sure your codes start that way.
In the Name field, enter a brief description of this sensitivity panel (Gram Positive,
for instance). Then select Add Test(s) to add the antibiotic tests for that panel.
When complete, select OK.
Setting Up Isolate Panel
The next to the last step in setting up Microbiology is creating the Isolate panel.
Select F8. Tools.
Select Set-Up.
Select Test & Panel Definition.
Select Panel Definition.
Create an Isolate panel and add the tests to it as we have pictured below.
445
Setup Microbiology
The final part of setting up Microbiology is done through what is, appropriately
enough, called Setup Microbiology. This function permits you to define the actual
organisms you expect to isolate, and link them to a specific sensitivity panel (e.g.,
Gram Negative organisms to the panel of Gram Negative antibiotics).
To access the Microbiology Setup function
Select F7. Features.
Select Microbiology.
SchuyLab displays the Microbiology menu screen.
Select Setup Microbiology
SchuyLab displays the Update Organism Codes box, listing the organisms currently
defined in your system.
446
The first column shows the code used by your lab to identify each organism. This
can be a number, a letter, or any combination thereof—in short, an abbreviation,
whatever’s most comfortable for your lab. The second column shows a more
complete description of the organism; this is what’s printed on the patient’s report.
To change one of the defined organisms, select it from the list. To define a new
organism, select Add Organism. Either way, SchuyLab displays the Add/Update
Organism Code box.
In the Code field, type in your code for the organism. In the Description field, type
in the full name of the organism (that is, the form you want to print on the patient’s
report).
From the Sensitivity list field, pull down the list of panels and select the sensitivity
panel you wish to link with this organism.
When complete, select OK. When all your organisms are defined to your
satisfaction, select Finished. (If you wish to print a list of your defined organisms,
select Print Organisms first.)
447
Entering Microbiology Results
Once setup is complete for Microbiology, you’re ready to enter and accept results.
This can be done through either the Patient Processing Screen (via Alter Results) or a
worksheet—just as with other test results. But wait! Wouldn’t you enter the results
from the Enter Results screen like you do for other tests? We suggest not to. Once
you accept the results, the test will disappear from the Enter Results screen. IF you
have other organisms that show up at a later time, you will still have to enter those
results through Alter Results.
Let’s take a concrete example. We’ve ordered a culture to be done on a given
specimen. Now we want to enter the results. From the Patient Processing Screen, we
select Alter Results. SchuyLab displays the Alter Results screen. We select the test
to get the result entry field (the ‘window’), and we notice immediately how much
larger it seems:
The large window is due to the fact that we specified a large number of characters
when we defined this test.
In the entry window, type in your result. In this case, we’ve typed “after 48 hours”.
(Had we seen no growth, we’d have typed “No growth seen” or words to that effect,
and we’d have been done.) Now select the Expand button. SchuyLab displays the
Update Culture Results box.
448
The Update Culture Results box shows the name of the culture test, and the entry
already typed. It can be changed at this point, if desired, by simply typing over it.
Coll Date,
Time, By
Collect date and time. This defaults to day and time that you
enter these results and can be changed to reflect when you
collected the specimen. All dates can be put in as -n or +n
which means that many days in the past or future, +0 or -0 will
translate to today.
Recv Date,
Time, By
Received date and time. This defaults to day and time that you
enter these results and can be changed to reflect when you
received the specimen. All dates can be put in as -n or +n
which means that many days in the past or future, +0 or -0 will
translate to today.
Source
You can specify the source of the swab in more detail. For a
wound culture, for instance, you can type “left arm”.
Stat
If this specimen is a STAT, clicking on this box will move this
specimen to the top of any worksheet you may use and also
print STAT on the barcode labels.
Note
As with all the other yellow note pads in SchuyLab, you can
type in a free-text note.
Result
Enter the numbers of the Result Codes (up to four of them) to
449
be appended to this test result. (A typical comment here might
be the growth medium used for the culture.)
When you’re ready to enter the name of the organism you’ve isolated, select Isolate.
SchuyLab displays the Update Isolate Results box.
In the Isolate field, enter the code for the organism you’ve isolated. (Recall that you
defined these codes through the Setup Microbiology icon, in F7. Features.) If you
don’t remember the correct code, click on the arrow next to the Organism field.
SchuyLab displays the Which Organism? box, listing all the organisms currently
defined in your system.
450
From this list, you may select the organism you’ve isolated in this sample. Selecting
an organism from the list removes the Which Organism? box; SchuyLab displays the
Update Isolate Results box again, with the Organism field filled.
Note that the Sensitivity field is already filled as well. This is the sensitivity panel
that was linked to E. Coli during Setup. If you wish to override the defined panel and
choose another sensitivity panel, you can use the pull-down list to display the
currently defined sensitivity panels (that is, all panels with names beginning “SENS”)
and select from the list.
At this point, if the tests are setup, you can enter the results for the Quantity, Gram
Stain, Oxidas and the Catalas. Move your curser to the first box, enter the result and
then using your Tab key (on the keyboard) go to the next test and enter that result.
You can also make any comments, through Result Codes or the Note pad, about
THIS ISOLATE.
Once an organism and sensitivity are identified, select the Input button. SchuyLab
displays the Update Sensitivity box.
451
The Update Sensitivity box shows all the antibiotics on the sensitivity panel you’ve
chosen. Enter the appropriate values for the tests. When done, select OK.
SchuyLab returns to the Update Isolate Results box. If you’re satisfied with all that’s
been entered, select OK again.
SchuyLab returns to the Update Culture Results box, with the organism name in the
Organisms Isolated field. If this is the only organism found, select OK yet again.
SchuyLab returns to the Alter Results screen.
452
The result for the culture, the organism isolated, and the antibiotics for which results
were entered, are all displayed. They can be accepted into the patient’s file in the
normal manner. (Note that, in the above example, the culture test and organism
results still have to be accepted. But that’s a mere routine detail.)
If another organism had been isolated, it can be entered in the same way as the first
organism: If you’re back in the Alter Results screen, simply select the culture test, as
though you were updating its result, then select Expand. SchuyLab again displays
the Update Culture Results box. (In the normal course of operations, you would
probably not have left the Update Culture Results box yet; after all, you know you
have another organism to report.)
Select Isolate. SchuyLab again displays the Update Isolate Results box. In the
Organism field, enter the code for the second organism you’ve isolated, just as you
did for the first organism.
Select the Input button to enter the sensitivity results. Repeat the same steps as with
the first organism. You may repeat the process for as many organisms as you’ve
identified on your sample.
When you’re finally done, Accept the results for the culture and the Alter Results
screen will look something like this:
453
The screen will show the culture test, then each organism followed by its sensitivity
results. Each result can be annotated using the Result Codes or Notes buttons, in the
usual manner. When all has been satisfactorily entered, select F10. Done. The
accepted results will be written into the patient’s file.
Microbiology Annotation (Result Codes)
You’ll probably want to define some pre-recorded comments for use with
Microbiology: notes such as “>100,000 cfu/ml”, or “typical mixed flora noted”.
These are defined through the Result Codes, as described quite thoroughly in Sec. 8 –
Managerial Functions. One pertinent point regarding Microbiology needs to be
addressed here, though.
Result Codes are defined through F8. Tools, Remark Codes. When they’re being
defined, SchuyLab displays the Input Result Code box. This box shows several
check boxes, like so:
454
One of the check boxes is labeled “Microbiology”. When this box is checked, the
Remark Code is designated a Microbiology Result Code. When a test has been
defined as a Microbiology test (through the Report button in the Test Definition
screen, as described above), and its test results are being annotated, only the
Microbiology Result Codes will show on the list of Result Codes. That makes it less
likely that you’ll select an inappropriate Result Code for your culture results.
455
Appendix: Multi-Facility
A Multi-Facility Lab is a laboratory that has other labs associated with it, running
their own instruments but connected to the main lab by either a VPN or LAN
network. These would NOT be independent labs, but two or more labs owned by the
same person(s) and using one database, yet run separate from one another. Each lab
will have its own instruments, patients and have the need for many of the data logs to
be printed. But most important, each lab has its own CLIA number. When
SchuyLab is configured as a Multi-Facility system, it automatically keeps track of
which tests were done at which facility, and annotates the tests in compliance with
CLIA regulations. How many different facilities can SchuyLab track? 64 separate
facilities.
In addition to the CLIA-required testing location, what are some of the other aspects
of laboratory work that SchuyLab controls with its Multi-Facility module?
Instruments transmissions are specific to a facility, and these are kept separate and
specific to a site. If your main lab has a Vitros and a CD3500 and your satellite lab
has an Ace and a CD1700, you will only see the Vitros and CD3500 when you are in
the main lab.
Since you may want a given worksheet to be specific for a facility, SchuyLab also
defaults worksheets to apply to only the facility where the PC that generates them is.
(Functionally, the facility where you are… but there is a way around that, to be
discussed later.) On the other hand, it's become standard for laboratories with more
than one location to say, "We'll each do all of our own Hematology and General
Chemistry work, but the Special Chem will all be sent to the main lab, and the
Microbiology all gets taken to the satellite lab."
The database access can also be controlled. While all of the results exist in a
common database, the laboratory may want to restrict access at each facility to only
those results that are appropriate to that facility. The set up of the individual facility
can control this access.
In addition, the patient results that are transmitted to a particular HIS or other system
may represent a subset of the facilities that are set up on SchuyLab. The TCP/IP port
configuration controls this transmission. (Please see the Other System Interface docs
for a description of this.)
456
Set Up Facilities
The first step in setting up your Multi-Facility module is, logically enough, to define
each of the facilities that are part of your system. Additional facilities can be added
later, as your lab grows.
If you are adding the Multi-Facility module to an existing laboratory, then the main
laboratory must be set up as the "0" facility. All of the specimens you ran prior to
this new module will be automatically defaulted to "0", i.e., coming from the main
lab. If you have Multi-Facility as part of a new SchuyLab system, we nonetheless
strongly recommend that the main facility be your "0" facility, though this is not
technically necessary.
Select F7. Features.
Select Multiple Facility. SchuyLab displays the Update Facilities box, showing all
the facilites currently defined on your system. You can select one to update its
information.
To add to the list, select New Facility. SchuyLab displays the Update Facility box.
457
Code
The code is for the various labs and has a max of 4 characters.
Num
SchuyLab will autogenerate the number of labs (in this case,
the new facility is #0). This number is permanently assigned,
and cannot be changed.
Accn
Each facility's accessions can be designated to begin with a
particular digit. In this instance, all of the Accessions from
LAB will begin with a "1": 1050823027 or 1-050823027
(depending on which format you select for your accession
number).
Lab Name
Type in the lab's name.
Address
Type in the lab’s address.
City, St, Zip
Complete the lab’s address
Telephone
Type in the lab’s phone number.
CLIA ID
This is the CLIA ID number for this lab.
Order Screens
Each facility other than Facility “0” will have an Order Screens
checkbox on their Update Facility box. When this box is
checked, a new (blank) set of test order screens will appear at
458
each designated facility. These screens need to be set up to
provide a selection of tests and panels that the facility can use
for ordering.
Note Pad
As with all the Note Pads in SchuyLab, this one has to do with
the facility you are entering.
SchuyLab's database - all of it – is accessible to each of your facilities, unless that
database is further restricted by putting a specific list of Clients/ Doctors on the
facility. To do this, select the Doctors/Clients button. SchuyLab displays the Update
Clients/Doctors box.
The doctors and/or clients on this facility's list are the only ones that can access the
results of that facility. In this example, I have added a doctor (Doctor, Test) and a
client (TEST) under the Doctors/Clients button in the Facility module (note the
differentiating icons). Now this particular facility will not be able to see the entire
database of patients. This facility will see only results that have both That Client and
That Doctor on a specific accession. (Other accessions on the same patient may have
other clients and doctors on them and those will not be accessible to this Facility.)
As you can see, this is a powerful tool. You can 'turn off' access to the results in your
database just by putting a Client in this field. Schuyler House recommends that you
459
not put individual doctors in the Facility Set Up without serious consideration. The
Client will generally be sufficiently specific to limit access.
1. No entries in this Doctors/ Clients list means that the Facility has complete
access to all of the patient result data in your database (within the bounds of
the individual's Security code).
2. A single entry in this list throttles the access to just that listed parameter
(doctor or client or both).
3. The relevant record is the Accession record. It does not matter what doctor
or client is present on the patient record in Change Demographics.
Station Setup
You will need to set up the sites for each of your computers. In our example we have
two sites: LAB and ER. As LAB was the first site we entered, SchuyLab will
default all the stations (or computers) to that Facility name. To set up the
computer(s) at the second site you will need to perform the following at each
computer;
Select F8. Tools.
Select Set-Up.
Select Station Setup.
Select Update Station.
In the pull down box under Facility, choose the Facility where this station is located.
Select OK and you’re done.
Instrument Set Up
Since instruments are attached to an individual station, by setting the Facility on the
station you control which instruments are 'visible' at a particular facility. The F4.
460
Devices screen at each facility will therefore reflect only those instruments physically
present at that location. (Each instrument on the database must still have a unique
name: You cannot have a device called T360 at the LAB facility and another
instrument called the T360 at the EFM facility. You'll have to call them, oh, T360-L
and T360-E or something equally imaginative.)
Worksheet Set Up
Each facility can set up Master Worksheets that are specific to that facility. The
Worksheet Master 'knows' which facility set it up and will only look at Accessions
that 'belong' to its own facility – unless the "All Facilities" checkbox is selected.
For that contingency, we have put an "All Facilities" box on the Master Worksheet
setup. This lets you pull a Special Chem worksheet that draws work from all of the
Facilities in your system. If you do not mark "All Facilities", then the worksheet will
just contain specimens from the site you are at.
Security
In SchuyLab, everyone needs their own ID and Password. With the Multi-Facility
module, in addition to the user's other access levels, you can also specify which
461
facility the user can access. Once all your sites are set up, you will need to setup the
security levels for all your employees.
Select F8. Tools.
Select Security Levels.
Select Operator.
Select List.
Let us assume that you have added everyone’s ID and password. If you did not
assign the facility to each operator, simply click on the operator’s name
At the box labeled Facility, choose whether this operator can access one of the labs
(LAB or ER) or all of them. Select OK and Rhonda Nurse is now limited to working
at only one of the lab sites, or, if 'all' is selected, she can work at either lab.
Two of the possible security 'permissions' are very powerful, and deserve a mention
on their own. The Facility 'all' and 'rmte' appear in small case type at the bottom of
the list.
462
By setting the user's Facility to 'all', they're given the security clearance to sign on at
any of the facilities on your SchuyLab system, if the user is physically present at that
site.
By setting the user's Facility to 'rmte', they're given the security clearance to sign on
to any of the facilities on your SchuyLab system, regardless of whether they're
physically present at that site. This is a much more powerful permission.
Let's take an example: If user "JLC" is given 'all' as a Facility on her security
clearance, JLC can go to any of the labs that are a part of that system, sign on, and
perform the level of work permitted by her security "Class". If "JLC" is given 'rmte'
as her Facility, however, then she can sit in the main lab and 'virtually' sign on to any
of the other facilities. Once JLC has virtually signed on, the station at which she
works is considered part of the other facility. Any work done on that station is
recorded as if the user had gotten into her car, driven to that facility, and was sitting
there in that lab.
Obviously, 'rmte' is a very powerful clearance. It would, for instance, allow you to
sign on to another facility, accept the results from their instruments, annotate their
QC, and print their reports – all of this with SchuyLab considering you 'present' at
that other facility.
Test Order Screens
Multi-Facility sites have the ability to have a separate screen definition capability.
The Update Facilities box has a check box 'Order Screens' that appears for facilities
other than Facility “0”. (Obviously, Facility “0”, the home facility, already has its
SchuyLab screens set up.) When you check that box, SchuyLab generates a set of
blank screens that can be set up with tests for the subsidiary facility to use. Each
facility that has that box checked gets its own set of screens.
463
Daily Processing
Once the Multi-Facility module has been loaded, and your station is properly
assigned to its site, SchuyLab recognizes the existence of the facility as part of its
usual processing.
464
Every accession that is entered into SchuyLab now has a Facility that 'owns' that
particular accession. This 'ownership' tells SchuyLab where that accession is
supposed to print and how to label the origin of that specimen when it is transmitted
outside of SchuyLab – to an HIS, for example.
The Accession defaults to the Facility you are at, but can be overridden. Pull down
the list box and select a different Facility code if you want that Accession to 'belong'
to a different facility.
In addition to the Facility code appearing on the Accession, each test that is resulted
carries a record of which facility actually performed that test. For instance, you
could have a CBC and Diff that were ordered at Entertainment Family Medicine –
where the CBC itself was actually run and accepted. The Differential, however, was
done at the LAB site; when those results are accepted, SchuyLab overrides the
default presumption that the tests would be performed at EFM and records that each
test in the differential was done at LAB. The EFM Facility would still 'own' the
Accession, but the differential tests now 'belong' to the LAB.
465
Printing
What happens when the report with the CBC and Diff print out? Because SchuyLab
'knows' which site owns the accession and where each individual test was done, it
automatically knows how to print out the results. When you print that accession,
wherever you are when you print it, SchuyLab prints the 'owner' of the accession as
the header. Any tests on that accession that were done somewhere other than at the
site that 'owns' it are footnoted (per CLIA) with the name and address of the facility
that performed them.
In order to accomplish this, the Form for your Patient Report needs to have the
Facility Name, Facility Address, etc., selected as fields on the Header of the Form.
Select the appropriate fields and the patient report to reflect the laboratory that each
accession 'belongs' to, and annotates all tests performed elsewhere with their
respective locations.
466
As you may recall, the prior versions of SchuyLab had text fields in Headings (F8
Tools, Setup, Report Setup, Headings) that were used for the standard SchuyLab
reports and worksheets. Now those screens resemble the Forms and Reports utilities.
Select the appropriate fields and the Demographic and other internal reports will also
reflect the header of the site where they were printed.
467
Appendix: Refer Tests
Using the Refer Tests Module
Sending out a specimen to a reference laboratory is a three-step process.
The first step is the order itself: getting the patient data, the specimen data, and the
test order to the reference lab. The order might be telephoned; it might be carried on
a piece of paper; it might be e-mailed, or even sent to the reference lab's website on
the Internet. Currently, most reference lab customers either use the lab's Internet
facility to place the order, or are sending a piece of paper (almost always, a preprinted form) with the order written thereon.
The second step is the sample: getting the sample (vials of blood, bags of stool,
whatever) to the reference lab. Whatever method is used to place the order, at some
point in time a ‘container full of guck’ has to be physically transported from one
location to another. Usually this container is accompanied by a piece of paper that
either conveys the order (as discussed above), or confirms an order already placed.
The third step is the result: getting the results of the tests back from the reference lab
to the customer (i.e., you). The result might be telephoned; printed and mailed;
printed over a phone line (using a remote printer provided by the reference lab);
faxed or e-mailed; or made available using an Internet utility.
How does SchuyLab’s Refer Tests module affect these three steps?
Step one: If your lab has an electronic connection to the reference lab, SchuyLab can
transmit the order directly. (Without that connection, the order will be placed by
whatever means you're currently using.) The reference lab's complete test
compendium is present in SchuyLab, for use in placing the order – including the
normal ranges and temperature stability for each analyte.
Step two: Well, lacking quantum teleportation, Schuyler House has no way to affect
the physical transport of the specimen from one location to another. The specimen
must still be carried by a courier. SchuyLab prints a manifest to accompany the
samples, and tracks which tests are still outstanding.
Step three: If your lab has an electronic connection to the reference lab, SchuyLab
receives the result directly, as soon as it is released by the reference lab, and the
result is automatically incorporated into the patient’s record. Without that
connection, the results must be returned by whatever way you currently use.
To emphasize the point: There are two ways by which a lab can make use of the
Refer Tests module in SchuyLab:
468
1. with an electronic connection to transmit orders to the reference lab, and
receive results electronically (Refer Tests plus the interface for each
reference lab);
2. using paper manifests to communicate with the reference lab and receive
results on paper (Refer Tests module, but no interfaces).
The interface to an electronic connection is not part of the Refer Tests module: the
two features are separate and independent. The Refer Tests module can be used
without an interface; by itself, the Refer Tests module streamlines the paper ordering
of tests, and tracks the fact that these tests were done at another facility. The
reference lab's results must be entered manually into the patients' records. If you
don't send out a lot of tests – or send them out to many reference labs – you might
decide a direct connection isn't for you.
When buying a reference lab interface, it's important to remember that an interface
has two ends: SchuyLab and the reference lab. Both end need to install their
interface for the connection to work. For every reference lab connected to you,
therefore, you'll need an interface from Schuyler House (in addition to the Refer
Tests module), and an interface from that reference lab. But the payoff is enormous:
through the interface and the Refer Tests module, SchuyLab places orders and
receives results with the speed of electronic transmission. This yields a dramatic
drop in the turn-around-time for those results, since you no longer have to wait for a
courier to deliver them. Additionally, the results are integrated with the results of the
tests done in-house on that patient; SchuyLab automatically annotates where the
results are done.
If you patronize more than one reference lab, it's quite conceivable that you might
have an electronic connection to one, but not to another. Why? For a reference lab
to be willing to supply their end of a connection, the volume of tests sent to that
reference lab has to be high enough to make it financially worthwhile for them to go
to the trouble of interfacing with you. If (to take an example) a specialty lab
performed some exotic test, which you ordered very occasionally, it might not be to
that lab's advantage (or to yours) to buy the interfaces necessary for an electronic
connection. (Such a small workload could easily be handled manually – and you'd
still have the Refer Tests module to track your orders.) But you'd still want an
interface to the Mega Reference Lab that gets the bulk of your send-out business.
Whether your lab uses paper manifests or electronic transmission, the Refer Tests
module can still help you manage your send-outs. If you elect to use electronic
transmission, then you will need the Refer Tests module (as a basis for handling
reference lab tests) and a separate interface for each of the specific reference labs.
Each Reference Lab to which your lab is connected electronically requires a separate
interface, a different Test Compendium, a specific manifest, and potentially a slightly
different SOP.
469
A lab that uses just the paper manifests needs only the basic Refer Tests module. A
test compendium and manifest format can still be Imported for a particular reference
lab, for use with paper manifests.
Loading the Electronic Interface
Install the Refer Tests Module, using the standard SchuyLab utility (F8.Tools -> Set
Up -> Feature Install). This installs the generic Refer Tests module. Then likewise
Install the specific Mega Reference Lab interface onto your SchuyLab system. This
installs the capability to have a Mega Reference Lab interface, but the Mega
Reference Lab icon will not yet be present in your SchuyLab. How do you get the
Mega Reference Lab icon onto the screen? Go into F7 Features: There will be a
Refer Tests icon present. Select it.
Now you will see a Setup Labs icon. Select it.
SchuyLab displays a screen with two icons
Select the Reference Labs icon.
470
SchuyLab displays the Update Reference Labs box. Select New Facility.
SchuyLab displays the New Reference Lab box. The “I/F” pulldown box in the
upper right corner will contain an entry for each of the electronic interfaces that have
been installed. In this instance, the list contains one entry: REFMEGA. Select that
471
entry and type in the rest of the information on that reference lab. This data will be
used to provide the footnotes that annotate results performed at that lab.
Select OK. The prior listbox now contains an entry for this reference lab.
Now log out of SchuyLab, log back in, go to F7. Features -> Refer Tests, and the
Mega Reference Lab icon appears. Select the Mega Reference Lab icon.
Select Update Compendium.
SchuyLab displays the Update Compendium box.
472
For SchuyLab to have the Mega Reference Lab Test Compendium, one or more files
must be Imported. If there is more than one file, they must be loaded in a specific
order: The Mega Reference Lab test list, "megatest.csv", is the first file. (It does not
come originally in a csv format, but must be converted to a csv format before it is
loaded into SchuyLab. Schuyler House will provide the original Test Compendium
in csv format – If you need help with updates, please contact our Technical Support
department.)
Select Import and type in the path to the csv file.
Select OK, and you'll have loaded 3000 Mega Reference Labs tests. Their units and
their normal ranges are blank. The actual units, normal ranges and flags are
transmitted with each result, and are accepted as part of that result. If the
normal range, for instance, changed since the receipt of the test compendium, it does
473
not matter: The normal range that is dynamically sent in the HL7 file in association
with a particular result will be the one that is stored with the patient’s result.
Let’s say you need to perform a second Import for the additional file,
“megaspec.csv”:
There! Now the temperatures and stability information have been added to each of
the tests in the Mega Reference Labs Test Compendium.
The Compendium now looks something like this:
Each of these tests has a setup screen associated with it that duplicates the format of
our standard Test Definition screen.
474
475
Ordering Send Out Tests via Refer Tests Module
There are three ways to order tests using SchuyLab’s Refer Tests module. In each
case, SchuyLab knows that the test ordered belongs to a particular reference lab
facility, makes it available for printing on that facility’s manifest, and makes it
qualify for electronic transmission. How these three ways differ will depend on the
knowledge of the ordering tech, and how SchuyLab handles the results of that test.
1. Ad hoc reference lab test ordering
2. Explicitly linked tests
3. Conditionally linked tests, dependent on contract with payer
All three ways of ordering are potentially available to the users of the Refer Tests
module, but only the first item – ad hoc ordering – requires no (or almost no) setup.
Ad hoc Ordering
The ad hoc test ordering mechanism is intended to be used with tests that are rarely
ordered. Let's face it, you've just loaded a test compendium containing 3000 tests
into your Refer Tests module. There are a handful of these tests that you use all of
the time, some you use once in a while, and some you order once a year. The ad hoc
method of ordering is designed for the 'once a year' tests.
To order tests "ad hoc" from a reference lab, all you need to do is to set up the facility
as a reference lab in the Refer Tests module: You do not need to have a test
compendium loaded. Ad hoc ordering works with either paper or electronic methods
of transmitting tests to the actual performing lab.
The downside of ad hoc ordering is that it is easy to make a mistake. (SchuyLab will
trust you to know what you are doing and won’t argue with anything you type in.)
You'll need to know in advance the reference lab's test code for whatever you're
ordering. Also, you'll have little control over the placement of the tests on the printed
Patient Report. (The tests and their results will be grouped in a group heading under
the name of the Facility at the end of the Patient Report.)
To use ad hoc ordering, go into the Freeform style Order Tests screen in Patient
Processing. There you will type the test code and the Facility code into the Text box,
like this: "M1234@MEGA." This orders test "M1234" at ("@") the Facility
"MEGA".
How will a test ordered via ad hoc ordering print on the Patient Report? The HL7
format, which is used for most medical data communications, has provisions for
including the test description, normal range, flags and notes on each result. When a
test is ordered ad hoc, its result is printed in a Group in Report Order with the name
of the reference lab Facility. This Group does not have to be created by the
SchuyLab user – the existence of a test in the patient’s results that is not in the list of
tests in Report Order will dynamically create such a Group.
476
Explicitly linked tests
The previous section dealt with ad hoc ordering, which is good for tests that are done
once a year. How do you order a reference lab test that you use 50 times a day? For
those, you can afford to spend the time setting up a frequently used test, and placing
it in a specific spot on your Patient Report. (SchuyLab will automatically annotate
that this test was done at its performing Reference Facility.)
If you want to set up an ironclad rule that THIS test is always done at THAT lab, then
the second method of ordering reference lab tests – Explicitly linked tests – is what
you want.
Link a test in the SchuyLab database to a single test that is always done at a particular
reference lab. You set the Link for only the corresponding test code at that particular
lab and you set the Facility box for that facility. This SchuyLab test is then explicitly
linked to a particular test at a single reference lab.
Let’s say we have a test “Albumin” that we always want to be run at Mega Reference
Lab. We go into the Albumin tests in Test Definition (F8.Tools -> Set Up -> Test &
Panel Definition -> Test Definition) and select the Refer button. Type in what the
Mega Reference Lab order code is for that test, and set the Facility to Mega.
477
This is now an explicitly linked test. Irrespective of what a patient’s insurance is,
regardless of whatever contracts have been established, no matter what – This
Albumin is ALWAYS run at Mega Reference Lab.
Conditionally linked tests
The most common scenario that a laboratory faces is that a test is potentially ordered
at different facilities depending on the paying arrangements that have been made.
For example, you may be a rural hospital that typically runs all of you A1C’s in
house – except that you have a contract with Mega Reference Lab to act as a drawing
station for them in your area. When a doctor who uses Mega Reference Lab to
perform his tests sends a patient to you to be drawn, that A1C has to be ordered at
Mega Reference Lab even though you perform A1C’s in house.
It gets worse. Your contract with Mega Reference Labs says that there are exceptions
to this rule if the test drawn is marked STAT. If the A1C is marked STAT, then you
can do it yourself, even though it is a Mega Reference Lab patient.
478
How do you keep track of this? SchuyLab does it for you: You conditionally link a
test to one or more reference labs, and set up contracts that control when it gets
ordered where.
Select the Refer Tests icon.
Now you will see a Setup Labs icon. Select it.
SchuyLab displays a screen with two icons
Select Referral Contracts.
Now we will set up a Contract with Blue Cross that has all of their tests performed at
Mega Reference Lab, except for the Coag work:
479
We have a Blue Cross contract in existance. This single contrace lets me have one
‘BC contract’ for all 75 of the Blue Cross offices that I have in my insurance
company list – I do not want to set up (and maintain) contracts for each office
separately.
480
Select the correct reference lab “MEGA” in the pull-down box. This says that Blue
Cross has all of its work done at Mega Reference Lab. There is an exception,
though: Your contract with Blue Cross says that you may perform coags in-house on
Blue Cross patients. So, in the Exceptions box, I have selected my coag tests and
said that they are performed at my ‘SOP” facility – which in this case is Sky Labs.
Anytime there is a patient with Blue Cross insurance, the tests automatically ordered
at Mega Reference Lab – unless they are coagulation tests, in which case they are
done in-house.
How do you determine your “SOP” facility? This is set up in Test Definition, when
you place a default Facility on the test. (In an ‘Explicitly ordered test’ the default
Facility will always match the only link set up in Refer. If there is more than one
Refer link, or the default Facility is different than the (single) Refer link, then the test
is Conditionally linked. –see below)
481
Now we are back to the 75 aforementioned Blue Cross offices with which you do
business. You only need to set up one Contract for Blue Cross, but you do need to go
your insurance carriers and select “BC” for each one that uses that contract.
482
But how does SchuyLab know the Mega Reference Lab order code for this test? We
tell the Test Definition (F8.Tools -> Set Up -> Test & Panel Definition -> Test
Definition) what the Mega Reference Lab order code is. Please note that, unlike the
‘Explicitly ordered tests’, the Facility on the Albumin does not match the link set up
in ‘Refer?’. When there is more than one link in the Refer list, or when the Facility
in the Refer list (Mega) does not match the Facility set on the test itself (SKY) then
the test is conditionally linked. Now the ordering will take place by itself. When
SKY’s accessioners order an Albumin and a PT on a Blue Cross patient, the Albumin
will automatically be ordered as a M1234 at Mega Reference Labs and the PT will be
done at SKY (the default location, as it were).
Summary
So, there are 3 ways to order a reference lab test in SchuyLab:
1. Ad hoc ordering – you go into the Freeform style order screen in Patient
Processing and directly type the test code and the Reference Lab into the
Text box, i.e. M1234@MEGA. This test is now ordered at MEGA, whether
or not it is in their compendium.
2. Explicitly Link a test in the SchuyLab database to a single test that is always
done at a particular reference lab. You set the Link for only the
483
corresponding test code at that particular lab and you set the Facility box for
that facility.
3. Conditionally Link a test to one or more reference labs, and set up contracts
that control when it gets ordered where.
484
Appendix: Remote Printing
Your system is set up with its required printers, reports and invoices are printing
nicely to the correct locations, and all is right with the world. Now, you need to print
something from your computer station to the lab next door, the boss’s office across
the street, or a client across town. That’s where Remote Printing comes in.
Hardware requirements
1. Make sure the receiving printer is able to receive the transmission. Make
sure the power is on, the printer is online, and that it has paper.
2. Make sure the receiving printer is plugged in to a dedicated phone line, one
reserved for that printer alone. This enables you to send the receiving printer
data over a modem.
3. The SchuyLab station with the modem in it must have a line (cord) between
the modem and a dedicated phone line.
4. The SchuyLab station with the modem in it must be on and logged in to
SchuyLab.
Setting up Remote Printing
Setting up Remote Printing in your SchuyLab system consists of three steps:
A) Set up the printer queue, the area in the computer where documents go to be
printed, for the remote printer. Make sure there’s a separate queue for each
remote printer (REMOTE1, REMOTE2, or the name of the client), as there is
for each printer in the lab (test results going to the LAB queue, for example,
invoices going to the BILLING queue, etc.).
B) Attach the remote printer queue to the client’s record. Once that’s done, all
patients belonging to that client will automatically print on that remote
printer queue.
C) Set up the Remote Printer feature to connect the remote printer queue for a
client to their telephone number.
A) To set up a new queue for your remote printer:
1.
2.
3.
4.
Select F8. Tools.
Select Set-Up.
Select Report Setup.
Select Report Queues.
SchuyLab displays the current list of the Queues available.
485
5. Select New Queue. SchuyLab displays the Input Report Queue box.
6. Fill in the Name and Description entry fields. We’ve used “REMOTE1” and
“1st remote queue” for this example. Select OK.
7. Select Done.
B) To attach the new queue to the client record:
1.
2.
3.
4.
486
Select F8. Tools.
Select Doctor Records.
Select Update Clients.
Click the mouse on the name or number of the client with the remote printer.
Select OK. SchuyLab displays the Update Client Record box.
5. In the Queue pull-down list box, select the new queue you defined for this
remote printer site.
6. Select OK.
C) To set up the remote printer feature on SchuyLab:
1. Select F7. Features.
2. Select Remote Print.
SchuyLab displays the Update Remote Printers box, listing all the remote printer
connections currently defined in your system. Select New. SchuyLab displays the
Define Remote Printer box.
487
3. Enter an 8 character name for the client’s site in the Code field.
4. Select the correct remote printer queue (the one you just set up) from the
Queue pull-down list.
5. Select the model of remote printer from the Printer Model pull-down list.
The Printer Model will generally be Remotrix, but there are others available.
6. In the Printer Telephone field, enter the telephone number for the remote
printer’s line. Do not use any dashes or spaces. Include all prefixes and area
codes, and if the number is long distance for you, also include the “1” you
need (basically, enter the number as you would dial it).
7. The Site Name and Voice Telephone fields are optional. They allow you to
enter a more complete description of the client’s site, so it will be easily
available for future reference.
8. If you want each transmission to this printer to end with a separator page (to
distinguish it from tomorrow’s transmission, for instance), select the
“Generate Separator Page” button. The final separator page acts as a minilog and contains the date, time, and number of total reports printed at the
bottom of the page.
9. Select OK.
10. Select Done.
Once all this is accomplished, it should be a simple matter to access a patient record
(through F2. Patient or F3. Specimen) or other document you wish to remote print.
488
When a prompt window pops up with the Printer Queue choice, just select the new
remote printer queue. In the case of Batch Printing, SchuyLab will automatically
pick out the reports in the remote printing queues attached to clients and remote print
them. Everything should work without a hitch. In the case of possible hitches, see
below.
General problems and possible solutions
The “Suspend Transmission” button will be checked if SchuyLab has attempted to
connect to the remote printer and the connection has failed. To make SchuyLab try
the connection again, click on the button to remove the check mark and select OK.
SchuyLab will try to make the connection again. If it succeeds, it will send all of the
reports that were waiting to be printed. If it fails, a check mark will appear again in
the Suspend Transmission box.
To tell if there’s a problem
The Waiting button displays a list of all the reports which are in the queue for that
client, waiting to print as soon as the printer becomes available.
489
The Reprint button displays a log of all the reports which have been successfully
transmitted to the remote site; this is a way to double-check on the progress of your
printing. This will appear in a box with the title of the 8 character code you entered
for that client’s remote printer (the printer queue in this example is REMOTE1, but
the title is RAINBOW). To view a log from a previous day, select the Change Date
button, and enter the date you want.
Modem problems
Sometimes the problem can be with the modem. If the station with the modem in it
is not making proper “modem noises” (dialing, connecting, etc.), a few things may be
amiss. First, the modem may be in the computer, but the computer doesn’t know that
yet. To tell it there’s a modem there:
1. Select F8. Tools.
2. Select Set-Up.
3. Select Station Setup.
SchuyLab displays the Configuration screen for a
single station.
490
4. Select Setup Comm. SchuyLab displays the SchuyLab Communications
Setup screen. If your screen looks like the one displayed, the computer
doesn’t think it has a modem, when it actually does (it’ll almost always be in
COM4).
To correct this, click on the COM4 button.
SchuyLab displays the Setup Port [number] screen. Click on the pull-down Device:
list and select MODEM.
491
Click on the Setup... button. SchuyLab displays the Setup [device] screen.
Select the right numbers for your particular modem from the pull-down screen. Once
done, click Remote Printing. Then select OK. The SchuyLab Communications
Setup screen should have MODEM: Modem in COM4.
Other Problems
Other modem problems could stem from the internal buffers filling up. If this
happens, just get out of SchuyLab and turn the computer off for about 10 seconds.
Then go back in.
Static and other bad “noise” on a modem line, especially a low quality one, can be
checked by unplugging the modem line and plugging in a phone. If there is static on
the phone line, call the phone company.
Other things that can lead to problems with the transmission include problems in the
phone lines outside the building, problems with the remote printer (not turned on,
paper jammed or absent, etc.), or even something as simple as someone picking up a
phone on the other end, which is why the receiving printer should always have a line
of its own. If this happens, the “Suspend Further Print” box will be checked.
492
Appendix: SchuyFax
The SchuyFax Module will fax patient reports directly from SchuyLab
to your clients’ fax machines. It can be set up to do this automatically,
whenever you print in Batch; or you can fax a single report at a time.
There are three steps of setup before the SchuyLab system is ready to use automatic
faxing:
A) Define the fax queue for the automatic fax. You’ll need to define a separate
queue for each fax number.
B) Attach the fax queue to the client’s record. Thereafter, all patients belonging
to that client will automatically fax on that queue.
C) Set up the Automatic Fax feature to connect the fax queue for a client to their
telephone number.
Report Queues
The first step is to define the new queue for the fax. Essentially, SchuyLab considers
each fax number as a separate printer, with a printing queue for each.
To set up a new queue for your SchuyFax
1.
2.
3.
4.
Select F8. Tools.
Select Set-Up.
Select Report Setup.
Select Report Queues. SchuyLab displays the current list of the Queues
available.
493
1. Select New Queue. SchuyLab displays the Input Report Queue box.
2. Fill in the Name and Description entry fields. The Name field can be no
more than eight characters, and should be something easily
3. recognized, like “JONESFAX”. The description field can be a much longer
name, like “DR. JONES MED CLINIC”. Select OK.
4. Repeat steps 5 and 6 to create the queue for the next fax number.
5. When all the fax queues have been defined, select Done. SchuyLab returns
to the Report Setup menu screen.
Update Client
Once the queues are defined, to use the automatic fax feature to its fullest, each fax
queue must be assigned to its intended client.
To attach the new queue to the client record
1. Select F8. Tools.
2. Select Doctor Records.
3. Select Update Client. SchuyLab displays the Select Client box.
494
4. Enter the name or number of the client for whom you are setting up the fax.
Select OK. SchuyLab displays the Update Client Record box.
5. In the “Queue” pull-down list box, select the new fax queue you defined for
this site. Use the “Copy to” list box to select a local queue if you wish to
print out a copy of each patient report in your lab, in addition to the fax
automatically sent to the client.
6. In some cases, doctors or the clinics want more than 1 copy sent to them.
You can set the number of copies to be faxed, or printed, by changing the
number in the Copies box.
7. Select OK.
495
Finally, there are the details of the fax process itself: phone numbers, redials, etc.
These are defined through the Fax icon.
SchuyFax Set up
1. Select F7. Features.
2. Select Fax. SchuyLab displays the Automatic Faxing box, listing all the fax
connections currently defined in your system.
3. Select Setup Faxing. SchuyLab displays the Faxing Setup box.
496
4. The information in the Faxing Setup box applies to all of the faxes that are
sent from SchuyLab. In the Dial Prefix field, type any generic digits that
have to be dialed before you can call an outside line. (For instance, if you
have to dial 9 before you can dial out of your lab, type “9,” in this field. The
comma causes the modem to pause a moment after dialing the 9, so you’re
sure to get the dial tone.)
The Vertical Resolution should be set to 200 DPI (dots per inch). This will
keep the fax from looking blobby. (Setting the Vertical Resolution to 100
DPI, on the other hand, makes the fax twice as fast.)
The other two fields are optional. If you type a message in the “Label for
top of fax pages” field, that message will appear on every fax as a header. If
your lab has a scanned overlay (PCX file) of your report form, you can
incorporate it in your fax by typing its path and file name in the “Path forms
for overlay pcx” field.
The Prompt before suspending a site check, will always prompt an alert
when there is an error faxing to one of you sites. If it is not
checked, a site will be suspended automatically if there is a problem.
However, if this option is used, it requires a user response before any other
faxing can occur.
Timetable button – This feature is not working at this time. The Timetable
allows you to automatically send faxes in three ways. Continuously will fax
any results that are ready as soon as they are accepted. Every ______
minutes will fax any results that have been accepted only after a set number
of minutes that you determine. Finally, Specific Dates and Times. If you
497
have chosen Specific Dates and Times, another box will become available to
add the time and date for faxing.
‘Do not dial a 1 for’ button – In some areas of the country, you do not need
to dial a 1 before the area code. Click on the Add button to add those area
codes.
5. When done, select Done.
6. To define a new fax line, select New. SchuyLab displays the Define Fax
Location box.
7. In the Fax Telephone field, type the correct telephone number for the fax at
your client’s site . Do not use any dashes or spaces. Include the area code, if
necessary, but not the “1” (or any generic prefixes, such as “9”, since they’ve
already been defined in the Fax Setup box).
8. Select the correct fax queue (the one you just set up) from the Queue pulldown list.
9. The Site Name and Voice Telephone fields are optional. They allow you to
enter a more complete description of the client’s site, so it will be easily
available for future reference.
10. Timetable button – Again, this feature is not working at this time. The
Timetable allows you to automatically send faxes in three ways.
Continuously will fax any results that are ready as soon as they are accepted.
Every ______ minutes will fax any results that have been accepted only after
a set number of minutes that you determine. Finally, Specific Dates and
Times. If you have chosen Specific Dates and Times, another box will
become available to add the time and date for faxing.
11. Select OK.
12. Repeat steps 6-9 to set up for the next fax number.
13. When finished, select Done.
498
Using the SchuyFax Module
You have now implemented automatic faxing for the client(s) you have selected.
From this point, faxing takes place in one of two ways:
1. Anytime you Batch Print a series of reports, or if the SchuyLab system is set
to Automatically Print When Final (i.e. begin printing the moment the
results are accepted), the Fax Module will automatically fax reports to the
clients with assigned fax queues. Only the patients belonging to a client will
have reports automatically faxed to that client.
2. You can also fax a single report in the same way you’d print it: through the
Patient Processing screen. Select F2.Patient or F3.Specimen to reach the
Patient Processing screen, then select Print Results. SchuyLab displays the
“Print results for [Patient Name]?” dialog box.
The Queue list box will, by default, show the printing queue assigned for this
patient -- usually, your in-house SchuyLab printer. However, instead of
printing the report in house, select the queue for the fax number for which the
report is intended. Then select Yes. SchuyLab will send the report to the
chosen fax queue, which in turn will begin the faxing process.
499
Monitoring SchuyFax
To track which faxes have been sent, and when, select the SchuyFax icon. SchuyLab
displays the Automatic Faxing box, showing the fax numbers currently defined on
the system.
This screen here displays a lot of information that you can use to track your faxing
status. First, Suspend All Fax Transmissions will stop faxing to every site. This
option is used in the rare event that you need to disable faxing immediately to all of
your clients. The Show sites: options allow you to quickly view all of your fax
machines or which of your faxing locations still have reports that are waiting to print.
Sort by: allows changing the order your faxing locations are listed for you to more
easily find the specific site you are looking for.
The Defined fax stations: box holds most of the pertinent information you need to
review the status of your reports. Here every one of your Fax machines are listed.
Next to each site is a small dot. Each color represents a different basic status.
The Green status light means that everything is working properly.
SchuyLab has either faxed successfully to this site, or is waiting to do so.
The Yellow status light means that the location is on hold: there was a
problem when SchuyLab tried to send a fax to the site, but once SchuyLab
has faxed its other reports it will try to reaching this number again. The most
common reason for this status light is the modem received a Busy signal
when it dialed the number.
500
The Red status light means that the location has been suspended. When
SchuyLab tried to connect to this fax machine, there was a problem that will
prevent SchuyLab from trying to connect again until you tell it to try again.
The most common reason for this error is either the Client’s fax machine is
not plugged in, or the fax number is not correct and there is no fax machine
attached to the line.
In addition, below each site you may see some basic messages: “Sent 3 Reports”
“Busy” “NO CARRIER” “Dialing…”. If you select a specific fax number you can
monitor additional information. SchuyLab displays the Check Fax Status box.
The three control features of the Check Fax Status box are the “Suspend
Transmissions” box, and the Waiting and Refax buttons. In order:
1. The “Suspend Transmissions” button will be checked if SchuyLab has
attempted to connect to the client’s fax and the connection has failed. To
make SchuyLab try the connection again, remove the check mark from the
button, and select OK. SchuyLab will attempt to connect to the client’s fax
again. If it succeeds, it will transmit all of the reports that are queued under
the Waiting button. If it fails, a check mark will appear again in the Suspend
Transmission box.
2. The Waiting button displays a list of all of the reports which are in the queue
for that client, waiting to print as soon as the printer becomes available.
501
From here, print jobs can be copied or moved to another printing queue
(which includes other fax queues), or deleted altogether. This is done in the
same manner as for the Print Control icon, found in F6.Print.
3. The Refax button will also display a log of all the reports which have been
successfully transmitted to the client’s fax machine. To fax another copy of
any report, select them from the list, then select the Refax button.
To view a log from a previous day, select the Change Date button, and enter
the date you wish to view. SchuyLab displays the reports that had been
faxed to that client on that day. These, too, can be selected and refaxed.
Printing your Fax Transmission Log
On your main Automatic Faxing window and on each individual Fax Location you
will see the Print Log… button. This allows you to print out a Fax Transmission
Log. This report records every time SchuyLab connected to one of your Clients and
502
which reports were sent. If you print this log from the Automatic Faxing window, it
will include all of your clients on one report. If it is printed from a specific Fax
Location, it will only include the reports sent to that fax machine. However, from
either place, you will see the Fax Transmission Log window appear:
The Date From: and Through: fields allow you to select the date range you want
this Fax Log to incorporate. Queue: allows you to select which printer you want the
log to be sent.
The two check boxes only appear when printing the global Fax Transmission Log for
all of your locations.
The Include sites with no activity option will include the name of every fax
machine you have defined, whether or not you have used it within the specified date
range. The default is to only print a log of the clients that you actually transmitted to
during this time period.
Print each site on a separate page will place each client and all of their faxed
reports on their own page.
Pressing OK will print out a copy of the Fax Transmission Log.
503
Index
A
absurd range..................................................86
Absurd Range..............................................101
accept results...........................................50, 67
Accepted Log...........................13, 76, 225, 229
accession...............................................49, 293
Accession....................................................370
Accession Report..........................................71
add a value..................................................289
Add Condition.............................................418
Add Organism.............................................447
Add Test......................................................284
Adding a new column.................................215
Advanced Beneficiary Notice......................415
Age, Birth Date...........................................372
alias...................................................................
QC..........................................174, 183, 339
test codes from online instruments.........280
Alias..................................................................
add a new...............................................139
alter........................................................139
Manually entering..................................138
tests and panels......................................138
alias table....................................................289
Allegro........................................................358
Allergy testing.............................................125
configuring.............................................126
printing...................................................128
Same Ranges as Test..............................126
setup of..................................................125
Allow accessions with separate clients........302
alter results....................................................25
Alter Results................................................448
archive function.............................................36
Archive Lot.................................................179
archiving reports.........................................296
ASTM 1238 / 1394......................................395
Autofax.......................................................493
Automatically order.....................................283
B
back up..............................................................
CD.........................................................347
zip disk...................................................347
backup...................................................13, 346
Bar Code Setup...........................................358
barcode printers...........................................358
Barcodes......................................................355
automatic generation..............................356
checksum...............................................357
default number.......................................359
format.............................................357, 359
504
Host-query instruments..........................356
Labels only.............................................356
non-checksum........................................357
orientation..............................................356
placement...............................................356
Queue.....................................................358
trouble reading.......................................357
Unidirectional Instruments.....................356
'white space'...........................................357
baseline.......................................................182
batch reports............................................32, 72
deleting....................................................73
Batch Requisition..............................................
bottom section........................................373
Match to Patient ID................................374
Middle Section.......................................372
Top Section............................................370
Batch Requisition .......................................370
Bethesda system..........................................375
bi-directional interface................................168
bill types......................................................298
Billing module..............................................26
body setup...................................................218
Boeing 747..................................................140
C
calculations.................................................337
Cancel button..............................................372
cancel tests..............................................48, 50
cancel without saving....................................18
canned comments..........................36, 302, 371
change demographics....................................25
change header..............................................213
Change password........................................277
change specimen...........................................25
change test code..........................................337
change test name.........................................337
Change the Parameter..................................291
Checklist..............................................150, 153
cleanup database..............................13, 35, 330
cleanup database...............................................
setting parameters..................................295
CLIA, Multiple Facilities ...........................456
Client Field..................................................372
client groups..................................................33
client ID......................................................317
client panels.................................132, 136, 319
clients..................................................313, 316
enter new client......................................316
printing a list of clients...........................322
Closed Lot...................................................179
Common Alert.............................................413
GENDER...............................................413
NEED 4 DGT.........................................413
NEED 5 DGT.........................................413
NEED DOB...........................................413
NOT ALLOWED...................................413
TOO OLD..............................................413
TOO SOON...........................................413
TOO YOUNG........................................413
concentration.................................................54
Configure Test Values.................................288
Connect.......................................................343
Connect icon.................................................20
Connect Manger..........................................343
Connection Manager.............................20, 345
control...............................................................
define new control..................................175
new lot...........................................178, 184
range......................................................181
set 179, 185, 188
status..............................................179, 198
subset.....................................184, 187, 189
copy.............................................................182
CPT.............................................................412
Add CPT................................................417
CPT code.....................................................111
Critical Ranges..............................................85
cultures..........................................................55
cumulative report.....................................26, 70
cursor............................................................15
moving the cursor....................................17
Custom Options...........................................223
Cytology......................................................375
Client Report..........................................380
establish a test........................................375
PAP RSLT.............................................377
Setup......................................................375
D
daily reports................................................208
Data Log....................................13, 31, 76, 227
data management.........................................225
Datamax......................................................358
DBASE IV..................................................398
default screen..............................................327
Default Screen...................................................
Accession...............................................328
Patient....................................................328
default selection............................................17
delete patient.................................................25
delete patient XE ........................................334
delete print jobs (print control)......................75
delete specimens....................................25, 296
delete specimens XE ..................................333
delete test results...........................................64
delete tests...................................................338
delete worksheet..........................................296
Delta Check.............................................51, 99
Interval.....................................................99
demographics....................................................
Miscellaneous........................................236
patient....................................................235
Demographics.....................................209, 234
Billing....................................................235
Creating New.........................................238
department...................................228, 230, 232
derivation....................................................100
derivation..........................................................
automatically order..................................97
Detail...........................................................206
Device Setup.......................................280, 284
Device Setup.....................................................
Update Device Tests..............................281
Values....................................................282
diagnose problems.................................37, 342
doctor ID.....................................................312
doctor records........................................36, 310
deleting a doctor.....................................314
enter new doctor.....................................311
listed by client........................................319
printing a list of doctors.........................321
update.............................................312, 314
Draw Date, Time, By..................................371
Draw List....................................................209
Draw List..........................................................
report........................................................78
Draw required......................................263, 267
E
edit worksheet.............................................164
enter a patient................................................38
enter results.......................................................
manually............................................24, 49
worksheet.........................................67, 166
enter results through worksheet.....................29
Entering Results..........................................448
error log........................................................32
Error Log.....................................................234
Expand........................................................448
expand button....................................50, 55, 56
Export.........................................................384
ASCII.....................................................388
Format List.............................................385
setup.......................................................384
Test List.................................................410
Using......................................................404
F
Faxing Setup...............................................497
features....................................................23, 34
505
Features.............................................................
Auto Faxing...........................................350
Barcode..................................................352
Batch Requisitions.................................352
Billing....................................................351
Cytology................................................353
Export....................................................351
import patient demographics..................352
Import records........................................352
Medical Necessity..................................353
Microbiology.........................................353
Quality Control......................................352
Remote Printing.....................................351
SchuyLab Text Messaging.....................353
SchuyNet...............................................353
flag value ......................................................95
Format.........................................................150
full report..............................................36, 339
G
gender/age specific ranges...........87, 88, 89, 91
Graph Width / Height..................................247
Graphic Report..............................................26
Graphic Reports................................................
Set Up....................................................245
Graphics reports..........................................244
grouping tests..............................................338
Groups button..............................................223
H
historical results............................................26
HL7.............................................................397
Hospital Lab..........................................78, 301
Hospital Lab......................................................
Admit Date..............................................79
Bed...........................................................79
Class........................................................79
Dischg Date.............................................79
Location...................................................79
Room.......................................................79
Service.....................................................79
Unit..........................................................79
hot keys.........................................................18
I
ICD-9 code..........................................373, 411
ICD-9 codes......................................................
Update....................................................326
ICD-9 Codes...............................................324
Create New............................................325
Update....................................................325
ID
patient....................................................292
salespeople.............................................318
ignore..................................................283, 284
506
Import Clients.............................................321
Instrument Flags..........................................282
instruments........................................................
configuring the interface........................279
online.................................................22, 62
Intermec......................................................358
Interpretive Ranges.....................................379
Isolate..........................................................450
L
Lab staff......................................................275
Label Design...............................................366
labels.................................................................
print for a specimen range........................31
Labels..................................................363, 371
Labels................................................................
Format....................................................365
Setup......................................................364
With Bar Codes......................................363
Without Bar Codes.................................363
Layout Test By............................................257
Levey-Jennings....................................192, 204
Line by Accession...............................150, 160
Line by Test................................................150
linear range....................................................86
linearity.......................................................302
list active specimens......................................41
list box.....................................................16, 19
List button...................................................374
List Operator...............................................275
list patients by first letters of name................38
Load List.............................................150, 155
log
accessions yet to be drawn.......................32
all accepted tests................................31, 76
condensed format data........................31, 76
critical results...........................................31
error.........................................................32
pending tests............................................77
restricted..................................................77
restricted results.......................................32
tests/panels ordered............................31, 76
Log Message...............................................428
Logged...................................................428
Unlogged...............................................428
Logs............................................................209
LOINC........................................................100
Lot Edit.......................................................194
M
main menu...............................................16, 22
Manual Differential counter..........................37
master worksheets.......................................148
match patients...............................................37
Maximum results to graph...........................247
Medical Necessity.......................................411
Alert.......................................................411
Delete Link............................................421
Import Database.....................................419
Link........................................................416
Setup......................................................411
Update Link...........................................419
merge patients...............................................25
automatic search.....................................334
merge patients XE ......................................332
Message............................................................
Write Messages......................................427
Messages.....................................................423
delete message.......................................425
Deleting.................................................433
Forward..................................................425
New Msg................................................426
Print.......................................................432
Reply......................................................425
Saving....................................................433
Send.......................................................428
Sending new mail...................................425
Setup......................................................428
Tools......................................................429
Update Address......................................429
Update Mail Boxes................................431
microbiology.....................................................
entering results.........................................55
isolate organisms......................................57
sensitivities..............................................59
setup.........................................................97
Microbiology....................................................
Entering Results....................................448
Microbiology Setup.....................................446
modem........................................................490
mouse............................................................15
Multi-Facility..............................................456
N
new patient....................................................39
New Patient Report.............................241, 300
New Patient Report...........................................
Automatically Print Report....................243
Manually Print Report............................243
Set up.....................................................241
New Patient\................................................319
new specimen..........................................41, 43
new test.........................................................81
non-printing test............................................96
normal range.....................................................
wrong.....................................................337
Normal Ranges..............................................85
note codes......................................37, 302, 306
Note Codes....................................................53
Create.....................................................307
Print a List..............................................310
Update....................................................309
notes.........................52, 66, 196, 199, 201, 204
notes..................................................................
as footnotes..............................................96
Notes button................................................224
number of labels..........................................359
O
On-Line Analysis................................192, 197
online entry.......................................................
sending loadlist......................................169
Operator......................................................274
operator’s ID...............................................276
Optional Processing....................................300
options...........................................................23
Options..........................................................95
Order Log........................................31, 76, 229
order tests..........................................24, 43, 46
free text....................................................47
online (back door)....................................65
Order Tests..................................................373
Ordering Doctor..........................................373
Other Tests..................................................443
Outstanding Tests..............13, 32, 77, 229, 231
Override......................................................415
Override Necessity......................................421
P
Packed List..........................................150, 156
panel code...................................................111
panel definition...........................................109
Panel Specific..............................................145
panels................................................................
adding tests............................................112
ordering....................................................47
parallel testing.............................................187
parameter ID...............................................291
Change...................................................291
password.......................................................21
password box..............................................278
patient...........................................................22
Patient based barcodes................................359
patient demographics.....................................33
Patient Demographics.................................373
Patient Diagnosis for Accessions.................302
Patient Files.......................................................
delete patient..........................................334
delete specimen......................................333
match patient..........................................334
merge patients........................................332
reassign specimen..................................331
patient ID..........................................................
autogenerated.........................................292
507
Patient ID..........................................................
Format....................................................293
Patient ID Numbers.....................................291
patient information........................................25
patient name................................................372
patient processing screen.........................24, 42
patient report.....................................................
cumulative...............................................70
default format...........................................69
other formats......................................23, 26
printing rules..........................................145
separate page..........................................144
specimen..................................................71
Patient results..............................................220
patient type..........................87, 88, 89, 91, 297
inactive...................................................298
new........................................................296
Personalizing the Patient Report..................209
point and click...............................................15
primary tubes..............................................283
print...............................................................23
batch reports.............................................32
Draw List...............................................263
labels........................................................31
patient report............................................24
preliminary reports...................................73
reprint......................................................31
worksheet.................................................28
print control.............................................32, 75
Print Options...............................................256
print panel names........................................146
printer setup...........................................36, 268
Printing.............................................................
Large Numbers of Tests.........................128
panel definitions.....................................113
test definitions........................................107
printing groups............................................338
Printing Groups...........................................140
Change...................................................141
Create.....................................................141
new heading...........................................142
Panel Specific........................................145
sequencing tests.....................................144
printing queue...............................................75
printing queue...................................................
select........................................................74
printing queues............................269, 310, 318
printing queues..................................................
defining..................................................271
select........................................................69
view.........................................................32
prior online results.........................................64
Prior results.................................................221
508
procedure codes.....................................85, 112
provider...............................................314, 319
Q
QC.......................................................173, 190
accepting controls...........................192, 339
alias................................174, 183, 186, 193
alter........................................................194
baseline..........................................174, 190
control....................................................175
Detail Report (spreadsheet)............192, 206
enter control values................................173
flagged values........................................193
graphic display.......................................197
graphic report.........................................204
Levey-Jenning report.............................192
Lot Edit..................................................192
manual input...................................192, 200
new lot...........................................178, 187
online.....................................................192
online ....................................................174
parallel testing........................................184
setup.......................................................191
trends.....................................................198
troubleshooting......................................193
Update....................................................192
QC frequency..............................................177
quality assurance.........................................173
quality management....................................173
R
Ranges..............................................................
gender/age specific...........86, 87, 88, 90, 91
linear........................................................86
update......................................................91
ranges, absurd...............................................86
Re-arrange Lines.........................................218
Reading Mail...............................................423
reassign results..................................................
online QC...............................................194
online specimen.......................................65
reassign specimen..........................................26
reassign specimen XE ................................331
Recommended Checklist...............................14
Refer Tests..................................................468
Reflex Testing.............................................115
set up a new test.....................................117
Standard Table.......................................115
Remark Code................................................85
remark codes...................................36, 51, 302
Create New............................................304
Print.......................................................306
Setting up...............................................303
Update....................................................305
Remarks......................................................371
remote printing............................................272
Remote Printing..........................................485
client record...........................................486
printer queue..........................................485
Reprint...................................................490
Set up.....................................................485
Suspend Transmission............................489
Waiting..................................................489
Remotrix.....................................................488
removing test(s) from panel.........................113
report.................................................................
appearance.............................................140
cumulative...............................................30
graphic.....................................................31
number of tests.........................................33
patient demographics...............................33
send home................................................26
specimen..................................................31
troubleshooting........................................36
Report...............................................................
Body......................................................212
Cumulative.............................................208
Detail.....................................................192
Draw List...............................................261
Footer.....................................................212
Graphic..................................................208
Header....................................................212
Patient....................................................208
Statistics.................................................209
Report Order.....................................................
Allergy testing........................................128
Report Queues.............................................493
Reports..............................................................
Result Summary.....................................252
Reprint.............................................31, 74, 208
request forms...............................................323
restoring backup files..................................349
Restricted Log.........................................32, 77
result codes..........................196, 199, 201, 204
microbiology..........................................454
result values................................................375
results............................................................48
online entry..............................................62
routine print...................................29, 151, 161
S
Same Ranges as Test.............................99, 127
Sample Type.................................................84
saving your work...........................................18
SchuyFax....................................................493
Monitoring.............................................500
new queue..............................................493
set up......................................................496
Transmission Log...................................502
Using the SchuyFax Module..................499
Screen Definition..............................................
Configure a New....................................129
panel buttons..........................................131
test button..............................................131
screen formats.............................................132
screens..............................................................
definition................................................129
formats...................................................130
scroll box.................................................16, 19
Search button..............................................372
security..........................................................36
Security.............................................................
Add a New Operator..............................276
authorized..............................................274
Class......................................................274
Password................................................277
Security Levels......................................425
Set Up....................................................274
Security in SchuyLab..................................274
Select Class.................................................274
select form...................................................209
sequence tests..............................................285
set up.......................................................23, 35
Setting Up Cultures.....................................435
Setting Up Isolate Panel..............................445
Setting Up Sensitivities...............................438
Setting Up Sensitivity Panels......................444
Setting Up the Isolate..................................440
signing onto the system.................................21
slow down.....................................................13
Special Conditions......................................418
special features .............................................34
specimen.......................................................22
Specimen...........................................................
Received..................................................45
specimen ID..................................................44
Specimen ID.....................................................
autogenerated.........................................294
format....................................................293
Format....................................................295
specimen report.............................................71
Specimen Sample........................................103
Sample field...........................................105
Specimen Suffix..........................................103
Suffix field.............................................106
Spreadsheet.........................................150, 157
Standard Operating Procedures...................301
STAT..........................................................370
Summary.............................................192, 207
Supervising Physician.................................313
T
TAT.....................................................101, 257
509
test code........................................................83
translating from online instruments........280
test definition................................................81
test information.............................................52
Test Instrument Interfaces...........................343
Test List..............................................150, 158
Test Numbers......................................102, 301
Test Numbers....................................................
Use test numbers....................................102
test report....................................................107
test set up......................................................81
Billing Only.............................................97
calculations............................................100
do not print if blank..................................97
flag results................................................97
graphic.....................................................96
Restricted.................................................97
Result when ordered................................97
special report type....................................96
test tally.........................................................32
test values........................................33, 92, 288
tests...................................................................
deleting results.........................................64
time and date.................................................36
tools..............................................................23
touchpad........................................................15
trackball........................................................15
trigger tests............................................54, 112
trigger tests........................................................
Expand Button.........................................84
troubleshooting............................................339
misc. report .............................................32
Print Configuration................................346
Update Registration................................346
Validate Database..................................346
Turn Around Time.........................85, 101, 257
Values...............................................................
abnormal..................................................95
add keystroke...........................................94
add note...................................................94
add remark code.......................................94
critical range............................................87
Custom.....................................................93
free-form text...........................................94
interpretive range.....................................88
non-numeric.............................................93
normal range............................................86
plot values................................................90
Standard...................................................92
Veterinary Lab............................................301
view results.............................................25, 67
W
Undrawn Excessions...................................301
unread messages..........................................423
Update Client..............................................494
Update QC..................................................202
Westgard.....................................................177
Worklist...............................................150, 152
worksheet..........................................................
append......................................................29
manually build.........................................30
select........................................................28
worksheet barcode.........................................30
worksheet entry, master.................................28
worksheet, enter results.................................29
worksheets.............................................23, 148
Accession...............................................151
already existing..............................161, 163
Barcodes................................................172
Cumulative.............................................151
edit...................................................29, 164
Independent............................................150
Manual...................................................171
master....................................................148
new.................................................161, 162
printing...................................................166
re-entering results.....................................29
routine......................................................29
transmitting to instrument......................168
worksheets, delete.........................................29
worksheets, view...........................................29
V
Z
values................................................................
translating from online instruments........286
ZZZ....................36, 50, 85, 213, 313, 317, 318
U
510
511