1
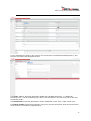
Installation + User manual Exact Synergy Enterprise Workflow Plus Version 14 GLM Systems Version Version date 2.5 2 June 2014 Exact Synergy Enterprise Workflow Plus Contents 1. Introduction ................................................................................................ 4 1.1 2. Revision............................................................................................................... 4 Installation .................................................................................................. 5 2.1 Run the installer.................................................................................................... 5 2.2 Copy the license file ............................................................................................... 6 2.3 Generate metadata................................................................................................ 6 3. License......................................................................................................... 8 4. Setup ........................................................................................................... 9 4.1 Introduction ......................................................................................................... 9 4.2 Multiple approval................................................................................................. 10 4.3 Visibility request field based on security level or role ................................................. 12 4.4 Fields only editable in new mode ............................................................................ 13 4.5 Email notification................................................................................................. 16 4.6 Email ................................................................................................................ 18 4.7 Purchase Limit .................................................................................................... 19 4.8 Free fields .......................................................................................................... 21 4.8.1 Additional Free Fields ....................................................................................... 21 4.8.2 Free text fields: hyperlink / url ........................................................................... 23 4.9 Browse fields ...................................................................................................... 24 4.9.1 Creating a new browser .................................................................................... 26 4.9.2 New browser: Accounts per manager .................................................................. 29 4.9.3 New browser: Purchase orders from Macola back office .......................................... 32 4.9.4 Existing browser: Sales order back office Exact Globe ............................................ 34 4.9.5 Item field depending on assortment freefield: Browser dependency on other request field in the request ............................................................................................................ 36 5. Reference fields ......................................................................................... 41 5.1.1 New reference: email + phone number of person .................................................. 41 5.1.2 New reference: address detail for parent account .................................................. 41 5.2 6. Role Access Level ................................................................................................ 42 Troubleshooting ......................................................................................... 44 6.1 Opening workflow plus settings: Failed to initialize Repository Business Component ‘GLMSysWflEmailNotification’…… ....................................................................................... 44 2 Exact Synergy Enterprise Workflow Plus 6.2 Opening a request: Non-existing property ‘WorkflowOrigin’ retrieved for Repository business Component....................................................................................................... 45 6.3 Repository failed to create class “GLMSys.WorkflowPlus.Repository.RequestExtension’ from assembly ...................................................................................................................... 45 6.4 Workflow email notification: Failure sending email. The remote name could not be resolved ‘[your email server]’ ....................................................................................................... 46 6.5 Workflow email notification: Value cannot be null. Parameter name address .................. 46 6.6 Server Error or Compilation error ........................................................................... 46 6.7 Email is not send out and no message in the error log (1) .......................................... 47 6.8 Email is not send out and no message in the error log (2) .......................................... 47 6.9 Browser: The following result columns where not found in the column info .................... 48 6.10 Browser: You have insufficient rights to perform this operation ................................... 48 6.11 No Valid License Installed ..................................................................................... 49 7. Uninstall .................................................................................................... 50 3 Exact Synergy Enterprise Workflow Plus 1. Introduction This document is for the installation and use of the features part of Workflow Plus add-on. The following features are available and explained: 1.1 Multiple approval Visibility request field based on security level or role Email notification Revision Version Date Author Description 1.0 23-04-2012 Gijs Lamers First version 2.0 21-09-2013 Gijs Lamers General update for the manual 2.1 17-10-2013 Gijs Lamers Freefield extended to 50 and 10 additional free comment fields 2.2 09-01-2014 Gijs Lamers License expiry message in left menu Extended role access level control 2.3 14-01-2014 Gijs Lamers Updates based on comments Donas Group (Dave Kloepfer) 2.4 16-03-2014 Gijs Lamers Version 13, support for browse field dependency on other request fields 2.5 02-06-2014 Gijs Lamers Version 15, suppport for url links for free text fields 4 Exact Synergy Enterprise Workflow Plus 2. Installation The installation consist of 3 steps: 1. Run the installer 2. Copy the license file 3. Generate metadata for email functionality 2.1 Run the installer The installer as delivered contains a installer executable GLMSysAddOnInstaller.exe. To install the add-on run this executable. When starting the GLMSysAddOnInstaller.exe the following screen will be shown: The title of the screen show which version of the Workflow Plus add-on is being installed. Choose the install made ‘Install’ and in the ‘Synergy folder’ field select the location where Synergy is installed. After the ‘Synergy folder’ is selected click start and the installation will start. When finished succesfully the following message is given. 5 Exact Synergy Enterprise Workflow Plus 2.2 Copy the license file With the setup of the workflow plus you shoud have receive a license file GLMSys.License.[Your exact license number].xml. For the workfow plus to work you will need to copy this file to the Synergy xml folder. In case you have the Event Manager from Vineyardsoft (KnowledgeSync Product) installed you will need to copy the license file also to the location where the Event Manager is looking for the Synergy files. This could be the Vinyard installation folder or a self defined folder. 2.3 Generate metadata If you are using the GLM Tool(s) Workflow Plus e-Mail or Workflow Plus e-Mail Notification, then this step must be taken. If you are not using these functions, you may disregard this section. After the intallation and copying the license file open Synergy and when you install the Workflow Plus add-on for the first time the following screen will be shown: When clicking update the database and repository of Exact Synergy will be updated to enable the Workflow Plus add-on. After the update go to System – Setup – Repository - Explorer. Look for the repository group GLMSys.WorkflowPlus (ID 2257) and open this repository group. 6 Exact Synergy Enterprise Workflow Plus After opening the group look for the business component GLMSysWflSendEmail and open the businesss component In the business component click ‘Generate metadata’. This will update the file Exact.ServiceLocation.config. This update is needed to enable the email functionality. 7 Exact Synergy Enterprise Workflow Plus 3. License The license has an end date when the end date is within one month a license message will be shown in your left menu. This is to inform you that you have to request for a new license You can see when your license will expire via the menu system – reports – add – ons – solutions. The first table will display the add-on license start date and end date. 8 Exact Synergy Enterprise Workflow Plus 4. Setup 4.1 Introduction This setup chapter will describe how to setup the use for multiple approval, visibility request field based on security level or role, Email notification, Email, Free fields, Purchase limit and reference and browse free field which are part of the add-on Workflow Plus depending on which feature is purchased this will be enabled for your company. Under the Workflow / Setup / General menu their is a new function ‘Settings: Workflow Plus’ this function is to maintain the settings of the Workflow Plus add-on and it will show which features are enabled. 9 Exact Synergy Enterprise Workflow Plus 4.2 Multiple approval When the multiple approval feature is used it will only go to the next stage / step in the workflow when all involved users have completed their action. For example when you enable the multiple approve for the approve stage where a role is linked and this role has 3 users all of the users should approve before the request will go to the realize stage. For the multiple approvals the setup is done at the maintenance of the request type in the ‘flow’ section. Determine the request type where you want to have multiple approval, realization or processing and open the maintenance for this request type in Workflow / Setup / Requests / Request Types. At the flow tab there are three extra checkboxes for the multiple approval: Approve: everyone Realize: everyone Process: everyone Based on the business requirement from the user you can determine which step in the process flow needs action from each user before the request will go to the next status in the process. When enabling/checking the ‘approve: everyone’ this will mean that all users which have the request in their workflow will need to approve before the request will go to the next status for realization or processing. Similar logic applies for ‘Realize: everyone’ and ‘Process: everyone’ 10 Exact Synergy Enterprise Workflow Plus For a request with the multiple approval enabled it will show additional information in the steps displayed in the request. It will show who already approved the request in addition who still needs to approve the request. In the workflow search three new columns ‘Approved: everyone’, ‘Realized everyone’, ’Processed everyone’ are available which will show all the users which have approve, realized or processed. The columns can be added via the customize function of the workflow search. 11 Exact Synergy Enterprise Workflow Plus 4.3 Visibility request field based on security level or role The setup of the visibility request field is done at the request field as part of the maintenance of the request type. When opening a specific ‘request field’ or ‘request section’ there are two new fields in the visible section: Security level Role To determine who can view a request field set the specific security level or role to determine who can view the request field. Persons who can view the request but have a lower security level as defined for a specific field will not see this field. Persons who have the same or a higher security level will see this specific field. Same logic applies for the role where only person with the role as defined for a specific field will be able to see the field in the request. If a person doesn’t have the role then this person will not be able to see this field. 12 Exact Synergy Enterprise Workflow Plus In the setup as shown above where the field is only visible for the procurement manager he can see the field when creating a new request. For a person without the procurement manager role the field will not be visible. 4.4 Fields only editable in new mode In the request definition you can set if a request field can be edited in open, approve, realize or process status. In the standard request definition it is not possible to make a field editable in new status but non editable in the other statuses. An additional option is added to the request field definition which makes it possible to set the editable option for the new mode. 13 Exact Synergy Enterprise Workflow Plus 14 Exact Synergy Enterprise Workflow Plus 15 Exact Synergy Enterprise Workflow Plus 4.5 Email notification The email notification feature will send an email automatically when a person receives a new request in their workflow. For persons who don’t want to receive this email this also can be disabled. The setup for the email notification is done at in the ‘Workflow Plus – Settings’ page and in the request type maintenance. To be able to send the email the email server details need to be defined in ‘Workflow Plus: Settings’ application. In the Workflow Plus settings there are the following fields to setup the email server, these settings can only be maintained be visible the administrator: E-mail: Exchange or SMTP Server: Server which has the email program to send from Port: Port to use to send the email to the email server, optional User name: User name which will be used to login in to the email server Password: Password to login to the email server Enabled SSL: Enable or disable SSL In the settings there is also a list of request types and their respective actions. Each user can open the workflow plus settings and by clicking on the ‘send email’ check or cross to determine if they want to receive a notification email yes or no. 16 Exact Synergy Enterprise Workflow Plus In the request type maintenance ‘Flow’ tab there are 5 new fields: Approve: Send email Rejected: Send email Approved: Send email Realize: Send email Process: Send email Check/Enable the option based on which action/process step you want to inform the person by email that they have received a new request in their workflow. 17 Exact Synergy Enterprise Workflow Plus Once the setup is completed and all is setup correct the user will receive the following standard email message. In case the email is not received any error can be checked via System / Reports / Log / Errors 4.6 Email The standard request functionally has the option to send an email via outlook but the attachments or attachments linked to a document can’t be attached to the email. The email feature allows for sending an email directly from the request without having outlook and also has the option to include attachments related to the request if needed. For the setup of the email server to be used see 3.4 Email notifications. In the request there is a new email icon toolbar button in the request. When clicking this button it will redirect you to a new screen from where you can send the email. 18 Exact Synergy Enterprise Workflow Plus In the screen you have the option to select the email from a person, current actions and / or project members. The other option is to select any email from Synergy or entering the email manually. 4.7 Purchase Limit In the standard request type definition at the approve stage you have the option to enable the purchase limit check. The purchase limit set at the resource card will be checked against the amount in the request. In case the amount in the request is above the purchase limit of the person it will look for the next person who has a high enough limit to approve. The purchase limit feature now also enables this option for the realize stage and the process stage. In the request definition there are five extra options: Approve - Purchase limit: remark Realize – Purchase limit Realize – Purchase limit: remark Process – Purchase limit Process – Purchase limit: remark When enabling this feature you can enable the purchase limit check also for the workflow realize and process step. The purchase limit check has additional features which are not available in the standard purchase limit check. When a role is used and there is nobody in a role level with a high enough limit it will look at a higher level. For example in the division there is no person within the role with a high enough purchase limit then it will look for a person with the same role at group level. 19 Exact Synergy Enterprise Workflow Plus 20 Exact Synergy Enterprise Workflow Plus 4.8 Free fields 4.8.1 Additional Free Fields Standard there are a limit set of free fields these free fields have been extended. All of the free field types have no 30 free fields with the same features as a standard free field: 50 free text fields 50 free guid fields 50 free number fields 50 free yes/no fields 50 free amount fields 50 free date fields 10 free comment fields These fields are available are also available to use in a standard workflow search or Pivot Analysis Views. 21 Exact Synergy Enterprise Workflow Plus Freezing of Free Fields (such as Freeze Everyone) may now be done for Multiple Type Requests, for our 10 Free Comment Field. This is not possible using Exact’s two comment fields (Remarks: Request or Remarks: Workflow). For the free comment fields additional settings are available to show the remark section on top (Comment above freeze) and to save the remarks in descending order (Add latest comment on top) so that the last remarks will be shown first. 22 Exact Synergy Enterprise Workflow Plus 4.8.2 Free text fields: hyperlink / url With the free text field: hyperlink feature it is possible to have a url in your text field and via a button this url can be opened. The url parameters can be from other fields in the request. A possible use could be that one of the request fields has the tracking number of a package and the hyperlink is using this value as parameter to open the website which tracks the package. The hyperlink can be to an external website outside of Synergy or can be a webpage in Synergy. When the user enters a valid url in the text field and hits enter, tab or moves to the next field a button will appear behind the text field. 23 Exact Synergy Enterprise Workflow Plus In the request field definition a new section for the hyperlink feature is added Url: The url for the hyperlink, when the text field is set to read only and the default text is set the hyperlink will show the default text but when clicked it will go to the entered url. Parameter: A list of available fields in the request type which can be used as input parameter. By clicking the add button the selected field will be added to the parameters. Parameters: Parameters to be used by the url. Format is [URL Parameter name 1],[Request field name 1]; [URL Parameter name 2],[Request field name 2]. Example: Text,Description;DOCAuthor,EmployeeID In the above screenshot that would mean that when the hyperlink is clicked it will open the document search screen with the Text and Created by already entered based on the values in the request. 4.9 Browse fields Free fields can be changed to use a predefined browser in the system or a newly created browser. This browser can browse on data in Synergy or on data in Exact Globe or Exact Macola ES. Currently free fields are limited on the data that can be browsed on and the back office data can’t be browsed. Free text fields: Items, Project and tax codes Free number fields: People and assortments Free guid fields: Request, Documents, Accounts, Contacts, Transactions and items By making use of existing system browsers all data in Synergy can be selected via a browser in a request. You also can create your own browser in case the browser you would like is not available. 24 Exact Synergy Enterprise Workflow Plus For a free request field of type text, guid and number the following additional fields are available to select a browser Browser: The browser to be used for this field. The browser can be selected from a list of browsers. The first browsers displayed are a number of standard system browsers and your own custom defined browser. After these browsers all browsers available in the repository are displayed. Division: The field which will determine the division to be used for the browser. The following options are available Creator (Division): the division of the creator will be used for the browser Person (Division): the division of person selected in the person field will be used for the browser Current (Division): the division of the user currently logged in will be used for the browser Division: the division used for the browser is based on the division field ‘division 2’ Result columns: The result columns are the normally two columns in the table with the first column being the key value (the value which will be stored when saving the request) and the description column which is used to display the description and/or hyperlink of the browser. The result columns field is also available in the browser maintenance when already filled in as required at the browser this doesn’t need to be entered again. Reference URL: The application which should be opened when clicking the hyperlink right of the browser. Reference SQL: When a different reference / description should be displayed a query can be entered here which will get the reference value. The query will be similar to SELECT cmp_name FROM cicmpy WHERE cmp_wwn = @P1. Where cmp_name is the description which will be displayed and cmp_wwn is the key the @P1 will be automatically replace by the actual value. Alternate Key SQL: This query will be used in case a different key value should be used. 25 Exact Synergy Enterprise Workflow Plus Show input field: The checkbox show input field is to determine if the input field before the browser should be shown. When unchecked the input field is not shown. Browse (button): The browse button will redirect to an application where the browser can be tested. When browsing on the available browser you will see the following workflow browser with the columns Name, Query and Standard browser Name: the name of the browser Query: the query used in the browser Standard browser: is the browser a standard browser in the repository (yes/no) In Synergy there are a number of standard system browser which are defined those are the browsers where the query column value is empty. 4.9.1 Creating a new browser In the request field at the browser section there is also a new button which will redirect you to the application to create your own browser. 26 Exact Synergy Enterprise Workflow Plus Name: This is the name of the browser, it is used in the source and repository to define the browser to use. Caption: The caption show in the browser. TermID: The term id of the caption. Query: This is the query the browser uses. (You can use parameters, in that case also Query parameters must be filled). Column info: This is the definition on how to show the columns, this will be filled when choosing Save + edit column info. Result columns: This defines the columns the browser returns to the code. Query parameters: This list the parameters used by the query. Table list: This is a list of the tables used in the browser query. Security level: The security level the user has to have to use the browser Maintenance Application: The maintenance application to start if the user presses the New button in the browser. Enterprise search entity: Security provider: security definition for the browser Security provider parameters: the parameters for the security definition 27 Exact Synergy Enterprise Workflow Plus In the left list box you can change the order of the columns. On the right you can configure the properties per column, remember to choose the column in the combo box. Header / TermID: This is the caption and term id of the column. Header - Suffix / TermID: This is the suffix and suffix term id of the column. Visible: This is to set columns visible or hidden. Sorting: This field is for enabling sorting on the column. Quick search column: This field is to enable the column for searching in the browser. Checkmark: This field is to change a 0 or 1 value from the database to a checkmark in the browser Domain: This field is to select the repository domain to be used. This will determine the way the column is displayed and the length which can be entered for the input field related to the browser. Scale | Currency column: The currency the display for an amount where the currency is available in another colum. Selection values: This field can be used to predefine the selection values of the column (used in the quick search). Selection columns: TermID column: The term id of the value in the result. This can be used when this is a status field which has value like ‘A’ (active), ‘P’ (proposed). Where the database value will be ‘A’ but the value you want to be displayed in the browser should be ‘Active’. Suffix/TermID column: The suffix termed of the value in the result Right aligned: This is to right align string fields. Human id: Show the result as a Human id. This can be used for the request Id where in the database the value is 15367 which will then be displayed as 15.367 Date/time format: The format in which the date / time field should be displayed. Search option: This is to configure the search operator used in the quick search. 28 Exact Synergy Enterprise Workflow Plus After the query is created it can be selected in the free field. The new browser can only be selected in the free field type which is the same as the browser key type. In the case where we make a browser on the accounts table (cicmpy) and the key used is cmp_wwn where the type is a guid (uniqueidentifier) the browser is only available in the request free guid fields.When saving the browser it will open the test application to test the browser 4.9.2 New browser: Accounts per manager The following example will show all accounts where the person in the request is the account manager. First create a new browser we will name the browser AccountManagers, the name of the browser which is displayed when browsing is ‘Accounts’. The term ID 9 for accounts can be found by looking for the term via System – Setup – Terms – Search The Query ‘SELECT c.cmp_wwn,c.cmp_name ,h.res_id,h.fullname FROM cicmpy c INNER JOIN humres h ON c.cmp_acc_man = h.res_id WHERE h.res_id = ? ORDER BY c.cmp_name’ will look for the accounts and the account manager which is linked to the account. The ? is the parameter which need to be supplied for the browser. The Column info ‘c.cmp_wwn,,,,,,2;c.cmp_name,,Name;h.res_id,,Resource Id;h.fullname,,Full name’ can be maintained via the ‘Save + Edit Column info’. Before clicking on the ‘Save + Edit Column Info’ each of the columns already need to be entered manually in the Column info field. The columns are separated by a ‘;’. So intiallly the column info will look like ‘c.cmp_wwn;c.cmp_name;h.res_id;h.fullname’ The Result colums ‘c.cmp_wwn,c.cmp_name’ are the key and the description which should be shown at the browser, the fields are separated by a ‘,’. The Query Parameters ’h.res_id’ is the list of columns which require a parameter. The Table list ‘cicmpy c,humres h’ is the list of tables in the query including the alias if used, separated by a ‘,’. 29 Exact Synergy Enterprise Workflow Plus When clicking ‘Save + Edit column info’ the above screen is shown. To switch between the columns you can select the columns from the column list displayed on the right. For the c.cmp_wwn column we set the Visible to ‘no’ as we don’t want to see the guid / uniqueidentifier in the result. For the c.cmp_name column we change the Header / TermId to ‘Name’ and ‘206’ which is the term id for Name. Once created you can select the browser in any free guid field. 30 Exact Synergy Enterprise Workflow Plus Because the browser has a parameter an additional field Dependency: h.res_id is shown with a drop down box of available fields in the request where the value for the parameter should come from. In this case we select the request field person. The Result columns is empty as this is already entered in the browser. Reference URL ‘CRMACcountCard.aspx?BCAction=1&ID=’ is the link which will display after the browser. In this case the link will start up the account card. The ID will be filled automatically based on the selected account. Reference SQL is empty as the reference sql will be build up automatically based on the browser details. There could be cases when using a standard browser you will get a query error in that case you can define your own query. For the AccoutnManagers browser that query would look like ‘SELECT c.cmp_name FROM cicmpy c WHERE c.cmp_wwn=@P1’. The @P1 parameter will be automatically replace by the account id. Show inputfield the show inputfield is automatically unchecked because the browse has a guid as key. The result in a request will look like When changing the person selected in the request the browser data displayed will also change 31 Exact Synergy Enterprise Workflow Plus 4.9.3 New browser: Purchase orders from Macola back office The following example will show the purchase orders directly from the Exact Globe Macola database. First create a new browser we will name the browser PurchaseOrderBO, the name of the browser which is displayed when browsing is ‘Purchase order list’. The term ID 490 for purchase order list can be found by looking for the term via System – Setup – Terms – Search 32 Exact Synergy Enterprise Workflow Plus The Query ‘SELECT po.ord_no,po.vend_no,v.vend_name FROM poordhdr_sql po INNER JOIN apvenfil_sql v ON v.vend_no = po.vend_no ORDER BY ord_no’ will look for the purchase orders in the Macola purchase order table as additional information the vendor name is also added to the query by joining the vendor table to the purchase order table. The Column info ‘po.ord_no,,PO No.;po.vend_no,,Vendor number;v.vend_name,,Vendor name’ can be maintained via the ‘Save + Edit Column info’. Before clicking on the ‘Save + Edit Column Info’ each of the columns already need to be entered manually in the Column info field. The columns are separated by a ‘;’. So intiallly the column info will look like ‘po.ord_no; po.vend_no; v.vend_name’ The Result colums ‘po.ord_no,v.vend_name’ are the key and the description which should be shown at the browser, the fields are separated by a ‘,’. The Table list ‘poordhdr_sql po,apvenfil_sql v’ is the list of tables in the query including the alias if used, separated by a ‘,’. When clicking ‘Save + Edit column info’ the above screen is shown. To switch between the columns you can select the columns from the column list displayed on the right. The Quick search column is set to ‘Both’. When the quick search column is not set and the purchase order number is entered manually it can’t be found. The Domain is set to ‘bkstnr_sub’. The domain will determine the length of the field in this case the bkstnr_sub length is 8 which means the for the order number field the length is also 8. When the domain is not set the length will be the default length of the free text field. 33 Exact Synergy Enterprise Workflow Plus Once the browser is created you can select the browser in any free text field as the browser key ord_no is a field of type text. The Division we will set to Creator (division). This means that the browser on the purchase orders will use the division of the creator of the request. The Result columns we will give the value ‘po.ord_no,po.ord_no,v.vend_name’ this will overwrite the value given in the browser. The first column po.ord_no is used for the key, the two other columns po.ord_no and v.vend_no are used in the reference / link. Reference URL ‘ICEMPoOrder.aspx?OrderType=N&Division=@Division&OrderNo=’ is the link which will display after the browser. In this case the link will start up the Interconnect purchase order application. The parameter @Division will automatically be replaced by the division of the creator. The OrderNo will be filled automatically based on the selected account. Reference SQL ‘SELECT ord_no,v.vend_name FROM poordhdr_sql po INNER JOIN apvenfil_sql v ON v.vend_no = po.vend_no WHERE LTRIM(RTRIM(ord_no)) = @P1’. The @P1 parameter will be automatically replaced by the order number. Show inputfield the show inputfield is checked and the order number also can be entered by the user. The result in a request will look like 4.9.4 Existing browser: Sales order back office Exact Globe A new free text field is added to the request and the standard browser SalesOrder is selected. The division from which the browser will get the data is based on the person division. 34 Exact Synergy Enterprise Workflow Plus When opening the browser the browser details can’t be changed as this is a standard browser. The information can only be viewed. The standard browser result column is ordernr in this case we change this by setting the Result columns to ordernr,refer in the request field definition. Without changing the reference / link will display the ordernr with the change it will display the sales order description. The Reference URL is set to ‘LogOrderBO.aspx?Type=V&Division=@Division&Number=’ which is the application to open the sales order from the Exact Globe backoffice in Synergy. 35 Exact Synergy Enterprise Workflow Plus In a request this browser will look like 4.9.5 Item field depending on assortment freefield: Browser dependency on other request field in the request You can add a standard item request field to the request which has a selection option this selection is fixed and can’t be made dependable on other fields in the request. This is possible with the browse field option. In addition to the free fields having the browse section to link your own browser also the standard browse request field like item1, item2, person and project will have the browse section to link your own browser. This browse will then replace the standard browser. In this example we will make a browser which will be depending on an assortment freefield. In this case when browsing only the items will be shown which are linked to the selected assortment. We will use free number field 1 as the assortment field with the standard reference selection: Assortments. 36 Exact Synergy Enterprise Workflow Plus For the standard item field we will create a new item browser ‘ItemAssortmentsDependency’, this browser will replace that standard browser. The Query ‘SELECT ItemCode,Description FROM Items WHERE Assortment = ? ORDER BY ItemCode. The ‘?’ will be replaced by the value in the field which is the reference field in this case the Number field 1. The Column info ‘ItemCode;Description’ can be maintained via the ‘Save + Edit Column info’. The Result colums ‘ItemCode,Description’ are the key and the description which should be shown at the browser, the fields are separated by a ‘,’. 37 Exact Synergy Enterprise Workflow Plus The Query parameters ‘Assortment’ will be the field/column which has the ‘?’ in the where clause. This field need to be linked to the field on which the item browser is depending. The Dependency field in the request field maintenance. The Table list ‘Items’ is the list of tables in the query including the alias if used, separated by a ‘,’. Once the browser is setup and saved and the Item request fields is opened in the browser section you will see a field ‘Dependency: Assortment’ and a dropdown box with all the request fields. Select the Free number field 1 (in this case Assortment field as this is the label given to the free number field 1). After saving the item request field the item browse will be depending on the assortment field. 38 Exact Synergy Enterprise Workflow Plus 39 Exact Synergy Enterprise Workflow Plus 40 Exact Synergy Enterprise Workflow Plus 5. Reference fields The reference fields feature will allow to show additional data based on other fields in the request. You can show for example address data, phone number, email address from the account field in the request. The data to be shown will be entered in the request field by defining the database fields. When adding a new request free text field the following section will be avalable Dependency: The field on which the reference is depending Column name: The column name of the data to be displayed Join table: The table to join on the dependency column, the join table will be used in case you want to display data which is not in the dependency table but in a related table. Join clause: The join clause for the join table 5.1.1 New reference: email + phone number of person Mail and telnr_prv are columns in the humres table for email address and phone number (the table used by the person field). By separating them with ‘+ char(13) +’ they phone number will be displayed below the email address. 5.1.2 New reference: address detail for parent account The column name adds the address 1, address 2, address 3,postcode and city together. The join table is the accounts table and the join clause is the join to the parent account. The ISNULL is used in the query in case one of the columns doesn’t have a value otherwise the result will always return ‘NULL’. The result in the request will look like below 41 Exact Synergy Enterprise Workflow Plus 5.2 Role Access Level In Synergy you have the option to assign a role to a person with one of the following levels: corporate, group, division, cost center group and cost center. When the division level is assigned for a role and this is also linked in a request type with the level division the person(s) which have the division level will get the request assigned. Now I have a scenario where in a division one or more persons in the HR cost center should get a request for the cost centers HR, IT and Finance and not for Operations. The requirement is that only the request which have the person from HR or IT or Finance should be assigned to the person(s) in the HR cost center. With the current standard implementation of the role levels this is not possible. When I set the level to division also requests for the operations cost center will be assigned to the person responsible for HR, IT and Finance. Setting the level to cost center group could be possible but in this case HR, IT and Finance are not in the same cost center group. Setting the level at cost center will also not work as the request for cost center HR, IT and Finance should be routed to the HR person(s). The new role access level workflow plus feature will make this possible as for each role linked to a person additional division group(s), division(s), cost center group(s) and/or cost center(s) can be added. So in this case we can add the HR, IT and Finance cost center to this person role. This means that this person will only get a request assigned when a person is in the HR, IT or Finance cost center and not in Operations. Below screenshot shows that two cost centers are assigned to the HR role on division level for Gijs Lamers. In the request the realize step is for persons in the HR division role. The person linked to the request is not in the cost center linked to Gijs Lamers so he will not be assigned. 42 Exact Synergy Enterprise Workflow Plus 43 Exact Synergy Enterprise Workflow Plus 6. Troubleshooting 6.1 Opening workflow plus settings: Failed to initialize Repository Business Component ‘GLMSysWflEmailNotification’…… This message is caused by a missing repository for the workflow plus add-on. To confirm the repository is missing you can look at the repository (System / Setup / Repository / Explorer) In the above screen shot you don’t see the group GLMSys.WorkflowPlus and zGLMSys.WorkflowPlus. Which indicates the repository is missing. Check the Synergy installation folder and see if the files Repository.GLMSys.WorkflowPlus.xml and Repository.zGLMSys.WorkflowPlus.xml are available in your Synergy installation xml folder. When the two files are available the repository need to be rebuild. Rebuilding the reposiory is done via System / Setup / Repository / Rebuild. After the rebuild the group GLMSys.WorkflowPlus and zGLMSys.WorkflowPlus should be visible in the repository explorer, System / Setup / Repository / Explorer 44 Exact Synergy Enterprise Workflow Plus Open the workflow plus settings again and the message will be gone. 6.2 Opening a request: Non-existing property ‘WorkflowOrigin’ retrieved for Repository business Component See solution given in 4.1.1. The repository needs to be rebuilt. 6.3 Repository failed to create class “GLMSys.WorkflowPlus.Repository.RequestExtension’ from assembly When opening a request and you get the message ‘Repository failed to create class “GlmSys.WorkflowPlus.Repository.RequestExtension” from assembly “GlmSys.WorkflowPlus.Repository”: could not load file or assembly “GlmSys.WorkflowPlus.Repository.dll” or one of its dependencies. The system cannot find the file specified’ this is most likely after you have uninstalled the workflow plus add-on. To remove this message a repository rebuild need to be done. After rebuild of the repository this message will not be shown anymore. 45 Exact Synergy Enterprise Workflow Plus 6.4 Workflow email notification: Failure sending email. The remote name could not be resolved ‘[your email server]’ This message is given when there is no internet connection. Make sure you have a connection. 6.5 Workflow email notification: Value cannot be null. Parameter name address This message is given when the email address is not set for the person who should receive the email. Check the persons who are supposed to get the email and confirm the email field is set. 6.6 Server Error or Compilation error 46 Exact Synergy Enterprise Workflow Plus When opening the workflow plus settings application and a message as shown above is given this means there is a conflict in versions. In this case let your vendor know which Synergy version you are currently using to make sure the correct version of the workflow plus settings tool is installed. To solution for this problem will be either updating Synergy to make sure you have the latest versions of all components or installing a different version of the Workflow Plus tool. 6.7 Email is not send out and no message in the error log (1) Open the Exact.ServiceLocation.config in your Synergy installation XMD folder and check if the following line can be found: <service name="GLMSysWflSendEmail" path="xmd\Exact.Metadata.GLMSysWflSendEmail.xml" bcname="GLMSysWflSendEmail" description="Workflow send email" operationsprovidername="Exact.EntityOperations.ESE" entitiesoperationprovidername="Exact.EntitiesOperations.ESE" fixedcriteriapath="" /> In case this line is missing in the Exact.ServiceLocation.config run the ‘Generate metadata’ as described in paragraph 2.3. After running the generate metadata run an IISRESET 6.8 Email is not send out and no message in the error log (2) This can be related to the workflow plus settings as described in paragraph 3.4. In the section Email: notification there is a list where you can see per person if an email need to be send. First select the person which is not receiving any email. In case the send email column has a green check this person will receive an email for the related request action. In case the send email column has a red cross this person will not receive an email for the related request action. 47 Exact Synergy Enterprise Workflow Plus For persons which are newly created these need to be selected via the person field, upon selection the correct entries will be created and this person also will receive the email the person is related to the workflow. 6.9 Browser: The following result columns where not found in the column info This happens when the columns specified in the result columns are not in the colinfo. Change the result columns in the browse to use the correct columns. 6.10 Browser: You have insufficient rights to perform this operation This happens when the browse can’t be found. When testing the browser which is a division browser the division should first be selected. 48 Exact Synergy Enterprise Workflow Plus 6.11 No Valid License Installed When an error message like this appears, please contact us so that we can review your Synergy Enterprise license from Exact and determine if changes were made to it that affect the GLM Licensing. Error Message WorkflowPlus No valid license installed. Number: 140965:101:007 Name: Exact Synergy Enterprise. We are recommending that accounts before they update their Synergy License (either for new Functionality, Annual Contract or Additional Users – we are contacted first so that we may review and if necessary, provide a new license proactively. 49 Exact Synergy Enterprise Workflow Plus 7. Uninstall Uninstalling of the Workflow Plus add-on consist of two steps 1. Run the installer GLMSysAddOnInstaller.exe in the uninstall mode Open the GLMSysAddOnInstaller.exe and select install mode ‘Uninstall’. Select or enter the location of the Synergy installation folder. To uninstall click start. The uninstall will remove the customization files from your Synergy folder and will copy back the original Synergy files. 2. Rebuild repository To make the uninstall complete open Synergy and rebuild the repository via System / Setup / Repository / Rebuild. 50