1
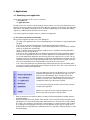
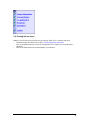
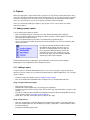
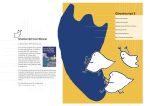
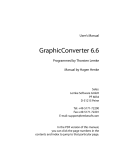
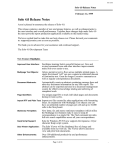
Version: June 2012
Contents
1. Introduction---------------------------------------------------------------------------------------------------------------- 3
1.1. Availability of the data ----------------------------------------------------------------------------------------------- 3
1.2. Software requirements ---------------------------------------------------------------------------------------------- 3
2. Basic operations --------------------------------------------------------------------------------------------------------- 4
2.1. Navigation-------------------------------------------------------------------------------------------------------------- 4
2.2. Information buttons -------------------------------------------------------------------------------------------------- 4
2.3. Help---------------------------------------------------------------------------------------------------------------------- 4
2.4. Required fields -------------------------------------------------------------------------------------------------------- 4
3. Starting with Iris ---------------------------------------------------------------------------------------------------------- 5
3.1. Opening an Iris account -------------------------------------------------------------------------------------------- 5
3.2. Logging in and out --------------------------------------------------------------------------------------------------- 5
3.3. Changing your account --------------------------------------------------------------------------------------------- 5
4. Applications --------------------------------------------------------------------------------------------------------------- 6
4.1. Submitting a new application -------------------------------------------------------------------------------------- 6
4.2. Viewing the progress of an application-------------------------------------------------------------------------- 7
4.3. Viewing application information ----------------------------------------------------------------------------------- 7
4.4. Printing the fact sheet ----------------------------------------------------------------------------------------------- 8
5. Projects --------------------------------------------------------------------------------------------------------------------- 9
5.1. Adding a project update -------------------------------------------------------------------------------------------- 9
5.1.1. Adding a report -------------------------------------------------------------------------------------------------- 9
5.1.2. Adding a product ---------------------------------------------------------------------------------------------- 10
5.2. Changing a project update --------------------------------------------------------------------------------------- 10
5.3. Sending a project update ----------------------------------------------------------------------------------------- 11
5.4. Viewing project information -------------------------------------------------------------------------------------- 11
6. Granting authorisation ----------------------------------------------------------------------------------------------- 13
7. Appendix: Creating PDF files -------------------------------------------------------------------------------------- 14
7.1. General --------------------------------------------------------------------------------------------------------------- 14
7.2. Creating PDF documents with PDF995----------------------------------------------------------------------- 14
7.3. Creating PDF documents with Ghostscript & Gsview ----------------------------------------------------- 15
7.4. Creating PDF documents with Adobe Acrobat for Windows & Mac------------------------------------ 18
7.5. Creating PDF documents with Adobe Acrobat for Unix --------------------------------------------------- 20
|2
1. Introduction
The electronic grant application system, Iris, allows researchers to submit their grant applications to STW
via the Internet with the help of a Web browser. To use Iris, the researcher must first of all the register as a
user with the system. A user can then manage his or her electronic applications for STW.
Each new application can be changed or deleted by the applicant via Iris at any time as long as it has not
been submitted to STW. All of the data from the application are stored in a secure database and file system. The data cannot be viewed by STW staff until after the application has been submitted. The fullycompleted application can be submitted by the applicant to STW. This means that the application is sent to
STW for processing. Submitted applications can no longer be changed. This ensures that the application
submitted by you is the same as the copy held by STW.
1.1. Availability of the data
The databases are automatically updated and the most recent information is then sent to STW. Data concerning applications and project updates are synchronised twice per day at 02:00 hours and 12:00 hours
(CET).
1.2. Software requirements
What do you need?
• Internet Explorer 5.0 or higher or
• Netscape 4.7 or higher (except version 6.0)
The website is best viewed with the more recent versions of the most commonly used browsers.
We advise you to use Internet Explorer 5.0 or Netscape 4.7 (or later versions).
Earlier versions make errors when displaying some pages.
An exception to this is Netscape 6.0. This version is no longer supported by Netscape due to a bug it contains.
• Your browser must support JavaScript
• Adobe Acrobat Distiller 4 or Alladin GhostScript version 7, or higher
2. Basic operations
2.1. Navigation
On-screen navigation
To navigate between windows in Iris use buttons, such as Next, Change or New Application. These will
allow you to enter increasingly deeper levels in Iris. To return to a previous level or to the main menu you
can make use of the Iris navigation bar. This is located immediately under the title bar of Iris. You can use
this bar to navigate, access the help function and log out.
Please note: It is not possible to use the button Back in the standard toolbar of your Internet browser!
Field Navigation
When completing the fields you can use the Tab key to go to a following field. You can return to the previous field with the keystroke combination Shift+Tab. You can also select buttons with the Tab key. Once
you have selected a button you can then use the Enter key to activate this.
2.2. Information buttons
Some fields or portions of the screen contain information buttons. If you move your mouse pointer
over the button a text block will appear with guidelines on how to complete the field concerned.
2.3. Help
On the Iris navigation bar you will find the help function. When you click on Help a separate window will
open on the right-hand side of your screen. The help information is specific for the window currently open
and provides answers to frequently asked questions. The help window also contains a menu bar with
which you can access this manual and find information about the Iris Helpdesk (at this moment only
available in Dutch).
2.4. Required fields
Fields that must be completed are marked with an *. If you fail to complete, or incorrectly complete one
of these fields, then an error message will appear when you leave the window.
3. Starting with Iris
3.1. Opening an Iris account
If you are going to use Iris for the first time then you need to open an account. You must provide a
user's name and password for this.
You will find a link to open a new account in the opening window under the headline Using Iris. Click on
this to open the window Your login data. Enter your details; fields marked with an * are compulsory.
Further information about completing the fields can be found under the information buttons
of the window concerned.
Your account will become active as soon as you have completed and sent the registration form and
then you can generate applications. For confirmation purposes you will also be sent an e-mail with
your user's name, password, pincode and authorisation code. You need the pincode to be able to
submit your application to STW. You need the authorisation code to be able to be authorised by
someone else as a researcher so that you can submit project updates (see section
5.1 Adding a project update).
3.2. Logging in and out
You can only log in to Iris after you have opened an account. You can do that at any given time and
the instructions for this are given in the previous section. If you have opened an account you can
log into Iris using the password you submitted. After you have logged in the Main menu will appear.
If you want to close Iris, you should log out. To do this, choose Log out in the menu. Your data will be
saved and you will return to the opening window of Iris. You can now close the browser if you want.
3.3. Changing your account
You can change your account details at any a given moment, for example changing your
password or address details.
• Click on the button Change account in the main menu. The window Your account opens.
• Enter the desired changes and click on the button Save & next.
|5
4. Applications
4.1. Submitting a new application
An electronic application via Iris consists of two parts:
- a fact sheet and
- an application form.
The data for the fact sheet are entered directly on the Iris website. You can log out during this process
without incurring any problems and proceed further with your application at a later date. The application
form that you can download during this process should be completed by you and added later (during
stage B) as a PDF document attached to the fact sheet.
You should complete the following stages to submit a new application.
A - Fact sheet: enter the basic information
After you have logged in the main menu of Iris will appear.
•
•
•
•
•
To submit a new application click on the button Applications. The window List of grant applications
will open.
Then click on the button New Application. The window New Application will open.
In this window click on To subsidy guide. In the next window you will see a list of all the subsidies
which can be applied for electronically.
Select a subsidy from the list by clicking on it with the mouse. A window containing information
about the chosen subsidy will open.
In the text or on the right-hand side of the window, under the button Further information, Applications click on the hyperlink Click here for electronic applications. In the window that now opens
you should download the application form and any other forms required (such as notes or an appendix) by clicking on the relevant hyperlinks. Complete the downloaded form and then save it as
a Word document. At a later stage you will attach this form to the fact sheet as a PDF document.
1
•
•
Click on the button Back in the standard toolbar of your browser to return to Iris.
In Iris click on the button Next. The window Project information will open. The information which
you enter here will be combined with other information on the fact sheet. This is the overview of all
information pertaining to the application.
In the top right-hand corner of your window you can see the flow
diagram for the application. By clicking on the stages you can
open the associated windows. Once a stage has been completed this is marked in the flow diagram with a green tick. This
enables you to keep track of which stages you have already
completed and which you still need to complete.
You can log out at any given moment and return later to further
complete your application.
Whether or not you will see the stages Co-applicant(s) and
Referees depends on the type of subsidy chosen.
•
•
Enter the project title and summary. Make sure that you follow the guidelines provided under the
information buttons.
Click on the button Save at the bottom of the window or click on the link Project information in the
flow diagram. The section Project information will now have been ticked off. You should complete
the sections Your particulars, Co-applicant(s) and Reviewers in a similar manner, but the sections
to co-applicants and suggestions for referees are not applicable to each type of subsidy. The information will be used by STW in the administrative process and will be automatically processed in
the administration.
|6
1
In this window you can make use of the button Back, because you are no longer in Iris.
B - Attach the PDF file with the application form
In this stage the application form is attached to the Iris fact sheet. You should do this in the Appendices
section of the blue flow diagram. Only documents in PDF form are permitted. You can find the requirements and instructions for Creating PDF files in the Appendix: Creating PDF files.
What do you have to do?
•
•
•
•
Convert the file containing the text of the application into a PDF file.
Go to the section Appendices of the fact sheet and click on the button Attach a file.
Enter the description and select file you want to attach.
Click on the button Upload this file.
If necessary repeat this procedure for other attachments.
C - Submit your application to STW
The last stage is to submit your application to STW (up until this point you are the only person who can
access your application).
•
Check that the fact sheet has been correctly and fully completed and that all of the necessary
documents have been attached to the fact sheet. Once you have submitted the application you
will no longer be able to change these data.
•
Go to the section Submit of the blue flow diagram and enter the pin code you received by e-mail
after you had opened your account.
•
Click on the button Submit to STW.
Your grant application will be sent to STW in the next planned update of the database (see 1.2
Availability of the data).
4.2. Viewing the progress of an application
After you have submitted an application this will be processed by STW. This process involves several
stages. You can view the progress of your application via Iris.
•
•
Click on the button Applications in the main menu. The window List of grant applications will open.
Next to the submitted projects you will see the button Progress. By clicking on this you will open
the window Progress review. In this window you can see the time schedule, the progress and the
result of the various phases of the application.
4.3. Viewing application information
If your application has been submitted then this will be listed in the Overview grant applications. At
any given moment you can view the information you submitted.
•
•
•
Click on the button Applications in the main menu. The window Overview grant applications will
open and display all of your applications.
Click on the button Show next to one of your submitted applications. The window Project information will open.
By clicking on the links in the blue flow diagram you can view the windows Project information,
Your particulars, Co-applicant(s), Reviewers, Appendices and Submit.
|7
4.4. Printing the fact sheet
Within Iris you can print off an overview of all your project details. This is called the fact sheet.
•
•
•
Follow the stages described under section 4.3 Viewing application information.
Click on the button Print Fact sheet in the navigation bar. The complete fact sheet will now be
displayed.
Click on the button Print in the standard toolbar of your browser.
|8
5. Projects
When your application is approved this will be a project in Iris. By clicking on the button Projects in the
main menu you will enter the Overview projects window where you can see all of the projects for which
you are the main applicant or one of the researchers. By clicking on the button Show in this window
next to one of your projects, you can once again view all of the project information.
Via Iris you can directly add project updates to your projects. These can be reports or products
related to the project.
5.1. Adding a project update
You can add a project update as follows.
•
•
•
•
Click on the button Projects in the main menu. The window Overview projects will open.
Click on the button Update next to the project to which you wish to add an update. The window
Overview project updates will open.
Click on the button New project updates. The window Project update will open.
Select a specific project update by clicking on the relevant button. You can choose between either
reports or products.
In each project update window you will see a blue
flow diagram. By clicking on the stages you can
open the associated windows. Once a stage has
been completed it will be marked in the flow diagram with a green tick. This enables you to keep
track of which stages you have already completed
and which you still need to complete.
Further information about completing the various Windows can be found under the Help (in
Dutch) button in the navigation bar of the window concerned.
5.1.1. Adding a report
A report can be of a financial administrative nature or can concern a progress report or final report
about the research. In both cases you will need to download and complete digital forms. You can add a
report as follows.
•
•
Follow the stages described in section 5.1 Adding a project update.
Click on the button Financial/administrative or Report. The associated window will open.
Stage 1: Project information update
•
•
•
•
•
Enter the title of your report.
Download the relevant digital form(s) by clicking on the hyperlink(s).
Complete the form and save it. Please note! The file name may only contain letters, numbers or the
symbols - . or _ .
Convert the completed form into PDF format. Detailed instructions about Creating PDF documents
can be found in chapter 7 Appendix: Creating PDF files.
Return to Iris and click on the button Save to complete this stage.
Stage 2: Attachments
•
•
•
Now click on Appendices in the flow diagram. The window Project update – Appendices will open.
Click on the button Add a file. The window Project update - Appendices - Select and attach a file to
be attached will open.
Complete the field Description of file.
|9
•
•
•
Then click on the button Browse next to the field Select a file to select the form saved as a PDF file
in stage 1.
Click on the button Upload this file. You might receive the message: Your file name contains illegal
characters. These will be deleted. Do you want to continue? If you click on the button OK these
characters will be removed from the file name (see stage 1). The contents of the file will remain unchanged!
You will now return to the window Project update – Appendices, where you can see the attached
file. If you wish you can now attach another file.
Stage 3: Submit to STW
•
•
Once all of the attachments have been added click on Submit in the flow diagram. The window
Project update – Send will open.
Enter your pincode and click on the button Submit to STW.
5.1.2. Adding a product
Products produced within the framework of the project can be registered at STW via Iris. Products are
categorised into articles, contributions to books, monographs, PhD theses, patents and other output.
The sending of attachments is optional for all products. You can add a product as follows.
•
•
Follow the stages described in section 5.1 Add a project update.
Click on one of the buttons with the description of your product. The associated window will open.
Stage 1: Update project information
•
•
•
•
Complete the requested fields.
Dependent on the window add an author, editor or producer by clicking on the appropriate button.
The associated window to be completed will open.
Enter the personal details and click on the button Save & back.
Finally click on the button Save at the bottom of the window. Stage 1 in the flow diagram will now be
ticked off.
Stage 2: Attachments
This stage is optional. For example, you can send your article or book contribution as an attachment.
•
•
•
•
•
•
Now click on Appendices in the flow diagram. The window Project update – Appendices will open.
Click on the button Add file. The window Project update - Appendices - Select and attach the file to
be attached will open.
Complete the field File description.
Then click on the button Browse next to the field Select a file to select the form saved as a PDF file
in stage 1.
Click on the button Upload this file. You might receive the message: Your file name contains illegal
characters. These will be deleted. Do you want to continue? If you click on the button OK these
characters will be removed from the file name (see stage 1). The content of the file will remain unchanged!
You now return to the window Project update – Appendices, where you can see the attached file. If
you wish you can now attach another file.
Stage 3: Submit to STW
•
•
Once all of the attachments have been added click on Submit in the flow diagram. The window
Project update – Send will open.
Enter your pincode and click on the button Submit to STW.
5.2. Changing a project update
As long as an update has not been sent to STW then this can still be changed. After sending this is no
longer possible!
|10
You can change a project update as follows.
•
•
•
•
Click on the button Projects in the main menu. The window Overview projects will open.
Click on the button Update next to the project to which you wish to add an update. The window
Overview project updates will open.
Click on the button Change next to the relevant project update. The window with the data from the
project update will open.
Now you can make the changes to the project-update information or the attachments. Click on the
button Save to save your changes in the project-update information.
5.3. Sending a project update
The last stage of the blue flow diagram is the sending of the project update.
Main applicants
If you are the main applicant and you have added and sent a project update then this will be sent
directly to STW.
If one of your researchers has added an update this will first of all be sent to you as the main applicant. You will receive an e-mail message with the statement that a new project update has been
added. As the main applicant you should then submit this update to STW.
You can submit one or more updates to STW as follows.
•
•
•
•
•
Click on the button Submit project updates in the main menu. The window Submit project updates
will open and show an overview of all updates which have been submitted by researchers and you
should send that to STW.
Click on the button Change next to the project update which you want to submit. The status of this
update is Ready to submit. The window with the data from the project update will open.
Check the data. If you want you can still make changes.
Click on Submit in the blue flow diagram. The window Project update – Send will open.
Enter your pincode and click on the button Submit to STW.
Researcher
If you are a researcher then you will first of all send the project update to the main applicant for signing.
This happens automatically after submission by the researcher. The main applicant must then submit
the update to STW. The researcher will receive a confirmation of this by e-mail.
As a researcher you can only submit project updates and send these if you have been authorised for
this purpose by the main applicant. For this you first of all need to open your own account in Iris. You
can find further information about this in section 3.1 Opening an Iris account and chapter 6 Granting
authorisation.
As a researcher you can send a project update to the main applicant as follows.
•
•
•
•
•
Click on the button Projects in the main menu. The window Overview projects will open.
Click on the button Update next to the project for which you want to send an update. The window
Overview project updates will open.
Click on the button Change next to the project update which is ready to be sent. The associated
project update window will open.
Click on Submit in the blue flow diagram. The window Project update - Send will open.
Enter your pincode and click on the button Send to main applicant. If you have forgotten your pincode you can request this in the same window. Once the update has been successfully sent you will
receive a confirmation of this by e-mail. The main applicant will also receive an e-mail message with
the statement that a new project update has been added and he/she should send the update to
STW.
5.4. Viewing project information
|11
Once your application has been approved this will become a project in Iris and will be listed in the
Overview
research projects.
You can view the project information as follows.
•
•
•
Click on the button Projects in the main menu. The window Overview projects will open and display
all projects for which you are the main applicant or a researcher.
Click on the button Show next to one of your projects. The window Project information will open.
By clicking on the links in the blue flow diagram you can view the windows with Project information,
Your particulars, Co-applicant(s), Reviewers, Appendices and Submit.
|12
6. Granting authorisation
As the main applicant of a project you can authorise researchers to view project information and to add
project updates. Please note! The researcher should first of all register as a user of Iris and request an
authorisation code. This authorisation code must be entered during the authorisation. The authorisation
code (and other account information) will be sent to the researcher by e-mail as soon as the account
has been opened. See also section 3.1 Opening an Iris account.
You can grant authorisation as follows.
•
•
•
•
•
Click on the button Projects in the main menu. The window Overview projects will open.
Click on the button Update next to the project for which you wish to grant someone authorisation.
You must be the main applicant of this project. The window Overview project updates will open.
Click on the button Authorize. The window Overview researchers will open and display a list of all
researchers who are known for the project selected.
Click on the button Add researcher. The window add researcher will open.
Complete the required fields and click on the button Save.
The authorised researcher will be automatically informed of the authorisation by e-mail. As the main
applicant you will also receive a confirmation by e-mail.
|13
7. Appendix: Creating PDF files
7.1. General
Application forms, project update forms and other attachments which are sent to STW must always
be converted to PDF format.
STW has made the PDF format compulsory - Why?
Portable Document Format (PDF) files show users on various operating systems (Windows, Mac and
UNIX) a document without the original formatting of the document being lost. Grant applications often
contain graphs, diagrams, mathematical formulas and various character sets (e.g. Greek symbols).
The PDF format (and the freely available Reader from Adobe) ensure (if the right settings are used)
that an application can easily be viewed and printed by referees and STW staff. No other document
format provides authors with the possibility for fixing margins and page set-up, inserting formulas, and
controlling the size and position of illustrations. In addition to this the PDF format guarantees you that
the file will not be accidentally changed.
When creating a PDF file you should follow the guidelines provided in the help texts. If you fail to do
this then there is a considerable risk that your application will not be viewed by others in the format that
you had intended.
Why PDF guidelines?
Your application (fact sheet and the attachments) will be merged by STW staff into a single document.
This document will be distributed to committee members and referees for assessment purposes.
Merging PDF files that have been compiled in different ways can give rise to unwanted results, unless
the PDF files satisfy the STW guidelines.
How do you create a PDF file?
You can create PDF files using Ghostscript & GSview or Adobe Acrobat.
Ghostscript & GSview can be downloaded free of charge from the Internet; Adobe Acrobat, however, is
a
commercial product which you must pay for.
In the case of doubt we advise you to contact your ICT department.
Instructions can be found in one of the following subsections.
•
•
•
•
7.2 Creating PDF documents with PDF995
7.3 Creating PDF documents with Ghostscript & Gsview
7.4 Creating PDF documents with Adobe Acrobat for Windows & Mac
7.5 Creating PDF documents with Adobe Acrobat for Unix
Please note! PDF files are not allowed to be security-enabled. Security-enabled PDF files cannot be
processed by STW.
7.2. Creating PDF documents with PDF995
What is PDF995?
Pdf995 is software which allows you to create a PDF document from any application with a print function. Pdf995 works like a print driver which makes the use of this program very simple.
What do you have to do? Download and install PDF995
Both files you have to download are self extracting. They contain compressed files necessary for the
|14
installation of PDF995.
First click on pdf995s.exe and choose “Open…” in the dialogue window. The Pdf995 driver will be installed. Answer the question with “No”.
Then click on ps2pdf995.exe to install the compatible postscript converter. Here you choose “Open…”
as well. Click on “Accept” to indicate that you want to use this converter in combination with Pdf995.
A browser window will open with a welcoming text. You can just close this window.
pdf995s.exe (1,29 MB) http://www.iris.nwo.nl/iris/dl/pdf995s.exe
ps2pdf995.exe (3,12 MB) http://www.iris.nwo.nl/iris/dl/ps2pdf995.exe
From every application you can print with, you can now use Pdf995. You can do this by simply adding a
print job. Pdf995 is added to your list of printers. Select Pdf995 as printer and click on “Print”. A dialogue window will appear where you can name your file. After this a sponsor page of Pdf995 will appear, which you can just close.
For more information check out the website of PDF995 (http://www.pdf995.com) (among other things
you can find how to disable the sponsor page).
7.3. Creating PDF documents with Ghostscript & Gsview
What are Ghostscript and GSview?
AFPL Ghostscript is software with which a PostScript file can be converted into other files such
as a PDF file. PostScript is a general 'printer driver language': this describes texts, pictures and format
in such a manner that every printer which understands PostScript can print these. Ghostscript is available for a large number of operating systems: e.g. Windows, MacOS and UNIX.
GSview (
MacGSview for MacOS) is a graphical interface for Ghostscript. This makes it
much easier to use Ghostscript. Further information about Ghostscript and GSview can be found at
http://www.cs.wisc.edu/~ghost/
What do you have to do - Windows and MacOS?
How you can create a PDF file from a document in Word, WordPerfect, TeX, etcetera is illustrated in a
simplified form in the following diagram.
[Word document Print to file PostScript file Convert PostScript file in Gsview PDF file]
You first of all convert the file with the completed application form into a PostScript file by printing this
to a file. You then convert the PostScript file into a PDF file using GSview/Ghostscript. How you do this
is explained in four stages.
Firstly you must download and install both Ghostscript and GSview.
Stage 1. Download & install
You can immediately download the latest versions of Ghostscript and GSview for Windows and MacOS at the end of this section. As soon as a new version of one of the programs becomes available,
STW tries to make the files for this available via this is user manual. However, somewhat older ver-
|15
sions might occasionally remain on this site. These will not hinder the conversion of your application to
PDF format.
You work with Windows 95, 98, ME, NT or 2000
Download
Both of the files to be downloaded are self-extracting programs. They contain the compressed
files necessary for the installation of Ghostscript and GSview.
Click on the links below and choose 'Save' and not 'Open...' in the dialogue window.
AFPL Ghostscript 7.0.3 (5.90 MB)
GSview 4.1 (1.65 MB)
Installation
Please note! Install Ghostscript first and then GSview. To install both programs go to the folder in Explorer in which you saved the programs. Double-click on gs703w32.exe to open the installation program for Ghostscript. Double-click on gsv41w32.exe to start of the installation of GSview. During the
installation you can indicate where you want the programs to be installed.
After the installation you can proceed further with Stage 2.
You work with MacOS
Download
You need MacGSview to be able to use Ghostscript. Download and install this program
first
The second file is an update of the Ghostscript engine. You do not have to install the update
but the results with the new version will be better.
MacGSview works on every Apple Power Macintosh, Powerbook (with PowerPC). iMac, iBook with
MacOS 8.5 and higher.
MacGSview 2.0b3 (3.31 MB)
AFPL Ghostscript 7.0.3 engine (2.65 MB)
Install
Start the MacGSview installation program.
After installation the update of Ghostscript can be decompressed (you need StuffIt
Expander for this). Make sure that MacGSview is closed.
Drag the entire contents of the macgs-703-shlib folder to the GhostScript program folder. You will find
the Ghostscript folder in Macintosh HD -> System folder -> Program support. After this the update will
be used automatically.
You can now proceed with stage 2.
Stage 2. Install a PostScript printer
Secondly you must install a PostScript printer (if needed). You do not need to have such a printer. You
only need to install the driver for the printer. With the help of the driver you can save your application
as a PostScript file and then later convert this into a PDF file. If a PostScript printer is already installed
then you can ignore this stage and proceed further with stage 3.
You work with Windows
|16
•
•
•
•
•
•
•
•
•
•
Click on Start > Settings > Printers to open the Printers window.
Double click on Add printer. With this you open the Add printer wizard.
Select Local printer and make sure that there is no tick before the automatic recognition of a plug
and play printer. Click on the button Next >.
From the list of available LPT ports choose a free port (e.g. LPT1:). A free port will not have a
printer name after it. Click on the button Next >.
Select a PostScript Printer. A printer with which good results are obtained is the HP LaserJet
4P/4MP PS. We therefore advise you to install the driver for this printer. Do this as follows:
- From the list of manufacturers choose HP.
- After this select the HP LaserJet 4P/4MP PS from the list of possible printers. If necessary you
can select another PostScript printer. You can usually recognise this from the suffix 'PostScript' or
'PS' after the name of the printer.
- Click on the button Next >.
If a warning appears that the driver is already installed, then choose Keep current driver file and
click on the button Next >.
Accept the name for the printer, or type in a different name. Select No for standard printer. Click on
the button Next >.
In the window Share printers choose for not sharing the printer. Click on the button Next >.
In the window Print a test page, select No. Click on the button Next >.
Click on the button Finish to complete the installation.
After the installation you can proceed further with stage 3.
You work with MacOS
•
•
•
•
•
•
•
Open the Desktop printer management: open the folder Applications and then the folder Tools and
start the program.
If the window New desktop printer is not visible, then in the menu Archive choose New.
Select 'Converter (Postscript)' and click on the button OK.
Click on the button Change in the box for the PostScript printer description file (PPD).
Select a PostScript printer description file. Choose one of the printer description files in the window
that appears, for example the LaserWriter 12/640 PS (you can also choose another printer description with the extension PS). Click on the button Select.
By default the printer will be placed on your desktop. If you want to save the printer description file in
a different folder, then click on the button Change in the box Standard target folder. Select a file or
create a new one. Click on the button Select.
Click on the button Create... or in the menu Archive select Save. Type a name for this desktop
printer file (for example 'PostScript converter') and click on the button Save.
The installation is now complete. Go further with stage 3.
Stage 3. Create a PostScript file
If both stages have been successful you can convert the application form into a PostScript file.
In both Windows and MacOS you can create a PostScript file by printing the completed application form using the PostScript printer you installed. To do this select the option Print to file.
You work with Windows
•
•
•
•
Open the application form in the program that you produced it in.
In the main menu select File, Print.
For the printer name select the PostScript printer that you installed and then select the option Print
to file. Click on the button OK.
Save the file under the name of your choice with the extension '.ps' of '.prn'. Click on the button
Save.
You can now proceed with stage 4.
You work with MacOS
|17
•
•
•
•
Open the application form in the program that you produced it in.
In the menu Print... choose Archive.
Select the PostScript printer you installed as the printer. Under Destination: check whether the option is on File. Under the print options choose Save as file. Set the setting Include fonts on All. Click
on the button Save.
Select the folder where you want the file to be saved. Type in a name and click on Save.
You can now proceed with stage 4.
Stage 4. Create a PDF file from your application form
If everything has proceeded satisfactorily you can now create a PDF file of the application form.
You work with Windows
•
•
•
•
•
•
•
Click on Start, Programs, Ghostgum to start up GSview.
Open the PostScript file containing the application form you completed and in the menu File,
choose Convert.
In the dialogue window Convert click on the button Properties.
Set the following values for the properties listed below:
Compatibility level = 1.2
EmbedAllFonts = true
SubsetFonts = true
maxSubsetPct = 100
Click on the button OK.
Set the options in the Convert dialogue window as follows:
Device -> 'pdfwrite'
Resolution -> as high as possible
Pages -> all (Click on 'All pages')
Paper size -> 'Fixed paper size'
Click on the button OK, choose the right folder and type in the name you want to give your file including the extension '.pdf' and then click on the button Save.
You have now completed converting your application form into a PDF file. You can now attach
the file to your application by using the section Appendices of the Iris fact sheet.
You work with MacOS
•
•
•
•
Start up MacGSview.
In the menu File choose Convert.... Select the folder in which you have saved the PostScript file of
your application, select this file and then click on the button Convert.
In the window Convert to select the folder in which you want to save the PDF file. Check that the
value PDF has been selected under the option Convert to. Then click on the button Select.
In the window Export Options you can change several settings. You do not need to change the
standard settings. Click on the button Export.
You have now completed converting your application form into a PDF file. You can now attach
the file to your application by using the section Appendices of the Iris fact sheet.
What must you do - Other operating systems?
Other operating systems are either rarely used or require the intervention of a systems manager.
Therefore no further instructions can be provided for these systems. We refer you to the user manual
for your system, to your ICT department and to the Ghostscript website
(http://www.cs.wisc.edu/~ghost/).
7.4. Creating PDF documents with Adobe Acrobat for Windows & Mac
Installing and using Adobe Acrobat Distiller
Install Adobe Acrobat version 3.0 or higher.
|18
If you have installed Adobe Acrobat then you will also have Adobe Distiller; this is included in
the Adobe Acrobat package. Use Adobe Distiller instead of PDFWriter.
The following problems are associated with PDFWriter:
-
Illustrations are not satisfactory processed and this results in blurred illustrations.
Settings for fonts are not correctly transferred (important for TeX and LaTex users),
as a result of which the fonts are not displayed in the correct size.
- Incorrect font sizes are a frequently recurring problem if files made with PDFWriter
are merged.
In such cases the compiling of your application into a single PDF document by STW staff can result in
a scarcely legible application.
If despite these problems you still choose to use PDFWriter, check whether the PDF document contains the desired result by examining the application without the local fonts being enabled.
For further information (PDF, 378KB),
(http://www.planetpdf.com/planetpdf/pdfs/issue02.pdf)
Download the 'Job options' file for Distiller
•
•
•
•
Click on the hyperlink below. A web page will open.
Distiller Job options file
In the menu File, select Save as.
Look for the directory where Adobe Acrobat is installed (most likely is c:\program
files\adobe\acrobat 6.0) and save this file in the directory "DistillrSettings" under the name:
"iris.joboptions". Under "save as type" choose text file (*.txt).
Close the window.
We advise the use of this settings file in order to achieve the best results in terms of fonts, layout and the resolution of illustrations.
Setting up Distiller with the Iris job options
•
•
Start up Adobe Distiller.
Set the job options in Iris.
Distiller and Distiller Assistant will now use these job options for compiling PDF files.
Creating a PDF file with Distiller
Distiller creates PDF files by converting Postscript files into PDF format. It is not usually necessary
to create a PostScript file; see the following stages:
You work with Windows:
•
•
•
•
Choose File, Print in the software program you used to produce your application (e.g. MS Word).
Choose Acrobat Distiller as the printer.
The option Print to file must be DISABLED.
Click on OK.
You work with Mac:
•
•
Choose File, Page set up in the software program in which you made your application (e.g. MS
Word).
Choose Acrobat Distiller as printer and click on OK.
|19
•
•
Choose File, Print.
Choose PDF in the box Target and click on Distill.
Acrobat Distiller will now automatically create a PDF file. The document will be displayed in the
viewer. If Acrobat Distiller does not request a file name, then choose File, Save as to save the
document.
Creating a PDF file with Distiller Assistant for MS Word
After installing Distiller Assistant you will find an icon in the MS Word (MS Word 97 and 2000)
toolbar, and a menu option in the menu File.
•
Start up Word
Then:
• Click on the Acrobat Distiller Assistant icon or
• Choose File, Create Adobe PDF
Acrobat Distiller will now automatically create a PDF file. The document will be displayed in the
viewer. If Acrobat Distiller does not request a file name, then choose File, Save as to save the
document.
Check the result
In Adobe Acrobat Distiller: in the menu choose Image and DISABLE Use local fonts!
7.5. Creating PDF documents with Adobe Acrobat for Unix
Installing and using Adobe Acrobat Distiller
For UNIX, no newer versions have been issued since version 3.x.
If you have this version then you also have Adobe Distiller; this is included in the Adobe Acrobat
package. Use Adobe Distiller instead of PDFWriter. The following problems are associated with
PDFWriter:
- Illustrations are not satisfactory processed and this results in blurred illustrations.
- Settings for fonts are not correctly transferred (important for TeX and LaTex users), as a result of
which fonts are not displayed in the correct size.
- Incorrect font sizes are a frequently recurring problem if files made with PDFWriter are merged.
In such cases the compiling of your application into a single PDF document by STW staff can result in
a scarcely legible application. If despite these problems you still choose to use PDFWriter, check
whether the PDF document contains the desired result by examining the application without the local
fonts being enabled.
For further information (PDF, 378KB) (http://www.planetpdf.com/planetpdf/pdfs/issue02.pdf)
|20