1
Fund Setup User Guide
Oracle FLEXCUBE Investor Servicing
Release 12.0.3.0.0
Part No. E53392-01
April 2014
Table of Contents
1.
About This Manual ................................................................................... 1-1
1.1
1.2
1.3
1.4
1.5
1.6
1.7
1.8
2.
Introduction..............................................................................................................
Related Documents .................................................................................................
Audience..................................................................................................................
Organization ............................................................................................................
Conventions Used in this Manual ............................................................................
1.5.1 General Conventions..................................................................................
1.5.2 Keyboard Conventions ...............................................................................
Glossary of Icons.....................................................................................................
Abbreviations and Acronyms...................................................................................
Getting Help.............................................................................................................
1-1
1-1
1-1
1-1
1-2
1-2
1-2
1-2
1-2
1-3
Setting up Fund Hierarchies ................................................................... 2-1
2.1
2.2
2.3
2.4
2.5
2.6
2.7
Introduction.............................................................................................................. 2-1
Fund and Investor.................................................................................................... 2-1
Setting up Fund ...................................................................................................... 2-2
Setting up Fund Hierarchy....................................................................................... 2-2
Maintaining Fund Families....................................................................................... 2-2
2.5.1 Fields in Fund Family Maintenance Screen ............................................... 2-3
2.5.2 Fund Family Summary Screen ................................................................... 2-4
2.5.3 Retrieving Record in Fund Family Summary Screen ................................. 2-4
2.5.4 Editing Fund Family Record ....................................................................... 2-5
2.5.5 Viewing Fund Family Record...................................................................... 2-5
2.5.6 Deleting Fund Family Record ..................................................................... 2-6
2.5.7 Authorizing Fund Family Record ................................................................ 2-6
2.5.8 Amending Fund Family Record .................................................................. 2-6
2.5.9 Authorizing Amended Fund Family Record................................................ 2-7
2.5.10 Copying Attributes ...................................................................................... 2-7
Share Class Definition ............................................................................................. 2-7
2.6.1 Fields in Share Class Definition Screen ..................................................... 2-8
2.6.2 Share Class Definition Summary Screen ................................................... 2-8
2.6.3 Retrieving Record in Share Class Definition Summary Screen.................. 2-8
2.6.4 Editing Share Class Definition Record ....................................................... 2-9
2.6.5 Viewing Share Class Definition Record...................................................... 2-9
2.6.6 Deleting Share Class Definition Record ................................................... 2-10
2.6.7 Authorizing Share Class Definition Record .............................................. 2-10
2.6.8 Amending Share Class Definition Record ................................................ 2-10
2.6.9 Authorizing Amended Share Class Definition Record .............................. 2-11
2.6.10 Copying Attributes .................................................................................... 2-11
Mapping Sub-Fund to Share Class ....................................................................... 2-11
2.7.1 Checks...................................................................................................... 2-12
2.7.2 Fields in Sub-Fund Share Class Maintenance Screen............................. 2-12
2.7.3 Sub-fund Share Class Summary Screen.................................................. 2-13
2.7.4 Editing Sub-fund Share Class Maintenance ............................................. 2-14
2.7.5 Viewing Sub-fund Share Class Maintenance ........................................... 2-14
2.7.6 Deleting sub-fund Share Class Maintenance ........................................... 2-15
2.7.7 Authorizing Sub-fund Share Class Maintenance...................................... 2-15
2.7.8 Amending Sub-fund Share Class Maintenance........................................ 2-15
2.7.9 Authorizing Amended Sub-fund Share Class Maintenance ..................... 2-16
2.7.10 Copying Attributes .................................................................................... 2-16
3.
Setting up Fund Rules (I) ........................................................................ 3-1
3.1
3.2
3.3
3.4
3.5
3.6
3.7
3.8
4.
What is Fund Rule? ................................................................................................. 3-1
Setting up Fund Rules ............................................................................................. 3-3
Fund Demographics Maintenance .......................................................................... 3-5
3.3.1 Checks........................................................................................................ 3-6
3.3.2 Fields in Fund Demographics Setup Screen .............................................. 3-6
3.3.3 Amount Limits for IRA Transactions Section ............................................ 3-11
3.3.4 Fields in Fund IRA Transactions Section ................................................. 3-11
Corporate Actions.................................................................................................. 3-12
3.4.1 Checks...................................................................................................... 3-13
3.4.2 Dividend Processing for Fund .................................................................. 3-13
3.4.3 Setting up Rules for Cash Dividend for Fund ........................................... 3-14
3.4.4 Setting up Rules for Stock Dividend for Fund........................................... 3-14
3.4.5 Fields in Corporate Actions Screen .......................................................... 3-15
Shares Characteristics Maintenance..................................................................... 3-28
3.5.1 Checks...................................................................................................... 3-28
3.5.2 Fields in Shares Characteristics Setup Screen ........................................ 3-29
General Operating Rules Maintenance ................................................................. 3-35
3.6.1 Ageing Policy for Fund ............................................................................. 3-35
3.6.2 Specifying Limit Order Options for Funds................................................. 3-36
3.6.3 Indicating Re-computation of Fund Prices and Adjustment of Units ........ 3-37
3.6.4 General Operating Rules Screen ............................................................. 3-40
3.6.5 Checks...................................................................................................... 3-40
3.6.6 Fields in General Operating Rules Setup Screen..................................... 3-41
Hedge Fund Processing Rules.............................................................................. 3-56
3.7.1 Fields in Hedge Fund Processing Rules Screen ...................................... 3-56
3.7.2 Fund Linkage Details................................................................................ 3-60
3.7.3 Investor Category Details ......................................................................... 3-62
Fund Investment Components .............................................................................. 3-62
3.8.1 Maintaining Ratios of the Fund Level Components.................................. 3-63
3.8.2 Invoking Fund Investments Component Screen....................................... 3-63
3.8.3 Fund Investment Component Summary Screen ...................................... 3-64
3.8.4 Copying Attributes .................................................................................... 3-67
Setting Up Fund Rules (II) ....................................................................... 4-1
4.1
4.2
Transaction Processing Rules Maintenance ........................................................... 4-1
4.1.1 Maintained Transaction Details Section ..................................................... 4-2
4.1.2 Checks........................................................................................................ 4-2
4.1.3 Fields in Transaction Processing Rules Setup Screen............................... 4-2
4.1.4 Checks...................................................................................................... 4-12
4.1.5 Fields in Investor Category Amount/Units Limit Screen ........................... 4-13
4.1.6 Checks...................................................................................................... 4-14
4.1.7 Fields in Communication Mode Amount/Units Limit ................................ 4-14
4.1.8 The Pricing section ................................................................................... 4-16
4.1.9 Limit for Standing Instructions Screen...................................................... 4-24
4.1.10 Fields in Screen........................................................................................ 4-25
SI Rules for Fund ................................................................................................. 4-26
4.2.1 SI Details .................................................................................................. 4-26
4.3
Fund Load Setup ..................................................................................................
4.3.1 Checks......................................................................................................
4.3.2 Fields in Fund Load Setup Screen ...........................................................
4.3.3 Fund Load Mapping - View Section..........................................................
4.4
Fund Formula Maintenance...................................................................................
4.4.1 Checks......................................................................................................
4.4.2 Entering Fund Formulae...........................................................................
4.4.3 Fields in Fund Formula Screen ................................................................
4.4.4 Fund Price Component Screen ................................................................
4.5
Fund Residency Restrictions.................................................................................
4.5.1 Checks......................................................................................................
4.5.2 Fields in Fund Residency Restriction Screen...........................................
4.6
Fund Sale Country Restrictions.............................................................................
4.6.1 Checks......................................................................................................
4.6.2 Fields in Fund Sale Country Restriction Screen.......................................
4.7
Fund Transaction Currency Restrictions ...............................................................
4.7.1 Checks......................................................................................................
4.7.2 Fields in Fund Transaction Currency Restriction Screen .........................
4.8
Setting up Specific Price Dates .............................................................................
4.8.1 Setting up Specific Price Date Parameters for Fund ................................
4.8.2 Fields in Specific Fund Price Date Setup .................................................
4.8.3 How pricing frequency is considered........................................................
4.8.4 How Cut-off Frequency is Considered......................................................
4.9
Mapping Investment Account Types to Fund ........................................................
4.9.1 Specifications in Screen ...........................................................................
4.9.2 Operations on Fund Investment Account Specifications ..........................
4.9.3 Fields in Fund Investment Account Screen ..............................................
4.10 Maintaining Additional Information for Fund ..........................................................
4.11 KYC Maintenance..................................................................................................
4.11.1 Fund Rules Summary Screen ..................................................................
5.
4-27
4-27
4-28
4-33
4-33
4-33
4-34
4-34
4-37
4-38
4-38
4-39
4-39
4-39
4-40
4-40
4-40
4-41
4-41
4-42
4-42
4-48
4-50
4-51
4-52
4-52
4-52
4-53
4-54
4-54
Other Fund Activities .............................................................................. 5-1
5.1
5.2
5.3
5.4
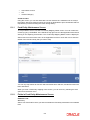
Associating Entities with Funds .............................................................................. 5-1
5.1.1 Fund Entity Maintenance Screen ............................................................... 5-2
5.1.2 Fields in Fund Entity Maintenance Screen ................................................. 5-2
5.1.3
Fund Entity Mapping Summary Screen ..................................................... 5-4
5.1.4 Authorizing Amended Fund Entity Mapping .............................................. 5-7
5.1.5 Copying Attributes ...................................................................................... 5-7
Agency Branch Backdating Setup .......................................................................... 5-7
5.2.1 Checks........................................................................................................ 5-8
5.2.2 Fields in Agency Branch Backdating Setup Screen ................................... 5-8
5.2.3 Fund Agency Backdating Limit Summary Screen ...................................... 5-9
Maintaining Restrictions for Switch Transactions .................................................. 5-12
5.3.1 Checks...................................................................................................... 5-13
5.3.2 Fields in this Screen ................................................................................. 5-13
5.3.3 Fund Switch Restrict Summary Screen.................................................... 5-17
Maintaining Fund Price.......................................................................................... 5-20
5.4.1 Specifying Fund Price - Fund Price Maintenance Screen ........................ 5-20
5.4.2 Fields in Fund Price Maintenance Screen ................................................ 5-21
5.4.3 Maintaining Fund Price Transaction Details ............................................. 5-23
5.4.4 Maintaining Fund Price Components ...................................................... 5-25
5.5
5.6
5.7
5.8
5.9
5.10
5.11
5.12
5.13
5.14
5.15
5.4.5 Maintaining Additional Information ........................................................... 5-26
5.4.6 Fund Price Maintenance Summary Screen.............................................. 5-27
Maintaining Adhoc Prices ...................................................................................... 5-30
5.5.1 Fields in Adhoc Price Dates Maintenance Detail Screen ......................... 5-30
5.5.2 Adhoc Price Dates Maintenance Summary Screen ................................. 5-31
Querying and Indicating Pricing Preference .......................................................... 5-35
5.6.1 Price Date Change Detail Screen............................................................. 5-35
5.6.2 Price Date Change Summary Screen ...................................................... 5-36
5.6.3 Copying Attributes .................................................................................... 5-39
Indicating Non Availability of Fund Price ............................................................... 5-39
5.7.1 Fields in Fund Price Holiday Maintenance Detail Screen......................... 5-40
5.7.2 Fund Price Holiday Maintenance Summary Screen................................. 5-41
Maintaining Fund CPMF Preferences ................................................................... 5-46
5.8.1
Fund CPMF Summary Screen ................................................................ 5-49
Setting up Fund Account ....................................................................................... 5-52
5.9.1 Fund Account Maintenance Screen ......................................................... 5-52
5.9.2 Checks...................................................................................................... 5-52
5.9.3 Fields in Fund Account Maintenance Screen ........................................... 5-53
5.9.4 Fund Account Summary Screen............................................................... 5-55
Mapping Funds to Products................................................................................... 5-58
5.10.1 Fields in this Screen ................................................................................. 5-58
Wrap Fund Maintenance ....................................................................................... 5-59
5.11.1 Fields in this Screen ................................................................................. 5-60
5.11.2 Wrap Fund Summary Screen ................................................................... 5-60
Maintaining Access Restrictions............................................................................ 5-63
5.12.1 Fields in FBC Access Restriction Screen ................................................. 5-64
5.12.2 FBC Access Restriction Summary Screen ............................................... 5-67
Corporate Actions for Fund ................................................................................... 5-70
5.13.1 Liquidation ................................................................................................ 5-70
5.13.2 Split and Reverse Split ............................................................................. 5-70
5.13.3 Merger ...................................................................................................... 5-70
5.13.4 Capital Payout .......................................................................................... 5-71
5.13.5 Side Pocket Creation................................................................................ 5-71
5.13.6 Side Pocket Merger .................................................................................. 5-71
5.13.7 Series Fund Merger .................................................................................. 5-71
5.13.8 Maintaining Details for Corporate Actions ................................................ 5-71
5.13.9 Fields in Corporate Action Maintenance Screen ...................................... 5-86
5.13.10 Corporate Actions Summary Screen ....................................................... 5-92
5.13.11 Processing Corporate Actions ................................................................. 5-95
5.13.12 Reports for Corporate Actions ............................................................... 5-105
Performing Bank Reconciliation .......................................................................... 5-108
5.14.1 Fields in Bank Reconciliation Screen ..................................................... 5-109
5.14.2 Fields in Bank Statement Search Option Frame .................................... 5-110
5.14.3 Fields in Trade Search Option Section .................................................. 5-113
5.14.4 Bank Reconciliation Summary Screen ................................................... 5-115
5.14.5 Authorizing Bank Reconciliation ............................................................. 5-118
Computing Performance Fee for Hedge Funds................................................... 5-118
5.15.1 Processing Performance Fee Payment.................................................. 5-119
5.15.2 Processing Performance Fee Accrual .................................................... 5-120
5.15.3 Modifying Performance Fee Calculation Method.................................... 5-120
5.15.4 Series Method of Performance Fee Calculation.....................................
5.16 Maintaining Override Trade Cycles Date For Funds ...........................................
5.16.1 Fields in the Override Trade Cycle Date Screen ....................................
5.16.2 Override Trade Cycle Date Summary Screen ........................................
6.
Setting up Load Groups .......................................................................... 6-1
6.1
6.2
7.
Load Groups............................................................................................................ 6-1
6.1.1 Rights of Accumulation............................................................................... 6-1
6.1.2 Creating Load Groups ................................................................................ 6-3
6.1.3 Creating Load Group ................................................................................. 6-4
6.1.4 Load Group Summary Screen.................................................................... 6-6
6.1.5 Copying Attributes ...................................................................................... 6-9
6.1.6 Load Group Characteristics Screen ........................................................... 6-9
6.1.7 Fields in Load Group Characteristics Screen ........................................... 6-10
6.1.8 Load Group Characteristics Maintenance Summary Screen ................... 6-11
6.1.9 Non-fulfillment of Letter of Intent .............................................................. 6-15
Group Load Mapping ............................................................................................ 6-17
6.2.1 Checks...................................................................................................... 6-17
6.2.2 Fields in Group Load Mapping Screen ..................................................... 6-18
6.2.3 Group Load Mapping - View Section........................................................ 6-21
6.2.4 Group Load Mapping Summary Screen ................................................... 6-22
6.2.5 Copying Attributes .................................................................................... 6-25
Maintenance for IRA Products ............................................................... 7-1
7.1
7.2
8.
5-122
5-122
5-123
5-125
Introduction..............................................................................................................
Features of Individual Retirement Accounts............................................................
7.2.1 Features of IRA Processing........................................................................
7.2.2 Maintenance for IRA Processing ................................................................
7.2.3 Plans for IRA ..............................................................................................
7.2.4 Investment Transactions in IRA Plans........................................................
7-1
7-1
7-1
7-2
7-2
7-2
Function ID Glossary ............................................................................... 8-1
1. About This Manual
1.1
Introduction
Welcome to Oracle FLEXCUBE Investor Servicing ™, a comprehensive mutual funds
automation software from Oracle Financial Servicing Software Ltd. ©.
This Oracle FLEXCUBE Investor Servicing User Manual helps you use the system to achieve
optimum automation of all your mutual fund investor servicing processes. It contains
guidelines for specific tasks, descriptions of various features and processes in the system and
general information.
1.2
Related Documents
The User Manual is organized in to various parts, each discussing a component of the Oracle
FLEXCUBE Investor Servicing system.
1.3
Audience
This Fund Manager User Manual is intended for the Fund Administrator users and system
operators in the AMC.
1.4
Organization
This volume of the Fund Manager User manual is organized under the following chapter
sequence:
Chapter 1
About This Manual explains the structure, audience, organization, and
related documents of this manual.
Chapter 2
Fund Setup – Setting up Fund Hierarchies explains funds and investors,
setting up fund hierarchies, maintaining fund families, share class definition, mapping sub-funds to share class
Chapter 3
Fund Setup – Setting up Fund Rules (I) explains the concept of a fund
rule, setting up of a fund rule, maintenance of various components, and
corporate actions.
Chapter 4
Fund Setup – Setting up Fund Rules (II) explains the maintenance of
transaction processing rules and various restrictions and rules such as
Fund Residency restriction.
Chapter 5
Fund Setup – Other Fund Activities explains other fund activities such as
associating entities with funds, maintaining fund prices, ad hoc prices etc.
Chapter 6
Fund Setup – Setting up Load Groups explains how you can set up groups
of funds with common applicable loads.
Chapter 7
Fund Setup – Maintenance for IRA Products explains how you can set up
retirement investment products in the system.
Chapter 8
Function ID Glossary has alphabetical listing of Function/Screen ID's used
in the module with page references for quick navigation.
1-1
1.5
Conventions Used in this Manual
Before you begin using this User Manual, it is important to understand the typographical
conventions used in it.
1.5.1
1.5.2
1.6
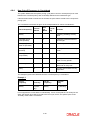
General Conventions
Convention
Type of Information
Italic type
Functional /foreign terms
Validations for fields on a screen
References to related Headings/Users Manuals
For emphasis
Numbered
Bullet
Step by step procedures
Keyboard Conventions
Convention
Type of Information
Keys
All keys of the keyboard are represented in capital letters. For example,
<CTRL>.
Shortcut
keys
All short cut keys are contained in brackets. For example,
<ALT+SHIFT>.
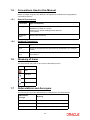
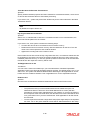
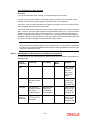
Glossary of Icons
This User Manual may refer to all or some of the following icons..
Icons
Function
Exit
Add Row
Delete Row
Option List
1.7
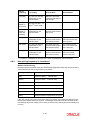
Abbreviations and Acronyms
The following acronyms and abbreviations are adhered to in this User Manual:
Abbreviation/
Acronym
Meaning
ADMIN
User Administrator
AGY
The Agency Branch component of the system
AMC
Asset Management Company
1-2
1.8
BOD
Beginning of Day
CDSC
Contingent Deferred Sales Charge
CGT
Capital Gains Tax
CIF
Customer Information File
EOD
End of Day
EPU
Earnings per unit
FC-IS
Oracle FLEXCUBE Investor Servicing
FMG
The Fund Manager component of the system
FPADMIN
Oracle FLEXCUBE Administrator
ID
Identification
IHPP
Inflation Hedged Pension Plan
IPO
Initial Public Offering
LEP
Life and Endowment Products
LOI
Letter of Intent
NAV
Net Asset Value
REG
The Registrar component of the system
ROA
Rights of Accumulation
ROI
Return on Investment
SI
Standing Instructions
SMS
Security Management System
URL
Uniform Resource Locator
VAT
Value Added Tax
WAUC
Weighted Average Unit Cost
Getting Help
Online help is available for all tasks. You can get help for any function by clicking the help icon
provided or by pressing F1.
1-3
2. Setting up Fund Hierarchies
2.1
Introduction
After you have set up reference data that you will use to operate your funds, you must define
the funds in the system, and set up the rules that each fund will be governed by. These rules
will be automatically applied by the system whenever you enter a transaction into the system
that has been requested by an investor into the fund.
This chapter will help you use the FCIS system to set up and operate funds.
2.2
Fund and Investor
A fund is, typically, a money pool that is accumulated through the contributions of persons
who are interested in investing their capital in this manner, with a view to obtaining either
steady incomes with periodic returns or steady appreciation of the capital. These interested
persons are typically called investors or unit holders.
The fund gives the investors an acknowledgment of their stake in the money pool by issuing
units to them, and invests their contributions into the securities market. The returns earned
by the fund on this investment is distributed to the investors either in the form of dividends
when a dividend is declared by the fund administrators, or in the form of capital appreciation
when the investors sell their holdings back to the fund.
Funds can be of various types depending upon their processing guidelines, their expected
returns for the investor, pricing guidelines, and so on. Therefore, funds will differ widely in any
or all of these characteristics.
Funds differ widely in any or all of the following:
Operational guidelines
Investment offer patterns
The structure of the fees and other loads that are charged or the incentives that are
given.
Pricing policies: The price of the fund on a given business day is known as the NAV (Net
Asset Value) for the fund. It is a measure of the net worth of a single asset (or unit) in
the fund. It is also the rate that is available to the investors at which they may buy into
the fund or sell out of the fund, at any given time.
The fund price is a reflection of the value of the assets in the fund, and so it is rarely constant.
Depending upon the frequency at which the fund administrators declare this price, funds may
be, accordingly, either pre-priced or post-priced.
Certificate guidelines: Some funds give investors certificates representing their holdings
in the money pool. Such funds are known as scrip-based, certificate-based or simply,
certificate funds. Some funds only give the investors an acknowledgment of their
holdings, in terms of the number of units held and their prevalent value. Such funds are
termed scrip-less funds.
Funds could also be grouped together based on common investment options, either as fund
families or as umbrella funds.
Sometimes, asset managers create a tree-structure of associated funds, which may be similar
in their investment options. Investors are allowed to invest in any level of the tree-structure.
Such fund structures are called umbrella funds.
2-1
2.3
Setting up Fund
In Oracle FLEXCUBE Investor Servicing, you set up a fund in the system as follows:
1. First, you set up any necessary fund hierarchies, either fund families or umbrella funds.
2. You set up the different guidelines according to which any investment in the funds will be
processed.
3. Have another user authorize the fund.
2.4
Setting up Fund Hierarchy
The system provides the facility of maintaining and processing umbrella funds as well as nonumbrella type of fund families. Therefore, a hierarchy of funds may be set up with fund rule
profiles at each level except the lowest level.
Before you actually set up a fund in the system, you must first set up the kind of hierarchy that
you require. You can do so by setting up the following:
Fund Families
First, you set up the lowest levels in the fund hierarchy. The fund families created here may
be designated either as umbrella funds or non-umbrella funds. For an umbrella fund, you
must maintain at least three levels.
Creation of the hierarchy for an umbrella fund is facilitated by this fund rule. Each umbrella
fund has one sub-fund associated with it and each sub-fund has at least one share class
associated with it. This makes up a complete hierarchy.
Share Class Definition
You can define the share classes that will be the last level in the hierarchy of funds. Each
share class will thus be uniquely identified in the system.
Setting up Sub-funds and Share Classes
Sub-funds and share classes may be setup, and the share classes may be mapped to the
sub-funds. A rudimentary profile consisting of a system-generated Fund ID, Fund Name and
Fund Short Name will be maintained for share class funds.
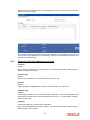
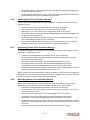
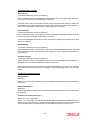
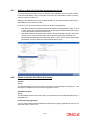
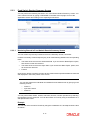
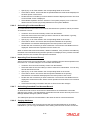
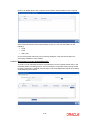
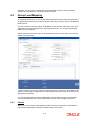
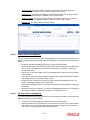
2.5
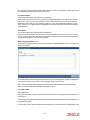
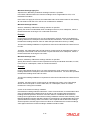
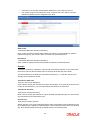
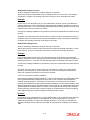
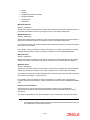
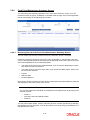
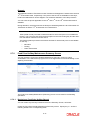
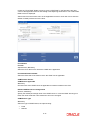
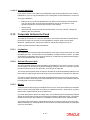
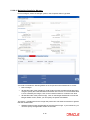
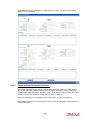
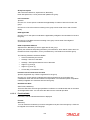
Maintaining Fund Families
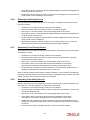
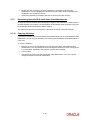
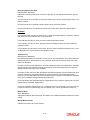
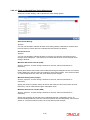
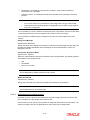
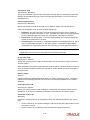
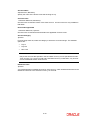
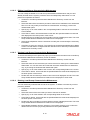
You can use the ‘Fund Family Detail’ screen to maintain fund families and umbrella fund
hierarchies. The lower levels of the fund hierarchy, for both Umbrella and non-umbrella funds
may be set up in this screen.
You can invoke this screen by typing ‘UTDFNDFM’ in the field at the top right corner of the
Application tool bar and clicking on the adjoining arrow button.
2-2
Select ‘New’ from the Actions menu in the Application tool bar or click new icon to enter the
details of a new fund family.
In the system, switching transactions that involve switching of a unit holder’s units from one
fund to another are dependent on the fund family setup for non-umbrella funds and the fund
hierarchy for umbrella funds.
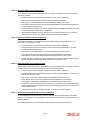
2.5.1
Fields in Fund Family Maintenance Screen
Family ID
Display
Enter a unique Identification for the fund family. This value should not be a valid Family ID
already existing in the system.
Portfolio Type
Optional
If the family being set up is to have a portfolio type, select Yes.
ROI Calc
Optional
If ROI calculation is applicable for the family which is being set up, select Yes.
Umbrella Type
Optional
If the family being set up is to be an umbrella fund, select Yes. If a fund is designated as an
umbrella fund, the hierarchy must be maintained up to level 3, i.e., fund families, umbrella
funds and sub-funds.
Family ID
6 Characters Maximum, Alphanumeric, Mandatory
Enter a unique Identification for the fund family. This value should not be a valid Family ID
already existing in the system.
2-3
Family Description
20 Character Maximum, Alphanumeric, Mandatory
Enter a brief description of the fund family that is being set up.
Immediate Parent ID
Alphanumeric, Mandatory
Select the Immediate parent ID from the option list. The option list contains list of all existing
fund families. Select a valid entry for the relevant Fund Family ID.
Fund Level
Display
Displays the level of immediate Parent ID selected.
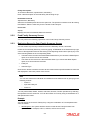
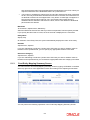
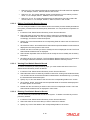
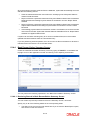
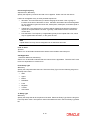
2.5.2
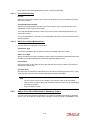
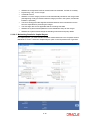
Fund Family Summary Screen
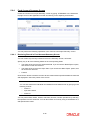
You can perform the following operations in the Fund Family Summary screen:
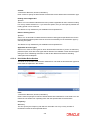
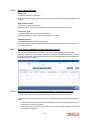
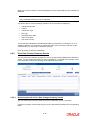
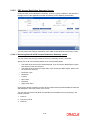
2.5.3
Retrieving Record in Fund Family Summary Screen
You can retrieve a previously entered record in the Summary Screen, as follows:
Invoke the ‘Fund Family Summary’ screen by typing ‘UTSFNDFM’ in the field at the top right
corner of the Application tool bar and clicking on the adjoining arrow button. Specify any or all
of the following details in the corresponding fields:
The status of the record in the Authorization Status field. If you choose the ‘Blank Space’
option, then all the records are retrieved.
The status of the record in the Record Status field. If you choose the ‘Blank Space’
option, then all records are retrieved
Family ID
Umbrella Type
Click ‘Search’ button to view the records. All the records with the specified details are retrieved
and displayed in the lower portion of the screen.
Note
You can also retrieve the individual record detail from the detail screen by querying in the
following manner:
–
Press F7.
–
Input the Family ID.
–
Press F8.
You can perform Edit, Delete, Amend, Authorize, Reverse, Confirm operations by selecting
the operation from the Action list. You can also search a record by using a combination of %
and alphanumeric value.
Example
You can search the record for Family ID by using the combination of % and alphanumeric
value as follows:
Search by A%: The system will fetch all the records whose Family ID starts from
Alphabet ‘A’. For example, AGC17, AGVO6, AGC74 and so forth.
2-4
Search by %7: The system will fetch all the records whose Family ID ends by numeric
value’ 7’. For example, AGC17, GSD267, AGC77 and so forth.
2.5.4
Search by %17%: The system will fetch all the records whose Family ID contains the
numeric value 17. For example, GSD217, GSD172, AGC17 and so forth.
Editing Fund Family Record
You can modify the details of a Fund Family record that you have already entered into the
system, provided it has not subsequently authorized. You can perform this operation as
follows:
Invoke the Fund Family Summary screen from the Browser.
Select the status of the record that you want to retrieve for modification in the
Authorization Status field. You can only modify records that are unauthorized.
Accordingly, choose the ‘Unauthorized’ option.
Specify any or all of the details in the corresponding fields to retrieve the record that is
to be modified.
Click ‘Search’ button. All unauthorized records with the specified details are retrieved
and displayed in the lower portion of the screen.
Double click the record that you want to modify in the list of displayed records. The Fund
Family Detail screen is displayed.
Select Unlock Operation from the Action list to modify the record. Modify the necessary
information.
Click Save to save your changes. The Fund Family Detail screen is closed and the
changes made are reflected in the Fund Family Summary screen.
Only maker can edit his unauthorized records.
2.5.5
Viewing Fund Family Record
To view a record that you have previously input, you must retrieve the same in the Fund
Family Summary screen as follows:
Invoke the Fund Family Summary screen from the Browser.
Select the status of the record that you want to retrieve for viewing in the Authorization
Status field. You can also view all records that are either unauthorized or authorized
only, by choosing the Unauthorized/ Authorized option.
Specify any or all of the details of the record in the corresponding fields on the screen.
2-5
2.5.6
Click ‘Search’ button. All records with the specified fields are retrieved and displayed in
the lower portion of the screen.
Double click the record that you want to view in the list of displayed records. The Fund
Family Detail screen is displayed in View mode.
Deleting Fund Family Record
You can delete only unauthorized records in the system. To delete a record that you have
previously entered:
2.5.7
Invoke the Fund Family Summary screen from the Browser.
Select the status of the record that you want to retrieve for deletion.
Specify any or all of the details in the corresponding fields on the screen.
Click ‘Search’ button. All records with the specified fields are retrieved and displayed in
the lower portion of the screen.
Double click the record that you want to delete in the list of displayed records. The Fund
Family Detail screen is displayed.
Select Delete Operation from the Action list. The system prompts you to confirm the
deletion and the record is physically deleted from the system database.
Authorizing Fund Family Record
An unauthorized Fund Family record must be authorized in the system for it to be processed.
To authorize a record:
Invoke the Fund Family Summary screen from the Browser.
Select the status of the record that you want to retrieve for authorization. Typically,
choose the unauthorized option.
Specify any or all of the details in the corresponding fields on the screen.
Click ‘Search’ button. All records with the specified details that are pending
authorization are retrieved and displayed in the lower portion of the screen.
Double click the record that you wish to authorize. The Fund Family Detail screen is
displayed. Select Authorize operation from the Action List.
When a checker authorizes a transaction, details of validation, if any, that were overridden by
the maker of the transaction during the Save operation are displayed. If any of these overrides
results in an error, the checker must reject the transaction.
2.5.8
Amending Fund Family Record
After a Fund Family record is authorized, it can be modified using the Unlock operation from
the Action List. To make changes to a record after authorization:
Invoke the Fund Family Summary screen from the Browser.
Select the status of the record that you want to retrieve for authorization. You can only
amend authorized records.
Specify any or all of the details in the corresponding fields on the screen.
Click ‘Search’ button. All records with the specified details that are pending
authorization are retrieved and displayed in the lower portion of the screen.
Double click the record that you wish to authorize. The Fund Family Detail screen is
displayed in amendment mode. Select Unlock operation from the Action List to amend
the record.
Amend the necessary information and click on Save to save the changes.
2-6
2.5.9
Authorizing Amended Fund Family Record
An amended Fund Family record must be authorized for the amendment to be made effective
in the system. The authorization of amended records can be done only from Fund Manager
Module.
The subsequent process of authorization is the same as that for normal transactions.
2.5.10
Copying Attributes
If you want to create a new Fund Family with the same attributes of an existing one, you can
copy the attributes of an existing Fund Family to a new one.
To copy the attributes:
2.6
Retrieve the record whose attributes the new Fund Family should inherit. You can
retrieve the record through the Summary screen or through the F7-F8 operation
explained in the previous sections of this chapter.
Click on Copy
Indicate the ID for the new Fund Family. You can, however, change the details of the
new maintenance.
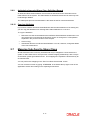
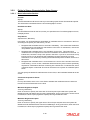
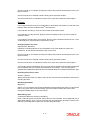
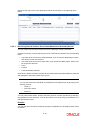
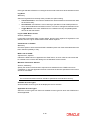
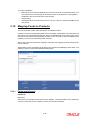
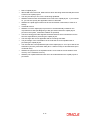
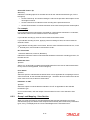
Share Class Definition
The share classes are the last or lowest level in the umbrella fund hierarchy. Each share class
is uniquely identified in this screen with a unique ID. You can maintain any number of share
class types as are necessary.
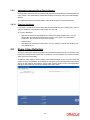
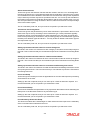
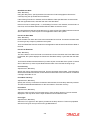
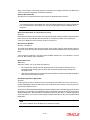
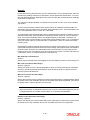
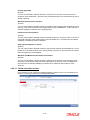
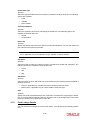
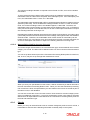
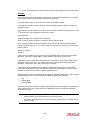
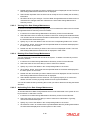
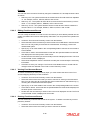
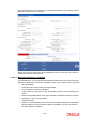
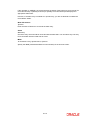
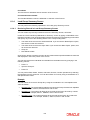
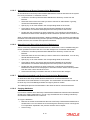
To maintain share classes, use the ‘Share Class Definition Detail’ screen. You can invoke this
screen by typing ‘UTDSCDEF’ in the field at the top right corner of the Application tool bar and
clicking on the adjoining arrow button. Select ‘New’ from the Actions menu in the Application
tool bar or click new icon to enter the details of the share class.
2-7
2.6.1
Fields in Share Class Definition Screen
Share Class ID
2 Characters Maximum, Alphanumeric, Mandatory
Specify a unique ID that will identify the share class in the system.
Share Class Description
20 Characters Maximum, Alphanumeric, Mandatory
Specify a unique description for the share class.
Reinvestment Mandatory
1 Character Maximum, Mandatory
Select ‘Yes’ if reinvestment is to be mandatory for this share class. If you select ‘Yes’ , and
reinvestment is mandatory for this share class, reinvestment is the only option that will be
available when a Corporate Actions profile is set up for this share class fund.
2.6.2
Share Class Definition Summary Screen
You can perform the following operations in the ‘Share Class Definition Summary’ screen:
2.6.3
Retrieving Record in Share Class Definition Summary Screen
You can retrieve a previously entered record in the Summary Screen, as follows:
Invoke the ‘Share Class Definition Summary’ screen by typing ‘UTSSCDEF’ in the field at the
top right corner of the Application tool bar and clicking on the adjoining arrow button and
specify any or all of the following details in the corresponding fields:
The status of the record in the Authorization Status field. If you choose the ‘Blank Space’
option, then all the records are retrieved.
The status of the record in the Record Status field. If you choose the ‘Blank Space’
option, then all records are retrieved
SHARECLASSID
Click ‘Search’ button to view the records. All the records with the specified details are retrieved
and displayed in the lower portion of the screen.
Note
You can also retrieve the individual record detail from the detail screen by querying in the
following manner:
–
Press F7.
–
Input the SHARECLASSID.
–
Press F8.
You can perform Edit, Delete, Amend, Authorize, Reverse, Confirm operations by selecting
the operation from the Action list. You can also search a record by using a combination of %
and alphanumeric value.
Example
You can search the record for SHARECLASSID by using the combination of % and
alphanumeric value as follows:-
2-8
2.6.4
Search by A%: The system will fetch all the records whose SHARECLASSID starts from
Alphabet ‘A’. For example, AGC17, AGVO6, AGC74 and so forth.
Search by %7: The system will fetch all the records whose SHARECLASSID ends by
numeric value’ 7’. For example, AGC17, GSD267, AGC77 and so forth.
Search by %17%: The system will fetch all the records whose SHARECLASSID contains
the numeric value 17. For example, GSD217, GSD172, AGC17 and so forth.
Editing Share Class Definition Record
You can modify the details of a Share Class Definition record that you have already entered
into the system, provided it has not subsequently authorized. You can perform this operation
as follows:
2.6.5
Invoke the Share Class Definition Summary screen from the Browser.
Select the status of the record that you want to retrieve for modification in the
Authorization Status field. You can only modify records that are unauthorized.
Accordingly, choose the ‘Unauthorized’ option.
Specify any or all of the details in the corresponding fields to retrieve the record that is
to be modified.
Click ‘Search’ button. All unauthorized records with the specified details are retrieved
and displayed in the lower portion of the screen.
Double click the record that you want to modify in the list of displayed records. The
Share Class Definition Detail screen is displayed.
Select Unlock Operation from the Action list to modify the record. Modify the necessary
information.
Click Save to save your changes. The Share Class Definition Detail screen is closed
and the changes made are reflected in the Share Class Definition Summary screen.
Viewing Share Class Definition Record
To view a record that you have previously input, you must retrieve the same in the Share
Class Definition Summary screen as follows:
Invoke the Share Class Definition Summary screen from the Browser.
Select the status of the record that you want to retrieve for viewing in the Authorization
Status field. You can also view all records that are either unauthorized or authorized
only, by choosing the Unauthorized/ Authorized option.
Specify any or all of the details of the record in the corresponding fields on the screen.
2-9
2.6.6
Click ‘Search’ button. All records with the specified fields are retrieved and displayed in
the lower portion of the screen.
Double click the record that you want to view in the list of displayed records. The Share
Class Definition Detail screen is displayed in View mode.
Deleting Share Class Definition Record
You can delete only unauthorized records in the system. To delete a record that you have
previously entered:
2.6.7
Invoke the Share Class Definition Summary screen from the Browser.
Select the status of the record that you want to retrieve for deletion.
Specify any or all of the details in the corresponding fields on the screen.
Click ‘Search’ button. All records with the specified fields are retrieved and displayed in
the lower portion of the screen.
Double click the record that you want to delete in the list of displayed records. . The
Share Class Definition Detail screen is displayed.
Select Delete Operation from the Action list. The system prompts you to confirm the
deletion and the record is physically deleted from the system database.
Authorizing Share Class Definition Record
An unauthorized Share Class Definition record must be authorized in the system for it to be
processed. To authorize a record:
Invoke the Share Class Definition Summary screen from the Browser.
Select the status of the record that you want to retrieve for authorization. Typically,
choose the unauthorized option.
Specify any or all of the details in the corresponding fields on the screen.
Click ‘Search’ button. All records with the specified details that are pending
authorization are retrieved and displayed in the lower portion of the screen.
Double click the record that you wish to authorize. The Share Class Definition screen is
displayed. Select Authorize operation from the Action List.
When a checker authorizes a transaction, details of validation, if any, that were overridden by
the maker of the transaction during the Save operation are displayed. If any of these overrides
results in an error, the checker must reject the transaction.
2.6.8
Amending Share Class Definition Record
After a Share Class Definition record is authorized, it can be modified using the Unlock
operation from the Action List. To make changes to a record after authorization:
Invoke the Share Class Definition Summary screen from the Browser.
Select the status of the record that you want to retrieve for authorization. You can only
amend authorized records.
Specify any or all of the details in the corresponding fields on the screen.
Click ‘Search’ button. All records with the specified details that are pending
authorization are retrieved and displayed in the lower portion of the screen.
Double click the record that you wish to authorize. The Share Class Definition screen is
displayed in amendment mode. Select Unlock operation from the Action List to amend
the record.
Amend the necessary information and click on Save to save the changes.
2-10
2.6.9
Authorizing Amended Share Class Definition Record
An amended Share Class Definition record must be authorized for the amendment to be
made effective in the system. The authorization of amended records can be done only from
Fund Manager Module.
The subsequent process of authorization is the same as that for normal transactions.
2.6.10
Copying Attributes
If you want to create a new Share Class Definition with the same attributes of an existing one,
you can copy the attributes of an existing Share Class Definition to a new one.
To copy the attributes:
2.7
Retrieve the record whose attributes the new Share Class Definition should inherit. You
can retrieve the record through the Summary screen or through the F7-F8 operation
explained in the previous sections of this chapter.
Click on Copy
Indicate the ID for the new Share Class Definition. You can, however, change the details
of the new maintenance.
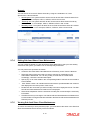
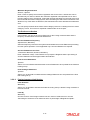
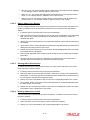
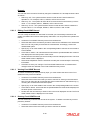
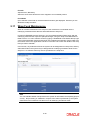
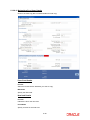
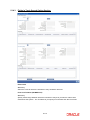
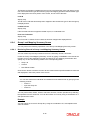
Mapping Sub-Fund to Share Class
All sub-funds that come under any umbrella fund may be mapped to a share class in the
system. A share class fund is set up for each of these mapping relationships, with a unique
six-character system-generated Fund ID. This mapping will complete the fund hierarchy for
an umbrella fund.
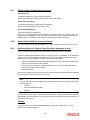
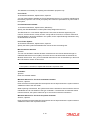
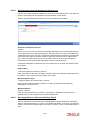
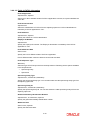
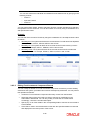
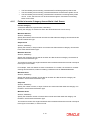
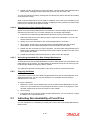
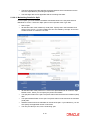
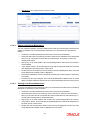
You can perform this mapping in the ‘Sub Fund Share Class Detail’ screen.
You can invoke this screen by typing ‘UTDSUBFN’ in the field at the top right corner of the
Application tool bar and clicking on the adjoining arrow button.
2-11
Select ‘New’ from the Actions menu in the Application tool bar or click new icon to enter the
details of the Mapping.
2.7.1
Checks
Before you actually map a sub-fund to a share class, the following information must be
already set up in the system:
2.7.2
The umbrella funds, up to sub-fund level, must already be set up in the Fund Family
Maintenance, i.e., the fund family, umbrella fund and sub-fund.
The share classes must be defined in the Share Class Definition maintenance.
Fields in Sub-Fund Share Class Maintenance Screen
Umbrella Fund
Alphanumeric, Mandatory
Select the umbrella fund that incorporates the sub-funds for which a share class mapping
must be done, from the options in the list. All the sub-funds that are set up with the selected
umbrella fund as parent will be populated in the Sub-Fund list in the lower portion of the
screen.
Sub-Fund ID
Alphanumeric, Mandatory
Select the umbrella fund that incorporates the sub-funds for which a share class mapping
must be done, from the options in the list.
Share ClassID
Alphanumeric, Mandatory
Select the share class that must be mapped to the selected sub-fund, from the options in the
list. This list will contain all share classes that have been defined in the system in the Share
Class Definition maintenance.
2-12
Fund ID
System Generated, Display
After the umbrella fund, sub-fund and share class have been selected for mapping, the share
class fund ID is generated by the system. The generation logic is as follows:
The Fund ID will be a unique six-character ID. The first two characters will be the ID of the
umbrella fund that is the immediate parent of the chosen sub-fund, the next two characters
will be the ID of the fund family of the sub-fund that is selected, and the last two characters
are the ID of the share class that has been mapped to the sub-fund. For example, if P1 is the
ID of the umbrella fund, P2 is the ID of the sub-fund and AC is the ID of the share class, the
share class fund generated will have a six-character ID, P1P2AC.
Fund Name Short
15 Characters Maximum, Alphanumeric, Mandatory
Specify the short name of the share class fund that has been created.
Fund Name
Alphanumeric, Mandatory
Specify the name of the share class fund that has been created.
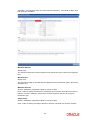
2.7.3
Sub-fund Share Class Summary Screen
You can perform the following operations in the ‘Sub Fund Share Class Summary’ screen:
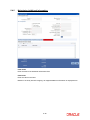
2.7.3.1
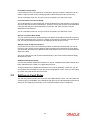
Retrieving Record in Sub-fund Share Class Summary screen
You can retrieve a previously entered record in the Summary Screen, as follows:
Invoke the ‘Sub Fund Share Class Summary’ screen by typing ‘UTSSUBFN’ in the field at the
top right corner of the Application tool bar and clicking on the adjoining arrow button and
specify any or all of the following details in the corresponding fields:
The status of the record in the Authorization Status field. If you choose the ‘Blank Space’
option, then all the records are retrieved.
The status of the record in the Record Status field. If you choose the ‘Blank Space’
option, then all records are retrieved
Share Class ID
Fund Id
Click ‘Search’ button to view the records. All the records with the specified details are retrieved
and displayed in the lower portion of the screen.
You can also retrieve the individual record detail from the detail screen by querying in the
following manner:
Press F7.
Input the Share Class ID.
Press F8.
You can perform Edit, Delete, Amend, Authorize, Reverse, Confirm operations by selecting
the operation from the Action list. You can also search a record by using a combination of %
and alphanumeric value.
2-13
Example
You can search the record for Share Class ID by using the combination of % and
alphanumeric value as follows:
Search by A%: The system will fetch all the records whose Share Class ID starts from
Alphabet ‘A’. For example, AGC17, AGVO6, AGC74 and so forth.
2.7.4
Search by %7: The system will fetch all the records whose Share Class ID ends by
numeric value’ 7’. For example, AGC17, GSD267, AGC77 and so forth.
Search by %17%: The system will fetch all the records whose Share Class ID contains
the numeric value 17. For example, GSD217, GSD172, AGC17 and so forth.
Editing Sub-fund Share Class Maintenance
You can modify the details of a Sub-fund Share Class Maintenance that you have already
entered into the system, provided it has not subsequently authorized.
You can perform this operation as follows:
2.7.5
Invoke the Sub-fund Share Class Maintenance Summary screen from the Browser.
Select the status of the record that you want to retrieve for modification in the
Authorization Status field. You can only modify records that are unauthorized.
Accordingly, choose the unauthorized option.
Specify any or all of the details in the corresponding fields to retrieve the record that is
to be modified.
Click ‘Search’ button. All unauthorized records with the specified details are retrieved
and displayed in the lower portion of the screen.
Double click the record that you want to modify in the list of displayed records. The Subfund Share Class Maintenance Detail screen is displayed.
Select Unlock Operation from the Action list to modify the record. Modify the necessary
information.
Click Save to save your changes. The Sub-fund Share Class Maintenance Detail screen
is closed and the changes made are reflected in the Sub-fund Share Class Maintenance
Summary screen.
Viewing Sub-fund Share Class Maintenance
To view a record that you have previously input, you must retrieve the same in the Sub-fund
Share Class Maintenance Summary screen as follows:
2-14
2.7.6
Invoke the Sub-fund Share Class Maintenance Summary screen from the Browser.
Select the status of the record that you want to retrieve for viewing in the Authorization
Status field. You can also view all records that are either unauthorized or authorized
only, by choosing the Unauthorized/ Authorized option.
Specify any or all of the details of the record in the corresponding fields on the screen.
Click ‘Search’ button. All records with the specified fields are retrieved and displayed in
the lower portion of the screen.
Double click the record that you want to view in the list of displayed records. The Subfund Share Class Maintenance Detail screen is displayed in View mode.
Deleting sub-fund Share Class Maintenance
You can delete only unauthorized records in the system. To delete a record that you have
previously entered:
2.7.7
Invoke the Sub-fund Share Class Maintenance Summary screen from the Browser.
Select the status of the record that you want to retrieve for deletion.
Specify any or all of the details in the corresponding fields on the screen.
Click ‘Search’ button. All records with the specified fields are retrieved and displayed in
the lower portion of the screen.
Double click the record that you want to delete in the list of displayed records. . The Subfund Share Class Maintenance Detail screen is displayed.
Select Delete Operation from the Action list. The system prompts you to confirm the
deletion and the record is physically deleted from the system database.
Authorizing Sub-fund Share Class Maintenance
An unauthorized Sub-fund Share Class Maintenance must be authorized in the system for it
to be processed. To authorize a record:
Invoke the Sub-fund Share Class Maintenance Summary screen from the Browser.
Select the status of the record that you want to retrieve for authorization. Typically,
choose the unauthorized option.
Specify any or all of the details in the corresponding fields on the screen.
Click ‘Search’ button. All records with the specified details that are pending
authorization are retrieved and displayed in the lower portion of the screen.
Double click the record that you wish to authorize. The Sub-fund Share Class
Maintenance screen is displayed. Select Authorize operation from the Action List.
When a checker authorizes a transaction, details of validation, if any, that were overridden by
the maker of the transaction during the Save operation are displayed. If any of these overrides
results in an error, the checker must reject the transaction.
2.7.8
Amending Sub-fund Share Class Maintenance
After a Sub-fund Share Class Maintenance is authorized, it can be modified using the Unlock
operation from the Action List. To make changes to a record after authorization:
Invoke the Sub-fund Share Class Maintenance Summary screen from the Browser.
Select the status of the record that you want to retrieve for authorization. You can only
amend authorized records.
Specify any or all of the details in the corresponding fields on the screen.
Click ‘Search’ button. All records with the specified details that are pending
authorization are retrieved and displayed in the lower portion of the screen.
2-15
2.7.9
Double click the record that you wish to authorize. The Sub-fund Share Class
Maintenance screen is displayed in amendment mode. Select Unlock operation from
the Action List to amend the record.
Amend the necessary information and click on Save to save the changes.
Authorizing Amended Sub-fund Share Class Maintenance
An amended Sub-fund Share Class Maintenance must be authorized for the amendment to
be made effective in the system. The authorization of amended records can be done only from
Fund Manager Module and Agency Branch module.
The subsequent process of authorization is the same as that for normal transactions.
2.7.10
Copying Attributes
If you want to create a new Sub-fund Share Class Maintenance with the same attributes of an
existing one, you can copy the attributes of an existing Sub-fund Share Class Maintenance to
a new one.
To copy the attributes:
Retrieve the record whose attributes the new Sub-fund Share Class Maintenance
should inherit. You can retrieve the record through the Summary screen or through the
F7-F8 operation explained in the previous sections of this chapter.
Click on Copy.
Indicate the ID for the new Sub-fund Share Class Maintenance. You can, however,
change the details of the new maintenance.
2-16
3. Setting up Fund Rules (I)
3.1
What is Fund Rule?
In Oracle FLEXCUBE Investor Servicing, each fund that the AMC wishes to maintain can be
entered into the system database.
Oracle FLEXCUBE Investor Servicing enables you to specify a set of logically grouped
guidelines for each fund, which pertain to aspect of the method of operation of the fund. Each
of these logically grouped sets of guidelines is distinct and unique, and is called a ‘fund rule’.
For each fund, you can maintain a complete set of such guidelines or ‘fund rules’. The options
chosen by the AMC in specifying each of the rules will be directives to the system for the
operation of the fund. Therefore, Oracle FLEXCUBE Investor Servicing processes each
transaction in a fund according to the fund rules that you maintain for the fund.
Whenever you need to refer to any or all guidelines about the operation of a fund, you can
refer to the fund rule records that you have maintained for the fund.
Some fund rules are mandatory and you must set them up before you authorize a fund, while
others are optional, and you may be set up as and when required.
There are many different fund rules that may be defined for a fund and these may be
enumerated as follows:
Fund Demographics
This is the entry point for setting up a fund in the system. The Fund name, Fund ID, the base
currency for the fund, the country that the fund is based in and the effective date for the fund
rules may be set here. You can also designate the Type and the Class that the fund comes
under. You can specify the AMC that operates the fund.
This is a mandatory fund rule, and you must set it up before you authorize a fund.
Corporate Actions
In this section, you can specify the rules that will govern the pattern of processing corporate
actions for the fund. This includes the income distribution by the fund to its unit holders. .
These rules include the Dividend Declaration and Payment frequencies, the Default
Distribution Mode, Tax Deducted at Source (TDS) details, the lead times for the different
dates such as the Book Closing, Freeze Holdings, and Dividend Payment dates.
Setting up this rule is optional, and you can set it up for a fund as and when required. It is
recommended that you set it up before you authorize the fund.
For corporate actions such as dividend, you can set up individual, separate rules for
processing cash dividend as well as stock dividends for the same fund.
General Operating Rules
In this section, you can designate the rules that will govern the operation of the fund. You can
specify the frequency at which the fund price is declared. You can also designate a fund to
have automatic redemption.
This is a mandatory fund rule, and you must set it up before you authorize a fund.
3-1
Shares Characteristics
These rules govern the features of shares that are issued in the fund. You can designate a
fund as scrip-less fund or a scrip-based fund that issues certificates. The limits on the number
of unit holders that must be allowed to subscribe to the fund and the ceiling on the capital that
may be issued by the fund may also be specified in this rule. You can set up the standard lot,
the maximum and minimum certificate denominations and the issue number range. You can
also set up the limits for Foreign Investors in the fund, either as an amount or as a percentage
of the issued share capital.
This is a mandatory fund rule, and you must set it up before you authorize a fund.
Transaction Processing Rules
These rules govern the parameters by which each transaction is processed in the fund, and
these rules may be set up according to each transaction type. These parameters typically
include the ranges of volumes allowed for each transaction type, the range of periods and
times for the processing of a transaction, the processing policy for each transaction type and
the base price definition types and factors. You may enable or disable a transaction type as
the requirement may be.
This is a mandatory fund rule, and you must set it up before you authorize a fund.
Setting up the Amount/Units Limits for Investor Categories
The limits in the volume of investment for each category of investors can be setup using this
fund rule. This is a sub-rule that you can maintain as part of the Transaction Processing Rules
rule.
Setting up the Amount/Units Limits for Communication Modes
The limits in the volume of investment for each communication mode can be set up using this
fund rule. This is a sub-rule that you can maintain as part of the Transaction Processing Rules
rule.
Setting up the Amount/Units Limits for Investment and Standing Instructions
The limits in the volume of investment for initial investments and standing instructions can be
set up using this fund rule. This is a sub-rule that you can maintain as part of the Transaction
Processing Rules rule.
Fund Load Setup
These rules govern the ways in which an applicable fee or incentive will impact the processing
of transactions in the fund.
Setting up this rule is optional, and you can set it up for a fund as and when required. It is
recommended that you set it up before you authorize the fund.
Fund Formula Setup
This fund rule facilitates the specification of any expression that will be used in estimating the
base prices or the Net Asset Value for any transaction type.
Setting up this rule is optional, and you can set it up for a fund as and when required. It is
recommended that you set it up before you authorize the fund.
Fund Residency Restriction Setup
This fund rule enables the Fund Manager to make restrictions with respect to the nationality
of the unit holders who subscribe to the fund.
This is a mandatory fund rule, and you must set it up before you authorize a fund.
3-2
Fund Sale Country Setup
If some funds are not to be opened for investment in specific countries, restrictions can be
made in respect of that country, identifying that the fund cannot be sold in that country.
This is a mandatory fund rule, and you must set it up before you authorize a fund.
Fund Transaction Currencies Setup
The Fund Manager can also identify the currencies that the fund can transact in, and restrict
the use of other currencies for transactions. Therefore, each Fund can have a set of identified
currencies that may be used as transaction currencies, and other currencies may be
disallowed for transactions.
This is a mandatory fund rule, and you must set it up before you authorize a fund.
Specific Fund Price Date Setup
You can use this fund rule to specify specific price dates to be operable at a specific frequency
for certain transaction types, for a fund. Setting up the specific price date is an optional fund
rule, and may be edited, authorized or amended just as the other fund rules.
Amount Limits for IRA Transactions
For funds that form part of the investment portfolio of retirement products that you offer to
investors, and in which you have opted to allow investment into retirement accounts (IRA),
you can define the limits for the different kinds of transactions into such accounts that would
apply to the fund.
This is an optional rule, and must be maintained only in the event of IRA investment being
allowed for the fund.
Additional Information Setup
You can also maintain additional information for a fund, if additional information heads have
been maintained for the AMC, to be applicable for funds.
Though maintenance of additional information is not, strictly speaking, a fund rule, you can
only maintain the information through the Fund Demographics screen, when you are setting
up a fund, along with all the other fund rules.
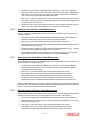
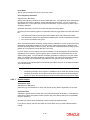
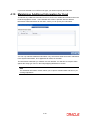
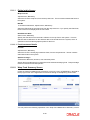
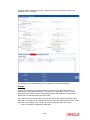
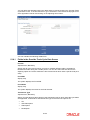
3.2
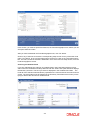
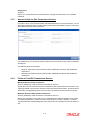
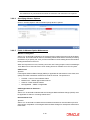
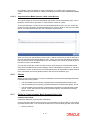
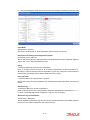
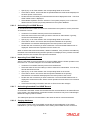
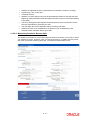
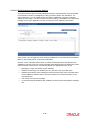
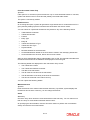
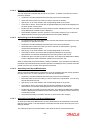
Setting up Fund Rules
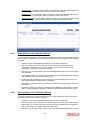
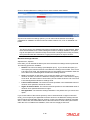
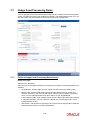
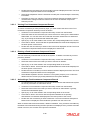
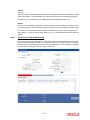
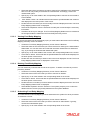
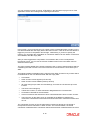
You can set up the fund rules for a fund in the ‘Fund Rules Detail’ screen. You can invoke this
screen by typing ‘UTDFNDRL’ in the field at the top right corner of the Application tool bar and
clicking on the adjoining arrow button. The ‘Fund Rules Detail’ screen is displayed.
3-3
In this screen, you must set up the first fund rule, the Fund Demographics rule, before you can
set up the other fund rules.
After you have maintained the Fund Demographics rule, click ‘Ok’ button.
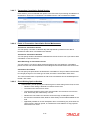
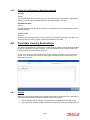
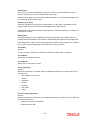
Click on any of the links to invoke the corresponding setup screen for any of the other fund
rules. For instance, to set up Corporate Actions for the fund, click on the Corporate Actions
link. The name, and ID of the fund is defaulted in each of the fund rule setup screen, from the
Fund Demographics record.
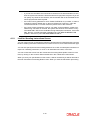
Choosing an Umbrella Fund
If you are maintaining fund rules for an umbrella fund in the Fund Demographics screen,
select Yes in the Umbrella Fund drop-down list and click ‘Umb Fund’ option list which displays
the hierarchy structure. The fund you select is displayed in the Umbrella Fund field. The
Fund ID of the selected umbrella fund is populated in the Fund ID field of the main fund rule
screen. The same steps must be followed in the Summary Fund Rule screen when you are
trying to retrieve the record of an umbrella fund.
3-4
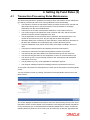
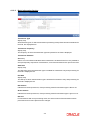
3.3
Fund Demographics Maintenance
This is the entry point for setting up a fund in the system. A rudimentary, demographic profile
is captured for the fund that includes the following basic details, and lays down a basis for
defining other important rules and details for the fund:
The Name of the fund and the unique ID that must be used by the system to identify the
fund.
The Start Date and the Rule Effective Date. The Start Date is the date after which the
fund is open for transactions. The Rule Effective Date is the date after which the fund
rule that is defined is effective. Also, the dates of the Fiscal Year that includes the Rule
Effective Date are captured.
The Type and Class of the fund and the Family of Funds that it must operate under.
The AMC that floats the fund and other entities that the fund will interact with such as
Registrar and Trustee.
The Country of Domicile of the fund and the base currency that the fund will be
denominated in.
A prospectus for the fund, if any.
The tax ID for the fund
Any additional details such as the registration address, ticker symbol in the stock
exchange and CUSIP number of the fund.
The ISIN code for the fund
Whether IRA transactions are allowed for the fund
Whether the fund is suspended for transactions of all types. Transactions of all types
(both those entered through the Transaction Detail screens as well as systemgenerated and uploaded transactions) into suspended funds are not allowed.
Whether the fund is a hedge fund
A fund will not be identified within the system unless it has a Fund Demographics profile
record, and all other rules and details for the fund cannot be set up unless the fund has this
profile.
3-5
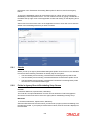
To set up the Fund Demographics profile for a fund, use the Fund Demographics screen. You
can invoke this screen by typing ‘UTDFNDRL’ in the field at the top right corner of the
Application tool bar and clicking on the adjoining arrow button.
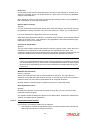
3.3.1
Checks
Before you set up a Fund Demographics profile record, it is desirable to ensure that the
following information is already setup in the system:
3.3.2
Fund Types must already be defined.
Fund Families must already be defined.
Currencies and Countries of Domicile must already be maintained, and the CountryCurrency mapping must be defined, so that each Country may be mapped to a default
base currency.
Entities such as AMC’s, Registrars and Trustees must already have a profile in the
system.
Fields in Fund Demographics Setup Screen
Existing Fund?
1 Character Maximum, Optional
Choose ‘Yes’ to indicate that the fund for which the record is being set up here is an existing
fund, i.e., the Rule Effective Date is earlier than the Application Date.
Umbrella Fund
1 Character Maximum, Optional
To enter a Fund Demographics Profile for an umbrella fund, choose ‘Yes’. This will enable
the Umbrella Fund Details.
Fund ID
6 Character Maximum, Alphanumeric, Mandatory
The Fund ID is a unique Identification for each Fund in the system. Enter a unique value for
the fund for which a Fund Demographics record is being set up. If the record of an umbrella
fund has been retrieved, the Fund ID is defaulted to the Family ID, and cannot be altered. If
3-6
the record retrieved is that of a share class, then the unique six-character system generated
ID is displayed here and this cannot be altered.
Fund Short Name
15 Character Maximum, Alphanumeric, Mandatory
Enter the short name of the fund for which the Fund Demographics profile is being set up in
this record. If the record of an umbrella fund has been retrieved, the Fund Short Name is
defaulted to the Family ID, and cannot be altered. If the record retrieved is that of a share
class, then the Fund Short Name is defaulted to the name specified in the Sub-Fund Share
Class Mapping.
Fund Name
60 Character Maximum, Alphanumeric, Mandatory
Enter the name of the fund for which the Fund Demographics profile is being set up in this
record. If the record of an umbrella fund has been retrieved, the Fund Name is defaulted to
the Family Description, and cannot be altered.
Multi Language Details Link
Click ‘Multi Language Details’ tab to access the Multi Language Details screen. The following
screen is invoked:
The Fund Name and the language specified in the Fund Demographics screen are displayed.
You can re-enter the fund name in the languages shown in the screen.
Refer the chapter Maintaining Reference Information under Reference Information User
Manual for information about Multiple language support.
Fund Start Date
Date, Mandatory
Using the date picker, specify the date upon which the fund is to begin operations (in case of
a new Fund).
If the Existing Fund box is checked, the Fund Start Date specified here must be earlier than
the Application Date.
For new funds, the Fund Start Date specified here may be the same as the Application Date.
3-7
Rule Effective Date
Date, Mandatory
Using the date picker, specify the date from when the Fund Demographics Rule that is
currently being set up should become effective.
If the Existing Fund box is checked, the Rule Effective Date specified here must be earlier
than the Application Date, and later than the Fund Start Date.
If the fund is not an existing fund, i.e., the Existing Fund box is not checked, and the fund is a
new fund, the Fund Start Date and Rule Effective Date must be the same.
The Rule Effective Date should be later than (or same as) the Fund Start Date and it should
also be later than (or same as) the current application date of the system.
Fiscal Year Start Date
Date, Mandatory
Enter the date from when the Fiscal Year should start for the fund. This will be the base date
for arriving at any frequency defined in the system.
The Fiscal Start Date must be earlier than the application date and the Rule Effective Date of
the fund.
Fiscal Year End Date
Date, Mandatory
This is the date on which the Fiscal Year should end for the fund when the Fiscal Start Date
is specified; the system displays the Fiscal Year End Date exactly a year later than the Start
Date.
The Fiscal End Date should be later than (or same as) the current date of the system. It should
also be later than (or same as) the Rule Effective Date of the fund that is being set up.
Fund Country
Alphanumeric, Mandatory
Specify the country of domicile of the fund, from the drop down list provided. This information
will be used to determine whether a unit holder that subscribes to the fund must be considered
a Foreign unit holder or not.
Fund Base Currency
Alphanumeric, Mandatory
Specify the currency in which the fund will be denominated, from the drop down list provided.
The NAV and dividend declarations for the fund will be in this base currency.
Fund Class
Alphanumeric, Mandatory
Select the class to which the Fund must belong, from the drop down list. The two classes
displayed in the drop down list are Open Ended and Closed-Ended Funds.
Fund Type
Alphanumeric, Mandatory
Select the Fund Type from the options provided in the drop down list. This list is populated
with the Fund Types set up in the Fund Type Maintenance.
3-8
Fund Family
Alphanumeric, Mandatory
Select the fund family under which the fund must be placed, from the drop down list that is
populated with all fund families that are maintained in the system as part of the Fund Family
Maintenance. If this record is being set up for an umbrella fund, then the ID of the Immediate
Parent Family is displayed here from the Fund Family Maintenance, and this cannot be
altered.
AMC
Mandatory
Specify the AMC that this Fund will be operative in. You can make your choice by using the
drop down list.
Registrar
6 Characters Maximum, Alphanumeric, Mandatory
Select the Registrar for the fund being set up, from the options provided.
Trustee
6 Characters Maximum, Alphanumeric, Mandatory
Select the Trustee for the fund being set up, from the options provided.
Minimum Holding Period
Numeric, Optional
Enter the lock in period for the investors investing in a Money Market Mutual Fund.
Fund Suspended?
Optional
You can use this field to suspend a fund for transactions of all types. Check this box to
indicate that the fund is suspended for transactions. Transactions of all types (both those
entered through the Transaction Detail screens as well as system-generated and uploaded
transactions) into suspended funds are not allowed.
If a fund is suspended, transactions of all types are not allowed into the fund. If a fund is not
suspended, transactions of specific types that have been suspended for the fund in the
Transaction Processing Rules (if any) are not allowed.
Brokers Mandatory?
Optional
Select Yes in this field, to indicate that brokers are to be mandatory for the given Fund. If not,
select ‘No’ in this field.
Fund Enabled?
Mandatory
This field may be used to enable or disable a fund. By default, when you are setting up a new
fund, this field has a ‘Yes’ value, indicating that every new fund is created in the system initially
as an enabled fund.
Primary Registration Address
255 Characters Maximum; Alphanumeric; Mandatory
If the registration address for the fund is different from the address of the AMC to which the
fund belongs, you may specify the address in this field. By default, the address of the AMC
is considered to be the primary registration address for the fund.
3-9
This address is necessary for reporting and information purposes only.
Fund Tax ID
25 Characters Maximum; Alphanumeric; Optional
You can use this field to indicate the Tax ID assigned to the fund. It is used for reporting and
information purposes. The Tax ID you specify here cannot be specified for any other fund in
the system.
Fund Identification Number
12 Characters Maximum; Alphanumeric; Mandatory
Specify the ISIN identification number (ISIN Code) assigned to the fund.
The ISIN Code is a 12-character alphanumeric code, with the first two digits being nonnumeric, and the last two, strictly numeric. Along with the Fund ID, It is used for retrieval of
the fund details in all search facilities in the system, and is captured during transaction entry
as identification for the fund.
Fund Ticker Symbol
25 Characters Maximum; Alphanumeric; Optional
Specify the ticker symbol that identifies the fund in the stock exchange list.
IRA Investments Allowed
Optional
You can use this field to indicate whether investment into the fund is allowed through an
Individual Retirement Account (IRA). Check this box to indicate that IRA investments are
allowed, into the fund. If so, you must maintain the limits for such investments by in the Fund
IRA Transactions section in this screen.
Note
If this option is checked, it implies that the fund is a pension fund.
Custodian
Optional
Enter the custodian details.
Minimum Amount For Tax ID for Individual Customer
Numeric, Optional
Enter the minimum subscription/IPO subscription amount beyond which the system needs to
validate the PAN of the unit holder.
While capturing a transaction, the system will check the transaction amount with the amount
maintained here for unit holders of the type ‘Individual’. If a transaction exceeds the stated
minimum amount, the system will throw up an error and not save the transaction.
Minimum Amount For Tax ID for Corporate Customer
Numeric, Optional
Enter the minimum subscription/IPO subscription amount beyond which the system needs to
validate the PAN of the corporate investor.
3-10
Hedge Fund
Optional
Select ‘Yes’ to indicate that the selected fund is a hedge fund and select ‘No’ to indicate
otherwise.
3.3.3
Amount Limits for IRA Transactions Section
For funds in which you have allowed IRA (Individual Retirement Account) investment, you can
define the transaction limits. Use the Amount Limit for IRA Transactions section in the Fund
Rules Detail screen to specify the limits.
It is mandatory for you to specify the IRA Limits fund rule for funds in which IRA investments
are allowed.
The following limits are specified:
3.3.4
Minimum transaction amount limits for initial, additional investment, and withdrawal
transactions
Maximum transaction amount limits for initial, additional investment and withdrawal
transactions.
Fields in Fund IRA Transactions Section
Minimum Amount (Initial Investment)
Numeric, Mandatory if IRA investment is allowed for the fund
Specify the minimum amount that can be contributed in the initial investment into this fund, for
a plan purchased in a product for which the fund forms part of the portfolio. This limit cannot
exceed the corresponding limit set for the product, the portfolio of which the fund is a part.
Maximum Amount (Subsequent Investments)
Numeric, Mandatory if IRA investment is allowed for the fund
Specify the maximum amount that can be contributed in the initial investment into this fund,
for a plan purchased in a product for which the fund forms part of the portfolio. This limit
cannot exceed the corresponding limit set for the product, the portfolio of which the fund is a
part.
3-11
Minimum Amount (Subsequent Investments)
Numeric, Mandatory if IRA investment is allowed for the fund
Specify the minimum amount that can be contributed as an additional investment into this
fund, for a plan purchased in a product for which the fund forms part of the portfolio. This limit
cannot exceed the corresponding limit set for the product, the portfolio of which the fund is a
part.
Maximum Amount (Additional Investment)
Numeric, Mandatory if IRA investment is allowed for the fund
Specify the maximum amount that can be contributed as an additional investment into this
fund, for a plan purchased in a product for which the fund forms part of the portfolio. This limit
cannot exceed the corresponding limit set for the product, the portfolio of which the fund is a
part.
Minimum Amount (Withdrawal)
Numeric, Mandatory if IRA investment is allowed for the fund
Specify the minimum amount that can be withdrawn through a withdrawal transaction out of
this fund, for a plan purchased in a product for which the fund forms part of the portfolio. This
limit cannot exceed the corresponding limit set for the product, the portfolio of which the fund
is a part.
Maximum Amount (Withdrawal)
Numeric, Mandatory if IRA investment is allowed for the fund
Specify the minimum amount that can be withdrawn through a withdrawal transaction out of
this fund, for a plan purchased in a product for which the fund forms part of the portfolio. This
limit cannot exceed the corresponding limit set for the product, the portfolio of which the fund
is a part.
3.4
Corporate Actions
This fund rule facilitates the definition of the guidelines that will govern the distribution of
income derived from the fund by the unit holders that subscribe to the fund. You can define
the framework according to which corporate actions such as dividend declaration and
processing must be performed for a fund.
3-12
To set up the Corporate Action rules for a fund, use the Corporate Actions screen. You can
invoke this screen by clicking ‘Corporate Actions’ button from the Fund Rules screen.
Note
This screen cannot be used to maintain parameters for corporate actions such as liquidation, split, reverse split and merger. To maintain these, you must use the Corporate Actions Maintenance screen, which you may invoke by clicking on Corporate Actions in the
Maintenance menu, and Detail under it.
For more information on these corporate actions and the Corporate Actions Maintenance
screen, refer the chapter Other Fund Activities in this user manual.
3.4.1
Checks
Before you set up a Corporate Actions profile record for a fund, it is desirable to ensure that
the fund already has an existing, unauthorized profile record.
3.4.2
Dividend Processing for Fund
In Oracle FLEXCUBE Investor Servicing, there are two types of dividend that can be
processed for a fund:
Cash Dividend
Stock Dividend
3-13
In the case of cash dividends, the unit holders receive the dividend in monetary form. If an
income distribution setup record is defined for an investor, then the dividend received is
reinvested according to the framework of the same. Cash dividends could be declared for
capital gains or income.
In the case of stock dividends, the unit holders receive dividend in the form of units in addition
to their holdings as on the record date, which are reinvested in the same fund.
In Oracle FLEXCUBE Investor Servicing, you can define an individual corporate actions
record for each of the dividend types, in the Corporate Actions screen. For a fund, if both cash
and stock dividends are declared, a separate Corporate Actions profile must be set up for
each of the dividend types.
Refer the chapter Dividend Maintenance in the Fund Manager User Manual for information
about the static maintenance for processing dividends in the system.
3.4.3
Setting up Rules for Cash Dividend for Fund
To set up the guidelines for a cash dividend for a fund in the Corporate Actions screen,
1. The ID of the fund and the Rule Effective Date are filled in from the Fund Demographics
screen.
2. In the Corporate Action type field, select “Cash Dividend”. If you are defining a cash
dividend for capital gains, choose Cash Dividend – Capital Gains. For a cash dividend
for income, choose Cash Dividend – Income.
3. Specify the frequencies for declaration and payment of dividend, in the Dividend
Declaration Frequency and Dividend Payment Frequency fields respectively.
4. Specify the rounding rules for dividend, in the Rounding Options and Rounding Precision
fields.
5. Specify the default mode of distribution for the cash dividend – payment by cheque,
transfer or reinvestment.
6. Specify the basis upon which exchange rate for dividend will be obtained, in the Dividend
Exchange Rate Basis field.
7. Specify the first dividend declaration date for the fund, in the First Dividend Declare Date
field.
8. Specify the tax ID for the fund, as well as the basis for tax deduction at source, in the TDS
Basis field.
9. Specify the units to be considered for the record date (freeze holdings) for dividend
eligibility, in the Units for Freeze Holding field.
10. If EPU components are applicable for the fund, select the Allow EPU Component Setup
option and specify the EPU Lot. The default value for EPU lot will be 1.
11. If look-ahead dividend processing for holidays is to be applicable for cash dividends for
the fund, select the Look Ahead Processing option.
12. Specify a lag period for dividend payment, if necessary, in the Payment Lag field.
13. Specify a lag period for reinvestments, if necessary, in the Reinvestment Lag field.
14. Specify the holiday rule to be applicable for cash dividends for the fund.
15. In the Lead Times section, specify the lead times for freeze holdings, book closing,
directors’ meeting and dividend payment, as applicable for cash dividends for the fund.
3.4.4
Setting up Rules for Stock Dividend for Fund
To set up the guidelines for a stock dividend for a fund in the Corporate Actions screen,
3-14
1. The ID of the fund and the Rule Effective Date are filled in from the Fund Demographics
screen.
2. In the Corporate Action type field, select “Stock Dividend”. The following information is
considered by default for stock dividends:
3. Since stock dividends are exempt from tax, the TDS Basis field has a default value, “taxexempt”, and is locked for data entry.
4. Income Distribution Setup options are not applicable for unit holders eligible for stock
dividends, and the option Restrict IDS for Unit Holders is selected and cannot be
changed. Also, the distribution mode for such dividends is taken by default to be
Reinvestment.
5. EPU components are not applicable for stock dividends.
6. Specify the frequencies for declaration and payment of dividend, in the Dividend
Declaration Frequency and Dividend Payment Frequency fields respectively.
7. Specify the rounding rules for dividend, in the Rounding Options and Rounding Precision
fields.
8. Specify the basis upon which exchange rate for dividend will be obtained, in the Dividend
Exchange Rate Basis field.
9. Specify the first dividend declaration date for the fund, in the First Dividend Declare Date
field.
10. Specify the units to be considered for the record date (freeze holdings) for dividend
eligibility, in the Units for Freeze Holding field.
11. If look-ahead dividend processing for holidays is to be applicable for stock dividends for
the fund, select the Look Ahead Processing option.
12. Specify a lag period for dividend payment, if necessary, in the Payment Lag field.
13. Specify a lag period for reinvestments, if necessary, in the Reinvestment Lag field.
14. Specify the holiday rule to be applicable for stock dividends for the fund.
15. In the Lead Times section, specify the lead times for freeze holdings, book closing,
directors’ meeting and dividend payment, as applicable for stock dividends for the fund.
3.4.5
Fields in Corporate Actions Screen
Fund ID
Display
This field indicates the ID fund for which you are setting up the Corporate Actions profile. This
information is defaulted from the Fund Demographics screen.
Rule Effective Date
Display
The Rule Effective Date for the fund, which you specified in the Fund Demographics screen,
is displayed here.
Corporate Action Type
Alphanumeric, Mandatory
Select the type of corporate action for which this rule is being set up. It could be either a cash
dividend or a stock dividend. It could be either a cash dividend for income, or capital gains
earnings.
For stock dividends, the following information is accepted by default:
3-15
The TDS Basis field has a default specification, “Tax-exempt”, and the field is locked for
data entry
The option Restrict IDS for Unit Holder is selected and cannot be changed
The Default Distribution Mode field has the option “Reinvestment” selected, and is
locked for data entry.
Dividend Declaration Frequency
Alphanumeric, Mandatory
Select the frequency with which the dividend is to be declared, from the options provided.
Dividend Payment Frequency
Alphanumeric, Mandatory
Select the frequency with which the declared dividends are to be paid. As the system supports
accumulation of dividends, the payment could be for any dividend that has been declared
earlier.
The Dividend Payment Frequency must not be less than Dividend Declaration Frequency.
Default Distribution Mode
Mandatory
If the Income Distribution Setup for the unit holder has not yet been specified, the fund level
default Unit Holder Distribution Mode to be considered for the unit holder can be specified
here. Any one of the options from the drop down list may be chosen. The following values
may be entered:
Full Payout - A/C Transfer
Full Payout - Check
Full Reinvestment into Source Unit Holder ID and Source Fund.
If the rules are being setup for a share class fund for which reinvestment is mandatory, then
this field is defaulted to Full Reinvestment and locked for data entry.
For stock dividends, the option “Reinvestment” is selected here by default, and cannot be
changed.
3-16
Click ‘Details’ button to invoke ‘Corporate Actions’ screen.
In this screen, define the following details:
Rounding Precision
1 Character Maximum, Numeric, Mandatory
Indicate the maximum number of decimals that would be reckoned for rounding precision, for
the dividend. You cannot indicate a precision higher than 6 decimal places.
Rounding Options
Alphanumeric, Mandatory
Indicate the rounding options for the value of the dividend, designated for the fund.
Choose ‘Round Up’ to indicate rounding the value at the precision decimal place to the next
higher numeral.
Choose ‘Round Off’ to indicate normal rounding at the precision decimal.
3-17
Choose ‘Round Down’ to indicate truncation of the value at the precision decimal place.
Example
Let us suppose that the dividend earned by an investor, Mrs. Laurie Klein, in the ABC Growth
Fund is 700.679263 currency units, and that this value must be rounded to the 3rd decimal
place.
If you indicate rounding up, then the value reckoned would be 700.680.
If you indicate rounding off, then, applying normal rounding off rules, the value reckoned
would be 700.679.
If you indicate rounding down or truncation, then the value would be truncated as it is, in the
3rd decimal place, and it would be reckoned as 700.679.
Dividend Exchange Rate Basis
Alphanumeric, Mandatory
Specify the basis upon which the exchange rate will be applied for dividend processing. The
system provides two options: Reference Date and Payment Date.
Distribution Mode For Minimum Balance
Optional
Indicate how the income derived from the fund is to be distributed, in respect of unit holders
whose holdings balance falls below the minimum holdings specified for the fund.
The options are:
Forced Payout - the income is paid out, regardless of the default distribution mode or
any income distribution options (IDS) set for the unit holder
According to Unit Holder IDS – the income is distributed based on the Income
Distribution (IDS) options set for the unit holder
Tax ID
15 Character Maximum, Alphanumeric, Mandatory
Enter the tax ID for the fund that is being set up.
TDS Basis
1 Character Maximum, Alphanumeric, Mandatory
This is to indicate whether slab should be looked for every dividend payment separately or
whether consolidated on a fiscal year basis.
For stock dividends, the option “Tax –Exempt” is selected here by default, and cannot be
changed.
EPU LOT
Numeric, Mandatory if EPU is applicable
Specify the number of units for which the EPU quote is deemed to be applicable, for the fund.
Setting up EPU components is not applicable for stock dividends
3-18
3.4.5.1
Preferences Section
Restrict IDS for Unit Holder
Mandatory
Select ‘Yes’ in this field to indicate that specific income distribution setups for unit holders may
be overridden.
Reinvestment Allowed
Optional
Select ‘Yes’ in this field to indicate that reinvestment is allowed for the fund. If the rules are
being setup for a share class fund for which reinvestment is mandatory, then this field has a
default ‘Yes’ and locked for data entry.
Allow EPU Components Setup?
Optional
Select ‘Yes’ in this field to indicate applicability of EPU, (Earnings Per Unit) and that the
earnings per unit must be defined in terms of components, or as a single value. By default,
this field has a ‘No’ value.
Setting up EPU components is not applicable for stock dividends.
Look Ahead Processing?
Optional
Select ‘Yes’ in this field to indicate that in the event of intervening holidays, the system would
obtain the EPU information and process dividends for the holiday period, ahead of the prior
business day, for the fund.
Units for Freeze Holding
Alphanumeric, Mandatory
Specify the units to be considered for dividend eligibility on the freeze holdings date. You can
specify any of the following options:
All units (including unconfirmed units) must be considered as on the allocation date
Only confirmed units are to be considered as on the allocation date
All units (including unconfirmed units) are to be considered as on the transaction price
date
All units (including unconfirmed units) are to be considered as on the transaction date
Only confirmed units are to be considered as on the transaction date
All units (including unconfirmed units) are to be considered as on the dealing date
Note
If the fund is a dividend equalization fund, i.e. if you have checked the ‘Dividend Equalization Applicable’ option in the General Operating Rules for the fund, you can maintain only
the following options here:
–
All Units as on allocation date
–
All units as on confirmed date
–
All units as on dealing date
If units for freeze holding is based on transaction/dealing date then all the transactions
backdated to the previous dividend cycle would be treated as old units (G1 units). If units for
3-19
freeze holding is based on allocation date then all the transactions backdated to the previous
dividend cycle would be treated as new units (G2 units).
Example:
Consider two dividend cycles - the first from January 01, 2010 to January 31, 2010 and the
second from February 01, 2010’ to ‘February 28, 2010. A subscription transaction (S1) is
captured on application date, February 15, 2010, with transaction date as January 15, 2010
and allocation date as February 16, 2010. For the second dividend, units allotted in this
transaction would be treated as G1 units (if the units for freeze holding is based on
transaction/dealing date) or G2 units (if the units for freeze holding is based on allocation
date).
First Dividend Declare Date
Date Format, Optional
Specify the first date for dividend declaration, for the fund. The system considers the first
dividend date in arriving at the date for dividend processing, as follows:
First dividend processing = First Dividend Declare Date – Dividend Declaration Frequency +
Dividend Payment Frequency.
The system also uses the first dividend declare date to arrive at the next dividend declare
date, applying the specified declaration frequency.
If you do not specify the first dividend declare date, the fiscal year specified for the fund is
used to determine the next dividend declare date.
Holiday Rule
Alphanumeric, Mandatory
Select the rule to be applied if the dividend processing date falls on a holiday. You can select
either the PRIOR rule (the previous working day is considered) or the AFTER rule (the next
working day is considered), for the dividend type.
The holiday rule you select here will be applicable to all dividend-processing dates that have
been arrived at using a frequency. They are not applicable to dates arrived at using lead times
or lag periods.
Pay Dividends During Redemption?
Optional
Select this option to indicate that dividends may be paid during redemption.
Special Dividend
Optional
Select ‘Yes’ in this field to indicate that special dividends are applicable for the fund. This
feature is only available if your installation has requested for it.
Mock Dividend?
Optional
Select ‘Yes’ in this field to indicate the applicability of mock dividends for the fund. This
feature is only available if your installation has requested for it.
3-20
Payment Lag
1 Character Maximum, Numeric, Optional
Specify a lag period (in days) for the payment of dividend. The lag value is interpreted in
calendar days, and is used to arrive at the payment date for the dividend. The payment date
is arrived at as follows:
Dividend Payment Date = Dividend Declaration Date + Payment Lag
Compulsory Reinvestment for Retirement Account
Optional
You can use this field to indicate that dividend due from the fund on an IRA account must be
compulsorily reinvested. Check this box to indicate compulsory reinvestment.
Default EPU to Previous Declared EPU
Optional
Specify whether the previous day’s Earning Per Unit (EPU) needs to be defaulted during the
generation of a dividend record. You can select either ‘Yes’ or ‘No’ from the drop-down list.
If you select the option ‘Yes’, the system will default the previous day’s EPU while generating
the dividend record at the Beginning of Day (BOD). This record will be an authorized record.
However, you will be able to modify it. If the previous day’s EPU is zero, the system will still
default the value and generate an authorized record. You can enter the EPU value for this
record.
This field is available only for Money Market funds. Also, if ‘Dividend Declaration Frequency’
and ‘Dividend Payment Frequency’ are the same, this field will be disabled.
Interest to be compounded for the payment period?
Optional
Indicate whether the dividend interest needs to be compounded for the entire payment period
or not. You can select either ‘Yes’ or ‘No’ from the drop-down list.
If you select ‘Yes’, the system will calculate the dividend on the amount instead of multiplying
the units by the EPU. The EPU value maintained as ‘As amount’ will be directly used in the
dividend calculations.
This field is available only for Money Market funds. Also, if ‘Dividend Declaration Frequency’
and ‘Dividend Payment Frequency’ are the same, this field will be disabled.
Example:
Assume that the EPU is 0.001267. This value will be directly used during dividend processing
to calculate the payment amount.
3-21
Consider the following case listing the transactions from Jan 1, 2005 to Jan 31, 2005:
Open
Bal
InTx
ns
(Bal.
sum)
Freeze
holdin
g
balanc
e
Div
calc
base
EPU
Div
Unit
s
NAV
Div
amt
Div
Sum
from
the 1st
till
date(U
nits)
Div Sum
from the
1st of the
Month till
date
(Amount)
1000
00
0
10000
0
1000
00.0
000
0.000
1369
86
15.0
7
25.0
0
376.
71
15.07
376.71
1000
00
0
10000
0
1000
15.0
685
0.000
1369
86
15.0
7
25.0
0
376.
75
30.14
753.46
1000
00
0
10000
0
1000
30.1
385
0.000
1369
86
15.0
7
25.0
0
376.
75
45.21
1130.21
1000
00
0
10000
0
1000
45.2
085
0.000
1369
86
15.0
7
25.0
0
376.
75
60.28
1506.96
1000
00
0
10000
0
1000
60.2
785
0.000
1369
86
15.0
7
25.0
0
376.
75
75.35
1883.71
1000
00
0
10000
0
1000
75.3
485
0.000
1369
86
15.0
7
25.0
0
376.
75
90.42
2260.46
1000
00
0
10000
0
1000
90.4
185
0.000
1369
86
15.0
8
25.0
0
377.
00
105.50
2637.46
1000
00
0
10000
0
1001
05.4
985
0.000
1369
86
15.0
8
25.0
0
377.
00
120.58
3014.46
1000
00
0
10000
0
1001
20.5
785
0.000
1369
86
15.0
8
25.0
0
377.
00
135.66
3391.46
1000
00
0
10000
0
1001
35.6
585
0.000
1369
86
15.0
8
25.0
0
377.
00
150.74
3768.46
1000
00
0
10000
0
1001
50.7
385
0.000
1369
86
15.0
9
25.0
0
377.
25
165.83
4145.71
1000
00
0
10000
0
1001
65.8
285
0.000
1369
86
15.0
9
25.0
0
377.
25
180.92
4522.96
3-22
Open
Bal
InTx
ns
(Bal.
sum)
Freeze
holdin
g
balanc
e
Div
calc
base
EPU
Div
Unit
s
NAV
Div
amt
Div
Sum
from
the 1st
till
date(U
nits)
Div Sum
from the
1st of the
Month till
date
(Amount)
1000
00
0
10000
0
1001
80.9
185
0.000
1369
86
15.0
9
25.0
0
377.
25
196.01
4900.21
1000
00
0
10000
0
1001
96.0
085
0.000
1369
86
15.0
9
25.0
0
377.
25
211.10
5277.46
1000
00
5000
10500
0
1052
11.0
985
0.000
1369
86
15.8
5
25.0
0
396.
25
226.95
5673.71
1050
00
0
10500
0
1052
26.9
485
0.000
1369
86
15.8
5
25.0
0
396.
25
242.80
6069.96
1050
00
0
10500
0
1052
42.7
985
0.000
1369
86
15.8
5
25.0
0
396.
25
258.65
6466.21
1050
00
0
10500
0
1052
58.6
485
0.000
1369
86
15.8
6
25.0
0
396.
50
274.51
6862.71
1050
00
0
10500
0
1052
74.5
085
0.000
1369
86
15.8
6
25.0
0
396.
50
290.37
7259.21
1050
00
0
10500
0
1052
90.3
685
0.000
1369
86
15.8
6
25.0
0
396.
50
306.23
7655.71
1050
00
0
10500
0
1053
06.2
285
0.000
1369
86
15.8
6
25.0
0
396.
50
322.09
8052.21
1050
00
0
10500
0
1053
22.0
885
0.000
1369
86
15.8
7
25.0
0
396.
75
337.96
8448.96
1050
00
0
10500
0
1053
37.9
585
0.000
1369
86
15.8
7
25.0
0
396.
75
353.83
8845.71
1050
00
0
10500
0
1053
53.8
285
0.000
1369
86
15.8
7
25.0
0
396.
75
369.70
9242.46
1050
00
0
10500
0
1053
85.5
685
0.000
1369
86
15.8
7
25.0
0
396.
75
385.57
9639.21
3-23
Open
Bal
InTx
ns
(Bal.
sum)
Freeze
holdin
g
balanc
e
Div
calc
base
EPU
Div
Unit
s
NAV
Div
amt
Div
Sum
from
the 1st
till
date(U
nits)
Div Sum
from the
1st of the
Month till
date
(Amount)
1050
00
0
10500
0
1053
85.5
685
0.000
1369
86
15.8
8
25.0
0
397.
00
401.45
10036.21
1050
00
0
10500
0
1054
01.4
485
0.000
1369
86
15.8
8
25.0
0
397.
00
417.33
10433.21
1050
00
0
10500
0
1054
17.3
285
0.000
1369
86
15.8
8
25.0
0
397.
00
433.21
10830.21
1050
00
0
10500
0
1054
33.2
085
0.000
1369
86
15.8
8
25.0
0
397.
00
449.09
11227.21
1050
00
0
10500
0
1054
49.0
885
0.000
1369
86
15.8
8
25.0
0
397.
00
464.97
11624.21
1050
00
0
10500
0
1054
64.9
685
0.000
1506
85
15.8
9
25.0
0
397.
25
480.86
12021.46
Total
Dividend
120
21.4
6
During payment processing at the end of the month (in case the payment frequency is
monthly), the EPU entered at the end of the month will be used for all calculations for the
payment period. In case the EPU entered at the end of the month is different, then the new
EPU will be used to calculate the dividend amount payable for all days in the payment period.
In case the payment date happens to be a holiday, defined in the system calendar, the system
will process the dividend on the day preceding the holiday (if the holiday rule is set to ‘prior’).
Reinvestment Base Price
Alphanumeric; Mandatory only if default distribution mode is ‘Reinvestment’.
Reinvestment transactions into the fund can be put through either at the NAV for the day or
the transaction base price. You can use this field to indicate the price that must be used.
Minimum Amount for Payment
Numeric, Optional
Indicate the threshold dividend amount in fund base currency. If Investor has chosen the cash
option for dividend payment and the dividend income in the current processing cycle is more
than threshold dividend amount, then dividend income can be paid out.
3-24
If Unit holder has chosen distribution mode as a combination of cash and reinvestment and
the cash portion of dividend amount net of tax is less than Minimum Amount for Payment then
system will generate a single reinvestment transaction for the total dividend income.
Action on Minimum Amount Validation
Optional
Select the options from list:
Reinvest - Reinvest the dividend if it falls below minimum amount for payment.
Hold - No additional processing is required and Dividend amount is neither be paid out
nor reinvested.
Override at Pay Time
Optional
Indicate whether Minimum Amount for Payment can be overridden during dividend payment
processing.
Auto Reinvestment for Unclaimed Dividend
Optional
If you select ‘Yes’, system will automatically reinvest when dividend is unclaimed, i.e.,
dividend check is not encashed within the expiry date.
Note
By default, this option will be ’No’.
Auto Reinvestment for Unclaimed Dividend When No Balance Left
Optional
If you select ‘Yes’, then system will automatically reinvest when dividend is unclaimed, i.e.,
dividend check is not encashed within the expiry date and when the unit holder does not have
sufficient balance in the underlying fund.
Note
By default, this option will be ’No’.
Track Dividend for Uncleared Transactions?
Optional
Indicate whether dividend payment/re-investment should be tracked for an individual uncleared transaction.
If you select ‘Yes’, dividend will be held back temporarily for subscription transactions whose
cheques are not cleared as on the Dividend Declaration Date. Dividend will be released when
the payment is cleared.
Note
By default, this option will be ’No’.
3-25
Track Dividend for Blocked Transactions?
Optional
Specify whether dividend payment should be tracked for a blocked transaction, where some
or all units are blocked at the time of dividend processing.
If you select ‘Yes’,, system will process the dividend as per the action selected in the Block
Transaction Screen.
Note
By default, this option will be ’No’.
Pay Ungenerated Reinvestments?
Optional
Select ‘Yes’, to indicate that in case the re investment results in zero units allotment, the
amount should be paid out to the investor.
If you select ‘Yes’, then system executes the following steps:
Converts the amount to be reinvested to the fund base currency
Divides the amount in fund base currency with the latest NAV for the fund. This will
result in the units expected to that could be allotted.
Applies the rounding rule to the number of units.
If the number of units in the result of step 3 is greater than zero, re-investment transaction will
be generated. If the result is zero then the amount should be paid out to the investor in the
unitholder preferred currency. In case any specific preference has been set at the unitholder
fund level then the respective currency will be used.
TDS Applicable for all UH
Conditional
You can enter a value in this field only if you have selected the ‘Dividend Equalization
Applicable’ option in the General Operating Rules for the fund. The default value is ‘No’; if you
select ‘Yes’, the system will distribute dividend after deducting the tax applicable for all unit
holders who are entitled to dividend. This is applicable even for the equalization amount.
FDAP Income
Optional
Check this box to indicate the dividends distributed in this fund are FDAP income.
Note
–
The preference that you have maintained ate the unit holder level (the ‘Tax
Deducted At Source’ field in the ‘Unit Holder Maintenance’ screen) will take
precedence over the value maintained here. For instance, if you have unchecked
the TDS option at the Unit holder level, then all inflows to the unit holder will be done
on a gross basis even if you have selected the ‘TDS Applicable for all UH’ field at
the fund level.
–
You are required to maintain a single WHT setup (with single slab) for the equalization fund. Tax on the gross dividend amount will be deducted based on this setup.
3-26
The Lead Times section
Book Closing
3 Characters Maximum, Numeric, Mandatory
Enter a lead-time in days. The Registrar must enter the book closing dates within this leadtime from the time the dividend information is declared.
The Book Closing From and To Dates together signify the period within which no change will
be allowed to a unit holder’s balances in a fund. This means that any transaction that has
been entered within these dates will not be allocated for the unit holder.
Freeze Holding
3 Characters Maximum, Numeric, Mandatory
Enter a lead-time in days. The Registrar must enter the Freeze Holdings Date within this leadtime from the time the dividend information is declared.
The Freeze Holding Date is the date on which the balances held by all unit holders in the fund
will be consolidated.
Board Meeting
3 Characters Maximum, Numeric, Mandatory
Enter a lead-time in days. The Registrar must enter the Board Meeting Date within this leadtime, before the time the dividend information is declared. This is captured for information
purposes only.
Dividend Payment
3 Characters Maximum, Numeric, Mandatory
Enter a lead-time in days. The Registrar must enter the Dividend Payment Date within this
lead-time, from the time the dividend information is declared.
Each of the lead times must be less than the Dividend Declaration Frequency. For example,
if the Dividend Declaration Frequency is WEEKLY, the Board Meeting Lead Time cannot be
8 days.
The NPI Preferences section
NPI Applicable
Mandatory
Select ‘Yes’ in this field to indicate that non permissible income (NPI) component is allowed
for this fund.
Default NPI Payment
Mandatory
If NPI is applicable for this fund, then specify the default payment option from the drop-down
list provided.
Override Unit holder preference?
Mandatory if NPI is applicable
Select ‘Yes’ in this field if the fund override the NPI payment preferences maintained for the
investor at the unit holder level. However, if the NPI payment preferences are not maintained
at the unitholder level, then NPI payment will be made as per the fund preferences.
3-27
Force Re-investment of Un-cleared units
Mandatory if NPI is applicable
The system does not consider NPI amount while processing reinvestments, even if it is from
un-cleared balances. It should either be paid to a trust or to the unit holder.
However, in case of Permissible income, you can opt to reinvest the Un-cleared Unit balances
by choosing the ‘Force reinvestment’ option. Else, select ‘No preference’, which overrides the
UH IDS setup.
3.5
Shares Characteristics Maintenance
The Shares Characteristics fund rule enables you to maintain certificate details for the fund.
Further, the fund corpus information, limits on the unit holders and the foreign investors and
the account statement information are maintained here.
You can also maintain the rounding precision pattern for allocation of units in this screen.
To set up the Shares Characteristics rule for a fund, use the ‘Shares Characteristics’ screen.
You can invoke this screen by clicking ‘Shares Characteristics’ tab from the ‘Fund Rules’
screen.
3.5.1
Checks
Before you set up a Shares Characteristics profile record for a fund, it is desirable to ensure
that the fund already has an existing, unauthorized Fund Rules profile record.
3-28
3.5.2
Fields in Shares Characteristics Setup Screen
3.5.2.1
Basic Information Section
Fund ID
Display
This field indicates the ID fund for which you are setting up the Shares Characteristics profile.
This information is defaulted from the Fund Demographics screen.
Rule Effective Date
Display
The Rule Effective Date for the fund, which you specified in the Fund Demographics screen,
is displayed here.
Scrip Based
Alphanumeric, Mandatory
In this field, you can designate the applicability of certificate issue for investment in the fund.
According to the option you select here, you can:
Designate that certificate issue for the fund is mandatory. This means that certificates
must be issued to unit holders for transactions in the fund. To indicate this, choose the
‘Scrip Based’ option in this field.
Designate that certificate issue is not mandatory for the fund. This means that
certificates are not required to be issued to unit holders for transactions in the fund. To
indicate this, choose the ‘Scrip Less’ option in this field. If you do so, the fund is a scrip
less fund, and you can designate that certificates must be issued only for block
transactions, if so needed, by checking the Certificate Required For Block check box in
this screen.
Designate that certificate issue is to be based on the choice of the investor at the time
of transacting. In such a case, certificates will be issued only if the investor specifically
requests for certificates at the time of entering into a transaction. To indicate this, select
‘Certificate Option’ in this field. Such funds are known in the system as certificate option
funds.
You can specify the details of certificate issue for the fund, in the Certificate Details tab in this
screen.
Certificate Required For Block
Optional
For scrip less funds, select ‘Yes’ in this field to indicate that certificates must be issued to
investors for block transactions in the fund.
Minimum Registered Capital
Currency, Mandatory
Enter an amount to specify the lower limit of Fund Corpus beyond which the system will
disable the fund and await action from the Fund Manager. At any point of time, when the fund
is enabled, the fund corpus (registered capital) cannot go below this value.
Maximum Registered Capital
Currency, Mandatory
Enter an amount to specify the Upper limit of Fund Corpus beyond which the system will
disable the fund and await action from the Fund Manager. At any point of time, when the Fund
is enabled, the fund corpus (registered capital) cannot go above this value.
3-29
This upper limit must be below the figure of ten thousand trillion, at any point of time.
Minimum Number of Unit Holders
10 Characters Maximum, Numeric, Mandatory
Enter a value to specify the lower limit (i.e.) Minimum Number of unit holders beyond which
the system will disable the fund and await action from the Fund Manager. At any point of time,
when the fund is enabled, the number of unit holders cannot fall below this value. This value
must not be lower than zero.
Maximum Number of Unit Holders
10 Characters Maximum, Numeric, Mandatory
Enter a value to specify the Upper limit (i.e.) Maximum Number of unit holders beyond which
the system will disable the fund and await action from the fund Manager. At any point of time,
when the fund is enabled, the number of unit holders cannot go above this value. This value
must not be lower than or equal to zero.
Unit Par Value
Currency, Mandatory
Enter the Par Value for the fund. Normally, this will be the base price for Initial Public Offer
(IPO) period. However, you can change the base price for IPO.
Rounding Precision for Units
1 Character Maximum, Numeric, Mandatory
Specify the decimal value or negative value for the units and the units would be reckoned for
rounding precision.
Rounding Option for Units
Alphanumeric, Mandatory
Indicate the rounding options for the value of the number of allotted units, designated for the
fund.
Choose ‘Round Up’ to indicate rounding the value at the precision decimal place to the next
higher numeral.
Choose ‘Round Off’ to indicate normal rounding at the precision decimal.
Choose ‘Round Down’ to indicate truncation of the value at the precision decimal place.
Example
Let us suppose that the number of allotted units reckoned for a subscription transaction is
100.36497, and that this value must be rounded to the 3rd decimal place.
If you indicate rounding up, then the value reckoned would be 100.365.
If you indicate rounding off, then, applying normal rounding off rules, the value reckoned
would be 100.365.
If you indicate rounding down or truncation, then the value would be truncated as it is, in the
3rd decimal place, and it would be reckoned as 100.364.
3-30
Maximum Registered Units
Numeric, Optional
Enter a value to specify the maximum registered units for the fund. A transaction can be
allocated only if it does not breach the maximum registered units specified here or at the
investor category level. If breached, system will calculate the balance in the fund at the fund
level as well at the investor category level, after considering the effect of the transaction to be
allotted. If any of the limits are breached, the transaction will not be allocated and marked as
error.
You can specify the limits at the fund-investor category level in the ‘Holding Limit for Investor
Category’ screen. This screen is explained in detail further in the chapter.
The Preferences Section
In this section, you can set up your preferences for the Foreign Investors limits and the
frequency and lead times for Account Statements.
Account Statement Frequency
Alphanumeric, Mandatory
Select the frequency with which the system should initiate the Account Statement processing,
from the options provided. This is applicable only if Account Statement is required.
Account Statement Lead Time
3 Characters Maximum, Numeric, Mandatory
Enter a lead-time in days. This lead-time is to prompt the Registrar that the processing of
Account Statement should happen within this lead-time.
Print Account Statement?
Optional
Select ‘Yes’ in this field to indicate that the Account Statement is to be printed for the fund that
is being set up.
Print Holdings Statement?
Optional
Select ‘Yes’ in this field to indicate that the Holdings Statement is to be printed for the fund
that is being set up.
3.5.2.2
Foreign Investors Limit Section
Limit Allowed?
Mandatory
Select ‘Yes’ in this field to indicate the fund that is being set up is allows Foreign Investors to
invest in the fund.
Limit By
Mandatory
Choose ‘Amount’ if the foreign investors limit is in terms of a flat Amount or choose
‘Percentage’ if the limit is to be defined in terms of percentage of Registered Capital..
3-31
Limit Value
Numeric, Optional
Enter a value to specify the percentage of fund corpus that foreigners are allowed to hold. This
could be either a percentage of Fund Corpus or a flat Amount. If it is a percentage, then it
cannot be greater than 100.
If this is entered as a flat amount, then it should never exceed or be equal to the figure of one
hundred trillion.
3.5.2.3
Certificate Details Section
For funds in which certificate generation is mandatory, or is at the option of the unit holder,
you must specify the details of the certificate denominations as mandatory information in this
section. Therefore, if you have chosen either the ‘Scrip Based’ option or the ‘Certificate
Option’ in the Certificate Options field, then you must specify the certificate details as
mandatory information in this tab.
If you have chosen the ‘Scrip Less’ option in the Certificate Options field, and have checked
the Certificate Required for Block box, then this section is not applicable.
Standard Lot
Numeric, Mandatory
Enter a value to specify the standard lot for fund. This is also the marketable lot.
Prefix Certificate Code
1 Character Maximum, Alphanumeric, Mandatory
Enter a character for this field. This will be used as prefix to the Certificate Number.
Start Certificate Issue Number
Numeric, Mandatory
Enter a value for this field. This is just for information. For a new Fund, the Certificate Numbers
will start from this number.
Last Certificate Issued Number
Numeric, Mandatory
Enter a value for this field. This is to specify that this was the last certificate number that has
been issued so far and system needs to start from next number. For new funds, this could be
zero. This is also equal to the Start Certificate Issue Number in the case of new Funds
Minimum Certificate Denomination
Numeric, Mandatory
Enter a value to specify the minimum certificate denomination, i.e., the next level of
denomination after the standard lot. The system will use this after exhausting the maximum
certificate denominations.
Maximum Certificate Denomination
Numeric, Mandatory
Enter a value to specify the maximum certificate denomination. This is the first level of
denomination used by the system.
3-32
Note
Min. Cert Denomination is 100, Max. Cert Denomination is 1000 and a unit holder purchases 5500 units. The certificates will be issued for 5 of 1000 denomination and 5 of 100 denomination.
Prefix Distinctive Number Record Code
1 Character Maximum, Alphanumeric, Optional
Enter a character for this field. This will be used as prefix to the Distinctive Number Record
(DNR) Number.
This information is only applicable if you have specified the number of decimals for units as
zero, in the Number of Decimals for Units field in this screen.
User Override Allowed
Mandatory
Select ‘Yes’ in this field to indicate the user on the unit holder’s request can override the
default denominations defined above. If this is enabled, system will allow the teller to override
the fund default denominations. This is true only for minimum and maximum denominations.
The Standard lot cannot be changed. This is applicable only to scrip-based funds.
Start Distinctive Number Record Issued Number
10 Characters Maximum, Numeric, Optional
Enter a value for this field. This is just for information. For new funds, this will be same as last
DNR issued number.
This information is only applicable if you have specified the number of decimals for units as
zero, in the Number of Decimals for Units field in this screen.
Last Distinctive Number Record Issued Number
6 Character Maximum, Alphanumeric, Optional
Enter a value for this field. This is to specify that this was the last DNR number that has been
issued so far and system needs to start from next number. For new funds, this could be zero.
This is also equal to the Start Certificate Issue Number in the case of new Funds.
This information is only applicable if you have specified the number of decimals for units as
zero, in the Number of Decimals for Units field in this screen.
3.5.2.4
Holding Limit for Investory Category
You can specify the limits in terms of units that can be allowed for any given investor category.
You may either skip this maintenance or specify limits for one or more investor categories.
Use the Holding Limit for Investory Category screen to specify the limits.
3-33
Click ‘Holding Limit for Investor Category’ button from the ‘Share Characteristics’ screen to
invoke this screen.
Fund ID
Display
This field indicates the ID fund for which you are setting up the Shares Characteristics profile.
This information is defaulted from the Fund Demographics screen.
Rule Effective Date
Display
The Rule Effective Date for the fund, which you specified in the Fund Demographics screen,
is displayed here.
Category
Character, optional
Enter one of the valid investor categories. During unitholder amendment the system will
validate if the amendment breaches the limit set up at the investor category level. System will
not allow the amendment if the limits are breached and displays an appropriate error
message.
You can click add icon to add details on Investor Category. Similarly you can click delete icon
to delete the details.
The allocation of the following transactions will be impacted:
IPO Subscription
Subscription
Transfer
Switch In
System will check if any limit has been set for the maximum registered capital at the fund level
as well as fund - investor category level. If yes, system will calculate the balance in the fund
at the fund level as well as investor category level, after considering the effect of the
transaction to be allotted. If any of the limit is breached the transaction will not be allocated
and marked as error. This transaction will get picked up in the subsequent EODs and may or
may not be allotted based on the holding on that day. The validation for the balances will
3-34
always be made for the latest fund rule only, regardless of the transaction being backdated or
current dated.
3.6
General Operating Rules Maintenance
This fund rule facilitates the maintenance of guidelines that will govern the operation of the
fund with respect to the following parameters:
The pricing policy, i.e., whether the fund is to be a pre-priced or a post-priced fund. You
can also set up the price declare frequency and the next price declare date. If it is a
closed-ended fund, you can also set up the maturity date.
The automatic redemption details, if the fund is to have automatic redemption of units
for a unit holder based on the threshold balance.
The number of decimals for NAV declaration, as well as the lot for NAV.
The Ageing Policy of the fund
The applicability of charges such as Contingent Deferred Sales Charge (CDSC) for
redemption or switch transactions in the fund, as well as the processing order.
Specification of the NAV Lot
Dividend Equalization
Rules that govern check writing for the fund, such as:
3.6.1
–
The limits on the amount for a check.
–
The minimum period for which units must be held in the investor account for the
fund, before they are redeemed by a check.
–
Whether the unit holder can close the account through a redemption check
–
If the fund is a retirement fund, whether check facility can be made available for the
fund
–
Applicable penalties on check redemption due to contravening any of the limits for
check amount, minimum period, or insufficient account balance or stop payment
instructions on a check.
Whether the system should recompute the fund prices and adjust units as per forecast
rates, if the fund is a Guaranteed Fund.
Ageing Policy for Fund
A subscription transaction entered into by an investor into any fund can be tracked till the units
resulting from the transaction have been cleared in full from the unit holder account of the
investor. This is known as ageing.
Each fund may have a different approach to ageing a transaction. The approaches followed
in Oracle FLEXCUBE Investor Servicing are presented below:
FIFO (First In First Out)
In this approach, in a scrip-less fund, the unit balance resulting from the earliest transactions
of the unit holder in the fund would be considered for redemption.
Ageing based on Transaction Receipts
In this approach, in a scrip-less fund, the unit balance resulting from any earlier transaction
chosen by the unit holder, based on the receipt presented for the same, would be considered
for redemption.
3-35
Hierarchy
If the AMC services distributors according to a service level agreement, and the distributor
books are maintained at the AMC, the option of ageing transactions received from the
distributors according to the hierarchy agreed to, is available. The allocation process updates
the balances at a unit holder and fund level. The distributor books are a reflection of the
underlying hierarchy holdings based on the AMC-Distributor agreement.
IOF/IRRF Optimization
If a fund has IRRF/IOF taxes applicable, provided the fund holding is redeemed within a
stipulated time then the IRRF/IOF based funds and the subscription transactions to be
redeemed are selected in the following order of priority.
Not in the Lock in period for gains
Lower IOF percentage
Lower IRRF percentage
Greater number of days to change the IRRF slab.
Funds following the IRRF/IOF taxation method need to be classified as “Pension Funds” and
“Non Pension Funds”.
FIFO across products
In money market funds in which there is a daily declaration of dividend, the ordering of
transactions for ageing, in the event of redemption, is based on the FIFO principle. In
addition, the dividend due to the unit holder as a result of the transactions that has been
distributed in the present payment cycle is also considered.
After the dividend computation is made and the appropriate tax deducted, the transactions are
ordered for ageing based on non-taxable and taxable holdings of the unit holder across
products, in the following sequence:
1. Units for which the retention period has expired and which have already gone through a
minimum of one dividend cycle and are taxable
2. Units for which the retention period has expired and which have not gone through a single
dividend cycle and are taxable
3. Units for which the retention period has expired and which have already gone through a
minimum of one dividend cycle and are not taxable
4. Units for which the retention period has expired and which have not gone through a single
dividend cycle and are taxable
5. Units for which the retention period has not expired and which have not gone through a
single dividend cycle and are taxable
6. Units for which the retention period has not expired and which have not gone through a
single dividend cycle and are not taxable
Note
This feature (FIFO across products) is available only if your installation has specifically requested for it.
3.6.2
Specifying Limit Order Options for Funds
For a fund, you can specify the following options for processing limit orders, in the General
Operating Rules screen:
Whether limit orders may be processed for the fund
3-36
Whether future dated transactions are allowed for the fund
Whether automatic processing in respect of limit orders is allowed for the fund
The pricing rule to be applicable, if the specified date falls on a holiday
Automatic processing for limit orders involves the automatic generation of buy or sell
transactions. If your AMC processes limit orders for third party funds, and must wait for
confirmation before processing the orders on the specified dates, you might need to disable
automatic processing.
You specify the limit order options in the Limit Order Processing Options section of the
General Operating Rules screen.
3.6.3
Indicating Re-computation of Fund Prices and Adjustment of Units
The fund prices of funds like Employee Benefit Growth Fund are derived based on the
forecasted rate of growth. The rates will be re-forecasted in the interim several times and the
actual rate of growth is published at the end of the year.
If you choose the option ‘Yes’ for Guaranteed Funds, the system will:
Re-compute the fund prices and adjust the units to the investors based on the reforecasted rates during interim periods and actual rate growth during annual rate
declaration time
Share the residual units of investors who have left before interim/annual rate declaration
time among the existing investors.
Example
Let us assume that a Fund (F100) is launched with the price of 10 ZAR with the forecasted
rate of 10% per annum. Consequently, 10 * 10/ (100 * 365) = 0.0027 will be the increase in
price till a new rate is declared. Please note that the price used here is an example and not
the exact formulae as such.
Day 0 10 ZAR
Day 1 10.0027 ZAR
Day 2 10.0054 ZAR
Day 3 10.0081 ZAR
Day 4 10.0108 ZAR
Day 5 10.0135 ZAR
Day 100 10.27 ZAR
Day 101 10.2727 ZAR
Day 102 10.2754 ZAR
Day 103 10.2781 ZAR and so on….
If an investor invests on Day 2 the transaction will get unitized using the price 10.0054…
3-37
Assume these are trades captured on Day 2 @ 10.0054…
UH
ID
Fund
ID
Subscription Amount (in
ZAR)
Units
UH1
F100
10,000
999.460
UH2
F100
20,000
1998.92
1
UH3
F100
30,000
2998.38
1
UH4
F100
35,000
3498.111
UH5
F100
25,000
2498.65
1
UH6
F100
15,000
1499.19
0
Assume these are trades captured on Day 100 @ 10.27…
UH
ID
Fund
ID
Redeems
Units
Redeems Proceeds (in
ZAR)
UH1
F100
100
1027.00 ZAR
UH5
F100
2498.651
25661.15 ZAR
Therefore, the balance of the investors in Fund F100 will be:
UH
ID
Fund
ID
Balance (in
Units)
UH1
F100
899.460
UH2
F100
1998.921
UH3
F100
2998.381
UH4
F100
3498.111
UH5
F100
0
UH6
F100
1499.190
Let us assume that a Fund Manager revises an interim forecast of 11% instead of 10%.
Consequently, all the trades that are unitized during the current fiscal year of the fund will be
considered for impact and the units will be recomputed based on the new prices.
Day 0 10 ZAR
Day 1 10.003 ZAR
Day 2 10.006 ZAR
Day 3 10.009 ZAR
3-38
Day 4 10.012 ZAR
Day 5 10.015 ZAR
Day 100 10.30 ZAR
Day 101 10.3030 ZAR
Day 102 10.3060 ZAR
Day 103 10.3090 ZAR
After subscription, the adjustment for the investors in F100 will be:
UH
ID
Fund
ID
Balance (in Units)
UH1
F100
999.1008 (Difference in units - 0.3595)
UH2
F100
1998.2020 (Difference in units-0.7190)
UH3
F100
2997.3020 (Difference in units - 1.0784)
UH4
F100
3496.8530 (Difference in Units - 1.2582)
UH5
F100
2497.7520 (Difference in Units - 0.8987)
UH6
F100
1498.6510 (Difference in units 0.5392)
The adjustment due to redemption will be:
UH
ID
Fund
ID
Balance (in Units)
UH1
F100
99.7087 (Difference units 0.3595)
UH5
F100
2491.3740 (Difference in units 0.8987)
The new/actual Balances are:
UH
ID
Fund
ID
Balance (in
Units)
UH1
F100
899.3921
UH2
F100
1998.2020
UH3
F100
2997.3020
UH4
F100
3496.8530
UH5
F100
6.3780
UH6
F100
1498.6510
3-39
Based on this condition, the system redeems certain number of units from each investor.
UH
ID
Fund
ID
Balance (in Units)
UH1
F100
899.3921 - 899.460 = 0.0679
UH2
F100
1998.2020 - 1998.921 = 0.719
UH3
F100
2997.3020 - 2998.381 = 1.079
UH4
F100
3496.8530 - 3498.111 = 1.258
UH5
F100
6.3780 – 0 = 6.378
UH6
F100
1498.6510 - 1499.190 = 0.539
The system will generate a redemption transaction for the above adjustment units excluding
the Investor UH5 and will be available for reporting only in case of interim run. If it is on actual
rate at the end of the year, the same will be shared with other investors proportionately.
When the next interim or actual run is executed the system will ignore these adjustment
redemptions and while adjusting units these adjusted units will taken into account.
3.6.4
General Operating Rules Screen
To set up the General Operating Rules for a fund, use the General Operating Rules screen.
You can invoke this screen by clicking ‘General Operating Rules’ tab from the Fund Rules
Detail screen.
3.6.5
Checks
Before you set up a General Operating Rules profile record for a fund, it is desirable to ensure
that the fund already has an existing, unauthorized profile record.
3-40
3.6.6
Fields in General Operating Rules Setup Screen
3.6.6.1
Maintaining Basic Information
Fund ID
Display
This field indicates the ID fund for which you are setting up the General Operating Rules
profile. This information is defaulted from the Fund Demographics screen.
Rule Effective Date
Display
The Rule Effective Date for the fund, which you specified in the Fund Demographics screen,
is displayed here.
Post Priced?
Mandatory
Select ‘Yes’ in this field to indicate that the price for the fund will be announced Post
Transactions.
Allotment on Cheque Clearing
Mandatory
Select ‘Yes’ in this field to indicate that allocation must be done on the check clearing date,
using the price prevailing on that date, for transactions in which the payment mode is Check.
Price Declare Frequency
1 Character Maximum, Alphanumeric, Mandatory
Select a value to specify the frequency with which the price will be announced, from the
options provided.
If you are specifying the General Operating Rules for a Post-priced Fund, you must specify
this frequency as Daily
Retain IPO Balance?
Mandatory
Select ‘Yes’ in this field to indicate that the IPO Balance of unit holders must to be stored for
later use.
Next Price Declare Date
Date, Mandatory
Specify the next date upon which the fund price is to be declared. This date must be after the
Rule Effective Date of the fund, and the current system date.
Allow Rejections before Allocation?
Mandatory
Select ‘Yes’ in this field to indicate that a rejection of a transaction as applicable, for all
authorized transactions, prior to allocation. If this is not specified, then all authorized
transactions will be taken up for allocation directly.
No of Decimals for NAV
1 Character Maximum, Numeric, Mandatory
Indicate the maximum number of decimals that would be reckoned for rounding precision, for
the NAV.
3-41
Rounding Options for NAV
Alphanumeric, Mandatory
Indicate the rounding options for the value of the NAV for the selected transaction type, for
the fund.
Choose ‘Round Up’ to indicate rounding the value at the precision decimal place to the next
higher numeral.
Choose ‘Round Off’ to indicate normal rounding at the precision decimal.
Choose ‘Round Down’ to indicate truncation of the value at the precision decimal place.
Example
Let us suppose that the NAV for the fund on a certain date 02-03-2003 is 10.561234, and that
this value must be rounded to the 3rd decimal place.
If you indicate rounding up, then the value reckoned would be 10.562.
If you indicate rounding off, then, applying normal rounding off rules, the value reckoned
would be 10.561.
If you indicate rounding down or truncation, then the value would be truncated as it is, in the
3rd decimal place, and it would be reckoned as 10.561.
Ageing Policy
Alphanumeric, Mandatory
By default transactions are ordered in a First In First Out (FIFO) basis. If the unit holder has
specified as to how transactions are to be ordered, then click on the drop down menu and
select Txn Receipts.
For AMCs, those service distributors, where the distributor books are maintained in the AMC
at hierarchical levels mutually decided on through a service level agreement, the option of
ageing based on the hierarchy is available.
For funds in which there is a daily declaration of dividend (typically money market funds), and
in which redemption transactions would be requested across non-taxable and taxable
products, you can select the FIFO Across Products option if required. This feature is available
only if your installation has specifically requested for it.
For Funds where IOF and IRRF taxes are applicable on the profits the ageing policy should
selected to be ‘IOF/IRRF’ Optimization.
In case of Certificate Option funds, i.e. if certificate issue is to be based on the choice of the
investor at the time of transacting, then the ageing policy can be specified as ‘Hierarchy’.
Maturity Date
Date, Mandatory
Indicate the maturity date for the fund. This field is only visible and enabled if the fund is closeended.
Money Market Fund?
Indicate if the fund is for money market.
3-42
Exchange Rate Source
Optional
You can specify the exchange rate source from which the exchange rate for cash dividends
must be obtained. By default, the exchange rate source that you specify here is used for cash
dividends.
Multiple Price Basis?
Optional
You can use this field to indicate whether multiple price bases are allowed for the fund. Check
the box to indicate that multiple price bases are allowed.
If you select this option, price bases other than the standard bases such as NAV and the
Transaction Base Prices are also allowed for the fund.
Cancel Instruction
Optional
You can use this field to indicate whether standing instructions defined in respect of a unit
holder, in the fund, are to be cancelled. If you select this option, the standing instructions for
the transaction are cancelled, including those that are to be generated after an automatic
redemption occurs. Select the ‘Standing Instruction’ option in this field to indicate cancellation
of standing instructions.
If this option has been chosen in the General Operating Rules, the automatic redemption
process generates redemption transactions for unit holders in the fund, with the ‘Cancel
Instruction’ option automatically set.
If this option is set for an outflow transaction such as redemption, switch or transfer, the End
of Day process cancels all standing instructions (irrespective of the transaction type) for the
unit holder in the fund after the outflow transactions involving the unit holder have been
allocated for the day.
Ageing Date
Indicate the ageing basis for the fund. Based on the ageing date specified here, ageing for
period based loads are calculated.
The options available are:
Confirmation Date
Dealing Date
Transaction Date
By default, the ageing date is the transaction date. You are allowed to specify the ageing basis
if you are creating a new fund. You cannot modify this value, post authorization of the fund.
Investment Simulation Method
Specify if the investment simulation option would be applicable for the fund or not by selecting
an option from the drop down list. The options are :
Not Allowed
Historic NAV Based
3-43
Refer to the chapter ‘Generating Reports’ in Volume II of the Agency Branch User Manual for
further information regarding investment simulation.
Amount Block Allowed
Check this box to indicate that the amount block is allowed at the fund level.
Note
You will be allowed to enter details in the Amount Block Maintenance screen provided this
box is checked for the fund. Moreover, the amount blocked will not be available for redemption.
Allow Fee Calculation in Transaction Currency
Optional
If this field is checked, then the field ‘Fee Calculation Basis’ will be provided at the transaction
level, where you can indicate that load should be computed in terms of the transaction
currency in addition to the fund base currency for the fund.
Block Priority Number
Numeric; Conditional
The funds are selected in the ascending order of the priority number .When blocking is done
at UH/ CIF level across funds. During Unblock, funds will be selected in the reverse priority of
Block.
This is field is not optional, if check box 'Amount Block Allowed' is Y, it is mandatory. If check
box is N, Block priority will be disabled.
Guaranteed Fund
Mandatory
Select the option ‘Yes’ if you want the system to:
Re-compute the fund prices and adjust the units to the investors based on the reforecasted rates during interim periods and actual rate growth during annual rate
declaration time
Share the residual units of investors who have left before interim/annual rate declaration
time among the existing investors.
Dividend Equalization Applicable
Optional
Funds typically consist of units which have received some benefit in the form of income or
dividend distribution and units which have not received any such inflows. The former are G1
units and the latter G2 units.
Since the income and dividend distribution rates are different for units belonging to the G1 and
G2 groups, you can apply an equalization rate to equalize the benefit for the G2 units during
dividend distribution. This rate will be considered only for the G2 units. To enable application
of this rate, select ‘Yes’. Else you can retain the default value ‘No’ to carry out normal dividend
distribution.
Note
You cannot maintain stock dividend if you select this option.
3-44
3.6.6.2
Specifying the Automatic Redemption Preferences
If the fund is to have automatic redemption of units of the unit holder based on the threshold
balance, the preferences and guidelines may be laid down in this section.
Click on ‘Automatic Redemption Preferences’ tab to maintain these details:
Automatic Redemption Allowed
Optional
Select ‘Yes’ in this screen to indicate that Automatic Redemption is to be allowed for the fund.
This is applicable only for Open Ended funds. When the balance the unit holder falls below
a defined minimum level, then the investor will be intimated about it and will be provided with
some lead-time to either increase the balance above the minimum level or redeem all his
units. After the elapsed lead- time, if the unit holder balance still lies below the defined
minimum level, then the automatic redemption of those units will be done.
If automatic redemption is allowed for the fund, and this box is checked, the following fields
are enabled:
Elapsed Days
7 Characters Maximum, Numeric, Optional
Enter the number of days from the date of intimation after which Automatic Redemption will
be initiated. This is the lead-time provided to the investor.
Minimum Balance Type
1 Character Maximum, Alphanumeric, Optional
Enter the type of Minimum balance (amount / units) to be maintained for Automatic
Redemption. Choose from list.
Minimum Balance
Numeric, Optional
Enter the minimum balance (in amounts / units based on what balance type has been
specified above) to be maintained for Automatic Redemption.
3.6.6.3
Specifying Minimum / Maximum Holdings Check
You can indicate the minimum/maximum holdings balance that is required for redemption,
switch or transfer transaction, for a CIF or an individual unit holder, in the fund. The minimum
holdings value can be specified either as an amount, number of units, or redeemable value of
units.
3-45
Click on ‘Minimum/Maximum Holdings Check’ tab to maintain these details:
As part of the minimum holdings options, you can also indicate whether the holdings
considered for validation are those of all unit holders under a CIF, or for an individual unit
holder.
Note
The above check is not validated online during transaction capture or authorization. When
there are transactions into a fund violating the minimum holdings validation, the system
logs an exception in the Pre-End of Day Check screen. During the End of Day processes,
the system allocates the transactions, logging the exceptions in respect of them.
Minimum Holdings Indicator
Alphanumeric; Optional
In this field, you can indicate the basis upon which the minimum holdings check is performed.
The following options are available:
Amount: The value of holdings (at redemption price). If you choose this option you
must specify the minimum amount in the Minimum Holdings Amount field. If the check
is to apply at CIF level, the redeemable value of units held by all unit holders under the
CIF in the fund is checked against the Minimum Holdings Amount.
Units: The number of units held. If you choose this option you must specify the
minimum number of units in the Minimum Holdings Units field. If the check is to apply
at CIF level, the total number of units held by all unit holders under the CIF in the fund
is checked against the Minimum Holdings Units.
Lower of Amount/Units: The minimum amount specified or the redeemable value of
minimum units specified, whichever is lower.
Higher of Amount/ Units: The minimum amount specified or the redeemable value of
minimum units specified whichever is higher.
Not Applicable: The minimum holdings validation is not performed if you choose this
option.
If you choose either of the last two options (Lower of Amount/Units or Higher of Amount/
Units), you must specify the applicable minimum amount in the Minimum Holdings Amount
field as well as the applicable minimum number of units in the Minimum Holdings Units field.
Also, in either case, the redeemable value of the total number of units held by all investors
under the CIF is considered for validation, if the check is to apply at CIF level.
3-46
Minimum Holdings Apply For
Alphanumeric; Mandatory if Minimum Holdings Indicator is specified
In this field, indicate whether the minimum holdings check is applicable for CIFs, or for
individual unit holders.
If the check is to apply at CIF level, the redeemable value of the total number of units held by
all unit holders under the CIF in the fund is considered for validation.
Minimum Holdings Amount
Numeric; Mandatory if Minimum Holdings Indicator is specified
Specify the minimum redeemable value of holdings in the fund, for a redemption, switch or
transfer transaction involving a CIF or individual unit holder.
Example
For the Royal Trust Growth Fund, you have selected the ‘Amount’ option as the Minimum
Holdings Indicator for redemption, switch and transfer transactions. You have also specified
the Minimum Holdings Amount value as 1200 USD (the fund base currency is USD).
The minimum holdings validation is required to be enforced for individual unit holders and not
for CIFs.
Therefore, the redeemable value of total number of units held by an individual unit holder, in
the Royal Trust Growth Fund must exceed or equal 1200 USD, for a redemption, switch or
transfer transaction involving the unit holder.
Minimum Holdings Units
Numeric; Mandatory if Minimum Holdings Indicator is specified
Specify the minimum number of units required to be held by an individual unit holder, or a CIF,
in the fund, for a redemption, switch or transfer transaction.
Example
For the Carey Bugle Growth Fund, you have selected the ‘Units’ option as the Minimum
Holdings Indicator for redemption, switch and transfer transactions. You have also specified
the Minimum Holdings Units value as 1000.
The minimum holdings validation is required to be enforced for individual unit holders and not
for CIFs.
Therefore, the total number of units held by an individual unit holder, in the Carey Bugle
Growth Fund must equal or exceed 1000 units, for a redemption, switch or transfer
transaction involving the unit holder.
A note on the minimum holdings validation
If the Minimum Holdings Indicator selected is ‘Lower of Amount/Units’, the redeemable value
of the specified Minimum Holdings Units is arrived at, and compared with the Minimum
Holdings Amount specified. The lower of the two values is considered as the minimum
holdings value against which the minimum holdings validation would be made. Similarly, if the
Minimum Holdings Indicator selected is ‘Higher of Amount/Units’, the redeemable value of the
specified Minimum Holdings Units is arrived at, and compared with the Minimum Holdings
Amount specified, and the higher of the two values is considered as the minimum holdings
value against which the minimum holdings validation would be made.
3-47
Example
For the Burton Carey Growth Fund, you have selected the ‘Lower of Amount/Units’ option as
the Minimum Holdings Indicator for redemption, switch and transfer transactions. You have
also specified the Minimum Holdings Amount value as 1200 USD, and the Minimum Holdings
Units value as 1000 units.
The minimum holdings validation is required to be enforced for CIFs, and not for individual
unit holders.
To arrive at the minimum holdings value against which the validation would be made, the
redeemable value of 1000 units is computed, at the redemption price. If the redemption price
is 0.8, the redeemable value = 1000 * 0.8 = 800 USD.
The redeemable value obtained (800 USD) is compared with the Minimum Holdings Amount
specified (1200 USD). Since the Minimum Holdings Indicator chosen is ‘Lower of Amount/
Units’, the minimum holdings value to be validated against, is 800 USD. Therefore, the
redeemable value of total number of units held by all unit holders under a CIF, in the Burton
Carey Fund must equal or exceed 800 USD, for redemption, switch or transfer transaction
involving a CIF.
If the Minimum Holdings Indicator were selected as ‘Higher of Amount/Units’, the higher value
(1200 USD) would be considered as the minimum holdings value against which the validation
would be made. Therefore, the redeemable value of total number of units held by all unit
holders under a CIF, in the Burton Carey Fund would have to equal or exceed 1200 USD, for
a redemption, switch or transfer transaction involving a CIF.
Min Holdings Threshold limit
Numeric
Specify the percentage value to be applied on minimum balance amount or units setup here.
Min Lock-in Period for Gain (Days)
Numeric, Optional
Specify the minimum lock-in period applicable for the fund. During subscription transaction,
the lock-in period specified at the transaction level should be equal ot or greater than the
minimum period indicated here.
Max Lock-in Period for Gain (Days)
Numeric, Optional
Specify the maximum lock-in period beyond which if the subscription is redeemed gains would
be passed over to the Unitholder and so IOF and IRRF taxes will be applicable. This should
be greater than or equal to the Min Lock-in Period.
Note
When a transaction is redeemed within the Lock-In period, redemption happens at the lowest applicable NAV as on date of Subscription or on the date of Redemption.
Default Lock-in Period for Gain (Days)
Numeric, Optional
Specify the default lock-in period within which if the subscription is redeemed no gains would
be passed over to the Unitholder and so IOF and IRRF taxes will not be applicable.
3-48
Note
The default lock-in period should be within the minimum and maximum lock in period.
3.6.6.4
Specifying Advance Options
Click on ‘Advance Options’ tab to maintain specify advance options:
3.6.6.5
Fields in Advance Option Maintenance
Maintain Trading Box?
Select ‘Yes’ in this field to indicate to the system that the trading functions must be enabled
for the fund. This means that for the fund, all trading transactions and the relevant processing
are allowed. If you specify ‘No’, then you will not be able to use the trading functions and effect
trading transactions in the fund.
Refer the Suspense Accounts, Statutory Accounts and Trading chapter in the Fund Manager
User Manual for a fuller discussion of the trading functions available in the FC-IS system.
CDSC Fund?
Optional
If Contingent Deferred Sales Charge (CDSC) is applicable for transactions in this fund, then
specify the CDSC calculation method to be used for the fund. The options are:
LOCOM – Lower of cost or Market Value
Market Price – Market appreciation method
Class B – CDSC Class B method
Not Applicable – CDSC not applicable
CDSC Applicable for Switches?
Optional
Select ‘Yes’ in this field to indicate that the Contingent Deferred Sales Charge (CDSC) must
be applicable to switch or exchange transactions.
Reinvestments First
Optional
Select ‘Yes’ in this field to indicate that reinvestment transactions must be taken up first for
aging during computation of Contingent Deferred Sales Charge for redemption transactions
in this fund.
3-49
EUSD Scope
Optional
Specify the EUSD scope of the fund i.e. if EUSD is applicable only for redemption and switch
transactions or only for dividend or for both.
Include Holding Period
Optional
Specify whether the holding period should be considered while calculating the age of
investments during computation of Contingent Deferred Sales Charge.
Note
This option will be enabled only for CDSC applicable funds.
3.6.6.6
Specifying Limit Order Processing Options
Click on ‘Limit Order Processing Options’ tab to maintain these details:
Allow Limit Orders
Check this box to indicate that limit order processing is enabled for the fund.
Allow Future Dated Transactions
Check this box to indicate that future dated transactions, in respect of limit order processing,
are allowed for the fund.
Automatic Processing
Check this box to indicate that automatic processing, in respect of limit order processing, is
allowed for the fund.
This option is intended for funds floated by your AMC. If automatic processing is enabled for
such funds, the limit order transactions are automatically generated and allocated by the end
of day processes according to the price and date options specified. For third party funds,
where your AMC would proceed with limit order processing only after appropriate confirmation
is received, you could disable this option.
Pricing Rule
Alphanumeric; Optional
Specify the option to be considered if the date on which the limit order is to be executed is a
fund or system/ AMC holiday. You could indicate that the transaction be generated prior to the
holiday, or following the holiday. Select the appropriate option (Prior or After) in this field.
3-50
3.6.6.7
Transaction Cancellation Period Section
In this section, you must maintain the options in the fund rules for processing cancellations of
transactions. Click on the ‘Transaction Cancellation Period’ Tab to maintain the details:
3.6.6.8
Fields in Transaction Cancellation Period Maintenance
Transaction Cancellation Period
You can specify a number of calendar days that represents a period from the date of
transaction within which cancellations are allowed.
Transaction Cancellation Allowed
You can specify whether cancellation is allowed for the fund. Choose ‘Yes’ if you wish to allow
cancellation or else choose ‘No’.
Allow Switching in Cancellation Period
You can specify if you wish to allow switch transactions any time within the cancellation
period. Choose ‘Yes’ to allow switches in the holdings due to the transaction else choose ‘No’.
Cancellation Price Basis
You can specify the price basis to be followed for cancellations. The price basis could be NAV
for a single pricing fund. For other type of funds, the basis could be Bid or Offer Price.
The current market value computation as well as the cancellation amount would depend on
the bid / offer / NAV.
3.6.6.9
Check Writing Options Section
In this section, you can specify the rules that govern check writing for the fund, such as:
–
Whether check writing is allowed to investors for this fund
–
The limits on the amount for a check.
–
The minimum period for which units must be held in the investor account for the
fund, before they are redeemed by a check.
–
Whether the unit holder can close the account through a redemption check
–
If the fund is a retirement fund, whether check facility can be made available for the
fund
–
Applicable penalties on check redemption due to contravening any of the limits for
check amount, minimum period, or insufficient account balance or stop payment
instructions on a check.
3-51
3.6.6.10 Fields in Check Writing Option Maintenance
Click on the ‘Check Writing’ Tab to indicate the check writing options:
Allow Check Writing
Optional
You can use this field to indicate whether check writing facility is allowed for investors who
invest in this fund. Check this box to indicate that check writing is allowed.
Account Closure
Optional
You can use this field to indicate whether an investor can close the unit holder account
through check redemption. Check this box to indicate that account closure through check
writing is allowed.
Minimum Amount for Checks (USD)
Numeric, Optional - If check writing is allowed for the fund, then this information is
mandatory.
Specify the minimum amount that can be redeemed through a redemption check, for investors
holding balances in the fund, who have opted for check writing facility. If the amount written
on a check falls below this value, the check attracts penal charges.
Minimum Holding Period (Days)
Numeric, Optional - If check writing is allowed for the fund, then this information is
mandatory.
Specify the minimum number of days for which units must be held in the investor account
before they can be redeemed through a redemption check.
Maximum Amount for Checks (USD)
Numeric, Optional - If check writing is allowed for the fund, then this information is
mandatory.
Specify the maximum amount that can be redeemed through a redemption check, for
investors holding balances in the fund, who have opted for check writing facility. If the amount
written on a check exceeds this value, the check attracts penal charges.
3-52
Penalty Applicable
Optional
You can use this field to indicate whether an investor can close the unit holder account
through a check redemption. Check this box to indicate that account closure through check
writing is allowed.
Minimum Holding Period Violation
Optional
You can use this field to indicate whether a violation of the holding period for balances in this
fund, by a unit holder using the check writing facility must be validated for. Check this box to
indicate validating of violation of the holding period.
Insufficient Account Balance
Optional
You can use this field to indicate whether insufficient balance in this fund, in the account of a
unit holder using the check writing facility must be validated for. Check this box to indicate
validating of insufficient balance situations.
Stop Payment Request on Check
Optional
You can use this field to indicate whether a stop payment request can be applied on a check
issued by a unit holder availing check writing facility, for this fund. Check this box to indicate
that a stop payment can be applied.
Minimum and Maximum Check Amount Violation
Optional
You can use this field to indicate whether a violation of the minimum and maximum check
amounts by a unit holder using the check writing facility in this fund, must be validated for.
Check this box to indicate validating of violation of the maximum and minimum check
amounts.
3.6.6.11 FATCA Information Section
In this section you can capture the details regarding Foreign Account Tax Compliance Act.
Click on ‘FATCA Information’ tab to maintain the details.
3-53
3.6.6.12 Fields in FATCA Information
FATCA Applicable
Alphanumeric; Optional
Select Yes or No to indicate whether FATCA is applicable. However, the system defaults the
value ‘No’.
FATCA Classification
Alphanumeric
Select the classification of FATCA from the adjoining option list. FATCA Classification is
mandatory if FATCA Applicable is ‘Yes’.
FATCA Reason
Alphanumeric; Optional
Specify the reason for FATCA classification.
Employer ID Number
Alphanumeric
Specify the employer ID number. The Employer ID Number is mandatory if the FATCA
Applicable is ‘Yes’.
FATCA Effective Date
Date Format
Specify the FATCA Effective Date if FATCA is applicable.
FATCA Effective Date cannot be lesser than the fund start date.
FATCA Sponsor Type
Mandatory
Select the type of FATCA sponsor from the drop-down list. Following are the options available
in the drop-down list:
Sponsoring Entity
Sponsored
Sponsoring Entity Type
Alphanumeric; 8 Characters; Mandatory
Specify the sponsoring Entity type. You can also select the valid sponsoring entity type from
the adjoining option list.
Sponsoring Entity ID
Alphanumeric; 8 Characters; Mandatory
Specify the sponsoring Entity ID. You can also select the valid sponsoring entity ID from the
adjoining option list.
Global Intermediary Identification Number
Alphanumeric; 16 Characters; Optional
Specify the global intermediary identification number.
GIIN Issue Date
Date Format; Optional
Specify the GIIN issue date.
3-54
The GIIN issue date cannot be greater than the application date.
GIIN Expiry Date
Date Format; Optional
Specify the GIIN expiry date.
The GIIN expiry date cannot be lesser than the GIIN issue date.
GIIN Verified Flag
Display
System displays the GIIN verified flag based on the GIIN. If you specify the GIIN then, GIIN
verified flag gets displayed as ‘No’. If you select the GIIN then, GIIN verified Flag gets
displayed as ‘Yes’.
FATCA WHT Applicable
Optional
Select if FATCA WHT is applicable or not from the drop-down list. Following are the options
available in the drop-down list:
Yes
No
FATCA WHT Indicator
Optional
Select the FATCA WHT indicator from the drop-down list. Following are the options available
in the drop-down list:
Exchange Info
Withhold
FATCA WHT Dividend Level
Optional
Select the FATCA WHT dividend level from the drop-down list. Following are the options
available in the drop-down list:
Yes
No
FATCA WHT Intermediary Commission
Optional
Select the FATCA WHT broker commission from the drop-down list. Following are the options
available in the drop-down list:
Yes
No
FATCA WHT Trailer Commission
Optional
Select the FATCA WHT trailer commission from the drop-down list. Following are the options
available in the drop-down list:
Yes
No
3-55
3.7
Hedge Fund Processing Rules
You can specify the fund rules associated with hedge funds in ‘Hedge Fund Processing Rules’
screen. To invoke this screen click ‘Hedge Fund’ button in Fund Rules detail screen. You can
click this button only if the related fund has been specified as a hedge fund.
3.7.1
Fields in Hedge Fund Processing Rules Screen
Hedge Fund Type
Alphanumeric, Mandatory
Select the type of the hedge fund from the drop-down list provided. The following options are
available:
Single/Simple - simple hedge fund is a regular fund with normal processing rules.
Master Fund - master-feeder fund structure accepts assets from both foreign and
domestic investors in the most tax and trading efficient manner possible. For master
funds, you can maintain feeder funds which will be of type ‘Single/Simple’.
Fund of Hedge Funds - fund of hedge fund invests in hedge funds rather than investing
in individual securities. You can capture the details of the underlying funds in ‘Fund
Linkage Details’ section.
Side Pocket - side pocket is a special type of account used in hedge funds to separate
illiquid assets from other more liquid investments
3-56
Lead Series – the initial fund series that is created in case of series method of
performance fee calculation
Follow-up Series – the subsequent fund series created for the following accounting
periods.
Note
–
You can not perform any transactions if the hedge fund is of type ‘Side Pocket’
–
‘Lead Series’ and ‘Follow-up Series’ are applicable only for ‘Series’ type of performance fee computation.
For more details on various methods of performance fee computation, refer the section titles
‘Computing Performance Fee for Hedge Funds’ section in this user manual.
For more details on different types of hedge funds, refer Overview chapter in this user
manual.
Hedge Fund Manager
Alphanumeric, Mandatory
Specify the name of the hedge fund manager or select the fund manager from the option list
provided. All entities maintained as fund managers in ‘Entity maintenance’ screen are
displayed in the list.
Transaction Generation Basis
Alphanumeric, Optional
Select the criteria based on which the transaction has to be generated. The following options
are available in the drop-down list:
Net
Non-Netted
Non-net Txn. Mode
Note
This is applicable for master funds and fund of funds.
Master Fund UH ID
Alphanumeric, Optional
Specify the unit holder Id for which the master fund transaction is generated.
Note
This is applicable only for master funds.
3.7.1.1
Performance Fee Details Section
Performance fee is a periodic fee collected by the fund manager from the investors of the
fund, calculated as a percentage of the fund’s profit.
In this section you can specify your preferences related to performance fee calculation. The
values you specify here are not applicable for side pocket type of hedge funds.
3-57
Group ID
Alphanumeric, Optional
Specify the rule group to be used for performance fee calculation or select the same from the
option list provided. All valid rule groups maintained in the system are displayed in the option
list.
Description
The description associated with the selected rule group gets displayed here.
Computation Method
Alphanumeric, Optional
Specify the computation method to be used for performance fee calculation or select the
same from the option list provided. The following options are available in the option list:
ECCL - Equalization Credit/Contingent Liquidation
ECED - Equalization Credit/Equalization Debit
FR - Forced Redemption
SER - Series Method
Description
The description associated with the computation method selected, gets displayed here.
Performance Fee %
Numeric, Optional
Specify the percentage of the fund value that needs to be given as the performance fee.
Accrual Frequency
Optional
Select the frequency of accrual of performance fee from the options provided in the dropdown list:
Daily
Weekly
Monthly
Quarterly
Yearly
Payment Frequency
Optional
Select the frequency of payment of performance fee from the options provided in the dropdown list:
Monthly
Quarterly
Half-yearly
Yearly
Next Accrual Date
Date, Optional
Specify the date on which the accrual of the performance fee should happen next. You need
to specify this value only once during initial fund setup.
3-58
For subsequent accruals, this date gets displayed automatically based on the accrual
frequency.
Next Payment Date
Date, Optional
Specify the date on which the payment of the performance fee should happen next. You need
to specify this value only once during initial fund setup.
For subsequent payments, this date gets displayed automatically based on the accrual
frequency.
Last Accrual Date
The system automatically displays the date on which performance fee accrual happened last.
Last Payment Date
The system automatically displays the date on which performance fee was paid last.
3.7.1.2
Hurdle Rate Details Section
Hurdle rate is the minimum fund returns necessary for a hedge fund manager to start
collecting performance fees. The hurdle rate is usually tied to a benchmark rate such as
LIBOR.
In this section you can specify details related to hurdle rates used for performance fee
calculation. The values you specify here are not applicable for side pocket type of hedge
funds.
Hurdle Rate Applicable
Optional
Select the option to indicate whether hurdle rate is applicable for performance fee calculation.
Select ‘Yes’ to indicate that hurdle rate needs to be considered for performance fee
calculation and ‘No’ to indicate otherwise.
Hurdle Type
Optional
Select the type of hurdle from the options provided in the drop-down list. The following options
are available:
Cumulative
Non-cumulative
Reset Hurdle
Optional
Select ‘Yes’ to indicate that the hurdle rate needs to be reset and ‘No’ to indicate otherwise.
Hurdle rate gets reset if the fund price at the end of the performance fee calculation fee period
is greater than the total of High Water Mark and hurdle rate.
Note
This is applicable only for ‘Cumulative’ type of hurdles.
3-59
Hurdle Rate Type
Optional
Select the type of hurdle rate from the options provided in the drop-down list. The following
options are available:
Fixed
Variable
Semi variable
Calculation Method
Optional
Select the method to be used for calculating the hurdle rate. The following options are
available in the drop-down list:
Simple
Compounded
Rate Code
Optional
Specify the interest rate code to be used for hurdle rate calculation. You can also select the
rate code from the option list provided.
Note
This is applicable only for hurdle rates of type ‘Variable’ or ‘Semi-variable’.
Day Basis
Optional
Select the basis on which the number of days is considered for hurdle rate calculation. The
following options are available in the drop-down list:
Actual
360
365
Rate Basis
Optional
Select the basis on which the hurdle rate is calculated from the following options available in
the drop-down list:
Percent - applicable for ‘Variable’ and ‘Semi-variable’ hurdle rate types
Basis Points – applicable only for ‘Semi-variable’ hurdle rate type
Rate
Optional
Specify the value associated with the rate code that is considered for computing the hurdle
rate. If you have selected ‘Basis Points’ as rate basis, then a percentage value of this basis
point is considered for computing the hurdle rate.
3.7.2
Fund Linkage Details
You can indicate the linkages of a fund in this section. You can specify the following details
here:
3-60
Fund Id
Alphanumeric, Mandatory
Specify the fund Id of the linked fund or select the linked fund Id from the option list provided.
For master funds, this list will display the list of feeder funds and for fund of funds this list will
display the list of underlying funds.
If the hedge fund type is specified as ‘Follow-up Series’, you can specify the fund Id of the
related ‘Lead Fund’ here.
Note
For side pocket funds the main fund name is captured here with the percentage specified
as blank.
Fund Name
The name of the selected fund gets displayed here.
Percentage
Numeric, Optional
Specify the percentage to be used for generating the underlying transaction.
Note
For fund of funds the sum of percentage of investment in each fund should not be greater
than 100.
Unit Holder Id
Alphanumeric, Optional
Specify the unit holder Id for generating the underlying transaction.
Note
Unit Holder ID is applicable only for underlying funds incase of Fund of Funds.
3-61
3.7.3
Investor Category Details
In this section, you can override the performance fee percentage details at the investor
category level. Click ‘Investor Category Details’ tab to specify these details.
Investor Category
Alphanumeric, Optional
Specify the investor category of the unit holder or select the category from the option list
provided. All unit holder categories existing in the system get displayed in the option list.
Investor Category Name
The name associated with the investor category selected gets displayed here.
Performance Fee %
Numeric, Optional
Specify the percentage of performance fee to be paid for the selected investor category. This
value overrides the performance fee percentage specified generically.
3.8
Fund Investment Components
To validate the Prudential Investment Guidelines it is mandatory to define the various
investment components that constitute the fund investment for a product or policy. Investment
components are a division of the fund that is allocated for investment in policies. These
3-62
components may be individual components or a combination of two or more components.
Based on the relation of the allotted fund characteristic, these components are allotted a
percentage or ratio, which describes the relation of these funds to the total Fund Investment.
Refer the chapter ‘Prudential Investment Guidelines Standard’ and ‘FOREX Compliance’, in
the LEP User Manual for more information on maintaining Prudential Investment Guidelines
and forex compliance.
To maintain the Fund Investment Components, you need to:
Define the various investment components as part of system parameters maintenance
under the parameter code “INVESTMENTCOMP”
Specify the Investment component code and its corresponding description.
Note
The system does not differentiate onshore /offshore components at this level.
3.8.1
Maintaining Ratios of the Fund Level Components
You need to maintain ratios for respective investment components type according to the
following considerations:
3.8.2
The total sum of these ratios must be equal to 100
The list of Investment Components is available as per the system parameters
maintenance
Invoking Fund Investments Component Screen
You can invoke the ‘Fund level Investment Components – Ratio Maintenance Detail’ screen
by typing ‘UTDFICRM’ in the field at the top right corner of the Application tool bar and clicking
on the adjoining arrow button. Select ‘New’ from the Actions menu in the Application tool bar
or click new icon to input the details of the fund component.
3-63
Fund ID
Select the Fund Id from the drop down list. The list contains a record of all stored fund types.
You can select the fund relevant for the activity under process by clicking on.
Fund Level Investment Components-ratio Maintenance
After selecting the required fund types you are provided with the records matching the input
information specified to the system.
Investment Component
The portion of the allocated Fund investment is displayed here as the Investment component.
Percentage
This is the ratio or percentage of the Total Investment Fund including the selected component.
It should be input as 100.
After capturing these details, click ‘Ok’ button to save the component. The following screen is
invoked stating that the component has been saved.
3.8.3
Fund Investment Component Summary Screen
You can perform the following operations in the Fund Investment Component Summary
screen:
3.8.3.1
Retrieving Record in the Fund Investment Component Summary Screen
You can retrieve a previously entered record in the Summary Screen, as follows:
Invoke the ‘Fund level Investment Components – Ratio Maintenance Summary’ screen by
typing ‘UTSFICRM’ in the field at the top right corner of the Application tool bar and clicking
on the adjoining arrow button. Specify any or all of the following details in the corresponding
fields:
The status of the record in the Authorization Status field. If you choose the ‘Blank Space’
option, then all the records are retrieved.
The status of the record in the Record Status field. If you choose the ‘Blank Space’
option, then all records are retrieved
Fund ID
Click ‘Search’ button to view the records. All the records with the specified details are retrieved
and displayed in the lower portion of the screen.
3-64
Note
You can also retrieve the individual record detail from the detail screen by querying in the
following manner:
–
Press F7
–
Input the Fund ID
–
Press F8
You can perform Edit, Delete, Amend, Authorize, Reverse, Confirm operations by selecting
the operation from the Action list. You can also search a record by using a combination of %
and alphanumeric value.
Example
You can search the record for Fund ID by using the combination of % and alphanumeric value
as follows:
Search by A%: The system will fetch all the records whose Fund ID starts from Alphabet
‘A’. For example, AGC17, AGVO6, AGC74 and so forth.
Search by %7: The system will fetch all the records whose Fund ID ends by numeric
value’ 7’. For example, AGC17, GSD267, AGC77 and so forth.
3.8.3.2
Search by %17%: The system will fetch all the records whose Fund ID contains the
numeric value 17. For example, GSD217, GSD172, AGC17 and so forth.
Editing Fund Investment Component Record
You can modify the details of a Fund Investment Component record that you have already
entered into the system, provided it has not been subsequently authorized. You can perform
this operation as follows:
Invoke the Fund Investment Component Summary screen from the Browser.
Select the status of the record that you want to retrieve for modification in the
Authorization Status field. You can only modify records that are unauthorized.
Accordingly, choose the unauthorized option.
Specify any or all of the details in the corresponding fields to retrieve the record that is
to be modified.
Click ‘Search’ button. All unauthorized records with the specified details are retrieved
and displayed in the lower portion of the screen.
3-65
3.8.3.3
Double click the record that you want to modify in the list of displayed records. The Fund
Investment Component Detail screen is displayed.
Select Unlock Operation from the Action list to modify the record. Modify the necessary
information.
Click Save to save your changes. The Fund Investment Component Detail screen is
closed and the changes made are reflected in the Fund Investment Component
Summary screen.
Viewing Fund Investment Component Record
To view a record that you have previously input, you must retrieve the same in the Fund
Investment Component Summary screen as follows:
3.8.3.4
Invoke the Fund Investment Component Summary screen from the Browser.
Select the status of the record that you want to retrieve for viewing in the Authorization
Status field. You can also view all records that are either unauthorized or authorized
only, by choosing the Unauthorized/ Authorized option.
Specify any or all of the details of the record in the corresponding fields on the screen.
Click ‘Search’ button. All records with the specified fields are retrieved and displayed in
the lower portion of the screen.
Double click the record that you want to view in the list of displayed records. The Fund
Investment Component Detail screen is displayed in View mode.
Deleting a Fund Investment Component Record
You can delete only unauthorized records in the system. To delete a record that you have
previously entered:
3.8.3.5
Invoke the Fund Investment Component Summary screen from the Browser.
Select the status of the record that you want to retrieve for deletion.
Specify any or all of the details in the corresponding fields on the screen.
Click ‘Search’ button. All records with the specified fields are retrieved and displayed in
the lower portion of the screen.
Double click the record that you want to delete in the list of displayed records. The Fund
Investment Component Detail screen is displayed.
Select Delete Operation from the Action list. The system prompts you to confirm the
deletion and the record is physically deleted from the system database.
Authorizing a Fund Investment Component Record
An unauthorized Fund Investment Component record must be authorized in the system
for it to be processed. To authorize a record:
Invoke the Fund Investment Component Summary screen from the Browser.
Select the status of the record that you want to retrieve for authorization. Typically,
choose the unauthorized option.
Specify any or all of the details in the corresponding fields on the screen.
Click ‘Search’ button. All records with the specified details that are pending
authorization are retrieved and displayed in the lower portion of the screen.
Double click the record that you wish to authorize. The Fund Investment Component
Detail screen is displayed. Select Authorize operation from the Action List.
When a checker authorizes a transaction, details of validation, if any, that were overridden by
the maker of the transaction during the Save operation are displayed. If any of these overrides
results in an error, the checker must reject the transaction.
3-66
3.8.3.6
Amending Fund Investment Component Record
After a Fund Investment Component record is authorized, it can be modified using the Unlock
operation from the Action List. To make changes to a record after authorization:
3.8.3.7
Invoke the Fund Investment Component Summary screen from the Browser.
Select the status of the record that you want to retrieve for authorization. You can only
amend authorized records.
Specify any or all of the details in the corresponding fields on the screen.
Click ‘Search’ button. All records with the specified details that are pending
authorization are retrieved and displayed in the lower portion of the screen.
Double click the record that you wish to authorize. The Fund Investment Component
Detail screen is displayed in amendment mode. Select Unlock operation from the Action
List to amend the record.
Amend the necessary information and click on Save to save the changes.
Authorizing Amended Fund Investment Component Record
An amended Fund Investment Component record must be authorized for the amendment to
be made effective in the system. The authorization of amended records can be done only from
Fund Manager Module and Agency Branch module.
The subsequent process of authorization is the same as that for normal transactions.
3.8.4
Copying Attributes
If you want to create a new Fund Investment Component record with the same attributes of
an existing one, you can copy the attributes of an existing Fund Investment Component
record to a new one.
To copy the attributes:
Retrieve the record whose attributes the new Fund Investment Component should
inherit. You can retrieve the record through the Summary screen or through the F7-F8
operation explained in the previous sections of this chapter.
Click on Copy.
Indicate the ID for the new Fund Investment Component. You can, however, change the
details of the new maintenance.
3-67
4. Setting Up Fund Rules (II)
4.1
Transaction Processing Rules Maintenance
This fund rule lays down the guidelines according to which transactions of each transaction
type will be processed for each fund. These guidelines include the following:
The frequency at which the transaction will be processed, and the times, periods and
date ranges during which it may be processed. The cut-off times for accepting
transactions can also be maintained here.
The limits on the number of transactions allowed for a unit holder in the fund.
The volume ranges of the transaction, both in amount and units, and the volumes
allowed for specific investor categories in the fund.
The pricing details, such as the basis of price definition, the base price factor, the
number of decimals for the price, the price lag and the back dating limits.
Allocation details such as allowing of online allocation, credit card/check allocation on
par with cash, allocation and confirmation lags, and the allocation policies.
The limit redemption mode, which can be either percentage of holdings, amount or
units.
The limits for initial transactions and standing instructions transactions.
The limits for transactions accepted through different means of purchase.
The final rounding precision patterns for transaction base prices and unit prices.
The final rounding precision for the computation of units, for each transaction type.
The rules for gross or net processing modes for IPO, subscription and redemption
transactions for a fund.
The payments lag, if any, to be applicable for redemption payouts.
The minimum holdings required for standing instruction transactions in the fund
To set up the Transaction Processing Rules for a fund, use the Transaction Processing Rules
screen.
You can invoke this screen by clicking ‘Transaction Processing Rules’ tab from the ‘Fund
Rules’ screen.
The screen displays the details of the fund for which the rules are being set up, in the Fund
Information section, and the details of all Transaction Processing Rules already maintained
for any transaction type, in the Maintained Transaction Details section. It also contains the
following data entry sections, each of which can be invoked by clicking the appropriate tab:
4-1
4.1.1
Basic Information
Transaction Rules
Unit Holder Rules
Transaction Limits
Pricing
Policies
Maintained Transaction Details Section
The details of rules that have already been made for any transaction types, if any, are
displayed in the Maintained Transaction Details section. The following information is
displayed in the box for each transaction type, and clicking on the row of each transaction type
will cause the transaction processing rules profile for that transaction type to be displayed in
the lower portion of the screen, and in each of the sections.
If you need to view all the details of a particular transaction processing rules profile for a
transaction type in the fund, click that transaction type in this box and the profile will be
populated in the lower half of the screen and in the sections.
4.1.2
Checks
Before you set up a Transaction Processing Rules profile record for a fund and transaction
type, it is desirable to ensure that the following information is already setup in the system:
The fund already has an existing, unauthorized Fund Rules profile record.
The fund already has an existing, unauthorized Shares Characteristics profile record.
4.1.3
Fields in Transaction Processing Rules Setup Screen
4.1.3.1
Fund Information Section
Fund ID
Display
This field indicates the ID fund for which you are setting up the Transaction Processing Rules
profile. This information is defaulted from the Fund Demographics screen.
Rule Effective Date
Display
The Rule Effective Date for the fund, which you specified in the Fund Demographics screen,
is displayed here.
4-2
4.1.3.2
Basic Information Section
Transaction Type
Display Only
All transaction types, for which a transaction processing rules profile has been maintained for
the fund, are displayed here.
Transaction Frequency
Display Only
The frequency at which the transaction type will operate for the fund is displayed.
Transaction Enabled?
Mandatory
Select ‘Yes’ in this field to indicate that the transaction is enabled for the fund. It is possible to
set up a temporary suspension of transactions, even if the transactions are open for the fund.
Start Date
Display Only
The date from which the transaction type is enabled for transaction entry and processing for
the fund is displayed here.
End Date
Display Only
The date up to which the transaction type is enabled for transaction entry and processing for
the fund is displayed here.
Net Amount
Indicate from the drop-down list, if the processing mode for transaction type is Net or not.
Gross Amount
Indicate from the drop-down list, if the processing mode for transaction type is gross or not.
Net Unit
For transactions with a net processing mode, the amount value of the transaction will be
processed as a net value apart from the charges.
4-3
Gross Unit
For transactions with a gross processing mode, the value of the transaction, whether as an
amount or a number of units, will be processed as a gross value from which any applicable
charges will be deducted.
Note: Opting for a gross or net mode in transaction processing is mode is only available for
IPO, subscription or redemption transactions.
Restrict Sale to Investor
Optional
You can use this field to indicate that transactions of the selected type, into the fund must only
be available to existing customers, and not to new customers. Select ‘Yes’ to indicate this.
If no such restrictions are applicable, select ‘No’ in this field.
When the system applies this restriction, it considers a new investor to be one whose balance
holding in the fund is zero. This restriction is only applicable to the inflow transaction types
subscription, switch in and transfer.
Transaction Suspended?
Optional
You can use this field to suspend transactions of specific types for a fund. Check this box to
indicate that the transactions of the selected type are suspended for the fund. The
suspension would be enforced for transactions of the specific type both entered through the
Transaction Detail screens as well as system-generated and uploaded transactions.
Note
If the fund is suspended (as specified in the Fund Demographics), transactions of all types
are not allowed into the fund. If the fund is not suspended, transactions of specific types
that have been suspended for the fund in the Transaction Processing Rules (if any) are
not allowed
Maximum IPO Issue Size
Numeric; Optional
Specify the maximum issue size for IPO transactions in the fund. This value places a
restriction on the total IPO order value for the fund. If the total order value units exceed the
maximum issue size, the number of allocated units is computed as follows:
Quantity allotted = Quantity applied * (Maximum issue size / Total order value)
Allow Systematic Plans?
Optional
By default this indicator would remain checked. Uncheck this if you do not wish to allow
systematic investment plans.
This indicator would be allowed for capture for IPO Subscription, Subscription, Redemption,
Transfer and Switch type of transactions.
4.1.3.3
Transaction Rules Section
In this section, the following details may be captured:
The frequency at which the transaction will be processed, and the times, periods and
date ranges during which it may be processed.
4-4
The limits on the number of transactions allowed for a unit holder in the fund.
The volume ranges of the transaction, both in amount and units, and the volumes
allowed for specific investor categories in the fund.
Start Period
3 Characters Maximum, Numeric, Mandatory
Enter a value to specify the Start Period within the frequency mentioned above. Within a
particular frequency, you have an option to restrict it to a particular period.
End Period
3 Characters Maximum, Numeric, Mandatory
Enter a value to specify the End Period within the frequency mentioned above.
Example
Transaction Frequency is WEEKLY, Start Period is 2 and End Period is 5. This means that
the Fund is open for this transaction from second day till the fifth day of the week.
The End period has to be within the Transaction Frequency i.e., it can take values up to 7
(weekly) and not greater than that.
Transaction Start Time
Time (hh: mm format), Mandatory
Enter a time to specify the start time for a given working date. On a given day when the fund
is open for this transaction, you can start entering transactions from this time.
Transaction End Time
Time (hh:mm format), Mandatory
Enter a time to specify the end time for a given working date beyond which you cannot enter
any transactions for this transaction type.
Cut Off Time
Time (hh:mm format), Optional
Specify the time, on a given working day before which a transaction of the selected type will
be accepted with the transaction date being the current date. Beyond this time on a working
day, the transaction date will be set by default to be the next working date.
4-5
Counter
4 Characters Maximum, Numeric, Mandatory
Enter a value to specify the total number of transactions to be allowed in this transaction type.
Holding Period Applicable
Optional
Select ‘Yes’ in this field to indicate that a lock in period is applicable for the investors investing
in a money market mutual fund. If you select this option, then you must specify whether the
holding period is to be enforced.
This feature is only available if your installation has requested for it.
Enforce Holding Period
Optional
Select ‘Yes’ in this field to indicate that the minimum holding period specified for the fund in
the Fund Demographics profile must be enforced as mandatory for the transaction type, by
selecting this option.
This feature is only available if your installation has requested for it.
Applicable Account Types
Select one or more account types for which fund transfer is allowed. If you do not select any
particular option, then all account types will be allowed. The validation of this rule will happen
during the save of Standing Instruction as well as the different transactions including
subscription and redemption.
4.1.3.4
Unit Holder Rules Section
The limits on the number of transactions allowed for a unit holder in this transaction type and
in this fund are captured in this section.
Limit
4 Characters Maximum, Numeric, Mandatory
Enter a value to specify the number of transactions that are allowed for a unit holder. You can
restrict the unit holder from operating more than the specified limit for transactions.
Frequency
Mandatory
This is to specify the frequency with which a unit holder can carry out any number of
transactions within the limit specified earlier.
4-6
Cycle Basis
Provided the frequency selected is yearly, you are allowed to specify the period basis during
which the free transactions will be applicable. The options provided are:
Transaction Start Date Basis
Actual Calendar Basis
The option ‘Actual Calendar Basis’ will be enabled only if the frequency is ‘Yearly’.
Note
If the free transaction is reversed and the transaction date of the transaction belongs to the
current cycle, the free transaction counter will be increased by 1. If it belongs to the previous cycle the counter will not be affected.
Free 8 Characters Maximum, Numeric, Mandatory
Enter a value to specify the number of free transactions within the permitted transactions. This
definition will override all loads that will be set for this transaction
Note
You can not modify the frequency or the cycle basis of the Unitholder limits. However you
are allowed to modify the number of free transaction number which will only be applicable
from the subsequent cycles and not immediately.
While tracking free transactions, pseudo switch transactions will be treated on par with switch
transactions. The Redemption leg of the pseudo switch transaction will be treated on par with
Switch from and the subscription leg of the pseudo switch transaction will be treated on par
with switch to.
4.1.3.5
Transaction Limits Section
The volume limits on transactions in the transaction type are captured here.
The limits that may be specified here depend upon the Application Mode specified for this
transaction type. If the Mode specified is Amount, then the Amount limits in this section are
4-7
mandatory. If the Mode is Units, the Units limits are mandatory. If the Mode is ‘Both’, then
both limits are mandatory.
Minimum Amount
Display Only
The minimum transaction amount allowed for this transaction type in this fund is displayed
here
Minimum Unit
Display Only
The minimum number of units that may be applied for in this transaction type in this fund is
displayed here.
Maximum Amount
Numeric, Mandatory if Application Mode is Amount or Both
Enter a value to specify the Maximum Transaction Amount that a unit holder can invest or
redeem. This is the maximum amount that can be accepted for the fund for this given
transaction type.
Step Amount
Numeric, Mandatory if Application Mode is Amount or Both
Enter a value to specify the steps of amount in which a unit holder can invest or redeem.
4-8
Step Units
Numeric, Mandatory if Application Mode is Units or Both
Enter a value to specify the steps of units in which a unit holder can invest or redeem. This
will operate above the Minimum Transaction Units.
Maximum Units
Numeric, Mandatory if Application Mode is Units or Both
Enter a value to specify the Maximum Transaction Units that a unit holder can invest or
redeem.
This operates in lines similar to that of the Transaction Amount.
The maximum volume (in terms of units) of a single transaction that is entered should never
exceed or be equal to the figure of one billion.
For example, if a user wishes to enter a transaction of 1.5 billion units, he will have to consider
entering two transactions, with neither exceeding a maximum limit of 999999999.999999
units.
Minimum Initial Transaction Amount
Numeric, Optional
Specify the minimum amount permitted for an initial transaction, for an investor in this fund.
Maximum Initial Transaction Units
Numeric, Optional
Specify the maximum amount permitted for an initial transaction, for an investor in this fund.
Minimum Initial Transaction Units
Numeric, Optional
Specify the minimum number of units permitted for an initial transaction, for an investor in this
fund.
Maximum Initial Transaction Units
Numeric, Optional
Specify the maximum number of units permitted for an initial transaction, for an investor in this
fund.
SI Minimum Amount / Units
Numeric, Optional
Specify the minimum amount or the minimum number of units allowable for a standing
instruction transaction in this fund.
SI Maximum Amount / Units
Numeric, Optional
Specify the maximum amount or the minimum number of units allowable for a standing
instruction transaction in this fund.
Note
If the client country parameter is set to “SIRULEATFREQ” for your bank, in order to maintain SI specific details click on the link ‘SI Rules for Frequency under the Transaction limit
tab. For further reference please refer to the Annexure.
4-9
Minimum Holdings Check Options
You can indicate the minimum holdings balance for an IPO or subscription transaction in
respect of a standing instruction, for a CIF or an individual unit holder, in the fund. The
minimum holdings value can be specified either as an amount, number of units, or
redeemable value of units.
As part of the minimum holdings options, you can also indicate whether the holdings
considered for validation are those of all unit holders under a CIF, or for an individual unit
holder.
Note
The above check is not validated online during transaction capture or authorization. When
there are transactions into a fund violating the minimum holdings validation, the system
logs an exception in the Pre-End of Day Check screen. During the End of Day processes,
the system allocates the transactions, logging the exceptions in respect of them.
SI Minimum Holdings Indicator
Alphanumeric; Optional
In this field, you can indicate the basis upon which the minimum holdings check is performed.
The following options are available:
Amount: The value of holdings (at redemption price). If you choose this option you
must specify the minimum amount in the Minimum Holdings Amount field. If the check
is to apply at CIF level, the redeemable value of units held by all investors under the CIF
in the fund is checked against the Minimum Holdings Amount.
Units: The number of units held. If you choose this option you must specify the
minimum number of units in the Minimum Holdings Units field. If the check is to apply
at CIF level, the total number of units held by all investors under the CIF in the fund is
checked against the Minimum Holdings Units.
Lower of Amount/Units: The minimum amount specified or the redeemable value of
minimum units specified, whichever is lower.
Higher of Amount/ Units: The minimum amount specified or the redeemable value of
minimum units specified, whichever is higher.
Not Applicable: The minimum holdings validation is not performed if this option is
chosen. For standing instructions involving transactions in the fund, the holdings
validation cannot be set.
If you choose either of the last two options (Lower of Amount/Units or Higher of Amount/
Units), you must specify the applicable minimum amount in the Minimum Holdings Amount
field as well as the applicable minimum number of units in the Minimum Holdings Units field.
Also, in either case, the redeemable value of the total number of units held by all investors
under the CIF is considered for validation, if the check is to apply at CIF level.
SI Minimum Holdings Apply For
Alphanumeric; Mandatory if Minimum Holdings Indicator is specified
In this field, indicate whether the minimum holdings check is applicable for CIFs, or for
individual unit holders.
If the check is to apply at CIF level, the redeemable value of the total number of units held by
all investors under the CIF in the fund is considered for validation.
4-10
SI Minimum Holdings Amount
Numeric; Mandatory if Minimum Holdings Indicator is specified
Specify the minimum redeemable value of holdings in the fund, for an IPO or subscription
transaction in respect of a standing instruction involving a CIF or individual unit holder.
Example
For the Royal Trust Growth Fund, you have selected the ‘Amount’ option as the Minimum
Holdings Indicator for IPO or subscription transactions that would be generated in respect of
standing instructions. You have also specified the Minimum Holdings Amount value as 1200
USD (the base currency of the fund is USD).
The minimum holdings validation is required to be enforced for individual unit holders and not
for CIFs.
Therefore, the redeemable value of total number of units held by an individual unit holder, in
the Burton Carey Fund must exceed or equal 1200 USD for an IPO or subscription transaction
in respect of a standing instruction involving the unit holder.
SI Minimum Holdings Units
Numeric; Mandatory if Minimum Holdings Indicator is specified
Specify the minimum number of units required to be held by an individual unit holder, or a CIF,
in the fund, for an IPO or subscription transaction in respect of a standing instruction.
Example
For the Carey Bugle Growth Fund, you have selected the ‘Units’ option as the Minimum
Holdings Indicator for IPO or subscription transactions that would be generated in respect of
standing instructions. You have also specified the Minimum Holdings Units value as 1000.
The minimum holdings validation is required to be enforced for individual unit holders and not
for CIFs.
Therefore, the total number of units held by an individual unit holder, in the Carey Bugle
Growth Fund must equal or exceed 1000 USD, for an IPO or subscription transaction in
respect of a standing instruction involving the unit holder.
A note on the minimum holdings validation
If the Minimum Holdings Indicator selected is ‘Lower of Amount/Units’, the redeemable value
of the specified Minimum Holdings Units is arrived at, and compared with the Minimum
Holdings Amount specified. The lower of the two values is considered as the minimum
holdings value against which the minimum holdings validation would be made. Similarly, if the
Minimum Holdings Indicator selected is ‘Higher of Amount/Units’, the redeemable value of the
specified Minimum Holdings Units is arrived at, and compared with the Minimum Holdings
Amount specified, and the higher of the two values is considered as the minimum holdings
value against which the minimum holdings validation would be made.
Example
For the Burton Carey Growth Fund, you have selected the ‘Lower of Amount/Units’ option as
the Minimum Holdings Indicator to be validated for successful generation of an IPO or
subscription transaction in respect of a standing instruction. You have also specified the
Minimum Holdings Amount value as 1200 USD, and the Minimum Holdings Units value as
1000.
4-11
The minimum holdings validation is required to be enforced for CIFs, and not for individual
unit holders.
To arrive at the minimum holdings value against which the validation would be made, the
redeemable value of 1000 units is computed, at the redemption price. If the redemption price
is 0.8, the redeemable value = 1000 * 0.8 = 800 USD.
The redeemable value obtained (800 USD) is compared with the Minimum Holdings Amount
specified (1200 USD). Since the Minimum Holdings Indicator chosen is ‘Lower of Amount/
Units’, the minimum holdings value to be validated against, is 800 USD. Therefore, the
redeemable value of total number of units held by all unit holders under a CIF, in the Burton
Carey Fund must equal or exceed 800 USD, for an IPO or subscription transaction in respect
of a standing instruction involving a CIF.
If the Minimum Holdings Indicator were selected as ‘Higher of Amount/Units’, the higher value
(1200 USD) would be considered as the minimum holdings value against which the validation
would be made. Therefore, the redeemable value of total number of units held by all unit
holders under a CIF, in the Burton Carey Fund would have to equal or exceed 1200 USD, for
an IPO or subscription transaction in respect of a standing instruction involving a CIF.
4.1.3.6
Amount/Units Limit for Investor Category
The volume ranges of a transaction, for each transaction type, can be limited for each investor
category, for a Fund. The limits can be defined in terms of units or amount of the transaction
type.
You can set up these limits as part of the Transaction Processing Rules profile for each fund,
and, as such, may be set up through that maintenance screen.
When you save your specifications in this screen, it will be closed and you will be returned to
the main Transaction Processing Rules screen. When you save the transaction processing
rule record for the fund, the specifications you have made in this screen are saved as part of
the same record, in the database.
You can also access this screen from the Amount / Units Limits for Investor Category menu
of the Fund Manager component. If you have accessed the screen in this manner, the limits
defined here will supersede the limits defined in the Transaction Processing Rules profile for
the fund and transaction type.
4.1.4
Checks
Before you set up an Amount/Units Limits on Investor Categories profile record for a fund, it
is desirable to ensure that the following information is already setup in the system:
4-12
4.1.5
The fund already has an existing, unauthorized Fund Demographics profile record.
The fund already has an existing, unauthorized Shares Characteristics profile record.
The fund already has an existing, unauthorized Transaction Processing Rules profile
record. In fact, this fund rule can be accessed through the Transaction Processing
Rules screen itself.
Fields in Investor Category Amount/Units Limit Screen
Investor Category
2 Character Maximum, Alphanumeric, Mandatory
Specify the category of Investor for whom the amount/units limit is to be set up.
Minimum Amount
Numeric, Mandatory
Specify the minimum amount that an investor who falls under this category can transact in this
fund and transaction type.
Step Amount
Numeric, Mandatory
Specify the amount, in steps of which an investor who falls under this category can transact
in this fund and transaction type.
Maximum Amount
Numeric, Mandatory
Specify the maximum amount that an investor who falls under this category can transact in
this fund and transaction type.
The maximum volume of a single transaction that is entered should never exceed or be equal
to the figure of one trillion.
For example, if the user wishes to enter a transaction of 1.5 billion, he will have to consider
entering two transactions, neither exceeding a maximum limit of 999999999999.999.
Minimum Units
Numeric, Mandatory
Specify the minimum number of units that an investor who falls under this category can
transact in this fund and transaction type.
Step Units
Numeric, Mandatory
Specify the number of units, in steps of which an investor who falls under this category can
transact in this fund and transaction type.
Maximum Units
Numeric, Mandatory
Specify the maximum number of units that an investor who falls under this category can
transact in this fund and transaction type.
The maximum volume of a single transaction that is entered should never exceed or be equal
to the figure of one billion, in terms of units.
4-13
For example, if the user wishes to enter a transaction of 1.5 billion units, he will have to
consider entering two transactions, neither exceeding a maximum limit of 999999999.999999
units.
4.1.5.1
Communication Mode Amount / Units Limits Screen
The volume ranges of an IPO or subscription transaction, for each transaction type, can be
limited for each means of purchase or communication mode, for a fund.
To set up these limits, use the Limit for Communication Mode screen. You can access this
screen from the Transaction Processing Rules screen for each fund, by clicking on the Max/
Min for Communication Mode link in the Transaction Limits section.
When you save your specifications in this screen, it will be closed and you will be returned to
the main Transaction Processing Rules screen. When you save the transaction processing
rule record for the fund, the specifications you have made in this screen are saved as part of
the same record, in the database.
You can also access this screen from the Amount / Units Limits for Communication Mode
menu item in the Maintenance menu category of the Fund Manager component. If you have
accessed the screen in this manner, the limits defined here will supersede the limits defined
in the Transaction Processing Rules profile for the fund and transaction type.
4.1.6
Checks
Before you set up these limits for a fund, it is desirable to ensure that the following information
is already setup in the system:
4.1.7
The fund already has an existing, unauthorized Fund Demographics profile record.
The fund already has an existing, unauthorized Shares Characteristics profile record.
The fund already has an existing, unauthorized Transaction Processing Rules profile
record. In fact, this fund rule can be accessed through the Transaction Processing
Rules screen itself.
Fields in Communication Mode Amount/Units Limit
Communication Mode
2 Character Maximum, Alphanumeric, Mandatory
From the list, select the means of purchase or communication mode for which you are setting
up the transaction limits. You can set up the limits for any of the following modes, from the list:
Direct (in Person)
4-14
E-Mail
Internet
Registered Investment Advisor
Registered Dealer
Savings Plan
Telephone
Minimum Amount
Numeric, Mandatory
Specify the minimum amount that an investor who subscribes through the selected means of
purchase can transact in this fund, through an IPO or subscription transaction.
Maximum Amount
Numeric, Mandatory
Specify the maximum amount that an investor who subscribes through the selected means of
purchase can transact in this fund, through an IPO or subscription transaction.
The maximum volume of a single transaction that is entered should never exceed or be equal
to the figure of one trillion.
For example, if the user wishes to enter a transaction of 1.5 billion, he will have to consider
entering two transactions, neither exceeding a maximum limit of 999999999999.999.
Minimum Units
Numeric, Mandatory
Specify the minimum number of units that an investor who subscribes through the selected
means of purchase can transact in this fund, through an IPO or subscription transaction.
Maximum Units
Numeric, Mandatory
Specify the maximum number of units that an investor who subscribes through the selected
means of purchase can transact in this fund, through an IPO or subscription transaction.
The maximum volume of a single transaction that is entered should never exceed or be equal
to the figure of one billion, in terms of units.
For example, if the user wishes to enter a transaction of 1.5 billion units, he will have to
consider entering two transactions, neither exceeding a maximum limit of 999999999.999999
units.
Disallow First Transaction
Check this box to ensure that the users transacting in this fund are not allowed to
communicate through the selected communication channels. By default this box will be
unchecked.
This option is applicable for the first subscription for the combination unit holder and fund.
Note
–
Subscription transactions will be treated as initial purchase if the balance is zero for
the combination of unit holder and fund.
4-15
–
4.1.8
If the client country parameter is set to “SIRULEATFREQ” for your bank please refer
to Annexure for further details.
The Pricing section
In this section, you can set up the pricing details, such as the basis of price definition, the base
price factor, the number of decimals for the price, the price lag and the back dating limits.
Base Price Definition
Mandatory
Select the Base Price definition for the transaction, from the options provided. The Unit Price
will be calculated based on this price and loads defined for this transaction.
Base Price Factor (%)
Numeric, Mandatory
Enter a value to specify the Percentage of Base Price value that is defined above. This
percentage will be applied to the price arrived from the above calculations to arrive at the Base
Price for this transaction type for the fund.
Rounding Precision for Base Price
1 Character Maximum, Numeric, Mandatory
Indicate the maximum number of decimals that would be reckoned for rounding precision, for
the transaction base price.
Rounding Options for Base Price
1 Character Maximum, Alphanumeric, Mandatory
Indicate whether the base price value must be rounded off or truncated, for the selected
transaction type, for the fund.
Rounding Precision for Unit Price
1 Character Maximum, Numeric, Mandatory
Indicate the maximum number of decimals that would be reckoned for rounding precision, for
the unit price for the selected transaction type.
Rounding Options for Unit Price
Alphanumeric, Mandatory
Indicate the rounding options for the value of the unit price for the selected transaction type,
for the fund.
4-16
Choose ‘Round Up’ to indicate rounding the value at the precision decimal place to the next
higher numeral.
Choose ‘Round Off’ to indicate normal rounding at the precision decimal.
Choose ‘Round Down’ to indicate truncation of the value at the precision decimal place.
Example
Let us suppose that the unit price computed for a subscription transaction is 10.561234, and
that this value must be rounded to the 3rd decimal place.
If you indicate rounding up, then the value reckoned would be 10.562.
If you indicate rounding off, then, applying normal rounding off rules, the value reckoned
would be 10.561.
If you indicate rounding down or truncation, then the value would be truncated as it is, in the
3rd decimal place, and it would be reckoned as 10.561.
Rounding options for Units
Alphanumeric, Mandatory
Indicate the rounding options for the computation of the units allotted in respect of a
transaction, for the selected transaction type, for the fund.
Choose ‘Round Up’ to indicate rounding the value at the precision decimal place to the next
higher numeral.
Choose ‘Round Off’ to indicate normal rounding at the precision decimal.
Choose ‘Round Down’ to indicate truncation of the value at the precision decimal place.
The rounding options specified for the fund in the Shares Characteristics profile is displayed
here by default, and you can alter this specification if necessary. The rounding option
specified in this field will be deemed as the final specification for the fund and transaction type.
Rounding Precision for Units
Numeric, Optional
Specify the decimal value or negative value for the units and the units would be reckoned for
rounding precision.
Backdating Allowed?
Mandatory
Select ‘Yes’ in this field to specify that backdating should be allowed for this fund. This means
that on any given date, for this transaction type, the system will allow the user to enter
transactions dated earlier to the current date.
Back Dating Limit
3 Characters Maximum, Numeric, Mandatory
Enter a value to specify the number of days that one can back date. This is applicable only if
Allow Back Dating is True. This has to be later than the transaction start date. Fund Price as
effective on that date will be taken into account during allocation.
4-17
Price Lag
3 Characters Maximum, Numeric, Mandatory
In you require the price applied for transactions of the selected type in the fund to be the
prevalent price as on a date earlier than the transaction date (for cash-based transactions) or
the clearing date (for instrument-based transactions), you can specify the number of lag days
in this field.
The number of days you specify is considered based on the Price Lag Calendar Basis
specified.
For instance, if you specify a price lag of 2, and the lag is based on the fund calendar, and the
transaction date for a cash-based transaction is 12th December 2003, the price as of 10th
December is used for allocation, provided both 11th and 10th December is working days for
the fund. If the lag is based on the actual calendar, the price as of 10th December is used.
Price Lag Calendar Basis
Alphanumeric; Mandatory
Specify whether the price lag days should be considered based on the holiday calendar for
the fund, the actual calendar or the System calendar.
Fluctuation (%)
Numeric; Optional
You can specify the fluctuation allowable in the base price for the transaction type, for the
fund. When prices are entered for the transaction type for the fund, for the day, the system
validates whether the fluctuation is within the allowable limit specified in this field.
Payment Lag (Days)
3 Characters Maximum, Numeric, Optional
Specify a value to indicate the number of days by which the settlement for a transaction would
be lagged or deferred, after it has been allotted and confirmed.
In the case of redemption transactions, to arrive at the actual date of redemption settlement,
both the confirmation lag (if specified) and the payment lag (if specified here) are taken into
consideration. For instance, if the redemption transaction was allocated on 15th January and
both the confirmation lag and payment lag were specified as 2, then the actual redemption
payout to the unit holder would be effected on 19th January (15 + 2+ 2), provided it is not a
holiday in the system, and provided there are no intervening holidays.
Payment Lag Calendar Basis
Alphanumeric; Mandatory
Specify whether the payment lag days should be considered based on the holiday calendar
for the fund, the actual calendar, the System calendar or the payment currency calendar.
Future Date Limit
Numeric; Optional
Indicate the number of days (in terms of fund calendar days) up to which the future dating will
be allowed. The transaction date should be within the future dating limit.
4.1.8.1
Policies Section
In this section, you can set up the following information:
1. Allocation details such as allowing of online allocation, credit card/check allocation on par
with cash, allocation and confirmation lags, and the allocation policies.
4-18
2. The limit redemption mode, which can be either percentage of holdings, amount or units.
Limit Mode
Alphanumeric, Optional
Choose the mode based on which redemption will be limited, from the list.
Allocation Percentage versus Registered Capital
Percentage format, Optional
Specify the percentage up to which allocation can be allowed for a given registered capital on
a given day, for the selected transaction type.
Policy
1 Character Maximum, Alphanumeric, Mandatory
Enter ‘F’ to signify ‘First In First Out’ or ‘P’ to signify ‘Proportionate’, to specify the policy for
allocation in case the maximum limit is reached for a given day. This policy is with respect to
the allocation percentage that is allowed against the fund corpus.
Carry Forward?
1 Character Maximum, Alphanumeric, Optional
Specify the manner in which the balance over redeemed quantity to be treated. Choose from
the list.
Allocation Lag
3 Characters Maximum, Numeric, Mandatory
Enter a value to specify when the transaction should be allocated if the transaction is ‘T’. T +
X, where ‘X’ signifies the number of lag days. Lag can only be positive.
Allocation Lag Calendar Basis
Alphanumeric; Mandatory
Specify whether the allocation lag days should be considered based on the holiday calendar
for the fund, the System calendar or the actual calendar.
4-19
Check On Par with Cash
Mandatory
Select ‘Yes’ in this field to indicate that all check / Demand Draft transactions are to be treated
on par with cash transactions. If this is true, then during allocation, the check / demand draft
transactions will be taken for allocation for the same day. The units allocated will be
provisional, and will be confirmed only after the check is cleared.
Credit Card On Par With Cash
Mandatory
Select ‘Yes’ in this field to indicate that all credit card transactions to be treated on par with
cash transactions. If this is true then during allocation the credit card transactions will be taken
for allocation for the same day. The units allocated will be provisional, and will be confirmed
only after the credit card transaction is cleared.
Transfer On Par With Cash
Mandatory
Select ‘Yes’ in this field to indicate that all transfer transactions to be treated on par with cash
transactions. If this is true then during allocation the transfer transactions will be taken for
allocation for the same day. The units allocated will be provisional, and will be confirmed only
after the bank transfers are cleared.
Online Allocation
Mandatory
Select ‘Yes’ in this field to indicate that Online Allocation is to be allowed for the given
transaction type. This can be enabled only if the fund is pre-priced.
For Post Priced Fund with Allocation as Online, the Transaction Frequency is Allocation.
Retain Ageing to Subscription?
Mandatory
Select ‘Yes’ in this field to indicate that the aging principle must be applied to subscription
transactions in the fund. Aging is the process of keeping track of a transaction from the
transaction date right up to when it is cleared in full from the account of the unit holder.
Depending upon the policy specified for aging, (i.e., either FIFO or Proportionate), aging is
applied.
In case of CDSC funds it is mandatory for you to select ‘Yes’.
Confirmation Note Required?
Mandatory
Select ‘Yes’ in this field to indicate that the Confirmation Slip is to be printed after every
transaction. Otherwise this can be user initiated after allocation of the transaction.
Acknowledgment Note Required?
Mandatory
Select ‘Yes’ in this field to indicate that the Acknowledgment Slip is to be printed after every
transaction. Otherwise this can be printed only at the User’s request.
Cross Branching Allowed
Optional
You can use this field to indicate whether transactions of the selected type can be entered
from a different branch.
4-20
Apply Entry Time Load?
Optional
For exit fee loads applied on outflow transactions such as redemption, switch-out and
transfer, you can choose to apply the return values prevalent at the time of initiation of the
inflow subscription or IPO transaction being aged, or the return values prevalent at the time
of the outflow transaction.
To indicate that the entry load values must be applied, select ‘Yes’ in this field. To indicate
that exit load values must be applied, select ‘No’ in this field.
Confirmation Lag
3 Characters Maximum, Numeric, Mandatory
Enter a value to specify when the redemption transaction should be picked for confirmation
after allocation. T + X, where ‘X’ signifies the number of lag days. Lag can only be positive.
The confirmation lag can be defined to be applicable to both AMC as well as Distributor
installations.
Link to Unsettled Inflows?
Optional
Select the option ‘YES’ against the field ‘Link to Unsettled Inflows?’ to indicate redemption
transactions can be linked to unsettled inflow transactions. Select the option ‘NO’ to indicate
redemption transactions can be linked to settled inflow transactions only.
Note
This field, by default, will be set to ‘NO’.
If entry time loads are being applied as specified here, and the loads are overridden at the
time of transaction entry, the overridden load values are applied.
Similarly, if entry time loads are being applied, and a unit holder deal has been specified for
the unit holder, the deal values are applied.
Note
This feature is only available if your installation has specifically requested for it.
Full Outflow
Check this box if you wish to allow full outflow of a fund. By default this will be unchecked.
If this option is checked for a redemption transaction, then partial redemption will not be
allowed for the fund.
Note
If this checked then the maturity date of a fund will not be displayed and the transaction
mode will be defaulted as “Percent” and transaction value as “100” in the redemption
screen.
4-21
Min Maturity Period (Days)
Specify the minimum maturity period of the fund here. During subscription transaction,
maturity date will be defaulted as the sum of the application date and the minimum maturity
period specified here.
Max Maturity Period (Days)
Specify the maximum maturity period applicable for the fund.
Note
–
The minimum and maximum maturity period can be specified only if ‘FundOutflow’
field is checked.
–
The subscription, maturity date should lie with in the Min/Max Maturity period specified here.
Once the maturity date is reached, automatic redemption of the fund will take place as a BOD
activity provided there is no judicial block (partial or full) on the subscription.
Notice Period
Notice period is the number of days which an investor has to inform the Transfer Agent in
advance before certain number of days, in case of transaction (Subscription / Redemption /
Switch / Transfer/ IPO transaction) in a fund.
A notice period is set at each transaction type level for a fund. The system tracks the
transaction breaches if any from the notice period. The person who authorizes the transaction
is made aware of the notice period breach.
The following details are captured in the Fund rules - transaction processing rules screen to
capture Notice period and the Notice period date basis:
(Actual Calendar or System Calendar) for Subscription
Redemption
Switch
Transfer transaction
IPO transaction
The system raises a warning message for breach in notice period if the transaction date
added to the notice period is greater than the dealing date during transaction capture. You
can view the overridden warning messages at the time of transaction authorization.
The system internally tracks a transaction level indicator to indicate the breach in notice
period. The criteria based flat percentage or amount based load can be setup for transactions
which breached the notice period based on this indicator.
Note
There is no change in deriving dealing date logic. The system will not re-validate the transaction for any changes in the holiday calendar post transaction save.
Transaction Threshold Amount
Specify a threshold amount for redemption type transaction. On saving a redemption
transaction, the system will display a warning message if the transaction amount (in fund base
currency) is greater than the maintained threshold amount.
4-22
In case of unit based transaction, units applied and latest available NAV will be used to derive
the basis value for comparison. The system will use the par value if latest NAV is not available.
Similarly, for multi-currency transaction, to derive the basis value for comparison, the
transaction base currency is converted to fund base currency based on the transaction
exchange rate. If transaction’s exchange rate is not available, then the system will use the
latest available exchange rate (as per project allocation logic). The system will not validate the
transaction value with maintained threshold amount if the exchange rate is not available.
4.1.8.2
SI Specific Info Section
In this section, you can maintain the rules for standing instruction generation that are to be
applicable for the fund.
You can maintain the following rules:
The holiday rule, that is, whether the generation date must be moved to the previous
working day or the next working day, if it falls on a holiday.
The calendar to be used for standing instructions generation – System, fund or actual
The default frequency for standing instructions generation – Daily, Bi-Weekly, Weekly,
Monthly, Quarterly, Half-Yearly or Yearly
The generation cycle for standing instructions – Monthly, Quarterly, Half-Yearly or
Yearly
The specific generation day, if any
If the generation of standing instructions must happen on the last day of the frequency
period
The cut-off day for SI generation
The cut-off lag for SI generation
Whether the SI rules must be enforced
The lead time period based on the system calendar for the standing instruction
The default description for the standing instruction
If an override message in case of inflow is to be displayed
The maximum number of times the SI payment rejections are allowed before the auto
termination.
The maximum number of times successive SI payment rejections are allowed before
being automatically terminated
The maximum number of SI transactions allowed for the fund. If you specify a limit here,
while saving the SI, the system will extend the end date for the SI to a hundred years
from the system date, subject to the validation for ‘Transaction End Date’ in the
transaction processing rules for the specific transaction for the specific fund. If the
number of transactions generated for a fund equals this limit, the SI will be cancelled.
4-23
Note
4.1.9
–
If you set the cumulative and consecutive counters for SI auto-termination to zero,
then the system will cancel the SI the first time an SI payment is rejected. If you do
not specify any value for the counters, auto-termination will not be activated for SIs
whose payment has been rejected.
–
If the client country parameter is set to “SIRULEATFREQ” for your bank, in order to
maintain SI specific details click on the link ‘SI Rules for Frequency’ under the
Transaction limit tab. For further reference please refer to the Annexure.
–
If the client country parameter is set for your bank, and provided the ‘Inflow Overridable msg’ check box is checked, the system will check for the existence of any
scheduled SWP / STP for the Unitholder during subscription transaction. If it is available, then the override message is displayed as “THE NEW SUBSCRIPTION
(PARTLY OR FULLY) WILL BE REDEEMED BY AN SI”.
Limit for Standing Instructions Screen
You can use this screen to indicate the minimum volume limits for initial transactions and the
limits for standing instruction transactions for investors in a fund, for a certain transaction type.
You can also specify the minimum holdings balance for an IPO or subscription transaction in
respect of a standing instruction, for a CIF or an individual unit holder, in the fund.
You can access this screen from the Transaction Processing Rules profile screen for each
fund, by clicking on the Limits for SI/Investment link in the Transaction Limits section.
When you save your specifications in this screen, it will be closed and you will be returned to
the main Transaction Processing Rules screen. When you save the transaction processing
4-24
rule record for the fund, the specifications you have made in this screen are saved as part of
the same record, in the database.
4.1.10
Fields in Screen
Display
The type of transaction to which this Investment and SI Limit profile must apply, is displayed
here, from the main Transaction Processing Rules screen.
4-25
4.2
SI Rules for Fund
You can maintain the rules for standing instructions generation, for a fund-investment account
type and transaction type combination, in the SI Specific Information Tab. To invoke this
screen, click on the SI Specific Information link in the Fund Demographics screen.
This information is optional and can be captured for IPO, Subscription, Redemption, Switch
and Transfer transaction types.
For each combination, you can maintain the holiday rule and the calendar basis that is to be
used. To view the transaction type level rules that have been defined in the Transaction
Processing Rules for the fund, click SI Details button.
4.2.1
SI Details
In this section, you can maintain the rules for standing instruction generation that are to be
applicable for the fund.
You can maintain the following rules:
The default frequency for standing instructions generation – Daily, Bi-Weekly, Weekly,
Monthly, Quarterly, Half-Yearly or Yearly
The generation cycle for standing instructions – Monthly, Quarterly, Half-Yearly or
Yearly
The SI Minimum and Maximum Amount.
The Minimum and Maximum SI units.
The specific generation day, if any.
If the generation of standing instructions must happen on the last day of the frequency
period.
The cut-off day for SI generation.
The cut-off lag for SI generation.
Whether the SI rules must be enforced.
The default description for the standing instruction.
The maximum number of installments for the Monthly, Quarterly, Half yearly and Yearly
frequencies.
The maximum number of days between the application date and the SI End Date
4-26
4.3
Fund Load Setup
This fund rule enables you to designate different fees or incentives that are levied during the
processing of transactions, as applicable for transactions in specific funds. A simple mapping
can be done where the appropriate fees or incentives, called loads in the system, may be
tagged as applicable to the appropriate transaction types for the appropriate funds.
You can also designate the loads as applicable to certain reference types of transactions,
such as standing instructions, policy transactions and so on.
The load details maintained will be attached to the funds using this maintenance screen. Only
authorized loads can be attached to a fund, whose fund rules are not authorized.
To map loads to a fund, use the Fund Load Setup screen. You can invoke this screen by
clicking the ‘Fund Load’ tab from the Fund Demographics screen.
4.3.1
Checks
Before you set up a Fund Load mapping profile record for a fund, it is desirable to ensure that
the following information is already setup in the system:
The fund already has an existing, unauthorized Fund Demographics profile record.
The fund already has an existing, unauthorized Shares Characteristics profile record.
The fund already has an existing, unauthorized Transaction Processing Rules profile
record for the appropriate Transaction Type.
The fees/incentives (Loads) that are to be applied must already have been identified in
the system and have existing, authorized profiles as maintained in the Loads
Maintenance.
4-27
4.3.2
The system does not support the mapping of the Ref Type 68 (Funding Repayment) to
any load.
Fields in Fund Load Setup Screen
Fund ID
Display
This field indicates the ID fund for which you are setting up the Fund Load Setup profile. This
information is defaulted from the Fund Demographics screen.
Rule Effective Date
Display
The Rule Effective Date for the fund, which you specified in the Fund Demographics screen,
is displayed here.
Load ID
Alphanumeric, Mandatory
Specify the name of the Load (fee/incentive) that must be applied for the selected Fund. You
may make your choice from the options provided in the drop down list.
Note
Loads defined as ‘price basis loads’ cannot be mapped to a fund in the Fund Load Setup.
Load To Price
Optional
Check this box to indicate that this load is to be loaded to the base price.
From Entity Type
Mandatory
Specify the entity that bears this load. Select the Entity Type from the following list given in
the drop down menu:
AMC
Agent
Broker
Distributor
Fund
Registrar
Trustee
Unit Holder
To Entity Type
Mandatory
Specify the entity that will be recipients of the load. Select the Entity Type from the list given
in the drop down menu. The options in the list are similar to those in the From Entity Type field
list.
4-28
Transaction Type
Alphanumeric, Mandatory
Specify the transaction type for which the loads are being defined. The adjoining option list
displays all valid transaction type codes along with their description. You can choose the
appropriate one.
Processing Frequency
Alphanumeric, Mandatory
Specify the frequency at which this load is to be applied. Select one from the list box.
Loads can be applied at any of three possible frequencies:
Allocation: This will mean that you will be charging the investor a fee or giving an
incentive at the time of allocation of units. Allocation time loads cannot be designated
for any transaction types other than IPO, subscription, redemption, and switch.
Transaction: The charge (fee) or incentive will be applied at the time the transaction
request is accepted from the investor.
Post Allocation: This frequency is applicable typically to the Capital Gains Tax, which
may be applied after allocation, on the gross amount. If indexation is applicable to
capital gains tax computation based on this load, then you must select this frequency.
Note
Capital Gains Tax may also be designated as an allocation time load.
GL Account Code
Alphanumeric, Optional
Specify the code that will be used to map this load to its corresponding charge code in the
external system.
When transaction information is exported to an external system, if separate books of accounts
are to be posted for different loads, this code will be used to identify this load information in
the export data.
Debit or Credit
Optional
Indicate whether the applied load would result in a debit or credit for the fund. This data is
captured for information purposes only and has no processing implications in the system
database.
Contra Account Code
Alphanumeric, Optional
Specify the code that will be used to identify the second leg of accounting entries for any
transaction, in the event of exporting of transaction information to an external system.
Round Off / Down / Up
Mandatory
Indicate the rounding options for the load amount for the selected transaction type, for the
fund.
Choose ‘Round Up’ to indicate rounding the value at the precision decimal place to the
next higher numeral.
Choose ‘Round Off’ to indicate normal rounding at the precision decimal.
4-29
Choose ‘Round Down’ to indicate truncation of the value at the precision decimal place.
Example
Let us suppose that the load amount computed for a subscription transaction is 10.561234,
and that this value must be rounded to the 3rd decimal place.
If you indicate rounding up, then the value reckoned would be 10.562.
If you indicate rounding off, then, applying normal rounding off rules, the value reckoned
would be 10.561.
If you indicate rounding down or truncation, then the value would be truncated as it is, in the
3rd decimal place, and it would be reckoned as 10.561.
Priority Number
5 Character Maximum, Alphanumeric, Mandatory
Enter a value to specify the priority number in case of optional loads.
For a mandatory load, the priority number is set to 0 and for an optional load the priority
number should be unique, i.e., for a given fund, no more than one load can have the same
priority number.
Based on Income?
Optional
If the load is a Capital Gains Tax, and it is to be applied based on the gross amount after
allocation, choose the Capital Gains – Gross option in this field, for such a load.
If indexation is being applied for capital gains tax computation, choose the Capital Gains –
Indexation option in this field. The capital gains load is then applied using appropriate
indexation, according to the option chosen by the investor.
If Contingent Deferred Sales Charge (CDSC) is applicable for transactions in this fund,
choose the option CDSC option in this field to identify the CDSC load. This option will be
available only when Fund chosen is CDSC applicable Fund.
If the ageing policy for the fund has been specified as ‘IOF/IRRF’ optimization in the General
Operating Rules screen, then the following additional options are available:
IOF
Default IRRF
Optional IRRF
The above options are provided under the criterion that the transaction type is redemption and
price to load is set to ‘No’. These options are applicable only for normal and systematic
withdrawal ref types.
Note
–
Optional IRRF can be maintained only for pension funds.
–
IOF load is applicable up to one year for pension funds and up to 30 days for non
pension funds.
4-30
Differential Fee?
Optional
Select ‘Yes’ in this field to indicate that the differential fee in the case of switch transactions
for any fund is to be applicable.
Slab Basis
Display only
System displays the basis on which the slabs will be reckoned for an amount-based load that
you are designating as applicable for the fund. The slabs must be reckoned on a gross
amount, net amount or on weighted average cost
Price Add In
Optional
Select this option to indicate that the add-in factor is to be applicable for computing the return
value for the load, for the selected transaction type. The add-in factor is used to arrive at the
return value for a load, at the time of allocation.
Level ID
Optional
Indicate the order in which the load is to be applied. Load is computed based on the fund
transaction amount and applied in the order of level id specified.
Note
Level Id is not applicable for LTP loads.
No. of Decimals
1 Character Maximum, Numeric, Mandatory
Indicate the maximum number of decimals that would be reckoned for rounding precision, for
the load amount.
Mandatory
Mandatory
Select Mandatory or Optional to specify whether the load is mandatory or optional, from the
options provided.
VAT Applicable?
Mandatory
Select ‘Yes’ in this field to indicate that the Load to Price is applicable. Therefore VAT Load
to Price is dependent on Load to Price..
FDAP Income
Optional
Check this box to indicate the load maintenance is a FDAP income.
This field is applicable only when ‘To Entity’ is Broker/Agent/Agency Branch/AO/IFA and
‘From Entity’ is fund/AMC/Unit holder. For other cases, if you check this field, then the system
will display the warning message. However, if you wish to continue, then the system will do
the WHT deductions and processes.
4-31
Send for GL Interface
Optional
Select ‘Yes’ in this field to indicate that accounting entries due only to the selected load must
be posted to the external asset management system, for the fund.
Apply Indexation on CGT?
Optional
If the load is a capital gains tax load, you can use this field to indicate whether indexation is
to be applied on capital gains tax computation, for transactions in this fund. Select this option
to indicate application of indexation. Leave it unchecked to indicate that indexation is not
applicable.
Dependent Level
Optional
Indicate the dependent level for the selected load, if any.
In case the load has a dependent level, then load will be applied on the difference between
the transaction amount and the sum of all dependent level load amounts, without considering
all recursive levels.
Note
The dependent level Id must be less than the Level Id. The dependent level Id is not applicable for LTP loads.
Details Section
Ref Type
Optional
To designate a load as being applicable for a reference transaction type for the selected fund,
select the reference type from the Available Reference Types box and move it to the Mapped
Reference Types box, using the arrows.
If loads are to be designated applicable to reference types for a fund, you must set up an
individual fund-load mapping record in this screen for each reference type for the fund, just as
you do for each transaction type.
Example
If the AMC wants a fee to be charged on subscription transaction but not on reinvestment
transaction, it can map only subscription transaction in the Ref Type field and not the
reinvestment.
Note
It must be remembered that, while mapping a load to a reference transaction type, the system does not support the mapping of the Ref Type 68 (Funding Repayment) to any load.
For more information, refer the chapter ‘The Allocation Process’ in the ‘Fund Manager User
Manual’.
4-32
4.3.3
Fund Load Mapping - View Section
When you enter the Fund ID, the Rule Effective Date and the transaction type for the fund for
which you want to set up the Fund Load Mapping profile, the details of the setups that have
already been made for any transaction types, if any, are displayed in the Fund Loads Mapped
to the Transaction box. The following information is displayed in the box for each transaction
type, and clicking on the row of each transaction type will cause the Fund Load Mapping
profile for that transaction type to be displayed in the lower portion of the screen, and in each
of the tabs.
Load ID
Display Only
The ID of the Load that has already been mapped to this transaction type for this fund is
displayed here.
Loaded to Price
Display Only
If the load that has been mapped is ‘Loaded to Price’, it is indicated here.
From and To Entities
Display Only
The ‘From’ and ‘To’ entities for the Load that has been mapped are displayed here.
4.4
Fund Formula Maintenance
This fund rule is an optional one that facilitates the definition of mathematical expressions and
factors that will be used in computation of any of the components in the NAV, Transaction
Base Prices, etc.
To set up a formula for a fund, use the Fund Formula screen. You can invoke this screen by
clicking the ‘Fund Formula Setup’ link from the Fund Demographics screen.
4.4.1
Checks
Before you set up a Fund Formula record for a fund, it is desirable to ensure that the following
information is already setup in the system:
The fund already has an existing, unauthorized Fund Demographics profile record.
The fund already has an existing, unauthorized Shares Characteristics profile record.
4-33
4.4.2
The fund already has an existing, unauthorized Transaction Processing Rules profile
record.
Entering Fund Formulae
The following considerations must be kept in mind while entering Fund Formulae:
4.4.2.1
If a formula is entered for a particular component, the formula cannot contain the
component itself as an operand. For example, if NAV is one of the components, and a
formula is being specified for NAV, it cannot contain NAV as one of the factors.
A component cannot be part of the factor (operand) and result for any other component.
For example, if the formula for the component NAV contains the component TxnBP01
as an operand, then the formula for the component TxnBP01 cannot contain NAV as an
operand.
Once you enter a formula, it must be tested successfully for it to be saved and applied.
To test a formula, click the Test button. The Fund Price Component screen is opened
and you must specify a component value that will be used in computing the results of
the formula.
Definition of Additional Components with Fund Prices
You can record additional components to be used for reporting along with the fund price, such
as tax information, interim profit, stock profit (capital gains), accumulated gains, and so on.
For instance, you may wish to include tax information as part of the Fund Price information,
but you may wish to indicate that the tax information you provide must not be used for actual
price computation.
Note
This feature is only available if your installation has specifically requested for it. An exhaustive note on this feature is found in the Annexure. The discussion in this chapter pertains only to definition of fund formula using components used in fund price computation.
4.4.3
Fields in Fund Formula Screen
Fund ID
Display
This field indicates the ID fund for which you are setting up the Fund Formula. This
information is defaulted from the Fund Demographics screen.
Rule Effective Date
Display
The Rule Effective Date for the fund, which you specified in the Fund Demographics screen,
is displayed here.
Used for Fund Price computation
Indicate from the drop-down list, if the rule is for fund price computation or not.
4-34
4.4.3.1
Fund Formula Section
Component ID
10 Character Maximum, Alphanumeric, Mandatory
Specify the component of the fund price, for which an expression is being defined for
computation, by selecting any one of the Component ID’s, from the list given. This is an
Alphanumeric ID that is used to build the fund formula.
The component could be one of the standard price bases such as the Net Asset Value or
Transaction Base Prices; or an additional price basis such as Offer Price, Bid Price, Price
Before Performance, Price After Performance and so on. These additional price bases are
built on the appropriate parent standard price bases.
For instance, the additional price basis ‘Offer Price’ could have the standard price basis
TBP02 as its parent.
Additional price bases can be defined only if multiple price bases are allowed as indicated in
the General Operating Rules for the fund.
If multiple price bases are defined, you must also indicate the applicable inherent fees or
incentives.
Component Type
Alphanumeric, Mandatory
Select any one of the 4 Component Types given in the option. They can be:
User Entered: indicates that the user enters the value.
Default: indicates that there is a specified default value, which can be edited.
Formula : indicates the component value is computed as per this formula, based on
other Component ID’s
Constant: indicates a fixed value that cannot be changed.
Component Description
50 Character Maximum, Alphanumeric, Mandatory
Enter any text message or remark regarding the formula. This is a free format text.
Formula
Alphanumeric, Optional
When Formula is selected as the Component Type, then this field becomes mandatory. Any
text or value entered here should be equal to the result of the formula. When Formula is not
selected as the Component Type, then this field becomes unavailable for data entry.
Fluctuation(%)
Numeric; Optional
You can specify the fluctuation allowable in the additional components (typically tax
components) for the transaction type, for the fund. When prices are entered for the
transaction type for the fund, for the day, the system validates whether the fluctuation is within
the allowable limit specified in this field.
Default Value
Numeric, Optional
This field is available for data entry only if the Component Type selected is either Default or
Constant.
4-35
Price Basis
Alphanumeric; Mandatory
If multiple price bases are allowed as indicated in the General Operating Rules for the fund,
you can use this field to indicate whether price bases other than the NAV and Transaction
Base Prices are being specified for computation of the fund price component, using the
formula specified.
For the NAV and Transaction Base Price components, the ‘Yes’ option is defaulted in this field
and cannot be changed. For additional components, you can select ‘Yes’ to indicate
additional bases, or ‘No’ if no additional bases are being used in the formula.
Parent Basis
Alphanumeric; Mandatory
For components used for additional price bases, specify the standard price basis from which
the additional price basis derives, in this field. You can select either the NAV or the
Transaction Base Price as the parent price basis. NAV can be chosen as the parent price
basis only for NAV components.
Additional price bases can only be defined if allowed for the fund in the General Operating
Rules.
For components used for standard price bases such as NAV and Transaction Base Price, the
parent price basis is defaulted to the component itself.
Inherent Fee
Alphanumeric; Mandatory
If multiple price bases are defined, you must also indicate the applicable inherent fee in this
field. You can use the ‘Find’ link to select the applicable loads. The selection list displays
loads tagged as Price Basis Loads in the Load Definition.
For Transaction Base Prices, the inherent fee / incentive cannot be parameterized.
Note
Any loads that have been defined as price basis loads are only used as the indicator for
computing load values, and are not picked up during evaluation of criteria. That is, the other load details specified for such loads, such as the return value, slabs and so on, are not
taken into consideration. The difference between the Transaction Base Price and the
Price Basis defined for the transaction is considered as an inherent fee or incentive, during
allocation.
For instance, if the Price Basis for a transaction is ‘Offer Price’, and Transaction Base Price
is 1.009 and the Offer Price is 1.060, the difference (1.06-1.009 = 0.051, without currency
rounding) is considered as the inherent fee (since the TBP is less than the offer price). If the
offer price were less than the TBP, the difference between the two is considered an inherent
incentive.
Inherent Incentive
If multiple price bases are defined, you must also indicate the applicable inherent incentive
loads in this field.
4-36
Exclude
Optional
Select this option to indicate that the selected price component must be excluded from capital
gains computation. This specification can only be made for the user-entered components.
This feature is only available if your installation has specifically requested for it.
Default
For each of the standard price basis components that are used as parent price bases, (that
is, the NAV and the Transaction Base Prices) you must assign one default price basis value.
For instance, you have defined the components Offer Price 1 and 2, with the parent price
basis TBP02. You must choose either Offer Price 1 or 2 as the default price basis value for
TBP02.
4.4.4
Fund Price Component Screen
Once you have entered a formula for a component, click on the Formula Test link to invoke
the Fund Price Component Screen. You may use this screen to test the formula. A formula
must be tested successfully before it can be saved and applied. If it is not tested successfully,
you must either modify the formula or enter a fresh one.
4-37
4.4.4.1
Fields in Fund Price Component Screen
Component Description
10 Character Maximum, Alphanumeric, Display
It displays the components as given in the Fund Formula Screen. The Component defines the
Net Asset Value and Base Price for the transactions.
Component Value
Numeric, Display
Click on the Compute button. It displays the component values after computing the formulae
from the Fund Formula Screen. You will be allowed to edit this field, if the Component Type
has been User Entered in the Fund Formula Screen.
If the Fund Price Component Screen is invoked from the Fund Price screen, the Update
button becomes active. Click on this button to refresh the Component Value fields.
4.5
Fund Residency Restrictions
This fund rule facilitates the maintenance of restrictions in respect of the nationalities of unit
holders who must not be allowed to transact in the fund. You can maintain a list of countries
that must not be excluded from operating in the fund, and all unit holders whose country of
domicile is found in this list will be allowed to subscribe into the fund.
To set up the nationality restrictions for a fund, use the Fund Residency Restriction screen.
You can invoke this screen by clicking the ‘Fund Residency Restriction’ link from the Fund
Demographics screen.
4.5.1
Checks
Before you set up a Fund Residency Restriction profile record for a fund, it is desirable to
ensure that the following information is already setup in the system:
The fund already has an existing, unauthorized Fund Demographics profile record.
The countries of domicile must be identified in the system in the Country Maintenance.
4-38
4.5.2
Fields in Fund Residency Restriction Screen
Fund ID
Display
This field indicates the ID fund for which you are setting up the Fund Residency Restriction
profile. This information is defaulted from the Fund Demographics screen.
Rule Effective Date
Display
The Rule Effective Date for the fund, which you specified in the Fund Demographics screen,
is displayed here.
Country Code
Optional
Choose only the countries that you wish to allow for the fund from the option list. When you
do not choose any country, all the countries are allowed for the fund.
4.6
Fund Sale Country Restrictions
This fund rule facilitates the maintenance of restrictions in respect of the fund being allowed
for sale or operations in certain countries. You can maintain a list of countries as the only
countries where the fund is allowed for sale.
To set up the country of sale restrictions for a fund, use the Fund Sale Country Restriction
screen. You can invoke this screen by clicking the Fund Sale Country link from the Fund
Demographics screen.
4.6.1
Checks
Before you set up a Fund Sale Country Restriction profile record for a fund, it is desirable to
ensure that the following information is already setup in the system:
The fund already has an existing, unauthorized Fund Demographics profile record.
The countries of domicile must be identified in the system in the Country Maintenance.
4-39
4.6.2
Fields in Fund Sale Country Restriction Screen
Fund ID
Display
This field indicates the ID fund for which you are setting up the Fund Sale Country Restriction
profile. This information is defaulted from the Fund Demographics screen.
Rule Effective Date
Display
The Rule Effective Date for the fund, which you specified in the Fund Demographics screen,
is displayed here.
Country Code
Optional
Choose only the countries that you wish to allow for the fund from the option list. When you
do not choose any country, all the countries are allowed for the fund.
4.7
Fund Transaction Currency Restrictions
This fund rule facilitates the maintenance of restrictions in respect of the currencies that may
be used in a transaction. You can maintain a list of currencies that will be exclusively allowed
as valid transaction currencies, and all other currencies will not be accepted in the process of
the transaction.
To set up the transaction currency restrictions for a fund, use the Fund Transaction Currency
Restriction screen. You can invoke this screen by clicking the Fund Transaction Currencies
link from the Fund Rules screen.
4.7.1
Checks
Before you set up a Fund Transaction Currency Restriction profile record for a fund, it is
desirable to ensure that the following information is already setup in the system:
The fund already has an existing, unauthorized Fund Demographics profile record.
The currencies must be identified in the system in the Currency Maintenance.
4-40
4.7.2
Fields in Fund Transaction Currency Restriction Screen
Fund ID
Display
This field indicates the ID fund for which you are setting up the Fund Transaction Currency
Restriction profile. This information is defaulted from the Fund Demographics screen.
Rule Effective Date
Display
The Rule Effective Date for the fund, which you specified in the Fund Demographics screen,
is displayed here.
Currency Code
Optional
Choose only the currencies that you wish to allow for transactions in the fund from the option
list. When you do not choose any currency, all the currencies are allowed for the fund
4.8
Setting up Specific Price Dates
The price (Real NAV) applicable for a fund is declared on a daily basis by the Fund Manager.
On any business day, the transactions that are entered are picked up and allocated by the
End of Day process using the Real NAV declared for that business day.
You can also set up a specific date on which all transactions entered during a period can be
allocated, using the price as on that date. This specific date can be maintained for each
transaction type mapped to a fund. A specific pricing frequency can also be set up for the
application of the specific pricing date.
Example
For the Carey Bugle Memorial Fund, a specific price date has been maintained for IPO and
subscription transactions, which is the 15th January 2002. The specific pricing is to be applied
on a monthly frequency basis, the first specific price date being 15th January 2002. The
declared price on this date is 12.45 for IPO, and 12.34 for subscription.
All IPO and subscription transactions that have been entered into the Carey Bugle Fund from
the 1st January 2002 till the 15th January 2002 will be allocated on 15th January 2002, using
the prices 12.45 and 12.34 respectively.
Any IPO or subscription transactions entered between 1st January and 15th can be redeemed
by the concerned unit holders only after 15th January.
The next specific pricing date for IPO and subscription transactions will be 15th February
2002, (the pricing frequency being monthly), and all IPO and subscription transactions
entered between 16th January 2002 and 15th February 2002 will be allocated on this date.
Note
If specific pricing has been defined for a fund, the specific pricing parameters would take
precedence over the pricing method and frequency defined in the General Operating
Rules for the fund.
4-41
4.8.1
Setting up Specific Price Date Parameters for Fund
To set up specific price dates for any transaction types mapped to a fund, use the ‘Specific
Fund Price Date Setup’ screen. Invoke this screen from the ‘Fund Rules’ screen by clicking
‘Specific Fund Price Date’ link.
Setting up the specific price date is an optional fund rule, and may be edited, authorized or
amended just as the other fund rules.
For a fund, you can specify whether specific prices are to be applicable:
4.8.2
With the first specific price date being the rule effective date (application date). In such
a case, specific pricing date parameters can be defined for individual transaction types,
in the main Specific Fund Price Date screen.
With the first specific price date being a date in the future (forward pricing). This option
can be set only for post-priced funds, and the specific pricing date parameters so
specified will be applicable for all transaction types. In such a case, specific pricing date
parameters cannot be defined for individual transaction types.
Fields in Specific Fund Price Date Setup
Fund ID
Display
This field indicates the ID fund for which you are setting up the Specific Price Date rule. This
information is defaulted from the Fund Demographics screen.
Rule Effective Date
Display
The Rule Effective Date for the fund, which you specified in the Fund Rules Detail screen, is
displayed here.
Forward Pricing Applicable
You can use this field to indicate whether forward specific pricing is applicable for the fund To
select this option, choose ‘Yes’.
4-42
When you opt for forward pricing, you should choose the ‘User Defined’ option for Price
Frequency and define the price dates in the ‘Details’ section in the Pricing Frequency
Definition screen. You may, if you choose, also maintain a Cut-off frequency.
If forward pricing is applicable, then you must also indicate the parameters given below in
addition to the pricing frequency and the holiday rule:
Whether the pricing frequency is applied based on the system calendar, fund calendar
or actual calendar
The specific day on which the price would be made available
Note
Forward specific pricing can be indicated only for post-priced funds.
Calendar Basis
Alphanumeric; Mandatory
In this field you can indicate whether the pricing frequency takes into consideration the fund
calendar, system calendar or the actual calendar
Pricing Frequency
Select the frequency at which the pricing dates will occur, from the options in the drop down
list.
Daily
Weekly
Fortnightly
Monthly
Quarterly
Half-Yearly
Yearly
If you choose an option other than daily, you must define the frequency of pricing for the fund
in Pricing Frequency Definition screen. The frequency of fund-price input and allocations will
happen on dates based on the definitions in Pricing Frequency Definition screen
Forward Pricing Not Applicable
If you indicate forward pricing is not allowed, you will be able to view the fields in the screen
given above. You must specify the following information in the Details section to set up a
specific pricing date.
Price Day
Date format, Mandatory
Indicate the specific date on which the price used for allocation is declared. Consequent to
this first price date, the system will arrive at the next price date by taking into consideration
the price frequency.
The date specified here must be the Rule Effective Date. Future dates cannot be specified.
Price Month
Specify the month when the price is to be user input.
4-43
Price Week
Specify the month when the price is to be user input.
Price Frequency Definition
Alphanumeric, Mandatory
Specify the frequency at which the pricing dates will occur. The adjoining option list displays
the valid price frequency definition codes maintained in the system. You can choose the
appropriate one. In the option list you will find information on price frequency and the price
frequency definition.
Automatic Generation of Prices for Funds with Specific Pricing Dates
Choose one of the following options for automatic fund price generation from the drop-down
list:
Auto Generate Fund Prices using the last available price and authorize the same.
Auto Generate Fund Prices using the last available price, but do not authorize the same.
Do not Auto Genertae Fund Prices
Note: As mentioned earlier, if specific pricing has been defined for a fund, the specific pricing
parameters would take precedence over the pricing method and frequency defined in the
General Operating Rules for the fund. Also, the prices for funds with specific pricing are only
picked up on the specific pricing date (the Price Day).
For such funds, you may require fund price information on all working days of the selected
calendar (fund or system), even though the price is picked up for transactions only on the
specific pricing date. You can indicate automatic generation of fund prices, for such funds.
When you indicate automatic generation of fund prices, the system uses the last available
price for the fund, and automatically generates the fund price for each working day.
You can specify the required option for automatic generation of prices, in the Auto Generation
of Fund Prices field.
Note
4.8.2.1
–
Automatic generation of fund prices is available only for funds with specific pricing
–
Automatic generation of fund prices takes place only for those funds with specific
pricing, for which the specific pricing frequency is any frequency other than ‘Daily’.
Details Section
Transaction Type
Alphanumeric, Mandatory
Select the type of transaction for which the specific pricing date is applicable, for the fund.
First Price Date
Indicate the specific date on which the price used for allocation is declared. Consequent to
this first price date, the system will arrive at the next price date by taking into consideration
the price frequency.
The date you specify here should be the same as the Rule Effective Date.
If you wish to specify the first price date as a future date, then you must indicate forward
pricing.
4-44
Holiday Rule
In the event of the price date being a holiday in the system, indicate whether the next or
previous working day is to be considered as the price date.
If the next working day is to be considered, select ‘Next Day’. If the previous working day is to
be considered, select ‘Previous Day’.
Dealing Lag (In Days)
Indicate the lag period (in days) for the dealing date. The lag value is interpreted in fund
calendar days, and is used to arrive at the dealing date for the fund price.
Dealing date is the number of business days (based on the fund calendar) prior to/after the
price date of the fund.
Dealing Rule
Indicate the dealing rule to be applied while deriving the dealing date. Dealing date for a
transaction is derived based on the forward or backward lag with regard to the fund price date.
If the dealing rule is ‘After’, then the dealing lag will be added to the price date. If the dealing
rule is ‘Prior’, then the dealing lag will be deducted from the price date.
Cut-off Day
Optional
You may choose to maintain cut-off dates for funds to facilitate ease of operation.
Cut-off Week
Specify the cut-off week for funds
Cut-off Month
Specify the cut-off month for funds
Cut off Frequency
Optional
Select the transaction cut-off date options for different frequencies, from the options in the
drop down list.
Daily- Based on Price Date
Weekly
Fortnightly
Monthly
Quarterly
Half-Yearly
Yearly
Cut-off Frequency Definition
Optional
Specify the frequency at which the cut-off should take place by choosing one of the following
from the drop-down list:
Based on weekend and weekday
Based on Month Day
4-45
User Defined Price Date Section
Price Date
If you choose the option User Defined, you should specify the price dates.
You can specify the Price Dates in the Details section by clicking on the option list. This is
enabled only when the Pricing Frequency Definition option is User Defined.
In all cases, if the next price date falls on a holiday, the holiday rule set for the specific date
setup is applied to arrive at the next price date.
You can also specify the last day of the cycle (month, quarter, half-year or year) as the price
date. To do this, check the option ‘Based on last specified day of the cycle’. Prices are made
available on the last day of the cycle that you specify. You can specify any weekday from
Sunday to Saturday as the last day. For instance, if you have specified a monthly frequency,
enabled the ‘Based on last specified day of the cycle’ option, and specified Sunday as the last
day, prices are made available on the last Sunday of each month.
Note
The prices that are generated will be used for reporting only. You will however, be allowed
to Edit/Amend the Unauthorized/Authorized fund price that is generated if any Adhoc Price
Dates are maintained that day.
4.8.2.2
Specifying Price Date Options for Different Frequencies
You can specify the price date options for different frequencies according to the guidelines in
the table below:
Pricing
Frequency
Price Day
Price Week
Daily
Price
Month
Remarks
Prices will be
made available on all
days of the
chosen calendar.
Weekly
Any day from
Sunday to Saturday *
Fortnightly
Any day from
Sunday to Saturday for the
selected week *
Monthly
(based on
month day)
Any day from the
1st to the 31st of
the month
Prices will be
picked up as
on the specified price day
Either the first
week or the
second week
of the fortnight
Prices will be
picked up as
on the specified price day
Prices will be
picked up as
on the specified price day
4-46
Pricing
Frequency
Price Day
Price Week
Monthly
(based on
week and
weekday)
Any day from
Sunday to Saturday for the
selected week *
Any week from
the first to the
last week of
the month
Quarterly
Any day from
Sunday to Saturday for the
selected week *
Any week from
the first to the
last week of
the selected
month
Any month
from the first
to the third
month of the
quarter
Prices will be
picked up as
on the specified price day
Half-Yearly
Any day from
Sunday to Saturday for the
selected week *
Any week from
the first to the
last week of
the selected
month
Any month
from the first
to the sixth
month of the
half-year
Prices will be
picked up as
on the specified price day
Yearly
Any day from
Sunday to Saturday for the
selected week *
Any week from
the first to the
last week of
the selected
month
Any month
from the first
to the twelfth
month of the
year
Prices will be
picked up as
on the specified price day
Price
Month
Remarks
Prices will be
picked up as
on the specified price day
User Defined
Prices will be
made available on days
chosen.
“*” - Sunday is considered the first day of the week, and Saturday, the seventh day.
For quarterly frequencies, you can indicate either of the following:
A certain day of certain month of every quarter.
A certain day of certain week of certain month of every quarter.
For half-yearly frequencies, you can indicate:
A certain day of certain month of either / both halves of the year.
A certain day of certain week of certain month of either / both halves of the year.
For yearly frequencies, you can indicate:
4.8.2.3
A certain day of certain month of every year.
A certain day of certain week of certain month of every year
Specifying Cut-off date for Different Frequencies
You can specify the transaction cut-off date options for different frequencies according to the
guidelines in the table below:
Cut-off
Frequency
Weekly
Cut-off Day
Cut-off Week
Any day from Sunday
to Saturday *
4-47
Cut-off Month
Cut-off
Frequency
Cut-off Day
Cut-off Week
Cut-off Month
Fortnightly
Any day from Sunday
to Saturday for the
selected week *
Either the first week
or the second week of
the fortnight
Monthly
(based on
month day)
Any day from the 1st to
the 31st of the month
Monthly
(based on
week and
weekday)
Any day from Sunday
to Saturday for the
selected week *
Any week from the
first to the last week of
the month
Quarterly
Any day from Sunday
to Saturday for the
selected week *
Any week from the
first to the last week of
the selected month
Any month from the
first to the third month
of the quarter
Half-Yearly
Any day from Sunday
to Saturday for the
selected week *
Any week from the
first to the last week of
the selected month
Any month from the
first to the sixth month
of the half-year
Yearly
Any day from Sunday
to Saturday for the
selected week *
Any week from the
first to the last week of
the selected month
Any month from the
first to the twelfth
month of the year
“*” - Sunday is considered the first day of the week, and Saturday, the seventh day.
4.8.3
How pricing frequency is considered
Without Forward Pricing
If the first specific price date is the rule effective date (application date), the next price date is
arrived at based on the pricing frequency as follows:
Pricing Frequency
Next price date
Daily
Last price date + 1 calendar day
Weekly
Last price date + 7 calendar days
Fortnightly
Last price date + 14 calendar days
Monthly
Last price date + 30 calendar days
Quarterly
Last price date + 90 calendar days
Half-Yearly
Last price date + 180 calendar days
Yearly
Last price date incremented by one year
If the next specific price date so arrived at falls on a holiday, the holiday rule defined for the
specific price date is taken into account. Accordingly, the actual price date is taken as the
next working day (if the holiday rule is ‘After’) or the previous working day (if the holiday rule
is ‘Prior’)
4-48
Note
The actual calendar is considered in arriving at the next price date, in the logic discussed
above.
Forward Pricing
If the first specific price date is a date in the future (forward pricing), the next price date is
arrived at based on the following factors:
Pricing frequency that has been specified.
Whether the frequency takes into account the Fund Holiday Calendar or System
Holiday Calendar.
The specified price day, week or month.
The holiday rule indicated for the specific pricing.
The next price date is arrived at as given in the example below for various combinations:
Price
Frequency
Price
Month
Price
Wee
k
Price
Day
Daily
Price available on
Price can be entered from Sunday to Saturday
Weekly
Fortnightly
(Price week
specified)
1
Fortnightly
(Price week
not specified)
Monthly (Price
week specified)
4
Monthly (Price
week not
specified)
3
Third day (Tuesday) of every week
4
Fourth day of the first week of the fortnight.
4
Fourth day of the fortnight
2
Monday of fourth week of every month.
2
Second day of the month
Quarterly
1
1
1
Sunday of first week of first month of
every quarter.
Half Yearly
5
2
4
Fourth day of second week of fifth month
of every half.
Yearly
9
3
5
Last day of third week of every September.
If the next specific price date so arrived at falls on a holiday in the specified calendar (Fund
or System), the holiday rule defined for the specific price date is taken into account.
Accordingly, the actual price date is taken as the next working day (if the holiday rule is ‘Next
Day’) or the previous working day (if the holiday rule is ‘Previous Day’)
4-49
4.8.4
How Cut-off Frequency is Considered
The system determines the specific pricing cycle (either current or subsequent) to be used
based on the cut-off frequency and cut-off days defined for the transaction type.
If the transaction date exceeds the cut-off date, the price date is moved to the next specific
pricing cycle.
The cut-off date is arrived at as given in the example below for various combinations:
Cut-off Frequency
Cut-off
Month
Cutoff
Week
Weekly
Fortnightly (Price
week specified)
1
Fortnightly (Price
week not specified)
Monthly (Price week
specified)
4
Monthly (Price week
not specified)
Cut-off
Day
Remarks
3
Third day (Tuesday) of every
week
4
Fourth day of the first week of
the fortnight.
4
Fourth day of the fortnight
2
Monday of fourth week of every
month.
2
Second day of the month
Quarterly
1
1
1
Sunday of first week of first
month of every quarter.
Half Yearly
5
2
4
Fourth day of second week of
fifth month of every half.
Yearly
9
3
5
Last day of third week of every
September.
The examples given below illustrate how the cut-off frequency is considered.
Example 1
Pricing
Frequency
Weekly
Price Day
4 (Thursday)
Cut-off
Frequency
Cut-off
Day
Weekly
1 (Monday)
Let us suppose the current date is a Wednesday. Since it is beyond the cut-off day for the
week, the specific price date is moved to the next cycle, that is, the specific price of the
Thursday of the week is considered.
4-50
Example 2
Pricing
Frequency
Weekly
Price Day
4 (Thursday)
Cut-off
Frequency
Cut-off
Day
Cut-off
Week
Monthly
1
4
The cut-off day is the Monday of the fourth week of the month. If the current date is 10th
September 2003 (say a Wednesday), it falls in the second week of the month. Since it is
before the cut-off day for the present cycle, the specific price date falls on the current cycle,
that is, the pricing on 4th September (the Thursday of the current pricing cycle) is considered.
If, in this same example, the cut-off week is 2, then the cut-off day is the Monday of the second
week of the month. Since the current date, 10th September 2003, a Wednesday, is beyond
the cut-off day, the specific price date is moved to the subsequent cycle, that is, the pricing
on 11th September (the Thursday of the subsequent pricing cycle) is considered.
Note
The number of business working days is considered while determining the cut off days.
The number of cut off days does not include the Fund holiday and the AMC Holiday.
4.9
Mapping Investment Account Types to Fund
To associate the allowable fund investment account types for a fund, you can use the Fund
Investment Account screen. When you are setting up a fund, you can invoke this screen from
the Fund Demographics screen by clicking on the Fund Investment Account link.
Note
You can also use the Fund Investment Account screen to map provident fund account
types as well as non-provident fund account types (such as cash nominee account types)
to a fund.
4-51
4.9.1
Specifications in Screen
In this screen, select the allowable fund investment account types for the fund, in the Account
Type field.
For each investment account type that you associate for the fund, you must specify a validity
period, by indicating a start date for validity and an end date.
4.9.2
Operations on Fund Investment Account Specifications
The Fund Investment Account specifications can be copied for child umbrella funds or made
part of a fund template. They can also be uploaded from a bulk client as fund rules for a fund.
Through the fund rule amendment function, you can change the account types allowable, by
revoking an existing allowable account type, and allowing a new type.
4.9.3
Fields in Fund Investment Account Screen
Fund ID
Display
This field indicates the ID fund for which you are setting up the Fund Investment Account
profile. This information is defaulted from the Fund Demographics screen.
Rule Effective Date
Display
The Rule Effective Date for the fund, which you specified in the Fund Demographics screen,
is displayed here.
4.9.3.1
Details Section
Account Type
Alphanumeric; Mandatory
From the drop down list, select the fund investment account type that you wish to allow, for
the fund. You can select either CPF or non-CPF account types in this field, to be mapped for
the fund.
Minimum Age
Specify a minimum age required for an investor to invest in the for the account type specified.
If the age of the investor is lower than the minimum age specified, he will not be allowed to
invest in this account type,
Start Date
Date Format, Mandatory
Specify the date that marks the beginning of the period for which the selected fund investment
account type is allowed for the fund.
If you have selected a non-CPF account type, you need not specify the Start Date. The
system defaults the Low Date Value maintained in the Defaults Maintenance as the Start
Date.
End Date
Date Format, Mandatory
Specify the date that marks the end of the period for which the selected fund investment
account type is allowed for the fund.
4-52
If you have selected a non-CPF account type, you need not specify the End Date.
4.10 Maintaining Additional Information for Fund
To maintain any additional information for a fund, click on the Additional Information link in the
Fund Demographics screen. The Fund Add Info screen is opened, with the different
information heads maintained for the AMC, where you can specify the information.
You can only maintain additional information if any information heads have been maintained
in the System Parameters, to be applicable for funds, for the AMC.
The information heads that you maintain are user defined. You will have to map the same
against the entity type ‘Fund’ in the Entity Mapping Maintenance screen.
Note
The Additional Information section allows you to capture valuation data and has no processing implications.
4-53
Refer to the chapter Maintaining System Parameters in Volume 1 of the Fund Manager User
Manual for further information.
4.11 KYC Maintenance
You can maintain a list of required KYC documents specific for the fund. Click on the KYC
Maintenance link in the Fund Demographics screen. The KYC Maintenance Detail screen is
opened.
Specify the required document in the Requirement field and check the checkbox provided
alongside to indicate that the document must be collected from the investor. You can select /
deselect all documents by checking/unchecking the ‘Select/Unselect All’ checkbox.
4.11.1
Fund Rules Summary Screen
You can perform the following operations in the Fund Rules Summary screen:
4.11.1.1 Retrieving Record in Fund Rules Summary Screen
You can retrieve a previously entered record in the Summary Screen, as follows:
Invoke the ‘Funds Rule Summary’ screen by typing ‘UTSFNDRL’ in the field at the top right
corner of the Application tool bar and clicking on the adjoining arrow button. Specify any or all
of the following details in the corresponding fields:
The status of the record in the Authorization Status field. If you choose the ‘Blank Space’
option, then all the records are retrieved.
The status of the record in the Record Status field. If you choose the ‘Blank Space’
option, then all records are retrieved
Fund ID
Rule Effective Date of the fund
Fund name
AMC name
Latest Rule
ISIN No
Fund Ticker symbol
4-54
Fund type
Whether fund is enabled or not
Hedge Fund
Whether the fund is an umbrella fund or not
Click ‘Search’ button to view the records. All the records with the specified details are retrieved
and displayed in the lower portion of the screen.
Note
You can also retrieve the individual record detail from the detail screen by querying in the
following manner:
–
Press F7.
–
Input the Fund Id.
–
Press F8.
You can perform Edit, Delete, Amend, Authorize, Reverse, Confirm operations by selecting
the operation from the Action list. You can also search a record by using a combination of %
and alphanumeric value.
Example
You can search the record for Fund ID by using the combination of % and alphanumeric value
as follows:
Search by A%: The system will fetch all the records whose Fund ID starts from Alphabet
‘A’. For example, AGC17, AGVO6, AGC74 and so forth.
Search by %7: The system will fetch all the records whose Fund ID ends by numeric
value’ 7’. For example, AGC17, GSD267, AGC77 and so forth.
Search by %17%: The system will fetch all the records whose Fund ID contains the
numeric value 17. For example, GSD217, GSD172, AGC17 and so forth.
4-55
4.11.1.2 Editing Fund Rules Record
You can modify the details of a Fund Rules record that you have already entered into the
system, provided it has not been subsequently authorized. You can perform this operation as
follows:
Invoke the Fund Rules Summary screen from the Browser.
Select the status of the record that you want to retrieve for modification in the Authorized
field. You can only modify records that are unauthorized. Accordingly, choose the
unauthorized option.
Specify any or all of the details in the corresponding fields to retrieve the record that is
to be modified.
Click ‘Search’ button. All unauthorized records with the specified details are retrieved
and displayed in the lower portion of the screen.
Double click the record that you want to modify in the list of displayed records. The Fund
Rules Detail screen is displayed.
Select Unlock Operation from the Action list to modify the record. Modify the necessary
information.
Click Save to save your changes. The Fund Rules Detail screen is closed and the
changes made are reflected in the Fund Rules Summary screen.
4.11.1.3 Viewing Fund Rules Record
To view a record that you have previously input, you must retrieve the same in the Fund Rules
Summary screen as follows:
Invoke the Fund Rules Summary screen from the Browser.
Select the status of the record that you want to retrieve for viewing in the Authorization
Status field. You can also view all records that are either unauthorized or authorized
only, by choosing the Unauthorized/ Authorized option.
Specify any or all of the details of the record in the corresponding fields on the screen.
Click ‘Search’ button. All records with the specified fields are retrieved and displayed in
the lower portion of the screen.
Double click the record that you want to view in the list of displayed records. The Fund
Rules Detail screen is displayed in View mode.
4.11.1.4 Deleting Fund Rules Record
You can delete only unauthorized records in the system. To delete a record that you have
previously entered:
Invoke the Fund Rules Summary screen from the Browser.
Select the status of the record that you want to retrieve for deletion.
Specify any or all of the details in the corresponding fields on the screen.
Click ‘Search’ button. All records with the specified fields are retrieved and displayed in
the lower portion of the screen.
Double click the record that you want to delete in the list of displayed records. The Fund
Rules Detail screen is displayed.
Select Delete Operation from the Action list. The system prompts you to confirm the
deletion and the record is physically deleted from the system database.
4-56
4.11.1.5 Authorizing Fund Rules Record
An unauthorized Fund Rules record must be authorized in the system for it to be processed.
To authorize a record:
Invoke the Fund Rules Summary screen from the Browser.
Select the status of the record that you want to retrieve for authorization. Typically,
choose the unauthorized option.
Specify any or all of the details in the corresponding fields on the screen.
Click ‘Search’ button. All records with the specified details that are pending
authorization are retrieved and displayed in the lower portion of the screen.
Double click the record that you wish to authorize. The Fund Rules Detail screen is
displayed. Select Authorize operation from the Action List.
When a checker authorizes a transaction, details of validation, if any, that were overridden by
the maker of the transaction during the Save operation are displayed. If any of these overrides
results in an error, the checker must reject the transaction.
Note
You cannot edit or delete an authorized fund rule
You can map agents to a fund, set up backdating limits, and enter transaction prices for a
fund only after you authorize it. Similarly, the tracking of limits, and acceptance of unit
holder transactions into the fund can only take place after authorization.
You cannot authorize a fund until you have maintained the following fund rules for it:
–
Fund Demographics
–
General Operating Rules
–
Shares Characteristics
–
Transaction Processing Rules
–
Fund Sale Country rule
–
Fund Residency Restriction rule
–
Fund Transaction Currency rule
The following fund rules are not mandatory for a fund, and it can be authorized without
them:
–
Corporate Actions
–
Fund Formula Maintenance
–
Fund Load Setup
These fund rules may be maintained as and when necessary.
4.11.1.6 Amending Fund Rules Record
After a Fund Rules record is authorized, it can be modified using the Unlock operation from
the Action List. To make changes to a record after authorization:
Invoke the Fund Rules Summary screen from the Browser.
Select the status of the record that you want to retrieve for authorization. You can only
amend authorized records.
Specify any or all of the details in the corresponding fields on the screen.
Click ‘Search’ button. All records with the specified details that are pending
authorization are retrieved and displayed in the lower portion of the screen.
4-57
Double click the record that you wish to authorize. The Fund Rules Detail screen is
displayed in amendment mode. Select Unlock operation from the Action List to amend
the record.
Amend the necessary information and click on Save to save the changes.
Note
An amendment must be subsequently authorized so that the new rules come into effect
on the new rule effective date. You must specify a date that is either the current date or
later.
The Fund Name and Fund Short Name cannot be altered for umbrella funds, sub-funds
and share class funds, during an amendment.
You will not be able to successfully amend the Specific Fund Price Date Setup if the Rule
Effective Date is lesser than the Application Date. While amending, the Rule Effective Date
will have to be GREATER than the Application Date.
If required, fund rules may be amended on a business day, with the new Rule Effective
Date being the current date itself. This feature is only available if your installation has specifically requested for it. An exhaustive note on this feature is available in the Annexure.
You can amend the following basic details provided no transactions have been accepted
for the fund, and provided no fund price has been entered for the fund:
–
Start date (provided no dividends have been generated in respect of the fund)
–
Fiscal start and end dates (provided no dividends have been generated in respect
of the fund)
–
Fund base currency, provided the new fund base currency that you specify is
necessarily a fund transaction currency, as designated in the Fund Transaction
Currency Restriction rule
–
Fund country, provided the new fund country that you specify is necessarily not restricted in the Fund Sale Country or Fund Residency Restriction rules.
4.11.1.7 Authorizing Amended Fund Rules Record
An amended Fund Rules record must be authorized for the amendment to be made effective
in the system. The authorization of amended records can be done only from Fund Manager
Module and Agency Branch module.
The subsequent process of authorization is the same as that for normal transactions.
4.11.1.8 Copying Attributes
If you want to create a new Fund Rules record with the same attributes of an existing
maintenance, you can copy the attributes of an existing Fund Rules record to a new one.
To copy the attributes:
Retrieve the record whose attributes the new Fund Rules record should inherit. You can
retrieve the record through the Summary screen or through the F7-F8 operation
explained in the previous sections of this chapter.
Click on Copy
Indicate the ID for the new Fund Rules record. You can, however, change the details of
the new record.
4-58
5. Other Fund Activities
5.1
Associating Entities with Funds
This screen can be used to associate entities with a fund. You can maintain either a list of
‘restricted’ entities, or an ‘allowed’ list.
If you maintain a restrictive list as ‘Yes’, only the entities that you maintain in the list in the
Fund Entity Maintenance screen for a fund are restricted from transacting in the selected
fund. If you maintain a restrictive list as ‘No’ , only the entities that you maintain in the list in
the Fund Entity Maintenance screen are allowed to transact in the selected fund. If you
maintain neither a restrictive nor an allowed list, all entities of a type are allowed to transact
in the fund.
Agents
In the case of agents, mapping can be carried out for only those Agents and their branches
as have been created using the Agent and Agency Branch screens. Only those agents and
their branches that have been mapped to a fund as part of an ‘allowed’ list will be able to
accept transactions related to that particular fund. Agents and their branches maintained as
a ‘restrictive’ list will not be able to accept transactions for the fund.
Distributor agents can also be mapped to the fund. This would be required in a scenario
where the Distributor markets certain funds of the AMC, or in cases where a service agent
performs back office processing for an AMC as well as a Distributor.
Customer Categories
Your AMC may wish to restrict investment in a fund based on investor categories, allowing
only investors of certain categories to invest. Also, your AMC may wish to restrict or allow use
of a fund to certain unit holders. You can maintain lists of such allowed / restricted investor
categories (or unit holders) in the Fund Entity Maintenance screen in the Fund Manager
component of the system.
At the transaction entry or upload (including adjustment transactions), standing instructions
entry or upload, or income distribution setup, the unit holders in a restricted list or belonging
to the restricted categories cannot be specified. For an allowed list, at the transaction entry
or upload (including adjustment transactions), standing instructions entry or upload, or
income distribution setup, the unit holders in the allowed list or belonging to the allowed
categories can be specified.
If you maintain neither a restrictive nor an allowed list, all customers are allowed to transact
in the fund.
CIFs
You might need to restrict certain CIFs from a restricted category from transacting in a fund.
You can maintain such restrictions in the Fund Entity Maintenance screen.
You can disallow CIFs belonging to a restricted category (a restrictive list); or, you might
require maintaining a list of CIFs that are allowed to transact in a fund (a positive list).
The system checks the CIF number specified for any transaction that is entered in the
Transaction Detail screens as well as in the Standing Instructions Detail screen, to see if any
restrictions have been maintained that would entail disallowing the specified CIF from
transacting into the fund. The restrictions, if any, applicable at the following levels, would be
enforced:
5-1
Unit Holder Account
CIF
Investor Category
Check Vendors
Using this screen, you can also associate a check vendor that is maintained as an entity in
the system, with those funds for which the vendor is designated to print checkbooks that are
requested by investors availing the check writing facility.
5.1.1
Fund Entity Maintenance Screen
To map entities to a fund, use the ‘Fund Entity Mapping Detail’ screen. You can invoke this
screen by typing ‘UTDFNENT’ in the field at the top right corner of the Application tool bar and
clicking on the adjoining arrow button. The ‘Fund Entity Mapping Detail’ screen is displayed.
Select ‘New’ from the Actions menu in the Application tool bar or click new icon to enter the
details of the fund and entity that you wish to map.
You can only map entities to a fund for which the latest rule is effective, and all fund rules have
been authorized.
When you enter a fund entity mapping in this screen, you can save it by selecting the save
option from the action menu.
5.1.2
Fields in Fund Entity Maintenance Screen
Umbrella Fund
Mandatory
Select ‘Yes’ if the fund for which you wish to maintain the fund entity association is an umbrella
fund.
5-2
Fund ID
6 Character Maximum, Mandatory
Select the fund for which you want to map entities, from the options provided. If you specify
the fund, the ISIN Code of the selected fund is displayed in the ISIN Code field. You can also
map all the funds to an entity by selecting ‘All’ option from the option list.
If you have selected the ‘All’ option, then any new fund created in the system will be
automatically mapped to this entity. You will not be able to map individual fund to this entity.
Similarly, if individual fund is mapped to an entity, then the system will not allow you to map
all the funds to the same entity.
Entity Type
Alphanumeric; Mandatory
You can use this field to indicate the type of entity that is to be associated with the selected
fund. You can associate any of the following entities:
Agent
Investor
Individual Investor Categories
Corporate Investor Categories
Check Vendor
Clearing Agent
CIF Number
Broker
If you are maintaining a restrictive / positive list of CIFs that you wish to disallow / allow to
transact into the specified fund, you must select the CIF Number option in this field.
If you select the CIF Number option, you can also specify the appropriate restriction category
and any remarks, in the Restriction Category and Remarks fields.
Entity ID
12 Character; Numeric; Mandatory
Select the code of the entity that is to be allowed to operate this fund, from the options
provided. It could be an agent, or a check vendor who is designated to print checkbooks that
are requested by investors availing the check writing facility; it could also be a unit holder,
individual or corporate investor category, or a clearing agent.
Restrictive List
Optional
Use this field to indicate whether you are maintaining a list of ‘allowed’ entity associations for
the fund, or a ‘restrictive’ one. Check this box to indicate a restricted list; leave it unchecked
to indicate an allowed list.
If you maintain a ‘restrictive list’, only the entities that you specify are restricted from
transacting in the selected fund. If you maintain an ‘allowed’ list, only the entities that you
specify are allowed to transact in the selected fund.
Based on the installation setup, the system validates Broker fund mapping in one the following
ways:
If any broker or brokerage is mapped to a fund and the restrictive list value is selected
as ‘No’, then only those brokers and the sub-brokers are allowed to transact in the fund.
If any broker or brokerage is mapped to a fund and the restricted list is listed as ‘Yes’,
5-3
then all the brokers apart from the disallowed list are allowed to in the fund, unless you
map the sub-brokers of the disallowed brokers to a particular fund.
If any broker or brokerage is mapped to a fund and the restrictive list value is selected
as ‘No’, then only those brokers are allowed to transact in the fund, the sub-brokers are
not allowed to transact in the mapped fund. If any broker or brokerage is mapped to a
fund and the restricted list is listed as ‘Yes’, then all the brokers apart from the
disallowed list are allowed to transact in the fund, even the sub-brokers of disallowed
parent broker are allowed.
ISIN Code
25 Characters; Alphanumeric; Mandatory
Select the ISIN Code of the fund for which you want to map entities, from the options provided.
If you specify the ISIN Code of a fund, the ID of the fund is displayed in the Fund field.
Entity Name
Display Only
On selection of the Entity Code, the system automatically displays the name of the entity.
Remarks
Alphanumeric; Optional
If you are maintaining a restrictive / positive list of CIFs that you wish to disallow / allow to
transact into the specified fund, you can specify any appropriate remarks in this field.
Restriction Category
Alphanumeric; Optional
If you are maintaining a restrictive / positive list of CIFs that you wish to disallow / allow to
transact into the specified fund, you can select the appropriate restriction category in this field.
5.1.3
Fund Entity Mapping Summary Screen
You can invoke the ‘Fund Entity Mapping Summary’ screen by typing ‘UTSFNENT’ in the field
at the top right corner of the Application tool bar and clicking on the adjoining arrow button.
You can perform the following operations in the Fund Entity Mapping Summary Screen:
5-4
5.1.3.1
Retrieving Record in Fund Entity Mapping Summary Screen
You can retrieve a previously entered record in the Summary Screen, as follows:
Invoke the ‘Fund Entity Mapping Summary’ screen by typing ‘UTSFNENT’ in the field at the
top right corner of the Application tool bar and clicking on the adjoining arrow button. Specify
any or all of the following details in the corresponding fields:
The status of the record in the Authorized field. If you choose the ‘Blank Space’ option,
then all the records are retrieved.
The status of the record in the Open field. If you choose the ‘Blank Space’ option, then
all records are retrieved
Fund ID
Entity Type
Entity Id
Custom Values Setup
Click ‘Search’ button to view the records. All the records with the specified details are retrieved
and displayed in the lower portion of the screen.
Note
You can also retrieve the individual record detail from the detail screen by querying in the
following manner:
–
Press F7
–
Input the Fund Id
–
Entity Type
–
Entity ID
–
Press F8
You can perform Edit, Delete, Amend, Authorize, Reverse, Confirm operations by selecting
the operation from the Action list. You can also search a record by using a combination of %
and alphanumeric value.
Example
You can search the record for Fund ID by using the combination of % and alphanumeric value
as follows:
Search by A%: The system will fetch all the records whose Fund ID starts from Alphabet
‘A’. For example, AGC17, AGVO6, AGC74 and so forth.
Search by %7: The system will fetch all the records whose Fund ID ends by numeric
value’ 7’ For example, AGC17, GSD267, AGC77and so forth.
5.1.3.2
Search by %17%: The system will fetch all the records whose Fund ID contains the
numeric value 17. For example, GSD217, GSD172, AGC17 and so forth.
Editing Fund Entity Mapping
You can modify the details of Fund Entity Mapping that you have already entered into the
system, provided it has not subsequently authorized. You can perform this operation as
follows:
Invoke the Fund Entity Summary screen from the Browser.
5-5
5.1.3.3
Select the status of the record that you want to retrieve for modification in the Authorized
field. You can only modify records that are unauthorized. Accordingly, choose the
unauthorized option.
Specify any or all of the details in the corresponding fields to retrieve the record that is
to be modified.
Click ‘Search’ button. All unauthorized records with the specified details are retrieved
and displayed in the lower portion of the screen.
Double click the record that you want to modify in the list of displayed records. The Fund
Entity Mapping Detail screen is displayed.
Select Unlock Operation from the Action list to modify the record. Modify the necessary
information.
Click Save to save your changes. The Fund Entity Mapping Detail screen is closed and
the changes made are reflected in the Fund Entity Summary screen.
Viewing Fund Entity Mapping
To view a record that you have previously input, you must retrieve the same in the Fund Entity
Mapping Summary screen as follows:
5.1.3.4
Invoke the Fund Entity Mapping Summary screen from the Browser.
Select the status of the record that you want to retrieve for viewing in the Authorization
Status field. You can also view all records that are either unauthorized or authorized
only, by choosing the Unauthorized/ Authorized option.
Specify any or all of the details of the record in the corresponding fields on the screen.
Click ‘Search’ button. All records with the specified fields are retrieved and displayed in
the lower portion of the screen.
Double click the record that you want to view in the list of displayed records. The Fund
Entity Mapping Detail screen is displayed in View mode.
Deleting Fund Entity Mapping
You can delete only unauthorized records in the system. To delete a record that you have
previously entered:
5.1.3.5
Invoke the Fund Entity Mapping Summary screen from the Browser.
Select the status of the record that you want to retrieve for deletion.
Specify any or all of the details in the corresponding fields on the screen.
Click ‘Search’ button. All records with the specified fields are retrieved and displayed in
the lower portion of the screen.
Double click the record that you want to delete in the list of displayed records. The Fund
Entity Mapping Detail screen is displayed.
Select Delete Operation from the Action list. The system prompts you to confirm the
deletion and the record is physically deleted from the system database.
Authorizing Fund Entity Mapping
An unauthorized Fund Entity Mapping must be authorized in the system for it to be processed.
To authorize a record:
Invoke the Fund Entity Mapping Summary screen from the Browser.
Select the status of the record that you want to retrieve for authorization. Typically,
choose the unauthorized option.
Specify any or all of the details in the corresponding fields on the screen.
5-6
Click ‘Search’ button. All records with the specified details that are pending
authorization are retrieved and displayed in the lower portion of the screen.
Double click the record that you wish to authorize. The Fund Entity Mapping Detail
screen is displayed. Select Authorize operation from the Action List.
When a checker authorizes a transaction, details of validation, if any, that were overridden by
the maker of the transaction during the Save operation are displayed. If any of these overrides
results in an error, the checker must reject the transaction.
5.1.3.6
Amending Fund Entity Mapping
After a Fund Entity Mapping is authorized, it can be modified using the Unlock operation from
the Action List. To make changes to a record after authorization:
5.1.4
Invoke the Fund Entity Mapping Summary screen from the Browser.
Select the status of the record that you want to retrieve for authorization. You can only
amend authorized records.
Specify any or all of the details in the corresponding fields on the screen.
Click ‘Search’ button. All records with the specified details that are pending
authorization are retrieved and displayed in the lower portion of the screen.
Double click the record that you wish to authorize. The Fund Entity Mapping Detail
screen is displayed in amendment mode. Select Unlock operation from the Action List
to amend the record.
Amend the necessary information and click on Save to save the changes.
Authorizing Amended Fund Entity Mapping
An amended Fund Entity Mapping maintenance must be authorized for the amendment to be
made effective in the system. The authorization of amended records can be done only from
Fund Manager Module and Agency Branch module.
The subsequent process of authorization is the same as that for normal transactions.
5.1.5
Copying Attributes
If you want to create a new Fund Entity Mapping with the same attributes of an existing
maintenance, you can copy the attributes of an existing Fund Entity mapping to a new one.
To copy the attributes:
5.2
Retrieve the record whose attributes the new Fund Entity mapping should inherit. You
can retrieve the record through the Summary screen or through the F7-F8 operation
explained in the previous sections of this chapter.
Click on Copy.
Indicate the ID for the new Fund Entity mapping. You can, however, change the details
of the new maintenance.
Agency Branch Backdating Setup
This fund rule facilitates the maintenance of the back dating limits for a particular transaction
type for an agency branch in a fund. The backdating limit applicable for every transaction type
can also be specified in the Transaction Processing Rules profile for the fund, but if it is
necessary to handle exceptions for a few agency branches for specific transaction types, the
same can be maintained here. The information entered here will then supersede the
5-7
information in the Transaction Processing Rules profile for the fund, and for that agency
branch.
To set up the backdating options for a transaction type for a fund, use the ‘Fund Agency
BackDating Limit Setup Detail’ screen. You can invoke this screen by typing ‘UTDFALMT’ in
the field at the top right corner of the Application tool bar and clicking on the adjoining arrow
button.
Select ‘New’ from the Actions menu in the Application tool bar or click new icon to enter the
details of the backdating limits that you wish to maintain.
5.2.1
Checks
Before you set up an Agency Branch Backdating limits profile record for a fund, it is desirable
to ensure that the following information is already setup in the system:
5.2.2
The fund already has an existing, unauthorized Fund Demographics profile record.
The fund already has an existing, unauthorized Shares Characteristics profile record.
The fund already has an existing, unauthorized Transaction Processing Rules profile
record for the concerned transaction type.
Fields in Agency Branch Backdating Setup Screen
Fund ID
6 Character Maximum, Alphanumeric, Mandatory
The Fund ID is a unique identification for each Fund as defined in Fund Demographics.
Choose the fund from the list for which the Agency Branch backdating is being set up.
ISIN Code
12 Characters Maximum; Alphanumeric; Mandatory
Select the ISIN Code of the fund for which you want to set up agency branch backdating, from
the options provided. If you specify the ISIN Code of a fund, the ID of the fund is displayed in
the Fund field.
5-8
5.2.2.1
Agency Details Section
Agent Code
3 characters, Numeric, Mandatory
Enter the code of the agent who is allowed to operate this fund and for whom backdating is to
be done.
Agency Branch Code
3 characters, Numeric, Mandatory
Enter the branch code of the specified Agent for whom backdating is to be done.
Transaction Type
2 Character Maximum, Alphanumeric, Mandatory
Enter the Transaction Type for which backdating is to be done.
Backdating Period
3 Characters Maximum, Numeric, mandatory
Enter the number of days allowed in Backdating for that Agency Branch for the transaction
type specified above.
5.2.3
Fund Agency Backdating Limit Summary Screen
You can perform the following operations in the Fund Agency Backdating Limit Setup
Summary screen. You can invoke the Fund Agency BackDating Limit Setup Summary’ screen
by typing ‘UTSFALMT’ in the field at the top right corner of the Application tool bar and clicking
on the adjoining arrow button.
5.2.3.1
Retrieving Record in Fund Agency Backdating Limit Summary Screen
You can retrieve a previously entered record in the Summary Screen, as follows:
Invoke the summary screen and specify any or all of the following details in the corresponding
fields:
The status of the record in the Authorized field. If you choose the ‘Blank Space’ option,
then all the records are retrieved.
The status of the record in the Open field. If you choose the ‘Blank Space’ option, then
all records are retrieved
5-9
Fund ID
Click ‘Search’ button to view the records. All the records with the specified details are retrieved
and displayed in the lower portion of the screen.
Note
You can also retrieve the individual record detail from the detail screen by querying in the
following manner:
–
Press F7.
–
Input the Fund Id.
–
Press F8.
You can perform Edit, Delete, Amend, Authorize, Reverse, Confirm operations by selecting
the operation from the Action list. You can also search a record by using a combination of %
and alphanumeric value.
Example
You can search the record for Fund ID by using the combination of % and alphanumeric value
as follows:
Search by A%: The system will fetch all the records whose Fund ID starts from Alphabet
‘A’. For example, AGC17, AGVO6, AGC74 and so forth.
Search by %7: The system will fetch all the records whose Fund ID ends by numeric
value’ 7’. For example, AGC17, GSD267, AGC77 and so forth.
5.2.3.2
Search by %17%: The system will fetch all the records whose Fund ID contains the
numeric value 17. For example, GSD217, GSD172, AGC17 and so forth.
Editing Fund Agency Backdating Limit
You can modify the details of Fund Agency Backdating Limit that you have already entered
into the system, provided it has not subsequently authorized. You can perform this operation
as follows:
1. Invoke the Fund Agency Backdating Limit Summary screen from the Browser.
2. Select the status of the record that you want to retrieve for modification in the
Authorization Status field. You can only modify records that are unauthorized.
Accordingly, choose the unauthorized option.
3. Specify any or all of the details in the corresponding fields to retrieve the record that is to
be modified.
4. Click ‘Search’ button. All unauthorized records with the specified details are retrieved and
displayed in the lower portion of the screen.
5. Double click the record that you want to modify in the list of displayed records. The Fund
Agency Backdating Limit Detail screen is displayed.
6. Select Unlock Operation from the Action list to modify the record. Modify the necessary
information.
7. Click Save to save your changes. The Fund Agency Backdating Limit Detail screen is
closed and the changes made are reflected in the Fund Agency Backdating Limit
Summary screen.
5-10
5.2.3.3
Viewing Fund Agency Backdating Limit
To view a record that you have previously input, you must retrieve the same in the Fund
Agency Backdating Limit Summary screen as follows:
1. Invoke the Fund Agency Backdating Limit Summary screen from the Browser.
2. Select the status of the record that you want to retrieve for viewing in the Authorization
Status field. You can also view all records that are either unauthorized or authorized only,
by choosing the Unauthorized/ Authorized option.
3. Specify any or all of the details of the record in the corresponding fields on the screen.
4. Click ‘Search’ button. All records with the specified fields are retrieved and displayed in
the lower portion of the screen.
5. Double click the record that you want to view in the list of displayed records. The Fund
Agency Backdating Limit Detail screen is displayed in View mode.
5.2.3.4
Deleting Fund Agency Backdating Limit
You can delete only unauthorized records in the system. To delete a record that you have
previously entered:
1. Invoke the Fund Agency Backdating Limit Summary screen from the Browser.
2. Select the status of the record that you want to retrieve for deletion.
3. Specify any or all of the details in the corresponding fields on the screen.
4. Click ‘Search’ button. All records with the specified fields are retrieved and displayed in
the lower portion of the screen.
5. Double click the record that you want to delete in the list of displayed records. The Fund
Agency Backdating Limit Detail screen is displayed.
6. Select Delete Operation from the Action list. The system prompts you to confirm the
deletion and the record is physically deleted from the system database.
5.2.3.5
Authorizing Fund Agency Backdating Limit
An unauthorized Fund Agency Backdating Limit must be authorized in the system for it to be
processed. To authorize a record:
1. Invoke the Fund Agency Backdating Limit Summary screen from the Browser.
2. Select the status of the record that you want to retrieve for authorization. Typically,
choose the unauthorized option.
3. Specify any or all of the details in the corresponding fields on the screen.
4. Click ‘Search’ button. All records with the specified details that are pending authorization
are retrieved and displayed in the lower portion of the screen.
5. Double click the record that you wish to authorize. The Fund Agency Backdating Limit
Detail screen is displayed. Select Authorize operation from the Action List.
When a checker authorizes a transaction, details of validation, if any, that were overridden by
the maker of the transaction during the Save operation are displayed. If any of these overrides
results in an error, the checker must reject the transaction.
5.2.3.6
Amending Fund Agency Backdating Limit
After a Fund Agency Backdating Limit is authorized, it can be modified using the Unlock
operation from the Action List. To make changes to a record after authorization:
5-11
1. Invoke the Fund Agency Backdating Limit Summary screen from the Browser.
2. Select the status of the record that you want to retrieve for authorization. You can only
amend authorized records.
3. Specify any or all of the details in the corresponding fields on the screen.
4. Click ‘Search’ button. All records with the specified details that are pending authorization
are retrieved and displayed in the lower portion of the screen.
5. Double click the record that you wish to authorize. The Fund Agency Backdating Limit
Detail screen is displayed in amendment mode. Select Unlock operation from the Action
List to amend the record.
6. Amend the necessary information and click on Save to save the changes.
5.2.3.7
Authorizing Amended Fund Agency Backdating Limit
An amended Fund Agency Backdating Limit must be authorized for the amendment to be
made effective in the system. The authorization of amended records can be done only from
Fund Manager Module and Agency Branch module.
The subsequent process of authorization is the same as that for normal transactions.
5.2.3.8
Copying Attributes
If you want to create a new Fund Agency Backdating Limit with the same attributes of an
existing one, you can copy the attributes of an existing Fund Agency Backdating Limit to a
new one.
To copy the attributes:
1. Retrieve the record whose attributes the new Fund Agency Backdating Limit should
inherit. You can retrieve the record through the Summary screen or through the F7-F8
operation explained in the previous sections of this chapter.
2. Click on Copy
3. Indicate the ID for the new Fund Agency Backdating Limit. You can, however, change the
details of the new maintenance.
5.3
Maintaining Restrictions for Switch Transactions
Switch transactions are governed by the switching policy indicated for the AMC. Accordingly,
switch transactions could either be allowed between funds within the AMC, or between funds
within the same fund family.
In the case of Distributors, no switching logic might be indicated.
For a fund, you might require to disallow switch transactions into a few selected funds (a
restrictive list); or, you might require maintaining a list of funds into which switch transactions
are allowed (a positive list).
Typically, a restrictive list could be required if the switching logic indicated for the AMC entails
no restrictions on switch transactions.
You can maintain such restrictive or positive lists for a fund in the ‘Fund Switch Restrict Detail’
screen. You can invoke this screen by typing ‘UTDFNSWR’ in the field at the top right corner
of the Application tool bar and clicking on the adjoining arrow button.
5-12
Select ‘New’ from the Actions menu in the Application tool bar or click new icon to enter the
details of the lists on switch transactions.
5.3.1
Checks
Before you maintain switch restrictions in the Fund Switch Restrictions screen, you must
ensure that:
The switching logic for the AMC has been maintained, in the Single Entity Maintenance.
Authorized fund rules have been maintained for the requisite funds.
Maintenance of switch restrictions is not a fund rule, and can be done after the fund rules have
been maintained.
Note
For a fund, you cannot maintain both a positive as well as a restrictive list.
5.3.2
Fields in this Screen
Fund ID
Alphanumeric; Mandatory if ISIN Code is not entered
Select the ID of the fund for which you are maintaining a restrictive or positive list of funds for
switch transactions. When the restrictive / positive list is applied, the fund you select here is
considered the ‘From Fund’.
To select the fund, you can either indicate the Fund ID or the ISIN Code of the fund. When
you select the fund, the effective date of the fund is also displayed.
5-13
ISIN Code
Alphanumeric; Mandatory if Fund ID is not entered
Select the ISIN Code of the fund for which you are maintaining a restrictive or positive list of
funds for switch transactions. When the restrictive / positive list is applied, the fund you select
here is considered the ‘From Fund’
To select the fund, you can either indicate the Fund ID or the ISIN Code of the fund. When
you select the fund, the effective date of the fund is also displayed.
Restrictive List
Optional
For a fund, you might require to disallow switch transactions into a few selected funds (a
restrictive list); or, you might require maintaining a list of funds into which switch transactions
are allowed (a positive list)
You can indicate that you are maintaining a restrictive list, by choosing ‘Yes’. To indicate that
the list is a positive list, choose ‘No’.
If you indicate a restrictive list, switch transactions into any of the selected funds in the list will
not be allowed. If you indicate a positive list, switch transactions are allowed only into any of
the selected funds in the list. For a fund, only a restrictive list OR a positive list can be
maintained, not both.
Limit Restrictive List To
Alphanumeric; Mandatory
If you have indicated a restrictive list, you can indicate the range of funds for which the
restrictive list applies, in this field.
Indicating the range of funds in this field is dependant on the switching logic applicable for the
AMC (also in the case of Distributors), as given below:
If the restrictions are being maintained for a Distributor, and no restrictions have been
indicated for switch transactions, you can indicate whether the restricted list would be
applicable for switch transactions involving:
–
All funds (select ‘No Restrictions’ in this field)
–
Funds within the same AMC
–
Funds within the same fund family
If the switching logic for the AMC is ‘Switch Within Funds of AMC’, the ‘Within AMC’
option is selected in this field and cannot be changed. The restrictive list will only be
applicable for funds within the AMC.
If the switching logic for the AMC is ‘Switch Within Funds of Fund Family’, the ‘Within
Fund Family’ option is selected in this field and cannot be changed. The restrictive list
will only be applicable for funds within the same fund family.
This field is not applicable for positive lists; the switching logic of the AMC is defaulted here
and cannot be changed.
Disabled?
Optional
You can use this field to disable the fund switch restrictions being maintained in this screen.
Check this box to disable the restrictions, or leave it unchecked to indicate that the restrictions
are enabled.
5-14
To Fund ID
Alphanumeric; Mandatory
Select the ID of the fund into which switch transactions from the selected ‘from fund’ are
disallowed (if you are maintaining a restrictive list) or allowed (if you are maintaining a positive
list). When the restrictive / positive list is applied, the fund you select here is considered the
‘To Fund’.
To select the fund, you can either indicate the Fund ID or the ISIN Code of the fund. When
you select the fund, the short name of the fund is also displayed.
The funds available for selection in this field depend on the option selected in the Limit
Restricted Funds To field:
If the ‘No Restriction’ option has been chosen, all valid funds in the system are available
for selection in this field.
If ‘Within AMC’ has been chosen, all funds belonging to the AMC of the ‘from fund’ are
available for selection
If ‘Within Fund Family’ has been chosen, all funds belonging to the fund family of the
‘from fund’ are available for selection
To ISIN Code
Alphanumeric; Mandatory
Select the ISIN Code of the fund into which switch transactions from the selected ‘from fund’
are disallowed (if you are maintaining a restrictive list) or allowed (if you are maintaining a
positive list). When the restrictive / positive list is applied, the fund you select here is
considered the ‘To Fund’.
To select the fund, you can either indicate the Fund ID or the ISIN Code of the fund. When
you select the fund, the short name of the fund is also displayed.
The funds available for selection in this field depend on the option selected in the Limit
Restricted Funds To field:
If the ‘No Restriction’ option has been chosen, all valid funds in the system are available
for selection in this field.
If ‘Within AMC’ has been chosen, all funds belonging to the AMC of the ‘from fund’ are
available for selection
If ‘Within Fund Family’ has been chosen, all funds belonging to the fund family of the
‘from fund’ are available for selection
To Fund Name
Alphanumeric, Display
When you select the Fund ID, the system defaults the value of the to fund name.
5.3.2.1
How Restricted / Positive Lists Work
The following example illustrates how restricted lists for switch transactions would be applied.
Example
For the Royal Trust AMC, no restrictions for switch transactions have been indicated in the
switching logic (the Switching Logic in the Entity Maintenance is ‘No Restrictions’). The
following funds are maintained:
Fund
AMC
Fund Family
5-15
Fund 1
Royal Trust AMC
Growth Funds
Fund 2
Carling Finance AMC
Equity Funds
Fund 3
Elton Trueblood AMC
Equity Funds
Fund 4
Carling Finance AMC
Growth Funds
Fund 5
Carling Finance AMC
Equity Funds
The switch restriction lists are maintained as follows:
Fund
Restrictive /
Positive List
Limit Restricted List To
Restricted / Allowed Funds
Fund 1
Restrictive
No Restrictions
Fund 2 (Restricted)
Fund 2
Restrictive
Within AMC
Fund 4 (Restricted)
Fund 3
Restrictive
Within Fund Family
Fund 5 (Restricted)
Fund 4
Positive
No Restrictions
Fund 1 (Allowed)
The lists would apply as follows:
From
Fund
To Funds Allowed
To Funds Disallowed
Fund 1
All funds except Fund 2
Fund 2
Fund 2
Fund 5
Fund 4
Fund 3
Fund 2
Fund 5
Fund 4
Fund 1
All funds except Fund 1
5-16
5.3.3
Fund Switch Restrict Summary Screen
You can perform the following functions in the ‘Fund Switch Restrict Summary’ screen. You
can invoke this screen by typing ‘UTSFNSWR’ in the field at the top right corner of the
Application tool bar and clicking on the adjoining arrow button.
5.3.3.1
Retrieving Record in Fund Switch Restrict Summary Screen
You can retrieve a previously entered record in the Summary Screen, as follows:
Invoke the summary screen and specify any or all of the following details in the corresponding
fields:
The status of the record in the Authorized field. If you choose the ‘Blank Space’ option,
then all the records are retrieved.
The status of the record in the Open field. If you choose the ‘Blank Space’ option, then
all records are retrieved
Fund ID
Click ‘Search’ button to view the records. All the records with the specified details are retrieved
and displayed in the lower portion of the screen.
Note
You can also retrieve the individual record detail from the detail screen by querying in the
following manner:
–
Press F7.
–
Input the Fund ID.
–
Press F8.
You can perform Edit, Delete, Amend, Authorize, Reverse, Confirm operations by selecting
the operation from the Action list. You can also search a record by using a combination of %
and alphanumeric value.
Example
You can search the record for Fund ID by using the combination of % and alphanumeric value
as follows:-
5-17
5.3.3.2
Search by A%: The system will fetch all the records whose Fund ID starts from Alphabet
‘A’. For example, AGC17, AGVO6, AGC74 and so forth.
Search by %7: The system will fetch all the records whose Fund ID ends by numeric
value’ 7’. For example, AGC17, GSD267, AGC77 and so forth.
Search by %17%: The system will fetch all the records whose Fund ID contains the
numeric value 17. For example, GSD217, GSD172, AGC17 and so forth.
Editing Fund Switch Restrict Record
You can modify the details of a Fund Switch Restrict record that you have already entered into
the system, provided it has not subsequently authorized. You can perform this operation as
follows:
1. Invoke the Fund Switch Restrict Summary screen from the Browser.
2. Select the status of the record that you want to retrieve for modification in the
Authorization Status field. You can only modify records that are unauthorized.
Accordingly, choose the unauthorized option.
3. Specify any or all of the details in the corresponding fields to retrieve the record that is to
be modified.
4. Click ‘Search’ button. All unauthorized records with the specified details are retrieved and
displayed in the lower portion of the screen.
5. Double click the record that you want to modify in the list of displayed records. The Fund
Switch Restrict Detail screen is displayed.
6. Select Unlock Operation from the Action list to modify the record. Modify the necessary
information.
7. Click Save to save your changes. The Fund Switch Restrict Detail screen is closed and
the changes made are reflected in the Fund Switch Restrict Summary screen.
5.3.3.3
Viewing Fund Switch Restrict Record
To view a record that you have previously input, you must retrieve the same in the Fund
Switch Restrict Summary screen as follows:
1. Invoke the Fund Switch Restrict Summary screen from the Browser.
2. Select the status of the record that you want to retrieve for viewing in the Authorized field.
You can also view all records that are either unauthorized or authorized only, by choosing
the Unauthorized/ Authorized option.
3. Specify any or all of the details of the record in the corresponding fields on the screen.
4. Click ‘Search’ button. All records with the specified fields are retrieved and displayed in
the lower portion of the screen.
5. Double click the record that you want to view in the list of displayed records. The Fund
Switch Restrict Detail screen is displayed in View mode.
5.3.3.4
Deleting Fund Switch Restrict Record
You can delete only unauthorized records in the system. To delete a record that you have
previously entered:
1. Invoke the Fund Switch Restrict Summary screen from the Browser.
2. Select the status of the record that you want to retrieve for deletion.
3. Specify any or all of the details in the corresponding fields on the screen.
5-18
4. Click ‘Search’ button. All records with the specified fields are retrieved and displayed in
the lower portion of the screen.
5. Double click the record that you want to delete in the list of displayed records. . The Fund
Switch Restrict Detail screen is displayed.
6. Select Delete Operation from the Action list. The system prompts you to confirm the
deletion and the record is physically deleted from the system database.
5.3.3.5
Authorizing Fund Switch Restrict Record
1. An unauthorized Fund Switch Restrict record must be authorized in the system for it to be
processed. To authorize a record:
2. Invoke the Fund Switch Restrict Summary screen from the Browser.
3. Select the status of the record that you want to retrieve for authorization. Typically,
choose the unauthorized option.
4. Specify any or all of the details in the corresponding fields on the screen.
5. Click ‘Search’ button. All records with the specified details that are pending authorization
are retrieved and displayed in the lower portion of the screen.
6. Double click the record that you wish to authorize. The Fund Switch Restrict Detail screen
is displayed. Select Authorize operation from the Action List.
When a checker authorizes a transaction, details of validation, if any, that were overridden by
the maker of the transaction during the Save operation are displayed. If any of these overrides
results in an error, the checker must reject the transaction.
5.3.3.6
Amending Fund Switch Restrict Record
After a Fund Switch Restrict record is authorized, it can be modified using the Unlock
operation from the Action List. To make changes to a record after authorization:
1. Invoke the Fund Switch Restrict Summary screen from the Browser.
2. Select the status of the record that you want to retrieve for authorization. You can only
amend authorized records.
3. Specify any or all of the details in the corresponding fields on the screen.
4. Click ‘Search’ button. All records with the specified details that are pending authorization
are retrieved and displayed in the lower portion of the screen.
5. Double click the record that you wish to authorize. The Fund Switch Restrict Detail screen
is displayed in amendment mode. Select Unlock operation from the Action List to amend
the record.
6. Amend the necessary information and click on Save to save the changes.
5.3.3.7
Authorizing Fund Switch Restrict Record
An amended Fund Switch Restrict record must be authorized for the amendment to be made
effective in the system. The authorization of amended records can be done only from Fund
Manager Module and Agency Branch module.
The subsequent process of authorization is the same as that for normal transactions.
5.3.3.8
Copying Attributes
If you want to create a new Fund Switch Restrict record with the same attributes of an existing
maintenance, you can copy the attributes of an existing Fund Switch Restrict record to a new
one.
5-19
To copy the attributes:
1. Retrieve the record whose attributes the new Fund Switch Restrict record should inherit.
You can retrieve the record through the Summary screen or through the F7-F8 operation
explained in the previous sections of this chapter.
2. Click on Copy.
3. Indicate the ID for the new Fund Switch Restrict maintenance. You can, however, change
the details of the new maintenance.
5.4
Maintaining Fund Price
The Real NAV for the fund for a specific date must be declared, according to the frequency
specified for this declaration.
5.4.1
Specifying Fund Price - Fund Price Maintenance Screen
To set up the fund prices, use the ‘Fund Price Detail’ screen. You can invoke this screen by
typing ‘UTDFPRIC’ in the field at the top right corner of the Application tool bar and clicking
on the adjoining arrow button. The ‘Fund Price Detail’ screen is displayed.
Select ‘New’ from the Actions menu in the Application tool bar or click new icon to enter the
details of the new fund price.
After you have set up and authorized a fund, you may enter the Fund Price on the Next Price
Declare Date that you have specified in the General Operating Rules. Subsequently, you can
5-20
enter the Fund Price according to the price declare frequency that you have specified in the
General Operating Rules for the fund.
5.4.2
Fields in Fund Price Maintenance Screen
Fund ID
6 Character Maximum, Alphanumeric, Mandatory
Select the fund for which the price is being set, from the options provided.
Effective Date
Display Only
The system date is displayed in this field. It is deemed that the price entered in this screen is
effective from the system date.
Fund Base Currency
Display Only
When the fund is selected, the Fund Base Currency for the selected fund is picked up from
the Fund Demographics profile and displayed here.
ISIN Code
12 Characters Maximum; Alphanumeric; Mandatory
Select the ISIN Code of the fund for which you want to set up the fund price, from the options
provided. If you specify the ISIN Code of a fund, the ID of the fund is displayed in the Fund
field.
5.4.2.1
NAV Computation
You need to select the option based on which the Fund Price is to be calculated. The following
options are available for calculation of Fund Price:
Net Asset Value
If you choose this option, you must specify the Real NAV per unit, and the system will compute
the fund price per transaction, based on whether the fund is formula-based.
Total Assets
If you choose this option, you must specify the Total Assets, and based on the outstanding
units, the system computes the net asset value.
Formula Builder
If you choose this option, you must specify values for all the user enterable fields, and the
system computes the Net Asset Value.
Real Net Asset Value per Lot
Numeric, Mandatory
Enter the Real NAV per Unit for the period when the price is being set.
This is applicable only if NAV is selected in the Total assets/ NAV / Formula Builder option. If
Total Assets is selected, then this is calculated by the system.
If entered, the system validates this value against the fluctuation limits set for the selected
transaction type, in the selected fund, in the Transaction Processing Rules. If the limit is
exceeded, an override is sought while saving the price.
5-21
NAV Lot
Enter the NAV lot amount.
Total Net Assets
Numeric, Optional
Enter the Total Net Asset Value or Fund Corpus for the fund. This is applicable only if Total
Assets is selected in the Total Assets / NAV / Formula Builder option. If NAV is selected then
this is calculated by the system.
This should never exceed or be equal to the figure of ten thousand trillion, at any point of time.
No. Of Unit Holders
Numeric, Display
This displays the Total Number of unit holders holding a balance in the fund. This number will
be the actual number for any given effective date. This is also calculated by the system.
Declared NAV per Lot
Numeric, Display
The NAV declared is displayed here.
Floor Price
Numeric, Mandatory
Enter the Floor Price for the fund. The floor price is to indicate the lowest price that the fund
can offer. Based on the loads, if the net transaction price happens to be lower than this floor
price then, the floor price would be considered as net transaction price. This will typically be
in case of a redemption or a switch transaction.
Ceiling Price
Numeric, Mandatory
Enter the Ceiling Price for the fund. The Ceiling price is to indicate the highest price that the
fund can offer. Based on the loads, if the net transaction price happens to be greater than the
Ceiling Price then, the Ceiling Price would be considered as the net transaction price. This will
typically be in case of a subscription or IPO transaction.
The Floor Price should be less than the Fund Price and the Ceiling Price should be greater
than the Fund Price i.e., Fund Price should be between Floor Price and the Ceiling Price.
Foreign Investors Outstanding Units
Numeric, Display
Displays the number of Foreign Investors’ Outstanding Units for the fund that is also
calculated by the system. The units displayed prior to allocation are of the previous period and
post-allocation, the Foreign Investors’ units will form the balance for the effective day.
The Foreign Investors Outstanding Units should always be below the figure of one hundred
trillion, at any point of time.
Amend Transactions
This option allows you to reverse and recreate transactions affected by amending the Fund
Price or merely updating the price. Only after you select this option, the transactions included
during authorization of the Fund Price are affected.
The system will not reverse and recreate the transactions if any underlying child transaction
has been created from the old transaction.
5-22
The details specified below are displayed if the related fund is a ‘Hedge Fund’.
Outstanding Units
Numeric, Display
This displays the number of Total Outstanding Units for the fund that is calculated by the
system. The units displayed prior to allocation are of the previous period. Post-allocation, the
outstanding units will become the balances for the effective day.
The Total Outstanding Units should never exceed or be equal to the figure of ten thousand
trillion, at any point of time.
High Water Mark (HWM)]
The high water mark, as per the price date, gets displayed here.
Reflect in Trading
Choose this option if you wish to make this fund price applicable for an investor who maintains
a trading account under this fund.
Hurdle Rate
The hurdle rate as per the price date, specified in ‘Hedge Funds Processing Rules’ screen
gets displayed here.
HWM + Hurdle
The sum of High Water Mark (HWM) and the hurdle rate, rounded based on the price rounding
method, gets displayed here.
5.4.3
Maintaining Fund Price Transaction Details
After you have specified the price details, click ‘Ok’ button. The Transaction Details link is
enabled, which when clicked, invokes the Fund Transaction Details to be displayed in the
lower section of the screen.
5-23
The Fund Price details for all the given transaction types are displayed in the Fund Price
Transaction Details section.
The transaction base price is calculated based on the definition in the fund rule set up. On
clicking ‘Ok’ button, the system defaults the Effective Date, the Transaction Type and the
Base Price. You can modify the Base Price Constant.
Allocation Vs Register Capital gives the value that can be redeemed out of the fund on that
day. You can modify this field only when the Transaction Type is Redemption, Transfer or
Switch From.
The transaction Base Price is calculated on the basis of the definition in the Fund Rule set-up.
Example
Say, for Redemption, the base price definition is 98% of the Fund Price, and then if Fund Price
is Rs.100, the Redemption Base Price will be Rs.98.
5-24
5.4.4
Maintaining Fund Price Components
This section displays the Fund Price details for all the given transaction types. To view this
section and its functionality, refer the Fund Formula Maintenance section in this manual.
Note
–
In the Fund Price details screen, you can compute values for additional components
that you have specified in the Fund Formula screen for a fund, (which you have
indicated not to be used for price computation) and their appropriate values, using
the compute button.
–
This feature is only available if your installation has specifically requested for it. For
an exhaustive note on this feature, refer the Annexure.
5-25
5.4.5
Maintaining Additional Information
Label Code
Enter the label of the additional information field.
Field Value
Enter the value in this field.
Based on the entity add info mapping, all mapped additional information is displayed here.
5-26
5.4.6
Fund Price Maintenance Summary Screen
You can perform the following operations in the ‘Fund Price Summary’ screen. You can
invoke this screen by typing ‘UTSFPRIC’ in the field at the top right corner of the Application
tool bar and clicking on the adjoining arrow button.
5.4.6.1
Retrieving Record in the Fund Price Maintenance Summary Screen
You can retrieve a previously entered record in the Summary Screen, as follows:
Invoke the ‘Fund Price Summary’ screen by typing ‘UTSFPRIC’ in the field at the top right
corner of the Application tool bar and clicking on the adjoining arrow button. Specify any or all
of the following details in the corresponding fields:
The status of the record in the Authorized field. If you choose the ‘Blank Space’ option,
then all the records are retrieved.
The status of the record in the Open field. If you choose the ‘Blank Space’ option, then
all records are retrieved
Fund ID
Effective Date
Declared NAV/Lot
Click ‘Search’ button to view the records. All the records with the specified details are retrieved
and displayed in the lower portion of the screen.
Note
You can also retrieve the individual record detail from the detail screen by querying in the
following manner:
–
Press F7.
–
Input the Fund Id and Effective Date.
–
Press F8.
You can perform Edit, Delete, Amend, Authorize, Reverse, Confirm operations by selecting
the operation from the Action list. You can also search a record by using a combination of %
and alphanumeric value.
5-27
Example
You can search the record for Fund ID by using the combination of % and alphanumeric value
as follows:
Search by A%: The system will fetch all the records whose Fund ID starts from Alphabet
‘A’. For example, AGC17, AGVO6, AGC74 and so forth.
Search by %7: The system will fetch all the records whose Fund ID ends by numeric
value’ 7’. For example, AGC17, GSD267, AGC77 and so forth.
5.4.6.2
Search by %17%: The system will fetch all the records whose Fund ID contains the
numeric value 17. For example, GSD217, GSD172, AGC17 and so forth.
Editing Fund Price Record
You can modify the details of Fund Price record that you have already entered into the
system, provided it has not subsequently authorized. You can perform this operation as
follows:
1. Invoke the Fund Price Summary screen from the Browser.
2. Select the status of the record that you want to retrieve for modification in the Authorized
field. You can only modify records that are unauthorized. Accordingly, choose the
unauthorized option.
3. Specify any or all of the details in the corresponding fields to retrieve the record that is to
be modified.
4.
Click ‘Search’ button. All unauthorized records with the specified details are retrieved and
displayed in the lower portion of the screen.
5. Double click the record that you want to modify in the list of displayed records. The Fund
Price Detail screen is displayed.
6. Select Unlock Operation from the Action list to modify the record. Modify the necessary
information.
7. Click Save to save your changes. The Fund Price Detail screen is closed and the changes
made are reflected in the Fund Price Summary screen.
5.4.6.3
Viewing Fund Price Record
To view a record that you have previously input, you must retrieve the same in the Fund Price
Summary screen as follows:
1. Invoke the Fund Price Summary screen from the Browser.
2. Select the status of the record that you want to retrieve for viewing in the Authorization
Status field. You can also view all records that are either unauthorized or authorized only,
by choosing the Unauthorized/ Authorized option.
3. Specify any or all of the details of the record in the corresponding fields on the screen.
4. Click ‘Search’ button. All records with the specified fields are retrieved and displayed in
the lower portion of the screen.
5. Double click the record that you want to view in the list of displayed records. The Fund
Price Detail screen is displayed in View mode.
5.4.6.4
Deleting Fund Price Record
You can delete only unauthorized records in the system. To delete a record that you have
previously entered:
1. Invoke the Fund Price Summary screen from the Browser.
5-28
2. Select the status of the record that you want to retrieve for deletion.
3. Specify any or all of the details in the corresponding fields on the screen.
4. Click ‘Search’ button. All records with the specified fields are retrieved and displayed in
the lower portion of the screen.
5. Double click the record that you want to delete in the list of displayed records. The Fund
Price Detail screen is displayed.
6. Select Delete Operation from the Action list. The system prompts you to confirm the
deletion and the record is physically deleted from the system database.
5.4.6.5
Authorizing Fund Price Record
An unauthorized Fund Price record must be authorized in the system for it to be processed.
To authorize a record:
1. Invoke the Fund Price Summary screen from the Browser.
2. Select the status of the record that you want to retrieve for authorization. Typically,
choose the unauthorized option.
3. Specify any or all of the details in the corresponding fields on the screen.
4. Click ‘Search’ button. All records with the specified details that are pending authorization
are retrieved and displayed in the lower portion of the screen.
5. Double click the record that you wish to authorize. The Fund Price Detail screen is
displayed. Select Authorize operation from the Action List.
When a checker authorizes a transaction, details of validation, if any, that were overridden by
the maker of the transaction during the Save operation are displayed. If any of these overrides
results in an error, the checker must reject the transaction.
5.4.6.6
Amending Fund Price Record
After a Fund Price record is authorized, it can be modified using the Unlock operation from
the Action List. To make changes to a record after authorization:
1. Invoke the Fund Price record Summary screen from the Browser.
2. Select the status of the record that you want to retrieve for authorization. You can only
amend authorized records.
3. Specify any or all of the details in the corresponding fields on the screen.
4. Click ‘Search’ button. All records with the specified details that are pending authorization
are retrieved and displayed in the lower portion of the screen.
5. Double click the record that you wish to authorize. The Fund Price Detail screen is
displayed in amendment mode. Select Unlock operation from the Action List to amend the
record.
6. Amend the necessary information and click on Save to save the changes.
5.4.6.7
Authorizing Amended Fund Price Record
An amended Fund Price record must be authorized for the amendment to be made effective
in the system. The authorization of amended records can be done only from Fund Manager
Module and Agency Branch module.
The subsequent process of authorization is the same as that for normal transactions.
5-29
5.4.6.8
Copying Attributes
If you want to create a new Fund Price record with the same attributes of an existing
maintenance, you can copy the attributes of an existing Fund Price record to a new one.
To copy the attributes:
1. Retrieve the record whose attributes the new Fund Price record should inherit. You can
retrieve the record through the Summary screen or through the F7-F8 operation
explained in the previous sections of this chapter.
2. Click on Copy
3. Indicate the ID for the new Fund Price record. You can, however, change the details of
the new maintenance.
5.5
Maintaining Adhoc Prices
To set up adhoc price dates for any transaction types mapped to a fund, use the ‘Ad Hoc Price
Detail’ screen.
Note
You will be allowed to enter adhoc price dates for funds for which you have maintained a
specific fund price date. This is irrespective of whether or not you have indicated Forward
Pricing is applicable.
5.5.1
Fields in Adhoc Price Dates Maintenance Detail Screen
You can invoke the ‘Ad Hoc Price Detail’ screen by typing ‘UTDAHPRM’ in the field at the top
right corner of the Application tool bar and clicking on the adjoining arrow button.
Select ‘New’ from the Actions menu in the Application tool bar or click new icon to enter the
details of the adhoc price maintenance.
5-30
In the Adhoc Price Dates Maintenance section, specify the following:
5.5.1.1
Fund Details Section
Fund Id
Select the fund id of the fund for which ad-hoc price dates have to be maintained, from the
option list provided.
Fund Identification Number
Select the fund identification number of the fund for which ad-hoc price dates have to be
maintained, from the option list provided
The Fund Identification Number of the fund you have chosen will be displayed when you
choose the Fund Id.
You could, alternatively, choose the Fund Identification Number of the fund and the Fund Id
will be displayed.
5.5.1.2
Adhoc Price Dates Maintenances
You can specify the following in this section:
Transaction Type
Choose the transaction type for which you want to maintain adhoc price dates.
Adhoc Price Date
Specify the adhoc price date. The date you enter cannot be earlier than Application Date, and
the Next Price Date maintained in the General Operating Rules screen.
Cut Off Days
Enter the number of days after the price date beyond which the price date is moved to the
next specific pricing cycle.
For Reporting?
Check this box to indicate the date entered is to be used for reporting purposes only. In this
case, this date will not be used for the subsequent price date calculation.
Note
5.5.2
–
You can check more than one ‘Delete?’ box and then click on the link Delete.
–
Click on the link ‘Add’ to add to the transaction types for which you are maintaining
the adhoc price date.
–
Click ‘Ok’ button to save.
Adhoc Price Dates Maintenance Summary Screen
You can perform the following operations in the Adhoc Price Dates Maintenance Summary
screen. You can invoke the ‘Ad Hoc Price Summary’ screen by typing ‘UTSAHPRM’ in the
5-31
field at the top right corner of the Application tool bar and clicking on the adjoining arrow
button.
5.5.2.1
Retrieving Record in Adhoc Price Dates Maintenance Summary Screen
You can retrieve a previously entered record in the Summary Screen, as follows:
Invoke the summary screen and specify any or all of the following details in the corresponding
fields:
The status of the record in the Authorized field. If you choose the ‘Blank Space’ option,
then all the records are retrieved.
The status of the record in the Open field. If you choose the ‘Blank Space’ option, then
all records are retrieved
SI No
Fund ID
Fund Identification Number
Click ‘Search’ button to view the records. All the records with the specified details are retrieved
and displayed in the lower portion of the screen.
Note
You can also retrieve the individual record detail from the detail screen by querying in the
following manner:
–
Press F7.
–
Input the Fund ID.
–
Press F8.
You can perform Edit, Delete, Amend, Authorize, Reverse, Confirm operations by selecting
the operation from the Action list. You can also search a record by using a combination of %
and alphanumeric value.
Example
You can search the record for Fund ID by using the combination of % and alphanumeric value
as follows:-
5-32
5.5.2.2
Search by A%: The system will fetch all the records whose Fund ID starts from Alphabet
‘A’. For example, AGC17, AGVO6, AGC74 and so forth.
Search by %7: The system will fetch all the records whose Fund ID ends by numeric
value’ 7’. For example, AGC17, GSD267, AGC77 and so forth.
Search by %17%:The system will fetch all the records whose Fund ID contains the
numeric value 17. For example, GSD217, GSD172, AGC17 and so forth.
Editing Adhoc Price Record
You can modify the details of an Adhoc Price record that you have already entered into the
system, provided it has not subsequently authorized. You can perform this operation as
follows:
1. Invoke the Adhoc Price Summary screen from the Browser.
2. Select the status of the record that you want to retrieve for modification in the Authorized
field. You can only modify records that are unauthorized. Accordingly, choose the
unauthorized option.
3. Specify any or all of the details in the corresponding fields to retrieve the record that is to
be modified.
4.
Click ‘Search’ button. All unauthorized records with the specified details are retrieved and
displayed in the lower portion of the screen.
5. Double click the record that you want to modify in the list of displayed records. The Adhoc
Price Detail screen is displayed.
6. Select Unlock Operation from the Action list to modify the record. Modify the necessary
information.
7. Click Save to save your changes. The Adhoc Price Detail screen is closed and the
changes made are reflected in the Adhoc Price Summary screen.
5.5.2.3
Viewing Adhoc Price Record
To view a record that you have previously input, you must retrieve the same in the Adhoc
Price Summary screen as follows:
1. Invoke the Adhoc Price Summary screen from the Browser.
2. Select the status of the record that you want to retrieve for viewing in the Authorization
Status field. You can also view all records that are either unauthorized or authorized only,
by choosing the Unauthorized/ Authorized option.
3. Specify any or all of the details of the record in the corresponding fields on the screen.
4. Click ‘Search’ button. All records with the specified fields are retrieved and displayed in
the lower portion of the screen.
5. Double click the record that you want to view in the list of displayed records. The Adhoc
Price Detail screen is displayed in View mode.
5.5.2.4
Deleting Adhoc Price record
You can delete only unauthorized records in the system. To delete a record that you have
previously entered:
1. Invoke the Adhoc Price Summary screen from the Browser.
2. Select the status of the record that you want to retrieve for deletion.
3. Specify any or all of the details in the corresponding fields on the screen.
5-33
4. Click ‘Search’ button. All records with the specified fields are retrieved and displayed in
the lower portion of the screen.
5. Double click the record that you want to delete in the list of displayed records. . The Adhoc
Price Detail screen is displayed.
6. Select Delete Operation from the Action list. The system prompts you to confirm the
deletion and the record is physically deleted from the system database.
5.5.2.5
Authorizing Adhoc Price Record
An unauthorized Adhoc Price record must be authorized in the system for it to be processed.
To authorize a record:
1. Invoke the Adhoc Price Summary screen from the Browser.
2. Select the status of the record that you want to retrieve for authorization. Typically,
choose the unauthorized option.
3. Specify any or all of the details in the corresponding fields on the screen.
4. Click ‘Search’ button. All records with the specified details that are pending authorization
are retrieved and displayed in the lower portion of the screen.
5. Double click the record that you wish to authorize. The Adhoc Price Detail screen is
displayed. Select Authorize operation from the Action List.
When a checker authorizes a transaction, details of validation, if any, that were overridden by
the maker of the transaction during the Save operation are displayed. If any of these overrides
results in an error, the checker must reject the transaction.
5.5.2.6
Amending Adhoc Price Record
After an Adhoc Price record is authorized, it can be modified using the Unlock operation from
the Action List. To make changes to a record after authorization:
1. Invoke the Adhoc Price Summary screen from the Browser.
2. Select the status of the record that you want to retrieve for authorization. You can only
amend authorized records.
3. Specify any or all of the details in the corresponding fields on the screen.
4. Click ‘Search’ button. All records with the specified details that are pending authorization
are retrieved and displayed in the lower portion of the screen.
5. Double click the record that you wish to authorize. The Adhoc Price Detail screen is
displayed in amendment mode. Select Unlock operation from the Action List to amend the
record.
6. Amend the necessary information and click on Save to save the changes.
5.5.2.7
Authorizing Amended Adhoc Price Record
An amended Adhoc Price record must be authorized for the amendment to be made effective
in the system. The authorization of amended records can be done only from Fund Manager
Module and Agency Branch module.
The subsequent process of authorization is the same as that for normal transactions.
5.5.2.8
Copying Attributes
If you want to create a new Adhoc Price record with the same attributes of an existing one,
you can copy the attributes of an existing Adhoc Price record to a new one.
5-34
To copy the attributes:
1. Retrieve the record whose attributes the new Adhoc Price record should inherit. You can
retrieve the record through the Summary screen or through the F7-F8 operation
explained in the previous sections of this chapter.
2. Click on Copy
3. Indicate the ID for the new Adhoc Price record. You can, however, change the details of
the new record.
5.6
Querying and Indicating Pricing Preference
You may search for a record and indicate whether or not the Adhoc price entered for a
transaction should be applied, in the ‘Price Date Change Maintenance Detail’ screen.
5.6.1
Price Date Change Detail Screen
You can invoke the ‘Price Date Change Maintenance Detail’ screen by typing ‘UTDPRDTC’
in the field at the top right corner of the Application tool bar and clicking on the adjoining arrow
button. The ‘Price Date Change Maintenance Detail’ screen is displayed. Select ‘New’ from
the Actions menu in the Application tool bar or click new icon to enter the details of the new
price date change.
You can search for a record using any of the following criteria:
Fund ID
Transaction Number
Transaction Type
AMC ID
Ref Type
5-35
When you click ‘Find’ button, records satisfying the search criteria that you have entered are
displayed.
Note
Only Unallotted transactions will be displayed.
You will be able to view the following details for the records that are displayed:
Transaction Number
Fund Id
Transaction Type
Ref Type
Scheduled Price Date
Adhoc Price Date
Use Adhoc Pricing
You would have indicated the scheduled and adhoc price dates for a transaction. If, for a
certain transaction, you would like to indicate the adhoc price should be used and not the
scheduled price, check the box ‘Use Adhoc Pricing?’
Click ‘Ok’ button to save any information.
5.6.2
Price Date Change Summary Screen
You can perform the following operations in the ‘Price Date Change Maintenance Summary’
screen. You can invoke this screen by typing ‘UTSPRDTC’ in the field at the top right corner
of the Application tool bar and clicking on the adjoining arrow button.
5.6.2.1
Retrieving Record in Price Date Change Summary Screen
You can retrieve a previously entered record in the Summary Screen, as follows:
Invoke the summary screen and specify any or all of the following details in the corresponding
fields:
5-36
The status of the record in the Authorized field. If you choose the ‘Blank Space’ option,
then all the records are retrieved.
The status of the record in the Open field. If you choose the ‘Blank Space’ option, then
all records are retrieved
Transaction Number
Fund ID
Transaction Type
Ref Type
Click ‘Search’ button to view the records. All the records with the specified details are retrieved
and displayed in the lower portion of the screen.
Note
You can also retrieve the individual record detail from the detail screen by querying in the
following manner:
–
Press F7.
–
Input the Fund Id.
–
Press F8.
You can perform Edit, Delete, Amend, Authorize, Reverse, Confirm operations by selecting
the operation from the Action list. You can also search a record by using a combination of %
and alphanumeric value.
Example
You can search the record for Fund ID by using the combination of % and alphanumeric value
as follows:
Search by A%: The system will fetch all the records whose Fund ID starts from Alphabet
‘A’. For example, AGC17, AGVO6, AGC74 and so forth.
Search by %7: The system will fetch all the records whose Fund ID ends by numeric
value’ 7’. For example, AGC17, GSD267, AGC77 and so forth.
Search by %17%: The system will fetch all the records whose Fund ID contains the
numeric value 17. For example, GSD217, GSD172, AGC17 and so forth.
You can use the Summary screen for authorizing or deleting in bulk. Select the records and
authorize using the ‘Authorize’ button or delete using ‘Delete’ button.
5.6.2.2
Editing Price Date Change Maintenance
You can modify the details of Price Date Change Maintenance that you have already entered
into the system, provided it has not been subsequently authorized. You can perform this
operation as follows:
1. Invoke the Price Date Change Maintenance Summary screen from the Browser.
2. Select the status of the record that you want to retrieve for modification in the Authorized
field. You can only modify records that are unauthorized. Accordingly, choose the
unauthorized option.
3. Specify any or all of the details in the corresponding fields to retrieve the record that is to
be modified.
4.
Click ‘Search’ button. All unauthorized records with the specified details are retrieved and
displayed in the lower portion of the screen.
5-37
5. Double click the record that you want to modify in the list of displayed records. The Price
Date Change Maintenance Detail screen is displayed.
6. Select Unlock Operation from the Action list to modify the record. Modify the necessary
information.
7. Click Save to save your changes. The Price Date Change Maintenance Detail screen is
closed and the changes made are reflected in the Price Date Change Maintenance
Summary screen.
5.6.2.3
Viewing Price Date Change Maintenance
To view a record that you have previously input, you must retrieve the same in the Price Date
Change Maintenance Summary screen as follows:
1. Invoke the Price Date Change Maintenance Summary screen from the Browser.
2. Select the status of the record that you want to retrieve for viewing in the Authorized field.
You can also view all records that are either unauthorized or authorized only, by choosing
the Unauthorized/ Authorized option.
3. Specify any or all of the details of the record in the corresponding fields on the screen.
4. Click ‘Search’ button. All records with the specified fields are retrieved and displayed in
the lower portion of the screen.
5. Double click the record that you want to view in the list of displayed records. The Price
Date Change Maintenance Detail screen is displayed in View mode.
5.6.2.4
Deleting Price Date Change Maintenance
You can delete only unauthorized records in the system. To delete a record that you have
previously entered:
1. Invoke the Price Date Change Maintenance Summary screen from the Browser.
2. Select the status of the record that you want to retrieve for deletion.
3. Specify any or all of the details in the corresponding fields on the screen.
4. Click ‘Search’ button. All records with the specified fields are retrieved and displayed in
the lower portion of the screen.
5. Double click the record that you want to delete in the list of displayed records. The Price
Date Change Maintenance Detail screen is displayed.
6. Select Delete Operation from the Action list. The system prompts you to confirm the
deletion and the record is physically deleted from the system database.
You can also delete in bulk by selecting the records you wish to delete and clicking the Delete
All button.
5.6.2.5
Authorizing Price Date Change Maintenance
An unauthorized Price Date Change Maintenance must be authorized in the system for it to
be processed. To authorize a record:
1. Invoke the Price Date Change Maintenance Summary screen from the Browser.
2. Select the status of the record that you want to retrieve for authorization. Typically,
choose the unauthorized option.
3. Specify any or all of the details in the corresponding fields on the screen.
4. Click ‘Search’ button. All records with the specified details that are pending authorization
are retrieved and displayed in the lower portion of the screen.
5-38
5. Double click the record that you wish to authorize. The Price Date Change Maintenance
Detail screen is displayed. Select Authorize operation from the Action List.
You can also authorize in bulk by selecting the records that you wish to authorize and clicking
on the Authorize button.
When a checker authorizes a record, details of validation, if any, that were overridden by the
maker of the record during the Save operation are displayed. If any of these overrides results
in an error, the checker must reject the record.
5.6.2.6
Amending Price Date Change Maintenance
After a Price Date Change Maintenance is authorized, it can be modified using the Unlock
operation from the Action List. To make changes to a record after authorization:
1. Invoke the Price Date Change Maintenance Summary screen from the Browser.
2. Select the status of the record that you want to retrieve for authorization. You can only
amend authorized records.
3. Specify any or all of the details in the corresponding fields on the screen.
4. Click ‘Search’ button button. All records with the specified details that are pending
authorization are retrieved and displayed in the lower portion of the screen.
5. Double click the record that you wish to authorize. The Price Date Change Maintenance
Detail screen is displayed in amendment mode. Select Unlock operation from the Action
List to amend the record.
6. Amend the necessary information and click on Save to save the changes.
5.6.2.7
Authorizing Amended Price Date Change Maintenance
An amended Price Date Change Maintenance must be authorized for the amendment to be
made effective in the system. The authorization of amended records can be done only from
Fund Manager Module and Agency Branch module.
The subsequent process of authorization is the same as that for normal transactions.
5.6.3
Copying Attributes
If you want to create a new Price Date Change Maintenance with the same attributes of an
existing maintenance, you can copy the attributes of an existing Price Date Change
Maintenance to a new one.
To copy the attributes:
1. Retrieve the record whose attributes the new Price Date Change Maintenance should
inherit. You can retrieve the record through the Summary screen or through the F7-F8
operation explained in the previous sections of this chapter.
2. Click on Copy.
3. Indicate the ID for the new Price Date Change Maintenance. You can, however, change
the details of the new maintenance.
5.7
Indicating Non Availability of Fund Price
You can indicate the non availability of a fund price in the ‘Fund Price Holiday Maintenance
Detail’ screen.
5-39
5.7.1
Fields in Fund Price Holiday Maintenance Detail Screen
You can invoke the ‘Fund Price Holiday Maintenance Detail’ screen by typing ‘UTDFPHOL’
in the field at the top right corner of the Application tool bar and clicking on the adjoining arrow
button. The ‘Fund Price Holiday Maintenance Detail’ screen is displayed.
Select ‘New’ from the Actions menu in the Application tool bar or click new icon to enter the
details of the holiday maintenance you wish to maintain for a fund price.
Enter the following information in this screen:
Fund Id
Select the Id of the fund for which you want to specify the day on which the price will not be
available.
ISIN Code
The Fund ISIN of the fund you have chosen will be displayed. You could, alternatively, choose
the ISIN Code and the corresponding Fund Id will be displayed.
Fund Price Holiday
Specify the date on which the fund price will not be available.
Note
You will not be allowed to enter the price of a fund on the application date if the same falls
on a day when the fund price is not available (indicated in the field Fund Price Holiday). In
such a case, you will be allowed to enter the fund price on the next working day even if it
is a fund holiday.
5-40
Example
The application dates of Transaction A and Transaction B mapped to FundA are the 16th and
17th of December 2004, respectively. If the price of the fund is not available on both days,
Fund Price Maintenance can be skipped. You will still be allowed to run EOD processes.
You can enter the prices applicable on the 16th and 17th on the 18th of December 2004 if
available.
During allocation, the system will use the fund price entered against the 16th of December for
Transaction A and the 17th of December for Transaction B.
Note
Bulk upload of fund prices will exclude all funds for which fund price is not available for
the day. The price for these funds will be accepted on the next working day and the effective date will be reflected as shown above.
The following batch processes will exclude all funds for which fund price is not available
for the day:
5.7.2
–
Allocation
–
Trading
–
Trailer Commission
Fund Price Holiday Maintenance Summary Screen
You can invoke the ‘Fund Price Holiday Maintenance Summary’ screen by typing
‘UTSFPHOL’ in the field at the top right corner of the Application tool bar and clicking on the
adjoining arrow button.
The Fund Price Holiday Maintenance (Summary) screen can be used for the following
operations:
5.7.2.1
Retrieving a Fund Price Holiday Record
You can retrieve a previously entered record in the Summary Screen, as follows:
Invoke the Fund Price Holiday Maintenance Summary screen. Specify any or all of the
following details in the corresponding fields:
5-41
The status of the record in the Authorization Status field. If you choose the ‘Blank Space’
option, then all the records are retrieved.
The status of the record in the Record Status field. If you choose the ‘Blank Space’
option, then all records are retrieved
Fund ID
ISIN Code
Click 'Search' to view the records. All the records with the specified details are retrieved and
displayed in the lower portion of the screen.
You can also retrieve the individual record detail from the detail screen by querying in the
following manner:
1. Press F7
2. Input the Fund ID, Fund Price Holiday
3. Press F8
You can perform Edit, Delete, Amend, Authorize, Reverse, Confirm operations by selecting
the operation from the Action list. You can also search a record by using a combination of %
and alphanumeric value.
Example
You can search the record for Fund ID by using the combination of % and alphanumeric value
as follows:
Search by A% :- System will fetch all the records whose Fund ID starts from Alphabet
‘A’. For example, AGC17,AGVO6,AGC74 etc.
Search by %7 :- System will fetch all the records whose Fund ID ends by numeric value’
7’ . For example, AGC17,GSD267,AGC77 etc.
Search by %17%:- System will fetch all the records whose Fund ID contains the numeric
value 17 . For example, GSD217,GSD172, AGC17 etc.
You can retrieve a previously entered record in the Summary Screen, as follows:
In the Browser, select the Fund Price menu and click on Summary, specify any or all of the
following details in the corresponding fields:
The status of the record in the Authorization Status field. If you choose the ‘Blank Space’
option, then all the records are retrieved.
The status of the record in the Record Status field. If you choose the ‘Blank Space’
option, then all records are retrieved
Fund ID
Effective Date
Latest Price
Click ‘Search’ to view the records. All the records with the specified details are retrieved and
displayed in the lower portion of the screen.
You can also retrieve the individual record detail from the detail screen by querying in the
following manner:
1. Press F7
2. Input the Fund Id
3. Press F8
5-42
You can perform Edit, Delete, Amend, Authorize, Reverse, Confirm operations by selecting
the operation from the Action list. You can also search a record by using a combination of %
and alphanumeric value.
For example:
You can search the record for Fund ID by using the combination of % and alphanumeric value
as follows:-
5.7.2.2
Search by A% :- System will fetch all the records whose Fund ID starts from Alphabet
‘A’. Ex:- AGC17,AGVO6,AGC74 etc.
Search by %7 :- System will fetch all the records whose Fund ID ends by numeric value’
7’ . Ex :- AGC17,GSD267,AGC77 etc.
Search by %17%:- System will fetch all the records whose Fund ID contains the numeric
value 17 . Ex:- GSD217,GSD172, AGC17 etc.
Editing a Fund Price Holiday Record
You can modify the details of Fund Price Holiday record that you have already entered into
the system, provided it has not subsequently authorized. You can perform this operation as
follows:
1. Invoke the Fund Price Holiday Summary screen from the Browser.
2. Select the status of the record that you want to retrieve for modification in the
Authorization Status field. You can only modify records that are unauthorized.
Accordingly, choose the unauthorized option.
3. Specify any or all of the details in the corresponding fields to retrieve the record that is to
be modified.
4.
Click 'Search'. All unauthorized records with the specified details are retrieved and
displayed in the lower portion of the screen.
5. Double click the record that you want to modify in the list of displayed records. The Fund
Price Holiday Maintenance Detail screen is displayed.
6. Select Unlock Operation from the Action list to modify the record. Modify the necessary
information.
7. Click Save to save your changes. The Fund Price Holiday Detail screen is closed and the
changes made are reflected in the Fund Price Holiday Summary screen.
You can modify the details of Fund Price record that you have already entered into the
system, provided it has not subsequently authorized. You can perform this operation as
follows:
1. Invoke the Fund Price Summary screen from the Browser.
2. Select the status of the record that you want to retrieve for modification in the
Authorization Status field. You can only modify records that are unauthorized.
Accordingly, choose the unauthorized option.
3. Specify any or all of the details in the corresponding fields to retrieve the record that is to
be modified.
4. Click ‘Search’. All unauthorized records with the specified details are retrieved and
displayed in the lower portion of the screen.
5. Double click the record that you want to modify in the list of displayed records. The Fund
Price Detail screen is displayed.
6. Select Unlock Operation from the Action list to modify the record. Modify the necessary
information.
5-43
7. Click Save to save your changes. The Fund Price Detail screen is closed and the changes
made are reflected in the Fund Price Summary screen.
5.7.2.3
Viewing a Fund Price Holiday Record
To view a record that you have previously input, you must retrieve the same in the Fund Price
Holiday Summary screen as follows:
1. Invoke the Fund Price Holiday Summary screen from the Browser.
2. Select the status of the record that you want to retrieve for viewing in the Authorization
Status field. You can also view all records that are either unauthorized or authorized only,
by choosing the Unauthorized/ Authorized option.
3. Specify any or all of the details of the record in the corresponding fields on the screen.
4. Click 'Search'. All records with the specified fields are retrieved and displayed in the lower
portion of the screen.
5. Double click the record that you want to view in the list of displayed records. The Fund
Price Holiday Detail screen is displayed in View mode.
To view a record that you have previously input, you must retrieve the same in the Fund Price
Summary screen as follows:
1. Invoke the Fund Price Summary screen from the Browser.
2. Select the status of the record that you want to retrieve for viewing in the Authorization
Status field. You can also view all records that are either unauthorized or authorized only,
by choosing the Unauthorized/ Authorized option.
3. Specify any or all of the details of the record in the corresponding fields on the screen.
4. Click ‘Search’. All records with the specified fields are retrieved and displayed in the lower
portion of the screen.
5. Double click the record that you want to view in the list of displayed records. The Fund
Price Detail screen is displayed in View mode.
5.7.2.4
Deleting a Fund Price Holiday Record
You can delete only unauthorized records in the system. To delete a record that you have
previously entered:
1. Invoke the Fund Price Holiday Summary screen from the Browser.
2. Select the status of the record that you want to retrieve for deletion.
3. Specify any or all of the details in the corresponding fields on the screen.
4. Click 'Search'. All records with the specified fields are retrieved and displayed in the lower
portion of the screen.
5. Double click the record that you want to delete in the list of displayed records. The Fund
Price Holiday Detail screen is displayed.
6. Select Delete Operation from the Action list. The system prompts you to confirm the
deletion and the record is physically deleted from the system database.
You can delete only unauthorized records in the system. To delete a record that you have
previously entered:
1. Invoke the Fund Price Summary screen from the Browser.
2. Select the status of the record that you want to retrieve for deletion.
3. Specify any or all of the details in the corresponding fields on the screen.
5-44
4. Click ‘Search’. All records with the specified fields are retrieved and displayed in the lower
portion of the screen.
5. Double click the record that you want to delete in the list of displayed records. The Fund
Price Detail screen is displayed.
6. Select Delete Operation from the Action list. The system prompts you to confirm the
deletion and the record is physically deleted from the system database.
5.7.2.5
Authorizing a Fund Price Holiday Record
An unauthorized Fund Price Holiday record must be authorized in the system for it to be
processed. To authorize a record:
1. Invoke the Fund Price Holiday Summary screen from the Browser.
2. Select the status of the record that you want to retrieve for authorization. Typically,
choose the unauthorized option.
3. Specify any or all of the details in the corresponding fields on the screen.
4. Click 'Search'. All records with the specified details that are pending authorization are
retrieved and displayed in the lower portion of the screen.
5. Double click the record that you wish to authorize. The Fund Price Detail screen is
displayed. Select Authorize operation from the Action List.
When a checker authorizes a transaction, details of validation, if any, that were overridden by
the maker of the transaction during the Save operation are displayed. If any of these overrides
results in an error, the checker must reject the transaction.
An unauthorized Fund Price record must be authorized in the system for it to be processed.
To authorize a record:
1. Invoke the Fund Price Summary screen from the Browser.
2. Select the status of the record that you want to retrieve for authorization. Typically,
choose the unauthorized option.
3. Specify any or all of the details in the corresponding fields on the screen.
4. Click ‘Search’. All records with the specified details that are pending authorization are
retrieved and displayed in the lower portion of the screen.
5. Double click the record that you wish to authorize. The Fund Price Detail screen is
displayed. Select Authorize operation from the Action List.
When a checker authorizes a transaction, details of validation, if any, that were overridden by
the maker of the transaction during the Save operation are displayed. If any of these overrides
results in an error, the checker must reject the transaction.
5.7.2.6
Amending a Fund Price Holiday Record
After a Fund Price record is authorized, it can be modified using the Unlock operation from
the Action List. To make changes to a record after authorization:
1. Invoke the Fund Price Holiday Summary screen from the Browser.
2. Select the status of the record that you want to retrieve for authorization. You can only
amend authorized records.
3. Specify any or all of the details in the corresponding fields on the screen.
4. Click 'Search'. All records with the specified details that are pending authorization are
retrieved and displayed in the lower portion of the screen.
5-45
5. Double click the record that you wish to authorize. The Fund Price Holiday Maintenance
Detail screen is displayed in amendment mode. Select Unlock operation from the Action
List to amend the record.
6. Amend the necessary information and click on Save to save the changes.
If an incorrect price has been entered in the Fund Price screen, for a particular date, the
system allows you to make correction through an amendment operation. Through this, prices
entered on any previous working day can be amended, if necessary, to make corrections.
Amendment of a fund price is only possible under the following circumstances:
The date of amendment must be a fund working day as well as a system / AMC working
day.
The fund for which the price is being amended is a scripless fund.
The ageing policy (in the General Operating Rules) defined for the fund for which the
price is being amended, is not ‘Txn Receipts’ or ‘FIFO Across Products’.
Note
This feature is only available if your installation has specifically requested for it.
After a Fund Price record is authorized, it can be modified using the Unlock operation from
the Action List. To make changes to a record after authorization:
1. Invoke the Fund Price record Summary screen from the Browser.
2. Select the status of the record that you want to retrieve for authorization. You can only
amend authorized records.
3. Specify any or all of the details in the corresponding fields on the screen.
4. Click ‘Search’. All records with the specified details that are pending authorization are
retrieved and displayed in the lower portion of the screen.
5. Double click the record that you wish to authorize. The Fund Price Detail screen is
displayed in amendment mode. Select Unlock operation from the Action List to amend the
record.
6. Amend the necessary information and click on Save to save the changes.
5.7.2.7
Authorizing an Amended Fund Price Record
An amended Fund Price Holiday record must be authorized for the amendment to be made
effective in the system. The authorization of amended records can be done only from Fund
Manager Module and Agency Branch module.
The subsequent process of authorization is the same as that for normal transactions.
5.8
Maintaining Fund CPMF Preferences
CPMF tax is deducted by the some banks and the money is transferred from current/savings
account to the investment account.
For a few selected investment products such as funds or term deposits the bank could decide
to return a part of the CPMF Tax that has been deducted as an incentive for having invested.
This is referred to as CPMF Bonus.
5-46
Invoke the ‘Fund CPMF Detail’ screen by typing ‘UTDFCPMF’ in the field at the top right
corner of the Application tool bar and clicking on the adjoining arrow button. The ‘Fund CPMF
Detail’ screen is displayed.
Select ‘New’ from the Actions menu in the Application tool bar or click new icon to enter the
details of CPMF preferences for the fund.
Fund Details
Fund ID
Alphanumeric; Mandatory
Select the ID for the fund for which the CPMF rule is applicable.
Fund Identification Number
Select the ISIN code of the fund for which the CPMF rule is applicable.
CPMF Details Section
CPMF Bonus Applicable
Mandatory
Check this box if the CPMF bonus is applicable to investment made in this fund.
Default CPMFBonus Percentage Value
Numeric; Mandatory
Specify the default percentage value of the CPMF bonus. In case the CPMF bonus type is
fixed, this value will be the value used and it can not be changed.
CPMF Bonus Type
Mandatory
Select the type of CPMF Bonus, the options being:
Fixed
Defined
5-47
If the type selected is fixed then no changes can be made to the bonus at the transaction level.
Lag Basis
Mandatory
Select the lag basis from the drop down provided, the options being;
Transaction Date: In this case the CPMF bonus will be credited on the transaction date
as an EOD activity.
User Defined: User Defined –In this case lag is specified in Fund CPMF preference
which will be defaulted in transaction screen. This can be changed at transaction level.
Trigger Based: In this case CPMF bonus is credited on the day of uploading basis
amount for that transaction.
Lag for CPMF Bonus Credit
Numeric; Mandatory
If Lag basis is transaction date or trigger based, lag will not be captured. If Lag basis is user
defined, then the 'Lag for CPMF Bonus Credit' will be captured.
Credit Bonus on Outflow
Mandatory
Check this option to ensure that the CPMF credit takes place even if the subscribed units have
been redeemed partially or fully.
IRRF Load for CPMF
Alphanumeric; Optional
Indicate the IRRF load to be applied to the CPMF bonus, in which case the net amount will
be credited to the investor after taking into consideration the tax amount.
Minimum Transaction Amount
Numeric; Mandatory
Specify the minimum amount that is required to be available for the CPMF bonus to be
considered, in case the application amount is less than the amount specified here the bonus
will not be calculated.
Note
The minimum transaction amount should be specified in the fund base currency.
Available Account Types
All the available account types will be displayed here for selection.
Applicable Account Types
Select the account types from the list of available account types for which the CPMF bonus
will be applicable.
5-48
5.8.1
Fund CPMF Summary Screen
Invoke the ‘Fund CPMF Setup Summary’ screen by typing ‘UTSFCPMF’ in the field at the top
right corner of the Application tool bar and clicking on the adjoining arrow button.
You can perform the following operations in the ‘Fund CPMF Setup Summary’ screen:
5.8.1.1
Retrieving Record in Fund CPMF Summary Screen
You can retrieve a previously entered record in the Summary Screen, as follows:
Specify any or all of the following details in the corresponding fields:
The status of the record in the Authorized field. If you choose the ‘Blank Space’ option,
then all the records are retrieved.
The status of the record in the Open field. If you choose the ‘Blank Space’ option, then
all records are retrieved
Fund ID
CPMF Bonus Applicable
Click ‘Search’ button to view the records. All the records with the specified details are retrieved
and displayed in the lower portion of the screen.
Note
You can also retrieve the individual record detail from the detail screen by querying in the
following manner:
–
Press F7.
–
Input the Fund ID.
–
Press F8.
You can perform Edit, Delete, Amend, Authorize, Reverse, Confirm operations by selecting
the operation from the Action list. You can also search a record by using a combination of %
and alphanumeric value.
5-49
Example
You can search the record for Fund ID by using the combination of % and alphanumeric value
as follows:-
5.8.1.2
Search by A%:- The system will fetch all the records whose Fund ID starts from
Alphabet ‘A’. For example, AGC17, AGVO6, AGC74 and so forth.
Search by %7:- The system will fetch all the records whose Fund ID ends by numeric
value’ 7’. For example, AGC17, GSD267, AGC77 and so forth.
Search by %17%:- The system will fetch all the records whose Fund ID contains the
numeric value 17. For example, GSD217, GSD172, AGC17 and so forth.
Editing Fund CPMF Record
You can modify the details of Fund CPMF record that you have already entered into the
system, provided it has not been subsequently authorized. You can perform this operation as
follows:
5.8.1.3
Invoke the Fund CPMF Summary screen from the Browser.
Select the status of the record that you want to retrieve for modification in the Authorized
field. You can only modify records that are unauthorized. Accordingly, choose the
unauthorized option.
Specify any or all of the details in the corresponding fields to retrieve the record that is
to be modified.
Click ‘Search’ button. All unauthorized records with the specified details are retrieved
and displayed in the lower portion of the screen.
Double click the record that you want to modify in the list of displayed records. The Fund
CPMF Detail screen is displayed.
Select Unlock Operation from the Action list to modify the record. Modify the necessary
information.
Click Save to save your changes. The Fund CPMF Detail screen is closed and the
changes made are reflected in the Fund CPMF Summary screen.
Viewing Fund CPMF Record
To view a record that you have previously input, you must retrieve the same in the Fund
CPMF Summary screen as follows:
5.8.1.4
Invoke the Fund CPMF Summary screen from the Browser.
Select the status of the record that you want to retrieve for viewing in the Authorized
field. You can also view all records that are either unauthorized or authorized only, by
choosing the Unauthorized/ Authorized option.
Specify any or all of the details of the record in the corresponding fields on the screen.
Click ‘Search’ button. All records with the specified fields are retrieved and displayed in
the lower portion of the screen.
Double click the record that you want to view in the list of displayed records. The Fund
CPMF Detail screen is displayed in View mode.
Deleting Fund CPMF Record
You can delete only unauthorized records in the system. To delete a record that you have
previously entered:
Invoke the Fund CPMF Summary screen from the Browser.
Select the status of the record that you want to retrieve for deletion.
5-50
5.8.1.5
Specify any or all of the details in the corresponding fields on the screen.
Click ‘Search’ button. All records with the specified fields are retrieved and displayed in
the lower portion of the screen.
Double click the record that you want to delete in the list of displayed records. . The Fund
CPMF Detail screen is displayed.
Select Delete Operation from the Action list. The system prompts you to confirm the
deletion and the record is physically deleted from the system database.
Authorizing Fund CPMF Record
An unauthorized Fund CPMF record must be authorized in the system for it to be processed.
To authorize a record:
Invoke the Fund CPMF Summary screen from the Browser.
Select the status of the record that you want to retrieve for authorization. Typically,
choose the unauthorized option.
Specify any or all of the details in the corresponding fields on the screen.
Click ‘Search’ button. All records with the specified details that are pending
authorization are retrieved and displayed in the lower portion of the screen.
Double click the record that you wish to authorize. The Fund CPMF Detail screen is
displayed. Select Authorize operation from the Action List.
When a checker authorizes a transaction, details of validation, if any, that were overridden by
the maker of the transaction during the Save operation are displayed. If any of these overrides
results in an error, the checker must reject the transaction.
5.8.1.6
Amending Fund CPMF Record
After a Fund CPMF record is authorized, it can be modified using the Unlock operation from
the Action List. To make changes to a record after authorization:
5.8.1.7
Invoke the Fund CPMF Summary screen from the Browser.
Select the status of the record that you want to retrieve for authorization. You can only
amend authorized records.
Specify any or all of the details in the corresponding fields on the screen.
Click ‘Search’ button. All records with the specified details that are pending
authorization are retrieved and displayed in the lower portion of the screen.
Double click the record that you wish to authorize. The Fund CPMF Detail screen is
displayed in amendment mode. Select Unlock operation from the Action List to amend
the record.
Amend the necessary information and click on Save to save the changes.
Authorizing Amended Fund CPMF Record
An amended Fund CPMF record must be authorized for the amendment to be made effective
in the system. The authorization of amended records can be done only from Fund Manager
Module and Agency Branch module.
The subsequent process of authorization is the same as that for normal transactions.
5.8.1.8
Copying Attributes
If you want to create a new Fund CPMF record with the same attributes of an existing
maintenance, you can copy the attributes of an existing Fund CPMF record to a new one.
5-51
To copy the attributes:
5.9
Retrieve the record whose attributes the new Fund CPMF record should inherit. You can
retrieve the record through the Summary screen or through the F7-F8 operation
explained in the previous sections of this chapter.
Click on Copy
Indicate the ID for the new Fund CPMF record. You can, however, change the details
of the new record.
Setting up Fund Account
Each of the funds floated by the AMC must maintain bank accounts that operate in the fund
base currency and any or all of the fund transaction currencies. These fund accounts can be
maintained through the Fund Account Maintenance screen.
You can capture multiple bank accounts for a fund in the same currency; however, a default
fund account must be designated for a particular currency. You can also specify the account
categories for each bank details.
5.9.1
Fund Account Maintenance Screen
To set up the bank accounts for a fund, use the ‘Fund Account Input’ screen. You can invoke
this screen by typing ‘UTDFNDAC’ in the field at the top right corner of the Application tool bar
and clicking on the adjoining arrow button. The ‘Fund Account Input’ screen is displayed.
Select ‘New’ from the Actions menu in the Application tool bar or click new icon to enter the
details of the new fund account you wish to maintain.
5.9.2
Checks
Before you set up a fund account for a fund, it is desirable to ensure that the following
information is already setup in the system:
The fund for which the fund account is being set up must have an authorized set of fund
rules profile records.
5-52
5.9.3
The Banks and Branches must be maintained in the system through the Bank
Maintenance and the Bank Branch Maintenance.
Fields in Fund Account Maintenance Screen
Fund ID
6 Character Maximum, Alphanumeric, Mandatory
Select the fund for which the fund account is to be set up, from the drop down list. This list
contains the names of all the authorized funds in the system.
When you select the fund, the Fund Base Currency is picked up from the Fund Demographics
profile for the selected fund and displayed in the Fund Base Currency field.
Fund Identification Number
12 Characters Maximum; Alphanumeric; Mandatory
Specify the fund identification number. The adjoining option list displays all valid fund id codes
maintained in the system. You can choose the appropriate one.
Fund Base Currency
The currency in which the fund is denominated is defaulted here.
5.9.3.1
Maintaining Bank Details
Bank Code
Alphanumeric, Mandatory
Select the name of the bank where the account is to be set up, from the drop down list.
Branch Code
Alphanumeric, Mandatory
Select the name of the branch of the bank where the account is to be set up, from the drop
down list. When you select the bank name, the branches that have been set up for the
selected bank are populated in the drop down list.
Account Number
20 Character Maximum, Alphanumeric, Mandatory
Enter the number of the account that will be operative for this fund.
IBAN
36 Characters Only; Alphanumeric; Optional
Specify the IBAN (International Bank Account Number) of the account holder.
Account Currency
Alphanumeric, Mandatory
Select the currency that the account is to operate in, from the drop down list provided. When
the fund is selected, all the currencies that are permitted for the fund as transaction currencies
are populated in this list, along with the fund base currency. This information is picked up from
the Fund Demographics profile and the Fund Transaction Currency profile for the selected
fund.
As mentioned earlier, multiple accounts can be set up for a Fund ID and an account currency.
An account must be maintained for the Fund Base Currency, and if this is not done, the
system prompts for this on usage of the Save option.
5-53
Account Name
Alphanumeric, Mandatory
Specify the name of the fund account that is being set up.
Close Account
1 Character Maximum, Mandatory
Check this box to indicate closure of this fund account. Account closure is only available in
Edit Mode.
Direct Debit Applicable
1 Character Maximum, Optional
Check this box to indicate that direct debits are applicable for the account.
Account Category
Optional
From the drop down list, select the category to which the account belongs. The available
options are:
Pay-In
Pay-Out
NPI-Trust
Note
Only those accounts that operate in the fund base currency can be specified as an NPITrust account. For a given Fund ID and Fund Base Currency combination, only account
can be maintained as NPI-Trust account.
Default Account
Optional
You must designate one default account for each currency, which would be deemed to be the
default fund account in the selected currency, for the fund.
5-54
5.9.4
Fund Account Summary Screen
Invoke the ‘Fund Account Input Summary’ screen by typing ‘UTSFNDAC’ in the field at the
top right corner of the Application tool bar and clicking on the adjoining arrow button.
You can perform the following operations in the ‘Fund Account Input Summary’ screen:
5.9.4.1
Retrieving Record in Fund Account Summary Screen
You can retrieve a previously entered record in the Summary Screen, as follows:
Specify any or all of the following details in the corresponding fields:
The status of the record in the Authorized field. If you choose the ‘Blank Space’ option,
then all the records are retrieved.
The status of the record in the Open field. If you choose the ‘Blank Space’ option, then
all records are retrieved
Fund ID
Click ‘Search’ button to view the records. All the records with the specified details are retrieved
and displayed in the lower portion of the screen.
Note
You can also retrieve the individual record detail from the detail screen by querying in the
following manner:
–
Press F7.
–
Input the Fund ID.
–
Press F8.
You can perform Edit, Delete, Amend, Authorize, Reverse, Confirm operations by selecting
the operation from the Action list. You can also search a record by using a combination of %
and alphanumeric value.
5-55
Example
You can search the record for Fund ID by using the combination of % and alphanumeric value
as follows:
5.9.4.2
Search by A%: The system will fetch all the records whose Fund ID starts from Alphabet
‘A’. For example, AGC17, AGVO6, AGC74 and so forth.
Search by %7:- The system will fetch all the records whose Fund ID ends by numeric
value’ 7’. For example, AGC17, GSD267, AGC77 and so forth.
Search by %17%:- The system will fetch all the records whose Fund ID contains the
numeric value 17. For example, GSD217, GSD172, AGC17 and so forth.
Editing Fund Account Record
You can modify the details of a Fund Account record that you have already entered into the
system, provided it has not been subsequently authorized. You can perform this operation as
follows:
5.9.4.3
Invoke the Fund Account Summary screen from the Browser.
Select the status of the record that you want to retrieve for modification in the Authorized
field. You can only modify records that are unauthorized. Accordingly, choose the
unauthorized option.
Specify any or all of the details in the corresponding fields to retrieve the record that is
to be modified.
Click ‘Search’ button. All unauthorized records with the specified details are retrieved
and displayed in the lower portion of the screen.
Double click the record that you want to modify in the list of displayed records. The Fund
Account Detail screen is displayed.
Select Unlock Operation from the Action list to modify the record. Modify the necessary
information.
Click Save to save your changes. The Fund Account Detail screen is closed and the
changes made are reflected in the Fund Account Summary screen.
Viewing Fund Account Record
To view a record that you have previously input, you must retrieve the same in the Fund
Account Mapping Summary screen as follows:
5.9.4.4
Invoke the Fund Account Summary screen from the Browser.
Select the status of the record that you want to retrieve for viewing in the Authorized
field. You can also view all records that are either unauthorized or authorized only, by
choosing the Unauthorized/ Authorized option.
Specify any or all of the details of the record in the corresponding fields on the screen.
Click ‘Search’ button. All records with the specified fields are retrieved and displayed in
the lower portion of the screen.
Double click the record that you want to view in the list of displayed records. The Fund
Account Detail screen is displayed in View mode.
Deleting Fund Account Record
You can delete only unauthorized records in the system. To delete a record that you have
previously entered:
Invoke the Fund Account Summary screen from the Browser.
Select the status of the record that you want to retrieve for deletion.
5-56
5.9.4.5
Specify any or all of the details in the corresponding fields on the screen.
Click ‘Search’ button. All records with the specified fields are retrieved and displayed in
the lower portion of the screen.
Double click the record that you want to delete in the list of displayed records. The Fund
Account Detail screen is displayed.
Select Delete Operation from the Action list. The system prompts you to confirm the
deletion and the record is physically deleted from the system database.
Authorizing Fund Account Record
An unauthorized Fund Account record must be authorized in the system for it to be processed.
To authorize a record:
Invoke the Fund Account Summary screen from the Browser.
Select the status of the record that you want to retrieve for authorization. Typically,
choose the unauthorized option.
Specify any or all of the details in the corresponding fields on the screen.
Click ‘Search’ button. All records with the specified details that are pending
authorization are retrieved and displayed in the lower portion of the screen.
Double click the record that you wish to authorize. The Fund Account Detail screen is
displayed. Select Authorize operation from the Action List.
When a checker authorizes a transaction, details of validation, if any, that were overridden by
the maker of the transaction during the Save operation are displayed. If any of these overrides
results in an error, the checker must reject the transaction.
5.9.4.6
Amending Fund Account Record
After a Fund Account record is authorized, it can be modified using the Unlock operation from
the Action List. To make changes to a record after authorization:
5.9.4.7
Invoke the Fund Account Summary screen from the Browser.
Select the status of the record that you want to retrieve for authorization. You can only
amend authorized records.
Specify any or all of the details in the corresponding fields on the screen.
Click ‘Search’ button. All records with the specified details that are pending
authorization are retrieved and displayed in the lower portion of the screen.
Double click the record that you wish to authorize. The Fund Account Detail screen is
displayed in amendment mode. Select Unlock operation from the Action List to amend
the record.
Amend the necessary information and click on Save to save the changes.
Authorizing Amended Fund Account Record
An amended Fund Account record must be authorized for the amendment to be made
effective in the system. The authorization of amended records can be done only from Fund
Manager Module and Agency Branch module.
The subsequent process of authorization is the same as that for normal transactions.
5.9.4.8
Copying Attributes
If you want to create a new Fund Account record with the same attributes of an existing
maintenance, you can copy the attributes of an existing Fund Account record to a new one.
5-57
To copy the attributes:
Retrieve the record whose attributes the new Fund Account record should inherit. You
can retrieve the record through the Summary screen or through the F7-F8 operation
explained in the previous sections of this chapter.
Click on Copy
Indicate the ID for the new Fund Account. You can, however, change the details of the
new record.
5.10 Mapping Funds to Products
You can associate a share class fund with a non-taxable product.
Invoke the ‘Product Fund Mapping Detail’ screen by typing ‘UTDPFMAP’ in the field at the top
right corner of the Application tool bar and clicking on the adjoining arrow button. Select ‘New’
from the Actions menu in the Application tool bar or click new icon to enter the details of the
mapping you wish for a particular product and fund.
After a share class fund has been mapped to a product, the mapping must be authorized for
it to be effective.
Authorization of such a mapping can be done in the Product Fund Mapping screen itself. The
mapping cannot be removed or deleted subsequently.
5.10.1
Fields in this Screen
Product ID
Mandatory
Select the non-tax product to which the fund is mapped. This specification can be made only
once for a fund, and once it is made, it cannot be reversed or deleted.
5-58
Fund ID
Alphanumeric, Mandatory
Select the share class fund that is to be mapped to a non-taxable product.
Fund Name
Upon selection of the fund id, the associated fund name gets displayed. However you are
allowed to modify the same.
5.11 Wrap Fund Maintenance
When an investor subscribes into a wrap fund, the investment is channelled into the
underlying investment funds that are associated with the wrap fund.
In Oracle FLEXCUBE Investor Servicing, you can maintain details of wrap funds, with the
underlying funds and the respective split percentages, using the ‘Wrap Fund Maintenance
Detail’ screen. You can invoke this screen by typing ‘UTDWRFND’ in the field at the top right
corner of the Application tool bar and clicking on the adjoining arrow button. Select ‘New’ from
the Actions menu in the Application tool bar or click new icon to enter the details of the wrap
fund you wish to maintain.
In this screen, any authorized fund in the system can be designated as a wrap fund, and any
authorized funds in the system may be designated as underlying investment funds for the
wrap fund. An effective date may also be specified for the wrap fund.
Note
You can maintain details of wrap funds in the system for information and reporting purposes only. No processing or validation in respect of the same is performed by the system
when there is an investment into the fund or its underlying investment funds.
5-59
5.11.1
Fields in this Screen
Wrap Fund ID
Alphanumeric, Mandatory
Select the ID of the wrap fund, from the drop down list. The list contains authorized funds in
the system.
ISIN No
12 Characters Maximum; Alphanumeric; Mandatory
Select the ISIN Code of the wrap fund, from the drop down list. If you specify the ISIN Code,
the ID of the fund is displayed in the Fund field.
Rule Effective Date
Date Format, Mandatory
Specify the date from which the fund is effective as a wrap fund in the system. This rule
effective date is different from the effective date of the actual fund in the system, which is
specified in the Fund Demographics profile for the fund.
5.11.1.1 Fund Investment Details
Fund ID
Alphanumeric, Mandatory
Select the ID of the underlying investment fund, from the drop down list. The list contains
authorized funds in the system.
Split Percentage –
5 Characters Maximum, Numeric, with 8 decimal places
Specify the percentage limit for investment into the selected underlying fund. This percentage
must not exceed one hundred percent.
5.11.2
Wrap Fund Summary Screen
Invoke the ‘Wrap Fund Maintenance Summary’ screen by typing ‘UTSWRFND’ in the field at
the top right corner of the Application tool bar and clicking on the adjoining arrow button.
You can perform the following operations in the ‘Wrap Fund Maintenance Summary’ screen:
5-60
5.11.2.1 Retrieving Record in Wrap Fund Summary screen
You can retrieve a previously entered record in the Summary Screen, as follows:
Specify any or all of the following details in the corresponding fields:
The status of the record in the Authorized field. If you choose the ‘Blank Space’ option,
then all the records are retrieved.
The status of the record in the Open field. If you choose the ‘Blank Space’ option, then
all records are retrieved
Wrap Fund
ISIN No
Rule Effective Date
Click ‘Search’ button to view the records. All the records with the specified details are retrieved
and displayed in the lower portion of the screen.
Note
You can also retrieve the individual record detail from the detail screen by querying in the
following manner:
–
Press F7.
–
Input the Wrap Fund.
–
Press F8.
You can perform Edit, Delete, Amend, Authorize, Reverse, Confirm operations by selecting
the operation from the Action list. You can also search a record by using a combination of %
and alphanumeric value.
Example
You can search the record for Wrap Fund by using the combination of % and alphanumeric
value as follows:
Search by A%:- System will fetch all the records whose Wrap Fund starts from Alphabet
‘A’. For example, AGC17, AGVO6, AGC74 etc.
Search by %7:- System will fetch all the records whose Wrap Fund ends by numeric
value’ 7’. For example, AGC17, GSD267, AGC77 etc.
Search by %17%:- System will fetch all the records whose Wrap Fund contains the
numeric value 17. For example, GSD217, GSD172, AGC17 etc.
5.11.2.2 Editing Wrap Fund Record
You can modify the details of a Wrap Fund record that you have already entered into the
system, provided it has not been subsequently authorized. You can perform this operation as
follows:
Invoke the Wrap Fund Summary screen from the Browser.
Select the status of the record that you want to retrieve for modification in the
Authorization Status field. You can only modify records that are unauthorized.
Accordingly, choose the unauthorized option.
Specify any or all of the details in the corresponding fields to retrieve the record that is
to be modified.
5-61
Click ‘Search’ button. All unauthorized records with the specified details are retrieved
and displayed in the lower portion of the screen.
Double click the record that you want to modify in the list of displayed records. The Wrap
Fund Detail screen is displayed.
Select Unlock Operation from the Action list to modify the record. Modify the necessary
information.
Click Save to save your changes. The Wrap Fund Detail screen is closed and the
changes made are reflected in the Wrap Fund Summary screen.
5.11.2.3 Viewing Wrap Fund Record
To view a record that you have previously input, you must retrieve the same in the Wrap Fund
Summary screen as follows:
Invoke the Wrap Fund Summary screen from the Browser.
Select the status of the record that you want to retrieve for viewing in the Authorization
Status field. You can also view all records that are either unauthorized or authorized
only, by choosing the Unauthorized/ Authorized option.
Specify any or all of the details of the record in the corresponding fields on the screen.
Click ‘Search’ button. All records with the specified fields are retrieved and displayed in
the lower portion of the screen.
Double click the record that you want to view in the list of displayed records. The Wrap
Fund Detail screen is displayed in View mode.
5.11.2.4 Deleting Wrap Fund Record
You can delete only unauthorized records in the system. To delete a record that you have
previously entered:
Invoke the Wrap Fund Summary screen from the Browser.
Select the status of the record that you want to retrieve for deletion.
Specify any or all of the details in the corresponding fields on the screen.
Click ‘Search’ button. All records with the specified fields are retrieved and displayed in
the lower portion of the screen.
Double click the record that you want to delete in the list of displayed records. The Wrap
Fund Detail screen is displayed.
Select Delete Operation from the Action list. The system prompts you to confirm the
deletion and the record is physically deleted from the system database.
5.11.2.5 Authorizing Wrap Fund Record
An unauthorized Wrap Fund must be authorized in the system for it to be processed. To
authorize a record:
Invoke the Wrap Fund Summary screen from the Browser.
Select the status of the record that you want to retrieve for authorization. Typically,
choose the unauthorized option.
Specify any or all of the details in the corresponding fields on the screen.
Click ‘Search’ button. All records with the specified details that are pending
authorization are retrieved and displayed in the lower portion of the screen.
Double click the record that you wish to authorize. The Wrap Fund Detail screen is
displayed. Select Authorize operation from the Action List.
5-62
When a checker authorizes a transaction, details of validation, if any, that were over ridden
by the maker of the transaction during the Save operation are displayed. If any of these
overrides results in an error, the checker must reject the transaction.
5.11.2.6 Amending Wrap Fund record
After a Wrap Fund record is authorized, it can be modified using the Unlock operation from
the Action List. To make changes to a record after authorization:
Invoke the Wrap Fund Summary screen from the Browser.
Select the status of the record that you want to retrieve for authorization. You can only
amend authorized records.
Specify any or all of the details in the corresponding fields on the screen.
Click ‘Search’ button. All records with the specified details that are pending
authorization are retrieved and displayed in the lower portion of the screen.
Double click the record that you wish to authorize. The Wrap Fund Detail screen is
displayed in amendment mode. Select Unlock operation from the Action List to amend
the record.
Amend the necessary information and click on Save to save the changes.
5.11.2.7 Authorizing Amended Wrap Fund Record
An amended Wrap Fund record must be authorized for the amendment to be made effective
in the system. The authorization of amended records can be done only from Fund Manager
Module and Agency Branch module.
The subsequent process of authorization is the same as that for normal transactions.
5.11.2.8 Copying Attributes
If you want to create a new Wrap Fund record with the same attributes of an existing
maintenance, you can copy the attributes of an existing Wrap Fund record to a new one.
To copy the attributes:
Retrieve the record whose attributes the new Wrap Fund record should inherit. You can
retrieve the record through the Summary screen or through the F7-F8 operation
explained in the previous sections of this chapter.
Click on Copy
Indicate the ID for the new Wrap Fund. You can, however, change the details of the new
record.
5.12 Maintaining Access Restrictions
You can impose restrictions on funds when there is a necessity to control inflows into,
outflows from or both with regard to the funds. For example, when you change a fund from an
open-ended fund to a close–ended fund or when limits on investment in a fund have been
breached, you will need to restrict further subscriptions to the fund.
You can impose restrictions on clients on the basis of the RPO (Restricted Post Office) Code.
For example, in case of an investor who is deceased, you may allow redemptions only if his
address is known. You can also restrict any further subscriptions to his account.
You can restrict the operations/setup for a fund, broker or a client to specific users. The
restrictions and the list of specific users can be maintained through the ‘FBC Access
5-63
Restriction Detail’ screen. You can invoke this screen by typing ‘UTDFAR’ in the field at the
top right corner of the Application tool bar and clicking on the adjoining arrow button.
Select ‘New’ from the Actions menu in the Application tool bar or click new icon to enter the
details of the restrictions that you wish to maintain.
Note
5.12.1
–
Restrictions on a broker are placed only when the broker has retired or has
deceased. You can do this through broker disabling in the Broker Maintenance
screen following which the system will not allow the broker to access any
transaction, policy or unit holder account.
–
The restrictions that are placed on any fund or client here do not apply to the system
generated transactions like Standing Instructions etc.
Fields in FBC Access Restriction Screen
Restriction Type
Mandatory
Specify the basis on which you wish to apply restrictions. The options are ‘Client’ and ‘Fund’.
Restriction
Mandatory
Choose ‘Yes’ if you want to apply restrictions. This prevents the users maintained in the list
from performing the operation specified.
Choose ‘No’ if you do not want to apply restrictions. This ensures that only the users
maintained in the list are allowed to perform the operation specified.
Fund Id
Character, Mandatory if Restriction Type is ‘Fund’
Specify the fund ID if you have opted for restriction type ‘Fund’.
5-64
Auto Auth
Mandatory
If you want the users maintained in the list to be able to authorize their own transactions,
choose ‘Yes’. Else choose ‘No’.
If you choose ‘Yes’, this selection will take precedence over the Auto Auth maintained in the
Security Maintenance System.
RPO Code
Character, Mandatory if Restriction Type is ‘Client’
Specify the RPO Code if you have opted for restriction type ‘Client’.
Apply to All Users
Mandatory
The option you choose here will define if all or only particular users can perform the operation
that you have specified. Choose ‘No’ if you wish the restriction on operations to be applicable
only to the users maintained in the list. Choose ‘Yes’ if you wish the restriction to be applicable
to all users. In this case, there will be no users maintained in the list.
Operation
Character, Mandatory
Specify the operation (s) that you wish to restrict. The following are the operations that are
allowed for client and fund restrictions:
Operation
Fund Level
Client Level
Subscriptions/ Policy Top Up
Allowed
Allowed
Redemption/ Surrenders
Allowed
Allowed
Subscription SI
Allowed
Allowed
Recurring Premiums
Allowed
Allowed
Redemption SI
Allowed
Allowed
Recurring Annuities
Allowed
Allowed
Switch Out
Allowed
Allowed
Switch In
Allowed
Allowed
Transfers
Allowed
Allowed
View UH profile & Portfolio View
Not Allowed
Allowed
Update of the profile
Not Allowed
Allowed
Correspondence
Not Allowed
Allowed
5.12.1.1 User Details Section
User Id
Conditional
List all the users that are allowed or disallowed to perform the operation that you have chosen.
5-65
User Name
Display Only
The system displays the corresponding Names for the User IDs that you select.
Example
Let us assume the following restriction parameters for a Fund:
Restriction
Type
Restriction
Fund
Id
Fund
Yes
OMGR
RPO
Code
Operation
Apply to
All Users
Subscription
No
User List
User 1 &
User2
This implies that only User 1 and User 2 are not allowed to do subscription for the fund
‘OMGR’.
Let us assume the following restriction parameters for a Client:
Restriction
Type
Restriction
Case
1
Client
Yes
Case
2
Client
No
Case
Fun
d Id
Operation
Apply
to All
Users
UNKNO
WN
ADDR
Redemptions
Yes
OVERPAID
View UH Profile &Portfolio View
No
RPO
Code
User
List
User
3
In Case 1, no user is allowed to do redemptions for investors whose RPO Code has been
specified as ‘UNKNOWN ADDR’.
In Case 2, only User 3 will be allowed to do the ‘Unit Holder View’ and ‘Portfolio View’
operations for clients with RPO Code as ‘OVERPAID’.
5-66
5.12.2
FBC Access Restriction Summary Screen
Invoke the ‘FBC Access Restriction Summary’ screen by typing ‘UTSFAR’ in the field at the
top right corner of the Application tool bar and clicking on the adjoining arrow button.
You can perform the following operations in the ‘FBC Access Restriction Summary’ screen:
5.12.2.1 Retrieving Record in FBC Access Restriction Summary screen
You can retrieve a previously entered record in the Summary Screen, as follows:
Specify any or all of the following details in the corresponding fields:
The status of the record in the Authorized field. If you choose the ‘Blank Space’ option,
then all the records are retrieved.
The status of the record in the Open field. If you choose the ‘Blank Space’ option, then
all records are retrieved
Restriction Type
Restriction
Fund ID
RPO Code
Operation
Apply to All Users
Click ‘Search’ button to view the records. All the records with the specified details are retrieved
and displayed in the lower portion of the screen.
You can also retrieve the individual record detail from the detail screen by querying in the
following manner:
1. Press F7.
2. Input the Fund ID.
3. Press F8.
5-67
You can perform Edit, Delete, Amend, Authorize operations by selecting the operation from
the Action list. You can also search a record by using a combination of % and alphanumeric
value.
Example
You can search the record for Fund ID by using the combination of % and alphanumeric value
as follows:
Search by A%:- System will fetch all the records whose Fund ID starts from Alphabet
‘A’. For example, AGC17, AGVO6, AGC74 etc.
Search by %7:- System will fetch all the records whose Fund ID ends by numeric value’
7’. For example, AGC17, GSD267, AGC77 etc.
Search by %17%:- System will fetch all the records whose Fund ID contains the
numeric value 17. For example, GSD217, GSD172, AGC17 etc.
5.12.2.2 Editing FBC Access Restriction
You can modify the details of an FBC Access Restriction that you have already entered into
the system, provided it has not been subsequently authorized. You can perform this operation
as follows:
Invoke the FBC Access Restriction Summary screen from the Browser.
Select the status of the record that you want to retrieve for modification in the Authorized
field. You can only modify records that are unauthorized. Accordingly, choose the
unauthorized option.
Specify any or all of the details in the corresponding fields to retrieve the record that is
to be modified.
Click ‘Search’ button or press F8. All unauthorized records with the specified details are
retrieved and displayed in the lower portion of the screen.
Double click the record that you want to modify in the list of displayed records. The FBC
Access Restriction Detail screen is displayed.
Select Unlock Operation from the Action list to modify the record. Modify the necessary
information.
Click Save to save your changes. The FBC Access Restriction Detail screen is closed
and the changes made are reflected in the FBC Access Restriction Summary screen.
5.12.2.3 Viewing FBC Access Restriction
To view a record that you have previously input, you must retrieve the same in the FBC
Access Restriction Summary screen as follows:
Invoke the FBC Access Restriction Summary screen from the Browser.
Select the status of the record that you want to retrieve for viewing in the Authorized
field. You can also view all records that are either unauthorized or authorized only, by
choosing the Unauthorized/ Authorized option.
Specify any or all of the details of the record in the corresponding fields on the screen.
Click ‘Search’ button. All records with the specified fields are retrieved and displayed in
the lower portion of the screen.
Double click the record that you want to view in the list of displayed records. The FBC
Access Restriction Detail screen is displayed in View mode.
5-68
5.12.2.4 Deleting FBC Access Restriction
You can delete only unauthorized records in the system. To delete a record that you have
previously entered:
Invoke the FBC Access Restriction Summary screen from the Browser.
Select the status of the record that you want to retrieve for deletion.
Specify any or all of the details in the corresponding fields on the screen.
Click ‘Search’ button. All records with the specified fields are retrieved and displayed in
the lower portion of the screen.
Double click the record that you want to delete in the list of displayed records. The FBC
Access Restriction Detail screen is displayed.
Select Delete Operation from the Action list. The system prompts you to confirm the
deletion and the record is physically deleted from the system database.
5.12.2.5 Authorizing FBC Access Restriction
An unauthorized FBC Access Restriction must be authorized in the system for it to be
processed. To authorize a record:
Invoke the FBC Access Restriction Summary screen from the Browser.
Select the status of the record that you want to retrieve for authorization. Typically,
choose the unauthorized option.
Specify any or all of the details in the corresponding fields on the screen.
Click ‘Search’ button. All records with the specified details that are pending
authorization are retrieved and displayed in the lower portion of the screen.
Double click the record that you wish to authorize. The FBC Access Restriction Detail
screen is displayed. Select Authorize operation from the Action List.
5.12.2.6 Amending FBC Access Restriction
After an FBC Access Restriction is authorized, it can be modified using the Unlock operation
from the Action List. To make changes to a record after authorization:
Invoke the FBC Access Restriction Summary screen from the Browser.
Select the status of the record that you want to retrieve for authorization. You can only
amend authorized records.
Specify any or all of the details in the corresponding fields on the screen.
Click ‘Search’ button. All records with the specified details that are pending
authorization are retrieved and displayed in the lower portion of the screen.
Double click the record that you wish to authorize. The FBC Access Restriction Detail
screen is displayed in amendment mode. Select Unlock operation from the Action List
to amend the record.
Amend the necessary information and click on Save to save the changes.
5.12.2.7 Authorizing Amended FBC Access Restriction
An amended FBC Access Restriction must be authorized for the amendment to be made
effective in the system. The authorization of amended records can be done only from Fund
Manager Module.
The subsequent process of authorization is the same as that for normal records.
5-69
5.12.2.8 Copying Attributes
If you want to create a new FBC Access Restriction with the same attributes of an existing
maintenance, you can copy the attributes of an existing FBC Access Restriction to a new one.
To copy the attributes:
Retrieve the record whose attributes the new FBC Access Restriction should inherit.
You can retrieve the record through the Summary screen or through the F7-F8
operation explained in the previous sections of this chapter.
Click on Copy
Indicate the ID for the new FBC Access Restriction. You can, however, change the
details of the new restriction.
5.13 Corporate Actions for Fund
The holdings of investors in a fund are affected by corporate actions that are declared and
processed in respect of the fund such as liquidations, mergers, splits, reverse splits,
dividends, capital payouts, side pocket creations, side pocket mergers and so on.
These corporate actions are discussed below:
5.13.1
Liquidation
This corporate action simply means the liquidation of the entire corpus of the fund on a date
decided by the fund. The proceeds of such liquidation are paid out to the investors. The date
of liquidation is intimated to the investors in advance, so that they may redeem their holdings,
prior to the liquidation date, if so desired.
5.13.2
Split and Reverse Split
The split corporate action involves the splitting of unit balances of a ‘parent’ fund into a ‘child’
fund. It results in an increase in the total outstanding holdings in the fund. However, both the
par value and the price per unit decrease, according to the split ratio.
The reverse split corporate action results in a decrease in the total outstanding holdings in the
fund. However, both the par value and the price per unit increase, according to the split ratio.
The split or reverse split ratio could result in fractional balances in the new fund, and in the
event of the AMC not allowing such fractional balances, the fractions are redeemed and the
proceeds paid out to the unit holders.
5.13.3
Merger
A merger involves the merging of unit balances from one or more parent funds into a resultant
fund. It can be put through either according to a predetermined user –input ratio or a systemderived ratio of parent fund(s) to the resultant fund
If you wish the system to derive the merger ratio, you should specify the fund(s) being merged
(Parent Fund) and the fund into which the merger is happening (Resultant Fund). The system
will derive the merger ratio based on the available net asset values of the specified funds.
The merger ratio could result in fractional balances in the new fund, and in the event of the
AMC not allowing such fractional balances, the fractions are redeemed and the proceeds paid
out to the unit holders.
5-70
5.13.4
Capital Payout
A capital payout liquidates a preset percentage of unit balances due to transactions in a fund,
the proceeds of which are paid out the corresponding unit holders with balances in the fund
due to the transactions.
The percentage of balances liquidated, could include units as of the price date of the
transaction (all units), transaction date (all or confirmed units) or allocation date (all or
confirmed units).
Oracle FLEXCUBE Investor Servicing provides the facility of maintaining the corporate
actions mentioned above and processing them in respect of a fund.
5.13.5
Side Pocket Creation
Side pockets are special type of accounts used in hedge funds to separate illiquid assets from
other more liquid investments. Once an investment enters a side pocket account, only the
present participants in the hedge fund will be entitled to a share of it. Future investors will not
receive a share of the proceeds in the event the asset's returns get realized.
During side pocket creation, percentage-wise redemption transactions are generated for all
unit holders, based on the split percentage specified in the corporate action. Unit-wise
subscription transactions, equal to units redeemed from the main fund, are generated for side
pocket fund.
5.13.6
Side Pocket Merger
During side pocket mergers, 100% redemption happens in the side pocket fund. Subscription
transactions, equivalent to the side pocket redemption units, are generated for the main fund.
5.13.7
Series Fund Merger
During ‘Series Fund Merger’, the fund series that are maintained separately in the system are
consolidated at period end.
Note
After merger process you need to manually disable the follow-up fund series.
5.13.8
Maintaining Details for Corporate Actions
You can maintain details for corporate actions in the ‘Corporate Actions Maintenance Detail’
screen. You can invoke this screen by typing ‘UTDCOACT’ in the field at the top right corner
5-71
of the Application tool bar and clicking on the adjoining arrow button. The ‘Corporate Actions
Maintenance Detail’ screen is displayed.
Select ‘New’ from the Actions menu in the Application tool bar or click new icon to enter the
details of the relevant corporate action.
5.13.8.1 Maintaining Details for Liquidation
For fund liquidations, you must maintain the details mentioned below in the ‘Corporate Actions
Maintenance Detail‘ screen. Select the ‘Liquidation’ option in the Corporate Action Type field.
Date of liquidation
ID and ISIN code of the fund that is being liquidated
Price at which the fund will be liquidated
Lot size. When you specify the lot size, the liquidation price per lot is computed by the
system.
Whether the liquidation date must be moved forward or backward, if it falls on a holiday.
Payment lag, if any, for the liquidation.
Threshold amount.
Whether or not the liquidation process must be automatically initiated on the liquidation
date (the Beginning of Day processes initiate the liquidation process in the system, if
automatic initiation is specified).
5-72
The book closing period that signifies the dates between which transactions into the
fund are suspended for processing the liquidation.
The exchange rate source applicable and the exchange rate date.
5.13.8.2 Maintaining Details for Split
For fund splits, you must maintain the details mentioned below in the Corporate Actions
Maintenance screen. Select the ‘Split’ option in the Corporate Action Type field.
Date of split.
ID and ISIN code of the resultant (or child) fund. Specify this in the Resultant Fund
section in the screen. If a new resultant fund is to be created by the split, click on the
Create Fund link to create the new fund.
ID and ISIN code of the parent fund. Click on the Split Details link to invoke the Split
Details screen, where you can specify the parent fund details.
The split parent ratio for the split. The parent ratio must be less than the resultant (child)
ratio.
The split Resultant Ration for the split. The parent ratio must be less than the resultant
(child) ratio.
Whether fractional units are allowable as a result of the split. If you indicate so, you can
also specify the applicable number of decimals.
The new par value per unit, for the units being split.
5-73
Whether the split date must be moved forward or backward, if it falls on a holiday.
Payment lag, if any, for the split.
Threshold amount.
Whether or not the split process must be automatically initiated on the split date (the
Beginning of Day processes initiate the split process in the system, if automatic initiation
is specified).
The book closing period that signifies the dates between which transactions into the
fund are suspended for processing the split.
The exchange rate source applicable and the exchange rate date.
Whether the units to be considered for the split are to be considered as of the
transaction date, allocation date or price date
5.13.8.3 Maintaining Details for Reverse Split
The details you maintain for reverse split corporate actions are similar in every way to those
you maintain for a split. However, when you specify the parent – resultant ratio, the parent
ratio must exceed the resultant (child) ratio, in the Reverse Split Details screen.
5-74
5.13.8.4 Maintaining Details for Mergers
For fund mergers, select the ‘Merger’ option in the Corporate Action Type field.
You need to maintain the following details in the Corporate Actions Maintenance screen:
Date of merger
ID and ISIN code of the resultant (or child) fund into which the parent funds are being
merged. Specify this in the Resultant Fund section in the screen. If a new resultant fund
is to be created by the merger, click on the Create Fund link to create the new fund.
ID and ISIN code of the parent fund(s). Click on the Merger Details link to invoke the
Merger Details screen, where you can specify the parent fund details.
The parent – resultant ratio for the merger the parent ratio can either be less than or greater
than the resultant ratio.
Whether fractional units are allowable as a result of the merger. If you indicate so, you
can also specify the applicable number of decimals.
5-75
Whether the merger date must be moved forward or backward, if it falls on a holiday.
Payment lag, if any, for the merger
Threshold amount
Whether or not the merger process must be automatically initiated on the merger date
(the Beginning of Day processes initiate the merger process in the system, if automatic
initiation is specified)
The book closing period that signifies the dates between which transactions into the
fund are suspended for processing the merger.
The exchange rate source applicable and the exchange rate date
Whether the system should update the income distribution setup for the merger
Whether the system should change the standing instructions and policy details
5.13.8.5 Maintaining Details for Capital Payout
For capital payouts, you must maintain the details mentioned below in the Corporate Actions
Maintenance screen. Select the ‘Capital Payout’ option in the Corporate Action Type field.
5-76
Date of capital payout.
ID and ISIN code of the fund, balances from which are being redeemed and paid out as
a result of the capital payout.
The new par value per unit, for the units being liquidated.
Whether fractional units are allowable as a result of the capital payout. If you indicate
so, you can also specify the applicable number of decimals.
Whether the capital payout date must be moved forward or backward, if it falls on a
holiday.
Threshold amount.
Whether or not the capital payout process is to be automatically initiated on the
corporate action date (the Beginning of Day processes initiate the capital payout
process in the system, if automatic initiation is specified)
The book closing period that signifies the dates between which transactions into the
fund are suspended for processing the capital payout.
The exchange rate source applicable and the exchange rate date.
The percentage of the units balance in the fund that are to be liquidated due to
processing the capital payout.
The units that are to be liquidated as part of the capital payout – as of price date of the
transaction (all units), transaction date (all or confirmed units) or allocation date (all or
confirmed units).
Whether the payment for the liquidated units is to be made in the unit holders’ base
currency or the fund base currency
Whether prior capital redeemed units are to be redeemed when the capital payout is
processed.
5-77
5.13.8.6 Maintaining Details for Side Pocket Creation
For side pocket creation, you must maintain related details in the Corporate Actions
Maintenance screen. Select the ‘Side Pocket Creation’ option in the Corporate Action Type
field.
You need to select the Corporate action type as ‘Side Pocket Creation’
Specify the date of side pocket creation
Specify the ID and ISIN code of the fund
If the split ratio is 10 then in split/ reverse split details, you need to specify the Parent
Ratio as 10. Child ratio will be ignored in this case.
5-78
5.13.8.7 Maintaining Details for Investor Category Map
You can maintain investor category map information in the Inv Category Map Tab:
Restricted Investor Category
Specify the category of the restricted investor. The adjoining option list displays valid investor
category codes and their names as maintained in the system. You can choose the appropriate
one.
5-79
5.13.8.8 Maintaining Fund Copy Details
Click on the fund copy tab to maintain details for fund copy.
From Fund Details
Fund Id
Select the fund ID whose attributes you want to copy.
ISIN Code
Specify the ISIN code.
New fund Details
Fund ID
Indicate the ID for the new fund.
Fund Name
Specify a name for the fund here.
5-80
Fund Short Name
You can specify a short name for the fund.
Fund Tax ID
You can specify the fund tax ID for the new fund here.
ISIN Code
Indicate the ISIN code for the new fund ID here.
Fund Ticker Symbol
You can enter the ticker symbol for the fund.
Create Fund as an
Click on Create Fund to create the new fund with the parameters specified.
After entering the above details, click create fund button. You will be shown the following
confirmation message:
5-81
5.13.8.9 Maintaining Details for Side Pocket Merger
For side pocket merger, you must maintain related details in the Corporate Actions
Maintenance screen. Select the ‘Side Pocket Merger’ option in the Corporate Action Type
field.
You can perform merger of side pockets with the main fund by following the instructions
specified below:
Select ‘Side Pocket Merger’ option in the Corporate Action Type field.
Specify the Parent Ratio for merger in ‘Merger Details’ tab.
System performs 100% redemption of the side pocket fund
Unit based subscription transactions are generated for the main fund
The transactions are allotted based on the allocation lag and price availability
After merger, you need to manually disable the side pocket funds.
5-82
The example given below illustrates the merger of a side pocket fund:
Example:
Assume that JPMORG is a Hedge Fund and SIDEP1 is a side pocket of JPMORG. The
current holdings of all unit holders are as below:
Unit holder ID
Units
UH1
1000
UH2
1500
UH3
2000
UH4
2500
Side Pocket Creation:Split Ratio 0.1
Units in JPMORG
Unit holder ID
Units
UH1
900
UH2
1350
UH3
1800
UH4
2250
Units in SIDEP1
Unit holder ID
Units
UH1
100
UH2
150
UH3
200
UH4
250
Side Pocket Merger:Merger Ratio .05
Units in JPMORG (before merger)
Unit holder ID
Units
UH1
900
UH2
1350
UH3
1800
UH4
2250
UH5
1000
5-83
Unit holder ID
Units
UH6
2000
Units in JPMORG (after merger)
Unit holder ID
Units
UH1
905
UH2
1357.5
UH3
1810
UH4
2262.5
UH5
1000
UH6
2000
SIDEP1 fund will be disabled after merger process. There will not be any change in units of
the new unit holders who subscribed in JPMORG after side pocket creation.
5.13.8.10 Maintaining Details for Series Fund Merger
During series fund merger, the fund series that are maintained separately in the system are
consolidated at period end. For series fund merger, you must maintain related details in the
5-84
Corporate Actions Maintenance screen. Select the ‘Series Fund Merger’ option in the
Corporate Action Type field.
The example given below illustrates the corporate action ‘Series Fund Merger’
Example
Assume that Investor A purchases 1,000 units at the launch of the fund GFUND1, at
US$1,000 per unit (HWM of GFUND1). This will be the "Lead Series" of Unit. It is also
assumed that the incentive fees are being paid quarterly and HWM of fund is Greater of
Subscription Price and Previous high water mark.
Also, assume that at the end of the first month the Gross NAV ("GNAV") (the NAV before
deduction of incentive fee) for GFUND1 has risen to US$1,100 and therefore the NAV will be
US$1,080, net of US$20 / 20% incentive fee (Assuming performance fee is 20%).
NAV for GFUND1 is published at US$1,080
5-85
After the first pricing period, you need to create one more fund, say ‘GFUND2’, with NAV
same as Lead Series. Assume that at this time Investor B subscribes US$1 million for 1,000
Unit (Series II) at, again US$1,000 (HWM of GFUND2) each.
At the end of second month, assuming that value of fund has risen by further 10%:
GNAV of GFUND1 is now US$1,210 = NAV US$1,168; and
GNAV of GFUND2 is now US$1,100 = NAV US$1,080
After second pricing period, you need to create one more fund with NAV same as Lead Series.
Let’s say user create ‘GFUND3’ for creation of Series III as below,
Investor C subscribes US$1 million for 1,000 Series III Unit at, again US$1,000 (HWM of
GFUND3) each.
At the end of the third month, the GNAV has yet again risen by a further 10%, so that:
The GNAV per Share of the GFUND1 (Lead Series) is US$1,331, which translates to
an NAV of US$1, 264.80;
The GNAV of GFUND2 (Series II) is US$1,210, equaling an NAV of US$1,168; and
The GNAV for GFUND1 (Series III) is US$1,100, equaling an NAV of US$1,080.
Thus, at the end of the first quarter, as a High Water-Mark ("HWM") has been reached and
each of the Series of Unit have paid incentive fees, the Series II and Series III Unit can now
be consolidated into the Lead Series.
This can be archived by using Corporate Action screen, by choosing the ‘Series Fund Merger’
option to merge GFUND2 (Series II) and GFUND3 (Series III) into GFNUD1 (Lead Series) as
below,
Units created for Investor B (Lead Series) = (NAV of GFUND2 / NAV of GFUND1) *
Units allotted to Investor B.
Therefore, Investor B's units are worth US$1,168.00, which equates to 923.466 units at the
NAV per Lead Series, at US$1,264.80 each.
Units created for Investor C (Lead Series) = (NAV of GFUND3 / NAV of GFUND1) *
Units allotted to Investor C.
Investor C will effectively liquidate his 1,000 Unit of US$1,080,000 and invest the proceeds of
that liquidation into the Lead Series at US$1,264.80 per share, to receive 853.890 Lead
Series Unit.
5.13.9
Fields in Corporate Action Maintenance Screen
Basic Information Section
Corporate Action Type
Mandatory
From the drop down list, select the type of corporate action for which you are maintaining the
processing parameters, in this screen. The types available are liquidation, split, reverse split
and merger.
5-86
Corporation Action Date
Date, Mandatory
Specify the date on which the corporate action falls due for processing. This must be the
same as the current date, or a future date. The implications for the fund in each case are as
follows:
Liquidation- The fund would cease to exist after the corporate action is processed on
this date.
Split and Reverse Split- The par value of the fund would change subsequent to
processing of the corporate action on this date.
Merger-The funds that are being merged would cease to exist and the new fund would
become effective, after the corporate action is processed on this date.
Corporate Action Status
Display
The status of the corporate action is displayed in this field.
When you enter a new record, it is marked with the ‘Active’ or ‘Unprocessed’ status. After
authorization, the corporate action record can be cancelled through an amendment, before it
is processed. In such a case, it acquires the ‘Cancelled’ status.
After the corporate action has been processed, it acquires the ‘Processed’ status.
Fund Information Section
Fund ID
6 Character Maximum, Alphanumeric, Mandatory
Select the fund for which you are maintaining a corporate action, from the drop down list. This
list contains the names of all the authorized funds in the system.
When you select the fund, the Fund Base Currency is picked up from the Fund Demographics
profile for the selected fund and displayed in the Fund Base Currency field.
In the case of liquidation, specify the ID of the fund being liquidated. For splits and reverse
splits, specify the ID of the child fund. In the case of mergers, you must specify the ID of the
resultant fund in this field.
ISIN Code
12 Characters Maximum; Alphanumeric; Mandatory
Select the ISIN Code of the fund for which you are maintaining a corporate action, from the
options provided. If you specify the ISIN Code of a fund, the ID of the fund is displayed in the
Fund field.
In the case of liquidation, specify the ISIN Code of the fund being liquidated. For splits and
reverse splits, specify the ISIN Code of the child fund. In the case of mergers, you must
specify the ISIN Code of the resultant fund in this field.
Price Information Section
Liquidation Price
Numeric; Mandatory for Liquidation
For liquidation, specify the price at which the selected fund is to be liquidated. It is the value
at which units are redeemed for liquidation.
5-87
Lot Size
Numeric; Mandatory for Liquidation
Specify the lots for liquidation. By default, the lot is considered to be one. You can alter this
and specify the applicable lot size. The liquidation price per lot is computed by the system
based on the liquidation price and the lot size you specify.
Liquidation Price / Lot
The liquidation price per lot is computed by the system based on the liquidation price and the
lot size you specify.
Fractions Allowed?
In this field, you can specify if fractional balances (as a result of processing the corporate
action) are allowable, for the fund. Check the box to indicate that fractional balances are
allowed, or leave it unchecked to indicate that fractional balances are not allowed.
If not allowed, the resulting fractions are redeemed and the proceeds paid out to the unit
holders.
By default, this box is unchecked, i.e., fractional balances are allowed. You can change this
if necessary and check the box, to indicate that fractional balances are not allowed.
New Unit Par Value
Numeric; Mandatory for Split, Reverse Split and Merger
Specify the new par value for units in the new or existing (resultant) fund, to be applicable after
the corporate action has been processed.
For Split and Reverse Split actions, the System computes the new par value, and displays the
same in this field. You can change this computed value and specify the desired value, if
required.
No. of Decimals
Numeric; Mandatory if fractions are allowed
By default, the number of decimals allowed is zero. If you indicate that fractional balances
are allowed, the number of decimals specified for the fund in the Corporate Actions fund rule
profile, are applicable.
Other Information Section
Holiday Rule
Alphanumeric; Mandatory
Specify whether the corporate action date must be moved forward (after) or backward (prior)
in case it falls on a system, fund or AMC holiday.
Payment Lag(Days)
Mandatory for Liquidation
Specify the payment lag to be applicable for liquidation.
Threshold Amount
Numeric; Mandatory
Specify the threshold amount for processing of the corporate action.
5-88
Auto Initiation?
You can use this field to indicate whether the corporate action must be executed manually or
automatically. Check this box to indicate automatic execution; leave it unchecked to indicate
manual execution.
If automatic execution is indicated, the Beginning of Day processes execute the corporate
action on the corporate action date. If manual execution is indicated, then you can manually
trigger the execution on the corporate action date, through the Corporate Action Processing
screen.
By default, this box is unchecked, i.e., automatic initiation is not indicated. You can change
this if necessary and check the box, to indicate automatic initiation.
Book Closing From and To Date
Date, Optional
Specify the book closing dates, between which transactions into the fund are suspended, for
processing the corporate action. The corporate action date must fall within the book-closing
period.
Exchange Rate Source
Alphanumeric; Mandatory
Specify the exchange rate source from which the exchange rate would be derived for
processing the corporate action, for conversion from fund base currency to unit holder
preferred currency.
By default, the first source entry in the list is deemed to be the exchange rate source. You
can change this and specify the requisite source by choosing from the list.
Exchange Rate Date
Date Format; Mandatory
Specify the date, the exchange rate prevalent on which, would be used for processing the
corporate action, for conversion from fund base currency to unit holder preferred currency.
By default, it is considered to be the same as the corporate action date. You can change this
and specify the requisite date.
Units for Corporate Action
In this field, you can indicate if holdings for the corporate action are to be considered based
on:
Transaction date (All or confirmed units)
Price date (all units)
Allocation date (All or confirmed units)
The following table depicts the possibilities for each corporate action:
Corporate action
type
Basis for
holdings
Liquidation
Allocation
date
Remarks
All available holdings must be liquidated as the
fund would cease to exist subsequent to the
corporate action.
5-89
Corporate action
type
Basis for
holdings
Split / Reverse split
with ISIN change
Allocation
date
All available holdings must be processed for
split / reverse split as the fund would cease to
exist subsequent to the corporate action.
Split/ Reverse split
with no ISIN change
Transaction
date
Price date
Allocation
date
Basis could be either of the options available.
The processing logic is similar to dividend
freeze holdings
Merge
Allocation
date
All available holdings must be processed for
merge as the underlying funds would cease to
exist subsequent to the corporate action.
Capital Payout
Transaction
date
Basis could be either of the options available.
The processing logic is similar to dividend
freeze holdings
Remarks
Price date
Allocation
date
Capital Payout Rate (%)
Percentage, Mandatory for Capital Payouts
For capital payouts, specify the percentage of units in the fund that are to be liquidated as a
result of processing the payout.
Payment Currency
Alphanumeric; Mandatory
Specify whether the capital payout amount is paid in the default currency of the unit holders
or the base currency of the fund in respect of which the payout is being processed.
Include Prior Capital Redeemed Units
Optional
Specify whether prior capital redeemed units are to be redeemed as a result of the capital
payout.
Update IDS
Optional
If you choose this option, the system updates the income distribution setup of the parent Fund
Id with that of the resultant Fund Id. For a successful update, you should choose ‘No’ for the
‘Restrict IDS for the Unit Holder’ option for the resultant Fund Id in the Corporate Actions
screen in Fund Rules Maintenance
Update SI
Optional
If you choose this option, the system changes the Fund Id of the following from the parent
Fund Id to the resultant Fund Id:
Standing Instructions for all types of Unit Trust transactions
Policy Premium details
Policy Annuity Details
5-90
Policy Recurring Switch details
Examples
Merger of Fund 1 into Fund 2: Let us assume Fund 1 is being merged into Fund 2.and
both are available in the asset allocation for premium and annuity to the extent of 40%
and 60% respectively. In this case, at the time of transaction processing, the system
updates the resultant Fund Id to Fund 2 and the ratio to 100%.
Merger of Fund 1 and Fund 2 into Fund 3: Let us assume Funds 1 and 2 are being
merged into Fund 3 and both (Funds 1& 2) are available in the asset allocation for
premium and annuity to the extent of 40% and 60% respectively. Here, at the time of
transaction processing, the system updates the resultant Fund Id to Fund 3 and the ratio
to 100%.
Merger of Fund 1 into Fund 2: Let us assume Fund 1 is being merged into Fund 2. Both
these funds (From Fund – Fund1 and To Fund – Fund2) are available in the asset
allocation for switch. In this case, at the time of transaction processing, the system will
not process the transaction.
5.13.9.1 Fields in Split / Reverse Split / Merger Details screens
Fund ID
6 Character Maximum, Alphanumeric, Mandatory
Select the parent fund for the corporate action, from the drop down list. This list contains the
names of all the authorized funds in the system.
In the case of mergers, you can specify more than one parent fund. Click on the Add link to
add a row.
ISIN Code
12 Characters Maximum; Alphanumeric; Mandatory
Select the ISIN Code of the parent fund for the corporate action, from the options provided. If
you specify the ISIN Code of a fund, the ID of the fund is displayed in the Fund field.
In the case of mergers, you can specify more than one parent fund. Click on the Add link to
add a row.
Split Parent Ratio
Numeric; Mandatory
Enter the split parent ratio. The parent ratio must be less than the resultant (child) ratio.
Split Resultant Ratio
Numeric; Mandatory
Enter the split resultant ratio The parent ratio must be less than the resultant (child) ratio.
Note
For splits and mergers, the parent ratio must not be greater than the child ratio. For reverse splits, the parent ratio must be greater than the child ratio. The ratios you specify
cannot be equal to or fall below zero.
5-91
5.13.10 Corporate Actions Summary Screen
Invoke the ‘Corporate Actions Maintenance Summary’ screen by typing ‘UTSCOACT’ in the
field at the top right corner of the Application tool bar and clicking on the adjoining arrow
button.
You can perform the following operations in the ‘Corporate Actions Maintenance Summary’
screen:
5.13.10.1 Retrieving Record in Corporate Actions Summary screen
You can retrieve a previously entered record in the Summary Screen, as follows:
Specify any or all of the following details in the corresponding fields:
The status of the record in the Authorized field. If you choose the ‘Blank Space’ option,
then all the records are retrieved.
The status of the record in the Open field. If you choose the ‘Blank Space’ option, then
all records are retrieved
Corporate Action Date
Corporate Action Type
Fund ID
ISIN Code
Click ‘Search’ button to view the records. All the records with the specified details are retrieved
and displayed in the lower portion of the screen.
You can also retrieve the individual record detail from the detail screen by querying in the
following manner:
1. Press F7.
2. Input Corporate Action Type.
3. Input Corporate Action Date.
4. Input the Fund Id.
5. Press F8.
5-92
You can perform Edit, Delete, Amend, Authorize operations by selecting the operation from
the Action list. You can also search a record by using a combination of % and alphanumeric
value.
Example
You can search the record for Fund ID by using the combination of % and alphanumeric value
as follows:
Search by A%:- System will fetch all the records whose Fund ID starts from Alphabet
‘A’. For example, AGC17, AGVO6, AGC74 etc.
Search by %7:- System will fetch all the records whose Fund ID ends by numeric value’
7’. For example, AGC17, GSD267, AGC77 etc.
Search by %17%:- System will fetch all the records whose Fund ID contains the numeric
value 17. For example, GSD217, GSD172, AGC17 etc.
5.13.10.2 Editing Corporate Actions Record
You can modify the details of a Corporate Actions record that you have already entered into
the system, provided it has not been subsequently authorized. You can perform this operation
as follows:
Invoke the Corporate Actions Summary screen from the Browser.
Select the status of the record that you want to retrieve for modification in the Authorized
field. You can only modify records that are unauthorized. Accordingly, choose the
unauthorized option.
Specify any or all of the details in the corresponding fields to retrieve the record that is
to be modified.
Click ‘Search’ button. All unauthorized records with the specified details are retrieved
and displayed in the lower portion of the screen.
Double click the record that you want to modify in the list of displayed records. The
Corporate Actions Detail screen is displayed.
Select Unlock Operation from the Action list to modify the record. Modify the necessary
information.
Click Save to save your changes. The Corporate Actions Detail screen is closed and the
changes made are reflected in the Corporate Actions Summary screen.
5.13.10.3 Viewing Corporate Actions Record
To view a record that you have previously input, you must retrieve the same in the Corporate
Actions Summary screen as follows:
Invoke the Corporate Actions Summary screen from the Browser.
Select the status of the record that you want to retrieve for viewing in the Authorized
field. You can also view all records that are either unauthorized or authorized only, by
choosing the Unauthorized/ Authorized option.
Specify any or all of the details of the record in the corresponding fields on the screen.
Click ‘Search’ button. All records with the specified fields are retrieved and displayed in
the lower portion of the screen.
Double click the record that you want to view in the list of displayed records. The
Corporate Actions Detail screen is displayed in View mode.
5-93
5.13.10.4 Deleting Corporate Actions Record
You can delete only unauthorized records in the system. To delete a record that you have
previously entered:
Invoke the Corporate Actions Summary screen from the Browser.
Select the status of the record that you want to retrieve for deletion.
Specify any or all of the details in the corresponding fields on the screen.
Click ‘Search’ button. All records with the specified fields are retrieved and displayed in
the lower portion of the screen.
Double click the record that you want to delete in the list of displayed records. The
Corporate Actions Detail screen is displayed.
Select Delete Operation from the Action list. The system prompts you to confirm the
deletion and the record is physically deleted from the system database.
5.13.10.5 Authorizing Corporate Actions Record
An unauthorized Corporate Actions record must be authorized in the system for it to be
processed. To authorize a record:
Invoke the Corporate Actions Summary screen from the Browser.
Select the status of the record that you want to retrieve for authorization. Typically,
choose the unauthorized option.
Specify any or all of the details in the corresponding fields on the screen.
Click ‘Search’ button. All records with the specified details that are pending
authorization are retrieved and displayed in the lower portion of the screen.
Double click the record that you wish to authorize. The Corporate Actions Detail screen
is displayed. Select Authorize operation from the Action List.
When a checker authorizes a transaction, details of validation, if any, that were overridden by
the maker of the transaction during the Save operation are displayed. If any of these overrides
results in an error, the checker must reject the transaction.
When you authorize a corporate action, you must re-key the liquidation price (for liquidations)
or the parent – resultant ratio (for splits, reverse splits and mergers)
5.13.10.6 Amending Corporate Actions Record
After a Corporate Actions record is authorized, it can be modified using the Unlock operation
from the Action List. To make changes to a record after authorization:
Invoke the Corporate Actions Summary screen from the Browser.
Select the status of the record that you want to retrieve for authorization. You can only
amend authorized records.
Specify any or all of the details in the corresponding fields on the screen.
Click ‘Search’ button. All records with the specified details that are pending
authorization are retrieved and displayed in the lower portion of the screen.
Double click the record that you wish to authorize. The Corporate Actions Detail screen
is displayed in amendment mode. Select Unlock operation from the Action List to amend
the record.
Amend the necessary information and click on Save to save the changes.
When you amend an authorized corporate action after it has been processed, you can only
alter the liquidation price, lot size and book closing period (for liquidations) or the new unit par
value, book closing period and parent – resultant ratio (for splits, reverse splits and mergers).
5-94
The original corporate action is marked ‘cancelled’, and a new record is created, with a link to
the original action record. Also, the book closing dates can be entered if required.
The exchange rate details, such as the rate source and rate date, can be amended provided
the corporate action has not been processed.
When you amend an authorized corporate action before it has been processed, the
amendment operation is similar to an edit operation. All the validations performed by the
system when a new corporate actions record is initiated, are applicable. In this mode, the
corporate action can also be marked as ‘cancelled’, in which case it will not be processed.
5.13.10.7 Authorizing Amended Corporate Actions Record
An amended Corporate Actions record must be authorized for the amendment to be made
effective in the system. The authorization of amended records can be done only from Fund
Manager Module and Agency Branch module.
The subsequent process of authorization is the same as that for normal records.
5.13.10.8 Reversing Corporate Action
When you reverse a corporate action that has been processed, the original action record is
marked as ‘cancelled’, and the reversal is processed either by the Beginning of Day process
(if designated as automatic) or manually, through the Corporate Action Processing screen.
In case of reversal or amendment of a corporate action after original processing, a reversal
transaction is generated for all the transactions for the day with reference types indicating
Split/ Reverse Split/ Merger/ Rollback/ Capital Payout.
5.13.10.9 Copying Attributes
If you want to create a new Corporate Actions record with the same attributes of an existing
maintenance, you can copy the attributes of an existing Corporate Actions record to a new
one.
To copy the attributes:
Retrieve the record whose attributes the new Corporate Actions record should inherit.
You can retrieve the record through the Summary screen or through the F7-F8
operation explained in the previous sections of this chapter.
Click on Copy
Indicate the ID for the new Corporate Actions. You can, however, change the details of
the new record.
5.13.11 Processing Corporate Actions
5.13.11.1 Automatic and Manual Execution
After a corporate action maintained in the Corporate Action Maintenance screen is
authorized, it is ready for processing. If the initiation of the corporate action process is
designated to be automatic, it is executed by the Beginning of Day processes on the corporate
action date.
If automatic execution is not designated, the corporate action must be manually executed.
You can use the Corporate Action Processing screen to manually execute the corporate
action.
5-95
5.13.11.2 Pre-Processing for Corporate Actions
The system performs pre-processing validations before a corporate action can be processed.
For automatic execution, the Beginning of Day processes perform the validations. For
manual execution, you can trigger the pre-processing validations, using the ‘Corporate
Actions (Fund)’ screen. You can invoke this screen by typing ‘UTDCORAC’ in the field at the
top right corner of the Application tool bar and clicking on the adjoining arrow button.
In this screen, you can trigger the pre-processing validations for corporate actions that fall due
either on the current date or on the next working day.
Click the ‘Fetch Corporate Action’ button to submit the background job that performs the
validations, and then click on the View Corporate Action Results button to display the results
in the list portion of the screen. The following details are displayed for each check:
Messages in respect of performing the validation
Whether the message is a standard one or is specific to the corporate action
Whether the resolution of the message is critical to the execution of the corporate action.
Those validations marked ‘critical’ must be resolved for successful execution of the
corporate action.
The number count for the message
To view the message details for each validation, click the list box alongside the message
row.
5-96
Click on the Details button, the Corporate Actions Online Check Details screen is opened
In the Corporate Actions Online Check Details screen you can view information on the
following:
Code
Fund
Sub Count
For more information about the pre-processing validations, refer the section titled ‘Preprocessing Validations’ in this chapter.
5.13.11.3 Executing Corporate Actions Manually
To recall, you can manually execute a corporate action on the corporate action date, in the
Corporate Action Processing screen. You can invoke the ‘Corporate Actions (Fund) screen
by typing ‘UTDCOAC’ in the field at the top right corner of the Application tool bar and clicking
on the adjoining arrow button.
5-97
In this screen, specify the corporate action type you wish to manually execute and the ID and
ISIN of the fund (resultant fund in the case mergers, and the source funds in case of split and
reverse splits), and click ‘Ok’ button.
The details of the corporate actions falling due on the current date, which are either in
‘unprocessed’ or ‘error’ status, for the selected fund, are displayed in the list portion of the
screen.
To trigger the pre-processing validations before you execute the corporate action, click on the
Online Check button. You can click on the ‘Execute’ button to actually execute the corporate
action.
5.13.11.4 Pre-processing Validations
Unauthorized fund-related static maintenances
This check reports the unauthorized fund-related static maintenances, with respect to any of
the maintenances mentioned below. It is a mandatory check and processing cannot continue
till the check is successful.
Fund rules
Group definition
Fund price
Fund account
Fund agency branch backdating limit
Periodic load
Fund holiday
Fund dividend
Fund sub-account
General Ledger Interface setup
Withholding tax setup
Switch privilege list setup
Fund sale restrictions
Broker Commission Processing
This check reports any pending commission (commission accrued but not adjusted). It is an
optional check; the information is for reporting only, and will not block further processing of
the corporate action.
Pending Transactions
This check reports transactions pending processing at any stage of the transaction life cycle,
such as the following:
Unauthorized transactions
Incomplete (due to exchange rate or payment)
Allotted but not settled
Unconfirmed global orders
Unprocessed / unauthorized SWIFT transactions
Valid Limit orders which have not been executed
Unauthorized overridden loads
All such transactions must be either allotted and settled, or, alternately, reversed. Alternately,
they would need to be reversed. Limit orders must be reversed; if not, processing of the
5-98
corporate action marks these as ‘EXPIRED’. All SWIFT transactions must also be processed
or deleted.
This is a mandatory check and processing cannot continue till the check is successful.
Unprocessed dividend or reinvestments
This check reports unprocessed dividend or reinvestments, which would include dividends
declared but not processed, so that appropriate action can be taken. It is an optional check;
the information is for reporting only, and will not block further processing of the corporate
action.
Trailing Commission
This check reports any accrued trail commission (trail commission for the period between the
last processed date to the corporate action date), so that it can be cleared manually. The load
id of the trailing commission is reported. It is an optional check; the information is for reporting
only, and will not block further processing of the corporate action.
Standing Instructions
This check reports the following:
Standing instructions for which action has not been taken after first reminder generation.
(A warning is displayed)
Standing instructions for which action has not been taken after last reminder generation.
(A warning is displayed)
Standing instructions which are generating on corporate action date
This is a mandatory check and must be successful for processing of the corporate action to
continue.
Unconfirmed redemption transactions
This check reports the number of redemption transactions for which confirmations are due. It
is a mandatory check and must be successful for processing of the corporate action to
continue.
Funds that do not retain ageing to subscription
For a corporate action triggered from an existing ISIN to a different ISIN, the ageing of units
is based on the parameter ‘Retain Ageing to Subscription’ set in the Transaction Processing
Rules for the fund. If this parameter is not indicated as true for the resultant fund for the
‘Switch In’ transaction type, a warning is displayed.
Funds those are not active for corporate action processing
For a corporate action triggered from an existing ISIN to a different ISIN, the system checks
that the resultant ISIN is effective as of the corporate action date. If not, an appropriate
message is displayed. This is a mandatory check and must be successful for processing of
the corporate action to continue.
Number of special deals for the fund
If any unit holder deals exist for the fund, a warning is displayed. This is an optional check.
Number of Letters of Intent (LOI) for the fund
If any Letters of Intent (LOI) exists for the fund, a warning is displayed. This is an optional
check.
5-99
Number of Income Distribution Setups (IDS) in the fund
This check reports the number of reinvestments set up into the fund. This is an optional
check.
Number of Interface Definitions to which the fund belongs
If the fund belongs to any of the parameters defined for any interface definition in the system,
a warning is displayed. This is an optional check.
Number of jobs to which the fund belongs
If the fund belongs to any one or many of the job parameters defined for any job definition in
the system, a warning is displayed. This is an optional check.
Funds for which holding period is applicable
If a holding period has been designated as applicable for the fund, a warning is displayed.
This is an optional check.
Funds with minimum registered capital greater than zero
If the minimum registered capital of the fund exceeds zero, an appropriate message is
displayed. This is a mandatory check and processing of the corporate action cannot continue
if it is unsuccessful.
Maintenance of Switch Out transaction type for the ‘From’ fund
For corporate actions involving different parent and resultant funds, the system checks that
the Switch Out transaction type has been maintained and is allowable for the ‘From’ fund.
This is a mandatory check and processing of the corporate action cannot continue if it is
unsuccessful.
Maintenance of Switch In transaction type for the ‘To’ fund
For corporate actions involving different parent and resultant funds, the system checks that
the Switch In transaction type has been maintained and is allowable for the ‘To’ fund. This is
a mandatory check and processing of the corporate action cannot continue if it is
unsuccessful.
Funds for which fractional balances are not allowed, with rounding rules other than
‘truncate’
In case fractional units need to be paid out in the resulting fund, the system checks that the
rounding options in the General Operating Rules must be set to ‘truncate’. If this has not been
set for the resultant fund for the Switch In transaction type, an appropriate warning message
is displayed. This is a mandatory check and processing of the corporate action cannot
continue if it is unsuccessful.
5.13.11.5 Messages for Pre-processing Checks
According to the checks listed above, the appropriate messages that would be displayed as
a result of performing the pre-processing checks are shown in the table below. A severity
level of ‘Warning’ indicates an optional check, which would not impede the processing of the
corporate action if the check fails. A severity level of ‘Critical’ indicates a mandatory check,
which must succeed in order to continue with the processing of the corporate action.
Message
Severity
Unauthorized Fund
Critical
Unauthorized Fund Price
Critical
5-100
Message
Severity
Unauthorized Fund Dividend record
Critical
Unauthorized Fund Account
Critical
Unauthorized Fund Agency Branch Backdating Limit
Setup
Critical
Unauthorized Fund Sub Account record
Critical
Unauthorized Fund GL record
Critical
Unauthorized WH Tax Setup record
Critical
Unauthorized Periodic Load record
Critical
Unauthorized Switch Privilege Setup record
Critical
Unauthorized Fund Holiday record
Critical
Unauthorized Group Definition
Critical
Unauthorized Fund Sale Restriction record
Critical
Unconfirmed Global Order
Critical
Unauthorized Incoming SWIFT message
Warning
Unprocessed/Repaired Incoming SWIFT message
Warning
Unauthorized Outgoing SWIFT message
Warning
Unprocessed/Repaired Outgoing SWIFT message
Warning
Unauthorized Overridden Loads
Critical
Unprocessed Dividends
Warning
Unprocessed Reinvestments
Warning
Standing Instructions for which Action is not taken after
generating the First Reminder or Last Reminder
Warning
Redemptions which are due for Confirmation
Critical
Unauthorized Transactions
Critical
Transactions which are either unallotted, unsettled or
partially allotted
Critical
Unexecuted valid Limit Orders
Warning
5-101
Message
Severity
SIs generating on corporate action date
Warning
Brokers for whom the Commission is pending due
Warning
Periodic loads for the fund for which trailing commission
is pending due
Warning
Fund(s) which do not retain ageing to subscription
Warning
Fund(s) which do are not active for corporate action processing
Critical
Number of Special Deals in which the fund belongs to
Warning
Number of LOI(s) in which the fund belongs to
Warning
Number of Income distribution(s) in the fund
Warning
Number of Reinvestment set up into the fund
Warning
Number of Interface Definition(s) in which the fund
belongs to
Warning
Number of Job(s) in which the fund belongs to
Warning
Fund(s) in which Holding Period is applicable
Warning
Fund(s) in which Minimum Registered Capital > 0
Critical
Fund(s) in which minimum number of Unit Holders is
greater than 0
Critical
Fund in which Switch Out transaction type should be
maintained
Critical
Fund in which Switch In transaction type should be
maintained
Critical
Fund in which fraction is not allowed but rounding rules
for units is not TRUNCATE
Critical
5.13.11.6 System Processing for Corporate Actions
Liquidation
During execution, the corporate actions procedure picks up all liquidations whose corporate
action date is the same as the current date, and with status as ‘unprocessed’ or ‘error’.
Subsequently, the pre-processing checks are performed. The liquidation procedure is then
executed, which performs the following actions:
Balances of all unit holders balances in the current fund, as of a date less than the action
date, are picked up, and full redemptions in the fund are generated in respect of these
unit holders
If a reversal or an amendment has been done after original processing, a reversal
transaction is generated for all transactions for the day with a reference type indicating
liquidation
Any underlying standing instructions for the unit holders are marked as ‘Cancelled’; if
any reversal has been done after original processing, the original SI status is restored
5-102
Any unexecuted limit orders for the unit holders are marked as ‘EXPIRED’, and the limit
status for underlying limit orders is marked as ‘ungenerated’
Fund Split / Reverse Split
During execution, the corporate actions procedure picks up all splits (or reverse splits, as
applicable) whose corporate action date is the same as the current date, and with status as
‘unprocessed’ or ‘error’. Subsequently, the pre-processing checks are performed. The split
(or reverse split, as applicable) procedure is then executed, which performs the actions as
shown below, in the appropriate scenario:
When the new fund is the same as the old fund
The fund rule of the new fund is amended and the par value changed to reflect the latest
split / reverse split ratio values
Balances of all unit holders balances in the current fund, as of a date less than the action
date, are picked up
Changes in the outstanding units and the balances of the unit holders based on split /
reverse split ratio, are posted as unit-based subscription transactions (split) or unitbased redemption transactions (reverse split)
Certificates are destroyed and recreated for the new units
Any underlying standing instructions for the unit holders are marked as ‘Cancelled’; if
any reversal has been done after original processing, the original SI status is restored
Any unexecuted limit orders for the unit holders are marked as ‘EXPIRED’, and the limit
status for underlying limit orders is marked as ‘ungenerated’
Subsequently, if any backdated transactions are entered with transaction date being
earlier than the corporate action date, a message is shown, indicating that a corporate
action has been processed within the period (this is done for limit orders and standing
instructions too)
If a reversal or an amendment has been done after original processing, a reversal
transaction is generated for all transactions for the day with a reference type indicating
split or reverse split
Fractional units, if any, that result from the processing of the corporate action, are
computed
When the new fund is not the same as the old fund
The system checks that the new fund is an authorized fund in the system, with no
existing holdings.
The fund rule of the new fund is amended and the par value changed to reflect the latest
split / reverse split ratio values
Balances of all unit holders balances in the old fund, as of a date less than the action
date, are picked up
Unit-based switch transactions are initiated for the unit holders
Any underlying standing instructions for the unit holders in the old fund are marked as
‘expired’; if any reversal has been done after original processing, the original SI status
is restored
Any unexecuted limit orders for the unit holders in the old fund are marked as
‘EXPIRED’, and the limit status for underlying limit orders is marked as ‘ungenerated’
The corporate action is processed after checking the holiday rules, for all the funds
If a reversal or an amendment has been done after original processing, a reversal
transaction is generated for all transactions for the day with a reference type indicating
split or reverse split
5-103
Fractional units, if any, that result from the processing of the corporate action, are
computed
Note
When units resulting from processing of a corporate action are redeemed, the computation
of capital gains tax (CGT) in respect of them takes the corporate action into account.
Fund Merger
During execution, the corporate actions procedure picks up all mergers whose corporate
action date is the same as the current date, and with status as ‘unprocessed’ or ‘error’.
Subsequently, the pre-processing checks are performed. In case of the merger ratio not
being specified, the system derives the parent-child ratio based on the respective net asset
values of the funds in the merger.
The merge procedure is then executed, which performs the actions as shown below, in the
appropriate scenario:
The system checks that the new fund is an authorized fund in the system, with no
existing holdings.
The fund rule of the new fund is amended
The par value of the resultant fund is changed to reflect the latest merger ratio values
Balances of all unit holders balances in the old fund, as of a date less than the action
date, are picked up (this procedure is repeated for each of the underlying funds)
Amount-based switch transactions are initiated for the unit holders (this procedure is
repeated for each of the underlying funds)
Any unexecuted limit orders for the unit holders in the old fund are marked as
‘EXPIRED’, and the limit status for underlying limit orders is marked as ‘ungenerated’
The system checks if the standing instructions have to be updated . If you have chosen
to Update SI, the system updates:
–
Changes existing instruction and policy details from the old fund to the resultant
fund.
–
The old Fund ID with the resultant Fund ID
–
The ratio for asset allocation
The system checks if the Income Distribution Setup has to be updated. If so, the system
updates the IDS of the old Fund Id with the resultant Fund Id. If the option chosen for
‘‘Restrict IDS for the Unit Holder’ is ‘No’ for the resultant Fund Id, the update is carried
out. Otherwise the IDS update is not carried out and an error message is logged.
The corporate action is processed after checking the holiday rules, for all the funds
Subsequently, if any backdated transactions are entered with transaction date being
earlier than the corporate action date, a message is shown, indicating that a corporate
action has been processed within the period (this is done for limit orders and standing
instructions too)
Note
When units resulting from processing of a corporate action are redeemed, the computation
of capital gains tax (CGT) in respect of them takes the corporate action into account.
5-104
5.13.12 Reports for Corporate Actions
In the system, you can obtain the following reports displaying details of corporate actions
processed in respect of funds:
5.13.12.1 Reports for Announcement / Confirmation of Corporate Actions
You can print reports that you would need to send to investors listing details of either:
Announcements of corporate actions, a stipulated period of time before the corporate
action date
Confirmation of processing the announced corporate action, displaying the booking
(both debit and credit) details, which you would typically send to investors
To obtain such announcement / confirmation reports, click on Corporate Actions in the
Queries / Reports menu, and Announcement / Confirmation Reports under it. The
Announcement / Confirmation Report screen is opened.
In this screen, you must specify the following as mandatory sorting parameters for report
generation:
Whether you require a corporate actions announcement report or a confirmation report
Whether you are generating the report as a batch activity, or online
The language in which the report must appear, in the Report Language field.
You could also print or view it as required, by making appropriate specifications in the
remaining fields of the generation screen, as follows:
Whether the report must reflect announcement / confirmation details for all corporate
actions – liquidation, split, reverse split and merger, or for a specific corporate action.
For a specific corporate action serial number
For announcement reports, the appropriate lag before the corporate action date, and
the lag type (daily). You can also specify the holiday rule to be used if the date of
extraction (arrived by subtracting the lag from the action date) falls on a holiday.
After making your specifications, click the Run Report button. The report details are displayed
in the Report Data Viewer screen.
Liquidation Announcement Report Details
The following details are displayed for liquidation announcement reports:
Date on which the announcement report is being printed
ID of the unit holder receiving payment due to the liquidation. The name and address
(street, city and zip code) are also displayed
ID, name and ISIN of the fund being liquidated. The base currency of the fund is also
displayed.
Total number of units held by the unit holder in the fund being liquidated
Liquidation Declaration Date, which is the corporate action date for the liquidation.
Liquidation ratio (displays the payment per unit due to the liquidation)
Liquidation price (the payment per unit expressed in the fund base currency)
Liquidation Confirmation Report Details
The following details are displayed for liquidation confirmation reports:
Date on which the confirmation report is being printed
Corporate action number for the liquidation
5-105
ID of the unit holder receiving payment due to the liquidation. The name and address
(street, city and zip code) are also displayed.
ID, name and ISIN of the fund being liquidated. The base currency of the fund is also
displayed.
Total number of units held by the unit holder in the fund being liquidated
Trade Date, which is the corporate action date for the liquidation.
Liquidation ratio (displays the payment per unit due to the liquidation)
Liquidation price (the payment per unit expressed in the fund base currency)
Stock exchange
Split Announcement Report Details
The following details are displayed for split announcement reports:
Date on which the announcement report is being printed
ID of the unit holder receiving payment due to the split. The name and address (street,
city and zip code) are also displayed
ID, name and ISIN of the parent fund being split. The base currency of the fund is also
displayed.
ID, name and ISIN of the resultant (child) fund due to the split. The base currency of
the fund is also displayed.
Total number of units held by the unit holder in the fund being split
Split Declaration Date, which is the corporate action date for the split.
Split ratio
Split Confirmation Report Booking Details (Debit or Credit)
The following details are displayed for split confirmation reports:
Date on which the confirmation report is being printed
Corporate action number for the split
ID of the unit holder receiving payment due to the split. The name and address (street,
city and zip code) are also displayed.
ID, name and ISIN of the parent fund being split. The base currency of the fund is also
displayed.
ID, name and ISIN of the resultant (child) fund due to the split. The base currency of
the fund is also displayed.
Total number of units held by the unit holder in the fund being split
Trade Date, which is the corporate action date for the split.
Split ratio
Stock exchange
Reverse Split Announcement Report Details
The following details are displayed for reverse split announcement reports:
Date on which the announcement report is being printed
ID of the unit holder receiving payment due to the reverse split. The name and address
(street, city and zip code) are also displayed
ID, name and ISIN of the parent fund being reverse split. The base currency of the fund
is also displayed.
ID, name and ISIN of the resultant (child) fund due to the reverse split. The base
currency of the fund is also displayed.
Total number of units held by the unit holder in the fund being reverse split
5-106
Reverse Split Declaration Date, which is the corporate action date for the reverse split.
Reverse split ratio
Reverse Split Confirmation Report Booking Details (Debit or Credit)
The following details are displayed for reverse split confirmation reports:
Date on which the confirmation report is being printed
Corporate action number for the reverse split
ID of the unit holder receiving payment due to the reverse split. The name and address
(street, city and zip code) are also displayed.
ID, name and ISIN of the parent fund being reverse split. The base currency of the fund
is also displayed.
ID, name and ISIN of the resultant (child) fund due to the reverse split. The base
currency of the fund is also displayed.
Total number of units held by the unit holder in the fund being reverse split
Trade Date, which is the corporate action date for the reverse split.
Reverse split ratio
Stock exchange
Merger Announcement Report Details
The following details are displayed for merger announcement reports:
Date on which the announcement report is being printed
ID of the unit holder receiving payment due to the merger. The name and address
(street, city and zip code) are also displayed
ID, name and ISIN of the parent fund being merged. The base currency of the fund is
also displayed.
ID, name and ISIN of the resultant (child) fund due to the merger. The base currency
of the fund is also displayed.
Total number of units held by the unit holder in the fund being merged
Merger Declaration Date, which is the corporate action date for the merger.
Merger ratio
Merger Confirmation Report Booking Details (Debit or Credit)
The following details are displayed for merger confirmation reports:
Date on which the confirmation report is being printed
Corporate action number for the merger
ID of the unit holder receiving payment due to the merger. The name and address
(street, city and zip code) are also displayed.
ID, name and ISIN of the parent fund being merged. The base currency of the fund is
also displayed.
ID, name and ISIN of the resultant (child) fund due to the merger. The base currency
of the fund is also displayed.
Total number of units held by the unit holder in the fund being merged
Trade Date, which is the corporate action date for the merger.
Merger ratio
Stock exchange
5-107
5.13.12.2 Corporate Actions Checks Report
This report details the results of pre-processing validations performed before execution of a
corporate action.
To obtain this report, click Corporate Actions in the Queries / Reports menu and Check Report
under it. The Corporate Actions Check Report screen is opened.
You must specify the ID and ISIN code of the fund for which you wish to generate the report.
Check the ‘As of next day’ box to indicate that you wish to generate the report for a fund for
which the checks prior to corporate actions processing would be performed the next day.
5.13.12.3 Corporate Actions Amendment Report
If you wish to view the details of changes in unit holder balances due to amendment of a
corporate action, you can use this report. The changes in the unit holder balance could be
due to any of the following factors:
Change of liquidation price, in case of liquidation
Change of split/reverse split ratio, in case of split/reverse split
Change of merger ratio, in case of merger
The pre-amendment and post-amendment balances are displayed.
To obtain this report, click on Corporate Actions in the Queries / Reports menu, and
Amendment Report under it.
The Corporate Actions Amendment Report screen is opened. You must specify the corporate
action for which you wish to generate the amendment report.
5.14 Performing Bank Reconciliation
Reconciliation is a process by which you will be able to match the bank statement entries with
the corresponding transaction entries. System allows you to track reconciled, un-reconciled
and partially reconciled transactions with the corresponding reconciled, un-reconciled and
partially reconciled bank statement entries.
On uploading the bank statement, system will try to reconcile the entries automatically and
update the cheque status as provided in the bank statement. Auto Reconciliation will happen
based on the matching of Fund ID, Instrument Number, Instrument Amount and Drawee
Bank/Branch code. Auto reconciled entries will be auto authorized by the system.
Manual reconciliation should be done for entries which the system fails to do auto
reconciliation.
Reconciliation activity can be performed through the ‘Bank Reconciliation Detail’ screen. You
can invoke this screen by typing ‘UTDBKREC’ in the field at the top right corner of the
5-108
Application tool bar and clicking on the adjoining arrow button. The ‘Bank Reconciliation
Detail’ screen is displayed.
5.14.1
Fields in Bank Reconciliation Screen
The screen is divided into two frames; Bank Statement Search Option and Trade Search
Option. Use the Bank statement search option to specify the search criteria to retrieve the
uploaded bank statement entries. Similarly, use the Trade search option to specify the search
criteria to retrieve the transaction entries that you want to reconcile.
Select the New option in the Operation field in this screen, to signify reconciliation.
Reconciliation activity can be amended in the same screen, by selecting the Amend option in
the Operation field.
5-109
5.14.2
Fields in Bank Statement Search Option Frame
Operation
Choose ‘New’ from the drop-down list to choose new operation or else choose ‘Amend’.
Bank
Alphanumeric, Mandatory
From the list, select the name of the bank in which the fund account is held.
Branch
Alphanumeric, Mandatory
From the list, select the name of the branch of the bank in which the fund account is held.
Reconciliation Status
Alphanumeric, Optional
Indicate the reconciliation status here.
If the operation is ‘NEW’ the reconciliation status can be Un-Reconciled or Partially
Reconciled.
If the operation is ‘AMEND’ the reconciliation status can be Reconciled or Partially
Reconciled.
Account Number
Alphanumeric, Optional
Specify the number of the fund account.
Statement From Date and To Dates (DD/MM/YYYY)
Date Format, Optional
Specify a date range between which the bank statement records that you want to retrieve was
uploaded into the system. The To Date that you specify must be later than the From Date.
Transaction Type
Alphanumeric, Optional
Specify a type of transaction; Pay in, payout, NPI, that you want to retrieve from selected fund
bank account records uploaded into the system.
Statement Number
Alphanumeric, Optional
Enter the number of the statement which you want to retrieve.
Statement Transaction Code
Alphanumeric, Optional
Enter the code of the transaction as printed on the statement.
Statement Ref/Instrument Ref
Alphanumeric, Optional
If you want to search based on a particular bank entry, enter the statement reference number.
Else, if you wish to search based on a particular instrument, enter the instrument reference
number.
5-110
Fund ID
Alphanumeric, Optional
Enter the ID of the fund involved in the transaction.
Drawee Bank
Optional
Specify the name of the bank where the payment instrument is drawn, if the mode of payment
is Check, Credit Card, Debit Card or Draft. In case of Transfer, specify the transfer bank code.
Drawee Branch
Optional
Specify the branch of the selected bank where the payment is drawn, if the mode of payment
is Check or Draft. In case of Transfer, specify the transfer branch code.
Payment Mode
Enter the mode of payment for the transaction.
Location Code
Optional
Enter the location code.
After you have specified the fund account and statement details, click on OK. The required
bank statement records that are located in the database are displayed in the lower grid.
The following details are displayed for each bank statement record in the Find Results
section:
The statement number
The date of the transaction
The reference number of the bank statement as generated by FCIS
The bank reference number for the statement
The fund account currency
The amount to be debited from the account
The amount to be credited to the account
Un-Reconciled amount
You can capture the following details:
Journal Entry
Optional
Check this option to indicate if a particular bank entry is a journal entry. For instance, bank
entries can contain bank interest details for which there will be no corresponding trade entry
to link with in FCIS. In such cases, you need to manually set the status of the entry as journal
entry.
ReConciliation Status
Conditional
If the operation is ‘NEW’, the system derives the status of the bank entry as reconcile (for Unreconciled entries) or partially reconcile (for partially reconciled entries) and displays the
appropriate status here.
5-111
If the operation is ‘AMEND’, the system derives the status of the bank entry as reconcile (for
reconciled entries) or partially reconcile (for partially reconciled entries) and displays the
appropriate status here.
However, if the bank entry is marked as a journal entry, you are not allowed to indicate the
reconciliation status.
Write Off Amount
Optional
Enter the write off amount to reconcile the bank entry.
Select
Mandatory
Check the entry which should be reconciled with the trade side. You can select only one entry
for reconciliation with the trade side at a time.
IBAN
36 Characters Only; Alphanumeric; Optional
Specify the IBAN (International Bank Account Number) of the account holder.
5-112
5.14.3
Fields in Trade Search Option Section
Event Code
Mandatory
Select the event for which the transaction entry should be retrieved.
From and To Dates (DD/MM/YYYY)
Mandatory
Specify a date range between which the transaction entry that you want to retrieve was
entered into the system. The To Date that you specify must be later than the From Date.
5-113
Fetch UnLinked Trades Only
Optional
If this option is un-checked, system will retrieve only un-reconciled trade entries. If checked,
system will retrieve both un-reconciled and partially reconciled trade entries.
This option is checked by default.
Bulk Reconcile
On checking this option, system will generate a single transaction for a selected event for a
given period by adding up all the transactions that fall within the search criteria.
You can search for a particular transaction entry based on any of the following criteria:
Trade Reference Number
Transaction Number
Fund ID
Entity Type
Entity ID
Transaction Reference Type
Transaction Sub Type
Payment Mode
Remarks entered for the transaction
Contact/Identification details of the unit holder involved in the underlying transaction
Account details such as bank, branch and account number
After you have specified the search criteria details, click on OK. The required bank statement
records that are located in the database are displayed in the lower grid.
The following details are displayed for each transaction entry record:
The Transaction number
The Transaction Reference number
The date of the transaction
The ID of the fund involved in the transaction
The ID and Name of the entity involved in the transaction
The amount reckoned in the match currency
You can capture the following details:
Matched Amount
Optional
Enter the amount to be matched with the bank side entry. By default, system displays the
transaction amount here. However, you can change the amount.
Select
Mandatory
Check the entry which should be reconciled with the bank side entry. You can select more
than one entry for reconciliation with bank side at a time.
On specifying the above details, click the ‘Reconcile’ button to perform the reconciliation
activity and save the reconciled entries.
5-114
Once the matching record is retrieved from the database, system will automatically reconcile
and take the following actions:
Clear the matched transaction and confirm the underlying units if Payment Status is
marked ‘Credit Received’
Reject or Reverse a particular transaction if Payment Status in Bank Feed is marked as
Debit Received and existing Payment status for transaction record is ‘Reject Status
Awaited’
Reject or Reverse a particular transaction if Payment Status in Bank Feed is marked as
‘Reject Status Awaited’ and existing Payment status for transaction record is ‘Debit
Received’
If the existing payment status for transaction record is ‘Not Cleared’, then the record will
not be auto reconciled. System will mark the Status as ‘Debit Received’ or ‘Reject Status
Awaited’ as supplied in Bank Feed.
If system can not find a matching entry for a record in the Bank Feed, this record will be
updated with Reconciliation status as ‘Unmatched Entry’.
If you are performing Amend operation, then click on the Un-Reconcile button to de-link the
matched entries and save the un-reconciled entries.
5.14.4
Bank Reconciliation Summary Screen
Invoke the ‘Bank Reconciliation Summary’ screen by typing ‘UTSBKREC’ in the field at the
top right corner of the Application tool bar and clicking on the adjoining arrow button.
You can perform the following operations in the ‘Bank Reconciliation Summary’ screen:
5.14.4.1 Retrieving Record in Bank Reconciliation Summary Screen
You can retrieve a previously entered record in the Summary Screen, as follows:
Specify any or all of the following details in the corresponding fields:
The status of the record in the Auth status field. If you choose the ‘Blank Space’ option,
then all the records are retrieved.
5-115
The status of the record in the Open field. If you choose the ‘Blank Space’ option, then
all records are retrieved
Statement Number
Statement Date
Reconciliation Status
Fund ID
Drawee Bank
Drawee Branch
From Date
To Date
Bank
Payment Mode
Click ‘Search’ button to view the records. All the records with the specified details are retrieved
and displayed in the lower portion of the screen.
Note
You can also retrieve the individual record detail from the detail screen by querying in the
following manner:
–
Press F7.
–
Input the Bank and the Branch.
–
Input the Fund ID.
–
Press F8.
You can perform Edit, Delete, Amend, Authorize, Reverse, Confirm operations by selecting
the operation from the Action list. You can also search a record by using a combination of %
and alphanumeric value.
Example
You can search the record for Fund ID by using the combination of % and alphanumeric value
as follows:
Search by A%:- System will fetch all the records whose Fund ID starts from Alphabet
‘A’. For example, AGC17, AGVO6, AGC74 etc.
Search by %7:- System will fetch all the records whose Fund ID ends by numeric value’
7’. For example, AGC17, GSD267, AGC77 etc.
Search by %17%:- System will fetch all the records whose Fund ID contains the numeric
value 17. For example, GSD217, GSD172, AGC17 etc.
5.14.4.2 Viewing Bank Reconciliation Record
To view a record that you have previously input, you must retrieve the same in the Bank
Reconciliation Summary screen as follows:
Invoke the Bank Reconciliation Summary screen from the Browser.
Select the status of the record that you want to retrieve for viewing in the Authorization
Status field. You can also view all records that are either unauthorized or authorized
only, by choosing the Unauthorized/ Authorized option.
Specify any or all of the details of the record in the corresponding fields on the screen.
5-116
Click ‘Search’ button. All records with the specified fields are retrieved and displayed in
the lower portion of the screen.
Double click the record that you want to view in the list of displayed records. The Bank
Reconciliation Detail screen is displayed in View mode.
5.14.4.3 Deleting Bank Reconciliation Record
You can delete only unauthorized records in the system. To delete a record that you have
previously entered:
Invoke the Bank Reconciliation Summary screen from the Browser.
Select the status of the record that you want to retrieve for deletion.
Specify any or all of the details in the corresponding fields on the screen.
Click ‘Search’ button. All records with the specified fields are retrieved and displayed in
the lower portion of the screen.
Double click the record that you want to delete in the list of displayed records. . The Bank
Reconciliation Detail screen is displayed.
Select Delete Operation from the Action list. The system prompts you to confirm the
deletion and the record is physically deleted from the system database.
5.14.4.4 Authorizing Bank Reconciliation Record
An unauthorized Bank Reconciliation record must be authorized in the system for it to be
processed. To authorize a record:
Invoke the Bank Reconciliation Summary screen from the Browser.
Select the status of the record that you want to retrieve for authorization. Typically,
choose the unauthorized option.
Specify any or all of the details in the corresponding fields on the screen.
Click ‘Search’ button. All records with the specified details that are pending
authorization are retrieved and displayed in the lower portion of the screen.
Double click the record that you wish to authorize. The Bank Reconciliation Detail
screen is displayed. Select Authorize operation from the Action List.
When a checker authorizes a transaction, details of validation, if any, that were overridden by
the maker of the transaction during the Save operation are displayed. If any of these overrides
results in an error, the checker must reject the transaction.
5.14.4.5 Copying Attributes
If you want to create a new Bank Reconciliation record with the same attributes of an existing
maintenance, you can copy the attributes of an existing Bank Reconciliation record to a new
one.
To copy the attributes:
Retrieve the record whose attributes the new Bank Reconciliation record should inherit.
You can retrieve the record through the Summary screen or through the F7-F8
operation explained in the previous sections of this chapter.
Click on Copy
Indicate the ID for the new Bank Reconciliation record. You can, however, change the
details of the new record.
5-117
5.14.5
Authorizing Bank Reconciliation
To authorize reconciled and un-reconciled entries, choose the operation ‘Authorize’ and the
desired Reconcile Entry in the Bank Reconciliation Summary screen and enter the search
criteria.
When you click ‘Ok’ button, records satisfying the search criteria that you have entered are
displayed.
Check the option ‘Select’ against the entry which you wish to authorize. While authorizing the
reconciled records you can specify the payment action the system should perform. The
options are:
Clear – If you choose this option, system will confirm the units
Reject – If you choose this option, system will pass a reversal to the original transaction
No Action - If you do not specify any payment action here, system will not take any
action. The entry will be reconciled. The transaction will neither be cleared nor rejected
irrespective of the cheque status.
If the status of the cheque in bank feed is ‘Debit Received’, ‘Reject Status Awaited’ or
‘Rejected’, then you can select the option ‘Reject’. If the status of the cheque in the bank feed
is ‘Credit Received’, you will be allowed to select the ‘Clear’ action.
5.15 Computing Performance Fee for Hedge Funds
Hedge fund managers charge the investors a fee called performance fee, which is a
percentage of the gains received by the investor. As investors enter and exit hedge funds at
different points in time, the performance gains received by them also differ accordingly.
Hence, the performance fee calculations are carried out using a special accounting
methodology called equalization accounting which ensures that the fund manager is paid the
correct performance fee and also that the fees are fairly allocated between each investor in
the fund. The investors also receive profit only for the period during which they stay invested
in the fund.
5-118
The following performance fee calculation methods are supported for hedge funds:
EC / CL (Equalization Credit / Contingent Redemption)
FR (Forced Redemption)
EC/ED (Equalization Credit / Equalization Debit): also known as Equalization
Redemption.
Note
Variations to the above listed methods are also possible by setting up new rules and rule
groups in the system.
The different performance fee calculation methods are briefly explained below:
Contingent Liquidation
The contingent liquidation method is an arithmetic method applied to subscriptions made at a
price below the current HWM plus hurdle rate.
The contingent liquidation process helps the investor avoid paying unfair performance fees,
in case the fund recovers in price. This mechanism ensures that the investor pays the same
rate of performance fees as all other investors for any gain in value.
Equalization Credit
The equalization credit method is an arithmetic method applied to subscriptions made at a
price (GAVPS) above the current HWM plus hurdle rate.
The equalization credit process ensures that the investor does not pay performance fees for
performance prior to investing in the fund. This process calculates a number of shares,
identified as the equalization credit holding, in the name of the investor, and is tracked during
the life-time of the dealing lot.
Forced Redemption
The forced redemption method is an arithmetic method applied to all subscriptions made at a
price (GAVPS) regardless of whether it is above or below the current HWM plus hurdle rate.
The forced redemption method ensures that all investors are treated equitably with regard to
the paying of performance fees for performance since investing in the fund. This process
calculates the number of shares to be redeemed either at the point of an early redemption or
at the end of the performance fee period based on the movement of the price since
subscription time.
5.15.1
Processing Performance Fee Payment
An EOD batch ‘Performance Fee Payment Process’ is used to process period end calculation
of performance fee, based on the next payment date defined at the Fund Rule. The steps
involved in the processing of performance fee can be summarized in the steps given below:.
1. If the current application date is greater than or equal to next payment date, the
‘Performance Fee Payment Process’ batch gets executed.
2. During payment processing, the system performs period end calculations as per the
period end rule maintained for the given group and crystallizes the performance fee for all
outstanding inflow transactions captured in the system.
5-119
Note
The reference type ‘PE’ identifies the transactions generated due to period end calculations.
5.15.2
Processing Performance Fee Accrual
An EOD batch ‘Performance Fee Accrual Process’ handles the accrual of performance fee,
based on the next accrual date defined at the Fund Rule. The accrual of the performance fee
is carried out as follows:
1. If the current application date is greater than or equal to next accrual date, the
‘Performance Fee Accrual Process’ batch gets executed.
2. The rule mapped for the event ‘Period End’ in Group Rule maintenance, for a given group
Id, is used for performance fee accrual calculations.
3. Once accrual processing gets completed, the system updates the ‘Last Accrual date’ as
current application date and ‘Next Accrual date’ as ‘current application date + accrual
frequency’ for the fund rule.
Note
Accruals are performed only for reporting purpose and there will be no impact on transaction processing or further performance fee calculation.
5.15.3
Modifying Performance Fee Calculation Method
If you wish to change the performance fee calculation method for a given fund, you need to
perform the steps given below. Two scenarios are explained based on the crystallization of
the performance fee.
Case 1:
In this scenario, the crystallization of the performance fee is not required using existing
performance fee method.
1. Create a new group ID that represents the new performance fee calculation method.
2. Amend the fund rule to replace the old Group ID with the new Group ID.
3. On BOD of new rule effective date, the system updates the fund rule with newly mapped
group and starts accruing and applying performance fee based on this new method.
Example:
Assume that the existing Fund Rule setup is as given below:
Fund ID: HFUND1
Rule Effective Date: 01-Jan-2009
Group ID: 8001 (Represents EC/CL methodology)
Last Payment Date : 31-Dec-2008
Next Payment Date : 31-Dec-2009
Application Date: 15-Jan-2009
Above setup indicates that the fund 'HFUND1' uses 'EC/CL' methodology for calculating
performance fee. If you want to change the PF calculation method for the fund from ‘EC/CL’
5-120
to ‘FR’ (e.g. Group ID '8002') from 01-May-2009 onwards and period end processing is not
required, then you need to perform the steps given below.
1. Amend the fund ‘HFUND1’; change the Group ID to 8002 which represent ‘FR calculation
methodology’ and specify the new Rule Effective Date for the fund as ’01-May-2009’.
2. On BOD of ’01-May-2009’, system will update group Id for fund ‘HFUND1 as 8002.
3. From 01-May onwards, the system starts applying performance fee based on ‘FR
methodology’.
4. On 31-Dec, system executes the period end calculation based on ‘FR methodology’.
Case 2:
In this scenario, the performance fee needs to be crystallized using existing performance fee
method.
1. Create a new group ID that represents the new performance fee calculation method.
2. Amend the fund rule and update ‘Next Payment Date’, so that the system performs period
end calculations as per the existing Group.
3. On BOD of new rule effective date, the system updates the Next Payment Date.
4. Before EOD of Next Payment Date, amend the fund rule to map with the new Group ID
and specify the next payment date and next accrual date.
5. On EOD, the system performs period end processing as per the existing Group ID.
6. On BOD of New Rule Effective Date, the system updates the Group ID with the new
Group ID.
7. From this date onwards the system calculates performance fee based on the new Group
ID.
Example
Assume that the existing Fund Rule setup is as given below:
Fund ID: HFUND1
Rule Effective Date: 01-Jan-2009
Group ID: 8001 (Represents EC/CL methodology)
Last Payment Date : 31-Dec-2008
Next Payment Date : 31-Dec-2009
Application Date: 15-Jan-2009
The above Fund Rule setup indicates that the fund 'HFUND1' is using 'EC/CL' methodology
for calculating performance fee. If you want to change the PF calculation method for the fund
from ‘EC/CL’ to ‘FR’ (e.g. Group ID '8002') from 01-May-2009 onwards and want the system
to process period end calculation using existing method (8001) then, hen you need to perform
the steps given below.
1. Amend the fund ‘HFUND1’; specify the new Rule Effective Date for the fund as ’16-Jan2009’ and change the Next Payment date to ’30-Apr-2009’ which represents next period
end date. (Next Payment Date should be grater then new Rule Effective Date)
2. On BOD of ’16-Jan-2009’, the system updates Next Payment Date as ’30-Apr-2009’ for
fund ‘HFUND1’.
3. Before EOD of ’30-Apr-2009’, amend the fund ‘HFUND1’ and specify the new Rule
Effective Date for the fund as ’01-May-2009’; Change the Group ID to ‘8002’ and Next
Payment date to ’31-Dec-2009’ for new group (8002).
5-121
4. On EOD of ’30-Apr-2009’, the system executes the period end calculation based on
Group 8001 (EC/CL methodology).
5. On BOD of ’01-May-2009’, the system updates group Id to 8002 (FR methodology) and
Next Payment Date to ’31-Dec-2009’ for fund ‘HFUND1’.
6. From 01-May -2009 onwards, the system starts applying performance fee calculations
based on Group Id 8002 (‘FR methodology’).
5.15.4
Series Method of Performance Fee Calculation
In the series method of performance fee calculation, a new series is created for a fund each
time there are new subscribers for each pricing period during the performance fee period.
These series are maintained separately until the time they are consolidated with other series
belonging to the same fund.
The consolidation for each of the subsequent series issued usually happens at the end of
every accounting period. For the consolidation to happen, an incentive fee needs to be paid
for each of the series, including the series in which it is being merged, which could be done
quarterly, half-yearly, or annually.
Note
You need to manually create new fund series for each fund pricing period and also handle
the consolidation of the fund series operationally. The system does not provide any automated tasks to achieve this.
5.16 Maintaining Override Trade Cycles Date For Funds
You can specify trade cycle dates that are different from the ones defined for a fund for
transactions falling within a limited period (known as the ‘Override Period’). If you maintain
these details, for the transactions that take place within the period, the system will use the
dates you have maintained rather than the ones at the fund level. This facility is available only
for funds with specific fund prices and for the following events:
Enrichment and Saving of UT Transactions
Generation of SI Transactions
Generation of Dividend Transactions
Redemption of Periodic Loads
Generation of UT transactions for LEP
Generation of Policy SI – UT transactions
5-122
You can define the alternate trade cycle dates and the override period in the ‘Override Trade
Cycle Date’ screen. To invoke this screen, type ‘UTDTDCYL’ in the field at the top right corner
of the Application tool bar and clicking on the adjoining arrow button.
You can maintain the following details here:
5.16.1
Fields in the Override Trade Cycle Date Screen
Fund ID
Alphanumeric; Mandatory
Specify the ID of the fund for which you wish to maintain different trade cycle dates for
transactions made during the override period. You can also select the fund ID from the
adjoining option list. The list contains the IDs of all the funds which have a specific fund price
setup.
Fund ISIN
Display Only
The system displays the Fund ISIN.
Fund Name
Display Only
The system displays the name for the fund selected.
Transaction Type
Alphanumeric; Mandatory
Select, from the adjoining drop-down list, the transaction type for which the trade cycle dates
are applicable. It should be a valid transaction type for the fund.The options are:
ALL
IPO Subscription
Subscription
Redemption
5-123
Switch
Transfer
Transaction From Date
Date Format; Mandatory
Enter the starting date of the override period. This should be a valid date in the system and
can be before, after or equal to the system date.
Transaction To Date
Date Format; Mandatory
Enter the ending date of the override period. This should be a valid date in the system and
can be before, after or equal to the system date.
For all the transactions falling within the ‘Transaction From Date’ and ‘Transaction To Date’,
the system will default the dealing, settlement and price dates maintained here.
Dealing Date
Date Format; Mandatory
Specify a valid date as the dealing date. This date should be greater than or equal to the the
‘Transaction To Date’. It can also be a holiday as per the system.
Settlement Date
Date Format; Mandatory
Enter a valid date as the settlement date. The date entered should be greater than or equal
to the ‘Transaction From Date’ and should not be a fund, currency or system holiday.If the
settlement date is a holiday in transaction currency, then the system will update the next
working day of the transaction currency as settlement date
Price Date
Date Format; Mandatory
Enter a valid date as the price date. The date entered should be greater than or equal to the
‘Transaction To Date’ but not a fund holiday.
After you authorize the maintenance, the dealing date, settlement date and price date for a
transaction type will be displayed in the transaction if the transactions falls within the override
period specified and if no transaction has been allotted within the override period.
Note
–
There should not be any overlap in the trade cycles maintained
–
The price date should be greater than or equal to the first price date maintained
under ‘General Operating Rules’ for the fund.
–
If holiday maintenance for the system calendar is not available, system will use the
default weekend holidays from the default maintenance
–
The trade details will be default for both LEP transactions as well as systemgenerated ones.
–
If a transaction is being reversed or a backdated transaction entered, the system
will pick up the relevant override trade cycle maintenance based on the type and
date of the transaction
–
Existing override trade cycle maintenances can be closed only if there are no nonreversed or unauthorized transactions in the system.
5-124
5.16.2
Override Trade Cycle Date Summary Screen
Invoke the ‘Override Trade Cycle Date Summary’ screen by typing ‘UTSTDCYL’ in the field
at the top right corner of the Application tool bar and clicking on the adjoining arrow button
You can perform the following operations in the ‘Override Trade Cycle Date Summary’
screen:
5.16.2.1 Retrieving Record in Override Trade Cycle Date Summary screen
You can retrieve a previously entered record in the Summary Screen, as follows:
. Specify any or all of the following details in the corresponding fields:
The status of the record in the Authorized field. If you choose the ‘Blank Space’ option,
then all the records are retrieved.
The status of the record in the Open field. If you choose the ‘Blank Space’ option, then
all records are retrieved
Fund ID
Transaction Type
Transaction From Date
Transaction To Date
Dealing Date
Settlement Date
Price Date
Click ‘Search’ button to view the records. All the records with the specified details are retrieved
and displayed in the lower portion of the screen.
You can also retrieve the individual record detail from the detail screen by querying in the
following manner:
Press F7.
Input the Fund ID, Transaction Type andTransaction Date.
Press F8.
5-125
You can perform Edit, Delete, Amend, Authorize operations by selecting the operation from
the Action list. You can also search a record by using a combination of % and alphanumeric
value.
Example
You can search the record for Fund ID by using the combination of % and alphanumeric value
as follows:
Search by A%:- System will fetch all the records whose Fund ID starts from Alphabet
‘A’. For example, AGC17, AGVO6, AGC74 etc.
Search by %7:- System will fetch all the records whose Fund ID ends by numeric value’
7’. For example, AGC17, GSD267, AGC77 etc.
Search by %17%:- System will fetch all the records whose Fund ID contains the
numeric value 17. For example, GSD217, GSD172, AGC17 etc
5.16.2.2 Editing an Override Trade Cycle Date Record
You can modify the details of an Override Trade Cycle Date record that you have already
entered into the system, provided it has not been subsequently authorized. You can perform
this operation as follows:
Invoke the Override Trade Cycle Date Summary screen from the Browser.
Select the status of the record that you want to retrieve for modification in the Auth
Status field. You can only modify records that are unauthorized. Accordingly, choose
the unauthorized option.
Specify any or all of the details in the corresponding fields to retrieve the record that is
to be modified.
Click ‘Search’ button. All unauthorized records with the specified details are retrieved
and displayed in the lower portion of the screen.
Double click the record that you want to modify in the list of displayed records. The
Override Trade Cycle Date screen is displayed.
Select Unlock Operation from the Action list to modify the record. Modify the necessary
information.
Click Save to save your changes. The Override Trade Cycle Date screen is closed and
the changes made are reflected in the Override Trade Cycle Date Summary screen.
5.16.2.3 Viewing an Override Trade Cycle Date Record
To view a record that you have previously input, you must retrieve the same in the Override
Trade Cycle Date Summary screen as follows:
Invoke the Override Trade Cycle Date Summary screen from the Browser.
Select the status of the record that you want to retrieve for viewing in the Authorization
Status field. You can also view all records that are either unauthorized or authorized
only, by choosing the Unauthorized/ Authorized option.
Specify any or all of the details of the record in the corresponding fields on the screen.
Click ‘Search’ button. All records with the specified fields are retrieved and displayed in
the lower portion of the screen.
Double click the record that you want to view in the list of displayed records. The
Override Trade Cycle Date screen is displayed in View mode.
5-126
5.16.2.4 Deleting an Override Trade Cycle Date Record
You can delete only unauthorized records in the system. To delete a record that you have
previously entered:
Invoke the Override Trade Cycle Date Summary screen from the Browser.
Select the status of the record that you want to retrieve for deletion.
Specify any or all of the details in the corresponding fields on the screen.
Click ‘Search’ button. All records with the specified fields are retrieved and displayed in
the lower portion of the screen.
Double click the record that you want to delete in the list of displayed records. The
Override Trade Cycle Date screen is displayed.
Select Delete Operation from the Action list. The system prompts you to confirm the
deletion and the record is physically deleted from the system database.
5.16.2.5 Authorizing an Override Trade Cycle Date Record
An unauthorized Override Trade Cycle Date record must be authorized in the system for it to
be processed. To authorize a record:
Invoke the Override Trade Cycle Date Summary screen from the Browser.
Select the status of the record that you want to retrieve for authorization. Typically,
choose the unauthorized option.
Specify any or all of the details in the corresponding fields on the screen.
Click ‘Search’ button. All records with the specified details that are pending
authorization are retrieved and displayed in the lower portion of the screen.
Double click the record that you wish to authorize. The Override Trade Cycle Date
screen is displayed. Select Authorize operation from the Action List.
5.16.2.6 Amending an Override Trade Cycle Date Record
After an Override Trade Cycle Date record is authorized, it can be modified using the Unlock
operation from the Action List. To make changes to a record after authorization:
Invoke the Override Trade Cycle Date Summary screen from the Browser.
Select the status of the record that you want to retrieve for authorization. You can only
amend authorized records.
Specify any or all of the details in the corresponding fields on the screen.
Click ‘Search’ button. All records with the specified details that are pending
authorization are retrieved and displayed in the lower portion of the screen.
Double click the record that you wish to authorize. The Override Trade Cycle Date
screen is displayed in amendment mode. Select Unlock operation from the Action List
to amend the record.
Amend the necessary information and click on Save to save the changes.
5.16.2.7 Authorizing an Amended Override Trade Cycle Date Record
An amended Override Trade Cycle Date record must be authorized for the amendment to be
made effective in the system. The authorization of amended records can be done only from
Fund Manager Module.
The subsequent process of authorization is the same as that for normal records.
5-127
5.16.2.8 Copying Attributes
If you want to create a new Override Trade Cycle Date record with the same attributes of an
existing maintenance, you can copy the attributes of an existing Override Trade Cycle Date
record to a new one.
To copy the attributes:
Retrieve the record whose attributes the new Override Trade Cycle Date should inherit.
You can retrieve the record through the Summary screen or through the F7-F8
operation explained in the previous sections of this chapter.
Click on Copy
Indicate the ID for the new Override Trade Cycle Date record. You can, however,
change the details of the new record.
5-128
6. Setting up Load Groups
6.1
Load Groups
The AMC may need to group funds together based on common load and transaction
processing characteristics, such as the same loads being applied to transactions in all funds
in the group, or applicability of certain preferences maintained for investors.
Such a group of funds, which entail common load or transaction processing characteristics,
are called load groups.
This is typical in the case of loads that are cumulative across funds (such as in the case of
Rights of Accumulation), and also load patterns for Letter of Intent investors. This is also
typical in the case of loads that are applied to funds that form part of a investment product or
policy (plan) portfolio.
6.1.1
Rights of Accumulation
The AMC may give investors benefits based on the history of their investment in the funds of
the AMC. This benefit would typically be a fee benefit, such as reduced transaction charges
or reduced commissions, and is offered based on the history of investments.
This benefit facility given to the investor is known as the Rights of Accumulation facility.
Investors are given the option of availing of the Rights of Accumulation, at their discretion.
Thus, when an investor transacts in a fund of the AMC, the history of the investor’s
transactions in the fund is considered when the fee is applied for the transaction, if the investor
has chosen to avail of the Rights of Accumulation facility.
The AMC reserves the discretion to interpret the history of investment of each investor on the
basis of which, the Rights of Accumulation benefit would be available. Also, the AMC
reserves the discretion to identify a single fund or a group of funds for which it would offer the
Rights of Accumulation facility to investors, as well as the method of interpretation of
investments, to be applicable for each group. The AMC can also specify whether the holdings
across all the investors under a CIF account are to be considered for ROA.
Any individual fund for which the AMC designates Rights of Accumulation as applicable are
called ROA funds, and any group of such funds is called an ROA group. An investor that opts
to avail of the Rights of Accumulation is called an ROA investor. Also, the investor can
override the AMC option of availing ROA at a CIF account level.
Interpreting the history of investments
The interpretation of the past investments of an investor in the case of Rights of Accumulation,
for any ROA group of funds, would be based on any of the following aspects, at the AMC’
choice:
Option (1): The total amount invested by the investor in all the funds in an ROA group
of the AMC as on the transaction date
Option (2): The product of the current holdings in all funds of the ROA group and the
prevalent NAV for each fund in the ROA group on the transaction date.
Option (3): The product of the current holdings in all funds of the ROA group and the
prevalent subscription price for each fund in the ROA group on the transaction date.
Option (4): Option (1) or (2), depending upon which of the two values is higher
Option (5): Option (1) or (3), depending upon which of the two values is higher
6-1
Option (6): The total value of the transactions entered into on the current business day
in all individual funds, as well as funds forming part of a load group or a plan or policy
portfolio. This option is known as the current day transactions value.
Depending upon the option chosen by the AMC for each ROA group of funds, any new
transaction for the investor in the ROA group would take into consideration the value of the
past investments, when the slab for loading is considered.
The following example will make this clearer:
For instance, let us suppose that an ROA investor, Mr. Colin White, would like to invest 10000
currency units in the Carey Bugle Growth Fund, which is part of an ROA group of funds known
as LGROA, on 02-01-2003.
Before 02-01-2003, he has invested in the LGROA group of funds of which the Carey Bugle
fund is a constituent, as follows:
Fund of ROA group
(LGROA)
Present holdings
(units)
Total amount invested in
ROA group (TA1)
Carey Bugle Growth Fund
(CBGF)
10000
100000
Farley Income Fund (FIF)
5000
50000
15000 (sum)
150000 (sum)
The worth of the holdings in the LGROA group in terms of NAV prevalent on 02-01-2003:
Fund
Present holdings
(units)
NAV on 0201-2003
Total worth of
holdings (TA2)
CBGF
10000
12
120000
FIF
5000
12
60000
15000 (sum)
180000 (sum)
The worth of the holdings in the LGROA group in terms of subscription prices on 02-01-2003:
Fund
Present holdings
(units)
Subscription price
on 02-01-2003
Total worth of
holdings (TA3)
CBGF
10000
11
110000
FIF
5000
12
60000
15000 (sum)
170000 (sum)
The AMC has chosen Option (4) as the basis for applicability of Rights of Accumulation for
the LGROA group. Since the value TA2 is higher than TA1, the value taken for identifying the
loading slab for any new transactions for Mr. White in the LGROA group is taken to be TA2.
6-2
The load slabs defined for the LGROA group, of which the two funds are a part, are as follows:
Slab
From Amount
To Amount
Return Value (%)
001
0
10000
5
002
10000
20000
4
003
20000
40000
3
004
40000
80000
2
005
80000
16000
1
006
160000
320000
0.25
Now for Mr. White’s subscription transaction of 10000 currency units on 02-01-2003, the
amount considered for identifying the slab, according to the ROA option chosen by the AMC
for the LGROA group = Transaction Amount + TA2 = 10000 + 180000 = 190000 currency
units.
This would fall in slab 006 for the fund and so, the applicable return value percentage would
be 0.25%.
6.1.2
Creating Load Groups
In Oracle FLEXCUBE Investor Servicing, you create a load group as follows:
Give the load group a unique identifier (ID) and identify the funds that will constitute the
load group. A fund can be mapped to more than one load group.
Indicate the load and transaction processing characteristics that would apply to
transactions in any of the funds belonging to the group. This includes specifying Letter
of Intent (LOI) applicability and Rights of Accumulation (ROA) applicability. If ROA is
applicable, you must also specify the method of computation applicable.
Map any required loads to the group in the Group Load Mapping screen.
Have the load group authorized by another user.. The Group Definition (Summary)
screen can be used for this. This screen can be accessed through the Group Definition
(Summary) menu item in the Maintenance menu category in the Fund Manager
component.
6-3
6.1.3
Creating Load Group
To create a load group in the system, use the ‘FCIS Group Definition Detail’ screen. You can
invoke this screen by typing ‘UTDGRPDF ’ in the field at the top right corner of the Application
tool bar and clicking on the adjoining arrow button.
You must specify the following as mandatory information for the creation of a load group:
6.1.3.1
A unique ID for the group and descriptive text qualifying the group, in the Group and
Description fields in the screen, respectively.
The date from which this rule is effective.
Whether Rights of Accumulation (ROA) would be applicable for investors that invest in
the funds identified for the load group. Specify this in the ROA Applicable field.
If ROA is applicable, you must also specify the ROA computation method that would
apply on investment into the group, as well as whether current transactions must be
taken into account for ROA computation.
Whether Letters of Intent (LOI) would be applicable for investors that invest in the funds
identified for the load group. Specify this in the LOI Applicable field.
The funds that would constitute the group, in the Funds Included box. A fund can be
mapped to more than one load group.
Fields in Group Definition Screen
Group Id
16 Characters Maximum, Alphanumeric, Mandatory
Specify a unique alphanumeric identifier for the load group. You will use this ID to set up
characteristics for the group.
6-4
Group Description
255 Characters Maximum, Alphanumeric, Mandatory
Enter descriptive text, a short phrase that qualifies the group.
LOI Transaction
Optional
Choose ‘Yes’ for this option to indicate the applicability of Letters of Intent for funds in the
group.
Choose ‘No’ if the LOI investors investing in the group cannot avail of the Letter of Intent
facility.
ROA Applicable
Choose ‘Yes’ for this option to indicate the applicability of Rights of Accumulation for funds in
the group.
Choose ‘No’ if the ROA investors investing in the group cannot avail of the Rights of
Accumulation facility.
ROA Computation Method
Alphanumeric; Mandatory if ROA is applicable for the group
Specify the method of interpreting the history of investments, which will be used to arrive at
the basis for ROA computation, for any investments by unit holders into the ROA group.
The following methods could be available:
Amount invested by the investor
Holdings * NAV as of that date
Holdings * Subscription Base Price as of that date
Higher of (1) and (2)
Higher of (1) and (3)
Current Day’s Transaction Value
Include Current Transactions for ROA
Optional, Applicable only if ROA is applicable for the group
Choose ‘Yes’ for this option to indicate that current transactions are to be taken into
consideration when the selected method of interpretation of investments (ROA computation
method) is applied on investments into the ROA group.
Rule Effective Date
Date format, Mandatory
This is the date from which the group definition is effective. It should be later than or the same
as the application date. You can select the date from the calendar provided.
6.1.3.2
Fund Available
In this box, a list of unauthorized funds is displayed.
Fund Id
Mandatory
You can select the funds that you want to designate to be part of the load group. A fund can
be mapped to more than one load group.
6-5
Fund Name
The fund name is defaulted hereon selection of the Fund Id.
Fund Identification Number
The fund identification number is defaulted on selection of the Fund Id
6.1.4
Load Group Summary Screen
You can perform the following operations in the Load group Summary screen:
6.1.4.1
Retrieving Record in Load Group Summary Screen
You can retrieve a previously entered record in the Summary Screen, as follows:
Invoke the ‘FCIS Load Group Maintenance Summary’ screen by typing ‘UTSLDGRP’ in the
field at the top right corner of the Application tool bar and clicking on the adjoining arrow button
and specify any or all of the following details in the corresponding fields:
The status of the record in the Authorized field. If you choose the ‘Blank Space’ option,
then all the records are retrieved.
The status of the record in the Open field. If you choose the ‘Blank Space’ option, then
all records are retrieved
Group ID
Rule Effective Date
Click ‘Search’ button to view the records. All the records with the specified details are retrieved
and displayed in the lower portion of the screen.
You can also retrieve the individual record detail from the detail screen by querying in the
following manner:
Press F7.
Input the Group ID.
Press F8.
You can perform Edit, Delete, Amend, Authorize, Reverse, Confirm operations by selecting
the operation from the Action list. You can also search a record by using a combination of %
and alphanumeric value.
Example
You can search the record for Group ID by using the combination of % and alphanumeric
value as follows:
Search by A%: The system will fetch all the records whose Group ID starts from Alphabet
‘A’. For example, AGC17,AGVO6,AGC74 and so forth.
Search by %7: The system will fetch all the records whose Group ID ends by numeric
value’ 7’. For example, AGC17, GSD267, AGC77 and so forth.
Search by %17%: The system will fetch all the records whose Group ID contains the
numeric value 17. For example, GSD217, GSD172, AGC17 and so forth.
6-6
6.1.4.2
Search by %: The system will fetch all the records.
Editing Load Group Maintenance
You can modify the details of Load Group Maintenance that you have already entered into the
system, provided it has not subsequently authorized. You can perform this operation as
follows:
6.1.4.3
Invoke the Load Group Maintenance Summary screen from the Browser.
Select the status of the record that you want to retrieve for modification in the Authorized
field. You can only modify records that are unauthorized. Accordingly, choose the
unauthorized option.
Specify any or all of the details in the corresponding fields to retrieve the record that is
to be modified.
Click ‘Search’ button. All unauthorized records with the specified details are retrieved
and displayed in the lower portion of the screen.
Double click the record that you want to modify in the list of displayed records. The Load
Group Maintenance Detail screen is displayed.
Select Unlock Operation from the Action list to modify the record. Modify the necessary
information.
Click Save to save your changes. The Load Group Maintenance Detail screen is closed
and the changes made are reflected in the Load Group Maintenance Summary screen.
Viewing Load Group Maintenance
To view a record that you have previously input, you must retrieve the same in the Load Group
Maintenance Summary screen as follows:
Invoke the Load Group Maintenance Summary screen from the Browser.
Select the status of the record that you want to retrieve for viewing in the Authorized
field. You can also view all records that are either unauthorized or authorized only, by
choosing the Unauthorized or Authorized option.
Specify any or all of the details of the record in the corresponding fields on the screen.
Click ‘Search’ button. All records with the specified fields are retrieved and displayed in
the lower portion of the screen.
Double click the record that you want to view in the list of displayed records. The Load
Group Maintenance Detail screen is displayed in View mode.
6-7
6.1.4.4
Deleting Load Group Maintenance
You can delete only unauthorized records in the system. To delete a record that you have
previously entered:
6.1.4.5
Invoke the Load Group Maintenance Summary screen from the Browser.
Select the status of the record that you want to retrieve for deletion.
Specify any or all of the details in the corresponding fields on the screen.
Click ‘Search’ button. All records with the specified fields are retrieved and displayed in
the lower portion of the screen.
Double click the record that you want to delete in the list of displayed records. The Load
Group Maintenance Detail screen is displayed.
Select Delete Operation from the Action list. The system prompts you to confirm the
deletion and the record is physically deleted from the system database.
Authorizing Load Group Maintenance
An unauthorized Load Group Maintenance must be authorized in the system for it to be
processed. To authorize a record:
Invoke the Load Group Maintenance Summary screen from the Browser.
Select the status of the record that you want to retrieve for authorization. Typically,
choose the unauthorized option.
Specify any or all of the details in the corresponding fields on the screen.
Click ‘Search’ button. All records with the specified details that are pending
authorization are retrieved and displayed in the lower portion of the screen.
Double click the record that you wish to authorize. The Load Group Maintenance Detail
screen is displayed. Select Authorize operation from the Action List.
When a checker authorizes a transaction, details of validation, if any, that were overridden by
the maker of the transaction during the Save operation are displayed. If any of these overrides
results in an error, the checker must reject the transaction.
6.1.4.6
Amending Load Group Maintenance
After a Load Group Maintenance is authorized, it can be modified using the Unlock operation
from the Action List. To make changes to a record after authorization:
6.1.4.7
Invoke the Load Group Maintenance Summary screen from the Browser.
Select the status of the record that you want to retrieve for authorization. You can only
amend authorized records.
Specify any or all of the details in the corresponding fields on the screen.
Click ‘Search’ button. All records with the specified details that are pending
authorization are retrieved and displayed in the lower portion of the screen.
Double click the record that you wish to authorize. The Load Group Maintenance Detail
screen is displayed in amendment mode. Select Unlock operation from the Action List
to amend the record.
Amend the necessary information and click on Save to save the changes.
Authorizing Amended Load Group Maintenance
An amended Load Group Maintenance must be authorized for the amendment to be made
effective in the system. The authorization of amended records can be done only from Fund
Manager Module.
The subsequent process of authorization is the same as that for normal transactions.
6-8
6.1.5
Copying Attributes
If you want to create a new Load Group Maintenance with the same attributes as that of an
existing maintenance, you can copy the attributes of an existing Load Group Maintenance to
a new one.
To copy the attributes:
6.1.6
Retrieve the record whose attributes the new Load Group Maintenance should inherit.
You can retrieve the record through the Summary screen or through the F7-F8
operation explained in the previous sections of this chapter.
Click on Copy
Indicate the ID for the new Load Group Maintenance. You can, however, change the
details of the new maintenance.
Load Group Characteristics Screen
To specify the load and transaction processing characteristics that would apply to
transactions in funds in a load group, use the ‘Group Characteristics Detail’ screen.
Invoke this screen by typing ‘UTDGRPCH’ in the field at the top right corner of the Application
tool bar and clicking on the adjoining arrow button.
Select ‘New’ from the Actions menu in the Application tool bar or click new icon to enter the
details of the group that you are defining.
You can specify any of the following loading parameters that would be applicable for all funds
in the group:
The date from which the characteristics are effective, in the Rule Effective Date field.
The default period (in days) for the Letter of Intent facility availability. Specify this in the
Default LOI Period field.
The threshold balance percentage of the holdings that must be maintained in an LOI
investor account. Redemption for such investors would not be allowed if the holdings
in any funds of the load group falls below this percentage as a result of the redemption.
6-9
This percentage is known as the escrow percentage. Specify this in the Escrow
Percentage field.
For all funds in the group, the applicability of a prior credit period for LOI fulfillment.
Indicate this in the Prior Credit Allow field. If allowed, also specify the prior credit period
applicable (by default) in the Prior Credit Period field.
The applicability of redemption and switch transactions affecting the LOI used up
amount, for all funds in the group, in the Redemption Affect LOI and Switch Affect LOI
fields.
The applicability of standing instructions for investors investing in the group, in the SI
Applicable field.
The applicability of reinvestments for investors investing in the group, in the
Reinvestment Applicable field.
The lead time, if any, for the verification of amounts for LOI or ROA applicability, that is
to apply to all funds in the group. Specify this in the Lead Time for Amount Verification
field.
For a fuller discussion of what Letters of Intent are and how an investor can opt to avail of the
same, refer the Managing Investor Accounts chapter.
6.1.7
Fields in Load Group Characteristics Screen
The following fields are available for data entry in the Load Group Characteristics screen:
Group ID
Alphanumeric, Mandatory
From the list, select the group of funds for which you are setting up the common load and
transaction processing characteristics for transactions.
Default LOI Period (Days)
Numeric, Optional
Specify the default period (in days) for the Letter of Intent facility availability that would apply
to all funds in the group.
Escrow Percentage
Percentage Format, Optional
Specify the escrow percentage that is to apply to LOI investors who transact in the funds of
the group.
For LOI investors, the AMC stipulates a certain threshold percentage of holdings that must
always be maintained. A redemption transaction due to which the holdings balance in the
funds of the group falls below this percentage, will not be accepted. This percentage is called
an escrow percentage.
Prior Credit Period for LOI (Days)
Numeric, Mandatory only if prior credit is allowed.
If prior credit is permitted to investors for fulfillment of LOI in any of the funds in the group,
specify the duration (in days) of the period.
Rule Effective Date
Date Format
Specify the date on and following which the load group characteristics you are specifying for
the group will be effective.
6-10
Lead Time for Amount Verification (Days)
Numeric, Optional
Specify the lead time applicable, if any, for the verification of amounts for LOI or ROA
applicability that is to apply to all funds in the group.
Dividend Reinvestments Impact ROA
If you choose ‘Yes’, then the units increased due to dividend reinvestment will also be
considered for ROA. The system will consider the Reinvestment Units in terms accumulated
units.
Prior Credit Allowed For LOI
Optional
Check this box to indicate that a prior credit period is permitted for the fulfillment of LOI
amount, for LOI investors.
If you do not check this box, none of the transactions of an investor earlier than the transaction
date, will be reckoned to affect the LOI used up amount.
SI Applicable for LOI
Optional
Check this box to indicate that standing instructions are permitted to be accepted for investors
transacting in the load group.
Reinvestment Applicable for LOI
Optional
Check this box to indicate that reinvestment instructions are permitted to be processed for
investors transacting in the load group.
Redemption Affect LOI
Optional
Check this box to indicate that redemption transactions can be taken into account for reducing
the LOI amount for LOI investors that invest in the load group.
Switch Affect LOI
Optional
Check this box to indicate that switch transactions can be taken into account for reducing the
LOI amount for LOI investors that invest in the load group.
Switch Impact ROA
If you choose ‘Yes’, the system will take into account the fluctuation of units due to Switch in
while computing Accumulated Units.
6.1.8
Load Group Characteristics Maintenance Summary Screen
You can perform the following operations in the Load Group Characteristics Maintenance
Summary screen:
6.1.8.1
Retrieving Record in Load Group Characteristics Maintenance Summary
Screen
You can retrieve a previously entered record in the Summary Screen, as follows:
6-11
Invoke the ‘Group Characteristics Summary’ screen by typing ‘UTSGRPCH’ in the field at the
top right corner of the Application tool bar and clicking on the adjoining arrow button and
specify any or all of the following details in the corresponding fields:
The status of the record in the Authorized field. If you choose the ‘Blank Space’ option,
then all the records are retrieved.
The status of the record in the Open field. If you choose the ‘Blank Space’ option, then
all records are retrieved
Group ID
Click ‘Search’ button to view the records. All the records with the specified details are retrieved
and displayed in the lower portion of the screen.
Note
You can also retrieve the individual record detail from the detail screen by querying in the
following manner:
–
Press F7.
–
Input the Group ID.
–
Press F8.
You can perform Edit, Delete, Amend, Authorize, Reverse, Confirm operations by selecting
the operation from the Action list. You can also search a record by using a combination of %
and alphanumeric value.
Example
You can search the record for Group ID by using the combination of % and alphanumeric
value as follows:
Search by A%: The system will fetch all the records whose Group ID starts from
Alphabet ‘A’. For example, AGC17, AGVO6, AGC74 and so forth.
Search by %7: The system will fetch all the records whose Group ID ends by numeric
value’ 7’. For example, AGC17, GSD267, AGC77 and so forth.
Search by %17%: The system will fetch all the records whose Group ID contains the
numeric value 17. For example, GSD217, GSD172, AGC17 and so forth.
6-12
6.1.8.2
Editing Load Group Characteristics Maintenance
You can modify the details of a Load Group Characteristics Maintenance that you have
already entered into the system, provided it has not subsequently authorized. You can
perform this operation as follows:
6.1.8.3
Invoke the Load Group Characteristics Maintenance Summary screen from the
Browser.
Select the status of the record that you want to retrieve for modification in the Authorized
field. You can only modify records that are unauthorized. Accordingly, choose the
unauthorized option.
Specify any or all of the details in the corresponding fields to retrieve the record that is
to be modified.
Click ‘Search’ button. All unauthorized records with the specified details are retrieved
and displayed in the lower portion of the screen.
Double click the record that you want to modify in the list of displayed records. The Load
Group Characteristics Maintenance Detail screen is displayed.
Select Unlock Operation from the Action list to modify the record. Modify the necessary
information.
Click Save to save your changes. The Load Group Characteristics Maintenance Detail
screen is closed and the changes made are reflected in the Load Group Characteristics
Maintenance Summary screen.
Viewing Load Group Characteristics Maintenance
To view a record that you have previously input, you must retrieve the same in the Load Group
Characteristics Maintenance Summary screen as follows:
6.1.8.4
Invoke the Load Group Characteristics Maintenance Summary screen from the
Browser.
Select the status of the record that you want to retrieve for viewing in the Authorization
Status field. You can also view all records that are either unauthorized or authorized
only, by choosing the Unauthorized/ Authorized option.
Specify any or all of the details of the record in the corresponding fields on the screen.
Click ‘Search’ button. All records with the specified fields are retrieved and displayed in
the lower portion of the screen.
Double click the record that you want to view in the list of displayed records. The Load
Group Characteristics Maintenance Detail screen is displayed in View mode.
Deleting Load Group Characteristics Maintenance
You can delete only unauthorized records in the system. To delete a record that you have
previously entered:
Invoke the Load Group Characteristics Maintenance Summary screen from the
Browser.
Select the status of the record that you want to retrieve for deletion.
Specify any or all of the details in the corresponding fields on the screen.
Click ‘Search’ button. All records with the specified fields are retrieved and displayed in
the lower portion of the screen.
Double click the record that you want to delete in the list of displayed records. The Load
Group Characteristics Maintenance Detail screen is displayed.
Select Delete Operation from the Action list. The system prompts you to confirm the
deletion and the record is physically deleted from the system database.
6-13
6.1.8.5
Authorizing Load Group Characteristics Maintenance
An unauthorized Load Group Characteristics Maintenance must be authorized in the system
for it to be processed. To authorize a record:
Invoke the Load Group Characteristics Maintenance Summary screen from the
Browser.
Select the status of the record that you want to retrieve for authorization. Typically,
choose the unauthorized option.
Specify any or all of the details in the corresponding fields on the screen.
Click ‘Search’ button. All records with the specified details that are pending
authorization are retrieved and displayed in the lower portion of the screen.
Double click the record that you wish to authorize. The Load Group Characteristics
Maintenance Detail screen is displayed. Select Authorize operation from the Action List.
When a checker authorizes a transaction, details of validation, if any, that were overridden by
the maker of the transaction during the Save operation are displayed. If any of these overrides
results in an error, the checker must reject the transaction.
6.1.8.6
Amending Load Group Characteristics Maintenance
After a Load Group Characteristics Maintenance is authorized, it can be modified using the
Unlock operation from the Action List. To make changes to a record after authorization:
6.1.8.7
Invoke the Load Group Characteristics Maintenance Summary screen from the
Browser.
Select the status of the record that you want to retrieve for authorization. You can only
amend authorized records.
Specify any or all of the details in the corresponding fields on the screen.
Click ‘Search’ button. All records with the specified details that are pending
authorization are retrieved and displayed in the lower portion of the screen.
Double click the record that you wish to authorize. Load Group Characteristics
Maintenance Detail screen is displayed in amendment mode. Select Unlock operation
from the Action List to amend the record.
Amend the necessary information and click on Save to save the changes.
Authorizing Amended Load Group Characteristics Maintenance
An amended Load Group Characteristics Maintenance must be authorized for the
amendment to be made effective in the system. The authorization of amended records can
be done only from Fund Manager Module and Agency Branch module.
The subsequent process of authorization is the same as that for normal transactions.
6.1.8.8
Copying Attributes
If you want to create a new Load Group Characteristics Maintenance with the same attributes
as that of an existing maintenance, you can copy the attributes of an existing Load Group
Characteristics Maintenance to a new one.
To copy the attributes:
Retrieve the record whose attributes the new Load Group Characteristics Maintenance
should inherit. You can retrieve the record through the Summary screen or through the
F7-F8 operation explained in the previous sections of this chapter.
Click on Copy
6-14
6.1.9
Indicate the ID for the new Load Group Characteristics Maintenance mapping. You can,
however, change the details of the new maintenance
Non-fulfillment of Letter of Intent
If an investor does not bring in the investment amount promised in a letter of intent, before the
expiry of the letter of intent, it constitutes non-fulfilment, and the AMC can recover the
applicable commission that would have been due without the letter of intent.
The system monitors the fulfilment of letters of intent. The following facilities are available in
the system:
Prior Warning Report
On the date that marks the beginning of the start of the lead time period for the load group, a
prior warning report is generated by the system during the Beginning of Day (BOD) process.
This report contains information about those letters of intent that have not been fulfilled as on
that date.
For instance, if the letter of intent expires on 15th June 2002 and the lead-time specified for
the load group is 10 days, , a BOD process is executed on 5th June 2002 to ascertain whether
the investor has satisfied the letter of intent amount agreed upon. This verification is
performed for all letters of intent.
The report identifies and displays the following information for each letter of intent for any
investor which is unfulfilled as on the date that marks the beginning of the lead time period:
LOI Number
LOI start date
LOI end date (expiry date)
LOI amount
Amount fulfilled or used up as on the current date
Amount remaining unfulfilled as on the current date. This is computed as the difference
between the LOI amount and the Amount Used Up as on the current date
The Load Group to which the fund belongs, for which the LOI has been set up for the
investor
The lead time period specified for the load group
Post-Adjustment Report
In the event of non-fulfilment of a letter of intent, you can obtain a report (known as the post
adjustment report) that displays the actual commission that would have been due on any
transactions entered into by the investor, had the letter of intent not been applied.
To obtain such a report, you must trigger the computation and storing of the actual
commission data, from the system database. You can use the ‘Lol Adjust Proc’ screen for this.
6-15
You can invoke this screen by typing ‘UTDLOIPR’ in the field at the top right corner of the
Application tool bar and clicking on the adjoining arrow button.
In this screen, you must specify the LOI number of the corresponding letter of intent, on the
next business date after the expiry date of the letter of intent. Click on the Process button to
trigger the process of computation and storage. Alternatively, if you do not specify the
number, you can trigger the computation of commission data for all such letters of intent that
are unfulfilled, after the expiry date.
After you have triggered the computation of commission data, in the LOI Adjustment
Processing screen, you can use the LOI Non-Fulfilment menu item in the Batch menu to
obtain the actual report.
The report contains details of the actual commission due on each of the transactions without
considering the letter of intent. This amount must be recovered from the unit holder by the
AMC.
The following details are displayed in the report for each letter of intent for any investor which
is unfulfilled as on the next business date after the expiry date :
LOI Number
Letter of intent amount agreed (LOI amount)
Letter of intent amount fulfilled (used up amount)
ID of the load group to which the fund belongs, for which the LOI was set up for the
investor
The funds in the load group
Transaction number, for each transaction designated as an LOI transaction
Commission collected for the transaction
Actual commission that should have been collected had there been no letter of intent.
The loss borne by the AMC, which is computed as the difference between the
commission collected and commission that should have been collected had there been
no LOI.
The commission for each of the LOI transactions entered into during the LOI period is
recomputed as if there had been no letter of intent. For each transaction, the actual
commission collected and the commission that should have been collected without the LOI is
6-16
displayed. The sum of the commissions will be subtracted from the actual commission
collected and the difference is reported through the report.
6.2
Group Load Mapping
To designate different fees or incentives that are levied during the processing of transactions,
as applicable for transactions in funds of specific load groups, use the ‘Group Load Mapping
Detail’ Screen.
You can invoke this screen by typing ‘UTDLDGRP ’ in the field at the top right corner of the
Application tool bar and clicking on the adjoining arrow button. The ‘Group Load Mapping
Detail’ screen is displayed.
Select ‘New’ from the Actions menu in the Application tool bar or click new icon to enter the
details of the group load.
A simple mapping can be done where the appropriate fees or incentives, called loads in the
system, may be tagged as applicable to the appropriate transaction types for all funds in the
appropriate load groups.
You can also designate the loads as applicable to certain reference types of transactions,
such as standing instructions, policy transactions in funds of the load group and so on.
6.2.1
Checks
Before you set up a Group Load mapping profile record for a load group, it is desirable to
ensure that the following information is already setup in the system:
6-17
6.2.2
Any of the funds in the load group already has an existing, unauthorized Fund
Demographics profile record.
Any of the funds in the load group already has an existing, unauthorized Shares
Characteristics profile record.
Any of the funds in the load group already has an existing, unauthorized Transaction
Processing Rules profile record for the appropriate Transaction Type.
The fees/incentives (Loads) that are to be applied must already have been identified in
the system and have existing, authorized profiles as maintained in the Loads
Maintenance.
It must be remembered that, while mapping a load to a reference transaction type, the
system does not support the mapping of the Ref Type 68 (Funding Repayment) to any
load.
Fields in Group Load Mapping Screen
Group ID
6 Character Maximum, Alphanumeric, Mandatory
Select the ID of the load group for which the group load mapping profile is being set up, from
the options provided.
Rule Effective Date
Date, Mandatory
Specify the Rule Effective Date for the load group for which the group load mapping profile is
being set up, from the options provided.
Transaction Type
Alphanumeric, Mandatory
This is to indicate the transaction type for which the loads are being defined. Select the
Transaction Type from the list given in the drop down menu.
Ref Type
Optional
To designate a load as being applicable for a reference transaction type for the selected load
group, select the reference type from the Available Reference Types box and move it to the
Mapped Reference Types box, using the arrows.
If loads are to be designated applicable to reference types for a load group, you must set up
an individual group load mapping record in this screen for each reference type for the load
group, just as you do for each transaction type.
Note
It must be remembered that, while mapping a load to a reference transaction type, the system does not support the mapping of the Ref Type 68 (Funding Repayment) to any load.
Load ID
Alphanumeric, Mandatory
Specify the name of the Load (fee/incentive) that must be applied for the selected load group.
You may make your choice from the options provided in the drop down list.
6-18
Processing Frequency
Alphanumeric, Mandatory
Specify the frequency at which this load is to be applied. Select one from the list box.
Loads can be applied at any of three possible frequencies:
Allocation: This will mean that you will be charging the investor a fee or giving an
incentive at the time of allocation of units. Allocation time loads cannot be designated
for any transaction types other than IPO, subscription, redemption, and switch (both in
and out legs).
Transaction: The charge (fee) or incentive will be applied at the time the transaction
request is accepted from the investor. Typically, a transaction time fee could be the
counter fees.
Post Allocation: This frequency is applicable typically to the Capital Gains Tax, which
may be applied after allocation, on the gross amount.
Note
Capital Gains Tax may also be designated as an allocation time load.
Load To Price
Optional
Select ‘Yes’ in this field indicate that this load is to be loaded to the base price.
VAT Applicable
1 Character Maximum, Mandatory
Select ‘Yes’ in this field to indicate that the Load to Price is applicable. Therefore VAT Load
to Price is dependent on Load to Price.
From Entity Type
Mandatory
Specify the entity that bears this load. Select the Entity Type from the following list given in
the drop down menu.
AMC
Agent
Broker
Distributor
Fund
Registrar
Trustee
Unit Holder
To Entity Type
Mandatory
Specify the entity that will be recipients of the load. Select the Entity Type from the list given
in the drop down menu. The options in the list are similar to those in the From Entity Type field
list.
6-19
Mandatory
Mandatory
Select Mandatory or Optional to specify whether the load is mandatory or optional, from the
options provided.
Priority Number
5 Character Maximum, Alphanumeric, Mandatory
Enter a value to specify the priority number in case of optional loads.
For a mandatory load, the priority number is set to 0 and for an optional load the priority
number should be unique i.e. for a given load group, no more than one load can have the
same priority number.
GL Account Code
Alphanumeric, Optional
Specify the code that will be used to map this load to its corresponding charge code in the
external system.
When transaction information is exported to an external system, if separate books of accounts
are to be posted for different loads, this code will be used to identify this load information in
the export data.
Contra Account Code
Alphanumeric, Optional
Specify the code that will be used to identify the second leg of accounting entries for any
transaction, in the event of exporting of transaction information to an external system.
Send for GL Interface
Optional
Select ‘Yes’ in this field to indicate that accounting entries due only to the selected load must
be posted to the external asset management system, for the load group.
Debit or Credit
Optional
Indicate whether the applied load would result in a debit or credit for the funds in the load
group. This data is captured for information purposes only and has no processing implications
in the system database. This is to be used in case of an interface with an Asset Management
system where details for calculation of NAV would need to be uploaded.
Based on Income
Optional
If the load is a Capital Gains Tax, and it is to be applied based on the gross amount after
allocation, choose the Capital Gains – Gross option in this field, for such a load.
Slab Basis
Alphanumeric, Optional
Indicate the basis on which the slabs will be reckoned for an amount-based load that you are
designating as applicable for the load group. You can indicate that the slabs must be
reckoned on a gross amount or a net.
6-20
Round Off / Down / Up
Mandatory
Indicate the rounding options for the load amount for the selected transaction type, for the
load group.
Choose ‘Round Up’ to indicate rounding the value at the precision decimal place to the
next higher numeral.
Choose ‘Round Off’ to indicate normal rounding at the precision decimal.
Choose ‘Round Down’ to indicate truncation of the value at the precision decimal place.
For example,
Let us suppose that the load amount computed for a subscription transaction is 10.561234,
and that this value must be rounded to the 3rd decimal place.
If you indicate rounding up, then the value reckoned would be 10.562.
If you indicate rounding off, then, applying normal rounding off rules, the value reckoned
would be 10.561.
If you indicate rounding down or truncation, then the value would be truncated as it is, in the
3rd decimal place, and it would be reckoned as 10.561.
No. of Decimals
1 Character Maximum, Numeric, Mandatory
Indicate the maximum number of decimals that would be reckoned for rounding precision, for
the load amount.
Differential Fee?
Optional
Select ‘Yes’ in this field to indicate that the differential fee in the case of switch transactions
for any fund is to be applicable, for the load group.
Price Add In
Optional
Select this option to indicate that the add-in factor is to be applicable for computing the return
value for the load, for the selected transaction type. The add-in factor is used to arrive at the
return value for a load, at the time of allocation.
Indexation on CGT
Optional
Select this option to indicate that the indexation of CGT is applicable for the selected
transaction type.
For more information, refer the chapter ‘The Allocation Process’ in the Allocation User
Manual.
6.2.3
Group Load Mapping - View Section
When you enter the Group ID, the Rule Effective Date and the transaction type for the
selected load group, the details of the setups that have already been made for any transaction
types, if any, are displayed in the ‘Fund Loads Mapped to the Transaction box’.
6-21
The following information is displayed in the box for each transaction type, and clicking on the
row of each transaction type will cause the group load mapping profile for that transaction type
to be displayed in the lower portion of the screen, and in each of the tabs.
Load ID
Display Only
The ID of the Load that has already been mapped to this transaction type for this load group
is displayed here.
Loaded to Price
Display Only
If the load that has been mapped is loaded to price, it is indicated here.
From and To Entities
Display Only
The From and To entities for the Load that has been mapped are displayed here.
6.2.4
Group Load Mapping Summary Screen
You can perform the following operations in the Group Load Mapping Summary screen:
6.2.4.1
Retrieving Record in Group Load Mapping Summary Screen
You can retrieve a previously entered record in the Summary Screen, as follows:
Invoke the ‘Group Load Mapping Summary’ screen by typing ‘UTSGRPDF’ in the field at the
top right corner of the Application tool bar and clicking on the adjoining arrow button and
specify any or all of the following details in the corresponding fields:
Group ID
Load ID
Rule Effective Date
Click ‘Search’ button to view the records. All the records with the specified details are retrieved
and displayed in the lower portion of the screen.
Note
You can also retrieve the individual record detail from the detail screen by querying in the
following manner:
–
Press F7.
–
Input the Group ID.
–
Press F8.
You can perform Edit, Delete, Amend, Authorize, Reverse, Confirm operations by selecting
the operation from the Action list. You can also search a record by using a combination of %
and alphanumeric value.
Example
You can search the record for Group ID by using the combination of % and alphanumeric
value as follows:-
6-22
Search by A%: The system will fetch all the records whose Group ID starts from
Alphabet ‘A’. For example, AGC17, AGVO6, AGC74 and so forth.
Search by %7: The system will fetch all the records whose Group ID ends by numeric
value’ 7’. For example, AGC17, GSD267, AGC77 and so forth.
6.2.4.2
Search by %17%: The system will fetch all the records whose Group ID contains the
numeric value 17. For example, GSD217, GSD172, AGC17 and so forth.
Search by %: The system will fetch all the records.
Editing Group Load Mapping
You can modify the details of a Group Load Mapping that you have already entered into the
system, provided it has not been subsequently authorized. You can perform this operation as
follows:
6.2.4.3
Invoke the Group Load Mapping Summary screen from the Browser.
Select the status of the record that you want to retrieve for modification in the Authorized
field. You can only modify records that are unauthorized. Accordingly, choose the
unauthorized option.
Specify any or all of the details in the corresponding fields to retrieve the record that is
to be modified.
Click ‘Search’ button. All unauthorized records with the specified details are retrieved
and displayed in the lower portion of the screen.
Double click the record that you want to modify in the list of displayed records. The
Group Load Mapping Detail screen is displayed.
Select Unlock Operation from the Action list to modify the record. Modify the necessary
information.
Click Save to save your changes. The Group Load Mapping Detail screen is closed and
the changes made are reflected in the Group Load Summary screen.
Viewing Group Load Mapping
To view a record that you have previously input, you must retrieve the same in the Group Load
Mapping Summary screen as follows:
Invoke the Group Load Mapping Summary screen from the Browser.
Select the status of the record that you want to retrieve for viewing in the Authorization
Status field. You can also view all records that are either unauthorized or authorized
only, by choosing the Unauthorized/ Authorized option.
6-23
6.2.4.4
Specify any or all of the details of the record in the corresponding fields on the screen.
Click ‘Search’ button. All records with the specified fields are retrieved and displayed in
the lower portion of the screen.
Double click the record that you want to view in the list of displayed records. The Group
Load Mapping Detail screen is displayed in View mode.
Deleting Group Load Mapping
You can delete only unauthorized records in the system. To delete a record that you have
previously entered:
6.2.4.5
Invoke the Group Load Mapping Summary screen from the Browser.
Select the status of the record that you want to retrieve for deletion.
Specify any or all of the details in the corresponding fields on the screen.
Click ‘Search’ button. All records with the specified fields are retrieved and displayed in
the lower portion of the screen.
Double click the record that you want to delete in the list of displayed records. The
Group Load Mapping Detail screen is displayed.
Select Delete Operation from the Action list. The system prompts you to confirm the
deletion and the record is physically deleted from the system database.
Authorizing Group Load Mapping
An unauthorized Group Load Mapping must be authorized in the system for it to be
processed. To authorize a record:
Invoke the Group Load Mapping Summary screen from the Browser.
Select the status of the record that you want to retrieve for authorization. Typically,
choose the unauthorized option.
Specify any or all of the details in the corresponding fields on the screen.
Click ‘Search’ button. All records with the specified details that are pending
authorization are retrieved and displayed in the lower portion of the screen.
Double click the record that you wish to authorize. The Group Load Mapping Detail
screen is displayed. Select Authorize operation from the Action List.
When a checker authorizes a transaction, details of validation, if any, that were over ridden
by the maker of the transaction during the Save operation are displayed. If any of these
overrides results in an error, the checker must reject the transaction.
6.2.4.6
Amending Group Load Mapping
After a Group Load Mapping is authorized, it can be modified using the Unlock operation from
the Action List. To make changes to a record after authorization:
Invoke the Group Load Mapping Summary screen from the Browser.
Select the status of the record that you want to retrieve for authorization. You can only
amend authorized records.
Specify any or all of the details in the corresponding fields on the screen.
Click ‘Search’ button. All records with the specified details that are pending
authorization are retrieved and displayed in the lower portion of the screen.
Double click the record that you wish to authorize. The Group Load Mapping Detail
screen is displayed in amendment mode. Select Unlock operation from the Action List
to amend the record.
Amend the necessary information and click on Save to save the changes.
6-24
6.2.4.7
Authorizing Amended Group Load Mapping
An amended Group Load Mapping maintenance must be authorized for the amendment to be
made effective in the system. The authorization of amended records can be done only from
Fund Manager Module and Agency Branch module.
The subsequent process of authorization is the same as that for normal transactions.
6.2.5
Copying Attributes
If you want to create a new Group Load Mapping with the same attributes of an existing
maintenance, you can copy the attributes of an existing Group Load mapping to a new one.
To copy the attributes:
6.2.5.1
Retrieve the record whose attributes the new Group Load mapping should inherit. You
can retrieve the record through the Summary screen or through the F7-F8 operation
explained in the previous sections of this chapter.
Click on Copy.
Indicate the ID for the new Group Load mapping. You can, however, change the details
of the new maintenance.
Retrieving Group Load Mapping Record
To perform any operation on a group load mapping record, you must first retrieve the record
from the database in the Summary screen.
To retrieve a record for viewing, select View in the Operation field. Specify the Group ID and
the Rule Effective Date of the group whose record you want to retrieve, and click OK. (In the
Operation field, you must select the operation that you want to perform, before you specify the
search criteria.)
All the group mapping records that match your search criteria are displayed in the lower list
portion of the screen.
6-25
7. Maintenance for IRA Products
7.1
Introduction
Your AMC could offer investors the facility of maintaining and processing retirement plans.
7.2
Features of Individual Retirement Accounts
One of the typical modes of retirement planning that is opted for by investors is investing in
mutual funds through an Individual Retirement Account (IRA). The contributions of an investor
into an IRA could be either taxed, or could be non-taxable, depending upon the type of IRA.
The income on the assets in an IRA is typically tax-sheltered.
An investor obtains an IRA by purchasing or subscribing to a retirement plan under one of the
retirement investment products offered by your company. Investment into an IRA could be
increased over a period of time during the tenor of the plan, either through premiums or
additional investments, or both. The investor could also be paid annuity, if such a feature is
available in the plan.
Generally, a retirement age is set for a retirement plan, so that when the investor reaches the
retirement age, withdrawals can be availed. After the retirement age is reached, no further
additional investments or premiums can be contributed to the plan, but regular withdrawals
and annuities, if applicable, are allowed. In the case of Roth IRA Retirement Plans,
contributions can be made after retirement age. The age up to which contributions can be
made is the retirement age at which withdrawals are required.
The contribution made by an investor into an IRA plan is directed into the specific fund opted
for by the investor, in the underlying portfolio of funds defined for the product under which the
plan was purchased.
The income derived from investment into the product portfolio could be reinvested back into
the portfolio, or received as payment. The income could be taxed under applicable laws, or
tax-sheltered, depending upon the tax laws of the country and the guidelines of the plan.
This chapter explains the manner in which you can configure Oracle FLEXCUBE Investor
Servicing to process investment in IRA plans for an investor.
7.2.1
Features of IRA Processing
In Oracle FLEXCUBE Investor Servicing, you can maintain and process investments into
IRA’s for an investor. This would involve the following processes:
You can maintain the different types of retirement products offered by your organization. Each
type can be characterized by different attributes. You can define patterns of investment in
IRA’s and fund portfolios for each product, by applying the specifications made for a product
type.
Investment transactions into IRA’s can also be processed, such as the initial investment,
additional investments, premiums and partial or complete withdrawals.
Distribution of the income derived from investment into the funds portfolio is also managed in
the system. You can configure the system to process the income as desired by investors,
either through reinvestment or payment, or a combination of both.
7-1
7.2.2
Maintenance for IRA Processing
Funds
You must define IRA processing rules for each fund of your AMC into which you wish to allow
IRA investments. These guidelines include whether IRA investments are allowed into the
fund, and the volume limits that would apply to such IRA transactions into the fund.
For a detailed description of the rules maintained for funds, which pertain to IRA
transactions, refer the chapter Setting Up Funds, in the Fund Setup user manual.
Product Types
You should maintain the different types of products that your AMC offers to investors, for IRA
transactions. You can define different attributes for each product type.
Products
You must define each of the products that your AMC offers, with the processing guidelines
that will apply to any plans or policies purchased under the product. As with product types,
you can tailor the attributes of the products to suit your requirement
Typically, when you define a product, you associate the funds that would be part of the
product portfolio. Processing guidelines for IRA transactions must be defined for each of the
funds that you have associated.
7.2.3
Plans for IRA
When an investor buys an IRA plan in one of the retirement products floated by your AMC,
you can maintain the details of the plan in the system. All the processing guidelines and
details maintained for the product under which the plan was purchased will apply to the plan.
You can, however, make appropriate changes as necessary, to the guidelines when you
maintain the details of the plan in the system.
7.2.4
Investment Transactions in IRA Plans
An investor who subscribes to a retirement plan subscribes an initial amount, which may or
may not be increased during the tenor of the plan. Contributing additional investments during
the tenor of the plan can increase in the investment amount, provided additional investments
are allowed for the product in which the plan is purchased. If the product involves a product
type for which premiums are also applicable, the investment can also be increased by
premiums.
Therefore, the following inflow investments could occur into an IRA plan:
An initial investment
Additional investment (if allowed for the product in which the plan is subscribed)
Premiums (if premiums are allowed for the product in which the plan is subscribed)
Earnings from the investment could be availed through partial or complete withdrawals, or
through annuities, provided withdrawals and annuities are applicable for the product in which
the plan is subscribed.
You can enter and process each of these transactions in the system.
Each of the transactions, when requested, could be directed into any of the funds opted for
by the investor, in the product under which the plan was purchased. All the transaction
processing guidelines specified for the product (and the plan) will be applied to the
transaction. Also, the limits maintained for the fund in which the transaction is requested, will
also be validated.
For further information refer to the Life and Endowment Product User Manual
7-2
8. Function ID Glossary
U
UTDAHPRM .......................5-30
UTDBKREC .....................5-108
UTDCOAC .........................5-97
UTDCOACT .......................5-71
UTDCORAC .......................5-96
UTDFALMT ..........................5-8
UTDFAR ............................5-64
UTDFCPMF .......................5-47
UTDFICRM ........................3-63
UTDFNDAC .......................5-52
UTDFNDFM .........................2-2
UTDFNDRL .................. 3-3, 3-6
UTDFNENT ..........................5-2
UTDFNSWR ......................5-12
UTDFPHOL ........................5-40
UTDFPRIC .........................5-20
UTDGRPCH .........................6-9
UTDGRPDF .........................6-4
UTDLDGRP .......................6-17
UTDLOIPR .........................6-16
UTDPFMAP .......................5-58
UTDPRDTC .......................5-35
UTDSCDEF .........................2-7
UTDSUBFN .......................2-11
UTDTDCYL ......................5-123
UTDWRFND ......................5-59
UTSAHPRM .......................5-31
UTSBKREC .....................5-115
UTSCOACT .......................5-92
UTSFALMT ..........................5-9
UTSFAR .............................5-67
UTSFCPMF .......................5-49
UTSFNDAC .......................5-55
UTSFNDFM .........................2-4
UTSFNENT ..........................5-4
UTSFNSWR .......................5-17
UTSFPHOL ........................5-41
UTSFPRIC .........................5-27
UTSGRPDF .......................6-22
UTSPRDTC .......................5-36
UTSSCDEF ..........................2-8
UTSTDCYL ......................5-125
UTSWRFND ......................5-60
8-1
Fund Setup User Guide
April 2014
Oracle Financial Services Software Limited
Oracle Park
Off Western Express Highway
Goregaon (East)
Mumbai, Maharashtra 400 063
India
Worldwide Inquiries:
Phone: +91 22 6718 3000
Fax:+91 22 6718 3001
www.oracle.com/financialservices/
Copyright © 2007, 2014, Oracle and/or its affiliates. All rights reserved.
Oracle and Java are registered trademarks of Oracle and/or its affiliates. Other names may be trademarks of their respective
owners.
U.S. GOVERNMENT END USERS: Oracle programs, including any operating system, integrated software, any programs installed
on the hardware, and/or documentation, delivered to U.S. Government end users are "commercial computer software" pursuant to
the applicable Federal Acquisition Regulation and agency-specific supplemental regulations. As such, use, duplication, disclosure,
modification, and adaptation of the programs, including any operating system, integrated software, any programs installed on the
hardware, and/or documentation, shall be subject to license terms and license restrictions applicable to the programs. No other
rights are granted to the U.S. Government.
This software or hardware is developed for general use in a variety of information management applications. It is not developed or
intended for use in any inherently dangerous applications, including applications that may create a risk of personal injury. If you use
this software or hardware in dangerous applications, then you shall be responsible to take all appropriate failsafe, backup,
redundancy, and other measures to ensure its safe use. Oracle Corporation and its affiliates disclaim any liability for any damages
caused by use of this software or hardware in dangerous applications.
This software and related documentation are provided under a license agreement containing restrictions on use and disclosure and
are protected by intellectual property laws. Except as expressly permitted in your license agreement or allowed by law, you may
not use, copy, reproduce, translate, broadcast, modify, license, transmit, distribute, exhibit, perform, publish or display any part, in
any form, or by any means. Reverse engineering, disassembly, or decompilation of this software, unless required by law for
interoperability, is prohibited.
The information contained herein is subject to change without notice and is not warranted to be error-free. If you find any errors,
please report them to us in writing.
This software or hardware and documentation may provide access to or information on content, products and services from third
parties. Oracle Corporation and its affiliates are not responsible for and expressly disclaim all warranties of any kind with respect
to third-party content, products, and services. Oracle Corporation and its affiliates will not be responsible for any loss, costs, or
damages incurred due to your access to or use of third-party content, products, or services.