Download HPS 749-R -ITA-
Transcript
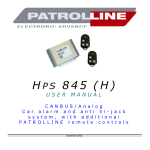
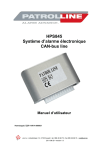
USER MANUAL
HPS 840 PTL (H)
C A N B U S
C A R A L A R M
Working
ALARM SYSTEM ARMING
Push the CLOSING button of the remote-control. The arming will be confirmed by:
•
Blinker flashings based on the lock features of the vehicle
•
2 beeps (if it is programmed)
•
Switching on of the LED on the dashboard (fixed light for 5 seconds).
•
Activation of electric engine immobilization. (if it is connected)
•
Activation of modules output (windows lifter, ultrasonic sensors, etc.).
•
The CDL close the doors
ALARM SYSTEM DISARMING
Push the OPENING button of the remote-control. The disarming will be confirmed by:
•
1 beep (if it is programmed)
•
Switching off of the LED on the dashboard.
•
Deactivation of electric engine immobilization.
•
Deactivation of modules output (windows lifter, ultrasonic sensors, etc.).
•
The CDL open the doors
Neutral Time and Status of Alert
Once the signalling of arming is over, the alarm will stay for 5 seconds into “neutral time” condition,
signalled by the fixed light of the LED. After 5 seconds, another flashing of the blinkers and the flashing
of the LED of the dashboard will indicate that the system supervises the vehicle and is ready to signal
the alarms.
Alarm
In case of attempt to brake in, the system will emit an optic-acoustic signal (flashing of the blinkers and
sound of the horn) or a sound of the siren (if installed) for 30 seconds repeated.
To stop the alarm signalling, push the OPENING button of the remote control.
Exclusion of the Siren
Through the ignition key it is possible to exclude the functioning of the horn or the siren.
With the alarm disarmed (CDL opened), turn on and off the ignition key for 3 times and, within 30
seconds, push the original remote control to close the CDL of the vehicle.
From this moment, the central unit will signal the attempt to brake in by the flashing of the blinkers
only.
Warning! The exclusion of the siren is valid for only one cause of trigger. If you switch OFF
the alarm with the remote control, the alarm will be restored automatically in the original
state, and for the next switching ON it will react with beep and acoustic signals for every
cause.
IGNITION KEY
On Off On Off On Off
Push the original remote
control to close the doors
With CDL open
(LED off)
1st time
2nd time
within 30 seconds
3rd time
Memory of Alarm
If the central unit records one or more causes of alarm, they are signalled, when disarming, through the
LED. To verify the type of alarm, check the number of flashings of the LED with the table below.
N. flashings of the LED
CAUSE
2
SIREN TRUNK BUTTON (IF
INSTALLED)
3
ULTRASONIC SENSOR ALARM (INPUT BLUE/RED
4
SHOCK SENSOR
5
DOORS OPENING (SIGNALLED
6
BONNET OPENING (SIGNALLED
7
EXTRA SENSORS ALARM (INPUT BLUE
8
IGNITION PROTECTION
BY
WIRE)
CAN-BUS)
BY
CAN-BUS)
WIRE)
Safety function
Door protection
Motor blokk
Shock sensor
Ignition protection
Ultrasonic
Door, trunk and bonnet open sense
Prevent the start of the motor of the door.
Sense the broke of the door’s window.
Sense the ignition of the car.
Optional! Sense the moving in the passenger compartment.
PIN code
The PIN code is for that the user can switch off the alarm, if the remote control or the alarm get
wrong or the battery discharged.
In all boxes of the alarms can be found an envelop, which contains a secret PIN code.
Only the user can open this envelop. All alarms have different PIN code! We suggest for
the user as for the perfect safety to change the original set PIN code for a new, own one.
Please follow the next instructions in the followings chapters.
If you have got any further problem in conncetion of the PIN code, please look for only
your importeur!
Open only by the
USER!!!
The code is a 3-figures number (from firm is: 1-2-3) and must be composed with the ignition key of
the vehicle by following this procedure:
With the alarm armed, open the driver’s door with key. The alarm will trigger.
1. Within 30 seconds after opening the door, turn on and off the ignition key of the vehicle for 3
times.
If the operation is correct, the LED of the dashboard switches on for 5 seconds.
IGNITION KEY
With the alarm armed
(LED on) open the
CDL of the vehicle
The alarme will sound
and within 30 seconds
2.
On Off On Off On Off
1st time
2nd time
Signalling LED
The alarm switches on
the LED for 5 seconds
3rd time
When the LED switches ON (5 seconds), turn on the ignition key of the vehicle.
The LED of the dashboard starts flashing.
3.
Count the flashings of the LED. After the first flashing, turn off the ignition key (first figure “1” of
the firm code).
The LED switches on for 5 seconds.
LED on for
5 seconds
Turn on the
ignition key
The LED starts
flashing
On
Turn off the
ignition key
The LED switches on
for 5 seconds
Off
First figure: 1
4.
Before the LED switches off (5 seconds), turn on again the ignition key.
The LED of the dashboard starts flashing.
5.
Count the flashings of the LED. After the second flashing, turn off the ignition key (second figure
“2” of the firm code).
The LED switches on again for 5 seconds.
LED on for
5 seconds
Turn on the
ignition key
On
The LED starts
flashing
Turn off the
ignition key
The LED switches on
for 5 seconds
Off
Second figure: 2
6.
7.
Before the LED switches off (5 seconds), turn on again the ignition key.
The LED of the dashboard starts flashing.
Count the flashings of the LED. After the third flashing, turn off the ignition key (third figure of
the firm code).
The LED switches on again for 5 seconds.
LED on for
5 seconds
Turn on the
ignition key
The LED starts
flashing
Turn off the
ignition key
On
The alarm switches off
and the LED starts flashing
Off
Third figure: 3
At the end of the third figure, if the code is correct the alarm disarm and the led start flashing.
During this phase (LED flashing) it is not possible to arm the alarm through the remote control of the
vehicle.
To enable again the normal working of the alarm, while the LED is flashing, turn on and off the
ignition key of the vehicle for 3 times.
IGNITION KEY
With the LED flashing
On Off On Off On Off
signalling LED
turn on and off the
ignition key 3 times
1st time
2nd time
The led stops
flashing
3rd time
If the operation is correct, after the third figure, the LED will stop flashing.
From this moment, the alarm will start its normal working.
Changing the Unlocking Code
This operation permits to customize the emergency code – from 1-2-3 to 2-1-2 to the one wanted – by
following this procedure:
Through the ignition key, compose the old pin code as described in the previous paragraph.
IGNITION KEY
On Off On Off On Off
With the alarm off
turn on and off the
ignition key 3 times
signalling LED
The alarm switches on
the LED for 5 seconds
1st time
2nd time
3rd time
To change the PIN code follow the next procedure:
1. With the alarm armed, turn on the ignition key 3 times, then turn off the ignition key.
The LED switches on fixed for 5 seconds.
2.
When the LED switches on (5 seconds), turn on the ignition key. The LED starts flashing.
3.
Count the flashings of the LED. After the first flashing turn off the ignition key (the first figure of
the PID code is “1”).
The LED switches on fixed for 5 seconds.
LED on for
5 seconds
Turn on the
ignition key
The LED starts
flashing
On
Turn off the
ignition key
The LED switches on
for 5 seconds
Off
First figure: 1
4. Before the LED switches off (5 seconds), turn on the ignition key. The LED starts flashing.
Once reached the flashings of the LED corresponding to the figure that must me memorized, turn off
the ignition key.
If the operation is correct, after the third figure the alarm switches on the LED for 10 seconds
confirming that the new PIN CODE has been memorized and replaced the previous one.
5.
Count the flashings of the LED. After the second flashing turn off the ignition key (the second
figure of the PIN code is “2”).
LED on for
5 seconds
Turn on the
ignition key
The LED starts
flashing
On
Turn off the
ignition key
The LED switches on
for 5 seconds
Off
Second figure: 2
6.
Before the LED swicthing OFF (5 seconds) turn on the ignition key. The LED starts flashing.
7.
Count the flashings of the LED. After the third falshing turn off the ignition key (the third figure of
the PIN code is “3”. The LED swicthes on fixed for 5 seconds.
LED on for
5 seconds
Turn on the
ignition key
The LED starts
flashing
On
Turn off the
ignition key
Off
The LED switches on
for 10 seconds
New PIN
CODE OK!
Third figure: 3
8. When the LED switches on (5 seconds), turn on the ignition key. The LED starts flashing.
9. Count the flashings of the LED. After the second flashing turn off the ignition key (the first figure of
the new PIN code is “2”). The LED switches on for 5 seconds.
LED on for
5 seconds
Turn on the
ignition key
Turn off the
ignition key
The LED starts
flashing
On
The LED switches on
for 5 seconds
Off
First figure: 2
10. Before the LED switches off (5 seconds), turn on the ignition key. The LED starts flashing.
11. Count the flashings of the LED. After the first flashing turn off the ignition key (the second figure
of the new PIN code is “1”). The LED switches on for 5 seconds.
LED on for
5 seconds
Turn on the
ignition key
The LED starts
flashing
On
Turn off the
ignition key
The LED switches on
for 5 seconds
Off
Second figure: 1
12. Before the LED switches off (5 seconds) turn on the ignition key. The LED starts flashing.
13. Count the flashings of the LED. After the second flashing turn off the ignition key (the third figure
of the new PIN code is “2”. If the procedure is correct, the LED switches on for 10 seconds.
LED on for
5 seconds
Turn on the
ignition key
The LED starts
flashing
On
Turn off the
ignition key
Off
Third figure: 2
The LED switches on
for 10 seconds
ALARM MAINTENANCE
The alarms of our range are based on a very high technology and are characterized by an extreme
reliability. Using some shrewdness it is possible make them living longer and working better:
VEHICLE WASHING: in case the vehicle has to be washed with some high pressure devices (hydro-jet or
similar), it is necessary to protect the alarm before starting the washing procedure. In case of
infiltrations of water caused by using the hydro-jet, the warranty will be automatically annulled.
GENERAL MAINTENANCE: all the repairing operations to the alarm must be done by PATROL LINE centres;
tampering by non authorized staff can compromise the reliability of the device and the safety when
the vehicle is going.
Note:
PATROLLINE KFT
8000 Székesfehérvár Királysor 32. Hungary
Tel-Fax:+36-22/ 317-367, 503-078
E-mail: [email protected]
Web: www.canbusriaszto.hu, www.patrolline.ro,
www.autoalarmcanbus.cz, www.patrolline.eu


