1
Oracle Order Management Suite Implementation Manual Volume 1 Release 11 i July 2001 Part No. A90140-01 Oracle Order Management Suite Implementation Manual, Release 11i Part No. A90140-01 Copyright © 1999, 2000, 2001 Oracle Corporation. All rights reserved. Primary Authors: Ginger Alexander, Francesca Amezquita, Rajeev Bellamkonda, Rajeev Bellamkonda, Reb Bowman, Sagar Boyapati, Zeeshan Butt, Charlene Chandonia, Manish Chavan, Michael Cummings, Shashi Dhar, Sasi Erla, Joshua Gould, Nitin Hase, Jayarama Holla, Matilde Jareno, Nithya Lakshmanan, Nancy Lynn Klokke, Vivian Y. Lee, Maria Matheny, Tony Maxey, Vidyesh Mishra, Tom Myers, Vijay Pillarisetti, Hemalatha Raman, Sumeet Rijhsinghani, Sandy Rota, William Rudge, Jolin Salazar-Kish, Leena Sampemane, Esha Sen, Rohit Shivram, Alok Singh, Renganathan Sreenivasan, Kannan Tarakad, Bonnie Williams, Samuel Wong, John Young, and Jessica Zhang. Contributors: Elizabeth Looney, Kristina Momber, Tom Myers, David Reitan, John Salvini, James Siri The programs are not intended for use in any nuclear, aviation, mass transit, medical, or other inherently dangerous applications. It shall be licensee's responsibility to take all appropriate fail-safe, back up, redundancy and other measures to ensure the safe use of such applications if the Programs are used for such purposes, and Oracle disclaims liability for any damages caused by such use of the Programs. This Program contains proprietary information of Oracle Corporation; it is provided under a license agreement containing restrictions on use and disclosure and is also protected by copyright, patent and other intellectual property law. Reverse engineering of the software is prohibited. Program Documentation is licensed for use solely to support the deployment of the Programs and not for any other purpose. The information contained in this document is subject to change without notice. If you find any problems in the documentation, please report them to us in writing. Oracle Corporation does not warrant that this document is error free. No part of this document may be reproduced or transmitted in any form or by any means, electronic or mechanical, for any purpose, without the express written permission of Oracle Corporation If this Program is delivered to a U.S. Government Agency of the Department of Defense, then it is delivered with Restricted Rights and the following legend is applicable: Restricted Rights Legend Programs delivered subject to the DOD FAR Supplement are “commercial computer software” and use, duplication and disclosure of the Programs shall be subject to the licensing restrictions set forth in the applicable Oracle license agreement. Otherwise, Programs delivered subject to the Federal Acquisition Regulations are “restricted computer software” and use, duplication and disclosure of the Programs shall be subject to the restrictions in FAR 52.227-14, Rights in Data -- General, including Alternate III (June 1987). Oracle Corporation, 500 Oracle Parkway, Redwood City, CA 94065. Oracle is a registered trademark, and Oracle Applications, Oracle Inventory, Oracle e-Commerce Gateway, Oracle Order Management, Oracle Payables, Oracle Purchasing, Oracle Self-Service Purchasing, Oracle Self-Service Web Applications, and Oracle Internet Procurement are trademarks or registered trademarks of Oracle Corporation. Windows NT is a registered trademark of Microsoft Corporation. Other names may be trademarks of their respective owners. Contents Volume 1 Oracle Order Management Suite Implementation Manual, Release 11i Send Us Your Comments ................................................................................................................ xxiii Preface........................................................................................................................................................ xxvi Audience for This Guide.................................................................................................................. xxvi Other Information Sources .............................................................................................................. xxvi Do Not Use Database Tools to Modify Oracle Applications Data........................................ xxxvii 1 Implementing Order Management Introduction ......................................................................................................................................... 1-2 2 Order Management: New Features Introduction ......................................................................................................................................... Architected for e-Business ................................................................................................................ New Features ....................................................................................................................................... Oracle Order Management as a Fulfillment Engine................................................................ Order Capture from Any Source................................................................................................ Reduce Implementation Risk and Lower Cost of Ownership ............................................... A New Look Takes Ease of Use to the Next Level .................................................................. 3 2-2 2-2 2-3 2-3 2-3 2-4 2-4 Shipping Execution: New Features Introduction ......................................................................................................................................... New Features ....................................................................................................................................... Shipping Transaction Form......................................................................................................... Tracking Freight Cost................................................................................................................... Transportation Calendar ............................................................................................................. 3-2 3-2 3-2 3-3 3-3 iii Container Management ............................................................................................................... Enhanced Pick Release................................................................................................................. Over/Under Shipments............................................................................................................... Shipping Exceptions ..................................................................................................................... INTRASTAT/EXTRASTAT (Movement Statistics) ................................................................. Global Packing Slip....................................................................................................................... UPS Integration ........................................................................................................................... Enhanced Pick Slip Grouping Rules ........................................................................................ Document and Label Printer Assignments ............................................................................. Roles and Users........................................................................................................................... Additional Line Status ............................................................................................................... 3-4 3-5 3-8 3-9 3-9 3-9 3-10 3-10 3-11 3-11 3-14 4 Basic Setup Oracle Order Management Recommended Setup........................................................................ 4-3 Order Management Profile Options ............................................................................................. 4-15 Enabling Parameters......................................................................................................................... 4-31 Taxation ............................................................................................................................................... 4-33 Defining Order Management QuickCodes ................................................................................. 4-36 Defining Freight and Special Charge Types................................................................................ 4-38 Overview of Workflows................................................................................................................... 4-50 Defining Workflow Exceptions...................................................................................................... 4-55 Process Automation for Workflows .............................................................................................. 4-56 Viewing Notifications ...................................................................................................................... 4-57 Setting Up Workflow ....................................................................................................................... 4-58 Order Management Workflow Standards.................................................................................... 4-73 Defining Document Sequences for Order Numbering............................................................. 4-83 Defining Order Management Transaction Types ....................................................................... 4-86 Defining Order Import Sources ................................................................................................... 4-102 Overview of Processing Constraints ........................................................................................... 4-104 Defining Processing Constraints ............................................................................................ 4-104 Special Considerations ............................................................................................................. 4-107 Processing Constraints Usage ................................................................................................. 4-108 Defining Validation Templates .................................................................................................... 4-109 Defining Record Sets ..................................................................................................................... 4-112 Overview of Defaulting Rules ..................................................................................................... 4-114 iv Defining Defaulting Rules ........................................................................................................... Overview of Price Lists.................................................................................................................. Defining Price Lists .................................................................................................................. Creating a Price List ................................................................................................................. Deleting a Price List.................................................................................................................. Copying a Price List ................................................................................................................. Adjusting a Price List ............................................................................................................... Adding Items to a Price List.................................................................................................... Overview of Formulas ................................................................................................................... Creating a Pricing Formula ..................................................................................................... Updating Formula Prices ........................................................................................................ Overview of Modifiers .................................................................................................................. Creating a Modifier List........................................................................................................... Creating List Level Qualifiers................................................................................................. Creating Modifier Lines........................................................................................................... Creating Line Level Qualifiers................................................................................................ Attaching Pricing Attributes................................................................................................... Creating a GSA Price List.............................................................................................................. Overview of Agreements............................................................................................................... Creating a Price Agreement .................................................................................................... Overview of Credit Checking ...................................................................................................... Automatic Credit Checking of Orders........................................................................................ Activating Credit Checking .......................................................................................................... Deactivating Credit Checking...................................................................................................... Defining Credit Check Rules ....................................................................................................... iPayment Processing ...................................................................................................................... Defining Sales Credit Types......................................................................................................... Defining Holds ............................................................................................................................... Overview of Attachments ............................................................................................................. Defining Attachment Addition Rules.................................................................................... Defining Document Categories ................................................................................................... Defining Documents in Advance ................................................................................................ Overview of Shipping Tolerances ............................................................................................... Defining Shipping Tolerances ................................................................................................ Internet Customer Portal ............................................................................................................... 4-118 4-126 4-127 4-129 4-132 4-132 4-134 4-136 4-138 4-141 4-144 4-146 4-147 4-149 4-149 4-154 4-155 4-156 4-159 4-159 4-167 4-171 4-173 4-180 4-181 4-184 4-186 4-187 4-191 4-193 4-195 4-197 4-199 4-200 4-203 v 5 Sales Order Process Overview .............................................................................................................................................. Required Setup.................................................................................................................................... Process Steps ........................................................................................................................................ Workflow ............................................................................................................................................ 6 Returns Overview .............................................................................................................................................. Required Setup.............................................................................................................................. Process Flow......................................................................................................................................... Workflow ..................................................................................................................................... 7 8-2 8-2 8-3 8-4 Configure-to-Order Overview .............................................................................................................................................. Required Setup.................................................................................................................................... Process Steps ........................................................................................................................................ Workflow ....................................................................................................................................... Configured Item Workflow....................................................................................................... Related Processes .............................................................................................................................. vi 7-2 7-2 7-3 7-3 Internal Orders Overview .............................................................................................................................................. Required Setup.................................................................................................................................... Process Steps ........................................................................................................................................ Workflow .............................................................................................................................................. 9 6-2 6-2 6-5 6-13 Drop Shipments Overview .............................................................................................................................................. Required Setup.................................................................................................................................... Process Steps ........................................................................................................................................ Workflow .............................................................................................................................................. 8 5-2 5-2 5-4 5-11 9-2 9-3 9-5 9-9 9-11 9-14 10 Introduction to Basic Pricing Overview ............................................................................................................................................ Overview of Basic Pricing............................................................................................................... Definitions ......................................................................................................................................... Feature Highlights ............................................................................................................................ Process Flow for Implementation.................................................................................................. 11 Price Lists Overview ............................................................................................................................................ General Basic Price List Capabilities........................................................................................... Role of precedence in resolving multiple price lists.............................................................. Price List Active Flag ................................................................................................................. Price List Deletion....................................................................................................................... Pricing Attributes - in Pricing Context Flexfield.................................................................... 12 11-2 11-2 11-4 11-5 11-5 11-6 Modifiers Overview ............................................................................................................................................ Implementing Modifiers................................................................................................................. Types of Adjustments ...................................................................................................................... Modifiers: How Do I Define My Product Hierarchy................................................................. Modifiers: How are they qualified? ......................................................................................... Modifier Applications Methods .................................................................................................... Modifier: Additional Controls and Special Considerations................................................. Manual Adjustments........................................................................................................................ Applying Manual Adjustments................................................................................................ 13 10-2 10-2 10-3 10-4 10-7 12-2 12-2 12-2 12-4 12-5 12-6 12-7 12-8 12-8 Agreements Overview of Agreement Features .................................................................................................. Type of Agreement..................................................................................................................... Agreement Revisions ................................................................................................................. Define Special Terms.................................................................................................................. Pricing Agreement Price List and Lines.................................................................................. Customer Items........................................................................................................................... Single Currency........................................................................................................................... 13-2 13-2 13-3 13-3 13-3 13-4 13-4 vii Agreements Setup............................................................................................................................. 13-4 Defining Agreements....................................................................................................................... 13-5 14 GSA Pricing Overview of GSA Features ............................................................................................................. Government Services Pricing Guidelines................................................................................ Minimum Price Floors ............................................................................................................... GSA Pricing = GSA Discount.................................................................................................... GSA Violation.............................................................................................................................. Setup GSA Pricing............................................................................................................................ Defining GSA Pricing...................................................................................................................... List Qualifiers .............................................................................................................................. Modifier Summary ..................................................................................................................... 15 Formulas Overview of Formulas...................................................................................................................... Defining Formulas ...................................................................................................................... Formula SetUp Form.................................................................................................................. Updating Formula Pricing......................................................................................................... 16 14-2 14-2 14-2 14-2 14-3 14-3 14-4 14-6 14-7 15-2 15-2 15-2 15-6 Pricing Profiles Overview ............................................................................................................................................ 16-2 Profile Options .................................................................................................................................. 16-2 Setup Profile Options Summary.................................................................................................... 16-2 17 Using Defaulting Rules in Basic Pricing Overview ............................................................................................................................................ Pricing Date ................................................................................................................................. Agreement ................................................................................................................................... Price List....................................................................................................................................... Currency Code ............................................................................................................................ viii 17-2 17-2 17-2 17-2 17-2 18 Simple Pick & Ship Process Overview ............................................................................................................................................ 18-2 Required Setup.................................................................................................................................. 18-2 Process Steps...................................................................................................................................... 18-3 19 Simple Pick & Ship Process Using Mobile Devices and UPS Overview ............................................................................................................................................ 19-2 Required Setup.................................................................................................................................. 19-3 Process Steps...................................................................................................................................... 19-4 20 Simple Pick & Ship Process Using Containers/LPNs Overview ............................................................................................................................................ 20-2 Required Setup.................................................................................................................................. 20-2 Process Steps ............................................................................................................................... 20-4 21 Multimodal Shipments Overview ............................................................................................................................................ Required Setup.................................................................................................................................. Process Steps...................................................................................................................................... An Example ................................................................................................................................. 22 Hold Management Overview ............................................................................................................................................ Required Setup.................................................................................................................................. Process Flow....................................................................................................................................... Workflow .......................................................................................................................................... 23 21-2 21-2 21-3 21-4 22-2 22-2 22-4 22-14 Oracle Configurator Setup Requirements Overview ............................................................................................................................................ 23-2 Configurator....................................................................................................................................... 23-2 ix 24 Order Import Overview ............................................................................................................................................ Feature Functions and Basic Instruction - What is it? How is it used?................................... Tools/Techniques of Feature - API’s, Workflow.......................................................................... Setup Steps to Implement Order Import ..................................................................................... Loading the Import tables ............................................................................................................... Flags .............................................................................................................................................. Actions Table ..................................................................................................................................... IDs vs. Codes ................................................................................................................................... Matching Changes to Orders ........................................................................................................ Summary/Conclusion..................................................................................................................... 25 The Internet Customer Portal Overview ............................................................................................................................................ Feature Functions and Basic Instruction - What is it? How is it used?................................... Tools/Techniques of Feature - API’s, Workflow.......................................................................... Setup Steps to Implement Feature ................................................................................................ Conclusion.......................................................................................................................................... 26 25-2 25-2 25-4 25-4 25-9 Invoicing Overview ............................................................................................................................................ Feature Functions and Basic Instruction - What is it? How is it used?................................... Invoicing and Fulfillment .......................................................................................................... Discounts...................................................................................................................................... Freight and Other Charges ........................................................................................................ Over and Under Shipments ...................................................................................................... Credit Cards ................................................................................................................................ Notes/Attachments.................................................................................................................... Viewing the Invoice.................................................................................................................... Tools/Techniques of Feature - API’s, Workflow.......................................................................... Setup Steps to Implement Invoicing ............................................................................................ Troubleshooting ................................................................................................................................ Summary/Conclusion....................................................................................................................... x 24-2 24-2 24-6 24-6 24-7 24-7 24-9 24-10 24-10 24-11 26-2 26-3 26-3 26-3 26-3 26-4 26-4 26-4 26-4 26-5 26-6 26-8 26-9 27 Shipping Execution Setup Release Rules..................................................................................................................................... Release Sequence Rules .................................................................................................................. Pick Slip Grouping Rules .......................................................................................................... Shipping Parameters .................................................................................................................. Organization Parameters......................................................................................................... Document Sequencing ............................................................................................................. Generate Document Numbers................................................................................................ Ship Method .............................................................................................................................. Freight Costs.............................................................................................................................. Profile Options ................................................................................................................................ Prerequisites .................................................................................................................................... Containers & Vehicles.............................................................................................................. Concurrent Programs............................................................................................................... 28 Shipping Migration Overview ............................................................................................................................................ Functional Differences ............................................................................................................... Migration: Common Technical Considerations .................................................................... Technical Migration R10.7 to R11i ................................................................................................. Technical Migration R11 to R11i .................................................................................................... Data Not Upgraded.................................................................................................................... 29 27-2 27-2 27-3 27-4 27-12 27-13 27-17 27-18 27-21 27-21 27-21 27-22 27-25 28-2 28-2 28-4 28-5 28-6 28-7 Document Sequencing for Shipping Overview ............................................................................................................................................ Document Categories....................................................................................................................... Defining Document Categories ..................................................................................................... Summary Document Category................................................................................................. Document Sequence......................................................................................................................... Summary Document Sequence................................................................................................. Assign a Document Sequence to a Document Category.......................................................... Summary Assign Category to Sequence ................................................................................. Creating a Bill of Lading ................................................................................................................. Summary Generate Bill of Lading.......................................................................................... 29-2 29-2 29-2 29-4 29-5 29-6 29-7 29-7 29-8 29-12 xi Creating a Packing List .................................................................................................................. 29-13 Summary Generate the Packing Slip ..................................................................................... 29-17 30 Shipping Execution Reports Overview ............................................................................................................................................ Preliminary Setups ........................................................................................................................... Document and Printer Assignment ......................................................................................... Document Categories Definition .............................................................................................. Sequences Definition .................................................................................................................. Document Sequence and Category Assignment.................................................................... Document Sets............................................................................................................................. Shipping Parameters Setups ................................................................................................... Pick Slip Report .............................................................................................................................. Pick Slip Grouping Rules......................................................................................................... Release Rules ............................................................................................................................. Release Sequence Rule ............................................................................................................. Pick Slip Sections ...................................................................................................................... Backorder Reports........................................................................................................................... Backorder Detail Report .......................................................................................................... Backorder Summary Report.................................................................................................... Packing Slip ..................................................................................................................................... Bill of Lading ................................................................................................................................... Mailing Labels................................................................................................................................. Commercial Invoice........................................................................................................................ Vehicle Load Sheet Reports .......................................................................................................... Vehicle Load Sheet Detail........................................................................................................ Vehicle Load Sheet Summary ................................................................................................. 31 30-2 30-2 30-2 30-6 30-6 30-7 30-9 30-11 30-12 30-12 30-13 30-14 30-15 30-17 30-17 30-18 30-19 30-20 30-22 30-23 30-24 30-24 30-25 Order Management Reports Report Name Mapping .................................................................................................................... 31-2 32 Flexfield Migration Descriptive Flexfields ...................................................................................................................... 32-2 xii 33 Migrating Profile Options Profile Options .................................................................................................................................. 33-2 System Parameters Setup ................................................................................................................ 33-8 34 Migrating Cycles to Workflow Overview ............................................................................................................................................ Upgrading Order Types ............................................................................................................ Upgrading Order Number Sources ......................................................................................... Upgrade Strategy for Cycles and Cycle History ......................................................................... Upgrading User Defined Cycle Data....................................................................................... Cycle Action Pre-Requisites.................................................................................................... Upgrading Order Type - Cycle Assignments ............................................................................ Upgrading Cycle History............................................................................................................... Post-Upgrade steps that affect the Cycle History Upgrade .................................................... Cycles Upgrade and other Order Entry features....................................................................... Cycles Upgrade and Security Rules....................................................................................... Glossary ..................................................................................................................................... 34-2 34-2 34-3 34-5 34-6 34-10 34-26 34-27 34-35 34-39 34-39 34-40 Volume 2 Oracle Order Management Suite Implementation Manual, Release 11i Send Us Your Comments .................................................................................................................... iii A Using Workflow in Order Management Overview .............................................................................................................................................. Introduction ......................................................................................................................................... Functional Differences ...................................................................................................................... R11i Features........................................................................................................................................ Flexible and extensible order processes .................................................................................... Automated, Deferred and Manual Transactions ..................................................................... Interactive decision support and exception handling........................................................... Order Management Workflow Standards.................................................................................... Synchronous - Implementing a business function that is automatically executed........... Manual - Implementing a Business Function that Requires User Intervention. ............... Deferred - Implementing a Business Function that is Executed Off-line. .......................... A-2 A-2 A-2 A-4 A-4 A-9 A-10 A-11 A-11 A-12 A-12 xiii Naming Conventions ................................................................................................................. Activity Results ........................................................................................................................... Default Error Process ................................................................................................................. Access Control............................................................................................................................. Using WorkFlow in Order Management...................................................................................... Set up ............................................................................................................................................ Order or Line Business Processes that are Workflow Enabled............................................ Moving Orders and Lines forward in their flows.................................................................. Tracking order status ................................................................................................................. Workflow and other OM function areas ................................................................................. Error handling ............................................................................................................................. Purging Workflow Status Information.................................................................................... Customizing Order and Line Flows .............................................................................................. Guidelines .................................................................................................................................... Examples ...................................................................................................................................... Caveats ......................................................................................................................................... Conclusion.......................................................................................................................................... A-14 A-16 A-17 A-17 A-17 A-17 A-23 A-26 A-28 A-33 A-35 A-36 A-36 A-36 A-38 A-43 A-44 B Data Model Overview Overview .............................................................................................................................................. B-2 The Tables............................................................................................................................................. B-3 Sales Credits ................................................................................................................................ B-22 Price Adjustments....................................................................................................................... B-22 Pricing Attributes........................................................................................................................ B-26 Adjustment Attributes ............................................................................................................... B-26 Adjustment Associations ........................................................................................................... B-27 LOT And Serial Numbers.......................................................................................................... B-28 KEY Order Management Modules ................................................................................................ B-29 Integration Points........................................................................................................................ B-35 Conclusion ................................................................................................................................... B-41 C Using Credit Cards and iPayment Overview .............................................................................................................................................. C-2 Introduction ......................................................................................................................................... C-2 Background .......................................................................................................................................... C-2 xiv Features Provided ............................................................................................................................... IPayment Process.......................................................................................................................... Types of Authorizations .............................................................................................................. Set Up Required.................................................................................................................................. Profile Options .............................................................................................................................. Reports ........................................................................................................................................... Watch Out For............................................................................................................................... C-3 C-3 C-3 C-6 C-6 C-8 C-8 D Defaulting Rules Overview .............................................................................................................................................. D-2 Introduction ......................................................................................................................................... D-2 Background .......................................................................................................................................... D-2 Functional Differences ...................................................................................................................... D-3 Key Enhancements ....................................................................................................................... D-3 Terminology .................................................................................................................................. D-3 Attributes and Entities in Order Management ........................................................................ D-3 Conditions ..................................................................................................................................... D-4 Sequence of Defaulting ................................................................................................................ D-5 Sources of Values.......................................................................................................................... D-5 Dependencies ................................................................................................................................ D-6 Controlling Changes .................................................................................................................... D-8 Reports ........................................................................................................................................... D-8 Watch Out For ...................................................................................................................................... D-9 Creating Conditions ..................................................................................................................... D-9 Defaulting vs. Cascading........................................................................................................... D-10 Migration/Upgrade from SVRS ..................................................................................................... D-10 Example............................................................................................................................................... D-11 Conclusion ......................................................................................................................................... D-12 E Using Processing Constraints Overview .............................................................................................................................................. Introduction ......................................................................................................................................... Background .......................................................................................................................................... Functional Differences ...................................................................................................................... Key Enhancements ....................................................................................................................... E-2 E-2 E-3 E-3 E-4 xv Terminology .................................................................................................................................. E-4 Defining Processing Constraints ................................................................................................ E-5 Defining Validation Templates................................................................................................. E-11 Defining Record Sets .................................................................................................................. E-14 Concurrent Program................................................................................................................... E-16 Report ........................................................................................................................................... E-16 Migration/Upgrade from Security Rules...................................................................................... E-16 Examples ............................................................................................................................................. E-17 Conclusion.......................................................................................................................................... E-21 F Using Transaction Types Overview .............................................................................................................................................. Introduction ......................................................................................................................................... Background .......................................................................................................................................... Functional Differences....................................................................................................................... Key Enhancements ....................................................................................................................... Terminology .................................................................................................................................. Reports............................................................................................................................................ Migration/Upgrade from Order Types............................................................................................ Example................................................................................................................................................. Conclusion.......................................................................................................................................... G Customer Agreements Overview ............................................................................................................................................. Introduction ........................................................................................................................................ Business Needs................................................................................................................................... Major Features .................................................................................................................................... Agreement Types and Agreements .......................................................................................... Price Lists and Agreements........................................................................................................ Track Revisions to Agreements ................................................................................................. Use Agreements on Orders ........................................................................................................ Set up.................................................................................................................................................... Define Agreement Types ............................................................................................................ Define Agreements ...................................................................................................................... Define Order Transaction Types ............................................................................................... xvi F-2 F-2 F-2 F-2 F-3 F-3 F-7 F-8 F-8 F-12 G-2 G-2 G-2 G-3 G-3 G-3 G-4 G-4 G-5 G-5 G-5 G-6 Defaulting Rules and Processing Constraints .......................................................................... G-6 Entering Orders Using Agreements ................................................................................................ G-7 Sales Order UI ............................................................................................................................... G-7 Sales Order Entry.......................................................................................................................... G-7 Reports .................................................................................................................................................. G-7 Using Agreements with Commitments .......................................................................................... G-8 Example................................................................................................................................................. G-8 A Second Example:....................................................................................................................... G-9 Migration/Upgrade .......................................................................................................................... G-10 Conclusion ........................................................................................................................................ G-10 H Freight & Special Charges and Freight Costs Overview .............................................................................................................................................. H-2 Introduction ......................................................................................................................................... H-2 Functional Differences ...................................................................................................................... H-3 Process Flow......................................................................................................................................... H-3 New Features ....................................................................................................................................... H-4 Terminology ......................................................................................................................................... H-4 Calculation Methods .................................................................................................................... H-4 Pricing Setup........................................................................................................................................ H-5 Setting up Freight Cost Types .................................................................................................... H-5 Defining a Pricing Modifier for Freight and Special Charges................................................ H-7 Applying a Manual Line Level Freight Charge on an Order................................................. H-9 Setting up Automatic Line Level Freight Charges .................................................................. H-9 Applying an Automatic Line Level Freight Charge on an Order ....................................... H-10 Setting up Freight and Special Charges For COST to CHARGE conversion .................... H-11 Assigning Actual Freight Costs at Ship Confirmation.......................................................... H-15 Confirm Freight Costs to Freight Charges Conversion ........................................................ H-16 Invoicing the Order with Freight Charges.............................................................................. H-16 Freight Costs not included as Freight Charges ...................................................................... H-17 Freight and Special Charges for Returns ................................................................................ H-17 Other Business Scenarios................................................................................................................ H-18 Conclusion ......................................................................................................................................... H-25 xvii I Scheduling Overview ............................................................................................................................................... Introduction .......................................................................................................................................... Background ........................................................................................................................................... Functional Differences........................................................................................................................ Key Enhancements ........................................................................................................................ Terminology ................................................................................................................................... Calculating Available to Promise (ATP) .................................................................................... Scheduling ...................................................................................................................................... Reserving......................................................................................................................................... Unreserving and Unscheduling................................................................................................. Scheduling Groups of Lines ....................................................................................................... Changing Scheduled Lines......................................................................................................... Setup .............................................................................................................................................. Choosing Not to Use Scheduling .............................................................................................. Watch Out For ..................................................................................................................................... Migration/Upgrade .................................................................................................................... Example................................................................................................................................................ Conclusion........................................................................................................................................... I-2 I-2 I-2 I-2 I-3 I-3 I-4 I-6 I-9 I-10 I-10 I-12 I-13 I-15 I-15 I-16 I-16 I-18 J Carrier-Ship Method Relationship and Setup Overview .............................................................................................................................................. Difference Between Release 11 and Release 11i ........................................................................... Freight Carriers.................................................................................................................................... Defining Freight Carriers............................................................................................................. Ship Method ........................................................................................................................................ Carrier- Ship Method Relationship................................................................................................. Find a Carrier-Ship Method Relationship ..................................................................................... Assign a Ship Method..................................................................................................................... J-2 J-2 J-3 J-3 J-4 J-7 J-9 J-10 K Containerization in Shipping Execution Overview .............................................................................................................................................. K-2 Setup Steps........................................................................................................................................... K-2 Define Container Item and Vehicle as Item Types .................................................................. K-3 xviii Define Container Types ............................................................................................................... Create a Container Item............................................................................................................... Create a Vehicle ............................................................................................................................ Define Physical Attributes for Items to Include in Containers (Load Items) ...................... Setup Container-Load Relationships for Containers and Items ............................................ Define Shipping Parameters ....................................................................................................... Define Default Containers for Customer Items ..................................................................... Creating Containers.......................................................................................................................... Packing Items into Containers ....................................................................................................... Manual Packing .......................................................................................................................... Auto-Packing............................................................................................................................... Packing Workbench ................................................................................................................... Additional Functionality................................................................................................................. Assigning Serial Numbers to Containers................................................................................ Generating a Loading Sequence for Deliveries/Containers ................................................ K-3 K-4 K-6 K-7 K-8 K-9 K-11 K-12 K-13 K-14 K-14 K-16 K-19 K-19 K-19 L Fulfillment Overview .............................................................................................................................................. Introduction ......................................................................................................................................... Terminology .................................................................................................................................. How it Works ................................................................................................................................ Setup ............................................................................................................................................... Watch Out For ...................................................................................................................................... Examples............................................................................................................................................... Example1........................................................................................................................................ Example 2....................................................................................................................................... Conclusion ........................................................................................................................................... L-2 L-2 L-2 L-2 L-3 L-3 L-4 L-4 L-4 L-4 M Upgrading to Order Management Overview ............................................................................................................................................. Documentation References......................................................................................................... Strategy ................................................................................................................................................ Bifurcation of Order Management Upgrade ........................................................................... Intended Users ................................................................................................................................... Steps to Upgrade to Order Management 11i ................................................................................ M-2 M-2 M-2 M-3 M-4 M-4 xix An Insight to Order Management Upgrade.................................................................................. Upgrade Temporary Objects...................................................................................................... Fine Tuning the Order Management Upgrade ........................................................................... Object Sizing files....................................................................................................................... Object Sizing Estimation ........................................................................................................... Conclusion......................................................................................................................................... M-8 M-8 M-14 M-15 M-15 M-16 N Lookups Lookups ................................................................................................................................................ N-2 O Pricing Attribute Seed Data Pricing Attribute Seed Data ............................................................................................................. O-2 P Qualifier Seed Data Qualifier Seed Data ............................................................................................................................ P-2 Q Introduction to CBO Troubleshooting in R11i Introduction ........................................................................................................................................ Objectives ...................................................................................................................................... Overview....................................................................................................................................... The Optimizer .................................................................................................................................... CBO vs. RBO....................................................................................................................................... CBO Operation............................................................................................................................. COSTS............................................................................................................................................ Statistics....................................................................................................................................... TABLE STATISTICS .................................................................................................................. Troubleshooting ......................................................................................................................... Reference Material ..................................................................................................................... Appendix .................................................................................................................................... B. Types of Access Methods .................................................................................................... C. Execution Plan ...................................................................................................................... The EXPLAIN PLAN Command............................................................................................. D. Parameters that Affect Cost-Based Optimization Plans ................................................ E. Gathering Statistics Concurrent Programs ....................................................................... xx Q-2 Q-2 Q-2 Q-3 Q-4 Q-5 Q-8 Q-10 Q-12 Q-15 Q-17 Q-17 Q-18 Q-21 Q-23 Q-24 Q-26 F. Mandatory CBO init.ora Parameters ................................................................................. Q-29 xxi xxii Send Us Your Comments Oracle Order Management Suite Implementation Manual, Release 11i Part No. A90140-01 Oracle Corporation welcomes your comments and suggestions on the quality and usefulness of this publication. Your input is an important part of the information used for revision. ■ ■ ■ ■ ■ Did you find any errors? Is the information clearly presented? Do you need more information? If so, where? Are the examples correct? Do you need more examples? What features did you like most about this manual? If you find any errors or have any other suggestions for improvement, please indicate the chapter, section, and page number (if available). You can send comments to us in the following ways: ■ ■ ■ E-mail - [email protected] FAX - 650-506-7294 Attn: Oracle Order Management Postal service: Oracle Corporation Oracle Oracle Order Management Documentation 500 Oracle Parkway, 3op6 Redwood Shores, CA 94065 USA If you would like a reply, please give your name, address, and telephone number below. If you have problems with the software, please contact your local Oracle Support Services. xxiii xxiv xxv Preface Audience for This Guide Welcome to Release 11i of the Oracle® Order Management Suite Implementation Manual. This guide assumes you have a working knowledge of the following: ■ The principles and customary practices of your business area. ■ Oracle® Order Management, Oracle Pricing (Basic), Oracle Shipping Execution If you have never used Oracle® Order Management, Oracle Pricing, or Oracle Shipping Execution we suggest you attend one or more of the Oracle® Order Management training classes available through Oracle University. http://ou.us.oracle.com/ ■ The Oracle Applications graphical user interface. To learn more about the Oracle Applications graphical user interface, read the Oracle Applications User Guide. See Other Information Sources for more information about Oracle Applications product information. Other Information Sources You can choose from many sources of information, including online documentation, training, and support services, to increase your knowledge and understanding of Oracle® Order Management. If this guide refers you to other Oracle Applications documentation, use only the Release 11i versions of those guides unless specified otherwise. xxvi Online Documentation All Oracle Applications documentation is available online (HTML and PDF). The technical reference guides are available in paper format only. Note that the HTML documentation is translated into over twenty languages. The HTML version of this guide is optimized for onscreen reading, and you can use it to follow hypertext links for easy access to other HTML guides in the library. When you have an HTML window open, you can use the features on the left side of the window to navigate freely throughout all Oracle Applications documentation. ■ ■ You can use the Search feature to search by words or phrases. You can use the expandable menu to search for topics in the menu structure we provide. The Library option on the menu expands to show all Oracle Applications HTML documentation. You can view HTML help in the following ways: ■ From an application window, use the help icon or the help menu to open a new Web browser and display help about that window. ■ Use the documentation CD. ■ Use a URL provided by your system administrator. Your HTML help may contain information that was not available when this guide was printed. Related User Guides Oracle® Order Management shares business and setup information with other Oracle Applications products. Therefore, you may want to refer to other user guides when you set up and use Oracle® Order Management. You can read the guides online by choosing Library from the expandable menu on your HTML help window, by reading from the Oracle Applications Document Library CD included in your media pack, or by using a Web browser with a URL that your system administrator provides. If you require printed guides, you can purchase them from the Oracle store at http://oraclestore.oracle.com. xxvii User Guides Related to All Products Oracle Applications User Guide This guide explains how to navigate the system, enter data, and query information, and introduces other basic features of the GUI available with this release of Oracle® Order Management (and any other Oracle Applications product). You can also access this user guide online by choosing Getting Started and Using Oracle Applications from the Oracle Applications help system. Oracle Alert User Guide Use this guide to define periodic and event alerts that monitor the status of your Oracle Applications data. Oracle Applications Implementation Wizard User Guide If you are implementing more than one Oracle product, you can use the Oracle Applications Implementation Wizard to coordinate your setup activities. This guide describes how to use the wizard. Oracle Applications Developer’s Guide This guide contains the coding standards followed by the Oracle Applications development staff. It describes the Oracle Application Object Library components needed to implement the Oracle Applications user interface described in the Oracle Applications User Interface Standards. It also provides information to help you build your custom Oracle Developer forms so that they integrate with Oracle Applications. Oracle Applications User Interface Standards This guide contains the user interface (UI) standards followed by the Oracle Applications development staff. It describes the UI for the Oracle Applications products and how to apply this UI to the design of an application built by using Oracle Forms. User Guides Related to This Product Oracle Applications Demonstration User’s Guide This guide documents the functional storyline and product flows for Vision Enterprises, a fictional manufacturer of personal computers products and services. As well as including product overviews, the book contains detailed discussions and xxviii examples across each of the major product flows. Tables, illustrations, and charts summarize key flows and data elements. Oracle Assets User’s Guide If you install Oracle Assets, you can use this manual to add assets and cost adjustments directly into Oracle Assets from invoice information in Payables. Oracle Bills of Material User’s Guide This guide describes how to create various bills of materials to maximize efficiency, improve quality and lower cost for the most sophisticated manufacturing environments. By detailing integrated product structures and processes, flexible product and process definition, and configuration management, this guide enables you to manage product details within and across multiple manufacturing sites. Oracle Business Intelligence System Implementation Guide This guide provides information about implementing Oracle Business Intelligence (BIS) in your environment. BIS 11i User Guide Online Help This guide is provided as online help only from the BIS application and includes information about intelligence reports, Discoverer workbooks, and the Performance Management Framework. Oracle Capacity User’s Guide This guide describes how to validate a material plan by verifying that there are resources sufficient to perform the planned work for repetitive and discrete jobs. Using finite capacity planning techniques, you learn how to use rough-cut capacity planning to validate a master schedule and capacity planning to validate the material plan. Oracle Cash Management User’s Guide This manual explains how you can reconcile your payments with your bank statements. Oracle Cost Management User’s Guide This guide describes how to use Oracle Cost Management in either a standard costing or average costing organization. Cost Management can be used to cost inventory, receiving, order entry, and work in process transactions. It can also be used to collect transaction costs for transfer to Oracle Projects. Cost Management xxix supports multiple cost elements and multiple subelements. It also provides comprehensive valuation and variance reporting. Oracle e-Commerce Gateway User’s Guide This guide describes how Oracle e-Commerce Gateway provides a means to conduct business with trading partners via Electronic Data Interchange (EDI). Data files are exchanged in a standard format to minimize manual effort, speed data processing and ensure accuracy. Oracle Engineering User’s Guide This guide enables your engineers to utilize the features of Oracle Engineering to quickly introduce and manage new designs into production. Specifically, this guide details how to quickly and accurately define the resources, materials and processes necessary to implement changes in product design. Oracle General Ledger User’s Guide This guide explains how to plan and define your chart of accounts, accounting period types and accounting calendar, functional currency, and set of books. It also describes how to define journal entry sources and categories so you can create journal entries for your general ledger. If you use multiple currencies, use this manual when you define additional rate types, and enter daily rates. This manual also includes complete information on implementing Budgetary Control. Oracle HRMS Documentation Set ■ Using Oracle HRMS - The Fundamentals explains how to set up organizations and site locations. ■ ■ ■ ■ xxx Managing People Using Oracle HRMS explains how to enter and track employee data. Running Your Payroll Using Oracle HRMS explains how to set up payroll, do withholding, run statutory reports, and pay employees. Managing Compensation and Benefits Using Oracle HRMS explains how to set up Total Compensation, including 401(k), health, and insurance plans. Customizing, Reporting, and System Administration in Oracle HRMS explains how customize to the system and design reports. Oracle Inventory User’s Guide This guide describes how to define items and item information, perform receiving and inventory transactions, maintain cost control, plan items, perform cycle counting and physical inventories, and set up Oracle Inventory. Oracle Manufacturing Scheduling User’s Guide This guide describes how to use Oracle Manufacturing Scheduling to view and reschedule single discrete jobs or the entire shop floor. Specifically, this guide details how to easily use the drag and drop functionality to view and reschedule jobs, operations, and resources. Oracle Master Scheduling/MRP and Oracle Advanced Supply Chain Planning User’s Guide This guide describes how to anticipate and manage both supply and demand for your items. Using a variety of tools and techniques, you can create forecasts, load these forecasts into master production schedules, and plan your end-items and their component requirements. You can also execute the plan, releasing and rescheduling planning suggestions for discrete jobs and repetitive schedules. Oracle Order Management User’s Guide This guide describes how to enter sales orders and returns, copy existing sales orders, schedule orders, release orders, create price lists and discounts for orders, and create reports. Oracle Payables User’s Guide This guide describes how accounts payable transactions are created and entered in Oracle Payables. This guide also contains detailed setup information for Oracle Payables. Oracle Pricing User’s Guide This guide describes how to setup modifiers, price lists, formulas, pricing agreements, pricing rules, and pricing of special orders in Oracle Pricing. Oracle Project Manufacturing User’s Guide This guide describes the unique set of features Oracle Project Manufacturing provides for a project-based manufacturing environment. Oracle Project Manufacturing can be tightly integrated with Oracle Projects. However, in addition to Oracle Projects functionality, Oracle Project Manufacturing provides a comprehensive set of new features to support project sales management, project xxxi manufacturing costing, project manufacturing planning, project manufacturing execution and project quality management. Oracle Projects User’s Guide This guide explains how to set up projects for use in project manufacturing and project accounting. Oracle Purchasing User’s Guide This guide describes how to create and approve purchasing documents, including requisitions, different types of purchase orders, quotations, RFQs, and receipts. This guide also describes how to manage your supply base through agreements, sourcing rules and approved supplier lists. In addition, this guide explains how you can automatically create purchasing documents based on business rules through integration with Oracle Workflow technology, which automates many of the key procurement processes. Oracle Quality User’s Guide This guide describes how Oracle Quality can be used to meet your quality data collection and analysis needs. This guide also explains how Oracle Quality interfaces with other Oracle Manufacturing applications to provide a closed loop quality control system. Oracle Receivables User’s Guide Use this manual to learn how to implement flexible address formats for different countries. You can use flexible address formats in the suppliers, banks, invoices, and payments windows. Oracle Release Management User's Guide This manual describes how to manage high volume electronic demand by continually incorporating your customers demand into your order and planning processes. By explaining how to validate, archive, manage and reconcile incoming planning, shipping and production sequence schedules with updates to sales orders and forecasts, it enables you to electronically collaborate with your customers to more accurately manage demand. It also describes how to plan, create and manage trading partner layers for trading partner specific customizations. Oracle Sales and Marketing Connected Client User’s Guide This guide describes how to set up your connected client, manage your account information, manage your database of contacts, and how to record, review and add xxxii information about an account, contact, or opportunity. This guide also describes how to view pending, current, and past customer orders, to create and track responses to promotional campaigns, track the effectiveness of a promotional program, and how to project your progress towards sales goals. Oracle Sales Compensation User’s Guide This guide describes how to categorize your sales revenue, how to define the data you need to Oracle Sales Compensation, and where to collect the data from. Each sales organization has different ways of paying compensation; thus each organization needs different types of data to calculate a compensation payment. This guide also explains how to setup and calculate compensation for a salesperson, adjust for sales credits, and view a salesperson’s performance against their quota. In addition, this guide also explains how to run a variety of reports for individuals or groups of salespeople. Oracle Shipping Execution User’s Guide This guide describes how to set up Oracle Shipping Exection to process and plan your trips, stops and deliveries, ship confirmation, query shipments, determine freight cost and charges to meet your business needs. Oracle Supplier Scheduling User’s Guide This guide describes how you can use Oracle Supplier Scheduling to calculate and maintain planning and shipping schedules and communicate them to your suppliers. Oracle Work in Process User’s Guide This guide describes how Oracle Work in Process provides a complete production management system. Specifically this guide describes how discrete, repetitive, assemble-to-order, project, flow, and mixed manufacturing environments are supported. Oracle Workflow User’s Guide This guide explains how to define new workflow business processes as well as customize existing Oracle Applications-embedded workflow processes. You also use this guide to complete the setup steps necessary for any Oracle Applications product that includes workflow-enabled processes. xxxiii Reference Manuals Oracle Technical Reference Manuals Each technical reference manual contains database diagrams and a detailed description of database tables, forms, reports, and programs for a specific Oracle Applications product. This information helps you convert data from your existing applications, integrate Oracle Applications data with non-Oracle applications, and write custom reports for Oracle Applications products. You can order a technical reference manual for any Oracle Applications product you have licensed. Oracle Release Management Implementation Manual This manual describes the setup and implementation of the Oracle Applications used for the Oracle Automotive solution, including Oracle Release Management and Oracle Automotive. Oracle Manufacturing and Distribution Open Interfaces Manual This manual contains up-to-date information about integrating with other Oracle Manufacturing applications and with your other systems. This documentation includes open interfaces found in Oracle Manufacturing. Oracle Applications Message Reference Manual This manual describes all Oracle Applications messages. This manual is available in HTML format on the documentation CD-ROM for Release 11i. Oracle Project Manufacturing Implementation Manual This manual describes the setup steps and implementation for Oracle Project Manufacturing. Oracle Receivables Tax Manual This manual provides everything you need to know about calculating tax within Oracle Receivables, Oracle Order Management, Oracle sales, and Oracle Web Customers. It includes information about implementation procedures, setup forms and windows, the Oracle Receivables Tax calculation process, tax reports and listings, and open interfaces. xxxiv Oracle Self-Service Expenses Implementation Guide This guide explains in detail how to configure Oracle Self-Service Expenses and describes its integration with Oracle Payable and Oracle Projects. Oracle Self-Service Web Applications Implementation Manual This manual describes the setup steps for Oracle Self-Service Web Applications and the Web Applications dictionary. Oracle Applications Flexfields Guide This guide provides flexfields planning, setup, and reference information for the Oracle® HRMS implementation team, as well as for users responsible for the ongoing maintenance of Oracle Applications product data. This guide also provides information on creating custom reports on flexfields data. Installation and System Administration Guides Oracle Applications Concepts This guide provides an introduction to the concepts, features, technology stack, architecture, and terminology for Oracle Applications Release 11i. It provides a useful first book to read before an installation of Oracle Applications. This guide also introduces the concepts behind, and major issues, for Applications-wide features such as Business Intelligence (BIS), languages and character sets, and self-service applications. Installing Oracle Applications This guide provides instructions for managing the installation of Oracle Applications products. In Release 11i, much of the installation process is handled using Oracle One-Hour Install, which minimizes the time it takes to install Oracle Applications and the Oracle 8i Server technology stack by automating many of the required steps. This guide contains instructions for using Oracle One-Hour Install and lists the tasks you need to perform to finish your installation. You should use this guide in conjunction with individual product user guides and implementation guides. Upgrading Oracle Applications Refer to this guide if you are upgrading your Oracle Applications Release 10.7 or Release 11.0 products to Release 11i. This guide describes the upgrade process in general and lists database upgrade and product-specific upgrade tasks. You must be at either Release 10.7 (NCA, SmartClient, or character mode) or Release 11.0 to xxxv upgrade to Release 11i. You cannot upgrade to Release 11i directly from releases prior to 10.7. Using the AD Utilities Use this guide to help you run the various AD utilities, such as AutoInstall, AutoPatch, AD Administration, AD Controller, Relink, and others. It contains how-to steps, screenshots, and other information that you need to run the AD utilities. Oracle Applications Product Update Notes Use this guide as a reference if you are responsible for upgrading an installation of Oracle Applications. It provides a history of the changes to individual Oracle Applications products between Release 11.0 and Release 11i It includes new features and enhancements and changes made to database objects, profile options, and seed data for this interval. Oracle Applications System Administrator’s Guide This guide provides planning and reference information for the Oracle Applications System Administrator. It contains information on how to define security, customize menus and online help, and manage processing. Oracle Self-Service Purchasing Implementation Manual This manual describes how to set up Oracle Self-Service Purchasing. Self-Service Purchasing enables employees to requisition items through a self-service, Web interface. Oracle Workflow Guide This guide explains how to define new workflow business processes as well as customize existing Oracle Applications-embedded workflow processes. You also use this guide to complete the setup steps necessary for any Oracle Applications product that includes workflow-enabled processes. Training and Support Training We offer a complete set of training courses to help you and your staff master Oracle Applications. We can help you develop a training plan that provides thorough training for both your project team and your end users. We will work with you to organize courses appropriate to your job or area of responsibility. xxxvi Training professionals can show you how to plan your training throughout the implementation process so that the right amount of information is delivered to key people when they need it the most. You can attend courses at any one of our many Educational Centers, or you can arrange for our trainers to teach at your facility. We also offer Net classes, where training is delivered over the Internet, and many multimedia-based courses on CD. In addition, we can tailor standard courses or develop custom courses to meet your needs. Support From on-site support to central support, our team of experienced professionals provides the help and information you need to keep Oracle® HRMS working for you. This team includes your Technical Representative, Account Manager, and Oracle’s large staff of consultants and support specialists with expertise in your business area, managing an Oracle server, and your hardware and software environment. Do Not Use Database Tools to Modify Oracle Applications Data We STRONGLY RECOMMEND that you never use SQL*Plus, Oracle Data Browser, database triggers, or any other tool to modify Oracle Applications tables, unless we tell you to do so in our guides. Oracle provides powerful tools you can use to create, store, change, retrieve, and maintain information in an Oracle database. But if you use Oracle tools such as SQL*Plus to modify Oracle Applications data, you risk destroying the integrity of your data and you lose the ability to audit changes to your data. Because Oracle Applications tables are interrelated, any change you make using an Oracle Applications form can update many tables at once. But when you modify Oracle Applications data using anything other than Oracle Applications forms, you might change a row in one table without making corresponding changes in related tables. If your tables get out of synchronization with each other, you risk retrieving erroneous information and you risk unpredictable results throughout Oracle Applications. When you use Oracle Applications forms to modify your data, Oracle Applications automatically checks that your changes are valid. Oracle Applications also keeps track of who changes information. But, if you enter information into database tables using database tools, you may store invalid information. You also lose the ability to track who has changed your information because SQL*Plus and other database tools do not keep a record of changes. xxxvii About Oracle Oracle Corporation develops and markets an integrated line of software products for database management, applications development, decision support and office automation, as well as Oracle Applications. Oracle Applications provides the E-business Suite, a fully integrated suite of more than 70 software modules for financial management, Internet procurement, business intelligence, supply chain management, manufacturing, project systems, human resources and sales and service management. Oracle products are available for mainframes, minicomputers, personal computers, network computers, and personal digital assistants, enabling organizations to integrate different computers, different operating systems, different networks, and even different database management systems, into a single, unified computing and information resource. Oracle is the world’s leading supplier of software for information management, and the world’s second largest software company. Oracle offers its database, tools, and application products, along with related consulting, education and support services, in over 145 countries around the world. Your Feedback Thank you for using Oracle® Order Management Suite Implementation Manual. We value your comments and feedback. This guide contains a Reader’s Comment Form you can use to explain what you like or dislike about Oracle® Order Management or this Implementation Manual. Mail your comments to the following address or call us directly at (650) 506-7000. Oracle Applications Documentation Manager Oracle Corporation 500 Oracle Parkway Redwood Shores, CA 94065 U.S.A. Or, send electronic mail to [email protected]. xxxviii 1 Implementing Order Management Topics covered in this chapter include: ■ Introduction on page 1-2 Implementing Order Management 1-1 Introduction Introduction Using the Oracle Order Management (OM) Suite, you can enter sales orders, calculate the price of items on order lines, fulfill the orders, for example by shipping the items, and send information to an accounts receivable system so that invoices are created. The core OM products are Oracle Order Management Oracle Shipping Execution (SE) Oracle Pricing These products are included when OM is purchased. Additional products are available which are also integrated with OM, and these include Oracle Advanced Pricing Oracle Configurator Oracle Accounts Receivable Oracle Advanced Planning and Scheduling This manual explains how to implement the core OM Products. It is divided into four parts. 1. Setup Steps - Flowchart of all required and optional steps for setting up OM. Each step is described. 2. Process Overviews - For Order Management and Shipping Execution, the supported business processes are described along with the special setup required to support those processes. For OM the processes include standard sales orders, returns and drop ship. For SE the processes include simple shipping and container management. 3. Pricing Setup - Basic Pricing enables you to create pricing information such as price lists and modifiers. The pricing setup section describes how to setup and use basic pricing. 4. Topical Essays - This section includes more in depth information on certain features of OM such as scheduling and invoicing. The OM products replace the Oracle Order Entry (OE) product and the Oracle Delivery Based Shipping product. Since 1990 the Oracle ERP suite included OE. All features from OE were carried forward. Also, an automated upgrade was written so that existing OE customers can migrate their setup and information to 1-2 Oracle Order Management Suite Implementation Manual Introduction OM. This manual is designed both for new OM customers and for customers that are upgrading. Implementing Order Management 1-3 Introduction 1-4 Oracle Order Management Suite Implementation Manual 2 Order Management: New Features Topics covered in this chapter include: ■ Introduction on page 2-2 ■ Architected for e-Business on page 2-2 ■ New Features on page 2-3 Beta Draft Order Management: New Features 2-1 Introduction Introduction Oracle Order Management is a new product within the Oracle Supply Chain family that supplies comprehensive transaction execution capabilities for managing and fulfilling all forms of customer demand. Order Management is fully enabled for the new internet-based e-business paradigms of today's business world. Order Management provides the tools to meet these challenges. It provides the capability to proactively exploit the growing movement to internet selling and self service customer support through more effective customer service, more personalized products, and more profitable pricing and fulfillment. Oracle Order Management replaces the Oracle Order Entry and Shipping products in the Oracle Applications product lineup. Order Management retains the functionality of the Order Entry/Shipping product, and significantly extends it. Architected for e-Business Oracle Order Management is built on a new object-oriented, open API-based architecture that is flexible enough to support management of demand across all channels. Oracle Order Management delivers a robust set of features that enables it to perform as the central order fulfillment engine for Oracle Applications, both in the horizontal and vertical industries. Order Management begins with a completely new architectural design that is based on open, documented APIs. These APIs perform all functions related to orders including checking security, validating items, creating orders, manipulating order lines, checking credit, pricing, packing, ship confirming, placing orders on hold, and releasing orders from hold. Within Order Management, these APIs are invoked by logic coded in Oracle Workflow. Workflow controls the sequence of events that occur in the processing of both your customer's order and its respective order lines. This provides you with maximum flexibility, as you can use the combination of APIs and Oracle Workflow to efficiently handle not only the mainline revenue cycle-based business processes, but also the many exception-based processes that every business must accommodate. 2-2 Oracle Order Management Suite Implementation Manual New Features New Features Oracle Order Management as a Fulfillment Engine You can define as many types of orders as your business requires, with each order type having its own unique set of processing steps in their own unique sequence. For example, business to consumer orders often require credit card processing, with payment approval being obtained from the credit card issuer. Business to business order transactions normally require a credit check be made against the user's own internal accounts receivable system. Using Oracle Order Management, a firm requiring both types of processes can create an order type with appropriate processing steps and sequence for each, and then run both processes side by side in the same instance of the software. Specialized business flows such as no-charge sample orders, return orders, warehouse transfer orders, and rush orders, may require expensive and risky customization with competitive order entry systems, but can be accommodated simply and without custom coding in Oracle Order Management. Even more flexibility is gained through the use of the same workflow API constructs at the order line level. This makes it possible to flexibly combine customer returns and orders for new product on the same order. Additionally, the architecture enables users to easily and effectively collaborate with supply chain trading partners in the larger world tied together by the Internet. Oracle Order Management's Shipping Execution module includes several Self Service Web Applications that enable you to harness the power of the Internet to work more effectively with your customers, carriers, and logistics partners. Order Capture from Any Source Oracle Order Management is very effective for large multinational manufacturers and distributors who are selling to other businesses and who must process high volumes of orders and order lines received from electronic sources such as EDI, and entered in the application by customer service staff. However, when implemented in conjunction with Oracle's Customer Relationship Management products, Order Management is ideally suited for companies transacting e-business over the Internet with either consumers or other businesses. The exploding world of e-Business demands that credit cards be accepted and handled in a secure environment. The new Order Management system integrates with the Oracle iPayment Server to provide credit card validation and authorization, and passes that information to Oracle Receivables for capture of funds. Beta Draft Order Management: New Features 2-3 New Features Oracle Telesales, Oracle iStore, Oracle Marketing, and Oracle Service, Oracle Field Sales, and Oracle Trade Promotion all fully integrate and inter-operate with Oracle Order Management. These applications provide you with a variety of finely honed order entry/order capture capabilities appropriate to specialized sales environments such as web stores and telemarketing, yet let you to manage pricing and order fulfillment accurately and efficiently in one uniform application. This gives you a seamless, tight integration of front office and back office applications that no vendor other than Oracle Applications can offer. After customer order demand has been captured, Oracle Order Management works with Oracle's other ERP applications such as Oracle Inventory, Oracle Purchasing, Oracle Manufacturing, and Oracle Advanced Supply Chain Planning to ensure that supplies of product are available to meet demand. Rounding out the back office, Order Management also integrates with Oracle Receivables and Oracle Sales Compensation. Reduce Implementation Risk and Lower Cost of Ownership Because they manage mission-critical revenue cycle-related business processes, order management software applications are notorious for requiring extensive modifications and tailoring. Oracle's API/Oracle Workflow based architecture is both highly extensible and highly customizable. This makes Order Management faster and less expensive to implement because fewer modifications are required to accommodate your specialized revenue cycle processes. The design philosophy underlying Oracle Order Management is to provide the maximum capability to tailor the operation and functionality of this software product to your business, rather than forcing you to re-engineer your business to fit the software. Where you may have requirements that make customizations unavoidable, the open, documented API set makes extensions easier and less time consuming. This reduces your expense and risk. You can develop extensions in a technically non-invasive manner that helps preserve your ability to upgrade to subsequent releases, and thereby leverages your investment in Oracle Applications. A New Look Takes Ease of Use to the Next Level With its completely redesigned user interface, Oracle Order Management sets a new standard for productive, friendly, screen ergonomics. Regardless of whether you are a novice or experienced user, you will find it more convenient than ever to view summary information, status of orders, line and shipment details, and to enter orders quickly and easily. Summary and entry information is only one click away. 2-4 Oracle Order Management Suite Implementation Manual New Features Order Organizer and Tree You can personalize your interface with the system through the use of folder technology and a tree-style representation of data that allows each user to store their favorite queries. These can then be re-used without having to drill down through a complex set of screen navigation. Order Management provides an interface suitable for both simple and complex business processes, while reducing training requirements by making primary tasks simple and intuitive. Product Configuration Configuration activities use tight integration with Oracle Configurator. Configurator provides next-generation, state-of-the-art configuration for all types of products - from simple units to full systems or assemblies, including engineer-to-order products. Configurator supports configuration rules written against model structures provided by Oracle Bill of Materials. A default user interface (UI) is automatically derived from the configuration model using a predefined layout template. Oracle Configurator also provides the ability to create custom user interfaces to meet the unique needs of any end user or selling channel. Product specialists can quickly and easily build intuitive user interfaces using simple drag-and-drop techniques, eliminating the need for technical programming skills. To reinforce brand identity, corporate branding elements such as logos, colors and typefaces can be included. The default UI appears as a tree structure with the model bill displayed on the left side of the window, and product options displayed in the right side of the window. Configurator dynamically and interactively guides the end-user through option selection screens, resulting in a configuration that is always valid. Default Layout of Oracle Configurator Window Oracle Configurator provides prices for models, option classes and options during the configuration session. Available to Promise (ATP) checks can be performed to provide an estimate on the product availability date based on material and resource constraints. Configurator is licensed and priced separately from Oracle Order Management. E-Business and E-Commerce Capabilities Oracle Order Management gives you the ability to transact e-business via four methods of information interchange. These are: Personalized, one to one order entry via Order Management's own internal UI. Electronically via an expanded repertoire of EDI transactions. Beta Draft Order Management: New Features 2-5 New Features Electronically via XML. Via open APIs to other Oracle products such as Oracle iStore and customer developed applications. With these methods, Order Management provides support for both business to business and business to consumer order/demand capture and fulfillment applications. In addition to these highly versatile methods of order capture, Order Management excels at high volume electronic collaboration between business to business trading partners via the Oracle e-Commerce Gateway and the new extension to it, the XML Gateway. Today's electronic collaborations not only demand a strong EDI capability, but also advanced technology to support collaboration with trading partners who do not yet use EDI, or who wish to bypass its sometimes expensive implementation cost. Oracle's e-Commerce Gateway and the XML Gateway together provide the solution with full enabled XML. Order Management adds a host of new enhancements to the existing Order Import process, and also adds support for several new EDI transaction sets. The Oracle e-Commerce Gateway is a product that is licensed and priced separately from Oracle Order Management. Order Import Enhancements Today's e-business often requires users to capture orders using specialized external systems and then import them into Oracle Order Management for fulfillment. Order Management adds new edit, validation, and error handling capabilities to its Order Import. You can view on-line orders and lines that did not import due to errors, and see detailed error messages about what went wrong. You can fix those errors using the same forms, and then re-import the data. You can also run Order Import in validation-only mode, without importing the data. Then, view and correct problems in the interface table before the base Order Management tables are updated. When orders are imported with an entry status of Booked, they are automatically eligible to progress to the next step of its order cycle in the Workflow when the import is complete. If any of the required fields for a booked order are not supplied, Order Management still imports the order in the Entered state and reports a booking error. Import returns in addition to regular orders. You can import items identified using the supplier specific internal part number or using any one of the supported item identifiers such as Customer Item, UPC code, etc. Order Import has been enhanced in direct response to requests by the EDI trading community. If Order Import detects differences in the system-calculated price and the user-provided price on an inbound order (850/ORDERS), Order Import will 2-6 Oracle Order Management Suite Implementation Manual New Features return an appropriate warning or error message. If there is a difference in the system-generated payment terms and the user-provided payment terms, Order Import will return a warning message to the user. New EDI Transactions You can now import inbound Order Change (860/ ORDCHG) transactions for automated changing of order shipment quantities, dates and location information. You can send EDI acknowledgments for original orders and change requests (whether received through EDI or other means). Both the outbound Purchase Order Acknowledgment (855/ORDRSP) transaction, and the outbound Purchase Order Change Acknowledgment (865/ORDRSP) transaction are supported. Extended Core Order Management Features Enhancing and extending the already rich feature set delivered in Oracle Order Entry/Shipping, Oracle Order Management adds several new, significant capabilities. These give you powerful additional capabilities to configure Oracle Order Management to facilitate your business processes without requiring costly re-engineering. Item Cross Reference This new capability allows your customers to order in their internal, customer specific, generic item numbers, or your internal item numbers. The following commonly used generic identifiers are supported: UPC (Universal Product Code) EAN (European Article Number) JAN (Japanese Article Number) CLEI (Common Language Equipment Identifier) ISBN Customer/generic items can be used in both on-line order entry and Order Import. When entering on-line, searching using the cross references is possible. Both customer and generic item numbers can be printed on external documents, including acknowledgments and invoices. Decimal Quantity Handling Order quantities for standard items can now be specified as decimal quantities. Whether or not decimal quantities are allowed for an item is specified at item setup. Beta Draft Order Management: New Features 2-7 New Features The maximum decimal precision that may be specified is 10 decimal digits and 15 mantissa digits. Over/Under Shipment Tolerances You can now define tolerances for both over- and under-shipments. Using under-shipment tolerances, you can specify that if the quantity shipped to your customer is within a tolerance you specify, the order line is automatically considered to be fulfilled. This enables you to avoid the extra work of adjusting small quantity differences that you know will be tolerated by your customer. Using over-shipment tolerances, you can specify how much over the ordered quantity is allowed to be shipped. Shipping also can specify an option to allow users to over-ship above the tolerance. Returns Enhancements Order Management adds several enhancements to Returns functionality. Returns and shipments can now be mixed on the same order. You can enter return receipts using standard Oracle Receiving forms. You can enter lot and serial numbers of goods being returned. You can now print acknowledgment documents for returns. You can also track goods returned for repair using a new Depot Repair process. Order Changes Role-based Processing Constraints allow you to control who has permission to make changes. You can assign authority to make updates, perform cancellations, and deletion of orders to specific users. New functionality will allow you to notify an authorized user when a user with less authority attempts to make a change they are not authorized to perform. Multi-select and mass change of orders and lines is supported throughout the new Sales Order user interface, making it much easier and more efficient for you to make necessary changes. Order Management enables you to more easily change configure-to-order lines after the manufacturing process has been initiated by automating some of the steps involved in effecting such a change. You can use Processing Constraints to control who has authority to make such changes. Order Cancellations You have the option to cancel a sales order line with or without a reason code entry after the order has been booked You can record and track changes in order quantity for historical and analytical purposes after the order is booked by using Change Order History. Multi-line selection during order line cancellation is now possible. You can cancel lines even after Pick Release, and Oracle Shipping Execution has 2-8 Oracle Order Management Suite Implementation Manual New Features visibility to the changed quantities. Order Import has been enhanced to process cancellation requests. Order Copy The order copy function has been enhanced to allow you to copy orders at original prices, copy directly from sales forms, copy lines from orders to returns, access newly copied orders, append lines to existing orders, copy selected lines only to an order, and re-price a copied order. ATO-PTO Orders You can use Oracle Workflow to manage the Assemble to Order (ATO) and Pick to Order (PTO) flows. The standard configure-to-order flow consists of independent workflow activities for configured item creation, bills of material and routing creation, lead time rollup, cost rollup, and supply order creation. Streamlined flows enables you to easily tailor the process to your specific requirements. Credit Checking Credit Checking has been enhanced to let you to specify a maximum number of days due for invoices as a criteria for imposing credit holds. Tax will always be included as part of the balance in the credit exposure calculation. You can now assign multiple bill-to locations to the same order. In this case, the bill-to credit limits will be separately evaluated for the value of the order assigned to each bill-to location. Holds and Releases You can now apply and release holds directly from the Sales Order form or through the new Order Summary window. Also, you can request that the system send FYI notifications to specific individuals when an order hold is applied. Order holds can be detected as an Oracle Workflow activity. Tailor the processing flow for orders to your specific needs considering the hold status of your orders. Error Message Handling Window You can view error messages from processes such as on-line mass changes, copying orders, and other concurrent programs through a standardized Message Window. You can save the messages for later review, or you can discard the messages. While viewing messages, you can send text message notifications to others. Beta Draft Order Management: New Features 2-9 New Features Vendor Drop Shipments You now have the ability to conveniently and accurately maintain address information for vendor drop shipments at a single point within Oracle Applications. You can also associate sourcing rules to items. These rules will guide the system to automatically drop ship the item when an order is placed. Oracle Workflow streamlines the processing of these orders by eliminating the manual step of running Purchase Release. Tax Triangulation Oracle Order Management provides support for Tax Triangulation for all transactions including European Union Triangulation for International Drop Shipments. Oracle Receivables Tax Groups have been enhanced to allow the system to automatically select applicable tax rates and liability accounting for all transactions from Order Management, based on a combination of addresses. Freight and Special Charges Order Management provides a set of APIs that can capture, store, update and view costs associated with a shipment, order, container, or delivery. You can attach your own program logic to these APIs to allow these costs to be converted into charges that are added to the order. Order Management provides you the option to either itemize or summarize such charges on your orders. This capability includes functionality to pass customer charge information to Oracle Receivables for invoicing. Invoicing Pass detailed discount and promotional information from Order Management to Oracle Receivables. Detailed information about freight and other charges will also be passed to receivables. You have the option to pass a customer item description from Order Management to Oracle Receivables for invoice printing for item records where such a description exists. You can now select whether to invoice the quantity ordered or quantity shipped where an over-shipment has occurred. Order Numbering Flexibility of order numbering is a capability frequently required by users. Several new capabilities that substantially increase system flexibility: Select separate number sequences by order type. The system will validate that the combination of order type with order number is unique. 2-10 Oracle Order Management Suite Implementation Manual New Features Import or enter orders where an order number is assigned outside the system and entered manually. Specify that a set of order numbers is to be gap-less, to fulfill requirements in certain legal jurisdictions. Orders entered using a gap-less number sequence cannot be deleted after entry, but may be canceled. Defaulting Order Entry's standard value rule set functionality has been replaced with a more powerful and flexible defaulting architecture. The new defaulting framework allows for defaulting of more order and line attributes from more varied sources than previously possible. Line Sets In addition to retaining the capability to group order lines into shipping line sets (included in Release 11 of Order Entry/Shipping), OM adds new capabilities that enable you to group order lines into arrival line sets. When so grouped, all order lines in the set are scheduled so that they can be delivered to the same place at the same time. Order Workbench Enhancements Oracle Order Management has been enhanced with numerous improvements to make your order processing staff more productive. The Order Organizer has a tree structure and order summary information. Multi-select is enabled in all the windows of the Sales Order forms. You can define your own folders in the Order Organizer, Order Pad, and Find windows. Access multiple functions from the Sales Order form, including cancel, copy, scheduling and hold functions. This saves time and helps you work efficiently by reducing the amount of navigation and forms you must go through to perform an action. Enhanced Planning and Reservation Logic Order Management delivers new, enhanced reservations capabilities. You can define sourcing rules in Oracle Advanced Supply Chain Planning to determine from which warehouse an order should ship. A new workflow activity will source all lines that have not been sourced at entry. Once sourced, all lines are visible to Oracle Planning. Request that the system schedule your order within a schedule/delivery window from your request date. Beta Draft Order Management: New Features 2-11 New Features Order Management now gives you the option to check ATP or display availability automatically as soon as you enter a line. You can also choose to reserve the inventory at entry, if the request date is within a user-specified window of time. If the request date is farther into the future, an automatic Workflow process will perform the reservation automatically as the requested ship date moves within the allocation window. 2-12 Oracle Order Management Suite Implementation Manual 3 Shipping Execution: New Features Topics covered in this chapter include: ■ Introduction on page 3-2 ■ New Features on page 3-2 Shipping Execution: New Features 3-1 Introduction Introduction Oracle® Order Management, a new product within the Oracle Supply Chain family, enables you to proactively exploit the growing movement to internet selling and self service customer support through more effective customer service, more personalized products, and more profitable pricing and fulfillment. Oracle Order Management is part of the Oracle E-Business Suite, an integrated set of applications, designed to transform your business to an e-business. New Features Oracle Shipping Execution introduces many features in Release 11i to simplify shipment planning. A list of the new features will be followed by a detail description: Shipping Transaction Form, Tracking of Freight Costs, Transportation Calendars, Container Management, Enhanced Pick Release, Over/Under Shipments, Shipping Exceptions, Global Packing Slip, INTRASTAT & EXTRASTAT Statistics, United Parcel Service (UPS) Carrier Integration, and Decimal Quantities for standard items. Several features and reports have been enhanced for Release 11i. Among these: Pick Slip Grouping Rules, Commercial Invoice, Bill of Lading, Vehicle Load Sheet Summary and Detail, and Open API’s, and Interfaces. Release 11i brings several new features to Oracle Shipping Execution: Roles and Users, Additional Line Status, Integration with Oracle Projects Contracts and Managing Containers (License Plate Numbers or LPNs) for Organizations with Oracle Warehouse Management System (WMS) Enabled. Shipping Transaction Form The Shipping Transaction form is a workbench that consolidates three major Shipping forms seen in Release 11: Departure Planning, Ship Confirm, and View Shipping Information. In addition to the consolidation, this form contains modifications that support many new features: trips, stops, deliveries, delivery lines, delivery legs, and containers (LPNs). Most of the work done within Shipping Execution will take place in the Shipping Transaction Form. Here, you query and modify data, create and save queries, and modify tab names within the Lines/Containers (LPNs) tab. Using Folder technology, fields can be moved around to increase accessibility to fields you use most often. Within this form, you can also plan trips and deliveries, confirm shipments (trip, stops, and deliveries), explode, and enter sourcing material information for delivery lines, support multi-leg shipments (for shippers who have their own shipping fleet), and access all Shipping functionality by invoking forms 3-2 Oracle Order Management Suite Implementation Manual New Features and reports. The Shipping Transaction form is composed of a Concurrent or Transaction manager. The Query Manager enables you to specify and find Trips, Stops, Deliveries, Delivery Lines and Containers (LPNs) plus provides the opportunity to save the queries to use in the Navigator tree. You can query by delivery lines (order# query), containers (LPNs), stops, trips, or deliveries. The Data Manager enables you to navigate and modify the data easily. There are Actions available at each entity level that are possible to launch directly from this form. Tabs for different entities associated with the query are shown at the bottom. For example, when looking at the delivery line, the tabs for different entities associated with this delivery line are delivery, path by trip, path by stop. Tracking Freight Cost Freight costs can now be tracked. For many companies, the Shipping operation is a profit center. By tracking the shipper’s freight cost (amount shipper pays the carrier), the profit margin between the shipper’s freight cost and the amount a customer pays for freight can be identified. Freight costs can be assigned to trips, stops, deliveries, delivery lines, delivery legs, or containers. You can apportion the freight costs on a per line basis based on percentage of weight, volume, or quantity. If you have a weight defined for the items, then the apportionment will be based on weight. If you don’t have a weight defined, then the apportionment will be based on volume. If you don’t have a weight or a volume defined for the item, the apportionment will be based on quantity. Freight costs can be modified after Ship Confirm. However, the modified costs will only be included on the customer invoice if OM Interface has not yet run (previously called Update Shipping). Once you have run the OM interface, you can no longer pass modified freight cost information back to OM. You can still modify freight costs, but you won’t be able to pass the information to OM. The currency of the freight costs will be automatically converted when you run the OM Interface (pass freight costs back to OM). A set of books currency will be used for the operating unit of the warehouse or ship from location as the default currency. The currency will be converted to the currency of the sales order. Transportation Calendar A calendar function has been added to apply to shipping schedules for the shipper, receiver and carrier. The Transportation Calendar defines the valid shipping days and hours for a shipper, receiver, or carrier. It consists of a repeating pattern of days Shipping Execution: New Features 3-3 New Features on and days off as well as pattern exceptions, such as holidays. For example, a work week can be defined to have five shipping days followed by two non-shipping days for a standard work week. Shipping and Receiving Calendars designating when your customers, customer sites, suppliers, supplier sites, and internal organizations can ship and/or receive. Using calendars for carriers will allow you to define the dates when a given carrier is able to pick up and deliver items. Although a transportation calendar can be defined at the organization level, it is probably more useful to define it at a lower level, such as the customer, and use it to manage exceptions. For example, if you are shipping a delivery on Tuesday at 2 p.m. that will arrive at your customer’s warehouse on Wednesday at 9 a.m., the system will validate that your warehouse is able to ship product on Tuesday at 2, that your customer can receive product on Wednesday at 9, and that your carrier will be able to pick up and drop off the delivery on those days. This feature is used when planning a Delivery. It is validated both at the time the Delivery is planned and at Ship Confirm. BOM calendars that have been defined for an organization are the basis for the assignment of the Transportation Calendars. Container Management The Container Management Module has been separated from Ship Confirm and features the creation and manipulation of containers at any point in the shipping process. You can autocreate and autopack containers using predefined container-load relationships that you define. As a part of Container Management, you can create new containers without having to associate the containers to a delivery. This allows you to pack lines that have not yet been assigned to a delivery. Multiple containers can be packed with multiple lines. Containers can be automatically filled using one of two methods: 1) by placing an equal amount in each container, or 2) by filling each container sequentially maximizing the capacity of each container (weight ,volume or qty) prior to moving to the next container. This new functionality lets you to assign a label/license plate number (LPN) to containers (automatically or manually), pack containers with or without assignment to a delivery, enter summary information for multiple containers and explode them into individual containers, estimate the number of containers required for a delivery line/item, pack multiple lines into multiple containers, assign containers to deliveries, and Pick Release containers. The feature for estimating containers for unpacked lines has also been upgraded to automatically create and pack both the detail and master containers required for a 3-4 Oracle Order Management Suite Implementation Manual New Features delivery line. For more information, see the chapter on Containerization in Shipping Execution Enhanced Pick Release In Release 11i, Pick Release provides increased functionality by becoming a two step process: allocation and pick confirm. Allocating Pick Release creates Move Order Lines. To release lines to the warehouse and print pick slips the lines must be allocated. The process by which the Picking Engine generates transaction line suggestions is called Allocating. The allocating process for a Pick Wave Move Order Line also creates a high level (organization level) Reservation on the material if no Reservations previously existed. This can be done immediately after the Move Order Lines are created or it can be postponed. Postponing the allocating process might be employed by organizations that pick release across multiple warehouses but prefer to allow each warehouse to determine when to release the order lines to the floor. Allocating the order lines immediately after creation is called “auto-allocating”. Auto-allocating suggests the sourcing for material immediately based on defined Picking Rules. A default allocating mode can be defined by organization in the Shipping Parameters form. This default can be overridden at each Pick Release. Postponing the allocating process is referred to as manual-allocate. If Auto-allocate is NOT used, the manual process is to go to Move Transactions screen (Inventory), query the batch (created by the Pick Release process), and allocate the quantity manually. Pick Confirm The Move Order Line Details (transaction lines) created by the allocating process must be transacted to confirm the material drop-off in staging. This process, called Pick Confirmation, executes the sub-inventory transfer that moves the material and transfers the reservation from its source location in the warehouse to the Staging location. Pick Confirmation automatically transfers the high level Reservation to a detailed Reservation (including lots, sub-inventory revisions and locators) in the Staging location. At pick confirmation, discrepancies in actual quantity, lot, serial, locator, or sub-inventory can be reported. If mobile devices such as bar code scanners are used to perform Inventory transactions, it is suggested that you use manual pick confirmation for greatest inventory accuracy and control. Shipping Execution: New Features 3-5 New Features If an organization’s picks rarely deviate from the suggested picking lines and the overhead of requiring a Pick Confirmation is unmanageable, the Pick Confirm transactions can occur immediately after the lines are detailed. This option, called auto pick confirm, can also be defined to default by organization in the Shipping Parameters form. This default can be overridden at each Pick Release. Note that even if an automatic pick confirm is employed, the material is only transacted to the Staging sub-inventory and reserved. Any discrepancies found can be managed by deleting the reservation and transacting the material back to its original sub-inventory. If Auto Pick Confirm is used then Reservations are placed for each line up to the available quantity. If Auto Pick Confirm is not used, the manual process is to go to Move Transactions screen (Inventory), query the batch (created by the Pick Release process), and pick confirm the quantity manually. Staging Locations The destination sub-inventory on the Pick Wave Move Order is the staging location where the picked material should be deposited. Each organization must designate at least one staging sub-inventory. Each batch created at pick release will have the same destination staging sub-inventory. The default staging sub-inventory and locator to be used for all Pick Wave Move Orders can be specified by organization in the Shipping Parameters form. This location can be changed at Pick Release. To model different staging lanes within the staging area, facilities may choose to either create different sub-inventories or designate staging lane locators within one Staging sub-inventory. Figure 1. exhibits the basic procedural flow for Material Picking move orders from allocation to staging. 3-6 Oracle Order Management Suite Implementation Manual New Features Figure 3–1 Material Picking Move Orders A move order is created by the Pick Release engine. Next, it must be Allocated. Allocating is the process where the picking rules determine where to source the material from to fulfill a request line (move order line). The allocating process fills in the move order line details with the actual transactions to be performed. If adequate quantity is not available to allocate the move order, this process can be done later. If no reservation exists before the allocating process, it will also create the high level reservation for the material. Before transaction, you can print a pick slip or push the move order line details to mobile devices for transaction through the move order APIs. The move order can then transact to pick confirm. The order line can be transacted all at once, or one detail line at a time as the items are moved. If less than the requested quantity is transacted, the order will proceed according to the Over/Under Tolerance profiles described in the following section. The pick confirm transaction creates a sub-inventory transfer from the source location to the staging location. Shipping Execution: New Features 3-7 New Features Over/Under Shipments Over and under shipment tolerances can be defined for orders and for returns. Tolerances can be set up globally in OM profile options. The four profile options related to over/under tolerances are: OM: Over Return Tolerance OM: Over Shipment Tolerance OM: Under Return Tolerance OM: Under Shipment Tolerance Exceptions can be set at lower levels: at the customer or site level using Customer forms, the item level using PDM (Inventory) Master Items form, and for customer and item combination using a new OM form. Over-Shipment tolerance is validated at ship confirm. The overship invoice basis profile option is: OM: Overshipment Invoice Basis A quantity greater than the quantity on the line is allowed if it is within the over-shipment tolerance. If it is greater than the over shipment tolerance, a warning will be given, but the user will not be stopped from shipping the additional quantity. The actual quantity shipped is recorded on the line. The Under-Shipment tolerance behaves differently. At ship confirm, any quantity less than the requested amount is allowable. If the quantity shipped is within the under-shipment tolerance, the line will close once the shipment is processed. The remaining quantity will automatically cancel. However, if the quantity shipped is outside the tolerance, the line will split into 2 lines, one line represents the quantity shipped, the other line becomes a backordered line with the difference. The profile option OM: Overshipment Invoice Basis controls whether to invoice for quantity shipped or quantity ordered. A corresponding attribute exists on the 3-8 Oracle Order Management Suite Implementation Manual New Features Customer and site level to help manage exceptions. Undershipments are always invoiced at quantity shipped. Shipping Exceptions The Shipping Exceptions feature helps identify and correct shipping exceptions that violate the requirements of your operation or that of your carriers and customers. The Shipping Exceptions feature enables the definition of exceptions and processes for handling them. Exceptions can be recorded automatically from within Oracle Shipping Execution, or you can log exceptions manually through the user interface input forms. You can initiate exception handling and view and track the exceptions as you manage them to resolution. With some custom programming, provided APIs can be used to integrate with Oracle with third party applications to log exceptions. INTRASTAT/EXTRASTAT (Movement Statistics) Oracle Purchasing, Order Management, and Inventory provide the ability to support the automatic creation of the INTRASTAT and EXTRASTAT movement statistics declarations to governmental authorities for the European Union (EU). You can compile all material receipt (arrival) and shipment (dispatch) transactions for the given period and automatically create Intrastat records based on Ship-from and Ship-to locations. You can then review and validate the data using the Movement Statistics Exception Report, update the information using the Movement Statistics Form, and run the Standard Movement Statistics Declaration Report. In addition, the Oracle e-Commerce Gateway supports the outbound EDIFACT INSTAT and EXSTAT transactions for electronic reporting to governmental authorities. Global Packing Slip The Packing Slip has been enhanced to support many of the requirements needed for shipments made in European Countries. In Europe the Packing Slip acts more like a legal document similar to the Bill of Lading in the US. For example some countries require an audit trail of the Packing Slips created for a particular shipper and the shipper must provide a gapless sequence of packing list created. This requirement is now supported. Additional features that are supported by the global packing slip include the ability to reprint, print prior to Ship Confirmation, provide draft and final versions, sort by inventory item or by Shipping Execution: New Features 3-9 New Features customer item, allow alphanumeric prefix/suffix and allow subsequent reprint of final designation. UPS Integration The integration with United Parcel Service (UPS) provides a common solution for those customers who use both Oracle Shipping Execution and UPS. The integration is in the form of APIs. Oracle-UPS APIs integrates shipping information, provided by UPS On-line Tools into Oracle Applications suite to help customers streamline operations in the fulfillment cycle. This feature is available in R11i and requires enabling the profile option WSH: Internet Proxy URL. This profile option allows the system to access UPS servers for UPS integration. If your site does not have a firewall, you do not need to set the profile. This profile can only be modified by the System Administrator at the site level. Oracle-UPS APIs will be used throughout the Oracle ERP application suite. Order Management and Customer Relationship Management (CRM) Applications use these APIs to verify address and postal code and to provide customers with shipping service selection while taking orders. Shipping Execution Applications will use these APIs to integrate UPS functionality seamlessly into the Oracle Shipping functionality Oracle - UPS integration will enable Oracle customers to: Rate & Service Selection: You can calculate estimated rates and service costs in US dollars for deliveries, lines and containers and update freight cost value for a delivery line. Address Validation: This window validates the Ship From and Ship To address postal codes for a delivery line and matches it with the UPS address information. Ground Time in Transit: You can view how long it takes to ship between two sites. The time in transit displays in business days. Shipment Tracking: You can track UPS ground shipments for lines and containers and view information such as tracking numbers, status and service type. You can also view detailed tracking information for a selected line such as the date and location where a package was picked up or dropped off. Enhanced Pick Slip Grouping Rules Oracle Shipping Execution supports Pick Methodology. Several fields have been added to the Pick Slip Grouping Rules form: item, locator, lot, revision and pick methodology. Pick Methodology contains five possible values: 3-10 Oracle Order Management Suite Implementation Manual New Features 1. User defined - Grouping will be done according to the parameters set by the user. This will be the only value where you will be able to modify the group by clause. A unique pick slip number will be generated for each group. All tasks corresponding to a pick slip number will be dispatched to a single user. 2. Order Picking - Grouping will be done by order. The group by attributes will not be editable. A unique pick slip number will be generated for each order. The entire order will be dispatched to a single user. This selection is designed to work when Oracle Warehouse Management System (WMS) is installed. 3. Zone Picking - Grouping will be done by order and zone. Again, an unique pick slip number will be generated for each group and dispatched. The group by attributes will not be editable. This selection is designed to work when Oracle Warehouse Management System (WMS) is installed. 4. Cluster - No grouping of pick tasks will be done. The tasks will be ordered by locator and dispatched to the appropriate users. The group by attributes will not be editable. This selection is designed to work when Oracle Warehouse Management System (WMS) is installed. 5. Bulk - Grouping will be done by item and locator. The group by attributes will not be editable. Tasks will be consolidated based on this grouping and dispatched to the appropriate users. This selection is designed to work when Oracle Warehouse Management System (WMS) is installed. Document and Label Printer Assignments Document and Label Printer Assignments (RCD) allows printers to be assigned to different documents for multiple levels in Oracle Shipping Execution. The levels include Equipment Type, User, Zone, Department, Responsibility, Application, and Site in this order of precedence. Equipment Type is the most specific and Site is the most general. If Oracle Warehouse Management System (WMS) is installed, Equipment Type, Zone, and Department can be used. Roles and Users Defining Roles and Users Shipping Execution introduces data access control features called roles that can be assigned to users. Roles can be assigned to permit or restrict a user’s access to important shipping entities such as trips, stops, deliveries (including delivery legs, Bill of Lading, and Packing Slip), lines, and LPNs (containers). This is useful to prevent users from doing unwanted actions such as unintentionally pick releasing Shipping Execution: New Features 3-11 New Features across multiple organizations or from entering incorrect data. Roles can also be used to limit access to certain functions for a specified period: for example, granting short-term roles with temporary privileges to temporary employees or granting view-only roles to inexperienced employees. Each role consists of a set of data action controls (also called privileges) that control a user’s access to the Actions list and Tools menu in the Shipping Transactions window. For example, a user with a view-only role can view shipping information but cannot make changes to the data or perform actions such as pick release. However, a role can also have a combination of view-only and edit features: for example, a user may be assigned a role that permits edit access to trips but view-only access to deliveries. Shipping Execution provides several predefined roles based on a user’s shipping responsibility. In addition to the predefined roles, customized roles can be created and assigned to users. The system administrator or super-user is responsible for assigning roles to users. The predefined roles are: Transportation Manager Shipping Manager Shipping Supervisor Shipping Clerk Customer Service Control Description Edit - enables users to edit and view the data, and perform actions such as pick release. View - enables users to browse the data but not perform actions on them. None - does not allow viewers to edit or view the selected action(s). Note if upgrading from 11i.2: After the upgrade, existing users are automatically assigned a default role that provides full view and edit privileges. These default roles can be changed by assigning a different role. New users for both upgrade and new installations are granted default roles with view-only access. User 3-12 If upgrading from 11i.2 Oracle Order Management Suite Implementation Manual If installing Shipping Execution for the first time (no upgrades) New Features Existing The default role "Pre-Upgrade User" is automatically assigned to all existing users. This provides full view and edit privileges. You can assign the user a new role. N/A (No pre-existing users) New The default role "New User" is assigned to new users. This provides view-only access. You can assign the user a new role. The default role "New User" is assigned to new users. This provides view-only access. You can assign the user a new role. For example, if upgrading from Shipping Execution 11i, all existing users are automatically assigned a "Pre-Upgrade User" role, providing full view and edit privileges. After the upgrade, you can change this default role by assigning the user a different role. Note: New roles cannot be assigned globally to all users, you must assign the new role to each individual user. Grants When a role is assigned to a user, a grant that contains the identical privileges of the role is assigned. This provides flexibility for the system administrator to apply user-level controls such as adding an expiration date to a grant. The user can only be assigned one grant per warehouse organization. More than one grant can be assigned to an individual user if different access controls are required to more than one warehouse organization. For example, if a user requires full-access privileges to three warehouses and view-only access to a fourth, the user must be assigned four grants—one for each respective organization (three full-access and one view-only grant). However, if only one grant is assigned, that grant becomes the default grant for all warehouses that the user can access. In addition, the grant has the following requirements: A grant must have one inventory organization selected. A role can be used by many grants. A user can have one or more grants. (If the user does not have a grant, full access is the default.) There is no provision for marking a grant as default. A role can be assigned to a user that spans all warehouses instead of granting a unique grant per organization per user. Shipping Execution: New Features 3-13 New Features Updating a User’s Role Changes in job requirements, such as a promotion, requires updates to a user’s role. To change the role, you must end the user’s existing role (expiration dates) and assign a new role with the new privileges. The start date of the new role must occur after the end date of the old. You can update the end date of a user’s grant (if it has not expired) by editing the end date and saving the changes. If the date and grant has expired, the user must be granted a new grant (role). Note: You cannot change a role by editing the role’s parameters and saving the changes. Updating a user’s grant only affects that user, not all users assigned with the role. Additional Line Status Viewing the Status of a Delivery Line In the Shipping Transactions window, you can view the status of a delivery line to identify its current stage in the shipping flow. The following table identifies the line status available and the stage in the shipping flow: Delivery Line Status Description Ready to release Delivery line is eligible for pick release. Occurs after the order line is booked and passed to Shipping Execution. Released to warehouse Delivery line is released to warehouse after pick release has been launched. Occurs when pick release has started but has not completed either because no allocations were created or allocations were created but have not been pick confirmed. If auto-pick confirm was not set during pick release and you want to progress the delivery lines, then you need to navigate to Inventory’s Move Order Transaction window to perform a manual pick confirm. 3-14 Oracle Order Management Suite Implementation Manual New Features Delivery Line Status Description Backordered Delivery line has been pick released but no allocations were created or partial allocations occurred. For example: a delivery line has a quantity of 100, and at pick release, only 25 are available for allocation, the original delivery line splits to create a new line (quantity of 75) for the unallocated portion with a status of Backordered. The quantity on the original delivery line changes to 25 to reflect the allocated portion with a status of Staged. Staged Delivery line has been successfully pick released. Occurs after pick confirm to indicate subinventory transfer from source location to staging location is complete. Lines remain staged until they are ship confirmed. Delivery associated with the delivery line has been ship confirmed. Occurs after the delivery is set in transit and the trip is closed. Shipping Execution: New Features 3-15 New Features 3-16 Oracle Order Management Suite Implementation Manual 4 Basic Setup This chapter tells you everything you need to know about setting up Oracle Order Management. Order Management provides several features that enable you to set up your system and begin processing order information. You must define business policies, such as how you classify your orders, as well as various control features. ■ ■ ■ ■ ■ ■ ■ ■ ■ ■ set up your profile options. See: Order Management Profile Options on page 4-15. set up your tax information. See: Taxation on page 4-33 and Overview of Tax, Oracle Receivables User’s Guide. set up your QuickCodes. See: Defining Order Management QuickCodes on page 4-36. set up your workflows to meet your business needs. See: Overview of Workflows on page 4-50. define your document sequences for order numbering. See: Defining Document Sequences for Order Numbering on page 4-83. set up your security rules to prevent updates past certain steps in your order flows. See: Overview of Processing Constraints on page 4-104. set up your pricing information for sales orders. See: Overview of Price Lists on page 4-126 set up your defaulting rules. See: Overview of Defaulting Rules on page 4-114 setup your credit check processes. See: Overview of Credit Checking on page 4-167 define your transaction types (order and line types) on page 4-86 Basic Setup 4-1 ■ ■ ■ ■ 4-2 define your hold information. See: Defining Holds on page 4-187 setup your attachments to apply to sales orders. See: Overview of Attachments on page 4-191 setup your shipping tolerances for over and under shipments. See: Overview of Shipping Tolerances on page 4-199 viewing Sales Order and order delivery information via the Inernet Customer Portal (iCP) on page 4-203 Oracle Order Management Suite Implementation Manual Oracle Order Management Recommended Setup Oracle Order Management Recommended Setup Setup involves several phases, including setting up other integrated applications, that include Oracle General Ledger, Oracle Receivables, and Oracle Inventory. Some setup steps are optional, depending on whether you have the integrating applications installed and whether you use the associated feature. For example, if your business supports drop shipments, you should also setup Oracle Purchasing. If you are using a multiple organization structure, your system administrator must set the parameter Item Validation Organization. This enables Order Management to default code and revenue account information accurately. Oracle Applications Implementation Wizard If you are implementing more than one Oracle Applications product, you may want to use the Oracle Applications Implementation Wizard to coordinate your setup activities. The Implementation Wizard guides you through the setup steps for the applications you have installed, suggesting a logical sequence that satisfies cross-product implementation dependencies and reduces redundant setup steps. The Wizard also identifies steps that can be completed independently by several teams working in parallel to help you manage your implementation process most efficiently. You can use the Implementation Wizard as a resource center to see a graphical overview of setup steps, read outline help for a setup activity, and open the appropriate setup window. You can also document your implementation, for further reference and review, by using the Wizard to record comments for each step. Set Up Oracle Applications Technology The setup steps in this chapter tell you how to implement the parts of Oracle Applications specific to Oracle Order Management. Basic Setup 4-3 Oracle Order Management Recommended Setup The Implementation Wizard guides you through the entire Oracle Applications setup, including system administration. However, if you do not use the Wizard, you need to complete several other setup steps, including: ■ ■ Performing system-wide setup tasks, such as configuring concurrent managers and printers Managing data security, which includes setting up responsibilities to enable access to a specific set of business data and transactions, and assigning individual users to one or more of these responsibilities Also, if your product uses Oracle Workflow, for example, to manage the approval of business documents or derive Accounting flexfield values via the Account Generator, you need to set up Oracle Workflow. See Also Overview of Workflow, Oracle Workflow Guide Oracle System Administration, Oracle Applications System Administrator’s Guide Oracle System Administration, Oracle Applications System Administrator’s Guide Setup Steps Step 1 Flexfields Define key and descriptive flexfields to capture additional information about orders and transactions. This step is required for Key Flexfields, and optional if you plan on using the functionality surrounding Descriptive Flexfields. Several defaulting values are provided. Step 2 Multiple Organizations Define multiple organizations in Oracle Inventory. This step is optional. See: Overview of Inventory Structure, Oracle Inventory User’s Guide. 4-4 Oracle Order Management Suite Implementation Manual Oracle Order Management Recommended Setup Step 3 Inventory Organizations Define inventory organizations (warehouses), parameters, subinventories, and picking rules in Oracle Inventory. You must define at least one item validation organization and at least one organization that acts as an inventory source for orders fulfilled internally. If you plan to drop ship some orders, you must also define at least one logical organization for receiving purposes. Your item validation organization can be the same as your inventory source or your logical receiving organization, but you cannot use one organization for all three purposes. See Step 5 for setting your item validation organization. This step is required. See Also Oracle Inventory User’s Guide, Overview of Inventory Structure Oracle Inventory User’s Guide, Defining Picking Rules Step 4 Profile Options Define profile options to specify certain implementation parameters, processing options, and system options. This step is required. See: Order Management Profile Options on page 4-15. Step 5 Parameters Set your Order Management Parameters to validate items, enable customer relationships, and operating unit defaults. This step is required. See Enabling Parameters on page 4-31. Basic Setup 4-5 Oracle Order Management Recommended Setup Step 6 Invoicing Define invoicing information, including payment terms, invoicing and accounting rules, Autoaccounting parameters, territories, and invoice sources. This step is required if you plan on transferring invoicing information to Oracle Receivables. Several defaulting values are provided. See the following topics in the Oracle Receivables User’s Guide for more information: Payment terms Invoice with Rules Transaction Types AutoAccounting Territories Invoice Batch Sources Within the Order Management Users Guide, Invoice Processing Step 7 Salespersons Define information on your sales representatives. This step is optional. See: Salespersons, Oracle Receivables User’s Guide. Step 8 Tax Define tax features, such as codes, rates, exceptions, and exemptions. This step is required. See: Overview of Tax, Oracle Receivables User’s Guide. 4-6 Oracle Order Management Suite Implementation Manual Oracle Order Management Recommended Setup Step 9 QuickCodes Define QuickCodes that provide custom values for many lists of values throughout Order Management. This step is required if you plan on creating user defined Quickcodes for utilization within Order Management. Defaulting values are provided. See: Defining Order Management QuickCodes on page 4-36. Step 10 Workflow Define order and line processing flows to meet different order and line type requirements. This step is required. See: Overview of Workflow on page 4-50. Step 11 Document Sequences (Order Numbering) Define Document Sequences for automatic or manual numbering of orders. This step is required. See: Defining Document Sequences for Order Numbering on page 4-83. Step 12 Order Import Sources Define sources for importing orders into Order Management. This step is required if you plan on importing orders or returns into Order Management. See: Defining Order Import Sources on page 4-102. Basic Setup 4-7 Oracle Order Management Recommended Setup Step 13 Units of Measure Define the units of measure in which you supply items. This step is required. See: Defining Unit of Measure, Oracle Inventory User’s Guide. Step 14 Item Information Define item information, including item attribute controls, categories, and statuses. This step is required. See these topics in the Oracle Inventory User’s Guide for more information: Defining Item Attribute Controls Defining Categories Defining Item Status Codes. Step 15 Items Define the items that you sell, as well as container items. This step is required. See: Overview of Item Setup and Control, Oracle Inventory User’s Guide. Step 16 Configurations Define the configurations that you sell. This step is required if you plan on generating orders or returns for configured items. Several defaulting values are provided. See: Primary and Alternate Bills of Material, Oracle Bills of Material User’s Guide. 4-8 Oracle Order Management Suite Implementation Manual Oracle Order Management Recommended Setup Step 17 Pricing Define price lists for each combination of item and unit of measure that you sell. Optionally, you can define pricing rules and parameters to add flexibility. This step is required. Step 18 Customer Classes Define customer profile classes. This step is required if you plan on using the functionality surrounding Customer Profiles. Several defaulting values are provided. See: Defining Customer Profile Classes, Oracle Receivables User’s Guide. Step 19 Customers Define information on your customers. This step is required. See: Entering Customers, Oracle Receivables User’s Guide. Step 20 Item Cross References Define item cross references for ordering by customer part number, UPC, or any generic item number. This step is required if you plan on using the functionality surrounding item cross referencing. Several defaulting values have been provided. See Also Oracle Inventory’s User’s Guide, Defining Customer Item Cross References Oracle Inventory’s User’s Guide, Defining Cross Reference Types Basic Setup 4-9 Oracle Order Management Recommended Setup Step 21 Sourcing Define your sourcing rules for scheduling supply chain ATP functions. This step is optional. See: Setting up the Supply Chain, Oracle Advanced Supply Chain Planning User’s Guide. Step 22 Order Management Transaction Types (Order and Line Types) Note: Previous versions of this users guide referred to Order Management Transaction Types as either transaction types or order or line transaction types. In an effort to distinguish between the various Oracle Transaction types available, Order Management Transaction types will now be referred to as either OM Order or Line Transaction Types. Define Order Management transaction types to classify orders and returns. For each order type, you can assign a default price list, defaulting rules, order lines, return lines, line types, workflow assignments, payment terms, and freight terms. Note: Order Management provides NO seeded OM transaction types. For existing Oracle Order Entry customers, Order Management will update existing Order Types to OM transaction type during the upgrade process. This step is required. See: Defining Order Management Transaction Types on page 4-86. 4-10 Oracle Order Management Suite Implementation Manual Oracle Order Management Recommended Setup Step 23 Cost of Goods Sold (COGS) Set up your Cost of Goods Sold Accounting Flexfield combination (COGS Account) in Oracle Inventory. This step is required if you plan on utilizing the functionality surrounding COGS. See: Oracle Inventory User’s Guide. Basic Setup 4-11 Oracle Order Management Recommended Setup Step 24 Processing Constraints Define processing constraints to prevent users from adding updating, deleting, splitting lines, and cancelling order or return information beyond certain points in your order cycles. Use the constraints Order Management provides, which prevent data integrity violations, or create your own. This step is optional. Several default values for processing constraints have been defined. See: Defining Processing Constraints on page 4-104 Defining Validation Templates on page 4-109 Defining Record Sets on page 4-112. Step 25 Defaulting Rules Define defaulting rules to determine the source and prioritization for defaulting order information to reduce the amount of information you must enter manually in the Sales Orders window. This step is optional. Several Defaulting rules and corresponding values for have been defined. See: Defining Defaulting Rules on page 4-118. Step 26 Credit Checking Define your credit checking rules. This step is required if you plan on performing any type of order credit checking. See Also Automatic Credit Checking of Orders on page 4-171 Defining Credit Check Rules on page 4-181 Defining Sales Credit Types on page 4-186 4-12 Oracle Order Management Suite Implementation Manual Oracle Order Management Recommended Setup Step 27 Holds Define automatic holds to apply to orders and returns. This step is required if you plan on performing automatic hold for orders or returns. See: Defining Holds on page 4-187. Step 28 Attachments Define standard documents to attach automatically to orders and returns. This step is optional. See: Overview of Attachments on page 4-191. Step 29 Freight Charges and Carriers Define freight charges and freight carriers to specify on orders. This step is required if you plan on charging customers for freight or additional order charges. See Also Oracle Order Management Users Guide Defining Freight and Special Charge Types Freight and Special Charges Examples Oracle Shipping Execution User’s Guide: Defining Freight Costs Defining Freight Carriers Step 30 Shipping Define shipping parameters in Oracle Shipping Execution. Basic Setup 4-13 Oracle Order Management Recommended Setup This step is required. See: Oracle Shipping Execution User’s Guide. Oracle Training Administration Users Please refer to the Oracle Training Administration User Guide for additional Order Management Setup Steps. See: Using Oracle Training Administration with Order Management Oracle Process Manufacturing Users Please refer to the Oracle Process Manufacturing User Guide for additional Order Management Setup Steps. 4-14 Oracle Order Management Suite Implementation Manual Order Management Profile Options Order Management Profile Options During your implementation, you set a value for each profile option in Order Management to specify how the application controls access and processes data. You can set or view these profile options in Oracle Order Management. Generally, your system administrator sets up and updates profile option values. The Oracle Applications System Administration User’s Guide contains more information on profile options, including the internal names of each Order Management profile option. Note: The table below includes additional profile options from other Oracle Applications that are used within Order Management. For detailed information on these profile options, please refer to the related application users guide. For example, additional information regarding profile option BOM: Check for Duplicate Configuration can be found in the Oracle Bills of Material. See Also Oracle System Administration, Oracle Applications System Administrator’s Guide User System Administrator Profile Option User User Resp App AR: Use Invoice Accounting for Credit Memos - X X BOM: Check for Duplicate Configuration - 0 BOM: Component Item Sequence Increment X X Key X - You can update the profile option. You can view the profile option value but you cannot change it. 0 You cannot view or change the profile option value. Site Required ? Default Value X X Required No 0 0 X Optional No X X X Optional 10 Basic Setup 4-15 Order Management Profile Options User System Administrator Profile Option User User Resp App BOM: Configurator URL of UI Manager X X X BOM: Default Bill of Material Levels X X Journals: Display Inverse Rate X OM: Administer Public Queries OM: Apply Automatic Site Required ? Default Value X X Required No Default X X X Optional 1 X X X X Optional No 0 X X X X Required - 0 X X X Optional Yes OM: Autoschedule - 0 X 0 X Optional NULL OM: Auto Push Group Date - 0 X 0 X Optional NULL OM: Charging Privilege X X X X X OM: Context Responsibility for Upgraded Orders - - X - - OM: Credit Card - - X X X Optional - 0 0 0 X Required OM: Credit Salesperson for Freight on Sales X X X X X No No OM: Cust Item Shows Matches X X X X Required No Obsolete Obsolete No NULL Attachments No Default None Privileges OM: Credit Memo Transaction Type OM: Customer Relationships 4-16 OM: Deactivate Pricing at Scheduling 0 0 Key X - You can update the profile option. You can view the profile option value but you cannot change it. 0 You cannot view or change the profile option value. Oracle Order Management Suite Implementation Manual 0 0 X Order Management Profile Options User System Administrator Profile Option User User Resp App OM: Debug Level X X X OM: Debug log Directory X X OM: Discounting Privileges 0 OM: Estimated Authorization Validity Period OM: GSA Discount Site Required ? Default Value X X Optional NULL X X X Optional NULL X X X 0 Optional Full - X X X X Required 21 Days 0 0 0 0 X Optional Warning OM: Included Item Freeze Method 0 0 0 0 X Required Booking OM: Invoice Numbering Method X X X Required Automatic OM: Invoice Source - 0 0 0 X Required OM: Invoice Transaction Type - 0 0 0 X Required Violation Action OM: Inventory Stock Location OM: Item Flexfield 0 0 0 0 X OM: Item View method X X X X X OM: Log Directory for Generated Packages Obsolete Obsolete Required No Default Obsolete Obsolete OM: Negative Pricing - 0 X X X Optional OM: Non-Delivery Invoice Source - 0 0 0 X Required OM: Notification Approver X X X X X Key X - You can update the profile option. You can view the profile option value but you cannot change it. 0 You cannot view or change the profile option value. Basic Setup 4-17 Order Management Profile Options User System Administrator Profile Option User User Resp App OM: Orders Purge Per Commit - 0 0 0 X OM: Over Return 0 0 0 0 X Required 0 - 0 0 0 X Required 0 - 0 X X X Required Shipped OM: Payment Method for Credit Card Transactions X X X X X Optional No Default OM: Reservation Time Fence - 0 X 0 X Optional NULL OM: Return Item Mismatch Action X X X X X Required Allow OM: Return Unfulfilled Referenced Line Action - 0 X 0 X Required Allow OM: Risk Factor Threshold for Electronic Payments - 0 X 0 X Optional 50 Obsolete Obsolete Site Required ? Default Value 100 Tolerance OM: Over Shipment Tolerance OM: Over Shipment Invoice Basis OM: Party Totals Currency OM: Set of Books OM: Schedule Line on Hold - 0 X 0 X Optional NULL OM: Show Discount - 0 X X X Required No OM: Show Line Details X X X X X Optional No OM: Source Code 0 0 0 0 X Required ORDER ENTRY OM: Use Configurator X 0 0 0 X Optional No Key X - You can update the profile option. You can view the profile option value but you cannot change it. 0 You cannot view or change the profile option value. Details on Invoice 4-18 Oracle Order Management Suite Implementation Manual Order Management Profile Options User System Administrator Profile Option User User Resp App OM: Under Return - 0 0 - 0 - Site Required ? Default Value 0 X Required 0 0 0 X Required 0 0 0 X X Optional No Default QP: Blind Discount Option - 0 0 X X Required Yes QP: Bypass the Pricing Engine 0 0 X X X Required No QP: Item Validation Organization - 0 X 0 n Required No Default QP: Line Volume UOM Code - 0 0 X X Optional No Default QP: Line Weight UOM Code - 0 0 X X Optional No QP: Negative Pricing - 0 0 X X Required No Default QP: Source System Code 0 0 0 X X Required No Default Key X - You can update the profile option. You can view the profile option value but you cannot change it. 0 You cannot view or change the profile option value. Tolerance OM: Under Shipment Tolerance OM: Unit Price Precision Type ONT:Customer Service Feedback ONT:Customer Service Report Defect ONT:Records on Summary Page for External Users QP: Accrual UOM Class QP: Return Manual Discounts Basic Setup 4-19 Order Management Profile Options User System Administrator Profile Option User User Resp App QP: Unit Price Precision Type 0 0 0 QP: Verify GSA 0 0 Sequential Numbering - Tax: Allow Ad Hoc Tax Changes Site Required ? Default Value X X Required Standard 0 0 X Required No 0 X X X Required - X X X X Required Yes Tax: Allow Manual Tax Lines - X X X X Required Yes Tax: Allow Override of Customer Exemptions - X X X X Required Yes Tax: Allow Override of Tax Code - X X X X Required Yes Tax: Calculate Tax on Credit Memos - 0 X X X Optional No Tax: Inventory Item for Freight - X X X X Optional No Tax: Invoice Freight as Revenue - X X X X Optional No Tax: Use Tax Vendor - 0 X X X Required No X - You can update the profile option. You can view the profile option value but you cannot change it. 0 You cannot view or change the profile option value. Default WSH: Internet Proxy URL Key Order Management Profile Option Descriptions and Settings OM: Administer Public Queries ONT_ADMINISTER_PUBLIC_QUERIES This profile option determines which responsibility is able to create and update public queries. OM: Apply Automatic Attachments 4-20 OE_APPLY_AUTOMATIC_ATCHMT Oracle Order Management Suite Implementation Manual Order Management Profile Options This profile option determines whether rule-based attachments are applied without user intervention. OM: Auto Push Group Date ONT_AUTO_PUSH_GRP_DATE This profile option controls scheduling when a new line is inserted into an existing set. If the new line cannot be scheduled on the same date as the rest of the set, this profile is used. If the profile is set to Yes, the entire set will be automatically rescheduled. If the profile is set to No, an error will occur. You can change the dates or quantities to make scheduling succeed. This profile option can be overridden for a parameter specific to customers or customer sites by setting a value in the Customer window. The default is NULL which is equivalent to No. OM: AutoSchedule ONT_AUTOSCHEDULE This profile option determines the default setting of the use of autoscheduling. Yes--Order lines are scheduled automatically at the time of entry. No--Order lines are not scheduled automatically at the time of entry. OM: Charging Privilege OE_CHARGING_PRIVILEGE This profile option controls your ability to manually apply freight and special charges on an order or order line. Choices from: Full Access--You can modify and apply charges, but you cannot modify non-overridable charges. View Only Access--You can only view charges. Unlimited Access--You can modify and apply all charges including the non-overridable charges. OM: Context Responsibility for Upgraded Orders OE_RESP_FOR_WF_ UPGRADE This profile option is used to flag certain responsibilities to be used when setting the applications context for deferred activities for upgraded orders and order lines. It is used for customers who are upgrading and only needs to be set if a user, who has created orders, (created_by column in Order Management schema) has multiple responsibilities that point to a single operating unit. This profile option can only be set at the Responsibility level. OM: Credit Card Privileges ONT_CREDIT_CARD_PRIVILEGES Basic Setup 4-21 Order Management Profile Options This profile option limits the amount of credit card information displayed in the Sales Orders window and limits who can perform manual or on-line authorizations. The authorization code and credit card number fields displays only the last four digits if the profile option is set to None or Limited. On-line and manual authorizations are allowed if this profile option is set to All or Limited. Choose from All, Limited, or None. OM: Credit Memo Transaction Type OE_CREDIT_TRANSACTION_TYPE_ID This profile option value is transferred to Receivables if no value is defined for the credit memo transaction type. OM: Credit Salesperson for Freight on Sales WSH_CR_SREP_FOR_FREIGHT This profile specifies the default Salesperson to use during Invoice Interface when creating sales credits for Freight Charge lines. OM: Cust Item Shows Matches OE_CUST_ITEM_SHOW_MATCHES This profile option determines whether Order Management defaults the Item with the highest ranking item or shows the list of all the matched Internal item numbers when a customer item number is used and that customer item is cross-referenced to more than one internal item. OM: Customer Relationships ONT_CUSTOMER_RELATIONSHIPS This profile option is no longer used by Oracle. It is now obsolete, and has been replaced by an entry on the Order Management Parameters window. OM: Deactivate Pricing at Scheduling ONT_NO_PRICING_AT_SCHEDULING This profile option should not be set unless directed by an Oracle Representative. OM: Debug Level ONT_DEBUG_LEVEL This profile option is used to store debug messages to assist in problem identification. The OM: Debug profile option controls which debug messages get written to the debug log based on their assigned level. Assigning a value greater than 0 or NULL causes debugging to be turned on. The value of this option determines the level of debug messages printed within a log file. For example, if OM: Debug Level has a current value of 3, all debugging messages with 7a level of 1,2 or 3 will be spooled out to the debug log. Valid values for this profile option are: 4-22 Oracle Order Management Suite Implementation Manual Order Management Profile Options ■ NULL: Do not print any debug messages ■ 1: Level 1; Print a limited subset of debug messages (level 1) ■ 2: Level 2; Print a limited subset of debug messages, including level 1 ■ 3: Level 3; Print a limited subset of debug messages, including levels 1,2 ■ 4: Level 4; Print a limited subset of debug messages, including levels 1,2 3 ■ 5: Level 5; Print all debug messages The default for this profile option is NULL. Note: After setting Level place back to 0 else may see performance hits. OM: Debug Log directory OE_DEBUG_LOG_DIRECTORY This profile option determines the default directory used to store log file outputs when performing Order Management debugging. OM: Discounting Privilege ONT_DISCOUNTING_PRIVILEGE This profile option provides the choice of controlling user’s ability to apply discounts on an order or order line. Full--Ability to apply any valid discount against an order or order line, as long as the order type of the order does not enforce list prices. (Default value). Non-Overridable Only--Ability to apply only non-overridable discounts against an order or order line. Unlimited--Ability to apply any valid discount against any order or order line, regardless of whether the order type of the order enforces list prices. OM: Estimated Authorization Validity Period ONT_EST_AUTH_VALID_DAYS This profile option determines the estimated number of days a credit card authorization is assumed to be valid. The default value is 21 days. OM: GSA Discount Violation Action ONT_GSA_VIOLATION_ACTION This profile option determines how you want the user notified when you define a discount that results in an item price less than the price on a GSA discount for the same price list. OM: Included Item Freeze Method ONT_INCLUDED_ITEM_FREEZE_METHOD Basic Setup 4-23 Order Management Profile Options This profile option determines the point in the order’s status at which the included items from a configuration’s bill of material are added as lines on the order. OM: Invoice Numbering Method WSH_INVOICE_NUMBERING_METHOD This profile option determines whether or not the Invoicing activity generates invoice numbers based on the delivery name. OM: Invoice Source OE_INVOICE_SOURCE This profile option value is transferred to Receivables if the value is null for your transaction type. 4-24 Oracle Order Management Suite Implementation Manual Order Management Profile Options OM: Invoice Transaction Type OE_INVOICE_TRANSACTION_TYPE_ID This profile option value is transferred to Receivables if no value is defined for the transaction type. This profile option is no longer used by Oracle. It is now obsolete. If the inventory item is set up to the locator level Order Management will use that as the default picking location. You can also enable default staging locations at the locator level in Shipping Parameters window. OM: Inventory Stock Location OM: Item Flexfield OE_ID_FLEX_CODE This profile option determines the structure of the Item Flexfield (System Items) used by Order Management. This structure should be the same across all applications in the same database. OM: Item View Method ONT_ITEM_VIEW_METHOD This profile option determines the display method of data retrieved within the LOV for the Item field within the Order Management Options Window. Valid values are: ■ 1: Only return item descriptions, with child indentations. ■ 2: Only return item description without child indentations. ■ 3: Display the concatenated item segment values with child indentations. ■ 4: Display the concatenated segment values without indentation. OM: Log Directory for Generated Packages OE_CONC_LOG_DIRECTORY This profile option is no longer used by Oracle. It is no longer used. OM: Negative Pricing ONT_NEGATIVE_PRICING This profile option controls whether Order Management allows a negative list price or negative selling price to be determined by the Pricing Engine or to be entered as an override by a user on a sales order. The profile option QP: Negative Pricing is used for price lists, and controls whether a negative unit price can be entered on a price list Basic Setup 4-25 Order Management Profile Options OM: Notification Approver OE_NOTIFICATION_APPROVER This profile option is used during upgrading Order Entry Order Cycle History to Order Management Workflow History. Setting this profile option enables you to send workflow Notifications (Approval or FYI notifications) to the Role that the option is set to for the following Oracle Order Management seeded Workflow types: ■ OEOH-OM Order Header ■ OEOL-OM Order Line This profile option can be optionally set. When an order or line is created, the value of this profile option is defaulted to the wf item attribute Notification Approver on the Sales Order Header or Sales Order Line work items. Valid values for this profile are based upon a Value Set that uses the seeded view WF_ROLES. If the profile option is NULL, then notifications for this role value will go to the user SYSADMIN. All upgraded approvals are sent to this role value of this Profile option. OM: Non-Delivery Invoice Source OE_NON_DELIVERY_INVOICE_SOURCE This profile option value is transferred to Receivables if the OM: Invoice Numbering Method profile option is set to Delivery and the line is non-shippable. OM: Orders Purge Per Commit OM_ORDERS_PURGE_PER_COMMIT This profile option determines how many orders the purge process should purge before performing a commit to the database. OM: Over Return Tolerance OM_OVER_RETURN_TOLERANCE This profile option indicates the percentage by which a return line can be over-received. Any value greater than or equal to zero (0) is a valid value. This profile option is set at the site level. Default value is zero (0). OM: Over Shipment Invoice Basis OE_OVERSHIP_INVOICE_BASIS This profile option determines whether to invoice the ordered quantity or the shipped quantity for an over shipment. This profile option can be overridden for the parameter specific to customers or customer sites by setting a value in the Customer window. Default value is Shipped. 4-26 Oracle Order Management Suite Implementation Manual Order Management Profile Options OM: Over Shipment Tolerance OM_OVER_SHIPMENT_TOLERANCE This profile option indicates the percentage by which an order line can be over-shipped. Any value greater than or equal to zero (0) is a valid value. This profile option is set at the site level. Default value is zero (0). OM: Party Totals Currency OM_CUST_TOTAL_CURRENCY This profile specifies the currency used by the Calculate Party Totals concurrent program that sums up order totals by Party. OM recommends that you specify this profile at the site level only. You should use the currency that is in use for the most orders so that currency conversion can be kept to a minimum. OM: Payment Method for Credit Card Transactions ONT_RECEIPT_METHOD_ID This profile option is used by the credit card authorization process as a default for the primary payment method if a specific customer does not have one. OM: Reservation Time Fence ONT_RISK_FAC_THRESHOLD This profile option controls automatic reservations during scheduling. The profile option represents the number of days into the future that scheduling will reserve. The default value is NULL which means that scheduling will not automatically reserve. This profile option is used during autoscheduling and also by the scheduling workflow activity and concurrent program to perform reservations. OM: Return Item Mismatch Action ONT_RETURN_ITEM_MISMATCH_ACTION This profile option controls what should occur if you try to change the item ID of a referenced return line. Select from: Reject--Line processing is halted with an error message. Warning--Line processing is continued with a warning. Allow--Line processing continues with no warning or error. Default value is Allow. Basic Setup 4-27 Order Management Profile Options OM: Return Unfulfilled Referenced Line Action ONT_RETURN_FULFILLED_ LINE_ACTION This profile option is used for returns to control return of unfulfilled lines. Default value is Allow. Choices from: Reject--Do not create return line if the reference line is non-fulfilled. Warning--Create return line with Warning if the referenced line is non-fulfilled. Allow--Create return line without Warning if the referenced line is non-fulfilled. OM: Risk Factor Threshold for Electronic Payments ONT_RISK_FAC_ THRESHOLD This profile option sets a threshold for determining whether a credit card authorization qualifies as a high risk. Scores can range from 1 to 100, referring to a risk free authorization and 100 referring to a high risk authorization. If the score for a transaction exceeds this threshold, Order Management will put the order on a High Risk Hold. The default value is a score of 50. OM: Set of Books OE_SET_OF_BOOKS_ID This profile option is no longer used. It has been replaced by entering an operating unit on the Order Management Parameters window that is associated with a default set of books you wish to use. OM: Schedule Line on Hold ONT_SCHEDULE_LINE_ON_HOLD This profile option controls whether scheduling will attempt to schedule lines that are on hold. The default value is NULL, which is the equivalent to Yes. OM: Show Discount Details on Invoice OE_DISCOUNT_DETAILS_ON_INVOICE This profile option determines whether the discount details are passed to Oracle Receivables for printing on an invoice. Default value is No. OM: Show Line Details ONT_SHOW_LINE_DETAILS This profile option determines whether the line details of a model are displayed in the Sales Orders window. You can also toggle the display of line details using the Tools menu from the Sales Orders window. 4-28 Oracle Order Management Suite Implementation Manual Order Management Profile Options OM: Source Code ONT_SOURCE_CODE This profile option identifies the source code that Order Management passes to Oracle Inventory during scheduling. The source code should be defined as the third segment of the Sales Order Flexfield to guarantee that each transaction is unique. OM: Use Configurator ONT_USE_CONFIGURATOR This profile option indicates which Oracle application software will be launched to enter configuration information when selecting the Configurator button from the Sales Order window. Valid values are: Yes -- Use the Oracle Configurator application to enter you configurations via Oracle Configurator user interfaces. Oracle Configurator should be installed and setup if you chose this value. See: Oracle Configurator Installation Guide. No -- Use the Oracle Order Management application to enter your configurations via the Options window The default for this profile option is No. Note: ■ ■ If you set this profile option value to Yes and do not have the Oracle Configurator product installed, Order Management will automatically display the Order Management Options window when selecting the Configurator button from the Sales Order Pad. Do not switch the value of this profile option when working with existing orders. For example; If a sales order that contains configurations is created while the profile value is set to Yes, do not change your profile option value to No and then attempt to update the sales order via the Configurator button. Update the configuration information through the same options window as the order was created in, or update via the Sales Order window. OM: Under Return Tolerance OM_UNDER_RETURN_TOLERANCE This profile option indicates the percentage by which a return line can be under-received for it to be considered fulfilled. Any value between zero (0) and 100 (both inclusive) is a valid value. This profile option is set at the site level. Default value is zero (0). Basic Setup 4-29 Order Management Profile Options OM_UNDER_SHIPMENT_TOLERANCE OM: Under Shipment Tolerance This profile option indicates the percentage by which an order line can be under-shipped for it to be considered fulfilled. Any value between zero (0) and 100 (both inclusive) is a valid value. This profile option can be set only at the site level. Default value is zero (0). For additional information on profile option descriptions and setting for products other than Order Management, please refer to the product specific users guide. OM: Unit Price Precision Type ONT_UNIT_PRICE_PRECISION_TYPE This profile option determines whether entry and display of unit prices in Order Management are in a currency’s standard precision or its extended precision. Note: Totals are always displayed in the standard precision of the currency. The profile option QP: Unit Price Precision Type is used to control the value that can be entered for the rounding factor on price lists and pricing agreements. The rounding factor can not be greater than the precision allowed by this profile. Unit price precision is not controlled by this profile. ONT:Customer Service Feedback ONT_FEEDBACK_PROFILE This profile option value is the Customer Service contact responsible for a Return Material Authorization (RMA) Request. A workflow notification is sent to the Customer Service Representative. Enter the Oracle Applications user id. ONT:Customer Service Report Defect ONT_REPORTDEFECT_PROFILE This profile option value is the Customer Service contact responsible for report defects. A workflow notification is sent to the Customer Service Representative. Enter the Oracle Applications user id. ONT:Records on Summary Page for External Users ONT_ICP_DEFAULT_ RECORDS This profile option indicates if default records for external customers are required. It can be set to true or false. 4-30 Oracle Order Management Suite Implementation Manual Enabling Parameters Enabling Parameters Item Validation Organization Item Validation Organization In Order Management, the Item Validation Organization parameter indicates the Oracle Manufacturing organization against which items are validated. You set the Item Validation Organization parameter in the Parameters window, and can only set this parameter for the operating unit associated with your current responsibility. You must define all transactable items in this organization. Note: Organization is synonymous with warehouse in Order Management. Note: If you are upgrading from Oracle Order Entry Release 11 to Oracle Order Management Release 11i, the upgrading process automatically sets up the Item Validation Organization system parameter to the current Release 11 values (for each operating unit) for the OE profile option: OE: Item Validation Organization. Note: Some Shared Install Customers who do not have Order Management installed will also be using this parameter. For this reason, they need to setup this parameter using our standard OM Parameters form. Our entire System Parameters functionality is available as a self-sufficient patch complete with all server side and client side objects which can be downloaded by Shared Install customers to use our Parameters functionality. Customer Relationships Customer Relationships enable the sharing of Ship To and Bill To locations between related customers. If this check box is not selected, you can only select Ship To and Bill To locations for an order that belong to the Customer sold to on the order. ◗◗ To enable Order Management parameters: 1. Navigate to the Parameters window. The Parameters window appears. Basic Setup 4-31 Enabling Parameters Warning: You cannot have any open orders when performing updates to Order Management Parameters. If open orders are found, a warning message displays. Select the OK button to ignore the Warning or select the Cancel button to not commit changes. 2. Select a value for the Operating Unit. The operating unit can provide additional defaulting information for processing orders and returns if certain order information is not entered. 3. Select the Item Validation Organization for your operating unit. The Item Validation Organization determines which inventory organization you will validate your Items against. This field typically contains the value of your Master Inventory Organization. 4-32 4. Select the check box for Customer Relationships to enable the use of Ship To and Bill To addresses for related customers. 5. Save your work. Oracle Order Management Suite Implementation Manual Taxation Taxation Order Management enables you to quote an estimated tax for orders at the time of order entry. The tax estimate can be based on the tax status; address information, and VAT (Value Added Tax) codes assigned to items, sites, and customers. The actual tax value that appears on the customer’s invoice in Oracle Receivables may vary. See: Overview of Tax and Setup Steps for Value Added Tax, Oracle Receivables User’s Guide. Credit Check Tax amount for each line will be stored on the order line. You can control whether the tax amount is included in credit checking. Multiple Tax Amounts on an Order Line You can specify a tax group for an order line. You can view multiple taxes applied to an order line at the time of entry and query, or on the acknowledgement and notification of shipment. Oracle Receivables allows each invoice line to be taxed automatically with one or more taxes. Tax Points Currently, Order Management only supports calculation for tax at the time of invoice creation. Through the use of seeded processing constraints, Order Management does not allow a user to update Tax Exempt Number, Reason, or any other tax related fields once an invoice has been generated. If you business process allows tax information to be updated after an invoice has been created, you must modify the seeded processing constraints that affect updating tax information. Tax Calculation You can calculate tax for display by picking a date to base tax rates on, including the entry, planned ship, schedule, requested, and promise dates. You can prevent updates to this date after an order line reaches the point where the tax amount payable by the customer is calculated and fixed. When the line is invoiced, the tax date is set to the invoice date and becomes non-updatable. Taxes are recalculated based on the tax rate of the invoice date. Basic Setup 4-33 Taxation Tax Inclusive Values You can review the tax inclusive value of an order when the order is queried or entered. Order Management displays the estimated tax amount based on the tax date of the order. You can perform a credit check on the tax inclusive or tax exclusive values. Tax Method Options Order Management enables you to specify the tax method for your company or installation as a system option. The tax method determines how taxes are calculated. Tax methods include the following: ■ Sales Tax For sales tax, taxes are based on different components of the customer’s shipping address. Order Management provides you with a default sales tax location flexfield structure composed of the State, County, and City. ■ Value Added Tax (VAT) For value added tax, taxes are based on tax rates assigned to user- defined codes. These codes are assigned to specific items, customers, and customers business locations. Note: Tax codes are used for value added taxes or a location-based taxes (sales tax). Tax Security Order Management enables you to update the tax security information on an order or return by setting the Tax: Allow Override of Customer Exemption profile option. This profile option controls the modification of the Tax Handling Status, Reason & Certificate fields at the order header and order line levels. Standard tax calculations can be overridden by setting the profile option to Yes. The Tax: Allow Override of Tax Code profile option determines whether the defaulted tax code on an order line can be updated. Non-Taxable Transaction Types Order Management enables you to define whether Oracle Receivables can automatically calculate taxes for a given order type. This will also determine if tax is required on an order. This option is set in Oracle Receivables. You can specify 4-34 Oracle Order Management Suite Implementation Manual Taxation whether a transaction type is taxable in the Receivables Transaction Types window. See: Transaction Types, Oracle Receivables User’s Guide. See Also Overview of Tax, Oracle Receivables User’s Guide. Setup Steps for Value Added Tax, Oracle Receivables User’s Guide. Tax Codes and Rates, Oracle Receivables User’s Guide. Tax Groups, Oracle Receivables User’s Guide. Tax Exemptions, Oracle Receivables User’s Guide. Basic Setup 4-35 Defining Order Management QuickCodes Defining Order Management QuickCodes You can create lookup codes for Order Management. QuickCode types that you can define include: ■ Cancellation Codes ■ Credit Cards ■ Freight Terms ■ Hold Types ■ Note Usage Formats ■ Release Reasons ■ Sales Channels ■ Shipment Priorities You can create as many quickcodes as you require. You can also inactivate quickcodes. ◗◗ To define quickcodes: 1. Navigate to the Oracle Order Management Lookups window. The Oracle Order Management Lookups window displays. 4-36 Oracle Order Management Suite Implementation Manual Defining Order Management QuickCodes 2. Query the Type for which you want to enter Lookup Codes. 3. Enter your User Name. 4. Select the Application you want to use to define QuickCodes. Note: The Access Level toggles display whether you can define new Lookup Codes. You can modify User and Extensible Lookup Codes, however, system code cannot be modified. Contact your system administrator. 5. Optionally, enter the effective dates for the Lookup Code. 6. Check Enabled to activate the Lookup Code. 7. Toggle Enabled off to inactivate the Lookup Code. 8. Save your work. See Also Lookups - Defining Receivables Lookups, Oracle Receivables User’s Guide. Basic Setup 4-37 Defining Freight and Special Charge Types Defining Freight and Special Charge Types Order Management enables you to charge for freight and special charges to meet your business needs. The full charge to your customer is visible at the time of order entry and can be communicated to the customer. The freight and special charge costs can be estimated or final. The actual costs incurred are captured at Ship Confirmation and can be converted to charges based on freight terms and other rules you define. Freight and Special Charges are created and enabled using pricing Modifiers. See: Overview of Modifiers on page 4-146. Order Management captures the freight and special charges information and Shipping Execution captures all costs incurred on the shipment of goods. Once ship confirmation completes, the costs are transferred to Order Management for converting the costs into charges. You can set up your different freight costs in Shipping Execution. Order Management’s freight and special charge feature enables you to: ■ capture the charges at the time of order entry. ■ change the freight and special charges until invoicing. ■ 4-38 capture the freight and special charge information at any point in the order cycle. ■ create various freight and special charge types. ■ support charges at various levels (order and line). ■ specify the controls for refunds. Oracle Order Management Suite Implementation Manual Defining Freight and Special Charge Types Freight Terms You can choose the freight terms for an order line depending on the Customer Contract, Customer, Ship-To, and Ship-From locations. Freight terms can include the following: Prepaid You (the shipper) take responsibility for paying the freight costs. The costs are recorded in Shipping Execution, and a record is captured in Accounts Payable for the freight cost. Prepay and add with fixed charges You can prepay the freight costs and charge your customer as a direct pass through charge. The costs are recorded in Shipping Execution and transferred to Order Management. A pricing modifier is used to apply the charge to the customer invoice. Corresponding records are captured in Accounts Payable for the freight cost, and in Accounts Receivable for the Charge. You can prepay the freight costs and pass it on to your customer as a charge with a markup or markdown. The costs are recorded in Shipping Execution and transferred to Order Management. Prepay and add with cost converted to charge A pricing formula and pricing modifier are used to calculate the markup/markdown and apply the charge to the customer invoice. Corresponding records are captured in Accounts Payable for the freight cost, and in Accounts Receivable for the Charge. The freight carrier bills the customer directly; not you. The costs are not recorded in Shipping Execution or Order Management. Collect The freight carrier bills a third party, not the seller or buyer. The costs are not recorded in Shipping Execution or Order Management. Third Party Billing Freight and Special Charge Types Order Management provides you with the ability to setup and capture different charge types and sub type including (but not limited to): ■ Duty ■ Handling ■ Insurance Basic Setup 4-39 Defining Freight and Special Charge Types ■ Export ■ Freight ■ Administration ■ Miscellaneous Grouping of Freight and Special Charges You can setup different sub-types under a give charge type, such as, if the freight or special charge type is Miscellaneous, you can group the following different charges: ■ Late penalty charges ■ Restocking charges ■ Negotiations and legal fees ■ Foreign agent commissions The following Charge Types and sub-types have been predefined by Oracle under the Oracle Shipping Execution lookup for FREIGHT_COST_TYPE: ■ Insurance ■ Export ■ Duty ■ Freight ■ Administration ■ Handling Order Management shares these Freight Cost Types with Shipping Execution for the COST to CHARGE conversion. Note: You cannot define sub-types for the Shipping Execution Charge Types lookups. Additionally, Oracle Order Management has its own lookup type, also called FREIGHT_CHARGES_TYPE. You are allowed to add charge types codes to the lookup FREIGHT_CHARGES_TYPE. The following charge type code is predefined for this lookup: ■ 4-40 Miscellaneous Oracle Order Management Suite Implementation Manual Defining Freight and Special Charge Types You can define sub-types for the Oracle Pricing Charge Type Code of FREIGHT_CHARGES_TYPE. The following sub-types are predefined for the FREIGHT CHARGE TYPE = Miscellaneous: ■ Miscellaneous ■ Penalty ■ Restocking ■ Return Fees Definition Data Elements You can define different attributes for setting your charges including the following elements: ■ Charge Currency: The currency for the Charge amount setup at list level ■ Charge Name: Charge Name picked from the pre-defined setup in pricing ■ Level: Order Level or Line level charges ■ Calculation Method: Percentage (%), Amt (Per pricing unit), Lumpsum amount Formula based ■ Refundable: Whether the charge is refundable ■ Automatic: Whether the charge is automatic or manual ■ Overridable: Whether the charge is overridable after it is applied ■ Start/End Dates: Active date range ■ Qualifiers: Qualifiers to apply charges conditionally Calculation Method Various common methods of calculating charges are supported. Examples of calculation methods include: ■ Fixed amount ■ Percentage of line or order total ■ Fixed rate per pricing unit of measure ■ Simple pass of a cost ■ Percentage markup or markdown of a cost Basic Setup 4-41 Defining Freight and Special Charge Types ■ User-defined formula for a given charge type. The formula can be constructed using the pricing attributes, constant values, or function returning a value. Qualifier /Pricing Attributes for Freight and Special charges The following Qualifier Attributes / Pricing Attributes have been predefined for Freight and Special Charges. Note: You can also make use of any other Qualifier / Pricing Attributes setup in the Pricing for freight and special charges Table 4–1 Qualifier Attributes Context Attribute ORDER SHIPPABLE_FLAG ORDER SHIPPED_FLAG ORDER FREIGHT_COST_TYPE_CODE VOLUME LINE_WEIGHT VOLUME LINE_VOLUME Table 4–2 Pricing Attributes Context Attribute PRICING ATTRIBUTES INSURANCE_COST PRICING ATTRIBUTES HANDLING_COST PRICING ATTRIBUTES DUTY_COST PRICING ATTRIBUTES EXPORT_COST PRICING ATTRIBUTES FREIGHT_COST PRICING ATTRIBUTES ADMINISTRATIVE_COST For more information on Freight and Special Charges using qualifiers within Order Management, see Appendix F. 4-42 Oracle Order Management Suite Implementation Manual Defining Freight and Special Charge Types Application of Charges You can have freight and special charges applied to an order in the following ways: ■ Manually Applied ■ Open Interface ■ Automatically based on the qualifier setup Order or Order Line Charges You can enter charges for order or order line levels. The Freight and Special Charges are returned by the Pricing Engine and if there are multiple automatic charges of same charge type and subtype then Order Management applies the one with Maximum amount. If user wants the charge to be applied in preference then they may need to set them up with incompatibility group and precedence as described in the Modifier Setup section. See Overview of Modifiers. Note: f there is an applied charge of a Charge Type/Subtype then the LOV for Charge Name field in Charges window will not show any manual charges for the same type/subtype Estimate or Actual The estimated or actual charge is displayed in the Charges user interface. You can set the amount as Estimated or Fixed. Note: You can set estimated or actual charges only after a charge has been applied on an order or order line. Multiple Unlimited Charges You can enter an unlimited number of charges at each level with unique combination of Charge Type and Charge Sub-Type. Timing of Charges Entry You can enter freight and special charges at any event point or activity, up to the point where the order and line is invoiced. At the point of invoicing the charge will be made fixed and no more charges can be added after the line is invoiced. Basic Setup 4-43 Defining Freight and Special Charge Types Changing and Deleting of Charges Based on your processing constraints, you have the ability to manually change the amount, delete or cancel charges applied to an order or order line until invoicing. You can enter a reason code if the charge is being changed, however, the history will not be maintained. In addition, you can add processing constraints to prevent charges from deletion or cancellation after a user-definable point in the order’s process. ◗◗ To define Order Management Freight Cost Types: 1. Navigate to the Oracle Order Management Freight Cost Types window. The Oracle Order Management Freight Cost Types window displays. 4-44 2. Enter a name for your Freight Cost type in the Name field. 3. Enter a description for your Freight Cost type in the Type field. 4. Select a currency that the Freight Cost Type will use in the Currency field. 5. Enter the default value for your Freight Cost Type in the Amount field. The amount will be defaulted to an order line when you enter select the Freight Cost Type on a order line. 6. Enter effective dates for you Freight Cost Type in the Effective Date From/To fields. Oracle Order Management Suite Implementation Manual Defining Freight and Special Charge Types 7. Determine whether to link your Freight Cost Type to a Freight Charge. Select the Map to Charge check box if you wish to process Cost to Charge conversions. 8. Save your work. ◗◗ To define Order Pricing or Shipping Execution Freight Charge lookups: 1. Navigate to the Oracle Pricing or Oracle Shipping Lookups window. The Oracle Pricing or Oracle Shipping Lookups window displays. 2. Query for Pricing or Shipping lookup = FREIGHT_CHARGES_TYPE. 3. Enter a name for your Pricing or Shipping freight charge lookup in the Code field. 4. Enter a description that will appear in the List of Values when selecting a freight charge on an order line in the Meaning field. For example, the Lookup type Print has a code of Y, and a value Yes in the Meaning field. When you select the LOV for the Print lookup code, you will see Yes as opposed to Y. 5. Enter a description for your Pricing or Shipping freight charge lookup in the Description field. Basic Setup 4-45 Defining Freight and Special Charge Types 6. Optionally, enter a value in the Tag field to describe your lookup. Tag’s are used to categorize lookup values. 7. Enter effectivity dates for your lookup in the Effective Date From/To fields. 8. Select the Enable check box to enable you Pricing or Shipping freight charge lookup to be selected when entering an order line. 9. Save your work. a. To define a new sub-type for Pricing FREIGHT_CHARGES_TYPE, create a new Pricing Lookup where lookup_type = <lookup_code previous defined> This becomes a Type for all sub-type codes. For more information on freight and special charges, see Appendix F. Sales Orders window You can setup Charges to apply automatically when a new order or order line is entered. The charges are displayed in Charges user interface accessible from Sales Orders window. Viewing and Applying Freight and Special Charges Freight and special charges can be viewed from within the Sales Order window, provided the profile option OM:Charging Privilege has been properly set. ■ ■ 4-46 To view Order level charges, navigate to the Sales Order Header window, select the Actions button, then select Charges To view Order Lines charges, navigate to the Sales Order Lines window, select the Actions button, then select Charges. Oracle Order Management Suite Implementation Manual Defining Freight and Special Charge Types Field Information for Charges window ■ Charge Name: The charge name for the charge. ■ Type: The charge type code for Freight Charge. ■ Rate: The rate percentage specified in the setup of the Freight Charge. ■ ■ ■ ■ ■ ■ ■ Amt/Unit: If the charge is setup as AMT, then this field contains the amount per pricing unit. Charge: The applicable charge amount in the Order currency. Fixed: This check-box can be used to mark the charge as Fixed so that the charge is not overridden by the Pricing Engine or any cost conversion programs. Auto: This check-box indicates whether the charge is automatic or manual. Automatic charges are applied directly by the Pricing Engine. Overridable: This check-box indicates whether the charge is overridable by the user. Unless the user has unlimited privileges, no changes are allowed on this type of charge, although a user can mark or un-mark the charge as fixed or estimated. Refundable: This check-box indicates whether the charge is refundable or not. Invoiced: This check-box will indicate whether the charge is invoiced or not. Invoiced charges are non-modifiable. Basic Setup 4-47 Defining Freight and Special Charge Types ■ ■ Reason: If any change is made to the charge, user will need to specify the reason for it. Comments: Optional field for entering the comments on the charge. You are allowed to change a Charge as a Credit within the Charges window by changing the integer sign for a value within either the Rate, Percent, Amt/Unit, or Charge Amount fields, provided the charge you are modifying is overridable. Charge Types which have been defined as Automatic get applied to an order or order line. If multiple charges (automatic charges only) of same type/subtype are returned by the Pricing Engine, then the charge with highest amount will be applied to the order or line. Manual Charges are available for use on order or order lines through the Charges window. The LOV for the Charge Name field displays available manual charges only. ■ ■ When navigating to the Charges window, if there currently is an applied charge of a type/subtype appearing, then the LOV for the Charge Name field will not show a charge of the same type/subtype. If there are no manual charges setup in Pricing, then the Charge Name field LOV returns no records. Returns ■ ■ These Freight charges can be a charge or credit to the customer. ■ These charges can be setup using Freight Terms defined on the return line. ■ The Freight Term will be either defaulted or copied from the referenced line. ■ ■ ■ 4-48 The User will be allowed to set Freight Charges for return lines using the Line Category/Line Type as the Qualifier Attributes. User may change the (Defaulted/Referenced) Freight Term, depending upon the contract he has with the Customer, for the Freight on return. If the Return Line is referenced from any existing Order Line, the refundable freight charges associated with the referenced order, will be available as a credit to the user. If the user creates a new Return line without a reference to any existing line, then the user will have to manually apply any Refundable Freight Charges on it. Oracle Order Management Suite Implementation Manual Defining Freight and Special Charge Types Copying Charges The copy order functionality in Oracle Order Management supports the following pricing options for standard copying of orders and returns: Copy for Orders Retain Original Pricing: Retains manual, automatic price adjustments, and charges. The CALCULATE_PRICE_FLAG is set to Freeze Price. Re-price based on user-defined date: Manual adjustments and charges will be recalculated. The CALCULATE_PRICE_FLAG is set to Calculate Price. Copy for Returns Retain original pricing: Retains the refundable manual and automatic charges. The CALCULATE_PRICE_FLAG will be set to Partial. The CALCULATE_PRICE_FLAG is set to Partial in order for any manual charges, such as the return and restocking fees can be added to the order. Re-price based on user-defined date: Retains the refundable manual and automatic charges. The charges are marked as Fixed so that they cannot be overridden by subsequent re-pricing requests. The CALCULATE_PRICE_FLAG is set to Calculate Price. Invoicing A line level charge is invoiced with the invoicing order line. All order and order line level charges are invoiced with the first invoicing order line. If any new charges are added at the order header level, then the charges are invoiced with the next invoicing order line. See Also Overview of Sales Order on page 5-2 Invoicing Activity on page 26-2 Copying Orders on page 5-4 Overview of Returns on page 6-2 Order Import on page 24-2 Basic Setup 4-49 Overview of Workflows Overview of Workflows Order Management utilizes Oracle Workflow to provide you control over the sequence of events that occur in processing of orders, returns, order lines, and return lines. Order Management provides you the maximum flexibility to handle mainline revenue cycle and exception-based business processes. The Oracle Workflow manages the state of all activities for an order, automatically executes functions and sends notifications, maintains a history of completed activities, and detects error conditions and starts error processes. The Workflow Engine is implemented in server PL/SQL and activated when a call to an engine API is made. See: Oracle Workflow User’s Guide. Order Management enables you to model your organization's processes in terms of generic order processes. When defining a new workflow, you can start with the basic activities of order processing. You can model your business processes by copying and editing seeded processes or model your business processes by using seeded and custom activities as components. You may want to add an approval step in the order process that your product executes, you should model your process in Oracle Workflow. Order Management enables you to track the history of your process by utilizing Oracle Workflow to control the execution of the order process. When Order Management begins an order process step or sends a notification, the system records the event. The event is also recorded when the system has completed processing or the notification is answered. Types of Order Processes You can use workflow processes to control the order processing for different types of orders. You can create workflow assignments from the Define Transaction Types window. Each order type can use a different order workflow. Line flows can be assigned based on an order type, line type, and item type combinations. These workflows can share the same seeded workflow activities. The order and order line processes can differ in which workflow activities are performed and in which order. Orders and lines operate on separate workflow processes. Different types of lines can belong to the same order. For example, return lines can be entered on the same sales order. Order Management enables you to prevent unauthorized returns or credits. You can control which items customers can return, as well as, which items require inspection. Below are examples of header and line workflow processes: 4-50 Oracle Order Management Suite Implementation Manual Overview of Workflows Sample header workflow: Sample order line workflow: Sample return line workflow: See: Defining Order Management Transaction Types on page 4-86. Approval Notifications You can regulate order activity by defining as many manual approvals as you need and position the activities anywhere in your order process. You can add an approval step anywhere in your process by creating a notification in Oracle Workflow. By indicating the authorized user responsibility to perform the approval, Oracle Workflow can be configured to send out a notification. You can specify the conditions under which an approval is necessary by creating a preceding function activity. From this function activity, control can flow either to the approval or directly to the step after the approval. Basic Setup 4-51 Overview of Workflows Multiple Results Oracle Workflow enables you to accurately represent your business activities and results. You can define your process or process steps such that there is more than one way to succeed (multiple passing results). Similarly, your process or process steps can fail for more than one reason (multiple failing results). Note: Oracle Workflow Builder enables you to have multiple passing and failing results in your workflow process. Example: Order Booking Process. The Book activity can complete with four different results. Not Eligible & Complete are passing results while Incomplete and On Hold are failure results. Process Dependencies With Order Management, you can control the sequence and timing of all order workflow activity. You can prevent business activities from being performed when their prerequisites have not been met. Conversely, you can perform all activities with no prerequisites or with prerequisites that have been met. Note: Process dependencies can be built into the workflow process with the use of Oracle Workflow Builder. Oracle Workflow allows you to model transitions based on different results. 4-52 Oracle Order Management Suite Implementation Manual Overview of Workflows Sub-process Enter - Line: The example below is the first sub-process in a line flow. The flow ensures that a line waits for the order to book before progressing. Line Flow - Configuration: The flow shown below is only for Configuration Item Lines that are automatically created when ATO configurations are processed. A flow can transition differently based on results with which an activity completes. Order Header and Line Coordination You can specify dependencies between header and line level actions. Order processing will take place on both a header and line process. For each order, there is only one instance of the header process. However, a separate line process will be run for each line in the order. Parent-child flows can be coordinated through the standard Oracle Workflow coordination activities. These are: ■ Continue-activity ■ Wait-for-activity Basic Setup 4-53 Overview of Workflows For example, the line workflows wait for booking on the header level to complete. The booking sub-process has a Continue-activity which triggers the line flows to progress once the order is booked. Note: Oracle Workflow provides the ability to easily update process definitions automatically. Line Sets You can coordinate dependencies between order lines. You can ensure that all lines of a line set reach a certain state before further processing can continue. You need to include fulfill line activity in the line workflow process. This feature can be used to support fulfillment sets. Split Lines Order Management enables you to split a line into two order lines for independent processing. The header process acknowledges the existence of the new line process. The new order line has the workflow history identical to that of the original line. The new line has a flow identical to that of the line it split from. See Also Split Order Lines 4-54 Oracle Order Management Suite Implementation Manual Defining Workflow Exceptions Defining Workflow Exceptions You can build your own workflow activity to handle any exceptions within your order process. For example, you can prevent the processing of an order that may shop to customers that are not authorized to received a specific product. Your process can contain a legal review workflow step that requires an approval for certain customers or items. Defining a workflow exception in an order process consists of defining the rules that generate exceptions based on your business policies and defining how these workflow exceptions are handled. Return approval workflow example: Return approval process example: The Approval Failed block is used to keep the flow active when an approval fails. This enables you to cancel the line, which closes the line and ends the flow as shown below: The line flow that is used with this header flow should have the appropriate coordination Wait-for-Flow activity. Note: Basic Setup 4-55 Process Automation for Workflows Process Automation for Workflows Process Improvement You can change process definitions as you introduce new products or further streamline your operations. You can easily change an order activity flow to include new steps or remove obsolete steps. Process Execution You can process orders using on-line forms procedures or using batch processing. In the latter, these batch processes may be executed immediately or in the background. Order Management enables you to start the completion of a function activity from the Sales Orders window. For example, the booking sub-process enables an order to become eligible for booking. You can then complete booking through the Sales Orders window or an action request to the Process Order API. Expedited Order Processing You can expedite the processing of orders through automated actions. Assuming that no exceptions are raised, you can link several automated actions to be performed sequentially without user intervention. For example, one of the seeded booking processes, (xx), supports synchronous booking that is as soon as the order header is created, Order Management books the order. 4-56 Oracle Order Management Suite Implementation Manual Viewing Notifications Viewing Notifications Single Notification Viewer You can use a single mechanism for receiving all of your notifications, as opposed to different review facilities for different types of messages. This viewer is provided with Oracle Workflow. Customizable Notification Viewer You can review notifications and take the appropriate action to resolve each one quickly and easily. You can define selection and sorting criteria that let you manage your notification list so you see the most critical notifications first or can view different types of notifications on demand. Notification Context Given this universal Inbox of exceptions, you can see the context of each notification. For notifications where you need no additional information, you can choose a button to take the suitable action. If you require additional information, you can open the appropriate Order Management window. For example, if you must approve or reject an order, you can view the order header and lines easily. The notification can either be a URL message or an attachment. Basic Setup 4-57 Setting Up Workflow Setting Up Workflow Setting Up Workflow Processes Order Management comes seeded with workflow definition data that is used for processing orders and lines. Before you create custom workflow processes, you must review the seed data. Warning: All Order Management seed data is locked at an access level of 20. Please do not override the locks. Modifying any seed data is considered customization. Customization Exceptions ■ The Item Attribute OM WF Administrator is set to the role SYSADMIN. This can be changed to point to another responsibility. ■ Message bodies on seeded messages can be changed to meet your business needs. Order Management comes seeded with several order header and line flows. The seeded and new flows that you define can be assigned to order and line types in the Transaction Types window. If the seeded processes do not meet your business processing needs exactly and you need to create your own flows, you can change the flows by using one of the following three methods: ■ ■ 4-58 Copy a seeded Order or Line flow, change its Internal Name, Display Name, and description in the Workflow Builder. Change the definition as desired. You are re-configuring using seeded activities and processes. Utilize the seeded flows as examples to create new order or line flows using the seeded functional activities in the Workflow Builder. You are re-configuring using seeded activities and processes. Oracle Order Management Suite Implementation Manual Setting Up Workflow ■ Utilize the seeded flows as examples to create new order or line flows using the seeded functional activities and processes and/or your custom activities in the Workflow Builder. Note: When creating customer flows, we recommend that you use the seeded function sub-processes as opposed to using the individual function activities, unless the seeded flows are using activities for a given function such as the Fulfill activity. Set the default error process of RETRY_ONLY on any new functions, processes or flows you define. For more information, refer to the Order Management Workflow Standards for Naming Standards. See: Creating Process Definitions, Oracle Workflow Builder User’s Guide. Note: The workflow standard RETRY_ONLY error process supports only re-trying of the activity that is in an error state. It does not support aborting the flow or skipping the activity that is in an error state. Order Management may not work correctly if you specify any other error process or specify no error process at all. Seeded Workflow Item Types OM Order Header-OEOH: Order header flows are created using this item type. header ID will be used for the item key. The OM Order header Item Attributes Header Short Descriptor - You can use this item attribute in notification message bodies to provide context for your notification. If used in the message body it will display the Order Type and Order Number, when the notification is viewed. Notification Approver - This item attribute has a default value of SYSADMIN. When an Order Header is created this attribute is set to the value of the profile option OM: Notification Approver. You can use the OM Standard Utility Activity Set Notification Approver in your custom flows to set the item attribute to other values from pre-seeded sources. See the section Seeded WF Utility Activities Under the Order Management Standard Item Type (OESTD) for more information. OM Order Line-OEOL: Order line flows are created using this item type. The line ID is used for the item key. Basic Setup 4-59 Setting Up Workflow OM Order Line Item Attributes Line Short Descriptor - You can use this item attribute in notification message bodies to provide context for your notification. If used in the message body it will display the Order Type, Order Number, Line Number, Shipment Number, Option Number and Service Number, when the notification is viewed. Notification Approver - This item attribute has a default value of SYSADMIN. When an Order Line is created this attribute is set to the value of the profile option OM: Notification Approver.You can use the OM Standard Utility Activity Set Notification Approver in your custom flows to set the item attribute to other values from pre-seeded sources. See the section Seeded WF Utility Activities Under the Order Management Standard Item Type (OESTD) for more information. This is a repository for common functions and lookups. The application does not use this item type to create any flows. OM Standard-OESTD OM Change Order-OECHG This item type is used to manage change orders. Change order notification flows are created using this item type. Note: You can use the Oracle Workflow Builder to view the seeded lookups, functions, processes for the above item types. The following workflow activity and process definitions are seeded in Order Management: Seeded order flows: This order flow has booking and close order sub-processes. This flow can be used for both orders and returns. Generic order flow This flow has Booking, header level invoicing, and close order sub-processes. Generic order flow with generic header level invoicing 4-60 Oracle Order Management Suite Implementation Manual Setting Up Workflow Order Flow - Return with Approval This flow has Booking, a notification, and close order sub-processes. Generic order flow - close order This flow has close, wait for line and close order sub-processes. Basic Setup 4-61 Setting Up Workflow Seeded line flows: Note: Unless explicitly specified, all transitions are using the Default result. Line Flow - ATO Item This flow supports ATO item lines only. It has enter line (wait for booking), scheduling, creation of work orders/flow schedules, ship line, fulfill line, invoice line, and close line sub-processes in it. This flow supports ATO model lines only. It has Enter Line (wait for booking), scheduling, creation of configuration item, fulfill line, invoice line and close line sub-processes. Line Flow - ATO Model 4-62 Oracle Order Management Suite Implementation Manual Setting Up Workflow Line Flow - Configuration This flow is only for Configuration Item Lines that are automatically created when ATO configurations are processed. The flow has sub-processes to create the BOM/Routings, work orders, and flow schedules. In addition, it has ship line, fulfill line, and close line sub-processes. This flow below is identical to the Line Flow-Configuration except that it also has an additional authorization process before shipping. This is for Release Management users. Line Flow - Configuration with Authorize to Ship Basic Setup 4-63 Setting Up Workflow The flow below is an outbound flow which handles all item types including the Configured Item. It has Enter Line (Wait for Booking), scheduling, create supply, ship line, fulfill line, invoice interface line, and close line sub-processes. Line Flow - Generic Line Flow - Generic with Authorize to Ship (RLM) This is identical to the Line Flow - Generic except that it also has an additional authorization process before Shipping. This is for Release Management users. An example of the Line Flow - Generic that works with the seeded header flow to support header level invoicing. Line Flow - Generic with Header Level Invoice Interface 4-64 Oracle Order Management Suite Implementation Manual Setting Up Workflow Line Flow - Generic, Bill Only This flow has been modified for this release. The Fulfillment activity has been added to set the fulfillment quantity for a Bill Only order line. Note: If you decide to create a custom workflow for Bill Only orders, you must include the Fulfillment activity with the workflow definition if you do not want to return an unfulfilled line. A version of the Line Flow - Generic without Invoicing. This can be used for Internal Orders. Line Flow - Generic, Ship Only Line Flow - Standard Service This has Enter Line (wait for Booking), fulfill line, invoice interface line, and close line sub-processes in it. This can be used for service lines. Basic Setup 4-65 Setting Up Workflow This has Enter Line (wait for Booking), invoice interface line and close line sub-processes. Line Flow - Return for Credit Only Line Flow - Return for Credit only with Approval This is identical to the Line Flow - Return for Credit Only with a wait for a header approval, invoice interface line deferred, close line after Enter Line. This has Enter Line (wait for Booking), RMA Receiving, Invoice Interface line deferred, and Close Line sub-processes. Line Flow - Return for Credit with Receipt 4-66 Oracle Order Management Suite Implementation Manual Setting Up Workflow This is identical to the Line Flow - Return for Credit with Receipt with a Wait for Header Approval after ‘Enter Line’. Line Flow - Return for Credit with Receipt and Approval Order Management Workflow to support both order and return lines (not seeded) Attention: Order Management does not include seeded data with any line flows that can support both order and return lines. You can create customized flows to support order and return lines. However, this should be performed with caution. See example flows below. Example: Workflow to support both order and return lines. Basic Setup 4-67 Setting Up Workflow The above flow will not work correctly, since once a line is booked, Oracle Workflow randomly selects which transition flow to process first, and then processes it until it can go no further. For an outbound order line using this flow, if the transition flow for Returns Receiving is processed first, it will get marked as not applicable and continue to Invoice Interface which, if processing in synchronous mode, would incorrectly interface the line and then continue to Close Line, which would close the line and end the flow. Even if invoicing is deferred the problem still exists, since the background engine could process it before you perform a ship confirmation. The sample line flow below can support both order and return lines: The above flow branches on the result returned by the activity that determines the Line category. This ensures that run time, only one of the transitions are executed (order or return). Seeded WF Function Activities/Sub-processes under the Order Header Item type (OEOH) ■ Booking Functions and Sub-processes. Booking related Coordination activities ■ Close Order Functions and Sub-processes. Close related Coordination activities ■ RMA Approval - Header level approval for Returns Seeded Function Activities/Sub-processes under the Order Line Item type (OEOL) Where appropriate, functional activities/sub-processes are seeded in a deferred and non-deferred version. ■ ■ 4-68 ATO functions - Functions to Create Configuration Item, Create BOM, and Create Work Order. Close Line Functions and Sub-Processes. Close related Coordination activities. Oracle Order Management Suite Implementation Manual Setting Up Workflow ■ ■ ■ ■ ■ ■ ■ ■ Create Supply - This is a sub-process that handles the branching needed for internally/externally sourced items, standard items, and ATOs. The process handles configuration creation for ATO models and purchase release for externally sourced items. Fulfillment - Function to determine whether an order line is fulfilled. Seeded to work with ship line and return receipt. This function is seeded in a deferred and non-deferred version. Purchase Release - Interface to purchasing for externally sourced lines. This is seeded in a deferred and a non-deferred version. Invoice Interface to invoicing for creating invoices/credit memos. This process is seeded in a deferred and non-deferred version. Reprice Line to invoke repricing. Return Receipt/Inspection - Interface to purchasing for return receipts/inspection. Schedule Line - Activity that schedules the line, if isn’t already scheduled.This activity is seeded in a deferred and non-deferred version. Ship Line - Interface to inventory for picking and shipping for confirmation, and handles purchase release receipts. ■ Utility that returns the line category (Order/Return). ■ Utility that returns the line supply type (Internal/External). Seeded WF Utility Activities Under the Order Management Standard Item Type (OESTD) Common utilities: Approval Failed (Block Activity to handle Failed Approvals) This can be used to transition failure results from approvals. It calls the WF Standard block function. By using this activity, the flow remains active so that the order and order line can be manually cancelled, thus closed by the user. Set Notification Approver This activity can be used to set the Notification Approver item attribute to various values. You can place this activity before a notification activity in your custom flow and set the activity attribute Source as needed. You can then set the Basic Setup 4-69 Setting Up Workflow Performer on the notification to default its value from the Notification Approver item attribute. The following values are valid for the activity attribute Source: ■ ■ ■ Created By: The User who created the Order Header or Line. Order Created By: The User who created the Order Header (for use in Line flows) Profile Approve: The role value of the OM: Notification Approver profile option. Order Management Workflow Administrator Responsibility The Order Management Workflow Administrator WF item attribute is seeded for the WF items OEOH (OM Order Header), OEOL (OM Order Line) and OECHORD (OM Change Order). It is set to a constant value of SYSADMIN. You can change this to a different user responsibility. When an Order Management flow error occurs, a notification listing the errors is sent to this Responsibility. Once the problems are corrected, the errored activity can be re-executed by responding to the notification. Assign Flows to Order and Line Management Transaction Types You can use the Transaction Types window to assign header flows to order types. In the same window, you can use the Workflow Assignments window to assign line flows to an order type, line type, and item type combination. See: Defining Order Management Transaction Types on page 4-86. Setting up the Workflow Background Engine The Workflow Background Engine processes deferred (due to high cost) activities, timed out notification activities, and wait activities. You should schedule the Workflow Background Process Concurrent Program to re-submit periodically. Depending on their order processing needs, you should run as many background processes as often as needed to process all the deferred and timed-out Order Management-related activities. These should be set-up such that they pick up only Order Management work items (OM Order Header, OM Order Line). Most functional sub-processes have been seeded in both deferred and non-deferred versions. The seeded line flows use the deferred versions of processes. You can change this to meet their needs. In many cases, the wait activities are used to handle holds. Thus, you must have a scheduled background process running to process Order Management-related workflow activities. See: Additional Workflow Processes, Deferred Processing, Oracle Workflow User’s Guide. 4-70 Oracle Order Management Suite Implementation Manual Setting Up Workflow Creating and Managing Order and Line Flows Once all the set-up is in place, users can start creating orders. The application will start an order header flow for every order header that is created. It will start a line flow for every order line that is created. The flow that is used is determined by the flow assignment that you have setup in the Transaction Types window. A flow may halt at various points, once it begins. For example: ■ The Header Flow will await at the Book Eligible block. ■ The Line flow will await at the Ship Line block. In some cases, you may need to take action to re-start the flow. For example: ■ ■ ■ When you book the order through the Progress Order list of values, you can restart the header and line flows. The ship confirmation event restarts the line flow. You can run the ‘Auto Create Final Assembly Orders’ to create work orders to process configured items. This restarts the configured item line flow. In others cases the flow stops because it gets deferred to the Background Engine. In that case, the flow restarts when WF Background Engine picks it up for processing. The Sales Orders window displays the flow summary status on the order header and line. You can access the Workflow Status page from the Tools menu. This gives a tabular representation of all the activities an order header or line has completed and the results completed. From the Status page, choose the View Diagram button launches the Workflow Monitor. A graphical representation of where the header or line is in its flow displays. Basic Setup 4-71 Setting Up Workflow Managing Exceptions There are two types of exceptions that a header or line flow can run into: ■ Expected Exceptions - These are exceptions that a business process expects and can handle. ■ ■ Booking requires that there be a Price List on the Order. If you attempt to book an order that has no price list, the application displays appropriate messages and the order will not book. Thus the booking workflow activity completes with an Incomplete result and transitions back to the eligibility block. Many business functions honor holds. The Invoice Interface activity honors holds. If it finds a hold on the line, it will post appropriate messages, complete with a On Hold result and transition to a Wait activity. When the Wait-for-activity is processed by the Workflow Background Engine, the line will attempt to interface to invoicing again. When activities are processed by the Background Engine, the messages that they post are stored in the Order Management processing messages table. You can use the Processing Messages window to query and view messages that were posted by various workflow activities. When activities are completed via the Sales Orders window, the Processing Messages window is launched to display any posted messages. When activities are completed in a concurrent program, the output file displays all posted messages. ■ Unexpected Exceptions - These are exceptions that a business process does not expect under normal circumstances. ■ Database errors such as running out of rollback segments. ■ Data integrity errors. In this case, the activity errors out and Workflow starts the default error process. The activity gets marked with an Error status and a notification listing the details is sent to the Order Management Workflow Administrator. Once the problems have been corrected, the system administrator can choose the Re-try option on the notification and complete it. The System Administrator can also choose to re-try the activity from the Workflow Monitor. See Also Overview of Workflows, Oracle Workflow User’s Guide 4-72 Oracle Order Management Suite Implementation Manual Order Management Workflow Standards Order Management Workflow Standards Order Management uses the following standards when defining workflow objects. You can follow them when creating your custom workflow objects. Naming Functions/Notifications/Messages Internal Names The internal names of all functions, notifications and messages should be preceded with a short name for the feature that it is emulating. The message names should be related to the internal name of the notification activity and should be unique within the item type. Example: Activity Type Name Sub-Process GSA_CHECK Functions GSA_VIOL_CK Notification GSA_HOLDS_APPROVAL Message GSA_HOLDS_APPROVAL Use the following naming convention when creating special function activities: Name Example FuncName_CONT_L BOOK_CONT_L Description Continue-Flow after header is booked. FuncName_WAIT_ FOR_H BOOK_WAIT_ FOR_H Line Wait-for-Flow waiting for Header Booking FuncName_ ELIGIBLE BOOK_ ELIGIBLE Booking Eligibility Activity that can be completed from the Progress Order list of values. FuncName_DEFER BOOK_DEFER Activity to defer the booking function. Basic Setup 4-73 Order Management Workflow Standards Display Names The following conventions are followedFunction Activity Examples Name Description Book The Booking function. Book - Eligible Booking Eligibility block. Book - Deferred Activity to defer thread, so that Booking is deferred. Book - Continue Line Booking co-ordination activity. Close - Wait for Line Close co-ordination activity. Wait for Inspection Block activity used for Return Inspection. Wait for Receiving Block activity used for Return Receiving. Utility to Get Line Category Utility function that returns Line Category. Utility - Is Line Receivable? Utility function that determines whether a Return Line is receivable. (Upgrade) Ship Confirmed? Function used for Upgraded Lines, determines whether Line is ship-confirmed. Naming Sub-processes Internal Names 4-74 Name Description BOOK_PROCESS_SYNCH Synchronous booking process. BOOK_PROCESS_ASYNCH Manually completed booking process. BOOK_PROCESS_DEFER Process where booking is deferred. Oracle Order Management Suite Implementation Manual Order Management Workflow Standards Display Names: Order Level Processes Name Description Book Order, Deferred Process, where Booking is deferred Book Order, Manual Process that uses the Booking Eligibility Block Book Order Process where Booking is neither deferred nor manual (Upgrade) Book Order, Manual Booking Process that is used only for Upgraded Orders Close Order Close Order Process that is neither deferred nor manual Line Level Processes Name Description Purchase Release - Line, Deferred Process where purchase release is deferred. Purchase Release - Line, Manual Process that uses the purchase release eligibility block. Invoice Line Invoice process that is neither deferred nor manual. (Upgrade) Fulfill - Line Fulfill line process that is only used for upgraded lines. Naming Runnable Processes Internal Names The internal names of runnable processes should precede with a R_. This will make it easier to distinguish between runnable processes and function sub-processes in the builder. Examples: Name Description R_STANDARD Header Flow R_ FOR_ORDER_LVL_INVOICING Line Flow Basic Setup 4-75 Order Management Workflow Standards Display Names The following conventions are followed: Order Flow Examples: Name Description Order Flow - Generic Generic order header flow. Order Flow - Generic, with Header level Invoicing Generic flow that supports header level invoicing. Order Flow - Return with Approval Flow for return orders that has a header level approval. Line Flow examples: Name Description Line Flow - Generic Generic outbound line flow that supports all item types except configuration. Line Flow - Generic, Ship Only Generic outbound flow that is ship only (no invoicing). Line Flow - Configuration Outbound line flow for configurations. Line Flow - ATO Model Outbound line flow for ATO models. Line Flow - ATO Item Outbound line flow for ATO items. Line Flow - Return for Credit Only Inbound Line flow for credit only (no receipt). Line Flow - Return for Credit with Receipt and Approval Inbound line flow for credit with receipt and approval. Lookup Types Commonly used lookups for Order Header and Line processes In Order Management all lookup types have been defined under Order Management Standard (OESTD) so that they can be shared by other seeded workflow items: Commonly used lookups: OE_SUBPROCESS_RESULTS (OM Sub-Process results, handles holds) This includes the results Complete, Incomplete, On Hold and Not Eligible. This result type can be used by function activities. 4-76 Oracle Order Management Suite Implementation Manual Order Management Workflow Standards Thus, if an activity processes a line it will mark it as Complete. If does not process the line because of validation errors, holds etc. it will mark it as Incomplete, On Hold and it will re-process it at a later stage. If it finds that the line is not eligible to be processed it marks it as Not Eligible. For example, seeded process Purchase Release Line - Manual. The Purchase Release function can complete with a result of Complete Incomplete, On Hold or Not Eligible. OE_SUBPROCESS_SUCCESS (OM Sub-Process Success Results): This includes the results COMPLETE and NOT_ELIGIBLE. This result type should be used by functional top level activities and sub-processes that are directly used in the runnable Header or Line flows. For example, the Purchase Release Line - Manual process completes with a result of Complete of Not Eligible. Basic Setup 4-77 Order Management Workflow Standards Internal Names Precede name with ONT or OE so that they are easily found in the list of values which displays all the lookups across various Products. For example, ONT_PASS_ FAIL. Display Names Precede names with OM. Attention: Please do not modify the existing lookups since adding or deleting lookup codes can affect other processes that may be using this lookup. For example, the lookup codes for the Notification Result lookup type are Approved, Rejected, and Wait. If a process needed another lookup code such as, Maybe, then you should create a new lookup type instead of adding a new lookup code for the existing one. Note: Please do not abbreviate the Internal and Display names for lookup codes. The Lookup Codes for Pass_Fail lookup type should be Pass and Fail. Please do not set them as P and F. Defining Sub-Processes Note: Remember to disable the runnable flag while defining functional sub-processes. Assigning a result type to the top-level functional activity or sub-process Specify a result type such as, ONT Sub-Process Success Results, at the topmost sub-process or activity. This provides flexibility to the user to transition conditionally if needed. When configuring the runnable flows, if this activity/sub-process transitions unconditionally to the next one, then use the Default transition. De-lineate the different end activities for clarity. For example, the Purchase Release Line - Manual process completes with a result of Complete of Not Eligible. Refer to the above Purchase Release Line - Manual process workflow example. 4-78 Oracle Order Management Suite Implementation Manual Order Management Workflow Standards Implementing a function such that it can be completed from the Progress Order list of values Book Order - Manual (BOOK_PROCESS_ASYNCH) sample: In the above example, booking has been implemented such that it can be completed from the Progress Order list of values. The function BOOK_ELIGIBLE calls the OE Standard Block function. This block can be completed from the Sales Orders window, transitioning the flow to the BOOK_ORDER activity which can complete itself with one of the results of Incomplete, On Hold, Complete, or Not Eligible. The following naming convention is followed for Block Activities that can be completed from the Sales Orders window: ■ Internal Name: FuncName_ELIGIBLE. E.g.: BOOK_ELIGIBLE. ■ Display Name: FuncName Eligible. Eg: Book Eligible. Ensure that the On Revisit poplist is set to Loop. This is available on the Details tabbed region of the Activity Property Sheet. Setting the value to Loop ensures that the activity is executed every time it is called without the Cancel logic running. Implementing a function such that it runs synchronously (deferred) For example, Book Order - Defer (BOOK_PROCESS_DEFER) Basic Setup 4-79 Order Management Workflow Standards Note: Oracle Workflow enables you set the cost of an activity to a higher value in order to defer it. However the limitation with that is that wherever the activity is used it will get deferred. Business processes require that an activity is synchronous in one flow but deferred in another. To meet this requirement you can use the WF standard DEFER_THREAD activity or create an activity that calls the WF_ENGINE.Defer_thread API. In the above example Book -Deferred calls the WF_ENGINE.Defer_thread API. In this example, Booking has been implemented as a synchronous process. However the process design needs to handle expected errors that a function might run into. Hence the Book activity will post messages, complete with an Incomplete result and transition to the Book Eligible block in case it finds missing or invalid data. If your activity does not make sense for it to be completed from the Sales Order window, then you can transition to a Wait-for-flow activity that waits for a certain amount of time before re-executing your activity such as the Invoicing Activity finds a hold on a line. In that case, it displays a message that the line is on hold and then completes with a result of On Hold to the Wait activity. The Wait activity is set to wait for a period of eight hours. After eight hours, it will transition back to the Invoicing Activity. Ensure that the On Revisit poplist is set to Loop. This is available on the Details tabbed of the Activity Property Sheet. Setting the value to Loop ensures that the activity is re-executed every time it is visited without the cancel logic running. Coordination between Header and Line Flows There are instances in order processing where the line flows wait for a header activity to complete before progressing. Workflow provides the standard Wait-for-flow and Continue-flow activities to manage this coordination. Refer to the Oracle Workflow User’s Guide on how to use these activities. For example, line flows have to wait for the Booking activity on the header to complete before 4-80 Oracle Order Management Suite Implementation Manual Order Management Workflow Standards proceeding. Upon booking, the header the flow needs to signal the line flows can continue. You should place the continue co-ordination activity in the functional sub-process itself. Thus in the case of Booking sub-process, the Book - continue line is included inside the sub-process. To ensure that the line flow is coordinated, you can merge it with the Enter Line activity creating the following sub-process. However, if this may not always be the case always and the Wait-for-flow activity may need to be added as an independent activity. Make sure to add it to the detail flow, otherwise, the flow will not function correctly. Basic Setup 4-81 Order Management Workflow Standards Error Handling Unexpected errors are those that an Order Management function activity cannot handle. To handle unexpected errors, you need to specify a Error Process when defining a Function activity or process within a workflow. Examples includes: ■ Table does not exist. ■ Cannot extend rollback segments. ■ Package does not exist etc. Be sure to specify the RETRY_ONLY error process provided under WF_ERROR. This will provide the WF administrator opportunity to correct any problems and retry the activity. Specify the error process both at the activity and sub-process level. A seeded Item attribute of type Role named Order Management Workflow Administrator is defined both for the header and line work item. This is set to a value of SYSADMIN. The error process sends notifications about the error to this role. You can change value to a different role. Be sure to follow the Oracle Workflow standards on exception handling in Workflow function covers. Handling Expected Errors Validation and other errors that are expected as part of normal processing are considered Expected errors. Examples include the following: ■ Line is on hold and cannot be invoice interfaced. ■ Price list needs to be specified before an order can be booked. Complete the function activity with a ON_HOLD result if it cannot complete because of a hold, else complete it with an INCOMPLETE result. In either case the flow then needs to transition to a block that can be completed from the Sales Orders window or to a Wait Activity. Examples include: ■ ■ The Invoicing Activity finds a hold on a line. In that case it posts a message that the line is on hold and then completes with a result of On Hold to the Wait activity. The Wait activity is set to wait for a period of eight hours. After eight hours it will transition back to the Invoicing activity. The Booking activity finds the price list missing on the order. In this case, it displays a message that a required attribute is missing and then complete with a result of Incomplete to the booking eligibility block. See Also Overview of Workflows on page 4-50 4-82 Oracle Order Management Suite Implementation Manual Defining Document Sequences for Order Numbering Defining Document Sequences for Order Numbering Order Management utilizes AOL Document Sequence functionality for order numbering. You can define document sequences that automatically generate numbers for your orders and returns as you enter them. You can define a single document sequence to assign unique consecutive numbers to all your orders and returns, or you can define multiple document sequences that are assigned to different order types. In the latter case, an order or return is uniquely identified by its type and its number, since orders and returns of different types may share numbers. Order and return numbers cannot contain alphabetic characters. Gapless Order Number Source Many countries have legal and audit requirements for order numbers to be contiguous. You can set up a document sequences as gapless through the Define Documents Sequences window. In addition, Order Management prevents deletion of orders that have been numbered using the gapless numbering sequence. The application uses locks to ensure gapless numbering. If you are using gapless sequences, please save your changes frequently to minimize lock contention issues. Manual Order Numbers Order Management enables you to enter the order numbers for certain types of orders. You can define a document sequence as manual and assign it to a desired order type. This order type can be used on orders that you want to manually enter order numbers. When an order number is specified for such an order, Order Management validates that it is unique for a given order type. Prerequisites ■ ■ Set the profile option Sequential Numbering to Always Used at the Order Management Application level. Set your document sequences to Automatic, Gapless, or Manual. Basic Setup 4-83 Defining Document Sequences for Order Numbering ◗◗ To define document sequences for order numbering: 1. Navigate to the Document Sequences window. 2. You can define the sequence to be Automatic, Gapless or Manual. ■ ■ ■ Automatic sequences: The system will automatically increment document numbers. Automatic sequences do not guarantee contiguous numbering. Gapless sequences: The system guarantees that the numbers returned are contiguous. Manual: User must specify a unique document number. For all types of numbering, the Order Management system validates that the number specified by you is unique for a given order type. For more information on AOL Document Sequences, see System Administrator’s User’s Guide, Document Sequencing. 3. Enter a name for the order number source. Specify Oracle Order Management as the Application. 4-84 4. Enter a starting number. 5. Optionally, enter effective dates for the order number source. Oracle Order Management Suite Implementation Manual Defining Document Sequences for Order Numbering 6. Save your work. Note: When Order Types are defined, a corresponding Document Sequence Category will automatically be created. The category created has the same name as the order type. You need to navigate to the AOL Assign document Sequence window to assign a sequence to the newly created category. If the Document Descriptive Flexfield is enabled, you need to specify the governing Set of Books. The Document Method code should be left blank. See Also Order Management Profile Options on page 4-15 Basic Setup 4-85 Defining Order Management Transaction Types Defining Order Management Transaction Types Overview In prior releases of Oracle Order Entry, Order Types were used for defaulting information on orders, establishing processing controls such as invoicing, and most importantly, determining the Order Cycle that an order would have. Order Cycles, in turn, controlled the processing flow of an order. With the release of Oracle Order Management 11i, Order Cycles have been replaced by Oracle Workflow definitions, and Order Types have been replaced by Order Management Transaction Types. Order Management provides seeded Workflow process definitions for both orders and lines, and Order Management also enables you to define both order header and Order Line transaction types. Note: Order Management provides NO seeded transaction types. For existing Oracle Order Entry customers, Order Management will update existing Order Types to order and line transaction types during the upgrade process Order Management Transaction types: ■ determine the workflow processes executed for both the order and line ■ can act as sources for order and line level attribute defaulting ■ can establish order or line level processing constraints ■ ■ ■ can default from the Customer, Ship-To, Bill-To, or Deliver-To site at the order header, and line transaction types can default from the order transaction type. enable you to group orders and lines can specific processing controls for an order or line based upon the transaction type entered. For example, the inspection required flag determines whether inspection is required when return lines are received. The Scheduling level controls the way scheduling works at the time of order entry for lines. Prerequisites 4-86 ■ Review seeded order and line flows. ■ Define all lookups. See: Defining Order Management QuickCodes on page 4-36. Oracle Order Management Suite Implementation Manual Defining Order Management Transaction Types ■ ■ ■ ■ Define freight carriers. See: Oracle Shipping Execution User’s Guide. Define organizations. See: Creating an Organization, Oracle Human Resources Management Systems User’s Guide. Define document sequences. See: Defining Document Sequences for Order Numbering on page 4-83. Define defaulting rules. See Overview of Defining Defaulting Rules on page 4-114 ■ Define price lists. See: Defining Price Lists on page 4-127. ■ Define credit check rules. See: Defining Credit Check Rules on page 4-181. ■ ■ Define currencies and currency types. See: Defining Currencies, Oracle Applications System Administrator’s Guide. Set up your cost of goods sold account flexfield segments. See: Defining Key Flexfield Segments, Oracle Applications Flexfields Guide. Order and Line Level Controls You can define order controls that apply to the order as a whole and are not overridable at the line level. For example, order numbering is controlled at the order level. An order can be numbered differently based on the order type, such as an order or return. You can also define line controls that affect the line type level. You can set up certain controls that default from the order level and can be overridden at the line level. For example, you can have both return and order lines on a single order, however, the return and order lines process differently. The individual line processing is controlled at a higher line type level. You need to specify the workflow couplings for the permitted transaction type combinations. If a combination has notifications or workflow activities at the header flow which need to be completed before the line can proceed, then the header flow needs to have a Continue-flow activity. The line flow needs to have the appropriate Wait-for-flow activity. The following table displays the various column controls that are available for Order Management order transaction types. Basic Setup 4-87 Defining Order Management Transaction Types Table 4–3 Controls available for Order Management Order Level Transaction Types 4-88 Define for Order Transaction Types Required on Order Defaulting Transaction Source for Types Header Column Name Purpose NAME Unique within the table for a given language. Yes Yes TRANSACTION_ Distinguishes between order TYPE_CODE and line types. Line types are Order and Line. Yes Yes ORDER_ CATEGORY_ CODE Defaulting on the order or line. Restricts the types of lines on an Order. Mixed, Order, or Return. Line types are Order or Return. Yes Yes CURRENCY_ CODE Defaulting source. Yes Yes CONVERSION_ TYPE_CODE Defaulting source. Yes Yes CUST_TRX_ TYPE_ID Invoicing Interface. Yes COST_OF_ GOODS_SOLD_ ACCOUNT Invoicing Interface Yes ENTRY_ CREDIT_ CHECK_RULE_ ID Credit checking. Yes SHIPPING_ CREDIT_ CHECK_RULE_ ID Credit checking. Yes PRICE_LIST_ID Defaulting source Yes ENFORCE_ LINE_PRICES_ FLAG Used for validating discount application on order and lines Yes WAREHOUSE_ ID Defaulting source. Yes Oracle Order Management Suite Implementation Manual Yes Yes Yes Yes Defining Order Management Transaction Types Table 4–3 Controls available for Order Management Order Level Transaction Types Define for Order Transaction Types Required on Order Defaulting Transaction Source for Types Header Column Name Purpose DEMAND_ CLASS_CODE Defaulting source. Yes Yes SHIPMENT_ PRIORITY_ CODE Defaulting source. Yes Yes SHIPPING_ Defaulting source. METHOD_CODE Yes Yes FREIGHT_ TERMS_CODE Defaulting source. Yes Yes FOB_POINT_ CODE Defaulting source. Yes Yes SHIP_SOURCE_ TYPE_CODE Defaulting source. The values are Internal, External. AUTO_ SCHEDULE_ FLAG Used by Scheduling. The values are Yes, No. Yes SCHEDULING_ LEVEL_CODE Used by Scheduling. The values are 0, 1, 2. Yes AGREEMENT_ TYPE_CODE Validation at header level. Yes AGREEMENT_ REQUIRED_ FLAG Validation on Header. Yes Yes PO_REQUIRED_ FLAG Validation at header level. Yes Yes INVOICING_ RULE_ID Defaulting source. Yes Yes INVOICING_ Defaulting source. CREDIT_ METHOD_CODE Yes Yes ACCOUNTING_ RULE_ID Yes Yes Defaulting source. Basic Setup 4-89 Defining Order Management Transaction Types Table 4–3 Controls available for Order Management Order Level Transaction Types Column Name Purpose Define for Order Transaction Types ACCOUNTING_ Defaulting source. CREDIT_ METHOD_CODE Yes INVOICE_ SOURCE_ID Invoicing Interface. Yes NON_ DELIVERY_ INVOICE_ SOURCE_ID Invoicing Interface. Yes DEFAULT_ INBOUND_ LINE_TYPE_ID Defaulting source for inbound lines. Use this value as Source for defaulting Line type on Line. Yes DEFAULT_ OUTBOUND_ LINE_TYPE_ID Defaulting source for outbound lines. Use this value as Source for defaulting Line type on Line. Yes Required on Order Defaulting Transaction Source for Types Header Yes Note: The transaction type name for the base language cannot be changed once there are orders or lines referenced. Order Category You can specify an order category on the order transaction type. The order category can be defined as Order, Return, or Mixed. When defining line transaction types, specify an order category of Order or Return. Order Numbering Define your order numbering options using the Oracle Application Object Library (AOL) Document Sequence functionary. You can set up various order transaction types and different document sequences. Both transaction types and document sequences can control which types of orders are numbered automatically or manually. 4-90 Oracle Order Management Suite Implementation Manual Defining Order Management Transaction Types For example, you can have all your outbound orders numbered in a certain sequence and all your returns in a different sequence.When an order transaction types is created, a document category with the same name is automatically created. You can define sequences and assign them to the respective document category. See: Defining Document Sequences for Order Numbering on page 4-83. Category Codes When you create an order and specify a transaction type. The category code controls the types of lines which are permitted on the order. If the category code is Order, then the order can only have outbound lines. If the category code is Return, then the order can only have inbound lines. If the category code is Mixed, then the order can have inbound and/or outbound lines. Order Management Line Transaction Types Order Management line transaction types can be defined to control order line information. There are specific controls that need to be definable at the line type level. Some controls can be such that, they default from the order level, but can be overridden at the line level. For example, you can have both order and return lines on a single order. However, order and return lines go through different types of processing. The kind of processing that an individual line undergoes is controllable at a line type level. Table 4–4 Controls Available for Order Management Line Transaction Types Usable on Line Type Required for Line Type Column Purpose NAME Unique within the table for a given language. Yes Yes TRANSACTION_TYPE_ CODE Distinguish between order and line types. Valid values for Line types: Order/Line. Yes Yes ORDER_CATEGORY_ CODE Defaulting for order or line; If used on Order Type, restricts line types. Yes Yes Defaulting source for Line Yes Valid values for Line Types: Order/Return CURRENCY_CODE Defaulting Source CONVERSION_TYPE_ CODE Defaulting Source Basic Setup 4-91 Defining Order Management Transaction Types Table 4–4 Controls Available for Order Management Line Transaction Types 4-92 Column Purpose CUST_TRX_TYPE_ID Used by Invoicing COST_OF_GOODS_ SOLD_ACCOUNT Used by Inventory Interface ENTRY_CREDIT_ CHECK_RULE_ID Used by Credit Checking SHIPPING_CREDIT_ CHECK_RULE_ID Used by Credit Checking PRICE_LIST_ID Defaulting Source ENFORCE_LINE_ PRICES_FLAG Used for validating discount application on Order/Lines WAREHOUSE_ID Usable on Line Type Required for Line Type Defaulting source for Line Yes Yes Yes Defaulting source Yes Yes DEMAND_CLASS_ CODE Defaulting source Yes Yes SHIPMENT_PRIORITY_ CODE Defaulting source Yes Yes SHIPPING_METHOD_ CODE Defaulting source Yes Yes FREIGHT_TERMS_ CODE Defaulting source Yes Yes FOB_POINT_CODE Defaulting source Yes Yes SHIP_SOURCE_TYPE_ CODE Defaulting source. Valid values: Internal/External Yes Yes AUTO_SCHEDULE_ FLAG Used by Scheduling. Valid values: Yes/No SCHEDULING_LEVEL_ CODE Used by Scheduling. Valid values: ONE, TWO, THREE AGREEMENT_TYPE_ CODE Validation on Header AGREEMENT_ REQUIRED_FLAG Validation on Header PO_REQUIRED_FLAG Validation on Header Oracle Order Management Suite Implementation Manual Yes Defining Order Management Transaction Types Table 4–4 Controls Available for Order Management Line Transaction Types Usable on Line Type Required for Line Type Defaulting source for Line Column Purpose INVOICING_RULE_ID Defaulting source Yes Yes INVOICING_CREDIT_ METHOD_CODE Defaulting Source Yes Yes ACCOUNTING_RULE_ ID Defaulting source Yes Yes ACCOUNTING_ CREDIT_METHOD_ CODE Defaulting Source Yes Yes INVOICE_SOURCE_ID Used by Invoicing Yes NON_DELIVERY_ INVOICE_SOURCE_ID Used by Invoicing Yes DEFAULT_INBOUND_ LINE_TYPE_ID Defaulting source for Inbound Lines. Use this value as Source for defaulting Line type on Line Yes DEFAULT_ OUTBOUND_LINE_ TYPE_ID Defaulting Source for Outbound Lines. Use this value as Source for defaulting Line type on Line Yes When you define Order Management line transaction types, you can define the line flow that lines of this type will follow. A line transaction type can be coupled with different order transaction types. For example, a return transaction type can be used with a standard order type or an international order type. However, you need to specify the flow couplings for the permitted transaction type combinations. Workflow Assignments A pre-defined line workflow can be used with only certain header flows based on how Continue-flow and Wait-for-flow activities are paired. Therefore, the same line transaction type needs to follow a different line flow when used with a different order transaction type. The inventory item that a line is processing may have specific flow requirements. For example, a configuration needs to have a BOM and work order created before it can be picked and shipped. The standard item can be picked from stock and Basic Setup 4-93 Defining Order Management Transaction Types shipped. Therefore, the workflow for a configuration item is different than a standard item. However, both types of order lines can be use the same line type. The Workflow Assignments window displays the following item types for which a workflow can be assigned for a given order or order line type assignment: ■ ATO Models, Classes, Options, Items ■ Configured Item ■ Kits ■ Included Items ■ PTO Models, Classes, Options ■ Standard Items ■ Service Items ■ ■ If the item type code is left blank, the specified workflow assignment applies to all item types for which there is no specific assignment. Exception-You should specify an assignment for the configured item type, if you plan to use the line type for ATO models Note: A workflow assignment is required for a given line type to support creation of lines using that line type. Table 4–5 Order Types and Header Workflow assignments 4-94 Order Type Header Flow Assignment Domestic Header - Standard International Header - International (This has a post-booking approval.) Line Type Order Types used with Standard Domestic Standard Domestic For Item Type Line Flow Assignments Outbound Domestic Configured Item Outbound Domestic Configuration Oracle Order Management Suite Implementation Manual Comments For all item types (except configured items) Workflow specific to configured items. Defining Order Management Transaction Types Line Type Order Types used with Standard International Standard International Return Domestic Inbound Domestic For all item types. Return International Inbound International This has the appropriate Wait-forFlow defined for the notification activity on the International Header flow. This workflow is for all item types. For Item Type Line Flow Assignments Outbound International Configured Item Outbound Domestic Configuration Comments This has the appropriate Wait-for Flow defined for the notification activity on the International Header flow. The workflow is for all item types (except configured items). This workflow is specifically for configured items. Line Flow Assignments The Line Flow Assignments window is available only for order transaction types only. Use this window to assign line flows to the various line types that can be used with an order type. A line flow can be assigned to an order type, line type and item type combination. Order Management enables you to define only one effective assignment for a given combination. If the item type is left blank, then that assignment will apply to all item types that do not have a specific assignment. If you plan to use a line type for ATO models then Order Management requires that you specify an assignment for the item type of configured item. Refer to Overview of Workflows and Setting up Workflow. Basic Setup 4-95 Defining Order Management Transaction Types Defining Order Management Transaction Types Prerequisites ■ ■ Define all lookups. ■ Define freight carriers. See: Oracle Shipping Execution User’s Guide. ■ Define organizations. See: Creating an Organization, Oracle Human Resources Management Systems User’s Guide. ■ Create Document Sequences for order numbering. ■ Define defaulting rules. ■ Define price lists. ■ Define credit check rules. ■ ■ 4-96 Review seeded Order and Line flows. Define new to meet your business requirements. Define currencies and currency types. See: Defining Currencies, Oracle Applications System Administrator’s Guide. Set up your cost of goods sold account flexfield segments. See: Defining Key Flexfield Segments, Oracle Applications Flexfields User’s Guide. Oracle Order Management Suite Implementation Manual Defining Order Management Transaction Types ◗◗ To define Order Management document, Pricing, or Credit Check order or line transaction types: 1. Navigate to the Transaction Types window. The Transaction Types window displays. 2. Select the Main tabbed region and specify a name that is unique across Operating Units. 3. Enter a Description. 4. Specify whether this is an order or line transaction type. 5. Specify the category. For Order Types, you can specify a value of Order, Return, or Mixed. For Line Types you can specify Order or Return. When an order type is assigned to an order, the category determines whether both order and return lines can go on the order. A category of Mixed enables an order to have both kinds of lines. 6. For Order Transaction Type only - Optionally, enter an agreement type. Basic Setup 4-97 Defining Order Management Transaction Types If you enter an agreement type here, you can choose only agreements with this agreement type when using this order type. Define agreement types using Order Management QuickCodes. 7. For Order Transaction Type only, specify a line type that will serve a default for all lines on the order with this order type. If you are defining a Mixed order type, specify an inbound and outbound default line type. When you create a return line with negative quantities, the Sales Order window automatically sets the category on the to Return. For Order Lines, the Sales Orders window automatically sets the category to Order. Order Management seeds defaulting rules to get the appropriate default outbound or inbound line transaction type from an order type to a line based on its category code. 8. Indicate whether an agreement is required for order transaction type only. 9. For Order Transaction Type only, check Purchase Order Required to require purchase order numbers during order entry for orders and returns with this Order type. 10. Select a price list to serve as a defaulting source. 11. For Order Transaction Type only- Optionally check Enforce List Price, if you do you cannot apply discounts to the order line list price when you use this order type and you cannot override the selling price, unless the profile option OM: Discounting Privilege is set at the appropriate level. 12. Optionally, select the credit check rule to use when checking credit on an order when it is booked, for order transaction type only. If you leave this field blank, no credit checking occurs when you enter orders with this order type. 13. Optionally, select the credit check rule to use when checking credit on an order, when the order is pick released for order transaction type only. If you leave this field blank, no credit checking occurs when you release sales orders for picking with this order type. 4-98 Oracle Order Management Suite Implementation Manual Defining Order Management Transaction Types Note: When an order type is created, Order Management automatically creates a Document Sequence Category of the same name for you. You can then go an assign a document sequence that you have defined for order numbering to this document sequence category. Document sequence categories are not MLS Compliant. We recommend that you create your order types in the base language of your installation to minimize potential confusion. Note: Workflow assignments are required for order types to support the creation of orders. 14. Save your work. ◗◗ To define Order Management order and line Shipping transaction types: 1. Navigate to the Shipping tabbed region in the Transaction Types window. 2. Optionally, select a warehouse. Warehouses are synonymous with inventory organizations in Oracle Manufacturing. 3. Optionally, enter a Shipping Method. 4. Optionally, enter a Shipment priority. Define shipment priorities using Order Management QuickCodes. 5. Optionally, enter the Freight terms. Define freight terms using Receivables QuickCodes. 6. Optionally, enter the Free On Board (FOB) point. Define FOB points using Receivables QuickCodes. 7. For Line Transaction Type only – Optionally specify a value for ship source type. It can be either internal or external. This determines whether the order line is sourced internally or externally (via Drop Shipment). 8. Optionally, enter the Demand Class. Define demand classes using Manufacturing QuickCodes. 9. Optionally, specify the scheduling level. It can have the following values: ■ One: Perform only ATP check. Basic Setup 4-99 Defining Order Management Transaction Types ■ ■ TWO: Perform ATP check and Scheduling - No reservations THREE: perform complete scheduling (ATP Check, Demanding, Reserving). Note: If you do not specify a value for an Order Transaction type, the application interpreted the null value as Complete Scheduling. If you do not specify a value for a Line Transaction Type the application uses the value from the Order Type on the Order. 10. For order transaction type only - Optionally, check auto-schedule. This setting determines whether auto-scheduling is performed for orders using this order type. 11. For return line transaction type only – Optionally, set whether inspection is required. ◗◗ To define Order Management finance order or line transaction types: 1. Navigate to the Finance tabbed region in the Transaction Types window. 2. If you use Oracle Receivables, enter the Default Invoicing Rule to apply to this order or line type. An invoicing rule controls the amount and timing of your invoices. 3. If you use Oracle Receivables, enter the default accounting rule to apply to this order type or line type. An accounting rule controls the amount and timing of when you recognize revenue for this order. See: Defining Invoicing and Accounting Rules, Oracle Receivables User’s Guide. 4. Optionally, select a Invoice Source. 5. Optionally, select a Non-Delivery Invoice Source. 6. Optionally, select the Accounting credit method Oracle Receivables uses when adjusting the revenue account assignments of invoices using multi-period invoicing and accounting rules. See: Crediting Transactions, Oracle Receivables User’s Guide. LIFO (Last In First Out)--Backs out revenue starting with the last general ledger period, and reverses all prior periods until it has used up the credit memo. 4-100 Oracle Order Management Suite Implementation Manual Defining Order Management Transaction Types Prorate--Credits an equal percentage to all account assignments for that invoice. Unit--Reverses the revenue for the number of units you specify from an original line of the invoice. 7. Optionally, select the Invoicing credit method Oracle Receivables uses when crediting the installments of invoices that have multiple installments (split term invoices). Crediting Transactions, Oracle Receivables User’s Guide. LIFO (Last In First Out)--Credits the last installment to be credited first and then credits all prior installments until all of the credit is used. FIFO (First In First Out)--Credits the first installment first and then credits all subsequent installments until all of the credit is used. Prorate--Prorates the credit received by the installments of invoices by the amount remaining on their installments. 8. If you use Oracle Receivables, enter the receivables transaction invoice type. Invoice types designate invoice status, invoice printing options, credit memo type, and whether the invoice posts to General Ledger or creates an open receivable. 9. If you are defining a return type, select the invoice type associated with the appropriate credit memo type. 10. Optionally, enter a Cost of Goods Sold Account. – Definable only for the Order Transaction Type. 11. Optionally, enter a currency and a currency conversion type. – Definable only for the order transaction type. If you choose User as the currency conversion type, the Sales Orders window requires you to enter the conversion rate and date. 12. Save your work. Basic Setup 4-101 Defining Order Import Sources Defining Order Import Sources You can define Order Import Sources from which to import order information. You can import historical orders, orders from other quote or sales systems, and changes to orders.We recommend that you define a unique name for each source of order information you are importing. When you run the Order Import program, you can enter the source or sources for each execution. You can run Order Import for multiple sources at one time. Internal Sales Orders If you are importing internal sales orders from Oracle Purchasing, you need to define an Order Import source to be used when you transfer the internal requisition information from Oracle Purchasing to create an internal sales order in Order Management. You need to choose an Order Import source for internal requisitions/internal sales orders when you define purchasing options in Oracle Purchasing. You choose this same Order Import source as a parameter when you run the Order Import program in Order Management. See: Integrating Oracle Order Management Using Order Import, Oracle Manufacturing, Distribution, Sales and Service Open Interfaces Manual. ◗◗ To define an Order Import source: 1. Navigate to the Order Import Sources window. The Order Import Sources window displays. 4-102 Oracle Order Management Suite Implementation Manual Defining Order Import Sources 2. Enter the Order Import source name and a description. 3. Check Enabled to activate the Order Import source. 4. Save your work. See Also Order Import on page 24-2 Basic Setup 4-103 Overview of Processing Constraints Overview of Processing Constraints In Order Management, not all changes can be allowed to an order at all stages of its order cycle. The reasons for this could be: ■ ■ System Constraints--changing data on an entity that would make the data inconsistent and difficult to audit. For example, changing the price list on an order already invoiced. Processing Constraints--changing data on an entity that has effected downstream activities that are difficult or costly to undo. For example, changing options on an ATO configuration order if the item is already built. You can relate a given role to the highest state of the order that changes can be made. For example, the order entry clerk cannot change an order when it has been acknowledged by customer, but the order entry supervisor can change the order until it has shipped. These constraints may apply to the entire order or individual attributes. Seeded Processing Constraints Order Management provides seeded processing constraints that prevent the loss of data integrity as information is interfaced to other applications, such as Oracle Inventory or Oracle Receivables. These system constraints are pre-seeded and should always be enforced. The seeded processing constraints generally allow for changes to information not interfaced to other applications until the order is closed. Defining Processing Constraints You can define processing constraints for entity or attributes. Entities include regions on the Sales Orders window, such as Order, Line, Order Price Adjustments, Line Price Adjustments, Order Sales Credits, and Line Sales Credits. Attributes include individual fields (of a particular entity), such as Warehouse, Ship-To Location, or Agreement. These are the same entities and attributes you use when defining defaulting rules for order entry. A processing constraint includes these components: ■ Entity ■ Operation ■ Attribute If an attribute is not assigned to a constraint, the constraint prevents you from updating all attributes on the entity. 4-104 Oracle Order Management Suite Implementation Manual Overview of Processing Constraints ■ Group Number ■ Conditions ■ ■ Group Number ■ Scope ■ Record Set ■ Modifier ■ Validation Template Applicable To (Optional, user responsibility) Prerequisites ■ ■ You must define your validation templates. See: Defining Validation Templates on page 4-109. You must define your record sets. See: Defining Record Sets on page 4-112. Identify an Entity Processing Constraints enable you to define constraints for entities such as order header, order line, and order/line price adjustments. Select an Operation You can define processing constraints to prevent users from performing the operations of Cancel, Create, Delete, and Update on your orders and returns. You can prevent Update on attributes. You can effectively assign a general Update rule to all attributes associated with a particular entity, as a data entry tool. Select an Attribute Select an attribute when the operation is updated or left blank to prevent all updating of all attributes. Select an Action Not Allowed--The specified operation of the attribute selected is not allowed. Required Reason--The specified operation is allowed only when a reason is supplied. This is only applicable for cancel operations or update on the Order Quantity attribute on the line. Basic Setup 4-105 Overview of Processing Constraints System Changes The system changes are used for defaulting to enable the system to re-default the attribute value whenever the defaulting source changes result to a new default value. This is only applicable for attribute level update operation. Assign Conditions The condition of your processing constraint is like an If-Then statement. Order Management checks for occurrences of the condition in your constraint while users are cancelling, deleting, inserting, splitting lines, and updating orders and returns. When the condition or conditions of a processing constraint are met, Order Management prevents the operation of that constraint. Conditional Group Number Each processing constraint condition has a number that indicates whether the condition is independent of all other conditions, or whether it should be considered only when another condition is also true. Use this number to create and/or conditions. Create an And condition by using the same number in this field for each row in the condition, or an Or condition by using a different number in this field for each row. Conditions with the same number must both be true for the processing constraint to apply. For conditions with different numbers, at least one must be true for the processing constraint to apply. You can create several And conditions and Or conditions for one object or attribute. Attention: Order Management does not allow you to enter a number equal to any number already used in the Number field of a predefined processing constraint. This would, in effect, create an And statement with a system processing constraint, and could endanger data integrity. Modifier You can use a modifier in the condition of a processing constraint to define a negative condition. This rule would prevent users from cancelling the entity of the constraint if the workflow result of Backorder Release were anything but Eligible (or Not Applicable). 4-106 Oracle Order Management Suite Implementation Manual Overview of Processing Constraints Scope Scope indicates whether you want Order Management to evaluate the condition of the constraint against any or all entities in the record sets. A condition holds true if any line within the scope meets the condition. Record Sets A record set is a set of records that are bound by common attributes such as invoice sets. You can define constraining conditions and specify a record set to be validated for a given condition as defined by its validation template. Special Considerations Rules That Cannot Apply If you define a constraint for Create on an entity where the condition would be applicable on the same existing entity, the constraint will never apply. If the condition only occurs for existing entities, but they are already inserted, the constraint cannot be enforced and will not be applied. For example, a rule for Insert on a Line where the condition is Ship Confirm is unenforceable because a line is already inserted if that condition exists. Processing Constraints Must Be in Cooperative at Various Entity Levels Order Management evaluates processing constraints for an entity when you are trying to perform an action on that entity. If you have a processing constraint on a lower-level entity (such as Line), and you try to perform an operation on the higher-level entity (such as Order), the Line level constraint is not evaluated. Therefore, when defining processing constraints, make sure that your higher-level entity constraints cooperate with your lower-level entity constraints so that all levels are synchronized. For example, if you have a constraint for the Line entity on the operation of Delete, define a comparable constraint for the Order entity so that you can cover all delete situations. Processing Constraints--Sales Orders Window The Sales Orders window enforces some processing constraints that are not predefined using the Processing Constraints window. For example, the Sales Orders window prevents you from cancelling order line quantities that have been shipped or invoiced, and from cancelling return line quantities that have been received or credited. The Sales Orders window honors processing constraints that you define Basic Setup 4-107 Overview of Processing Constraints for the Cancel operation that are stricter than these constraints, but if you define any that conflict with these constraints, they will be ignored. Processing Constraints Usage As you use Order Management, processing constraints are evaluated for any entity you try to cancel, delete, insert, split, or update. If you are trying to modify an order line, Order Management evaluates the processing constraints for the Line entity. See Also Overview of Processing Constraints on page 4-104 Defining Processing Constraints on page 4-104 Overview of Sales Orders on page 5-2 Cancelling Orders on page 5-4 4-108 Oracle Order Management Suite Implementation Manual Defining Validation Templates Defining Validation Templates Order Management provides you the ability to define your own validation conditions by the use of validation templates in processing constraints. A validation template names a condition and defines the semantics of how to validate that condition. Validation templates can be used in the processing constraints framework to specify the constraining conditions for a given constraint. These conditions are based on: ■ where the entity is in its workflow ■ the state of attributes on an entity ■ any other validation condition that cannot be modeled using the above methods ◗◗ To define a validation template: 1. Navigate to Validation Templates window. The Validation Templates window displays. 2. Select the Entity for which the condition is to be defined. 3. Enter a Template Name for the condition. 4. Enter a name in the Short Name field for the condition. Basic Setup 4-109 Defining Validation Templates 5. Optionally, enter a Description for the constraint condition. 6. Select the Validation Type to be performed by the condition. Select: ■ Wf: f the validation is based on the workflow status of this entity. ■ API: If the validation is completed through an application program interface. ■ Col: if the validation is based on the values of columns on this entity. If you select the Wf--Workflow Validation Type toggle: ■ Select the Activity for the condition. ■ Select the Activity Status for the condition. Select from: ■ Active, Complete, Error, Notified, and Suspended. ■ Select the activity Result for the condition. ■ Save your work. If you select the API--Application Packaged Interface toggle: ■ Select the PL/SQL Package you wish to interface with the constraint condition. ■ Enter the Procedure name of the API. ■ Save your work. If you select the Col--Column toggle: ■ Select the Attribute Column name on the entity for the constraint condition. ■ Select the Validation Operation for the constraint condition. Select from: = (Equal To), <> (Not Equal To), Is NULL, and Is Not NULL. ■ Select the Value String you want to validate against the value of the column Note: You can add more than one attribute, value pair, otherwise all pairs will be added together in the validation. ■ Save your work. 4-110 Oracle Order Management Suite Implementation Manual Defining Validation Templates 7. You can select the Create Validation Packages from the Tools menu to submit a concurrent request to create a validation package for all new or modified validation templates and record sets that may constitute a permitted validation combination. After the request completes, all validation templates that processed successfully will be visible in the list of values in the Processing Constraints window. See Also Defining Processing Constraints on page 4-104 Defining Record Sets on page 4-112 Basic Setup 4-111 Defining Record Sets Defining Record Sets The Records Sets feature in Order Management is used to define and maintain record set definitions for processing constraints. A record set is a set of records that are bound by common attributes such as ship sets. You can define constraining conditions and specify a record set to be validated for a given condition as defined by its validation template. ◗◗ To define a record set: 1. Navigate to the Record Sets window. The Record Sets window displays. 2. Select the Entity for which you are defining a record set. The System Defined check box is enabled if the system automatically defines the name of the record set. 3. Enter the name of the Record Set. 4-112 Oracle Order Management Suite Implementation Manual Defining Record Sets 4. Enter the Short Name for the record set. Note: You cannot modify the Short Name once it has been entered. 5. Optionally, enter a Description for the record set. The Based On Primary Key check box is used to indicate the record set that is based on the primary key columns for the entity. There can only be one primary record set per entity. These records are seeded and cannot be updated. 6. Select the name of the columns that should be matched from the validated record in the Matched Columns For Record Selection region. For example, if you define a Ship Set record set, the matching columns will be the Header ID and the Ship Set number. 7. Save your work. 8. Select the Create Validation Packages from the Tools menu to submit a concurrent request to create a validation package for all modified validation templates and record sets that may constitute a permitted validation combination. 9. Select the Create Validation Packages from the Tools menu to submit to create a validation package for all modified validation templates and record sets that may constitute a permitted validation combination. Only after the request completes, the created validation template is visible in the list of values in the Processing Constraints window. 10. Save your work. Basic Setup 4-113 Overview of Defaulting Rules Overview of Defaulting Rules You can create rules to determine the source and prioritization for defaulting order information to the Sales Orders window. These defaulting rules reduce the amount of information you must enter. You can even define a constant for most fields to be used when all other sources do not contain values. Entities and Attributes Entities include regions on the Sales Orders window such as Order, Line, Order Price Adjustments, Line Price Adjustments, Sales Credits, and Line Sales Credits. Attributes include individual fields of a particular entity, such as Warehouse, Ship-To Location, or Agreement. These are the same entities and attributes you use when defining Order Management processing constraints. A default is a value that Order Management automatically places in an order field. You can base the default value for a field on values of other fields, such as values you have previously entered for the order, the customer, or the order type. A defaulting rule is a collection of defaulting sources for entities and their attributes. You can define several different rules to use in different order processing situations. A defaulting rule includes these components: ■ Defaulting Conditions ■ Sequence ■ Source: ■ ■ Entity, Attribute, Value Defaulting Source/Value Defaulting Conditions You can define defaulting conditions that control defaulting of object attributes of an object (data object) in given mode of functionality. Defaulting conditions are evaluated at run time to select the appropriate default source assignments for all the object attributes. 4-114 Oracle Order Management Suite Implementation Manual Overview of Defaulting Rules Defaulting Rule Sequences Specify the priority sequence in which you want to search for a field’s defaulting value. Order Management looks at the lowest number first to begin searching for a default value, and continues to the next highest number until it finds a value. For example, if your first and second sources are null, but your third source does contain a value, Order Management uses your third source. Sources Types A defaulting rule source is the location from which you obtain a defaulting value; usually the location is another entity and attribute. For most attributes, you can assign at least one entity/attribute defaulting source, in addition to using the profile option and constant value sources. For example, you may want to define a rule to default the Price List to an order automatically based upon a variety of different sources. In this example, the entity of the rule is Order Header and the attribute (field) is Price List. Potential sources of entities include customer agreement, customer, and order type; the potential attribute for all three of these entities would be Price List. You can choose which sources you want to use. Your choice may depend on your business practices, whether those sources exist for a particular order, and whether those sources have a price list defined for them. For the customer, you may have defined separate price lists for the Bill-To and Ship-To addresses in addition to the customer itself. All three of these fields are available as sources. Source Types include; Same Record, Related Record, System Variable, Constant Value, Profile Option, PL/SQL API, Web Application dictionary Attribute Default, and Web Application Dictionary Object Attribute Default. Profile Option You can specify a value for other types of source entities, instead of a field that contains a value. The profile option source enables you to use a profile option, either system- or user-defined, as a default value source. You must then indicate the name of the profile option to be used as the default value in the rule. This source allows for greater default value tailoring flexibility without complex customizations. Note: If you intend to use a profile option as a defaulting source, be certain that it is defined before attempting to reference it in a defaulting rule. Basic Setup 4-115 Overview of Defaulting Rules Constant Value The constant value source option enables you to specify a constant value instead of a field that contains a value. This is especially useful if you always want the default to be the same value or to be used if none of the other sources you have defined for your rule can actually provide a value. For example, if all items in your organization are sold with the unit of measure Each, you could define a defaulting rule to default the value of Each for the Unit of Measure attribute within the Order Line entity. Defaulting Rule Example Here is an example of a defaulting rule that you can define so that a specific Price List will default to the Sales Order Header window. You may also define a sequence (priority) in which you want Order Management to search for a Price List. The default sequence might be: Look on an Agreement for a Price List, followed by the Invoice To Location, then the Ship-To Location, then the Customer, and finally, the Order Type. If Order Management still does not find a price list for any of the source locations listed (Invoice-To, Ship-To, Customer, Order Type), you can have a Constant Value default, such as 1998 USA Prices, which you enter in the Value field of the Attribute Defaulting Rules window. The table below represents this example. Table 4–6 Sequence Sources Source Field or Value 1 Related Record Agreement Price List 2 Related Record Invoice To Location Price List 3 Related Record Ship To Location Price List 4 Related Record Customer Price List 5 Related Record Order Type Price List 6 Constant Value 1998 USA Prices We do not recommend that you define any overly complex or recurring defaulting rules. If your rules are unclear, Order Management generates an error. Suggestion: 4-116 Oracle Order Management Suite Implementation Manual Overview of Defaulting Rules Effects of Modifications to Orders and Rules Modifications to orders may cause Order Management to reapply the defaulting from your defaulting rules. This reapplication of defaults also may lead to changes that trigger another reapplication. If re-application changes a value and results in inconsistent information on the order, Order Management prevents users from committing the order and provides messages to assist in correcting the data. For example, depending on the defaulting rules, changing the line type on the order line could change the price list on the line. If the line items are not in the new price list, Order Management prevents you from committing the order and issues instructions. Modifications to defaulting rules take effect for any new orders that use the modified defaulting rules when you reopen the window. Existing orders are affected only if you update a field on the order that was involved in the modification (also after you close and reopen the window). If you never make a change to an existing order that uses the modified defaulting rules, thus activating validation of defaulting, then the order is not affected by the modification. See Also Defining Defaulting Rules on page 4-118 Basic Setup 4-117 Defining Defaulting Rules Defining Defaulting Rules You can create and modify defaulting rules to improve the efficiency and accuracy with which you enter orders. You can define the rules to determine the source and prioritization for defaulting order information to reduce the amount of information you must enter manually in the Sales Orders window. For most fields, you can assign one or more defaulting sources in a priority sequence, or, if the default is always the same, you can define a constant value. Modifications to defaulting rules go into effect once you have logged out and logged in again for any new orders that use the defaulting rules. Existing orders are affected only if you update an attribute on the order that was involved in the modification. If you never make a change to an existing order that uses the modified defaulting rules, thus activating validation of defaulting, the order is not affected by the modification. ◗◗ To query entities and attributes: 1. Navigate to the Defaulting Setup - Entity Attributes window. The Defaulting Setup - Entity Attributes window displays. 2. Application--The Application field displays the application context for the entity displayed. For Oracle Order Management, the value is Oracle Order Management. This field is non updatable. 4-118 Oracle Order Management Suite Implementation Manual Defining Defaulting Rules 3. Entity--The Entity field displays the name of the object for which defaulting rules and conditions are being defined such as the order line. For Order Management you have the following options: ■ Order Header ■ Order Line ■ Order Price Adjustment ■ Order Sales Credit ■ Line Price Adjustment ■ Line Sales Credit The Attributes Region displays all the entity attributes for which defaulting rules can be defined. You are currently NOT allowed to enter new records here. 4. The Defaulting Sequence field enables a user to assign the sequence (priority) number in which this attribute should be defaulted. Note: Attribute with identical sequence numbers are defaulted in alphabetical order. e.g. If the order type has a sequence number of 1 and the price list has a sequence number of 1, then the order type defaults before the price list. 5. The Attribute field stores the name of available attributes. Values are currently defaulted based upon the entity selected. ■ ■ The Defaulting Condition Templates button enables you to define defaulting conditions for the application\entity combination displayed on the defaulting rules setup window. Selecting this button will take you to the Defaulting Validation Condition Templates window. The Defaulting Rules button enables users to define defaulting rules for the attribute selected. Selecting this button will take you to the Define Defaulting Rules window. For more information on defining or updating defaulting sourcing rules, see the Define Defaulting Rules section. Basic Setup 4-119 Defining Defaulting Rules 6. The Include in Building Defaulting Conditions check box indicates whether an attribute can be used in defining conditions for the entity selected. Note: The Include in Building Defaulting Conditions checkbox is for display purposes only, and is non-updateable. 7. Select the Defaulting Condition Templates button to define the defaulting condition for this entity. The Defaulting Condition Validation Templates window displays. Note: There is one default validation conditions template for each Application\Entity combination. The template that appears after selecting the Default Condition Template button is based upon current values displayed in the Application and Entity field on the Defaulting Step screen. 4-120 Oracle Order Management Suite Implementation Manual Defining Defaulting Rules Defaulting conditions enable you to control how an attribute is defaulted. For example, defaulting for returns can differ from defaulting for regular orders. 8. Defaulting conditions enable users to control how an attribute is sourced. Select an existing condition name if you wish to update the associated validation rules or add a new condition name with associated validation rules. 9. In the Description field, enter a brief description of the condition. Note: A generic condition of Always is seeded for each entity. Use this condition to define generic defaulting rules 10. The Seeded check box will be checked for seeded conditions. It is currently not used by Order Management In the Validation Rules Region, enter the validation rules based on the attribute values of the above entity. For example, standard orders could have the order type Standard. Order type = Standard. 11. In the Group Number field: ■ ■ For conditions that should together evaluate to TRUE (AND conditions), enter the same group number. For conditions that should together evaluate to OR (OR conditions), enter a different number for each record. 12. Enter the Attribute name such as Order Type. 13. Select the validation operation: ■ (>) Greater Than ■ (<) Less Than ■ (>=) Greater than or Equal to ■ (<=) Less than or Equal to ■ (=) Equal ■ (!=) Not Equal 14. Enter the Value String of the attribute that you want to validate against. 15. Navigate to the Defaulting Setup - Entity Attributes window. Basic Setup 4-121 Defining Defaulting Rules The Attribute name displays in the Attribute field. Flex attributes will not be displayed. 16. Select the Defaulting Rules button to define your defaulting rules. The Attribute Defaulting Rules window displays. ◗◗ To define defaulting rules: 1. Navigate to the Attribute Defaulting Rules window. Note: The Always condition should be the last in this sequence as it would always evaluate to True and no other defaulting conditions would be evaluated. 2. Enter a value in the Precedence field to determine the precedence when resolving multiple TRUE defaulting conditions. 4-122 Oracle Order Management Suite Implementation Manual Defining Defaulting Rules Note: If more than one defaulting condition is valid, the conflict is resolved by internally ranking conditions using the Precedence value. For example, defaulting condition “Standard Order” has a precedence value two and Copied Order has the precedence value one. If an order is standard and a copied order, then the defaulting rules for the condition with higher priority, Copied Order, is used. 3. Select a Defaulting Condition from the List of Values and then enter the defaulting rules to be used if this defaulting condition is TRUE. 4. Select the priority Sequence in which you want to retrieve the default for this attribute. Defaulting searches for a default value for this attribute by evaluating the defaulting rules in ascending order. 5. Select the Default Source/Value. Based on this source type, you can select the default sources or enter the default values. Select from the following: Table 4–7 Default/ Source Values Source Type Action required Constant Value Enter the default constant value. Profile Option Select the profile option from where you want to retrieve the default value. Same Record Select the attribute on the same record from where you want to retrieve the default value. Related Record Object--Select the related object. Attribute--Select the attribute on the related object from where you want to retrieve the default value. System Variable Expression--Enter the system expression to be evaluated to obtain the default value. (E.g. System Date.) Basic Setup 4-123 Defining Defaulting Rules Table 4–7 Default/ Source Values Source Type Action required PL/SQL API You can write a custom API to obtain a default value if the value cannot be obtained using other source types such as, the default order number from a sequence. Package--Enter the PL/SQL package name. Function--Enter the function name. Object--Optionally, enter the name of an object to be passed to this API. Attribute--Optionally, you can also enter the name of an attribute to be passed to this API. (See the PL/SQL API Procedure below.) You can use this source to get the default assigned when the Web App Dictionary Object Attribute Default attribute was assigned to this object in the web applications dictionary. Seeded If enabled, this is a seeded defaulting rule and the defaulting condition associated with this rule cannot be updated. PL/SQL API Procedure The signature of the PL/SQL API is: function function_name (p_database_object_name VARCHAR2 , p_attribute_codeVARCHAR2) return VARCHAR2 Note: Within this function if you need to access other attributes on the entity, then you can use the global entity record that is cached by defaulting: OE_<Entity Code>_Def_Hdlr.g_record and the datatype for this record is <Database Object Name>%Rowtype. Table 4–8 Entity Entity Code Database Object Order Header HEADER OE_AK_ORDER_HEADERS_V Order Line LINE OE_AK_ORDER_LINES_V Order Price Adjustment HEADER_ADJ OE_AK_HEADER_PRCADJS_V 4-124 Oracle Order Management Suite Implementation Manual Defining Defaulting Rules Table 4–8 Entity Entity Code Database Object Line Price Adjustment LINE_ADJ OE_AK_LINE_PRCADJS_V Order Sales Credit HSCREDIT OE_AK_HEADER_SCREDITS_V Line Sales Credit LSCREDIT OE_AK_LINE_SCREDITS_V For example: Function to default order number from a sequence based on the order type: Function Get_Order_Number(p_database_object_name IN VARCHAR2 , p_attribute_code IN VARCHAR2) return varchar2 IS l_header_rec OE_AK_ORDER_HEADERS_V%ROWTYPE; BEGIN -- Getting the defaulting global record l_header_rec := OE_Header_Def_Hdlr.g_record; -- for internal orders, use this sequence but for all other order types -- use the sequence for STANDARD orders. if l_header_rec.order_type_id = 1 then return to_char(OE_INTERNAL_ORDERS_S.nextval); else return to_char(OE_STANDARD_ORDERS_S.nextval); end if; END; Basic Setup 4-125 Overview of Price Lists Overview of Price Lists Price Lists Price lists are essential to ordering products because each item entered on an order must have a price. Each price list contains basic list information and one or more pricing lines, pricing attributes, qualifiers, and secondary price lists. Basic information includes the price list name, effective dates, currency, pricing controls, rounding factor, and shipping defaults such as freight terms and freight carrier. Effective Dates Price lists can have starting and ending dates. This enables you to prepare price lists ahead of when they are valid and to ensure they will not be used until their start dates. Price List Currency If you have international sales, you can record transactions in different currencies by defining a price list for each currency. After entering the currency for an order or return, you must choose a price list in the same currency. Rounding Factor You can define the number of places to the right or left of the decimal point to which the pricing engine rounds prices from price lists and modifiers from modifier lists. If you enter a negative number, you increase the number of characters to the right of the decimal point. If you enter a positive number, you affect more columns to the left of the decimal point. If you enter zero, you affect nothing Rounding factor -3 indicates rounding to the nearest thousands (for example, 1007 rounds to 1000). Rounding factor 2 indicates rounding to the nearest hundreds for example 107 rounds to 100). Note: You can limit the rounding factor value by the number of positions you specify in the extended precision format of the price list’s currency—profile option QP: Unit Price Precision Type. Secondary Price Lists The pricing engine uses secondary price lists when it cannot determine the price for an item using the price list assigned to an order. Primary and secondary price lists have the same currency. 4-126 Oracle Order Management Suite Implementation Manual Overview of Price Lists You can assign the same secondary price list to multiple price lists but you can not assign a secondary price list to a secondary price list. If the item that you are ordering an item is not in the primary price list, the pricing engine uses the highest-precedence secondary price list (the secondary price list with the lowest value for the precedence field). Line-level discounts and modifiers that apply to the primary price list do not apply to the secondary price list If an item appears on both the primary and a secondary price list with the same effective dates, the pricing engine uses the primary price list to price the item. If an item appears on the primary price list but is not active (the effective end date has passed), the pricing engine uses the price on the secondary price list. Defining Price Lists Price lists are defined at the item level. You can define and maintain multiple price lists. You can define the following types of prices on price lists: ■ Unit price--A fixed price. ■ Percent Price--A price which is a percent of the price of another item. ■ Formula--Multiple pricing entities and constant values related by arithmetic operators. For example, you define the price of an item to be a percentage price of another price list line. Price List Maintenance Price List Maintenance enables you to: ■ manually add lines to a price list. ■ copy price list lines from one price list to another. ■ add a new group of inventory items to a price list by specifying a range. ■ add a new group of inventory items to a price list by specifying an item category. Price lists can also be active or inactive. If a price list is inactive, you cannot use the price list on an order or order line to select unit price for an item. Inactive price lists may be modified or activated. Basic Setup 4-127 Overview of Price Lists Copying Price Lists You can quickly create a new price list by copying from an existing price list. You can copy a range of lines or all lines from the original price list. Only active price list lines—those with an effective end date later than the current date and those with active customers—copy. You can choose: ■ To copy active discounts from the original price list. ■ To copy the effective dates from the original price list lines. Adding Inventory Items When you add inventory items to a price list, you can specify an item status, such as active or planned; an item category, such as hardware or software; or a range of items. You can request the price to be either zero or the items’ costs in a specific inventory organization. Later, you can adjust the prices to your selling price. The process only adds items that exist in the item validation inventory organization and that are not on the price list, even if they are inactive on the price list. If you want to add items from an item category, you must first define the default inventory category set for Order Management. When you add items from an item category, the process adds all items of the item category to the price list; it does not add the item category. Manual Changes to List Prices You can always change the price on an existing price list line. If you type over the existing price, the new price is effective for new orders as soon as you save your changes. If you use price list line effectivity dates, you can maintain a historical record of your prices. Adjust Price Lists You can increase or decrease the list price of price list lines by an amount or percentage. You can apply the increase or decrease to all lines on the price list, lines that belong to an item category, lines with items of a certain status, lines created on a specified date, or lines having a range of items. Mass changes do not maintain price history. 4-128 Oracle Order Management Suite Implementation Manual Overview of Price Lists Creating a Price List ◗◗ To create a price list: 1. Navigate to the Price Lists window. The Price Lists window displays. 2. Enter a price list name in Name field. 3. Determine the status of the price list: ■ Inactive: Active Checkbox is blank ■ Active: Active Checkbox is selected (checked) Note: When in initiating query mode functionality within the Price list window, the Active checkbox will appear selected (checked) but the underlying value is Null. If you wish to query for price lists that are active, you must first de-select the Active checkbox, then reselect it. 4. Enter a description of the price list in Description. 5. Enter the price list currency in Currency. 6. Enter a rounding factor to be applied to the price list in Round To. Basic Setup 4-129 Overview of Price Lists A positive number indicates number of places to the left of the decimal point; a negative number indicates number of places to the right of the decimal point. The default is -2. Oracle Pricing rounds the base price and all discount amounts before using them in calculations. The value returned depends on the value that you have set for the profile option QP: Unit Price Precision Type: ■ ■ 7. Standard--The rounding factor defaults to the currency's precision value. You can override the rounding factor to any value greater than or equal to the currency's precision value. Extended--The rounding factor defaults to the currency's extended precision value. You can override the rounding factor to any value greater than or equal to the currency's extended precision value. Enter the starting and ending effectivity dates of this price list in Effective Dates. The Start Date defaults to the current date. 8. Enter a default payment term in the Payment Terms field. 9. Enter a default freight terms in the Freight Terms field. 10. Enter a default carrier in the Freight Carrier field. 11. Enter a comment in the Comments field. 4-130 Oracle Order Management Suite Implementation Manual Overview of Price Lists 12. Navigate to the List Lines tabbed region. Perform the remainder of the steps for each price list line that you want to create. 13. Select Item in Product Context. 14. Select Item Number In Product Attribute. 15. Depending on the value of Product Attribute, select an item number for the Product Value. 16. Select a unit of measure in UOM. 17. Select Application Method. Use the Unit Price for inventory items and either the Unit Price or Percent Price for service items 18. Enter Operand and Formula as follows: ■ ■ ■ For inventory items enter the base list price of the item in Operand. For service items, enter a value in the Operand. If Application Method is Unit Price, enter the base list price of the item. If Application Method is Percent Price, enter a percent of another item's price. Enter a static formula in Static Formula. If you enter a static formula, run a concurrent process to calculate the value. The result of the calculation changes the value of Value. 19. Enter the starting and ending effectivity dates of this price list line in Start Date and End Date. The dates should be within the start and end effectivity dates of the price list. 20. Select Price List Line for Line Type. 21. Enter a value in Precedence; this is the product precedence. When the pricing engine is trying to locate a price, it uses precedence to resolve conflicts when it selects more than one price list line from a price list. 22. Select Primary UOM if this price list line unit of measure is the primary pricing unit of measure for the item. Pricing uses the primary pricing unit of measure and the Oracle Inventory unit of measure conversion information to price an order whose unit of measure does not have a price list line. For example, a price list has two price list lines for item A11111, one with unit of measure EA—the primary UOM—and one for Basic Setup 4-131 Overview of Price Lists boxes. When the pricing engine receives an order in unit of measure CS, it accesses the unit of measure conversion tables to convert CS to EA. 23. Save your work ◗◗ To define pricing attributes: 1. Select the Pricing Attributes button in the List Lines tabbed region. 2. Enter a pricing context in Pricing Context. 3. Enter a pricing attribute in Pricing Attribute. 4. Select = or BETWEEN for Operator. 5. Enter Value From. 6. If Operator is BETWEEN, enter Value To. 7. Save your work. Note: The pricing attributes are joined as AND conditions since they apply to one price list line. ◗◗ To define secondary price lists: 1. Navigate to the Secondary Price Lists tabbed region. 2. Select a price list in Secondary Price List. 3. Save your work. Deleting a Price List ◗◗ To delete price list information: ■ You cannot delete price list, price list lines, or pricing attributes. To make price list or price list lines ineffective, change the effective dates. To make pricing attributes, make the price list line ineffective. Copying a Price List Use this procedure to create a new price list or add items to an existing price list. 4-132 Oracle Order Management Suite Implementation Manual Overview of Price Lists Note: This function is only effective on effective price lists. ◗◗ To copy a price list: 1. Navigate to the Copy Price List window. The Copy Price List window displays. 2. Navigate to the Copy From tabbed region. 3. Select the price list you want to copy. Currency and Description display. Refer to steps 3 through 4 to select the items that you want added to the price list. 4. Optionally, enter a range of items to add. Note: You cannot use wild cards when you specify the beginning and ending item numbers. 5. Select an item category and item category set to limit the items to add.When you add items from an item category, the process adds all items of the item category to the price list; it does not add the item category. Basic Setup 4-133 Overview of Price Lists Note: You must enter both Item Category Set and Item Category for this criteria to be effective. 6. Select Include Discounts to instruct the process to copy discounts. 7. Select Retain Effective Dates to instruct the process to copy the effective dates of price list lines. Note: The process does not copy the effective dates of the price list. You specify the effective dates for the new price list. 8. Navigate to the Copy To tabbed region. 9. You can copy to a new price list or an existing price list. Refer to steps 10 through 12, and 14 for new price lists and steps 13 through 14 for existing price lists. 10. Enter the Name of the new price list. 11. Enter the Description of the new price list. 12. Enter the Effective Dates of the new price list. 13. Select an existing price list. The Description and Effective Dates displays. 14. Select the Submit button. The request ID displays in the Request ID field. Adjusting a Price List ◗◗ To adjust a price list: 1. Navigate to the Adjust Price List window. The Adjust Price List window displays 4-134 Oracle Order Management Suite Implementation Manual Overview of Price Lists 2. Select the price list you want to adjust. Currency and Description will default. Refer to steps 3 through 6 to select the items that you want added to the price list. Enter a range of items to add. Note: You cannot use wild cards when you specify the beginning and ending item numbers. 3. Select an item category and item category set to limit the items to add.When you add items from an item category, the process adds all items of the item category to the price list; it does not add the item category. Note: You must enter both Item Category Set and Item Category for this criteria to be effective. 4. Enter an item status to limit the items to add. 5. Enter a creation date to limit the items to add. Pricing adjusts only the items added to the price list on that date. 6. Select Percent or Amount for Adjust By, as follows: ■ Percent: The process increases or decreases Operand by a percentage. Basic Setup 4-135 Overview of Price Lists Enter the percentage in the second field. ■ Amount: The process increases or decreases Operand by a fixed amount. Enter the fixed amount in the second field. 7. Select the Submit button. The request ID is displayed in the Request ID field. Adding Items to a Price List Prerequisite You must first define a price list header. Pricing submits a concurrent process when you add inventory items. The concurrent process only adds new items to a price list; it does not replace existing items, even if the existing items are ineffective. Note: ◗◗ To add items to a price list: 1. Navigate to the Add Items to Price List window. The Add Items to Price List window displays. 2. Select the price list to add items. 4-136 Oracle Order Management Suite Implementation Manual Overview of Price Lists Perform any or all of steps 3-5 below to select the items that you want added to the price list. 3. Enter a range of items to add. Note: You cannot use wild cards when you specify the beginning and ending item numbers. 4. Select an item category and item category set to limit the items to add.When you add items from an item category, the process adds all items of the item category to the price list; it does not add the item category. Note: You us enter both Item Category Set and Item Category for this criteria to be effective. 5. Enter an item status to limit the items to add. 6. Select Set List Price Equal to Cost From check if you have Oracle Inventory installed and you want to set the list price of the inventory item equal to its cost. Note: The list price becomes zero if you clear the List Price Equal to Cost From and the Inventory Organization does not use the standard costing method. 7. Enter Inventory Organization to limit the source of the items to add to those in the organization. If you do not specify an organization, the process uses the organization specified in the profile option QP: Organization ID. 8. Select the Submit button. The request ID displays in the Request ID field. Basic Setup 4-137 Overview of Formulas Overview of Formulas Formulas are mathematical expressions that the pricing engine uses to determine the list prices of items and the discounts that apply to those items. You can use them to: ■ ■ ■ Create a price from a computation as an alternative to entering prices in a price list. Calculate a price adjustment. For example, you can instruct the pricing engine to calculate a discount by attaching a formula to a discount line. Set up and maintain formulas based on one or more of the following component types: ■ ■ Numeric constant--A numeric value. Pricing attribute--The absolute value of a pricing attribute (such as thickness or height) of an item. Pricing attributes are characteristics of products and services that you can specify when the characteristics help to determine the price of a product or service. Distance, age of a related product, customer class, product family group, and level of service are examples of pricing attributes.You can specify one or a combination of pricing attributes and assign them to a product or service. ■ Factor list--A list of factors that you can link to multiple pricing attributes or a range of these attributes. The pricing engine evaluates the formula; it chooses one of these factors depending into which range the actual pricing attribute of the item falls. For example, a step in the formula has a different factor defined for different ranges of glass thickness; a glass with thickness between 0.1 and 0.3 mm has a factor of 3 and a glass with thickness between 0.4 and 0.8 mm has a factor of 5. The pricing engine determines which factor qualifies when it evaluates an order and applies this factor in the formula calculation. You can also relate multiple factor conditions. For example, if the base pricing attribute for glass thickness is between 0.1 and 0.3 mm AND the length of the glass is between 0.5 and 2 m, apply the factor of 3 OR if the base pricing attribute for glass thickness is between 0.4 and 0.8 mm AND the length of the glass is between 0.5 and 2 m, apply the factor of 5. ■ Link them to a price list line or a modifier line. ■ Use static formula calculations in price lists. 4-138 Oracle Order Management Suite Implementation Manual Overview of Formulas Formula Creation To create a formula, set up: ■ ■ The formula expression (formula) as the formula header. A formula is a valid mathematical expression that the Oracle database supports. The formula lines. Formula lines provide details about each part of the formula. The formula expression contains any of the following: ■ Parentheses, for example (and) ■ Mathematical operators, for example +, -, /, and * ■ Built-in functions, for example NVL, SQRT, and MOD ■ Operands: Operands are step numbers about which you provide more detail. You can use as many step numbers as you need, up to the limit of the field. You can repeat a step number in a formula, for example, 1+2*2. An operand is not a numeric constant. If you want to use a numeric constant in a formula, you: Note: ■ ■ Create a step number in the formula expression Assign the numeric constant to the step number in a formula line The valid formula (1+2*SQRT(3)) / 4 contains: ■ 1, 2, 3, and 4 as operands ■ +, *, and / as mathematical operators ■ SQRT as a built in function ■ Parentheses to group the operands and operators For each step number, create a formula line. In the previous formula example, you create four formula lines since the formula has four step numbers. When Oracle Pricing calculates a formula, it does not use the face value of the step number. It refers to the formula line and evaluates it to obtain the value of the operand. You assign one of the following types to each formula line: ■ Numeric constant: A numeric value. Basic Setup 4-139 Overview of Formulas ■ Pricing attribute: The absolute value of a pricing attribute (such as thickness or height) of an item. Pricing attributes are characteristics of products and services that you can specify when the characteristics help to determine the price of a product or service. Distance, age of a related product, customer class, product family group, and level of service are examples of pricing attributes.You can specify one or a combination of pricing attributes and assign them to a product or service. At order entry time, the pricing engine evaluates the attributes you have specified during formula setup to calculate the price. You can define as many attributes as you need to meet your pricing business needs. For example, you may use the formula 1*2 to calculate the price of a glass item. Step 1 is a pricing attribute for thickness and step 2 is the list price to calculate the price of a glass item; if 100 is the base price of the glass item and 0.3 is the value of the thickness attribute of the glass then the pricing engine evaluates the formula as 0.3*100 which is 30. ■ Factor list: A list of factors that you can link to multiple pricing attributes or a range of these attributes. The pricing engine evaluates the formula; it chooses one of these factors depending into which range the actual pricing attribute of the item falls. For example, a step in the formula has a different factor defined for different ranges of glass thickness; a glass with thickness between 0.1 and 0.3 mm has a factor of 3 and a glass with thickness between 0.4 and 0.8 mm has a factor of 5. The pricing engine determines which factor qualifies when it evaluates an order and applies this factor in the formula calculation. You can also relate multiple factor conditions. For example, if the base pricing attribute for glass thickness is between 0.1 and 0.3 mm AND the length of the glass is between 0.5 and 2 m, apply the factor of 3 OR if the base pricing attribute for glass thickness is between 0.4 and 0.8 mm AND the length of the glass is between 0.5 and 2 m, apply the factor of 5. Null Values in Formulas If a step number could have a null value, arrange to gracefully handle it in the formula. For example, in the formula 1*2, step 2 is of type Pricing Attribute, pricing attribute context is Physical Attribute, pricing attribute is Volume, and the user supplies the volume at order entry time. Since the user may not provide a volume, change the formula to 1* NVL(2,3). In the formula line for step number 3, arrange for a non-null value, for example a numeric constant. 4-140 Oracle Order Management Suite Implementation Manual Overview of Formulas If the expression does not use NVL in the expression, and the step number evaluates to NULL, the entire expression evaluates to NULL, the formula calculation fails, and the calling applications processes the failure. Creating a Pricing Formula ◗◗ To create a pricing formula: 1. Navigate to the Pricing Formulas window. The Pricing Formulas window displays. 2. Enter a new pricing formula in the Name field. 3. Enter a description of the pricing formula in Description. 4. Enter the effective dates of the pricing formula in the Effective Dates field. 5. Enter the formula in the Formula field. The formula is an arithmetic expression made up of step numbers that you enter in the Formula Lines tabbed region. You can repeat step numbers in the formula. Basic Setup 4-141 Overview of Formulas In the Formula Lines tabbed region, refer to steps 6 through 9 for each component of the formula. 6. Select a value for Formula Type. 7. Enter the following information depending on Formula Type: ■ ■ ■ 8. Numeric Constant--Enter the numeric constant in Component. Pricing attribute--Select the pricing context in Pricing Attribute Context. Select the pricing attribute name in Pricing Attribute. Factor List--Select or enter the name of a factor list in Component. To use an existing factor list, select it from the list of values. To create a new factor list, enter the name and the form creates it. Enter the step number for the component. You cannot repeat step numbers in this region even though you can repeat step numbers in the formula. 9. Save your work. If the Formula Type is Factor List, select the Factors button to enter factor list details. ◗◗ To define factor list details: 1. In the Pricing Formulas window, Formula Lines tabbed region, select the Factors button. The Factors window displays. 4-142 Oracle Order Management Suite Implementation Manual Overview of Formulas In the Base Pricing Attributes region, perform steps 2-8 for each base pricing attribute factor. 2. Select a value for Base Pricing Attribute Context. If you have multiple entries, you must use the same base context in this region (to create an OR condition); the pricing engine chooses one of the entries. Use the Associate Pricing Attributes region to associate additional contexts with the base context (to create an AND condition). 3. Select a value for Base Pricing Attribute. 4. Select Comparison Operator and enter the Value From and Value To as follows: If you select Between, you must enter a value for Value From. If you do not enter a value for Value To, it defaults to unlimited. If you select =, you must enter Value From and you cannot enter Value To. 5. Enter the Adjustment Factor. 6. Perform steps 7 and 8 for each associate pricing attribute. Basic Setup 4-143 Overview of Formulas 7. In the Associate Pricing Attributes region, select an Associated Pricing Attribute Context and Associated Pricing Attribute to associate with the base pricing attribute context and base pricing attribute values (to create an AND condition). 8. Select Comparison Operator and enter the Value From and Value To as follows: If you select Between, you must enter a value for Value From. If you do not enter a value for Value To, it defaults to unlimited. If you select =, you must enter Value From and you cannot enter Value To 9. Save your work. Updating Formula Prices ◗◗ To update formula prices: 1. Navigate to the Update Rule Prices window. The Update Rule Prices window displays. 2. Select New and Modified Lines Only of Price Lists to instruct the process to calculate formula-based prices for price list lines whose formulas you have added or changed since the process last executed. To instruct the process to calculate formula-based prices for all price list lines, clear the New and Modified Lines Only of Price Lists. 3. Select Update All Pricing Formulas for Price Lists to instruct the process to consider price list lines that have any formula. To instruct the process to consider price list lines that have a certain formula: 4-144 Oracle Order Management Suite Implementation Manual Overview of Formulas ■ Select Update Individual Pricing Formula for Price Lists ■ In Pricing Formula, select the pricing formula from the list of values The process applies this choice after it selects the price list lines according to the criteria for step 2. 4. Select the Submit button. The request ID displays in the Request ID field. Basic Setup 4-145 Overview of Modifiers Overview of Modifiers Modifiers enable you to setup price adjustments (for example, discounts and surcharges) and freight and special charges that the pricing engine applies immediately to pricing requests or accrues for later disbursement. Using modifiers, you can: ■ Setup a modifier list with multiple modifier lines ■ Create eligibility rules for modifiers by assigning list and line level qualifiers Modifier Concepts You use the Define Modifier form to set up price adjustments, benefits, freight, and special charges. You can define simple discounts and surcharges. Modifier lists contain one or more modifiers. Modifiers have list level and line level components. Each list level must have one or more lines associated with it. By defining qualifiers at the list and line levels, you define a customer’s eligibility for the modifier. This enables you to create both modifiers which are product specific and modifiers which apply to all products. Modifier List Types Using modifier lists, you can create groupings of price adjustments, benefits, and freight and special charges that you offer and report together to meet various business needs. At the list level, you define criteria that is common to all of the line level modifiers. You can use the following list types: ■ Discount ■ Surcharge ■ Freight/Special Charges For each list type that you define, you associate certain line types. Please refer to the white paper on Freight and Special Charges. Modifier Line Types Use modifier lines to define the type of price adjustments, benefits or freight and special charges that the pricing engine applies to pricing requests. You can associate certain line types with each list type. You can use the following line types: ■ Discount: Creates a negative price adjustment. ■ Surcharge: Creates a positive price adjustment. 4-146 Oracle Order Management Suite Implementation Manual Overview of Modifiers ■ ■ Freight charge Price Break - Applies a variable discount or surcharge price adjustment to a pricing request based meeting the condition of a break type. . Table 4–9 Modifier List Type and Modifier Line Type Relationships Modifier List Types Discount Surcharge Freight & Special Modifier Line Types Discount X Surcharge X X X Freight Charge Price Break Header X X Creating a Modifier List ◗◗ To create a modifier list: 1. Navigate to the Define Modifier window. The Define Modifier window displays. Basic Setup 4-147 Overview of Modifiers 2. In the Main tabbed region, enter the modifier list type in Type. 3. Enter the modifier list number in Number. 4. Enter the modifier list name in Name. 5. Select or clear the Active check box. Note: The pricing engine looks at this flag before it checks effectivity dates and ignores inactive modifiers. Inactivating expired modifiers helps the pricing engine to perform more effectively. You can query inactive modifier lists. 6. Select or clear Automatic. Note: If you select Automatic for a list, all the lines for this list default to Automatic. 4-148 Oracle Order Management Suite Implementation Manual Overview of Modifiers 7. Enter Currency. The pricing engine applies modifiers to sales orders of the same currency. 8. Enter the start and end date that the modifier lines are effective in Start Date. Note: If you do not enter dates and check Active, the list is effective from the creation date and does not become ineffective. 9. Enter a description of the modifier list in Description. Creating List Level Qualifiers Modifier list level qualifiers help the pricing engine to determine who is eligible for the modifier lines. If an order is not eligible for a modifier list, it is not eligible for that list’s line level modifiers even if the lines have qualifiers for which the order is eligible. ◗◗ To create list level qualifiers: 1. Navigate to the Define Modifier window and navigate to the Main tabbed region. 2. Select List Qualifiers. The Qualifier window displays. You can add, change, and delete qualifiers and change the dates. 3. Select OK. 4. Save your work Creating Modifier Lines ◗◗ To enter basic modifier line information: 1. Navigate to the Define Modifier window. 2. In the Modifiers Summary tabbed region, enter a modifier number as an identifier for the modifier line in Modifier No Basic Setup 4-149 Overview of Modifiers 3. Enter the Level. ■ ■ 4. 5. Line--The pricing engine determines if the pricing request is eligible for this modifier by validating the request for each line. It applies this modifier at the line level. Order--The pricing engine determines if the pricing request is eligible for this modifier by validating the pricing request header. It applies this modifier at the order level but prorates a percentage value to each line. Enter Modifier Type from the following: ■ Discount ■ Surcharge ■ Freight/Special Charges ■ Price Break Enter the Start Date and End Date of this modifier line. Note: Start date and end date on the modifier line must be between the start date and end date on the modifier list. The pricing engine uses the modifier line dates to determine if this line is effective. 6. Print On Invoice is reserved for future use. 7. Select or clear Automatic. If you select it, the pricing engine automatically applies this modifier. If you clear it, someone must manually apply it to an order. Note: If you select Automatic, Automatic for each line appears as selected but you can change it. You can allow manual application of discounts, surcharges, and freight and special charges line types. 8. Select or clear Override. If you check it, you can change application of this modifier to each order. The Pricing Phase will default to List Line Adjustment for line level modifiers and Header Level Adjustment for order level modifiers. 4-150 Oracle Order Management Suite Implementation Manual Overview of Modifiers Incompatibility Group defaults to Level 1 Incompatibility. Bucket also defaults to 1. 9. Enter the Proration Type. Note: this is reserved for future use. Note: GL Value is reserved for future use. 10. Enter Item Number, Item Category, or All Items in Product Attribute. 11. Enter the value for the item number or item category in Product Attribute Value. 12. Enter Volume Type. 13. The volume type instructs Pricing which attribute of the item to use when qualifying for a modifier. Note: Valid types are Item Quantity and Item Amount. Period is reserved for future use. 14. Enter Equal (=) or Between in the Operator field. For example, item quantity = 5 or item quantity between 5 and 20. To create greater than and less than conditions, leave From Value and To Value blank as follows: Table 4–10 From Value To Value Meaning 5 <blank> value > 5 <blank> 100 value < 100 5 100 value >= 5 and <= 100 15. Enter the unit of measure of the item or item category in UOM. 16. Enter Value From and Value To. Basic Setup 4-151 Overview of Modifiers Note: If Operator is Equal (=), enter Value From. If Operator is Between, you must enter Value From and Value To is optional; if Value To is blank has no upper limit. 17. Save your work. ◗◗ To enter discount and charge information: 1. In the Discount/Charges tabbed region, select or clear Include on Returns. If you select it, the pricing engine includes freight charge on returns. The default is selected. 2. Enter the Application Method to instruct Pricing on how to apply this modifier. Valid values are: ■ ■ ■ ■ Amount--Creates a fixed price adjustment on each unit for the amount specified in the Value. Percentage--Creates a percentage price adjustment on each unit for the percentage specified in the Value. New price--Overrides the selling price of this item and makes the new price specified in the Value the new selling price. Creates a price adjustment for the difference in list price and the new price. Lumpsum--Creates a price adjustment for this lump sum amount on the new price entire line. For example, with a modifier type of discount: Table 4–11 List Price 3. Item Quantity Ordered Extended Application Price Selling Method Value Adjustment Price 10 Item A 200 Amount 5 5 per unit 1000 10 Item A 200 Percent 5 5% 1900 10 Item A 200 New Price 5 5 1000 10 Item A 200 Lumpsum 5 5 off 1995 Enter Value of the application method. 4-152 Oracle Order Management Suite Implementation Manual Overview of Modifiers 4. Save your work. ◗◗ To enter freight charge information: 1. Enter the following information in the Modifiers Summary tabbed region ■ Level--Use Line or Order ■ Modifier Type--Use Freight/Special Charge ■ Bucket--Use 1 2. In the Discounts/Charges tabbed region, enter charge name in Charge Name. 3. Select or clear Include on Returns. If you select it, the pricing engine includes freight charge on returns. The default is selected. 4. Enter the Application Method to instruct the pricing engine how to apply this modifier. Valid values are: ■ Percent ■ Amount ■ Lumpsum ■ New Price 5. Enter Value. 6. Save your work. ◗◗ To enter price break information: 1. Enter the following information in the Modifiers Summary tabbed region: ■ Level ■ Modifier Type: Use Price Break Header ■ Break Type Enter point for Modifier Type Price Break to determine the method of calculating the volume break. For Point, the pricing engine charges each unit of volume at the price of the break within which the total falls. Basic Setup 4-153 Overview of Modifiers Table 4–12 Product Attribute Value From Value To Value (%) Item A 1 100 5 101 200 10 250 <blank> 15 In the example, the discount is 150 at 10%. 2. ■ Product Attribute ■ Product Attribute Value ■ UOM ■ Volume Type In the Price Breaks* tabbed region, enter Adjustment Type. Note: Rebate Transaction Type and Estimated Accrual Rate are reserved for future use. 3. Select the Define Discount button. 4. In the Price Break tabbed region, enter Value From and Value To. 5. Enter Application Method.Valid values are: ■ Amount ■ Percentage ■ New Price 6. Enter Value of the application method. 7. Save your work. Creating Line Level Qualifiers Modifier line level qualifiers help the pricing engine to determine who is eligible for the modifier lines. If an order is not eligible for a modifier list, it is not eligible for that list’s line level modifiers even if the lines have qualifiers for which the order is eligible. 4-154 Oracle Order Management Suite Implementation Manual Overview of Modifiers ◗◗ To create line level qualifiers: 1. Navigate to the Define Modifier window. 2. Navigate to the Modifiers Summary tabbed region and select a modifier. 3. Select Line Qualifiers. The Qualifiers window displays. You can add, change, and delete qualifiers; change the grouping numbers, and change the dates. 4. Select OK. 5. Save your work. Attaching Pricing Attributes Use this procedure to attach attributes to the items and item categories that you define in modifier lines. When the pricing engine determines eligibility for a modifier, it validates the pricing attributes along with the item number or item category. ◗◗ To attach pricing attributes: 1. Navigate to the Define Modifier window. 2. Navigate to the Modifiers Summary tabbed region and select a modifier. 3. Click Pricing Attributes. The More Pricing Attributes window displays. 4. Enter a pricing context in Pricing Context. 5. Enter a pricing attribute in Pricing Attribute. 6. Enter Value From and Value To. 7. Select the OK button. 8. Save your work. Basic Setup 4-155 Creating a GSA Price List Creating a GSA Price List GSA Price List enables you to define a GSA Price List for your GSA customers. The GSA Price List actually uses the modifiers form and uses the new price. You create a discount that adjusts the base price of the item to the GSA price. You can set up multiple GSA price lists that are effective during the same time period. ◗◗ To create a GSA price list: 1. Navigate to the Define Modifier - Define GSA Price window. The Define Modifier - Define GSA Price window displays. Note: GSA Price List actually uses the Define Modifiers window to set up your GSA prices. 2. In the Main tabbed region, enter Discount List in Modifier List Type. 3. Enter the modifier list number in Number. 4. Enter modifier list name in Name. 5. Enter Currency. 4-156 Oracle Order Management Suite Implementation Manual Creating a GSA Price List Pricing applies modifiers to sales orders of the same currency. 6. Enter the start date and end date during which the GSA price list is effective. 7. Enter a description of the GSA price list in Description. 8. In the Modifiers Summary tabbed region, enter a modifier number as an identifier for the GSA price list. The Level defaults to Line and the Modifier Type defaults to discount. 9. Enter the start date and end date of this GSA price list line. Note: The Start and End Dates on the discount line must be between the start date and end date of the GSA price list. Pricing uses the discount line dates to determine if this line is effective. 10. Phase defaults to List Line Adjustment. 11. Incompatibility defaults to Exclusive. 12. Bucket defaults to 1. 13. Enter Item Number in Product Attribute. 14. Enter the item number in Product Attribute Value. 15. Enter Precedence. 16. Enter the item unit of measure. The Application Method defaults to New price in the Discounts/Charges tabbed region. 17. Enter the item price in Value. 18. Save your work. Basic Setup 4-157 Creating a GSA Price List ◗◗ To create GSA list qualifiers: You can attach multiple GSA customers as qualifiers to a GSA Price List. Note: You can only attach customers only at the list level. You cannot assign line level qualifiers. 1. Select List Qualifiers. Refer to steps 2 through 8 if you want to qualify the GSA price. 2. Enter Grouping Number. Note: Since Qualifier Context is Customer, make OR conditions by creating each qualifier with a different grouping number. 3. Qualifier Context defaults to Customer. 4. Qualifier Attribute defaults to Customer Name. Precedence defaults from the item segment of the descriptive flexfield. 5. Enter Operator. 6. Enter customer name in Value From. 7. Enter start date and end date for the customer. Note: The start and end dates of the list qualifiers must be within the start and end date of the modifier list. 8. Save your work. Warning: GSA behavior is affected if the Qualifier flexfield sequence for GSA qualifier is changed in the flexfield setup. 4-158 Oracle Order Management Suite Implementation Manual Overview of Agreements Overview of Agreements Oracle Pricing enables you to establish agreements with your customers that let you define the prices, payment terms and freight terms that you negotiated in the agreement. When pricing, the pricing engine will ignore qualifiers attached to a price list associated with an agreement if the agreement is chosen at the time of order entry. The pricing engine, will however, still check for product and pricing attributes in the price list associated with the agreement. With Agreements, you can: ■ ■ Define your agreements using customer part numbers and inventory item numbers. Make revisions to the original terms and maintain these changes and their reasons under separate revision numbers. ■ Attach an already existing price list to the agreement or define new prices. ■ Assign optional price breaks by quantity. Price lists are exclusive by agreement. ■ Set effectivity dates for agreement terms. ■ Set payment terms including invoice rule and accounting rule. ■ Set freight terms including the freight carrier. ■ Apply agreement terms to sales orders by reference agreements. Creating a Price Agreement ◗◗ To create a price agreement: 1. Navigate to the Pricing Agreements window. The Pricing Agreements window displays. Basic Setup 4-159 Overview of Agreements 2. In the Agreement tabbed region, enter an agreement name in Agreement Name. 3. Enter an agreement number in Agreement Number. 4. Enter a revision number in Revision. If you want to create a revision: 1. Retrieve the current revision. 2. Change the ending effective date of the current revision. Different revisions cannot have overlapping start or end dates. 3. You cannot create a revision for an agreement unless the current version has effectivity dates. If the current revision does not have effectivity dates, add them now and save your work. 4. Clear the window. 5. Enter the same agreement name, the same agreement number, and a new revision number as if you are creating a new agreement. 6. Select a revision date in Revision Date. The revision date defaults to the current date. 7. Enter the customer name in Customer. The customer number displays in Cust Number. 8. Select an agreement type in Agreement Type. 9. Enter a contact in Contact. 4-160 Oracle Order Management Suite Implementation Manual Overview of Agreements 10. Enter effectivity dates in Effective Dates. The effectivity period defaults from the current date. 11. Enter a salesperson name in the Sales Person field. 12. Enter the customer’s purchase order number in Purchase Order. 13. Enter the purchase order signature date in Signature Date. 14. Select the Pricing tabbed region, Payment Terms region. 15. In the Price List Type field, select the Agreement list type: ■ Standard Price List (PRL) ■ Agreement Price List (AGR) Note: If a sales order has an agreement, the price list used for the order is the price list associated with the agreement. You can however, override the price list associated with the agreement with a price list that is not of Price List Type AGR (Agreement). Standard Agreements (PLR) ■ Standard Agreements cannot have any agreement Lines ■ Standard agreements must be associated with a standard Price List ■ Price List and Price List Lines can only be viewed and maintained through Price List Setup window Basic Setup 4-161 Overview of Agreements ■ ■ ■ A Price List can be used with any number of Standard Agreements or to price orders which are not associated with a specific Agreement You cannot create revisions for Price List Lines The Agreement Number is not automatically created as a Qualifier for the associated Price List Pricing Agreements (AGR) ■ ■ ■ ■ ■ ■ Pricing Agreements must have at least one Agreement Line Pricing Agreements can only be viewed and maintained through the Pricing Agreement Setup window Pricing Agreements must be associated with an Agreement Price List An Agreement Price List can be used with any number of Pricing Agreements but cannot be used to price an order which is not associated with a Pricing Agreement Revisions can be created on Pricing Agreement Lines through the Pricing Agreement Setup window Price List will always have the Agreement Number as a Qualifier (and hence can only be used when the Pricing Agreement is specified on the Order Line) . Note: If you select Standard Price List, the price list must be an existing price list, and additional fields within this window will default from the standard price list selected. If you select Agreement Price List, you can create or make changes to price list lines, and you can enter values for: ■ description ■ currency ■ rounding factor ■ freight carrier ■ freight terms ■ comments 16. Select a pricing list to associate with the agreement in Price List. 4-162 Oracle Order Management Suite Implementation Manual Overview of Agreements Note: You cannot associate a qualifier with an agreement because the price list of an agreement is the qualifier for the agreement. 17. Select a currency in Currency. 18. Enter a rounding factor in Rounding Factor. 19. Enter a description for the price list in Description. 20. Enter a default freight carrier in Freight carrier. 21. Enter default freight terms in Freight Terms. 22. Enter a comment in Comments. 23. In the Payment tabbed region, select payment terms in Payment Terms. 24. Enter the bill-to name in Invoice To. 25. Enter the bill-to address in Address. 26. Enter the bill-to contact in Invoice Contact. 27. In the Payment tabbed region, Rules region, enter an accounting rule in Accounting Rule. 28. Enter an invoicing rule in Invoicing. Note: Create the accounting and invoicing rules in Oracle General Ledger. 29. To set the accounting rule override flag, in the Override Flag region, select Accounting Rule. 30. To set the invoicing rule override flag, in the Override Flag region, select Invoicing Rule. Refer to steps 28 through 40 for each item that you want to add to the price list. 31. In the lowest region of the form, enter a customer item number in Customer Item. Customer item is a pricing attribute. Basic Setup 4-163 Overview of Agreements Note: When you enter a customer item, Pricing creates one pricing attribute and one product attribute for the agreement line for the customer item and its corresponding internal inventory item. 32. Enter a customer address category in Address Category. 33. Enter an inventory item number in Product Value Note: You cannot enter an item category in Product Value. If you entered a customer item which is associated with more that one inventory item, you must select the correct inventory item for the agreement line. 34. Enter a unit of measure in UOM. 35. Select Unit Price for Application Method. 36. Enter base price in Value. 37. Enter the effectivity dates in Start Date and End Date. 38. Select Price List Line in Line Type. They should be within the effectivity dates of the agreement. 39. Select Primary UOM if this price list line unit of measure is the primary pricing unit of measure for the item. Pricing uses the primary pricing unit of measure and the Oracle Inventory unit of measure conversion information to price an order whose unit of measure does not have a price list line. For example, a price list has two price list lines for item A11111, one with unit of measure EA—the primary UOM—and one for boxes. When the pricing engine receives an order in unit of measure CS, it accesses the unit of measure conversion tables to convert CS to EA. 40. Enter a comment in Comments. 41. Enter a revision number in Revision . Note: This revision number is not dependent on the agreement revision number. 4-164 Oracle Order Management Suite Implementation Manual Overview of Agreements 42. Enter a revision reason in Revision Reason.You must create a list of reasons before you use this field. 43. Enter the revision date in Revision Date. 44. Save your work. ◗◗ To define pricing attributes: 1. Select the Pricing Attributes button. 2. Enter a product context in Product Context. 3. Enter a product attribute in Product Attribute. 4. Enter a product value in Product Value. 5. Enter a pricing context in Pricing Context. 6. Enter a pricing attribute in Pricing Attribute. 7. Enter values in Value To. Note: You cannot enter Value To and Operator in the Pricing Attributes window. 8. Save your work. Note: The pricing attributes are joined as AND conditions since they apply to one price list line. ◗◗ To define price breaks: 1. Select the Price Breaks button. The Price Breaks button is enabled only when you select the Price Break Header in Line Type on the agreement line. Perform the remainder of the steps for each price break that you want to define. 2. Enter the Pricing Context. 3. Enter the Pricing Attribute. 4. Enter the Value From. 5. Enter the Value To. Basic Setup 4-165 Overview of Agreements 6. Enter the list price in Price field. 7. Save your work. Note: Once a Pricing Agreement has been saved, you cannot update or change the value for Price List Type. 4-166 Oracle Order Management Suite Implementation Manual Overview of Credit Checking Overview of Credit Checking Order Management’s credit checking feature is the process by which orders are validated against user-defined rules to verify that the customer has a sufficient credit record established with your company to allow the order to be processed and shipped in advance of payment. Credit checking includes: ■ validating orders to continue through the workflow process ■ a notification of appropriate parties of credit holds ■ a method to release the hold or approve the order ■ reporting and querying tools to enable the credit department to verify that holds are being processed in a timely manner. Order Management enables you to perform credit checks on your customer orders, and automatically hold orders that violate your credit rules. You can define customer profile classes and maintain individual credit profiles for your customers and customer sites that specify the maximum single order limit and the maximum total credit balance for each customer or site. You can also define the rules that Order Management uses to calculate a customer or site's total credit balance. You can define whether certain payment terms are exempt from credit checking, such as a cash payment in full. When the order is committed after making any changes, credit check is automatically performed, if applicable. ■ ■ Define credit check rules are assigned to order types. If order types, customer profiles and payment terms on an order enable credit checking, then credit checking will occur at Booking or Pick Release. Orders failing credit check are placed on Credit Check Failure hold and can be resolved by manually releasing the hold in the Sales Orders window. Credit Checking Criteria You can control which orders are subject to credit checking. The orders that could be exempted from credit check can be: ■ Orders of a given type. For example, you may want to exclude staff sales or internal sales orders from credit checks. Credit checking rules are assigned to order types. While setting up order types, if the credit check rule field is left blank, this would automatically exclude orders of that type from credit check. Basic Setup 4-167 Overview of Credit Checking ■ ■ ■ ■ Orders for a given class of customer. For example, a manufacturer may wish to exclude all orders from internal customers from credit check. You can group all your internal customers into one customer class, and then set up credit checking rules to exclude that class of customer. With Order Management and Oracle Receivables, while setting up a customer profile class, you can disable the Credit Check flag. Customers that have this customer profile class assigned to them would then be excluded from credit check. Order for a given customer. For example, a manufacturer may wish to exclude all orders from its largest customer from credit check. With Order Management and Oracle Receivables, excluding a specific customer from a credit check can be achieved by disabling the Credit Check flag for this customer only in the individual customer profile. Orders for a given customer billing address. For example, a manufacturer may wish to exclude orders that will be invoiced to one of it’s largest customer corporate headquarters from the credit check process. With Order Management and Oracle Receivables, the individual bill-to sites can have a different transaction profile from the parent customer. While setting up the bill-to site profile, enabling the Credit Check flag determines whether orders billed to that address will be credit checked. Order lines with a given payment term. For example, order lines with a cash on delivery payment term can be excluded from the credit checking process. With Order Management, the payment terms also have a Credit Check flag. Disabling this flag will automatically exclude order lines with that payment term from the credit evaluation. Only those lines that have payment terms with credit checking turned on are compared against the credit limits. Credit Check Rules You can use different credit checking rules at different points in the order process flow. For example, you might want to perform a credit check before booking, but you may want to apply specific controls before shipping the product to your customer. In Order Management, separate credit checking rules can be assigned for use at the time of booking and shipping when setting up the order type. The Booking credit check rule is used if the credit evaluation occurs before any one of the order lines has been booked and the picking rule would be used if at least one of the lines has been booked. Thus, a stringent rule which can include uninvoiced orders and open receivables for exposure calculation can be used as the picking rule, whereas the booking rule may just include open receivables. 4-168 Oracle Order Management Suite Implementation Manual Overview of Credit Checking Prevent Processing You can prevent the processing of a line or group of lines which violate a business rule that manages exposure and cash flow. For example, if a business rule exists that prevents entering a customer order with a total value greater than $100,000, without credit manager approval, then those orders, lines, or line groupings in excess of $100,000 will be placed on credit check hold. Possible groupings are: ■ Total order ■ Shipment of an Order Line ■ All lines on the Order that must ship together ■ All lines that must be delivered together In Order Management, credit holds are applied for to bill-to sites or bill-to customers that fail credit check on an order. The lines that belong to these held sites or bill-to customers are checked for holds within each workflow activity in the order and line flows. If a hold exists, then the processing of that line is stopped. Lines that ship together or should be delivered together can be placed in a set. If any one of these lines on the set is on credit hold, none of the other lines can be shipped or delivered until the line is released from hold. However, other lines will be processed until the shipping and delivery activities. Credit checking is performed at the header level, meaning it checks the order at the header level and if it fails the whole order is put on credit check hold. If the quantity of one or more lines get changed, the whole order goes through the credit check again and every thing is reevaluated again. Pick release performs a check for hold and if the order or line is on hold, it stops the line from being pick released by not creating a move order line for the corresponding delivery. Releasing Orders and Lines for Further Processing You can view orders and lines on credit check hold in various ways. You can view the following: ■ All customers, order, lines sets on credit hold, their activities, and date ranges that belong to a particular approver. For example, a credit manager may be asked to improve cash flow, so that credit manager wants to view all customers on a hold of some sort, in an effort to prioritize which customer is contacted first to expedite payment. From the Holds Information tabbed region in the Find Orders window, the approver can query all hold criteria for hold sources or a credit hold. Basic Setup 4-169 Overview of Credit Checking ■ All lines on credit hold for a given customer. For example, to handle a customer request for an increased credit maximum value, a credit manager may want to review all current credit holds for that customer. From the Find Orders window in the Order Organizer, the approver can query all lines for a particular customer that are on credit hold. You can release a group of order lines for further processing after the appropriate approval. Groupings of order lines can include, but are not limited to: ■ A single order line from multi-lines. ■ All order lines for all companies under a given parent. ■ All order lines for a given customer, class, or customers. ■ All order lines on a given order, order type, or range of orders. ■ ■ All order lines that are to be delivered on a given date and time or range of dates. All order lines that are scheduled to ship at a given date/time or range of dates. For example, you may prefer to expedite resolving credit holds by applying managerial approval and release to a group of lines as opposed to approving lines or orders individually. This way, a greater number or volume of credit holds can be resolved at one time. You should be able to release some of the lines of an order, while leaving other lines of the order on credit hold. Credit check holds are automatically released if the lines are updated such that the new balance is within the site or customer credit limits. In addition, an approver can view all the lines on credit hold and can selectively release some lines from this hold. These manually released lines are not placed on Credit Check Hold during subsequent credit checks. 4-170 Oracle Order Management Suite Implementation Manual Automatic Credit Checking of Orders Automatic Credit Checking of Orders Use Order Management’s automated credit checking to prevent shipping of products to customers with unacceptable outstanding credit exposure automatically. Credit checking can be done at ordering, shipping, or both. You determine balances to include when calculating total credit exposure, and set total exposure limits for a customer or customer site. Credit Check Rules Credit check rules are the formulas you use to calculate total credit exposure for a customer or customer site. You may include or exclude several different balances which Order Management uses to derive a customer’s outstanding credit balance. For example, you can include all outstanding receivables, only past due receivables, or only receivables within a certain date range. You can define as many different credit rules as you need to meet your business requirements. Customer Profile Classes Customer Profile Classes enable you to create different credit risk classes and to assign default credit policies to each class. Customer Profile Classes standardize your credit policies across customers and serve as templates when you create Customer Profiles. Customer Profiles Customer Profiles define your credit policies for individual customers or customer sites. You can accept the default credit policies from a Customer Profile Class, or you can customize credit limits to fit the particular customer. You can implement credit policy changes by modifying a Profile Class and cascading the changes to individual Customer Profiles. Order Types You can determine by order type whether to perform credit checking at ordering, shipping, or both by specifying the Credit Check Rule name when you define your order type. See: Defining Transaction Types on page 4-102. Payment Terms Order Management enables you to control credit checking by payment terms, so you never unnecessarily credit check orders when, for example, your customer pays in cash. Basic Setup 4-171 Automatic Credit Checking of Orders Exposure Calculation Order Management provides you with the ability to increase the available credit for customers automatically as payments post to their accounts. If a customer reaches a $10,000 credit limit and a payment posts to the account for $6,000, the total credit exposure will be automatically recalculated to show the $6000 available credit. See: Oracle Receivables User’s Guide. Discounts and Allowances Order Management enables you to credit check orders after discounts and allowances. The value of an invoiced order being credit checked will include all discounts and allowances. The value of an uninvoiced order will include any off-invoice discounts and allowances. Note: Additional deals or promotions that do not affect the invoice amount are not used in credit checking. These types of deals and promotions include accrued non-invoiced and retrospective discounts and pending rebates. Credit Check Hold Order Management automatically holds customer orders that exceed credit limits. You control who is authorized to release Credit Check holds when you want to make an exception or the customer’s credit balance is acceptable. Audit Trail of Credit Check Holds Order Management maintains a complete audit trail of credit check holds, which enables you to track who applied or removed each hold, the date it was applied or removed, and why. On-line Status Order Management’s on-line inquiry capability enables you to review the status of any orders on credit check hold. Report on Credit Check Holds The Outstanding Holds Report lists orders on hold, including credit check hold, for any or all customers. The Orders on Credit Check Hold Report lists customer balances for customers with orders on credit hold to help you determine why their orders are on hold. 4-172 Oracle Order Management Suite Implementation Manual Activating Credit Checking Activating Credit Checking Three levels of control determine which orders undergo automatic credit checking: Order Type, Customer Profile, and Payment Terms. Credit Checking occurs on an order when all three levels enable credit checking. If one level disregards credit checking, credit checking does not occur for the order. Define Credit Check Rules Define as many credit check rules as you need to support your business practices. Assign up to two rules to an order type: one for order booking and the other for shipping. Any customer balances you include in your rule are added together to calculate the total order limit for a customer or customer site. If you include your customer’s open receivables balance, you can limit the balance to only overdue receivables. If you include uninvoiced orders, you can limit the balance to only orders scheduled to ship within a certain number of days. This prevents blanket orders (orders for a large quantity of an item with several ship dates over several months) from artificially inflating your customer’s outstanding balance. You can also include balances from orders currently on hold. Orders Currently On Hold includes orders on any hold: Credit Check hold, GSA Violation hold, or any of your unique holds. The more balances you include in the formula, the higher your customer’s total credit exposure (potentially) and the sooner they reach the credit limit. Use the Credit Check Rules window to define credit rule formulas. Assign Credit Check Rules to a Transaction Type Control when credit checking occurs and the rule used to calculate a customer’s outstanding credit balance by assigning Credit Check Rules to a Transaction Type. By assigning Credit Check Rules to the fields Ordering and/or Shipping in the Transaction Type window, you enable credit checking for orders using this order type. The Ordering field enables credit checking when you book an order, and the Shipping field enables credit checking when you run Pick Release. You can assign the same rule to both fields or use different rules. Attention: If you do not assign a rule to either Ordering or Shipping, verification of payment, including credit card authorizations do not occur for orders using this order type, regardless of other credit checking parameters. Basic Setup 4-173 Activating Credit Checking Create Customer Profile Classes Use the Customers window to specify credit limits in different currencies using these four fields: Order Credit Limit, Credit Limit, and Currency in the Profile Class Amounts tabbed region, and Credit Check and Tolerance in the Profile: Transaction tabbed region. To enable credit checking for the Profile Class, check the Credit Check check box. Leave the Credit Check check box unchecked to disable credit checking for the Profile Class. The Order Credit Limit field sets a limit on the amount of an individual order. If credit checking is active and the customer exceeds the Order Credit Limit on an individual order, the order is placed on credit hold. 4-174 Oracle Order Management Suite Implementation Manual Activating Credit Checking The Credit Limit field sets a limit on the customer’s outstanding credit balance, which is calculated using the Credit Check Rule. If credit checking is active and a customer’s outstanding credit balance exceeds the assigned Credit Limit for that customer, the order is placed on hold. The Tolerance field specifies a percentage by which a customer can exceed the Order Credit Limit and the Credit Limit without being placed on credit hold. If a Tolerance percentage exists, the Order Credit Limit and the Credit Limit are increased by the Tolerance percentage before individual order balances and the customer’s outstanding credit balance are compared to these limits. The Currency field determines the currency of the Order Credit Limit and Credit Limit values. A single Customer Profile Class can have limits in several different currencies. Order Management uses the currency of the order you are credit checking to determine which currency credit limits to use in credit checking calculations. Order Management considers only orders and invoices in the same currency as the order you are credit checking when calculating a customer’s outstanding credit balance, and compares this to the Credit Limit value for the currency. Attention: If you have not defined credit limits in a particular currency and you enter an order in that currency, no credit checking occurs on the order. Create Customer Profiles Implement credit limits for individual customers or customer sites by creating a Customer Profile for the customer and/or the Bill-To Site. A Customer Profile is required at the customer level, and is optional at the Bill-To Site level. When credit checking uses a Customer Profile associated with a Bill-To Site, the Credit Check Rules consider only those orders for the Bill-To Site in their calculations. When credit checking uses a Customer Profile from the customer level, the Credit Check Rules consider all orders for the customer, regardless of Bill-To Site, in their calculations. Basic Setup 4-175 Activating Credit Checking Below describes which Customer Profile controls credit checking calculations when Profiles exist at the customer level and/or Bill-To Site. The table uses a customer called ACME as an example. ACME has two Bill-To Sites: Gotham and Metro. The Metro site does not have a Bill-To Site Customer Profile; it relies on the Customer Profile at ACME’s customer level. Each row in the table corresponds to a different combination of Customer Profiles for the Gotham Bill-To Site and ACME’s customer level. Each row shows which Customer Profile controls credit checking on ACME’s sales orders depending on which Bill-To Site is used on the order, Gotham or Metro. ACME Gotham Bill-To Site Customer Level Customer Limits in Profile? order Customer Limits in Profile? order currency currency Customer Profile used for Credit Checking a sales order when the Bill-To Site is Gotham Customer Profile used for Credit Checking a sales order when the Bill-To Site is Metro Yes Yes Yes Yes Gotham Site Profile Customer Level Profile Yes Yes Yes No Customer Level Profile Customer Level Profile Yes Yes No N/A Customer Level Profile Customer Level Profile Yes No Yes Yes Gotham Site Profile No Credit Checking Yes No Yes No No Credit Checking No Credit Checking Yes No No N/A No Credit Checking No Credit Checking No N/A Yes Yes Gotham Site Profile No Credit Checking No N/A Yes No No Credit Checking No Credit Checking No N/A No N/A No Credit Checking No Credit Checking The interaction between Customer Profiles at the customer level and at the Bill-To Site enables flexibility in implementing your credit policies. For example, if you enter a new Bill-To Site with no credit history, you can assign a profile which does not perform credit checking, while at the customer level the profile does require credit checking. In this case, credit checking does not occur on orders from the particular Bill-To Site, but does occur for all other sites belonging to the customer. Or you might decide not to assign a Profile to the new Bill-To Site. In this case, credit checking occurs on orders for the new Bill-To Site based on the customer level profile, and using balances for all of the customer’s sites. 4-176 Oracle Order Management Suite Implementation Manual Activating Credit Checking You can also control credit policies by currency for each Bill-To Site or customer. For example, orders in a particular currency may comprise a small portion of the orders from a particular Bill-To Site, but are a large portion of the orders from other sites. You can omit defining credit limits in that currency for the Bill-To Site, while defining appropriate limits in that currency on the Profile assigned to the customer. When you enter an order in that currency for the Bill-To Site, credit checking uses the Profile at the customer level and considers all the customer’s orders, invoices, and payments in that currency, not only the small portion related to the Bill-To Site. Define Credit Checking Policies on Payment Terms To enable automatic credit checking on an order using specific payment terms, enable the Credit Check check box on the Payment Terms window. Attention: If the Credit Check field is disabled, automatic credit checking does not occur on any order using the payment terms, regardless of other credit checking parameters. Using Credit Checking Order Management uses these procedures when credit checking orders. Initiate Automatic Credit Checking If the order type, customer profile, and payment terms on an order enable credit checking, then credit checking automatically occurs at ordering, shipping, or both according to the order type. If credit checking is active at ordering, any changes that affect the order total, payment terms, or schedule date of a booked order in the Sales Orders window automatically initiate another credit check. If an order fails credit checking at booking, it is placed on Credit Check Failure hold. The order cannot proceed in its order flow until the hold is released. A message displays at the bottom of the Sales Orders window notifying you that the order failed credit checking and is on hold. If an order fails credit checking at shipping, the order is placed on Credit Check Failure hold and is not pick released. The order cannot proceed in its order’s process flow until the hold is removed. You can view individual orders on Credit Check Failure hold in the Sales Orders Pad window, or all orders on Credit Check Failure hold in the Order Summary tabbed region of the Order Organizer window. You can generate a report of orders on Credit Check Failure hold using the Outstanding Holds Report, or run the Basic Setup 4-177 Activating Credit Checking Orders on Credit Check Hold Report to view customer balances for customers who have orders on credit hold to help you determine why their orders are on hold. Release an Order from Credit Check Failure Hold You may automatically release an order from Credit Check Failure hold when you make changes that affect the order total, payment terms, or schedule date of the order in the Sales Orders window. As mentioned above, if credit checking is active at ordering, the order goes through credit checking again. If the order no longer violates credit checking criteria, Order Management automatically releases the hold. The order may no longer violate credit checking because changes to the total value of the order may bring it under credit limits, or changes to payment terms may turn off credit checking. Also, the customer’s total outstanding balance may now be within limits. If an order is on credit hold as a result of violating credit limits at shipping, the next time you Pick Release the order it goes through credit checking again. If the order no longer violates credit checking criteria, Order Management automatically removes the hold and releases the order according to your picking criteria. The order may no longer violate credit checking because of changes to quantities, schedule dates, or customer’s total outstanding balance. If Pick Release immediately follows order entry in the order flow, then Pick Release also can automatically remove a credit checking hold placed at ordering. If your responsibility has the authority, you can release an order manually from credit check hold at any time by choosing the Actions button in the Sales Orders window. Modify Customer Profiles Modify multiple Customer Profiles at once by modifying a Customer Profile Class in the Customers window. Upon committing your changes to a Customer Profile Class, three options exist for implementing your changes for customers whose Customer Profiles were originally created from the Customer Profile Class: Do Not Update Existing Profiles, Update All Profiles, and Update All Uncustomized Profiles. Use these update options to increase or decrease credit risk easily and without changing each customer’s credit limits, by modifying the Tolerance percentage and selecting either Update All Profiles, or Update All Uncustomized Profiles. Changes to Order Credit Limit, Credit Limit, and Tolerance values on the Customer Profile do not automatically initiate rechecking credit for existing orders or release orders currently on hold. When credit checking is next performed against an 4-178 Oracle Order Management Suite Implementation Manual Activating Credit Checking existing order, either through Pick Release or in the Sales Orders window, the new limits take effect. New limits are immediately in effect for new orders. Update a Customer’s Outstanding Credit Balance Depending on what your Credit Check Rule includes in calculating your customer’s outstanding credit balance, these transactions may affect your customer’s outstanding credit balance: paying or crediting invoices, releasing orders from hold, invoicing orders, or new orders moving into the shipping horizon. Your customer’s outstanding credit balance is calculated and compared to the Credit Limit only during the credit checking process at ordering and/or shipping. At either point in the order cycle, changes in your customer’s outstanding credit balance can cause Order Management to automatically place a hold or remove a hold from an order. For example, during order entry the customer is over the specified credit limit and the order is put on Credit Check hold. The next day the customer pays several invoices which puts the balance under the credit limit. The order is not automatically released from Credit Check hold when the invoices are paid. The order is automatically released from Credit Check hold only if you run Pick Release or modify the price, quantity, or schedule date of a booked order line in the Sales Orders window, because these events trigger automatic credit checking. If your responsibility has the authority, you have the option of manually releasing a credit hold on an order in the Holds Information tabbed region of the Sales Orders window. Basic Setup 4-179 Deactivating Credit Checking Deactivating Credit Checking There are three ways to deactivate Credit Checking on an order: ■ Use an order type that does not have an assigned credit rule. ■ Define the Customer Profile so that the Credit Check check box is not checked. ■ Use payment terms for which the Credit Check check box is not checked. Deactivating Credit Checking does not automatically release orders previously on credit hold. However, the next time you attempt to Pick Release an order or trigger credit checking in the Sales Orders window, Order Management releases the credit check hold. See Also Defining Credit Check Rules on page 4-181 Defining Holds on page 4-187 4-180 Oracle Order Management Suite Implementation Manual Defining Credit Check Rules Defining Credit Check Rules You can define credit checking rules to use when calculating a customer’s outstanding credit balance. If an order fails a credit check, it is automatically placed on credit check hold. You can include in or exclude from your credit check rule some or all of your open accounts receivable balances, and some or all of your uninvoiced orders. You can define as many credit checking rules as you need. If you inactivate a credit checking rule, you also must remove it from any order types that use it. Order Management uses the currency of the order you are credit checking to determine which credit limits to use in credit checking calculations. Order Management only includes orders and invoices in the same currency as the order you are credit checking when calculating a customer’s outstanding credit balance. ◗◗ To define a credit check rule: 1. Navigate to the Credit Check Rules window. The Credit Check Rules window displays. 2. Enter a name for the credit check rule. Basic Setup 4-181 Defining Credit Check Rules 3. Optionally, enter the Effective Dates for the rule. 4. Indicate whether to include the Open Receivables Balance in this credit check rule. You must enable either the Include Open Receivables Balance check box or the Include Uninvoiced Orders check box in your credit check rule. You can activate both, but you cannot toggle both off. 5. If you enabled Include Open Receivables Balance, enter a value to indicate the range of dates for open receivables that you want to include in this credit check rule. ■ ■ ■ Negative Number--Includes past due, current, and future open receivables up to X days beyond the current date. Positive Number--Includes open receivables with invoice dates X days earlier than the current date. No Value--Includes all open receivables. Indicate whether to include uninvoiced orders in this credit check rule. 6. If you enabled Include Open Receivables Balance in your credit check rule, you can indicate whether to Include Payments at Risk when calculating a customer’s outstanding balance. Receipts at risk are remitted receipts that have not been cleared, or discounted (factored) receipts that have not been risk eliminated. If the performance of credit checking requires improvement you can toggle off this option. 7. If you enabled Include Uninvoiced Orders, enter the number of scheduled shipping horizon days for uninvoiced orders to include in your total credit exposure. For example, if you enter 45, the total exposure includes only uninvoiced orders scheduled to ship within 45 days of the current date. Orders scheduled to ship after 45 days are not included when calculating exposure. 8. If you include uninvoiced orders in your credit check rule: ■ Indicate whether to Include Orders Currently On hold. ■ Indicate whether to Include Tax on uninvoiced orders. Credit checking calculations on open receivables always include tax amounts and are not affected by the Include Tax option. If the performance of credit checking requires improvement you can toggle off this option. 4-182 Oracle Order Management Suite Implementation Manual Defining Credit Check Rules 9. Enter the number of days that an invoice can be past due in the Maximum Days Past Due field to specify the number of days that an invoice can be past due. Order Management checks to verify if at least one invoice for the customer has been past due for a period beyond the time you specified. If so, the order is placed on credit hold. 10. Save your work. Basic Setup 4-183 iPayment Processing iPayment Processing Order Management provides you with the ability to record credit card information through the Sales Orders window and obtain authorizations for credit card transactions using Oracle iPayment. You can also set up the secure encryption feature to mask confidential card holder information. Order Management tracks the following credit card information: ■ credit card numbers ■ credit card holder’s names ■ expiration dates ■ payment types and methods ■ authorization codes and amounts Attention: iPayment processing can only occur if you are using an order type that has a credit checking rule and the rule will perform the authorization at Booking or Shipping. Risk Management iPayment offers a risk management feature to identify high risk transactions by Oracle iRisk. This feature enables merchants and e-commerce service providers to manage the risk when processing transaction through the internet. Oracle iRisk enables you to define any number of risk factors to verify the identity of your customers, assess their credit rating, and manage risk in a secure on-line environment. You will receive the customer’s risk score, that is based on the risk factors, scores, and formulas that are setup in Oracle iRisk. The risk factor calculations are dependent on the OM: Risk Factor Threshold for Electronic Payments profile option. See: Order Management Profile Options on page 4-15. If the risk factor score exceeds the risk score threshold, the order is automatically placed on hold. High risk holds include credit card authorization and high risk failures. If a customer’s transaction receives both authorization failures, the authorization failure hold will be applied. Both hold types can be removed manually and the order will continue through the order cycle process. 4-184 Oracle Order Management Suite Implementation Manual iPayment Processing Below is a list of risk factors used by Order Management: ■ payment amount ■ time of purchase ■ payment history ■ frequency of payments ■ transaction amount limit ■ ship-to and bill-to addresses Quantity Changes and Cancellations Authorizations are given at the sales order header level only. If order line quantities are changed or cancelled and if an unexpired or uncaptured authorization exists, Order Management voids the first authorization and attempts to obtain a new authorization for the new order amount. Manual and On-line Authorizations You can choose to obtain manual authorizations and enter the authorization code in the Authorization Code field in the Sales Orders window. Encryption Order Management enables you to mask cardholder information including credit card numbers and authorization codes by setting the OM: Credit Card Privileges profile option. Only the last four digits of the credit card number are displayed if the profile option is set to Limited or None. If the profile option is set to All, the full credit card number is displayed. Drop Shipments Order Management provides the ability to obtain credit card authorizations for drop shipments. Authorizations are obtained at the booking and purchase release activity of the drop shipment order. See Also Defining Sales Order Main and Others Header Information. Order Management Profile Options on page 4-15 Basic Setup 4-185 Defining Sales Credit Types Defining Sales Credit Types Order Management uses sales credit types to determine if the sales credit for an order is a quota or non-quota amount. You can define as many sales credit types as you need. ◗◗ To define sales credit types: 1. Navigate to the Sales Credit Types window. The Sales Credit Types window displays. 2. Enter the Credit Type Name and Description for the credit type. 3. Select the Quota check box if the sales credit type applies to revenue quota sales credit that you assign to salespeople. 4. Select the Enabled check box to activate the sales credit type. 5. Save your work. 4-186 Oracle Order Management Suite Implementation Manual Defining Holds Defining Holds You can define holds to halt processing of your orders, returns, and their lines. Because orders and returns are not affected by holds until they are applied, you can define all the holds you use in your business at once. You can define holds that are effective only at certain steps of the order or line workflow and holds that apply regardless of the stage in the order’s flow. For example, you may want to apply an item hold to prevent order lines for a particular item to be released for shipment. Any orders that are not ready for shipment or any orders that have already been shipped are not affected by this hold. You can also define a hold that affects all orders, no matter where the order is in its cycle. When this type of hold is applied, it is effective regardless of the order’s position in the cycle. For each hold, you can specify hold security by responsibility to control which responsibilities have authority to apply or remove the holds you define. Holds can be defined to be specific to pick, pack, or ship activities. ◗◗ To define a generic hold: 1. Navigate to the Holds window. The Holds window displays. Basic Setup 4-187 Defining Holds 2. Enter the Name and Description for the hold you want to create. 3. Enter a valid hold Type. Table 4–13 Hold Name Description Hold Type Configurator Validation Hold Automatically applied to order lines that fail Configurator Validation. Configurator Validation Credit Card Authorization Failure Automatically applied to orders if credit card authorization request to iPayment fails. Electronic Payment Credit Card High Risk Automatically applied to orders if risk score determined by iPayment is greater than the value of profile OM: Risk Factor Threshold for Electronic Payments. Electronic Payment Credit Check Failure Automatically placed if credit check Credit Check rule evaluation fails on orders setup to be credit checked. 4-188 Oracle Order Management Suite Implementation Manual Defining Holds Table 4–13 Hold Name Description Hold Type GSA Violation Automatically placed on orders which are in violation of GSA. GSA Violation - No pre-defined hold of this type Reserved for you to define Order Administration Hold administration holds based on your business processes. 4. Optionally, enter the Effective Dates for the hold to control when you can use this hold. 5. Optionally, determine which user responsibilities have authority to apply or release holds by entering combinations of responsibilities, authorized actions, and effective dates. You can give some responsibilities the authority to apply a hold, other responsibilities the authority to release it, and others the authority to do both. If you do not specify a responsibility for a hold, anyone can apply or release it. 6. Save your work. ◗◗ To define an activity-specific hold: 1. Navigate to the Holds window. 2. Enter the Name and Description of the activity-specific hold you want to create. 3. Enter a valid activity-specific hold Type. Order Management provides two standard hold types that are used for the GSA and Credit Checking features: GSA Violation Failure and Credit Check Failure. Order Management also provides the Configurator Validation hold type, which is used if you invalidate a configuration after booking. Define other hold types using quickcodes. 4. ■ Order Level--Places the activity-specific hold at the order level. ■ Line Level--Places the activity-specific hold at the line level. ■ Return Level--Places the activity-specific hold at the return level. Enter the Workflow Item where you want to stop processing of orders with this hold. The hold activates as soon as the workflow item has a status for the applicable order. For example, you can define a hold that prevents an order from being Basic Setup 4-189 Defining Holds released for picking by entering Pick Release in this field. The hold takes effect as soon as an order that meets your hold criteria is eligible for Pick Release. If you leave this field blank, the hold prevents the order from processing as soon as it is applied regardless of workflow item. 5. Enter the Workflow Activity for the hold. The workflow activity determines where in the order cycle the hold will be placed. All other lines will be processed except for the line against which the hold is effective. 6. Optionally, enter the Effective Dates for the activity-specific hold to control when you can use this hold. 7. Optionally, determine which user responsibilities have authority to apply or release activity-specific holds by entering combinations of responsibilities, authorized actions, and effective dates. You can give some responsibilities the authority to apply a hold, other responsibilities the authority to release it, and others the authority to do both. If you do not specify a responsibility for an activity-specific hold, anyone can apply or release it. 8. Save your work. See Also Overview of Holds Applying Holds Releasing Holds 4-190 Oracle Order Management Suite Implementation Manual Overview of Attachments Overview of Attachments Order Management provides you with an attachments feature which includes: ■ standard document attachments ■ adding free form text to order, order lines, returns, and return lines. ■ attach all types of attachments including graphics, free form text and HTML pages. ■ multi-lingual support for translation purposes ■ specifying attachment rules for automatic attachments Standard Documents Definition You can define and set up standard documents using the forms interface provided. These documents can later be attached to your orders, order lines using Attachments window. One Time Document Attachments Order Management enables you to add free form text to your orders, order lines, returns, and return lines as attachments. You can copy standard documents and modify them into one time document attachments. Multilingual Support Order Management enables you to translate documents to the language of your choice by using the standard attachment technology. Attachment Addition Rules You can specify the attachment rules for automatically attaching all types of documents to orders, order lines, returns, and return lines. The document attachment rules can be specified for any data type supported by the attachments technology including graphics, image, html, and free form text. You can specify the attachment addition rules at the order and line levels by specifying values for specific attributes on the orders and returns. See: Defining Attachment Addition Rules on page 4-193 Basic Setup 4-191 Overview of Attachments Applying Attachments You can automatically apply standard attachments to orders and returns based on the attachment addition rules you defined. You need to set the OM: Apply Automatic Attachments profile option to Yes to determine the method automatic attachments are applied. You can also apply attachments manually by choosing the Actions button and select Apply Automatic Attachments on the Sales Orders window. Note: Attachments are not reapplied automatically when an order or return is updated. Select the Actions button from the Sales Orders window and select Apply Automatic Attachments to apply updated. Viewing Attachments You can view the attached documents in the Order Organizer and Sales Orders windows. From the View menu, select Attachments in the Order Organizer and Sales Orders windows to view and edit your attachments. Report Assignments You can specify which attachments appear on your reports. You should be able to specify any type of reports. This include the following reports, but not limited to: ■ Sales Order Acknowledgement Report ■ Pick Slip Report ■ Pack Slip Report ■ Bill Of Lading Report ■ Commercial invoice You can setup your report assignments in the AOL Document Categories window and choose the Report Assignments button. In addition, you can specify the preferred language or select the language of your choice to print on the attached documents. Copying Orders You can copy document attachments to a new order or return when you copy an order by using the copy orders feature. In the Copy Orders window, you have the option of including or excluding manual attachments when copying orders, order lines, returns, and return lines. 4-192 Oracle Order Management Suite Implementation Manual Overview of Attachments Order Import Once an order has been imported through Order Import into Order Management, you can apply your attachments. You can automatically apply attachments to imported orders based on your attachment addition rules. When creating the order or order line through Order Import, automatic attachments are applied if the profile option OM: Apply Automatic Attachments is set to Yes. Security When viewing order and returns, you can specify which user responsibility can apply and update or simply view attachments. The function security feature in the Sales Orders window also applies attachments. If you set the function security to view orders and returns, you will only be able to view attachments without the ability to apply or update the attachment. Defining Attachment Addition Rules You can specify rules for automatically attaching of all types of documents to orders and order lines. At order level, you can specify your attachment addition rules by specifying values for the following attributes on the order or return: ■ Customer ■ Customer PO ■ Invoice To ■ Order Category ■ Order Type ■ Ship To At order line level, you can specify your attachment addition rules by specifying values for the following attributes on the order or return: ■ Customer ■ Inventory Item ■ Invoice To ■ Line Category ■ Line Type ■ Purchase Order Basic Setup 4-193 Overview of Attachments ■ Ship To ◗◗ To define an attachment addition rule: 1. Navigate to the Documents window and select the Addition Rules button. 2. Enter the name of the Entity to attach to the document. 3. Enter a Group Number to group all your rules. Rules with the same number will be considered as ANDs and rules that are different are validated separately. 4. Select the name of the Attribute on the entity that you have selected in Entity (Attach To) field for which you want to define the condition. 5. Enter the Attribute Value that should be validated in this condition. 6. Save your work. See Also Overview of Attachments on page 4-191 4-194 Oracle Order Management Suite Implementation Manual Defining Document Categories Defining Document Categories You must define at least one document category to use attachments in Order Management. Documents can print automatically on the Bill of Lading, Commercial Invoice, Pack Slip, Pick Slip, and Sales Order Acknowledgement shipping documents, depending on the document categories you define. ◗◗ To define document categories: 1. Navigate to the Document Categories window. 2. Enter a Category name. 3. Select a Default Datatype. Though your choice can be overridden later when you create documents, providing a default here speeds document definitions. 4. Optionally, enter an effective date range. 5. Select the Reports button. The Document Usages window displays. 6. Select the Report that you want to associate with the category. Basic Setup 4-195 Defining Document Categories You can associate as many reports as you need with a single category. If you customize your own reports to include documents, you can specify your own as well as Order Management’s default reports in this field. Only text documents can print on reports. 7. Select a Format. The Format value determines where documents in this category will appear on the report. You can add your own formats to the predefined formats via the Order Management QuickCodes window. Standard reports support only the three pre-seeded formats (body, footer, header). Attention: In standard reports, order-level notes print only at the header and footer levels; line-level notes print only in the report body. 8. Save your work, close the Document Usages window, and select the Assignments button in the Document Categories window. The Category Assignments window displays. Select Form in the Type field and Enter Orders in the Name field. Once assigned, notes in this category are subsequently available in all non-modal windows associated with the Sales Orders window. You can disable this choice later by deselecting the Enabled check box. 9. Save your work. 4-196 Oracle Order Management Suite Implementation Manual Defining Documents in Advance Defining Documents in Advance You can predefine standard, template, and one-time documents to attach to your orders, returns, order lines, or return lines. You can define the rules that Order Management uses to determine whether to apply to a document to an order or return. You can specify that documents be applied to orders or lines for a certain customer, bill-to customer, ship-to customer, item, order type, and/or purchase order. You can create complex and/or conditions for your rules. Order Management applies documents automatically according to these rules when you choose the Apply Notes option from the Tools menu in the Sales Orders window. In addition, you can set the OM: Apply Automatic Attachments profile option to automatically apply attachments to your orders or returns. Prerequisites ■ Define your document categories. ◗◗ To define document attachments: 1. Navigate to the Documents window. 2. Select a Category. The choices available here depend on your definitions in the Document Categories window. 3. Enter a category Description. 4. Select a Data Type Source or accept the default. The default selection derives from your definition in the Document Categories window. You can choose any data type, but Order Management provides a default to speed note definition. 5. If you chose the Image data type, select a Storage Source. 6. If you chose the Image data type, specify a filename; if you chose the Web Page data type, enter a Uniform Resource Locator (URL). The browser that Order Management uses to display Web-based attachments is determined by the Web Browser system profile option. Basic Setup 4-197 Defining Documents in Advance 7. Select a Usage. Standard notes once defined, can be applied to any number of orders, returns, or lines. You can edit a standard note only in the Documents window. Once a standard note has been applied, if you subsequently modify its contents, your changes are reflected in each order, return, or line to which the document is applied. Template documents, like standard documents, can be attached to numerous orders, returns, or lines. However, to provide unique information for a particular order or return, you can modify a template document in the Attachments window. After an applied template note is modified in Attachments, it becomes a one-time note. One-time notes enable you to attach unique information to one order or return. 8. Optionally, enter the Effective Date range. You cannot apply a note after the date range has passed. 9. If the data type is Image, optionally adjust the magnification. 10. Save your work. 4-198 Oracle Order Management Suite Implementation Manual Overview of Shipping Tolerances Overview of Shipping Tolerances Oracle Order Management provides you with the ability to capture shipping tolerance levels for over and under shipments during ship confirmation. The shipping tolerance feature enables you to define various shipping tolerance levels for ordered and expected return quantities. Order Management then automatically fulfills an order line within the shipping tolerances you defined. Order Management’s shipping tolerances feature captures: ■ over and under shipments and returns percentages at the system, customer, site, item, site-item, and customer item levels. ■ different tolerances for ordered and returned quantities. ■ defaulted tolerances from various sources based on your defaulting rules. ■ ■ automatic fulfillment of total shipped quantities for order lines within the under tolerance limit. tolerances levels that enable you to over ship at the time of ship confirmation. Over Shipments When Oracle Shipping Execution attempts to over ship an order, Order Management processes the order based on the shipping tolerances you define. In order to perform an over shipment, Order Management: ■ ■ determines if the ship quantity is within the defined over shipment tolerance levels you defined by setting the OM: Overshipment Tolerance profile option or setting your shipment tolerances in Order Management. See: Order Management Profile Options on page 4-15. notifies the appropriate personnel when an over shipment is above the set shipping tolerance. ■ issues the material for any unpicked or unreserved quantity. ■ rolls back your ship quantity with a process error message. Basic Setup 4-199 Overview of Shipping Tolerances Under Shipments When Oracle Shipping Execution attempts to under ship an order, Order Management processes the order based on the shipping tolerances you define. In order to perform an under shipment, you must: ■ ■ ship confirm the quantity at the time of closing the delivery. determine if the total quantity shipped is within the under shipment tolerances you defined. Any remaining shipment allocations are removed. If the total quantity shipped is under the shipment tolerances, Order Management will split the original shipment line. The shipment will be shipped as a partial shipment. Note: Over Shipments Report Oracle Shipping Execution provides the Over Shipments Report for displaying shipping tolerances. This report displays shipping tolerance information based on the customer, site, item, warehouse, ship date, and order type. See Also Order Management Profile Options on page 4-15 Oracle Shipping Execution User’s Guide Defining Shipping Tolerances Defining shipping tolerances are based on your customers and items or your customer site and item tolerances. Prerequisites ■ set up your customer and customer site tolerances in the Customer window. ■ set up your tolerances for items in the Master Items window. ◗◗ To define shipping tolerances for orders or returns: 1. Navigate to the Setup Tolerance window. The Setup Tolerance window displays. 4-200 Oracle Order Management Suite Implementation Manual Overview of Shipping Tolerances 2. Select the Customer name for the shipping tolerance. 3. Select the customer Address for the shipping tolerance. 4. Select the Item Number for the shipping tolerance. 5. Enter the Over Shipment Tolerance percentage. The over shipment tolerance percentage determines the amount of the shipment you can exceed at the time of ship confirmation. 6. Enter the Under Shipment Tolerance percentage. The under shipment tolerance percentage determines the amount of the shipment you can ship below at the time of ship confirmation. When shipping confirms shipped quantities for the shipments belonging to a order or return, Shipping Execution validates any further shipments pending for the order or return. If there are pending shipments, Shipping Execution calculates the new tolerance value. If the new shipping tolerance level is less than the old tolerance level, Order Management notifies you of the shipped quantity and the new tolerance value. Order Management determines whether the total shipped quantity for the order or return is within the under shipment tolerance value, and closes the line as an under shipment. 7. Enter the Over Return Tolerance percentage for return receipts. The over return tolerance percentage determines the amount of the return you can accept above. Basic Setup 4-201 Overview of Shipping Tolerances 8. Enter the Under Return Tolerance percentage for return receipts. The under return tolerance percentage determines the amount of the return you can accept below. 9. Save your work. See Also Overview of Shipping Tolerances on page 4-199 4-202 Oracle Order Management Suite Implementation Manual Internet Customer Portal Internet Customer Portal OSSWA combines and extends the functionality of several core applications, and also servers as an extension of Oracle Applications. The suite of products for the Internet delivers self-service information using dynamically generated HTML pages over the Web. The Internet Customer Portal (iCP) is a Oracle Self-Service Web Application (OSSWA) designed for secure, self-service business transactions across the Internet or corporate intranets. The term Order Management Portal has been replaced with Internet Customer Portal. Attention: The iCP will enable a user to view existing sales orders and returns using just a standard web browser. Users can also view delivery information and any quality plans created in Oracle Quality for existing sales orders. Users can query by a variety of criteria and query results can be limited to select records based upon user defined values. Example of query criteria can be purchase order numbers, customer, or ship to and the results could be limited by attributes such as a range of purchase orders, a specific customer or group of customers, or a ship to location. Attribute Control OSSWA uses the Web Applications Dictionary to supply many of the rules governing navigation and access to data and queries. By using attributes of web application dictionary entries, you can control the display of data to users based on their ID and the responsibilities you assign to them. Note: When assigning a securing attribute to a user, the attribute defined is not responsibility specific. Securing Attributes will restrict data for all the responsibilities that are assigned to a user. Attributes are first defined, using the Web Applications Dictionary, when Web inquiries are created. They become securing or excluding attributes once defined as such at the responsibility level. ■ Securing Attributes--Enable you to control which database rows are displayed in inquiries based on the values assigned to the user. These attributes enable Basic Setup 4-203 Internet Customer Portal rows (records) of data to be visible to specified users based on the specific data (attribute value) contained in the row. Securing attributes secure data for all responsibilities assigned to a particular user. ■ Excluding Attributes--Prevent certain columns of data from being visible to specified responsibilities assigned to a user. For example, enable user Mark to view Sales Orders for customer “Business World” only. For user Mark, assign the securing attribute of CUSTOMER_NAME with a securing attribute value of CUSTOMER_NAME equal to Business World. Note: Contact your system administrator for setting up securing and excluding attributes See Also Oracle Self-Service Web Applications Implementation Manual System Administrator User’s Guide Viewing Sales Orders Information via the Internet Customer Portal 4-204 Oracle Order Management Suite Implementation Manual 5 Sales Order Process Topics covered in this chapter include: ■ Overview on page 5-2 ■ Required Setup on page 5-2 ■ Process Steps on page 5-4 ■ Workflow on page 5-11 Beta Draft Sales Order Process 5-1 Overview Overview In Oracle Order Management, the sales order form enables you to organize, enter, view, and update order information. Order Management offers Line level independence where you can capture regular orders as well as returns using the same form. The sales order form offers users a convenient and quick entry point for creating and editing order information as well as viewing summary information from other subsystems (i.e. Shipping, Receivables, Purchasing etc.) and status of orders. Oracle Order Management designed a mechanism called the Process Order API which performs a consistent validation of data manipulation (i.e. changes, deletions etc.) on the Sales Order attributes. This provides a consistent, secure, and valid means for managing sales orders. With the flexibility of the new Process Order API, Processing Constraints, Workflow, and Transaction Type framework, Order Management provides a flexible and powerful tool for processing orders. Required Setup To accomplish entering an order from entry to invoicing, the following setups are required: Order Header/Line Workflow processes Order Management comes with seeded Workflow processes. Review the seeded flows, activities and notifications to determine if the seeded data can meet your business needs. To successfully enter a standard order in OM, you can use the Generic - Order and Line Flows. If you need to modify the seeded workflows, it is recommended that you make a copy and modify the copy. You can also determine if you want certain activities to be Synchronous, Deferred, or Manual. The Workflow engine will move the order/line ahead as long as the activities are synchronous activities. The order or line flow will stop at any manual activity which will require a manual task to move the workflow along. The Workflow background engine processes deferred activities, notifications, wait activities and time out activities. You setup the Workflow background engine when setting up Workflow in your environment. You also need to schedule the Workflow Background Process concurrent program to re-submit periodically. When scheduling the concurrent program, please specify Order Management work item types as the parameter so that it will only pick up the activities or notifications for Order Management work items. Refer to the topical essay on Workflow at the end of this manual for details on setting up workflow process. 5-2 Oracle Order Management Suite Implementation Manual Required Setup Transaction Types Both order and line transaction types need to be setup in order for an order to process from entry to invoicing. When setting up order types, assign order header and line workflows to the order type. Since each line can go through its own flow process, each line needs to have its own workflow process. Line level workflow processes are assigned based on the order type, line type, and item type combination. E.g. Generic Order Type + Generic Line Type + Standard Item => Generic Line Workflow process. Refer to the topical essay Using Transaction Types in Oracle Order Management at the end of this manual for details on setting up transaction types. Document Sequence The document sequence functionality is for numbering orders. The same sequence can then be assigned to all order types. For instance, you could define an automatic sequence beginning with 1 and assign it to all your order types. Then each new order that you enter will receive the next number in the sequence. Refer to the topical essay Using Transaction Types in Oracle Order Management at the end of this manual for details on document sequencing setup. Processing Constraints Order Management has seeded constraints that will prevent data integrity problems. If the business needs more restrictive rules when processing orders, rules can be set up to control changes or operations of the order process flow. Refer to the topical essay on Processing Constraints at the end of this manual for details on setting up processing constraints. Scheduling Activity The “Schedule function can be performed anywhere in a process flow according to your business needs. If you want to setup scheduling to run automatically, you can set it as a synchronous function within the workflow process so it will happen automatically. The profile option OM: Autoschedule should be set to Yes. Or the user can schedule manually directly from the sales order form. Refer to the topical essay on Scheduling at the end of this manual for details on scheduling setup. Shipping Parameters Set the Shipping Parameters specific to company picking and ship confirmation processes. The Shipping Parameters form consists of four tabs: General, Pick Release, Shipping Transaction and Delivery Grouping. The General Tab includes percent fill basis (i.e. by quantity), Weight and Volume UOM Class. These Beta Draft Sales Order Process 5-3 Process Steps parameters are primarily used for the containerization functionality. The Pick Release Tab includes a default Pick Slip Grouping Rule, Release Sequence Rule and a Auto Pick Confirmation flag which confirms your order to be released from Inventory. The Shipping Transactions Tab includes default Shipping Documents at ship confirmation and container packing controls. Finally, the Delivery Grouping Tab includes the criteria for grouping delivery lines (i.e. must have same ship to location, warehouse etc. as order lines). Master Items A standard, finished good item should be defined in the Inventory module, with attributes set appropriately. The key attributes that control the processing of a finished good item are on the Order Management tab in the Master Item setup form. The flag Shippable and Transactable should be selected. The best way to create your items is to copy them from the Finished Good seeded template. Item Quantity On-Hand In order to ship an item, there must be sufficient quantity available. In a test environment you can create inventory by executing a miscellaneous receipt .in the Inventory module., To generate a miscellaneous receipt, go to the Transactions > Miscellaneous Transactions form. Enter the newly created Item name and specify a subinventory and quantity and save. In a production environment, your inventory will typically come from receipts against purchase orders or completion of work orders. The quantity on hand for the item will be decremented the amount of the order line when pick releasing the order. Price List Setup To price the new item when entering the ordered item on the order, the user should add the new item to a price list. The item is added to a price list via the Price List Setup form: Pricing > Lists > Price Lists Setup. Query an existing price list or create a new price list. Add a new line, enter the item name, UOM and price and save. The price and UOM will default when entering the item on the order line. Process Steps This section will guide you through a basic sales order flow from entry to invoicing, including: Enter a Standard Sales Order Schedule the Order 5-4 Oracle Order Management Suite Implementation Manual Process Steps Book the Order Pick Release Ship Confirm Fulfillment Invoicing Interface 1. Enter Order Header information with a standard order type. Note: There are no seeded transaction types. You will need to create a standard order type which uses the generic order and line workflow to progress the order through to invoicing. Refer to the Required Setup section for Workflow and Transaction Type setup. Figure 1 shows the Sales Order Header. Beta Draft Sales Order Process 5-5 Process Steps Figure 5–1 Sales Order Information (Header) form The Order Information screen is in a single record format. The most commonly used fields by all industries will be displayed by default. You may use the folder tools to add or remove fields which are displayed. Forms can be customized to meet business needs. Field values can be set up to default from a variety of sources such as the Order Type or the customer record. All defaults can be overridden. Once the Order Header information is entered, you will enter the line information within the Line Items screen. The Line Items form, shown in Figure 2, will display in multi-line format. The overflow region will display Item Description, Line Total 5-6 Oracle Order Management Suite Implementation Manual Process Steps and Line Quantity fields. The Line, Ordered Item and Quantity fields are static on the form. Minimum line information required to book an order is item number and quantity. Other line information that can be entered in the Main tab include Schedule Date, Line Type, Source Type, etc. The Line Items form includes five additional tabs to enter detailed line information. These tabs include Pricing, Shipping, Addresses, Returns, and Other. Figure 5–2 Line Items Form Other functions are available through the Actions button on both the Order Information and Line Items forms. On the Order Information form, the Actions include functions such as, Copy, Cancel, Apply and Release Holds, Price Order, etc. Beta Draft Sales Order Process 5-7 Process Steps In the Line Items form, the Actions include additional functions such as, Split Line, ATP, Price Line, Configurator, etc. 5-8 2. Schedule the order. This can be setup to be performed manually or automatically, depending on the user’s needs. The user can schedule orders automatically by setting the Autoscheduling feature via a profile option or from the Special menu. Or the user can schedule orders manually by using the right mouse button or from the Special menu. Refer to the topical essay on Scheduling in this manual for the details of scheduling. Once the order is scheduled, the schedule ship date will be populated on the lines of the order. 3. Book the order. Users are able to book an order at either the Order Information tab or Line Items tab via the Book button. 4. Pick release the order from the Shipping > Release Sales Orders > Release Sales Orders form. Make sure to include a Release Sequence Rule, a Warehouse, a Pick Slip Grouping Rule and check the Auto Detail and Auto Pick Confirm boxes. Users can also pick release their orders from the Shipping Transaction form. Although, the user will need to setup their Shipping Parameters to ensure the order is released. Refer to the Required Setup section below for details. 5. View the Pick Status of the lines. The lines of the order must be in a status Released to proceed to the Ship Confirmation activity in the Workflow process. You can view the status in the Shipping Transaction form. First, the user will query the order number in the Query Manager form (Figure 3). This form will execute your query and populate the order lines in the Shipping Transaction form. Oracle Order Management Suite Implementation Manual Process Steps Figure 5–3 Query Manager form To view the status of the lines, use the horizontal scroll bar in the Lines/ Containers tab of the Shipping Transaction form, and scroll to the right to a field called Pick Status. You can also click on the Detail button to open up the form. The status should be Released for all lines. 6. Create a Delivery. This can be performed automatically during Pick Release by selecting AutoCreate Delivery equal to Yes. This can also be performed manually or automatically within the Shipping Transaction form (Figure 4). If you manually create a delivery, you need to use the same ship to address, warehouse etc. based on the setup criteria of the shipping parameters. Refer to the Required Setup section for information on Shipping Parameters. In this example, we will create a delivery automatically within the Shipping Beta Draft Sales Order Process 5-9 Process Steps Transaction form. Once the order has been queried, the lines will appear in the Shipping Transaction Form. To create a delivery automatically, highlight (Ctrl + mouse click) the lines you want to include in the delivery, select the Actions list and choose Autocreate Deliveries and GO. A system generated delivery name will be populated on all of the lines selected. At this time, you can click on the Delivery Tab to see the delivery name, ship to location and other shipping information. Figure 5–4 Shipping Transaction Form 7. 5-10 Ship Confirm the order. Specify a quantity to be shipped in the Lines/Containers tab of the Shipping Transaction form, and optionally enter a Waybill in the Delivery Tab. To ship confirm the order, select the Actions list in the Delivery Tab, choose Ship Confirm and GO. The ship confirmation window Oracle Order Management Suite Implementation Manual Workflow will appear and give you the options to backorder, ship all or ship partial quantities and set user defined shipping documents to print. The ship confirm process triggers the inventory interface automatically to update quantities, and triggers the Order Management Interface to update the status of the order lines. 8. The fulfillment activity acts as a synchronization point for all lines on the order that are in a fulfillment set. The lines in the fulfillment set will wait at the fulfillment activity until all the lines in the set have reached the activity. Lines that are not in a fulfillment set simply pass through the activity. 9. Invoice the order. Once the Fulfillment activity completes, a Background Workflow Process processes the order line(s) to the Invoice Interface activity. The invoice interface activity places the information from the sales order line into the Receivables Interface tables. When the information is written to the tables, the invoice interface activity is complete, and the line proceeds to the close line activity. However, note that the invoice is not actually generated until the Autoinvoice program in Receivables has been run. The invoice will then be viewable in the Sales Order form. Workflow A basic order flow, from entry to invoicing, will most commonly use the Generic Order and Line flows which are assigned to a Generic order type. Figure 5 is an example of a Generic Order Workflow process (enter -> book -> close): Figure 5–5 Order Flow - Generic Workflow Process Figure 6 is an example of a Generic Order Line Workflow process (enter -> schedule -> ship -> bill -> close): Beta Draft Sales Order Process 5-11 Workflow Figure 5–6 Line Flow - Generic Workflow Process In Order Management, the user now has the ability to enter order lines or return lines in the same form. Figure 7 is an example of a Line flow for inbound and outbound shipments (Refer to the Returns section of the manual for information on the RMA process): 5-12 Oracle Order Management Suite Implementation Manual Workflow Figure 5–7 Line Flow - Generic for Inbound and Outbound Shipments Beta Draft Sales Order Process 5-13 Workflow 5-14 Oracle Order Management Suite Implementation Manual 6 Returns Topics covered in this chapter include: ■ Overview on page 6-2 ■ Process Flow on page 6-5 Beta Draft Returns 6-1 Overview Overview In Release 11i of Oracle Order Management, Return Materials Authorization (RMA) functionality is now incorporated in the Sales Order form where users can enter both regular and return order lines on the same order. RMA is often used synonymously with Return or Credit Orders and Returned Material. An order can have a mix of outbound (regular) and inbound (return) lines, if not restricted by the order type definition. Credit order types have an order type category Return and an order with Mixed order type category can contain both regular and return lines. Each order type and each line type is associated with a workflow process. A return line is indicated by Line Type and by its negative and highlighted item quantity and line total price. Line types can be variations of Return, such as Return with Approval, Return for Credit Only, etc., and have a line type category of RETURN. There are three ways to create RMA’s within Order Management. First, identify a sales order to be returned and query the order lines. After you have selected the sales order or order lines, use the Copy function in the Actions list to generate the return order or line by specifying an RMA line type. Second, reference a sales order, invoice, PO number or serial number of an item directly in the Return Reference field within the Line Items tab of the Sales Order form. Lastly, for return without originating sales order line, manually enter return line information and choose the appropriate return line type in the Sales Order form. Required Setup Profile Options There are three profile options relating to RMA’s that you may want to set differently than the seeded value. First, the profile, OM: Return Item Mismatch Action, allows a mismatch value between the item on the RMA line and the item on the referenced line. For example, you may need to allow a mismatch when a wrong item is shipped and you want to put the correct item on the RMA line. The seeded value is Allow or no profile option entry will be treated as Allow. The second profile is OM: Return Unfulfilled Referenced Line Action which allows non-fulfilled lines to be used as referenced lines. The seeded value is Allow or no profile option entry will be treated as Allow. And third profile is OM: Overshipment Invoice Basis which will determine when an over-shipment happens, should the invoicing module invoice the ordered quantity or the shipped quantity. For instance, material is received at the receiving dock, the quantity received will be compared with the RMA, which could be less than tolerance, within tolerance or greater than tolerance. When the received quantity is greater than tolerance, Purchasing will create a receipt with the quantity on the return line and an unordered receipt for the remaining quantity. 6-2 Oracle Order Management Suite Implementation Manual Overview When Order Management is notified by the customer about the over-return, another return line will be created so that Purchasing can match it against the unordered receipt. Workflow Order Management comes with seeded Workflow processes. Review the seeded flows, activities and notifications to determine if the seeded data can meet your business needs. To successfully enter a RMA in OM, you can use the Generic - Order Flow Return with Approval and Line Flow - Return for Credit only. The user can also modify existing seeded workflows or create new workflows to include or exclude inspections and/or invoicing activity. For instance, you can have the Invoicing Activity after the Receiving activity, or you can simply close the line without interfacing data to Receivables. For inspections, a workflow can be setup to process Invoicing once the materials have been received or to wait until inspection has been completed before invoicing is invoked. The seeded workflow will process Invoicing only after the completion of Inspection (delivery) Activity. Also, if any return lines are flagged as non-shippable or non-transactable, the Receiving workflow activity will complete with a Not Eligible result. Although, fulfillment of ATO/PTO items is required before crediting the ATO/PTO lines. This is achieved by inserting ATO/PTO lines into Fulfillment sets. This means the ATO/PTO line will wait at fulfillment until all its children are received and reach fulfillment. Refer to the topical essay on Workflow at the end of this manual for details on setting up workflow process. Transaction Types Both order and line transaction types need to be setup in order to process an RMA. When setting up order types, you need to assign order header and line workflows to the order type. Since each line can go through its own flow process, you need to setup workflow assignments to let each line assign its own workflow process. Credit order types have an order type category Return. An order with a Mixed order type category can contain both regular and return lines. Line level workflow processes are assigned based on the order type, line type, and item type combination. When you setup a return order type or mixed order type, you have the option to set a default return line type, so that the user doesn’t have to manually choose the line type unless they want it to be different. Refer to the topical essay Using Transaction Types in Oracle Order Management at the end of this manual for details on setting up transaction types. Returns 6-3 Overview Master Items You can create a return line only if an item is Returnable. Therefore, a standard, finished good item should be defined in the Inventory module, with attributes set appropriately. The best way to create your items is to copy them from the Finished Good seeded template and set additional attributes as needed in the Master Item setup form. The key attributes that control the processing of a returnable item are: Order Management Tab: Returnable, Shippable and Transactable = Yes, RMA Inspection Required = Yes or No Receiving Tab: Receipt Routing = Inspection (if required) Invoicing Tab: Invoicable Item = Yes or No, Invoice Enabled = Yes or No Note: If the Item is not flagged as Returnable, Shippable and Transactable, you cannot receive in Oracle Purchasing’s receiving module and if the item is not flagged as Invoicable the return lines will not interface to Receivables. Also, an item can be returnable but not orderable. This is commonly used if a company stops selling an item, but they still want to be able to do returns for it. For lot and/or serial controlled items, OM will have the capability to store one or more lot and serial numbers associated with one RMA line. Order Management will not validate the serial numbers against Inventory serial numbers in the system or against serial numbers associated with the referenced sales order. Receiving will capture the serial numbers of the items at delivery. The Credit Order Discrepancy Report can be used to show the difference between actually delivered lot/serial numbers and the numbers on the RMA. The sales order form has a window to capture lot and serial numbers suggested by the customer for the RMA line. For ATO/PTO configurations, only the Returnable configuration lines will be displayed on the sales order form. Therefore, you need to make sure that the item attributes are set correctly for ATO/PTO children items. Price List Setup In order to price any new items when entering an ordered item on the sales order form, the user should add the new item to a price list. The item is added to a price list via the Price List Setup form: Pricing > Lists > Price Lists Setup. Query an existing price list or create a new price list. Add a new line, enter the item name, UOM and price and save. The price and UOM will default when entering the item on the order line. When an RMA line is created and the originating transaction is known, the pricing information is populated from the originating order line. The user can change the pricing if needed. The list of values on the Price List will show all the active price lists on the pricing date. Also, ATO configured items and PTO 6-4 Oracle Order Management Suite Implementation Manual Process Flow included items should be included on a price list in order to be received and credited. Processing Constraints Order Management has seeded constraints that will simply prevent data integrity problems. For instance, you can prevent change for a line if it has been: closed, canceled at order level, canceled, shipped, invoiced, return line cannot be canceled after it has been interfaced to Receivables and a return line cannot be canceled after it has been received. If the business needs more restrictive rules when processing orders, they can setup rules to control changes or operations of the order process flow. Refer to the topical essay on Processing Constraints at the end of this manual for details on setting up processing constraints. Return Reason Codes Since a return reason is required on all returns, you can setup your own reason codes in the Receivables Quickcodes form. To do this, navigate to the Order Management responsibility and select the menu: Setup > Quickcodes > Receivables. The Oracle Receivables Lookup form will appear. Query the CREDIT_MEMO_REASON code from the query manager (Flashlight icon). You can view the existing codes or add a new code. These codes will show up in the Return Reason list of values when entering a return. Reports The Returns by Reason report can be used to view all return reasons setup in the system. You can run the report by Return Reason, Credit Order Date, Credit Order or Line Type and/or Item Number. Freight and Special Charges for Returns When setting up freight or special charges, users can specify if the charge is returnable, meaning the charge may be refunded. When you create a return line from an original order line, you should copy the refundable invoiced charges. You can also setup special charges to be applied specifically to returns, like restocking fees, return handling, damage etc. You can set this through an attribute called Refundable Flag (Include on Returns field) within the Pricing Modifier setup. Refer to the topical essay on Freight and Special Charges for more information. Process Flow This section will guide you through a basic flow for a Return for Credit with Receipt, Returns 6-5 Process Flow from entry to generating a credit memo, including: Create an RMA having a single line whose originating transaction is unknown Book the RMA Receive the RMA using the Receipts form of Oracle Purchasing Check the on-hand quantity of the item in Inventory to verify that correct quantity was received Fulfill RMA line Generate a credit memo View the Credit Memo in Order Management Check the Shipped and Fulfilled quantity on the RMA line 1. 6-6 Enter the RMA on the Sales Order form. Entering a return on the Sales Order form, is exactly the same as entering an order, except at the line level where the user specifies the Line Type as a Return and a negative line quantity and total quantity appear on the form. Thus, in the Order Information tab of the Sales Order form, the user will enter the same information (i.e. Customer Name, Order Type, etc.) as a standard order. The Standard order type is assigned to a Generic Order and Line workflow which allows either an order or return to be entered. Refer to the Workflow section for details on the Generic Order and Line workflow for returns. Figure 1. is the Sales Order form for entering the Header information for the RMA: Oracle Order Management Suite Implementation Manual Process Flow Figure 6–1 Sales Order Information (Header) form 2. Once the Order Header information is entered, you will enter the line information within the Line Items screen, as seen in Figure 2. : Returns 6-7 Process Flow Figure 6–2 Line Items form 3. 6-8 In the Main Tab, enter the Ordered Item and the Quantity to be returned . The user can enter a positive or negative number. You will also see that the negative quantity will be highlighted in another color. Next, in the Returns tab, the user will need to enter the Line Type as a return (i.e. Return for Credit with Receipt of Goods) and enter a Return Reason. A Return Reason is required to be Oracle Order Management Suite Implementation Manual Process Flow entered (i.e. Product Discontinued). Since we did not reference a sales order, we are entering a single line RMA where the originating transaction is unknown. 4. Book the RMA. Users are able to book an order or return at either the Order Information Tab or Line Items Tab via the Book button. 5. Receive the RMA using the Receipts form of Oracle Purchasing. Change responsibilities to Purchasing and navigate to the Receiving > Receipts form. In the Receipts form, an Organization window will be displayed if this is the first time you have navigated to the Purchasing > Receipts form since your login. The organization you choose should be the same warehouse where your RMA is created. In the Receipt Header window, select the Customer Tab and find your RMA #. Tab through the Header window to the Receipts Line window. Once you are in the Receipts Line window, the RMA number and quantity will populate the form. Check the box next to the line you wish to receive, enter a Destination Type as Inventory and subinventory. Save this transaction and record the receipt number in the Header window. By choosing the Destination Type as Inventory, the user is creating a transfer to inventory transaction in Purchasing. These items are now considered as supply. Purchasing will communicate the quantity received to Order Management to update the RMA. Returns 6-9 Process Flow Figure 6–3 Receipt Header form 6-10 Oracle Order Management Suite Implementation Manual Process Flow Figure 6–4 Receipts (Line) form 6. Check the on-hand quantity of the item in Inventory to verify that correct quantity was received. Change responsibilities to Inventory and navigate to the Transactions > Material Transactions form. In the Material Transactions form, an Organization window will be displayed if this is the first time you have navigated to the Inventory > Material Transactions form since your login. The organization you choose should be the same warehouse where your RMA is created. Find the item name being returned and navigate to the Transaction Type tab. Verify that the source type is RMA and the source is your RMA # for Returns 6-11 Process Flow the quantity being returned. This form will show you your item #, the subinventory chosen and the quantity specified to be returned from the Receipts form. Figure 6–5 Material Transaction form 7. 6-12 Fulfill RMA line. The fulfillment activity acts as a synchronization point for all lines on the order that are in a fulfillment set. The lines in the fulfillment set will wait at the fulfillment activity until all the lines in the set have reached the activity. Lines that are not in a fulfillment set simply pass through the activity Oracle Order Management Suite Implementation Manual Process Flow automatically. The user will not have to perform anything during this step. The eligible lines will automatically be put into a fulfillment set. 8. Generate a credit memo for the return. The Workflow process of the return line(s) will be on the Invoice Interface activity, once the Fulfillment activity completes. The invoice interface activity places the information from the return line into the Receivables Interface tables. Once the information is written to the tables, the invoice interface activity is complete, and the line proceeds to the close line activity. However, note that the credit memo is not actually generated until the Autoinvoice program in Receivables has been run. The credit memo will then be viewable in the Sales Order form. To run the Autoinvoice program, the user needs to change responsibilities to Receivables and navigate to the Interfaces form. Select the Autoinvoice Master program and run the program for your RMA # and specify the invoice source as the one associated with the line type of the RMA line. The Autoinvoice Master program will generate the Autoinvoice Import program which generates the credit memo. 9. View the credit memo in Order Management. To view the credit memo in Order Management, the user need to change responsibilities to Order Management > Orders, Returns > Order Organizer form. Query your RMA # in the Order Organizer. Once the RMA is queried, select the Actions button and choose Additional Order Information. Once the Additional Order Information form has opened, click on the Receivables tab to view the credit memo. This form will show your the credit memo number and amount. 10. Check the Shipped and Fulfilled quantity on the RMA line. From the above step, navigate in the Sales Order form to the Line Items tab for the RMA. Scroll to view the Shipped Quantity field. To access the Fulfilled Quantity field, the user needs to use the folder technology to add the field to the sales order form. To add the field, click on the Warehouse field in the Shipping Tab of the Line Items form. Next, select the Folder menu at the top of the form, select Show Field and choose the Quantity Fulfilled field from the list. The field will populate in the form. The Shipped Quantity means the received quantity for return lines and the Fulfilled Quantity means the delivered quantity for the return lines. Workflow In Oracle Order Management, you can have many types of credit order by specifying it’s Order Type and Line Type. Each order type and each line type is associated with a workflow process. You can customize order types and RMA line types to meet your business needs. For instance, you can use Approvals and Holds with returns in order to manage exceptions when your customer returns more or less than you Returns 6-13 Process Flow authorize. Credit order types have order type category Return’. An order with a Mixed order type category can contain both regular and return lines. But you cannot enter return lines into an order with order type category Regular. Figure 6 is an example of a seeded Order Return Flow process (enter -> book -> approval notification -> close): Figure 6–6 Order Flow - Return with Approval Figure 7. is an example of a seeded Order Return Line Flow process (enter -> return-> invoice -> close): Figure 6–7 Line Flow - Return for Credit with Receipt Figure 8., Figure 9., and Figure 10 are other workflow processes that Order Management seeds for Return Line flows: 6-14 Oracle Order Management Suite Implementation Manual Process Flow Figure 6–8 Line Flow - Return for Credit only Figure 6–9 Line Flow - Return for Credit only with Approval In Oracle Order Management, there are also flows which support both order and return lines (inbound and outbound transactions), however, there are no seeded workflows. Customers can create flows that support both Order & Return Lines. However this should be done with caution as Workflow does not function identically to Cycles. For instance, the flow listed below (Figure 10) will not work correctly, since once a line is booked, workflow randomly picks which transition to process first. It then processes it all the way till it can go no further. So for an outbound Line using this flow, if the branch ‘Returns receiving’ is first processed, it will get marked as Not Eligible and hit the Fulfill -Defer activity (to defer thread) and stop. Then the WF Engine starts executing the other branch; the line will schedule and hit the Ship - Line, Manual sub-process, where it will stop and wait to get picked and shipped. However the Background Engine could pick up the deferred thread and execute the Fulfill activity. This activity will error out since the fulfilling event for the order line Ship-Confirmation is not yet complete. Returns 6-15 Process Flow Figure 6–10 INCORRECT Line Flow - Supporting inbound and outbound shipments For this flow to work correctly, the flow ensures that only one transitions is executed (Order or Return). The flow needs to be defined as follows: Figure 6–11 CORRECT Line Flow - Supporting inbound and outbound shipments After booking the line flow branches based on the Line Category ensuring that only one of the branches are (Order or Return) executed runtime. The activity Utility to 6-16 Oracle Order Management Suite Implementation Manual Process Flow get Line Category is seeded OM: Order Line Work Item. With regard to item inspections, the Order Management system does not process inspection results, and only processes delivery transactions. Based on the users business rules, if an item is rejected, the user can either deliver to inventory (scrap sub-inventory) or return to the customer. Delivering to inventory will give credit to the customer. Returning to the customer will reduce the shipped quantity and credit will be given for only accepted goods. Therefore, receiving transactions drive the flow of the return and what gets credited Returns 6-17 Process Flow 6-18 Oracle Order Management Suite Implementation Manual 7 Drop Shipments Topics covered in this chapter include: ■ Required Setup on page 7-2 ■ Required Setup on page 7-2 ■ Process Steps on page 7-3 ■ Workflow on page 7-3 Drop Shipments 7-1 Overview Overview A Drop Shipment occurs when a customer order is sourced from and delivered by a supplier. Order Management sends information to the Purchasing Application to create that PO, and then when that PO is received (to indicate shipment from the supplier to your customer), the order line is automatically updated to indicate that it was fulfilled. In this process, the company running Order Management is modeled as the company to whom the end customer places the original order. We call this process Vendor Drop Shipment, to indicate that we are defining the process from this point of view. The Source Type attribute on the order line controls whether a line will be fulfilled internally or drop shipped. A source type of External indicates Drop Ship. Only standard items may be drop shipped; kits and models cannot be drop shipped at this time. Required Setup Verify the following are set up to meet your business’ drop ship needs: Customers In R11, because of the separate data models of OE and PO, it was necessary for user to maintain the customer address in two places - the AR tables and the HR tables. In R11i Order Management, there is no longer a need for dual address maintenance – Purchasing obtains the ship-to address from the AR tables. Therefore there is no special setup for Customers to do drop shipments. Warehouse Consider establishing a logical warehouse to receive drop shipments. This will isolate the costs of drop shipped items from items you physically stock. Order Management does not require you to use a special shipping org for drop shipments, but you can choose to do so. In that case, define the logical warehouse as a shipping org, and enable the items you want to be drop shipped in that warehouse. Order Type/Line Type Define line type/order types for your drop shipment orders that have a workflow containing the Create Supply activity. 7-2 Oracle Order Management Suite Implementation Manual Workflow Defaulting Rules Define defaulting rules, based on conditions that make sense to your business process, for the source type attribute of the Order Line. If you want a line to be drop shipped, make the source type equal to External. In addition, if you defined a special warehouse for drop shipped items, you might want to create a defaulting rule to default that shipping org to your order line. Process Steps Enter and book order. Defaulting Rules may set source type attribute to External, or the user may manually choose External source type. Note that only standard items can be drop shipped; kits and models cannot be drop shipped. Create Supply workflow step loads OM information into Purchasing’s Requisition Import tables. Alternatively, a Purchase Release concurrent program can be run to do the same. Run Requisition Import in Purchasing to create the requisition. After Requisition Import completes successfully, approve the requisition to generate the Purchase Order. Create a PO or autocreate a Blanket PO Release from the approved requisition. This is sent to the vendor. A drop ship order can be changed or canceled in Order Management after it has been sent to Purchasing but before receipt. However, the changes are not automatically communicated to Purchasing. A report, Sales Order/Purchase Order Discrepancy Report, shows what orders have changed. These changes need to be manually updated in Purchasing and then communicated to the vendor. When the vendor ships product to your customer, you may receive an ASN, or even an invoice, to indicate shipment to the customer. The receipt triggers automatic receipt of the line in Purchasing. If the vendor does not send ASN, receipt can be entered manually (passive receiving). Inbound and outbound material transactions are automatically created for accounting purposes. OM workflow proceeds to next step, typically invoicing of the end customer. Workflow Figure 1., the Generic Line workflow, contains the Create Supply activity, which branches to various sub-processes based on different characteristics of the item and sales order line. Order Management’s Workflows streamline the process of loading order information into the Purchasing requisition import tables, eliminating the need to Drop Shipments 7-3 Workflow run the Purchase Release concurrent program. You can still run Purchase Release as a concurrent program, if you prefer to batch up requisition lines. 7-4 Oracle Order Management Suite Implementation Manual 8 Internal Orders Topics covered in this chapter include: ■ Overview on page 8-2 ■ Required Setup on page 8-2 ■ Process Steps on page 8-3 ■ Workflow on page 8-4 Internal Orders 8-1 Overview Overview The Internal Requisition/Internal Orders process is used for requesting and transferring material from one inventory or expense location to another. An Internal Requisition is initiated in Oracle Purchasing. Sourcing rules can automatically determine if the source type is to be Inventory or an external supplier. Order Management receives information from the Purchasing Application to create an Internal Sales Order. When the sales order is shipped (to indicate either intra or inter-organization movement of goods), the requisition can be received to record receipt of goods. The Source Type attribute on the requisition line controls whether a line will be fulfilled internally or purchased from a supplier. A source type of Inventory indicates an internal order. Order Management is seeded with an Order Source of Internal, to identify lines created from internal requisitions. The internal requisition id is stored in the Original System Reference column on the order header of the Internal Order. It is not possible to manually enter Internal Orders using the Order Management user interface – these orders must come in via Order Import. Within Release 11i Order Management, the internal order is processed almost exactly like an order that is to be shipped to an external customer. Some coordination between Order Management and Purchasing has been automated – tighter coordination is being planned for future releases. Please refer to the Oracle Purchasing User Manual for details of Purchasing set up and processing. Required Setup To process Internal Orders, the following special setups are required: Customers Because internal orders are processed through the sales order form, corporate locations that receive product via internal orders must be set up as customers. Create customer records to correspond to internal locations, and link them using location associations on the Customer bill-to site usage. Items Set up the items you want to allow on Internal Orders with both the Internal Orders enabled flag and the Internal Ordered Item flag on. Enable the item in both the source and the destination organizations. 8-2 Oracle Order Management Suite Implementation Manual Process Steps Order Type/Line Type You do not have to set up special order types or line types for Internal Orders. You do have to specify in your Purchasing setup what order type you are using for internal orders, however. You can use any generic order type for internal orders. Defaulting Rules Analyze your business process and define defaulting rules for Internal Order defaults. Processing Constraints Seeded processing constraints in Order Management prevent changes to the Customer, Ship To, Invoice To, Warehouse, Request Date, Source Type, and the Ordered Quantity for internal lines. If you want to further restrict what can be changed on internal orders, you can constrain other attributes using the Internal Order validation template. Order Source An order source (for Order Import) of Internal is seeded. This should be selected in the Purchasing options setup for Order Source. Process Steps 1. Enter Requisition in Oracle Purchasing. Sourcing Rules may set source type attribute to Inventory, or manually choose Inventory source type. 2. Approve the Internal Requisition. 3. Run the Create Internal Sales Order concurrent program in Purchasing to load the Order Import tables. This can also be scheduled as part of your set up to run periodically to meet business needs. 4. Run Order Import with Order Source = Internal in OM to create the Internal Order. Be sure to run Order Import using a responsibility that corresponds to the operating unit in which the internal order needs to be created. It is possible to create an internal order in an operating unit different from that of the internal requisition. This can also be scheduled as part of your set up to run periodically to meet business needs. 5. After Order Import completes successfully, book, pick and ship the internal order. Internal Orders 8-3 Workflow 6. Receive against the Internal Requisition. Workflow There are no special Workflow implications to processing Internal Orders, the Standard Flows can be used. Even if the workflow contains a step for Invoicing Interface, Internal Order lines will not be invoiced. 8-4 Oracle Order Management Suite Implementation Manual 9 Configure-to-Order Topics covered in this chapter include: ■ Overview on page 9-2 ■ Required Setup on page 9-3 ■ Process Steps on page 9-5 ■ Related Processes on page 9-14 Configure-to-Order 9-1 Overview Overview The Configure-to-Order process (CTO) is a cross-modular process which enables users to select options in the sales order form to define a possibly unique item, build the item using Oracle’s Manufacturing Applications Suite, and continue processing the item as if it were a standard item through the shipping and invoicing activities. This section defines the CTO process as well as the related processes of Assemble- to-Order (ATO), Pick-to-Order (PTO) and Kits. It provides an overview of how this business process is implemented, the workflow processes that support it, and the required setup. For details on implementing CTO, please see the Oracle Configure to Order Implementation Manual. The CTO process goes through these basic steps: First the user goes to the sales order form and enters an ATO model as an item. They press the Configurator button, and a form opens which allows them to select options. When they close the form, the system adds the options to the sales order as new lines. The system creates a new item and a new bill of material (if necessary) and generates communicates with the manufacturing applications so that the item is built. The completed item is then shipped to the customer and an invoice is generated. (Note: These steps will be described in detail later in this paper). The PTO process is similar except that all options are finished goods which are stocked in the warehouse, so no assembly operation is required. These are the basic steps for the PTO process. 9-2 Oracle Order Management Suite Implementation Manual Required Setup The ATO process is also similar. The item is built based on the demand from the customer order. However, for an ATO item the customer cannot select options. Therefore the item and the bill of material are already defined. The user enters an ATO item and it follows this process. Finally, the kit process is similar to the CTO process, because a kit item has a bill of material structure and the included items are added as lines to the sales order. The user enters a Kit item and it follows this process. Required Setup To make these flows work, some special setup is required. First, all models, option classes, options and kits must be defined in the Inventory module and they must have their attributes set appropriately. Bills of Material must be created for all models, option classes and ATO items. Finally, the workflow Configure-to-Order 9-3 Required Setup processes must be correctly assigned to the transaction types. The key attributes that control the processing of the CTO and related processes are on the Order Management tab in the Item setup form. The flag Assemble to Order should be selected for CTO items and ATO items. The Pick Components flag should be selected for PTO models. Other attributes are also important. The best way to create your items is to copy them from the following seeded templates: ATO Model (for the Configure-to-Order process) ATO Option Class ATO Item PTO Model PTO Option Class Kit Bills of Material (BOMs) must be created for your models, option classes,ATO items, and kits. For models and option classes, some key attributes are defined on the Order Entry tab of the BOM form. The optional flag is checked if an option class or option is not required. If an option class is required then the configuration must include at least one of the options from the class. The option class that is not optional is called a mandatory option class. If an option is not optional it is considered an included item and it not shown as an available selection in the Configurator or option selection window. It is automatically added to the sales order. At least one item should be optional within the structure of an ATO model or a PTO model. No items can be optional in a kit. Another important attribute of the BOM is the required for revenue flag on the shipping tab. This flag is only enabled in PTO configurations for included items. If the flag is checked, then the option class or model which is the parent of the item will not be invoiced until this item has been shipped for additional information see the Oracle Bill of Material User’s Guide. The transaction type for an order which will include CTO items must have at least two line workflow processes associated with it - one for the model, options and option classes and one for the configured item. In the Assign Line Flows form, the item type of Configuration must be specified for the workflow of the configured item. For ATO models, ATO items, PTO models, options, option classes, and kits the seeded generic line flow can be used for all the item types. See the topical essay Using Transaction Types in Oracle Order Management at the end of this manual for details on setting up 9-4 Oracle Order Management Suite Implementation Manual Process Steps transaction types. Process Steps This section will describe to steps required to order, ship and invoice a CTO item from the Order Management point of view including: Entering the item - OM Selecting the options - CZ Creation of a configured item - BOM Creation of a work order - WIP Manufacturing - WIP Shipping and Invoicing - SHP Associated Workflows - WF 1. Enter your item. The CTO process begins in the sales order form. Enter an ATO model as the item number and then press the Configurator button. You will see a graphical screen for selecting options shown in Figure 1. Configure-to-Order 9-5 Process Steps Figure 9–1 Oracle Configurator window 2. Select your options. The folders on the left side are the model and its option classes. For the selected option class (in this example the RAM option class), the available options are in the top box on the right. The options are selected by checking the box to the left of the item name. The options and option classes which are selected are in the bottom right. Required option classes which have no selections are indicated by a red asterisk on the folder icon. A Note on Configurator: Oracle Configurator is a powerful tool which allows you create complex rules for configurations and then validate those rules when you create configurations. It is completely integrated with Order Management. For more information on Oracle Configurator, Oracle Configurator Developer User’s Guide and the Oracle Configurator Installation Guide. 9-6 Oracle Order Management Suite Implementation Manual Process Steps Once you have selected the options that your customer has requested you press the Done button or the OK button and return to the sales order form. The model, option classes, and selected options are now all separate lines on the sales order form, as shown in Figure 2. Note that the lines are related by the line number. Figure 9–2 Sales Order Form with Model, Option Classes and Options Each of these lines has a separate workflow and this paper will discuss the workflow process for each line in the workflow section. After the options for the configuration are selected, the items on the order must be scheduled. See the topical essay on Scheduling in this manual for the details of scheduling. Configure-to-Order 9-7 Process Steps 3. Create the configured item. This item could be completely new, or it could have been manufactured before because someone selected the same combination of options. A program runs which first looks for an existing configuration with these options (if the value of the profile option BOM: Match to Existing Configuration = Yes), and if one does not exist (or if the value of the profile option BOM: Match to Existing Configuration = No) it creates an item and BOM for this combination of options. To run this program from the sales order form, place your cursor on the model line (the one with a two segment line number), press the Actions button and select Progress Order. The line will be eligible for the Create Configuration activity. Select this from the list and press the OK button. Alternatively you can create one or more configuration items in batch mode by running the AutoCreate Configuration Items concurrent request in the Bills of Material application. When you have completed this step, your order will have an additional line item which is known as the configured item. The item will have an item number which was created for the first order with this exact combination of selected options. The format for the configuration item number is determined by the Numbering Method parameter in the BOM parameters window. 4. Create the work order. Creation of the work order will trigger the manufacture of the item. (Note: The CTO process works with both Oracle’s Discrete Manufacturing applications and Oracle’s Flow Manufacturing applications. This section uses the terminology of the discrete manufacturing process). To create the work order from the sales order form, place your cursor on the configured item line (the one that was added in the previous step,) press the Actions button and select Progress Order. The line will be eligible for the Create Final Assembly Order activity. Select this from the list and press the OK button. Alternatively you can create one or more work orders in batch mode by running the AutoCreate FAS concurrent request in the Work in Process (WIP) application. 5. Manufacture the Item. In a production environment this could require many steps. None directly affect Order Management until the final status of work order completion. When the completion activity is performed in WIP the item is transferred to inventory with a reservation to the sales order. At this point, the configured item is available to progress through the standard order process of shipping and the model progresses through the invoice activity. The steps are described in the sales order flow and the shipping process flows sections of this manual. 9-8 Oracle Order Management Suite Implementation Manual Process Steps Workflow Although there are many item types in this business process, only two top level line workflow processes are needed to support it. The seeded flow Line Flow - Generic is used for the model, option class and option lines. The seeded flow Line Flow - Configuration is used for the configured item. Model, Options and Option Classes Workflow The flow for the model, options and option classes all begin with the following basic process depicted in Figure 3. Figure 9–3 Line Flow - Generic Workflow Process The lines progress through the Enter - Line and Schedule - Line subflows along the same path. At the Create Supply - Line subflow, their paths deviate. Configure-to-Order 9-9 Process Steps Figure 9–4 Create Supply - Line Subprocess Figure 4 shows the variety of sublow paths that can be taken within Create Supply Line. In the Branch on Source Type function, the options follow the path for Stock and the model follows the path for Build. Purchase Release Line, Deferred is another subflow for drop shipments. See the corresponding section in this manual for more information on drop shipments. The Build path, shown in Figure 5, has an additional sub-process of Create Configuration - Line Manual which looks like this. 9-10 Oracle Order Management Suite Implementation Manual Process Steps Figure 9–5 Create Configuration - Line, Manual Workflow Subprocess This subprocess creates the new line on the order for the configuration item, and its workflow begins. This flow will be addressed in a moment. The activity also creates the new item (or finds the existing one, if applicable,) and creates the BOM and Routing. Once the Create Configuration - Line, Manual subflow is complete for the model line, the model line as well as the options and option classes have completed the Create Supply - Line subprocess and are ready for shipping. However, the model, options and option classes of a Configure to Order item are not shippable. The assumption is that in the manufacturing process the components are built into one indivisible item. So they pass through the shipping process with a result of Not Applicable, and proceed to the invoice process. The model line will be invoiced, so it goes through the Invoice Interface - Line activity and should complete. The options and option classes are not invoiced, so they go through the Invoice Interface - Line activity with a result of Not Applicable. Configured Item Workflow The configured item is created and added to the order when the model goes through the Create Configuration activity. Its workflow process is simpler than the process for models and options, shown in Figure 6. Configure-to-Order 9-11 Process Steps Figure 9–6 Line Flow - Configuration Workflow Process Figure 7 shows the first subprocess in the flow is the Create Manufacturing Configuration Date - Line, Manual. Figure 9–7 Create Manufacturing Configuration Data - Line Manual Workflow Subprocess This is the subprocess that performs the necessary Costing rollup and calculates the lead time for the configured item. Figure 8 shows the next step in the configured item workflow, Create Supply Order - Line, Manual subprocess. This subprocess interfaces with the manufacturing system to trigger the assembly of the item. The Check Supply Type activity determines whether the item should be manufactured using discrete manufacturing or flow manufacturing. If the result is Flow Schedule, 9-12 Oracle Order Management Suite Implementation Manual Process Steps the Create Flow Schedule activity is executed. If the result is a Work Order, the final subprocess, the Create Work Order - Line process is executed. Configure-to-Order 9-13 Related Processes Figure 9–8 Create Supply Order - Line, Manual Workflow Subprocess Figure 9–9 Create Work Order - Line Workflow Subprocess Figure 9 indicates the final subprocess flow - Create Work Order - Line. The primary activity in this flow is the AutoCreate FAS activity, which will cause the WIP application to create a work order. After the work order is created, the sales order will wait for completion of the work order before proceeding. When the work order is complete the inventory will be received into the inventory module and automatically reserved to the sales order. The configured item then continues through the normal shipping and fulfillment steps from Figure 3 and then its workflow is complete. It does not have an Invoice Interface subprocess because it is never invoiced. Only the model line, option classes and options may be invoiced depending on their item attributes. Related Processes Several processes share some of the characteristics of the configure-to-order process. They include the assemble-to-order process, the pick-to-order process and the kit process. Because the configure-to-order process is the 9-14 Oracle Order Management Suite Implementation Manual Related Processes most comprehensive and includes all the steps it was described first, and the rest will be described relative to it. The assemble-to-order process is similar to the PTO model, item, or PTO/ATO modelss because the items that are ordered by a customer are manufactured specifically for the customer order. So the manufacturing steps of the configured item are part of this process. However, the ATO item is not configurable for a customer in the sales order form. The ATO item is entered on the sales order form and then the order is booked without selecting any options. No option class lines or option lines are added to the order. The workflow process Line Flow - Generic supports the ATO process. The ATO item takes the ATO item branch in the Create Supply - Line workflow subprocess. The pick-to-order process is similar to the configure-to-order process because you can select the options chosen by the customer. It follows the same flow as Figure 8. On the sales order form the PTO model is entered, and then you press the Configurator button to launch the options selection window. The configuration options are saved, and the option classes and options are added as lines on the sales order. However, there are no assembly steps in the PTO process. The options all continue their own workflows which include the standard sales order line activities. When you create your PTO model in the Inventory application, Inventory sets the attributes for the model, and you can specify whether or not it is Ship Model Complete. If this attribute is Yes, all the options will be in a ship set. If this attribute is No then the items can ship independently. The kit process is similar to the pick-to-order process except that the user cannot select options to create a configuration. All the items in the kit are required; these are known as included items. Kits are similar to configure-to-order items because the included items are added to the order and have their own workflows. They are added either when the kit line is saved,when the order is booked, or when the line is pick released depending on the value of the profile option OM: Included Item Freeze Method. Ship Model Complete logic for PTO models also applies to kits. Configure-to-Order 9-15 Related Processes 9-16 Oracle Order Management Suite Implementation Manual 10 Introduction to Basic Pricing Topics covered in this chapter include: ■ Overview on page 10-2 ■ Overview of Basic Pricing on page 10-2 ■ Definitions on page 10-3 ■ Feature Highlights on page 10-4 ■ Process Flow for Implementation on page 10-7 Introduction to Basic Pricing 10-1 Overview Overview This section explains how to implement the Basic Pricing capability of Oracle Order Management, including: Definitions Feature Highlights Implementation Planning Process Flow Price Lists Agreements Modifiers Formulas GSA Pricing Freight And Special Charges Defaulting Decisions Profile Options and Systems Parameters Technical Considerations / Troubleshooting Migration Overview of Basic Pricing The Basic Pricing component of Order Management provides the capability to price orders according to price lists, pricing formulas, or agreements. You can also apply discounts, control the lowest level price that may be given in order to comply with General Services Administration Agency (GSA) regulations, and apply freight and logistics related charges to orders. It is important to note that if you have licensed Advanced Pricing, you should not use this section for implementation guidance. Instead, refer to the Oracle Advance Pricing Implementation Manual and Oracle Pricing User’s Guide. 10-2 Oracle Order Management Suite Implementation Manual Definitions Definitions Customer Hierarchy The customer hierarchy in Basic Pricing consists of the ability to roll up individual customers according to the following structure: The sold-to organization The ship-to organization The bill-to organization Site Customer Class You can use elements of the customer hierarchy above as defaults to control the operation of price lists and modifiers. Additional product hierarchy capabilities, such as additional levels, can be defined if Oracle Advanced Pricing is installed. Pricing Engine The pricing engine is the program module called by Order Management that prices the order as orders are entered, or order data changed. Pricing Request A pricing request is the specific information provided to the Pricing Engine when the engine is called by Order Management. In general, this includes the customer, the product, what attributes may be associated with the customer or product that may be used by the pricing engine, the pricing date, and other pricing data attributes that may be required by the pricing engine. Product Hierarchy The product hierarchy in Basic Pricing consists of the ability to roll individual items, as defined in MTL_SYSTEM_ITEMS table, into single level groups called Item Categories. For price lists, you can only define products at the item level, however, you can use hierarchy to reprice. For modifiers, you can use item, item and pricing attribute, item categories, or the Super Group of item ALL. Additional levels of product hierarchy can be defined if Oracle Advanced Pricing is installed. Introduction to Basic Pricing 10-3 Feature Highlights Oracle Advanced Pricing Oracle Advanced Pricing is a separately licensable product that can be used as an alternative to Basic Pricing. Oracle Advanced Pricing provides the functionality of Basic Pricing, while adding significant additional functionality and extensibility. For additional information, refer to the Oracle Pricing User’s Guide and the Oracle Advanced Pricing Implementation Guide. Feature Highlights The following is a list of key Basic Pricing features supported by Oracle Applications: Price Lists Price lists relate a selling price to a product. Price lists contains one or more price list lines, pricing attributes, and secondary price lists. Basic information includes the price list name, effective dates, currency, rounding factor, and shipping defaults such as freight terms and freight carrier. You may default a price list based on any one of the following: An agreement The sold-to organization The ship-to organization The bill-to organization Order type You can define multiple price lists. Alternatively, you may enter a specific price list on the order header or at the order line level. For each price list, you can also designate Secondary Price lists, which the engine will search for a price when it cannot find an item on the primary list. Only one secondary price list will be searched for each primary list. Price lists may be specified in different currencies. During order entry, if you enter a currency on the order, the pricing engine will select price lists having a currency matching the currency you entered on the order. Pricing Attributes Order Management with Basic Pricing is delivered with seeded pricing attributes. The same attributes are seeded for Basic as with Advanced Pricing. The seeded 10-4 Oracle Order Management Suite Implementation Manual Feature Highlights attributes are documented in the Oracle Pricing User’s Guide Appendix A. You can use one pricing attribute per order line. Maintaining Price Lists You can maintain price lists using any one of the following functions: Copy Price List Adjust Price List Add Items to Price List These capabilities are invoked from a form within the Order Management Superuser Responsibility, which submits Concurrent Manager jobs for each step. Agreements Agreements let you define the prices, payment terms and freight terms that you negotiated with specific customers. You can: Define your agreements using customer part numbers and inventory item numbers. Make revisions to the original terms and maintain these changes and their reasons under separate revision numbers. Attach an already existing price list to the agreement or define new prices. Assign optional price breaks by quantity. Set effectivity dates for agreement terms. Set payment terms including invoice rule and accounting rule. Set freight terms including the freight carrier. Apply agreement terms to sales orders by reference agreements. GSA Pricing GSA Pricing enables you to define a GSA Price List for your GSA customers. The GSA Price List actually uses the modifiers form and uses the new price. You create a discount that adjusts the base price of the item to the GSA price. Introduction to Basic Pricing 10-5 Feature Highlights Formulas Formulas allow you to define a mathematical expression that the pricing engine uses to determine the list prices of items. A full complement of mathematical operators and numeric operands can be used. When processing formulas, the Pricing Engine begins by locating a price list line linked to a formula. It then applies the mathematical expression to generate a final list price. In Basic Pricing, formulas are static; that is, the variables in the formula must be pre-populated with data by running a concurrent manager job before the formula can be used. Modifiers Using modifiers, you may increase or decrease the list price to arrive at a net selling price for your orders. You can define a modifier that will be applied automatically by the pricing engine, or you can manually enter a modifier. Additionally, modifiers, with proper setup, can be overridden. Modifier have a data structure that consists of a header along with one or more lines. You can define modifier headers as one of the following three types: 1. Discount 2. Surcharge 3. Freight and Special Charge You may default the pricing engine’s selections of modifiers at the header level to one of the following customer hierarchy related attributes: Site Customer Name Customer class - (as defined in RA_CUSTOMERS table) As an alternative, you can also default the pricing engine’s selection of modifiers based on the price list name. You may define default modifiers at the order line level based on agreements including: Agreement Type Agreement Name 10-6 Oracle Order Management Suite Implementation Manual Process Flow for Implementation Alternatively, you can default modifiers based on Purchase order. For a modifier to default at the line level, it must first default at the header level. If it does not default at the header level, the line level default will have no effect. In combination with the above defaults, you can also default modifiers based one of three levels of the product hierarchy. These are: 1. Item 2. Item Category 3. All Items Modifiers can be used to compute price breaks. You can define breaks at the line level to be computed as percent, amount or fixed price. Price breaks are available only on modifiers in Basic Pricing. Point type price breaks are supported in Basic Pricing. Freight and Special Charges The Freight and Special Charges capability of Oracle Order Management gives you the ability to capture, store, update and view costs associated with a shipment, order, container, or delivery. You can either itemize or summarize such charges on your orders. This capability includes functionality to pass customer charge information to Oracle Receivables for invoicing. When using freight and special charges, you set up freight and special charges as pricing modifiers. The pricing engine applies the qualified freight and special charges to order lines. You can view the application of freight and special charges. Order Management captures costs at shipping and converts them to charges. Freight and special charges appear on invoices. Process Flow for Implementation The process flows for implementing from a fresh install and implementing from an upgrade both assume that Oracle Applications, including Order Management has been successfully installed, that Oracle Pricing has been installed Shared, and that all necessary patches have been applied. Implementing from Fresh Install Following are the recommended steps for implementation assuming a fresh install e.g. no prior implementation of Oracle Order Entry/Shipping exists. The recommended implementation steps differ when upgrading from prior release. Introduction to Basic Pricing 10-7 Process Flow for Implementation 10-8 # Name Description 1 Analyze and Understand Business Pricing Scenarios It is highly recommended that an exact understanding of pricing business requirements be established, before beginning an implementation of Basic Pricing. 2 Develop Logical Pricing Model Solutions For each Pricing Scenario, plan how you will use Basic Pricing to accomplish each. An excellent resource for this is the remainder of this manual. 3 Setup and Test Prototype Solutions Prior to implementing a production system, setup prototype Basic Pricing solutions for all the pricing scenario’s you have identified, and have entered test orders against them to determine that they are handled properly. The Vision Sample database shipped with the software can be used to facilitate this process. 4 Make necessary defaulting decisions See subsequent section of this manual for details. 5 Setup Basic Pricing Profile Options and System Parameters See subsequent section of this manual for details. 6 Setup Customers and necessary customer hierarchy information Customer setup must be performed using Oracle Accounts Receivable 7 Setup Items and Item Hierarchy information (except Pricing Attributes) Item setup must be performed using Oracle Inventory 8 Setup Pricing Attributes See subsequent section of this manual for details. 9 Setup Price Lists See subsequent section of this manual for details. 10 Setup Formulas See subsequent section of this manual for details. 11 Setup Agreements See subsequent section of this manual for details. 12 Setup Modifiers See subsequent section of this manual for details. Oracle Order Management Suite Implementation Manual Process Flow for Implementation 13 Setup GSA Pricing, if required See subsequent section of this manual for details. 14 Setup Freight and Special Charges, if required Refer to Appendix for chapter on Freight and Special Charges Upgrading from Release 10.7 or Release 11 of Oracle Applications When upgrading from previous release, the upgrade of pricing data to Release 11i Basic Pricing occurs within the overall flow of upgrading from Order Entry Shipping. Since the outcome of the upgrade process is to establish a working 11i system into which new transactions can be entered, the steps to complete the upgrade are the same steps required to implement. In general, Basic Pricing supports a similar feature set to Oracle Applications Release 10.7 and Release 11. There are functional differences in the behavior of pricing objects such as price lists, formulas, modifier, etc. in Basic Pricing release 11i from their counterparts in prior releases. The table below summarizes where such functional differences exist, and indicates whether further post upgrade setup is required before the object can be used. Release 10.7 & Release 11 # Pricing Object Name Upgrade Summary 1 Item Groups Migrated to Item Categories and Item Category Sets in Release 11i. Additional setup is required post upgrade. 1) Run Add Items to Price List concurrent request to add upgraded Item Category to Price List 2) Additional set-up is required for non-upgraded fields 2 Price Lists Price Lists in Prior Releases migrate to Price Lists in Basic Pricing. No additional setup is required after running migration for price lists to be usable. 3 Pricing Rules Pricing Rules in prior releases migrate to Static Pricing Formulas in Basic Pricing. No additional setup is required after running migration for Pricing formulas to be usable. Introduction to Basic Pricing 10-9 Process Flow for Implementation 4 Agreements Agreements in Prior Releases are migrated to Standard Agreements in Basic Pricing. A new separate form is provided for agreements in R11i Basic Pricing. No additional setup is required after running migration for Standard Agreements to be usable. 5 Discounts Discount headers, customers, and line forms found in prior releases are upgraded to Modifier header and lines in Basic Pricing. No additional setup is required after running migration for Basic Pricing modifiers to be usable. 6 GSA Pricing GSA Discounts in prior releases migrate to GSA modifiers. No additional setup is required after running migration for GSA modifiers to be usable. 7 Freight and Special Charges Freight and Special Charge capability is new for R11i Basic Pricing, and did not exist in prior releases. See subsequent section of this manual for details. 10-10 Oracle Order Management Suite Implementation Manual 11 Price Lists This chapter contains information about the implementation consideration of Price Lists in the Basic Pricing functions of Oracle Order Management. For further information see Pricing Section of the Oracle Order Management User’s Guide. Topics covered in this chapter include: ■ Overview on page 11-2 ■ General Basic Price List Capabilities on page 11-2 Price Lists 11-1 Overview Overview Price Lists are essential to ordering products because each item entered on an order must have a price. An order cannot be booked with an ordered item that does not exist on a price list. Each price list contains basic list header information and one or more pricing lines, pricing attributes, and secondary price lists. Basic information includes the price list name, effective dates, currency, pricing controls, rounding factor, and shipping defaults such as freight terms and freight carrier. Price lists contain prices and currencies for specific products and services. They can be defined in the following types of prices: Unit price--A fixed price. Percent Price--A price which is a percent of the price of another item. This is especially useful in pricing service items. Formula--Multiple pricing entities and constant values related by arithmetic operators. For example, you define the price of an item to be a percentage price of another price list line. Price List Maintenance Once Price Lists have been set up Oracle Order Management enables you to perform maintenance on the Price List allowing you to: ■ manually add lines to a price list ■ copy price list lines from one price list to another ■ add a new group of inventory items to a price list by specifying a range ■ add a new group of inventory items to a price list by specifying an item category General Basic Price List Capabilities Multiple Price lists Order Management enables you to define and use multiple price lists to serve various business needs. At least one price list must be established to price all orders. A base or corporate price list can be created with all inventory items to establish a base price for each. This price list can be used in the absence of a specific price list. 11-2 Oracle Order Management Suite Implementation Manual General Basic Price List Capabilities In Basic Pricing, price lists can only use one Product Context: Item, one Product Attribute: Item Number, and Product Value is the item Id. Defaulted Precedence value is 220. If price list defaulting rules are not defined for customer, or order type, the sales order header does not require a selection of price list. In this event, the Pricing Engine will utilize precedence to search for and return the price with the lowest precedence value for any given order line from among the several price lists. Multiple Price lists may contain the same products and be priced differently using Precedence. The price list containing the item ordered with the lowest precedence value will be selected by the pricing engine (See Role of Precedence in resolving multiple price list below). Precedence is not used by the Pricing Engine whenever a specific price list is defaulted to the customer or order type, or selected at order entry. Price lists can be in several currencies. If you have international sales, you can record transactions in different currencies by defining a price list for each currency. After entering the currency for an order or return, you must choose a price list in the same currency. If an ordered item is not on any price list, the pricing engine returns an error message that it cannot locate the item and UOM. In such cases, the order cannot be booked with an un-priced line. Secondary Price Lists The pricing engine uses secondary price lists when it cannot determine the price for an item using the price list assigned to an order. Primary and secondary price lists must have the same currency. You can only assign one secondary price list to any specific primary price list, however, you can assign the same secondary price list to multiple primary price lists. If an item appears on both the primary and a secondary price list with the same effective dates, the pricing engine uses the primary price list to price the item. If an item appears on the primary price list but is not active (the effective end date has passed), the pricing engine uses the price on the secondary price list. Line-level discounts and modifiers that apply to the primary price list do not apply to the secondary price list. Multiple Currencies International sales transactions can be recorded in different currencies by defining a price list for each currency. After entering the currency for an order or return, you Price Lists 11-3 General Basic Price List Capabilities must choose a price list in the same currency. Currency must match in Price List, Pricing Request, and Assigned customer profile class. Negative Pricing Depending upon the Profile setting of QP: Negative Pricing, you can have either positive or negative prices or both, depending upon the selection, to be on a price list. Profile option OM: Allow Negative Pricing determines whether or not a negative list price or selling price can be entered on an order. GSA (USA General Services Administration) Price List If your business requirements are for use of GSA price lists, you can set these price lists up using the modifier form. See Profile Options section for discussion of setting up GSA profile options. Qualifiers for Price List Qualify by defaulting rules - There are no qualifiers in User Interface Form as all happens behind the scene. You cannot define or add any Qualifiers to a Price List in Basic Pricing. Hence, for example, to make a Price List, Customer or Order specific you would need to use the Defaulting Rules in Order Management to default the appropriate Price List. These rules can be setup in Order Management at the Customer Set up as well as set up of Order Types. Customer Default You cannot create qualifiers for a price list in the Pricing Price List form. Price lists are defaulted from the Customer Set up or from the Sales Order form. Customer Set up - In the customer definition, a price list can be assigned to a customer. At order entry for this customer, this price list will be defaulted from that source. Sales Order form - In the Sales Order form, a price list may be selected from the LOV of available price lists. Order Type - In Order Management, Order Types are defined and may be defined to default a specific price list. Role of precedence in resolving multiple price lists The Segment Number in the Item Context ONLY is defaulted into the Precedence of a Price List Line or Modifier during setup. 11-4 Oracle Order Management Suite Implementation Manual General Basic Price List Capabilities Precedence controls which Price List or Modifier is applied to the order line when multiple are eligible. The Price List Line or Modifier with the highest - precedence (lowest Precedence value) is selected. Precedence may be better thought of as Specificity--the lower the precedence the more specific the price or discount. Price List Lines The precedence on Price List Lines decides what price the pricing engine should select when an item is found on more than one price list. This could occur if the price list was not specified on the order line and as a result the pricing engine searched all eligible price lists for an item. Note: It is not possible to price by Item Category in Basic Pricing. Price List Active Flag A check box on the Price List header indicates the status of the price list as to whether it is active or not. A checked box indicates an active price list. The default status when entering a new price list is active. You have the ability to temporarily or permanently disable the price list. This functionality will also be used in the Euro conversion where a user must be able to manually activate or de-activate a particular price list. In query mode the checkbox appears as checked, but the underlying value is null. Thus if doing query by example, attempting to retrieve price lists that are active, the user must un-check and recheck the box. Effective dates: Price lists can have Starting and Ending Dates. This allows one to prepare price list before they are valid and to ensure that they will not be used until their Start Date. Make manual changes to price lists for effective pricing requests passed to the pricing engine after the change. Use price list and price list line effective dates to retain history. Price List Deletion You cannot delete Price Lists nor can you delete Price List Lines once they are created and saved. However, Price lists can be ended by utilizing the End Date on the Price List Header for the entire price list, or on the Price List Line to effectively remove use of the line you wish to delete. Price Lists 11-5 General Basic Price List Capabilities Pricing Attributes - in Pricing Context Flexfield Navigation > Set Up > Flexfields > Descriptive In the set up of Descriptive Flexfields, the following considerations of Pricing Context should be taken into account. For Price List, only one Context for product is allowed, however, you can create as many as 100 pricing attributes for products. Users can create as many as 100 Attributes for pricing context on an Order Line. Figure 11–1 Figure 1 reflects a pricing context created, where a pricing attribute was added, NRCONTEXT, with a simple description. New Attribute information is added by navigating to the Segments field, Figure 2. 11-6 Oracle Order Management Suite Implementation Manual General Basic Price List Capabilities Figure 11–2 In Figure 2, after selecting the Segments button, provide a name and window prompt for a Pricing Attribute with a value of 15 Digit Number. This attribute is associated with the product AS54888, in the Price List NH23, seen in Figure 3. Price Lists 11-7 General Basic Price List Capabilities Figure 11–3 Selecting the Pricing Attributes Button Figure 3 shows an inventory item Id. AS54888 as the only item on this special price list. Selecting the Pricing Attributes button shows a user created pricing attribute 3. 11-8 Oracle Order Management Suite Implementation Manual General Basic Price List Capabilities Figure 11–4 Figure 4 displays the Pricing Context of NRCONTEXT, Pricing Attribute of NRATTR1. The value of the Pricing Attribute can be entered in this screen. Subsequently an Order for this product., using the Price List NH23 will ask for the value of the Pricing Attribute associated with Item AS54888. Static Formulas You can use static formulas to create a price on a price list. Once static formulas are created, or updated, you must run a concurrent process BEFORE any order entry to update the price on the price list. Otherwise, the pricing engine will not return the new price. Static formulas are calculated once, and related price lists updated. Price Lists 11-9 General Basic Price List Capabilities 11-10 Oracle Order Management Suite Implementation Manual 12 Modifiers Topics covered in this chapter include: ■ Overview on page 12-2 ■ Implementing Modifiers on page 12-2 ■ Types of Adjustments on page 12-2 ■ Modifiers: How Do I Define My Product Hierarchy on page 12-4 ■ Modifier Applications Methods on page 12-6 ■ Manual Adjustments on page 12-8 Modifiers 12-1 Overview Overview This chapter contains information about what to consider when implementing modifiers. The Modifier form is used to set up price adjustments, freight and special charges, simple discounts and surcharges. Modifier lists contain one or more modifiers. Modifiers have list-level and line-level components. Qualifiers at the list and line levels define a customer’s eligibility for the modifier. For basic pricing, the qualifiers determine the eligibility of various modifiers. By defining them at the list and line levels, you can define a customer’s eligibility. The modifier level, product & product groups, and attributes also help to determine which modifiers will get applied. In basic pricing, pricing phase, incompatibility group, and bucket are defaulted. The pricing engine returns volume breaks and price adjustments back to the calling application. Implementing Modifiers There are certain questions you should consider for implementing modifiers. What types of adjustments can I make? At what item level can I apply my adjustments? How are these modifiers qualified? How are my adjustment applied? Are there any additional controls and special cases? Types of Adjustments You can create 3 modifier list types in Basic Pricing. 1. Discount List 2. Surcharge List 3. Freight and Special Charges List There are 4 modifier line types available in Basic Pricing. 12-2 1. Discount: Creates a negative price adjustment 2. Surcharge Creates a positive price adjustment Oracle Order Management Suite Implementation Manual Types of Adjustments 3. Freight and Special Charges Amount applied to the customer invoice for movement of a shipment to a destination. See the Appendix chapter on Freight & Special Charges for details. 4. Price Break: Creates price breaks based on item quantity or item amount. Discounts and Price Breaks can be defined for a a discount list. Similarly, a surcharge list can include surcharges and price breaks. Freight and special charges are only available from the Freight and Special Charges List. Figure 1. depicts the four modifier types. Modifiers 12-3 Modifiers: How Do I Define My Product Hierarchy Figure 12–1 Four Modifier Types Modifiers: How Do I Define My Product Hierarchy Modifiers are defined at the line or order level. Discounts, surcharges, and freight and special charges may be defined at the line or order level. Price Breaks are only defined at the line level. Line level modifiers can be defined for an item, an item category, or for all products within your product hierarchy. You can attach pricing attributes when Product Attribute field is ITEM_ALL. Only one context per order line with 100 attributes is allowed for Pricing Attributes. Example: Discount of $15 on Item A Surcharge of 10% for All Items with Grade A Price Break for item category- Sodas 12-4 Oracle Order Management Suite Implementation Manual Modifiers: How Do I Define My Product Hierarchy Setup Considerations The Precedence field is defaulted based on the Product Attribute selected and can be updated. When two modifiers qualify to apply to the same line, precedence determines which one applies. The lower the value the higher the precedence. UOM is not mandatory unless the modifier line type is price breaks. For Line level Discount and Surcharge Lists, the following fields are defaulted. ■ Pricing Phase: List Line Adjustment ■ Incompatibility: Level 1 Incompatibility ■ Bucket: 1 Modifiers: How are they qualified? Qualifiers help to determine who is eligible for certain modifiers. They are linked individually to modifiers. Oracle provides basic seeded qualifier contexts and attributes. You cannot create new qualifier attributes. Qualifiers may be grouped to create and/or conditions using grouping numbers. Qualifiers with the same group number create and conditions and require that all conditions be met. Qualifier groups with different numbers create or conditions indicating that at least one qualifying condition must be met. Qualifiers can be defined at the list or line level. List Qualifiers are Customer Name, Price Lists, Customer Class, and Customer Site. Line Level Qualifiers are Agreement Name, Agreement Type, Order Type, and Purchase Order. Line level qualifiers are only applicable if the Product Attribute is ITEM_ALL. Null Qualifiers If a qualifier is mandatory for all qualifying conditions, the field can be left null. The pricing engine will always ensure a null qualifier condition is met before proceeding to other qualifiers. Example: A customer will receive a discount on a order if the Customer Name is Customer X or Customer Class is High Tech and Customer Name is Customer Y, but the price list always has to be the Fall Price List. Modifiers 12-5 Modifier Applications Methods Qualifier Qualifier Group Attribute Operator Value From Null Price List = Fall Price List 1 Customer Name = Customer X 2 Customer Class High Tech 2 Customer Name = = Value To Customer Y Modifier Applications Methods The application methods available for modifiers will depend on the modifier line type and modifier level. The various methods are: Amount: Creates a fixed price adjustment on each unit for the amount specified in the field Value Percentage: Creates a percentage price adjustment on each unit for the percentage specified in the field Value New Price: Overrides the selling price of this item and makes it the new price. Lump sum: Creates a price adjustment for this lump sum amount on the entire line For Freight and Special Charges, you can attach a formula to calculate the value of the charge. 12-6 Modifiers Application Method Percent Amount New Price Line Level Discount X X X X Line Level Surcharge X X X X Line Level Freight Charge X X X Line Level Price Breaks X X X Order Level Discount X X Order Level Surcharge X X Oracle Order Management Suite Implementation Manual Lump sum Formula X X X Modifier Applications Methods Order Level Freight X X Modifier: Additional Controls and Special Considerations Precedence The precedence is defaulted from the segment number in the descriptive flexfields. In Basic Pricing all modifiers are automatically incompatible with one another as the Incompatibility Code is always set as LVL 1. Hence the pricing engine will select which modifier to apply to the Order Line based on best price processing. The engine will apply the modifier which gives the Best Price to the customer. Example: Modifier 1: Discount by Item Category : All 6 Packs of Soda $1.00, (Defaulted Precedence => 290 ) Modifier 2: Discount by Item : 6 Pack of Pepsi $2.00, (Defaulted Precedence => 220 ) The engine will select a discount of $2.00 when pricing a 6 Pack of Pepsi because that will give the customer a lower price. Modifier Effectivity There are two places the pricing engine looks to determine valid Modifiers: The Active checkbox and the effectivity dates. The Active checkbox determines whether the pricing engine will consider the modifier as an option. The pricing engine will search all Active Modifiers. If a modifier is active, it must then have a current effectivity date for the pricing engine to continue. Modifier effectivity can be controlled at the header and line level. The effectivity dates of the modifier line must fall within the effectivity dates for the modifier list. UOM UOM is not a mandatory field for modifier types other than price breaks. If the Primary UOM checkbox is selected on the price list, the pricing engine will evaluate modifiers lines that have the same UOM as the ordered UOM and primary UOM. Example: Item A has a UOM of EA with Primary UOM checked for the price list line. The ordered UOM for Item A is DZN, then the engine will consider modifier lines with EA and with null values. Modifiers 12-7 Manual Adjustments Manual Adjustments To manually create a new selling price on the order line, either a discount, surcharge or new price, you must define a manual discount (to decrease the price) and a manual surcharge (to increase the price). When you move to another line or the line is saved, a new price can be typed and the manual adjustment type selected. If you have only manual overridable discounts eligible at the line level, you can only decrease the price. If you have only manual overridable surcharges eligible at the line level, you can only decrease the price. A manual adjustment has the following field value characteristics: automatic checkbox is unchecked at the modifier list and line level, Modifier Line is overridable, and the bucket is null. The pricing phase will determine when you can override the selling price. For lines in the pricing phase List Line Adjustment, you cannot override the selling price without moving to another line or saving the order for lines. For Order level adjustment, you cannot override the selling price without saving the order. If the profile option QP: Return Manual Discounts Profile Option set to Y, then ALL manual discounts will be returned and all automatic discounts that were not considered will be returned as manual discounts. This is the default value. If this profile option is set to N, then the pricing engine will return only one automatic or one manual discount. Discounts (automatic or manual) will not be returned as manual discounts. Applying Manual Adjustments In the Sales Order form, press the Actions button and select View Adjustments. In the Modifier Name field, select the LOV to view the unapplied manual adjustments for the line. In the Sales Order form Line Items Tab, choose Unit Selling Price LOV to apply line level manual adjustments. Type over the Unit Selling Price field to apply manual overridable adjustments for the line. Overtype the Unit Selling Price field to apply line level manual overridable adjustments. To manually override the selling price, verify the profile option ‘OM: Discounting Privileges’ is set to Unlimited. This allows the user to apply all eligible manual adjustments. If it’s set to Non-Overridable Only, then only non-overridable manual adjustments can be applied. Also make sure the Enforce List Price checkbox for the 12-8 Oracle Order Management Suite Implementation Manual Manual Adjustments order type is unchecked so that the order allows manual override of the selling price. Note: If you invoke the Unit Selling Price LOV twice, you may get an error message because the manual adjustment was applied the first time and there are no more manual adjustments eligible. Modifiers 12-9 Manual Adjustments 12-10 Oracle Order Management Suite Implementation Manual 13 Agreements Oracle Order Management enables you to establish agreements with your customers that let you define the prices, payment terms, and freight terms that you negotiated in your agreement. This chapter contains information about the implementation consideration of Agreements in Oracle Order Management. Topics covered in this chapter include: ■ Overview of Agreement Features on page 13-2 ■ Agreements Setup on page 13-4 ■ Defining Agreements on page 13-5 Agreements 13-1 Overview of Agreement Features Overview of Agreement Features Type of Agreement Order Management offers two different types of Agreement functionality: Standard Agreements and Pricing Agreements. Each type serves different business needs. You will need to determine how you will use each type of agreement and thus establish controls around the naming, numbering and using of each. Standard Agreement Standard Agreements use standard price lists. Price list lines are setup and maintained through the regular Price List Setup form. Use Standard Agreements to define special terms and conditions that are defaulted onto the order, but use prices that are available to other orders. Standard Agreements can be generic or can be specific to a customer or customer family. Pricing Agreements Pricing Agreements use Agreement Price Lists. These price lists are setup and maintained through the Agreements form. Use Pricing Agreements to setup special pricing arrangements with either a customer or a group of customers. You are also able to define special terms and conditions that are defaulted onto the order. Standard Agreement vs. Pricing Agreement The table below explains the difference between the two types of Agreements: 13-2 Standard Agreements Pricing Agreements Agreement lines not allowed. Agreement lines required. Associated with standard price list (type PRL). Associated with agreement price list (type AGR). Maintain and view price list lines through price list form. Maintain and view price list lines through agreement form. Use each standard price list with multiple standard agreements and to price orders not associated with an agreement. Use each agreement price list with multiple pricing agreements. Not usable to price orders not associated with an agreement. Cannot revise price list lines using agreement form. Can revise price list lines using agreement form. Oracle Order Management Suite Implementation Manual Overview of Agreement Features Standard Agreements Pricing Agreements Agreement number not automatically created as a qualifier for the associated price list. Agreement number automatically created as a qualifier for the associated price list. You can only use it to specify the pricing agreement on the order line. Agreement Revisions Order Management enables you to maintain multiple versions of the same agreement. This enables you to keep the same agreement name, make changes to the original terms, and keep a record of these changes. Create new versions by changing the Reason number field on the Agreement header. You can further manage these changes by providing a reason for the revision chosen from an LOV. You can have many versions of the agreement, but only one version of an agreement can be active. Effective date ranges must also be exclusive for each agreement version. For Pricing Agreements only, you have line level revision and reason capability that is independent of the Agreement level revision. You must manually end date the line and enter a reason number prior to entering the new agreement line. Define Special Terms Order Management enables you to define special terms for an Agreement. These become defaults to the order lines when an agreement is used on an order. Defaulted attributes include: price list, freight terms, freight carrier, payment terms, accounting rule, and invoicing rule. The values of these attributes will default to the order lines when this agreement is used on an order. Pricing Agreement Price List and Lines Pricing Agreement price lists are defined in the Agreements form on the Pricing tab. When you choose the Price List Type of Pricing Agreement, the LOV price lists that are displayed in the Price List field only those associated with Agreements. Choose to use an existing Agreement Price List, or create a new Agreement Price List. You can use each agreement price list with multiple pricing agreements. Agreement number is automatically created as a qualifier for the associated agreement price list. Only use this price list to specify the pricing agreement on the order line. You cannot use an agreement price list to price orders not associated with an agreement Agreements 13-3 Agreements Setup Pricing Agreement Price List lines are defined on the bottom block of the agreements form. Here you can define agreement prices for the agreement price list using customer part numbers and inventory item numbers. You can also maintain line revisions and keep track of these with revision reasons. Customer Items You can define Pricing Agreements for customer items. The Customer Item must be setup in the inventory system. At order entry time, you can order either by the customer item or its cross referenced internal item. Single Currency Both Standard Agreements and Pricing Agreements are for a single currency. This is the currency that is specified on the price list. If you need an agreement to apply to multiple currencies, then you need to setup multiple price lists for each currency, and then setup multiple agreements and attach the price list to each. Agreements Setup Prior to defining Agreements, you need to determine how agreements can be used in your business processes. The following needs to be considered: Agreement and Customer Relationship Agreements can be defined to be generic, that they can be used by any customer. Agreements can also be defined for a specific customer and all their related customers. Defining Agreement Types By setting up different Agreement Types (not to be confused with Type of Agreement), you can categorize agreements into a particular type. A type can be used to limit which agreements can be entered on a particular order type or a type can be used for segmenting for reporting purposes. Agreement type is not mandatory. You define Agreement Types by using the Lookups menu item under the Pricing sub-menu. Revision Reason Revision Reasons can help you track the reason why a new version of an agreement was created. This is an optional field. You define Revision Reasons by using the Lookups menu item under the Pricing sub-menu. 13-4 Oracle Order Management Suite Implementation Manual Defining Agreements Customer Items You can define Pricing Agreements for customer items. The Customer Item must be setup in the inventory system. Set customer items in Order Management Super User > Items > Customer Items. You can specify the org ID and setup customer items. The customer item must then be cross referenced to an internal item. In the agreement form, the customer item LOV shows all customer items setup for that customer and the product value has its internal item number defaulted when a customer item is chosen. Defining Agreements In this section, implementation considerations will be discussed regarding each field on the Agreements User Interface form. The differences for a Standard Agreement and a Pricing Agreement will be highlighted if any exist. For the user steps for creating an Agreement, refer to the Order Management User’s Guide. Navigate: Pricing > Pricing Agreements to get to the Pricing Agreements form shown in Figure 1. Agreements 13-5 Defining Agreements Figure 13–1 Pricing Agreements, Agreement tab Agreement Tab Agreement Name Enter an Agreement Name. A consistent, meaningful naming convention should be considered and business practices established. Consideration giving a separate naming pattern for Standard Agreements versus Pricing Agreements so a user will be able to query and identify the type of agreement. This is because the find query, using the flashlight icon, displays only the Agreement Name, Customer, Customer Number and Revision. The sort reduction is only based on Agreement Name. The contents of the Agreement Name is the name that displayed in the Sales Order Pad LOV at time of order entry. 13-6 Oracle Order Management Suite Implementation Manual Defining Agreements Agreement Number Agreement number is entered by the user. A consistent, meaningful naming convention should be considered and business practices established. This field is not mandatory. It is only informational. Revision Revision number defaults to 1 at setup time. Additional versions of the same agreement can be maintained. Each Agreement version needs to have a unique date range. There can only be one active agreement version at a time. The creation of new Agreement versions is manual. Manually change the end of the an Agreement effective date to end prior to the start of a new agreement. Only then can you create the new agreement with the same Agreement Name, new Revision number and new effective dates. Revision Date Revision Date is the date on which the revision was made. This is a mandatory field. The form checks that the revision cannot be before the start date active of the agreement. Revision Reason This field can be used to enter a reason corresponding to the agreement revision. This is an optional field. Customer This field displays a LOV of customers. If a customer is entered, then the agreement is limited to use for this customer and all its related customers. If this field is left blank, then this agreement can be used for any customer. If a customer is not specified, then fields such as Contact, Invoice-to location and Invoice Contact cannot be entered. For Pricing Agreements, you cannot use a customer item number if there is no customer. Customer Number Defaults automatically from the customer. Agreement Type Can be used for creating reports by agreement type or can be used to restrict order types to certain agreement types. Please refer to White Paper Customer Agreements in Order Management for discussion on Agreement Types. This field is optional. Contact Use this field to enter a customer contact from LOV of contacts for this customer. This field can be entered only if you have specified a customer. Effective Dates When an agreement is initially created, start date defaults to the current system date. These values can be changed. The end date will need to be changed prior to making a new revision number. Agreements 13-7 Defining Agreements Sales Person Use this field to enter Sale Person information. The LOV shows names of all active salesreps. This comes from the receivables table ra_salesreps. The LOV of sales person does not depend on the customer. Purchase Order Use this field to reference a Purchase Order for this Agreement. This is an enterable field, there is no LOV. This field does not depend on the customer. Signature Date Use this field to enter the date that the agreement was signed or the date on the purchase order. This is a referencable field only and is also to be entered by the user. 13-8 Oracle Order Management Suite Implementation Manual Defining Agreements Pricing Tab The functionality of the information on the pricing tab differs for a Standard Agreement and a Pricing Agreement. Each type and field behavior is described in Figure 2. Figure 13–2 Pricing Agreements, Pricing tab Agreements 13-9 Defining Agreements Standard Agreement Price List Type = Standard Price List If the Price List Type is a Standard Price List it means that only standard price lists can be referenced on the agreement. Once you choose that the agreement is for a standard price list this agreement must always be for a standard price list and you cannot change the price list type. Use each standard price list with multiple standard agreements and to price orders not associated with an agreement. NOTE: The default price list for an agreement can be overridden by the user on the order, but it can only be replaced by a standard price list. Price List The LOV displays only Standard Price Lists that are setup and maintained through the Price List Setup form. When you choose a Price List from the LOV, the Currency, Rounding Factor, Description fields are defaulted from the standard price list. These fields cannot be changed through the Agreements form. Any changes to these fields must be made through the Price List Setup form. Information in the Freight Carrier, Freight Terms, and Comments fields also default from the standard price list but can be updated on the agreements form. The information that is entered in the Freight Carrier and Freight Terms fields will be defaulted on the order when this agreement is referenced. Change the Standard Price List for the Agreement by choosing a different Standard Price List from the LOV. You will need to save this change, and requery the agreement form to have the agreement lines display with the values of the standard price list. The Standard Price List lines also default and display in Agreement Lines block on this form. These fields are only for display and cannot be changed through the Agreements form. Any changes to these fields must be made through the Price List Setup form. Pricing Agreement Price List Type = Agreement Price List If the Price List Type is a Agreement Price List, then the Price List is of type AGR. This means that only agreement price lists can be referenced on the agreement. Once you choose that the agreement is for an agreement price list this agreement must always be for an agreement price list and you cannot change the price list type. 13-10 Oracle Order Management Suite Implementation Manual Defining Agreements Price List The LOV price lists that are displayed in the Price List field are price lists that are only associated with Agreements. Use an existing Agreement Price List, or create a new Agreement Price List. NOTE: If you choose an existing agreement price list, you can make changes to the fields on the Pricing Tab and to the fields in the Agreement Lines. However, these changes will also be reflected in every agreement that uses this price list. The Currency, Rounding Factor fields are mandatory and must be entered. The Description, Freight Carrier, Freight Terms, and Comments fields are optional and can be entered by the user. The LOV for the Freight Carrier and Freight Terms is the same as the LOV for these fields found on the standard price list. The information that is entered in the Freight Carrier and Freight Terms fields will be defaulted on the order when this agreement is referenced. NOTE: You can use each agreement price list with multiple pricing agreements. Agreement number is automatically created as a qualifier for the associated AGR price list. You can only use this price list to specify the pricing agreement on the order line. You cannot use an AGR price list to price orders not associated with an agreement. Payment Tab The information that is entered on the payment tab will be defaulted to the order line when the agreement is referenced on the order. These have priority over other defaulted rules establish for the customer. Figure 3. shows the Payment tab. Agreements 13-11 Defining Agreements Figure 13–3 Pricing Agreements, Payment tab Payment terms Payment Terms This is a mandatory field. User chooses from LOV of payment terms. Invoice-to Field can only be entered if you specify a customer on the agreement. LOV contains the customer specified and all the related customers. Address Field is mandatory if you entered the Invoice-to field. Choose from LOV of address. 13-12 Oracle Order Management Suite Implementation Manual Defining Agreements Contact Contact field will default form information entered in Contact field on the agreements tab. Accounting Rule Optional field. User can choose from LOV of valid accounting rules. Invoicing Optional field. User can choose from LOV of valid invoicing rules. Override Flag Determines whether or not defaulting values can be overridden. Accounting Rule and Invoicing Rule If one or both of these boxes is checked, then the flag is Y. This means that during the receivables interface, the item or order rules could override the rules set on the agreement. Agreement Lines Pricing Agreement Price List lines are defined on the bottom block of the agreements form. Here is where you can define your agreement prices for the Agreement Price Lists only. The Standard Price List lines default and display in Agreement Lines block. These fields are only for display and cannot be changed through the Agreements form. Any changes to these fields must be made through the Price List Setup form. Customer Item You can optionally define prices for customer items. The Customer Item must be setup in the inventory system. You can set customer items in Order Management Super User > Items > Customer Items. You can specify the org ID and setup customer items. The customer item must then be cross referenced to an internal item. In the agreement form, the customer item LOV will show all customer items setup for that customer and the product value will have its internal item number defaulted when a customer item is chosen. Address and Address Category The address and address category fields get defaulted when a customer item is chosen from the LOV if these values exist for the customer item. These fields do not have any individual LOV’s. Product Value Choose the item for the LOV that you want to define an agreement price. If you have defined a customer item on this line, then the LOV of product values contains the valid cross referenced values. It is mandatory to have a product value if you have customer item. Agreements 13-13 Defining Agreements UOM Specify the UOM for the product value. Primary UOM You can make this item UOM be the primary UOM. Please refer to definition of Primary UOM in the Order Management user guide, Price List chapter. Line Type Enter Price Break Header if you want to create price breaks for this line item. Price Break Type This defaults of price break type if this line is a price break line. Application Method Field defaults to Unit Price. Value Enter the base price value of the agreement line item. Start Date Optionally enter the Start Date that this value is effective. End Date Optionally enter the End Date that this value is effective. Note: the start date and end dates must be with in the date range of the Agreement. Comments Optionally enter user comments. Revision You also have line revision capability that is independent of the Agreement level revision. You must manually end date the line and enter a reason number prior to entering the new agreement line. Revision Reason This field can be used to enter a reason corresponding to the agreement revision. This is an optional field. Revision Date Revision Date is the date on which the revision was made. This is a mandatory field if you made a line revision. The field defaults with the date that the line revision was entered. Pricing Attributes Button: You can enter pricing attributes for the internal item. These attributes are defined and work exactly like pricing attributes for standard price lists. Please refer to the Pricing Attribute documentation in the Order Management user guide, Price List chapter. Price Breaks You can enter different prices for this item based on the quantity ordered. Enter the quantity range and a corresponding price for this range 13-14 Oracle Order Management Suite Implementation Manual 14 GSA Pricing This chapter provides information on the implementation of the GSA Pricing functionality and how this feature can be used for companies that follow the Government Services Administration pricing guidelines, or to create minimum price floors. Topics covered in this chapter include: n Overview of GSA Features on page 14-2 n Setup GSA Pricing on page 14-3 n Defining GSA Pricing on page 14-4 GSA Pricing 14-1 Overview of GSA Features Overview of GSA Features Oracle Order Management provides functionality that enables you to identify when a selling price of an item falls below a minimum price. This functionality is used in companies that have Government Services Administration agreements. Commercial customers, otherwise known as non-GSA customers, should not receive a selling price for an item that is equal or less than a price for a GSA customer. Order Management only provides functionality to manage this pricing practice. It does not provide any official GSA pricing policies. The setting up and managing of GSA customers is solely the responsibility of internal corporate policies and practices. Business practices for overriding GSA violation warnings should be determined by the company. Even though this feature is designed to enforce GSA Pricing, it’s functionality can also be used to set price floors. Government Services Pricing Guidelines GSA policies require that commercial (non-GSA) customers of a company do not receive equal or greater discounts than GSA customers. If the price of the same item is equal or lower then it causes a GSA violation. Oracle Order Management provides functionality to warn when a GSA violation has occurred. The GSA Advantage policy allows the Order to have several ship-to locations but a single bill-to (GSA Address). Order Management also provides functionality to allow different ship-to addresses on the same order. Order Management also allows you to have more than one bill-to address for a customer, but only the bill-to addresses checked GSA will get the GSA price. Minimum Price Floors Even if your business is not governed by the pricing rules of the Government Services Administration, the GSA Pricing functionality can be used to monitor minimum price floors for items. Thus, you have the ability to define price minimums and issue warnings when selling prices go below this minimum. GSA Pricing = GSA Discount In R11i Oracle Order Management, there is a new form and name for creating GSA Prices. However, the functionality is similar to that of R11 Order Entry GSA Discounts. The GSA Pricing form actually uses the Modifier technology. When you setup a GSA price, you are actually creating a modifier discount with an application method of new price. At order entry time, when the item is entered for a GSA customer, the base price will be returned 14-2 Oracle Order Management Suite Implementation Manual Setup GSA Pricing from the regular price list. When you leave the order line, the New Price discount will be applied and become the new base price. A price adjustment will be created for the difference of the new price and the base price: For example: Base Price Item A: $12 GSA Price Item A: $10 Unit Selling Price on Order Line: $10 GSA Discount Item A: $2 A GSA Discount is created for the requirement that some companies need to manage the discounts given to GSA customers. The value of these discounts represents the loss in revenue for an item for doing business with a GSA customer verses a non-GSA customer. GSA Violation A GSA Violation occurs when the price of an item for a non-GSA customer is equal to or less than the price of this item in the GSA Price List. This will cause a GSA violation. In Oracle Order Management there is a profile option that determines how the company wants this violation to be controlled. In the event of multiple GSA price lists, the violation floor will be set based on the GSA price list with the highest price for the item. Setup GSA Pricing Creating a GSA Customer To identify a customer as being eligible to receive a GSA Price, the GSA box needs to be checked. The GSA box is located on the Customer record on the Order Management tab. You can navigate to the Customer form from Oracle Order Management > Customers > Standard. Only GSA customers can receive prices that are on the GSA price list. If you want to use the GSA functionality for monitoring price minimums, then you do not need to specify any customers as being GSA. QP: Verify GSA The GSA Pricing feature must be enabled before it can be used. The profile option QP: Verify GSA controls is the comparison between the selling price for items being sold to GSA Pricing 14-3 Defining GSA Pricing non-GSA customers and items price in the GSA Price List. The default value of ‘No’ must be switched to Yes before the GSA Pricing functionality will work. You must enable this system profile option to use the GSA functionality for monitoring price minimums. OM: GSA Discount Violation Action Order Management lets you define how to notify the user when a GSA Violation has occurred. The system profile: OM GSA Discount Violation Action determines what will occur in the event of a GSA Violation: Prevent GSA Violation by Causing Error or Issue Warning when GSA Rules are violated. The default value for this profile option is to issue a warning. The business practice should dictate how this profile option is set. GSA Violation Hold Oracle Order Management has seeded the hold type: GSA Violation Failure. If the OM: GSA Discount Violation Action is set to Prevent GSA Violation by Causing Error, orders that are in GSA violation will automatically be placed on hold. The GSA Violation holds are automatically released if the order or order line is updated and no longer violates the business rule due to which the hold was applied. Defining GSA Pricing The GSA Pricing form is found in Oracle Order Management > Pricing > Price Lists > GSA Pricing Setup. The form name is Define Modifier - Define GSA Price. GSA Pricing uses the modifier technology to apply GSA Prices (i.e. GSA Discounts as described above). This form has been coded to only accept GSA Price setup. You cannot use this form to define any other modifiers. In this section, implementation considerations will be discussed regarding each field on the GSA Pricing form. For more information of the functionality of the fields in the modifier form, refer to the Modifier Implementation section. Main Tab Define Modifier to view the Oracle form. 14-4 Oracle Order Management Suite Implementation Manual Defining GSA Pricing Type This field is coded to default to Discount List. This field cannot be changed. Number GSA Pricing, i.e. GSA Discount is entered by user. This number will be the reference number used for the GSA Discount that is created when the GSA New Price is applied. This number will be displayed in the Modifier Number field in the View Adjustments form. The field is AlphaNumeric. A consistent, meaningful naming convention should be considered and business practices established. Name This field is used for reference. Entry is mandatory. GSA Pricing 14-5 Defining GSA Pricing Version You can have more than one version of a GSA Price list, but only one version is allowed to be active at a time. This activity is controlled by the effectivity dates on the list header. Currency This field is mandatory. The default is USD. Other currencies are allowed because this feature can be used for price floors and not just GSA Pricing which is a USA Government regulation. Start Date User can define dates that this GSA Price list is effective. If the date fields are blank then this GSA Price list is effective. Description Field is for reference only. List Qualifiers The GSA flag on the customer record defines a customers GSA status. This flag must be set for Customers to be eligible to receive a GSA Price. Using List Qualifiers in Oracle Order Management, you have the ability to define GSA Price lists that are specific to a GSA Customer. If there are no List Qualifiers defined for a GSA Price List, then all GSA customers are eligible to receive the prices on the GSA Price list. If you are using the GSA Pricing functionality to monitor price floors, then you would not define any customers as GSA, and you would not define any customers in the List Qualifiers. Grouping Number You can use both And or Or grouping numbers for Qualifiers. Qualifier Context Qualifier context LOV is limited to Customer or Modifier List. Qualifier Attribute Qualifier attributes are limited per context: Customer Context: Customer Name or Site Use Modifier List Context: Price List 14-6 Oracle Order Management Suite Implementation Manual Defining GSA Pricing Operator You can define operators as being equal, between, or not equal. Between cannot be used to validate alpha character ranges. It is only used for numeric and thus will most likely not be used to define any of these qualifiers. Value From Depending on the qualifier attribute, the LOV contain: Customer Name - LOV of GSA customers Site Use - LOV of Sites. The LOV is independent of any customers defined as qualifiers on this form. Price List - LOV contains all Price Lists. If Price List is a qualifier, the Price List must be used on order for this GSA Price to apply. OK Button After entering information into the List Qualifier form, the OK button saves the data. You do not need to hit the save icon from the main form to save the List Qualifier data. Modifier Summary Modifier No Field used for reference; optional. Level Coded for Line level. Cannot be changed by user. Modifier Type Coded for Discount type. Cannot be changed by user. Start Date & End Date User can enter line level start and end effectivity dates. Date range must be valid with in any dates that are defined on the list header. Automatic Coded as automatic Yes. Cannot be changed by user. If customer is eligible to receive GSA price, then the GSA price is automatically applied. GSA Pricing 14-7 Defining GSA Pricing Override Coded as No. A GSA Price cannot be overridden. Proration Type Coded as None. Cannot be changed by user. Pricing Phase Coded as List Line adjustment. Cannot be changed by user. Incompatibility Group Coded as Level 1 Incompatibility. Cannot be changed by user. Bucket Coded as 1. Cannot be changed by user. Product Attribute Coded as Item Number. Cannot be changed by user. Product Attribute Value User enters Item Number value from LOV of items. Precedence Precedence can be used to determine which new price value to apply if an item is found on more than one GSA Price List, and a GSA customer is eligible to receive both. The item value with the highest precedence (i.e. lowest precedence number) will be applied. UOM User can enter UOM for item if more than one UOM exist. Application Method Coded as New Price. Cannot be changed by user. 14-8 Oracle Order Management Suite Implementation Manual Defining GSA Pricing Value User enters New Price value of GSA Price. User does not enter the GSA discount value. The GSA Discount value will be calculated automatically when the GSA New Price is applied on GSA Pricing 14-9 Defining GSA Pricing 14-10 Oracle Order Management Suite Implementation Manual 15 Formulas This chapter contains information about the implementation considerations of Pricing Formulas in Oracle Order Management. Topics covered in this chapter include: ■ Overview of Formulas on page 15-2 Formulas 15-1 Overview of Formulas Overview of Formulas Oracle Order Management offers the ability to create formulas (mathematical expressions) that the pricing engine uses to calculate the list prices of items and the discounts that apply to them. You can use these formulas to: Create a price from a computation as an alternative to entering prices in a price list. Calculate a price adjustment. For example, you can instruct the pricing engine to calculate Freight and Special charges by attaching a formula to a discount line. Meet different business needs. Determine how to use each formula and establish controls around the naming and description of each formula. NOTE: In Oracle Order Management Basic Pricing only static formulas can be used. This requires that prior to running any newly created or updated formulas, a concurrent process must be run prior to any order entry activity, in order to update any prices in price lists. Defining Formulas In this section, implementation considerations will be discussed regarding each field on the Pricing Formulas User Interface form. For the user steps for creating a formula, refer to the Oracle Order Management User’s Guide. Formula SetUp Form Navigate: Pricing>Pricing Formulas>Formula Setup to view the Pricing Formulas form depicted in Figure 1. 15-2 Oracle Order Management Suite Implementation Manual Overview of Formulas Figure 15–1 Defining Formulas Formula Name Enter the Formula Name. A consistent, meaningful naming convention should be considered and business practices established. Consideration should be given to having a naming pattern that will facilitate users ability to query and identify formulas in a meaningful way. This is because the find query, using the flashlight icon, displays only the Formula Name and Effective dates on which to query. The name field will have a LOV with all existing formulas. The sort reduction is only based on Formula Name. Description User enters a brief description of what the formula relates to. Formulas 15-3 Overview of Formulas Effective Dates User enters Start and End Dates. A Start Date and null End Date will keep the formula active at all times. Entering an End Date specifies a beginning and ending effective date and can be used to end or make a formula ineffective. Formulas cannot be deleted. Formula The user enters the mathematical expression of the formula. Operands are *,+,- and ( ), / Formula Type User enters Formula Line Type. A the line types can be used throughout the formula. Basic Pricing uses three formula line types: 1. Numeric Constant. Requires the numeric constant in Component 2. Pricing Attribute. A single context must be used for all formula steps. 3. Factor List. These line types can be used throughout the formula. Pricing Attribute Context Select the pricing context in Pricing Attribute Context Pricing Attribute Select the pricing attribute name in Pricing Attribute. Factor List Select an existing factor list from the list of values, or create a new factor list, by entering the name and the form Whenever Factor List is entered as a formula line type, the Factors Button is activated. Component For Numeric Constant, enter the numeric constant in this field. For Pricing Attribute, enter the attribute being used related to the Pricing Attribute Context selected. For Factor List, enter or select a Factor List name. Step Enter the step for which this line is to be used. Defining Factor List Factor lists are defined in the Pricing Formulas window, Formula Lines, by selecting the Factors tab which displays the Factors window. This tab is activated whenever a factor list line type is entered in Formula Type. Selecting this tab will open the Factors form, shown in Figure 2, with the Factor List name entered in the Component. 15-4 Oracle Order Management Suite Implementation Manual Overview of Formulas Figure 15–2 Factors Form Base Pricing Attributes Factor information is entered in the columns of this region Base Pricing Attribute Context Select a value for Base Pricing Attribute Context. If you have multiple entries, you must use the same base context in this region (to create an OR condition); the pricing engine chooses one of the entries. BasePricing Attribute Select a value for Base Pricing Attribute Operator A Comparison Operator of ‘Between’ will require a Value From. The Value To defaults to unlimited. A Comparison Operator of ‘=’ only allows a Value From value, no Value To. Formulas 15-5 Overview of Formulas Adjustment Factor Enter a numerical adjustment factor in this region. Associate Pricing Attributes Use the Associate Pricing Attributes region to associate additional contexts with the base context (to create an AND condition). Associated Pricing Attribute Context Select a value for Associated Pricing Attribute Context. Associated Pricing Attribute Select a value for Associated Pricing Attribute. Operator A Comparison Operator of ‘Between’ will require a Value From. The Value To defaults to unlimited. A Comparison Operator of ‘=’ only allows a Value From value, no Value To. Updating Formula Pricing In this section, implementation considerations will be discussed regarding the updating of Formulas after original creation or updating existing formulas. It is important to understand that formulas will not update prices or changes unless a concurrent process is run prior to any order entry activity. Not doing so, will not update or change any previously defined formula. 15-6 Oracle Order Management Suite Implementation Manual Overview of Formulas Figure 15–3 Update Formula Prices Update formula prices Navigate: Pricing > Pricing Formulas > Update Formula Prices to the Update Formula Prices form displayed in Figure 3. New and Modified Lines Only Select New and Modified Lines Only of Price Lists to calculate formula-based prices for price list lines whose formulas you have added or changed since the process was last executed. To calculate formula-based prices for all price list lines, clear the New and Modified Lines Only of Price Lists. Update All Pricing Formulas for Price Lists To include price list lines that have any formula, select Update All Pricing Formulas for Price List. Update Individual Pricing Formula for Price Lists To include price list lines that have a specific formula: Select Update Individual Pricing Formula for Price Lists In Pricing Formula, select the pricing formula from the list of values. The process applies this choice after it selects the price list lines whose formulas you have added or changed since the process was last executed. Formulas 15-7 Overview of Formulas Note: You must remember to do this process after creating or changing any formulas in order for the engine to calculate and update the related price list lines covered by the formula. 15-8 Oracle Order Management Suite Implementation Manual 16 Pricing Profiles Topics covered in this chapter include: ■ Overview on page 16-2 ■ Profile Options on page 16-2 ■ Setup Profile Options Summary on page 16-2 Pricing Profiles 16-1 Overview Overview This chapter contains information about the implementation considerations of Profile Options and System Parameters at Implementation time in Oracle Order Management. Discussion will be limited to those Profiles and Parameters required by Pricing. Profile Options During implementation, value for each user profile option is defined to specify how Oracle Pricing controls access to and processes data. The system administrator usually owns the tasks of setting and updating profile values. For more information see Oracle Applications System Administrator’s Guide. Setup Profile Options Summary The table below indicates whether you can view or update the profile option and at which System Administrator levels the profile options can be updated: User, Responsibility, Application, or Site levels. A Required profile option requires you to provide a value. An Optional profile option already provides a default value, so you only need to change it if you do not want to accept the default. Profile Option User System Administrator Requirements User Use r Re A Site sp pp Required ? Default Value QP: Blind Discount Option - 0 0 n n Required Yes QP: Line Volume UOM Code - 0 0 n n Optional No Default QP: Line Weight UOM Code - 0 0 n n Optional No QP: Negative Pricing - 0 0 n n Required No Default OM: Allow Negative Pricing - 0 n n n Optional 16-2 Oracle Order Management Suite Implementation Manual Setup Profile Options Summary Profile Option User System Administrator QP: Item Validation Organization - 0 n 0 n Required No Default QP: Source System Code 0 0 0 n n Required No Default QP: Unit Price Precision Type 0 0 0 n n Required Standard QP: Verify GSA 0 0 0 0 n Required No OM: GSA Discount Violation Action 0 0 0 0 n Optional Warning QP: Return Manual Discount - 0 0 n n Optional Yes OM: Discounting Privilege 0 n n n 0 Optional Full OM: Show Discount Details on Invoice - 0 n n n Required No Requirements QP: Bypass the Pricing Engine n You can update the profile option. - You can view the profile option value but you cannot change it. 0 You cannot view or change the profile option value. QP: Blind Discount Option Default Value: Yes The default value for this profile option should only be changed if you never define blind discounts. Used for tuning purposes. If you never define Blind Discounts set this profile option to No; This will bypass part of the Search engine processing. A Blind Discount is defined as a Modifier that has: No List Qualifiers on the Modifier List Header and No Line Qualifiers on the Modifier and No Products or Pricing Attributes Pricing Profiles 16-3 Setup Profile Options Summary Note: If your business needs to define a Modifier as described above, make sure that this profile option is set to Yes otherwise these Modifiers will not be selected by the Search Engine Values Yes = Blind Discounts are enabled. No = Blind Discounts are disabled, i.e. Bypass Blind Discount processing in Search Engine. This profile option is visible and updateable at the site and application levels. QP: Bypass the Pricing Engine Default Value: No The default value for this profile option should only be changed for debug purposes. Used for debug purposes. Values Yes = The search engine will bypass standard processing. Instead the engine will simply return a fixed base and adjusted price on the pricing request line. No = The search engine will perform standard processing This profile option is updateable at the site, application and responsibility levels. QP: Line Volume UOM Code Default Value: None This is required if your business needs to define qualifier rules which include the seeded qualifier Line Volume. Specifies the unit of measure of the Line Volume Qualifier. The attribute sourcing API converts the item on the Request Line to its primary UOM, and then uses the volume attributes of the item to derive the Line Volume of the item in the UOM specified in this profile option. Values All units of measure currently defined to Oracle. This profile option is visible and updateable at the site and application levels. QP: Line Weight UOM Code Default Value: None 16-4 Oracle Order Management Suite Implementation Manual Setup Profile Options Summary This is required if your business needs to define qualifier rules which include the seeded qualifier Line Weight. Specifies the unit of measure of the Line Weight Qualifier. The attribute sourcing API converts the item on the Request Line to its primary UOM, and then uses the weight attributes of the item to derive the Line Weight of the item in the UOM specified in this profile option. Values All units of measure currently defined to Oracle. This profile option is visible and updateable at the site and application levels. QP: Negative Pricing Default Value: No The default value should only be changed if your business needs to define a negative price on a price list line. Controls whether a negative price can be entered in the Price List Setup U.I. Values Yes = Allow a negative price to be entered. No = Do not allow a negative price to be entered. This profile option is visible and updateable at the site and application levels. OM: Allow Negative Pricing This profile option determines whether or not a negative list price or selling price can be entered on an order. Choose from Yes or No. For example: a trade in item may be entered on an order with the trade in value as a negative value. QP: Item Validation Organization Default Value: None Set this to an organization at the level in your organization hierarchy at which you set prices for items. Indicates the Oracle Manufacturing organization that items are validated and viewed against when entering items in the Price List or Modifier U.Is. Set the QP: Item Validation Organization profile, by site or responsibility, to an organization at the level in your organization hierarchy at which you set prices for items. Values Pricing Profiles 16-5 Setup Profile Options Summary All inventory master organizations currently defined to Oracle This profile option is visible and updateable at the site and responsibility levels. QP: Source System Code Default Value: QP: Oracle Pricing The default value should only be changed if the source of the pricing data is any application other than Oracle Pricing. Set this to the Source System Lookup Code of the application which is interfacing the pricing data Used in all setup U.Is to identify the application through which the pricing information is being entered. This Source System code is held on all Price and Modifier Lists to identify the origin of the data. At the time of pricing, the pricing engine may restrict its search to pricing information which originated from a particular application depending on the Request Type to Source System Setup. Note: Set the QP: Source System Code Profile to the Source System Lookup Code of the application from which the QP Setup or other application setup U.Is are being called. Values QP: Oracle Pricing This profile option is updateable at the site and responsibility levels. QP: Unit Price Precision Type Default Value: Standard This profile option change a the default value if you need to round to the currencies extended precision. Used to determine the value for the rounding factor which is defaulted on the Price List. The rounding factor is limited by the number of positions allowed in the standard or extended precision format of the price list currency. Values Extended = Rounding Factor is defaulted to the currencies extended precision Standard = Rounding Factor is defaulted to the currencies standard precision This profile option is updateable at the site and application levels. 16-6 Oracle Order Management Suite Implementation Manual Setup Profile Options Summary QP: Verify GSA Default Value: No Change the default value to Yes if your business requires GSA pricing functionality Indicates whether the pricing calculation engine should test for GSA violations. The evaluation is performed if a request is for a non-GSA customer, and GSA rules are violated if the selling price of an item is calculated to be less than the price of the item on any GSA price list. Values Yes = Pricing Calculation engine tests for GSA violations, any violating request lines are returned to the calling application with a status of GSA violation. No = Do not test for GSA violations. This profile option is updateable at the site level. OM: GSA Discount Violation Action This profile option determines how you want the user notified when you define a discount that results in an item price less than the price on a GSA discount for the same price list. This is required to be set at Yes, if you want order entry personnel to receive a warning message of GSA violation and the QP: Verify GSA is set to Yes. QP: Return Manual Discounts Default Value: Y If the profile option is set to Y' Value Yes = In Basic Pricing, this option is defaulted to Y and should not be changed. This will duplicate R11 functionality. One automatic discount will be applied. All the manual discounts will be returned for user selection. All the automatic discounts that do not get used as part of incompatibility processing will be returned as manual discounts available for user selection. No = All automatic and manual discounts will go through incompatibility processing and one of them under each incompatibility group will be returned. In this process an automatic discount might get ignored and a manual discount might get selected. Discounts (automatic or manual) ignored as part of incompatibility processing will not be returned as manual discounts. Pricing Profiles 16-7 Setup Profile Options Summary OM: Discounting Privilege This profile option determines the choice of controlling users’ ability to apply discounts on an order or order line. Values Full = Ability to apply any valid discount against an order or order line, as long as the order type of the order does not enforce list prices. (Default Value). Non-Overridable Only = Ability to apply only non-overridable discounts against an order or order line. Unlimited = Ability to apply any valid discount against any order or order line, regardless of whether the order type of the order enforces list prices. 16-8 Oracle Order Management Suite Implementation Manual 17 Using Defaulting Rules in Basic Pricing Topics covered in this chapter include: ■ Overview on page 17-2 Using Defaulting Rules in Basic Pricing 17-1 Overview Overview Some of the defaulting decisions established in Oracle Order Management (OM) can potentially change the final price fetched by the pricing engine. It is imperative to carefully select your defaulting values during order entry . Pricing Date Pricing date instructs the pricing engine to price the order using list prices and benefits that are valid on that day. At the Order Line level, you can setup a defaulting rule to default the pricing date entered in the order header, ordered date or requested date etc. By controlling the defaulting value of the pricing date you control the LOV of price lists being queried in OM and the list price and benefits applied on to the order. Agreement By entering an agreement name on an order the customer is able to receive the prices negotiated in the agreement. Agreement is tied to a standard price list or an agreement price list. An agreement price list could be chosen in OM only if the agreement to which the price list is tied to has been entered in the Sales Order screen. You can use agreements to default Sales person, Purchase Order Number, Payment terms, Freight terms, etc. Price List The price list on the order line is used to fetch the list price and apply benefits. If the item is not found in the price list, the secondary price list is searched. If the item is not listed on the secondary price list, or if there is no secondary price list, an error message is given. If an agreement is mentioned on the order, then standard price lists and agreement pricelist attached to the agreement can be used. Price lists can be defaulted from customer, agreement, or order type. Currency Code The pricing engine searches for the price lists and benefits in the currency code mentioned on the order. Use defaulting to control the currency in which the order is going to be priced. 17-2 Oracle Order Management Suite Implementation Manual 18 Simple Pick & Ship Process Topics covered in this chapter include: ■ Overview on page 18-2 ■ Required Setup on page 18-2 ■ Process Steps on page 18-3 Simple Pick & Ship Process 18-1 Overview Overview The Simple Pick and Ship process is the business process used to pick and ship an order in the most expedient method. When an order line reaches the Order Management workflow Shipping Activity, Order Management calls Shipping Execution to indicate the line is ready to import. Shipping then imports the order line. Setting defaults in the Organization and Shipping Parameters will allow the Simple Pick and Ship process to occur. Required Setup To accomplish Simple Pick & Ship, the following setups are required: Organization Parameters Navigate: Order Management > Shipping > Setup > Organization Parameters. On the ATP, Pick, Item-Sourcing tab, ensure that the Pick Confirmation Required check box is UNCHECKED. This will allow Inventory to automatically pick confirm each move order line. Shipping Parameters Navigate: Order Management > Shipping > Setup > Shipping Parameters. Pick Release tab Check Autocreate Deliveries and Auto Allocate boxes. Autocreate Deliveries will use the defined Delivery Grouping Rules to group delivery lines into deliveries. Auto Allocate will use the Picking Rules that you have defined in Inventory to determine the source. Delivery Grouping tab You can define delivery grouping rules, based on conditions that make sense to your business process. Ship From Location and Ship To Location are mandatory. Six additional attributes enable multiple grouping options; customer, freight terms, FOB code, intermediate ship to locations, ship method, and carrier. Picking Rules Navigate: Inventory > Setup > Rules > Picking. When you define an item you choose a picking rule to determine the order in which revisions, lots, subinventories, and locators are picked for sales orders. Oracle Shipping Execution submits requests to Oracle Inventory, which uses the information you enter in the Picking Rules window to generate pick lists for sales orders. If you choose None for any of the criteria fields, Inventory ignores that criterion. For example, if you 18-2 Oracle Order Management Suite Implementation Manual Process Steps choose None for Revision, Inventory picks units of an item without regard to revision levels. Oracle Inventory looks at the picking criteria in the order in which they appear in the Picking Rules window. Then, Inventory looks at the options (except for None options) for each criterion in the order in which they appear beneath each criterion. Defaulting Rules Navigate: Order Management>Setup>Rules>Defaulting Ship Method, Freight Terms and FOB are fields which appear on the Order Header that could be helpful to have default at the time the order is created, depending on your business process. They may also be entered or the defaults overridden at the time the order is created. These fields can be entered until the Delivery has been Ship Confirmed. Once the Delivery has been Ship Confirmed, changes can not be made to the above mentioned fields. Process Steps Enter and book order. Note: Import Delivery Lines must occur before order lines are visible in Shipping as Delivery Lines. This can be triggered manually or as a concurrent process that can be set to run at specific time intervals. Navigate: Shipping > Interfaces > Run > Import Delivery Lines (choose Order Management as the Parameter). Launch Pick Release. There are several ways to launch Pick Release however the most streamlined method would be to set up Pick Release to run as a concurrent process. Navigate: Shipping > Release Sales Orders > Release Sales Orders SRS. Other methods for launching Pick Release are: From the Shipping Transaction Form(STF): - Select specific Delivery Lines for Pick Release by selecting one or multi-selecting many delivery lines , then Navigate: Action > Launch Pick Release and click on the ‘Go’ button. (Once created, Containers/LPNs, Deliveries, Stops and Trips can also be submitted for Pick Release through the STF.) - You can also bring up the Release Sales Order form while in the Shipping Transaction form by using the Tools menu and selecting the Pick Release Form. Finally, Pick Release can be run manually. Navigate: Shipping > Release Sales Orders > Release Sales Orders Simple Pick & Ship Process 18-3 Process Steps Note: When Pick Releasing using the Release Sales Order form, any of the defaults set in the Organization and Shipping Parameters can be overridden for that particular Pick Release. Ship Confirm the Delivery (i.e.) associated to the lines from the order. On the Ship Confirm form, check Set Delivery In Transit and Auto Close Trip. Navigate: Order Management > Shipping > Transactions, choose the Delivery tab, highlight the desired delivery (for multiple selections, hold the shift key and left click each delivery). Go to Actions, choose Ship Confirm and click the Go button, the Ship Confirm window will appear. Check the Set Delivery In Transit box and the Auto Close Trip box. The Set Delivery In Transit will automatically update the status of each Delivery to In Transit. The Auto Close Trip will change the status of the Stops Picked up or Dropped Off and the status of the Trip will be Closed. By checking these boxes, the delivery lines will be available to the Receivables Interface. (Process Order API and Inventory) 18-4 Oracle Order Management Suite Implementation Manual 19 Simple Pick & Ship Process Using Mobile Devices and UPS Topics covered in this chapter include: ■ Overview on page 19-2 ■ Required Setup on page 19-3 ■ Process Steps on page 19-4 Simple Pick & Ship Process Using Mobile Devices and UPS 19-1 Overview Overview A variation of the Simple Pick and Ship process includes the use of mobile devices to streamline the picking process and incorporate real time shipment information utilizing the four API’s that have been built as a result of Oracle’s collaboration with United Parcel Service (UPS). These two features are independent of one another and can be used separately or together as described in this scenario. This business process starts when your company receives an order from your customer and you would like to pick and ship using mobile devices. In this scenario, the preferred carrier is UPS. Once the order line reaches the Order Management workflow Shipping Activity, Order Management calls Shipping Execution to tell them the line is ready to import. Shipping then imports the order line. Setting defaults in the Organization and Shipping Parameters will allow the Simple Pick and Ship with mobile devices process to occur. Enabling the profile option, WSH: Internet Proxy URL, allows your company to exchange information with UPS via APIs. This scenario employs the use of Oracle Mobile Supply Chain Applications, a new module available in Release 11i. that provides mobile user interfaces for Inventory (to include shipping and receiving), Work in Process (WIP), and Quality. 19-2 Oracle Order Management Suite Implementation Manual Required Setup Required Setup To accomplish Simple Pick & Ship using Mobile Devices and UPS, the following setups are required: Organization Parameters Navigate: Order Management > Shipping > Setup > Organization Parameters ATP, Pick, Item-Sourcing tab Ensure that the Pick Confirm Required check box is CHECKED. This will allow you to manually Pick Confirm each move order line utilizing mobile devices. Shipping Parameters: Navigate: > Order Management> Shipping > Setup > Shipping Parameters Pick Release tab Check Autocreate Deliveries to use the Delivery Grouping Rules you have defined to group delivery lines into deliveries Check Auto Allocate to use the Picking Rules that you have defined in Inventory to determine the source. Delivery Grouping tab Define delivery grouping rules, based on conditions that make sense to your business process. Ship from location and Ship to location are mandatory. There are six additional customer, freight terms, FOB code, intermediate ship to locations, ship method, and carrier. Profile Option Navigate: Order Management > Shipping > Setup > Profiles WSH: Internet Proxy URL must be enabled for your company to access the UPS servers via API. If your site does not have a firewall, you do not need to set the profile. This profile can only be modified by the System Administrator at the site level. Picking Rules Navigate: Inventory > Setup > Rules > Picking. When you define an item, define a picking rule to determine the order in which revisions, lots, subinventories, and locators are picked for sales orders. Oracle Shipping Execution submits pick requests to Oracle Inventory, which uses the information entered in the Picking Rules window to generate allocations for sales orders. If you choose None for any of the criteria fields, Inventory ignores that criterion. For example, if you choose None for Revision, Inventory picks units of an item without regard to revision levels. Inventory looks at the picking criteria in the order in which they appear in Simple Pick & Ship Process Using Mobile Devices and UPS 19-3 Process Steps the Picking Rules window. Then, Inventory looks at the options (except for None options) for each criterion in the order in which they appear beneath each criterion. Defaulting Rules Navigate: Order Management > Setup > Rules > Defaulting Ship Method, Freight Terms and FOB are fields which appear on the Order Header that could be helpful to have default at the time the order is created, depending on your business process. They may also be entered or the defaults overridden at the time the order is created. These fields can be entered until the Delivery has been Ship Confirmed. Once the Delivery has been Ship Confirmed, changes can not be made to the above mentioned fields. Process Steps Enter and book order Note: Import Delivery Lines must occur before order lines are visible in Shipping as Delivery Lines. This can be triggered manually or as a concurrent process that can be set to run at specific time intervals. Navigate: Shipping > Interfaces > Run > Import Delivery Lines (choose Order Management as the Parameter) Launch Pick Release There are several ways to launch Pick Release however the most streamlined method would be to set up Pick Release to run as a concurrent process. Navigate: Shipping > Release Sales Orders > Release Sales Orders SRS. Other methods for launching Pick Release are: From the Shipping Transaction Form(STF): Select specific Delivery Lines for Pick Release by selecting one or multi-selecting many delivery lines , then Navigate: Action > Launch Pick Release and click on the ‘Go’ button. (Once created, Containers/LPNs, Deliveries, Stops and Trips can also be submitted for Pick Release through the STF.) You can also bring up the Release Sales Order form while in the Shipping Transaction form by using the Tools menu and selecting the Pick Release Form. Finally, Pick Release can be run manually. Navigate: Shipping > Release Sales Orders > Release Sales Orders 19-4 Oracle Order Management Suite Implementation Manual Process Steps Note: When Pick Releasing using the Release Sales Order form, any of the defaults set in the Organization and Shipping Parameters can be overridden for that particular Pick Release. Pick Confirm via Mobile Device The Pick Release process in R11i is two fold. The first portion is allocation and the second part is pick confirm. Using the default in the Shipping Parameters to auto allocate will tell the system to use the Picking Rules that you have defined in Inventory to determine the source of the item to be picked. The picker will receive the item and source information on the pick slip and can confirm that pick transaction or change the details to reflect material that was actually picked on the mobile device. When the item is picked from its source location, the picker will verify the information on the mobile device by scanning the location and item bar codes and transfer the item to the staging location. The verification and staging transfer represent the second step of the Pick Release process, Pick Confirm. The quantity, serial #, lot and location can all be confirmed on the mobile device and transmitted back to Inventory as the pick confirmation for each move order line. Once both steps of Pick Release are completed, the delivery line is eligible to be Ship Confirmed. Note: Pick Confirm can be committed through the standard forms if Mobile Supply Chain Applications (MSCA) are not employed, Navigate: Inventory > Move Orders > Transact Move Orders, select the desired move order lines and then transact. Simple Pick & Ship Process Using Mobile Devices and UPS 19-5 Process Steps Figure 19–1 MSCA Query Pickwave Move Order screen using Sales Order number to display Allocation information 19-6 Oracle Order Management Suite Implementation Manual Process Steps Figure 19–2 MSCA Pick Confirm by validating the information for each Move Order Line. Select UPS API The UPS APIs can be accessed in the Shipping Transaction form from the Lines/LPNs tab or the Delivery tab, Navigate: Order Management > Shipping > Transactions > Actions, choose from one of the four API’s below: Rate & Service Selection: Calculate estimated rates and service costs in US dollars for deliveries, delivery lines and containers and update freight cost value for a delivery line. Currently, this service is available for US domestic shipments. Address Validation: This window validates the Ship From and Ship To address postal codes for deliveries, delivery lines and containers and matches it with the UPS address information. Currently, this service is available for US domestic shipments. Ground Time in Transit: Using UPS Ground Level Service, view how long it takes to ship between a shipment’s origin and it’s destination. The time in transit displays Simple Pick & Ship Process Using Mobile Devices and UPS 19-7 Process Steps in business days. This is available for deliveries, delivery lines and containers. Currently, this service is available for US domestic shipments. Shipment Tracking: Track UPS ground shipments for delivery lines and containers and view information such as tracking numbers, status and service type. You can also view detailed tracking information for a selected line such as the date and location where a package was picked up or dropped off. Shipment tracking is available for international as well as US domestic numbers. Note: The UPS APIs do not validate against the Ship Method on the deliveries, delivery lines or containers. It is possible that the Ship Method would be DHL Overnight Express and you wanted to obtain the estimated cost if the shipment were to travel via UPS One Day Air. If you prefer to ship with UPS, you would have to change the Ship Method to UPS One Day Air. This step can be executed as soon as the delivery lines have been imported to Shipping from Order Management. It is not necessary to wait until after Pick Release to access the API’s. However, if a delivery has not yet been created (this flow autocreates deliveries at the time of Pick Release) then you will not be able to run the APIs for the delivery entity. Ship Confirm the Delivery (ies) associated to the lines from the order. There are currently two methods for Ship Confirming via MSCA. The simplest method is called EZ Ship, see Figure 3. With EZ-Ship, enter the Delivery name and the system ships all quantities as entered during Pick Confirm. Optionally, enter the weight, waybill, bill of lading (BOL )and carrier of the Delivery. 19-8 Oracle Order Management Suite Implementation Manual Process Steps Figure 19–3 MCSA screen: EZ Ship The second Ship Confirm method via MSCA allows you to enter the specific items and quantities being shipped. This allows you to change the shipped quantities, ship only some of the lines of a delivery or enter serial numbers for items that are serialized at sales order issue and not at receipt. To use this form, enters the delivery number followed by each line being shipped by entering the item and shipped quantity. The waybill can be recorded at the Delivery Line level or at the delivery header. As with the EZ Ship form, the weight, waybill, carrier, and bill of lading can be entered for the delivery. The process involves three steps, querying the Delivery (see Figure 4), verify Delivery Line information and entering Delivery header information. Simple Pick & Ship Process Using Mobile Devices and UPS 19-9 Process Steps Figure 19–4 MSCA screen: Ship Confirm, query Delivery Verify the Item and Ship Qty for each Delivery Line (Figure 5) associated with the Delivery to be ship confirmed. The Waybill can be recorded at the Delivery Line level or at the Delivery header level. 19-10 Oracle Order Management Suite Implementation Manual Process Steps Figure 19–5 MSCA screen: Ship Confirm, verify Delivery Line information. (Item, Ship Qty, Miss Qty, Waybill) The final step to complete the Ship Confirm process is to enter the Delivery header information (Figure 6). Simple Pick & Ship Process Using Mobile Devices and UPS 19-11 Process Steps Figure 19–6 MSCA screen: Ship Confirm, enter Delivery header information. (Weight, Waybill, BOL, Carrier) 19-12 Oracle Order Management Suite Implementation Manual 20 Simple Pick & Ship Process Using Containers/LPNs Topics covered in this chapter include: ■ Overview on page 20-2 ■ Required Setup on page 20-2 Simple Pick & Ship Process Using Containers/LPNs 20-1 Overview Overview The Simple Pick and Ship process can be expanded to include the use of containers. After Shipping Execution imports the order lines from Order Management, predefined container-load relationships enables the system to automatically pack the items into containers and onto a pallet; ready to be picked and shipped quickly. A few quick setup steps can be followed to create this scenario. Set defaults in the Organization and Shipping Parameters to allow the Simple Pick and Ship process to occur. Create containers/LPNs in Inventory to enable the definition Container-load relationships used to automatically pack items into containers and containers into larger containers. Required Setup To accomplish Simple Pick & Ship using Containers/LPNs, the following setups are required: Organization Parameters Navigate: Order Management > Shipping > Setup > Organization Parameters. On the ATP, Pick, Item-Sourcing tab, ensure that the Pick Confirm Required check box is unchecked, to enable Inventory to automatically pick confirm each move order line. Shipping Parameters Navigate: Order Management > Shipping > Setup > Shipping Parameters. On the Pick Release tab, check Autocreate Deliveries and Auto Allocate boxes. Autocreate Deliveries uses the defined Delivery Grouping Rules to group delivery lines into deliveries. Auto Allocate uses the Picking Rules defined in Inventory to determine the source. On the Delivery Grouping tab, define delivery grouping rules, based on conditions that make sense to your business process. Ship from location and Ship to location are mandatory. There are six additional conditions: customer, freight terms, FOB code, intermediate ship to locations, ship method, and carrier. Picking Rules Navigate: Inventory > Setup > Rules > Picking. Picking rules determine the order in which revisions, lots, subinventories, and locators are picked for sales orders. These rules are assigned to the master item. Oracle Shipping Execution submits requests to Oracle Inventory, that uses the information entered in the Picking Rules window to generate pick lists for sales orders. If you choose None for any of the 20-2 Oracle Order Management Suite Implementation Manual Required Setup criteria fields, Inventory ignores that criterion. For example, if you choose None for Revision, Inventory picks units of an item without regard to revision levels. Oracle Inventory looks at the picking criteria in the order they appear in the Picking Rules window. Then, Inventory looks at the options (except for None options) for each criterion in the order they appear beneath each criterion. Defaulting Rules Navigate: Order Management > Setup > Rules > Defaulting. Ship Method, Freight Terms, and FOB are fields that appear on the Order Header that can be set to default at order entry. Defaults may be overridden or non-defaulting values manually keyed. These fields can be entered until the Delivery has been Ship Confirmed. Once the Delivery has been Ship Confirmed, changes can not be made to these fields. Container Item Navigate: Inventory > Items > Master Items. Containers/LPNs items must be created to utilize the Packing functionality. The tabs which have container/LPN specific fields are: Main tab: User Item Type, select Container from the List of Values. Physical Attributes tab: Complete the fields in the Weight, Volume, and Container sections. Inventory Define the Serial Generation as At Sales Order Issue to assign serial numbers to the container/LPN in the Shipping Transactions form. Container-Load Relationship Navigate: Order Management > Shipping > Setup > Container-Load Details. To utilize the Auto-Pack and Auto-Pack Master functionalities, relationships must be established between an item (load) and the corresponding container/LPN, including maximum quantity to be packed in the container/LPN. A relationship must also be defined to pack one container/LPN inside another container/LPN. It is possible to have multiple load-relationships between items and different containers. Check the preferred flag in order to identify a preferred relationship for Auto-Pack and Auto-Pack Master . An Auto-Pack Master example: ten hard drives (load item) pack inside a 24” x 30” box (container/ LPN), and eight 24” x 30” boxes (now considered load item) pack Simple Pick & Ship Process Using Containers/LPNs 20-3 Required Setup onto a pallet (container/LPN). Establish a relationship between the hard drive and the 24” x 30” box, and the 24” x 30” box and the pallet. The system will be able to automatically pack 10 hard drives into each 24” x30” box and pack eight 24” x 30” boxes (filled with 10 hard drives each) onto a pallet. Process Steps 1. Enter and Book order Note: Import Delivery Lines must occur before order lines are visible in Shipping as Delivery Lines. This can be triggered manually or as a concurrent process that can be scheduled. Navigate: Shipping > Interfaces > Run > Import Delivery Lines (choose Order Management as the Parameter). 2. Autopack Master. From the Shipping Transactions form, highlight the delivery lines you wish to pack (into a box and onto a pallet), navigate to Actions, select Autopack Master and click on the Go button. The containers will be automatically created and the items packed based on the defined container-load relationships. 3. Launch Pick Release. There are several ways to launch Pick Release. The most streamlined method is to schedule Pick Release to run as a concurrent process. Navigate: Shipping > Release Sales Orders > Release Sales Orders SRS. Other methods for launching Pick Release are: From the Shipping Transaction Form: Select a specific LPN for Pick Release by selecting one or multi-selecting many LPNs , then Navigate: Action>Launch Pick Release and click on the Go button. (You can pick release by Delivery Line(s) and once created, Deliveries, Stops, and Trips can also be submitted for Pick Release through the STF.) Open the Release Sales Order form while in the Shipping Transaction form by using the Tools menu and selecting the Pick Release Form. Pick Release can be run manually. Navigate: Shipping > Release Sales Orders > Release Sales Orders Note: When Pick Releasing using the Release Sales Order form, any of the defaults set in the Organization and Shipping Parameters can be overridden for that particular Pick Release. 4. 20-4 Find the LPNs before you choose the Delivery tab. Ship Confirm the Delivery (ies) associated to the LPN(s) from the order. On the Ship Confirm dialog, check Set Delivery In Transit and Auto Close Trip. Navigate: Order Management > Shipping > Transactions, choose the Delivery tab, highlight the desired delivery Oracle Order Management Suite Implementation Manual Required Setup (for multiple selections, hold the shift key and left click each delivery). Go to Actions, choose Ship Confirm and click the Go button, the Ship Confirm window will appear. At this time, check the Set Delivery In Transit to automatically update the status of each Delivery to In Transit. Check the Auto Close Trip box to change the status of the Stops Picked up or Dropped Off and the status of the Trip will be Closed. By checking these boxes, the delivery lines will be available to the Receivables Interface. (Process Order API and Inventory Interface run after a delivery has been Ship Confirmed.) For additional information, reference the Appendix Chapter, Containerization in Shipping Execution. Simple Pick & Ship Process Using Containers/LPNs 20-5 Required Setup 20-6 Oracle Order Management Suite Implementation Manual 21 Multimodal Shipments Topics covered in this chapter include: ■ Overview on page 21-2 ■ Required Setup on page 21-2 ■ Process Steps on page 21-3 Multimodal Shipments 21-1 Overview Overview When a customer’s order needs to ship via different modes (i.e. air, ocean, truck) to arrive at the final destination, multimodal shipping must be used. This business process starts when your company receives an order from your customer, the items are picked and it is necessary to assign the delivery lines to multiple carriers before shipping the order. Once the order line reaches the Order Management workflow Shipping Activity, Order Management calls Shipping Execution to identify the line as ready to import. When shipping imports the order line, Shipping Execution picks the items and autocreates a delivery. Once a delivery has been created, it can be assigned to the corresponding carriers via Trips. Shortly after assigning the Delivery to the Trips, the Delivery can be shipped. A few quick setup steps can be followed to execute this scenario. Setting defaults in the Organization and Shipping Parameters will allow the streamlined Pick process to occur. Trips can be created to represent multiple carriers either before the order has been placed or during the order flow from entered to shipped. Required Setup To accomplish Multimodal Shipment, the following setups are required: Organization Parameters Navigate: Order Management > Shipping > Setup > Organization Parameters. On the ATP, Pick, Item-Sourcing tab, ensure that the Pick Confirm Required check box is unchecked. This will allow Inventory to automatically pick confirm each move order line. Shipping Parameters Navigate: Order Management > Shipping > Setup > Shipping Parameters. On the Pick Release tab, check Autocreate Deliveries to use the Delivery Grouping Rules you have defined to group delivery lines into deliveries. Check Auto Allocate to use the Picking Rules that you have defined in Inventory to determine the source. Option: if you prefers to manually create a Delivery ahead of time to assign Delivery Lines to, the Autocreate Deliveries box must be unchecked. Delivery Grouping tab You can define delivery grouping rules, based on conditions that make sense to your business process. Ship from location and Ship to location 21-2 Oracle Order Management Suite Implementation Manual Process Steps are mandatory. There are six additional conditions: customer, freight terms, FOB code, intermediate ship to locations, ship method, and carrier. Picking Rules Navigate: Inventory > Setup > Rules > Picking. When you define an item you choose a picking rule to determine the order in which revisions, lots, subinventories, and locators are picked for sales orders. Shipping Execution submits requests to Inventory, which uses the information you enter in the Picking Rules window to generate pick lists for sales orders. If you choose None for any of the criteria fields, Inventory ignores that criterion. For example, if you choose None for Revision, Inventory picks units of an item without regard to revision levels. Inventory looks at the picking criteria in the order in which they appear in the Picking Rules window. Then, Inventory looks at the options (except for None options) for each criterion in the order in which they appear beneath each criterion. Defaulting Rules Navigate: Order Management > Setup > Rules > Defaulting Ship Method, Freight Terms and FOB are fields which appear on the Order Header that could be helpful to default during order entry. They may also be entered or the defaults overridden at the time the order is created. These fields can be entered until the Delivery has been Ship Confirmed. Once the Delivery has been Ship Confirmed, changes can not be made to the above mentioned fields. Define Location Navigate: Inventory > Setup > Organizations > Locations An intermediate address can be assigned to a trip once a Location has been defined. This address will be used as the Pick-up or Drop-off location defined when a Delivery is assigned to a Trip. Upon saving the newly created Location, the system will generate a number which corresponds to the Location. In many cases, the Location may represent a Port or an Airport. Process Steps 1. Enter and Book order Note: Import Delivery Lines must occur before order lines are visible in Shipping as Delivery Lines. This can be triggered manually or as a concurrent process that can be set to run at specific time intervals. Navigate: Shipping > Multimodal Shipments 21-3 Process Steps Interfaces > Run > Import Delivery Lines (choose Order Management as the Parameter). 2. Launch Pick Release. There are several ways to launch Pick Release however the most streamlined method would be to set up Pick Release to run as a concurrent process. Navigate: Shipping > Release Sales Orders > Release Sales Orders SRS. Other methods for launching Pick Release are: From the Shipping Transaction Form select a specific Delivery Line for Pick Release by selecting one or multi-selecting many Delivery Lines , then Navigate: Action > Launch Pick Release and click on the Go button. (You can pick release by LPN(s) and once created, Deliveries, Stops and Trips can also be submitted for Pick Release through the Shipping Transaction form). Additionally, you can bring up the Release Sales Order form while in the Shipping Transaction form by using the Tools menu and selecting the Pick Release Form. Finally, Pick Release can be run manually. Navigate: Shipping > Release Sales Orders > Release Sales Orders Note: When Pick Releasing using the Release Sales Order form, any of the defaults set in the Organization and Shipping Parameters can be overridden for that particular Pick Release. 3. Create Trips Navigate: Order Management > Shipping > Transactions By default, you will be on the Trips tab. To create a Trip, click on the Detail button and populate the information. At minimum, Name and Ship Method. Save each Trip. An Example When a delivery requires transportation on multiple carriers, the creation of a Trip is required for each carrier. 21-4 Oracle Order Management Suite Implementation Manual Process Steps Figure 21–1 Create Trip 2 to follow Trip 1. Assign Delivery to Trips Using the Query Manager in the Shipping Transactions Form, find the order, click on the Delivery tab, select Assign to Trip and click the Go button to assign the Delivery to each newly created Trip. See Figure 2. Multimodal Shipments 21-5 Process Steps Figure 21–2 Assign Delivery to Trip 2. (same procedure for each Trip) View the Stops From the Shipping Transactions Form, click on the Path by Stop tab and verify that there are two stops associated to each Trip that the Delivery has been assigned to. See Figure 3. 21-6 Oracle Order Management Suite Implementation Manual Process Steps Figure 21–3 View ‘Path by Stop’ tab Ship Confirm the Delivery Navigate: Order Management > Shipping > Transactions, choose the Delivery tab, highlight the desired Delivery, select Actions, choose Ship Confirm and click the Go button, the Ship Confirm window will appear. Click Ok to complete the process. Process Order API runs after the delivery has been Ship Confirmed. Note: The options in the Auto-create Trip Options box are grayed out. Update the status of the stops to Closed. Inventory Interface will be submitted when the Pick-up Stop has been Closed. The delivery lines will now be available to the Receivables Interface. Multimodal Shipments 21-7 Process Steps 21-8 Oracle Order Management Suite Implementation Manual 22 Hold Management Topics covered in this chapter include: ■ Overview on page 22-2 ■ Required Setup on page 22-2 ■ Process Flow on page 22-4 ■ Workflow on page 22-14 Hold Management 22-1 Overview Overview In R11i Oracle Order Management, applying and releasing holds is convenient as it is possible to perform these activities right from the Sales Order Pad. You can create holds based on a combination of two criteria, such as customer and item, or item and warehouse. Also, you can manually send a notification through Workflow to specific individuals when an order hold is applied. There is a concurrent program whose function is to automatically release holds based on the ‘hold until’ date. Additionally, you are able to track and view history information on holds at the order and/or line level. When you prevent further processing on an order through an exception, you are placing a hold on the order. However, you can arbitrarily hold all orders for a specific customer or customer site, an individual order, or all order lines for a specific item. Furthermore, you can define holds that affect existing orders, future orders, or both. Holds can be placed automatically when certain metrics, such as credit limits, are violated. Holds can be automatically released by using Workflow once the order or line no longer violates the business metric. Order Management manages exposure to these various types of risks through this holds and releases functionality. Required Setup Profile Options The profile option OM: Notification Approver is setup to enable you to send notifications (approval or FYI notifications) to this role. It can be set at any level (Site, Application, Responsibility, User). For a different Approver role per Operating Unit, set the Profile Option at the responsibility level. Notifications generated by OM flows can be sent to this role via a seeded WF item attribute (Notification Approver). This item attribute is used as a place holder for storing role information. When the Header or line is created, the item attribute Notification Approver is set based on the Profile Option setting. If all approvals need to go to this role, you do not need to use the Utility - Set Notification Approver. If they do not then you can use this seeded utility to set the value of the item attribute Notification Approver to various values. Refer to the Workflow section for additional details. Another profile option to be aware of for holds is OM: Schedule Line on Hold that controls whether scheduling should attempt to schedule lines that are on hold. The default is set to No. 22-2 Oracle Order Management Suite Implementation Manual Required Setup Workflow Order Management comes with seeded Workflow processes. Review the seeded flows, activities and notifications to determine if the seeded data can meet your business needs. Typically, the Generic - Order Flow and Line Flows are used for standard orders. The user can modify this existing seeded workflows or create new workflows to include approval activities or wait-for-flow activities in order to safeguard processing orders that are on hold. Refer to the topical essay on Workflow at the end of this manual for details on setting up workflow processes. Hold Lookup Codes Setup your own codes for Hold Types, Holdable Header and Line Activities for workflow in the Order Management Quickcodes form. To do this, Navigate: Order Management > Setup > Quickcodes > Order Management. The Order Management Lookup form will appear. Select the query manager (Flashlight icon) to view the existing codes or add a new code. Reports There are some seeded reports in Order Management for Holds. They include: Hold Source Activity Report, Lines on Credit Check Hold Report, Orders on Credit Check Hold Report and Outstanding Holds Report. You can run these reports by a variety of parameters, including, customer name, hold name, item, order, order type, etc. Credit Check Rules & Profiles When setting up credit checking rules, you have the ability to specify if you want to include orders currently on hold in the exposure calculation when the order flow performs a credit check. To set this option, Navigate: Setup > Credit > Credit Check Rules and check the box for Include orders currently on hold. Customers In Receivables, when setting up a Customer, you can specify whether or not to perform credit checking for this customer by checking the credit check box in the Profile. When you process orders for that particular customer and if you use an order type and payment terms that also call for credit checking, the credit check process will run and if they do not pass based on their credit limits, the orders will go on hold automatically. In addition, there is a ‘credit hold’ checkbox on the Customer form. When checked, all orders for the customer will go on credit hold without going through credit check logic - a hold source is automatically created to put all that customers existing and future orders on hold. To activate credit check Hold Management 22-3 Process Flow holds on a customer, navigate to the Order Management or Receivables responsibility, and select Customers > Standard. Either enter a new customer or find an existing customer, select the Profile: Transactions Tab and check the credit check and possibly the credit hold boxes. To perform credit checking, you will also need to set the credit limits for the customer in the Profile: Amounts Tab of the Customer form. Process Flow This section will cover the different process flows for defining, applying and releasing holds through Oracle Order Management, including: 1. Defining Generic and Activity-Specific Holds 2. Creating a Generic Hold Source 3. Creating a Hold Source with Multiple Entities 4. Applying a Generic Hold 5. Releasing Holds and Hold Sources 6. View Hold Information Define Generic and Activity-Specific Holds The first step is defining a generic or activity-specific hold and assigning the responsibilities that are authorized to apply or release the hold. A hold can be defined to be effective at certain steps of the order or line workflow or to be applied regardless of the stage of the orders flow. Because orders and returns are not effected by holds until they are applied, define all the holds you use in your business at once. To define a hold, Navigate: Order Management > Setup > Orders > Holds. Figure 1. shows the Holds form for defining a generic or activity-specific hold. 22-4 Oracle Order Management Suite Implementation Manual Process Flow Figure 22–1 Holds form For a generic hold, define a name, description and a hold type (i.e. Credit Check) for the hold. Assign specific responsibilities to allow access to apply or release this hold. For an activity-specific hold, define a name, description and hold type, but also assign a workflow item and activity. By assigning a workflow item and activity, the hold will be applied based on where the activity is assigned. For instance, defining a hold with the workflow item as Order Header and the workflow activity as Book Order, the order will be placed on hold before or when the order has been booked. You can create activity-specific holds for shipping activities which include: Pack Line, Pick Line, and Ship Line. You can define holds with these activities to hold lines at those particular activities. For example in the generic hold, you can assign specific responsibilities to allow access to apply or release or both for activity-specific holds. Optionally, effective dates can be entered if the hold is effective only for a period of time. Hold Management 22-5 Process Flow Create a Generic Hold Source A hold source allows you to apply a particular hold to a group of existing orders, returns or lines and to new orders and lines meeting your hold criteria. Hold Sources are created to hold all current and future orders for an item, customer, order, warehouse or customer site (Bill to or Ship To locations). Navigate: Order Management > Orders, Returns > Order Organizer. Select the Tools menu, and choose Create Hold Source. The Apply Holds form will appear as shown in Figure 2. Figure 22–2 Apply Holds form In this form, define the entity based on which the orders and lines can be placed on hold. This entity can either be Customer, Warehouse, Bill To Site, Ship To Site, Item or the Order itself. It can also be a combination of up to two entities. The multiple entity hold sources will be discussed in the next step. In the Criteria Tab, use the list 22-6 Oracle Order Management Suite Implementation Manual Process Flow of values to retrieve the hold defined above . This will default the Hold Type and Description as defined from the hold. The user can add a Hold Until Date and Comments and/or hold all existing or future orders/lines if needed. Next, the user will select a Hold Criteria. This can be any of the following: Customer, Warehouse, Bill To Site, Ship To Site, Item, or Order. Enter a value for the Hold Criteria based on the selected Hold Criteria (i.e. Item number, Order Number etc.). Create Hold Source with Multiple Entities Creating a Hold Source for Multiple Entities occurs in the same Apply Holds form as above (Figure 2). Follow the same steps when entering the Hold Source, but define two entities which orders and lines can be placed on hold based on the hold criteria defined. For instance, if you want to hold a specific item from being shipped to a customer, select the first Hold Criteria as Customer and the second as Item. This will create a hold source using that specific Customer and Item and will not process orders or lines that have that Item and Customer on it. Currently, Order Management supports Hold Sources with up to two entities. The combinations of two supported entities are as follows: Item > Customer Item > Ship To Site Item > Bill To Site Item > Warehouse Warehouse > Customer Warehouse > Ship To Site Warehouse > Bill To Site Apply a Hold Applying a Hold can be performed through the Sales Order form. To hold existing orders or lines, Navigate: Orders > Returns > Order Organizer. The Find Orders window will appear where you can search for the orders you want to put on hold. In the Holds Information tab of the Find window, you can search by different criteria such as Hold Name, Held By, etc. as seen in Figure 3. Hold Management 22-7 Process Flow Figure 22–3 Find Orders (Holds Information Tab) form Once you have selected which orders you want placed on hold, the Find window will take you to the Orders Organizer window of the Sales Order form and display the orders or lines that have met your search criteria. To hold more than one of the orders, multi-select the orders by the Ctrl + mouse click. Click the Actions button and select Apply Holds as seen in the screen in Figure 4. 22-8 Oracle Order Management Suite Implementation Manual Process Flow Figure 22–4 Order Organizer form (Apply Holds) The Apply Holds window will appear where the user can enter Hold Criteria, Hold Until Dates etc. based on the user’s business needs for the hold. This Apply Holds window is the same window seen above in Figure 2. Release a Hold Releasing a Hold can also be performed through the Sales Order form. To release holds of orders or lines, Navigate: Orders, Returns > Order Organizer. The Find Orders window will appear where you can search for the orders that you want to release. Once the Order Organizer window displays the orders or lines that have met your search criteria, you can select one order to release or multi-select multiple orders by using the Ctrl + mouse click function. Click the Actions button and select Release Holds as seen in the screen in Figure 5. Hold Management 22-9 Process Flow Figure 22–5 Order Organizer form (Release Holds) Apply and Release Holds at the order and/or line level within the Order Organizer of the Sales Order form. The examples are shown at the order level, however, you can apply or release holds at a line level by moving to the Line Items form and performing the same steps. Select Action > Release Holds, the Release Holds window will appear as seen in Figure 6. 22-10 Oracle Order Management Suite Implementation Manual Process Flow Figure 22–6 Release Holds form You are required to enter a Release Reason (i.e. Passed credit check). To release multiple holds, highlight all the holds to be released and select a Reason. Click the Release button. You will receive a message stating the Release was successful. Additionally, holds can be released automatically when you run the Released Expired Holds concurrent program on or after the date that the hold source expires. This date is defined in the Hold Until Date field in the Release Hold Sources window. This concurrent program is a way to automatically release orders on hold when that date is reached. Releasing a Hold Source is performed in the same way as releasing a hold. Although, releasing a hold source releases all the orders, returns and lines to which that hold source is applied. Whereas, when you release an order, return or their Hold Management 22-11 Process Flow lines, that order or return becomes available for the subsequent workflow steps. Navigate: Orders > Returns > Order Organizer. The Find Orders window will appear. Select the Holds Information Tab. Enter the search criteria for all Hold Sources you want to release. Click on the Hold Sources button. This will take you to the Release Sources form as seen in Figure 7. Figure 22–7 Release Sources form Based on your search criteria, you will see the appropriate hold sources. Highlight the Hold Source you would like to release, if more than one, highlight each line and select a Release Reason. Click on the Release button. You will receive a message that states the release was successful. View Hold Information Hold information can be viewed from the Sales Order form at either the order or line level. To view hold information at the Order level, Navigate: Orders > Returns 22-12 Oracle Order Management Suite Implementation Manual Process Flow > Order Organizer. Search for the order or orders you whose Hold history you would like to view. Click on the order and right mouse click. This will give you a pop-up menu, select Additional Order Information > Holds. The Additional Order Information window will appear within the Holds Tab as seen in Figure 8. Figure 22–8 Additional Order Information (Holds Tab) form The page shows you the history information about the order, such as how many holds have been applied and if any of the holds have been released. Also, you can find all orders on a specific hold or set of criteria by using the Hold Tab on the Find Window of the Order Organizer. View the Line level hold information just like you would do for the order level. Navigate: Orders > Returns > Order Organizer. Search for the order or orders whose order line history you would like to view. Click on the Order and select Open Order button. Once the order opens, click on the Line Items Tab. When you Hold Management 22-13 Workflow get to the Line Items form, select a line to view and right mouse click. This will give you a pop-up menu, select Additional Line Information > Holds. The Additional Line Information window will appear within the Holds Tab as seen in Figure 9 Figure 22–9 Additional Line Information (Holds Tab) form This will show you the history information about the Line. You can also use the Actions button at the Order or Line level to view the Additional Order/Line Information. Workflow In R11i Order Management, you can control the steps in your order process at which a hold is applied. Even with an exception, processing on an order can continue up to a certain step. More generally, when you place a hold against an 22-14 Oracle Order Management Suite Implementation Manual Workflow item, you can disable any or all activities in its order process so the order cannot proceed unless the hold is removed. For example, you cannot Book an order that has a generic order level hold or a Booking specific hold. The Book activity posts messages indicating that a hold exists. It then completes with an On Hold result and transition back to the Book Eligible activity. You can define custom workflow activities that honor holds. Order Management provides Public APIs that can apply holds, check whether an order or line is on hold and remove holds. You can also seed lookups (Holdable Header Activities, Holdable Line Activities) based on your custom workflow activities and define holds based on them. Additionally, the notification functionality in R11i can be used for handling business exceptions (i.e. orders on hold) and approval requests. For instance, you can setup a notification that requires a manager’s approval when orders go on credit check hold. The role assigned to the Notification Approver, determines to whom the notification is sent. For instance, the person assigned as Notification Approver can be a Manager where all orders that are placed on credit check hold would be routed to him via email for approval before the orders are released from the hold. Refer to the Required Setup, Profile Options section for details on assigning a notification approver. Figure 10 is an example of a Booking process with exception handling. In this example, the booking process is designed to handle expected errors, that are validation or other errors that are expected as part of normal processing (i.e. Line on Hold, it cannot be Picked). If the Booking activity finds a hold on the Order, it Hold Management 22-15 Workflow will post a message that the Order is on hold and then complete with a result of ON_HOLD to the Booking eligibility block. The flow needs to transition to a block that can be completed from the Sales Order form or to a Wait Activity. The Line flow that is used with the Header flow should have the appropriate co-ordination wait-for-flow activity so that the line will not proceed until the appropriate action has been taken to resolve the error. Workflow provides you the ability to customize your processes to include exception processing activities as well as approval activities in order to ensure the appropriate holds are placed on specific orders and/or lines. 22-16 Oracle Order Management Suite Implementation Manual 23 Oracle Configurator Setup Requirements Topics covered in this chapter include: ■ Overview on page 23-2 ■ Configurator on page 23-2 Oracle Configurator Setup Requirements 23-1 Overview Overview This section talks about what to set up to access configurator in order management. For details of implementing CTO, Please see the Oracle Configure to Order Implementation Manual and also please refer to the section on Configure to Order Process to undertand how Order Management is intergrated with CTO, ATO, PTO and KITS and how these items are processed to their fulfillment It also talks about implementation of such items in detail. Configurator Before using the CTO process and configurator window in sales order form you must have the following setup in place. Installation Status The status of configurator product must be in complete installed mode(Status = ‘I’). Profile OM: Included Item Freeze Method This profile decides when to freeze included items for Model, Class or Kit. Once the included items are frozen, they will not be re-exploded at any given time. The profile will have the following values. Entry - Indicates included items will be exploded at the time the MODEL, CLASS or KIT is entered Booking - If the profile value is booking, the included items will be exploded at the time of booking . Pick Release - If the profile value is pick release, the included items will be exploded at the time of pickrelease Profile BOM:Configurator URL of UI Manager Ensure that the profile which identifies the URL of the Configurator UI Manager is correct. This profile setting is used by OM to identify the configurator. To verify this profile: Navigate: System Administrator > Profile > System. Perform Find System Profiles using %BOM%URL% as the profile search string. Note: This name may vary, but it is usually BOM:configurator URL of UI Manager. Verify that the value is: “http://{URL}:{port}/{mount_point_for_configurator_ servlet}/oracle.apps.cz.servlet.UiServlet" where the values in braces ({}) should be replaced with the appropriate values. Note: The profile must be set for the site OR 23-2 Oracle Order Management Suite Implementation Manual Configurator for every user. If this profile is not set properly, the configurator screen will come up blank. Errors will not be logged, but if you turn on the Java Console it will capture as invalid URL error. Edit/Create .dbc File In order to use the Oracle Configurator, the Database Configuration (".dbc") file must be edited/created for your particular installation. You must ensure that .dbc file exists in $FND_TOP/secure directory and is in <hostname>_<SID>.dbc(be sure to replace db_host and SID with the correct values) format. If it does not exists, use template.dbc to create this file in the given format. The following changes are required on top of any settings that maybe required by other Application products: Only Oracle thin drivers are supported, so uncomment: APPS_JDBC_DRIVER_TYPE=THIN Add the following two lines and replace the items between brackets (<>) with the appropriate values: BATCH_VALIDATE_USER = <Applications Username of the Guest> BATCH_VALIDATE_PWD=<Applications Password of the Guest> Uncomment the following line and replace "host_name" with the appropriate value: DB_HOST=host_name Uncomment the following line and replace "port_number" with the appropriate value: DB_PORT=port_number Uncomment the following line and replace "db_name" with the appropriate value: DB_NAME=db_name Note: Please refer to Oracle Configurator Implementation Guide and the Oracle Configurator Custom Web Deployment Guide and information posted on meta link for further details on the setup and possible issues that might come up while working in a Configurator window. Oracle Configurator Setup Requirements 23-3 Configurator 23-4 Oracle Order Management Suite Implementation Manual 24 Order Import Topics covered in this chapter include: ■ ■ Overview on page 24-2 Feature Functions and Basic Instruction - What is it? How is it used? on page 24-2 ■ Tools/Techniques of Feature - API’s, Workflow on page 24-6 ■ Setup Steps to Implement Order Import on page 24-6 ■ Loading the Import tables on page 24-7 ■ Actions Table on page 24-9 ■ IDs vs. Codes on page 24-10 ■ Matching Changes to Orders on page 24-10 ■ Summary/Conclusion on page 24-11 Order Import 24-1 Overview Overview Order Import is Order Management’s open interface for entering, changing or canceling orders and returns. Use Order Import to bring in orders from external systems, legacy systems, EDI, or from internal systems such as internal orders created by Oracle Purchasing to fulfill internal requisitions. Order Import has been implemented as a set of interface tables that must be loaded with the order or return data, and a set of APIs to process that data. A concurrent program is provided which calls the APIs to initiate processing of the data. In addition, Order Import provides forms that allow you to query orders from the interface tables, make corrections or changes to that data, and re-initiate the import process. Orders that fail to be imported are retained in the tables, and can be queried and corrected using the forms. Messages are provided to give you details of why the order did not import. Order Import calls base Order Management APIs (specifically, Process Order API) to validate and insert or update data in the base order tables, thereby insuring that consistent processing occurs. Feature Functions and Basic Instruction - What is it? How is it used? Order Import provides many features to ease the work of integrating order data from external and other types of system. Importing Orders Order Import’s main task is to provide a batch-like facility for inputting large numbers of orders into Order Management in a hands-off manner. It is runnable as a concurrent request, so you can schedule it to run at specific intervals throughout the day – for example, to coincide with schedules of your feeding systems. Once orders are imported into the base Order Management tables, the order and line workflows are started. All subsequent processing, including sourcing and scheduling activities, takes place as though the order were input manually. Validation Order Import does not contain its own validation routines for the data. Instead, it calls the Process Orders API, which is the same API used to validate and insert orders if you are keying them through the Sales Order form. This design makes for better maintainability, as any enhancements or bug fixes done to Process Orders will immediately affect importing orders too. The Process Orders API uses Processing Constraints to evaluate whether a requested change can be made to an 24-2 Oracle Order Management Suite Implementation Manual Feature Functions and Basic Instruction - What is it? How is it used? order. Order Import, because it uses Process Order API, evaluates all Processing Constraints, and any constraint violations are captured and can be reviewed using the Correction Forms and the Messaging Window. Order Import has a feature that allows you to run in validate only mode, to pre-screen the orders in a batch and correct all the errors before you run the import. If an order has any errors, then the entire order will be retained in the import tables. Importing is an all-or-nothing process per order. Correction Forms Order Management has a set of forms you can use to review and correct data that is in the Order Import tables. They are called the Order Import Correction Forms. They are accessible from the OM Menu under the Order Import menu item. They consist of a find screen followed by a series of forms where you can view and correct data. There are forms to display order headers, order lines, sales credits, price adjustments, return lot/serial numbers, and the actions table. The forms have buttons to enable you to re-validate or re-import data that you have selected. There is another button to transfer to the Message Window to display any error messages in your data import. Viewing error and warning messages about imported orders replaces the Order Import Processing Exception Report used in the R11 Order Entry version of Order Import. Most fields do not have any validation or list of values within the form, so if you key over a field to correct it, you won’t know if it is good until you either validate or re-import. If you decide an order or line is in the import tables in error, you can set the Reject_Flag to Y on the Status Tab to indicate that you don’t want to continue processing it. The order or line will be deleted in the next run of Order Import. See the Flags section below for more information about the Reject_Flag. This can be useful if an order it too difficult to correct via the forms. This allows you to fix it in the feeder system and re-import it, or it can be used to purge off orders that may have resulted from duplicate runs of your feeder systems. The user interface for the Correction Form is currently not a folder form – the thinking was that if users hide columns and then those columns are the ones in error, it would be difficult for the user to make the necessary corrections. There is an enhancement request logged to make these forms folder-enabled, and that will be done when the work can be scheduled. In addition, the forms are not currently multi-select enabled for re-validating or re-importing using the button. There is an enhancement pending to enable multi-select. The data from the header and lines import tables is presented in forms with the data organized logically onto various tabs. The other forms (discounts, sales credits and actions) are single-tab forms. Screen shots of the Find screen and the Orders window are contained in the Oracle Order Management User’s Guide. Order Import 24-3 Feature Functions and Basic Instruction - What is it? How is it used? Booking Orders via Order Import Import orders and book them through Order Import. If the order fails booking validation, the order is still imported, but is left in the Entered state. The Messages Window can be used to see why the order failed booking or you can just attempt to Book using the Book button, and then errors will be displayed. To indicate that you want the order to be booked, you must load the actions interface table OE_ ACTIONS_IFACE_ALL with a value of BOOK_ORDER in the OPERATION_CODE column to import orders in a booked status. See the section below on the Actions table for more information. Item Cross Referencing Customer item numbers or UPC numbers can be entered in Order Import the same way as manually created orders, so long as you have the cross-references and cross reference types set up in advance of running order import. In the interface tables you need to put the ‘item ordered’ into the column named CUSTOMER_ITEM_ NAME and if you know what kind of item number it is (customer, inventory item or one of the generic cross references), you can put its type into CUSTOMER_ITEM_ ID_TYPE. Changes and Cancellations Input order changes and cancellations to existing orders via the Order Import open interface tables. There is a column in each of the interface tables called OPERATION_CODE where you put INSERT, UPDATE or DELETE. Null is equivalent to INSERT. If you want to make changes, you must specify an OPERATION_CODE of UPDATE. To cancel a line, use an operation of UPDATE and then make the ordered quantity = 0. To partially cancel, change the ordered quantity to the new quantity you want to remain on the line. To cancel an order in its entirety, use an operation of UPDATE at the header, and then set the CANCEL-FLAG to Y. All order changes and cancellations are subject to the Processing Constraints you defined. Returns Import returns just like you import orders, by choosing an order type that supports return line types. You can also import mixed orders – those are orders that have some outbound lines and also some inbound (return) lines. The path that the line follows is determined by the workflow attached to the line type. You might import returns or return lines from legacy systems, or from other order entry systems you might be running. There is a separate interface table where you can import anticipated lot/serial numbers – this table is only used for return lines. 24-4 Oracle Order Management Suite Implementation Manual Feature Functions and Basic Instruction - What is it? How is it used? Notes/Attachments Orders that are input using Order Import will get rule-based attachments automatically applied based on the setting of the profile option OM: Apply Automatic Attachments. If you have this profile option set to NO, you can still apply automatic attachments on an order by order basis by using the Actions Interface table – see the discussion of that table below. There is at this time no way to import note texts, or to create attachments via an open interface. Pricing There are two ways to price orders being imported. You can let the system calculate the price, or you can populate the price fields in the lines interface table with the price you want to charge, and also populate the price-adjustment interface tables with price adjustments that result in that net price. You indicate which you want to use by setting a value in CALCULATE_PRICE_FLAG in the lines interface table. If the calculate price flag is Y, the system will ignore any pricing values loaded into the price fields and will calculate the price using the pricing engine. If the calculate price flag is N, you must populate unit list price, unit net price, and any price adjustments in the interface tables to account for the difference between list and net. Pricing and Payment Terms Validation A common requirement from EDI customers is the ability to validate the price and payment terms that a customer sends in against what the system determines. EDI customers do not typically accept any price or terms that the customer sends in, but they need to keep track of what the customer said they thought they should get. The Customer Service Representative usually contacts the customer to resolve any discrepancies. For example, a customer may send in one price that they have been quoted by a salesperson, which assumed they received some discount. Perhaps the discount had expired by the time the order was imported . This results in a discrepancy that a CSR needs to investigate. Order Import supports this requirement by letting you populate two attributes in the order lines interface table, CUSTOMER_ITEM_NET_PRICE and CUSTOMER_ PAYMENT_TERM. If either of these columns contain data, Order Import compares the system-determined price or payment terms to these columns, and raises a warning if there is a difference. It will still import the order as long as there are no other errors in the order. In both cases, the system-determined value is what is used to process the order, and the customer value is retained on the order line in the base sales order tables for reference purposes. Order Import 24-5 Tools/Techniques of Feature - API’s, Workflow Following is a table with examples of what would happen in different cases of the customer price and the system price – in addition, it shows how the Calculate Price Flag affects the process: Calculate Price Flag Customer Provided Price System Calculated Price Action N 20 - Accept customer price. Y 20 20 Accept customer price. (System = Customer). Y 20 10 Accept customer price. (System < Customer). Y 20 30 Don’t accept Customer price. Report the error. (System > Customer). Tools/Techniques of Feature - API’s, Workflow Order Import uses the Process Orders API to validate and process order data in the interface tables. For more information on open interfaces, see the Oracle Manufacturing APIs and Open Interfaces Manual. There are no special workflow considerations for Order Import. Setup Steps to Implement Order Import There is only one special setup for Order Import; otherwise, the same setup that you need to perform to manually key orders must be in place before you can import orders. Order Import Sources Set up the names of the sources from which you intend to import orders. There is a special setup form in Order Management allows you to define the name and description for your source. Import Source is a parameter you can use when you submit the Order Import concurrent program, and it is also one of the queriable fields on the Find form of the Order Import Correction form. The Import Source is carried in the order header also, so you can identify the origin of the order. Seeded Order Import sources include EDI and Internal Orders. 24-6 Oracle Order Management Suite Implementation Manual Loading the Import tables The Item Validation Org parameter for the operating unit of the user running Order Import determines the organization used for validating items and bill of material structures. Item Validation Org is an Order Management parameter that is set per operating unit. Loading the Import tables To import orders, you need some means to load the Order Import tables. In most cases, you will develop a program or script using SQL-loader or some other programming language to convert data from your feeder system into the standard data format that Order Import is expecting. Oracle Purchasing contains such a program (Create Internal Sales Order) that takes data from the Purchasing schema for internal requisitions and loads the Order Import tables. Similarly, the eCommerce Gateway product provides a program (Purchase Order Inbound ) that loads the import tables for the Inbound Purchase Order EDI transaction set. You can take a look at that code to guide you in writing your own program to load the tables. It is advisable that you set up Defaulting Rules in Order Management that will default as much of the order and line information as possible for your environment, thereby reducing the amount of data that would need to be populated into the import tables. There are certain columns and tables in the set of import tables whose function is not self-evident. Here is some additional information about these attributes to help you be successful in loading the tables properly. Flags Several flags in the interface tables of Order Management affect Order Import processing. Valid values of these flags are Y, N and null. Null means different things depending on the particular flag. These flags are viewable and updateable from the Status Tab of both the Order Header and Lines forms of the Order Import Correction Forms. Force Apply Flag (used for Change transactions only) The Force Apply flag is used to indicate that you want to apply a Change transaction even though the change sequence numbers are out of order. Default is N, and a null value is equivalent to N. Typically a user would set this flag to Y (checked in the UI) if they determine that a set of changes should be applied regardless of the change sequence. See the Order Import 24-7 Loading the Import tables section below for more information on Change Sequence Numbers and how they are used. This flag is at the header level only. Closed Flag The Closed flag is used to indicate the line or order being imported should be imported in a Closed state. You might want to import a closed order so your historical data is all in one place, or to provide reference data for Returns. Default for this flag is N, and a null value is equivalent to N. This flag is at both the header and the line level. Canceled Flag The Canceled flag is typically used to indicate that the line or order being imported should be imported in a Canceled state. Default is N, and a null value is equivalent to N. This flag is at both the header and the line level. Reject Flag There may be orders or order lines you have determined you no longer want to attempt to process further. Using the Order Import Corrections window, you can select an order or line you no longer wish to process, go to the STATUS tab, and select the Rejected checkbox. Rejected orders or rejected order lines are Deleted during the next execution of the Order Import program. Default is N, and a null value is equivalent to N. This flag is at both the header and the line level. ERROR_FLAG The error flag is set on by the Order Import process whenever an error is encountered during the validation process. Default is N, and a null value is equivalent to N. This flag is at both the header and the line level. READY_FLAG The ready flag indicates that the record will be processed in the Order Import Process. Default is Y, and a null value is equivalent to Y. If the ready flag is N, the order will not be looked at when Order Import is run. This flag is at the header level. Validate Mode Parameter in Concurrent Manager There is a validate mode parameter you can set when you submit Order Import to run through the concurrent manager. This parameter tells the process to only validate the records, and not to process valid records any further. Base Order Management tables will not have records inserted, updated, or deleted. 24-8 Oracle Order Management Suite Implementation Manual Actions Table (Only) Validate READY_FLAG Parameter Processing N Y Record is not processed N N Record is not processed Y or NULL Y Process to Validate Only Y or NULL N Process to Insert/Update/Delete in Base Table Actions Table One of the Order Management interface tables is the Actions table. Its purpose is to allow you to indicate what ‘actions’ you want to be done to the order, once it has been written to the Order Management base tables. It is the Order Import equivalent of a user pressing the Action button on the Sales Order form after you have entered an order. Load the action name into the OPERATION_CODE column of this table, and populate other data as needed, and then Process Orders will execute that action if the order import is successful. You can hold or release an order or line from hold using this method, and this is how you book an order through Order Import, too. Other actions you can perform are Apply Automatic Attachments and Delink Config Item and Match & Reserve a configured item. Here is the character string you need to populate in OPERATION_CODE of the OE_ ACTIONS_INTERFACE table and other data you need to put in the table to achieve each action. ACTION OPERATION_CODE OTHER DATA Apply Automatic Attachments AUTOMATIC_ATCHMT none Apply a Hold APPLY_HOLD hold_id, hold_type_code, hold_type_id, comments (optional), hold_until_ date (optional) Release a Hold RELEASE_HOLD hold_id, hold_type_code, hold_type_id, comments (optional), release_ reason_code Order Import 24-9 IDs vs. Codes ACTION OPERATION_CODE OTHER DATA Book the Order BOOK_ORDER none Delink the Config Item DELINK_CONFIG none Match and Reserve a configuration item for an ATO model MATCH_AND_RESERVE none IDs vs. Codes Most attributes in the interface tables have two flavors – a code or name and an ID. You may choose to populate either the code or the ID for each attribute. If you populate IDs, performance will be improved. If you populate both an ID and a code for an attribute, the ID will be used and the value in the code field will be ignored. Matching Changes to Orders When you send in changes to orders using Order Import, you need a way to tell Order Import what order or line you are changing. Your feeding system most likely doesn’t know the Order Management Order Number. If it does, you can populate the interface column ORDER_NUMBER to locate your order. There are a group of columns in the interface tables that are carried over into the Sales Order tables, and these are used to locate the order to be changed. For Order level changes, the following fields need to match between the change transaction in the interface tables and the existing order in the Sales Order tables: ORIG_SYS_DOCUMENT_REF - note, this is often the customer’s purchase order number ORDER_SOURCE_ID For Line level changes, the following fields need to match between the change transaction in the interface tables and the existing order in the Sales Order tables: ORIG_SYS_DOCUMENT_REF - note, this is often the Customer’s Purchase Order Number ORDER_SOURCE_ID ORIG_SYS_LINE_REF - note, this is often the customer’s purchase order line Number concatenated with the shipment number or current customer request date. 24-10 Oracle Order Management Suite Implementation Manual Summary/Conclusion If the existing order or line do not have these fields populated, you will not be able to make changes to them using Order Import. Change Sequence Numbers Change sequence numbers are a way to control the sequence in which a group of changes is applied to an order. The use of change sequence numbers in Order Import is optional. Change sequence numbers are most frequently used by the EDI Purchase Order Change transaction, but you can also use them to control the order of application of changes, in the event you are importing changes from a legacy or third-party system. For more information about how change sequence numbers work, see the Oracle Order Management User’s Guide. Summary/Conclusion In summary, Oracle Order Management provides a powerful and robust open interface to facilitate your loading orders and returns, as well as changes to existing orders and returns, from external or internal systems. It also provides you with tools to manage the import process and correct errors that are encountered during the importing of data. Order Import 24-11 Summary/Conclusion 24-12 Oracle Order Management Suite Implementation Manual 25 The Internet Customer Portal Topics covered in this chapter include: ■ ■ Overview on page 25-2 Feature Functions and Basic Instruction - What is it? How is it used? on page 25-2 ■ Tools/Techniques of Feature - API’s, Workflow on page 25-4 ■ Setup Steps to Implement Feature on page 25-4 ■ Conclusion on page 25-9 The Internet Customer Portal 25-1 Overview Overview The Internet Customer Portal (iCP) (aka Order Management Portal) is a Business to Business (B2B) Self-Service Web Application. The purpose of the Order Management Portal (OM Portal) is to provide an industry leading and competitively differentiating self-service order management. It enables a company to improve the accessibility of service to customers, improve customer satisfaction and limit expensive calls to the support center. The OM Portal is a web internet self service tool to place orders and view order/return transaction information as a form base Order Management application. A company who uses the OM portal will allow its customer’s personnel to enter and view order transactions through the OM portal. The primary target users of the OM Portal are the business to business (B2B) external users. These are close partners and frequent customers. The B2B users will access the Portal to save time with queries and transactions. They also need to closely review their account and the status of their orders. By giving the B2B users access to the Portal, the order entry and customer service groups of the OM licensee will save time on reduced customers calls and manual order entry efforts. The secondary target users are internal users. A common internal user could be a salesperson who wishes to review customer account information or place an order. These users access the Portal because they may not have access to the standard forms. The order entry groups and the internal users of the licensee could save time on internal calls if the standard forms aren’t a viable alternative for the internal user. The tertiary target users are the business to consumer (B2C) external users. These users are generally infrequent end users who may or may not use a purchase order. The B2C user will access the Portal because they need to save time with queries and wish to view the status of their order. The Order Entry and Customer Service groups of the OM licensee will save time on reduced customer calls and manual order entry efforts. This Internet Customer Portal technology has been developed to align with e-business practices and provide the end user an easy and efficient way to interact and conduct business with their customers. Feature Functions and Basic Instruction - What is it? How is it used? The Internet Customer Portal (iCP) is a web internet self service tool to place orders and view order/return transaction information. This self service tool can be used to create orders, check pricing and availability of certain products, view order or return information, view detailed shipping information and view detailed account 25-2 Oracle Order Management Suite Implementation Manual Feature Functions and Basic Instruction - What is it? How is it used? and payment information. Because the portal is web based, functionality, processing and user interface somewhat different from the core Order Management Sales Order Functionality. Any user with a Netscape browser can access the iCP web page with a sign on and password. When you request an account, the portal administrator can review and approve each request. Once the account has been approved, a notification is sent to the requestor with account information and confirmation. The notification will also contain the system generated user name and password. At this time, the you are ready to log in and place orders or view order or delivery information. Once you sign on to the Internet Customer Portal, the Home page will be the first screen to appear. This page will welcome you to the iCP, list advertisements for products and provide links to shipment, orders or payment information. You can customize this Home page to include information relevant to your business. There are multiple tabs across the top of the home page, including the following: Order Status Tab: Query and view orders based on user defined criteria. (See Figure 3) Order Management Tab: Check pricing and availability on items and creating new orders. (See Figure 2) Delivery Information Tab: Query and view deliveries based on user defined criteria. (See Figure 4) Account Tab: Query and view payment, invoice, credit and debit memos and account history based on user defined criteria. Customer Service/Contact Us Tab: Lists contact information. When placing an order, you will be able to enter the order header and line information directly in the iCP form. You can order standard items, both shippable and non-shippable, and configurations using the portal. You can modify the quantity of the items added to the order, the price and enter coupon information, if any. Once complete, you review the order and submit it. When the order has been submitted, the system internally books this order and takes you to the Acknowledgment page with your order number which can be printed as a reference. During the booking process, scheduling is done first. If the schedule date doesn’t match the requested ship date, the user is informed. Order submission stops until the user changes the requested ship date and submits the order again. This process utilizes the business API’s supported by Oracle Order Management application from release 11i onwards. The Internet Customer Portal 25-3 Tools/Techniques of Feature - API’s, Workflow Tools/Techniques of Feature - API’s, Workflow API calls are made at different stages in the iCustomer Order Entry Process. These API’s are listed below: After getting results for searched Item, you might need to Check Item Availability. A call is made to an MRP API i.e. MRP_ATP_PUB.CALL_ATP which will return the expected shipping date for the item(s) selected and the recommended shipping method depending on whether the defaulting rules for the same are set by the customer. Before calling the Pricing Engine to get Pricing Information, a call is made to the Process Order API to get all customer profile setup information which can default as Header information in Order Form. The Process Order API will also identify item related defaulting information like UOM etc. Once the necessary defaulting information is retrieved, the Pricing Engine API can get correct Pricing information for selected items. When you select an item and click Add To Order, the Process Order API is called to create order header/line information in post mode. The Scheduling API schedules the items in the order for the requested date. If you decide to save the order as a draft, Oracle will need to rollback the order posted in the previous stage. When the order gets submitted, the Process Order API commits the changes to the database and then calls the Scheduling API to reserve the ordered items. Setup Steps to Implement Feature In order to distinguish Web orders from Normal orders, the user should setup a separate workflow process or processing constraint/defaulting rule so that web orders will go through a different workflow or order process than normal orders. In core OM, orders will be entered by company’s own salespeople. However, customers can log into the company’s Portal and enter orders. Thus, Companies might want more approvals or restrictions to be included in the order flows of orders entered through Portals. Create a separate workflow process for Portal Orders/Lines and tie it to the Portal Orders to address these requirements. Order Types and Line Types of orders/lines determine which workflow process an order will follow. Default different order types/line types for customers when entering through the Portal. The basis to distinguish between Portal Orders from Orders entered through core OM system is the Order Source. For Portal Orders, a foreign key is referenced to Order Source created for Web Orders and this will be a point of distinction between Portal Orders and Normal Orders. A Defaulting Rule to default Order/Line Types would be setup for each customer based on the condition to 25-4 Oracle Order Management Suite Implementation Manual Setup Steps to Implement Feature check on the order source id to understand whether this is a Portal Order or an order entered through core OM for a particular customer. And to default a particular order/line type. (Refer to Defaulting Rules and Processing Constraints Section for setup information) Diagram of Process - What does it look like? Figure 25–1 Create Orders Form , part 1 The Internet Customer Portal 25-5 Setup Steps to Implement Feature Figure 25–2 Create Orders Form, part 2 The Create Orders form consists of two segments, the Order Information and Item Information sections. The Order Information section includes all header level information for your order, such as, Customer Name, Customer Purchase Order, etc. The Item Information section includes line level information, such as, Item Number, Quantity, Unit Price, etc. From the Item Information section, you can also drill down to additional details (i.e. Payment and Pricing Information) for each line. 25-6 Oracle Order Management Suite Implementation Manual Setup Steps to Implement Feature Figure 25–3 Order Status Form The Order Status form is a static form where the information is viewable only. A customer uses the form to query and view orders based on the user defined criteria. You can view additional order information by clicking on the sales order number. The Internet Customer Portal 25-7 Setup Steps to Implement Feature Figure 25–4 Delivery Information Form The Delivery Information form is a static form where the delivery information is viewable only. A customer uses the form to query and view delivery information based on user defined criteria. You can also drill down into additional delivery line information by clicking on the Waybill field. 25-8 Oracle Order Management Suite Implementation Manual Conclusion Conclusion In summary, Oracle is offering Internet-based self-service applications to change the way companies conduct business and interact with their customers. This Internet Customer portal serves as an entry point to a secured, web-based collaborative environment for businesses to provide customer-specific and product information and for their customers the means to track their business. The Internet Customer Portal 25-9 Conclusion 25-10 Oracle Order Management Suite Implementation Manual 26 Invoicing Topics covered in this chapter include: ■ ■ Overview on page 26-2 Feature Functions and Basic Instruction - What is it? How is it used? on page 26-3 ■ Tools/Techniques of Feature - API’s, Workflow on page 26-5 ■ Setup Steps to Implement Invoicing on page 26-6 ■ Troubleshooting on page 26-8 ■ Summary/Conclusion on page 26-9 Invoicing 26-1 Overview Overview Invoicing in Order Management is the process by which data from Orders and Returns is communicated to Oracle Receivables to create invoices, credit memos and credits on account, recognize revenue and manage sales credits. Invoicing Integration has been implemented as a workflow activity in Order Management. When it executes, it transfers fulfilled item information including quantities, selling prices, payment terms, and transaction dates to Oracle Receivables, which processes invoices for customers and accounts for revenue. Additionally, you can process credit memos and credits on accounts created from returns using this process. Upon completion of the Invoicing workflow activity, users must submit AutoInvoice from Oracle Receivables to import the invoice and credit data into Oracle Receivables. The Invoicing Integration workflow activity can be part of the Order Header workflow, if you want the entire order to interface to Receivables at the same time, or part of the Order Line workflow, which will interface each line or set of lines as they become eligible. For more information about the Invoicing activity and the nuances of interfacing to Receivables see the Oracle Order Management User’s Guide and the Oracle Manufacturing APIs and Open Interfaces Manual, Release 11i. 26-2 Oracle Order Management Suite Implementation Manual Feature Functions and Basic Instruction - What is it? How is it used? Feature Functions and Basic Instruction - What is it? How is it used? The Invoicing workflow activity loads the Receivables Autoinvoice Interface tables with data from the order lines, price adjustments, sales credits and charges. Types of data interfaced are product information (ordered item identifier, description, inventory item identifier), quantities and prices, currency, payment terms, etc. It can be run from the line workflow or the header workflow, depending on whether you want to invoice the lines as they are shipped or wait for the whole order to invoice together. Invoicing and Fulfillment Order Management seeded workflows are designed so order lines are eligible to be Invoice Interfaced once they have completed the Fulfillment workflow activity. The Fulfillment concept, along with the use of fulfillment sets, allows you to group lines together for invoicing purposes. Typically, for shippable lines, shipping completes fulfillment. For non-shippable lines, booking completes fulfillment. If you want to hold up invoicing of a non-shippable line until an associated shippable line is shipped, put those lines together into a fulfillment set. None of the lines in the set progress past fulfillment to invoicing until all lines in the set are fulfilled. Discounts In Order Management, you have the option to send items and prices to Receivables net of any price adjustments (as was done in R11 and prior releases of Order Entry) or to send the list price and then send separate adjustment lines for each discount. This is controlled by the profile option OM: Show Discount Details on Invoice. If you choose to show discounts, they are sent as regular invoice lines to Receivables with a negative price, and are accounted for like the item to which they belong. The Description field for the discount lines is the name of the discount. This feature provides visibility to discounts for printing on invoices, but does not provide separate accounting for discounts. Freight and Other Charges In Order Management, all charges (freight and special charges such as insurance, handling, export charges, etc.) are passed individually to Oracle Receivables as invoice header level charges. There is no grouping done by the Invoicing Activity. However, Oracle Receivables will consolidate all the freight charge lines into one line for accounting and printing on the invoice. Order Management passes the Invoicing 26-3 Feature Functions and Basic Instruction - What is it? How is it used? details to Receivables to support differing charge accounting and printing in the future, once Receivables supports such functionality. Over and Under Shipments Overshipments are invoiced based on the setting of the OM: Overshipment Invoice Basis profile option and also corresponding attributes on the Customer and bill-to site. Values for this attribute are Ordered or Shipped. If this value is Ordered, the ordered quantity is invoiced, even if a larger amount was actually shipped. If this value is Shipped, the actual shipped quantity is used for billing. Undershipments are always invoiced as the amount shipped. Please note that you must set over and under shipment tolerances to be able to overship or automatically close a line on an undershipment. You can set site-level shipping tolerances via a profile option. You can also specify exceptions for a customer, bill-to site, item or customer/item combination using the Customer Standard form, Master Items form, and a new Order Management form for customer/item. Credit Cards Credit card information is sent to Receivables if the Payment Type on the order is Credit Card. Data interfaced includes: iPayment order number (transaction id), approval code, bank account id, credit card holder name, primary payment method. This information will allow Receivables to do the necessary capture functions for the credit card. Notes/Attachments It is possible in Order Management to set up note categories to indicate you want the note to print on the Invoice. As of this time, these notes will not actually print on the standard Receivables Invoice. However, if you choose to customize the printing of the Invoice, you can fetch those notes flagged for the invoice and print them in your print procedure. Viewing the Invoice Once a line or an order has invoiced, Receivables updates the order with the invoice information. From the Sales Order Organizer, you can query your order, go to Additional Line Information – Invoicing or Additional Order Information – Invoicing to see invoice data. Data available to be viewed include Invoice Number, Batch Source, invoice date, amount and balance. 26-4 Oracle Order Management Suite Implementation Manual Tools/Techniques of Feature - API’s, Workflow Tools/Techniques of Feature - API’s, Workflow When you set up your order and line workflows for invoicing, choose carefully which line and header workflows you use together to be sure you match the correct Invoicing Activities. If you intend to use header level Invoicing, be sure to use line level workflows that have coordination points with the header activity. The seeded workflows are named to make that easy to do. For example, there is a header workflow called Order Flow – Generic with Header Level Invoice Interface – you would use it with line flows such as Line Flow – Generic with Header Level Invoice Interface. See Figures 1 & 2 . Figure 26–1 Order Flow with Header Level Invoicing Figure 26–2 Line Flow with Header Level Invoicing Similarly, if you want to use line level Invoicing, use a header workflow that does not have invoicing, and use line flows that do not wait for coordination with the header regarding Invoicing. See Figures 3 & 4. For more information on the Invoicing Workflow Activity processes, see the Order Management User’s Guide. Invoicing 26-5 Setup Steps to Implement Invoicing Figure 26–3 Order Flow with Line Level Invoicing Figure 26–4 Figure 4: Line Flow with Line Level Invoicing Setup Steps to Implement Invoicing There are numerous setup steps required to get Invoicing to work in your environment. Here are some of them that are especially important: Profile Options There are many profile options that control the Invoicing Process, specifically, OM: Credit Memo Transaction Type, OM: Credit Salesperson for Freight, OM: Invoice Numbering Method, OM: Invoice Source, OM: Invoice Transaction Type, OM: Non-Delivery Invoice Source, OM: Overshipment Invoice Basis, and OM: Show Discount Details on Invoice. For more information about setting these profile options see the Order Management User’s Guide. 26-6 Oracle Order Management Suite Implementation Manual Setup Steps to Implement Invoicing Item Attributes The items you expect to invoice must be setup with the Invoiceable and the Invoice Enabled item attributes turned on. You can also specify a GL account which can be used for building the revenue account in autoAccounting on this tab of the item setup form. Accounting Rules and Invoicing Rules These are set up in Oracle Receivables and refer to the way revenue is recognized and in which accounting period. There are several seeded rules which suit most applications. In Order Management, you can specify an Accounting and an Invoicing Rule when you define an order type or line type, and also when you define agreements. When the Invoice Interface workflow activity runs, the data to pass to Receivables is obtained based on tables documented in the Oracle Manufacturing APIs and Open Interfaces Manual, Release 11i chapter on Interfacing Oracle Order Management with Oracle Receivables and Invoicing. Receivables Transaction Types There are various transaction types seeded in Receivables, such as Invoice, Credit Memo, etc. These definitions control how the different AR transactions are processed, and this is where you can specify various GL accounts available for use during autoAccounting. You must attach a Receivables Transaction Type to your Order Management Order Types and Lines Types when you define them in order to make Autoinvoice import your orders. Receivables Invoice Sources Also called Transaction Sources or Batch Sources – these entities enable you to specify a default transaction type assigned to a batch and determine whether Receivables will automatically number your transactions and batches. To use for OM, create at least one of these with a type = automatic. For more information on Invoice Sources and uses, see Oracle Manufacturing APIs and Open Interfaces Manual, Release 11i chapter on Interfacing Oracle Order Management with Oracle Receivables and Invoicing. Auto-accounting Controls the how the accounting is derived for lines that are processed by the Autoinvoice Import process. See the Oracle Receivables User’s Guide for set up details. Invoicing 26-7 Troubleshooting Order Management Transaction Types When you define your OM order types and line types, you can specify various information that affects the Invoicing Activity. Enter this information on the Finance tab of the Define Transaction Type form. Pick a Receivables Transaction Type and Invoice Source. You may choose Accounting and Invoicing Rules, Credit Method for Accounting and Installment. Invoice Grouping Rules These rules are setup in Receivables and let you specify which attributes must be identical on the same invoice. If the chosen attributes are different for different lines, then separate invoices will be generated. Invoice Line Ordering Rules These rules are also setup in Receivables and let you specify the sequence of printing lines within an invoice. Troubleshooting If your order does not appear in the Sales Order list of values in the Autoinvoice Import request submission window, check the workflow status of your lines and verify that the Invoice Interface activity status is COMPLETE. If your lines show Invoice Interface activity status of INCOMPLETE, use the Process Messages window to find the messages logged by the Invoice Interface for these lines. Typically this process errors out due to incomplete or missing data on the order line, data such as batch source name, Receivables transaction type, credit memo transaction type or service start date and end date for service lines. If your invoices are not getting created when you run Autoinvoice Import, be sure to examine the log and report resulting from the concurrent job. It points out the reasons why data is not processed. Usually the problem stems from auto-accounting rules that have or have not been set up. For example, verify that there are General Ledger numbers entered for the revenue accounts for the salespeople on your order. Usually you can correct the setup and rerun Autoinvoice Import. The corrected sales order data will process correctly and your invoices will be created. 26-8 Oracle Order Management Suite Implementation Manual Summary/Conclusion Summary/Conclusion In summary, Oracle Order Management integrates with Oracle Receivables to provide billing and revenue recognition capabilities. Users in Order Management have some measure of control over how and when invoices are produced, but the formatting of the physical invoice and the complexities of accounting are all controlled by the Receivables application. Invoicing 26-9 Summary/Conclusion 26-10 Oracle Order Management Suite Implementation Manual 27 Shipping Execution Setup This chapter contains setup information for Shipping Execution. Topics include: ■ Release Rules on page 27-2 ■ Release Sequence Rules on page 27-2 ■ Profile Options on page 27-21 ■ Prerequisites on page 27-21 Shipping Execution Setup 27-1 Release Rules Release Rules This rule defines and saves picking criteria that can be used when running Pick Release. Required when Running Pick Release as a Standard Release Submission (SRS) Process. Using current date defaults system date in rule Create rule for Order, Shipping or Inventory Information. Navigate: Shipping > Setup >Picking > Define Release Rules Form. The Release Rule form enables you to set up picking rules that define criteria for what lines are going to be released to the warehouse on a specific pick release job. A Release Rule is required if you are scheduling Pick Release as SRS process. A Release Rule can be used when running non SRS Pick Release jobs by selecting a defined rule in the Based on Rule field in the Release Sales order form. Release rules can be created based on criteria represented in three different tabs: 1. Order Tab - Criteria = Order Type, Order Number, Customer, Item, Unreleased/Backordered/All, Ship Set #, Scheduled Ship Dates from and To, Request Dates from and to. 2. Shipping Tab - Criteria = Carrier, Ship From, Shipment Priority, Release Sequence Rule, Auto Create Delivery, Shipment Priority. 3. Inventory Tab - Criteria = Warehouse, Pick Slip Grouping Rule, Auto Allocate, Auto Pick Confirm Note: In Inventory Tab, when a warehouse is selected, other criteria is defaulted. Release Sequence Rules This rule is used at Pick Release to determine the sequence in which inventory is allocated to orders lines. Rules can be defined to sequence release by order, outstanding invoice value, schedule date, departure date and shipping priority. Results of the allocation sequence can be applied in ascending or descending order. A release rule defined using outstanding invoice value is mutually exclusive. A release sequence rule can be defined to have multiple release sequence priorities. For example, a rule can be defined with shipping priority the number 1 priority descending and schedule date the number 2 priority ascending. The result: the highest priority orders with the earliest scheduled date is released first. You can define as many release sequence rules as necessary. 27-2 Oracle Order Management Suite Implementation Manual Release Sequence Rules Can be a defaulted rule in the Release Sales Order form. Create rule for different Business Conditions. Establish Hierarchy based on priority Figure 27–1 Release Sequence Rule Attributes: Navigate: Order Management>Shipping >Setup>Picking>Define Release Sequence Rules Form. Pick Slip Grouping Rules When Pick Release is run, Pick Slip Grouping Rules determine how the pick slips are grouped. Rules can be defined to group pick slips by Order Number, Sub Inventory, Customer, Ship to, Carrier, Delivery, Shipping Priority, item, location, lot, revision, or any combination. An example of a pick slip grouping rule is Group by Customer and Sub Inventory. Grouping Rules make Picking more efficient by putting logical lines to be picked on one Pick slip. Can be set as default rule in the Release Sales order form. Create rule for different Business Conditions. Establish hierarchy based on priority Shipping Execution Setup 27-3 Release Sequence Rules Figure 27–2 Pick Slip Grouping Rule Attributes: Navigate: Shipping > Setup>Picking> Define Pick Slip Grouping Rules Form Shipping Parameters General Tab Shipping Parameters are specific to an organization. The General tab represents the parameters to be set for the organization related to Unit of Measure (UOM) class for shipping attributes in the organization and percent fill basis of containers used in the organization. 27-4 Oracle Order Management Suite Implementation Manual Release Sequence Rules Figure 27–3 Shipping Parameters, General Tab: Navigate: Oracle Shipping >Set up > Shipping Parameters. There are three parameters to be set on the tab. 1. Weight UOM Class. The choices in the LOV are all the valid UOM classes that are set up in Oracle Inventory. 2. Volume UOM Class. The choices in the LOV are all the valid UOM classes that are set up in Oracle Inventory. 3. Percent Fill Basis. The choices in the LOV are weight, volume or quantity. If weight or volume is chosen for this parameter, the calculation will be made from the item’s and container’s physical attributes set up in Oracle Inventory. If quantity is chosen for this parameter, the calculation is made based on the Container Load Details set up from where a quantity is entered as the maximum amount that will fit into the container. Pick Release Tab The Pick Release tab sets most of the parameters that relate to the Pick Release process. The following are the parameters are to be set in this form, their corresponding values and the meaning of those values. Shipping Execution Setup 27-5 Release Sequence Rules Figure 27–4 Shipping Parameters, Pick Release Tab: Navigate: Oracle Shipping >Set up > Shipping Parameters Release Sequence Rule The choices in the LOV are all the valid Release Sequence Rules that are set up in the organization. The chosen rule will appear as the default Release Sequence Rule in the Release Sales Order form. It is recommended that you use the release sequence rule most frequently used for this parameter setting. Though this is the default rule that populates the Release Sales Order form, the rule can be changed on the fly to accommodate the pick release process. Pick Slip Grouping Rule The choices in the LOV are all the valid Pick Slip Grouping Rules set up in the organization. The chosen rule will appear as the default Pick Slip Grouping Rule in the Release Sales Order form. It is recommended that you use the Pick Slip Grouping rule most frequently used for this parameter setting. Though this is the default rule that populates the Release Sales Order form, the rule can be changed on the fly to accommodate the pick release process. Print Pick Slip The choices in the LOV are At the End or Immediate. If At the End is chosen for this parameter, the system will wait for the all pick slips that were create from the Pick Release job to finish before sending them to a printer to be printed. 27-6 Oracle Order Management Suite Implementation Manual Release Sequence Rules If Immediate is chosen for this parameter, the system will send a pick slip immediately to the printer regardless of whether more pick slips are in the pick release job to be completed. Instructor Note: It is recommended that Immediate be chosen as it has less impact on system resources. Default Pick Release Document Set The choices in the LOV are all the document sets that have been set up. This is the document that will print resulting from any initiated pick release process. Autocreate Delivery within an order The choices in the LOV are, Within an Order and Across Orders. If ‘Within an Order’ is chosen, the autocreate delivery process will create deliveries from the selected order lines or lines meeting the release criteria based on the order number and standard delivery grouping attributes. i.e. The system will automatically create a delivery for each order number released and only assign lines with that order number to that delivery. If Across Order is chosen, the autocreate delivery process will create deliveries from the selected order lines or lines meeting the release criteria based on the standard delivery grouping attributes. i.e., If multiple lines from multiple order numbers are all shipping to the same customer/ship to combination, the system will automatically create one delivery during the pick release process and assign all lines to that delivery. Default Stage Subinventory The choices in the LOV are all the valid subinventories within the inventory organization where you are working. This is the Sub inventory that an order line will reside in as a result of the manual or auto pick confirm process. Default Stage Locator The choices in the LOV are all the valid row, rack, bin locators within the inventory organization where you are working. This is the locator that an order line will reside in as a result of the manual or auto pick confirm process. Number of Pick Slip Lines This parameter enables the user to determine the number of lines that will print on each pick slip. This is a free form field where the user can enter any number. This parameter should be used in conjunction with the Print Pick Slip Immediately parameter to get the Pick Slip document prior to the pick slip job completing. Shipping Execution Setup 27-7 Release Sequence Rules Auto Detail Check box When this box is checked: The system automatically creates a move order and details that move order immediately after it is created. Detailing is the process of creating a high level (organization level) Reservation on the material if no Reservations previously existed. When this box is unchecked: The system automatically creates a move order but postpones the detailing process. This is referred to as manual-detailing where the user will need to navigate to Oracle Inventory forms to complete the transaction. To emulate the pick release process from Release 10.7 and 11.0 this check box should be checked. Auto Create Deliveries Check box When this box is checked: the system automatically creates deliveries, based on the Delivery Grouping Rules (see Delivery Grouping Tab), and assigns them to selected delivery lines from the same organization the parameter represents. When launching pick release from the shipping transaction form, the system checks this parameter. When releasing lines from the release sales order form, the Auto Create Deliveries check box in the form will default to the parameter setting as soon as a warehouse is entered in the inventory tab. If a warehouse is not entered, the system will look at the warehouse on the line to determine behavior. When this box is unchecked: the system will not automatically create deliveries for selected lines that are releasing from the organization the parameter represents. Shipping Transactions Tab The Shipping Transaction tab sets the parameters that relate to the functionality in the Shipping Transaction form. The following are the parameters to be set in this form, their corresponding values and the meaning of those values. 27-8 Oracle Order Management Suite Implementation Manual Release Sequence Rules Figure 27–5 Shipping Parameters, Shipping Transaction Tab: Navigate: Oracle Shipping >Set up > Shipping Parameters Default Delivery Document Set The choices in the LOV are all the valid Delivery Document sets. This is the document set that will print as a result of shipment confirmation. It usually consists of the Bill of Lading, Packing List, and if it is an international shipment, commercial invoice. Weight / Volume Calculation The choices in the LOV are Automatic and Manual If Automatic is chosen, the weight and volume will be automatically calculated when a delivery status is set to confirmed. If Manual is chosen, the weight and volume for a delivery can only be calculated from the action menu. Enforce Packing in Containers The choices in the LOV are Yes and No. If Yes is chosen, an warning message will appear during ship confirmation if any item in a delivery is not assigned to a container. This message can be bypassed to complete the shipment if necessary. If No is chosen, the system will not check to see that all items in a delivery are assigned to a container. Shipping Execution Setup 27-9 Release Sequence Rules Container Inventory Control This is a non-operational parameter that has no impact to container functionality. It is intended to support future functionality. Pack Slip Required Check Box If this box is checked, the system checks to see that a pack slip is printed for the delivery. An error message will appear if a packing slip is not created. If this box is unchecked, the system will not check to see that a packing slip has been generated. Goods Dispatched Account This is also known as the Cost of Goods Sold Account to use for this organization and is used if the OM workflow cannot determine one for the sales order issue transaction. Freight Class Category Set This parameter has no functionality in the current release. Commodity Code Category Set This parameter has no functionality in the current release. Delivery Grouping Tab The Delivery Grouping tab sets all the parameters that relate to the criteria for grouping lines into deliveries. Mandatory grouping criteria consists of Ship from Location and Ship to Location. The system looks at this parameter when autocreating deliveries and assigning lines to them and when a user is manually assigning lines to deliveries. 27-10 Oracle Order Management Suite Implementation Manual Release Sequence Rules Figure 27–6 Shipping Parameters, Delivery Grouping Tab: Navigate: Oracle Shipping >Set up > Shipping Parameters. Additional criteria includes: Customer Freight Terms FOB Code Intermediate Ship To Location Ship Method Carrier Note: These should not be changed if there are any deliveries that are not ship confirmed. This might cause problems with the unshipped deliveries. Currently, there is no validation to prevent this. Shipping Execution Setup 27-11 Release Sequence Rules Organization Parameters ATP, Pick, Item, Sourcing Tab There is one setting within the Organization Parameters form that affects the behavior of the picking process in Shipping Execution, the Pick Confirmation Required checkbox. Figure 27–7 Organization Parameters, ATP, Picking, Item, Sourcing Tab: Navigate: Oracle Shipping > Set up > Organization Parameters > ATP, Picking ,Item, Sourcing tab If the Pick Confirmation Required check box is checked, the system requires that the user navigate to inventory forms to perform a manual pick confirmation of the move order that was generated as a result of the Pick Release process. The pick confirmation process acknowledges the transfer of the item being picked from its source location to the default staging location. If the Pick Confirmation Required check box is unchecked (default) for new installs, the system performs the pick confirmation process automatically based on sourcing rules set up in Oracle Inventory. To emulate the picking processes from release 10.7 and 11.0, this check box should be unchecked. 27-12 Oracle Order Management Suite Implementation Manual Release Sequence Rules Document Sequencing Two steps are required in order to print Bill of Lading and Packing Slip Reports, Set up and Generate Document Number. Navigate: Shipping > Setup > Documents Setup Setup requires three steps, Define Document Categories, Define Document Sequences, and Make their Assignments. Document Categories A category must be defined for each Bill of Lading and Packing Slip you wish to create. You can create a Bill of Lading category for each Ship Method/Carrier you use or define one Bill of Lading category for all Ship Methods/Carriers. The advantage to having a different Bill of Lading sequence for each carrier is that you could easily identify the carrier by looking at the Bill of lading number. In addition to creating document categories by Ship Method/Carrier, you can tie a category to a specific location. This provides the opportunity to have a different BOL sequence for the same carrier departing from a different location. An example of this is: For a Viking Freight shipment departing from warehouse 1 the Bill of lading number could look like this: WH1-Viking-12345 For a Viking Freight shipment departing from warehouse 2 the Bill of lading number could look like this: WH2-Viking-54321 When defining a document sequence for the Packing Slip, you can create a category for every location or one category for all locations. The document category is specific to a document type and location. The document category is also specific to the application /responsibility from which you accessed the form. This means that if you create a document category called Viking BOL for WH1 under the responsibility Oracle Order Management Super User, you must be logged on as Oracle Order Management Super User to have visibility to Viking BOL for WH1 when assigning a sequence to a category. Navigate: Oracle Order Management >Shipping > Setup > Documents > Document Categories 1. Click on the New button 2. Enter the Category Name and Description. Shipping Execution Setup 27-13 Release Sequence Rules 3. Choose the Document: Bill of Lading or Packing Slip. 4. Define the scope of the Category 5. If Bill of Lading, one specific or all ship methods for the Delivery Leg’s Ship Method (Packing Slip is always for Sales Order) 6. One specific or all locations for the Delivery Leg’s Pick-up Location (if a BOL) or the Delivery’s Pick-up Location (if a Packing Slip). 7. Define the Sequence Prefix, Suffix, and Delimiter Information pertaining to the fields in the Document Category definition window are as follows: Category Name This is a free form field used to enter the name of the category you are defining. This is the name that will appear in the list of values when assigning the category to a sequence. Description Enter text that describes the category you are defining. An example might be, Bill of Lading for Viking Freight from Whse V1. Document From the list of values select the document type the document category will apply to. Ship Methods/ Document Types If in the previously described document field you select Bill of Lading, the prompt for this field will be Ship Method. Define the document category for a specific carrier by clicking the One radio button and selecting the carrier from the LOV you want the document category to be applied to. Clicking the All radio button results in the document category being applied to all carriers. If you select Packing Slip or Advanced Shipment Notice for the document field, the prompt for this field will be Document Type. For release 11i Customer Orders is the only sub-type supported and should be the only choice in the list of values. Locations The document category you are defining can be applied to on location or all locations. This is the field where this is determined. Selecting the All radio button indicates the document category applies to all locations. Selecting the ‘One’ radio button allows you to select a specific location from the LOV you wish the document category to apply. Sequence You can define a Prefix, Suffix and delimiter to the document category. The Prefix and Suffix fields are free form and any alpha numeric combination can be entered. Typical use of these fields are something that represents an identity to 27-14 Oracle Order Management Suite Implementation Manual Release Sequence Rules the location, carrier, date etc. in which document is generated. The delimiter can also be any character and simply separates the prefix and suffix from the actual generated number. The default appearance shows the user what the Bill of Lading, Packing Slip, or ASN number will look like when it is generated Document Sequences Navigate: Shipping > Setup > Documents > Document Sequences 1. Enter the Sequence name. 2. Choose Oracle Shipping as Application. 3. Enter the Effective From and To Dates. 4. Always choose Automatic as Type. 5. Enter the Initial Value Information pertaining to the fields in the Document Sequences definition window are as follows: Name Enter a name for the sequence you are creating. This will be a unique name that will identify this sequence in the application defined for a specific duration. Application From the list of values, choose Oracle Shipping. Effective, From and To Enter the first date you want the document sequence to become effective by clicking on the calendar LOV in the ‘From’ field. Enter the date you want the document sequence to end by clicking on the calendar LOV in the ‘To’ field. Type The available types for this field are Automatic, Manual and Gapless. Automatic sequentially assigns, by date and time of creation, a unique number to each document as it is generated. Manual numbering requires you to assign a number to each document before it is generated. You must enter unique values. However, note that numerical ordering and completeness is not enforced. Gapless numbering type is valid only in the context of certain localizations. We recommend that you choose this type only after consulting with Worldwide Support, as it may affect the performance of your system. Shipping Execution Setup 27-15 Release Sequence Rules Message Check the Message check box if you want each document to display a message (in the message line near the bottom of the screen) informing the user of the sequence name and value (number). This check box only applies to sequences with the automatic type of numbering. Messages appear only on form displays, and are not written to a request's log file. Once a sequence is defined, the message choice cannot be changed. Initial Value The initial value indicates the numeric value in which you wish to use when the first document is created. Enter a value for the first document in your sequence. This field only applies to sequences with automatic or gapless numbering type. The maximum sequence value is 1.0e+27. If you leave this field blank, the first document is automatically assigned a value of 1. Once a sequence is defined, this initial value cannot be changed. For example if you select 1 as the initial value, the first document that is created will consist of the prefix you defined in the document category, the delimiter you defined, the numeric value 0000001, and the suffix you defined. Assign a Document Sequence to a Document Category Once you have defined a Document Category and a Document Sequence, the final step before you create a Bill of Lading or Packing Slip is to assign a document sequence to a document category. A document sequence must be assigned to a document category. The assign sequence form is also application and category specific. Navigate: Oracle Order Management>Shipping>Setup>Documents>Assign Sequences 1. Choose Oracle Shipping as Application. 2. Choose the Document Category. 3. Enter the Start and End Dates. 4. Choose the Document Sequence. For additional information, see the topical essay on Document Sequencing. 27-16 Oracle Order Management Suite Implementation Manual Release Sequence Rules Generate Document Numbers Generate Bill of Lading Numbers When the set up processes have been completed, the user can create a Bill of Lading and or Packing Slip for a delivery. Both documents can be generated as part of a document set that can be run at the completion of ship confirmation, or the documents can be created individually from the document request menu. The Bill of Lading number can be generated in two ways Click the Generate BOL button in the Legs tab page on Delivery’s Detail window. At Ship Confirm, Check Create Bill of Lading if the Delivery is not assigned to any trip. A Delivery must meet the following prerequisites in order for a Bill of Lading to be created. The Delivery must have a ship method. The Delivery must be assigned to a trip. The Delivery must have a waybill number. To create and print a Bill of Lading, simply query the Delivery for which you want to print a Bill of Lading in the Shipping Transaction form. Click on the Details button to invoke the delivery details window. From the Delivery Details window, click on the Legs tab. This will open a window that displays all the information pertaining to the Leg of the delivery. Click on the Generate BOL button and the system will create a Bill of Lading number based on the document category/sequence that it has been assigned. You will be able to see the Bill of Lading number dynamically populate in the field on the form. At this point you can print the individual BOL by navigating to the Reports and Documents form and select the individual BOL to print. For additional information, please see the topical essay on Printing Documents. Generate Packing Slip Numbers The Packing Slip Number is generated for a Delivery: Click Generate Pack Slip button in the Packing Slip tab page on the Delivery’s Detail window Shipping Execution Setup 27-17 Release Sequence Rules Two fields can be input on the Packing Slip tab page for the Packing Slip: Reason of Transport and Description After Setting up Document Sequences, Document Categories, and their Assignments you will be able to successfully print the Bill of Lading and Packing Slip reports. Ship Method Freight Carriers-Inventory Navigate: Shipping > Setup > Freight > Define Freight Carriers Carrier 1. Select the Inventory Organization that uses the carrier. 2. Enter Name of the freight carrier 3. Enter Description of the freight carrier 4. Enter Distribution Account Number 5. If applicable, enter Inactive after date Ship Method Setup There is a need to provide a mechanism to determine valid freight codes from ship methods. Order Management will capture the ship methods from which the appropriate freight code can be determined by Shipping and subsequently used in Invoicing. Ship Methods are organization and Carrier specific. A given ship method for an organization must map to one freight code for the same organization. The Carrier Ship Method Setup form allows you to enter data to define what kind of ship method the carrier will provide. Freight Carriers can have multiple Ship Methods to reflect the different service levels. For example a Carrier can be UPS. Associated Ship Methods may include UPS Next Day Air AM, UPS Next Day Air PM, and UPS Ground. Navigate: Inventory > Setup > Organizations > Shipping Methods 1. Click on + key to create a new line (alternatively, go to the File menu and choose New) 2. Enter name of the Ship Method Code 3. Enter Meaning of the Ship Method Code 4. Enter Description of the Ship Method 27-18 Oracle Order Management Suite Implementation Manual Release Sequence Rules 5. If applicable, enter End Effectivity Date Figure 27–8 Ship Method Setup Upgrade Issues To minimize the impact of the upgrade, the information in ORG_FREIGHT will be upgraded to FND_LOOKUP_VALUES so that no changes will be necessary to the system relating to the freight carrier and ship method information immediately after the upgrade. Subsequent to the upgrade this information will have to be maintained and adjusted according to the user’s needs. Carrier-Ship Method Relationship Once Ship Methods have been defined, it is necessary to establish a mapping relationship between freight carriers, and ship methods for their organizations. In this form the user can: Establish mapping relationship between freight carriers, ship methods, and suppliers (carriers) for their organizations. A Ship Method can have only one relationship with a Freight Carrier per organization. Navigate: Shipping > Setup > Freight > Define Carrier Ship Methods Shipping Execution Setup 27-19 Release Sequence Rules 1. Enter Ship Method 2. Enter Organization desired 3. Enter Freight Carrier (LOV) in Freight field The Lookup form provides the proper user interface for you to enter, query and update the definition of mapping between carriers and ship method code. Freight Code Identifies a carrier. This is foreign key to ORG_FREIGHT. Choose a value from LOV or enter data directly. The form will check entered value with LOV. Ship Method Defines style/method of freight movement, e.g. Air, Rail, or Truck . This is foreign key to FND_LOOKUP_VALUES_VL. You can choose a value from LOV or enter data directly. The form will check entered value with LOV. Organization This qualifies as the organizations where the ship method is available. It also serves as a foreign key to the organization in ORG_FREIGHT. Service Level If you are using Oracle-UPS integration features, you need to select a Service Level Value. Descriptive Flexfield User defined values Enabled Flag Indicates if this relationship is valid Web Enabled Flag If you have CRP installed and want Istore to display a subset of service levels, select the Web Enabled Flag. Carrier Ship Method Setup form enables users to enter data to define what kind of ship methods the carrier will provide. Ship Method, UPS Ground, has a relationship with Freight Carrier UPS in the Seattle Manufacturing (M1) Organization. Ship Method, UPS Ground, can not have a relationship with another Freight Carrier within the M1 organization. 27-20 Oracle Order Management Suite Implementation Manual Prerequisites Figure 27–9 Entity Relationship Diagrams for Ship Methods For additional information, please see the Topical Essay on Ship Methods. Freight Costs Freight Costs are the expenses incurred by the Shipper to move product via a hired freight carrier. For additional information, please see the Topical Essay on Mapping Freight Cost to Freight Charge. Profile Options Profile options that existed in previous versions have been eliminated in release 11i. The only Shipping profile that needs to be set is WSH: Internet Proxy URL. This profile is required for the shipper to use the UPS (United Parcel Service) API’s. To enable this functionality, enter the address of the user’s proxy server. As an example, www-proxy.us.oracle.com. Prerequisites Perform all setup steps required for the Inventory module, then perform the following steps: Setup internal Locations for HR for your Inventory Organizations. Setup Inventory Organizations in the Inventory responsibility mapping the Inventory Organization to the internal location. Shipping Execution Setup 27-21 Prerequisites Containers & Vehicles Containers and Vehicles are set up similar to items in Inventory which allows full functionality of the containerization feature in Shipping Execution. Oracle Shipping Execution is not integrated with Inventory with regards to container management. This set up step is to use the physical attributes defined for the containers and vehicles to drive the container functionality in Shipping Execution. In order to effect inventory controls for containers, additional item setup information would need to be completed including making the container OM transactable. Navigate: Inventory > Items > Master Items Physical Attribute Tab Select Container or Vehicle Enter Container Type Enter the container’s internal volume Enter the container’s maximum load weight. Enter the container’s minimum fill % Enter the weight of the empty container. Enter the external volume of the container. For additional information, please see the White Paper on Containerization. Container-Item Relationships: A container-item relationship enables efficient packing of items into containers and of containers into containers. Navigate to: Shipping > Setup > Container Load Details 1. Select the inventory Organization you are defining container-item relationships for. 2. Select the Item, and Type of Container 3. Select the Item, UOM and Maximum Quantity for the content item inside the container. 4. Check the Preferred Flag checkbox if the container-item relationship is a common shipping configuration in that inventory Organization. 27-22 Oracle Order Management Suite Implementation Manual Prerequisites Document Sets A document set is a group of documents/reports that needs to be printed at Picking or Shipping time. Navigate to: Shipping > Setup > Documents > Document Sets 1. Enter the Name, Description and Usage. Pick Release or Ship Confirm are the only valid values. 2. Select the Effective Dates range and Printing Method for the document set. 3. Parallel or Sequential are the only valid values. 4. Enter the Sequence number. 5. Select the Application and the application Report Name. Shipping Execution Setup 27-23 Prerequisites Choose Printers The choose printers module allows the user to map a report to a document based on the level of the assignment Navigate to: Shipping > Setup > Documents > Choose Printers Select a document and then assign a printer(s) to it OR Select a printer and assign documents to it. 27-24 Oracle Order Management Suite Implementation Manual Prerequisites Concurrent Programs There are four Shipping SRS Concurrent Programs Import Delivery Lines This program can be used to import delivery lines into shipping. At this time it supports importing Order Management lines. Normally, this is not required as they get automatically imported into shipping when the workflow reaches the Awaiting shipping activity, but this program is useful for CTO environments as well as debugging import failures (when the automatic mechanism fails) Inventory Interface - SRS This program is run to update inventory with the ship confirmation information. Inventory balances are decremented and reservations relieved. This program always spawns the Order Management Interface - SRS program. It is very important in the process flow that the Inventory Interface complete before the Order Management Interface to ensure the integrity of the reservation information. Shipping Execution Setup 27-25 Prerequisites Order Management Interface - SRS This program is run to update order management with the ship confirmation information. Order line shipped quantities will be updated. This program always spawns the Departure Ship Notice Outbound program. Departure Ship Notice Outbound This program triggers the EDI DSNO process. It first verifies that EDI is installed and DSNO transaction profile is enabled before triggering the DSNO concurrent program. 27-26 Oracle Order Management Suite Implementation Manual 28 Shipping Migration This chapter contains migration information about Shipping Execution from R10.7 to R11i and from R11 to R11i. Topics covered in this chapter include: ■ Overview on page 28-2 ■ Technical Migration R10.7 to R11i on page 28-5 ■ Technical Migration R11 to R11i on page 28-6 Shipping Migration 28-1 Overview Overview Shipping User Interface (UI) Entities Migration from R10.7 to R11i Release 11i Release 10.7 Picking Headers Maps to ◊ Trips, Stops, Deliveries, Delivery Legs Picking line Maps to ◊ Delivery details Picking line details Shipping User Interface (UI) Entities Migration from R11 to R11i Release 11i Release 11 Departures Maps to ◊ Trips, Stops, Delivery Legs Deliveries Maps to ◊ Deliveries, Delivery Legs Packed Containers Maps to ◊ Containers/LPNs Delivery Lines Maps to ◊ Delivery Details Warehouse, Customer/Vendor Site Maps to ◊ Locations Functional Differences Ship Set Validation In R10.7and R11 ship sets are validated while Pick Releasing for unreleased lines and backordered lines. In R11i, ship sets are validated while Ship Confirming a Delivery. The Order lines will be released with available quantity irrespective of them being in a Ship set. Note: If you authorize the Ship set to be broken then the remaining Shipment is no longer part of the original ship set group. The remaining unshipped line quantities become disassociated from the ship set as individual lines. Ship Model Complete Validation In R10.7 and R11, Ship Model Complete is validated at time of Pick Release for unreleased and backordered Models. 28-2 Oracle Order Management Suite Implementation Manual Overview In R11i, Ship Model Complete is Pick Released with available quantity even if it breaks the Ship Model Complete rule. Validation occurs at Ship Confirm. Inventory Controls In R10.7 and R11, you cannot choose or update the Inventory Controls of the Pick Released items if OE Profile:Reservations = Yes. In R11i, you can update the Inventory Controls of any item while Pick Confirming. (OE:Reservations are obsolete.) Ship Confirm Open Interface and Public API’s In R10.7 and R11, Ship Confirm Open Interface process can be submitted from the application menu. In R11i, Ship Confirm Open Interface Application menu is replaced by Public API’s. The Shipping Execution 11i Public APIs are viewable on METALINK. 1. Sign on to Metalink, and navigate to the Oracle Applications Release 11i Info Center page. Tip: To display this page, enter 11i Info center in the Search field in Metalink, and click the Search button. When the search results display, click the Oracle Applications Release 11i Info Center link. 2. Click the Documentation link at the top of the page to display the Documentation section. 3. Scroll down the documentation table to the Distribution/Supply Chain row, then click the Order Management link to display the Order Management Product Documentation page 4. Click the Oracle Shipping Execution 11i Public APIs link to view the document. It is in .pdf format so you must have Adobe Acrobat installed to view the document. Smallest Unit to be Ship Confirmed In R10.7, Pick Slip is the smallest unit which could be Ship Confirmed. In R11 and R11i, a Delivery is now the smallest unit that can be Ship Confirmed. Serial Number Entry In R10.7 and R11, serial numbers are entered while Ship Confirming the order line for pre-specified serial controlled items. In R11i, serial numbers need to be entered while Pick Confirming pre-specified serial controlled items. It is no longer entered at Ship Confirm time. Pick Slips, Batches and Deliveries In R10.7, Consolidated Pick Slip and Open Batch Reports are available. Shipping Migration 28-3 Overview In R11, you can query open Deliveries and directly take action on them from within the Ship Confirm Delivery form. Pick Slip Reports remain available. In R11i, you can query open Deliveries and directly take action on them from within the Transactions form. Pick Slip Reports remain available. Migration: Common Technical Considerations WSH_DELIVERY_DETAILS contains all the lines which needs to be processed through Shipping Execution. SOURCE_CODE =’OE’ identifies the lines imported from OE. WSH_DELIVERY_DETAILS.SOURCE_HEADER_NUMBER stores Order Number WSH_DELIVERY_DETAILS.SOURCE_HEADER_ID stores OE_ORDER_ LINES_ALL.HEADER_ID WSH_DELIVERY_DETAILS.SOURCE_LINE_ID stores OE_ORDER_LINES_ ALL.LINE_ID Freight Carrier information in ORG_FREIGHT is upgraded to lookups (FND_ LOOKUP_VALUES) with lookup_type = ‘SHIP_METHOD’ Upgraded table information: ORG_FREIGHT and SO_PICKING_RULES WSH_CARRIER_SHIP_METHODS will store the link between Carrier and Ship Method. While upgrading each record in ORG_FREIGHT will have a corresponding record in FND_LOOKUP_VALUES and WSH_CARRIER_SHIP_ METHODS. All document sets and the individual report will be upgraded for reference purposes. The User will be responsible for updating the document set lines to the equivalent new Reports manually. SO_PICKING_RULES is upgraded to WSH_PICKING_RULES, but the document_set will be NULL, which has to be updated manually. WSH_DELIVERY_DETAILS.RELEASED_STATUS can have the following values: Ready To Release. Line has been booked but has not been submitted for Pick Release. Submitted for Release. Move order has been created, the line may or may not be detailed. Released. Line has been Pick Confirmed. After the line has been Ship Confirmed and Closed, the Released status does not change. 28-4 Oracle Order Management Suite Implementation Manual Technical Migration R10.7 to R11i If a container is created using the Transactions form in 11i, a record is created in WSH_DELIVERY_DETAILS with container_flag = Y and SOURCE_CODE=WSH Note: WSH Patchset D introduces new line status: Ready to Release (same) Released to Warehouse: (same as Submitted for Release) Backordered: During the detail process, there was not sufficient quantity to fulfill the line. The remaining quantity will be automatically backordered and have the status of backordered on the line. Staged: Line has successfully pick released (detailed and pick confirmed) and is now located in the staging subinventory. Shipped: Delivery associated with the line has been Ship Confirmed. Technical Migration R10.7 to R11i Picking Headers, Deliveries and Trips SO_PICKING_BATCHES_ALL ◊ WSH_PICKING_BATCHES WSH_NEW_DELIVERIES ◊ WSH_DELIVERY_ASSIGNMENTS After upgrade every Closed Picking Header (in SO_PICKING_HEADERS_ALL) is assigned a delivery_id (generated from a sequence). Each of these Delivery is moved into WSH_NEW_DELIVERIES in R11i. For each Delivery inserted into WSH_NEW_DELIVERIES a TRIP is created and a record is inserted into WSH_TRIPS. For each Delivery created a record is inserted into WSH_DELIVERY_LEGS, where the PICK_UP_STOP_ID is the location_id attached to the warehouse from where the line was shipped and the DROP_OFF_STOP_ID is the location_id of SO_PICKING_ HEADERS_ALL.SHIP_TO_SITE_USE_ID For each TRIP created, two records are inserted into WSH_TRIP_STOPS, one with STOP_LOCATION_ID as the location id of the warehouse from which the line is shipped and the other is the location_id of SO_PICKING_HEADERS_ALL.SHIP_ TO_SITE_USE_ID Shipping Migration 28-5 Technical Migration R11 to R11i Backordered Lines All Backordered lines in R10.7 are created as fresh line in WSH_DELIVERY_ DETAILS with RELEASED_STATUS = ‘R’ and ordered_quantity = backordered_ quantity. Pick Slip, Pack Slip and Bill of Lading Pick Slip numbers initially stored in SO_PICKING_HEADERS_ALL are NOT upgraded to R11i. New Pick Slip Numbers are stored in MTL_MATERIAL_TRANSACTIONS and MTL_MATERIAL_TRANSACTIONS_TEMP. Number of Boxes entered while Ship Confirming a Pick Slip in R10.7 (stored in so_ picking_headers_all.number-of_boxes) is NOT upgraded and dropped during R11i upgrade process. Patch 1426086 (included in WSH patchset.E) introduces a field 'Number Of LPN' in Shipping transactions screen under Deliveries TAB. The patch also has a script to upgrade the number_of_boxes in so_picking_headers_all to number_of_LPN in WSH_NEW_DELIVERIES. Packing Slips and Bill of Lading reports cannot be generated for SO lines upgraded from R10.7. In R11i each instance of the report is identified by a unique sequence number. Initial steps are required to generate these reports in R11i. Each line in SO_PICKING_LINE_DETAILS that is attached to a Closed Picking Header is moved into WSH_DELIVERY_DETAILS. Technical Migration R11 to R11i Deliveries and Delivery Legs Data from WSH_DELIVERIES is moved into WSH_NEW_DELIVERIES where WSH_DELIVERIES.DELIVERY_ID = WSH_NEW_DELIVERIES.DELIVERY_ID. For every Delivery a record is created in WSH_DELIVERY_LEGS. Departures and Trips Data from WSH_DEPARTURES is moved into WSH_TRIPS, where WSH_ DEPARTURES. DEPARTURE_ID = WSH_TRIPS.TRIP_ID 28-6 Oracle Order Management Suite Implementation Manual Technical Migration R11 to R11i For every Departure in Release 11, a record is created in WSH_TRIP_STOPS Containers and Delivery Details Each Container in WSH_PACKED_CONTAINERS becomes a Container Instance i.e a record is inserted in WSH_DELIVERY_DETAILS with container_flag = Y and source_code = WSH. For each Container in WSH_PACKED_CONTAINERS a record is inserted into WSH_DELIVERY_ASSIGNMENTS. WSH_CONTAINER_LOAD will be upgraded to WSH_CONTAINER_ITEMS. Report Sets and Usage Code WSH_REPORT_SETS is upgraded to WSH_REPORT_SETS, but the usage_code is changed from PICK_RELEASE_DELIVERY to PICK_RELEASE and SHIP_ CONFIRM_DELIVERY to SHIP_CONFIRM. Pick Slip and Pick Slip Grouping Rules WSH_PICK_SLIP_RULES is upgraded to WSH_PICK_GROUPING_RULES Data Not Upgraded Descriptive Flexfield The descriptive flexfield attribute values are upgraded but their definition is not. After an upgrade descriptive flexfields need to be redefined. Document Sets The document sets should be redefined after the upgrade. Profile Options The profile options used in 10.7 and 11.0 are discontinued. Shipping Migration 28-7 Technical Migration R11 to R11i 28-8 Oracle Order Management Suite Implementation Manual 29 Document Sequencing for Shipping Topics covered in this chapter include: ■ Overview on page 29-2 ■ Document Categories on page 29-2 ■ Defining Document Categories on page 29-2 ■ Document Sequence on page 29-5 ■ Assign a Document Sequence to a Document Category on page 29-7 ■ Creating a Bill of Lading on page 29-8 ■ Creating a Packing List on page 29-13 Document Sequencing for Shipping 29-1 Overview Overview Oracle Shipping Execution Release 11i provides the ability to generate shipping documents i.e. Packing Slips, Bills of Lading’s and ASN’s that are sequentially numbered according to specifications you define. This is a mandatory step to be able to create and print the above mentioned documents. The set up process for enabling document sequencing consists of three basis steps. 1) Creating a Document Category. 2) Creating a Document Sequence, and 3) Assigning a Document sequence to a Document category. This chapter describes the process for setting up document sequencing and generating Packing Slips and Bills of Lading for deliveries. Document Categories A category must be defined for each document you wish to create. In the case of the Bill of Lading document, you can create a Bill of Lading category for each Ship Method/Carrier you use. This would allow you to have a different Bill of lading sequence number for each Ship Method /Carrier. This helps avoid confusion when closing out shipments by providing a visual reference in the BOL number to a specific carrier. You can also define one BOL category for all Ship Methods/Carriers. In addition to creating document categories by Ship Method/Carrier, you can tie a category to a specific location. This provides the opportunity to have a different BOL sequence for the same carrier departing from a different locations. When defining a document sequence for the Packing Slip, you can create a category for every location or one category for all locations. The document category is always specific to the application Oracle Shipping. You must always create the shipping document category from the Shipping set up menu. The document category will be visible in all applications and responsibilities where you access the Shipping Transactions form to generate BOL or Packing Slip numbers. You can create the document sequence and assign them in any Set up menu, as long as you always specify Oracle Shipping as the application. Figure 1. depicts the form used to define a document category. Defining Document Categories Navigate: Shipping -> Setup -> Documents -> Document Categories. A Document Category Summary window will appear and list any Document Categories that have been previously defined. 29-2 Oracle Order Management Suite Implementation Manual Defining Document Categories To define a new category , click on new and the window in Figure 1. will appear. Figure 29–1 Document Category Definition Information pertaining to the fields in the Document Category definition shown in Figure 1. are as follows: Category Name This is a free form field used to enter the name of the category you are defining. This is the name that will show up in the list of values when assigning the category to a sequence. Description Enter text that describes the category you are defining. An example might be, Bill of Lading for Viking Freight from Whse V1. Document From the list of values select the document type the document category will apply to. Ship Methods/ Document Types If in the previously described document field you select Bill of lading, the prompt for this field will be Ship Method. Define the document category for a specific carrier by clicking the One radio button and selecting the carrier from the LOV that you want the document category to be applied to. Clicking the all radio button would result in the document category being applied to all carriers. If you select Packing Slip or Advanced Shipment Document Sequencing for Shipping 29-3 Defining Document Categories Notice for the document field, the prompt for this field will be Document Type. For release 11i Customer Orders is the only sub-type supported and should be the only choice in the list of values. Locations The document category you are defining can be applied to on a single location or all locations. This is the field where this is determined. Selecting the All radio button indicates the document category applies to all locations. Selecting the One radio button allows you to select a specific location from the LOV that you wish the document category to apply. Sequence You can define a Prefix, Suffix and delimiter to the document category. The Prefix and Suffix fields are free form and any alpha numeric combination can be entered. Typical use is to represent an identity to the location, carrier, date etc. in which the document is generated. The delimiter can also be any character and simply separates the prefix and suffix from the actual generated number. The default appearance shows the user what the Bill of Lading, Packing Slip, or ASN number will look like when it is generated. Summary Document Category Set up your Document Category for each of the shipping reports Navigate: Setup > Documents > Document Categories 1. Click the New button. 2. Enter a Category Name. 3. Enter a Description. 4. In the Document field, select the name of the report. (Note: In the Category Includes section, the area on the left will be titled differently depending on which report we are setting up). 29-4 5. In the Document Types section (for the Packing Slip), you can leave the default as 'All'. 6. In the Ship Methods section (for the BOL), you can leave the default as 'All'. 7. In the Locations section, you can leave the default as 'All'. Oracle Order Management Suite Implementation Manual Document Sequence Document Sequence Once you have defined a Document Category, create a Document Sequence for the specific application and define the date range over which the sequence is valid. Navigate: Shipping -> Setup -> Documents -> Document Sequences. Figure 29–2 Document Sequence Definition Information pertaining to the fields in the Document Sequence definition window are as follows: Name Enter a name for the sequence you are creating. This will be a unique name that will identify this sequence in the application defined for a specific duration. Application From the list of values, choose Oracle Shipping. Effective, From and To Enter the first date you want the document sequence to become effective by clicking on the calendar LOV in the From field. Enter the date you want the document sequence to end by clicking on the calendar LOV in the To field. Type The available types for this field are automatic, manual and gapless. Automatic sequentially assigns, by date and time of creation, a unique number to each document as it is generated. Document Sequencing for Shipping 29-5 Document Sequence Manual requires you to assign a number to each document before it is generated. You must enter unique values. However, note that numerical ordering and completeness is not enforced. Gapless numbering type is valid only in the context of certain localizations. We recommend that you choose this type only after consulting with Worldwide Support, as it may affect the performance of your system. Message Check the Message check box if you want each document to display a message (in the message line near the bottom of the screen) informing the user of the sequence name and value (number). This check box only applies to sequences with the automatic type of numbering. Messages appear only on form displays, and are not written to a request's log file. Once a sequence is defined, the message choice cannot be changed. See the on-line help for details on this field. Initial Value The initial value indicates the numeric value in which you wish to use when the first document is created. Enter a value for the first document in your sequence. This field only applies to sequences with automatic or gapless numbering type. The maximum sequence value is 1.0e+27. If you leave this field blank, the first document is automatically assigned a value of ‘1’. Once a sequence is defined, this initial value cannot be changed. For example if you select 1 as the initial value, the first document that is created will consist of the prefix you defined in the document category, the delimiter you defined, the numeric value 0000001, and the suffix you defined. Summary Document Sequence Set up your Document Sequence for each of the shipping reports Use the Shipping Execution Responsibility Navigate: Setup > Documents > Document Sequences 29-6 1. In the Name field, enter a name for the sequence. 2. In the Application field, select 'Oracle Shipping'. 3. In the Effective From field, enter the Current Date. 4. For the Type, leave the default value as 'Automatic'. 5. Check the Message check box. Oracle Order Management Suite Implementation Manual Assign a Document Sequence to a Document Category Assign a Document Sequence to a Document Category Once you have defined a Document Category and a Document Sequence, the final step before you create a Bill of Lading or Packing Slip is to assign a document sequence to a document category. Navigate: Shipping -> Setup -> Documents -> Assign Sequences. A document sequence must be assigned to a document category. The assign sequence form is also application and category specific. Figure 29–3 Assign Sequence to Category For details on the contents of each field in this form, please see on-line help from the sequence assignment form. Summary Assign Category to Sequence Assign Sequences for each of the shipping reports Use the Shipping Execution Responsibility Navigation Path: Setup > Documents > Assign Sequences 1. Navigate to the Document tab. 2. In the Application field, select Oracle Shipping. Document Sequencing for Shipping 29-7 Creating a Bill of Lading 3. In the Category field, enter the Document Category created in Step 1 above . 4. In the Set of Books field, select your organization. 5. For the Method, leave the default as 'Null'. 6. Navigate to the Assignment tab. 7. In the Start Date field, specify the start date. 8. In the Sequence field, assign the Document Sequence created in Step 2. Creating a Bill of Lading When the above three processes have been completed, you can create a Bill of Lading and or Packing Slip for a delivery. Both documents can be generated as part of a document set that can be run at the completion of ship confirmation, or the documents can be created individually from the document request menu. The documents should also be generated automatically when the user clicks the Generate BOL button and the Create Packing List Button. A Delivery must meet the following prerequisites in order for a Bill of Lading to be created. The Delivery must be assigned to a trip. The trip must have a ship method. To create and print a Bill of Lading, query the Delivery for which you want to print a Bill of Lading in the Shipping Transaction form. Click on the Detail button to open the Delivery window showing a single record. To make sure that the trip has a ship method, click on the Path by Trip tab and enter the Ship Method for each trip. Save the changes before you continue. 29-8 Oracle Order Management Suite Implementation Manual Creating a Bill of Lading Figure 29–4 Transactions Form Document Sequencing for Shipping 29-9 Creating a Bill of Lading Next click on the legs tab within the Detail window. 29-10 Oracle Order Management Suite Implementation Manual Creating a Bill of Lading Figure 29–5 Delivery Window Figure 29–6 Delivery Legs Click on the generate BOL button. A Bill of lading number will be generated and populated into the form base on the document sequence defined for the particular characteristics of the delivery. Document Sequencing for Shipping 29-11 Creating a Bill of Lading Figure 29–7 BOL Number Generated Summary Generate Bill of Lading Generating the Document Number – Bill of Lading To generate the BOL, click on the Generate BOL button in the Legs tab on the Delivery's Detail window. Navigate: Shipping > Transactions > Transactions 1. Query your delivery. 2. Click on the Delivery tab. 3. Click on the Details button. 4. Click on the Legs tab. 29-12 Oracle Order Management Suite Implementation Manual Creating a Packing List A delivery must meet the following prerequisites in order for a Bill of Lading to be created: The delivery must be assigned to a trip The trip must have a ship method. Another way to generate the document number for the BOL is during Ship Confirm, in the Autocreate Trip section, check the 'Create Bill of Lading' check box and enter the Ship Method. This only applies if the delivery is not already assigned to a trip. When you generate the document number for either of these reports, you may encounter an error message warning that a document sequence or a document category could not be found. This message usually means that the setup is incorrect. Verify that you have set up your document category and document sequences and that the trip for the delivery leg has a ship method. Creating a Packing List You can create a Packing List at any point in the shipping process providing a delivery has been created and a delivery line has been assigned to the delivery. Document Sequencing for Shipping 29-13 Creating a Packing List Figure 29–8 Shipping Transactions Form To create and print a Packing List, query the Delivery for which you want to print a Packing List in the Shipping Transactions form. Click the Detail button to invoke the delivery details window. 29-14 Oracle Order Management Suite Implementation Manual Creating a Packing List Figure 29–9 Delivery Details Next, click on the Packing List tab. Document Sequencing for Shipping 29-15 Creating a Packing List Figure 29–10 Generate Pack Slip The Packing List detail window opens with the delivery name populated in the form. Additional information required is the reason for transport. The description field is optional. Click on the Generate Pack Slip button to generate the packing slip based on the document sequences you have set up. 29-16 Oracle Order Management Suite Implementation Manual Creating a Packing List Figure 29–11 Generated Pack Slip Number Summary Generate the Packing Slip Before the reports will print, the document numbers will need to be generated. To generate the Packing Slip, click on the Generate Pack Slip button in the Packing Slip tab on the Delivery's Detail window. Navigate: Shipping > Transactions > Transactions 1. Query your delivery. 2. Click on the Delivery tab. 3. Click on the Details button. 4. Click on the Packing Slip tab. Document Sequencing for Shipping 29-17 Creating a Packing List Also, if the Require Pack Slip check box in the Shipping Parameters for the organization that you are shipping from is checked, then, when you ship confirm the delivery, the Packing Slip document number will automatically be generated. 29-18 Oracle Order Management Suite Implementation Manual 30 Shipping Execution Reports Topics covered in this chapter include: ■ Overview on page 30-2 ■ Preliminary Setups on page 30-2 ■ Pick Slip Report on page 30-12 ■ Backorder Reports on page 30-17 ■ Packing Slip on page 30-19 ■ Bill of Lading on page 30-20 ■ Mailing Labels on page 30-22 ■ Commercial Invoice on page 30-23 ■ Vehicle Load Sheet Reports on page 30-24 Shipping Execution Reports 30-1 Overview Overview This chapter covers all R11i Shipping Execution reports. To support the shipping process, the Shipping Transaction and Document Set reports are normally generated and printed automatically. Automatic printing can be setup at two different stages: at Pick Release and at Ship Confirm time. Reports can also be manually requested through an SRS concurrent process. Shipping reports are routed to document printers individually associated. The list of reports supported by Oracle Shipping Execution release 11i is as follows: Shipping Transaction Reports included in this chapter are: Pick Slip Pick Slip Summary report Backorder Details/ Summary Shipping Document Sets included in this chapter are: Packing Slip Vehicle Load Sheet Details/ Summary Bill of Lading Mailing Labels Commercial Invoice Preliminary Setups System setups required by Shipping reports. Document and Printer Assignment Document and Printer assignment is managed in a tree structure either by Document names or by Printer names. To access these settings Navigate: Setup > Document > Choose Printers 30-2 Oracle Order Management Suite Implementation Manual Preliminary Setups Registering a new system printer By the time you get to setup Shipping Execution, printers attached to the system should be already defined by the System Administrator. If not follow these registration steps: Login the System Administrator account (Privileges required) Navigate: Install > Printer Enter the driver information related to the particular device you are installing. Navigate: Install > Printer > Styles This is where you can create landscape and 132 columns landscape-wide types Navigate: Install > Printer > Types A Printer Type is defined as an association of a printer driver and Printer Style. If the existing Styles and Types values do not match the printer being installed, use the Styles or Types button at the bottom of the form. Navigate: Install > Printer > Printers This where a unique friendly name is given to Printer Types along with a description. This printer name will be used to select where to print the Shipping execution documents. Adding new documents or printers Navigate: Shipping > Setup > Documents > Choose Printers. To display the existing list of Documents or Printers on the system: navigate the screen path listed above. If you need to add documents or printers not listed in the tree found in the left frame: Select the Printer or Document tab Right click the Printer or Document tree heading From the pop-up menu select ‘New” From the search window enter appropriate filter From the list of Printers or Documents make your selection Confirm the Printer or Document was added to the tree list Shipping Execution Reports 30-3 Preliminary Setups Figure 30–1 Choose Document and Label Printers Granularity Order Printers and Documents are assigned at the specific level they should be available. The granularity order from broad to narrow is as follows: Site location Application Name Responsibility level */ Department (BOM departments) */ Warehouse Zone (sub-inventory) User account */ Equipment Type (item with Equipment attribute turned on). (*/: option available only with WMS installed). 30-4 Oracle Order Management Suite Implementation Manual Preliminary Setups Figure 30–2 Access Granularity Associating Documents and Printers Navigate: Shipping > Setup > Documents > Choose Printers > Printers Tab. Use the two tabs on the left side of the screen to toggle between document view and printer view. Typically you will want to select a printer and assign a document to it. Once all documents are added you can review where documents will print by navigating to the Document tab and selecting a document name. This view will list all printers assigned to a document. To define documents select a printer, then enter the following document information: Document Select from LOV the document you want to define. Level Select the printer definition level at which it will be available. Value Select the actual value for the level you selected above. Equipment Instance Used for Equipment type only. Select the serial number for the equipment item value you have selected. Label Format Select the label format for the document you are setting up. Field disabled in the document tab region. Shipping Execution Reports 30-5 Preliminary Setups Comments Free text entry to make a note. Enabled Turns On or Off the association of a particular document with a printer. (Existing entries can not be removed. Default A new entry is automatically set to Default if it is a unique level-document-label-equipment instance combination. This field is provided to manually prioritize overlapping entries. (Existing entries can not be removed.) Document Categories Definition The purpose of the document categories is to define document numbering sequence specific to Freight Carrier and/or Location for Packing Slips and/or Bill of Lading. To access this settings Navigate: Setup > Document > Document Categories. By creating a document type you will be able to setup the system so it matches the document numbering system used in the supply chain beyond the client docks. The document sequencing is comprised of: Prefix, Delimiter and Suffix values. The resulting string format is shown under the appearance field. Caution: Document Categories definition for security reasons can not be edited in a multi-user environment. Instead you should: ■ Create and commit a new category. ■ Re-assign document sequences to the new Category ■ Either leave alone the existing Category or Disable it cautiously since it may affects other document using the setting. For that reason disabling can not be undone. For additional related information refer to the section Document Sequencing for Shipping. Sequences Definition This is where the Document Sequences are defined by application and type. Document Sequences can be used to uniquely identify Shipping reports by number. To access these settings Navigate: Setup > Documents > Document Sequences. The Document Sequences form will come up with the following list of fields: Name (Sequence Name), Application (Oracle Shipping), Date (Validity date range), Type (Automatic/Manual/Gapless), Message, Initial Value. 30-6 Oracle Order Management Suite Implementation Manual Preliminary Setups Sequence Types ■ ■ ■ Automatic: a unique number is assigned to each to document Gapless is a subtype of automatic numbering. This option can be system intensive and therefore should be used carefully. Manual: a user entry is required before each document is generated. Message Flag This option can be turned on for automatic types. The numbering information is displayed on the screen in the status bar (lower left corner). Initial Value This field defines the first value used for automatic sequence types Operating Date Range This field can be used to activate the Sequence rule only an interval period by using a limited end date. For additional related information refer to the section Document Sequencing for Shipping. Document Sequence and Category Assignment This is where Sequences are assigned to Document Categories and set to be either Automatic or Manual. To access these settings Navigate: Setup > Documents > Assign Sequences. The Sequence Assignment form will come up with the following list of fields: Application (Oracle Shipping), Category ( ), Set of Books (Operating Org./VisionOperationUSA), Method (Automatic/Manual/Null), Date (Validity date range), Sequence. Automatic vs. Manual When numbering is required the preferred method is Automatic numbering so processing continuously is enabled without additional manual entries. For additional related information refer to the section Document Sequencing for Shipping. Shipping Execution Reports 30-7 Preliminary Setups Figure 30–3 Sequence Assignments: Document tab 30-8 Oracle Order Management Suite Implementation Manual Preliminary Setups Figure 30–4 Sequence Assignments: Assignment tab Document Sets Shipping documents can be printed by groups at Pick Release or Ship Confirm stage. Three seeded sets are available: Pick Release Documents, All Shipping Documents, and Pack Slip only. New sets can be defined to meet unique business requirements Shipping Execution Reports 30-9 Preliminary Setups Figure 30–5 Define Document Sets To define a custom set Navigate: Shipping > Setups > Document > Document Sets. 1. Enter a document set name and a description 2. Select either Pick Release or Ship Confirm stage 3. Use the sequence field to define the printing order. 4. Select Oracle Shipping as Application type 5. Select the Report Name needed in the set The printing method defaults to parallel. This enables all documents submitted for printing to complete through individual concurrent processes. This prevents a report printer failure from holding all report printing. 30-10 Oracle Order Management Suite Implementation Manual Preliminary Setups Shipping Parameters Setups Report default values defined above can be setup on the Shipping Parameter form. Pick Release Actions This is a list of actions taking place at Pick Release time. See the screen capture for a complete list of fields. You can define: ■ Print Pick Slip: (immediate) ■ Default Pick Release Document Set: (All Pick Release Document Set) ■ (Release sequence rule) ■ (Pick Slip Grouping Rule) Shipping Transactions You can setup a default delivery documents set by selecting a document set value. The LOV is populated with seed values Ship Confirm documents and other sets you may have defined above. Shipping Execution Reports 30-11 Pick Slip Report Pick Slip Report The Pick slip report is printed at Pick Release time. (See Pick Slip sample below). The lines released by pick release process are grouped in pick slips according to grouping rule (and grouping attributes of the grouping rule) and the associated pick methodology. The generated pick slips can be printed individually or in bulk depending on the number of lines pick released (user defined preference). To define how orders are released to the warehouse for picking use Pick Slip Grouping Rules, Pick Release Rule and Sequence Pick Slip Grouping Rules These Rules dictate how released order lines are grouped into individual pick slips. All lines showing the same value in the grouping criteria get grouped on the same pick slip List of Pick slip grouping rules grouping criteria : ■ Order number, Subinventory, Customer, Ship-To, Carrier, Trip Stop 30-12 Oracle Order Management Suite Implementation Manual Pick Slip Report ■ Delivery, Shipment Priority, Item, Locator, Lot, Revision. Navigate: Shipping > Setups >Picking > Define Pick Slip Grouping When Oracle WMS is installed you can select from additional Grouping Rules: ■ Order Picking: grouped by Order and Pick Slip number ■ Zone Picking: grouped by Order and Zone ■ Cluster Picking: task ordered by Locator ■ Bulk Picking: grouped by Item and Locator Figure 30–6 Pick Slip Grouping Rules Release Rules Sets of Release Rules can be custom defined to become easily selectable at Pick Release time. Pick Release is an action performed on order line that attempts picking/source inventory items from a warehouse prior to shipping The rules will filter orders released to the floor according to preset parameters you have selected. Navigate: Shipping > Setups >Picking > Define Release Rules Shipping Execution Reports 30-13 Pick Slip Report Figure 30–7 Release Rules Release Sequence Rule Use these rules to define in which order the eligible picking lines are allocated to the Inventory during pick release. (Order Number, Invoice Value, Schedule/Departure Date, and Shipment Priority). Navigate: Shipping > Setups >Picking > Define Release Sequence Rules 30-14 Oracle Order Management Suite Implementation Manual Pick Slip Report Figure 30–8 Release Sequence Rules The Pick Slip Report will list the set of parameters used during picking. Pick Slip Sections Pick slip Grouping rules (see description in above section) Pick slip Release Sequence (see description in above section) Release Rules (see description in above section) Release criteria This section shows the Pick Slip Grouping rule name used and its associated grouping criteria: SO#, Sub-inventory, Customer, Ship-to, Carrier, delivery or shipment priority. Pick Slip List Shows each item, line number, UOM, Qty requested, sales order number, Customer name, Ship-To, order date, PO#, freight, payment terms, sales person, FOB point, planned freight carrier and shipping notes associated with order if any Pick Slip Header Shows the report date, warehouse, pick slip number, picking batch and release date. Shipping Execution Reports 30-15 Pick Slip Report Shipped Quantity Shown on the Pick Slip is always zero unless a portion of the batch was already picked in a separate instance. (Pick release partial, Ship Confirm and re-run Pick release) 30-16 Oracle Order Management Suite Implementation Manual Backorder Reports Figure 30–9 Pick Slip Report Backorder Reports Backorder Detail Report This report provides detailed information on customer orders that have been backordered. Customer name, order number, order type, backordered items, line numbers, quantity and price for both ordered and back ordered items. This report is either printed automatically or manually by providing the following filter information. Blank values will provide a null filter: Figure 30–10 Backorder Report Submission Shipping Execution Reports 30-17 Backorder Reports Figure 30–11 Backorder Report Backorder Summary Report This report lists only unshipped orders in open sales orders. This report is either printed automatically or manually by providing the following filter information: (Blank values will provide a null filter) (Transaction type) (Order Number range) (Move Order Number range) Warehouse Item Display: ■ Description: this option will show item description only ■ Flexfield: this option will show item name only ■ Both: this option will show both item name and description. Item Flex Code 30-18 Oracle Order Management Suite Implementation Manual Packing Slip Packing Slip The packing slip is a shipping document that list all the goods being transported between two locations that are related to Sales Orders, Outside Processing, Drop-Shipments, Consigned Inventory, Return to Suppliers, and Internal Movements. This report is EMEA standard compliant. Before the Packing Slip can be printed, the document number will need to be generated. To generate the Packing Slip click on the Generate Packing Slip button in the Packing Slip tab from the Delivery’s Detail window. Navigation steps: Shipping > transactions > transactions. Query the delivery. Click on the delivery tab. The Packing Slip lists: Customer Name, Items, Line level Ship-To, Bill-To, Ship date, Freight, and Payment Terms. For additional related information refer to the section about Document Sequencing for Shipping. Shipping Execution Reports 30-19 Bill of Lading Figure 30–12 Pack Slip Submission Bill of Lading This report is usually printed on pre-printed forms. It shows all sales orders that have been confirmed from a selected delivery. This report is either printed automatically at Ship Confirm time as part of the Shipping Document Set or manually by providing the following filter information: Blank values will provide a null filter: (Delivery date range) (Freight Carrier) (Delivery Name) (Trip Name) 30-20 Oracle Order Management Suite Implementation Manual Bill of Lading (Bill of Lading Number) Item Display: ■ Description: this option will show item description only ■ Flexfield: this option will show item name only ■ Both: this option will show both item name and description. Warehouse: unit concerned with the Item. In order for a Bill of Lading to be created the Delivery must meet the following prerequisites: ■ The delivery must be assigned to a trip ■ The trip must have a ship method. Another way to generate the document number for the BOL is during Ship Confirm if the delivery is not already assigned to a trip. In the Autocreate Trip section, check the Create Bill of Lading check box and enter the Ship Method. To create and print a Bill of Lading, query the Delivery for which you want to print a Bill of Lading in the Shipping Transaction form. To make sure that the Trip has a Ship Method, click on the Path by Trip tab and enter the Ship Method for each trip. Save these changes before continuing. Shipping Execution Reports 30-21 Mailing Labels For additional related information refer to the section about Document Sequencing for Shipping. Mailing Labels The Mailing Labels should be routed to the specific device loaded with printable labels. Labels can be used in conjunction with containers created without a delivery association. Labels can identify: Customer Name, Ship to Address, Carrier name, Waybill number and number of package included in a shipment. 30-22 Oracle Order Management Suite Implementation Manual Commercial Invoice Figure 30–13 SRS mailing Label submission Commercial Invoice The Invoice report list all shipped confirmed items in a delivery trip. (Trip Stop) an LOV is provided to select the trip stop code (Departure Date range) (Freight Carrier) (Delivery Name) Item Display: ■ Description: this option will show item description only ■ Flexfield: this option will show item name only ■ Both: this option will show both item name and description. (Currency Code) (Print Customer Item Information) Shipping Execution Reports 30-23 Vehicle Load Sheet Reports Vehicle Load Sheet Reports Vehicle Load Sheet Detail The vehicle Load Sheet Detail report prints the loading sequence of items within a delivery. List of information printed: Header level: Organization, report date, and shipping location. Delivery level: trip and stop information, Ship from date, customer name, delivery name, delivery loading sequence number, gross and tare weights, and method used to load the delivery. 30-24 Oracle Order Management Suite Implementation Manual Vehicle Load Sheet Reports Figure 30–14 Vehicle Load Sheet: Detail Vehicle Load Sheet Summary The Vehicle Load Sheet Summary report prints a list of all deliveries assigned to a specific trip. List of information printed: Header Level: Organization, report date, shipping location, and report name. Trip Level :Trip date, initial ship from date, Freight carrier, vehicle type, gross weight, and net weight of the trip, and vehicle number. Shipping Execution Reports 30-25 Vehicle Load Sheet Reports Figure 30–15 Vehicle Load Sheet: Summary 30-26 Oracle Order Management Suite Implementation Manual 31 Order Management Reports This chapter contains information about Reports Migration from Order Entry to Order Management 11i. Topics covered in this chapter include: ■ Report Name Mapping on page 31-2 Order Management Reports 31-1 Report Name Mapping Report Name Mapping Order Management 11i reports do not all have the same names as they did in Order Entry. Report name mapping is provided below along with a listing of new Order Management reports. OM 11i Report Name Concurrent Program short name Cancelled Orders Report Cancelled Orders Report OEXOEOCS Comprehensive Order Detail Report Comprehensive Order Detail Report OEXOECOD Open Return Detail Report Credit Order Detail Report OEXOEORD Open Returns Report Credit Orders Report OEXOEORS Standard Value Rules Defaulting Rules Listing Report OEXDERUL Hold Source Activity Report Hold Source Activity Report OEXOHHSA Order Discount Detail Report Order Discount Detail Report OEXPRPRD Order Discount Summary Report Order Discount Summary Report OEXPRPRS Order/Invoice Detail Report Order/Invoice Detail Report OEXOEIOD Order/Invoice Summary Report Order/Invoice Summary Report OEXOEIOS Orders by Item Report Orders by Item Report OEXOEITR Orders on Credit Check Hold Report Orders on Credit Check Hold Report OEXOECCH Outstanding Holds Report Outstanding Holds Report OEXOHOHS Security Rules Listing Processing Constraints Listing Report OEXOEPCL OE Report Name 31-2 Oracle Order Management Suite Implementation Manual Note Report Name Mapping OM 11i Report Name Concurrent Program short name Returns by Reason Report Returns by Reason Report OEXOEORR Sales Order Acknowledgment Sales Order Acknowledgment Report OEXOEACK Sales Order and Purchase Order Discrepancy Sales Order and Purchase Order Discrepancy Report OEXPODIS Salesperson Order Summary Report Salesperson Order Summary Report OEXOESOS Order Type Listing Transaction Types Listing Report OEXORDTP Unbooked Orders Report Unbooked Orders Report OEXOEUBK new Internal Order and Purchasing Requisition Discrepancy Report OEXIODIS new Lines on Credit Check Hold Report OEXOECCL new Workflow Assignments Report OEXWFASG new Cancelled Orders Reason Detail Report OEXOEOCR new Credit Order Discrepancy Report OEXCRDIS new OE-OM Order Line Transaction Count Comparison Report OEXOELCS OE Report Name Note workflow replaces all Cycle/Action/A pproval reports Shows returns discrepancies in lot/serial numbers Order Management Reports 31-3 Report Name Mapping 31-4 Oracle Order Management Suite Implementation Manual 32 Flexfield Migration This chapter contains information about Flexfields Migration from Order Entry to Order Management 11i. Flex field definitions from OE are not upgraded to OM, only flex values from OE tables will be upgraded to OM/QP/WSH tables as mentioned below. Customers will need to create new definitions for corresponding OM/QP/WSH Flexfields. Topics covered in this chapter include: ■ Descriptive Flexfields on page 32-2 Flexfield Migration 32-1 Descriptive Flexfields Descriptive Flexfields Note : For the Headings, Upg means ‘Values Upgraded from OE to OM/QP/WSH’. OE Flex OM Flex Upg Usage Title: Additional Header Information Title: Additional Header Informations Yes Name: SO_HEADERS Name: OE_HEADER_ ATTRIBUTES Descriptive Flexfield for Order Headers table. Table: SO_HEADERS_ALL Table: OE_ORDER_ Columns: Context, Attribute1.. HEADERS_ALL 15 Columns: Context, Attribute1..15 Title: Additional Line Information Title: Additional Line Attribute Yes Information Name: SO_LINES Name: OE _LINE_ ATTRIBUTES Table: SO_LINES_ALL Columns: Context, Attribute1.. 15 Descriptive Flexfield for Order Lines table. Table: OE_ORDER_LINES_ ALL Columns: Context, Attribute1.. 15 Title: Pricing Attributes Title: Pricing Contexts Name: PRICING_ ATTRIBUTES Name: QP_ATTR_DEFNS_ PRICING Table: SO_LINES_ALL Table: QP_ATTRIBUTE_ DEFNS Columns: Pricing_Context, Pricing_attribute1..15 Columns: Pricing_Context, Pricing_Attribute1..100 Application: Oracle Pricing (QP) Definition for Pricing Flex on the Line. Actual columns are stored in OE_ORDER_PRICE_ATTRIBS table. Note: The Definition is also upgraded for this flex field. 32-2 Oracle Order Management Suite Implementation Manual Yes Pricing Attributes Descriptive Flexfield. The OE flexfield Pricing Attribute is now replaced by the Pricing Flexfield Pricing Context. Descriptive Flexfields OE Flex OM Flex Upg Title: Additional Industry Attributes Title: Additional Line Industry Yes Information Name: RLA_DEMAND_ LINES_ALL Name: OE_LINE_INDUSTRY_ ATTRIBUTE Table: RLA_DEMAND_ LINES_ALL Table: OE_ORDER_LINES_ ALL Columns: Industry_Context, Industry_Attribute1..15 Columns: Industry_Context, Industry_Attribute1..30 Usage Industry Attributes Descriptive Flexfield on Order Line. Application: Oracle Release Management Kit(RLA) Definition for Industry Flex on Line. Columns are stored in SO_LINE_ATTRIBUTES table. Title: JG_SO_LINE_ ATTRIBUTES Name: JG_SO_LINE_ ATTRIBUTES Table: SO_LINE_ATTRIBUTES Columns: Global_Attribute_ category, Global_attribute1..20 Title: JG_OE_ORDER_LINES Yes Globalization Descriptive Flexfield on Order Line. Yes Descriptive Flexfield for Service installation details table. Name: JG_OE_ORDER_LINES Table: OE_ORDER_LINES_ ALL Columns: Global_Attribute_ category, Global_attribute1..20 Application: Regional Localizations (JG). Title: Additional Line Service Detail Info Title: Additional Line Service Detail Info Name: SO_LINE_SERVICE_ DETAILS Name: CS_LINE_INST_ DETAILS Table: SO_LINE_SERVICE_ DETAILS Table: CS_LINE_INST_ DETAILS Columns: Context, Attribute1.. Columns: Context, Attribute1.. 15 15 Application: Oracle Service(CS) Flexfield Migration 32-3 Descriptive Flexfields OE Flex OM Flex Upg Usage Title: Additional Sales Credit Information Title: Additional Sales Credits Information Yes Name: SO_SALES_CREDITS Name: OE_SALES_CREDITS_ ATTRIBUTES Descriptive Flexfield for Sales Credits table. Yes Descriptive Flexfield for Hold Definitions table. Yes Descriptive Flexfield for Hold Authorizations table. Yes Descriptive Flexfield for Hold Releases table. Yes Descriptive Flexfield for Hold Sources table. Table: SO_SALES_CREDITS Table: OE_SALES_CREDITS Columns: Context, Attribute1.. 15 Columns: Context, Attribute1.. 15 Title: Additional Hold Information Title: Additional Hold Information Name: SO_HOLDS Name: OE_HOLD_ DEFINITIONS Table: SO_HOLDS Table: OE_HOLD_ Columns: Context, Attribute1.. DEFINITIONS 15 Columns: Context, Attribute1.. 15 Title: Additional Hold Authorization Info Title: Additional Hold Authorization Info Name: SO_HOLD_ AUTHORIZATIONS Name: OE_HOLD_ AUTHORIZATIONS Table: SO_HOLD_ AUTHORIZATIONS Table: OE_HOLD_ AUTHORIZATIONS Columns: Context, Attribute1.. Columns: Context, Attribute1.. 15 15 Title: Additional Hold Release Title: Additional Hold Release Information Information Name: SO_HOLD_RELEASES Name: OE_HOLD_RELEASES Table: SO_HOLD_RELEASES Table: OE_HOLD_RELEASES Columns: Context, Attribute1.. Columns: Context, Attribute1.. 15 15 Title: Additional Hold Source Information Title: Additional Hold Source Information Name: SO_HOLD_ SOURCES_ALL Name: OE_HOLD_SOURCES Table: SO_HOLD_SOURCES_ ALL Table: OE_HOLD_SOURCES_ ALL Columns: Context, Attribute1.. Columns: Context, Attribute1.. 15 15 32-4 Oracle Order Management Suite Implementation Manual Descriptive Flexfields OE Flex OM Flex Upg Usage Title: Additional Note Addition Rule Info Title: Additional Attachment Rule Elements Info No Name: SO_NOTE_ ADDITION_RULES Name: OE_ATTACHMENT_ RULE_ELEMENTS Descriptive Flexfield for Attachment Rules table. Table: SO_NOTE_ ADDITION_RULES Table: OE_ATTACHMENT_ RULE_ELEMENTS No Descriptive Flexfield for ‘Document Sequences’ table. Yes Descriptive Flexfield for Price Adjustments table. Definition is used for Price Adjustments / Freight and Special Charges. Yes AETC(Authorize d Excess Transportation Charges) Descriptive Flexfield. Columns: Context, Attribute1.. Columns: Context, Attribute1.. 15 15 Title: Additional Order Number Source Info Name: SO_ORDER_ NUMBER_SOURCES Title: Define Sequences Name: FND_DOCUMENT_ SEQUENCES Table: FND_DOCUMENT_ Table: SO_ORDER_NUMBER_ SEQUENCES SOURCES Columns: Attribute_category, Columns: Context, Attribute1.. Attribute1.. 15 15 Application: Application Object Library(AOL) Title: Additional Freight Charge Information Title: Additional Price Adjustment Information Name: SO_FREIGHT_ CHARGES Name: OE_PRICE_ ADJUSTMENTS Table: SO_FREIGHT_ CHARGES Table: OE_PRICE_ ADJUSTMENTS Columns: Context, Attribute1.. Columns: Context, Attribute1.. 15 15 Title: AETC / Allowances and Charges Title: AETC / Allowances and Charges Name: SO_FREIGHT_ CHARGES_AC Name: OE_PRICE_ ADJUSTMENTS_AC Table: SO_FREIGHT_ CHARGES Table: OE_PRICE_ ADJUSTMENTS Columns: AC_Attribute_ Category, AC_Attribute1.. 15 Columns: AC_Context, AC_ Attribute1.. 15 Flexfield Migration 32-5 Descriptive Flexfields OE Flex OM Flex Upg Usage Title: Additional Line Detail Information None No Obsolete None No Obsolete. None No Obsolete. None No Obsolete. None No Obsolete. Name: SO_LINE_DETAILS Table: SO_LINE_DETAILS Columns: Context, Attribute1.. 15 Title: Additional Order Hold Information Name: SO_ORDER_HOLDS Table: SO_ORDER_HOLDS_ ALL Columns: Context, Attribute1.. 15 Title: Additional Line Approval Information Name: SO_LINE_ APPROVALS Table: SO_LINE_APPROVALS Columns: Context, Attribute1.. 15 Title: Additional Note Information Name: SO_NOTES Table: SO_NOTES Columns: Context, Attribute1.. 15 Title: Additional Note Reference Information Name: SO_NOTE_ REFERENCES Table: SO_NOTE_ REFERENCES Columns: Context, Attribute1.. 15 32-6 Oracle Order Management Suite Implementation Manual Descriptive Flexfields OE Flex OM Flex Upg Usage Title: Additional Note Usage Information None No Obsolete. None No Obsolete. None. No Obsolete. Title: Additional Security Rule None Information No Obsolete. No Obsolete. Name: SO_NOTE_USAGES Table: SO_NOTE_USAGES Columns: Context, Attribute1.. 15 Title: Additional Order Approval Information Name: SO_ORDER_ APPROVALS Table: SO_ORDER_ APPROVALS Columns: Context, Attribute1.. 15 Title: Additional Order Cancellation Info Name: SO_ORDER_ CANCELLATIONS Table: SO_ORDER_ CANCELLATIONS Columns: Context, Attribute1.. 15 Name: SO_SECURITY_RULES Table: SO_SECURITY_RULES Columns: Context, Attribute1.. 15 Title: Attribute Data Information None Name: ATTRIBUTE_DATA_ INFORMATION Table: SO_ATTRIBUTES Flexfield Migration 32-7 Descriptive Flexfields OE Flex OM Flex Upg Usage Title: Attribute Value None No Obsolete. None No Obsolete. None No Obsolete. None No Obsolete. None No Obsolete. None No Obsolete. None No Obsolete. None No Obsolete. Name: ATTRIBUTE_VALUE Table: SO_ATTRIBUTE_ VALUES Title: Additional Action Information Name: SO_ACTIONS Table: SO_ACTIONS Title: Additional Attribute Information Name: SO_ATTRIBUTES Table: SO_ATTRIBUTES Title: Additional Attribute Std Value Source In Name: SO_ATTRIBUTE_ STD_VALUE_SOURCES Table: SO_ATTRIBUTE_ STD_VALUE_SOURCES Title: Additional Attribute Use Information Name: SO_ATTRIBUTE_USES Table: SO_ATTRIBUTE_USES Title: Additional Cycle Information Name: SO_CYCLES Table: SO_CYCLES Title: Additional Entity Information Name: SO_ENTITIES Table: SO_ENTITIES Title: Additional Entity Use Information Name: SO_ENTITY_USES Table: SO_ENTITY_USES 32-8 Oracle Order Management Suite Implementation Manual Descriptive Flexfields OE Flex OM Flex Upg Usage Title: Additional General Std Value Source Info None No Obsolete. None No Obsolete. None No Obsolete. None No Obsolete. None No Obsolete. Title: Additional Sales Credit Type Information NA Descriptive Flexfield for Sales Credits Types table. Name: SO_GENERAL_STD_ VALUE_SOURCES Table: SO_GENERAL_STD_ VALUE_SOURCES Title: Additional Object Information Name: SO_OBJECTS Table: SO_OBJECTS Title: Additional Results Information Name: SO_ RESULTS Table: SO_RESULTS Title: Additional Standard Value Rule Info Name: SO_ STANDARD_VALUE_RULES Table: SO_STANDARD_ VALUE_RULES Title: Additional Standard Value Rule Set Info Name: SO_STANDARD_ VALUE_RULE_SETS Table: SO_STANDARD_ VALUE_RULE_SETS None Name: OE_SALES_CREDIT_ TYPES Table: OE_SALES_CREDIT_ TYPES Columns: Context, Attribute1.. 15 Flexfield Migration 32-9 Descriptive Flexfields OE Flex OM Flex Upg Usage None. Title: Trading Partner Flexfield NA Trading Partner Descriptive Flexfield on Order line. NA Descriptive Flexfield for Transaction (Order and Line) Types table NA Descriptive Flexfield for OM Parameters table. NA Descriptive Flexfield for Shipping Tolerances Table. (Shipping Tolerances Form in OM Setup). Name: OE_LINE_TP_ ATTRIBUTES Table: OE_ORDER_LINES_ ALL Columns: TP_Context, TP_ Attribute1..15 This is the Trading Partner Flex Field. None Title: Additional Order Type Information Name: OE_ORDER_TYPES Table: OE_TRANSACTION_ TYPES_ALL Columns: Context, Attribute1.. 15 None Title: Additional System Parameter Information Name: OE_SYSTEM_ PARAMETERS Table: OE_SYSTEM_ PARAMETERS_ALL Columns: Context, Attribute1.. 15 None Title: Additional Customer-Item Settings Name: OE_CUST_ITEM_ ATTRIBUTES Table: OE_CUST_ITEM_ SETTINGS Columns: Context, Attribute1.. 15 32-10 Oracle Order Management Suite Implementation Manual 33 Migrating Profile Options This chapter contains information about migrating the Profile Options from Order Entry to Order Management 11i. The listing starts with the old profile options from Order Entry and maps them to new profiles in Order Management if they exist. New Order Management Profile Options are listed at the end of the table. For more information about these profile options and how they are used, please refer the Basic Setup chapter of this manual. Topics covered in this chapter include: ■ Profile Options on page 33-2 ■ System Parameters Setup on page 33-8 Migrating Profile Options 33-1 Profile Options Profile Options OE Profile Option (Old) OM Profile Option (New) Description of the OM Profile Option WSH: Allow Future Departure Date N/A No equivalent profile option in OM/WSH OE: Apply Order Adjustments to Service Lines N/A No equivalent profile option in OM. OE: Configurator Display Mode N/A No equivalent profile option in OM. OE: Cycle Action Changes Affect Existing Orders N/A No equivalent profile option in OM. OE: Customer Relationships OM: Customer Relationships Obsolete. Replaced by a system parameter setup. OE: Debug Level OM: Debug Level This profile option determines the level of debug messages printed in a OE Debug log file. To print all messages set it to 5 and for no messages set it to NULL. OE: Default RMA Status N/A No equivalent profile option in OM. OE: Debug OM: Debug Level This profile option can also be used for getting the OM Debug file for concurrent programs. OE: Debug Trace N/A No equivalent profile option in OM. OE: Default CP Selection Attribute N/A No equivalent profile option in OM. OE: Discounting Privilege OM: Discounting Privileges Privileges to apply/Modify price adjustments (e.g. Discounts, Surcharges etc.) The possible values are : Unlimited, Full, Non-Overridable Only, None. OE: External Pricer Installed N/A No equivalent profile option in OM. WSH: Enforce Freight Carrier At Ship Confirm N/A No equivalent profile option in OM/WSH OE: Force Valid Configurations N/A No equivalent profile option in OM. 33-2 Oracle Order Management Suite Implementation Manual Profile Options OE Profile Option (Old) OM Profile Option (New) Description of the OM Profile Option OE: GSA Discount Violation Action OM: GSA Discount Violation Action Controls what to do if the Pricing Engine returns a GSA Violation. Works with QP: Verify GSA Violations OE: Immediate Inventory Update N/A No equivalent profile option in OM/WSH. OE: Included Item Freeze Method OM: Included Item Freeze Method It determines the date and time Order Management uses to determine the included items for a configuration’s bill of material. WSH: Invoice Numbering Method OM: Invoice Numbering Method Determines whether invoices numbers are automatically generated or are mapped to the delivery name Tax: Invoice Freight as Revenue Tax: Invoice Freight as Revenue- 1 If profile option TAX: Allow Tax Code Override is set to YES, and profile option TAX: Invoice Freight as Revenue is set to YES, then freight charges are treated as revenue lines, and Invoicing module passes along VAT tax information and sales credits for them. Tax: Inventory Item for Freight Tax: Inventory Item for Freight- 1 Invoicing module passes this item for freight charges treated as revenue lines. OE: Inventory Stock Location N/A No equivalent profile option in OM. OE: Item Flexfield OM: Item Flexfield This profile option specifies the name of the flexfield structure of the System Items flexfield OE: Item Validation Organization OM: Item Validation Organization Obsolete. It has been replaced by System Parameters functionality. OE: Item View Method OM: Item View Method The method to be used in the Order Management Order Form Options Window for item LOV. It controls the way the LOV for the items is displayed. SHP: Release Online Exception Report N/A No equivalent profile option in OM/WSH. SHP: Release Single Orders Online N/A No equivalent profile option in OM/WSH. SHP: Release Online Pick Slip Report N/A No equivalent profile option in OM/WSH. OE: Reservations N/A No equivalent profile option in OM. Migrating Profile Options 33-3 Profile Options OE Profile Option (Old) OM Profile Option (New) Description of the OM Profile Option OE: Schedule Date Window N/A No equivalent profile option in OM. OE: Set of Books OM: Set of Books Obsolete . OM Looks at Set of Books of the Account Receivable’s setup for the Operating Unit. (Table : ar_system_parameters_all) WSH: Shipping Method N/A No equivalent profile option in OM/WSH OE: Source Code OM: Source Code This profile option identifies the source code that Order Management passes to Oracle Inventory during scheduling. The source code should be defined as the third segment of the Sales Order Flexfield to guarantee that each transaction is unique. OE: Trans. Manager Debug Level N/A No equivalent profile option in OM. OE: Tune for Large Number of Discounts N/A No equivalent profile option in OM. OE: Transaction Manager N/A No equivalent profile option in OM. OE: Unit Price Precision Type OM: Unit Price Precision Type Currency Precision Type: Extended or Standard. OE: Verify GSA Violations QP: Verify GSA Violations Select YES to verify GSA Violations. OE: Validate Standard Line Item N/A No equivalent profile option in OM. OE: Validate Option Line Item N/A No equivalent profile option in OM. OE: Weight Unit Of Measure Class N/A No equivalent profile option in OM. N/A OM: Administer Public Queries This profile option determines which responsibility is able to create and update public queries. N/A OM: Apply Automatic Attachments The profile option controls whether rule-based attachments are applied without user intervention. 33-4 Oracle Order Management Suite Implementation Manual Profile Options OE Profile Option (Old) OM Profile Option (New) Description of the OM Profile Option N/A OM: Auto Push Group Date This profile option controls what happens if a user changes something on a line that is part of a group and that change causes the schedule date to change. If YES, then the date on all members of the group will be pushed. N/A OM: AutoSchedule This profile option controls the default setting for the use of autoscheduling. If YES, order lines will get scheduled at entry automatically. N/A OM: Charging Privilege This profile determines your ability to Apply/Modify/Delete freight and special charges on an order or order line. Unlimited, Full Access, View Only. N/A OM: Context Responsibility for Upgraded Orders This profile option is used to set applications context for deferred activities on upgraded orders and order lines. N/A OM: Credit Card Privileges This profile option limits the amount of credit card information displayed in the in the Sales Orders window. The authorization code and credit card number fields can be set to display only the last four digits. N/A OM: Credit Memo Transaction Type While interfacing a RMA line for credit, this profile option value is transferred to Receivables if no value is defined for the credit memo transaction type (Receivables Transaction Type to be associated with the OM’s Transaction Type in Transaction Type setup form). N/A OM: Credit Salesperson for Freight on Sales This profile specifies the default Salesperson to use in the Invoicing Interface when creating sales credits for Freight charge lines. N/A OM: Cust Item Shows Matches This profile option determines whether Order Management defaults the Item with the highest ranking item or shows the list of all the matched Internal item numbers when a customer item number is used and that customer item is cross-referenced to more than N/A OM: Deactivate Pricing at Scheduling For internal use only. Migrating Profile Options 33-5 Profile Options OE Profile Option (Old) OM Profile Option (New) Description of the OM Profile Option N/A OM: Debug Log Directory The directory path of the OM debug log file. Specify the value from the session parameter “utl_file_dir” from v$parameters. N/A OM: Estimated Authorization Validity Period This profile option determines the estimated number of days the authorization is valid. The default value is 21 days. N/A OM: Invoice Source This profile option is passed to Receivables if no value is defined for the transaction type. N/A OM: Invoice Transaction Type While interfacing a Outbound line for invoicing, this profile option value is transferred to Receivables if no value is defined for the transaction type. (Receivables Transaction Type to be associated with the OM’s Transaction Type in Transaction type setup form). N/A OM: Log directory for generated packages No longer used. N/A OM: Negative Pricing Controls whether OM allows a negative list price or selling price to be entered as an override or determined by the pricing engine. QP has a similarly named profile that controls whether a negative price can be entered on a Price List. N/A OM: Non-Delivery Invoice Source This profile option value is transferred to Receivables if the OM: Invoice Numbering Method profile option is set to Delivery and the line is non-shippable. N/A OM: Notification Approver The profile information value is defaulted to the work flow item attribute - ‘Notification approver’ on the Sales Order and Line work items for upgraded orders. This enables you to send notifications (approval or FYI notifications) to this role. N/A OM: Order Date Type Code No longer used. N/A OM: Orders Purge Per Commit Controls how often to commit during running of Order Purge concurrent job. 33-6 Oracle Order Management Suite Implementation Manual Profile Options OE Profile Option (Old) OM Profile Option (New) Description of the OM Profile Option N/A OM: Over Return Tolerance This profile option indicates the percentage by which a return line can be over-received. Any value greater than or equal to zero (0) is a valid value. This profile option is set at the site level. Default value is zero (0). N/A OM: Over Shipment Tolerance This profile option indicates the percentage by which an order line can be over-shipped. Any value greater than or equal to zero (0) is a valid value. This profile option is set at the site level. Default value is zero (0). N/A OM: Overshipment Invoice Basis This profile option determines whether to invoice the ordered quantity or the shipped quantity for an over shipment. Default value is shipped. N/A OM: Party Totals Currency The currency used by the Calculate Party Totals concurrent job that sums up order totals by Party. (R11.5.2) N/A OM: Payment method for Credit Card Transactions This profile option determines the primary payment method for a specific customer. N/A OM: Reservation Time Fence This profile option specifies how many days out into the future auto-scheduling should automatically reserve inventory. N/A OM: Return Item Mismatch Action This profile option controls whether a user can change data like item id on a referenced return line. N/A OM: Return Unfulfilled Referenced Line Action This profile option is used for returns to return unfulfilled lines. Default value is Allow. Choices include: Reject: Do not create return line if the reference line is non-fulfilled. Warning: Create return line with Warning if the referenced line is non-fulfilled. Allow: Create return line without Warning if the referenced line is non-fulfilled. N/A OM: Risk Factor Threshold for Electronic Payments This profile option determines whether the exceeds the authorization risk score threshold. Scores range from 1 to 100, 1referring to a risk free authorization and 100 referring to a high risk authorization. The default value is a score of 50. Migrating Profile Options 33-7 System Parameters Setup OE Profile Option (Old) OM Profile Option (New) Description of the OM Profile Option N/A OM: Schedule Line on Hold This profile option controls whether scheduling should attempt to schedule lines that are on hold. N/A OM: Show Discount Details on Invoice This profile option determines whether the discount details are displayed on an invoice. Default value is No. N/A OM: Show Line Details This profile option determines whether the line details of a model are displayed in the Sales Orders window. N/A OM: Under Return Tolerance This profile option indicates the percentage by which a return line can be under-received for it to be considered fulfilled. Any value between zero (0) and 100 (both inclusive) is a valid value. This profile option is set at the site level. Default value is N/A OM: Under Shipment Tolerance This profile option indicates the percentage by which an order line can be under-shipped for it to be considered fulfilled. Any value between zero (0) and 100 (both inclusive) is a valid value. This profile option can be set only at the site level. Default N/A OM: Use Configurator Set this profile to "Y" if you want to use the product configurator from OM. System Parameters Setup Order Management has converted Old Profile Options “OE: Item Validation Organization” and “OE: Customer Relationships” into System Parameters. These profile Options were available to setup at the Site Level. Now you can set them up as System Parameters at the Operating Unit level. The setup screen is available under Order Management Super User responsibility Navigate: Setup > Parameters. On opening, the default Operating Unit will display (MO: Operating Unit for the Responsibility ). You can set the value for Item Validation Organization (Inventory Organizations) to define which Inventory Organization you can use to transact items in a given Operating Unit. The Customer Relationships flag for the Operating Unit defines whether a user can specify SHIP_TO and BILL_TO locations for related customers while entering orders. 33-8 Oracle Order Management Suite Implementation Manual 34 Migrating Cycles to Workflow This chapter contains information on how Order Types, Order Number Sources, Cycles and Cycle History for Order and Lines are migrated to Order Management. Please refer to the White Paper “Using Workflow in Oracle Order Management” to undertand how Order Management uses Workflow to process Orders and Lines. Please refer to the White Paper “Transaction Types in Oracle Order Management”. ■ Overview on page 34-2 ■ Upgrade Strategy for Cycles and Cycle History on page 34-5 ■ Upgrading Order Type - Cycle Assignments on page 34-26 ■ Upgrading Cycle History on page 34-27 ■ Post-Upgrade steps that affect the Cycle History Upgrade on page 34-35 ■ Cycles Upgrade and other Order Entry features on page 34-39 Migrating Cycles to Workflow 34-1 Overview Overview Order Management uses Workflow to implement Order Cycles functionality. This chapter discusses how each of the following is achieved: Upgrade of Order Types to Order and Line Transaction Types Upgrade of Order Number Sources to AOL Document Sequences Upgrade of user defined cycle data to Workflow design-time entities Upgrade of Order Type - Cycle Assignments to Transaction Type - Workflow assignments. Upgrade of cycle history for all open order and lines to Workflow Item Activity Status History. Upgrading Order Types Order types in Order Entry served as a pool for defaulting sources and transactional controls. With Order Management a lot of the header attributes are available on the line and are controllable at that level. It follows that the application offer an entity similar to the order type for the Line; i.e. the line type. Order types and line types are both referred to as Transaction Types in Order Management. The order types you defined in Order Entry are automatically upgraded to order transaction types in Order Management. Order types that have an order category ‘R’ or ‘P’ are upgraded to order transaction types of category ‘ORDER’. Order types that have an order category ‘RMA’ are upgraded to order transaction types of category ‘RETURN’. Order types that have do not have an order category specified are upgraded to order transaction types of category ‘MIXED’. When you create an Order using a Mixed Order Type, you can combine both order and return lines on it. The upgraded order type has the same name as the original Order Type it was upgraded from. You can use an upgraded order type for creating new orders, provided you specify the header workflow process that it should use. See Also Users Guide for Defining Transaction Types. For every order type that is upgraded, one or more line type(s) are also created as follows: For an upgraded order type of category ‘ORDER’ a line type of category ‘ORDER’ is created. The default outbound line type on the upgraded order type is set to this automatically created line type. For an upgraded order type of category ‘RETURN’ a line type of category ‘RETURN’ is created. The default inbound line type on the upgraded order type is set to this automatically created line type. For 34-2 Oracle Order Management Suite Implementation Manual Overview an upgraded order type of category ‘MIXED’ two line types; one of category ‘ORDER’ and the other of category ‘RETURN’ are created. The default outbound and inbound line types on the upgraded order type are set to the these automatically created line types respectively. You can use these line types for creating new lines, provided you define new workflow assignments for them. See Also - Users Guide for Defining Transaction Types. The line types that the upgrade creates are named as follows: UPG_LINE_TYPE_xxx_nnn Where xxx stands for the category on the Line Type and nnn for the Order Type ID of the upgraded Order Type that this line type was created based on. After successfully upgrading to Order Management, you can change the names of these automatically created Line Types to something more user friendly. Example - In Order Entry you had defined an order type as follows: Name - International (Order Type ID - 1001) Category - Regular (‘R’) After the upgrade you should see the following Order Transaction Type Name - International Category - Order (‘ORDER’) Default outbound line type - UPG_LINE_TYPE_ORDER_1001 You should also see the following Line Transaction Type Name - UPG_LINE_TYPE_ORDER_1001 Category - Order (‘ORDER’) Upgrading Order Number Sources In Order Entry, user defined order number sources controlled how your orders were numbered. When you defined an order number source, the application automatically created a database sequence object for it. You had to specify an order number source, when you defined an order type. Order Management uses AOL Document Sequences for order numbering purposes. See Also - Order Numbering - Defining Document Sequences. The upgrade to Order Management automatically migrates your active Order Entry number sources to AOL Document Sequences of type ‘Automatic’. It calls the AOL Document Sequence APIs to do so. The sequence is defined as follows: Migrating Cycles to Workflow 34-3 Overview Application - Order Management Name of sequence - xxxxxx (where xxxxxx stands for the Order Number Source Name) Type of sequence - Automatic Start value - Current unused value of sequence tied to Order Number Source being upgraded Start date - Start Date on the Order Number Source being upgraded. If null, then current date End date - End Date on the Order Number Source being upgraded. For every active Order Type that is upgrade, an AOL Document Sequence Category is also created, as follows: Application - Order Management Document Sequence Category Code - nnnn (where nnnn stands for the Order Type ID) Name - xxxxxxx (where xxxxxx stands for the Order Type Name) Description - xxxxxxx (where xxxxxxx stands for the Order Type Description) Table - OE_TRANSACTION_TYPES_ALL The upgrade process also creates a document sequence assignment linking the document sequence to the document sequence category that was created. If an order number source was referenced by several order types, then multiple document sequence assignments are created linking the respective document categories to the document sequence. Example - You have a order number source ‘International Orders’ defined. It is assigned to the Order Type ‘International’ (Order Type ID 1001). The order number source ‘International Orders’ is upgraded to an AOL Document sequence of type ‘Automatic’. This sequence is defined under the Order Mangement product with the name ‘International Orders’. We have described before how the Order Type is upgraded. An AOL document sequence category is also created with the code of ‘1001’. This category is defined under the Order 34-4 Oracle Order Management Suite Implementation Manual Upgrade Strategy for Cycles and Cycle History Mangement product with the name ‘International’. A document sequence assignment is also created linking the category to the sequence. Note: The Profile Option ‘Sequential Numbering’ needs to be set at the application and responsibility level to be able to number your orders in Order Management. See Also Users Guide. Upgrade Strategy for Cycles and Cycle History The upgrade to Order Management uses the following strategy for upgrading cycle definition data and cycle history for orders and lines: Upgrading Cycle Definition Data All custom actions, approvals and result lookups are upgraded to Workflow entities. In Order Entry all cycles were user-defined. Cycles that are used by any open Orders are upgraded to workflow processes. Workflow process definitions are created dynamically during the Upgrade. The upgrade process calls the Workflow APIs (WF_LOAD APIs) to create workflow design time data. Upgrading Cycle History Cycle history for all open orders and lines is upgraded to workflow status tables. To achieve this the upgrade starts appropriate header for all open orders and line flows for all open lines. Now, functions that have already been executed in the Order Entry should NOT get re-executed during the upgrade. Eg: When you upgrade an order header that is booked and is eligible for closure (waiting for lines to close), it should not get re-booked in Order Management. That is the header flow should skip activities that have already been executed and should reach functionally the same point in the flow that the Order was in its cycle before the upgrade. Thus on upgrade, a booked order waiting to close should be waiting inside the Close Order workflow sub-process, awaiting for its Line(s) to close. This chapter discusses in detail how the following is achieved: Business functions that have already been executed in Order Entry, are skipped in Order Management Migrating Cycles to Workflow 34-5 Upgrade Strategy for Cycles and Cycle History Functionally the Order or line that is upgraded is in the same point in its Order Management flow as it was in its Order Entry cycle. Upgrading User Defined Cycle Data The following section discusses how each of the cycle components are upgraded to Workflow. Upgrading Results and Cycle Action Results The upgrade automatically creates data in WF_LOOKUPS for those records in SO_ RESULTS that are referenced by custom actions (records in SO_ACTION_ RESULTS). Based on the records in SO_ACTION_RESULTS, these results are automatically mapped to custom activities and notification activities. The lookup is created under the OM Order Header workflow (OEOH) item type, if the action that a result was mapped was a header cycle action. The lookup is created under the OM Order Line (OEOL) workflow item type, if the action that a result was mapped was a line cycle action. A lookup type is created for every set of results used by a custom action or approval action. The following naming convention is used for creating lookups types: Lookup Type Code - UPG_RT_nn (Where nn stands for the Action ID) Display Name - UPG_RT_xx (Where xx stands for the Action Name (first 26 characters)) The following naming convention is used for creating lookup codes: Lookup Code - UPG_RC_nn (Where nn stands for the Result ID) Meaning - XX (Where XX stands for the Result name) Example: You have the following cycle results defined: Result Name Result Description Result Id Pass Approval Passed 1 Fail Approval Failed 2 These are associated to a custom action “Export Approval” as follows: 34-6 Oracle Order Management Suite Implementation Manual Upgrade Strategy for Cycles and Cycle History Custom Action Custom Action ID Result Passing Export Approval 1001 Pass Yes Export Approval 1001 Fail The upgrade will create a Workflow lookup type as follows: Meaning Lookup Type Code UPG_RT_Export_ Approval UPG_RT_1001 The upgrade will create the following workflow lookups under the above lookup type Meaning Description Lookup Code Pass Approval Passed UPG_RC_1 Fail Approval Failed UPG_RC_2 Seeded Cycle Actions Seeded cycle actions are not upgraded. Rather, Order Management comes seeded with upgrade specific versions of all seeded functional workflow sub-processes. The upgrade process uses these sub-processes as building blocks for creating order and line workflow process definitions based on the cycle definitions. These upgrade specific functional sub-processes are designed to detect whether the order or line is already past the respective business functions. They are also designed such that no processing happens during the upgrade. Example - (Upgrade ) Book - Order, Manual (UPG_BOOK_PROCESS_ASYNCH) Migrating Cycles to Workflow 34-7 Upgrade Strategy for Cycles and Cycle History This is the upgrade specific version of the seeded ‘Book - Order, Manual’ sub-process. It works as follows: If the Upgrade is running , the function ‘(Upgrade) Order Booked?’ checks whether the Order is already booked. If not it completes with a ‘No’ and the flow will hit the Book – Eligible block. Else it completes with a ‘Yes’ and skips past the actual function that books an Order. If the Upgrade is not running then the function ‘(Upgrade) Order Booked?’ completes with a ‘No’. The following table indicates the seeded Order Management WF sub-processes that various Order Entry seeded cycle actions map to: Header Cycle Actions Cycle Action ID Cycle Action In WF Sub-process Internal Name ter =D WF Sub-process Display Name 1 Booking UPG_BOOK_PROCESS_ASYNCH (Upgrade ) Book - Order, Manual 9 Complete Order (Close) UPG_CLOSE_ORDER_PROCESS (Upgrade) Close - Order Line Cycle Actions 34-8 Oracle Order Management Suite Implementation Manual Upgrade Strategy for Cycles and Cycle History Cycle Action ID Cycle Action In WF Sub-process Internal Name ter =c WF Sub-process Display Name 1 Booking ENTER * Enter - Line 2 Pick Release UPG_SHIPPING_SUB (Upgrade) Ship - Line 3 Ship Confirm UPG_SHIPPING_SUB (Upgrade) Ship - Line 4 Back Order Release UPG_SHIPPING_SUB (Upgrade) Ship - Line 7 Receivables Interface UPG_LINE_INVOICE_INTERFACE_SUB ** (Upgrade) Invoice Interface - Line 8 Complete Line (Close) UPG_CLOSE_LINE_PROCESS (Upgrade) Close - Line 11 Inventory Interface UPG_SHIPPING_SUB (Upgrade) Ship - Line 12 Demand Interface UPG_SCHEDULE_LINE (Upgrade) Schedule - Line 13 RMA Interface UPG_RMA_RECEIVING_SUB (Upgrade) Return Receiving - Line 15 Manufacturing Release UPG_MODEL_MFG_RELEASE (Upgrade) Manufacturing Release Line UPG_CONFIGURATION_LINE *** (Upgrade) Create Supply Order Line UPG_SHIPPING_SUB **** (Upgrade) Ship - Line 16 Service Interface Migrating Cycles to Workflow 34-9 Upgrade Strategy for Cycles and Cycle History Cycle Action ID Cycle Action In WF Sub-process Internal Name ter =c WF Sub-process Display Name 17 Purchase Release UPG_PUR_REL_LINE (Upgrade) Purchase Release - Line * - This is used when a line action has Booking as a prerequisite. ** - Additionally UPG_FUFILLMENT_SUB ((Upgrade) Fulfill - Line) is also added before the invoicing process if the original cycle had Ship-Confirm or RMA Interface cycle actions. *** - This is used in the flow created specifically for the Configured Item Line **** - Service Interface is obsolete in OM. Shipping behaves like a no-op for Service Lines See Also -- for detailed descriptions of each of these sub-processes. Cycle Action Pre-Requisites Cycle action pre-requisites determined when an Order or Line became eligible for a certain cycle action. In Workflow transition information determines when a particular workflow activity is executed. The upgrade creates this information based cycle action pre-requisites. Appropriate ‘AND’ & ‘OR’ activities are also created depending on the grouping of the records via the group number. Custom Cycle Actions Custom cycle actions are those actions that are not seeded and are not approvals actions. In Order Entry the processing for such a cycle action was done externally, and you needed to call C based Order Entry functions to move the Order or Line forward in its cycle based on the result of the custom action. Such cycle actions are upgraded to special workflow block activities. The block activity is created under the workflow item type OM Order Header(OEOH), if the custom cycle action was a Header action. It is created under the workflow item type OM Order Line(OEOL), if the custom cycle action was a Line action. The following naming convention is used when creating this special block activity: Internal Name - UPG_AN_nn (Where nn stands for the ACTION ID) Display Name - xxxxxxxxxxxx (Where xxxxxxxxxx stands for the Cycle Action Name) 34-10 Oracle Order Management Suite Implementation Manual Upgrade Strategy for Cycles and Cycle History This activity is defined to call the function OE_WF_UPGRADE_UTIL.UPGRADE_ CUSTOM_ACTIVITY_BLOCK. An activity attribute is also created and it is set to the name of the S column (status column) that the custom cycle action was mapped to. The procedure OE_WF_UPGRADE_UTIL.UPGRADE_CUSTOM_ACTIVITY_ BLOCK does the following: If the activity is executed when the Upgrade is running, then it retrieves the S Column name from its activity attribute. It then checks the S Column value for the order or line in Order Entry. If the S column has a value other than eligible (18) it completes the block with that value (using the upgraded workflow lookup code naming convention). If the S column has a value of ‘eligible’ (18) indicating that the order or line was eligible for the custom action, then it completes with ‘NOTIFIED’. If the block activity is executed when the Upgrade is not running then it will complete with ‘NOTIFIED’ to indicate that the order or line is eligible for external custom processing. After you have successfully upgraded to Order Management, you need to complete such special blocks for upgrade orders or lines using the Workflow API WF_ENGINE.CompleteActivityInternalName() after completing the external processing that the custom cycle action did. Example - A custom action is defined as following in Order Entry: Action ID - 1022 Action Name - External Export Processing Result Table - SO_HEADERS_ALL Result Column - S11 It is used in a cycle “International Ship”. The cycle action becomes eligible once the Order is entered and it serves as a pre-requisite for the Pick Release Action. The following records are defined for it in SO_ACTION_RESULTS: Result Name Result Id Passing Pass 1 Yes Fail 2 Migrating Cycles to Workflow 34-11 Upgrade Strategy for Cycles and Cycle History The cycle action is upgraded to a block activity that is defined under the workflow item type OM Order Header as follows: Internal Name - UPG_AN_1022 Display Name - External Export Processing It is tied to the Lookup UPG_RT_1022 that has the following two lookups: I Lookup Coden Lookup Meaning UPG_RC_1 Pass UPG_RC_2 Fail The activity attribute ‘S_COLUMN’ on this block activity is set to the value ‘S11’. When the cycle that uses this activity is upgraded, the workflow process that is created will look as follows; In the above process the block activity ‘External Export Processing’ represents the upgraded cycle action. It calls the function OE_WF_UPGRADE_UTIL.UPGRADE_ CUSTOM_ACTIVITY_BLOCK . The function ‘UPG_AN_OEOH_1022_CONT_L’ is created for handling the dependency of a Line action on this Header action. When cycle history is upgraded, a header flows are started using this workflow process. If an Order was eligible for this custom action then the function ‘External Export Processing’ sets itself to ‘NOTIFIED’. 34-12 Oracle Order Management Suite Implementation Manual Upgrade Strategy for Cycles and Cycle History If an Order was past this custom action with the ‘Pass’ result then the block completes with a ‘Pass’ (UPG_RC_1) thus transitioning to the continue-flow activity and then the flow transitions to the Close Order process. There it will wait for the lines to close. If an Order was past this custom action with a ‘Fail’ result then the block will complete with a ‘Fail’ (UPG_RC_2) transitioning to the wait activity (via the default transition). Post-upgrade this transition will revisit the block activity, which will set itself to ‘NOTIFIED’ again. This transitioning back to the custom activity is done to mimic order cycles functionality, where an action when completed with a non-passing result could stay in that unprocessed state forever. Now post-upgrade to handle orders that are eligible for this custom activity, you need to process these orders externally. To query orders that are eligible for this custom activity ‘External Export Processing’, you can query workflow item activity statuses as follows: SELECT FROM WHERE AND ITEM_KEY WF_ITEM_ACTIVITY_STATUSES_V ITEM_TYPE = ‘OEOH’ ACTIVITY_NAME = ‘UPG_AN_1022’ AND ACTIVITY_STATUS_CODE = ‘NOTIFIED’ AND SOURCE = ‘R’; This query will return all the Orders (Header Ids) that are awaiting processing at this custom activity. On successfully completing the external processing you need to complete this block activity for each Order, to progress its flow. You can do this by calling the Workflow API WF_ ENGINE.COMPLETEACTIVITYINTERNALNAME with the following parameters: Item Type - ‘OEOH’ Item Key - OE_ORDER_HEADERS_ALL.HEADER_ID for the Order that has been processed. Activity Name - ‘UPG_AN_1022’ Result Code - ‘UPG_RC_1’ To handle the case where the Order fails the external processing, you can cancel the Order via the Sales Order Form, so that it can go ahead and close. You can also call the Process Order API Order (OE_ORDER_PUB.Process_Order) to cancel an order. Please refer to the Open Interfaces Manual for details on using this public API. Migrating Cycles to Workflow 34-13 Upgrade Strategy for Cycles and Cycle History Approval Actions Approval actions get upgraded to workflow notification activities. The upgrade also creates special pre-notification activities and message data for the notifications. The notification and pre-notification activities are created under the workflow item type OM Order Header(OEOH) if the approval was a Order level approval action. They are created under the workflow item type OM Order Line (OEOL) if the approval was a Line level approval action. The following naming convention is used when creating the notification activities: Internal Name - UPG_AN_nn (where nn stands for the Approval Action ID) Display Name - xxxxxxxxxxxx (Where xxxxxxxxxx stands for the Approval Action Name) The activity is defined to be a high-cost activity to ensure that no notifications are sent when the upgrade is running. The responder on the notification activity determines who the notification is sent to. This is set to default from the workflow item attribute “Notification Approver”. Please refer to the section “Post -upgrade steps that affect the Cycle History upgrade” for information on how this item attribute is set. For every usage of the approval action in a cycle, a pre-notification activity is also created. The following naming convention is used in creating pre-notification activities: Internal Name - UPG_AN_PNOT_nnn (where nnn stand for the WF instance Id of the Notification activity it precedes.) Display Name - UPG_AN_PNOT_nnn (where nnn stand for the instance Id of the Notification activity it precedes.) This activity is defined to call the PL/SQL Function - OE_WF_UPGRADE_ UTIL.UPGRADE_PRE_APPROVAL An activity attribute is also created and it is set to the name of the S column (column status column) that the approval cycle action was mapped to. The procedure OE_WF_UPGRADE_UTIL. UPGRADE_PRE_APPROVAL does the following: If the activity is executed when the Upgrade is running, then it retrieves the S Column name from its activity attribute. It then checks the S Column value for the order or line in Order Entry. If the S column has a value other than eligible (18) it completes with that value (using the upgraded lookup code naming convention). 34-14 Oracle Order Management Suite Implementation Manual Upgrade Strategy for Cycles and Cycle History If the S column has a value of ‘eligible’ (18) indicating that the order or line was eligible for the approval, then it completes with ‘Not Processed’. If the pre-notification activity is executed when the Upgrade is not running then it will complete with ‘Not Processed’. The ‘Not Processed’ result from the pre-notification activity is transitioned to the respective notification activity. A Notification activity needs to have a message tied to it. The upgrade creates a message for each approval, using the following convention: Display Name - xxxxxxxxxxxx (Where xxxxxxxxxx stands for the Approval action name) Message Subject - xxxxxxxxxxxx (Where xxxxxxxxxx stands for the Approval action name) Message attributes are created that reference the seeded Header or Line Short Descriptor workflow item attributes, depending on whether this is a message for a Order level approval or a Line level approval. Example - An approval action is defined as following in Order Entry: Action ID - 1023 Approval Action Name - Legal Approval Result Table - SO_HEADERS_ALL Result Column - S12 It is used in the cycle “International Bill-Only”. It becomes eligible once the Order is entered. It can complete with a Pending, Pass or Fail result. When it completes with a ‘Pass’, it serves as a pre-requisite for the Receivables Interface line action. The following records are defined for it in SO_ACTION_RESULTS: Result Name Result Id Passing Pass 1 Yes Fail 2 Pending 30 This approval action is upgraded to a notification activity under the workflow item type OM Order Header as follows: Migrating Cycles to Workflow 34-15 Upgrade Strategy for Cycles and Cycle History Internal Name - UPG_AN_1023 Display Name - Legal Approval It is tied to the Lookup UPG_RT_1023 that has the following two lookups: I Lookup Coden Lookup Meaning UPG_RC_1 Pass UPG_RC_2 Fail UPG_RC_30 PP Pending N N NOT_PROCESSED NOT_PROCESSED_NOTN_ UPG_AN_1023 For every usage of the approval action in a cycle, a pre-notification activity is also created as follows: Internal Name - UPG_AN_PNOT_51167 Display Name - UPG_AN_PNOT_51167 The activity attribute ‘S_COLUMN’ on this pre-notification activity is set to the value ‘S12’. When the cycle that uses this approval is upgraded, the flow that is created will look as follows: 34-16 Oracle Order Management Suite Implementation Manual Upgrade Strategy for Cycles and Cycle History The Pre-notification Activity ‘UPG_AN_PNOT_51167’ is placed before the Notification ‘Legal Approval’. It calls the function OE_WF_UPGRADE_ UTIL.UPGRADE_PRE_APPROVAL. If the Order is already past the approval with a ‘Pass’ result then the pre-notification also completes with a ‘Pass’, transitions the flow to the continuation activity ‘UPG_ AN_OEOH_1023_CONT_L’. If the Header is eligible for the Approval then the pre-notification activity completes with a ‘Not Processed’ transitioning it to the Notification Activity (via the ‘Or’). If the Approval was completed with a result other than ‘Pass’ (the passing result), the pre-notification activity completes with that result transitioning to the notification activity (via the ‘default’ transition and Wait activity). Since the Notification Activity is created with a High Cost the flow is deferred when it reaches it. This transitioning back to the notification activity is done to mimic order cycles functionality, where an approval action when completed with a non-passing result could stay in that unprocessed state forever. Post-Upgrade, you can respond to Notifications from the WF Notifications page. It is available off the Order Management menu. Notifications that the upgrade creates are all configured to go the role that is set via the profile option ‘OM: Notification Approver’. Migrating Cycles to Workflow 34-17 Upgrade Strategy for Cycles and Cycle History Header and Line Action Dependencies Order Entry cycles supported line actions having header actions as pre-requisites. In Workflow such parent-child co-orodination is achieved via wait-for-flow and continue-flow coordination activities. Coordination for Booking (Lines wait for Order to book) and Closure (Order waits for Lines to close) is handled by the upgrade specific versions of those seeded functional sub-processes. However the following kinds of dependencies are handled dynamically when the cycle definitions are upgraded: Seeded Line actions having custom Header actions or approvals as pre-requisites Custom Line actions or approvals having custom Header actions or approvals as pre-requisites For every such dependency two new activities are created. A continue flow activity at the Header level, that is placed immediately after the Header pre-requisite activity. It is named as follows: Internal/Display Name - UPG_AN_OEOH_nn_CONT_L (Where nn stands for the Action ID of the pre-requisite action) A wait for flow activity at the Line level, that is placed immediately before the dependent Line action. It is named as follows: Internal/Display Name - UPG_AN_OEOL_nn_WAIT_FOR_H (Where nn stands for the Action ID of the pre-requisite action) Appropriate activity attributes are created for coordination. When more than 1 Line Action is dependent on the same Header action the code creates multiple wait-for-flow activities and then merges them, since WF supports only one Continue-flow activity linked to a single wait-for-flow activity. Example - The cycle “International Bill Only” is defined such that the Line cycle action Receivables interface is dependant on the order being booked and the order having passed the Header level Legal Approval (Action ID is 1023). When the cycle is upgraded the header workflow definition looks as follows: 34-18 Oracle Order Management Suite Implementation Manual Upgrade Strategy for Cycles and Cycle History The activity UPG_AN_OEOH_1023_CONT_L is positioned such that it is executed when the Notification Activity (Legal Approval) completes with a ‘Pass’ result. This is the continuation activity that signals the Line flows to continue. The Line workflow definition looks as follows: The ‘Enter Line’ activity is a seeded activity that handles Line dependency on Booking. It includes the coordination activity that makes the Line flow wait for Booking. The activity UPG_AN_OEOL_1023_WAIT_FOR_H is the WAIT_FOR_ FLOW coordination activity that the Upgrade dynamically creates to handle the Migrating Cycles to Workflow 34-19 Upgrade Strategy for Cycles and Cycle History dependency on the Header Approval Action. As the process definition indicates both of these serve as prerequisites to Interface to Invoice Sub-process. Cycle Definitions Order Entry did not seed any cycles. Every user defined cycle that is referenced by open orders or lines is upgraded in to a Header workflow process and a Line workflow process. A Cycle that has the Manufacturing Release Action is upgraded into 3 workflow processes. The third one is a Line workflow process that is specific only for the Configured Item Line. The upgrade specific functional sub-processes, special block activities (for upgraded custom cycle actions), pre-notification and notification activities (for upgraded approval actions), coordination activities (for dependencies), ‘and’ and ‘or’ activities (for pre-requisite groupings) that are described in the previous sections are used as building blocks to define workflow process definitions. The upgrade dynamically creates these process definitions based on the cycle definitions. Header workflow process definitions are created based on all the header level cycle actions in the cycle. Line workflow process definitions are created based on all line level cycle actions in the cycle. The following naming conventions are used to name these workflow processes: Header workflow processInternal Name - UPG_PN_OEOH_REG_nn (Where nn stands for the Cycle Id) Display Name - UPG_PN_OEOH_REG_xxxxxxxxxxx .. (Where xx stands for the Cycle Name) Line workflow processInternal Name - UPG_PN_OEOL_REG_nn (Where nn stands for the Cycle Id) Display Name - UPG_PN_OEOL_REG_xxxxxxxxxxx (Where xxx stands for the Cycle Name) Configured Item Line workflow process Internal Name - UPG_PN_OEOL_CFG_nn (Where nn stands for the Cycle Id) Display Name - UPG_PN_OEOL_CFG _xxxxxxxxxxx (Where xxx stands for the Cycle Name) 34-20 Oracle Order Management Suite Implementation Manual Upgrade Strategy for Cycles and Cycle History Cycle Definitions that are NOT upgraded Certain cycle definitions that were unsupported in Order Entry, have corrupt definitions or are extermely complex are not upgraded. If a cycle is not upgraded then any Open order referencing such a cycle is not upgraded either. Workflow Process definitions are NOT created for the following kinds of cycles: 1. A cycle that has no ‘Complete Order’ cycle action. Order Entry required that you include the actions of ‘Complete Line’ and ‘Complete Order’ action at the end of all your order cycles. To upgrade open Orders referencing such a cycle, you can do one of the following: Complete cancel the order thus closing it. Add the ‘Complete Order’ Header action to the cycle definition. Verify that the ‘Create Dynamic Where Clauses’ Concurrent Program completes successfully. 2. A cycle that has no ‘Complete Line’ cycle action. Order Entry required that you include the actions of ‘Complete Line’ and ‘Complete Order’ action at the end of all your order cycles. To upgrade open Orders referencing such a cycle, you can do ONE of the following: Completely cancel all the lines on the order thus closing them. Add the ‘Complete Line’ cycle action to the cycle. Verify that the ‘Create Dynamic Where Clauses’ Concurrent Program completes successfully. 3. A cycle that has the Order or Line Cancel Action. Order Entry DOES NOT support defining cycles with the Cancel Action in them. It DOES NOT provide a program or a form to process orders or lines that are eligible for the Cancel Action To upgrade open Orders referencing such a cycle, you can do ONE of the following: Process all orders through the order cycle and close them using the Close Orders program. Verify that there are NO orders or lines eligible for the Cancel Action. And then take out the Cancel Action from the cycle. Verify that the ‘Create Dynamic Where Clauses’ Concurrent Program completes successfully. Migrating Cycles to Workflow 34-21 Upgrade Strategy for Cycles and Cycle History Recommendation: If you were using the line cancel action in a cycle to cancel back-ordered lines, you can use the Order Management Under-Shipment feature. By setting the under-shipment tolerances appropriately you can ship partially but fulfill completely (thus obviating the need to cancel the un-shipped portion). Refer to the Order Management User Guide for more information on Over-Under Shipments. 4. A Non-Ship Cycle that has the Inventory Interface Action To upgrade open Orders referencing such a cycle, you can do ONE of the following: Process all orders through the order cycle and close them using the Close Orders program. Take out the Inventory interface action. This means that you have to manually decrement inventory for some transactions post-upgrade, unless you progress all open transactions past inventory interface before you upgrade. Verify that the ‘Create Dynamic Where Clauses’ Concurrent Program completes successfully. 5. A Cycle that has both the RMA Interface Action and the Purchase Release Action To upgrade open Orders referencing such a cycle, you can do ONE of the following: Process all orders through the order cycle and close them using the Close Orders program. Process all open Orders to closure and then take out the Purchase release Action from the cycle. Verify that the ‘Create Dynamic Where Clauses’ Concurrent Program completes successfully. Process all open Returns to closure and then take out the RMA interface Action from the cycle. Verify that the ‘Create Dynamic Where Clauses’ Concurrent Program completes successfully. 6. A Cycle that has a Line Action with 1. More than one group in its pre-requisites (OR condition) AND 2. One of the groups has more than one pre-requisite action (AND condition) AND 3. Such a group has a header action as one or more of its pre-requisite actions 34-22 Oracle Order Management Suite Implementation Manual Upgrade Strategy for Cycles and Cycle History To upgrade open Orders referencing such a cycle, you can do ONE of the following: Process all orders through the order cycle and close them using the Close Orders program. Convert the 'AND' conditions to 'OR' conditions. This may not be feasible to do while retaining the same functionality. It will also result in some actions becoming eligible post-upgrade that would not have become eligible pre-upgrade (because an AND condition was not met). Verify that the ‘Create Dynamic Where Clauses’ Concurrent Program completes successfully. 7. A Cycle that does not have records in the table so_action_results for those actions - result combinations that serve as prerequisites for other actions in that cycle. This is a case of data corruption that can happen when you define cycles without using the Application Forms. To upgrade open Orders referencing such cycles, you can do ONE of the following: Process all orders through the order cycle and close them using the Close Orders program. Create the required records in SO_ACTION_RESULTS via the 'Define Action Results’ form. 8. A Cycle that has Header level actions dependent on Line level actions. Entry does not support such a definition. Order To upgrade open Orders referencing such a cycle, you can do ONE of the following: Process all orders through the order cycle and close them using the Close Orders program. Take out the dependency of the Header level action from the Line Level action. Ensure that the header action is now dependent on some other Header level action. Verify that the ‘Create Dynamic Where Clauses’ Concurrent Program completes successfully. 9. In Order Entry the cycle actions of Pick Release, Back Order Release and Ship-Confirm have to be used in a certain way. Not Supported - A Cycle that has the Ship-Confirm cycle action and it has as its pre-requisites actions other than Pick Release or Back Order Release. To upgrade open Orders referencing such a cycle, you can do ONE of the following: Migrating Cycles to Workflow 34-23 Upgrade Strategy for Cycles and Cycle History Process all orders through the order cycle and close them using the Close Orders program. Ensure that all open lines using this cycle are before the Pick Release action. That is the line status columns for Pick Release, Back Order Release and Ship-Confirm have null values. If they are not, then process those lines to closure. AND then change the cycle definition so that the Ship-Confirm Action does not have as its pre-requisite an action other than Pick Release or Back Order Release. Verify that the ‘Create Dynamic Where Clauses’ Concurrent Program completes successfully. 10. In Order Entry the cycle actions of Pick Release, Back Order Release and Ship-Confirm have to be used in a certain way. Not Supported - A cycle that has the Back Order release cycle action and it has as its pre-requisite an action other than Ship-Confirm. To upgrade open Orders referencing such a cycle, you can do ONE of the following: Process all orders through the order cycle and close them using the Close Orders program. Ensure that all open lines using this cycle are before the Pick Release action. That is the line status columns for Pick Release, Back Order Release and Ship-Confirm have null values. If they are not, then process those lines to closure. AND then change the cycle definition so that the Back Order Release Action does not have as its pre-requisite an action other than Ship-Confirm. Verify that the ‘Create Dynamic Where Clauses’ Concurrent Program completes successfully. 11. In Order Entry the cycle actions of Pick Release, Back Order Release, Ship-Confirm and Inventory Interface had to be used in a certain way. Not Supported - A cycle that has the Ship-confirm and Inventory Interface cycle actions and the Inventory Interface action has as its pre-requisites an action other than Ship-Confirm or Service Interface. To upgrade open Orders referencing such a cycle, you can do ONE of the following: Process all orders through the order cycle and close them using the Close Orders program. Ensure that all open lines using this cycle are before the Pick Release action. That is the line status columns for Pick Release, Back Order Release, Ship-Confirm, Inventory Interface and Service Interface have null values. If they are not, then process those lines to closure. AND then change the cycle 34-24 Oracle Order Management Suite Implementation Manual Upgrade Strategy for Cycles and Cycle History definition so that the Inventory Interface Cycle Action does not have as its pre-requisite actions other than Ship-Confirm or Service Interface. Verify that the ‘Create Dynamic Where Clauses’ Concurrent Program completes successfully. 12. In Order Entry the cycle actions of Pick Release, Back Order Release, Ship-Confirm, Inventory Interface and Service Interface have to be used in a certain way. Not Supported - A cycle that has Ship-confirm OR Inventory Interface AND it also has Service Interface and the Service Interface action has as its pre-requisites actions other than Ship-Confirm or Inventory Interface. To upgrade open Orders referencing such a cycle, you can do ONE of the following: Process all orders through the order cycle and close them using the Close Orders program. Ensure that all open lines using this cycle are before the Pick Release action. That is the line status columns for Pick Release, Back Order Release, Ship-Confirm, Inventory Interface and Service Interface have null values. If they are not, then process those lines to closure. AND then change the cycle definition so that the Service Interface Cycle Action does not have as its pre-requisite actions other than Ship-Confirm or Inventory Interface. Verify that the ‘Create Dynamic Where Clauses’ Concurrent Program completes successfully. A Pre-upgrade script (ontexc08.sql) is provide that identifies such non-upgradable cycles. You need to run this script before the upgrade and take corrective actions as needed. You need to then re-run the script to ensure that no exceptions are listed. Mapping of Cycle entities to Workflow Cycle definition data maps to Workflow definitions data as follows: R11 Tables for Order Cycle Definition R11i WF tables for Flow Definition SO_ACTIONS WF_ACTIVITIES SO_ACTION_PRE_REQS WF_ACTIVITY_TRANSITIONS SO_ACTION_RESULTS WF_ACTIVITIES, WF_LOOKUPS SO_CYCLES WF_ACTIVITIES SO_CYCLE_ACTIONS WF_PROCESS_ACTIVITIES Migrating Cycles to Workflow 34-25 Upgrading Order Type - Cycle Assignments SO_RESULTS WF_LOOKUPS Workflow is architected very differently from Cycles and hence the workflow process definitions that the upgrade creates are not optimal. The upgrade process follows certain heuristics to create process definitions that are functionally equivalent to the cycle definition. In doing so it creates extraneous ‘and’ and ‘or’ activities. These upgraded workflow process definitions use the upgrade specific funtional sub-processes, that have these additional activities that do special stuff when the cycle history is upgraded. For these reasons it is very strongly recommended that you DO NOT use these flows for processing new order and lines. Upgrading Order Type - Cycle Assignments Order Management has Transaction Types; Order Types and Line Types. Header workflow processes are assigned to Order Types. Line workflow processes are assigned to Order Type, Line Type and Item Type combinations. See Also Users Guide - Workflow Assignments for details. We have described how Order Types are upgraded to Order and Line transaction types. The upgrade also creates workflow assignments for these transaction types. These workflow assignments are for use by the upgraded orders and lines only and hence are end dated. To be able to use the upgaded Order and Line transaction types for new orders and lines, you need to define new workflow assignments. For every Order Type that is upgraded, a workflow assignment is created as follows: Column Value Order Type Order Type that is upgraded Process Name UPG_PN_OEOH_REG_xxx (where xxx stands for the cycle name that the Order Type referenced) Start Date The Start Date on the original Order Type End Date sysdate (Since this assignment is for upgraded orders ONLY) 34-26 Oracle Order Management Suite Implementation Manual Upgrading Cycle History For every new Line Type that is created for an upgraded Order Type a line workflow assignment is created as follows: Column Name Value Order Type Order Type that is upgraded Line Type Line Type that is automatically created for this Order Item Type NULL Process Name UPG_PN_OEOL_REG_xxx (where xxx stands for the cycle name that the Order Type referenced). Start Date The Start Date on the original Order Type End Date sysdate (Since this assignment is for upgraded lines ONLY) If the cycle that the original Order Type references has Manufacturing Release, then we create additionally create the following workflow assignment for supporting the Configured Item Line. Column Name Value Order Type Order Type that is upgraded Line Type Line Type that is automatically created for this Order Item Type Configured Item Process Name UPG_PN_OEOL_CFG_xxx (where xxxx stands for the cycle name that the Order Type referenced). Start Date The Start Date on the original Order Type End Date sysdate (Since this assignment is for upgraded lines ONLY) Upgrading Cycle History Cycle History is upgraded to Workflow Status Tables only for all Open Orders and Lines. Upgrading cycle history is a very expensive operation and you are advised to run the Close Orders program to close all Orders/Lines that are eligible to close before the upgrade. Migrating Cycles to Workflow 34-27 Upgrading Cycle History Supported and Unsupported Cycle States Order and Lines need to be in certain cycle states in order to be upgraded. A pre-upgrade script (ontexc07.sql) identifies Orders and Lines in unsupported cycle states. You need to run this script and handle the exceptions it lists. You can move such orders or line forward to a supported cycle state using Order Entry concurrent programs or forms. Cancellation Status History In Order Management partial cancellation is supported as a direct update of the ordered quantity. Partial cancellation status is not tracked via Workflow. Cancellation history is stored in lines history table (OE_ORDER_LINES_HISTORY). When an Order or Line is fully cancelled its flow is automatically transitioned to the Close Order or Close Line activity and the Order or Line is closed. In Order Entry, an Order Header or Line were closed on full cancellation as well. This means that cycle history for fully canceled (hence closed)Orders/Lines is not upgraded. Null Cycle Statuses A Null Status for any S Column is supported, since it indicates that the order or line has not reached that cycle action yet or its cycle does not have that cycle action in it. Seeded Partial Line Action Statuses Order Managment does not store partial statuses **. In OM, when a Line is partially processed it splits, so that the processed part progresses in its own flow and the new line created awaits processing. Example: A line is ship-confirmed partial. The system splits it into 2 lines. The original line will complete the Ship-Line activity and move on to fulfill and invoice interface. The new line created gets its own flow and will wait at the Ship-Line activity, awaiting to be picked and shipped. See Also the User’s Guide for more information on Line Splits. When an order line with a partial status is upgraded to Order Management, it is automatically split into multiple lines depending on the number of line details or picking line details that it is tied to. ** - Invoice Interface is an exception here, it can partially invoice interface a line when all its required for revenue components are not fulfilled. 34-28 Oracle Order Management Suite Implementation Manual Upgrading Cycle History Supported Header Seeded Cycle Action Statuses The following table summarizes the supported state and unsupported cycle states for order headers. S Column S1 S4 Seeded Cycle Action Unsupported Cycle States Booking Cancel Order Supported States other than null and not applicable(8 or Where is the Order flow after the 24) upgrade? 1 - Booked Will skip past actual Booking function 5 - Partial Will be Book eligible 15 - Entered Will be Book eligible 18 - Eligible Will be Book eligible 11 - Complete Please look at above section on Cancellation Status History 8 or 24 not supported for S4 since Cancel Action cannot be used in a cycle. S6 Close/Complete 18 - Eligible In Order Management it would become eligible for closure. Will close once all lines have closed. 10 Status history not upgraded for Closed Orders Supported Order Line Seeded Cycle Action Statuses The following table summarizes the supported state and unsupported cycle states for order lines. Seeded Cycle S Column Action S2 Pick Release Unsupported Cycle States Supported States other than null and not applicable(8 or 24) Where is the line flow after the upgrade? 18 - Eligible This equates to ‘Awaiting Shipping’ Migrating Cycles to Workflow 34-29 Upgrading Cycle History Seeded Cycle S Column Action Unsupported Cycle States Supported States other than null and not applicable(8 or 24) Where is the line flow after the upgrade? 4 - Released, NO If not shipped, This equates to ‘Awaiting OPEN Pick Slips Shipping’ S3 S4 S5 Back Order Release Ship Confirm Receivables Interface 5 - Partial Line is split as part of upgrade. If not shipped, This equates to ‘Awaiting Shipping’ 18 - Eligible This equates to ‘Awaiting Shipping’ 5 - Partial Line is split as part of upgrade. If not shipped, This equates to ‘Awaiting Shipping’ 4 - Released, NO OPEN Pick Slips If not shipped, This equates to ‘Awaiting Shipping’ 5 - Partial Line is split as part of upgrade. The Ship-confirmed Line will skip past Ship-Line. The other will be ‘Awaiting Shipping’ 6 - confirmed Will skip past ‘Ship Line’ activity. 7 - Backordered Complete This equates to ‘Awaiting Shipping’ 22 - Backordered Partial Line is split as part of upgrade. If not shipped, this equates ‘Awaiting Shipping’ else it will skip past Ship-Line. 18 - Eligible This equates to Invoice Interface eligible. If a line was partially invoiced due to unfulfilled Rrequired For Revenue components then post-upgrade the invoice interface function will push it to the RFR block activity. 18 - Eligible 34-30 Oracle Order Management Suite Implementation Manual Upgrading Cycle History Seeded Cycle S Column Action S6 S8 Unsupported Cycle States Close/Complete Inventory Interface Supported States other than null and not applicable(8 or 24) Where is the line flow after the upgrade? 9 - Interfaced to AR This will skip past the Invoicing Sub-process. 5 - Partial This equates to Invoice Interface eligible. If a line was partially invoiced due to unfulfilled Required for Revenue components then post-upgrade the invoice interface function will push it to the RFR block. 18 - Eligible In OM it would become eligible for closure. 10- Closed Status History not upgraded for Closed Lines 5 - Partial Line is split as part of upgrade. The Ship-confirmed Line will skip past Ship-Line. The other will be ‘Awaiting Shipping’. 14 - Interfaced This equates to ship-confirmed (in a ship flow) and thus ‘Awaiting fulfillment’. 5 - Partial Please look at above section on Cancellation Status History. 11 - Complete 8 or 24 not supported for S4 since Cancel Action cannot be used in a cycle. 14 - Interfaced Service Interface has no corresponding WF activity in Order Management. 18 - Eligible 13 - Interfaced Error S9 S25 Cancel Line Service Interface 18 - Eligible Migrating Cycles to Workflow 34-31 Upgrading Cycle History Seeded Cycle S Column Action S26 S27 Unsupported Cycle States Purchase Release Manufacturing Release Supported States other than null and not applicable(8 or 24) Where is the line flow after the upgrade? 18 - Eligible This equates to it being Purchase Release Eligible. 14 - Interfaced This equates to skipping Purchase Release and being eligible at the Ship-Line Block. 6 - Confirmed This will skip both Purchase Release and the Ship-Line Block. 5 - Partial The Line is split as a result of the upgrade. The received line will skip past ship-Line, the other will be “Awaiting Shipping”. 4 - released . 20 - WO partially completed 21 - WO created 23 Configuration created S28 Demand Interface 18 - Eligible For the Model Line, this equates to being Create Configuration Eligible. For the Class and Option Lines this equates to “Awaiting Fulfillment”. 19 - Work Order Completed For the Model Line this equates to being ATO fulfillment eligible (Wait for CTO block). For the Class and Option Lines this equates to “Awaiting Fulfillment” . For the configured item Line this equates to “Awaiting Shipping”. eligible - 18 This equates to scheduling eligible interfaced - 14 This equates to will be eligible at for the next activity in the flow. 34-32 Oracle Order Management Suite Implementation Manual Upgrading Cycle History Seeded Cycle S Column Action S29 RMA Interface Unsupported Cycle States Supported States other than null and not applicable(8 or 24) Where is the line flow after the upgrade? eligible - 18 This equates to ‘Wait for receiving’ partially accepted Line will be split as part of Upgrade. If not - 16 received, This equates to ‘Wait for receiving’, else it will be at eligible for the next activity. interfaced - 14 If not received, This equates to ‘Wait for receiving’ completely accepted - 17 It is past the Return Receipt sub-process Note: For the Manufacturing Release cycle action, the Order Management upgrade process only upgrades lines in the following statuses: Eligible or WO Complete. If you cannot complete all your open work orders in time for the upgrade, you can do the following before the upgrade: Request the ARU for bug 1504523. For lines that are mfg release - released: Run the pre-upgrade script that the ARU provides. For lines that are mfg-release - config created: You need to delink the config item and run the pre-upgrade script the ARU provides. For lines that are mfg-release - wo open or partial(no shipped items) - You need to delink the WO, delink the item and run the pre-upgrade script that the ARU provides. The script does the following: - It picks up scheduled ATO lines (model, class, option) that are mfg release - released and updates their cycle state to mfg release eligible. After running this update script you should re-run the pre-upgrade script ontexc07.sql to confirm that such lines no longer show-up in the exception report. Migrating Cycles to Workflow 34-33 Upgrading Cycle History After successfully upgrading you can re-link the Config Items (via the "Link Item" action in the Sales Order Form), and link Work Orders (via the WIP Discrete Jobs form) back to the order lines. Supported Custom Action Statuses The Order Management upgrade supports upgrading orders and lines that are eligible for OR past a custom action. As described before the custom action is upgraded to a special workflow block activity. If an order or line was eligible for a custom action, after the upgrade the flow for the order or line will be stopped at the corresponding block activity (which will be in a ‘NOTIFIED’ state). If the order or line was past the custom action, then the block activity would get completed with that result. Pending cycle states (have completed with a non-passing result temporarily) for custom actions are supported as well. In this case too after the upgrade, block activity will be in a ‘NOTIFIED’ state (after the Workflow Background Engine has run). Supported Approval Statuses The Order Management upgrade supports upgrading orders and lines that are eligible for OR past an approval. As described before, approval actions are upgraded to WF notification activities. If an order or line was eligible for an approval, on upgrade the corresponding notification will be sent out(after the Workflow Background Engine runs). If the order or line was past the approval action then the pre-notification activity completes with that result thus skipping the notification activity. Pending approval states (have completed with a non-passing result temporarily) for approval actions are supported as well. In this case the notification will be re-sent (after the Workflow Background Engine runs). Note: Order and Line Approval History data (SO_ORDER_ APPROVALS, SO_LINE_APPROVALS) is not upgraded. Order Management provides a special form that allows you to view this Order Entry data for upgraded orders and lines. 34-34 Oracle Order Management Suite Implementation Manual Post-Upgrade steps that affect the Cycle History Upgrade Flow Creation for Upgraded Orders and Lines One of the last tasks that the Order Mangement Upgrade does is the flow creation for the upgraded order headers and lines. This is done to upgrade cycle status history to workflow status information. For every order that was successfully upgraded to Order Management, the upgrade process does the following: As we described before cycle definitions are upgraded to workflow processes definitions. A header flow is started for the Order Header, using the header workflow process that maps to the cycle it referenced in Order Entry. The Header ID is used as the item key for the header flow. For every line on the order, a line flow is started using the line workflow process that maps to the cycle it referenced in Order Entry. The Line Id is used as the item key for the line flow. Example: An Order has a standard item line. The order uses the cycle “International Bill - Only”. This is the cycle we discussed in the “Header and Line Action Dependencies”. The order is booked and eligible for the Legal Approval cycle action. The line is waiting for the Order level approval to complete. The cycle gets upgraded into a header workflow process (UPG_PN_OEOH_REG_ International Bill-Only) and a line workflow process(UPG_PN_OEOL_REG_ International Bill-Only). The upgrade process starts a header flow for the order using the process UPG_PN_OEOH_REG_International Bill-Only. The flow will stop at the notification activity “Legal Approval”. A line flow is started for the line will be waiting for the Legal Approval to complete (wait-for-flow coordination activity). After successfully upgrading when you start the Workflow Background Engine (see Also Users Guide for details), the notification will get sent out to the role specified in the profile option OM: Notification Approver. After successfully upgrading you need to complete certain post-upgrade steps. In one of the post-upgrade steps, you need to run a script that updates worflow item attributes for all the upgraded orders and lines. The next section discusses this. Post-Upgrade steps that affect the Cycle History Upgrade To be able to process upgraded orders and lines you need to complete all post-upgrade steps. Some steps involve the setting of certain profile options and others involve running an update script: Migrating Cycles to Workflow 34-35 Post-Upgrade steps that affect the Cycle History Upgrade Profile Option - OM: Context Responsibility for Upgraded Orders In Order Management, for every Order and Line the following WF item attributes are set: User ID (USER_ID) - The user that created the Order/Line Responsibility ID(RESPONSIBILITY_ID) - The responsibility that was used to create the Order/Line Application ID(APPLICATION_ID) - The application that was in effect when the Order/Line was created. These item attributes are used to set application context when deferred flows are picked up by the Background Engine for processing. The application context determines the Operating Unit (Org) the environment is pointing to and the profile options that are in effect. Now for upgraded orders and lines, the first item attribute can be set based on the created_by column on the Orders and Lines. However to set the other two you need to complete certain manual post-upgrade steps. As part of your Order Management Implementation you will be setting up new Order Management responsibilities and assigning them to users that create and manage orders. A post-upgrade script (ontupg48.sql) lists all the unique Users (who have created Order/Lines) for each Operating Unit. Another post-upgrade script (ontupg49.sql)lists exceptions; Users who have multiple responsibilities pointing to an Operating Unit or no responsibilities at all. For the former case you need to set the “OM: Context Responsibility for Upgraded Orders” (to “Yes”) on ONE of the responsibilities. In the latter case you need to assign that user an appropriate responsibility that has all the required profiles set appropriately. When the script (ontupg49.sql) lists no exceptions, it means that when you run the script (ontup255.sql in a later post-upgrade step) to update the workflow item attributes, it can easily identify the context responsibility to use for every order and line, based on the user that created it and the operating unit it was created in. Example: A sample listing (ontupg48.lst) produced by the script ontupg48.sql: Listings Report Distinct Operating Unit Listing in OE 34-36 Oracle Order Management Suite Implementation Manual Post-Upgrade steps that affect the Cycle History Upgrade Org ID Organization ---------- -------------------------------------------------204 498 **US** Vision Operations US Vision ADB 600 Vision Project Mfg Users who created Orders or Lines and their operating units in OE User ID Name Org ID Organization --------- ------------------------------ ------ -----------------------------1894 NDSMITH 498 1894 NDSMITH 1737 ECLARKE 1001 VISION 204 600 204 2501 Vision ADB **US** Vision Operations US Vision Project Manufacturing **US** Vision Operations US DMARTIN 600 Vision Project Manufacturing This example has 4 distinct Users who have access to 3 distinct Operating Units, in which they have created Orders or Lines. You can create 3 new Order Management or non-OM (if you plan to use a Custom Application on top of OM) responsibilities. The example indicates a Multi-Org installation, hence the ‘MO: Operating Unit’ profile option has to be set to the appropriate value on each of these new responsibilities. Set the ‘OM: Context Responsibility for Upgraded Orders’ to ‘Yes’ on each of these responsibilities, thus flagging them for cycle history Upgrade usage. Set other profile options that need to be set for processing orders. Now assign these new responsibilities appropriately to the 4 Users, so that they continue to have access to the same Orgs that they did in the previous release. The user NDSMITH has access to two operating units, so you would assign him two different responsibilities. Both of which are flagged to be used as context responsibilities for the operating units that they are pointing to. Migrating Cycles to Workflow 34-37 Post-Upgrade steps that affect the Cycle History Upgrade To validate the responsibilities settings for user/org combination which was done in this step, run the script ontupg49.sql. If you find any errors in the report produced by this script, correct the settings and re-run the script to ensure that the settings are correct. Profile Option - OM: Notification Approver In Order Entry any user who had access to the Approve Orders form could approve an order or a line that was eligible for an approval. As discussed before, approval cycle actions are converted to workflow notification activities. Notifications that require a response need to be sent to a WF Role. See Also WF Users Guide for more information on WF Roles. The OM: Notification Approver Profile option setting determines, to whom these upgraded notifications are sent. You can set this profile option at the Site, Application, Responsibility or User level. It can be set to any Workflow role (Application Responsibility or User). To get functionality akin to Order Entry Approvals, you can set it to an Application Responsibility. Setting this profile at a Responsibility level enables the user at a minimum to have a different approver role for a given Operating Unit. If the profile OM: Notification Approver resolves to a null value for a given User, Responsibility and Application on an Upgraded Order or Line, then the notification will be sent to the SYSADMIN user. As we described in the section on upgrading approval actions, the responder on the Notification Activity is set to default from the workflow item attribute “Notification Approver”. This workflow item attribute is set by a script (ontup255.sql in a later post-upgrade step), based on the value of the profile option OM: Notification Approver. Updating WF Item Attribute Values for Upgraded Orders and Lines When Order Management starts a header or a line flow, it also sets certain workflow item attribute values. See Also “Order Management Workflow seed data” section for a list of all the seeded workflow item attributes. When the upgrade starts flows for upgraded orders and lines, it sets some of these attributes. But to be able to set certain others, you need to complete certain manual post-upgrade steps and then run a script that will update these attributes. As described before, you need to assign (Order Management) responsibilities to all the users that the post-upgrade script ontupg48.sql lists. You need to ensure that 34-38 Oracle Order Management Suite Implementation Manual Cycles Upgrade and other Order Entry features the script ontupg49.sql lists no exceptions. You also need to set the OM: Notification Approver Profile option as required. Now you can run the script ontupg255.sql that updates the following workflow item attributes for all upgraded order and line flows: Responsibility ID(RESPONSIBILITY_ID) Application ID(APPLICATION_ID) Notification Approver(NOTIFICATION_APPROVER) You should start the Workflow Background Engine for the Order Management workflow items (OM Order Header, OM Order Line) ONLY after you have successfully completed all the post-upgrade steps. Cycles Upgrade and other Order Entry features Cycles Upgrade and Security Rules In Order Entry you could define security rules based on cycle state. The upgrade to Order Management does not upgade user defined security rules for the following reasons: Order Management is much more flexible than R10/11 Order Entry. You are advised to review your Security Rules and decide whether you still need these with the new product. The Order Management Constraints Framework allow definition of Role based constraints. You may want to take advantage of that. The Order Management Data Model is very different from the Order Entry one and security rules cannot be automatically & unambiguously upgraded. When you need to define constraints based on upgraded approvals, note the following: The Processing Constraints Framework lets you define constraints based on workflow state. See Also - User Guide on the Processing Constraints Framework. As described before, the upgrade notification processes are defined such that, the actual notification activity is skipped if the Order or Line was already past that appoval action in Order Entry. This means that you cannot define constraints based only the notification activity. You also need to define it based on the pre-notification activity. Migrating Cycles to Workflow 34-39 Cycles Upgrade and other Order Entry features Example: Payment Terms on the Order cannot be changed once it has passed the Legal Approval. To support this the constraint needs to be defined with the following conditions: The order is past the Legal Approval Notification Activity with a ‘Pass’ result. OR The order is past the pre-notification Activity that precedes the Legal Approval with a ‘Pass’ result. The previous sections describe how notification and pre-notification activities are named. Cycles Upgrade and Holds In Order Entry you could define generic or cycle action specific holds. The upgrade migrates all user defined hold definitions and other holds data. Cycle action specific holds that were based on non-seeded cycle actions get upgraded as generic holds. Cycle Action specific holds that were based on seeded cycle actions get upgraded to activity specific holds. If an Order or Line was not getting processed in Order Entry on account of a Hold, it will get held up in Order Management as well on upgrade. Example: An Order in the old system cannot book due to a generic hold on the Order. It remains booking eligible. On upgrade it is Booking eligible. When you attempt to book it, the operation will fail because of the generic hold. Note: Notification Activities do not honor Holds in Order Management. If you want your custom activities to honor holds, then your external process needs to check for holds. See Also “Using Workflow in Order Management”. Glossary A flow is what the application starts for a order or a line. A flow is started using a specific "workflow process" A workflow process is made up of workflow activites or workflow sub-processes. A workflow sub-process is made of workflow activites or more workflow sub-processes. A workflow sub-process is not defined as "runnable" which means that you cannot start a flow using it. 34-40 Oracle Order Management Suite Implementation Manual Oracle Order Management Suite Implementation Manual Volume 2 Release 11 i July 2001 Part No. A90141-01 Oracle Order Management Suite Implementation Manual, Release 11i Part No. A90141-01 Copyright © 1999, 2000, 2001 Oracle Corporation. All rights reserved. Primary Authors: Ginger Alexander, Francesca Amezquita, Rajeev Bellamkonda, Rajeev Bellamkonda, Reb Bowman, Sagar Boyapati, Zeeshan Butt, Charlene Chandonia, Manish Chavan, Michael Cummings, Shashi Dhar, Sasi Erla, Joshua Gould, Nitin Hase, Jayarama Holla, Matilde Jareno, Nithya Lakshmanan, Nancy Lynn Klokke, Vivian Y. Lee, Maria Matheny, Tony Maxey, Vidyesh Mishra, Tom Myers, Vijay Pillarisetti, Hemalatha Raman, Sumeet Rijhsinghani, Sandy Rota, William Rudge, Jolin Salazar-Kish, Leena Sampemane, Esha Sen, Rohit Shivram, Alok Singh, Renganathan Sreenivasan, Kannan Tarakad, Bonnie Williams, Samuel Wong, John Young, and Jessica Zhang. Contributors: Elizabeth Looney, Kristina Momber, Tom Myers, David Reitan, John Salvini, James Siri The programs are not intended for use in any nuclear, aviation, mass transit, medical, or other inherently dangerous applications. It shall be licensee's responsibility to take all appropriate fail-safe, back up, redundancy and other measures to ensure the safe use of such applications if the Programs are used for such purposes, and Oracle disclaims liability for any damages caused by such use of the Programs. This Program contains proprietary information of Oracle Corporation; it is provided under a license agreement containing restrictions on use and disclosure and is also protected by copyright, patent and other intellectual property law. Reverse engineering of the software is prohibited. Program Documentation is licensed for use solely to support the deployment of the Programs and not for any other purpose. The information contained in this document is subject to change without notice. If you find any problems in the documentation, please report them to us in writing. Oracle Corporation does not warrant that this document is error free. No part of this document may be reproduced or transmitted in any form or by any means, electronic or mechanical, for any purpose, without the express written permission of Oracle Corporation If this Program is delivered to a U.S. Government Agency of the Department of Defense, then it is delivered with Restricted Rights and the following legend is applicable: Restricted Rights Legend Programs delivered subject to the DOD FAR Supplement are “commercial computer software” and use, duplication and disclosure of the Programs shall be subject to the licensing restrictions set forth in the applicable Oracle license agreement. Otherwise, Programs delivered subject to the Federal Acquisition Regulations are “restricted computer software” and use, duplication and disclosure of the Programs shall be subject to the restrictions in FAR 52.227-14, Rights in Data -- General, including Alternate III (June 1987). Oracle Corporation, 500 Oracle Parkway, Redwood City, CA 94065. Oracle is a registered trademark, and Oracle Applications, Oracle Inventory, Oracle e-Commerce Gateway, Oracle Order Management, Oracle Payables, Oracle Purchasing, Oracle Self-Service Purchasing, Oracle Self-Service Web Applications, and Oracle Internet Procurement are trademarks or registered trademarks of Oracle Corporation. Windows NT is a registered trademark of Microsoft Corporation. Other names may be trademarks of their respective owners. Send Us Your Comments Oracle Order Management Suite Implementation Manual, Release 11i Part No. A90141-01 Oracle Corporation welcomes your comments and suggestions on the quality and usefulness of this publication. Your input is an important part of the information used for revision. ■ ■ ■ ■ ■ Did you find any errors? Is the information clearly presented? Do you need more information? If so, where? Are the examples correct? Do you need more examples? What features did you like most about this manual? If you find any errors or have any other suggestions for improvement, please indicate the chapter, section, and page number (if available). You can send comments to us in the following ways: ■ ■ ■ E-mail - [email protected] FAX - 650-506-7294 Attn: Oracle Order Management Postal service: Oracle Corporation Oracle Oracle Order Management Documentation 500 Oracle Parkway, 3op6 Redwood Shores, CA 94065 USA If you would like a reply, please give your name, address, and telephone number below. If you have problems with the software, please contact your local Oracle Support Services. iii iv A Using Workflow in Order Management Topics covered in this appendix include: ■ Overview on page A-2 ■ Introduction on page A-2 ■ Functional Differences on page A-2 ■ R11i Features on page A-4 ■ Order Management Workflow Standards on page A-11 ■ Using WorkFlow in Order Management on page A-17 ■ Customizing Order and Line Flows on page A-36 ■ Conclusion on page A-44 Using Workflow in Order Management A-1 Overview Overview Businesses seek technologies to increase profitability and enhance competency. They hope to use such technologies to streamline and automate transaction flows, better manage exceptions and identify non-value added activities. Companies need software systems that can work in dynamic business environments, enable users to control business rules and increase transaction automation. These systems not only have to be flexible and but must also be easy to use. Workflow technology supports automation and continuous improvement of business processes. It supports routing information of any type according to user-defined business rules. Business transactions, such as order placements or purchase requests that involve various controls, routings, and approvals, can be managed more efficiently by leveraging Workflow technology. This is the primary reason why, Oracle Order Management integrates with Oracle Workflow; to provide users with a comprehensive order processing and fulfillment system. Introduction Oracle Order Entry (Release 11 and earlier) includes a feature called Order Cycles. This feature provides the flexibility in setting up different order processes to fit various business needs. Today, Order Management has greatly enhanced the order cycles functionality by replacing Order Cycles with Workflow. The goal is to give you the following benefits: Flexible and extensible order processing for all industry segments Automated transactions for reducing operation overhead Interactive decision support and exception handling This paper explains functional differences between R11 Order Cycle and R11i Workflow. It also discusses Order Management Workflow features, Workflow standards, setup procedures, various means of processing orders and other useful tips. Functional Differences In R11i Order Management, Workflow replaces Order Cycles. Order cycles, cycle actions and approval cycle actions are obsolete. You can define workflow processes that determine the series of activities executed in an order life cycle. Such workflow activities replace cycle actions. Workflow notification activities replace approval actions. The following table lists how cycle entities map to workflow in R11i: A-2 Oracle Order Management Suite Implementation Manual Functional Differences R11 Entity R11i Entity Order Cycle Workflow runnable process Cycle Action Workflow activity, Workflow sub-process Cycle Action Result Workflow activity result and look up Cycle Action Prerequisite Workflow Activity Transitions Approval action Workflow Notification Activity that requires a response Note: Please check the Workflow User’s Guide(A85440-01) for detailed information on workflow activities, sub-processes, processes, transitions and notifications. Figure 1. is an example of a generic order header workflow process: Figure A–1 Generic Order Header Workflow process Figure 2 is an example of a generic order line workflow process: g Using Workflow in Order Management A-3 R11i Features Figure A–2 Generic Order Line Workflow process R11i Features Flexible and extensible order processes Order Header and Line WorkFlow processes In R11i, an order and each of its lines follow different workflow processes, unlike R11 order cycles, where an entire order and all its lines followed the same cycle. For example in R11i, an order header is entered, booked and then closed. Lines flow through line specific steps after the order is booked, such as scheduling, shipping, invoice interface, etc. Different lines on an order can follow different line flows, thus completing different activities. This means that return lines and sales order lines can be processed on the same order using different process flows. This can support requirements such as a Car Dealership, who on a single order sells a new car to a customer and accepts a trade-in on the customer’s old car. In R11 Order Entry, you can tailor cycles to your meet order processing needs by defining approval or custom cycle actions. Adding new approval actions is easy. However adding new custom actions is much harder, since that means you have to integrate with the C based utilities that help set the status columns and move the order or line forward. Secondly the number of custom actions or approvals you can define is limited, since the number of status columns (S columns) available is fixed. Order Management eliminates both these drawbacks in 11i, by integrating with Workflow. Oracle Workflow provides Workflow Builder, a tool that lets you model your Ordering process graphically. Secondly, there is no limit on the number of custom function or notification activities you can define. Order Management provides you with seeded functional activities and sub-processes. Using the Workflow Builder, you can define new function activities and notifications. These functional activities, notifications and sub-processes serve as building blocks for creating flows. The product comes seeded with several order and line flows. If these seeded flows do not meet your requirements you can define your own. Use these flows for processing orders and lines by assigning them to order and line transaction types. A-4 Oracle Order Management Suite Implementation Manual R11i Features Workflow enabling order and line business functions If a business function is workflow enabled, you can control when it is going to occur by adding the appropriate activity or sub-process into a workflow process. You can also control how it is executed; whether the activity requires user intervention or executes automatically, and the ‘cost’ of the activity. Expensive activities are best executed off-line. You can find order header or line business functions that are workflow enabled, in the seeded OM workflow activities or sub-processes. Order Management (OM) comes seeded with the following workflow item types: OM Order Header (OEOH) - All Order Header level activities and sub-processes, are seeded under this WF Item type. Header flows are started using this item type, with the header ID as the Item Key. An order flow is started when an order header is created and saved. OM Order Line (OEOL) - All order line level activities and sub-processes, are seeded under this WF item type. Line flows are started using this item type, with the line ID as the item key. An order line flow is started when an order line is created and saved. OM Standard (OESTD) - Common functions and lookups are seeded under this item type. No flows are started using this item type. OM Change Order (OECHGORD) - Change Order Notification flows are started using this item type. Some functions are seeded in multiple variants (Synchronous, Manual & Deferred). The following is a list of all the business functions that are Workflow enabled: Using Workflow in Order Management A-5 R11i Features Note: For more details on the sub-process, please refer to the Order or Line business processes that are workflow enabled section, further down in this paper. A-6 Oracle Order Management Suite Implementation Manual R11i Features ** - The seeded sub-processes have been designed so that the concurrent program will pick up lines that did not schedule due to exceptions (holds, missing data etc.). Creating customized workflow activities/sub-processes Order processes can be dynamic and complex. Companies in different industries or regions often have different business needs and rules for fulfilling orders. Instead of providing flows and activities to meet every possible business rule and need, Order Management integrates with Workflow to provide easy customizing capability. Oracle Workflow provides a complete set of PL/SQL APIs and public views that can be used to make any application function workflow enabled. For example, your business makes a big floor announcement if an order whose total value exceeds a certain amount, is booked. You can create custom sub-process that checks the order total and sends FYI notifications to a group of people. Figure A–3 Sub-process that checks Order Totals and sends out a Notification. The function activity Is this a BIG Order checks whether the Order value exceeds a certain amount (set via an activity attribute). If it does, then it completes with a Yes and an FYI notification is sent to a certain application Responsibility. Appendix E lists the PL/SQL API that the function activity calls. Use this sub-process in a header flow after the seeded Book - Order, Manual sub-process and assign it to an Order Type. The notification activity this sub-process uses is defined to be an FYI notification. That is there is no result type associated with it. However you can also design this sub-process so the notification requires a response, i.e. it is an approval notification. The sub-process could then meet the requirement where an order whose value Using Workflow in Order Management A-7 R11i Features exceeds a certain amount needs a special approval before it can proceed. To ensure that the lines on the order wait for the approval, you need to coordinate the order and line flows using the workflow continue-flow and wait-for-flow activities as described in the following section. . Note: Please refer to the Using Workflow in Order Management section for examples of defining approval notifications. Refer to the section Customizing Order and Line Flows for more examples of customizations. Refer to the Workflow Users Guide (A85540-01) for details on defining Response and FYI Notification Activities). Process Dependencies Oracle Workflow provides utilities to build dependencies between parent and child workflow processes. Here are some examples of dependencies: Order lines should wait for the order to book before progressing in their individual Line flows. All order lines should close before the order header closes. Order Management creates all order flows as parent flows. Line flows for the lines on an order are created as child (detail) flows. Native WF utilities Wait For Flow and Continue Flow are used to support this kind of order (parent) - line (child or detail) coordination. To coordinate orders and lines for Booking the Continue Flow (Book - Continue Line) activity is included as part of the Order Booking Sub-process (Figure 4.). It is configured (via activity attributes) to continue the line activity that is waiting for the order to book. The Wait For Flow (Wait for Booking) activity is included in the Enter - Line sub-process in the line flow (Figure 5). It is configured (via activity attributes) to wait for the Continue Flow inside the seeded booking process. This ensures that the line flow waits for the header level booking sub-process to complete. A-8 Oracle Order Management Suite Implementation Manual R11i Features Figure A–4 Order Booking Sub-process Figure A–5 Enter Line Sub-process You may need similar coordination for other business functions. For example, all order lines should wait for a custom order level Legal Approval to complete before progressing in their individual Line flows. To support this, you also need to use Wait-for-flow and Continue-Flow activities and configure them based on your custom approval activity (Notification). Note: Please Refer to the Workflow Users Guide (A85540-01) for details on using coordination activities. Automated, Deferred and Manual Transactions Workflow activities can be executed automatically by the Workflow engine. Instead of pulling orders by running batch processes, the Workflow engine can push orders forward. This is called synchronous or automatic execution mode. Using Workflow in Order Management A-9 R11i Features As opposed to the synchronous mode, a workflow activity can be set to require user intervention. This is called manual execution mode. A workflow activity can also be set-up to be executed by the Workflow background engine in order to save on-line transaction time. This is called deferred execution mode. Automatic and deferred modes are natively supported by Workflow. Order Management gives you the manual mode for more flexibility. For example, if you use the seeded Schedule- Line sub-process (Figure 6) in a line flow, an order line automatically schedules after the order header is booked. You can setup an expedited order process where several activities are performed sequentially (synchronously) without user intervention. If you use the seeded Book - Order, Manual sub-process (Figure 7) in a header flow, the order will book only when requested(by clicking the ‘Book’ button OR via the Progress Order LOV in the R11i Sales Order form). If you use the seeded Book - Order, Deferred sub-process(Figure 8) you do not need to explicitly request for the order to book. Rather the order will book when Workflow Background Process concurrent program will processes the deferred activity. (See Setup Workflow Background Engine in later section). In the Order Management Workflow Standards section, we discuss how to implement business functions in synchronous, deferred, and manual modes. Interactive decision support and exception handling Notification functionality is new in R11i and can be used for handling business exceptions and approval requests. As described before, you can setup a notification that requires a sales manager’s approval when booking orders over a certain dollar amount. The role assigned to the Notification Performer, determines whom the notification is sent to. By default, users can view their own notifications in Order Management. The ‘Notifications’ menu entry in the Order Management Menu launches the Workflow Notification Viewer Web Page. Users can setup the Workflow notification viewer to view notifications using a web interface or receive notifications as e-mails in plain text. Note : Please refer to Setup approval notification and OM: Notification Approver in later section for details on notification features. A-10 Oracle Order Management Suite Implementation Manual Order Management Workflow Standards Order Management Workflow Standards Most Order Management functions are seeded in one or more variants (Automatic/Synchronous, Manual or Deferred). The following section discusses how these variants are designed. Synchronous - Implementing a business function that is automatically executed. In a synchronous mode, the function executes automatically. It requires no user intervention. Example - The seeded Schedule - Line sub-process Figure A–6 Automatic Scheduling sub-process If you create a Line that uses this Scheduling sub-process flow, then the Line will schedule as soon as the Order books. If Scheduling cannot complete due to Holds or other expected errors then the flow will transition to the Schedule-Eligible activity. Run the Schedule Order Concurrent program to re-process such lines or complete them via the Progress Order LOV on the Sales Order form. Using Workflow in Order Management A-11 Order Management Workflow Standards Manual - Implementing a Business Function that Requires User Intervention. To enable a function to be completed manually, you need to place special block activity before the actual function activity. This special block activity needs to call the function OE_STANDARD_WF.STANDARD_BLOCK and NOT the WF_ STANDARD.BLOCK. This ensures that Orders or Lines awaiting at this special activity shows up in the Progress Order LOV, in the Sales Order form. It is recommend that you follow the following naming conventions to name this special block activity: Internal Name - ‘FuncName_ELIGIBLE’ (eg: BOOK_ELIGIBLE) Display Name - ‘Function Name - Eligible’ (eg: Book - Eligible) Example - The seeded Book - Order, Manual sub-process. Figure A–7 Manual Booking Sub-process The Book - Eligible activity calls the function OE_STANDARD_WF. STANDARD_ BLOCK. If you create an Order with an Order Type using this Booking sub-process in its Header flow, it’s flow will stop at the Book - Eligible activity. The Progress Order LOV on the Sales Order form shows that this order is eligible for Booking. Book such an order either by clicking OK button on the LOV or by clicking the Book button on the Sales Order form. Deferred - Implementing a Business Function that is Executed Off-line. Oracle Workflow lets you associate a cost to a function activity. This refers to the processing time it takes to execute an activity. Assign complex, long running activities a high cost. In normal processing, the Workflow Engine completes the execution of a single activity before continuing to a subsequent activity. Activities with a high cost may be appropriate candidates for background processing. A-12 Oracle Order Management Suite Implementation Manual Order Management Workflow Standards The default threshold for the Workflow Engine is 50 hundredths of a second. When a flow comes across an activity whose cost is higher than the threshold, it is deferred to the background. Cost can also be relative in terms of the business flow that is being executed. For example, a few Order Entry clerks are dedicated to taking orders from habitual, long time customers. Since all the standard information for these customers is already set-up, you want the order to be entered as quickly as possible into the system, with no waiting by the clerk to book, before moving on to the next order or customer. In this case you would want to defer the booking process. Now let’s say other Order Entry clerks deal with new first-time customers. In this case, you want the order to be booked online so that the clerk can get additional required information from the customer or can be informed about credit check related issues. To give you such flexibility, Order Management uses the Workflow API WF_ ENGINE.Defer_Thread to defer a flow to the background. Instead of defining an activity to be high cost, it enables variants of business functions that are deferred and those that are not. This increases flexibility in designing your flows. Thus you can use the seeded Book - Order, Deferred sub-process for processing orders from longtime customers, but use the seeded Book - Order, Manual sub-process for processing orders from new customers. Note that both these sub-processes use the same Book function activity. The naming convention followed for activities that call the WF_ENGINE.Defer_ Thread is as follows: Internal Name - FunctionName_DEFER (e.g.: BOOK_DEFER) Display Name - Function Name - Deferred (e.g.: Book - Deferred) Example - The seeded Book - Order, Deferred sub-process Using Workflow in Order Management A-13 Order Management Workflow Standards Figure A–8 Deferred Booking Sub-process In this sub-process, the activity Book -Deferred calls the WF API WF_ STANDARD.DEFER_THREAD to defer the flow to the background. When the Workflow Background Engine picks up this deferred flow, it executes the ‘Book’ activity, booking the order. Naming Conventions Order Management follows certain naming convention for creating WF processes, sub-processes, activities, etc. It is not necessary that you follow the same conventions. However doing so, will make all OM WF data (seeded and custom) appear consistent to the end user. Here, we discuss only the display name naming conventions. Unlike internal names, display names can be changed after Workflow data is created. Users can see these display names in both Workflow builder and in the Workflow monitor when viewing the order or line status. For internal name naming conventions, please refer to Order Management User’s Guide. Order Management follows the following naming convention for Display Names: Process Flow Format: Order/Line Flow - XXX e.g. A-14 Oracle Order Management Suite Implementation Manual Order Management Workflow Standards Name Description Order Flow - Generic Generic order header flow that can go with any line flow for standard item, model, return. Order Flow - Generic, with header level invoicing Generic order header flow that includes header level invoice activities. Line Flow - Generic Generic sales order line flow that supports all item types except the Configured Item. Line Flow - Return for credit only Return line flow for issuing credit only. Sub-Process Format: Function - Order/Line, Manual/Deferred Name Description Book - Order, Manual Automatic booking header level sub-process Book - Order, Deferred Deferred booking header level sub-process Invoice Interface - Line Automatic Invoice Interface line level sub-process Function Activity Format: Function - Eligible/Deferred/Continue/Wait Name Description Book The actual booking function activity Book - Eligible Booking eligibility block Book - Deferred Activity to defer Booking Book - Continue Line Booking coordinating activity to continue the waiting line flows Wait for Booking Line coordinating activity that waits for the Order to Book. Using Workflow in Order Management A-15 Order Management Workflow Standards Activity Results Most Order Management function activities use the standard seeded lookup OM Sub-Process Results, handles Holds. This lookup has the following result codes: Complete, Incomplete, On Hold, and Not Eligible. A function activity completes with the ‘Complete’ result when it executes successfully. E.g.: When the seeded Book function successfully books an order, it will complete with a ‘Complete’ result. A function activity completes with the Incomplete result when it runs into expected errors that it is built to handle. The Incomplete result normally transitions to an Eligibility block or a Wait Activity. E.g.: When the seeded Book function finds that the order header does not have a Customer specified, it will complete with an Incomplete result and transition to the Book -Eligible activity. You can then provide the missing information and attempt to re-book the order via the Book button or the Progress Order LOV. A function activity completes the On Hold result when it runs into a generic or activity specific Hold. The On Hold result normally transitions to an Eligibility block or a Wait Activity. E.g.: When the seeded Book function finds there is generic hold on the order, it will complete with an On Hold result and transition to the Book -Eligible activity. You can provide the missing information and attempt to re-book the order via the Book button or the Progress Order LOV. A function activity completes with the Not Eligible result when it does not make sense for the Order Header or Line to be processed by a that activity. E.g.: When the seeded Schedule activity processes a Service Item Line, it completes with a Not Eligible result and transitions to the end of the scheduling sub-process. It is important to note that only on a successful completion (Complete or Not Eligible result) of a business function, does a flow exit out of the respective functional sub-process. Hence most function high-level sub- processes (those that can be used in runnable flows) use the seeded lookup OM Sub-Process Success Results. This lookup has the result codes: Complete, Not Eligible. All seeded flows are built using the Default transitions to move a flow forward, as opposed to having separate transitions for the Complete and the Not Eligible results. The assumption is that in either case the sub-process has completed processing and the flow can move forward. A-16 Oracle Order Management Suite Implementation Manual Using WorkFlow in Order Management Default Error Process All Order Management seed WF data is defined to use the Retry Only error process. This process determines the notification flow that Oracle Workflow starts when a workflow activity runs into an unexpected error. With any new OM WF data, specify this error process as the default. If an error process is not specified, Oracle Workflow does not start a notification flow in case the activity runs into an unexpected error. If you specify a default error process other than Retry Only, the user who receives the error notification has the option of skipping or aborting the erred activity. This can result in data corruption. Order Management does not support specifying a default error process other than Retry Only error process. Note: Please refer to Handling Errors section for details on how unexpected errors are handled. Access Control All Order Management seed WF data is locked at the access level of 20. Work at an access level of 100. To customize, make copies of the seeded processes and then make the necessary modifications. The following data is not locked: Item Attribute - OM WF Administrator Message Bodies Using WorkFlow in Order Management Set up Things to do before using Workflow with Order Management: Setup Order Management WF Administrator Workflow item attribute Review seeded OM WF data and define Workflow processes via the Workflow builder Setup approval notifications and OM: Notification Approver Setup Workflow assignments for order/line transaction types Setup the WF background Engine Using Workflow in Order Management A-17 Using WorkFlow in Order Management Setup ‘Order Management WF Administrator’ WF item attribute Assign a responsibility (role) to the Order Management Workflow item attribute Order Management WF Administrator for unexpected error handling. An order progressing along a flow can run into unexpected errors (Rollback segment errors, Data integrity errors etc.). Whenever an unexpected error occurs, a notification is sent (please refer to Workflow error process in Workflow User’s Guide) to the responsibility assigned to Order Management WF administrator item attribute. The WF activity that generated the error is marked to be in an error state. Set this item attribute via the WF builder. The item attribute is available for Order Management Workflow items OEOH (OM order header), OEOL (OM order line) and OECHORD (OM Change Order) and needs to be set for all three. The item attribute default value is SYSADMIN. In the Workflow builder, click on any of the OM Workflow items (OEOH, OEOL or OECHORD). Under the Attribute, find Order Management WF administrator. Right click on it and select Properties to open the properties window. In the Attribute tab, there is a Default region. Assign a responsibility in the Value field. If you can’t see any other responsibilities in the LOV, you’ll need to load roles from the database by going to the menu bar File and select Load roles from database. Note: Please refer to the section Error Handling on details on how errors are handled. Review seeded OM WF data and Define Workflow processes via the Workflow Builder Before processing orders in Order Management, setup the order header/line workflow processes, just like you setup order cycles in R11 Order Entry. Order Management comes with several seeded order and line workflow processes. It is recommend you do the following: Review the seeded flows, activities, notifications, etc. Check whether the seeded data meets your business needs. Create custom activities, notifications, and any other components needed to build flow processes to meet your specific business requirements. Use the seeded runnable flows as examples to create your own flows, using seeded and/or custom sub-processes/activities. You can also copy a seeded workflow process to create a new workflow process and modify this newly, copied workflow process according to your business requirements. A-18 Oracle Order Management Suite Implementation Manual Using WorkFlow in Order Management Suggestion: Build a few complex flows to accommodate various business scenarios, or build several simple flows to handle the different business process needs and use them appropriately via Transaction Type Workflow Assignments. You need to balance performance with user convenience. A complex flow will have more condition checking and branching to handle various scenarios, so the performance cost will be higher. However, creating many simpler flows relies on the user to pick the right Order Type/Line Type when entering orders. Note: Please see the Appendix for seeded R11i workflow processes. Setup approval notification and OM: Notification Approver Workflow Notifications in R11i replace R11 Approval functionality. To support the Approval requirements, define Notification Activities that require a response. When an order or line flow comes across such an activity, the WF Engine sends out a notification to the approver and request a response. The approver can either approve, decline, or forward the notification to another approver. In R11 Order Entry, any user who had access to Approve Orders form could perform an approval. In R11i Order Management, there are a couple of ways to determine who gets an Approval Notification : When you add the notification activity to a workflow process, set the Performer to be of type Constant and assign a value (WF Role) to it. This is a static approver for this notification for any order or line using this workflow process. The notification will always go to the same recipient (WF Role). When you add the notification activity to a workflow process, set the Performer to be of type Item Attribute and assign the value Notification Approver to it. In this case, the responder of the notification is the value indicated by the NOTIFICATION_APPROVER Workflow Item attribute. With R11i, when an order or line is created, this WF item attribute is set based on the value of the Profile Option OM: Notification Approver. When the notification is sent, the recipient is derived based on the value of the Notification Approver item attribute. The same notification can go to different recipients for different orders/lines. Or, set the value of this Workflow item attribute dynamically based on one of the following values: OM: Notification Approver profile option value, Created By of the order or line. To do this, place the seeded order Management Workflow utility ‘Set Notification Approver’ in a workflow process before the notification activity. Using Workflow in Order Management A-19 Using WorkFlow in Order Management Figure A–9 Return Approval Sub-process Set its activity attribute Source to one of the following: Profile Approver, Created By, or Order Created By. When this activity is executed, it will dynamically set the WF Item Attribute ‘Notification Approver’ for that Order or Line to the appropriate role value. The notification will be sent to that role. Define custom activities that dynamically determine the Approver. It is recommend that you use the Notification Approver Item attribute as a place holder to store the value, as opposed to defining additional item attributes. The responder on the Notification Activity defaults from the Notification Approver Item attribute. When defining notification message bodies, you can use the following seeded Order Management Workflow item attributes to provide context: Header Short Descriptor - This returns the order type and order number. Line Short Descriptor - This returns the order type, order number, and line quadruplet (Line number, shipment number, option number, service number). Use these as default values for your message attributes and then use the message attributes in the body of the message. e.g. This return order (&RMA_HDR_SHORT_DESCRIPTOR) requires your approval. In this example, the message attribute RMA_HDR_SHORT_DESCRIPTOR has the WF item attribute Header Short Descriptor as its default value. A-20 Oracle Order Management Suite Implementation Manual Using WorkFlow in Order Management Again, define additional item attributes. Set them using custom function activities and use them for message context. However note that having too many workflow item attributes defined can deteriorate performance, since a database row is created for the order or line for every item attribute defined. Use the seeded Approval Failed block defined under OM: Standard (OESTD) to manage failed approvals. Transition failure results to this block to ensure that the flow does not progress any further. You can then manually cancel the Order or Line that failed the approval. Setup Workflow assignments for order/line transaction types Note: Please refer to the Transaction Types White Paper for detailed information on defining Transaction types and setting up workflow assignments . Now, how do you get an Order or a Line to start a particular workflow process? You set up workflow assignments for Order and Line transaction types. This is very similar to associating order cycles to order types in R11 Order Entry. In R11i, in addition to order types, there are line types. Both order and line types are setup using the Transaction Types form. When defining an order type, assign a header workflow to it. E.g. set up a Standard order Type. Assign the seeded Order Flow - Generic to it. When create an order with the Standard order type, the order header will start a flow using the Order Flow - Generic workflow process. Since each line follows its own flow, you also need to setup workflow assignments at the Line Type level. Line level workflow processes are assigned based on an order type, line type, and item type combination. Do the following: Setup Line and Order Types in the Transaction Type form Query up a particular Order Type Click on the ‘Assign Line Flows’ button Assign a line workflow process for a combination of Order type, Line type, and Item type. If you leave item type field empty, any type of item will be able to use this line flow assignment. E.g. If you setup the following assignment: Standard Order Type + Standard Line Type + Standard Item -> Line Flow - Generic When you create an Order using the Standard order type, add a Line using the Standard line type for a standard item, it will start a flow using the Line Flow -Generic workflow process. Using Workflow in Order Management A-21 Using WorkFlow in Order Management Figure A–10 Transaction Types Form Setup the WF background Engine The Workflow Background Engine processes deferred activities, wait activities and timed out activities. You need to schedule the ‘Workflow Background Process’ A-22 Oracle Order Management Suite Implementation Manual Using WorkFlow in Order Management concurrent program to re-submit periodically. When scheduling the concurrent program, please specify Order Management work item types as parameter so that it only picks up activities specific to Order Management work items. Note: Refer to the Oracle Workflow Users Guide (Part Number A85440-01) for information on the Workflow Background Engine. Order or Line Business Processes that are Workflow Enabled Booking In R11i, Booking an Order is workflow enabled. There are several ways to book an order. You can use the ‘Book - Order, Deferred’ process for certain types of Orders and the ‘Book - Order, Manual’ for others. You can also create you own Booking process. For example, you may want to control when the Order books, but defers it to the background. You can also add an order-level approval before the Booking process in a header flow. Order Management uses native WF co-ordination activities to ensure that order lines wait for the order to book before progressing. A seeded sub-process Enter Line is provided at the line level; this is configured to wait for the seeded Booking function to complete before progressing (figure 3). Scheduling In R11i, the Scheduling function allocates supply to demand and makes the Order line visible to MRP (as demand). Order Management provides two variations on Scheduling. One performs synchronously. The other is deferred. In both cases exceptions are routed to the Schedule - Eligible block activity. You can progress lines that are at this activity using the Schedule Orders Concurrent program or the Progress Order LOV. You can also define your own custom sub-process, to restrict Scheduling to occur only via the concurrent program (by placing the Schedule Eligible activity before the ‘Schedule’ activity). Note: Please refer to the Scheduling White Paper for more details. Create Supply The seeded Create Supply sub-process has the intelligence to route Order Lines differently based on the item type and whether sourcing is internal or external. Use this sub-process when defining line flows that need to support different types of items. For example, it branches ATO model lines through the Create Configuration process; or branches externally sourced lines to the Purchase Release process. Using Workflow in Order Management A-23 Using WorkFlow in Order Management Note: The Create Supply sub-process can handle all kinds of lines except the Configured Item Line. ATO Processing The entire ATO process is now workflow enabled. There are various seeded sub-processes to support functions such as creating the configuration item, the BOM & routings, calculating lead time and rolling-up cost, creating the work order, etc. The processing needed for handling the configuration item is separated from the ATO Model. The seeded Line Flow - Generic can handle all kinds of lines except the Configured Item Line. The seeded flow ‘Line Flow - Configuration’ supports processing for Configured Item Lines. Ship The functionality provided by the cycle actions of Pick Release, Back Order Release, Ship Confirm and Inventory Interface is now delivered via the seeded Ship - Line, Manual sub-process. Each of the shipping functions are not Workflow enabled in R11i. In fact the Ship activity is a block activity that waits until the line is picked, shipped and interfaced to Inventory and Shipping communicates that information to Order Management. Once a Line hits this block activity, manually pick and ship the line using the Shipping transaction forms. Purchase Release The seeded Purchase Release sub-process interfaces information to Purchasing when order lines need to be drop-shipped. There are two variations of this process Purchase Release - Line, Manual and Purchase Release - Line, Deferred. The first, requires manual intervention. You can Purchase Release the Line either via the Progress Order LOV from the Sales Order form or by running the Purchase Release Concurrent Program. The second, Purchase Release - Line, Deferred, defers the Purchase Release activity to the background. When the WF Background Process Concurrent Program is run, it picks up deferred activities and processes them. Return Receipt The Returns receipt and acceptance function is workflow enabled using block activities. Returns are received using Oracle Purchasing Receipt functionality. Purchasing looks at a view based on Return Lines to determine what is eligible for A-24 Oracle Order Management Suite Implementation Manual Using WorkFlow in Order Management receiving. It then communicates information to Order Management regarding receipt and acceptance against those lines. Fulfillment In R11 Order Entry the Receivables Interface Concurrent program had built-in intelligence to not interface lines that were not fulfilled. For example, the ATO Model, Class and Option lines would not interface to Receivables until the Configured item was shipped. Order Management enhances this functionality of Fulfillment and separates it from the function that interfaces to Invoicing. Ship-confirmation, Purchase Release Receipt and Returns Receipt are supported as fulfillment events, out of the box. Fulfillment is also workflow enabled and the seeded Fulfill activity ensures that lines do not move forward in their flows until they are fulfilled. You can define your own fulfillment sets and put Lines in them. The fulfillment functionality ensures that they all go past the ‘Fulfill’ activity together. ATO and PTO configurations are viewed as native fulfillment sets by the application. When you define custom line flows, ensure that you configure the Fulfill activity appropriately by setting its activity attributes. Invoice Interface The seeded Invoice Interface - Line sub-process interfaces line information to Invoicing. Order Management can also interface all lines on Order to Invoicing at the same time via the seeded sub-process Header level Invoice Interface - Order. Use the seeded Order Flow Order Flow - Generic with Header Level Invoice Interface along with the seeded Line Flow ‘Line Flow - Generic with Header Level Invoice Interface’ to interface the entire order to Invoicing. The creation of the invoice is still controlled by the Auto Invoice concurrent program. Setup Invoicing Grouping Rules if you want to create one invoice for the entire order. The application still supports Invoicing only after Shipping. There is nothing to prevent you from a creating a workflow process that interfaces to Invoicing before the Line is shipped. However if a line using such a flow is partially shipped, Invoicing data will be pointing only to the original line. Secondly, various seeded constraints go into effect one a line is Invoice interfaced, Eg.: You cannot cancel a line once it is interfaced to Invoicing. This will prevent you from canceling a line that is shipped and ready to invoice. There are also legal issues to consider when recognizing revenue before product ships. Using Workflow in Order Management A-25 Using WorkFlow in Order Management Close Order and Close Line Closing Orders and Lines is workflow enabled. The seeded Close - Order sub-process uses native WF co-ordination activities (wait for Flow) to ensure the order header closes after all the lines have closed. It is designed to close the order at the end of the month. The seeded Close - Line closes the line and uses the native WF activity Continue-Flow to communicate to the waiting header Close process. Note: The Service Interface Concurrent Program is obsolete with R11i. Order Management calls CRM APIs whenever an Order is created or updated. Moving Orders and Lines forward in their flows How do you progress an order or line along its flow? As stated above, there are three modes in which business functions could be executed: Synchronous, Manual or Deferred. When an order (or line) is created, the application starts a header (or line) flow. The Workflow engine will push the order/line ahead for synchronous activities. The flow stops when it hits block activities, notification activities or wait activities. The flow gets deferred to the background when it hit a high-cost activity or an activity that explicitly defers the flow to the background. Synchronous Completion In this mode, once a flow is started or re-started (after it has stopped) the WF activities are executed synchronously or online until it reaches the end of the flow or reaches some kind of a block activity or is deferred. Example - Create a line that uses the seeded Line Flow - Generic. This has the seeded Schedule - Line sub-process (Figure 5). Provided that there are no holds, the booked order line(s) will automatically schedule. The flow will then continue on to the Ship activity, making the line eligible for Pick Release. Manual Completion If the order/line hits an Eligibility Block like the one discussed in the section on Implementing a manual function in Order Management, then you can move the order/line forward via the Progress Order LOV (can be accessed from Action button). This LOV displays the functions that the order or line is eligible for (and can be manually completed). A-26 Oracle Order Management Suite Implementation Manual Using WorkFlow in Order Management The following (Figure 9), shows the case where an order is eligible for Booking. The flow for that order is the seeded Book - Order, Manual sub-process (Figure 4). The order is currently stopped at the Book - Eligible block. The Progress Order LOV displays that the order is eligible for Booking. Clicking OK on the LOV, will trigger completion of the Book -Eligible block, the flow will move to the Book activity and execute it, thus booking the order. Figure A–11 Progress Order LOV; available from the Sales Order Form Some seeded Eligibility Blocks can be completed en-mass by running the following concurrent programs: Using Workflow in Order Management A-27 Using WorkFlow in Order Management Schedule Orders Purchase Release AutoCreate Configuration Items AutoCreate Final Assembly Orders Some other block activities can be completed by performing certain specific actions. Thus if a line is waiting at the Ship activity, Pick Release the line and then Ship Confirm to move it forward. If a return line is stopped at the Wait for Receiving activity, receive the goods against that return line (and accept them) to move forward. If a order or line flow stops because it is awaiting a user response on a Notification Activity, respond to the Notification to re-start the flow. Deferred Completion A order or line flow can also stop because the flow was deferred to the Background Engine. For example, create an order that uses a flow that has the seeded Book Order, Deferred sub-process (Figure 6). When the flow reaches the Book - Defer activity, the Order flow is deferred to the background. Run the Workflow Background Engine Process concurrent program to pick up such deferred flow and continue processing. Fulfillment is deferred in all the seeded line flows. Schedule the Workflow Background Engine Process concurrent program to run at periodic intervals to be able to fulfill and invoice interface lines. The Workflow Background Engine also processes Wait activities and Timed-Out activities. Tracking order status R11 Order Entry tracks cycle status via the S and S Date columns on Order Headers and Lines. In R11i Order Management workflow status is stored Workflow entities; in WF_ITEM_ACTIVITY_STATUSES and WF_ITEM_ACTIVITY_STATUSES_H tables. The Workflow Engine maintains state information and history for work items (orders & lines) in these tables. Some core status information (Booking, Open/Close, Fulfillment etc.) is de-normalized onto the base Order Management entities. So how do you know where an order or line is in its flow? There are a couple of ways: A-28 Oracle Order Management Suite Implementation Manual Using WorkFlow in Order Management Order and Line Summary status The status field on order and line tabs in the Sales Order form and Order Organizer, shows where an order or line is in its flow. The header status displays one of the following values based on where the order header is in its flow: Entered, Booked, Closed or Canceled. The line status displays one of the following values based on where the order line is in its flow: Entered, Booked, Awaiting Shipping, Awaiting Receipt, Picked Partial, Picked, Shipped, Received, Awaiting Fulfillment, Fulfilled, Invoice Interfaced, Invoice Interfaced Partial. Status for the Configuration Line will additionally show the following information: BOM and Routing Created, Config Item Created. Status for configuration and ATO Item lines will additionally show: Production Eligible, Production Open, Production Partial, Production Complete, depending on where the line is in its line flow. Workflow Activity Status Page You can launch the Workflow Status page from the Tools menu from the Sales Order Form/Order Organizer. A browser window is launched to display the Workflow status history in a tabular format. It displays detailed information on when an activity was completed, which activity is currently active etc. You can use filters on this page to only view status information for certain kinds of activities (eg: Response Notifications, FYI Notifications, Functions, etc.). Using Workflow in Order Management A-29 Using WorkFlow in Order Management Figure A–12 Workflow Status Page, available from the Sales Order Form Workflow Monitor From the Status Page, you can launch the Workflow Monitor, via the View Diagram button. This gives you a graphical representation of where an order or line is in its A-30 Oracle Order Management Suite Implementation Manual Using WorkFlow in Order Management flow. The progress of flow is highlighted in green. You can select individual components of the flow, and the tabs at the bottom will display information about the selected activity/sub-process. You can also zoom in/out of sub-processes using the buttons in the right-hand corner. Using Workflow in Order Management A-31 Using WorkFlow in Order Management Figure A–13 Workflow Monitor, available from the Status Page Public Status APIs Order Management also provides you with Public PL/SQL APIs to query order and line workflow status. The package OE_HEADER_STATUS_PUB provides status information for order headers for Booking, Cancellation and Close status. The package OE_LINE_STATUS_PUB provides status information for Order Lines for Cancellation, Configuration Creation, Close, Drop-Ship Receipt, Fulfillment, Invoice Interface, Pick Release, Return Receipt, Scheduling, Shipping, and Work Order Management. These APIs are overloaded with the following generic signature: GET_FUNCTION_STATUS (ENTITY_ID IN NUMBER, STATUS OUT VARCHAR2) GET_FUNCTION _STATUS(ENTITY_ID IN NUMBER STATUS OUT VARCHAR2, DATE_COMPLETED OUT DATE) Where FUNCTION stands for the actual function that you are querying status information for. ENTITY_ID stands for either HEADER_ID or LINE_ID depending on whether the functions is returning order or line status information. Pass the HEADER_ID or LINE_ID to the API for the order or line that you are querying status for. These APIs allow you to retrieve status information or status and date (when the function was completed) information for an order header or line. The APIs return a Y when a order or line has completed a specified business function, an N when a order or line has not completed a specified business function and a P when a order or line has partially completed a specified business function (eg: Invoiced Interfaced partial on account of unfulfilled Required for Revenue components). Example - To check whether a certain order is booked, you can call the booking status API as follows: OE_ORDER_HEADER_PUB.GET_BOOKED_STATUS(12345, l_result); In this case the header_id for the order whose booking status you are querying is 12345. L_result is declared as a variable of type VARCHAR2. If the order is booked, then after this call, l_result will have a value of Y, if the order isn’t booked then l_result will have a value of N. If you want to query both the booking status and the date the order was booked, you can call the booking status API as follows: A-32 Oracle Order Management Suite Implementation Manual Using WorkFlow in Order Management OE_ORDER_HEADER_PUB.GET_BOOKED_STATUS(12345, l_result, l_result_ date); If the order is booked then the l_result_date will indicate the date the order was booked. Workflow and other OM function areas Cancellations Cancellations is not workflow enabled in Order Management. However when you fully cancel an order or a line, its flow is stopped and transitioned to the Close Order or Line activity. The order or line summary status will indicate the order or line is canceled. Holds In R11 Order Entry, you define generic or cycle action specific holds. Cycle actions honor both kinds of holds. In Order Management, you can define and apply generic or activity specific Holds (based on workflow activities). Header and line flows honor both kinds of holds. A flow that comes across a hold does not proceed unless that hold is removed. For example, you cannot Book an order that has a generic order level hold or a Booking specific hold. The Book activity posts messages indicating that a hold exists. It then completes with an ‘On Hold’ result and transition back to the Book Eligible activity. You can define custom workflow activities that honor holds. Order Management provides Public APIs (OE_HOLDS_PUB) that apply holds, check whether an order or line is on hold and remove holds. You can also seed lookups (Holdable Header Activities, Holdable Line Activities) based on custom workflow activities and define holds based on them. Processing Constraints In R11 Order Entry you defined security rules based on cycle actions. In R11i Order Management, the Processing Constraints Framework provides you with enhanced security rules functionality. You can define processing constraints based on flow state or custom PL/SQL APIs. The application checks constraints before every update/delete/insert operation. If the Constraints are status based, the framework logic looks at WF status tables or status information de-normalized onto the base Using Workflow in Order Management A-33 Using WorkFlow in Order Management Order Management entities. The product comes seeded with various constraints and you can define additional constraints. Example: Cannot delete an Order Line, once the Order is booked, Example: Cannot change quantity, once Line is past some custom approval. Since the Processing Constraints Framework looks at Workflow status tables, you can define constraints based custom activities as well. A-34 Oracle Order Management Suite Implementation Manual Using WorkFlow in Order Management Error handling There are two kinds of errors that Order and Line flows can run into; Expected errors and Unexpected errors. Expected Errors These are errors that business processes expect to run into and handle. Example: Booking requires that a Customer is specified on the Order. If you attempt to Book an Order that does not have a Customer specified, the application will display an appropriate message and the Order will not book. The seeded WF activity Book will complete with an Incomplete result. When an activity completes via the Sales Order Form, i.e. the activity is synchronous or is manually completed via the Progress Order LOV, the Processing Messages window pops up to display messages that indicate the errors. When an activity is processed by the Background Engine, i.e. the activity is deferred, these error messages are stored in the Order Management processing message table. View these messages via the Processing Messages window using either the Concurrent Program request number, or the Workflow activity (Book) and/or by Order or Line Basis. When an activity is completed via a concurrent program, its output file lists all the error messages that were posted. Unexpected Errors Unexpected errors are errors that a business process does not expect under normal circumstances. Eg: Database errors such as running out of rollback segments, Data integrity errors. In this case, the activity errors out and Oracle Workflow starts the default error process - Retry Only. This is seeded WF error process. The activity that ran into the unexpected error gets marked with an Error status (in WF_ITEM_ACTIVITY_ STATUSES) and a notification listing the details is sent to the role specified in the ‘OM Workflow Administrator’ item attribute. Once the problems have been corrected the administrator can choose the Retry option on the notification and complete it. This triggers a retry of the erred activity. The Administrator can also choose to retry the activity from the Workflow Monitor. Note: Refer to ‘Setup Order Management WF Administrator WF item attribute’ section on how you can set this WF Item attribute. Using Workflow in Order Management A-35 Customizing Order and Line Flows Purging Workflow Status Information Oracle Workflow provides a Concurrent program that lets you purge workflow status information for flows that have completed. If the high volume of workflow status information is affecting performance negatively, run this Concurrent program to delete WF status history data for Closed Orders (and their closed Lines) whose flows have completed. However if you run this concurrent program, you should be aware of the following: You will no longer be able to view Workflow status information for closed orders. Most of the core Order Management status information (like open, booked, fulfilled etc.) is de-normalized onto the base OM entities. Most seeded processing constraints work off these base columns. Seeded constraints prevent updating closed Orders/lines. However, if you had defined custom constraints based on workflow activity statuses, they would no longer apply (since the WF status information is deleted). Note: Order Purge functionality is provided with Order Management. The Purge Orders concurrent program lets you purge selected closed orders and their workflow history. Customizing Order and Line Flows You can customize Order or Line Workflow processes via the Workflow builder. Again, work at an access level of 100. Copy seeded processes, change the internal & display names and modify the copies as needed. Any new runnable Order or Line flows can be used by assigning them to Order or Line types via the Define Transaction Types form. Guidelines We recommend the following guidelines when you define custom data: When defining runnable order or line flows, use the seeded functional sub-processes as opposed to using the function activities. Example: When defining a header flow, use one of the seeded Booking processes as opposed to the seeded “Book” function activity. The functional sub-processes are designed to handle exceptions and sometimes additional items. A-36 Oracle Order Management Suite Implementation Manual Customizing Order and Line Flows You could use specific function activities when the seeded flows also use them. Example: All the seeded line flows that support fulfillment use the function activity “Fulfill”. Adhere to the following rules ■ ■ ■ ■ ■ ■ All order header flows should have the Close Order sub-process. All line flows should have the Close Line sub-process. If the header or the line flow (used with the header flow) is using any of the seeded functional sub-processes then; the order header flow should have the Booking sub-process and the line flow should have the Enter sub-process (to ensure that lines wait for the order to book). If Close Order and Close Line are the only seeded sub-processes you are using in your header or line flows then you do not need to include the Booking sub-process in the Header flow and you do not need to include the Enter sub-process in the Line flow. Do not design a line flow such that the line interfaces to Invoicing before it ships. See the section Order or Line processes that are workflow enabled - Invoice Interface for details. Include the functions sub-processes that represent the processing you would like the order or line to go through. Thus if a line needs be interfaced to Invoicing, you need to ensure that its flow has a sub-process that does that. Some WF activities need to be configured to be used, via setting its activity attributes. You need to set the activity attributes when such an activity is placed in a process. Example - Fulfillment activity, The activity to set the Notification Approver. If you add order level approvals that need to be honored by all lines on an order, then you may need to ensure that new lines are not added to the order once it is past that header approval (via custom constraints). Always specify “RETRY_ONLY” as the default error process for any custom WF data. If you copy a seeded functional sub-process and change its definition (eg: add a custom activity in between seeded activities, delete a seeded activity etc) and use it in new order or line flows, then this sub-process is considered a custom sub-process. Oracle does not guarantee that such a custom sub-process will provide the same functionality as the seeded sub-process. Secondly, when the seeded functional sub-process is altered to provide enhanced functionality, the custom sub-process will not automatically be changed. Using Workflow in Order Management A-37 Customizing Order and Line Flows Hence instead of customizing the seeded functional sub-process, you should create a different activity or sub-process that does the custom processing. You can then place this new activity or sub-process before or after the appropriate seeded functional sub-process in a runnable Order or Line flow. Examples You can do simple to very complex customizations using Oracle Workflow. You can design order - line co-ordination based on custom activities, to honor holds, to complete via the Progress Order LOV, and you can also define constraints based on your custom activities and activity completion. Standard Items and PTO Only - your business does not do ATO processing and it does not drop-ship lines. The seeded Order Management flows are designed to handle different kinds of items. Copy and modify these to suit your requirements, and make them more efficient. Copy the flow ‘Line Flow - Generic’ to a new one, change its internal and display name. Remove the sub-process Create Supply - Line from this new definition(Figure 14). This sub-process internally calls other sub-processes based on whether the item is built and whether the line is internally or externally sourced. Since this example only deals with Standard items and PTOs and you do not source from an external supplier, your line flows do not need this sub-process. Figure A–14 Line Flow - Standard Items Only Deferred Booking that is manually controlled - you want your Order Entry clerks to be able to control when an order is booked, however you do not want them to have to wait while the order books. Order Management does not seed a sub-process that supports this exact variant, however you can very easily create such a sub-process. Using the seeded activities Book -Eligible, Book -Deferred, Book, and Book Continue Line, you can create a new Booking sub-process. Branch the transitions for the Incomplete and On Hold results back to the Book - Eligible activity. Create an order header flow that uses this booking process and assign it to an Order Type. A-38 Oracle Order Management Suite Implementation Manual Customizing Order and Line Flows Figure A–15 Book - Order, Manual and Deferred Custom external processing - Your business sells to foreign nations and hence needs to comply with export regulations. You use Export Compliance software from an external vendor that ensures compliance and you need to integrate with this software so that it checks that an order line is export compliant before it can be processed further. There are many different ways to achieve this: Define a workflow function activity Export Compliance that calls a PL/SQL API that integrates with your Export Compliance software (Figure 16). If the Order line is export compliant then if completes with a Passes result. In case of failure it completes with a Fails result and transitions to a failure block (WF_ STANDARD.BLOCK) that ensures the flow does not move forward. Manually cancel the line. Using Workflow in Order Management A-39 Customizing Order and Line Flows Figure A–16 Export Compliance sub-process that uses a function activity Alternatively you could code the cover for the Export Compliance activity in case of failure it transitions the flow to a Block activity that calls the API OE_STANDARD_ WF.STANDARD_BLOCK (Figure 17). Users with proper authority can either cancel the line or complete the necessary procedures to make the line compliant. In the latter case, they would be able to progress the line from the Progress Order LOV(from the Sales Order Form). The sub-process is designed to perform the compliance check again. Figure A–17 : Export Compliance sub-process that allows a re-try If the Export Compliance call is expensive you can defer it by setting its cost to be higher than the WF Threshold. To process Lines for export compliance en-mass, you can design the sub-process as follows(Figure 18): Figure A–18 Export Compliance sub-process that is externally completed The block activity Eligible for Export Compliance Check calls the API WF_ STANDARD.BLOCK. Write a concurrent program that can pick up lines eligible for Export Compliance; have it query lines awaiting at the block activity Eligible for Export Compliance Check by looking at WF Item Activity Statuses view. It then A-40 Oracle Order Management Suite Implementation Manual Customizing Order and Line Flows integrates with the export compliance software and processes them. If they fail export compliance, the concurrent program can call the Order Management Process Order API (OE_ORDER_PUB.Process_Order) to cancel the lines. If they pass export compliance, it can complete the block activity using WF Engine APIs (WF_ ENGINE.COMPLETE_ACTIVITY). Refine it further (Figure 19); in cases where completing some additional procedures could make an Order Line compliant, the concurrent program could put the Line on Hold, using the Order Management Hold APIs. The flow transitions with an On Hold result to an eligibility block. Authorized users complete required procedures and release the Hold. Then, complete the Handle Holds block activity via the Progress Order LOV. Set a time-out interval (e.g. 1 day) on the block activity to automatically trigger its completion after the specified time. If nothing can be done to make this Order Line export compliant, the user can cancel the line. This will force the flow to closure. Figure A–19 Export Compliance sub-process that handles holds. As you can see, using Order Management and Workflow helps solve this business requirement in many different ways. You could enhance this process further, by adding notifications activities. Once you have defined one or more sub-processes to meet your needs, you need to use it/them in a line flow(s) and assign the flow(s) to a Line Type(s). Oracle Workflow also lets you define activities that call external functions. It uses Oracle Advanced Queues functionality to achieve this. Note: Refer to the Oracle Workflow Users Guide (Part Number A85440-01) for more information on the WF APIs and on defining function activities of type PL/SQL and Using Workflow in Order Management A-41 Customizing Order and Line Flows External. Refer to the Open Interfaces Manual (Part Number - A83746-01) for information on the calling the Process Order API. Defining a flow that can be used for both Outbound(order) and Inbound(return) Lines: Order Management does not seed a generic flow that can support both order and return lines. This can be done using the seeded sub-processes. However this should be done with caution as Workflow does not function identically to Cycles. Figure A–20 INCORRECT Flow to support both Order and Return Lines The flow depicted in Figure 20 WILL NOT work correctly, since once a line is booked, WF randomly picks which transition to process first. It then processes it all the way till it can go no further. So for an outbound Line using this flow, if the branch ‘Returns receiving’ is first processed, it will get marked as Not Eligible and hit the Fulfill -Defer activity (to defer thread) and stop. Then the WF Engine starts executing the other branch; the line will schedule and hit the Ship - Line, Manual sub-process, where it will stop and wait to get picked and shipped. However the Background Engine could pick up the deferred thread and execute the Fulfill activity. This activity will error out since the fulfilling event for the order line Ship-Confirmation is not yet complete. For this to work correctly you need to define the flow as follows: A-42 Oracle Order Management Suite Implementation Manual Customizing Order and Line Flows Figure A–21 CORRECT Flow to support both Order and Return Lines After booking the line flow branches based on the Line Category ensuring that only one of the branches are (Order or Return) executed runtime. The activity Utility to get Line Category is seeded OM: Order Line Work Item. Caveats While you get immense flexibility when designing order and line flows with Oracle Order Management and Oracle Workflow, it is recommended that you do so wisely. It is recommended that you acquire training in using Oracle Workflow, before you customize Order Management Workflow processes. It is also recommended that you keep in mind the following: When Order Management sends you patches for bug fixes or new releases, it will affect only the seeded OM data. You should carefully review any WF patches you receive. Look at the changes made, and decide whether a change is required to your custom processes. Example - You define a custom booking process (Figure 13). Patches that update the definitions of the Book-Order, Manual and Book-Order, Deferred will not affect the definition of this custom booking process. However, if Order Management sends out a patch that changes the definition of the seeded Book activity, your custom process will also pick up the updated definition since it is referencing this seeded activity. Using Workflow in Order Management A-43 Conclusion Example - Currently the seeded Book function internally calls the Credit Checking API. With a future release Order Management release, this may changed such that credit checking/payment verification is WF enabled. The API that seeded Book function will be changed to not call the credit checking API. The seeded Booking processes will be changed to include the credit checking /payment verification workflow activities. When this patch is received, review it and modify your custom booking process accordingly. If you do not, your custom booking process will not do credit checking (since it references the updated book function that no longer calls credit checking). You may define new workflow item attributes for the seeded Order Management Work items. Keep in mind that Oracle Workflow creates a row for every item attribute whenever a flow is started using a workflow item type (irrespective of whether the item attribute has a value) and this can affect performance negatively. Hence we recommend that you define new workflow item attributes judiciously. Example: You define 10 new item attributes under the item type OM: Order Line. You define new workflow activities that set values for these attributes and you use them in your notification activities. Now whenever you create an Order Line, Workflow will create 10 additional rows in WF_ITEM_ATTR_VALUES for these new attributes. Order Management uses the primary key (Header_id/Line_id) for the Order/Line as the workflow item key when it starts Order/Line flows. You can use this in your function activities to get more information about a order or line. Note: Look at the appendix for an example of a PL/SQL based function activity. Conclusion Understand the capability that Oracle Workflow provides and the seeded functionality that Order Management provides to design the best order processing flows for your business. By configuring flows that are flexible and optimal, you can significantly improve your order fulfillment times, thereby increase your profitability. A-44 Oracle Order Management Suite Implementation Manual B Data Model Overview This document intends to give you a very high level overview of the Order Management data model, key modules, and its integration points. Additionally it discusses at a high level how Order Management differs from Order Entry. . Topics included are: ■ Overview on page B-2 ■ The Tables on page B-3 ■ KEY Order Management Modules on page B-29 Data Model Overview B-1 Overview Overview Order Management has done a great job in simplifying the data model while giving more granular control of the data. The Sales Order is modeled as a business object comprised of the following entities: Order Header, Header Sales Credits, Header Price Adjustments, Header Pricing Attributes, Header Adjustment Attributes, Header Adjustment Associations, Order Lines, Line Sales Credits, Line Price Adjustments, Line Pricing Attributes, Line Adjustment Attributes, Line Adjustment Associations and Lot Serial Numbers. Most of the attributes in the Header table are moved to the lines table. Some attributes like Bill To which used to be only at the header level is now at the line level, Meaning you can bill lines on the same sales order to different bill to sites. The following diagram represents OM data model on high level. B-2 Oracle Order Management Suite Implementation Manual The Tables The Tables Data Model Overview B-3 The Tables Column Description Used By ACCOUNTING_RULE_ID Foreign Key to RA_RULES Invoicing AGREEMENT_ID Agreement Pricing Contracts BOOKED_DATE Date when Order was Booked Booking BOOKED_FLAG Indicates whether order is booked Booking CANCELLED_FLAG Indicates whether entire order is canceled Cancellations CHANGE_SEQUENCE Controls sequence in which updates are done EDI Integration CHECK_NUMBER Number of Check used to make payment on Order Invoicing CONVERSION_RATE Rate of currency conversion. General CONVERSION_RATE_DATE Date for the rate used for currency conversion. General CONVERSION_TYPE_CODE Type of conversion used for currency conversion General CREDIT_CARD_APPROVAL_ CODE Credit Card Approval Code I-Payment Integration CREDIT_CARD_APPROVAL_ DATE Credit Card Approval Date I-Payment Integration CREDIT_CARD_CODE Credit Card Code I-Payment Integration CREDIT_CARD_HOLDER_NAME Credit Card Holder’s name I-Payment Integration CREDIT_CARD_NUMBER Credit Card Number I-Payment Integration CREDIT_CARD_EXPIRATION_ DATE Credit Card Expiration Date I-Payment Integration CUST_PO_NUMBER PO Number in the customer system which the customer specifies when placing order. Pricing Contracts CUSTOMER_PREFERENCE_SET_ CODE Determines default set: Arrival or Ship Scheduling DELIVER_TO_CONTACT_ID Contact person for the organization General that the product is finally delivered to. B-4 Oracle Order Management Suite Implementation Manual The Tables Column Description Used By DELIVER_TO_ORG_ID Organization / individual that General would be the end consumer of the goods. Also delivery confirmations may be done using the deliver_to. Defaults to the order line. DEMAND_CLASS_CODE Demand Class Planning EARLIEST_SCHEDULE_LIMIT Inner limit of Schedule Date Window Scheduling EXPIRATION_DATE Future Use Future Use FIRST_ACK_CODE Acknowledgment Code that is sent EDI Integration to the EDI trading partner when the order is acknowledged the first time FIRST_ACK_DATE The first day the order was acknowledged EDI Integration FLOW_STATUS_CODE Order Header flow status summary General FOB_POINT_CODE Point of ownership transfer General FREIGHT_CARRIER_CODE Shipping Integration FREIGHT_TERMS_CODE Freight Term Code, could be Absorb, buyer Pays, Cost to Charge, Fixed Charge Shipping Integration HEADER_ID Unique identifier for an order system generated id. Process Order INVOICE_TO_CONTACT_ID Contact person for the organization Invoicing Integration that will foot the bill. INVOICE_TO_ORG_ID Organization that should be invoiced for the order / who would pay for the order. Defaults to the order line. Invoicing Integration INVOICING_RULE_ID Foreign Key to RA_RULES Invoicing Integration LAST_ACK_CODE Acknowledgment Code that is sent EDI Integration to the EDI trading partner when the order was last acknowledged Data Model Overview B-5 The Tables Column Description Used By LAST_ACK_DATE Last Date the order was acknowledged EDI Integration LATEST_SCHEDULE_LIMIT Outer limit of Schedule Date window Scheduling LOCK_CONTROL Internal Use Process Order OPEN_FLAG Indicates whether order is open General ORDER_CATEGORY_CODE Category of Order (ORDER, RETURN or MIXED). Defaults from Order Type. General ORDER_DATE_TYPE_CODE Indicates whether Customer is ordering based on ship date or arrival date. Scheduling ORDER_NUMBER User displayed order number. Order Numbering ORDER_SOURCE_ID Foreign key to oe_order_sources. This field will be used by OI to point to the order source e.g EDI, Service etc. Order Import ORDER_TYPE_ID Foreign key to OE_Transaction_ Types. General ORDERED_DATE Date on which order was placed. General ORG_ID Organization that is taking the order. (same as sold_from_org_id). General ORIG_SYS_DOCUMENT_REF Used by Order Import - this field will contain the document number from the legacy or external Order Entry system. Order Import PACKING_INSTRUCTIONS Packing Instruction Shipping Integration PARTIAL_SHIPMENTS_ ALLOWED Flag to indicate whether partial Shipping Integration quantities may be shipped for lines belonging to the order (when set to ‘Y’) or whether it should follow the all or none rule. (when set to ‘N’). PAYMENT_AMOUNT Advance payment made by Customer Invoicing Integration PAYMENT_TERM_ID Foreign Key to RA_TERMS Invoicing Integration PAYMENT_TYPE_CODE Indicates type of Payment Invoicing Integration B-6 Oracle Order Management Suite Implementation Manual The Tables Column Description Used By PRICE_LIST_ID Foreign key to oe_price_lists. Pricing Indicates which price list should be used for the order. PRICING_DATE Date on which order was priced. Pricing REQUEST_DATE Request Shipping / Arrival date communicated by the customer. Defaulting Source RETURN_REASON_CODE Defaulting source for Return Reason on the Line. RMA SALES_CHANNEL_CODE Sales Channel that was the source for this Order. Reporting SALESREP_ID Foreign key to RA_SALESREP Sales Credits, Tax Integration SHIP_TO_CONTACT_ID Contact person for the organization Defaulting Source that the products have been shipped to. SHIP_TO_ORG_ID Organization to which the order Defaulting Source items were sent to and would take ownership of the product. Defaults to order lines. SHIP_TOLERANCE_ABOVE Upper tolerance level for line quantities (expressed as percent of the originally ordered quantity). When quantities are shipped within this tolerance level, this wont be considered as over shipment. Defaulting Source SHIP_TOLERANCE_BELOW Lower tolerance level for line quantities (expressed as percent of the originally ordered quantity). When quantities are shipped within this tolerance level, this wont be considered as under shipment. Defaulting Source SHIPMENT_PRIORITY_CODE Shipment Priority Defaulting Source SHIPPING_METHOD_CODE Freight Carrier + Service Level Defaulting Source SOLD_FROM_ORG_ID Organization that took the order ( same as org_id). General Data Model Overview B-7 The Tables Column Description Used By SOLD_TO_CONTACT_ID Contact person for the organization General that products have been sold to. Defaults to the order line. SOLD_TO_ORG_ID Organization that the goods/services are sold to. Company that placed the order. SOURCE_DOCUMENT_ID Based on the source document Copy Orders, RLM Integration, type, this would be a foreign key to Internal orders, CRM an oracle application table . SOURCE_DOCUMENT_TYPE_ID Foreign key to oe_order_sources TAX_EXEMPT_FLAG Tax exempt indicator TAX_EXEMPT_NUMBER Tax exemption certificate number TAX_EXEMPT_REASON_CODE Tax exemption reason General Copy Orders, RLM Integration, Internal Orders, CRM Integration TAX_POINT_CODE TRANSACTIONAL_CURR_CODE Currency code to be used for order General transactions. UPGRADED_FLAG Flag to indicate whether this record Upgrade was upgraded from OE VERSION_NUMBER Not currently used. Not used Order types in Order Entry served as a pool for defaulting sources and transactional controls. With Order Management a lot of the header attributes are available on the line and are controllable at that level. It follows that the application offer an entity similar to the order type for the Line; i.e. the line type. Order types and line types are both referred to as Transaction Types in Order Management. The order types you defined in Order Entry are automatically upgraded to order transaction types in Order Management. Order types that have an order category ‘R’ or ‘P’ are upgraded to order transaction types of category ORDER. Order types that have an order category RMA are upgraded to order transaction types of category ‘RETURN’. Order types that have do not have an order category specified are upgraded to order transaction types of category MIXED. When you create an Order using a Mixed Order Type, you can combine both order and return lines on it. Order LineSO_LINES_ALL & SO_LINE_DETAILS & SO_HEADERS_ALL => OE_ORDER_LINES_ALL B-8 Oracle Order Management Suite Implementation Manual The Tables The new Order Line is functionally and technically very different from its R11 Order Entry counterpart. It has attributes from so_headers, so_order_lines, so_line_ details and more. Order Management offers Line level independence; a lot of the Order attributes are now available on the Line and each Line follows its own flow that allows it to be processed independently. ■ ■ ■ ■ ■ ■ ■ In Order Entry a shipment was different from the (shipment parent) line, now every Order Line is a Shipment. The Line quintuplet (Line Number, Shipment Number, Option Number, Component Number, Service Number) is displayed as 1.1.1.1.1 on the Sales Order Form. In Order Entry the line followed the same cycle as the Order Header it belonged to. Now a line follows a flow that is different from that of the Header. Each Line on an Order can follow a different flow, depending on the Workflow assignment tied to its Line Type. Ordered Quantity on the Line indicates Open quantity as opposed to the original ordered quantity. Cancellation is modeled as a decrement in the ordered quantity along with an increment in the canceled quantity. User and System defined processing constraints define the point in the Order flow, where Cancellations functionality becomes effective. That is you can define the point, where onwards you are required to provide a reason to reduce (cancel) the ordered quantity. The application records history for ordered quantity changes whenever a reason code is provided. Many of the Header attributes are now available on the line and their values can be different from that of the Header - e.g. price list, Salesperson, payment terms, shipping and packing instructions, agreement, invoice to, etc. Scheduled Order Lines are viewed as demand by the Advanced Planning System. Ordering can be based on requested ship or arrival date. Delivery lead time is used to determine the schedule ship date and it can be user specified. When lines were partially processed in Order Entry, they reflected partial cycle states. Now an Order Line splits on partial processing. Order Management splits a line at the following activities - Ship-Confirmation, Return Receipt and Drop-ship receipt, when it is partially processed. Order Entry did not support decimal quantities. Now decimal quantities are supported both for standard items and configurations (with 11i). The application also supports ordering, pricing and shipping in different UOMs. Data Model Overview B-9 The Tables ■ ■ ■ ■ With Order Management, shipping tolerances are supported. The tolerance value can be defaulted and adjusted at the line level. Order Lines can be entered using the Internal item number or the Customer Item number of one the Generic Item numbers (UPC, EAN, JAN, CLEI). Additionally you can define your own cross-reference types in Inventory and use those to specify an item. Lines can be priced based on a date different from the creation date. The pricing date is exposed enabling you to re-price based on different dates until the Line is invoiced. Returns can be entered using Serial number information in addition to the original Order, Invoice or Purchase Order. Technical Notes Order Management schema is simplified compared to the Order Entry model. There are fewer tables, although each table is wider to offer enhanced functionality. • Shipments, Options, Included Items Lines and Configuration Item Lines are all stored in OE_ORDER_LINES_ALL. • Every line is a shipment and is identified via a line number and a shipment number. The user visible line number ties together all shipments belonging to a Line. To split a shipment further, you can use the Split Lines window. The LINE_ SET_ID internally ties together shipments from an original line. In Order Entry only a single attribute on SO_LINES_ALL stored the numbering. Depending on the kind of line, it stood for either the line number, the shipment number, the option number or the service line number. Now these are all de-normalized on to the line entity, you have separate columns for all of these. Additionally component number helps track included items under a given Line. ■ ■ B-10 The Category code on the line indicates whether it is an inbound (‘RETURN’) or an outbound (‘ORDER’) one. It defaults from the Line Transaction Type. Every line that is a part of the configuration, will have the TOP_MODEL_ LINE_ID pointing to the top Model. The Model line will have the TOP_ MODEL_LINE_ID value set to itself. The LINK_TO_LINE_ID points to immediate parent for a line in a configuration. ITEM_TYPE_CODE identifies a item to be a STANDARD, MODEL, CLASS, OPTION or INCLUDED ITEM. For a subassembly (an ATO model within a PTO), the options, classes and included items under the subassembly will have it’s ATO_LINE_ID column to point to its ATO Model line. Oracle Order Management Suite Implementation Manual The Tables ■ ■ Order Entry used S and S Date columns to store Order Cycle Status. Order Management uses workflow to track status. Some core statuses are de-normalized onto the Line - Open/Closed, Booked, Fulfilled. Some other columns can be used to derive specific status information e.g.: A not null Shipped_quantity indicates that an outbound line is past shipping. The FLOW_ STATUS column stores the Line Flow Summary Status, and its value changes as the Line progresses in its flow. The API OE_LINE_STATUS_PUB provides informationaboutvariousfunctionalstatusesandwhenalineactivitywascompleted. Order Entry used SVRID columns to manage defaulting attribute values and cascading attribute changes. Order Management uses the PL/SQL based Defaulting Framework to provide default values for records and it does not retain an audit trail of how an attribute was defaulted. The following table describes OE_ORDER_LINES_ALL in alphabetical order. Columns that are new in this release are in BOLD. The table also has the regular Descriptive Flex, Global Descriptive, Industry Attribute Flex, Trading Partner Flex and Standard Who Columns Column Description Used By ACCOUNTING_RULE_ID Accounting rule, Foreign Key to RA_RULES Invoicing actual_arrival_date actual date when the item arrived at the ship_to location Fulfillment ACTUAL_SHIPMENT_DATE Will be used to track the Actual Shipment Date Scheduling AGREEMENT_ID foreign key to OE_AGREEMENTS Pricing Contracts ARRIVAL_SET_ID Foreign key to OE_SETS Sets ato_line_id Points to the ATO parent line Configurations Authorized_TO_SHIP_FLAG Used by Release Management RLM Integration auto_selected_quantity Used by Oracle Configurator. Indicates the qty selected by the system when an item is selected Configurations BOOKED_FLAG Indicates whether line is booked Booking CALCULATE_PRICE_FLAG Indicates whether this line can be re-priced Pricing Data Model Overview B-11 The Tables Column Description Used By CANCELLED_FLAG Indicates whether entire line is canceled Cancellations CANCELLED_QUANTITY Quantity canceled Cancellations CANCELLED_QUANTITY2 Quantity canceled in secondary UOM for Lines using Process Manufacturing Process Manufacturing CHANGE_SEQUENCE Controls sequence in which updates are done EDI Integration COMMITMENT_ID Commitment that this Order is used against. Invoicing COMPONENT_CODE Identifier of component within an exploded bill Configurations component_number Included item sequence within a model or class. Configurations COMPONENT_SEQUENCE_ID Bill of materials component (option) or bill (top model) identifier Configurations CONFIG_DISPLAY_SEQUENCE Will not be used/Obsolete Configurations CONFIG_HEADER_ID Foreign key to Configurator schema Configurations CONFIG_REV_NUMBER Foreign key to Configurator schema Configurations CONFIGURATION_ID Not used Not used CREDIT_INVOICE_LINE_ID The invoice line that a Return Line applies credit to Returns, Invoicing CUST_MODEL_SERIAL_ NUMBER Vehicle ID number (VIN) RLM Integration CUST_PO_NUMBER Customer Purchase Order number RLM Integration CUST_PRODUCTION_SEQ_ NUMBER Used by RLM RLM Integration CUSTOMER_DOCK_CODE A specific delivery location at the ship-to destination. RLM Integration CUSTOMER_ITEM_NET_PRICE Reference Information. Contains Order Import Customers net price, if specified while importing an order. B-12 Oracle Order Management Suite Implementation Manual The Tables Column Description Used By CUSTOMER_JOB Customer job number RLM Integration Reference Information. Contains Order Import CUSTOMER_LINE_NUMBER customers line number, if specified while importing an order. CUSTOMER_PAYMENT_TERM_ ID Reference Information. Contains CUSTOMER_PRODUCTION_ LINE Customer Production line - a specific delivery location at the ship-to destination. RLM Integration CUSTOMER_SHIPMENT_ NUMBER Reference Information. Contains Order Import CUSTOMER_TRX_LINE_ID Not Used DELIVER_TO_CONTACT_ID Contact person for the organization General that the product is finally delivered to. DELIVER_TO_ORG_ID Organization / individual that would be the end consumer of the goods. General DELIVERY_LEAD_TIME Time it takes the reach the item from the SHIP_FROM to SHIP_TO org. Scheduling Order Import Customers payment term, if specified while importing an order. customers shipment number, if specified while importing an order Not used DEMAND_BUCKET_TYPE_CODE Bucket Type designator (e.g. discrete, weekly, monthly) associated with the order line. Validated against FND_ LOOKUPS_TYPE = RLA_ DEMAND_SUBTYPE RLM Integration DEMAND_CLASS_CODE Demand Class General DEP_PLAN_REQUIRED_FLAG Indicates whether departure planning required for this shipment Shipping Integration earliest_acceptable_date Earliest Date when the customers is Scheduling ready to received the item Data Model Overview B-13 The Tables Column Description Used By END_ITEM_UNIT_NUMBER Uniquely identifies which bill of material to be used for building a specific Model/Unit Number effectivity controlled Project Manufacturing Integration item explosion_date Date when the Bill is exploded Configurations FIRST_ACK_CODE Acknowledgment Code that is sent EDI Integration to the EDI trading partner when the line is acknowledged the first time FIRST_ACK_DATE The first day the line was acknowledged EDI Integration FOB_POINT_CODE Point of ownership transfer General FREIGHT_CARRIER_CODE Freight Carrier Shipping Integration FREIGHT_TERMS_CODE Freight Term Code, could be Absorb, buyer Pays, Cost to Charge, Fixed Charge Freight and Special Charges FULFILLED_FLAG Flag indicating whether the line is fulfilled Fulfillment FULFILLED_QUANTITY Quantity fulfilled Fulfillment FULFILLED_QUANTITY2 Quantity fulfilled in secondary UOM Process Manufacturing FULFILLMENT_METHOD_CODE Fulfillment Method Code Fulfillment HEADER_ID Foreign key to OE_ORDER_ HEADERS. Header ID of the order to which the line belongs General INTMED_SHIP_TO_CONTACT_ ID Stores the Intermediate Ship To RLM Integration contact person information for the organization that the products have been shipped to. Same kind of validation as the ship_to_contact_ id B-14 Oracle Order Management Suite Implementation Manual The Tables Column Description Used By INTMED_SHIP_TO_ORG_ID Stores the Intermediate Ship to RLM Integration organization to which the items are sent to before reaching the final destination and will be validated against the org and address for the given customer. Same kind of validation as the ship_to_org_id. INVENTORY_ITEM_ID Foreign key to MTL_SYSTEM_ ITEMS. Inventory Item INVOICE_INTERFACE_STATUS_ CODE Indicates status of Invoice Interface Invoicing activity INVOICE_TO_CONTACT_ID Contact person for the organization General that will foot the bill. INVOICE_TO_ORG_ID Organization that should be invoiced for the order / who would pay for the order. Invoicing INVOICED_QUANTITY Quantity interfaced to invoicing Invoicing INVOICING_RULE_ID Invoicing rule, Foreign Key to RA_ RULES Invoicing ITEM_IDENTIFIER_TYPE To distinguish different types of items (internal, customer and generic items) Item Management ITEM_REVISION Revision of item being returned Returns ITEM_TYPE_CODE Line Item Type (can be model, class, standard etc. ) Configurations, Scheduling LAST_ACK_CODE Acknowledgment Code that is sent EDI Integration to the EDI trading partner when the line was last acknowledged LAST_ACK_DATE Last Date the line was acknowledged EDI Integration latest_acceptable_date Latest Date when the customers is ready to Scheduling General received the item LINE_CATEGORY_CODE Signifies whether this is a ‘ORDER’ Transaction Types or ‘RETURN’ . Defaulted from the line type. Data Model Overview B-15 The Tables Column Description Used By LINE_ID System generated ID General LINE_NUMBER Line sequence number within the order General LINE_SET_ID Foreign key to OE_SETS. Ties all shipments in a Line Split Line Processing LINE_TYPE_ID Foreign key to OE_LINE_TYPES Transaction Types LINK_TO_LINE_ID System generated identifier of immediate parent component line Configurations LOCK_CONTROL Internal use Process Order MARKETING_SOURCE_CODE_ ID Foreign key reference to CRM table CRM Integration MFG_LEAD_TIME Manufacturing Lead Time APS Integration model_group_number Not used Not Used MODEL_REMNANT_FLAG Indicates whether model has partially shipped components Split Lines Processing OPEN_FLAG Indicates whether line is open Close Line OPTION_FLAG Indicator whether line is an option in a configuration Configurations OPTION_NUMBER Option sequence number within the model line General ORDER_QUANTITY_UOM Unit of measure for the quantity ordered General ORDER_SOURCE_ID Source of Order Line Order Import ORDERED_ITEM Generic or Customer Name of Ordered Item General ORDERED_ITEM_ID Ordered Item ID General ORDERED_QUANTITY Open Quantity ordered General ORDERED_QUANTITY2 Open quantity ordered in the secondary UOM OPM Integration ORDERED_QUANTITY_UOM2 Secondary Unit of measure for Ordered qty. OPM Integration B-16 AMS_SOURCE_CODE. Oracle Order Management Suite Implementation Manual The Tables Column Description Used By ORG_ID Operating Unit to which this line belongs. General ORIG_SYS_DOCUMENT_REF Original document reference for Order Import the order in external system ORIG_SYS_LINE_REF Original line information for the line of the order in external system Order Import ORIG_SYS_SHIPMENT_REF Original shipment information for the line of the order in external system Order Import OVER_SHIP_REASON_CODE Reason for over-shipment Over/UnderShipment OVER_SHIP_RESOLVED_FLAG Used for reporting on over-shipments Over/UnderShipment PACKING_INSTRUCTIONS Instructions for packing Shipping Integration PAYMENT_TERM_ID Payment term, Foreign Key to RA_ Pricing Contracts TERMS PLANNING_PRIORITY Planning Priority passed to Planning APS Integration PREFERRED_GRADE Grade requested by Customer Process Manufacturing PRICE_LIST_ID Foreign key to OE_PRICE_LISTS. Price list Pricing PRICING_DATE Date on which line was priced. Pricing PRICING_QUANTITY Quantity in Pricing UOM Pricing PRICING_QUANTITY_UOM UOM in which the item is priced Pricing PROJECT_ID Project associated with this transaction Project Mfg. Integration PROMISE_DATE Date promised to customer to receive the item Scheduling RE_SOURCE_FLAG Internal Use Scheduling REFERENCE_CUSTOMER_TRX_ LINE_ID Original invoice line the return line Returns refers to REFERENCE_HEADER_ID s REFERENCE_LINE_ID s Data Model Overview B-17 The Tables Column Description REFERENCE_TYPE Used By s REQUEST_DATE Date requested by customer to receive the item Scheduling RESERVED_QUANTITY Quantity reserved for this line. Sourcing RETURN_ATTRIBUTE1 …. Return Attribute descriptive flexfield segment …. s RETURN_ATTRIBUTE15 Return Attribute descriptive flexfield segment s RETURN_CONTEXT Return Attributes descriptive flexfield structure defining column s RETURN_REASON_CODE Reason for return Returns REVENUE_AMOUNT Not used Not Used RLA_SCHEDULE_TYPE_CODE Source of requirement to determine RLM replacement eligibility and hierarchy for the netting logic. Validated against FND_ LOOKUPS.LOOKUP_TYPE = RLA_SCHEDULE_TYPE SALESREP_ID Foreign key to RA_SALESREPS Sales Credits, Tax Integration schedule_arrival_date Date the system has calculated as to when the item will arrive at the ship_to location Scheduling SCHEDULE_SHIP_DATE Date planned for shipping the item Scheduling schedule_status_code Indicates whether a item is sourced, demanded or reserved Scheduling SERVICE_COTERMINATE_FLAG Identifies whether the service can be coterminated CRM Integration SERVICE_DURATION Internal Use CRM Integration SERVICE_END_DATE End Date for Service CRM Integration SERVICE_NUMBER Service Line Number CRM Integration SERVICE_PERIOD Period used for Service (year, month etc.) CRM Integration SERVICE_REFERENCE_LINE_ID Identifies the immediate parent CRM Integration line to which the service is attached B-18 Oracle Order Management Suite Implementation Manual The Tables Column Description Used By SERVICE_REFERENCE_SYSTEM_ ID Stores the system id for either reference type like order or customer product CRM Integration SERVICE_REFERENCE_TYPE_ CODE Identifies the service reference type. Typical values are Order and Customer Product CRM Integration SERVICE_START_DATE Start Date for Service CRM Integration SERVICE_TXN_COMMENTS Comments for the service transaction CRM Integration SERVICE_TXN_REASON_CODE Reason for the service transaction CRM Integration SHIP_FROM_ORG_ID Organization from where order was shipped out. Scheduling/Shipping ship_model_complete_flag Indicates whether a PTO options have to be Configurations shipped together or not. SHIP_SET_ID Foreign key to OE_SETS Sets SHIP_TO_CONTACT_ID Contact person for the organization General that the products have been shipped to. SHIP_TO_ORG_ID Organization to which the order items were sent to and would take ownership of the product. General SHIP_TOLERANCE_ABOVE Upper tolerance level for line quantities (expressed as percent of the originally ordered quantity). When quantities are shipped within this tolerance level, this wont be considered as over shipment. Over/under shipment SHIP_TOLERANCE_BELOW Lower tolerance level for line quantities (expressed as percent of the originally ordered quantity). When quantities are shipped within this tolerance level, this wont be considered as over shipment. Over/Under Shipment SHIPMENT_NUMBER Shipment sequence number within General the line Data Model Overview B-19 The Tables Column Description Used By SHIPMENT_PRIORITY_CODE Indicates the urgency with which the item should be shipped to the customer General SHIPPABLE_FLAG Indicates whether the line is shippable Shipping Integration SHIPPED_QUANTITY Quantity shipped Shipping Integration SHIPPED_QUANTITY2 Quantity Shipped in secondary UOM OPM Integration SHIPPING_INSTRUCTIONS Special instructions for Shipping Shipping Integration SHIPPING_INTERFACED_FLAG Indicates that the shipment has been Delivery Planned Shipping Integration SHIPPING_METHOD_CODE Freight Carrier + Service Level Pricing Contract, Shipping Integration SHIPPING_QUANTITY Shipping Quantity of Ordered quantity in shipping UOM Shipping Integration SHIPPING_QUANTITY2 Shipping Quantity of Ordered quantity in secondary shipping UOM OPM Integration SHIPPING_QUANTITY_UOM UOM in which the item is shipped Shipping Integration SHIPPING_QUANTITY_UOM2 Secondary UOM in which item is shipped OPM Integration SOLD_TO_ORG_ID Organization that the goods/services are sold to. Company that placed the order. Internal use SORT_ORDER Sorting sequence for the component within the bill. Configurations SOURCE_DOCUMENT_ID Foreign key to an application table, Copy Orders, RLM, Internal e.g.: in case of copy, it points to oe_ Orders order_headers SOURCE_DOCUMENT_LINE_ID Depending on the source, this is a foreign key to an application table, in case of copy, it points to oe_ order_lines. Copy Orders, RLM, Internal Orders SOURCE_DOCUMENT_TYPE_ID Foreign key to oe_order_sources. Copy Orders, RLM, Internal Orders B-20 Oracle Order Management Suite Implementation Manual The Tables Column Description Used By source_type_code Indicated whether the item is to be Scheduling built,dropshipped or it can be found in stock. SPLIT_BY Indicates User who initiated the Split Split Lines Processing SPLIT_FROM_LINE_ID Indicates it is split shipment Split Lines Processing TASK_ID Task associated with this transaction Project Mfg. Integration TAX_CODE Tax code associated with the rate user has specified TAX_DATE TAX_EXEMPT_FLAG Indicator whether the line is tax exempt. TAX_EXEMPT_NUMBER Tax exemption certificate number TAX_EXEMPT_REASON_CODE Tax exemption reason TAX_POINT_CODE TAX_RATE TAX_VALUE Estimated value of tax on this line TOP_MODEL_LINE_ID Id of Top Parent Line in Configuration Configurations UNIT_LIST_PERCENT Price List Percent of the Item Pricing UNIT_LIST_PRICE Price per unit of the item as it is on the price list Pricing UNIT_LIST_PRICE_PER_PQTY Unit List Price per pricing quantity Pricing UNIT_PERCENT_BASE_PRICE Base Price used for percent based pricing Pricing UNIT_SELLING_PRICE Price per unit of the item that is charged to the customer Pricing UNIT_SELLING_PRICE_PER_ PQTY Unit Selling Price per pricing quantity Pricing Data Model Overview B-21 The Tables Column Description Used By UPGRADED_FLAG Indicates whether this is an upgraded Line Upgrade VEH_CUS_ITEM_CUM_KEY_ID Used by RLM RLM Integration VISIBLE_DEMAND_FLAG Flag to indicate to MRP to look at the line as demand. Scheduling Sales Credits SO_SALES_CREDITS => OE_SALES_CREDITS The Order Management Sales Credit entity is identical to its Order Entry counterpart. Order and Line Sales Credits are stored in oe_sales_credits The following table describes OE_SALES_CREDITS in alphabetical order. The table also has the regular Descriptive Flex and the Standard Who Columns. Column Description DW_UPDATE_ADVICE_FLAG Not Used HEADER_ID Foreign Key to OE_ORDER_HEADERS_ALL LINE_ID Foreign Key to OE_ORDER_LINES_ALL LOCK_CONTROL Internally used ORIG_SYS_CREDIT_REF Used by Order Import PERCENT Used to distribute revenue Sales Credits across Sales Reps SALES_CREDIT_ID System Generated ID SALES_CREDIT_TYPE_ID Foreign Key to OE_SALES_CREDIT_TYPES. Determines whether this is a revenue (quota) sales credit. SALESREP_ID Foreign Key to RA_SALESREPS_V WH_UPDATE_DATE Not Used Price Adjustments SO_PRICE_ADJUSTMENTS => OE_PRICE_ADJUSTMENTS B-22 Oracle Order Management Suite Implementation Manual The Tables This entity stores Order and Line price adjustments information. It stores the benefits offered at header, line or group of lines. Benefits can be discounts on other items, item upgrade, terms substitution, coupons, discounts, surcharges etc. This table has a lot more columns than SO_PRICE_ADJUSTMENTS to support the capabilities offered by Advanced Pricing. The entity also stores information for tax, freight and special charges. The following table describes OE_PRICE_ADJUSTMENTS in alphabetical order. Columns that are new in this release are in BOLD. The table also has the regular Descriptive Flex and the Standard Who Columns. Column Description AC_ATTRIBUTE1 ….. Additional Charges Descriptive Flex AC_ATTRIBUTE15 Additional Charges Descriptive Flex AC_CONTEXT Context for Additional Charges Descriptive Flex ACCRUAL_CONVERSION_RATE Conversion Rate used in accruals ACCRUAL_FLAG Indicates of the adjustment is accrued ADJUSTED_AMOUNT Stores the Adjusted Amount at the adjustment level APPLIED_FLAG Indicates, if the adjustment has been applied to the order line. Used for storing manual discounts , which are not yet applied by the user ARITHMETIC_OPERATOR Qualifies the value in operand, ( % , Amount, Lump sum or a New Price) AUTOMATIC_FLAG Indicates whether this is an automatic adjustment BENEFIT_QTY Quantity Accrued BENEFIT_UOM_CODE UOM of Benefit Quantity CHANGE_REASON_CODE User entered reason code for making a change to the adjustment value CHANGE_REASON_TEXT Free form text for the reason code CHANGE_SEQUENCE Controls sequence in which updates are done CHARGE_SUBTYPE_CODE Sub-Type of Charge CHARGE_TYPE_CODE Type of Charge Data Model Overview B-23 The Tables Column Description COST_ID Foreign Key to WSH_FREIGHT_COSTS CREDIT_OR_CHARGE_FLAG Indicates whether the adjustment record is a credit or charge to a customer. DISCOUNT_ID Foreign key to OE_DISCOUNTS DISCOUNT_LINE_ID Foreign Key to OE_DISCOUNTS ESTIMATED_FLAG Flag indicating whether the charge amount is estimated or fixed. EXPIRATION_DATE Expiration Date of Coupon HEADER_ID Foreign Key to OE_ORDER_HEADERS_ALL INC_IN_SALES_PERFORMANCE Flag indicating whether the charge should be included in Sales Performance calculation. INCLUDE_ON_RETURNS_FLAG Indicates , if the adjustment is returnable. INVOICED_FLAG Flag indicating whether the charge is invoiced or not. LINE_ID Foreign Key to OE_ORDER_LINES_ALL LIST_HEADER_ID Header Id of the Modifier LIST_LINE_ID Line Id of the Modifier LIST_LINE_NO Line Number of the Modifier LIST_LINE_TYPE_CODE Line Type of the Modifier (Indicates whether record represents price adjustment and type of price adjustments tax or charge). LOCK_CONTROL Internal Use MODIFIED_FROM Used for storing value of the item code or term, which was upgraded MODIFIED_TO Used for Storing Value of the item code or term, to which an item was upgraded MODIFIER_LEVEL_CODE Stores the modifier level: Order, Line or Line group MODIFIER_MECHANISM_TYPE_CODE Not Used OPERAND Stores the Adjustment value , Qualified by Arithmetic Operator ORIG_SYS_DISCOUNT_REF B-24 Original System Discount Reference Oracle Order Management Suite Implementation Manual The Tables Column Description PARENT_ADJUSTMENT_ID Not Used PERCENT Not Used PRICE_AJDUSTMENT_ID Primary Key PRICE_BREAK_TYPE_CODE Indicates the type of price breaks – point or range PRICING_GROUP_SEQUENCE Used in price calculation PRICING_PHASE_ID Pricing phase in which this adjustment was created PRINT_ON_INVOICE_FLAG Indicates whether adjustment is to be printed on the invoice PRORATION_TYPE_CODE For future use RANGE_BREAK_QUANTITY Breakup of Order line quantity, used when the price break is of type range REBATE_PAYMENT_SYSTEM_CODE Rebate Payment Code REBATE_TRANSACTION_REFERNCE Reference for rebate transaction REBATE_TRANSACTION_TYPE_CODE Rebate Transaction Type code from QP_LIST_LINES REDEEMED_DATE Date of an accrual was redeemed REDEEMED_FLAG Indicates if the accrual is redeemed SOURCE_SYSTEM_CODE Source System which generated this Adjustment SPLIT_ACTION_CODE Not Used SUBSTITUTION_ATTRIBUTE Indicates the type of terms upgrade given. Holds the flex-structure segment name for context TERM TAX_CODE Tax Code for a Tax Group record TAX_EXEMPT_FLAG Not Used TAX_EXEMPT_NUMBER Not Used TAX_EXEMPT_REASON_CODE Not Used UPDATE_ALLOWED Indicates if this adjustment is over-ridable UPDATED_FLAG Flag to indicate if the user has modified this row Data Model Overview B-25 The Tables Pricing Attributes Pricing Attributes from SO_LINES_ALL => OE_ORDER_PRICE_ATTRIBS With Order Management, Order and Line pricing attributes are stored in a different entity. The Order and Line Pricing Attributes Descriptive Flex Definitions are based off this table. You now have 100 pricing attribute columns. With Advanced Pricing you can use multiple descriptive flex contexts for a given Order Line. With Basic pricing , when entering an Order you can select only one Context (excluding the Item and Volume Contexts which have special meaning). The following table describes OE_ORDER_PRICE_ATTRIBS in alphabetical order. The table also has the regular Descriptive Flex and the Standard Who Columns. Column Description HEADER_ID Foreign key to OE_ORDER_HEADERS_ALL LINE_ID Foreign key to OE_ORDER_LINES_ALL PRICING_CONTEXT Context Column for Pricing Descriptive Flex PRICING_ATTRIBUTE1 … Pricing Related Descriptive Flexfield segment PRICING_ATTRIBUTE100 Pricing Related Descriptive Flexfield segment FLEX_TITLE Flex_name of the flex Structure to which the pricing_context belongs ORDER_PRICE_ATTRIB_ID Primary Key OVERRIDE_FLAG Override the search engine selection for “Asked for promotion/deals” LOCK_CONTROL Used Internally Adjustment Attributes This is a new entity in Order Management. It stores the information on the qualifiers and pricing attributes a price adjustment line qualified for. The following table describes OE_PRICE_ADJ_ATTRIBS in alphabetical order. The table also has the regular Descriptive Flex and the Standard Who Columns. B-26 Oracle Order Management Suite Implementation Manual The Tables Description COMPARISON_OPERATOR Operators such as ’=’ , ’>’ ’< used for comparison FLEX_TITLE Flex_name to which the pricing_context belongs. LOCK_CONTROL Internal Use PRICE_ADJ_ATTRIB_ID Primary Key PRICE_ADJUSTMENT_ID Foreign Key to OE_PRICE_ADJUSTMENTS PRICING_ATTR_VALUE_FROM Value of the qualifier or pricing Attribute PRICING_ATTR_VALUE_TO Value of the qualifier or pricing Attribute PRICING_ATTRIBUTE Pricing Related descriptive flex–field segment PRICING_CONTEXT Context for Descriptive Flexfield segment Adjustment Associations This is a new entity in Order Management. It stores the association information between Order lines and price adjustments. One price adjustment might be result of benefit on another order line or a group of order lines might be responsible for a benefit. The following table describes OE_PRICE_ADJ_ASSOCS in alphabetical order. The table also has the regular Descriptive Flex and the Standard Who Columns. Column Description LINE_ID Foreign key to OE_ORDER_LINES_ALL LOCK_CONTROL Internal use PRICE_ADJ_ASSOC_ID Primary Key PRICE_ADJUSTMENT_ID Foreign Key to OE_PRICE_ADJUSTMENTS RLTD_PRICE_ADJ_ID Adjustment id related to price_adjustment_id Data Model Overview B-27 The Tables LOT And Serial Numbers This is a new entity in Order Management. It stores lot and serial number information for return lines. Order Management lets you create returns using the original serial number as a reference. If you create a return using the original Order or Invoice as a reference and the item being returned was under serial number control, the application automatically pulls up serial number information from Oracle Inventory. The following table describes OE_LOT_SERIAL_NUMBERS in alphabetical order. The table also has the regular Descriptive Flex and the Standard Who Columns. Column Description FROM_SERIAL_NUMBER The start point in a range of serial numbers. LINE_ID Foreign key to oe_order_lines_all LINE_SET_ID Foreign key to oe_sets LOT_NUMBER Lot number LOT_SERIAL_ID Primary key QUANTITY Number of serial numbers in the range. TO_SERIAL_NUMBER The end point in a range of serial numbers. Installation Base SO_LINE_SERVICE_DETAILS => CRM Installation base data from SO_LINE_SERVICE_DETAILS moves to Customer Relationship Management (CRM) through the CS application program interface Freight Charges SO_FREIGHT_CHARGES => OE_PRICE_ADJUSTMENTS The freight charges in Order Entry is migrated as Price Adjustments (Header Charges) Cancellations History SO_ORDER_CANCELLATIONS => OE_ORDER_LINES_HISTORY B-28 Oracle Order Management Suite Implementation Manual KEY Order Management Modules The history table in OM stores a picture of line entity before a cancellation. The history is recorded for the complete line. Drop Ships SO_DROP_SHIP_SOURCES => OE_DROP_SHIP_SOURCES Data from OE drop ship sources are moved to OE_DROP_SHIP_SOURCES. This may be in a one to many relation, depending on the number of lines created in OM from each OE line. Holds and Releases SO_HOLD_SOURCES_ALL => OE_HOLD_SOURCES_ALL SO_HOLD_RELEASES => OE_HOLD_RELEASES SO_ORDER_HOLDS_ALL => OE_ORDER_HOLDS_ALL KEY Order Management Modules Cancellations In Order Entry you could perform cancellations on the line via the Cancel Orders Form. The point in the order processing flow when Orders or lines could not be deleted but had to be canceled was fixed (at Booking). You could not perform cancellations on a standard item Line once it was pick-released. The ordered quantity on the line was not reduced to reflect a cancellation, only the canceled quantity was incremented. Order Entry tracked the cancellation action via a S column. Cancellations with Order Management is a lot more flexible. You can partially cancel a line by directly changing the ordered quantity on the line. The system seeded constraints preventing cancellations for standard item line are moved further down in the order processing flow to ship-confirmation or invoice interface (for no-ship flows). You can define more restrictive constraints if you need to. In Order Management, Cancellations is not tracked via workflow. The canceled quantity on the line indicates, whether any cancellations have been performed on the Line. The canceled flag on the Order and Line indicate whether they have been fully canceled. On a full cancellation, the Header or Line flow is forced to the respective close activity. Data Model Overview B-29 KEY Order Management Modules The application also lets you set-up rules that determine when a decrement in the ordered quantity is viewed as a cancellation. You are required to provide a cancellation reason only when you are canceling and the canceled quantity on the line is incremented by the appropriate amount. A picture of the old record is captured whenever a reason code is provided with a quantity change. This is stored in OE_ORDER_LINES_HISTORY. Defaulting Framework In Order Entry the C based Standard Value Rule Sets feature provided the means to default order attributes with values from various sources. You could define defaulting rule sets and tie them to Order Types. Not only were these rules used to provide default values for a record the first time around, but they were also used to clear and re-default values on existing child records when a parent record was updated. E.g.: Changing the warehouse on the Line could change the warehouse on the line details, if the user had set-up the rule as such. Order Management provides enhanced functionality with the PL/SQL based Defaulting Framework. Order attributes are defaulted based on generated PL/SQL Defaulting Rules. You can define a set of rules for each attribute on the order header or line, and you can define the conditions for when to use each rule. Updates to records do not cause a cascading effect on existing child record. E.g.: Changing the warehouse on the Order Header does not change the warehouse on existing Order Lines. This obviates the need to store to track the exact rule that was used to default a value the first time around. You can use the mass change feature to update a certain value for a set of records. E.g.: You can use the Mass Change feature to change the warehouse on all the lines of an Order to a different value. The Defaulting Framework depends on the AK dictionary for object, object relationship and attribute definitions. Various objects can serve as defaulting sources; such as same record, related record, profile options, custom APIs etc. Defaulting Rules can be applied based on user defined conditions. Fulfillment In Order Entry the Invoice Interface function determined whether a line had been ‘fulfilled’ before interfacing it to invoicing. Thus non-shippable lines in a configuration would not invoice interface until their shippable components had shipped. With Order Management this functionality is managed and further enhanced by the Fulfillment feature. Fulfillment is workflow enabled and driven off fulfillment events and sets that are system or user defined. Configurations are implicitly B-30 Oracle Order Management Suite Implementation Manual KEY Order Management Modules treated as fulfillment sets by the application. The following fulfillment events are seeded: Ship-Confirmation Purchase Release Receipt Return Receipt You can define your own fulfillment event activities and configure the seeded Fulfillment activity to recognize them. You can also put an Order line in one or more fulfillment sets. Such a line will progress past the fulfillment activity only when the all the members of the fulfillment set(s) it is a member of have been fulfilled. Columns on the Order Line (fulfilled flag, fulfilled quantity) indicate whether a Line has been fulfilled and the quantity that has been fulfilled. Over & Under shipment can result in a fulfillment quantity that is different from the Ordered quantity. The Over & Under Shipment tolerances control whether a line is considered fulfilled in cases of over or under shipment. Mass Change This is a new feature with Order Management. Mass Change lets you to update attribute values against selected record sets. In R11, changes to attributes could cascade across object boundaries based on Defaulting Rule controls. This was confusing and often perceived as inconsistent. Mass Change lets you explicitly select the record set that you wants to update and apply a change to it. You can also perform certain actions such as copying, re-pricing, scheduling, applying holds with record sets using this feature. Processing Constraints Framework In Order Entry the C based Security Rules feature controlled what actions were allowed on the order object at various points in its cycle. You could define security rules that were universally applicable, based on seeded conditions. With the PL/SQL based Processing Constraints Framework, Order Management provides enhanced and more flexible security functionality. You can define constraint conditions based on various sources including Workflow Activity Statuses and custom APIs. Additionally constraints can be defined against responsibilities using both inclusion and exclusion rules. Data Model Overview B-31 KEY Order Management Modules The Framework depends on AK dictionary for object and attribute definitions. Order Management checks constraints for every update, insert and delete operation on the Sales Order object. Order Management comes with fewer seeded and less stringent system constraints, thus giving you more flexibility. You can define additional or more stringent constraints to better suit your business needs. Some constraints are seeded for backwards compatibility but can be deleted. For e.g. The application can handle deletion of a line until it is shipped, fulfilled, invoice interfaced or closed. However there are the following constraints: Line cannot be deleted, once the Order is booked is seeded to support upgrading customers; it can be deleted to better suit your business requirements. If a constraint prevents you from performing a certain action, you have the option of sending a notification to somebody who does have the authority to perform that action. Sets In Order Entry you could put lines in Ship Sets, indicating that they need to be shipped together. Pick Release honored ship sets. Order Management lets you define Ship or Arrival sets. The latter lets you determine which lines should arrive together. Pick Release does not look at Ship or Arrival sets to determine what can be released. At Ship-Confirmation you are informed if your are breaking a ship set (and allowed to do so). If you partially ship lines from a Ship Set, they are automatically dropped from the Ship Set. When any of the lines from a Ship or Arrival Set is ship-confirmed the set is automatically closed. In Order Entry when you broke a Line into shipments, the original line was marked as a Shipment Parent Line (line_type_code = “PARENT”) and ignored from that point on. The shipment lines (line_type_code = “DETAIL”) were processed by the application. In Order Management there is no Shipment Parent entity. Every Line that is created is a shipment, and has both a Line and a Shipment Number. To break an existing Shipment Line further into multiple shipments you need to Split it. Splitting a Line creates a Line Set, with all the line records that were split from the original line pointing to the Line Set (via the line_set_id). The attributes that need to be common B-32 Oracle Order Management Suite Implementation Manual KEY Order Management Modules across such lines are stored on the Line Set (Item, Ordered Quantity UOM, Shipping tolerances). Line Sets are only created for outbound top level lines (standard item line, Kit Line, Top Model Lines). Order Entry maintained partial cycle statuses on a line when it was processed partially. In Order Management when a Line is partially processed the application splits it. All the child entities split as well, including the line flow. The fully processed part progresses along its flow and the partially processed part awaits processing in its flow. Partial processing at the following points triggers a Line Split: Ship-Confirmation Drop- Ship Receipt Return Receipt Partial processing of configurations can result in proportional or non-proportional splits. In the latter case the application also creates a remnant set that has both processed and unprocessed lines. Order Management also lets you create Fulfillment Sets. A line in a Fulfillment Set will progress will be marked Fulfilled only when the all the members of the fulfillment set(s) it is a member of have been fulfilled. Set definitions are stored in OE_SETS. Membership in a Line Set, Ship Set and Arrival sets is de-normalized onto the Order Line. Since a given Order Line can be in one or more fulfillment set, fulfillment set membership is stored in OE_LINE_ SETS. System Parameters Some controls that drive application processing need to be definable at an Operating Unit level. In Order Entry such controls were defined as profile options. You had to set up such profile options at a responsibility level and ensure that they were consistently set-up across responsibilities pointing to the same Operating Unit. Order Management simplifies the set-up of such controls via the System Parameters entity. You now need to define the following controls via the OM System Parameters form: Item Validation Organization Customer Relationships Enabled Flag Data Model Overview B-33 KEY Order Management Modules Order Management looks at Oracle Receivables set-up to determine your Set of Books and does not require you to set the value redundantly via an OM specific profile option. Transaction Types Order Types in Order Entry served as a pool for defaulting sources and transactional controls. With Order Management a lot of the Header attributes are available on the Line and are controllable at that level. It follows that the application have an entity similar to the Order Type for the Line; i.e. the Line Type. Transaction Types stores both Order Types and Line types. Most of the Transaction Type attributes are common to the two types. However there are some controls that are available only at the Header level (e.g.: Order Numbering controls) and some only at the Line level (e.g.: A control that dictates whether a Line is sourced internally or externally). The category code on the Order Transaction type (ORDER, RETURN, MIXED) lets you control whether you want to mix outbound and inbound lines on a given Order. Transaction Types also let you control the workflow that the Order Header or Line follows. You assign a Header workflow to an Order type and a Line workflow to a Order Type, Line Type and Item type combination. This means, that on the same Order you can have lines with different Line types following different flows. This lets you determine which Line types can be combined with a certain Order type. B-34 Oracle Order Management Suite Implementation Manual KEY Order Management Modules Integration Points Processing an Order requires integration with many other business areas. In Order Entry most of these integration points were implemented via concurrent programs that ran off-line. With Order Management most of the integration points with other Oracle products are implemented via PL/SQL based APIs. AK - Common Modules AK serves as a common runtime dictionary for both the Defaulting and Processing Constraints Frameworks. These modules use AK for object and attribute information. AK replaces the functionality provided by SO_OBJECTS and SO_ ATTRIBUTES in R11 Order Entry. Additionally Order Management uses the following tables to extend the AK data model to support Usage functionality: OE_AK_OBJECT_EXT OE_AK_OBJ_ATTR_EXT Data Model Overview B-35 KEY Order Management Modules AOL Order Management uses the following AOL features Document Sequences - Order Entry used Order Number Sources for order numbering. It let you define sequences that were used to automatically number Orders and Returns. You assigned an Order Number source to an Order Type. Order Management uses the AOL Document Sequences feature to meet Order Numbering requirements. This lets you number Order and Returns using Manual, Automatic or Gapless sequences. You can define Document Sequences using the AOL Define Document Sequences form. When you define an Order Transaction Type, the application automatically creates a Document Sequence Category of the same name. You can assign a pre-defined sequence to one or more Document Sequence Categories, using the AOL Sequence Assignments form. When an Order is created, Order Management calls AOL Document Sequence APIs to number the Order. Attachments - In Order Entry you could define Notes and addition rules regarding when they were attached to an Order or Line. You had to manually choose to add the eligible Notes to the Order or Line. You could also define how the Notes were printed on various Reports. Database triggers were used to duplicate Note definition data in AOL. Order Management drives off the AOL Attachment functionality enabling you to attach images and web pages (in addition to short or long text). It also offers multi-lingual Document capability. Attachment definition and usage data is stored only in AOL. Automatic Addition rule definitions are stored in Order Management (OE_ ATTACHMENT_RULES, OE_ATTACHMENT_RULE_ELEMENTS). In addition to the attributes (Customer, Ship-to, Invoice-to, Order Type, Item, PO #) that were previously available, you can now define rules based on the Order Category, Line Category and Line Type. The Profile Option OM: Apply Automatic Attachments determines whether rule based attachments are automatically applied (without User intervention). Configurator Order Management integrates with Oracle Configurator to support ordering and validation of configurations. The Configurator window is a Java Applet that can be launched from the Sales Order form. Order Management communicates with Oracle Configurator via XML messaging. See: Oracle Configurator Developer User’s Guide. B-36 Oracle Order Management Suite Implementation Manual KEY Order Management Modules CRM Order Entry had a separate entity: SO_LINE_SERVICE_DETAILS to store install base information associated with product sales order lines. You had to run the Service Interface concurrent program to then communicate the install base information to Oracle Service. This program is now obsolete. Order Management integrates with the various CRM products (IStore, TeleSales, Quotes, etc.) via Order Capture. Any changes to the Order Object are communicated on-line to Order Capture via the ASO_ORDER_FEEDBACK_ PUB.UPDATE_NOTICE API. Order Capture in turn publishes the information to a queue that all the interested CRM products poll. CTO To support processing of configured items, Order Entry integrated with Oracle BOM and WIP. You needed to run various concurrent programs to (Manufacturing Release, AutoCreate Configuration Items, and AutoCreate Final Assembly Orders) to manage configurations. In Order Management these business functions are Workflow enabled. The product is seeded with workflow processes to create the Configuration Item, BOM, Routings, Work Orders and Flow Schedules. If you choose to process lines en mass you can do so by running the AutoCreate Configuration and AutoCreate Final Assembly concurrent programs. The Manufacturing Release concurrent program is now obsolete. Inventory Management Order Management integrates with Oracle Inventory Management in the following areas: Managing reservations - Order Management calls Inventory’s reservation APIs to manage reservations. You can create reservations to on-hand quantities from the Sales Orders form. You can also go to Inventory reservation form from the Sales Orders form and create a reservation to any level of inventory (sub-inventory, locator, lot). When supply is created for a ATO configuration (for a configuration item), it is reserved to a Work Order. This reservation gets transferred to on-hand when the work order is completed, thus reserving the Order line to on-hand. For every Order created, Order Management creates a record in MTL_SALES_ ORDERS, an entity that Inventory uses to manage demand from various sources. Data Model Overview B-37 KEY Order Management Modules Reservation information is stored in MTL_RESERVATIONS. Reservation records for order Lines point to both MTL_SALES_ORDERS and OE_ORDER_LINES_ALL. Customer-Item Cross reference - You can use Oracle Inventory to set-up Customer Items and Customer Item Cross reference information. You can then place orders using those pre-defined customer item identifiers. Order Management calls the Inventory API INV_CUSTOMER_ITEM_GRP to derive the internal item based on the specified customer item, ship-to site and the warehouse on the Order Line. The Item Identifier Type on the Order Line indicates the Cross-reference Type that was used for placing the order. The Ordered Item tracks identifier that was used to place the order. IPayment Order Entry had attributes on the Order to store Credit Card information but that information was neither encrypted, validated or interfaced to Receivables. Order Management encrypts Credit Card information. It integrates with Oracle IPayment to validate this information and get Credit Card authorizations. This information is then interfaced to Receivables. Purchasing Order Management integrates with Oracle Purchasing in the following function areas: Return Receipts - Order Entry used Inventory’s receipt functionality to manage returns. Order Management uses the Oracle Purchasing Receipt functionality to handle Return receipts. When an item is received, Purchasing calls Order Management to indicate delivery and to get COGS information. When an item is accepted and delivered to Inventory, Purchasing calls Order Management (OE_ RMA_RECEIVING) to indicate acceptance. Fulfillment of the Return line is driven off the acceptance event. The RMA Interface concurrent program is obsolete with Order Management. Purchasing looks at the view OE_PO_ENTER_RECEIPTS_VIEW to determine the Order Lines to expect Return receipts against. This view returns lines that are booked, receivable and are waiting at the Wait for Receiving block activity. Internal Orders - Oracle Purchasing uses Order Import to create internal orders. Purchasing calls the Process Order API to communicate changes in the requisition to Order Management. Order Management calls a Purchasing API (PO_SUPPLY) to communicate changes in the internal order to Purchasing. B-38 Oracle Order Management Suite Implementation Manual KEY Order Management Modules Drop-Ship Orders - Order Management integrates with Purchasing to fulfill drop-ship orders. It populates the PO requisitions interface table with information for order lines that need to be fulfilled via an external source. Purchasing calls Order Management APIs (OE_DROP_SHIP_GRP) to communicate information about the requisition, purchase order and receipts. Receivables Order Management integrates with Oracle Receivables in the following function areas: Invoice Interface - In Order Entry, you had to run the AR Interface concurrent program to interface invoicing information to Oracle Receivables. In Order Management this is workflow enabled. The seeded Invoice Interface - Line workflow sub-process populates the Receivables interface table. You run AutoInvoice to create invoices. The Receivables Interface concurrent program is now obsolete. Order Management also supports Header level invoicing via the seeded Invoice Interface - Order. Tax - Order Entry did not store the estimated tax on the Order, rather it was calculated runtime when you viewed an Order on the Sales Order Form. Order Management calls the Global Tax Engine APIs to default the Tax Code (ARP_ TAX.GET_DEFAULT_TAX_CODE) and to calculate estimated tax (ARP_PROCESS_ TAX.SUMMARY) for the order Line. The estimated tax value is now stored on the line and re-calculated only when any of the attributes affecting tax change. Information about the tax value is also stored as Line Price Adjustments. The Tax Engine looks at the view OE_TAX_LINES_SUMMARY_V to calculate the estimated tax value for an Order Line. Shipping Execution In release 11, Oracle Shipping looked at Order Entry tables to select order lines eligible for pick release. It then based ship confirmation eligibility on picking detail information. Now, Order Management provides APIs to Shipping to view lines that are eligible for delivery planning, picking and shipping. The view OE_DELIVERY_LINES_V returns all open, booked, shippable lines that are not interfaced to Shipping. When an Order Line reaches the Ship Line workflow activity, Order Management calls Shipping APIs to indicate that a line is pick Data Model Overview B-39 KEY Order Management Modules eligible and communicate changes to the line once it is interfaced to Shipping. When a delivery is ship-confirmed, Shipping calls OM APIs to communicate the event, triggering the line flow to move forward. Supply Chain ATP/Advanced Planning System Order Management uses Advanced Supply Chain Planning to check the availability of ordered items and schedule order lines. Scheduled Order Lines are viewed as demand by the Advanced Planning System. To check availability or schedule an order line (scheduling checks availability and consumes supply if there is any available), Order Management calls an MRP API (MRP_ATP_PUB.CALL_ATP). MRP checks for item availability (or group availability if a group of lines is passed) and returns back the results. The API also sources the line (find a ship from location) when a ship from location is not specified. A source will only be returned if there are sourcing rules set up in MRP. To ascertain open demand Planning looks at the view MTL_DEMAND_OM_VIEW, based off OE_ORDER_LINES. This returns open (un-shipped) lines whose visible to MRP flag is set to Y. The visible to MRP flag is set to Y, when a line is scheduled. You can perform scheduling one of several ways with Order Management. Auto-scheduling lets you schedule a line when it is entered into the system. Scheduling is workflow enabled; the seeded workflow process Schedule - Line performs scheduling for a line. Controls on the Transaction Type determine the level of scheduling that is performed on a line. The Demand Interface concurrent program is now obsolete. Workflow Order Entry used Cycles functionality to process Orders. The product came seeded with certain cycle actions. You could define approval actions easily and define cycles using these along with the seeded cycle actions. Adding custom actions was harder since that involved calling the C based cycle functions. You were limited with respect to the number of approvals or custom actions you could define and use. Order Management uses Workflow to manage Order and Line processing. PL/SQL based Workflow is a natural replacement for Order Cycles functionality. It provides a Graphical User Interfaces for defining activities, notifications, flows and viewing flow status. There are no limits on the number of custom functions or notifications you can define. Additionally it provides the following features: B-40 Oracle Order Management Suite Implementation Manual KEY Order Management Modules In-built flexibility - You can easily define new custom functions or flows using the Workflow Builder. Support for notifications - Approval functionality is supported via Notification activities. You can easily define notifications via the Workflow builder and use them in flows. Notifications can be accessed via any electronic mail application or the Notifications web page. Coordination between parent-child flows - This aids in synchronizing Header and Line flows. Thus you can have lines wait for the Order header to complete a certain header activity or have the Header wait for all lines to complete a certain line activity. A built-in on-line/background mode with a user-definable threshold - This lets run certain activities (e.g.: Credit Checking) off-line. Every Order Header and Line entered into the system starts a workflow. Order Headers follow Header flows and Order Lines follow Line flows. The product comes seeded with several Order and Line flows. Every business function is workflow enabled and the product comes seeded with functional workflow sub-processes. Order Headers are mapped to the OM Order Header workflow item type (OEOH). Order Lines are mapped to the OM Order Line workflow item type (OEOL). The Workflow Engine APIs are used to create, start and manage flows. The Order Type tied to an Order determines the Header flow it starts. The Order Type, Line Type and Item type determines the Line flow a Line starts. The FLOW_STATUS column on Order headers and Lines provides summary information about the flow. Its value changes as the Order or Line progresses in its respective flow. You can also use the Public query APIs (OE_HEADER_STATUS_ PUB, OE_LINE_STATUS_PUB) to get information regarding various functional statuses and when an Order or Line activity was completed. The Workflow builder is available on the Windows (NT and 95) platform. You can use this graphical tool to define flows. The Workflow monitor is a Java based tool that can be launched from the Sales Order form. It lets you graphically monitor a workflow's progress as well and view its transaction history. Conclusion Order Management has been architected to be very flexible, dynamic, and easy to use. The product and all of its integration points are PL/SQL based, that makes it easily customizable. You can use features such as Workflow, the Processing Data Model Overview B-41 KEY Order Management Modules Constraints, and Defaulting Framework to tweak the product to suit your specific order processing requirements without heavy customizations. B-42 Oracle Order Management Suite Implementation Manual C Using Credit Cards and iPayment Topics covered in this appendix include: ■ Overview on page C-2 ■ Introduction on page C-2 ■ Background on page C-2 ■ Features Provided on page C-3 ■ Set Up Required on page C-6 Using Credit Cards and iPayment C-1 Overview Overview In Release 11 and earlier, the Oracle Order Entry product contained fields in the Order Header to hold credit card information. However, Order Entry did not provide credit card authorization or pass credit card information to Receivables. In this era of Web stores and Business-to-Customer selling, the ability to accept and authorize credit card payments has become vitally important. With Release 11i, Oracle Order Management delivers greatly expanded functionality to handle credit checking and payment authorization. In particular, you can now indicate that an order is being paid using a credit card, and authorize those transactions through Oracle’s iPayment product. Introduction Oracle Order Management in Release 11i offers enhanced functionality in the area of payment verification. You can use a credit card to pay for items on an order, and obtain authorization from the issuing institution through the iPayment server product. This paper explains the many features of Oracle Order Management’s credit card solution, including the key setup options and how they work, and offers some insight into how you could use them in your company. Background Credit Checking and Credit Card authorization are both ways of attempting to ensure that your company will receive payment for the goods that are being ordered. Credit Checking validates sales order values against credit limits you define on the customer record. During, Credit Card authorization is a program, iPayment, electronically calls the credit card company for an authorization code. Either method begins with Verify Payment. Verify Payment is called to determine if the payment type is Credit Card or Other. If it is Credit Card, iPayment goes to work. If the payment type is not Credit Card, then Credit Checking is done. Since Release 11, Oracle Receivables has contained functionality to enable users of Web Customers and other web front-ends to capture and account for credit card payments. Before Order Management was enhanced to provide credit card data to AR, Receivables obtained credit card information through a pre-processor that ran before Autoinvoice Import. That pre-processor read Order Entry and iPayment tables to obtain the necessary data to do the credit card capture functions. The credit card features of Order Management eliminate the need to run Receivables’ pre-processor, but still relies on Receivables to do all the accounting and collection activities required to process actual credit card payments. C-2 Oracle Order Management Suite Implementation Manual Features Provided Features Provided Oracle Order Management provides features to enable you to accept a credit card as a method of payment for an order. You can enter or select one credit card per order to be used for paying for the entire order amount. IPayment Process A simple iPayment example: During Order Header entry, choose a payment TYPE of Credit Card. The customer’s primary credit card number, expiration date and cardholder’s name default in from Accounts Payable tables. You can override the primary credit card, choosing from other credit cards that have been set up in AP Bank Accounts for this customer, or enter a new credit card information. Enter the rest of the order information, including all the line information and book the order. Order Management will call the iPayment server to obtain authorization for the full amount of the order, including tax and freight and other charges. iPayment returns an approval or a denial, along with a risk code. The authorization code is recorded on the order header, and the order proceeds in its workflow. If authorization is denied or an unacceptably high risk factor is returned, Order Management places the order on hold until the problem is resolved. The order is picked and shipped, and during Invoice Interface, the credit card information is passed to Receivables. AR handles the funds capture and all accounting transactions. Types of Authorizations There are three types of authorizations that can be done from Order Management. A credit card can be authorized automatically, as described above. For this to occur, the order type must be setup for credit checking at Booking or at Shipping. The authorization will occur automatically during the Payment A credit card can also be authorized on-line, by choosing the Authorize Payment order action from the Action button on the Sales Order form. If this is done, authorization is attempted using the iPayment interface, and the results are processed the same as for automatic authorization. Using Credit Cards and iPayment C-3 Features Provided Problems, such as those with hardware, software, servers or networks, may require an authorization to be obtained manually. An authorization might be obtained via a telephone call, or a dial-up device. In that case, the authorization code can be entered on the Order Header, and the order will be considered authorized. Timing of Authorization If there is a Booking Credit Check Rule set up for the order type, the authorization call to iPayment takes place at Booking. A second authorization can occur during Pick Release if a Shipping Credit Check Rule is set up for the order and if no previous unexpired or uncaptured authorization exists on the order. For Drop Shipment orders, the second authorization evaluation occurs during Purchase Release. If the value of the order increases after the Booking authorization, an attempt is made to void the first authorization, and then another authorization for the full value of the order will take place at the time the order changes are saved. Authorization Results The authorization call to iPayment returns a success or failure, as well as a risk code. See the section following on Risk Management to understand how risk code is handled. A successful authorization will return an authorization code and authorization date to be stored on the order header. The authorization code can be viewed by users with appropriate security. If an authorization fails, the order is placed on Credit Card Failure hold. If the authorization was done on-line or at Booking, you will be notified of the failure via a message. Respond by changing the credit card number at the header and then re-authorizing, using the Action button. Returns and Mixed Orders In Order Management, you can use a credit card as a Payment Type on returns and also on mixed orders; orders containing both outbound and return lines. In the case of mixed orders, the amount authorized is the total amount of the outbound order lines, not the net of outbound and inbound. For pure return orders, a credit card number can be recorded, but no authorization is needed or done. The credit card information is passed to Receivables for returns, although AR is as of this writing (October 2000) unable to process credit card refunds. When AR code has been enhanced to process credit card refunds, no changes will be needed in Order Management to use that feature. Until such time, it is recommended to process credit card refunds manually or to choose a different payment type for returns. C-4 Oracle Order Management Suite Implementation Manual Features Provided Copy Orders Copy Orders has been enhanced in Order Management to give a choice whether or not to copy credit card information when an order header is being copied. There is a checkbox on the Copy Header window called Credit Card details where you can indicate your desire to copy. Data to be copied are Credit Card Number, Card Holder’s Name, Credit Card Type and Expiration Date. This checkbox is enabled only when you have All or Limited credit card privileges, as set in the profile option. The checkbox is seeded as unchecked to allow users to make a conscious decision to copy such information. Order Changes and Partial Shipments Credit card authorization is obtained for the total order amount. If order changes after authorization result in the total order amount being decreased, no further authorization occurs. If the order total increases, a new authorization is done for the total amount. A call is made to iPayment to void the previous authorization, but not all of the partner networks that iPayment interfaces with support the void transaction. Therefore it is possible that excess funds will be blocked if multiple authorizations occur. If an order is authorized and only partially shipped, the shipped amount may go to Receivables for capture before the backordered quantities ship. If that occurs, Receivables captures only the amount of the shipped lines, using the original authorization code. An authorization code can only be used once for a capture transaction. When the remainder of the order is Shipped (Pick Released), a check is made to see if there is an unexpired and uncaptured authorization on the order. If not, then the remaining amount is authorized again. See the examples below for further clarification. Holds There are two new holds seeded in Order Management for Credit Card processing. They are Credit Card Authorization Failure which is applied if authorization fails, and Credit Card High Risk which is applied if authorization is successful but the risk score was higher than the threshold set in the profile option. Both of these holds can be released manually, but can be reapplied automatically if a subsequent authorization fails. These holds can be removed with a manual authorization. Risk Management iPayment has a Risk Management feature (Oracle iRisk) that can help manage exposure to questionable transactions. Oracle iRisk allows you to define any number of risk factors to verify the identity of your customers, assess their credit Using Credit Cards and iPayment C-5 Set Up Required rating, and manage risk in a secure online environment. Set up these factors and a risk calculation formula when you set up iPayment. Authorizations from Order Management use the default risk formula setup in iPayment. Authorization returns a risk score, in addition to an authorization code. The score can range from 0 to 100, with 0 referring to a risk free transaction and 100 referring to a high risk authorization. If the risk score exceeds the risk threshold you have set up in the corresponding profile option, the order is automatically placed on Credit Card High Risk hold. Importing Orders and CRM Integration You can import orders with a payment type of credit card. There are columns in the header interface tables for all of the credit-card related data. You can import orders that are already authorized by populating the authorization code and authorization date columns. This supports the business case where you might have a legacy system or some other feeder system that has already done the authorization sending orders into Order Management for fulfillment. Similarly, orders coming from CRM or other front-end systems that have been pre-authorized can be entered into Order Management via the Process Orders API. Those orders will not be re-authorized, unless re-authorization is needed at Shipping or because of increases in the order value after authorization. Set Up Required To use credit card authorization in Order Management, you must install and set up the iPayment server which in turn communicates with the credit card provider networks. In addition, create at least one Credit Check Rule in Order Management and set up your order transaction types to use Credit Checking. Credit Card authorization will not occur automatically unless Credit Checking is called. Following are other key setups required or that affect the operation of credit card authorization. Profile Options There are several new Order Management profile options that effect the processing of credit cards. Here is what they are and how they work: OM: Credit Card Privileges – this profile, updateable at the site, application and responsibility level, controls the view and update privileges for credit card information on orders. Possible values are: C-6 Oracle Order Management Suite Implementation Manual Set Up Required All – view the complete credit card number and authorization code on the Order Header and the Order Summary window, and have full update capabilities. This means you can type in new credit card numbers, and obtain manual and online authorizations. Limited – view the credit card number and authorization code on the Order Header and the Order Summary window in a masked fashion – only the last four digits are displayed. You do have full update capabilities, similar to those of a user with All privileges. None – view only the credit card number and authorization code on the Order Header and the Order Summary window in a masked fashion – only the last four digits are displayed. In addition, you cannot key in credit card numbers or obtain manual or online authorizations. This is the default. OM: Estimated Authorization Validity Period – this profile represents the number of days an authorization is expected to remain valid. Since all of the various iPayment vendors do not provide an expiration date for authorizations, it is necessary to set a default number of days. The actual expiration time for authorizations varies by credit card provider. The default for this profile is 21 (days). When Verify Payment is called at Shipping, the code checks to see if the original authorization has expired. If it has, it will obtain another authorization. If it has not, it will not re-authorize. The expiration is computed by adding this profile option to the authorization date and comparing to the system date. OM: Risk Factor Threshold for Electronic Payments – This profile is a value between 1 and 100, and represents the cutoff point where orders that authorize with a risk factor will be placed on Credit Card High Risk hold. The default is 50. For example, assume an order authorizes successfully, but returns a risk factor of 51. Since its risk code is above the threshold of 50, it will go on hold. See the section above on Risk Management. OM: Payment Method for Credit Card Transactions: this profile option represents the default payment method used by the Invoice Interface to pass to Receivables for orders that have a payment type of credit card. It is used if the customer does not have a primary payment method recorded. There is no default, but this profile must be populated prior to interfacing orders with credit cards to Receivables. There is a LOV for this profile, and validation is against all active payment methods in AR where the payment type is Credit Card. Bank Accounts When you select a Payment Type of Credit Card on the order header, the primary bank account for the customer in Accounts Payable provides default information Using Credit Cards and iPayment C-7 Set Up Required for credit card number, cardholder’s name and expiration date. A LOV on the credit card number field on the order header will be based on AP’s bank account table where branch_id = 1 (this is AP’s convention for indicating a credit card type of bank account). You can key in a different credit card number to be used, and when the data is saved (committed) to the database, that account will be created as a new bank account for the customer in AP. Lookups There are several OM lookups that are used by Credit Card authorization. There is an OM lookup for Credit Card Type – this is seeded with the most common credit card types such as AMEX, Visa, etc. You can extend this list. Payment Type is another OM lookup. It is seeded with Credit Card, Cash and Check and cannot be extended. iPayment integration logic in OM is triggered when Payment Type = Credit Card. IPayment Setup There is an entire manual devoted to implementing the iPayment server. Several critical things to setup that influence Order Management are the risk management factors and formula and the merchant bank account. Other setup information can be found in the Oracle iPayment Implementation Guide, part number A86047-01. Reports There are no new or existing reports in Order Management that list credit card information. Watch Out For Here are some limitations you need to understand: Credit Checking Must be Active As stated previously, credit checking must be active for the order type you are using with credit cards. The calls to iPayment for authorization are included in the Verify Payment code, which is only called if there is a credit checking rule on the order type. Credit card authorization does not care about the payment terms on the order or lines, or whether the customer or bill-to has credit checking turned on. C-8 Oracle Order Management Suite Implementation Manual Set Up Required Encryption In Order Management, credit card information is masked from view by unauthorized users, based on the setting of the OM: Credit Card Privileges profile option. This occurs in the User Interface only. Credit card information is not encrypted in the database at this time. Restrict direct access to the database to prevent access to sensitive information stored. Multiple Authorizations If a second or subsequent authorization is needed to an order with an unexpired and uncaptured authorization, Order Management calls iPayment to void the previous authorization. However, not all of the credit card system integrators that iPayment uses have support for the void transaction. Because of this, it is possible that excess funds may remain blocked for a credit card until such time as the earlier authorization expires. Order Management only allows one active authorization per order at any given time. What if iPayment isn’t Installed? If iPayment is not installed, but a payment type of credit card is entered on the order, the Verify Payment code will not return an error or place the order on hold. Credit Checking will not occur either, since the Credit Card authorization code will be invoked instead. The Authorize Payment action on the Action button will not be available. The only way to authorize a credit card without iPayment (or without a customization) is to do a manual authorization, and enter the authorization code. In effect, if you don’t have iPayment installed, the credit card fields on the order header are for information only. Credit card data is passed to Receivables, however, even if iPayment is not installed. If you don’t have iPayment installed and you don’t want to take the risk of people entering credit card information that is then not used, you can set up a Processing Constraint to prohibit users from saving data to the credit card fields. Debugging Tips If you are experiencing problems getting the iPayment integration to work in your environment, it can be very helpful to support if you generate a log file of what is happening. Here are specific steps to generate a debug file while reporting iPayment integration issues 1. Log into the application using a new session 2. Open the sales order form and query the order Using Credit Cards and iPayment C-9 Set Up Required 3. From Tools menu click on Debug, 4. Choose "Turn Debug On" 5. From Tools menu click on Debug again 6. Choose "Initialize Debug Cache" 7. From Tools menu click on Debug yet again 8. Choose "Write to a File" Note the default file name – you cannot change it. Debug messages will be logged into this file. Perform the steps which are failing - in this case it may be payment authorization through booking/ picking/ manual. 9. Turn debug off 10. Provide the debug file to Oracle Support. Examples The following examples assume an order type that has a Credit Check Rule assigned for both Booking and Shipping. Assume also the OM: Estimated Authorization Validity Period profile has been left to default to 21 days. Simple order: consider the case of a simple order that is authorized at Booking, pick released and shipped complete within one week with no changes to the order. One authorization is obtained for the entire order at Booking. No further authorization at Shipping occurs, because an unexpired and uncaptured authorization existed. The entire order interfaces to Receivables at one time. Receivables does the funds capture against the original authorization code. Partial Shipment: this order consists of one line for a quantity of 10 with an extended amount of $1000. The authorization obtained at Booking is for $1000. Only 3 of the quantity of 10 is picked and ship confirmed and interfaced to Receivables. The remaining 7 were backordered. What occurs when the remainder of the order is pick released depends on whether Receivables has captured against the original authorization. If so, AR captures $300 against the first authorization. At Pick Release of the remainder of the order, a new authorization is obtained for $700 – the amount uncaptured. If AR has not done a funds capture at the time of the second Pick Release, OM will not reauthorize if the original authorization had not expired. Whether or not an authorization has had funds captured is determined by calling an iPayment API. C-10 Oracle Order Management Suite Implementation Manual Set Up Required Cancellations: consider the same order as in Partial Shipments above. However, after Booking but before interface to Receivables, the order is canceled. If the entire order is canceled, OM will attempt to void the initial authorization. If the credit card provider does not support the void transaction, the authorization will be left to expire. On the other hand, if the order is partially canceled, the part that is shipped and interfaced to Receivables will capture against the original authorization code but for the amount shipped. The remainder (amount canceled) will never authorize, as it has been canceled. Mixed Order: this order consists of one outbound line for $200 and one return line with a value of $50. Therefore the order total is the net or $150. The authorization at Booking will authorize for the full $200. Migration/Upgrade There is no special upgrade performed for orders containing credit card information. Old Order Entry orders with credit card information will have the credit card data copied to the upgraded order. If the new upgraded order goes through Booking or Shipping and there is a credit check rule on the order type, then authorization will be attempted. Future Plans There have been numerous enhancements requested to the basic credit card functionality that is provided in Order Management. Among the ones being considered for future releases are: Multiple credit cards at the header. Multiple credit cards at the line. Multiple payment types at the header Database encryption of credit card information Report on credit card orders/ authorizations/ holds Background/ batch processing for authorization Availability The functionality associated with Order Management Credit Card authorization was available in May of 2000 with the release 11i initial release. Receivables will be making code changes necessary to process credit card refunds in a post-11i patch. Using Credit Cards and iPayment C-11 Set Up Required Conclusion Oracle Order Management’s new functionality to handle credit card authorization enables orders to be accepted from many new channels, including web stores. Order Management helps you by seamlessly obtaining the authorization for orders where a credit card is used as the payment vehicle, and passing the necessary information to Receivables for actual funds capture. C-12 Oracle Order Management Suite Implementation Manual D Defaulting Rules Topics covered in this appendix include: ■ Overview on page D-2 ■ Introduction on page D-2 ■ Background on page D-2 ■ Functional Differences on page D-3 ■ Watch Out For on page D-9 ■ Migration/Upgrade from SVRS on page D-10 ■ Example on page D-11 ■ Conclusion on page D-12 Defaulting Rules D-1 Overview Overview Defaulting rules enable field values on forms to populate automatically. They do not need to be keyed in manually. In Release 11 and earlier, the Oracle Order Entry product contained a feature called Standard Value Rule Sets (SVRS) where you defined how you wanted order attributes to be defaulted. In Release 11i Order Management, we have a new defaulting paradigm called ‘Defaulting Rules’, which offers somewhat differing functionality. This paper outlines the key differences between SVRS and the new Defaulting Rules, with tips on how to use the new, more powerful features. Introduction Users familiar with Order Entry’s Standard Value Rule Sets might look at Order Management’s new Defaulting Rules framework and wonder what happened here?’ The user interface looks very different look and feel. The functionality seems to behave somewhat differently from the SVRS. The R11i Order Management User’s Guide gives a good explanation of the new forms and fields, but there are nuances of setup and use that are not obvious to the non-technical reader or user. This paper attempts to explain the key functional differences between the SVRS in Order Entry and the Defaulting Rules in Order Management, and offer some insight into making the rules work for you. Background Standard Value Rule Sets provided great functionality for Order Entry users. But they were very much tied to the architecture and functionality of the Order Entry product. You could define sets of rules and attach them to order types. There was a hard-coded list of sources for each particular data field. It was difficult to extend or customize the rules. In Order Management, the product architecture has been updated and the product functionality greatly expanded. Every functional area had to be re-designed and re-coded. Some of the enhancements that users had been requesting in the area of SVRS could not be accommodated without revamping the entire structure of defaulting. The design goal was to create a defaulting framework that other products could use, too, since most applications need similar capabilities. So the decision was made to design a more generic solution for defaulting. The Defaulting Rules Framework is the result of that re-design. D-2 Oracle Order Management Suite Implementation Manual Functional Differences Functional Differences To an Order Entry/Management user or implementer, the biggest difference from SVRS is that with Defaulting Rules, you define a set of rules for each attribute on the order header or line, and you define the conditions for when to use each rule. This forces you to think of each attribute individually, instead of within the context of an order type. But once you start thinking of attributes in this way, the new framework seems more straightforward and intuitive. The new framework also brings somewhat more flexibility in where you can default from and to, as well as a way for you to invoke your own PL/SQL package to perform more complex logic. Key Enhancements Some of the great new enhancements that this framework allows are: the ability to default the Order Type the ability to define defaulting rules for returns and return lines - they used to be hard-coded. the ability to define formulas to create the defaulted data - see the Sources of Values section below. a clear distinction between ‘defaulting’ behavior and ‘cascading’ - see the Watch Out For section below. Terminology Since Defaulting Rules are now generic, and potentially can be used by other Oracle applications, we’re using more generic names for the things you default from and to. Attributes and Entities are the things you default to. ‘Sources’ are where things default from. See the Sources of Values section below on all the various places you can default from. Attributes and Entities in Order Management An Entity in this context is a group of related attributes that roughly correspond to a table or a form in Order Management. So we have entities of Order Header, Order Line, Order Price Adjustment, Line Price Adjustment, etc. Entities correspond to blocks in the old SVRS. Defaulting Rules D-3 Functional Differences An Attribute is a field or column that belongs to that entity. Therefore, the ordered unit of measure is an attribute of the Order Line entity. Attributes correspond to fields in the old SVRS. When you query up the Defaulting Setup form for a particular entity, you’ll see a list of all the attributes for which you can define defaulting rules. As in OE, you will not be able to define defaulting rules for descriptive flexfields, since their defaulting is controlled by AOL’s flexfield routines. Conditions Conditions are rules set up that to control when a particular group of default sources will be looked at. Define one or more condition validation templates per entity based on common business rules to meet your business needs. Then you can use them over and over for the attributes of that entity. For example, you might set up a condition template for all return lines, or another one for all internal order lines. The ALWAYS condition is seeded for each entity. When defining a set of Conditions and using them in rules, be sure to place the ALWAYS condition last in the Precedence for Defaulting Conditions. Defining Condition Validation Templates Once you query up the entity that you want to work with in the Defaulting Setup form (use the flashlight icon to get the LOV of available entities), press the Defaulting Condition Template button to get to the form to define the conditions. You’ll see a form that lists all the conditions already defined for this entity. To add a new condition, go to a blank line (or use the green + icon to create a blank line) and key in a name and description for your new condition. The lower half of the form is where you enter the details of the condition you are defining or viewing. The Group Number is an arbitrary number used to control and, and or conditions. Indicate that rules are to be connected by an and rule by giving them the same group number, whereas rules to be connected by or should be given different group numbers. In the Attribute column, choose from the list of attributes on which a condition can be based. Available attributes that show up here are ones from this entity that have the ‘Include in Building Defaulting Conditions checkbox checked on the Defaulting Setup - Entity Attributes form. The only attributes that have this checkbox checked are ones that are the source for a dependency relationship. See section on Dependencies below. You cannot add to this list of attributes. In the Operator column, choose an operator from equal, not equal, greater than, less than, not greater than or not less than. D-4 Oracle Order Management Suite Implementation Manual Functional Differences In the Value String column, key in (or choose from the LOV) the actual value you want to compare to. Sequence of Defaulting On the main Defaulting Setup screen, where all the attributes of the entity are listed, there is a column called Defaulting Sequence. This number determines the order in which attribute defaulting takes place. When attributes have equal sequence numbers, defaulting takes place alphabetically. All the attributes are seeded with a sequence of 50. You can change these sequences, if you need defaulting to happen in some different order. For example, you might define a sourcing rule that says default attribute A on the line from attribute B on the same line. In this case, you need to insure that the Attribute B gets its value before A is defaulted, or the rule will not work as expected. Sources of Values Sources are places where values can be defaulted from. Defaulting Rules provide a variety of sources that can used in building your defaults. Most of them will be familiar to users of Oracle Order Entry. Constant Value - is simply a text string that will be used. Profile Option - is the value of a profile option. This can be a system provided profile option, or a new profile option that you’ve defined just to provide a defaulting value. Same Record - is the value of another attribute on the same entity (or record) as the attribute you are defining the rule. For example, you might set up the Promise Date to default from the Request Date on the same line. Related Record - is the value of another attribute on a related entity (or record). For example, you might set up the Ship Method on the line to default from the Ship Method on the header. Or some attribute on the order header might default from an attribute on the related customer record. System Variable - is the value of a system (server) variable, such as System Date. For this type of source (and this type only), you can use an expression containing a formula, for example, sysdate + 7. PL/SQL API - is where you provide your own routine to provide the default. There are a few seeded defaulting rules that use this - for example, defaulting of the currency on the order header from the set of books (SOB) is seeded this way. Look Defaulting Rules D-5 Functional Differences at this attribute for an example of how to specify a PL/SQL API or look in the Rule Based Defaulting Framework HLD for technical details. Others - there are several esoteric source types relating to the Web App Dictionary definitions for this attribute. Most people won’t want to use these. They are documented in the Rule Based Defaulting Framework HLD. Defining Sourcing Rules Once you query up the entity that you want to work with in the Defaulting Setup form and have defined your Conditions, you are ready to define your Sourcing Rules. Select the attribute you want to work on, and then click on the Defaulting Rules button to get to a form called Attribute Defaulting Rules. This form lists all the conditions and rules that have been previously defined for this attribute. To add a new condition and its rules, go to a blank line in the Defaulting Conditions section of the form (or use the green + icon to create a blank line), key in a precedence and choose from conditions you have already defined. (The precedence controls the sequence in which the conditions are evaluated.) The lower half of the form is where you enter the details of the rule you are defining or viewing for this condition. This set of defaulting rules will be used if its corresponding Defaulting Condition is TRUE. The Sequence here controls the order in which the system attempts to locate a default. In the Source Type column, choose from the list of Source Types as described above. In the Default Source Value column, specify the attribute or value you want to use for the source. Selection choices here depends on the Source Type you have selected. There is a good table in the Setup section of the Oracle Order Management R11i User’s Guide that explains the various options per Source Type. What you’ll see in this field is a flexfield whose context is based on the Source Type. Then you can choose among pre-seeded possible source attributes. Similar to what occurred in Order Entry, there are similar restrictions to defaults. The data type has to match that of the attribute you are defaulting, and the source relationship has to be pre-defined. Dependencies Some attributes are dependent upon the value of other attributes on the same record. If an attribute is changed, either by the user or by the system, any other attribute that are dependent on it will be cleared and then re-defaulted. For D-6 Oracle Order Management Suite Implementation Manual Functional Differences example, the Price List is dependent on Agreement. If the Agreement is changed, the Price List will be cleared and re-defaulted. As of September, 2000, this functionality was changed so that if the redefaulting did not result in a new value for the dependent field, and there was a value previously, the old value will be retained. In the initial implementation of Defaulting Rules, dependencies are hard-coded. See the Rule Based Defaulting Framework HLD for a list of which dependencies have been provided. An enhancement request has been logged to provide a form to allow users to create their own dependencies. Until such time as that enhancement is provided, if you need to create additional dependencies, you can code a simple customization to package OE_Dependencies (the file name is OEXUDEPB.pls). Remember, however, that dependencies can be established only among attributes on the same entity, not across entities. For an experienced coder, the code modifications are relatively easy. For example. the following code indicates that payment term, invoice to and price list are dependent on sold to: l_index := OE_HEADER_UTIL.G_SOLD_TO_ORG * G_MAX ; g_dep_tbl(l_index ) := OE_HEADER_UTIL.G_PAYMENT_TERM; g_dep_tbl(l_index +1 ) := OE_HEADER_UTIL.G_INVOICE_TO_ORG; g_dep_tbl(l_index +2 ) := OE_HEADER_UTIL.G_PRICE_LIST; If you want to add another attribute - currency - as a dependent attribute, then add the following line after the above code: g_dep_tbl(l_index +3 ) := OE_HEADER_UTIL.G_TRANSACTIONAL_CURR; If, on the other hand, you want to create a dependency for a source attribute that doesn’t already have any, then it takes a little more work. For example, if you want to make Shipping Method on the header dependent on Shipment Priority, then you need to add a line for the source attribute as above and also modify another entity specific utility package. Add the following code in Load_Entity_Attributes: l_index := OE_HEADER_UTIL.G_SHIPMENT_PRIORITY * G_MAX ; g_dep_tbl(l_index ) := OE_HEADER_UTIL.G_SHIPPING_METHOD; Then add the following statement in OE_Header_Util.Clear_Dependent_Attr Defaulting Rules D-7 Functional Differences (file: OEXUHDRB.pls). If you’re want a change in the Shipment Priority on the order line to also affect Shipping Method on the order line entity, code similar to the following needs to be added to OE_Line_Util. IF NOT OE_GLOBALS.Equal(p_x_header_rec.shipment_priority_code ,p_old_header_rec.shipment_priority_code) THEN l_index := l_index + 1.0; l_src_attr_tbl(l_index) := OE_HEADER_UTIL.G_SHIPMENT_PRIORITY; END IF; Similarly, you can remove dependencies if there are some hard-coded that you do not want. Controlling Changes In Order Entry SVRS, there used to be two checkboxes on each rule line to control changes to an attribute. You could check whether or not to allow users to override a defaulted value (Override Allowed) and you could control whether the rules should re-default over user-specified values (Override User-Specified Values). These checkboxes often were viewed to be confusing and to operate inconsistently Order Management’s Defaulting Rules solved that problem by getting rid of those checkboxes. Instead, you control who can change data (and when) using the new Processing Constraints framework, regardless of how or whether an attribute was defaulted. In addition, you have the ability when defining Processing Constraints to indicate that you want the system to be able to update an attribute, but a user cannot make changes. The only time that Defaulting Rules result in a change to an existing attribute on an entity is when that attribute has a dependency on another attribute that has been changed. Reports There is a new report in Order Management that lists the Defaulting Rules you have set up. It replaces the old OE ‘Standard Value Rules Listing’. The report is called Defaulting Rules Listing, and it has parameters to allow you to limit the listing to a specific object (entity), attribute or condition. D-8 Oracle Order Management Suite Implementation Manual Watch Out For Watch Out For Here are some differences and limitations that you will need to understand: Creating Conditions Conditions give you powerful flexibility in designing how you will implement defaulting rules for your company. However, there are a few behaviors to take into consideration when creating Conditions. What Attributes can you use? Be aware that Conditions you create for an entity can only be based on attributes that belong to that entity. Therefore, for example, you cannot set up a Condition for a line attribute based on the order type because order type is a header attribute. You’ll have to examine carefully your business rules so you can state Conditions in terms of attributes on the same level. Fortunately, in Order Management, most attributes (with few exceptions such as order type and currency) at the header are also present at the line level. Even the sold-to customer is present as a line-level attribute, even though the software enforces that the customer is the same throughout an order. This way, the customer can be used in a condition template for the line. Sequencing of Attributes Used in Conditions Sequencing of defaulting of attributes plays an important role in the correct design of Conditions and Sourcing Rules. If you create a rule for attribute X based on a Condition using attribute Y, you must be sure that attribute Y gets defaulted before attribute X, or your Condition will not evaluate true. For example, if you define a Condition for defaulting the Unit of Measure by using the Customer, it will only work if you ensure Customer gets defaulted before UOM. And even then, it will only work for the initial defaulting of the UOM field. And that is because of Dependencies. Dependencies of Attributes Used in Conditions So you must also regard dependencies when you are building Conditions. If a Condition involving attribute Y is used to setup the defaulting rule for attribute X, then the rule will work during subsequent updates of attribute Y only if attribute X is dependent on attribute Y. So in the UOM and Customer example above, if you later change the Customer on the order, the UOM will not re-default based on the new customer, because UOM is not dependent on Customer. Defaulting Rules D-9 Migration/Upgrade from SVRS Defaulting vs. Cascading In Order Management, a clear and unambiguous distinction has been made between defaulting and cascading, that will cause behavior different from what we have become used to in R11 Order Entry. In OE, defaulting and cascading were intermixed, making it sometimes difficult to predict what might happen when an attribute at one level was changed. In OM, the defaulting logic will come into play only when the record is initially created (when you click on a new record on the form), or when an attribute upon which this attribute is dependent is changed. Cascading, on the other hand, means replicating the value of an attribute down to lower level entities. We do not perform cascading in Order Management. If you want to change the value of attributes on existing rows, you need to use the new mass change capability, where you multi-select the rows you want to change, and then change them. How do these concepts get applied? Here’s an example. Assume you have a defaulting rule set up to default a line-level attribute such as Ship Method from the header to the line. Create an order with several lines and use Ship Method A for the header (and therefore the lines). Then you want to change the ship method to Ship Method B. Changing this attribute at the header will result in any subsequent new lines getting Ship Method B defaulted onto them. The existing lines that have Ship Method A will not get changed to B as a result of your changing the header attribute. You will need to use mass change to do that. The good news


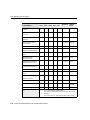
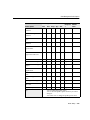
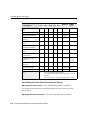


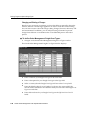
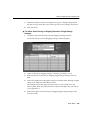


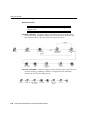


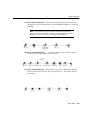
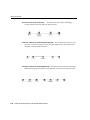
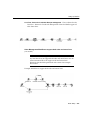
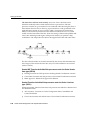

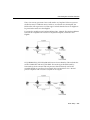
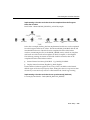
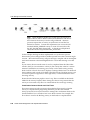
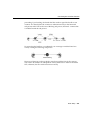


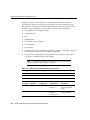
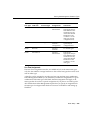
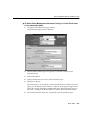
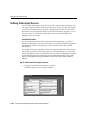
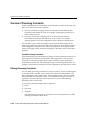
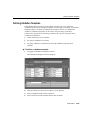

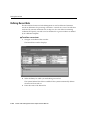


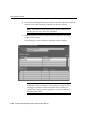


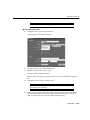
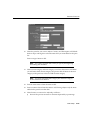
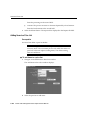


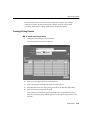
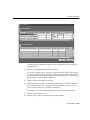
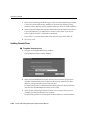

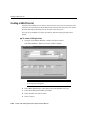
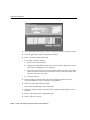
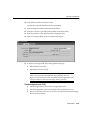


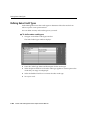


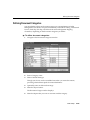
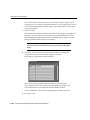


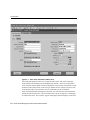

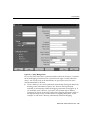
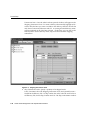
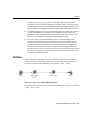
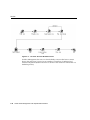
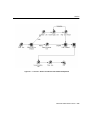


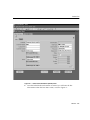
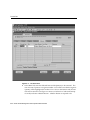

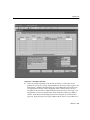
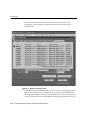


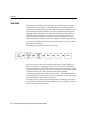
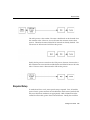
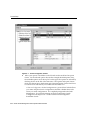

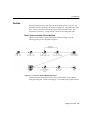

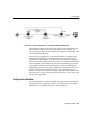
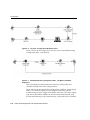
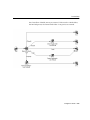
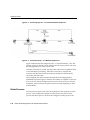


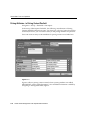
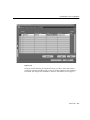
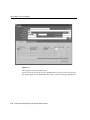
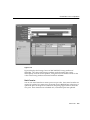

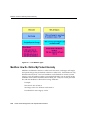


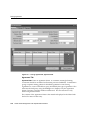

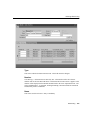


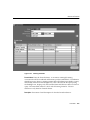
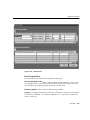
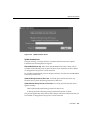


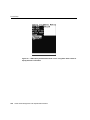
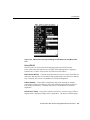
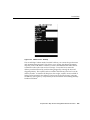

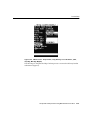


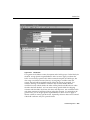
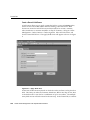


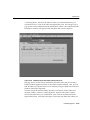
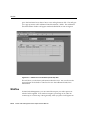
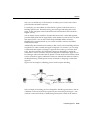


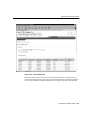
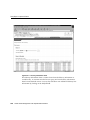


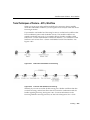
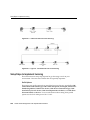

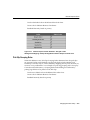
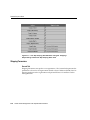
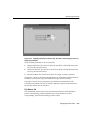
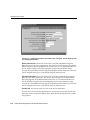

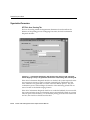


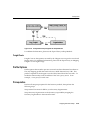
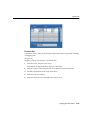
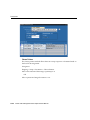
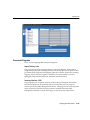


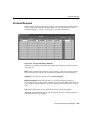
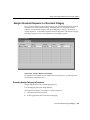
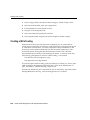
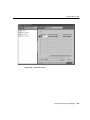


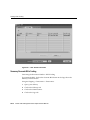
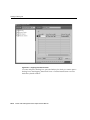
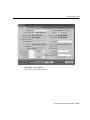
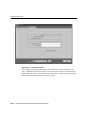
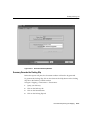
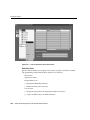
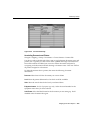
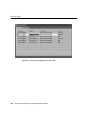
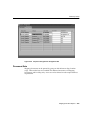
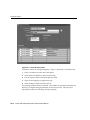
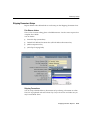
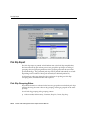
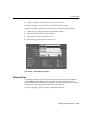
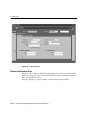
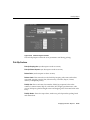
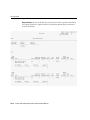
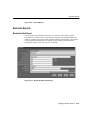

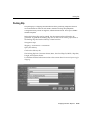
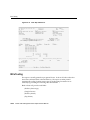
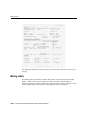

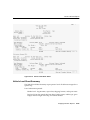


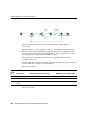

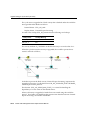
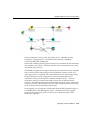
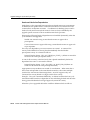
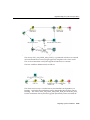

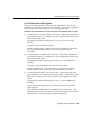


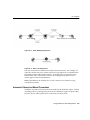
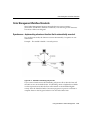
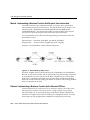

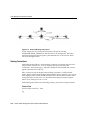
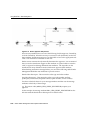


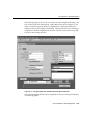

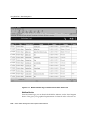
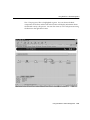
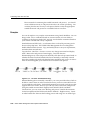
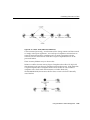

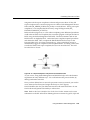
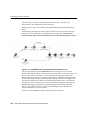
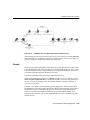
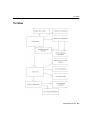


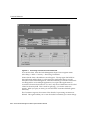

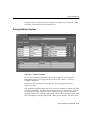


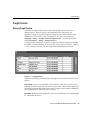

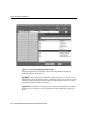
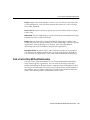
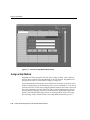
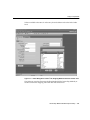
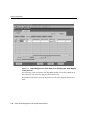
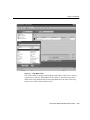
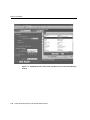

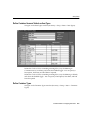
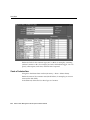
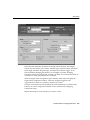
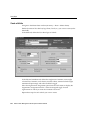

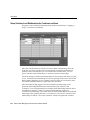
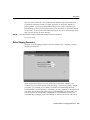
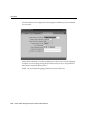


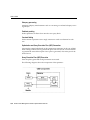

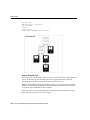


![Main lSetup l Cleanup] Parameters Locals}](http://vs1.manualzilla.com/store/data/005794368_1-f1180d1b21e5ef681561217b8f35e179-150x150.png)