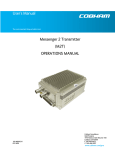
1
Operations Manual User’s Manual The most important thing we build is trust. The most important thing we build is trust. Very Efficient Transmission Apparatus Transmitters (VETA TX) SOFTWARE MANUAL 100-M0143X3 1 of 49 GMS Inc. doing business as Cobham Tactical Communications and Surveillance Cobham Tactical Communications and Surveillance 1916 Palomar Oaks Way, Suite 100, Carlsbad, CA 92008 Tel: 760-496-0055 FAX: 760-496-0057 www.cobham.com/tcs Table of Contents 1. Acronyms ....................................................................................................................................................................................................6 2. Introduction .............................................................................................................................................................................................8 2.1 About the Manual.....................................................................................................................................................................................8 2.2 Warranty .......................................................................................................................................................................................................8 2.3 Safe Operating Procedures ..................................................................................................................................................................8 3. Software Control Overview ............................................................................................................................................................9 3.1 System Requirements.............................................................................................................................................................................9 3.2 Software Installation...............................................................................................................................................................................9 3.2.1 Download Method – Setup Utility ..........................................................................................................................................9 3.2.2 CD Method – Setup Utility.......................................................................................................................................................14 3.3 Product Control & Status Monitoring Approach ....................................................................................................................14 3.4 VETA Tx Configurator Functions ...................................................................................................................................................15 3.5 Access levels ............................................................................................................................................................................................16 3.6 Transmitter Differences .....................................................................................................................................................................16 4. Pull-Down Menu Definitions ......................................................................................................................................................18 4.1 File.................................................................................................................................................................................................................18 4.2 Options .......................................................................................................................................................................................................18 4.2.1 Load Configuration File .............................................................................................................................................................19 4.2.2 Write License Code/File .............................................................................................................................................................19 4.2.3 Restore Default Configuration ...............................................................................................................................................19 4.2.4 Log Off ...............................................................................................................................................................................................19 4.2.5 Create Log File ...............................................................................................................................................................................19 4.2.6 Change Administrator Password ...........................................................................................................................................20 4.2.7 Disable Login Requirement ......................................................................................................................................................21 4.3 Help ..............................................................................................................................................................................................................22 4.3.1 Manuals .............................................................................................................................................................................................22 4.3.2 FW Version ......................................................................................................................................................................................22 4.3.3 About ..................................................................................................................................................................................................22 5. Status Elements Details.................................................................................................................................................................24 5.1 Status Group ............................................................................................................................................................................................24 5.2 Connection Group .................................................................................................................................................................................24 5.3 Front Panel Control Group ................................................................................................................................................................25 6. TAB Definitions....................................................................................................................................................................................27 6.1 Main Page Tab.........................................................................................................................................................................................27 6.1.1 The RF Parameters Group .........................................................................................................................................................27 6.1.2 Video / Audio Group....................................................................................................................................................................30 6.1.3 Configuration Group ...................................................................................................................................................................31 6.2 Video Settings Tab ................................................................................................................................................................................31 6.3 Audio Settings Tab................................................................................................................................................................................34 100-M0143X3 GMS Inc. doing business as Cobham Tactical Communications and Surveillance 2 of 49 www.cobham.com/tcs 6.4 Security Tab .............................................................................................................................................................................................36 6.4.1 VT Front Panel Override ............................................................................................................................................................39 6.5 User Data Tab ..........................................................................................................................................................................................40 6.6 Special Setup Tab ..................................................................................................................................................................................41 6.7 Transport Stream Tab..........................................................................................................................................................................43 6.8 Chaining Tab ............................................................................................................................................................................................46 7. Default Configurations ...................................................................................................................................................................48 List of Tables Table 1 – Transmitter Differences .............................................................................................................................................................. 17 Table 2 – RF Parameters Field Definitions............................................................................................................................................... 28 Table 3 – Video / Audio Field Definitions ................................................................................................................................................ 30 Table 4 – Video Selections Field Definitions ......................................................................................................................................... 32 Table 5 – Audio Selections Field Definitions ......................................................................................................................................... 34 Table 6 – Encryption Field Definitions ...................................................................................................................................................... 38 Table 7 – User Data Field Definitions ........................................................................................................................................................ 40 Table 8 – Special Setup Field Definitions ................................................................................................................................................ 43 Table 9 – Transport Stream Field Definitions ........................................................................................................................................ 44 Table 10 – Default PID Definitions ............................................................................................................................................................. 45 Table 11 – Chaining Setup Field Definitions .......................................................................................................................................... 47 Table 12 – Typical VT Default Configurations File ............................................................................................................................. 48 Table 13 – Typical VMT Default Configurations File ......................................................................................................................... 49 List of Figures Figure 1 – File Download Security Screen.................................................................................................................................................. 9 Figure 2 – Save As Screen ............................................................................................................................................................................... 10 Figure 3 – Download Progress Screen ....................................................................................................................................................... 10 Figure 4 – Option Menu ................................................................................................................................................................................... 11 Figure 5 – Files in Setup Package................................................................................................................................................................. 11 Figure 6 – Setup Copying Files ..................................................................................................................................................................... 12 Figure 7 – VTx Setup Introduction Screen ............................................................................................................................................. 12 Figure 8 – Installation Directory Selection ............................................................................................................................................. 13 Figure 9 – Choose Program Group .............................................................................................................................................................. 13 Figure 10 – File Installation ............................................................................................................................................................................ 14 Figure 11 – Setup Successfully Completed ............................................................................................................................................ 14 Figure 12 – VETA Tx Configurator.............................................................................................................................................................. 15 Figure 13 – VETA Tx GUI Main Screen..................................................................................................................................................... 16 Figure 14 – File Pull-Down Menu................................................................................................................................................................. 18 Figure 15 – Options Initial Pull-Down Menu .......................................................................................................................................... 18 Figure 16 – Administrator Login .................................................................................................................................................................. 18 Figure 17 – Options Full Pull-Down Menu............................................................................................................................................... 19 Figure 18 – Options Pull-Down Menu – Disable Logging ................................................................................................................. 20 Figure 19 – Change Administrator Password......................................................................................................................................... 20 Figure 20 – Password Changed .................................................................................................................................................................... 20 100-M0143X3 GMS Inc. doing business as Cobham Tactical Communications and Surveillance 3 of 49 www.cobham.com/tcs Figure 21 – Login Is No Longer Required................................................................................................................................................. 21 Figure 22 – Re-enable Login Requirement .............................................................................................................................................. 21 Figure 23 – Login Is Now Required ............................................................................................................................................................. 21 Figure 24 – Help Pull-Down Menu .............................................................................................................................................................. 22 Figure 25 – Help Pull-Down Menu - Manuals ........................................................................................................................................ 22 Figure 26 – VMT FW Version Window ..................................................................................................................................................... 22 Figure 27 – About Box Window ................................................................................................................................................................... 23 Figure 28 – VMT Status.................................................................................................................................................................................... 24 Figure 29 – VT Status ........................................................................................................................................................................................ 24 Figure 30 – Connection.................................................................................................................................................................................... 24 Figure 31 – Multiple Transmitter Availability ........................................................................................................................................ 25 Figure 32 – Trying to Reestablish the Connection.............................................................................................................................. 25 Figure 33 – Connection Lost.......................................................................................................................................................................... 25 Figure 34 – Request for User Direction .................................................................................................................................................... 25 Figure 35 – VT Front Panel Control Group.............................................................................................................................................. 25 Figure 36 – VMT Front Panel Control Group ......................................................................................................................................... 26 Figure 37 – Main Page Tab ............................................................................................................................................................................. 27 Figure 38 – RF Parameters Group ................................................................................................................................................................ 28 Figure 39 – Video / Audio Group ................................................................................................................................................................. 30 Figure 40 – Configuration Group................................................................................................................................................................. 31 Figure 41 – Video Settings Tab .................................................................................................................................................................... 32 Figure 42 – MPEG4 Settings .......................................................................................................................................................................... 32 Figure 43 – Audio Encoder OFF Settings ................................................................................................................................................. 35 Figure 44 – Audio Encoder NICAM Settings.......................................................................................................................................... 35 Figure 45 – Audio Encoder MPEG Settings............................................................................................................................................. 36 Figure 46 – VMT Security Tab ...................................................................................................................................................................... 37 Figure 47 – VT Security Tab........................................................................................................................................................................... 37 Figure 48 – VMT Security Tab in ABS Mode ......................................................................................................................................... 38 Figure 49 – VMT Security Tab in AES 128 Mode ................................................................................................................................ 38 Figure 50 – VMT Security Tab in AES 256 Mode ................................................................................................................................ 39 Figure 51 – VMT Security Tab in AES/BCRYPT 128 ........................................................................................................................... 39 Figure 52 – VMT Security Tab in AES/BCRYPT 256 ........................................................................................................................... 39 Figure 53 – VT Front Panel ............................................................................................................................................................................. 40 Figure 54 – VT Front Panel Override .......................................................................................................................................................... 40 Figure 55 – User Data Tab .............................................................................................................................................................................. 41 Figure 56 – Special Setup for VMT ............................................................................................................................................................. 42 Figure 57 – Special Setup for VT ................................................................................................................................................................. 42 Figure 58 – Transport Stream for VMT .................................................................................................................................................... 44 Figure 59 – Transport Stream for VT ......................................................................................................................................................... 44 Figure 60 – Chaining for VT ........................................................................................................................................................................... 46 Figure 61 – Chaining for VMT ....................................................................................................................................................................... 46 Figure 62 – Chaining for VMT – Manual Video Bit Rate .................................................................................................................. 47 100-M0143X3 GMS Inc. doing business as Cobham Tactical Communications and Surveillance 4 of 49 www.cobham.com/tcs Revision History Revision Date Main Changes from Previous version Edited by X1 Initial Release – Extracted detailed software operation 26 Apr 2010 for VETA Transmitters into single manual to support VTx GUI DRF 1 19 Apr 2011 Transferred from 100-M0143X1 OdM A 14 Jul 2011 Production Release DM X2 9 Jan 2012 Added Admin Password DRF Checked OdM Added 625KHz BW, 8PSK and BPSK Modulation Modes. X3 31 Aug 2012 Updated screen shots and modified styles to current manual format. 100-M0143X3 GMS Inc. doing business as Cobham Tactical Communications and Surveillance NM/DRF 5 of 49 www.cobham.com/tcs 1. Acronyms This section lists and describes the various acronyms used in this document. Name 16 QAM 64 QAM 8PSK A/V AES ASI BDC or BDCC BER BPSK COFDM CVBS/Y C D/C DVBT FEC GUI HD I/O Kbaud Kbps Mbps MER MPEG MSR M2D M2T M2L NTSC PAL QPSK QAM RF RX S/N SD SDI THD TS Meaning 16-state Quadrature Amplitude Modulation 64-state Quadrature Amplitude Modulation 8-State Phase-Shift Keying Audio/Video Advanced Encryption System (32 bit) Asynchronous Serial Interface Block down converter Bit Error Rate Binary Phase-Shift Keying Coded Orthogonal Frequency Division Multiplexing Composite video/Luminance with S-video Chroma video Down-Converter Digital Video Broadcasting Terrestrial Forward Error Correction Graphical User Interface High Definition Input/ Output Kilobaud per second Kilobits per second Megabits per second Modulation Error Rate Moving Picture Experts Group Messenger Smart Receiver Messenger Two Decoder Messenger Two Transmitter Messenger Two Link National Television System Committee Phase Alternation Line Quadrature Phase Shift Keying Quadrature Amplitude Modulation Radio Frequency Receiver Signal-to-Noise Ratio Standard Definition Serial Digital Interface Total Harmonic Distortion Transport Stream 100-M0143X3 GMS Inc. doing business as Cobham Tactical Communications and Surveillance 6 of 49 www.cobham.com/tcs Name TX VDC VDL VETA VR VT VMT VNA Meaning Transmitter Volts (Direct Current) VETA Digital Link Very Efficient Transmission Apparatus VETA Receiver VETA Transmitter VETA Miniature Transmitter VETA Network Adapter 100-M0143X3 GMS Inc. doing business as Cobham Tactical Communications and Surveillance 7 of 49 www.cobham.com/tcs 2. Introduction 2.1 About the Manual This manual describes how to use the software application to interact with VETA family transmitters. All the transmitters in the family have the same basic functions. The manual is divided into the following main sections: Software Control Overview Drop-Down Menu Definitions Status Elements Details Tab Definitions Default Configurations 2.2 Warranty Cobham offers a 12 month standard product warranty. During this period, should the customer encounter a fault with the equipment we recommend the following course of action: Check the support section of the website for information on that product and any software/firmware upgrades. If fault persists call our support line and report the fault. If fault persists and you are informed to return the product, please obtain an RMA number from the Cobham support department or website and ship the equipment with the RMA number displayed and a description of the fault. Please email the support section the airway bill/consignment number for tracking purposes. Depending on the nature of the fault, Cobham endeavor to repair the equipment and return it to the customer within 14 days of the item arriving at our workshops. Obviously it is impossible to cater for all types of faults and to manage 100% replacement part availability, and delays are sometimes inevitable. Please contact Cobham for details of packages that can be tailored to meet your individual needs, whether they are service availability, technical training, local geographic support or dedicated spares holdings. 2.3 Safe Operating Procedures Ensure that the power supply arrangements are adequate to meet the requirements of VETA product. Operate within the environmental limits specified for the product. The transmitter will generate considerable heat and it is the responsibility of the end user to properly heat sink the device before using. Electro-Static Discharge (ESD) precautions should be observed as a safe practice. Only authorized, trained personnel should open the product. There are no functions that required the User to gain access to the interior of the product. 100-M0143X3 GMS Inc. doing business as Cobham Tactical Communications and Surveillance 8 of 49 www.cobham.com/tcs 3. Software Control Overview This software is used for all Cobham products based on Very Efficient Transmission Apparatus (VETA) transmitters, including all variations of the VETA Transmitter (VT) and the VETA Miniature Transmitter (VMT). However, each product uses a unique control cable. Control cables, as well as connector pin outs, are described in detail in corresponding product manual. Configuration, control and monitoring of the VETA Series transmitters are accomplished using Cobham’s Microsoft Windows-based VETA Tx configurator software program (Cobham’s Part Number 630-SW0070). This Graphical User Interface (GUI) style program provides the end user with an easy way to interface with the VETA Transmitter units. During normal operation, once a VETA Digital Link (VDL) is established, the GUI does not need to be active and can be disconnected from the VETA Tx unit after the link is established. 3.1 System Requirements The VETA Tx Configurator program has been developed and tested on Windows XP (service pack 3), Vista (32-bit) (Service Pack 2) and Windows 7 (both 32-bit and 64 bit). Although the program may work properly on other operating systems, no Cobham support or assistance can be provided concerning other operating systems. 3.2 Software Installation 3.2.1 Download Method – Setup Utility Cobham customer service will provide a link to the folder containing the VTx Setup package. NOTE: Screens displayed by different computer operating systems may differ slightly from those shown. When you click the link, your default browser will start the file download. Depending on your computer’s security settings, you may see a security-warning screen shown in Figure 1 Figure 1 – File Download Security Screen If so, click on the Save button to proceed. The Save As screen should appear (Figure 2). The file can be saved at any convenient location. Accept the default file name. Remember the location where the file is stored. 100-M0143X3 GMS Inc. doing business as Cobham Tactical Communications and Surveillance 9 of 49 www.cobham.com/tcs Figure 2 – Save As Screen The file should complete downloading (Figure 3). Figure 3 – Download Progress Screen The file must be ‘unzipped’ (decompressed) to be used. Windows has numerous options to extract zip files. One option is to use Windows Explorer. Locate the file in Windows Explorer and right mouse click on the file name. An option menu for the file, similar to Figure 4, will appear. Any of the ‘Extract’ options will uncompress the file(s). 100-M0143X3 GMS Inc. doing business as Cobham Tactical Communications and Surveillance 10 of 49 www.cobham.com/tcs Figure 4 – Option Menu The setup package will contain the files listed in Figure 5. Figure 5 – Files in Setup Package Run the setup.exe program. The program will initially copy files and display the screen shown in Figure 6. 100-M0143X3 GMS Inc. doing business as Cobham Tactical Communications and Surveillance 11 of 49 www.cobham.com/tcs Figure 6 – Setup Copying Files The introduction screen shown in Figure 7 will be displayed when the setup application is ready to start. Figure 7 – VTx Setup Introduction Screen Continue with the installation by clicking the OK button. The next screen, Figure 8, allows you to change the installation directory. A new location can be selected by clicking the Change Directory button. It is recommended that the default directory be used. 100-M0143X3 GMS Inc. doing business as Cobham Tactical Communications and Surveillance 12 of 49 www.cobham.com/tcs Figure 8 – Installation Directory Selection Click the button to begin the installation. Figure 9 – Choose Program Group Figure 9 shows the next screen. This allows you to modify the program group that windows creates to launch the program from the All Programs section of the windows Start menu. It is again recommended that the default be used. 100-M0143X3 GMS Inc. doing business as Cobham Tactical Communications and Surveillance 13 of 49 www.cobham.com/tcs Figure 10 – File Installation The application will load and register the Configurator and support files (Figure 10). Figure 11 – Setup Successfully Completed The screen shown in Figure 11 is displayed when the installation has been successfully completed. 3.2.2 CD Method – Setup Utility The application is also available on the CD delivered with the product. The installation follows the same screens that were shown in 3.2.1. The following instructions outline the installation process for the VETA Tx Configurator program: Insert provided CD-ROM into computer. Click on ‘setup.exe’ file. This will launch the VR Setup program. Several initial setup files will begin to be copied onto the computer. The VTx Setup program will prompt the user to click on the ‘computer icon’ button to begin installation. If desired, the user can change the destination directory from the default. Click on the ‘computer icon’ button. The VTx Setup program will then prompt the user to ‘Choose Program Group’. If desired, the user can change the program group from the default. Click on the ‘Continue’ button. After installing the VETA Tx Configurator program, the VTx Setup program will put up a window indicating that setup was completed successfully. Click ‘OK’. 3.3 Product Control & Status Monitoring Approach Advanced control of VETA transmitters is available by using the configurator program. Typically, users may want to customize the factory provided default configuration based control settings (such as frequency, modulation parameters or scrambling keys). 100-M0143X3 GMS Inc. doing business as Cobham Tactical Communications and Surveillance 14 of 49 www.cobham.com/tcs Cobham transmitters and receivers provide programmable presets or configurations that can be set up through special programming software by Administrators. The user selects configurations though an application program. The VMT allow 16 configurations and the VT allows 8 configurations. Administrators define the configurations for specific applications. Each configuration completely defines all of the unit parameters including center frequency, modulation parameters, video and audio parameters, user data and encryption. Field personnel will select specific configuration via pre-determined guidance from the Administrators. Matching the transmitter operation to the receiver operation is as simple as selecting the same configuration for both. For example: If the transmitter is set to configuration #3, then the receiver needs to be set to configuration #3 for them to operate together. 3.4 VETA Tx Configurator Functions The VETA Tx Configurator program provides the user access to different configuration, control and monitoring options. Up to 32 VETA VTx units can be connected to the GUI. When the VETA Tx Configurator program is launched, it will detect all the VETA Tx units connected to the computer. However, it will not detect units connected to the computer after the program is launched. In this case, the user should close the program and open it again. If the program cannot find any valid devices connected, the screen shown in Figure 12 will be displayed. The user can exit the program or check the connection and then try again. Figure 12 – VETA Tx Configurator If the program finds valid devices on any com ports, it opens up the main control window. The program generates a message while collecting unit information. The main window is shown in Figure 13. 100-M0143X3 GMS Inc. doing business as Cobham Tactical Communications and Surveillance 15 of 49 www.cobham.com/tcs Figure 13 – VETA Tx GUI Main Screen As the figure shows, the application window consists of tab groups of associated functions and a status / connection area at the bottom of the window. The status / connection area remains visible apart from which tab is active. 3.5 Access levels As was described previously, the VETA Control software has two levels of access – a User level and an Administrator level. To have full access to the controls, it is necessary to enter the password provided by Cobham into the Administrator Login window. The Options pull-down menu provides access to this window. The password can only be changed by the factory. User level access only allows changing the predefined configuration groups. 3.6 Transmitter Differences The two basic transmitter types (VT and VMT) have different feature sets. Table 1 details these differences. 100-M0143X3 GMS Inc. doing business as Cobham Tactical Communications and Surveillance 16 of 49 www.cobham.com/tcs Table 1 – Transmitter Differences Function VMT VT Output High Low Switch 0 = low level 1 = high level (default) 0 = Low Power 1 = Medium Low Power 2 = Medium High Power 3 = Full Power Output Attenuation -MedLow Power NOT AVAILABLE Used Video Profile Used NOT AVAILABLE Audio PID NOT AVAILABLE Used Audio PID 1 Used NOT AVAILABLE Audio PID 2 Used NOT AVAILABLE Audio 2 Enable Used NOT AVAILABLE Core Temperature Used NOT AVAILABLE Video Stream ID Used NOT AVAILABLE Audio Stream ID Used NOT AVAILABLE Transport Stream Version Used NOT AVAILABLE Provider Name Used NOT AVAILABLE Transport Stream Switch Used NOT AVAILABLE Available Configurations 16 8 100-M0143X3 GMS Inc. doing business as Cobham Tactical Communications and Surveillance 17 of 49 www.cobham.com/tcs 4. Pull-Down Menu Definitions This section discusses the Pull-Down Menus that include File, Options and Help. 4.1 File This menu contains only one selection - Exit. The Exit selection closes and exits the PC control software. Alternatively, the X box in the upper right hand corner of the window can be used to exit the program. Figure 14 – File Pull-Down Menu 4.2 Options The number of selections in this menu depends on login level. For user level, this menu contains only one menu – Administrative Login (Figure 15), which allows the user to access more selections and widen the control by entering password (Figure 16) that can be obtained from Cobham. Contact the factory for the password. Figure 15 – Options Initial Pull-Down Menu Figure 16 – Administrator Login Administrator login (see Figure 17) adds the following selections: Log Off Load Configuration File Write License Code Write License File Create Log File 100-M0143X3 GMS Inc. doing business as Cobham Tactical Communications and Surveillance 18 of 49 www.cobham.com/tcs Change Administrator Password Disable Login Requirement Figure 17 – Options Full Pull-Down Menu 4.2.1 Load Configuration File This is a special feature that allows the Administrator to change all the parameters of the unit at once. Cobham can provide Configuration Files that can be modified before loading into the unit. Examples of Default Configurations Files are shown in Table 12 and Table 13 , Configuration Files are based on a Microsoft Excel® spreadsheet. To use this feature, Microsoft Excel® must be installed on the computer. After the desired changes are made in the file, save and close it. Ensure that no other Excel file is open during loading. Click Load Configuration File and select file from desired location. 4.2.2 Write License Code/File This option allows the user to enable features that are optional (e.g. advanced encryption) when new licensing option is purchased, without sending the unit back to factory. Depending on the version of the unit, the user will need to load Code or File. Contact Cobham for details. 4.2.3 Restore Default Configuration This option should be selected only after new Firmware was loaded into the unit. 4.2.4 Log Off Clicking Log Off will restrict access to User Parameters only. 4.2.5 Create Log File Clicking on this selection will create a log file in the same directory as the application. E.g. if the program is on the desktop, then a Logfiles subfolder will be created automatically for the desktop. This folder will contain a text file with the time stamp in the file name. The log file lists all the commands that were executed. Logging can be disabled by clicking the Disable Logging menu selection (see Figure 18). 100-M0143X3 GMS Inc. doing business as Cobham Tactical Communications and Surveillance 19 of 49 www.cobham.com/tcs Figure 18 – Options Pull-Down Menu – Disable Logging 4.2.6 Change Administrator Password User’s that have the administrator password can change that password. Clicking on Change Administrator Password brings up the window shown in Figure 19. Figure 19 – Change Administrator Password Enter the current password and the new password in the appropriate fields. Reenter the new password in the last field. If the current password entered is authenticated, and the two entries of the new password are the same; the administrator password is changed (Figure 20). The administrative password has no restricting characteristics. Figure 20 – Password Changed 100-M0143X3 GMS Inc. doing business as Cobham Tactical Communications and Surveillance 20 of 49 www.cobham.com/tcs 4.2.7 Disable Login Requirement The need for an administrative password can be eliminated by this menu as well. This means that the menus that were previously password restricted are available to anyone using the application. When the Disable Login Requirement is clicked, the application responds with the window shown in Figure 21. The application also shows a check mark (Figure 22) next to the menu selection indicating that the option is active. Figure 21 – Login Is No Longer Required Figure 22 – Re-enable Login Requirement The login requirement can be re-enabled by clicking the Disable Login Requirement to toggle the option. The application responds with the window shown in Figure 23. Figure 23 – Login Is Now Required 100-M0143X3 GMS Inc. doing business as Cobham Tactical Communications and Surveillance 21 of 49 www.cobham.com/tcs 4.3 Help Help menu has three selections: Manuals, FW Version and About. 4.3.1 Manuals This manual is attached to the Control Software. Clicking this selection will launch this manual as a PDF file. See Figure 24 and Figure 25. Figure 24 – Help Pull-Down Menu Figure 25 – Help Pull-Down Menu - Manuals 4.3.2 FW Version This menu contains the Firmware Version of the unit, FPGA Version number of the firmware and the Serial number of the unit. See Figure 26. Figure 26 – VMT FW Version Window 4.3.3 About Choosing this selection displays the Software version of the PC control program. See Figure 27. 100-M0143X3 GMS Inc. doing business as Cobham Tactical Communications and Surveillance 22 of 49 www.cobham.com/tcs Figure 27 – About Box Window 100-M0143X3 GMS Inc. doing business as Cobham Tactical Communications and Surveillance 23 of 49 www.cobham.com/tcs 5. Status Elements Details The Status Area includes Status, Connection and Front Panel groups. 5.1 Status Group The Status group has five indicators. The RF output status indicates the output power level. The Video Lock status is an indication that the transmitter has line-locked onto the analog video input signal. Scrambling Status indicates that outgoing signal is scrambled (Yellow). Channel Rate Displays channel rate depending on Modulation parameters. Displayed in Mega Bits per Second (Mbps) FPGA Core Temperature Displays the Core Temperature in Celsius of the VMT FPGA. Figure 28 – VMT Status Figure 29 – VT Status 5.2 Connection Group The left part of drop-down box shows communication ports that had VETA transmitter units connected at the opening of the Control GUI. The transmitter type and the serial number of the corresponding unit are displayed next to the communication port (Figure 30). Figure 30 – Connection If more than one device is connected, the user can switch between devices by clicking on the desired COM port in the drop-down list. The main window will be refreshed and the parameters of the corresponding device will be displayed. (Figure 31) 100-M0143X3 GMS Inc. doing business as Cobham Tactical Communications and Surveillance 24 of 49 www.cobham.com/tcs Figure 31 – Multiple Transmitter Availability The indicator on the left of the drop-down list indicates the connection status. When the indicator is green, the device is operating properly. When the indicator is gray, communications with the transmitter has been lost and the application is trying to reestablish the connection (Figure 32). When it is red, the connection has been lost and the application is requesting user direction (Figure 33 and Figure 34 ). Figure 32 – Trying to Reestablish the Connection Figure 33 – Connection Lost Figure 34 – Request for User Direction 5.3 Front Panel Control Group This group consists of a Current Configuration box (Figure 35 and Figure 36). This field reports the last loaded configuration number. Changes applied after configuration has been loaded are saved immediately into current configuration. The VMT has the additional option to disable the rotary switch by checking the appropriate check box. Figure 35 – VT Front Panel Control Group 100-M0143X3 GMS Inc. doing business as Cobham Tactical Communications and Surveillance 25 of 49 www.cobham.com/tcs Figure 36 – VMT Front Panel Control Group 100-M0143X3 GMS Inc. doing business as Cobham Tactical Communications and Surveillance 26 of 49 www.cobham.com/tcs 6. TAB Definitions 6.1 Main Page Tab The VETA Transmitter Control software contains eight tabs: Main Page, Video Settings, Audio Settings, Security, User Data, Special Setup, Transport Stream, and Chaining tabs (see Figure 13). It also has three pull-down menus consisting of the File, Options and Help. Under the menus are additional pull down submenus and selections which are explained in detail later in this document. The Main Page tab consists of the RF Parameters group, the Configuration Group and the Video/Audio group. (See Figure 37) Figure 37 – Main Page Tab 6.1.1 The RF Parameters Group This group (shown in Figure 38) consists of the following fields as shown Table 2 below along with explanation of each. Any field marked “R” in the column labeled ‘R/W”, indicates that the field is a “read’ only (a status indicator). The user cannot change it. Any field marked “R/W” or Read/Write, indicates that the value can be changed by the user. 100-M0143X3 GMS Inc. doing business as Cobham Tactical Communications and Surveillance 27 of 49 www.cobham.com/tcs Figure 38 – RF Parameters Group Table 2 – RF Parameters Field Definitions Field R/W RF Frequency R/W Description RF output frequency. Desired frequency is entered in MHz. Determines the BW of transmit signal. Desired bandwidth is selected from the following values: Bandwidth R/W Narrow Band Modes (2.5MHz, 1.25MHz and 625KHz BW) are optional and will not be selectable if they have not been licensed. Desired modulation guard interval size is selected; values are dependent on the COFDM Mode bandwidth selected. For DVBT Bandwidth Modes (8 MHz, 7 MHz, and 6 MHz): Guard Interval R/W For Narrow Band Modes: 100-M0143X3 GMS Inc. doing business as Cobham Tactical Communications and Surveillance 28 of 49 www.cobham.com/tcs Field R/W Description Desired modulation FEC rate is selected; values are dependent on the COFDM Mode bandwidth selected. For DVBT Bandwidth Modes FEC R/W For Narrow Band Modes: For DVBT Bandwidth Modes OFDM Mode R/W OFDM Polarity R/W For Narrow Band Modes: Desired OFDM polarity is selected, Output Mode controls power to the Power Amplifier / RF portion of the Transmitter and allows the following values: Output Mode R/W [NOTE: If ‘OFF’ is selected, the transmitter can still be configured] Output power level. Desired output level of VT is selected: Output Power Level R/W Desired output level of VMT is selected: After changing any “R/W” field with a new value the user must click on the APPLY button for the change to take effect. The change that did not yet take place appears in a magenta color. This indicates that the displayed parameters are different from the current unit settings. Clicking on the Query button will cancel the operation and restore the display to the current unit values. 100-M0143X3 GMS Inc. doing business as Cobham Tactical Communications and Surveillance 29 of 49 www.cobham.com/tcs 6.1.2 Video / Audio Group This group (see Figure 39) consists of fields that also appear on the Video Settings and Audio Settings tabs. They allow for quick examination and setting of the key video and audio parameters. The fields are described in Table 3. Figure 39 – Video / Audio Group Table 3 – Video / Audio Field Definitions Field R/W Description Desired video input format is selected from the following values: Video Input R/W Note: SDI is optional and will not be selectable if SDI has not been licensed. Desired mode of operation of the audio encoder is selected from the following values: Audio Encoder R/W . Desired sampling rate of the Audio signal is selected from the following values: For NICAM AUDIO: Audio Sample Rate R/W . For MPEG AUDIO: 100-M0143X3 GMS Inc. doing business as Cobham Tactical Communications and Surveillance 30 of 49 www.cobham.com/tcs 6.1.3 Configuration Group The Configuration Group (see Figure 40) consists of a pull down box, in which one of sixteen configurations can be selected, along with a LOAD button. To change the Configuration Group, select the desired configuration number in the Target Configuration drop-down list. Then click the Load button. This will update the configuration in the unit. In the Front Panel Control group (located at the lowest right corner), there is a read only box, which shows current configuration. The VETA transmitter can store (in memory) 16 configurations. These are pre-configured before leaving the factory but can be changed by the user. These 16 configurations are also set to match the receiver before leaving the factory. Figure 40 – Configuration Group Warning: If a configuration group is changed, it may not match the receiver configuration group and the digital link may no longer work. Keep in mind the receiver and transmitter configuration groups settings must match. What you should know about configuration groups: Any field that is a read/write (R/W) can be, and is, stored in a configuration group. A group is selected by choosing one of the 16 groups and then clicking on the button. This action loads all R/W fields (under any of the tabs or pull down menus, not just the tab) with the stored values of that group. A group can be changed by editing an R/W field and then clicking on the button (“APPLY” also automatically saves). All R/W field values (under any of the tabs or pull down menus, not just the tab) are stored to the current configuration group (the current selected group). For example, assume that current group 1 is selected and the existing RF Frequency is set at 2300 MHz. If the user wants to change the RF frequency to 2250 MHz, the user changes the RF Frequency field to 2250 and then clicks on the group 1. button. The new frequency is automatically saved to the current 6.2 Video Settings Tab This tab allows for various video parameters (see Figure 41) to be selected. It consists of a Video Selections section. The fields are explained in Table 4. Once again, you must click on the values have been selected in order for them to take effect. 100-M0143X3 GMS Inc. doing business as Cobham Tactical Communications and Surveillance button after new 31 of 49 www.cobham.com/tcs Figure 41 – Video Settings Tab Figure 42 – MPEG4 Settings Table 4 – Video Selections Field Definitions Field R/W Description Desired video input format is selected from the following values: Video Input R/W Note: SDI is optional and will not be selectable if SDI has not been licensed. 100-M0143X3 GMS Inc. doing business as Cobham Tactical Communications and Surveillance 32 of 49 www.cobham.com/tcs Field R/W MPEG Mode R/W MPEG4 Frame Rate R/W MPEG4 Video Sharpness R/W MPEG4 Encoding Option R/W Description This chooses the encoding when in NB only, DVB-T is always encoded MPEG2. MPEG4 is optional and must be licensed with 2.5 MHz, 1.25 MHz, and 625 KHz bandwidth. This is only valid when RF Bandwidth is in NB mode and MPEG4 has been licensed. In some NB settings the video bit rate may be too low for clear pictures to be decoded, lowering the frame rate can help increase the picture clarity. Only valid when encoding MPEG4 when in NB mode. Sharpness is related to the clarity of detail and edge definition of an image. Encoding of video information may remove some higher frequency content in the original video information. The decoded information may appear smoothed and/or somewhat fuzzy when displayed. To improve video image quality additional algorithms might be implemented by setting this parameter to Sharp. The default is low delay interlace. Other modes are available, but advice should be sought before selection. Desired Video Horizontal resolution is selected from the following values: Video Horizontal Resolution R/W Video Profile R/W GOP Length R/W Default for NTSC is 704. Changing the horizontal resolution to lower values will make the coded picture softer. Care should be taken to match the horizontal resolution to the resolution of the camera connected to the transmitter; this will give best image results. Selects desired Video Profile: 4:2:2 is optional and must be licensed in order to be selectable. By default MPEG2 GOP length is set to a low delay stripe refresh mode (GOP = 0). This option allows the user to set the GOP length for a standard GOP structure at the expensive of an additional delay. Valid GOP values range from 1 – 15 (Where a value of 1 is intra mode only) 100-M0143X3 GMS Inc. doing business as Cobham Tactical Communications and Surveillance 33 of 49 www.cobham.com/tcs 6.3 Audio Settings Tab This tab allows for various audio parameters (see Figure 43, Figure 44, and Figure 45) to be selected. It consists of Audio Selections section. The fields are explained in Table 5 – Audio Selections Field Definitions. Once again, you must click on the take effect. button after new values have been selected in order for them to Table 5 – Audio Selections Field Definitions Field R/W Description Desired mode of operation of the audio encoder is selected from the following values: Audio Encoder R/W Desired sampling rate of the Audio signal is selected from the following values: For NICAM AUDIO: Audio Sample Rate R/W . For MPEG AUDIO: MPEG Audio Bit Rate R/W Cobham recommends using 256kbps as a minimum to avoid distortion. This is not applicable when in NICAM audio encoder mode. This control is used to define the audio gain to be applied to the audio input signal. 0dB is used for line level audio. Audio Input Level R/W 12dB, 24dB, 36dB and 48dB of gain can be applied for microphone inputs. 100-M0143X3 GMS Inc. doing business as Cobham Tactical Communications and Surveillance 34 of 49 www.cobham.com/tcs Field R/W MPEG Audio Offset R/W Description Audio PTS offset when in MPEG audio compression. Default is 0 Figure 43 – Audio Encoder OFF Settings Figure 44 – Audio Encoder NICAM Settings 100-M0143X3 GMS Inc. doing business as Cobham Tactical Communications and Surveillance 35 of 49 www.cobham.com/tcs Figure 45 – Audio Encoder MPEG Settings 6.4 Security Tab This tab allows administrator to enable or disable encryption, to choose type of encryption to be used and enter the encryption key; ABS (supplied with link) and optional AES or AES/BCRYPT. AES and AES/ BCRYPT have 2 sub selections: 128 and 256. 128 requires 32 hex symbols for the Key, while type 256 is more secure and requires 64 hex symbols. If the transmitter in 128 or 256 modes, then the incoming signal can be decoded if the keys are matched or the incoming signal is not encrypted. If encryption is turned OFF, then the Security Key window is displayed as shown in Figure 46. The Scrambling Mode pull-down list shows all of the encryption modes. However if the unit does not have the corresponding license, it will return value that is licensed in the unit. Security key field is different for different encryption modes. The modes that require 64 character key (AES, B-crypt) have to two boxes for lower and upper parts of the key. See Figure 48. The user must enter the correct key, which must match the key of the receiver. Clicking on the button will notify the user if the incorrect number of characters have been entered. The user will not be able to exit this window unless the button is clicked or the correct amount of characters are entered. 100-M0143X3 GMS Inc. doing business as Cobham Tactical Communications and Surveillance 36 of 49 www.cobham.com/tcs Figure 46 – VMT Security Tab Figure 47 – VT Security Tab 100-M0143X3 GMS Inc. doing business as Cobham Tactical Communications and Surveillance 37 of 49 www.cobham.com/tcs Table 6 – Encryption Field Definitions Field R/W Description This field allows user to select between Scrambling Mode R/W (AES 128, AES 256, AES / BCRYPT 128, and AES/ BCRYPT 256 are optional). Security Key W When any scrambling option is selected, the user is prompted to enter an encryption key. The difference between scrambling modes is the length of the key measured in characters: 8 for ABS, 32 for AES/BCRYPT 128, or 32 upper and lower (64 characters total) for AES/BCRYPT 256. For security purposes, the Security Key cannot be read back from any Cobham product. Figure 48 – VMT Security Tab in ABS Mode Figure 49 – VMT Security Tab in AES 128 Mode 100-M0143X3 GMS Inc. doing business as Cobham Tactical Communications and Surveillance 38 of 49 www.cobham.com/tcs Figure 50 – VMT Security Tab in AES 256 Mode Figure 51 – VMT Security Tab in AES/BCRYPT 128 Figure 52 – VMT Security Tab in AES/BCRYPT 256 6.4.1 VT Front Panel Override The VT has an integral front panel (Figure 53) that can toggle the scrambling mode off and on. When this toggle is used, changes are reflected in the application’s status group. 100-M0143X3 GMS Inc. doing business as Cobham Tactical Communications and Surveillance 39 of 49 www.cobham.com/tcs Figure 53 – VT Front Panel Figure 54 shows the relationship between the status group and security tab displays. Status Group Security Tab Figure 54 – VT Front Panel Override Application control of scrambling can be regained by clicking the Resume Control button. 6.5 User Data Tab This tab (see Figure 55) allows the administrator to turn USER DATA ON or OFF. If turned ON, the transmitter injects any User Data into the transmitted stream. Refer to the corresponding transmitter’s operations manual for data inputs. Table 7 – User Data Field Definitions Field R/W Description This field allows user to select between the following values: User Data R/W When the control is set to other than OFF, the user can introduce RS232 data to the data input port of the receiver. 100-M0143X3 GMS Inc. doing business as Cobham Tactical Communications and Surveillance 40 of 49 www.cobham.com/tcs Field R/W Description This field specifies the baud rate of the RS232 data component. It can be set to: Input Data Baud Rate R/W Figure 55 – User Data Tab 6.6 Special Setup Tab Special Setup is configured at the factory for specific application and for advanced operations only. Consult Cobham before changing any of these parameters. This selection brings up special parameters (see Figure 56). Selections are described in Table 8. 100-M0143X3 GMS Inc. doing business as Cobham Tactical Communications and Surveillance 41 of 49 www.cobham.com/tcs Figure 56 – Special Setup for VMT Figure 57 – Special Setup for VT 100-M0143X3 GMS Inc. doing business as Cobham Tactical Communications and Surveillance 42 of 49 www.cobham.com/tcs Table 8 – Special Setup Field Definitions Field R/W Description VMT only The High power PAD adds additional attenuation onto the nominal Full power output. This can be used to lower the maximum power out of the VMT. The Default value is 0dB but, the value can be entered in 0.25dB steps to 31.75dB maximum. This value must be less than the Low Power Output PAD value. High Power Output PAD R/W Medium High Power Output PAD R/W VT only Medium Low Power Output PAD R/W VT only This value determines the Power output of the transmitter when in Low Power Mode. The Default value is 32dB but the value can be entered in 0.25dB steps to 0.25dB minimum. This value must be higher than the High Power Output PAD value. Selectable Low Power Output PAD R/W Sleep Mode R/W Putting the VMT in sleep mode will disable all functionality except the communication between the VMT and the RS232 control. This is the lowest current usage mode of the transmitter (besides turning the unit off). Sleep If No Video Lock R/W Default is normal, when in Sleep if no Video, the transmitter will be placed in sleep mode when no video is input to the Transmitter. Audio 2 Enable R/W Function enables 2nd set of single ended audio. 6.7 Transport Stream Tab The Transport Stream Tab contains information about the transport stream and allows the user to make changes to these parameters. The Transport Stream Settings Tab is shown in Figure 58 and Figure 59. Keep in mind you must click on the button in order for new values to take effect. Not that the ID and PID values can be returned to their default values (see Table 10) by entering in a value of ‘0’ (And clicking Apply). 100-M0143X3 GMS Inc. doing business as Cobham Tactical Communications and Surveillance 43 of 49 www.cobham.com/tcs Figure 58 – Transport Stream for VMT Figure 59 – Transport Stream for VT See Table 9 for an explanation the fields. Table 9 – Transport Stream Field Definitions Field R/W Description Narrow Band Service Name R/W Allows for a unique service name to be applied to the Transmitter while broadcasting in Narrow Band Mode 100-M0143X3 GMS Inc. doing business as Cobham Tactical Communications and Surveillance 44 of 49 www.cobham.com/tcs Field R/W Description DVB-T Service Name R/W Allows for a unique service name to be applied to the Transmitter while broadcasting in DVB-T Mode Provider Name R/W (VMT Only) User can enter a provider name for the Transmitter Video Stream ID R/W (VMT Only) User can set these to specific values or keep the default. Audio Stream ID R/W (VMT Only) User can set these to specific values or keep the default. Transport Stream Version R/W (VMT Only) User can set these to specific values or keep the default. PCR PID R/W User can set these to specific values or keep the default. PMT PID R/W User can set these to specific values or keep the default. Video PID R/W User can set these to specific values or keep the default. Data PID R/W User can set these to specific values or keep the default. Audio PID R/W (VT Only) User can set these to specific values or keep the default. Audio PID 1 R/W (VMT Only) User can set these to specific values or keep the default. Audio PID 2 R/W (VMT Only) User can set these to specific values or keep the default. Table 10 – Default PID Definitions Chain Number PMT PID Video PID Audio PID Data PID PCR PID 0 0x0020 0x012C 0x00C8 0x0064 0x1FFE 1 0x0021 0x012D 0x00C9 0x0065 0x1FFD 2 0x0022 0x012E 0x00CA 0x0066 0x1FFC 3 0x0023 0x012F 0x00CB 0x0067 0x1FFB 4 0x0024 0x0130 0x00CC 0x0068 0x1FFA 5 0x0025 0x0131 0x00CD 0x0069 0x1FF9 6 0x0026 0x0132 0x00CE 0x006A 0x1FF8 7 0x0027 0x0133 0x00CF 0x006B 0x1FF7 8 0x0028 0x0134 0x00D0 0x006C 0x1FF6 9 0x0029 0x0135 0x00D1 0x006D 0x1FF5 100-M0143X3 GMS Inc. doing business as Cobham Tactical Communications and Surveillance 45 of 49 www.cobham.com/tcs 6.8 Chaining Tab This tab allows for customization of the chaining feature within the VETA transmitters. Chaining Input allows the user to set the Tx to act as a relay or to allow multiplexing of transport streams within one Tx. The chaining out feature outputs the transport stream of the Tx to the ‘Chaining out’ interface. Keep in mind you must click on the button in order for new values to take effect. Figure 60 – Chaining for VT Figure 61 – Chaining for VMT 100-M0143X3 GMS Inc. doing business as Cobham Tactical Communications and Surveillance 46 of 49 www.cobham.com/tcs Figure 62 – Chaining for VMT – Manual Video Bit Rate Table 11 – Chaining Setup Field Definitions Field R/W Chaining Input R/W Chaining Output R/W Transport Stream Control R/W Chaining Status R/W Chain Number R/W Video Bit Rate R/W Description Off is when using the transmitter as a standard transmitter. Relay is used for purely repeater applications. One will notice that Video Input, Audio Encoder and Data ON/OFF are all set to OFF automatically once RELAY is set. ON is used to multiplex an additional digital stream onto the RF channel. This has the effect of dividing the channel rate equally between the chaining interface and the local video/audio/user data to be sent over the RF link. This will stream the encoded digital stream out of the Chaining Port VMT Only This field is reserved for future expansion. This should be set to Chaining In, Chaining Out. Active or Not Active. Chaining Status will register whether a valid chain is input to the VMT, this is only activated when the Chaining Input is set to ON or Relay. Selectable from 0-9. When multiplexing multiple digital streams, each stream must have a unique chain number. This is used to prevent SI table overlaps between the digital streams. This shows the amount of RF channel rate allocated to the local Tx Video Source. This number will divide by two once the Chaining Input is set to On, meaning half of the RF channel is now reserved for the Chaining input. The video bit rate will go to 0.00, when the Chaining Input is set to Relay, meaning all the RF channel is reserved for the Chaining Input Care should be taken if user chooses to manually set the video bit rate for the local video input as this will change the allocation of the channel rate. 100-M0143X3 GMS Inc. doing business as Cobham Tactical Communications and Surveillance 47 of 49 www.cobham.com/tcs 7. Default Configurations Table 12 – Typical VT Default Configurations File PARAMETER Config # Device Address COFDM BW RF Frequency Output Mode COFDM Mode DVB-T Modulation GI DVB-T Modulation FEC NB Modulation GI NB Modulation FEC Sp Inversion Output Power Level Video Input Audio Encoder MPEG Audio Sample Rate Audio Input Gain Auxiliary Data ON/OFF Input Data Rate Scrambling Chaining Output Attenuation: Medium High Power Output Attenuation: Medium Low Power Output Attenuation: Low Power Horizontal resolution Sleep Mode Sleep in no Video Front Panel Lock MPEG Mode MPEG4 Frame Rate Sharpness Encoding Option C2 glod gadd owid ofre oout odmo odgu odfe ogua ofec ospe ohls vinp aenc ampr alev dinp dbau zscr cinp olev olml ollv ehor gsle vsle gfpl eenc efrm esha ecmd CONFIGURATIONS 1 1 2 2 1 2 3 1 2 4 1 2 5 1 2 6 1 2 7 1 2 8 1 2 4700 1 0 1 0 1 0 0 3 4 11 8 0 1 3 0 0 3.25 6 32 0 0 0 0 0 0 0 3 4400 1 0 1 0 1 0 1 3 4 11 8 0 1 3 0 0 3.25 6 32 0 0 0 0 0 0 0 3 4500 1 0 1 0 1 0 0 3 4 11 8 0 1 3 0 0 3.25 6 32 0 0 0 0 0 0 0 3 4600 1 0 1 0 1 0 0 3 4 11 8 0 1 3 0 0 3.25 6 32 0 0 0 0 0 0 0 3 4700 1 0 1 0 1 0 0 3 4 11 8 0 1 3 0 0 3.25 6 32 0 0 0 0 0 0 0 3 4800 1 0 1 0 1 0 0 3 4 11 8 0 1 3 0 0 3.25 6 32 0 0 0 0 0 0 0 3 4900 1 0 1 0 1 0 0 3 4 11 8 0 1 3 0 0 3.25 6 32 0 0 0 0 0 0 0 3 5000 1 0 1 0 1 0 0 3 4 11 8 0 1 3 0 0 3.25 6 32 0 0 0 0 0 0 0 3 *Select MPEG4 only for Narrowband **Select Full Rate only for Low Delay Encoding 100-M0143X3 GMS Inc. doing business as Cobham Tactical Communications and Surveillance 48 of 49 www.cobham.com/tcs Table 13 – Typical VMT Default Configurations File *Select MPEG4 only for Narrowband **Select Full Rate only for Low Delay Encoding 100-M0143X3 GMS Inc. doing business as Cobham Tactical Communications and Surveillance 49 of 49 www.cobham.com/tcs