1
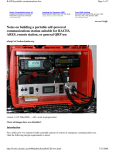
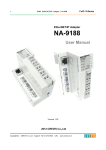
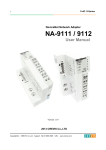
EBiz Micro
Membership
Wordpress Plug-in
Overview and
5 Step Quick Start Guide
© 2012 Syncnet
eBiz Micro Membership Wordpress Plug-in
EBiz Micro Membership is a basic, easy to use Wordpress plug-in that adds “membership”
functionality to your Wordpress blog. The real benefit of this plug-in is that it seamlessly
integrates PayPal or ClickBank payment processing into your blog allowing you to charge for
contact and automatically collect payments from your users.
Fully Automated Membership System
EBiz Micro Membership fully automates your membership system from the user registration to
confirmation of payment and account activation. EBiz Micro Membership integrates with the
subscription and notification services of both PayPal and ClickBank to fully automate the
subscription billing and payment process. EBiz Micro Membership generates the required
PayPal or ClickBank “Subscribe” buttons on the fly, so you don’t need to add or change any
Wordpress code.
Fast Activation & Install
EBiz Micro Membership installs just like any other Wordpress plug-in. You can use the
Wordpress Manual installation process or you can install “the old way” - using FTP to place the
plug-in in your Wordpress plug-ins directory.
Three (5) Membership Levels
EBiz Micro Membership creates and manages three payment levels:
•
Free – the user has registered thru Wordpress but has chosen not to pay for a subscription
•
Standard – the user has paid for the “standard” subscription
•
Premium – the user has pain for a “premium” level subscription
•
Executive – the user has paid for an “executive” level subscription
•
Elite – the user has paid for an “elite” level subscription
You don't have to implement all five subscription levels; for example, you may only use the “Paid”
subscriptions. That's fine – EBiz Micro Membership still works great.
Flexible Subscription Intervals
You can set how often the PayPal or ClickBank subscription service will automatically collect
payments, anything from 1 day to 9999 years.
Content Teasers and Content Protection
With EBiz Micro Membership every post or page of your blog can have a mix of unprotected text
(content everyone can view) and protected text (only viewable by registered users at the proper
subscription level). This allows you to create “teaser” text that everyone can view but hide the
remainder of the content from users who have not paid to see it.
Start Your Own Affiliate Program
EBiz Micro Membership fully integrates with ClickBank allowing you to recruit an army of
ClickBank affiliates to promote and send traffic to your membership site. We highly recommend
Clickbank as your payment processor because of their network of 100,000+ affiliates.
EBiz Micro Membership - 5 Step Quick Start
STEP #1 Install the Plug-in(s)
Currently there are three (3) plug-ins for EBiz Micro Membership. There's EBiz Micro
Membership itself and its companions, EBiz Micro Membership Button Editor, and EBiz Micro
Membership Gradual Content. These plug-ins are installed like any other Wordpress plug-ins.
The companion plug-ins are separate (for now) and add a "$" button to the editor window for
making EBiz Micro Membership payment buttons and add support for gradual content delivery.
If you're unfamiliar with installing Wordpress plug-in, this link has excellent, step-by-step
installation instructions:
How to Install a Wordpress Plug-in
You will have to use installation option 2 (Manually uploading a plug-in through Wordpress) or 3
(Manually uploading a plug-in via FTP) for these plug-ins and each will be installed separately.
STEP #2 Configure EBiz Micro Membership
Go to EBiz Micro Membership configuration page (Settings | EBiz Micro Membership
Configuration). The options there are explained by help text to the right of the page. Here are
the options you should set immediately:
1. Your email address that will be accepting PayPal payments
2. An authorization code (make one up)
3. Your ClickBank Vendor ID and Authorization Key (if you're using ClickBank)
4. Check the Use CB or PayPal for Subscriptions box to automatically bill your users. If you
check this box, make sure you select the appropriate payment processor under Subsr.
Processing
5. Fill in default values for the Item Name, Item Number, Payment Amount, Currency Code, and
Payment Period for the primary subscription. These values can be overridden by payment
buttons you'll place on your subscription payment page.
6. Choose your own Subscription Payment Page Title or accept the default “[pay]” and use that as
the title of your Subscription Payment Page
7. If you're using the Gradual Content Delivery feature, set the Top Level Course Category to
the category (your choice) that will hold all of your dripped content. (More on this later.)
STEP #3 Create Your Subscription Payment Page
This is the most difficult aspect of the installation. That's because EBiz Micro Membership
doesn't use your Wordpress theme for the Subscription Page. Consequently, to get it to look
decent, you'll have to stick some HTML on the page.
Here's sample code you can use to start out with:
<div style="width: 500px;">
Yes! For just $1 per week I want to have full access to all of the information on the How
to Do It Fast web site.
[paybutton]$1 Subscription|1001[[-STANDARD-]]|1|USD|1|W|[/paybutton]
<hr />No thank you.
I'll take the free access.
I understand the full access offer above is a <strong>one time offer</strong> that is only
available during this signup process and <strong>will never be availabe again</strong>.
[freebutton]Free Subscription|FR1001|0|USD|85|D|[/freebutton]</div>
And the steps to use the sample code:
1. Copy the code above
2. Create a new Wordpress Page.
3. Type [pay] as the title (or whatever you replaced [pay] with in EBiz Micro Membership
Configuration Page)
4. Click on the “HTML” tab
5. Paste the code from this document
6. Click the “Visual” tab
7. Edit the text as you normally would
Without any changes, this page will display like:
You can get creative with your Wordpress editor and make a much more attractive page. When
this page is displayed, it doesn't use your Wordpress theme which sets it apart from your normal
content and lets your subscribers know that something needs to be done. The key here, however,
is in the two buttons – the [paybutton] and the [freebutton]. Notice how EBiz Micro Membership
automatically replaces the button code with the appropriate PayPal or regular button.
*** IMPORTANT ***: You will not see your payment buttons unless you create a test user and
attempt to log in as that user. For details, please see the FAQs at the end of the document.
STEP #4 Configure Your Payment Button(s)
EBiz Micro Membership has a nifty button editor that frees you from having to worry about the
[paybutton] and [freebutton] syntax. Simply click on the $ to display the editor window.
Fill in the Basic information.
Item name, Item No., and Amount are used by nearly
all of the button types.
**IMPORTANT**: If you are using ClickBank, the
“Item No:” field must contain the ClickBank item
number of the product you have created in ClickBank.
Click the Subscription tab and fill in the subscripton
information. Choosing Subscription Type to “Free” will
create [freebutton][/freebutton] tags while the
“Standard” and “Premium” subscription types create
the [paybutton][/paybutton] tags that translate into
either the PayPal or ClickBank “Subscribe” button.
PayPal and ClickBank lets your subscribers sign up for
an initial trial For example:
- Initial Trial Subscription:
- Regular Subscription:
$1 for 14 days
$27 each month after
If you want to offer an initial trial subscription, fill in
the amount and duration below the line.
STEP #5 Protect Your Content
Protecting (hiding) content is easy using EBiz Micro Membership. Simply use [pay][/pay] tags
around protected text to hide content from Free (registered or unregistered) users.
Ex.: [pay]** this text will be hidden **[/pay].
To hide text from Free and Paid users so only Premium subscribers have access, use [payprem][/pay-prem] tags.
Here's a more visual example. If the code in your post or page looks like
this [pay]then this text would be hidden from all unpaid subscribers
(registered or not).[/pay]
When the unpaid user visits that post or page, it will look like this:
Here's a more visual example. If the code in your post or page looks like …
Login/Register to see more
The Login/Register to see more is a link to your Subscription Payment Page and the text is
configurable on the EBiz Micro Membership Configuration page using the “Login Message”
parameter.
To hide text from unregistered visitors so that only registered users (Free, Standard, Premium,
Executive, and Elite) subscribers have access, use [free-reg][/free-reg] tags.
To hide text from Free and Paid users so only Premium, Executive, and Elite subscribers have
access, use [pay-prem][/pay-prem] tags.
To hide text from Free and Paid, and Premium users so only Executive and Elite subscribers have
access, use [pay-exec][/pay-exec] tags.
To hide text from Free and Paid, Premium, and Executive users so only Elite subscribers have
access, use [pay-elite][/pay-elite] tags.
To hide text from paid subscribers use [free][/free] tags. These tags can be used to hide stuff
from paid members that doesn't relate to them. For example, a single post could tell the free
members what they're missing, while giving different levels of paid members the content without
having to see the "pitch."
Managing User Subscriptions
EBiz Micro Membership uses Wordpress capabilities to record the membership access levels.
EBiz Micro Membership adds three (3) custom capabilities: Read Registered, Read Paid, and
Read Premium. Here's how they're used to define subscription levels.
Capabilities
Membership
Levels
Read Registered
Free
X
Paid
X
X
Premium
X
X
X
Executive
X
X
X
X
Elite
X
X
X
X
Read Paid
Read Premium
Read Executive
Here are cropped screen shots from the Wordpress “Edit User” screen.
First, a user with a “Free” subscription:
Next, a user with a “Standard” subscription:
Read Elite
X
Finally, a user with a “Premium” subscription:
Although it's something you shouldn't need to do often, EBiz Micro Membership makes easy work
of managing your subscribers. You can access the screen from the EBiz Micro Membership
User Manager submenu of the Users menu (assuming you have rights to Edit Users – which the
admin does).
This will display EBiz Micro Membership's user administration page.
Enter a Username in the first text box and click the “Get User Info.” button. EBiz Micro
Membership will read the user's information from the database and display it for viewing an
update.
WARNING: If you're using PayPal's subscription processing, you should be very careful when
changing the “Next Payment Date” for a paying customer. Changing it here does not change the
subscription information stored on PayPal. You don't want to get these out of sync.
Managing Category Access
EBiz Micro Membership has the ability to assign access to Wordpress categories by subscription
level. You can place posts in categories and then limit access to subscribers of a certain level.
For example, you may have a category for just your Premium subscribers. Any posts placed in
that category cannot be viewed by logged out, free, or standard
subscribers. The protected categories won't even show up in standard
Wordpress lists (sidebars, menus, search results, widgets, etc.) unless the
user has access to them.
EBiz Micro Membership Category Security can also be used to hide tailor
the display properties of categories that have nothing to do with security
of subscribers. It works well with the Event Calendar plug-in to hide
the category from normal lists and search results. Consequently, the
events show on the event calendar sidebar widget but don't show up
anywhere else.
Category access is managed using EBiz Micro Membership Category Security screen which is
part of the “Posts” menu.
Selecting EBiz Micro Membership Category security from the menu displays EBiz Micro
Membership Category Security screen.
Simply choose the subscription level from the drop-down on the right of the screen. In the
illustration, posts in the Private category can only be viewed by Premium, Executive, and Elite
subscribers. Unregistered (logged out) users, Free, and Standard subscribers would not see the
category on any standard Wordpress lists nor will they see any posts in the Private category.
Managing Gradual Content Delivery
Gradual Content Delivery (also known as “dripped content”) allows you to do a timely release of
your membership site's information instead of making it available all at once.
To use gradual content delivery:
1. In the EBiz Micro Membership Configuration Page (under the Wordpress “Settings”
menu), specify the category that will be the top level category for your dripped content.
You'll create “courses” and modules underneath this category to hold you dripped posts.
2. Build your lists of “Courses” and “Modules”. The name of the courses and modules is not
relevant – name them what you'd like. What is important is their position. Courses
must have as their parent the designated Top Level Course Category – in the example
below; for example, the category “Courses” (set on the EBiz Micro Membership
Configuration Page above).
(Top Level Category)
(Course)
(Module)
(Node)
Course #1 is a course. Notice that its parent is the top level category “Courses”.
Module 1.1 is a module of Course #1 since Course #1 is its direct parent.
Node 1.1.1 is a category that belongs to Module 1.1 and can be used to hold and organize content
for the module.
The dripped content is “secured” by course and “delivered” by module. You'll get a better
understanding of this concept from the EBiz Micro Membership Course Maintenance Screen
discussed next.
3. The EBiz Micro Membership Course Maintenance screen (located under the “Tools” menu)
is where you specify your security and setup the delivery schedule for your content.
Notice that on the line for Course #1 you can “Apply to:” Registered, Standard, and/or
Premium subscribers. Content from Course #1 is available to both Registered and
Premium subscribers. Standard subscribers will not be able to view the content of this
“course”.
For each module you can specify both the order and the delivery schedule. The order is simply a
number between 1 and 9999. The actual number doesn't matter. What is important is the
numeric order. It specifies the order that the modules will be “delivered” (made available) to
your subscribers. The delivery schedule lets you specify “when” the module is delivered. There
are four schedule types:
Not Scheduled: Nothing happens with this module – regardless of the order.
WARNING: Since “delivery” of each module is contingent on the delivery date of the
preceding module, modules positioned after a Not Scheduled module
will also NOT have their content delivered.
Immediate: The content is delivered without delay.
Use Interval: Specify a time period after the prior module that this content
should be delivered.
Specific Date: The date a module should be delivered.
Save the changes using the “Submit Changes” button in the lower left-hand corner of the screen.
4. Before leaving the EBiz Micro Membership Course Maintenance screen, copy the URL for
the maintenance script from the textarea at the very bottom of the window. You'll need it
in the next section.
5. Set the maintenance script to run periodically. Admittedly, this is currently a bit hokey.
But an update will be coming (by the 2nd week of September 2012) that will make this
much smoother.
If you can access your system's Cron process or have something else that serves the same
scheduling function, you can certainly use that. If not, you can use the included U-Cron
plug-in. Install it just like you did the EBiz Micro Membership, EBiz Micro Membership
Button Editor, and EBiz Micro Membership Course Widget plug-ins. Once activated, you
can set it up from the U-Cron menu (under the Posts menu).
Follow the direction you'll find on the screen for entering the time and interval. When it
comes to the Full URL, paste the information that you copied from the EBiz Micro
Membership Course Maintenance screen in Section #4.
6. Use the standard Wordpress Widget editor to place the EBiz Micro Membership Course
Widget on one of your sidebars. Set the “Root Category” to the category you specified as
your “Top Level Course Category” on the config page. This widget displays the courses
and modules that the user has access to. For security reasons, they don't show up
anywhere else.
7.
And, YOU'RE DONE! Now you can place your content (posts) in the module and node*
categories that you need to for your gradual content delivery.
*Nodes are “delivered” along with their parent modules. You can use them to organize your content.
ClickBank Setup
Using ClickBank to handle your subscription payments has one HUGE benefit – you can business partners
from the thousands of ClickBank affiliates. These people will gladly send traffic to and promote your
membership site.
ClickBank is a bit different than PayPal, however. The only thing PayPal is interested in is collecting the
payment. As a result, you give PayPal all of your membership site's product and subscription
information in the payment button.
ClickBank, on the other hand, is product oriented. They capture sales information, payment
information, and affiliate statistics by product. Consequently, your membership site's product and
subscription information is entered into the product area in ClickBank.
Although you must enter in all of the relevant information in the EBiz Micro Membership Button Editor
screen (EBiz Micro Membership uses it to properly post the payment), ClickBank only uses the Item No.
Also, since ClickBank doesn't return any significant product information through its Instant Notification
Service (INS), you must always verify that the information entered using the EBiz Micro Membership
Button Editor corresponds exactly with the product information you have entered into ClickBank.
Here's part of the ClickBank product screen for a sample product.
“Recurring Billing” product type.
Notice that you will probably use the
When you edit your product, there are a few things you'll need to keep in mind:
Item No: You MUST use the same value you
specify as your CB Item No in the Item No:
field of the EBiz Micro Membership Button
Editor
Initial Price: If the Initial Price is not
the same as the Rebill Price, you must
set it up in the EBiz Micro Membership
Button Editor as a Trial. If you specify have
differing ClickBank prices and have selected
“No trial period” in the ClickBank Trial
Period field, your EBiz Micro Membership
Button Editor Duration and Initial
Trial Duration must both be the same as
what is specified in
the ClickBank Frequency field.
Frequently Asked Questions (FAQs)
So far, We've only had one question (We hope that's good!)
Q1:
Why can't I see my button after I've created my payment ([pay]) page.
A1:
Assuming you've created a page with the title that is exactly the same as what you entered as the
Subscription Payment Page Title on the eBiz Micro Membership Configuration Page, the problem is
likely that you're logged in as an exempt user.
You'll need to create a test user and attempt to log in as that user.
Here's what's happening...
In the eBiz Micro Membership Configuration Page you should see your id on the exception list
(near the bottom). If you didn't put it there then eBiz Micro Membership entered the id
automatically to ensure that the administrator can log in without paying for a subscription. Since
eBiz Micro Membership doesn't bother to create payment buttons for accepted id's, you won't see
the buttons if you're logged in with that id.