1
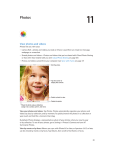
11
Photos
View photos and videos
Photos lets you view your:
Camera Roll—photos and videos you took on iPhone, or saved from an email, text message,
webpage, or screenshot
Shared photos and videos—Photos and videos that you’ve shared with iCloud Photo Sharing
or that others have shared with you (see iCloud Photo Sharing on page 74)
Photos and videos synced from your computer (see Sync with iTunes on page 18)
Tap to view
full-screen.
View your photos and videos. Tap Photos. Photos automatically organizes your photos and
videos by year, by collection, and by moment. To quickly browse the photos in a collection or
year, touch and hold for a moment, then drag.
By default, Photos displays a representative subset of your photos when you view by year
Summarize Photos.
View by events or by faces. Albums you sync with iPhoto 8.0 or later, or Aperture v3.0.2 or later,
View by location. While viewing by year or by collection, tap . Photos and videos that include
location information appear on a map, showing where they were taken.
73
While viewing a photo or video, tap to show and hide the controls. Swipe left or right to go
forward or backward.
Zoom in or out. Double-tap, or pinch and stretch a photo. When you zoom in, you can drag to
see other parts of the photo.
Play a video. Tap
Play a slideshow. While viewing a photo, tap , then tap Slideshow. Select options, then tap
Start Slideshow. To stop the slideshow, tap the screen. To set other slideshow options, go to
Settings > Photos & Camera.
To stream a slideshow or video to a TV, see AirPlay on page 34.
Organize your photos and videos
Create a new album. Tap Albums, tap
to add to the album, then tap Done.
, enter a name, then tap Save. Select photos and videos
Note: Albums created on iPhone aren’t synced back to your computer.
Add items to an existing album. While viewing thumbnails, tap Select, select items, tap Add To,
then select the album.
Manage albums. While viewing your album list, tap Edit.
Rename an album: Select the album, then enter a new name.
Rearrange albums: Drag
.
Delete an album: Tap .
Only albums created on iPhone can be renamed or deleted.
iCloud Photo Sharing
Share streams of photos and videos with people you choose. Friends you’ve chosen who have an
iCloud account—and iOS 6 or later or OS X Mountain Lion or later—can join your stream, view
the photos you add, and leave comments. If they have iOS 7 or OS X Mavericks, they can add
their own photos and videos to the stream. You can also publish your stream to a public website
for anyone to view.
Note: iCloud Photo Sharing works over both Wi-Fi and cellular networks. Cellular data charges
may apply. See Usage information on page 155.
Turn on iCloud Photo Sharing. Go to Settings > iCloud > Photos.
Create a shared stream. While viewing a photo or video, or when you’ve selected multiple
photos or videos, tap , tap iCloud, tap Stream, then tap New Shared Stream. You can invite
people to view your stream using their email address or the mobile phone number they use
for iMessage.
Enable a public website. Select the shared stream, tap People, then turn on Public Website. Tap
Share Link if you want to announce the site.
Add items to a shared stream. View a shared stream, tap , select items, then tap Done. You can
add a comment, then tap Post. You can also add items to a shared stream when you’re viewing
photos or albums. Tap , tap iCloud, tap Stream, then select the shared stream or create a new one.
Chapter 11 Photos
74
Delete photos from a shared stream. Select the photo stream, tap Select, select the photos or
videos you want to delete, then tap . You must be the owner of the stream, or the owner of
the photo.
Delete comments from a shared stream. Select the photo or video that contains the comment.
Touch and hold the comment, then tap Delete. You must be the owner of the stream, or the
owner of the comment.
Rename a photo stream. While viewing Shared Streams, tap Edit, then tap the name and enter a
new one.
Select the photo stream, then
tap People.
Subscribe to a shared stream. When you receive an invitation, tap the Shared tab (
Accept. You can also accept an invitation in an email.
), then tap
Add items to a shared stream you subscribed to. View the shared stream, then tap
items, then tap Done. You can add a comment, then tap Post.
, select
My Photo Stream
View the photos you take with iPhone on your other devices, automatically. Turn on My Photo
Stream in Settings > Photos & Camera. You can also turn on My Photo Stream in Settings >
iCloud > Photos.
Photos you take are automatically added to My Photo Stream when you leave the Camera
app and iPhone is connected to the Internet via Wi-Fi. All photos added to your Camera Roll—
including screen shots and photos saved from email, for example—appear in My Photo Stream.
Photos added to My Photo Stream on your other devices also appear in My Photo Stream on
iPhone. iOS devices can keep up to 1000 of your most recent photos in My Photo Stream; your
computers can keep all My Photo Stream photos permanently.
Note: Photos uploaded to My Photo Stream don’t count against your iCloud storage.
Manage My Photo Stream contents. In the My Photo Stream album, tap Select.
Save your best shots to an album on iPhone: Select the photos, then tap Add To.
Share, print, copy, or save photos to your Camera Roll album: Select the photos, then tap
Delete photos: Select the photos, then tap
.
.
Note: Although deleted photos are removed from My Photo Stream on all your devices, the
original photos remain in the Camera Roll on the device where they were originally taken. Photos
that you save to another album on a device or computer are also not deleted. To delete photos
from My Photo Stream, you need iOS 5.1 or later on iPhone and on your other iOS devices. See
support.apple.com/kb/HT4486.
Chapter 11 Photos
75
Share photos and videos
You can share photos and videos in email, text messages (MMS or iMessage), and tweets, and on
Facebook and Flickr. Videos can be shared in email and text messages (MMS or iMessage), and
on YouTube, Facebook, and Vimeo. You can also share photos and videos using Photo Sharing,
described above.
Tap to share with
a nearby friend
using AirDrop.
Share or copy a photo or video. View a photo or video, then tap
tap the screen to show the controls.
. If you don’t see
,
The size limit of attachments is determined by your service provider. iPhone may compress
photo and video attachments, if necessary.
You can also copy a photo or video, and then paste it into an email or text message (MMS
or iMessage).
Share or copy multiple photos and videos. While viewing by moment, tap Share.
Save or share a photo or video you receive.
Email: Tap to download it if necessary, then touch and hold the item to see sharing and
other options.
Text message: Tap the item in the conversation, then tap
.
Photos and videos that you receive in messages or save from a webpage are saved to your
Camera Roll album.
Chapter 11 Photos
76
Edit photos and trim videos
Filters
Rotate
Auto-enhance
Crop
Remove red-eye
You can edit photos right on iPhone. While viewing a photo full-screen, tap Edit, then tap one
of the tools.
Auto-enhance improves a photo’s exposure, contrast, saturation, and other qualities.
With the Remove Red-eye tool, tap each eye that needs correcting.
Crop by dragging the corners of the grid.
Drag the photo to reposition it, then tap Crop.
Don’t like the results? Tap the tool again to return to the original.
Trim a video. Tap the screen to display the controls, drag either end of the frame viewer, then
tap Trim.
Important: If you choose Trim Original, the trimmed frames are permanently deleted from
Set the Slo-Mo section of a video. (iPhone 5s) Use the vertical bars beneath the frame viewer to
set the section of the video you want to play in slow motion.
Print photos
Print to an AirPrint-enabled printer.
Print a single photo: Tap
, then tap Print.
Print multiple photos: While viewing a photo album, tap Select, select the photos, tap
tap Print.
See AirPrint on page 34.
, then
Photos settings
Settings for Photos are in Settings > Photos & Camera. These include:
My Photo Stream and Photo Sharing
Slideshow
Chapter 11 Photos
77
12
Camera
Camera at a glance
Quick! Get the camera! From the Lock screen, just swipe
edge of the screen to open Control Center, then tap .
up. Or swipe up from the bottom
Note: When you open Camera from the Lock screen, you can view (and even edit) photos and
videos by tapping the thumbnail at the lower-left corner of the screen. To share photos and
With iPhone, you can take both still photos and HD videos. And, there’s two cameras—in
addition to the iSight camera on the back, there’s a FaceTime camera on the front for FaceTime
just a swipe away in Control Center. See Control Center on page 30.
Set LED
flash mode.
Turn on HDR.
Switch between
cameras.
Filter
78
Take photos and videos
panoramas (iPhone 4s or later), videos, and slow-motion videos (iPhone 5s).
Choose a mode. Drag the screen left or right to choose Slo-Mo, Video, Photo, Square, or Pano.
Take a photo. Choose Photo, then tap the shutter button or press either volume button.
Make it square: Choose Square.
(iPhone 5s) Touch and hold the shutter button to take photos in burst
the suggested shots and select the photos you want to keep, tap the thumbnail, then tap
separate photo in Camera Roll, tap the circle on the lower-right corner. To delete the burst of
photos, tap it, then tap .
(iPhone 4s or later) Tap
photo. See Edit photos and trim videos on page 77.
detection (iPhone 4s or later) balances the exposure across up to 10 faces. A rectangle appears
for each face detected.
Exposure is automatic, but you can set the exposure manually for the next shot by tapping an
object or area on the screen. With an iSight camera, tapping the screen sets the focus as well as
tap the screen again, touch and hold until the rectangle pulses.
Take a panorama photo. (iSight camera on iPhone 4s or later) Choose Pano, tap the shutter
of a vertical pan, too.
Shoot some video. Choose Video, then tap the Shutter button to start and stop recording.
Snap a still while recording: (iPhone 5 or later) Tap the shutter button in the lower-left corner.
Take it slow: (iPhone 5s) Choose Slo-Mo to shoot video at a high frame rate. You can set which
section to play back in slow motion when you edit the video.
Chapter 12 Camera
79
Set the slow-motion section of a video. Tap the thumbnail, then use the vertical bars beneath
the frame viewer to set the section you want to play back in slow motion.
Slide to adjust the slow-motion
section of the video.
Zoom in or out. (iSight camera) Stretch or pinch the image on the screen. For iPhone 5 or later,
zoom works in video mode as well as photo mode.
If Location Services is turned on, photos and videos are tagged with location data that can be
used by apps and photo-sharing websites. See Privacy on page 36.
Want to capture what’s displayed on your screen? Simultaneously press and release the
Sleep/Wake and Home buttons. The screenshot is added to your Camera Roll.
You can edit photos and trim videos, right on iPhone. See Edit photos and trim videos on
page 77.
HDR
HDR
together into a single photo.
Use HDR. (iSight cameras and iPhone 5s FaceTime camera) Tap the HDR button at the top of
HDR shots.)
Keep the normal photo in addition to the HDR version. Go to Settings > Photos and Camera.
View, share, and print
Photos and videos you take are saved in your Camera Roll. With Photo Stream, new photos also
appear in your photo stream on iPhone and your other iOS devices and computers. See My
Photo Stream on page 75.
View your Camera Roll. Tap the thumbnail image, then swipe left or right. You can also view your
Camera Roll in the Photos app.
Tap the screen to show or hide the controls.
Get sharing and printing options. Tap
page 32.
. See AirDrop, iCloud, and other ways to share on
Upload photos and videos to your computer. Connect iPhone to your computer to upload
items to iPhoto or another supported application on your Mac or PC. If you delete photos or
videos in the process, they’re removed from your Camera Roll album.
Sync photos and videos to iPhone from your Mac. Use the Photos settings pane in iTunes. See
Sync with iTunes on page 18.
Chapter 12 Camera
80
Camera settings
Go to Settings > Photos & Camera for camera options, which include:
photo streams
slideshow
grid
Adjust the volume of the shutter sound with the Ringer and Alerts settings in Settings > Sounds.
Or mute the sound using the Ring/Silent switch. (In some countries, muting is disabled.)
Chapter 12 Camera
81