1
Getting Started
Install Solo
You can install Solo on either a single workstation, “standard” installation, or a network
installation whereby the data files are placed on a shared network drive. Solo is multi-user.
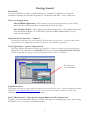
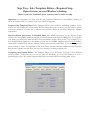
Solo’s two desktop icons
Solo (COBRA Application) - This is where you set-up your plans/rates, issue notices,
record elections, track premiums, and perform all day-to-day tasks.
Solo Template Editor - This is where you make necessary edits to the sample notices and
other document templates. You DO NOT perform COBRA administration or issue
notices in this module.
Open Solo for the first time – “update”!
You start Solo from the icon on your desktop. The first time you open Solo, you will see the Update
screen. Click on the Update button and Solo will close. You will then re-open Solo.
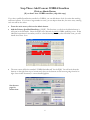
User Login Screen - process and password
The Login Window will appear each time you open Solo. Unless you change your password security
settings, the User's Name must be affordable (all lower case) and the password must be left blank.
Click on Login and you will go to the Solo Expiration screen. Click on Continue.
The Password
can be left blank
Expiration Screen
Will appear each time you logon until you request a new activation key code. You must submit the current
ID code to [email protected]. If your account is current, you will be issued a code.
Otherwise, you must make arrangement for payment.
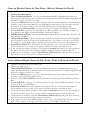
Solo’s “Main Screen” – three buttons: Setup, Admin, and the Camera icon
Typically, you will select either Setup or Admin. In Setup, you establish plans, rates, and settings.
In Admin, you do your day-to-day administration.
2