Download Key Fob manual Familiarise yourself with your remote
Transcript
Key Fob manual
The following instructions have been designed to help you install and get the best
performance out of Aeotec’s Z-Wave key fob remote control.
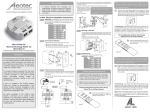
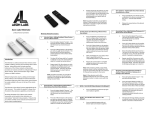
Familiarise yourself with your remote
control.
The compactness of the your Aeotec Key Fob Remote Control means that the one device
operates in two distinct modes: setup and use.
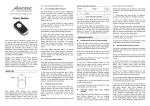
When you remove it from the packaging, your remote control is in setup mode. In this mode
the buttons operate as follows.
When you change your remote to be in use mode (you do this by pressing the mode button –
see ‘Changing your remote’s mode’ later in the guide for further information) the buttons
operate as follows.
Quick start.
Your Aeotec Key Fob Remote Control comes with its batteries installed and uses wireless
technology to talk to your Z-Wave home automation network.
For an existing Z-Wave network.
Your Key Fob Remote Control can be set up as an additional Z-Wave controller. This is
perfect for including it as a remote control in an existing Z-Wave network. You’ll need to be
near your existing primary Z-Wave controller and have the Key Fob Remote Control with
you.
1. Using something such as a pin or a paper clip, press the Learn button on the Key Fob
Remote Control. Its light will begin to pulse.
2. Press the Include button on your primary Z-Wave controller. If you’re unsure of how
to do this, refer to its user manual.
3. Once the two devices have exchanged information, the light on the Key Fob Remote
Control will stay lit for 2 seconds.
Your Key Fob Remote Control will now work as a remote control within your Z-Wave
network, allowing it to both control associated devices and act as a tool for adding and
removing devices to your Z-Wave network.
For a new Z-Wave network.
Your Key Fob Remote Control can be set up as the primary controller of a Z-Wave network.
This is ideal for a situation where you don’t already have a Z-Wave network set up, and
you’re either starting out or intending to set up only a small system.
In this case you need to associate your Z-Wave devices with the Key Fob Remote Control –
this will, by default, set up a new Z-Wave network for you. To do this, refer to ‘Adding
devices to your Z-Wave network’ in the Advanced Functions part of this manual, and follow
the instructions.
Selecting which devices to control.
With your Key Fob Remote Control now working within your Z-Wave network, it’s time to
tell it which other Z-Wave devices within the same network you want it to control. It can
activate / turn on any device within the network.
Before you begin the process you’ll need to change your remote from setup mode into use
mode – this will change the Include, Associate and Remove buttons to work as action buttons.
You cna change to use mode by pressing the mode button on the back of your remote – see
‘Changing your remote’s mode’ later in the guide for further information.
During the following set up process, you’ll need to move near any of the devices that you
wish to control.
1. Press, hold and do not release the action button that you want to use control a Z-Wave
device. Your remote’s light will blink quickly when it’s ready to add devices to an
action button.
2. Press the Z-Wave network button on the device that you wish to control. If you’re
unsure of how to do this, refer to its user manual.
3. Your remote’s light will stop blinking and stay on to let you know that the device can
now be controlled by the action button.
4. You can now turn devices on and off with a short press of the relevant action button.
Should you have devices that have degrees of functionality, such as lighting that can
be dimmed or blinds that can be half opened, there is an additional functionality that
you may choose to use – dimming. When held down, the action button will send up
and down instructions to any compatible Z-Wave devices associated with it. With a
dimmable light, holding down an action button would see it brighten or dim depending
on its current level of brightness.
5. If you are adding a light that can be dimmed or a device that can have a level, such as
a window shade or a garage door, you can set your remote to open it to a particular
level. To do this, after performing step 4, adjust the level of the Z-Wave device to
your desired setting.
6. Release the action button you held down in step 1.
7. Repeat the above steps to add other Z-Wave devices. Multiple devices can be
controlled all at once by a single Z-Wave button. To do this, repeat the previous steps
using the desired action button in step 1.
Advanced functions.
Changing your remote’s mode.
Your Key Fob Remote Control has two modes: setup mode and use mode. These two modes
change the way that your remote’s buttons work, and you can see the differences in the
‘Familiarise yourself with your remote control’ part of this guide.
To change the mode:
1. Slide open the main panel of the remote so that you can see the light.
2. Using a pin or a paper clip, press the Mode button.
3. The light will illuminate for a second to confirm that the mode has been successfully
changed.
Adding devices to your Z-Wave network.
In the case that you’re creating a new Z-Wave network or that an existing network’s
controller has been designed to allow it, your Key Fob Remote Control is able to add Z-Wave
devices to the network.
1. Press and release the Include button.
2. Press the Z-Wave network button on the device that you wish to add. If you’re unsure
of how to do this, refer to its user manual.
3. Once the device has been included, the light on the Key Fob Remote Control will stay
lit for 2 seconds.
4. Repeat step 2 for any other devices you wish to add to your network.
5. Once you’re finished, press any button on the Key Fob Remote Control to exit this
mode.
Removing devices from your Z-Wave network.
In the case that your Key Fob Remote Control is in charge of your Z-Wave network or that an
existing network’s controller allows it, your remote control is able to permanently remove ZWave devices from the same network.
1. Press and hold the Remove button.
2. Press the Z-Wave network button on the device that you wish to remove. If you’re
unsure of how to do this, refer to its user manual.
3. Once the device has been removed from the network, the light on your Key Fob
Remote Control will stay lit for 2 seconds.
4. Repeat step 2 for any other devices you wish to remove from your network.
5. Once you’re finished, press any button on your Key Fob Remote Control to exit
device removal mode.
Removing devices from an action button.
In the Quick Start part of this guide you associated Z-Wave devices with actions buttons on
your remote control There may come a time when you want to disassociate a device and an
action button. To remove a device from your emergency scenario, repeat the steps of the
‘Selecting which devices to control’ part of this manual – this will have the reverse effect of
what is described.
Demoting your Key Fob Remote Control.
If you set up your Key Fob Remote Control to act as primary controller in the ‘For a new ZWave network’ section of the Quick Start guide, there may come a time that you wish to
demote it to be a secondary controller. In this situation it is likely that you started with a small
Z-Wave network and have decided to expand it. Your Key Fob Remote Control has been
designed to cater.
To demote it to a secondary controller and pass all its knowledge on to a new controller:
1. Press the Learn button on the new controller. If you’re unsure of how to do this, refer
to its user manual.
2. Press and hold both the Include and Remove buttons on your Key Fob Remote Control
for 10 seconds.
Resetting your Key Fob Remote Control.
If you ever want to completely reset your Key Fob Remote Control’s settings, you can.
1. Slide open the main panel of the remote so that you can see the light.
2. Using a pin or a paper clip, press and hold the Mode button for 10 seconds.
3. The light on the front of your remote will stay solid for 1 second if successful.
Tip: Changing the battery.
Batteries eventually do run out. While your Key Fob Remote Control has been designed to
last for 12 months of normal use, there will come a time when you’ll need to change its
battery.
1. Push down on the grip on the bottom and slide the battery cover away from the
remote.
2. Remote the existing battery.
3. Replace it with a lithium cell CR2450 3 volt battery by placing a new one in the
battery cover with the positive touching the plastic.
4. Slide the battery cover back on to your remote control.


