1
NextOffice
Chapter 3 Next Writer
Chapter 3 Next Writer
Writer is a word processor with functions similar to MS Office Word. Using Writer, you can
create different types of documents, such as letter, fax, leaflet, etc. Writer also has advanced
functions such as "mail-merge" and "label preparation".
Moreover Writer has integrated some spreadsheet functionality. You can setup simple tables in a
Writer document. You can insert text or graphics created by Draw into your Writer document
and edit the graphics directly in Writer.
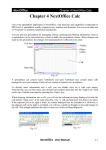
Fig. 3-1
Text Input and Formatting
Inputing Text
1.
Select menu “File” → “New...” (Fig. 3-2) to open a new document or “File” → “Open..”
(Fig. 3-3) to load an existing document.
Fig. 3-3
Fig. 3-2
2.
You can then use your keyboard to enter text in your document.
NextOffice User Manual
3-1
NextOffice
Chapter 3 Next Writer
3.
If you need to input some special characters not found in your keyboard, select menu
“Insert” → “Special Characters...” (Fig. 3-5) and pick the desired character from the pop-up
dialog.
Fig. 3-4
Fig. 3-5
4.
You may also press the “Chinese Punctuation Input Pad” icon (Fig. 3-6) in the Function
Tool Bar to activate the Chinese Punctuation Input Pad to enter Chinese punctuation
symbols, Chinese special symbols, Chinese mathematical symbols and Chinese phonetic
symbols. (Fig. 3-7)
Fig. 3-6
Fig. 3-7
5.
During text input, Writer will automatically perform line feed, you can simply press the
<Enter> key once.
Inputing Text in Any Position
You can use the “Direct Cursor On/Off” function to enter text in any area of your document.
1.
Select “View” → “Tool Bar” → “Tool” bring up the dialog box. Select the “Direct Cursor
On/Off” icon to turn on “Direct Cursor”. (Fig. 3-8)
2.
Click on your document where you would like to enter text, the mouse cursor will change
accordingly to different type of alignment selections.
Fig. 3-8
Centered
Right Aligned
Left Aligned
To facilitate you to input text, NextOffice will automatically fill the blank lines and columns.
3-2
NextOffice User Manual
NextOffice
Chapter 3 Next Writer
Text Formatting
You can edit objects in Writer, Calc, Impress and Draw documents. If you would like to
emphasize some content, you can apply effects such as font size, color, bold, italic, etc. First
select the text, the Object Bar on top will change to provide you a list of options including: Bold,
Italic, Font Size, etc. (Fig. 3-9)
Fig. 3-9
Text Selection
Position your mouse cursor at the beginning of the text to be selected. Left click and hold down
the mouse button and drag your mouse over the text which you wish to select. The selected text
will be highlighted.
More Formatting
In the Tool Bar you can find icons for setting “Font Name”, “Font Size”, “Bold”, “Italic” and
“Underline” effects. You can select the desired text and then press one of these icons to apply the
effect. (Fig. 3-10)
Fig. 3-10
The Tool Bar displays the most commonly used functions. If you need more formatting
functions, select menu “Format” → “Character” (Fig. 3-11). In the pop-up dialog box, you can
find additional settings, such as “Font Effects”, “Asian Layout” , etc. (Fig. 3-12)
Fig. 3-11
Fig. 3-12
NextOffice User Manual
3-3
NextOffice
Chapter 3 Next Writer
Text Alignment
You can use the “Align Left”, “Centered”, “Align Right” and “Justified” icons
in the Tool Bar to perform paragraph justification. (Fig. 3-13)
Fig. 3-13
If you need to highlight certain portions of text, you can apply different styles to it, such as text
color, point size, bold or italic effect, etc.
Text Color
First select the text section or paragraphs that you want to change
color. Click the arrow beside the “Font Color” icon in the Tool Bar,
the color selection palette will appear, you can pickup another color
from the palette. (Fig. 3-14)
Fig. 3-14
You may also press the “Font Color” icon to select another color without first selecting any text.
In this case, your mouse cursor will change to a pail. Use your mouse to drag across the section
of text that you would like to change color. When you release the mouse, the selected text will
have their color changed.
If “Font Color” is still in “Enable” state (i.e., the mouse cursor is still a pail), you can repeat the
above procedures to select and change color of other text regions. If you want to terminate this
function, click in any position of your document without dragging the mouse or press <ESC>.
Text Background Color
If you want to change the text background color, the
procedure is similar to changing text color. But this time
you have to use the “Background Color” icon in the
Function Tool Bar. (Fig. 3-15)
Fig. 3-15
3-4
NextOffice User Manual
NextOffice
Chapter 3 Next Writer
Default Font Settings
Writer documents support two different scripts: one is Western script and the other is Chinese,
Japanese and Korean (CJK) script. You can set different default fonts for different scripts, e.g..,
use “Times New Roman” as the default font for Western script and use “PmingLiU” as the
default font for CJK script. To enable this settings, select menu “Tools” → “Options” (Fig. 3-16)
→ “Text Document” and under the “Basic Fonts (Western)” and “Basic Fonts (Asian)” tabs,
setup your default Western and default CJK fonts. (Fig. 3-17)
Fig. 3-17
Fig. 3-16
When you are inputting Roman characters, Writer will automatically use the default Western font
for Western script. When you are inputting CJK characters, Writer will automatically switch to
use the default CJK font for Asian script.
Chinese Simplified and Traditional Conversion
NextOffice provides a quick way to translate your document content from Chinese Traditional to
Chinese Simplified or vice verse. To activate the translation, first select the text (or press
<Ctrl+A> to select the whole document), then press the “Convert Chinese Traditional to Chinese
Simplified” icon or the “Convert Chinese Simplified to Chinese Traditional” icon in the Tool
Bar to translate the content. (Fig. 3-18) Or you can select menu “Format” → “Change Case” → “
Convert Chinese Traditional to Chinese Simplified” or “Convert Chinese Simplified to Chinese
Traditional” . (Fig. 3-19)
Fig. 3-18
Fig. 3-19
NextOffice User Manual
3-5
NextOffice
Chapter 3 Next Writer
If you want to translate only some paragraphs, just select the paragraphs and press the
corresponding icons. (Fig. 3-20, 3-21)
Fig. 3-21
Fig. 3-20
Insert Bullets/Numbers
Using bullets and numbers right can make your document more neat and organized.
Turn Bullets On/Off
1.
First, select different paragraphs.
2.
Click on the “On/Off Bullet”icon (Fig. 3-22) in the Object Bar. (Fig. 3-23)
Fig. 3-22
Fig. 3-23
3.
Click on the “On/Off Bullet”icon (Fig. 3-24) again will reverse previous bullet formatting
effect. (Fig. 3-25)
Fig. 3-24
Fig. 3-25
3-6
NextOffice User Manual
NextOffice
Chapter 3 Next Writer
Or select menu “Format” → “Numbering/Bullets...” (Fig. 3-26) to bring up the
“Numbering/Bullets...” dialog to pick different bullet patterns. (Fig. 3-27)
Fig. 3-27
Fig. 3-26
Find and Replace
If you need to search for some text in your document, select menu “Edit” → “Find and
Replace...” (Fig. 3-28) to bring up the “Find and Replace” dialog box (Fig. 3-29), enter the word
you want to find and then click on “Find” button. The mouse cursor will jump to the first
occurrence of the word.
Fig. 3-29
Fig. 3-28
You may perform text substitution through the “Find and Replace” dialog box. After inputting
word you wish to find, input the word you wish to replace with and then press the “Replace”
button to to replace each occurrence or all occurrences of the word.
NextOffice User Manual
3-7
NextOffice
Chapter 3 Next Writer
English Spell Check
You can set default spell checker to use British English or US English. Select menu “Tools” →
“Options” (Fig. 3-30) → “Language Settings” → “Languages”, under “Default Languages of
Documents” select “English(British)” or “English(US)”. (Fig. 3-31)
Fig. 3-31
Fig. 3-30
After you have set the default spell check language, you can apply spell checking to your
document by clicking on the “Spell Check” icon in the Tool Bar. (Fig. 3-32)
If any possible error is detected, a dialog box with suggestions will pop up to prompt you to
make correction. (Fig. 3-33)
Fig. 3-32
Fig. 3-33
Auto Spell Check
You may choose to apply “Auto Spell Check” by clicking on the “Auto Spell Check” icon in the
Tool Bar. (Fig. 3-34)
Mis-spelled words will be automatically underlined by a red rippled line. (Fig. 3-35)
3-8
NextOffice User Manual
NextOffice
Chapter 3 Next Writer
Fig. 3-34
Fig. 3-35
Vertical Writing
If you would like to layout your text vertically, select menu “Format” → “Page...” (Fig. 3-36) →
“Page Style”. In the pop-up dialog box, select “Page” tab and in the text direction field, select
“Right-to-left (Vertical)”. (Fig. 3-37)
Fig. 3-37
Fig. 3-36
Tables
You may want to use tables (Fig. 3-38) to present your information in a Writer document. There
are a number of ways to insert tables into your document. You can chose an
automatic mechanism or a customizable mechanism.
Fig. 3-38
Note that the “Automatic” way requires you to have the text already in
place and then overlay the table on top of the text. If you want to
prepare some complex tables, you should create the table layout first
from scratch and then input the text.(Fig. 3-39)
Fig. 3-39
NextOffice User Manual
3-9
NextOffice
Chapter 3 Next Writer
Insert Table Automatically
1.
Select the paragraphs which you want to overlay a table on. (Fig. 3-40)
Fig. 3-40
2.
Click on the “Table” icon in the Tool Bar. (Fig. 3-41, 3-42)
Fig. 3-41
Fig. 3-42
3.
You may also use menu “Insert” → “Table” to insert the table, the result will be the same.
(Fig. 3-43, 3-44)
Fig. 3-44
Fig. 3-43
3-10
NextOffice User Manual
NextOffice
Chapter 3 Next Writer
Insert Table
1.
Position your mouse cursor to where you would like to insert a table.
2.
Press the arrow besides the “Table” icon on the Tool Bar to bring up a table panel. (Fig. 345)
3.
Move your mouse to the table panel and drag out a table with desired columns and rows and
then release your mouse.
Fig. 3-45
4.
Or select menu “Insert” → “Table” (Fig. 3-46) to open the “Insert Table” dialog, enter the
name of the table, number of rows and number of columns and then press <OK>. (Fig. 3-47)
Fig. 3-47
Fig. 3-46
Format Table in Writer Documents
After you have inserted a table into your document, the first row of the table will be treated as
title by default. Content will start from the second row. The characters you entered in the first
row will automatically being set to bold. Of course, you can override this setting on your own.
NextOffice User Manual
3-11
NextOffice
Chapter 3 Next Writer
1.
First position your cursor at the right position, then select menu “Format”→ “Table” (Fig. 348), this will open the “Table Format” dialog box, you can select different formatting styles,
such as background, border, color, etc, to apply to your table. (Fig. 3-49)
Fig. 3-49
Fig. 3-48
2.
For example, if you want to change the background color of your table, select the
“background” tab in your “Table Format” dialog box. (Fig. 3-50)
3.
In the upper right corner, you can select to change only one cell or the whole table. Then,
select your desired color, press <OK> to confirm. (Fig. 3-51)
Fig. 3-50
Fig. 3-51
After you have inserted a table, the Object Bar will be changed automatically to provide options
available for formatting a table. These functions include “Merge Cells”, “Split Cells”, “Insert
Row”, “Insert Column”, “Delete Row”, “Delete Column”, etc. These are commonly used
options for table manipulation. (Fig. 3-52)
Fig. 3-52
3-12
NextOffice User Manual
NextOffice
Chapter 3 Next Writer
Adjusting Column Width and Row Height
1.
First position your cursor at the border of the cell. At this moment, the mouse cursor will
change into a two-ended arrow and you can now drag on the cell border line to adjust the
cell width. (Fig. 3-53)
2.
If you would like to optimize column width, first select the columns which you would like to
adjust and then click on the “Optimize” icon in the Object Tool Bar. In the pop-up dialog,
select the “Optimize cell width” option. (Fig. 3-54)
Fig. 3-53
Fig. 3-54
Mechanism to adjust row height is similar.
Inserting New Rows and Columns
You can freely insert new rows and new columns
1.
First position your cursor to where you would like to insert a new row or a new column.
2.
Click on the “Insert Row” or the “Insert Column” icon in the Tool Bar, a new row or new
column will be inserted automatically. (Fig. 3-55, 3-56)
Fig. 3-55
Fig. 3-56
Newly inserted row or column will adopt the formatting of the one preceding it.
Fig. 3-57
Fig. 3-58
The mechanism to delete rows or columns is similar, use the “Delete Row” and “Delete
Columns” icons in the Tool Bar instead. (Fig. 3-57, 3-58)
NextOffice User Manual
3-13
NextOffice
Chapter 3 Next Writer
Merge and Split Cells
Newly inserted tables have regular cell distribution. Sometimes you may need to merge different
cells or split cells to suit you need. Following are the procedures.
Merge Cells
1.
2.
First select the cells to be merged.
3.
Click on the “Merge Cells” icon in the Object Bar(Fig. 3-59)
4.
The selected cells and their contents will then be merged.
Fig. 3-59
Split Cells
1.
First, select the cell to be split.
2.
Click on the “Split Cell” icon in the Object Bar. (Fig. 3-60)
Fig. 3-60
3.
In the “Split Cell”dialog box appears, setup the number of cells you wish to split into and the
direction in which to split. Press <OK> to confirm.(Fig. 3-61)
4.
The selected cells will be split but the content of the cell will not be split automatically. You
have to do it manually. (Fig. 3-61)
Fig. 3-61
3-14
NextOffice User Manual
NextOffice
Chapter 3 Next Writer
Graphics in Writer
If you want to make your documents look more professional, try using more graphics.
1.
Position your mouse cursor to where you would like to insert your graphics.
2.
Select menu “Insert” → “Graphics” → “From Files ...”. (Fig. 3-62)
3.
In the “Insert Graphics” dialog box, locate the graphics which you would like to insert into
your document. If you would like to preview graphics first, press <Preview> . (Fig. 3-63)
Fig. 3-63
Fig. 3-62
4.
If you have checked the “Link” check box, whenever the linked graphics are changed, the
changes will be reflected in your document. Using this “Link” option reduces the Writer
document size (because the graphics are stored separately). But if the locations of the
graphics are somehow changed, you have to update the links. Otherwise the link graphics
will be lost in the document.
5.
Finally press <Open> to load the graphics into your document.
Edit Inserted Graphics
You can insert graphics and images into your NextOffice documents. Sometimes imported
images from other sources (e.g. Scanner or a digital camera) look deviated from their originals
and may required some touching.
Select menu “Insert” → “Graphics” → “From File...” to insert an image. Select the image, the
Object Bar will switch to show image editing functions (Fig. 3-64) including: filters,
transparency, mirror, color, contrast, brightness, gamma, etc. You can click on the “Color” icon
to bring up the color selection list to select “Red”, “Green” and “Blue” percentage.
NextOffice User Manual
3-15
NextOffice
Chapter 3 Next Writer
Fig. 3-64
Adjusting Image Color
If the color of the image appears different from its actual color, you can adjust the RGB color
percentage. For example, increase red color percentage.
1.
First select the image.
2.
The Object Bar will show image editing functions.
3.
Click on the “Red” icon to adjust the image red color percentage. (Fig. 3-65, 3-66)
Fig. 3-65
Fig. 3-66
Adjusting Image Contrast
You can use the “Contrast” function to sharpen or blur your image.
1.
First select the image.
2.
The Object Bar will show image editing functions.
3.
Click on the “Contrast” icon to adjust the image contrast. (Fig. 3-67, 3-68)
3-16
NextOffice User Manual
NextOffice
Chapter 3 Next Writer
Fig. 3-67
Fig. 3-68
Adjusting Image Brightness
If you find your imported image too bright or too dim, you can adjust its brightness.
1.
First select the image.
2.
The Object Bar will show image editing functions.
3.
Click on the “Brightness” icon to adjust the image brightness. (Fig. 3-69, 3-70)
Fig. 3-69
Fig. 3-70
Trimming Image
You can also scale and adjust margins of the imported image.
1.
First select the image.
2.
Right click on your mouse to bring up a menu.
NextOffice User Manual
3-17
NextOffice
Chapter 3 Next Writer
3.
Select the “Graphics”sub-menu to bring up the “Graphics” dialog box. (Fig. 3-71)
4.
Select the “Crop” tab to setup the display scale and trim the margins of the image.
Fig. 3-71
5.
Finally, press <OK> to confirm the change.
Applying Image Filters
Image filters can create special effects.
1.
First select your image.
2.
The Object Bar will show image editing functions.
3.
Click on the “Filters” icon to bring up the “Filters” dialog box. In the “Filters” dialog box,
you will find different image filters, such as “charcoal” (Fig. 3-72), “mosaic” (Fig. 3-73),
“grey”, etc.
Fig. 3-72
3-18
Fig. 3-73
NextOffice User Manual
NextOffice
Chapter 3 Next Writer
Inserting Images from Gallery
You may also insert images from your Gallery by clicking on “Gallery” icon in the Tool Bar. In
Gallery, you will find graphics organized in different themes such as Hong Kong Scenery,
Flowcharts, Computer Peripherals, etc. You can simply select and drag the desired graphics into
your document.
Wrapping Text Around Image
After you have inserted an image into your document, you can setup the “Text Wrapping” mode
to adjust how the text is wrapped around the image.
1.
Right click on the image and in the pop-up dialog box, select “Wrap” tab. Try different
“Text Wrapping” modes such as “No Wrap”, “Page Wrap”, “Optimal Page Wrap” to
experience different effect. (Fig. 3-74, 3-75)
Fig. 3-74
Fig. 3-75
2.
If you would like to adjust the spacing between the image and the text, double click on the
image or select menu “Format”→ “Graphics” (Fig 3-76) to bring up the “Graphics” dialog
box. In the “Spacing” setting under the “Wrap” tab, adjust the top, bottom, left and right
margins and press <OK> to confirm. (Fig. 3-77)
NextOffice User Manual
3-19
NextOffice
Chapter 3 Next Writer
Page Attributes
Every page is comprised of text, images, headers, footers, footnotes, page margins, etc. To setup
your page attributes, select menu “Format” → “Page...” (Fig. 3-78) to bring up the “Page Style”
dialog box. In the dialog box, you can setup page size, margins, text direction, etc. (Fig. 3-79)
Fig. 3-79
Fig. 3-78
Page Header and Page Footer
In real life applications, we usually have to insert company logo, current date, page number,
company name, etc. in the page header or footer of a document.
Insert and Delete Page Header / Footer
1.
Select menu “Insert” → “Header” / “Footer” → “Standard” (Fig. 3-80). Note that there is no
tick beside the “Standard” menu, indicating that header/footer is not enabled.
2.
A rectangular input box representing the header area will appear on the top of your
document. You can enter text and graphics in this area which represents your page header.
(Fig. 3-81)
Fig. 3-81
Fig. 3-80
3-20
NextOffice User Manual
NextOffice
3.
Chapter 3 Next Writer
If you want to delete page header/footer, you can select menu
“Insert” → “Header”/”Footer” (Fig. 3-82), this time there is a
tick besides the “Standard” menu, indicating that
header/footer is enabled for the current document. Click to
select Header/Footer to cancel the setting.
Fig. 3-82
4.
If you want to further customize page header or page footer, select menu “Format” →
“Page”. (Fig. 3-83)
5.
In the “Page Style” dialog box, select “Header” or “Footer” tab. Ensure the “Header” or
“Footer” check box is checked. (Fig. 3-84)
Fig. 3-84
Fig. 3-83
6.
You can then setup the size, background color of the page header/footer. (Press <Other> to
setup)
7.
Finally, press <OK> to confirm.
NextOffice User Manual
3-21
NextOffice
Chapter 3 Next Writer
Filling Information in Header/Footer
The above method shows how to insert data directly on the
header and footer input boxes. If you want to input some
special dynamic fields, such as date, page count, current page
number, etc. into your page header or footer. Here is the
procedure:
1.
First position your cursor on the page header input box,
select menu “Insert” → “Fields” (Fig. 3-85). In the pop
window, select the desired field, such as “Date”, “Page
Number”, “Page Counter”, etc.
Fig. 3-85
2.
For example, select “Date” to insert the current date into the left hand side of your header
input box.
3.
Click the (Tab) key twice, then select “Insert” → “Field” → “Page Number” to insert the
current page number of the left hand side of the page header. (Fig. 3-87)
Fig. 3-87
Procedure to fill in dynamic information of page footer is similar.
3-22
NextOffice User Manual
NextOffice
Chapter 3 Next Writer
Using Multiple Columns
Sometimes you may want to improve and look and feel of your document by using multiple
columns.
1.
First, select the text paragraphs to be formatted.
2.
Select menu “Insert” → “Section” to bring up the “Insert Section” dialog box (Fig. 3-88).
Under the “Columns” tab and in the “Settings” fields, enter the desired number of columns.
3.
Finally, click “Insert” to apply the change.
Fig. 3-89
Fig. 3-88
Inserting Hyperlink
If you would like to insert hypertext links. First, position your cursor at the desired position, then
select menu “Insert” → “Hyperlink” (Fig. 3-90) to open the “Hyperlink” dialog box. In the
“Hyperlink” dialog box, enter the destination URL and the text representing the URL. (Fig. 3-91)
Fig. 3-91
Fig. 3-90
Readers can double click on the hyperlink to connect to the URL represented by the text.
NextOffice User Manual
3-23
NextOffice
Chapter 3 Next Writer
Inserting Notes
Inserting notes in your document by the following procedure:
First, position your input cursor to the right location and select from the menu “Insert” →
“Notes” to open the “Notes”dialog box. (Fig. 3-92)
In the “Text” field, key in the notes to be displayed and then click <OK> to confirm. (Fig. 3-93)
Fig. 3-93
Fig. 3-92
You will see a yellow marker being inserted into your document representing the inserted notes.
If tips is enabled (see menu “Help” → “Tips”, Fig. 3-94), you will see the details of the notes
when you move your cursor over the yellow marker. (Fig. 3-95)
To delete an existing note, position your cursor over the yellow marker and then press <Del>
key.
3-24
NextOffice User Manual
NextOffice
Chapter 3 Next Writer
Inserting Footnote
Sometimes we need to insert footnote to further explain a term or statement. First, position your
cursor at the right location, then select menu “Insert” → “Footnote”. (Fig. 3-96)
In the “Insert Footnote” dialog box, select the numbering styles as either “Automatic” or
“Character” and press <Enter>. Finally, enter your footnote at the bottom of the page (Fig. 3-97)
Fig. 3-97
Fig. 3-96
Navigator
”Navigator” allows you to quickly jump to various objects in your document and be more
efficient during editing.
Click on the “Navigator On/Off” icon (Fig. 3-98) in the Object Bar to toggle the Navigator
window on and off. In the “Navigator” window, select the object type and then the desired object
(Fig. 3-99). Double click on the selected object to jump to it directly.
Fig. 3-98
Fig. 3-99
NextOffice User Manual
3-25
NextOffice
Chapter 3 Next Writer
Protecting and Un-protecting Sections
Some documents, such as contracts, require some parts of the content to be protected from
modifications by the readers while other parts are allowed to be edited freely. To do this, you can
use “Section Protection”:
1.
First, select the text sections to be protected. (Fig. 3-100)
2.
Select menu “Insert” → “Section” to pop up the “Section” dialog box, enter a section name
or use the default suggestion, then check the “Write Protect” check box. (Fig. 3-101)
Fig. 3-101
Fig. 3-100
3.
Also check the “Use Password” check box (Fig. 3-102). You will be prompted for protection
password (Fig. 3-103), enter a valid password and press <OK> to confirm.
Fig. 3-102
4.
Fig. 3-103
To disable existing protection, select menu “Insert” → “Section” and pick the desired
section (Fig. 3-104), un-check the “Use Password” check box. You will be prompted for
password (Fig. 3-103), enter a valid password and press <OK> to confirm. (Fig. 3-105)
3-26
NextOffice User Manual