1
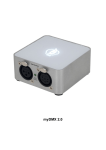
ArcControl 1024
USER MANUAL - ADVANCED SETUP
Version: 1.0
ArcControl 1024
For basic setup see separate PDF on CD.
Configuring the DMX controller for the First Time
(without using the Quick Setup Assistant)
Now that you’ve seen how the controls work, and how to reach the configuration menu
it’s time to make the DMX controller do something useful.
This is most easily achieved using the Quick Setup Assistant (see printed User Guide),
however if you want to create your own custom configuration then you need to follow
the following four steps:
Tell the DMX controller what fixtures are connected to it (see page 2)
Define Scenes to give the moods, levels or colours that you want (see page 6)
If required, define sequences to give movement to your scenes
Define triggers to make scenes or sequences happen
(see page 12)
Scenes may be copied to make other scenes, and a special Ripple Copy function enables
the rapid creation of colour-chase sequences.
Defining Fixtures
The first thing that we need to do is to tell the DMX controller what fixtures are connected
to it, so that it knows that to control.
From the Configuration menu select the Fixtures option:
To add a new fixture:
F Select Add New Fixture
You need to tell the DMX controller which DMX universe the fixture is connected to, and
what the DMX start address is to be.
If you wanted to edit the address of existing fixtures you would choose Fixture List to
view and edit fixtures that have already been added to the system.
F Select Add New Fixture to add new fixtures to the DMX controller
Give the fixture a name (this would normally be something descriptive about where
the fixture is located, and what it’s purpose is, for example “Wall Wash Left” or “Cove
Colour Centre” etc.
F To edit the fixture name, make sure the Name option is highlighted then press Select.
See page 15 for details of using the text editor.
When you have set the name you want press Back to return to the Add New Fixture
menu, as shown above.
The type of fixture is selected from a pre-programmed library of fixtures that is built into
the DMX controller:
Scroll down to the Type option and press Select.
Scroll down to the fixture type that you want to use and press Select to tick that fixture.
Once you have selected the type of fixture that you want press Back to return to the Add
New Fixture menu, as shown above.
To choose which of the DMX ports the fixture is to be added to highlight Port and press
Select.
To set the Start Channel of the DMX fixture:
F Move the scroll wheel to the Start Channel option.
F Press the Select button.
The start channel number itself will be highlighted.
F Use the Scroll Wheel to select the actual value required.
F When you have the start channel number that you want press Select.
You can add multiple fixtures at the same time using the Number to Add option.
To Add Several Fixtures of This Type at Once
Scroll down to the Number to Add option, and press Select.
The number is highlighted, and you can used the scroll wheel to adjust the value.
When you have the number you want press Select to confirm, or press Back to cancel.
If you add more than one fixture then they will be placed sequentially on the DMX
universe.
Add The Fixture(s)
When you have set all of the parameters that you need, scroll down to highlight the
Add…option and then press Select.
The new fixture(s) will be added to the project.
Testing a DMX Fixture
To test a DMX fixture select Fixtures from the Configuration menu:
Select Fixture List to display a list of fixtures that have been defined:
Press the Edit soft key (!) to select the fixture that you want to test.
Use the scroll wheel to highlight Test Fixture which is a the bottom of the menu.
Press Select to show the current output levels of the DMX channels that the fixture is using.
Use the scroll wheel to change the level of the channel that is highlighted.
Use Select to move to the next channel.
Use the (i) soft-key to change the menu’s title between the whole fixture name and the
name of the individual channel being adjusted
When you have finished press Back to return to the Edit Fixture menu.
See also: there is a feature on the Test DMX Universe screen to flash any channel, so
that you can locate the fixture which is on that channel.
Defining Scenes
A scene is group of target levels for a group of channels.
A scene may contain as many or as few of the channels in the fixtures as you need.
Therefore each scene does not have to define the level of every DMX channel.
F From the Configuration Menu select the Scenes option:
To add a new scene:
F Select Create Scene option
Each scene created should have a name. See page 15 for details of using the text editor
to set the text of names.
Next you need to select which fixtures are to be controlled in this scene:
F Select the Fixtures option from the Create Scene menu.
Each fixture that is ticked will be controlled by this scene. Other fixtures will be unaffected
when the scene is recalled.
Setting Channel Levels
Once you have selected the fixtures to be controlled, then for each fixture you need to
select which channels are to be controlled by the scene, and what their target level should
be (i.e. the level to which the channel will fade over the scene’s fade time).
From the Fixtures list press Select to edit the fixture’s levels within the scene:
Use the scroll wheel to change the level of the channel which is highlighted.
To move to the next channel press Select.
Including/Excluding Channels from the Scene
Channels within the fixture that are controlled are shown in black, channels which will not
be changed by the scene are shown in a hatched pattern.
To toggle the selected channel between being included / excluded use the
(in the middle).
soft-key
Set the Scene’s Fade Time
Next define the scene’s fade time. The fade time is the amount of time it will take to fade
from whatever the current levels are to reach the target levels.
To edit the scene’s fade time:
F Use the scroll wheel to change the value
F Use the select button to choose the value
Note: The Wait Time option is used when scenes are put into a sequence, and it enables
a delay with no fade between consecutive scenes.
F When you have finished defining the scene select the Add… option
The scene that you have created can be recalled from the Scenes menu from the main menu.
Alternatively it can be added to a favourite and then attached to one of the triggers.
Copying Scenes
There are five methods that can be used to copy a scene.
Copy Name
Function
Duplicate
Creates a number of exact copies of the scene
Copy with
Uniform
Value
Creates copies of the scene, with all channels changed to the value specified. This is particularly useful
for creating an “Off” scene from an existing scene.
Copy
Scaled
Creates copies of the scene, with all channels
proportionally scaled by the value given. Useful for
creating a dimmer/brighter version of a scene.
Copy Rippled
Creates a copy of the scene, but with channels shifted across by a certain number of channels. This is
very useful creating sequences of colours where you
have an array of fixtures of the same type.
Fixture
Ripple
Creates a copy of the scene, but intelligently matches
the function of channels within fixtures so that they
can ripple one to another.
Define Sequences
To define sequences select the Sequences menu from the Configuration menu.
Menu Item
Function
Sequence List
Gives a list of all the sequences that have already been defined
Create Sequence Creates a new sequence by selecting scenes that have already
been created and assigning cross-fade times to them.
Copy Sequence
A number of methods of duplicating a sequence in order to create
new sequences
Splice Sequence
Join existing sequences together to create one longer sequence.
Creating a New Sequence
Select the Create Sequence option from the menu above.
The sequence name may be edited by selecting it, and using the text editor in the normal way.
Once the scenes that form the sequence have all taken place the sequence can automatically perform one of a number of “end actions”:
End Action
Function
End
Sequence stops after all scenes have taken place
Repeat
Scenes will be recalled from first to last again
Bounce
Scenes will be recalled from first to last, then last to
first, then first to last. The number of transitions through
the sequence is defined by the number of Repeats
The number of times the sequence recalls the scenes that make it up is defined by the
number of Repeats.
A value of 0 will cause the sequence to repeat endlessly until it is specifically stopped.
The Sequence Script
The Scenes that are recalled by a Sequence and the order in which they are recalled is
defined by the Sequence Script.
Use the + button to add a new scene (or a sequence) to the script.
To remove a scene (or sequence) from the script highlight the step, and press the (x) button.
Notes:
It is permitted to include a sequence as part of a sequence’s script. However be careful
not to use a sequence which will never end. Also be careful not to create an “infinite loop”
where two or more nested sequences recall each other.
Rear Terminals Setup
DMX controller has three pairs of terminals on the rear which may be independently
configured to provide either a contact-closure input, or a 0-10V Analogue Output. To
configure these terminals highlight Rear Terminals Setup on the Configuration menu,
and press Select:
Each of the three terminals may be set as either a Contact Input or as an Analogue Output:
To change the selection, highlight the option that you need, and press Select to tick the new item.
Testing Analogue Outputs
If one or more of the configurable terminals are set as analogue outputs then the fixture attached
may be tested. Scroll down to the bottom of the menu, and select Test Analogue Outputs:
When the terminals are set up as required press Back to return to the Configuration menu.
Notes:
When using the terminals as Analogue Outputs, the “mute” button (bottom left) which puts
all DMX outputs to zero will also cause 0v outputs from the configurable terminals.
Analogue Fixtures are defined in the fixtures xml file using as follows:
<Fixture Name=“Analogue RGB“ PortType=“Analogue“ Class=“Colour“>
-
<Channels>
<Channel Name=“Red“ ChannelType=“RedBrightness“ />
<Channel Name=“Green“ ChannelType=“GreenBrightness“ />
<Channel Name=“Blue“ ChannelType=“BlueBrightness“ />
</Channels>
</Fixture>
Define Triggers
Triggers are used to set how the user’s actions will recall scenes or sequences. There
are triggers provided for power-up, the contact inputs and the IR remote, though more
may be created for timed events. To define triggers select the Triggers option from the
Configuration Menu (see page Error! Bookmark not defined. for details of the Configuration menu).
The triggers are:
Trigger Name
Description
Power On
This action happens when the DMX Generator is first switched on.
Contact Input 1
What to do when a contact closure happens on contact input 1
For details on setting up the rear terminals see page 13.
Contact Input 2
What to do when a contact closure happens on contact input 2
Contact Input 3
What to do when a contact closure happens on contact input 3
IR Remote Button 1
What to do when the user presses button 1 on the IR handset
IR Remote Button 2
What to do when the user presses button 2 on the IR handset
IR Remote Button 3
What to do when the user presses button 3 on the IR handset
IR Remote Button 4
What to do when the user presses button 4 on the IR handset
IR Remote Button 5
What to do when the user presses button 5 on the IR handset
IR Remote Button 6
What to do when the user presses button 6 on the IR handset
IR Remote Button 7
What to do when the user presses button 7 on the IR handset
IR Remote Button 8
What to do when the user presses button 8 on the IR handset
Each trigger can recall any favourite. To change the actions performed by a trigger:
FHighlight the trigger in the Triggers menu
FPress the soft-key next to the !_ (edit) icon to show the Configure Trigger menu.
Use the scroll wheel to highlight Trigger Enabled and press Select to toggle the tick on and off.
Use the scroll wheel to highlight Actions and press Select. A menu of favourites is shown.
Use the scroll wheel to select the favourite which you require, and then press Select to
tick it.
You may select any number or combination of favourites to trigger.
When you have finished selecting favourites press Back to return to the Configuration menu.
Clock Setup
The clock setup menu is access from the Configure menu. From here the current date
and time may be set.
In order for the DMX controller to be able to calculate the sunrise/sunset times it needs
to know it’s position on Earth, using longitude and latitude.
If you do not know the longitude and latitude of your site, then you may use the postcodelookup facility (UK only).
For reference, the resulting sunrise/sunset time for today is shown at the bottom of the
menu. Timed events that use the real-time-clock or the sunrise/sunset calculation are
configured using the Timed Events menu (see below).
Timed Events
DMX controller may be configured to perform the actions of a “favourite” at a specific time
or at sunrise/sunset (with an offset, if required). Timed events may be set to occur only
on specific days of the week.
The Timed Events menu is access from the Configuration menu.
To add a new timed event press the + button. The Edit Timed Event menu appears.
Firstly, give the event a name. This is done using the text editor in the normal way.
Set the type of event, either triggering at a specific GMT time, or using the built-in astronomical clock to trigger at a time determined by sunrise or sunset.
If you selected sunrise or sunset then the time becomes a + or – offset time for the event.
Events can be programmed to happen either at the same time on specific days of the
week, or on a specific date in a specific month (e.g. New Year’s Day). This is achieved
using the Date Type option.
With the Days of Week option selected in Date Type you can specify which days of the
week are to be used.
Days shown with a CAPITAL letter will
be included, whereas the trigger will not
happen on days shown with a lower-case
letter.
Once you have configured the settings for your new timed event the DMX controller will
ask you to confirm the changes made.
Notes:
The outputs of timed events will not override the setting of the “Mute” button (bottom left)
if it has been selected.
The Text Editor
The text editor enables items to be named using a mixture of upper and lower case
alphanumeric characters, special accented characters and symbols.
Use the joystick to move the highlighted bar between characters, and the Select button to
add the character that is currently highlighted to the text string shown in the title bar.
The soft-keys give access to additional character-sets and editing options:
Use „ ” and „
” to change between upper and lower case.
Use „é” to select foreign characters.
Use „I” to change between insert and overwrite modes.
The „
” symbol gives a backspace function.
Network Operation
The DMX controller has two built-in network features for use on a TCP/IP network:
1. Built-in web server
The DMX controller serves a web page that gives access to all the favourites, scenes
and sequences that have been created, as well as providing diagnostic feedback on the
current DMX outputs.
Enter the IP address of the DMX controller into your web browser. (By default the DMX
controller uses port 80 for the web page, which is also the default for web browsers, but
this can be configured if you need to use port-forwarding to control several units that are
on the same network through a router).
Use the buttons on the left of the browser window to select between Favourites, Scenes,
Sequences or the DMX Monitor diagnostic view.
Select the scene or sequence that you wish to recall, and click Apply Changes
Diagnostic output is shown in real time, and displays both the channel level and the RGB
colour mix effect produced:
Telnet Commands
The DMX controller has a built-in library of commands accessed by telnet.
The following is a list of telnet commands, items shown in bold are most frequently used.
delete
Deletes a specified file.
dir Lists the files stored within the file system.
enumerate
Enumerates a list of the system properties.
format Erases the file system, deleting all files.
get
Gets the value of a specified system property.
help
Provides Help information for console commands.
press
Simulates user button presses.
trigger
Simulates a trigger event.
read
Sends a file to the client.
quit
Closes console connection.
scroll
Simulates user scroll wheel activity.
set
Sets the value of a specified system property.
setdmxchannel Sets a DMX channel to a specified value.
write
Creates/Overwrites a file, with the specified data.
scene
Recalls the scene with the specified name
sequence
Recalls the sequence specified
favourite
Recalls the favourite specified
allstop
Cancels any sequence/scene/favourite
rescan
Force the device to rescan the file system and discover uploaded files.
clear
Clears the current lighting setup leaving the config files untouched.
home
Returns the main user interface to the Home Screen.
popup
Pops up a progress bar screen to the user.
track
Update the tracking status of the popup progress bar.
isidle : Returns Yes if device is at home screen, No otherwise.
Using Telnet to Control Master Speed/Brightness
Master speed and brightness are system properties that can be modified and read using
the “set” and “get” commands, e.g.:
set MasterBrightness 100
set MasterSpeed 250
The port used for telnet can be configured using Network Setup.
By default it is the standard port 23.
DMX Configuration
DMX controller enables detailed configuration of every aspect of the DMX packet transmission and timing.
From the Configuration menu highlight DMX Setup and press Select.
Each parameter of the DMX packet transmission may be configured from the menu
options given:
Sets the number of channels transmitted
Sets the timing of the start of the DMX packet
Sets the Mark-after-break time
Sets the delay between each set of (up to) 512
channels being transmitted
Sets the number of sets of (up to) 512 channels
Sets the DMX start code. This should not be
changed, and must always be 0 on DMX projects where RDM is being used.
Testing the DMX Output
DMX controller gives you immediate access to test the DMX output.
From the DMX Configuration menu scroll down to Test DMX Universe A or Test DMX
Universe B and press Select.
The „i”soft-key changes the information displayed in the title bar to show either the
channel name, or the name of the DMX fixture, belonging to the channel that’s currently
selected.
Pressing Select always moves you to the next channel.
The scroll wheel is either used to change the level of the channel which is currently
selected, or to move forwards or backwards between channels.
The
soft-key is used to make the scroll wheel move between channels.
The
soft-key is used to make the scroll wheel change a channel’s level.
When changing the channel’s level the speed of the scroll wheel can be adjusted:
The
The
soft-key is used to make coarse adjustments to the channel’s level.
soft-key is used to make fine single-step adjustments to a level.
Network Configuration
The DMX controller can be assigned an IP address from a DHCP server, or it can be set
to use a fixed IP address.
From the configuration menu select Network Setup.
Using a DHCP Server
If the IP addresses of devices on your network are assigned automatically by a DHCP
server (which may be your router or a server computer) then select DHCP from the
Network Setup menu.
Ensure that Use DHCP option is ticked:
You may set the hostname, by scrolling down to the HostName option and pressing
Select. A text editor is shown.
The IP address allocated to the DMX controller by the DHCP server is shown below,
along with the subnet mask and the default gateway.
Using a Fixed IP Address
To use a fixed IP address select Fixed IP from the Network Setup menu and press
Select.
In the Fixed IP menu highlight Use Fixed IP and use the Select button to tick the option.
To set the IP address, use the scroll wheel to highlight Local IP.
Press Select to select the IP address for editing. The scroll wheel changes the number
shown. Use Select to confirm, and move onto the next number.
Language and Display Setup
To choose an alternative language choose Language from the Configuration Menu.
Use the scroll wheel to select the language required:
When you have highlighted the language required press Select to tick it.
Press Back to return to the configuration menu, in the new language selected.
Setting the Display Backlight Colour
The DMX controller has an RGB backlight, that illuminates when a control has been
operated. After 20 seconds it is extinguished. You may select the backlight colour as
follows:
From the Configuration Menu highlight Display Setup and press Select.
Press Select to reveal a list of backlight colour options.
Use the scroll wheel to highlight the colour you want, and then press Select.
Press Back twice to return to the Configuration menu.
The About Menu
The About menu is near the bottom of the Configuration menu:
This menu shows the firmware version installed in your DMX controller, along with the
device’s unique MAC address. It also gives quick access to seeing the DMX controller’s
current IP address.
Firmware Update
To update the firmware in the unit:
FRemove the front fascia.
FMake sure that the DMX controller is connected to either a network with a computer
running the Firmware Server software.
FPress and hold Select and Mute (the top and bottom buttons on the left hand side)
FWhilst holding the above, press and release the concealed Reset button.
The DMX controller will request a firmware update from the server, and install its’ new
firmware automatically, which takes about 45 seconds.
When the firmware update is complete the DMX controller will restart automatically. Your
configuration will be preserved.
Utility Software
Connecting Directly, Without a Network
If you are connecting your computer directly to the DMX Generator, and you are therefore
not running on a network that has a DHCP server already then the utilities can provide
a DHCP server for you.
If you already have a DHCP server on your network (this service is usually provided by
the broadband router) then the DMX Generator will request and receive an IP address
automatically. The IP address of the DMX Generator can be determined either using the
Network Settings menu, or by looking at the About menu:
If you already have an IP address then there is no need to run the DHCP server from
within the utilities.
(A DHCP server is a computer or device on a network that allocates unique IP addresses
to devices/clients on the network)
To enable the DHCP server in any of the utilities tick the Serve DHCP box, and select the
network card from which you wish to serve, by using the drop-down menu. (It is possible
to have multiple network cards on a single computer, for example one cabled and one
wireless).
Modifying the DMX Fixture Library
To upload a replacement fixture definition library, use the Fixture Upload Utility.
Fixture definitions are given in XML format:
In order for the Quick Setup Assistant to create coloured scenes and sequences the
fixtures, and the channels in the fixture, may be given special types, as shown below.
Fixture Class
Meaning
Colour
This fixture has a single RGB, or RGBW / RGBD colour system
MultiColour
This fixture has several independent colour-mixing outputs
Dimmer
The fixture is a single channel of generic control
MultiDimmer
The fixture is a multi-channel dimmer
Channel Type
Meaning
Brightness
Overall brightness control for the fixture. “Master” channels
should use this type
RedBrightness
GreenBrightness
BlueBrightness
WhiteBrightness
DeviceSpecific
Brightness levels for individual channels within the fixture,
used for colour mixing
Any miscellaneous function for the channel, e.g. position,
gobo, focus etc.
<Fixture Name=“Generic RGBD“ Manufacturer=“Generic“ Class=“Colour“>
<Channels>
<Channel Name=“Red“ ChannelType=“RedBrightness“ />
<Channel Name=“Green“ ChannelType=“GreenBrightness“ />
<Channel Name=“Blue“ ChannelType=“BlueBrightness“ />
<Channel Name=“Brightness“ ChannelType=“Brightness“ />
</Channels>
</Fixture>
Browse for the location of the XML file, enter the IP address of the target DMX Generator,
and click Upload… to transfer the file.
Complete Configuration Backup / Restore
The configuration data from the DMX controller, which includes al fixtures, scenes, sequences, favourites, triggers and names can be extracted using the following utility.
All, or part of the configuration can also be restored.
This utility can be used for copying data from one DMX controller to another.
It can also be used for remote updates if you have the DMX controller connected to a
router with port-forwarding of the telnet port set up appropriately
Glossary of Terms
Channel
A DMX or analogue output
Universe
A group of 512 DMX channels, or the group of three analogue channels on the rear of the product. The DMX generator has 2 DMX universes.
Fixture
A pre-defined DMX device containing channels
Scene
scene A target state for one or more channels which will fade to the new values over a preset time (1/10th sec to 99 hours). More than one
may be active simultaneously.
Sequence
A number of scenes, recalled automatically over time. More than one sequence may be running simultaneously.
Favourite
A scene or sequence with a master brightness and master speed setting that can be recalled by a trigger, or from the Favourites menu.
Ripple
An advanced method of copying a scene in order to make creation of patterned sequences easy
Triggers
An input to the system that recalls a scene or sequence. Triggers include
user-mode buttons, the real-time-clock and the three configurable-
inputs on the rear of the product.
Telnet
A standard text-based method of communication with network-enabled devices, a little bit like RS232, but over Ethernet to send commands or to get data
Locale
The country in which you are using the DMX Generator, which includes the language into which all text will be translated
Logo
The pre-programmed 128x64 pixel black&white image displayed at start-up. This may be set using PC software
IP Address
The network address of the product, e.g. 192.168.2.38
DHCP
The DHCP server is a computer on the network that assigns IP ad
dresses to other computers or networked devices.