1
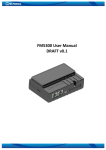
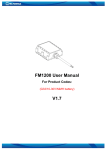
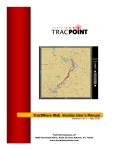
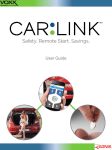
GPS TRACK MANAGER USER’S MANUAL CONTENTS GETTING STARTED Account Information > Listed Drivers Account Information > Listed Devices Account Information > Contacts Change Settings > Change Password Change Settings > Change Driver Icon Change Settings > Add New Driver Change Settings > Remove Driver Change Settings > Alert Settings Change Settings > Change Timezone Track History > Track History Geofencing > Select Geofencing Area Geofencing > View/Delete Geofences Report Generation > Travel Log Report Report Generation > Mileage Report Report Generation > Fuel Report Report Generation > DTC Report GETTING STARTED www.gpstrackmanager.com 1 Visit http://www.gpstrackmanager.com and enter the username/password. Your username and password were emailed to you in the welcome email, subject line “Welcome to GPS Track Manager”. Login to Your Account Enter your username and password and it will take you to the GPS Track Manager default view, which is always “Current Location” - the current location of the tracker based on its last report. The main menu is oriented vertically down the left side. There are 5 main menu categories: 1. 2. 3. 4. 5. Account Information Change Settings Track History Geofencing Report Generation www.gpstrackmanager.com 2 To expand any of the main menu categories, hover your mouse over the main menu category of your choice, and it will automatically expand to expose the task buttons for that menu. There are also task buttons oriented horizontally on the lower right of the screen. Real Time – Click this button to get a real-time view of your trackers as reports are received by GPS Track Manager. For accounts with only one tracker, the screen will will auto-center and maintain zoom level (zoom in/out using the zoom in/out scroll bar in the upper right of the screen, or use the scroll button on your mouse, if applicable). For accounts with more than one tracker, the screen will orient to allow a live view of all trackers simultaneously. Toggle Menu – Click this button to toggle the view of the main menu on/off (the menus going vertical down the left side). Support – Click this button to submit a support request. Logoff – Click this button to logout of your GPS Track Manager Account. Logout using this button every time you log off (i.e. do this rather than closing the window on your computer). Online Manual – Click this button to view the GPS Track Manager user’s manual. Current Location – Click this button to see the current location of your tracker(s) based on their last report. Provides a snapshot of the last read location of all trackers under your account. Last 24 Hours Chart – Click this button and select driver to plot all waypoints of the selected driver for the past 24 hours. www.gpstrackmanager.com 3 TOGGLE BETWEEN BUBBLES AND ARROWS This feature is applicable for OBD and Hard Wire trackers only. In the upper right corner (see example above), there is a green bubble. Click this to toggle between bubbles and arrows. Arrows indicate the direction of movement at the time of the report. Bubbles will let you see where idling happened. If the bubble is red, the vehicle was on (idling) but not moving. If the bubble is green, the vehicle was on and moving. Account Information > Listed Drivers Provides a listing of all drivers included in this account. Additional drivers may be added using the menu option www.gpstrackmanager.com 4 Account Information > Listed Devices Provides a listing of all devices available on this account. Devices cannot be manually added and these are listed by admin. Device with number 0211 is a dummy device that is present in all accounts. It does not read any live data. Account Information > Contacts Lists the email address and the phone number associated with the account. All alerts are sent to the email address and/or mobile phone. www.gpstrackmanager.com 5 Change Settings > Change Password: Enter old password, then enter the desired new password and confirm new password; and press SUBMIT to change the password Change Settings > Change Driver Icon : This menu enables you to select a custom icon for the driver. If “NO ICON” option is selected, then the icon is color coded. Please note that ignition sensing is applicable only to OBD and Hard Wired trackers (there is no ignition sense with the portable trackers): Green: Vehicle is running Red: Vehicle is idling Yellow: Ignition on/off Blue: Engine is off www.gpstrackmanager.com 6 Change Settings > Add New Driver : This adds a new driver to the account. Enter driver first name and last name as shown below. After this select the device associated with the driver (this shows up after the driver first name and last name is submitted). Change Settings > Remove Driver: This removes a driver (from the list of authorized drivers). TIP: Accounts come with the driver already named by default – Driver 1, Driver 2, etc. If you want to change this, you must first remove the driver (Change Settings > Remove Driver), then add a new driver to the same device (Change Settings > Add New Driver/Vehicle, type in driver first name and last name, click ‘Submit’, then choose the IMEI number of the device to assign this name, then click ‘Submit’). www.gpstrackmanager.com 7 Change Settings > Alert Settings : select which alert options are enabled. For each option that is enabled, an email is sent out to the listed email (under Account Information > Contacts). To disable alerts, select the “Alert Setting” option again and leave the checkbox unchecked for the alert option that you want to disable (while checking those that are to be enabled). TIP: Any time you enter ‘Change Alert Settings’, ensure the alerts that you want ‘ON’ are checked, even if they are already on. If left unchecked, they will turn off as soon as you click ‘Submit’. Function key alerts and Low battery alerts are only available for the GL200/GL300 portable. Ignition on/off are only available for the hard wired and OBD units. Tow alerts are only available for the OBD unit. For speed alerts, enter the speed value for sending alerts in the box provided. For low battery alerts, enter the battery capacity (%) at which the alert should be sent out. Change Settings > Add Email for Alerts: Enter email address where you would like email alerts to be sent. You can enter as many email addresses as you like. www.gpstrackmanager.com 8 Change Settings > Add SMS for Alerts: Enter mobile phone number and select the carrier where you would like SMS text alerts to be sent. You can enter as many mobile phone numbers as you like. TIP: We have the top 4 mobile service provider networks on the ‘Select Carrier’ list. Many local service companies contract through one of the top 4, so check with your cell provider to see if this is the case and then select the carrier that applies to your mobile network. If your mobile phone service is through a local company that does not contract through one of the top 4, contact us and we’ll attempt to partner with that company and coordinate compatibility. Change Settings > Remove Email/SMS for alerts: Place a check in the box next to email addresses and SMS numbers that you wish to stop receiving alerts, then click ‘Submit’. www.gpstrackmanager.com 9 Change Settings > Change Timezone : Select the appropriate time zone and click “Submit”. Following is the list of USA time zones: GMT-4 Eastern Daylight Time GMT-5 Eastern Standard Time/Central Daylight Time GMT-6 Central Standard Time/Mountain Daylight Time GMT-7 Mountain Standard Time/Pacific Daylight Time GMT-8 Pacific Standard Time GMT-10 Hawaii/Aleutian Time Zone TIP: For areas that observe standard and daylight savings time (most of the USA), you will need to change this twice a year in order for your account to display the accurate date/time information. www.gpstrackmanager.com 10 Track History > Track History : select start date and end date for viewing data. Also select the data points to be included in the chart as shown below (e.g. All, Stops Only, Ignition On/Off, Movements Only). After the ‘Submit’ button is clicked, the next window shows the list of drivers. Select driver from list and press “Submit” button. TIP: Ignition on/off applies only to OBD and hard wired trackers (portable tracker has no ignition sensing connection). The icon color codes for historical tracking are: Green : Vehicle is running Red : Vehicle is idling Blue : Vehicle is off Yellow Circles: Ignition on/off www.gpstrackmanager.com 11 Geofencing > Select Geofencing Area : This option selects the area for geofencing. Up to 10 geofence areas can be created. Type in an address in the general location where you’d like your geofence, and either choose the correct address from the pre-populated list that will appear as you type, or type in the full address and hit ‘Tab’ on your keyboard. The map will update to the specified address. To define the center and radius of your geofence, select the center marker by using your left mouse click and holding, then dragging to where you would like your Geofence center. Then left-click and drag the radius marker to define the outer boundary of the geofence circle. As the radius marker is being dragged, the red radius circle will adjust to show your defined area. Release the left mouse button. Repeat if necessary. The geofence can be as small or large as you want. Once you are satisfied with your geofence, click ‘Submit’. TIP: Make sure that the Geofencing alert is enabled under Change Settings > Alert Settings and a contact email/SMS is provided under Change Settings> Add Email/Add SMS in order to receive geofencing alerts. www.gpstrackmanager.com 12 Geofencing > View/Delete Geofences: This option enables you to scroll through all stored Geofence boundaries. Upto 10 locations can be stored. To delete any geofence location, press “Delete” button (when the “Delete” button is pressed, an icon will show up next to the “Submit” button showing that the geofence address is marked for deletion). Multiple geofences can be marked for deletion and press “Submit” button to update geofence list (and remove the ones selected for deletion). TIP: If your tracker is in a location where you’d like to be alerted when it moves, set up a quick Geofence surrounding the location of the tracker. Once it moves and you have been alerted, you can then delete the Geofence. Don’t make the Geofence radius too small as GPS drift occurs when the tracker is stationary, which may trigger false alerts. www.gpstrackmanager.com 13 Report Generation > Travel Log Report: This option enables you to generate a travel log for a specified period of time. For the portable tracker, it supports location data only. For OBD and hard wired trackers, events supported are ignition on and ignition off. Tow alerts are supported on OBD tracker only. Select date range and driver. For OBD and hard wired trackers, the events are color coded – green for vehicle running, red for idling and yellow for ignition on/off. Report Generation > Mileage Report: This option provides the mileage value at start date, mileage value at end date and miles traveled between start date and end date for the driver selected. Report Generation > Fuel Report: OBD Tracker Only. This option provides the vehicle fuel level at the start date, end date (including all refills since the start date but before the end date) and the amount of fuel consumed. Report Generation > DTC Report: OBD Tracker Only. This option provides all the Diagnostic Trouble Codes (DTC) read from the vehicle OBD port for the date range specified and driver specified. www.gpstrackmanager.com 14