1
length.
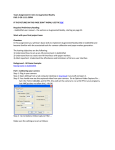
Step 9: Now copy calib.xml into the GoblinXNAv3.4\tutorials\Tutorial8 - Optical Marker Tracking folder.
Part II: Try out AR in GoblinXNA
Step 1: In GoblinXNAv3.4\tutorials\Tutorial8 - Optical Marker Tracking you will find groundALVAR.pdf
and toolbarALVAR.pdf. Print these out with page scaling set to none. You will need a longer sheet
of paper for the groundALVAR.pdf. (Actually it will still work if choose ‘Shrink to Printable Area’,
but later GoblinXNA might think the camera is further away from the marker than it actually is.)
Step 2: Now open Tutorials.sln in GoblinXNAv3.4\tutorials\. Right click on tutorial 8 and Set As Startup
Project. Make sure useStaticImage is false:
// set this to false if you are going to use a webcam
bool useStaticImage = false;
Make sure your capture parameters are set to 60 FPS at 640x480 in the SetupMarkerTracking()
method:
else
{
captureDevice = new DirectShowCapture();
captureDevice.InitVideoCapture(0, FrameRate._60Hz, Resolution._640x480,
ImageFormat.R8G8B8_24, false);
}
Step3: Hit the green arrow. Now you should see some a cube and a sphere if you point your camera at
the ground marker.
Step 4: Play around with the ground and the toolbar markers and get a feel for moving them around at
different speeds and from different distances from the camera. Try moving the camera around
with the objects stationary. Cover parts of the ground marker up and see if you can get it to
disrupt the tracking.
Part III: Create a new marker for use in AR.
Step 1: Go to the command line (Start>Run>cmd). Navigate to the folder where you unzipped
camcalibandmarkers.zip.