1
5.
Start with the front spool of the assembly; depress and hold down the
ribbon feeler lever. This allows the spool to turn freely. Push the back of the
spool towards you until it is clear of the ribbon drive shaft, then pull the front
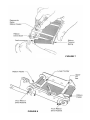
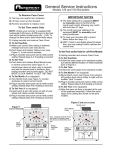
of the spool off of the ribbon tension spring. (See Figure 7)
6. Repeat step 5 to remove the rear ribbon spool. Discard the old ribbon.
7. Place the new ribbon on a piece of paper with the spools about 6" apart.
Place ribbon drive mechanism over the ribbon.
8. Starting with the rear spool, depress and hold down the rear ribbon feeler
lever. With your other hand, slide the new spool onto the stud mounted on
the ribbon tension spring. Apply pressure to the spring/spool and pivot the
spool allowing the other end to be mounted onto the ribbon drive shaft.
(See Figure 7) NOTE: Rotate the spool (with the ribbon feeler lever
depressed) slightly to correctly seat the ribbon drive shaft, if necessary.
9. Repeat Step #8 to install the other ribbon spool.
10. Remove all ribbon slack by turning either the front or rear ribbon drive
ratchet in the direction the arrow illustrates (See Figure 8) until the ribbon is
snug against the lower tie bars. The ribbon drive mechanism is now ready
to be installed on the machine.
11. Grasp the upper tie bar of the ribbon drive mechanism so that the rear
mounting slot is pointing away from you. Slide the rear mounting slot into
the rear pivot pin located on the left side of the lower housing. (See Figures
5 & 6) Then pivot the ribbon drive mechanism downward into place.
12. Lower the typehead assembly, insert the release pin from the right-hand
side. Lower the cover so that the cover latches to the typehead assembly.
Plug the unit in and insert a piece of paper into the throat until the stamp
prints. The machine is now ready for normal use.
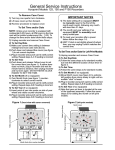
FIGURE 6