1
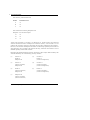
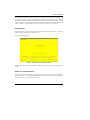
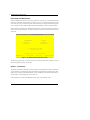
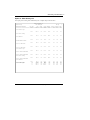
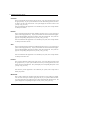
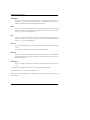
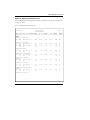
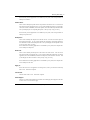
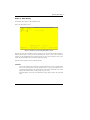
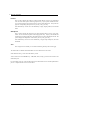
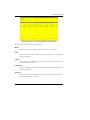
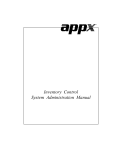
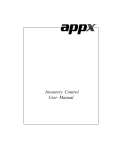
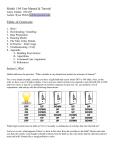
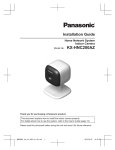
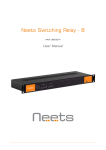
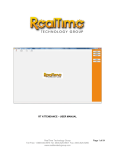
Sales Analysis
System Administration Manual
Confidential Information
This document contains proprietary
and valuable, confidential trade
secret information of
APPX Software, Inc., Richmond,
Virginia
Notice of Authorship
This publication and the computer
software it relates to were authored
by APPX Software, Inc.
© 1995 by APPX Software, Inc.
1100 Boulders Parkway
Richmond, Virginia 23225
APPX® is a registered copyright of
APPX Software, Inc.
All rights reserved. No part of this
publication may be reproduced or
used in any form or
by any means, electronic or
mechanical, including photocopying and recording, or by any
information storage and
retrieval system, without permission
in writing from APPX Software, Inc.
Table of Contents
Chapter 1: General Information ...................................................................... 1
Introduction ....................................................................................................................... 2
Purpose .............................................................................................................................. 2
Contents ....................................................................................................................... 2
Other Manuals ................................................................................................................... 2
Phases ................................................................................................................................ 3
Initial Setup ................................................................................................................. 3
Live Operations ........................................................................................................... 3
Recovery Processing ................................................................................................... 4
Procedures ......................................................................................................................... 4
Application Interfaces ........................................................................................................ 4
Special Considerations....................................................................................................... 5
Content of Postings to Sales Analysis ......................................................................... 5
Sales Analysis .................................................................................................................... 7
Option 24 - End Initial Setup ............................................................................................ 7
Chapter 2: Initial Setup File Maintenance ...................................................... 9
Option 1 - Parameters ..................................................................................................... 10
Option 2 - Sales History .................................................................................................. 12
Option 3 - Parameters List .............................................................................................. 16
Option 4 - Sales History List ........................................................................................... 17
Chapter 3: Initial Setup Opening Entries ..................................................... 19
Option 1 - Opening Transactions .................................................................................... 20
Option 2 - Opening Transactions List ............................................................................. 25
Chapter 4: Recovery Processing .................................................................... 27
Option 1 - Sales Detail .................................................................................................... 28
Option 2 - Sales History .................................................................................................. 33
Option 3 - Parameters ..................................................................................................... 36
Option 1 - Sales Analysis Defaults by User .................................................................... 38
Option 24 - End Recovery Processing ............................................................................ 39
Sales Analysis Initial Setup Manual iii
Table of Contents
iv
Sales Analysis Initial Setup Manual
Chapter 1: General Information
1 General Information
Introduction
Sales Analysis is a sales inquiry and reporting application that stores both detail and historical information transferred from such integrated applications as Accounts Receivable, Order Entry, and Commission Accounting. The amount of detail transferred to Sales Analysis is specified within the Accounts
Receivable, Commission Accounting, and Inventory Control applications.
Purpose
This manual provides instructions for using the Initial Setup phase and the Recovery Processing phase
of the APPX Sales Analysis application. Chapters 2 and 3 explain how to transfer records from your
present accounting system to the APPX Sales Analysis application. Chapter 4 explains how to use the
Recovery Processing phase to recover from abnormal situations.
Use this manual as a guide for setting up your Sales Analysis application. If you follow each of the
steps in the order described, you should have a successful installation.
All the features and options described in this manual are included in the APPX turnkey Sales Analysis
application. Any modification of the software or documentation is the responsibility of the licensed
software consultant who makes the modification.
Contents
In addition to an overview explaining the functions of the application, this manual includes:
•
Sample screen displays
•
Data field characteristics
•
Instructions and explanations for valid entries
•
Pertinent examples
•
Sample reports, lists, and inquiries
Other Manuals
The APPX User Manual provides general information about starting up your system, making entries,
printing, and using other features common to all APPX applications. Since the information contained
in the APPX User manual is not repeated in this or other APPX manuals, you should read it carefully
before working with the system.
2
Sales Analysis System Administration Manual
General Information 1
The APPX User manual, the Sales Analysis User Manual, and this Initial Setup manual, complete the
set of documentation that accompanies the Sales Analysis application.
For questions about the computer hardware used at your installation, refer to the manuals provided by
the hardware manufacturer.
Phases
The Sales Analysis application operates in three distinct phases:
•
Initial Setup
•
Live Operations
•
Recovery Processing
Each of these phases has a specific role in processing Sales Analysis data.
Initial Setup
During Initial Setup, master and system-maintained file information and transaction history can be
entered. This information provides a basis for the Live Operations phase.
Live Operations
In Live Operations, sales data, which may be transferred from Accounts Receivable, Order Entry, and
Commission Accounting, provides a basis for the reports and sales inquiry available through this application. Sales Analysis can produce a variety of reports, including:
•
Salesperson Productivity
•
Customer Activity
•
Product Activity
•
Sales By Area
•
Detail Sales Analysis
•
Sales History
•
Sales Comparison
•
Sales Percentage
•
Units Percentage
Sales Analysis System Administration Manual
3
1 General Information
Inquiry functions are available to display a variety of sales history information, including history by
customer, by product, and by salesperson.
Recovery Processing
As you use the Sales Analysis application, there is a certain day-to-day risk of losing data due to sudden
power surges or outages, and other system problems. Recovery Processing is used to manually restore
information to system-maintained fields and files that are normally not accessible during the Live Operations phase. Recovery Processing is provided as an aid to your software consultant and should only
be accessed by your consultant or under his or her direction.
Procedures
Initial Setup procedures are designed to establish “Master File Records” and to help you transfer information from existing records to the Sales Analysis application.
The first step in Initial Setup involves entering master file and historical data for the application. Here
is a list of those files:
•
Parameters
•
Sales History
In the next step, you may enter Opening Transactions from the Opening Entries menu. These entries
will be recorded on detailed sales reports available through Live Operations. Once you complete these
entries, print an Opening Transactions list to verify your entries.
The third and final step in the Initial Setup procedure is End Initial Setup. After you select this menu
option, the system begins the Live Operations phase.
Application Interfaces
The Sales Analysis application has no transaction processing functions. It receives sales transaction
detail and sales history from Accounts Receivable invoice postings, Order Entry invoice postings, and/
or Commission Accounting commission postings, depending upon the configuration of your individual
system. Each of these applications has a flag in its Parameter file, Post to Sales Analysis (SA)?, which
governs whether or not that application will interface with the Sales Analysis application. While Sales
Analysis is stand-alone to the extent that it does not require the existence of any one of these other
applications, at least one must exist to generate Sales Analysis data.
4
Sales Analysis System Administration Manual
General Information 1
Special Considerations
Before beginning Initial Setup, you need to consider several options that may affect your system’s operation. The Special Considerations section includes a discussion of accounting design issues and some
optional features, which allow you to tailor your system to your particular organization. The following
pages describe these system options.
Content of Postings to Sales Analysis
The content or “detail,” which is contained in the postings generated for Sales Analysis, is based upon
entries in master files in Accounts Receivable, Commission Accounting, and Inventory Control. Sales
Analysis identifies transactions by a combination of customer, salesperson, and product. For each
customer, you can either separately identify sales transactions, or you can group sales with the sales
transactions of other “nondetail” customers as a unit. You have the same option with each salesperson
and each product. In Accounts Receivable, this choice is indicated in the Post To Sales Analysis? field
on the Customers record. In Inventory Control, the Post Detail to SA? field is located on the Product
record. In Commission Accounting, the Post To Sales Analysis? field is found on the Salesperson’s
record.
For a transaction with a nondetail customer, product, and salesperson, no posting will be made to Sales
Analysis. For an individual transaction record to be posted to Sales Analysis, at least one of these
fields must be set to ‘Y’. If Order Entry, Inventory Control, or Accounts Receivable is not a part of
your system, the salesperson, product, or customer record will not be available to indicate detail or
nondetail postings. In this case, the system will assume you are keeping detail. For example, if your
system does not include Inventory Control, but you do enter a product number on the Accounts Receivable invoice record, the transaction posting to Sales Analysis will reflect the product number entered,
not a blank. (The only exception would occur if the customer and salesperson were both nondetail.
The system will not create a Sales Analysis posting solely on the basis of an assumed detail selection
relating to a nonexistent application.)
This example outlines the impact of entries in the Accounts Receivable, Order Entry, and Inventory
Control master file records on postings to Sales Analysis. Assume the following:
In the Accounts Receivable Customers file:
Customer
Post To Sales Analysis?
1
‘N’
2
‘Y’
3
‘N’
Sales Analysis System Administration Manual
5
1 General Information
In the Inventory Control Products file:
Product
Post Detail To SA?
A
‘Y’
B
‘N’
C
‘N’
In the Commission Accounting Salespersons file:
Salesperson Post To Sales Analysis?
21
‘N’
22
‘N’
23
‘Y’
Assume a sale of Product A to Customer 1 by Salesperson 23. In Sales Analysis, this transaction
would be identified as Product A/Salesperson 23/Customer (blank). Since Customer 3 is also
nondetail, this transaction would be grouped with sales of Product A/Salesperson 23/Customer 3.
However, a sale of Product A/Salesperson 23/Customer 2 would be kept separately from the other two
sales transactions, since, according to the Customer’s file entry, transactions for Customer 2 are to be
identified separately from all other customers.
Based upon the indicated master file selections, all postings to Sales Analysis detail and history files
would be identified by one of the following seven key structures:
(1)
Customer 2
Product A
Salesperson 23
(2)
Customer 2
Product A
(All non-23 salespersons)
(3)
Customer 2
(All non-A products)
Salesperson 23
(4)
Customer 2
(All non-A products)
(All non-23 salespersons)
(5)
Product A
(All non-2 customers)
Salesperson 23
(6)
Product A
(All non-2 customers)
(All non-23 salespersons)
(7)
Salesperson 23
(All non-A products)
(All non-2 customers)
6
Sales Analysis System Administration Manual
General Information 1
To find the total sales for a product (or customer or salesperson) for which detail is being kept, the
system must sum up all records containing that product (or customer or salesperson) as part of the key.
For example, total sales for Product A would be represented by transactions reported for key structures
1, 2, 5, and 6 above. Total sales for Products B or C cannot be identified, since they are nondetail
products. However, total sales for B and C is represented by 3, 4, and 7 (non-A products).
Sales Analysis
You may use Initial Setup to establish the Parameters master file and Sales History file by converting
and entering data from existing accounting records.
This is the Initial Setup menu:
Figure 1. The Sales Analysis Initial Setup Menu
Chapter 2 describes the File Maintenance menu selection. Chapter 3 describes the Opening Entries
selection.
Option 24 - End Initial Setup
While you are still in the Initial Setup phase of Sales Analysis, you can continue to access and change
fields on all screens. Once you have established all necessary master files, and created and processed
your opening entries, you may end Initial Setup.
Sales Analysis System Administration Manual
7
1 General Information
After you select this procedure, the Live Operations phase automatically begins, and certain fields and
files may become inaccessible. When Initial Setup is ended, the following changes occur:
•
The Sales History file becomes system-maintained and cannot be changed.
•
The Sales Detail file becomes system-maintained and cannot be changed.
When you are ready to end the Initial Setup phase, select “End Initial Setup?” from the Initial Setup
menu. The screen below appears.
Figure 2. The Sales Analysis End Initial Setup Screen
Data items for the preceding screen are described below.
End Initial Setup?
By default, the system displays ‘Y’ in this field. Press RETURN to end Initial Setup and begin
the Live Operations phase. Enter ‘N’ to continue in Initial Setup.
8
Sales Analysis System Administration Manual
Chapter 2: Initial Setup File Maintenance
2 Initial Setup File Maintenance
Initial Setup File Maintenance
Each File Maintenance selection on this menu represents a master file or a system-maintained file.
These files are arranged in logical order on the menu, so that you can enter information into each file
in the order shown. If you need to change this information after you complete the Initial Setup phase,
you can change most of the fields and files through File Maintenance in the Live Operations phase.
After data has been entered for each File Maintenance function, use the corresponding List function to
print out and verify the information. You may print these lists as often as necessary to check the status
of each file.
Figure 3. The Initial Setup File Maintenance Menu
The following pages provide you with instructions for entering file information. Sample screens are
shown along with descriptions of each field.
Option 1 - Parameters
The Parameters file defines important system-wide options and requirements that affect the operation
of your application. The information in this file specifies how long detail sales and sales history information is to be stored in system-maintained files. It also includes the current calendar month and year,
and the number of accounting periods in your fiscal year.
Select “Parameters” from the File Maintenance menu. Here is the Parameters screen:
10
Sales Analysis System Administration Manual
Initial Setup File Maintenance 2
Figure 4. The Initial Setup Parameters Screen
Data items for the preceding screen are described below:
Calendar Month/Year
Enter the current calendar month and year.
Number of Fiscal Months
Enter ‘12’ or ‘13’ to specify the number of periods in the fiscal year.
Months of Detail
Enter the number of months of sales detail to keep on file. After the system reaches this number, the detail records for the oldest month are deleted during Close Month processing in Live
Operations. This number should be at least twice the number of fiscal months so that “last
year” and “this year” history is available for reporting.
Months of History
Enter the number of months of sales history to keep on file. After the system reaches this
number, the records for the oldest month are deleted during Close Month processing in Live
Operations. This number should be at least twice the number of fiscal months so that “last
year” and “this year” history is available for reporting.
The entered data is validated. Press RETURN to save the information on this screen.
Sales Analysis System Administration Manual
11
2 Initial Setup File Maintenance
Option 2 - Sales History
Before Live Operations begins, you have the option of entering summarized sales history information
into this Sales History file. If you choose to use this program, please refer first to the Special Considerations section of this manual for a detailed explanation and example as to how you might set up and
maintain these records. If you choose not to enter summarized sales history information into this file,
you should not use the Opening Entries program to enter opening transactions into the Sales Detail file.
For each customer/product/salesperson combination for which you wish to maintain a historical sales
record, enter sales, commission, margin and units information by calendar month and year. The system will store this history for the period of time specified in the Parameters file.
Once Sales Analysis goes into the Live Operations phase, this file will become inaccessible, and summarized transaction history posted from Accounts Receivable, Order Entry, and Commission Accounting will build in this file.
Here is the Sales History screen:
Figure 5. The Initial Setup Sales History Screen
When the key value for a particular record is requested, you can review all the records in the file by
selecting the Scan option. The records will be presented on an “Access” screen, and you will be allowed to scan the available data until you find the record you want. Then, position the cursor by that
record and press RETURN; the record will be displayed for editing.
12
Sales Analysis System Administration Manual
Initial Setup File Maintenance 2
Data items for the preceding screen are described below:
Customer
Enter a code to identify the customer for whom the Sales History record is to be maintained.
You can use the Scan option to find an appropriate entry. If your system includes the Accounts Receivable application, this number must be on file in the Customers file. The system
displays the customer’s name so that you may verify your entry.
If the Sales History record is not to be identified by a single, unique customer, leave this field
blank.
Product
Enter a code to identify the product for which the Sales History record is to be maintained.
You can use the Scan option to find an appropriate entry. If your system includes the Inventory Control application, this number must be on file in the Products file. The system displays the corresponding description so that you may verify your entry.
If the Sales History record is not to be identified by a single, unique product, leave this field
blank.
Salesperson
Enter a code to identify the salesperson for whom the Sales History record is to be maintained. You can use the Scan option to find an appropriate entry. If your system includes the
Commission Accounting application, this number must be on file in the Salespersons file. The
system displays the salesperson’s name so that you may verify your entry.
If the Sales History record is not to be identified by a single, unique salesperson, leave this
field blank.
Year
Enter 2 digits for the calendar year to which the following monthly sales records apply.
The entered data is validated. Press RETURN to save the information on this screen.
Select Next Record to go to the next Sales History record.
At this screen the use of the MODE keys—ADD, DEL, CHG, or INQ—pertain to those records in the
Sales History file.
Sales Analysis System Administration Manual
13
2 Initial Setup File Maintenance
For each month of the year, enter the following line item information for this customer/product/salesperson. A sample line item screen is shown below:
Figure 6. The Initial Setup Sales History by Month Screen
Data items for the preceding screen are described below:
Month
Enter 2 digits to identify the calendar month to which this sales record applies.
Sales
Enter up to 7 digits and 2 decimals for the total, gross sales figure for this customer/product/
salesperson combination.
Credits
Enter up to 7 digits and 2 decimals for the total amount of credits issued to this customer/
product/salesperson combination.
Commission
Enter up to 7 digits and 2 decimals for the total commissions earned by this customer/product/
salesperson combination.
Sales Tax
Enter up to 7 digits and 2 decimals for the total amount of sales tax paid on sales to this customer/product/ salesperson combination.
14
Sales Analysis System Administration Manual
Initial Setup File Maintenance 2
Margin
Enter up to 7 digits and 2 decimals for the total margin (sales minus cost) for this customer/
product/salesperson combination.
Shipped
Enter up to 5 digits and 2 decimals for the total number of stockkeeping units shipped for this
customer/product/ salesperson combination.
Not Shipped
Enter up to 5 digits and 2 decimals for the total number of stockkeeping units ordered — but
not shipped — to this customer/product/salesperson. “Not shipped” orders (that is, orders
which were neither filled, nor backordered) represent lost sales.
The entered data is validated. Press RETURN to save the information on this screen.
Select the Previous Image option to go back to the Sales History screen. Select the Next Record option
to go to the next Sales History by Month screen. Select the END option to go to the next Sales History
screen.
At this screen the use of the MODE keys—ADD, DEL, CHG, or INQ—pertain to those records in the
Sales History by Month file.
Sales Analysis System Administration Manual
15
2 Initial Setup File Maintenance
Option 3 - Parameters List
You can print the contents of any file by selecting the corresponding list from the File Maintenance
menu. Lists include those items in each record that can be entered or changed, as well as systemmaintained information.
During Live Operations, you should print lists to check the accuracy of the data that is being entered.
These lists provide you with a printed record of the information used during Live Operations.
Use this function to print the Parameters List. A sample output is shown below.
Expert Distributing, Inc.
KAY Page:
1
Sales Analysis Parameters List
==================================================================================================================================
04/09/91 03:18 pm
Current Calendar Month / Year
Number of Fiscal Months
Months of Detail
Months of History
16
Sales Analysis System Administration Manual
8 89
12
36
36
Initial Setup File Maintenance 2
Option 4 - Sales History List
This option prints a listing of the Sales History file. A sample output is shown below.
Expert Distributing, Inc.
04/09/91 04:34 pm
KAY Page:
1
Sales History List
Customer/Product/Salesperson
Year Month
Sales
Credits
Margin Commission
Sales Tax
Shipped Not Ship
==================================================================================================================================
89 08
1350.00
0.00
469.88
67.50
0.00
3.75
0.00
010 Mr. Jarvis W. Payne
89 08
1500.00
0.00
290.00
117.65
0.00
9.00
0.00
89 08
275.00
0.00
275.00
290.00
0.00
1.00
0.00
89 08
90.00
0.00
86.63
0.00
0.00
0.25
0.00
89 08
640.00
0.00
640.00
32.00
0.00
2.00
0.00
89 08
1250.00
0.00
700.00
62.50
0.00
5.00
0.00
89 08
960.00
0.00
210.00
76.80
0.00
3.00
0.00
89 08
3150.00
0.00
650.00
58.50
0.00
10.00
0.00
89 08
290.00
0.00
265.00
290.00
0.23
1.00
0.00
88 06
08
10
11
12
300.00
900.00
1200.00
2400.00
3000.00
0.00
0.00
0.00
0.00
0.00
105.67
491.90
509.44
1165.60
1486.20
0.00
0.00
0.00
0.00
0.00
0.00
0.00
0.00
0.00
0.00
1.00
3.00
4.00
8.00
10.00
0.00
0.00
0.00
0.00
0.00
020 Mr. James V. Anthony
040 Mr. Max Woolf
999 House Commissions Record
10
#10 3-1/2" White Round
10 #10 3-1/2" White Round
010 Mr. Jarvis W. Payne
20
#4 12" Gold Plated Black Round
20 #4 12" Gold Plated Black Round
020 Mr. James V. Anthony
20 #4 12" Gold Plated Black Round
040 Mr. Max Woolf
30 #56 10" Red Cylinder
010 Mr. Jarvis W. Payne
Sales Analysis System Administration Manual
17
2 Initial Setup File Maintenance
18
Sales Analysis System Administration Manual
Chapter 3: Initial Setup Opening Entries
3 Initial Setup Opening Entries
Initial Setup Opening Entries
After you have set up the Parameters file and entered any needed historical information into the Sales
History file, you may enter information for opening transactions. This information provides a basis on
which the system builds during the Live Operations phase. The Opening Entries programs are optional
during Initial Setup.
Figure 7. The Initial Setup Opening Entries Screen
Option 1 - Opening Transactions
Before the Live Operations phase begins, you have the option of entering sales detail history information into this Sales Detail file. If you choose to use this program, please refer first to the Special Considerations section of this manual for a detailed explanation and example as to how you might set up
and maintain these records. If you choose not to use this program, you should not use the File Maintenance program to enter summarized sales history into the Sales History file.
The system will store this history for the period of time specified in the Parameters file. Once Sales
Analysis goes into the Live Operations phase, this file will become inaccessible, and transaction detail
posted from Accounts Receivable, Order Entry, and Commission Accounting will build in this file.
Here is the Opening Transactions screen:
20
Sales Analysis System Administration Manual
Initial Setup Opening Entries 3
Figure 8. The Initial Setup Sales Detail Screen
When the key value for a particular record is requested, you can review all the records in the file by
selecting the Scan option. The records will be presented on an “Access” screen, and you will be allowed to scan the available data until you find the record you want. Then, position the cursor by that
record and press RETURN; the record will be displayed for editing.
Data items for the preceding screen are described below:
Invoice
Enter up to 8 characters to identify the invoice number of this sale.
Line Number
Enter up to 4 digits to identify the invoice line number for this sales detail.
Sequence
In case of duplicate invoice numbers, enter up to 4 digits to assign a sequential number to this
invoice/line item combination.
Post Month/Year
Enter 2 digits for the calendar month and 2 digits for the calendar year in which the invoice
was posted.
Month ‘EY’ (End-of-year) is entered as 99.
Sales Analysis System Administration Manual
21
3 Initial Setup Opening Entries
Customer
Enter a code to identify the customer on the sales invoice. You can use the Scan option to find
an appropriate entry. If your system includes the Accounts Receivable application, this number must be on file in the Customers file. The system displays the customer’s name so that
you may verify your entry.
If the Accounts Receivable application is not included in your system, enter a unique number
to identify the customer.
Division
Enter a code to identify the sales division credited for the sales invoice. You can use the Scan
option to find an appropriate entry. If your system includes the Accounts Receivable application, this field will default, based on the customer, from the Customers file. The system displays the corresponding description so that you may verify your entry.
If the Accounts Receivable application is not included in your system, enter a unique number
to identify the customer division.
Area
Enter a code to identify the customer area credited for the sales invoice. You can use the Scan
option to find an appropriate entry. If your system includes the Accounts Receivable application, this field will default, based on the customer, from the Customers file. The system displays the corresponding description so that you may verify your entry.
If the Accounts Receivable application is not included in your system, enter a unique number
to identify the customer area.
Product
Enter a code to identify the product on the sales invoice. You can use the Scan option to find
an appropriate entry. If your system includes the Inventory Control application, this code
must be on file in the Products file. The system displays the corresponding description so that
you may verify your entry.
If the Inventory Control application is not included on your system, enter a unique code to
identify the product.
Warehouse
Enter a code to identify the warehouse from which the sales invoice product was shipped.
You can use the Scan option to find an appropriate entry. If your system includes the Inventory Control application, this number must be on file in the Products By Warehouse file. The
system displays the corresponding description so that you may verify your entry.
22
Sales Analysis System Administration Manual
Initial Setup Opening Entries 3
If the Inventory Control application is not included in your system, enter a unique number to
identify the warehouse.
Product Class
Enter a code to identify the product class for the product on the sales invoice. You can use the
Scan option to find an appropriate entry. If your system includes the Inventory Control application, this number will default, based on the product, from the Products By Warehouse file.
The system displays the corresponding description so that you may verify your entry.
If the Inventory Control application is not included in your system, enter a unique number to
identify the product class.
Salesperson
Enter a code to identify the salesperson on the sales invoice. You can use the Scan option to
find an appropriate entry. If your system includes the Commission Accounting application,
this code must be on file in the Salespersons file. The system displays the salesperson’s name
so that you may verify your entry.
If the Commission Accounting application is not included in your system, enter a unique number to identify the salesperson.
Sales Area
Enter a code to identify the salesperson’s sales area for the sales invoice. You can use the
Scan option to find an appropriate entry. If your system includes the Commission Accounting
application, this code will default, based on the salesperson, from the Sales Areas file. The
system displays the sales area name so that you may verify your entry.
If the Commission Accounting application is not included in your system, enter a unique number to identify the sales area.
Apply To
If this sales invoice is to be applied to an existing invoice, enter up to 8 characters to identify
that invoice. This field is required.
Invoice Date
Enter the date of the invoice. This field is required.
Units Shipped
Enter up to 5 digits and 2 decimals for the number of stockkeeping units shipped on this sales
invoice. Enter ‘1’ if units do not apply.
Sales Analysis System Administration Manual
23
3 Initial Setup Opening Entries
Not Shipped
Enter up to 5 digits and 2 decimals for the total number of stockkeeping units ordered — but
not shipped — to this customer/product/salesperson. “Not shipped” orders (that is, orders
which were neither filled, nor backordered) represent lost sales.
Price
Enter up to 7 digits and 2 decimals for the price per stockkeeping unit of the product on this
sales invoice. If the price per unit does not apply in this case, enter the amount of the sale here
and enter a ‘1’ in the Units Shipped field.
Cost
Enter up to 6 digits and 3 decimals for the cost per stockkeeping unit of the product on this
sales invoice. If the cost per unit does not apply in this case, enter the amount of the sale here
and enter a ‘1’ in the Units Shipped field.
Amount
The system calculates and displays the amount of this line item by multiplying Units Shipped
by Price.
If you change this field, the Price will be recomputed and redisplayed.
Sales Tax
Enter up to 7 digits and 2 decimals for the sales tax on this sales invoice. When posted from
Accounts Receivable or Order Entry, this amount is prorated based on the line item amount
and the invoice Subtotal.
Commission
Enter up to 7 digits and 2 decimals for the amount of commission on this sales invoice line
item.
The entered data is validated. Press RETURN to save the information on this screen.
Select Next Record to go to the next Sales Detail record.
At this screen the use of the MODE keys—ADD, DEL, CHG, or INQ—pertain to those records in the
Sales Detail file.
24
Sales Analysis System Administration Manual
Initial Setup Opening Entries 3
Option 2 - Opening Transactions List
Once you have finished entering opening transactions, you should print an Opening Transactions List
to verify your entries.
Here is a sample Opening Transactions List:
Expert Distributing, Inc.
04/09/91 04:36 pm
KAY Page:
1
Opening Transactions List
Month
Invoice
Line
Inv Date Div
Sales Shipped
Unit Cost
Discounted
Amount
Commission
Prod Class
/Year
Apply To
Seq
Area Area Not Ship
Unit Price
Sales Tax
Warehouse
=================================================================================================================================
Customer
Product
Salesperson 10 Mr. Jarvis W. Payne
08
89
1002
1002
0002
0001
08/12/89
03
01
10
3.00
0.00
290.000
360.000
1080.00
54.00
0.00
020
20
Salesperson 20 Mr. James V. Anthony
08
89
B6704
B6704
0001
0001
08/14/89
01
01
10
4.00
0.00
290.000
360.000
1440.00
115.20
0.00
020
20
08
89
B6704
B6704
0003
0001
08/14/89
01
01
10
5.00
0.00
10.000
12.000
60.00
2.45
0.00
010
20
01
01
20
1.00
0.00
0.000
275.000
275.00
290.00
0.00
000
00
00
00
90
0.25
0.00
13.500
360.000
90.00
0.00
0.00
02
02
30
2.00
0.00
0.000
320.000
640.00
32.00
0.00
020
20
03
01
10
5.00
0.00
110.000
250.000
1250.00
62.50
0.00
010
10
30
3.00
0.00
250.000
320.000
960.00
76.80
0.00
030
10
Salesperson 40 Mr. Max Woolf
08
89
1005
1005
0002
0001
08/20/89
Salesperson 999 House Commissions Record
08
89
1004
1004
0001
0002
08/15/89
*
020
20
Product 10 #10 3-1/2" White Round
Salesperson 0
08
89
3056
3056
0002
0001
08/12/89
Salesperson 10 Mr. Jarvis W. Payne
08
89
1002
1002
0001
0001
08/12/89
Product 20 #4 12" Gold Plated Black Round
Salesperson 0
08
89
4022
4022
0001
0001
08/10/89
01
01
Salesperson 10 Mr. Jarvis W. Payne
Sales Analysis System Administration Manual
25
3 Initial Setup Opening Entries
26
Sales Analysis System Administration Manual
Chapter 4: Recovery Processing
4 Recovery Processing
This menu contains function that allows recovery from abnormal situations. The functions on this
menu are not used during normal processing. Special security should be required to access this menu.
Figure 9. The Sales Analysis Recovery Processing Menu
Option 1 - Sales Detail
This function allows access to the Sales Detail file.
Here is the Sales Detail screen:
28
Sales Analysis System Administration Manual
Recovery Processing 4
Figure 10. The Recovery Processing Sales Detail Screen
When the key value for a particular record is requested, you can review all the records in the file by
selecting the Scan option. The records will be presented on an “Access” screen, and you will be allowed to scan the available data until you find the record you want. Then, position the cursor by that
record and press RETURN; the record will be displayed for editing.
Data items for the preceding screen are described below:
Invoice
Enter up to 8 characters to identify the invoice number of this sale.
Line Number
Enter up to 4 digits to identify the invoice line number for this sales detail.
Sequence
In case of duplicate invoice numbers, enter up to 4 digits to assign a sequential number to this
invoice/line item combination.
Post Month/Year
Enter 2 digits for the calendar month and 2 digits for the calendar year in which the invoice
was posted.
Month ‘EY’ (End-of-year) is entered as 99.
Sales Analysis System Administration Manual
29
4 Recovery Processing
Customer
Enter a code to identify the customer on the sales invoice. You can use the Scan option to find
an appropriate entry. If your system includes the Accounts Receivable application, this number must be on file in the Customers file. The system displays the customer’s name so that
you may verify your entry.
If the Accounts Receivable application is not included in your system, enter a unique number
to identify the customer.
Division
Enter a code to identify the sales division credited for the sales invoice. You can use the Scan
option to find an appropriate entry. If your system includes the Accounts Receivable application, this field will default, based on the customer, from the Customers file. The system displays the corresponding description so that you may verify your entry.
If the Accounts Receivable application is not included in your system, enter a unique number
to identify the customer division.
Area
Enter a code to identify the customer area credited for the sales invoice. You can use the Scan
option to find an appropriate entry. If your system includes the Accounts Receivable application, this field will default, based on the customer, from the Customers file. The system displays the corresponding description so that you may verify your entry.
If the Accounts Receivable application is not included in your system, enter a unique number
to identify the customer area.
Product
Enter a code to identify the product on the sales invoice. You can use the Scan option to find
an appropriate entry. If your system includes the Inventory Control application, this code
must be on file in the Products file. The system displays the corresponding description so that
you may verify your entry.
If the Inventory Control application is not included on your system, enter a unique code to
identify the product.
Warehouse
Enter a code to identify the warehouse from which the sales invoice product was shipped.
You can use the Scan option to find an appropriate entry. If your system includes the Inventory Control application, this number must be on file in the Products By Warehouse file. The
system displays the corresponding description so that you may verify your entry.
30
Sales Analysis System Administration Manual
Recovery Processing 4
If the Inventory Control application is not included in your system, enter a unique number to
identify the warehouse.
Product Class
Enter a code to identify the product class for the product on the sales invoice. You can use the
Scan option to find an appropriate entry. If your system includes the Inventory Control application, this number will default, based on the product, from the Products By Warehouse file.
The system displays the corresponding description so that you may verify your entry.
If the Inventory Control application is not included in your system, enter a unique number to
identify the product class.
Salesperson
Enter a code to identify the salesperson on the sales invoice. You can use the Scan option to
find an appropriate entry. If your system includes the Commission Accounting application,
this code must be on file in the Salespersons file. The system displays the salesperson’s name
so that you may verify your entry.
If the Commission Accounting application is not included in your system, enter a unique number to identify the salesperson.
Sales Area
Enter a code to identify the salesperson’s sales area for the sales invoice. You can use the
Scan option to find an appropriate entry. If your system includes the Commission Accounting
application, this code will default, based on the salesperson, from the Sales Areas file. The
system displays the sales area name so that you may verify your entry.
If the Commission Accounting application is not included in your system, enter a unique number to identify the sales area.
Apply To
If this sales invoice is to be applied to an existing invoice, enter up to 8 characters to identify
that invoice. This field is required.
Invoice Date
Enter the date of the invoice. This field is required.
Units Shipped
Enter up to 5 digits and 2 decimals for the number of stockkeeping units shipped on this sales
invoice. Enter ‘1’ if units do not apply.
Sales Analysis System Administration Manual
31
4 Recovery Processing
Not Shipped
Enter up to 5 digits and 2 decimals for the total number of stockkeeping units ordered — but
not shipped — to this customer/product/salesperson. “Not shipped” orders (that is, orders
which were neither filled, nor backordered) represent lost sales.
Price
Enter up to 7 digits and 2 decimals for the price per stockkeeping unit of the product on this
sales invoice. If the price per unit does not apply in this case, enter the amount of the sale here
and enter a ‘1’ in the Units Shipped field.
Cost
Enter up to 6 digits and 3 decimals for the cost per stockkeeping unit of the product on this
sales invoice. If the cost per unit does not apply in this case, enter the amount of the sale here
and enter a ‘1’ in the Units Shipped field.
Amount
The system calculates and displays the amount of this line item by multiplying Units Shipped
by Price.
If you change this field, the Price will be recomputed and redisplayed.
Sales Tax
Enter up to 7 digits and 2 decimals for the sales tax on this sales invoice. When posted from
Accounts Receivable or Order Entry, this amount is prorated based on the line item amount
and the invoice Subtotal.
Commission
Enter up to 7 digits and 2 decimals for the amount of commission on this sales invoice line
item.
The entered data is validated. Press RETURN to save the information on this screen.
Select Next Record to go to the next Sales Detail record.
At this screen the use of the MODE keys—ADD, DEL, CHG, or INQ—pertain to those records in the
Sales Detail file.
32
Sales Analysis System Administration Manual
Recovery Processing 4
Option 2 - Sales History
This function allows access to the Sales History files.
Here is the Sales History screen:
Figure 11. The Recovery Processing Sales History Screen
When the key value for a particular record is requested, you can review all the records in the file by
selecting the Scan option. The records will be presented on an “Access” screen, and you will be allowed to scan the available data until you find the record you want. Then, position the cursor by that
record and press RETURN; the record will be displayed for editing.
Data items for the preceding screen are described below:
Customer
Enter a code to identify the customer for whom the Sales History record is to be maintained.
You can use the Scan option to find an appropriate entry. If your system includes the Accounts Receivable application, this number must be on file in the Customers file. The system
displays the customer’s name so that you may verify your entry.
If the Sales History record is not to be identified by a single, unique customer, leave this field
blank.
Sales Analysis System Administration Manual
33
4 Recovery Processing
Product
Enter a code to identify the product for which the Sales History record is to be maintained.
You can use the Scan option to find an appropriate entry. If your system includes the Inventory Control application, this number must be on file in the Products file. The system displays the corresponding description so that you may verify your entry.
If the Sales History record is not to be identified by a single, unique product, leave this field
blank.
Salesperson
Enter a code to identify the salesperson for whom the Sales History record is to be maintained. You can use the Scan option to find an appropriate entry. If your system includes the
Commission Accounting application, this number must be on file in the Salespersons file. The
system displays the salesperson’s name so that you may verify your entry.
If the Sales History record is not to be identified by a single, unique salesperson, leave this
field blank.
Year
Enter 2 digits for the calendar year to which the following monthly sales records apply.
The entered data is validated. Press RETURN to save the information on this screen.
Select Next Record to go to the next Sales History record.
At this screen the use of the MODE keys—ADD, DEL, CHG, or INQ—pertain to those records in the
Sales History file.
For each month of the year, enter the following line item information for this customer/product/salesperson. A sample line item screen is shown below:
34
Sales Analysis System Administration Manual
Recovery Processing 4
Figure 12. The Recovery Processing Sales History by Month Screen
Data items for the preceding screen are described below:
Month
Enter 2 digits to identify the calendar month to which this sales record applies.
Sales
Enter up to 7 digits and 2 decimals for the total, gross sales figure for this customer/product/
salesperson combination.
Credits
Enter up to 7 digits and 2 decimals for the total amount of credits issued to this customer/
product/salesperson combination.
Commission
Enter up to 7 digits and 2 decimals for the total commissions earned by this customer/product/
salesperson combination.
Sales Tax
Enter up to 7 digits and 2 decimals for the total amount of sales tax paid on sales to this customer/product/ salesperson combination.
Sales Analysis System Administration Manual
35
4 Recovery Processing
Margin
Enter up to 7 digits and 2 decimals for the total margin (sales minus cost) for this customer/
product/salesperson combination.
Shipped
Enter up to 5 digits and 2 decimals for the total number of stockkeeping units shipped for this
customer/product/ salesperson combination.
Not Shipped
Enter up to 5 digits and 2 decimals for the total number of stockkeeping units ordered — but
not shipped — to this customer/product/salesperson. “Not shipped” orders (that is, orders
which were neither filled, nor backordered) represent lost sales.
The entered data is validated. Press RETURN to save the information on this screen.
Select the Previous Image option to go back to the Sales History screen. Select the Next Record option
to go to the next Sales History by Month screen. Select the END option to go to the next Sales History
screen.
At this screen the use of the MODE keys—ADD, DEL, CHG, or INQ—pertain to those records in the
Sales History by Month file.
Option 3 - Parameters
This function allows entry and maintenance of the Parameters file.
Select “Parameters” from the Recovery Processing menu. Here is the Parameters screen:
36
Sales Analysis System Administration Manual
Recovery Processing 4
Figure 13. The Recovery Processing Parameters Screen
Data items for the preceding screen are described below:
Calendar Month/Year
Enter the current calendar month and year.
Number of Fiscal Months
Enter ‘12’ or ‘13’ to specify the number of periods in the fiscal year.
Months of Detail
Enter the number of months of sales detail to keep on file. After the system reaches this number, the detail records for the oldest month are deleted during Close Month processing in Live
Operations. This number should be at least twice the number of fiscal months so that “last
year” and “this year” history is available for reporting.
Months of History
Enter the number of months of sales history to keep on file. After the system reaches this
number, the records for the oldest month are deleted during Close Month processing in Live
Operations. This number should be at least twice the number of fiscal months so that “last
year” and “this year” history is available for reporting.
Sales Analysis System Administration Manual
37
4 Recovery Processing
Maintain Sales Summary?
This flag controls posting of Sales History to the Sales Analysis Inquiry database. Posting
sales history to the Sales Analysis database must be done if you intend to use the Sales Inquiry
process.
Sales Analysis Default Columns
Select the default columns for the Sales Analysis Inquiry. These defaults are used when there
are no User defaults defined for the current user. Use SCAN to select from the list of available columns.
The entered data is validated. Press RETURN to save the information on this screen.
Please note that Option 1 is available at the bottom of this screen.
Option 1 - Sales Analysis Defaults by User
Figure 14. The Recovery Processing Defaults by User Screen
The following fields are contained on the Sales Analysis Defaults by User screen:
User Information
The system displays three charaters and a description for each user.
Column 1
Select the default columns for the Sales Analysis Inquiry. These defaults are used for this
user only and override the general defaults.
38
Sales Analysis System Administration Manual
Recovery Processing 4
Option 24 - End Recovery Processing
This job ends the Recovery Processing phase and returns processing to Live Operations. The following processing steps accomplish this job.
Step 1
This function is used to select the option to end the Recovery Processing phase.
The screen shown below allows you to end the Recovery Processing phase.
Figure 15. The Sales Analysis End Recovery Processing Screen
Data items for the preceding screen are described below:
End Phase?
Enter ‘Y’ (Yes) or ‘N’ (No). The initial default value is ‘Y’. This field is required.
Indicate ‘Y’ or ‘N’ to confirm your entry. If you enter ‘Y’, the system takes you to the Live
Operations menu. If you enter ‘N’, the system returns you to the menu of the current phase.
Press ENTER to save the information on this screen.
Step 2
This step ends the Initial Setup or Recovery Processing phases and begins (or returns to) the Live
Operations phase.
Sales Analysis System Administration Manual
39
APPX Software, Inc.
Sales Analysis System Administration Manual
Published 5/95
Appendix A
Appendix A
Appendix A - Initial Setup Checklist
Step I: Master Files
1)
2)
Enter records for the following files:
Required:
Parameters
Optional:
Sales History
Print and review lists of these files. If you find errors, correct them in Change mode.
Step II: Opening Entries
1)
You may optionally create Opening Transactions.
2)
Print the Opening Transactions list to review your entries.
Step III: End Initial Setup
28
Sales Analysis Initial Setup Manual