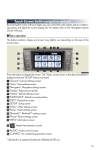
1
Contents The Quick Guide is not intended as a substitute for your Owner’s Manual. We strongly encourage you to review the Owner’s Manual and supplementary manuals so you will have a better understanding of your vehicle’s capabilities and limitations. Air Conditioning System (with navigation system)* Using the automatic mode..........................................................................................................51 Adjusting the temperature..........................................................................................................51 To turn off the airflow.....................................................................................................................51 Air Conditioning System (without navigation system) Using the automatic mode........................................................................................................ 65 Adjusting the temperature........................................................................................................ 65 To turn off the airflow................................................................................................................... 65 Audio System (with navigation system)* Basic operation ...............................................................................................................................47 Radio....................................................................................................................................................47 DVD player/CD player.............................................................................................................. 48 Operating an iPod........................................................................................................................ 49 Remote control (steering wheel switches).........................................................................50 Audio System (without navigation system) Basic operation ..............................................................................................................................58 Radio................................................................................................................................................... 59 CD player......................................................................................................................................... 60 Operating an iPod........................................................................................................................ 63 Remote control (steering wheel switches)......................................................................... 64 Automatic Transmission ...................................................................................................................16 Cruise Control .................................................................................................................................... 23 Door Locks ............................................................................................................................................ 75 Dynamic Radar Cruise Control.................................................................................................. 24 ECT Switch..............................................................................................................................................21 Engine (ignition) Switch ....................................................................................................................15 Floor Mat Installation .......................................................................................................................... 8 Fog Lights ................................................................................................................................................27 Fuel Tank Cap .......................................................................................................................................79 Hands-free System For Cellular Phone (with navigation system)* Bluetooth® phone pairing...........................................................................................................41 Phonebook transfer ..................................................................................................................... 42 Registering a speed dial ............................................................................................................. 43 Calling by speed dial.................................................................................................................... 44 Calling using SMS/MMS message....................................................................................... 45 Receiving a call............................................................................................................................... 46 Steering switches .......................................................................................................................... 46 Hands-free System For Cellular Phone (without navigation system)* Bluetooth® phone pairing......................................................................................................... 52 Calling by number ........................................................................................................................ 53 *: This feature may be operated by Voice command (See P.66) 1 Calling by name..............................................................................................................................53 Calling by speed dial ....................................................................................................................54 Phonebook transfer......................................................................................................................55 Changing the registered name................................................................................................56 Registering a speed dial..............................................................................................................57 Head Restraints.................................................................................................................................... 14 Headlights ..............................................................................................................................................26 Instrument Panel Light Control ...................................................................................................28 Intuitive Parking Assist.....................................................................................................................22 Keys..............................................................................................................................................................9 Lexus Enform with Safety Connect............................................................................................ 72 Multi-information Display ............................................................................................................... 19 Navigation System* Register home.................................................................................................................................35 Destination input Search by address.........................................................................36 Destination input Search points of interest by name ......................................... 38 Destination input Search points of interest by category...................................39 Destination input Search points of interest by telephone number...............40 Voice Command System...........................................................................................................66 Power Windows .................................................................................................................................. 76 Retractable Hardtop......................................................................................................................... 77 Safety Connect....................................................................................................................................70 Satellite Switches................................................................................................................................20 Seat Belts ................................................................................................................................................. 14 Seats........................................................................................................................................................... 12 Smart Access System with Push-button Start .......................................................................10 Theft Deterrent System......................................................................................................................11 Touch Screen Basic operation...............................................................................................................................32 Display................................................................................................................................................33 Screen scroll operation...............................................................................................................34 Setting a route.................................................................................................................................34 Trunk ........................................................................................................................................................ 80 Turn Signal Lever ................................................................................................................................. 21 Voice Command System* Basic operation...............................................................................................................................66 Command list .................................................................................................................................. 67 Windshield Wipers and Washer..................................................................................................28 XM Services.......................................................................................................................................... 74 *: This feature may be operated by Voice command (See P.66) 2 Overview Instrument Panel Shift paddle switch P.16 Headlight switch P.26 Turn signal lever P.21 Fog light switch P.27 Audio remote control switches P.50 3 Roof switch P.77 Inside door lock buttons P.75 Window lock switch P.76 Power window switches P.76 Door lock switch P.75 Trunk opener P.80 Fuel filler door opener P.79 All window control switch P.76 Satellite switches P.20 Multi-information display P.19 Shift paddle switch P.16 Windshield wiper and washer switch P.28 Engine (ignition) switch P.15 Trunk opener main switch Automatic transmission shift lever ECT switch P.80 P.15 P.21 4 Overview Instrument Panel Without navigation system (type A) Air conditioning system P.65 Audio system P.58 Security indicator P.11 Without navigation system (type B) Air conditioning system P.65 Audio system P.58 Security indicator P.11 5 With navigation system Navigation system P.35 Audio system Security indicator P.11 Air conditioning system P.51 P.47 6 Overview Instrument Panel Telephone switch P.41, 52 “DISP” switch P.19 Distance switch P.24 Cruise control switch P.23 Talk switch P.66 Dynamic radar cruise control switch P.24 : If equipped 7 Floor Mat Installation Use only floor mats designed specifically for vehicles of the same model and model year as your vehicle. Fix them securely in place onto the carpet. STEP 1 Insert the retaining hooks (clips) into the floor mat eyelets. STEP 2 Turn the upper knob of each retaining hook (clip) to secure the floor mats in place. *: Always align the marks. * The shape of the retaining hooks (clips) may differ from that shown in the illustration. 8 Keys ■ Electronic key Smart access system with push-button start (P.10, 15) *: If equipped Card key* ■ Mechanical key ● Locks and unlocks the doors ● Opens the trunk ● Locks and unlocks the glove box The mechanical key is stored inside the electronic key. To extract the key, release the latch and pull, or if equipped with a card key, press the button and pull. ■ Wireless remote control 1 Press: locks both side doors 2 Press once: unlocks the driver's door Press twice: unlocks passenger's door 3 Press and hold: opens the trunk 4 Press and hold: sounds the alarm (Use the alarm to attract attention to the vehicle in order to help deter break-ins. To stop the alarm, press any button on the wireless remote control.) 9 Smart Access System with Push-button Start The smart access system with push-button start allows you to enter and exit the vehicle or start the engine by simply carrying the electronic key in your pocket or bag. For details on starting the engine, see page 15. ■ Entering the vehicle To unlock the vehicle, simply grasp either of the door handles. ■ Exiting the vehicle To lock the vehicle, press the lock button on either of the door handles. ■ Opening the trunk To open the trunk, press the trunk release button. For details on what to do when the electronic key does not operate properly, see page 83. 10 Theft Deterrent System The theft deterrent system includes the following features to help protect your vehicle from theft. ■ Engine immobilizer system The engine immobilizer system prevents the engine from being started in the event that an attempt is made to start the vehicle using an unregistered key. The security indicator light flashes to indicate that the system is set. ■ Alarm The system sounds the alarm and flashes lights when forcible entry is detected. To set the alarm: close the doors, trunk and hood, and lock both side doors. The security indicator light comes on to indicate that the alarm is in its preparation state. When the indicator light begins to flash, the system is armed. To deactivate or stop the alarm: turn the “ENGINE START STOP” switch to ACCESSORY or IGNITION ON mode, or start the engine. Alternatively, unlock the doors or trunk using the entry function, wireless remote door lock function or mechanical key. ■ Steering lock The steering wheel locks when the “ENGINE START STOP” switch is OFF and the driver’s door is opened. When the steering lock cannot be released, the green indicator light on the “ENGINE START STOP” switch will flash and a message will be shown on the multi-information display. To release it, gently turn the wheel left or right while pressing the “ENGINE START STOP” switch. 11 Seats ■ Adjusting seat position 1 Moves the seat forward 2 Moves the seat backward ■ Adjusting seatback angle 1 Tilts the seatback forward 2 Reclines the seatback ■ Adjusting the seat cushion 1 Raises and lowers the front of the cushion 2 Raises and lowers the entire seat ■ Adjusting the lumbar support 1 Firmer 2 Softer 12 ■ Folding the seatback Folds ■ Entering or exiting the rear seat Type A Switch-operated “Front, Fold & Return” seat 1 Moves the front seat forward automatically 2 Moves the front seat backward automatically Using the satellite switch, the return function 2 can be set to activate only while the switch is being pressed. Type B Seat slide switch (front passenger seat) 1 Moves the front seat forward 2 Moves the front seat backward When enter or exit, fold the seatback. 13 Head Restraints ■ Vertical adjustment (front seats only) 1 To raise: push the head restraint upward. 2 To lower: push the head restraint down while pressing the lock release button. Lock release button ■ Folding (rear seats only) Pull the lever. Seat Belts ■ Seat belt guide (front) When fastening a front seat belt, always ensure that it passes through the seat belt guide. ■ Seat belt guide (rear) If the shoulder belt sits close to the occupant's neck, secure the seat belt in the guide position. 14 Engine (ignition) Switch With the electronic key on your person, the engine can be started by simply pressing the “ENGINE START STOP” switch, while depressing the brake pedal. (The mechanical key cannot be used to start the engine.) ■ Starting the engine Make sure the parking brake is engaged and the shift lever is in P. Depress the brake pedal. The “ENGINE START STOP” switch indicator light turns green. Press the “ENGINE START STOP” switch. ■ Stopping the engine Engage the parking brake and shift the shift lever to P. Press the “ENGINE START STOP” switch. ■ Changing power modes To change power modes without turning on the engine, press the “ENGINE START STOP” switch without depressing the brake pedal. The modes can be changed in the following order: Off (Indicator light: off) 15 ACCESSORY mode IGNITION ON mode (Indicator light: amber) Automatic Transmission ■ Shift positions P Park* R Reverse N Neutral (drive not engaged) D Drive S S mode *: The engine can only be started in P. The vehicle can only be shifted out of P when the “ENGINE START STOP” switch is in IGNITION ON mode and the brake pedal is depressed. 16 ■ Changing shift ranges in the D position Operating the shift paddle switches allows shift ranges to be selected to suit the driving conditions. Pull the “-” shift paddle switch toward you. The indicator in the meter cluster will display the selected shift range. Higher shift range: Pull the “+” shift paddle switch toward you. Lower shift range: Pull the “-” shift paddle switch toward you. Pulling and holding the “+” shift paddle switch for a certain period of time allows you to return to normal D position driving. If the accelerator pedal is depressed for more than a certain period of time in one range, shift range selection in the D position will be automatically deactivated. 17 ■ Changing shift ranges in the S position Operating the shift lever or shift paddle switches allows shift ranges to be selected to suit the driving conditions. Shift the shift lever to S. The indicator in the meter cluster will display the selected shift range. Higher shift range: Move the shift lever in the “+” direction or pull the “+” shift paddle switch toward you. Lower shift range: Move the shift lever in the “-” direction or pull the “-” shift paddle switch toward you. 18 Multi-information Display The multi-information display shows information about your vehicle, including the items shown below. ■ Display information ● Trip information Outside temperature Driving range Average fuel consumption Average fuel consumption after refueling Current fuel consumption Average vehicle speed Gear position ● Satellite switch mode display ● Intuitive parking assist display (if equipped) ● Dynamic radar cruise control display (if equipped) ● Roof function status indicator ● Warning messages ■ Changing the display of trip information Trip information items can be switched by pressing the DISP switch. ■ When using intuitive parking assist or dynamic radar cruise control, the appropriate display is shown on the screen. ■ In the event that a problem is detected in any of the vehicle's systems, a warning message is shown on the multi-information display. 19 Satellite Switches The satellite switches can be used to change the settings of various functions. Settings are shown on the multi-information display. The satellite switches can be used to change the settings of the following items. ● Intuitive parking assist (if equipped) ● Tire pressure warning system initialization ● ID code selection for tire inflation pressure warning system ● Vehicle speed indicator ● Tacho indicator ● Pre-collision braking function activate/deactivate (if equipped) ● Front seat auto return function ■ Changing the ON/OFF settings To cycle through the functions, press either the left or right selector switch. To change the settings, press the ON/OFF button. For detailed information of changing the settings, see the Owner’s Manual. 20 Turn Signal Lever 1 Right turn signal 2 Left turn signal To signal a lane change, move the lever partway and hold. ECT Switch Use the ECT switch to select the driving mode that best suits the driving and road conditions. 1 Power mode For more powerful acceleration and uphill driving. 2 Normal mode 3 Snow mode For starting or accelerating on snow-covered roads or other slippery surfaces. An indicator comes on when in power or snow mode. 21 Intuitive Parking Assist (If Equipped) The system uses a screen display and buzzer to inform the driver of obstacles near the vehicle when parking or driving at low speed. Owners of models equipped with a navigation system should refer to the “Navigation System Owner's Manual”. ■ Turning the system on and off The system can be turned on and off using the satellite switch. (P.20) ■ Multi-information display Sensors are used to detect obstacles near the vehicle. The distance to a detected obstacle is shown by the number of indicator bars. 1 Indicates obstacles detected by the corner sensors 2 Indicates obstacles detected by the back sensors 22 Cruise Control (If Equipped) Cruise control allows the driver to maintain a constant speed without having to operate the accelerator pedal. Use for highway driving or when traveling at a constant speed for long periods of time. 1 Indicator 2 Cruise control switch ■ Setting the speed Press the ON-OFF button. The system will turn on. Accelerate or decelerate to the desired speed, and then push the lever down. This sets the speed in the cruise control memory. ■ Canceling 1 To temporarily cancel the cruise control, pull the lever toward you. To resume the cruise control, push the lever up. 2 To turn the system off, press the ON-OFF button. ■ Adjusting the speed setting To increase speed: push the lever up. To decrease speed: push the lever down. Release the lever when the desired speed is reached. 23 Dynamic Radar Cruise Control (If Equipped) Dynamic radar cruise control supplements conventional cruise control with a vehicle-tovehicle distance control mode. 1 2 3 4 Indicator Display Distance switch Cruise control switch ■ Cruise control display Cruise control settings are shown on the multiinformation display. 1 Vehicle ahead indicator 2 Vehicle-to-vehicle distance 3 Preset speed ■ Vehicle-to-vehicle distance control mode Press the ON-OFF button. Accelerate or decelerate to the desired speed, and then push the lever down. Vehicle-to-vehicle distance can be adjusted using the distance switch. ■ Constant speed control mode Press the ON-OFF button. Push the lever forward and hold for at least one second. Accelerate or decelerate to the desired speed, and then push the lever down. 24 ■ Canceling 1 To temporarily cancel the dynamic radar cruise control, pull the lever toward you. To resume the cruise control, push the lever up. 2 To turn the system off, press the ON-OFF button. ■ Adjusting the speed setting To increase speed: push the lever up. To decrease speed: push the lever down. Release the lever when the desired speed is reached. The vehicle-to-vehicle distance control mode maintains the preset cruising speed as long as no vehicle is detected ahead. 25 Headlights Type A 1 Off The daytime running lights turn on. 2 The instrument panel, side marker, parking (vehicles with halogen headlights), tail, daytime running lights and license plate lights turn on. 3 The headlights and all lights listed above (except daytime running lights) turn on. 4 The headlights, parking lights, daytime running lights and other lights turn on/off automatically in accordance with ambient light levels. Type B 1 Off The daytime running lights turn on. 2 The instrument panel, side marker, parking (vehicles with halogen headlights), tail, daytime running lights and license plate lights turn on. 3 The headlights and all lights listed above (except daytime running lights) turn on. 4 The headlights, parking lights, daytime running lights and other lights turn on/off automatically in accordance with ambient light levels. To engage the high beams, push the lever forward. To flash the high beams, pull the lever and hold. 26 Fog Lights Type A Type B 27 The fog lights can be used only when the headlights (low beam) are on. 1 Front fog lights off 2 Front fog lights on The fog lights can be used only when the headlights (low beam) are on. 1 Front fog lights off 2 Front fog lights on Instrument Panel Light Control 1 Darker 2 Brighter Windshield Wipers and Washer ■ Intermittent windshield wipers Type A 1 2 3 4 5 Off Intermittent operation Low speed High speed Single wipe 28 Type B 1 2 3 4 5 Off Intermittent operation Low speed High speed Single wipe Intermittent operation: Wiper interval can be adjusted by turning the band. To spray washer fluid, pull the lever. The wipers will operate automatically. 29 ■ Rain-sensing windshield wipers Type A 1 2 3 4 5 Off Automatic operation Low speed High speed Single wipe 1 2 3 4 5 Off Automatic operation Low speed High speed Single wipe Type B 30 Automatic operation: Sensitivity can be adjusted by turning the band. To spray washer fluid, pull the lever. The wipers will operate automatically. 31 Touch Screen (with navigation system) By touching the screen with your finger, you can control the audio system and air conditioning system, and adjust the screen display etc. For details, refer to the “Navigation System Owner's Manual”. ■ Basic operation The button positions, shapes and screen may slightly vary depending on the type of the touch screen. Press the button to display the screen. The “Setup” screen shown in the above illustration is displayed when the “SETUP” button is pressed. 1 “General”: General settings screen 2 “Voice”: Voice settings screen 3 “Navigation”: Navigation settings screen 4 “Display”: Adjust picture quality 5 “Vehicle”: Vehicle settings screen 6 “MAP/VOICE”: Vehicle's current position 7 “DEST”: Destination screen 8 “SETUP”: Setup screen 9 “Other”: Other settings screen 10 “Audio”: Audio settings screen ® 1 1 “Bluetooth*”: Bluetooth settings screen 12 “Phone”: Phone settings screen 13 “INFO”: Information screen 14 : Hands-free operation screen 15 “AUDIO”: Audio control screen 16 “CLIMATE”: Air conditioning operation screen *: Bluetooth is a registered trademark of Bluetooth SIG, Inc. 32 ■ Display Adjusting the screen display Push the “SETUP” button on the side of the touch screen and touch “Display” screen on the “Setup” screen. 1 Displays the screen in “Day Mode” with the headlight switch on Adjusting the image the camera display 33 2 Turns the screen off 3 Change function 4 Adjust contrast/brightness ■ Screen scroll operation When any point on the map is touched, that point moves to the center of the screen. 1 Indicates the street name, city name, etc. for the selected point 2 Displays various information for the selected 3 4 5 6 point Indicates the distance from the current position to the pointer Switches the map configurations Zooms in on the map Zooms out on the map ■ Setting a route While route guidance is operating, you can change the route using the following method. Touch “Route”. The following settings can be accessed 1 2 3 4 Detour setting Route preferences Route overview Pause and resume route guidance 34 Navigation System (If Equipped) ■ Register home STEP 2 Push the “SETUP” button on the side of the touch screen. (P.32) Touch “Navigation”. STEP 3 Touch “Home”. Touch “Set Home”. Touch “Address”. STEP 6 35 Touch “City”. Input a city name and touch “OK”. Touch the screen button of the desired city name from the displayed list. For security reasons, use a point close to your home instead of your actual home address. Input the street name and touch “OK”. 10 When the desired street name is found, touch the corresponding screen button. 11 Input a house number and touch “OK”. 12 Touch “Enter”. 13 Touch “OK”. ■ Destination input Search by address Select by city name STEP 2 Push the “DEST” button on the side of the touch screen. (P.32) Touch “Address”. STEP 3 Touch “City”. STEP 4 Input a city name and touch “OK”. Touch the screen button of the desired city name from the displayed list. Input the street name and touch “OK”. When the desired street name is found, touch the corresponding screen button. Input a house number and touch “OK”. Touch “Go to”. 10 Touch “OK”. 36 Select by street address STEP 2 Push the “DEST” button on the side of the touch screen. (P.32) Touch “Address”. STEP 3 Touch “Street Address”. STEP 4 37 Input a house number and touch “OK”. Input the street name and touch “OK”. When the desired street name is found, touch the corresponding screen button. Input a city name and touch “OK”. Touch the screen button of the desired city name from the displayed list. Touch “Go to”. 10 Touch “OK”. ■ Destination input Search points of interest by name STEP 2 Push the “DEST” button on the side of the touch screen. (P.32) Touch “Point of Interest”. STEP 3 Touch “Name”. STEP 4 Input the name of the point of interest and touch “OK”. Touch the screen button of the desired destination. Touch “Go to”. Touch “OK”. 38 ■ Destination input Search points of interest by category 39 STEP 2 Push the “DEST” button on the side of the touch screen. (P.32) Touch “Point of Interest”. STEP 3 Touch “Category”. STEP 4 Touch “Near a Destination”. Touch the screen button of the desired destination and set screen the search point. Touch the desired point of interest category from the displayed list. Touch the screen button of the desired item. Touch “Go to”. Touch “OK”. ■ Destination input Search points of interest by telephone number STEP 2 Push the “DEST” button on the side of the touch screen. (P.32) Touch “Point of Interest”. STEP 3 Touch “Phone #”. STEP 4 Input a telephone number and touch “OK”. Touch “Go to”. Touch “OK”. 40 Hands-free System For Cellular Phone (with navigation system) ■ Bluetooth® phone pairing Compatible Bluetooth®-equipped phones can be connected to the vehicle, enabling hands-free operation. Please refer to the cellular phone manufacturer's user guide for pairing procedures, or go to “www.lexus.com/MobileLink” for more phone information. STEP 1 To use a Bluetooth® phone, it is necessary to first register it in the system. Push the button on the side of the touch screen or press on the steering wheel. (P.32) 41 STEP 2 Touch “Yes”. STEP 3 Enter the passcode displayed on the screen into the phone. Refer to the cellular phone user’s manual for cellular phone operation. If a completion message is displayed, registration is complete. ■ Phonebook transfer STEP 2 Push the “SETUP” button on the side of the touch screen. (P.32) Touch “Phone”. Touch “Phonebook”. Touch “Manage Contacts”. STEP 5 Touch “Transfer Contacts”. Touch “Update Contacts”. STEP 7 Transfer the phonebook data to the system using the cellular phone. Refer to the cellular phone user’s manual for cellular phone operation. 42 ■ Registering a speed dial 43 STEP 2 Push the “SETUP” button on the side of the touch screen. (P.32) Touch “Phone”. Touch “Phonebook”. Touch “Manage Speed Dials”. STEP 5 Touch “New”. STEP 6 Touch the data you want to register. Touch the desired phone number. Touch the button you want to register in. ■ Calling by speed dial STEP 1 Push the button on the side of the touch screen or press on the steering wheel. (P.32) STEP 2 Touch “Speed Dials”. STEP 3 Touch the desired number to call. 44 ■ Calling using SMS/MMS message STEP 1 Push the button on the side of the touch screen or press on the steering wheel. (P.32) STEP 2 Touch “Messages”. Touch “SMS/MMS” tab. Touch the desired received message from the displayed list. Press on the steering wheel. The tab display may vary depending on the type of cellular phone. 45 ■ Receiving a call STEP 1 When a call is received, this screen is displayed with a sound. STEP 2 Press on the steering wheel to talk on the phone. To refuse the call, press on the steering wheel. ■ Steering switches 1 2 3 4 Sending/Receiving/“Phone” screen display End call/Refuse call Start the voice command system Increases/decreases volume 46 Audio System (with navigation system) The button positions, shapes and screen may slightly vary depending on the type of the audio system. ■ Basic operation 1 Displays the audio control screen 2 Audio sources AM: AM radio FM: FM radio SAT (if available): Satellite radio Apps (if available): Internet radio broad cast DISC: DVD player/CD player iPod: iPod USB: USB memory BT Audio: Bluetooth® audio AUX: Auxiliary audio device Sound quality modes 3 4 Mute/unmute or pause/resume the current operation 5 Power/Volume ■ Radio 1 Displays the audio control screen 2 Station selector 3 Scanning for receivable stations TM 4 Using HD Radio Technology 5 Adjusting the frequency 6 Preset tuning/seeking the frequency 47 ■ Entering station presets Touch the desired station by using the tune, seek or scan function. Press and hold one of the preset buttons (1-6) until a beep is heard, indicating that the station has been set. ■ DVD player/CD player ■ Playing an audio CD 1 2 3 4 5 6 7 Displays the audio control screen Random playback Repeat play Pause/Playback Track select Track select/rewind/fast-forward Eject ■ Playing a CD with MP3/WMA files 1 2 3 4 5 6 7 8 Displays the audio control screen Random playback Repeat play Pause/Playback Folder select File select File select/rewind/fast-forward Eject 48 ■ Playing a DVD 1 2 3 4 5 6 7 8 Displays the audio control screen Reverse Stop Pause/Playback Image display (full screen) Fast forward Chapter select Eject 1 2 3 4 5 6 7 8 Displays the audio control screen Random playback Repeat play Pause/Playback Select play mode Displays the iPod video control screen Song select Song select/rewind/fast-forward ■ Operating an iPod 49 ■ Remote control (steering wheel switches) Some audio features can be controlled using the switches on the steering wheel. 1 Increases/decreases volume 2 Radio mode: Selects a radio station Audio CD mode: Selects a track MP3/WMA disc mode: Selects a file and folder DVD mode: Selects a chapter iPod mode: Selects a song 3 Press: Turns the power on, selects audio source Press and hold: Mute/unmute or pause/ resume the current operation 50 Air Conditioning System (with navigation system) 1 Fan speed control 2 Air flows to the feet and the windshield defogger operates Outside temperature Passenger’s side temperature display Air outlet selector Outside air/recirculated air mode Passenger’s side temperature control Rear window and outside rear view mirror defoggers 9 Windshield defogger 3 4 5 6 7 8 10 Micro dust and pollen filter 1 1 Off 12 Automatic mode 13 Driver’s side temperature control 14 DUAL mode 15 Cooling and dehumidification function on/off 16 Driver’s side temperature display 17 Air conditioning operation screen display button ■ Using the automatic mode Press 12 to turn on the airflow and 13 to adjust the temperature. ■ Adjusting the temperature ■ To simultaneously adjust the driver's side and passenger's side temperature settings Touch 14 to turn the “DUAL” indicator off ( ) and then press 13 . ■ To individually adjust the driver's side and passenger's side temperature settings Touch 14 or press 7 to turn the “DUAL” indicator on ( ■ To turn off the airflow Press 1 1 . 51 ) and then press 13 or 7 . Hands-free System For Cellular Phone (without navigation system) ■ Bluetooth® phone pairing Compatible Bluetooth®-equipped phones can be connected to the vehicle, enabling hands-free operation. Please refer to the cellular phone manufacturer's user guide for pairing procedures, or go to“www.lexus.com/MobileLink” for more phone information. STEP 1 To use a Bluetooth® phone, it is necessary to first register it in the system. Press or . Press and say “Pair phone”. Press and say a name*. *: This name will be used to identify your phone in the case that more than one phone has been registered to the system. Press and say “Confirm” to display the passkey. Enter the passkey shown on the display into the phone. Refer to the cellular phone user's manual for cellular phone operation. Once the voice guidance* for registration completion is finished, press . *: For vehicles sold in U.S. mainland, Canada and Hawaii only : Pressing this switch turns the voice command system on. Say a command after the beep. 52 ■ Calling by number STEP 1 Press and say “Dial by number”. Press and say the phone number. Dialing a. Press . b. Press and say “Dial”. ■ Calling by name You can call by saying a voice tag registered in the phonebook. For setting the voice recognition, refer to the “Owner's Manual”. STEP 1 Press and say “Dial by name”. Press and say a contact name. Dialing a. Press b. Press . and say “Dial”. : Pressing this switch turns the voice command system on. Say a command after the beep. 53 ■ Calling by speed dial STEP 1 Press STEP 2 Press the desired preset button (1-6). Press . . 54 ■ Phonebook transfer STEP 1 Press . Press and say “Phonebook”. Press and say “Add entry”. Press and say “By phone”. Press and say “Confirm”. Transfer the phonebook data to the system using the cellular phone. Refer to the cellular phone user’s manual for cellular phone operation. Press and say “Previous” or “Next” until the desired data is displayed. Press and say “Confirm”. Press and say the desired name. 10 Press and say “Confirm”. 11 Press and say “Confirm” again. Phonebook transfer may not be possible depending on phone model. : Pressing this switch turns the voice command system on. Say a command after the beep. 55 ■ Changing the registered name STEP 1 Press . Press and say “Phonebook”. Press and say “Change name”. Press and say the desired name. Press and say “Confirm”. Press and say the new name. Press and say “Confirm”. : Pressing this switch turns the voice command system on. Say a command after the beep. 56 ■ Registering a speed dial STEP 1 Press . Press and say “Phonebook”. Press and say “Set speed dial”. Select the data to be registered. STEP 7 Press and say the desired name. Press and say “Confirm”. Press the desired preset button (1-6). Press and say “Confirm”. : Pressing this switch turns the voice command system on. Say a command after the beep. 57 Audio System (without navigation system) ■ Basic operation Type A Sound quality modes Automatic Sound Levelizer (ASL) Mute Audio sources AM•FM: AM radio/FM radio SAT: Satellite radio CD•AUX: CD player/Auxiliary audio device/USB memory/iPod/ Bluetooth® audio player 5 Power/Volume 1 2 3 4 Type B Sound quality modes Automatic Sound Levelizer (ASL) Mute Audio sources AM: AM radio FM: FM radio CD: CD player AUX: Auxiliary audio device/USB memory/iPod/Bluetooth® audio player 5 Power/Volume 1 2 3 4 58 ■ Radio Type A 1 2 3 4 5 6 7 Traffic information Station presets Text messages Radio tuner RDS genre select Scanning radio stations Seek 1 2 3 4 5 Traffic information Station presets Radio tuner Station select Seek Type B ■ Entering station presets Press the desired station by using the tune, the seek or the scan function. Press and hold one of the preset buttons (1-6) until you hear a beep, indicating that the station is set. 59 ■ CD player ■ Playing an audio CD Type A 1 Random playback 2 Repeat play 3 Pause/Playback 4 Text information 5 Disc select 6 Disc load 7 Search playback 8 Playback 9 Eject 10 Track select/rewind/fast-forward Type B 1 2 3 4 5 6 7 8 9 Random playback Repeat play Pause/Playback Text information Disc select Disc load Playback Eject Track select/rewind/fast-forward 60 ■ Playing a CD with MP3/WMA files Type A Type B 61 1 Random playback 2 Repeat play 3 Pause/Playback 4 Folder select 5 Text information 6 File select 7 Disc select 8 Disc load 9 Search playback 10 Playback 1 1 Eject 1 Random playback 2 Repeat play 3 Pause/Playback 4 Folder select 5 Text information 6 File select 7 Disc select 8 Disc load 9 Playback 10 Eject ■ Loading a CD Press the “LOAD” button. “WAIT” is shown on the display. Insert a CD when the indicators on the slot turn from amber to green. The display changes from “WAIT” to “LOAD”. ■ Loading multiple CDs Press and hold the “LOAD” button until you hear a beep. “WAIT” is shown on the display. Insert a CD when the indicators on the slot turn from amber to green. The display changes from “WAIT” to “LOAD”. The indicators on the slot turn to amber when the CD is inserted. Insert the next CD when the indicators on the slot turn from amber to green again. Repeat the procedure for the remaining CDs. To cancel the operation, press the “LOAD” button. If you do not insert a CD within 15 seconds, loading will cancelled automatically. 62 ■ Operating an iPod Type A 1 2 3 4 5 6 7 8 Random play Repeat play Pause/Playback Go back Text information Playback Menu/Song select Song select/rewind/fast-forward 1 2 3 4 5 6 7 8 Random play Repeat play Pause/Playback Go back Text information Playback Menu/Song select Song select/rewind/fast-forward Type B 63 ■ Remote control (steering wheel switches) The audio system can be operated using the remote control located on the steering wheel. 1 Volume 2 Radio mode: radio tuner CD mode: disc/track/file (MP3/WMA) select iPod mode: song select 3 Power on/change mode: press Power off: press and hold 64 Air Conditioning System (without navigation system) Passenger side temperature display Passenger side temperature control Windshield defogger Outside air/recirculated air mode button 5 Cooling and dehumidification function on/off button 1 2 3 4 6 Dual mode button 7 Driver side temperature control 8 Automatic mode button 9 Driver side temperature display 10 “OFF” button 1 1 Fan speed controls 12 Air outlet selector button ■ Using the automatic mode Press 8 to turn on the airflow and 7 to adjust the temperature. ■ Adjusting the temperature ■ To simultaneously adjust the driver's side and passenger's side temperature settings Press 6 to turn the “DUAL” indicator off ( ) and then press 7 . ■ To individually adjust the driver's side and passenger's side temperature settings Press 6 or 2 to turn the “DUAL” indicator on ( ■ To turn off the airflow Press 10 . 65 ) and then press 7 or 2 . Voice Command System ■ Basic operation NOTE: When inputting voice commands you must wait until after the beep to speak. STEP 1 Press . - If you know the command: Press again. - If you do not know the command: Follow the voice guidance* to learn the command and then press again. *: For vehicles sold in U.S. mainland, Canada and Hawaii only Say a command after the beep. ■ Important voice commands information and tips Voice commands can be used while driving. You must wait until after the beep to say a command. In vehicles with a navigation system, a large TALK icon will appear on the navi- gation screen to prompt you to say a command. Vehicles sold in U.S. mainland, Canada and Hawaii only: If you know what command to use, you can press at any time to interrupt the voice guidance. 66 ■ Command list Without navigation system To Operate a Bluetooth® Connected Phone/Make Calls, SAY: “Phone” and then SAY: PHONE “Dial by Name” “Dial by Number” “Redial” “Call Back” “Mute” NOTE: You can also make a call by simply saying: “Call XXX-5555555” ETC. With navigation system Set a Destination Action Command “Find Nearby <POI category>” “Enter an Address” “Go Home” “Call Destination Assist” “Destination by Phone Number” *: 67 Displays a list of <POI category*> near the current position. Enables setting a destination by saying the address. Displays the route to home. Connects Lexus Enform with Safety Connect response center. Enables setting a destination by saying the phone number. For example; Gas stations, Restaurants, etc. Use the Phone Command “Call <name> <type>” “Dial <number>” “International Call” Action Calls made by saying a name from the phonebook. For example: Say “Call John Smith”, “Call John Smith, mobile” etc. Calls made by saying the phone number. For example: Say “Dial 911”, “Dial 5556667777” etc. Calls international numbers by saying the phone number. Play Music Command Action “Play Artist <name>” Plays tracks by the selected artist. For example: Say “Play artist <XXXXX>”* “Play Album <name>” Plays tracks from the selected album. For example: Say “Play album <XXXXX>”* “Play Song <name>” “Play Playlist <name>” *: Plays the selected track. For example: Say “Play song Summertime”, “Play song Concerto in A Major” etc. Plays tracks from the selected playlist. For example: Say “Play playlist My Favorite Songs”, “Play Playlist Classic Hits” etc. Say the desired artist name or album name in the place of the “<>”. 68 Get Information Action Command “Traffic” Displays the traffic incident list. “Weather” Displays weather information. “Sports Scores” Displays the sports list. “Stock Quotes” Displays the stocks list. “Fuel Prices” Displays the fuel prices list. “Lexus Insider” Displays the Lexus insider list. Select audio mode Action Command “Radio”, “AM”, “FM”, “Satellite radio”, “Disc”, “Auxiliary”, “Bluetooth* audio”, “iPod”, “USB audio” Change the audio mode. “Audio on” Turns the audio system on. “Audio off” Turns the audio system off. *: Bluetooth is a registered trademark of Bluetooth SIG, Inc. Climate/air conditioning system command Action Command “Automatic climate control” Turns air conditioning system on and off. “Warmer” Turns temperature up. “Cooler” Turns temperature down. “Select audio mode” and “Climate/air conditioning system command” are enable when expanded voice commands are turned “On”. Refer to the “Owner’s Manual” and “Navigation System Owner’s Manual”. 69 Safety Connect (If Equipped) Safety Connect is a subscription-based telematics service that uses Global Positioning System (GPS) data and embedded cellular technology to provide safety and security features to subscribers. Safety Connect is supported by Lexus’ designated response center, which operates 24 hours per day, 7 days per week. Safety Connect service is available by subscription on select, telematics hardwareequipped vehicles. ■ System components 1 Microphone 2 LED light indicators 3 “SOS” button ■ Services Subscribers have the following Safety Connect services available: ● Automatic Collision Notification* In case of either airbag deployment or severe rear-end collision, the system is designed to automatically call the response center. The responding agent receives the vehicle’s location and attempts to speak with the vehicle occupants to assess the level of emergency. If the occupants are unable to communicate, the agent automatically treats the call as an emergency, contacts the nearest emergency services provider to describe the situation, and requests that assistance be sent to the location. *: U.S. Patent No. 7,508,298 B2 ● Stolen Vehicle Location If your vehicle is stolen, Safety Connect can work with local authorities to assist them in locating and recovering the vehicle. After filing a police report, call the Safety Connect response center at 1-800-25-LEXUS (1-800-255-3987) and follow the prompts for Safety Connect to initiate this service. In addition to assisting law enforcement with recovery of a stolen vehicle, Safety-Connect-equipped vehicle location data may, under certain circumstances, be shared with third parties to locate your vehicle. Further information is available at Lexus.com. 70 ● Emergency Assistance Button (“SOS”) In the event of an emergency on the road, push the “SOS” button to reach the Safety Connect response center. The answering agent will determine your vehicle’s location, assess the emergency, and dispatch the necessary assistance required. If you accidentally press the “SOS” button, tell the response-center agent that you are not experiencing an emergency. ● Enhanced Roadside Assistance Subscribers can press the “SOS” button to reach a Safety Connect response-center agent, who can help with a wide range of needs, such as: towing, flat tire, fuel delivery, etc. For a description of the Enhanced Roadside Assistance services and their limitations, please see the Safety Connect Terms and Conditions, which are available at Lexus.com. ■ Subscription After you have signed the Telematics Subscription Service Agreement and are enrolled, you can begin receiving services. A variety of subscription terms is available for purchase. Contact your Lexus dealer, call 1800-25-LEXUS (1-800-255-3987) or push the “SOS” button in your vehicle for further subscription details. 71 Lexus Enform with Safety Connect (If Equipped) Lexus Enform with Safety Connect is a feature that includes Apps, Destination Assist, eDestination, Lexus Insider, and Safety Connect. The functions included in Lexus Enform with Safety Connect are classified into the following three functions. For details, refer to the “Owner’s Manual” and “Navigation System Owner’s Manual”. ■ Function achieved by using a cellular phone ■ Services Of the functions included with Lexus Enform with Safety Connect, only Apps can be achieved by using a cellular phone. Apps is a service that enables the usable contents of a cellular phone to be displayed on and operated from the navigation screen. ● APPS Each time “Apps” is activated, the system checks for updates. When there are no updates available, the main menu screen will be displayed right after a screen indicating that updates are being checked for has been displayed. ■ Subscription Apps will be available on a trial period included upon purchase of a new vehicle. User registration is required to start using the service. When a trial period has elapsed after purchasing a new vehicle, a fee will be charged to renew the contract. Services requiring a separate contract can also be used. For details, refer to http://www.lexus.com/enform/ or call 1-800-255-3987. ■ Function achieved by using DCM and the navigation system ■ Services Of the functions included with Lexus Enform with Safety Connect, Destination Assist, eDestination, and Lexus Insider can be achieved by making DCM cooperate with the navigation system. These are subscription-based telematics services that use Global Positioning System (GPS) data, embedded cellular technology to provide safety and security as well as convenience features to subscribers. The services are supported by Lexus’ designated response center, which operates 24 hours per day, 7 days per week. The services are available by subscription on select, telematics hardware-equipped vehicles. 72 ● Destination Assist Destination Assist provides you with live assistance for finding destinations via the Lexus Enform with Safety Connect response center. You can request either a specific business, address, or ask for help locating your desired destination by category, such as restaurants, gas stations, shopping centers or other points of interest (POI). After you tell the agent your choice of destination, its coordinates are sent wirelessly to your vehicle’s navigation system. ● eDestination With the eDestination feature, you can go online, via the Lexus.com owner’s Web site, to select and organize destinations of your choice and then wirelessly send them to your vehicle’s navigation system. Up to 200 locations can be stored online and accessed or updated at any time. Locations can be organized into up to 20 personalized folders. You must first go online at www.lexus.com/drivers/ to view the Owners site where you will need to register and log in. After this, personalized folders that contains the locations to be sent to your vehicle can be created. (See Lexus Enform with Safety Connect Guide for more information.) ● Lexus Insider Lexus Insider is an optional service that can send audio messages, or articles, to participating owners’ vehicles via the navigation system. Potential Lexus Insider subjects might include, for example, Lexus vehicle technology tips, updates on regional Lexus events, or audio excerpts from Lexus Magazine articles. Up to 20 articles can be stored at a time. You may opt out of receiving Lexus Insider messages at any time. ■ Subscription After you have signed the Telematics Subscription Service Agreement and are enrolled, you can begin receiving services. A variety of subscription terms is available for purchase. Contact your Lexus dealer, call 1-800-25-LEXUS (1-800-255-3987), or touch “Destination Assist” in your vehicle for further subscription details. ■ Function achieved by using DCM ■ Services Of the functions included with Lexus Enform with Safety Connect, Safety Connect can be achieved by using DCM. ● Safety Connect (P.70) 73 XM Services (If Equipped) XM services are subscription-based XM Satellite Radio services to provide convenient features to subscribers. For details, refer to the “Owner’s Manual” and “Navigation System Owner’s Manual”. ■ Services With an active XM subscription, the following features are available: ● XM Sports and XM Stocks*1 XM Sports and XM Stocks are services included with an XM Satellite Radio subscription. These services are also available with an XM TravelLink subscription. With these services, you can receive updates via the navigation system on your personally selected sports teams and stocks. ● XM Fuel Prices*2 XM Fuel Prices is a service included with an XM TravelLink subscription. It enables the navigation system to display current fuel prices and gas station locations, which can be set as a destination if desired. ● XM NavWeatherTM*2 The subscription-based XM NavWeatherTM service allows the navigation system to display weather information on the map screen. ● XM NavTraffic®*2 The subscription-based XM NavTraffic® service allows the navigation system to display traffic information on the map screen. 1 * : Available at no extra charge with an active XM Satellite Radio subscription. *2: Available via separate XM subscription(s). ■ Subscription XM NavTraffic®, XM NavWeatherTM and XM TravelLink require separate XM subscription(s). XM Sports*, XM Stocks* and XM Fuel Prices are available with an XM TravelLink subscription. After a 90-day trial, you must contact XM and set up the appropriate XM subscription(s) to continue receiving these services. *: XM Sports and XM Stocks are included with an XM Satellite Radio subscription. 74 Door Locks ■ Locking the vehicle from inside Inside lock button 1 Locks 2 Unlocks Door lock switch Operates both side door locks. 1 Locks 2 Unlocks ■ Locking the vehicle from outside Using the entry function or wireless remote control (P.9, 10) 75 Power Windows 1 Power window switches To open: press the switch. To close: pull the switch up. To one-touch closing (front windows): fully pulling up and releasing the switches causes the windows to close fully. To one-touch opening (all windows): fully pressing down and releasing the switches causes the windows to open fully. 2 Window lock switch The window lock switch disables the operation of passenger window switches. 3 All window control switch To open: press the switch. To close: pull the switch up. To one-touch opening: fully pressing down and releasing the switch causes the all windows to open fully. 76 Retractable Hardtop 1 Opening the retractable hardtop Press and hold the switch until “COMPLETE” is shown on the display. 2 Closing the retractable hardtop Pull up and hold the switch until “COMPLETE” is shown on the display. 3 Retractable hardtop status display Warnings, advice and the operational status of the retractable hardtop will be displayed. ■ To operate the retractable hardtop When the following conditions are met, the retractable hardtop can be operated: Operating condition 77 Details The vehicle is stopped — The trunk lid is closed — The “ENGINE START STOP” switch is in IGNITION ON mode (P.15) The luggage cover is installed (P.78) The trunk opener main switch is on (P.80) No obstacles are detected by the intuitive parking assist Refer to the Owner's Manual for details. ■ Installing the luggage cover Pull the board of the luggage cover toward you to unhook the hooks. Pull the luggage cover further until the tabs on the sides of the cover fit securely into the holders on the sides of the trunk. Make sure the upper part of the board is securely positioned in the holders. Fit the tabs on the bottom of the luggage cover into the holders on the floor of the trunk. Make sure the lower part of the board is securely positioned in the holders on the floor If the retractable hardtop still does not operated, see the owner's manual for more information or contact your Lexus dealer. 78 Fuel Tank Cap Press the fuel filler door opener. Slowly remove the cap by turning it counterclockwise. After the cap is removed, it can be hung on the inside of the fuel filler door. 79 Trunk ■ Trunk opener To open the trunk from inside the cabin, simply press the trunk opener. To disable the trunk opener, turn off the main switch in the glove box. 1 On 2 Off When the trunk opener is disabled, the trunk cannot be opened using the wireless remote control or the entry function. ■ Entry function and wireless remote control P.9, 10 80 What to do if ... List of Warning/Indicator Lights Stop the vehicle immediately. Continuing to drive the vehicle may be dangerous. (U.S.A.) Brake system warning light (Canada) Stop the vehicle immediately. Charging system warning light Have the vehicle inspected immediately. Electric power steering system warning light (U.S.A.) Malfunction indicator lamp (Canada) (Comes on) Pre-collision system warning light*1 SRS warning light (U.S.A.) (Blinking and then continuously on) Tire pressure warning light “ABS” warning light (Canada) Slip indicator (Comes on) Follow the correction procedures. Open door warning light Low fuel level warning light (On the instrument cluster) Driver’s seat belt reminder light (On the center panel) (Illuminates without blinking) Front passenger’s seat belt reminder light Tire pressure warning light*2 Master warning light For further information, refer to the Owner's Manual. 81 See the Owner's Manual Turn signal indicator “ECT PWR” indicator Headlight high beam indicator Cruise control indicator Headlight indicator (U.S.A.) Intuitive parking assist indicator*1 Tail light indicator (Canada) Slip indicator (Flashes) (Flashes or flashes quickly) Front fog light indicator VSC off indicator “ECT SNOW” indicator SRS airbag on-off indicator Pre-collision system warning light*1 Shift position and shift range indicators For further information, refer to the Owner's Manual. *1 : If equipped : Turns on due to natural causes such as natural air leaks or tire inflation pressure changes caused by temperature excluding the spare tire. Adjust the tire inflation pressure to the specified level. The light will turn off after a few minutes. In case the light does not turn off even if the tire inflation pressure is adjusted, have the system checked by your Lexus dealer. *2 82 What to do if ... If the electronic key does not operate properly ■ Unlocking and locking the doors To unlock or lock the vehicle, use the mechanical key to remove the lock cover on the driver's door handle. The mechanical key is stored inside the electronic key. 1 Unlocks 2 Locks ■ Starting the engine Depress the brake pedal. Touch the Lexus emblem side of the electronic key to the “ENGINE START STOP” switch. Press the “ENGINE START STOP” switch within 10 seconds of the buzzer, keeping the brake pedal depressed. If the electronic key battery becomes depleted, replace it with a new battery. For instructions on replacing the battery, refer to the Owner's Manual. If you need further assistance, contact your Lexus dealer. 83 If the engine doesn't start Make sure that the correct operating procedures have been followed. Brake pedal Make sure that the brake pedal is firmly depressed when attempting to start the engine. (P.15) Steering wheel lock Make sure that the steering wheel lock is released. To release the steering wheel lock, gently turn the wheel left or right while pressing the “ENGINE START STOP” switch. (P.11) If the engine still does not start, see the Owner's Manual for more information or contact your Lexus dealer. 84 What to do if ... Electronic Key Alarm The electronic key alarm uses an alarm and warning messages to indicate that the electronic key has been used improperly. Take appropriate measure in response to any warning messages that are displayed. In some cases, an alarm may sound without an accompanying warning message. If so, follow the correction procedure in the table below. Alarm Exterior alarm sounds once for 2 seconds Exterior alarm sounds once for 60 seconds Exterior alarm sounds once for 10 seconds Interior alarm sounds continuously Interior alarm pings continuously 85 Situation Tried to lock the doors using the entry function while the electronic key is still inside the passenger compartment Closed the trunk while the electronic key is still inside and both side doors are locked Tried to exit the vehicle with the electronic key and lock the doors without first turning the “ENGINE START STOP” switch OFF Tried to lock the vehicle using the entry function while a door is open Tried to open the door and exit the vehicle without shifting the shift lever to P Switched to ACCESSORY mode while the driver's door is open (Opened the driver's door when the “ENGINE START STOP” switch is in ACCESSORY mode.) Turned the “ENGINE START STOP” switch OFF while the driver's door is open Correction procedure Retrieve the electronic key from the passenger compartment and lock the doors again. Retrieve the electronic key from the trunk and close the trunk lid. Turn the “ENGINE START STOP” switch OFF and lock the doors again. Close both side doors and lock the doors again. Shift the shift lever to P. Close the driver's door. Close the driver's door. Customizing Your Lexus Your vehicle includes a variety of electronic features that can be personalized to your preferences. Programming these preferences requires specialized equipment and may be performed by an authorized Lexus dealership. Some function settings are changed simultaneously with other functions being customized. Contact your Lexus dealer for further details. Item Smart access system with push-button start Function Operation signal (Emergency flashers) Operation signal (Buzzer) Unlocking operation Wireless remote control Automatic door lock function to be activated if door is not opened after being unlocked Time elapsed before automatic door lock function is activated if door is not opened after being unlocked Operation signal (Emergency flashers) Operation signal (Buzzer) Door lock buzzer Trunk unlocking function Trunk unlocking operation Panic function Default setting Customized setting On Off On Off Driver's door unlocked in one step, both side doors unlocked in two steps Both side doors unlocked in one step On Off 30 seconds 60 seconds 120 seconds On Off On Off On On Off Off Push twice One short push Off Push and hold On 86 Customizing Your Lexus Item Function Unlocking using a key Door lock Steering wheel Power windows 87 Speed-detecting automatic door lock function Opening driver's door unlocks both side doors Shifting gears to P unlocks both side doors Shifting gears to position other than P locks both side doors Auto tilt-away function Wireless remote control linked operation Default setting Driver's door unlocked in one step, both side doors unlocked in two steps Customized setting Both side doors unlocked in one step Off On Off On On Off On Off On Off Off On Item Retractable hardtop Automatic light control system Lights Windshield wipers and washer Intuitive parking assist Illumination Function Retractable hardtop operation control linked to the intuitive parking assist Light sensor sensitivity Time elapsed before headlights automatically turn off after doors are closed Daytime running light system (U.S.A. only) Switching operation when the vehicle is stationary Drip prevention function Time elapsed before the drip prevention function operates Back sensor operation display and buzzer Buzzer volume Distance which a sensor detects Time elapsed before lights turn off Operation when the doors are unlocked Operation after the “ENGINE START STOP” switch turned OFF Front foot well lights Shift lever light Outer foot lights Default setting Customized setting On Off Level 3 Level 1 to 5 0 seconds 60 seconds 90 seconds 30 seconds On Off On Off On Variable depending on the vehicle speed Off 3 seconds On Off Level 3 4.9 ft. (150 cm) Level 1 to 5 2.0 ft. (60 cm) 7.5 seconds 30 seconds 15 seconds On Off On Off On On On Off Off Off 88 Memo 89 Your Lexus dealer Your Lexus dealer will provide quality maintenance and any other assistance you may require. If there is not a Lexus dealer near you, please call the following number: ■U.S. OWNERS ●In the U.S. mainland or Canada: Lexus Roadside Assistance 1-800-25-LEXUS or 1-800-255-3987 (Toll-Free) ●In Hawaii: Servco Automotive Roadside Assistance/Customer Services 1-800-25-LEXUS or 1-800-255-3987 (Toll-Free) ■CANADIAN OWNERS ●In Canada or the U.S. mainland: Lexus Roadside Assistance/Customer Service 1-800-26-LEXUS or 1-800-265-3987 (Toll-Free) Please access our websites for further information. ●The U.S. mainland: www.lexus.com ●Hawaii: www.servcolexus.com ●Canada: www.lexus.ca ©2014 TOYOTA MOTOR CORPORATION All rights reserved. This material may not be reproduced or copied, in whole or in part, without the written permission of Toyota Motor Corporation. 90