1
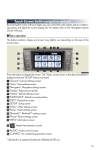
Navigation System (If Equipped)
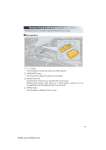
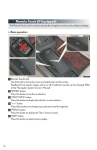
n Register home
STEP 2
STEP 3
Push the “SETUP” button.
Touch “Navi.”.
Touch “Home”.
Touch “Set Home”.
Touch “Address”.
Touch “City”.
Input a city name and touch “OK”.
Touch the button of the desired city
name from the displayed list.
Input the street name and touch “OK”.
When the desired street name is found,
touch the corresponding button.
Input a house number and touch “OK”.
Touch “Enter”.
Touch “OK”.
STEP 5
STEP 6
36
GX460_QG_U (OM60E77U)
n Destination input ⎯⎯ Search by address
Select by city name
STEP 2
STEP 3
STEP 4
STEP 6
37
GX460_QG_U (OM60E77U)
Push the “DEST” button
Touch “Address”.
Touch “City”.
Input a city name and touch “OK”.
Touch the button of the desired city
name from the displayed list.
Input the street name and touch “OK”.
When the desired street name is found,
touch the corresponding button.
Input a house number and touch “OK”.
Touch “Go to”.
Touch “OK”.
n Destination input ⎯⎯ Search by address
Select by street address
STEP 2
-
STEP 3
Push the “DEST” button.
Touch “Address”.
Touch “Street Address”.
Input a house number and touch “OK”.
Input the street name and touch “OK”.
When the desired street name is found,
touch the corresponding button.
Input a city name and touch “OK”.
Touch the button of the desired city
name from the displayed list.
Touch “Go to”.
Touch “OK”.
STEP 4
STEP 5
38
GX460_QG_U (OM60E77U)
n Destination input ⎯⎯ Search points of interest by name
STEP 2
STEP 3
STEP 4
STEP 5
39
GX460_QG_U (OM60E77U)
Push the “DEST” button.
Touch “Point of Interest”.
Touch “Name”.
Input the name of the point of interest
and touch “OK”.
Touch the button of the desired destination.
Touch “Go to”.
Touch “OK”.
n Destination input ⎯⎯ Search points of interest by category
STEP 2
STEP 3
Push the “DEST” button.
Touch “Point of Interest”.
Touch “Category”.
Touch “Near a Destination”.
Touch the button of the desired destination and set the search point.
Touch the desired point of interest category.
Touch the desired point of interest category from the list.
Touch “Go to”.
Touch “OK”.
STEP 4
STEP 6
40
GX460_QG_U (OM60E77U)
n Destination input ⎯⎯ Search points of interest by telephone number
STEP 2
STEP 3
STEP 4
STEP 5
41
GX460_QG_U (OM60E77U)
Push the “DEST” button.
Touch “Point of Interest”.
Touch “Phone #”.
Input a telephone number and select
“OK”.
Touch “Go to”.
Touch “OK”.
Hands-free System For Cellular Phone
(With Navigation System)
n Bluetooth® phone pairing
Compatible Bluetooth®-equipped phones can be connected to the vehicle, enabling
hands-free operation. Please refer to the cellular phone manufacturer’s user guide for pairing procedures, or go to “www.lexus.com/bluetooth” for more phone information.
STEP 2
STEP 3
To use a Bluetooth® phone, it is necessary
to first register it in the system.
Push the “SETUP” button.
Touch “Phone”.
Touch “Manage Phone”.
Touch “(add new)” to display the screen
for connecting Bluetooth®.
Enter the passcode displayed on the
screen into the phone.
Refer to the cellular phone user’s manual
for cellular phone operation.
When the connection is completed,
“Bluetooth connection successful.” will
appear.
STEP 4
STEP 5
42
GX460_QG_U (OM60E77U)
n Phonebook transfer
STEP 2
Push the “SETUP” button.
Touch “Phone”.
Touch “Phonebook”.
Touch “Manage Contacts”.
Touch “Transfer Contacts”.
Transfer the phonebook data to the system using the cellular phone.
Refer to the cellular phone user’s manual
for cellular phone operation.
STEP 3
STEP 4
STEP 6
Phonebook transfer may not be possible depending on phone model.
43
GX460_QG_U (OM60E77U)
n Registering a voice tag
STEP 2
Push the “SETUP” button.
Touch “Phone”.
Touch “Phonebook”.
Touch “Manage Voice Tags”.
Touch “New Voice Tag”.
Touch the data you want to register.
Touch “REC”, and record a voice tag.
Touch “OK”.
STEP 3
STEP 4
STEP 7
44
GX460_QG_U (OM60E77U)
n Registering a speed dial
STEP 2
STEP 3
STEP 4
STEP 6
45
GX460_QG_U (OM60E77U)
Push the “SETUP” button.
Touch “Phone”.
Touch “Phonebook”.
Touch “Manage Speed Dials”.
Touch “New Speed Dial”.
Touch the data you want to register.
Touch the desired phone number.
Touch the button you want to register in.
The registration completion message is
displayed on the screen.
n Calling by name
You can call by saying a voice tag registered in the phonebook. For setting the voice recognition, refer to the “Navigation System Owner’s Manual”. Only when English is selected as
the system language can you call by saying a name registered in the phonebook without
registering any voice tags beforehand. (Names in the phonebook work as voice tags.)
STEP 1
Press
.
Follow the voice guidance and say
“Phone”.
Follow the voice guidance and say “Dial
by name”.
Follow the voice guidance and say a
contact name.
Follow the voice guidance and say the
type of phone number (home, mobile,
work, other).
Follow the voice guidance and say “Dial”.
STEP 2
STEP 4
: Pressing this switch turns the voice command system on. Say a command after
the beep.
46
GX460_QG_U (OM60E77U)
n Calling by speed dial
Press
.
Touch “Speed Dials”.
Touch the desired number to call.
47
GX460_QG_U (OM60E77U)
n Receiving a call
When a call is received, this screen is
displayed with a sound.
Push
on the steering wheel to talk
on the phone.
To ignore the call, push
wheel.
on the steering
Audio System (With Navigation System)
n Basic operation
Display the audio control screen
Sound quality modes
Audio sources
AM⋅FM: AM radio/FM radio
SAT:
Satellite radio
DISC:
DVD changer
(if equipped)
CD:
CD changer
(if equipped)
AUX⋅USB: Auxiliary audio device/
USB memory/iPod®/
Bluetooth® audio
Power/Volume
48
GX460_QG_U (OM60E77U)
n Radio
Display the audio control screen
Station presets
Scanning radio stations
Radio tune
Station select
Seek
n Entering station presets
Select the desired station by using the tune, seek or scan function.
Touch one of the touch-screen buttons (1-6) you want and hold it until a beep is heard.
49
GX460_QG_U (OM60E77U)
n DVD player/CD player
n Playing an audio CD
Display the audio control screen
Disc select
Repeat play
Random playback
Search playback
Disc load
Track select/rewind/fast-forward
Eject
n Playing a CD with MP3/WMA files
Display the audio control screen
Disc select
Repeat play
Random playback
Search playback
Folder select
File select
Disc load
Eject
50
GX460_QG_U (OM60E77U)
n Playing a DVD (DVD player only)
Display the audio control screen
Disc select
DVD operation
Image display (full screen)
Disc load
Chapter select
Eject
n Loading a disc
Press the “LOAD” button.
When the indicator changes from flashing amber to green, insert a disc after the disc slot
door opens.
n Loading multiple discs
Press and hold the “LOAD” button until you hear a beep.
When the indicator changes from flashing amber to green, insert a disc after the disc slot
door opens.
After inserting a disc, wait until the indicator changes from flashing amber to green, then
insert the next disc after the disc slot door has opened.
Repeat and until you have inserted all discs.
To cancel the operation, press the “LOAD” button. If you do not insert a disc within 15 seconds, loading will be canceled automatically.
n Operating an iPod®
Display the audio control screen
Menu
Pause/Playback
Repeat play
Random playback
Track list
Track select
Track select/rewind/fast-forward
51
GX460_QG_U (OM60E77U)
n Remote control (steering wheel switches)
The audio system can be operated using the remote control located on the steering wheel.
Volume
Radio mode: radio tuner
DVD mode: track/chapter/disc select
CD mode: disc/track/file
(MP3/
WMA) select
iPod® mode (if equipped): track select
Power on/change mode: press
Power off:
press and hold
Rear Seat Entertainment System
(If Equipped)
The rear seat entertainment system is designed for the rear passengers to enjoy audio
and DVD video.
Front audio system
Displays
Rear seat entertainment system controller
A/V input adapter
Headphone volume control dials and headphone jacks
52
GX460_QG_U (OM60E77U)
n Headphone jacks
To listen to the rear audio, use headphones.
Headphone jacks
Volume:Turn the knob clockwise to
increase.
Turn the knob counterclockwise
to decrease.
n Changing the source
Turning on the audio source selection
screen
Inputting the selected icon
Selecting an icon
Push “SOURCE” to display the audio
source selection screen.
n Radio
Selecting a preset station
Turning the station
Select radio mode on the source screen to
display the control screen.
53
GX460_QG_U (OM60E77U)
n DVD changer
Turning on DVD changer mode
Selecting a disc
Push “∧” or “∨” of “DISC•CH” until the
desired disc number appears on the screen.
n CD player
Push “∧” or “∨” of “TUNE” until the desired
track number appears on the screen.
54
GX460_QG_U (OM60E77U)
n WMA/MP3 discs
Selecting a file
Selecting a folder
n Selecting a file
Push “∧” or “∨” of “TUNE” until the desired file number appears on the screen.
n Selecting a folder
Push “∧” or “∨” of “FOLDER” until the desired folder number appears on the screen.
55
GX460_QG_U (OM60E77U)
n DVD video/audio
Turning on the DVD mode
Inputting the selected icon
Selecting an icon
Turning on the menu screen
Playing/pausing a disc
Fast forwarding a disc
Turning on the control icon screen
Push to select a chapter/track
Push and hold to fast forwarding or
rewinding a chapter/track
Turning on the title selection screen
Rewinding a disc
n Video mode
Press “VIDEO” to select the video mode.
Before switching to the video mode, connect the audio-video equipment to the A/V input
adapter.
56
GX460_QG_U (OM60E77U)
Front Air Conditioning System
(With Navigation System)
Vehicles without a rear automatic air conditioning system
“CLIMATE” button
Outside temperature display
Air flow control buttons
Fan speed control buttons
Windshield wiper de-icer button
Micro dust and pollen filter button
“PASSENGER TEMP” button
Air intake control button
Passenger side temperature display
57
GX460_QG_U (OM60E77U)
“DUAL”
Rear window defogger button
Windshield air flow button
“OFF” button
Driver side temperature display
“AUTO” buttons
“TEMP” buttons
“A/C”
n Using the automatic mode
Press
to turn on the airflow and
to adjust the temperature.
n Adjusting the temperature
n To simultaneously adjust the driver’s side and passenger’s side temperature settings
Press
to turn the “DUAL” indicator off and then press
.
n To individually adjust the driver’s side and passenger’s side temperature settings
Press or to turn the “DUAL” indicator on and then press
Vehicles with a rear automatic air conditioning system
“CLIMATE” button
Rear air conditioning control touchscreen button
“3-ZONE”
Outside temperature display
Air flow control buttons
Fan speed control buttons
Windshield wiper de-icer button
Micro dust and pollen filter button
“PASSENGER TEMP” buttons
or
.
Air intake control button
Passenger side temperature display
“REAR” button
Rear window defogger button
Windshield air flow button
“OFF” button
Drive side temperature display
“AUTO” button
“TEMP” button
“A/C”
58
GX460_QG_U (OM60E77U)
n Using the automatic mode
Press
to turn on the air flow and
to adjust the temperature.
n Adjusting the temperature
n To simultaneously adjust the driver’s side, passenger’s side and rear seats temperature settings
Touch
on the operation screen if its indicator is on and then press
.
n To individually adjust the driver’s side, passenger’s side and rear seats temperature settings
Touch on the operation screen if its indicator is off and the press
the temperature for the rear seats, see below.
and
. To adjust
Rear Air Conditioning System
(With Navigation System)
Refer to Rear Air Conditioning System (Without Navigation System) about rear controller
operation. (→P. 71)
n Front controller (touch screen)
To display the rear air conditioning operation screen, touch the
ation screen.
“REAR OFF” button
Temperature control
Fan speed control
“REAR AUTO” button
59
GX460_QG_U (OM60E77U)
on the oper-
Hands-free System For Cellular Phone
(Without Navigation System)
n Bluetooth® phone pairing
Compatible Bluetooth®-equipped phones can be connected to the vehicle, enabling
hands-free operation. Please refer to the cellular phone manufacturer’s user guide for pairing procedures, or go to“www.lexus.com/bluetooth” for more phone information.
To use a Bluetooth® phone, it is necessary
to first register it in the system.
STEP 1
Press
or
.
Press
and say “Pair phone”.
Press
and say a name*.
*: This name will be used to identify
your phone in the case that more than
one phone has been registered to the
system.
Press
and say “Confirm” to display
the passkey.
Enter the passkey shown on the display
into the phone.
Refer to the cellular phone user’s manual
for cellular phone operation.
Once the voice guidance for registration
completion is finished, press
.
: Pressing this switch turns the voice command system on. Say a command after
the beep.
60
GX460_QG_U (OM60E77U)
n Calling by number
STEP 1
Press
and say “Dial by number”.
Press
and say the phone number.
Dialing
a. Press
.
b. Press
and say “Dial”.
n Calling by name
You can call by saying a voice tag registered in the phonebook. For setting the voice recognition, refer to the “Owner’s Manual”.
STEP 1
Press
and say “Dial by name”.
Press
and say a contact name.
Dialing
a. Press
b. Press
.
and say “Dial”.
: Pressing this switch turns the voice command system on. Say a command after
the beep.
61
GX460_QG_U (OM60E77U)
n Calling by speed dial
STEP 1
Press
STEP 2
Press the desired preset button.
Press
.
.
62
GX460_QG_U (OM60E77U)
n Phonebook transfer
STEP 1
Press
.
Press
and say “Phone book”.
Press
and say “Add entry”.
Press
and say “By phone”.
Press
and say “Confirm”.
Transfer the phonebook data to the system using the cellular phone.
Refer to the cellular phone user’s manual
for cellular phone operation.
Press
and say “Previous” or “Next”
until the desired data is displayed.
Press
and say “Confirm”.
Press
and say the desired name.
Press
and say “Confirm”.
Press
and say “Confirm” again.
Phonebook transfer may not be possible depending on phone model.
: Pressing this switch turns the voice command system on. Say a command after
the beep.
63
GX460_QG_U (OM60E77U)
n Changing the registered name
STEP 1
Press
.
Press
and say “Phone book”.
Press
and say “Change name”.
Press
and say the desired name.
Press
and say “Confirm”.
Press
and say the new name.
Press
and say “Confirm”.
: Pressing this switch turns the voice command system on. Say a command after
the beep.
64
GX460_QG_U (OM60E77U)
n Registering a speed dial
STEP 1
Press
.
Press
and say “Phone book”.
Press
and say “Set speed dial”.
Select the data to be registered.
Press
and say the desired name.
Press
and say “Confirm”.
Press the desired preset button.
STEP 7
Press
and say “Confirm”.
: Pressing this switch turns the voice command system on. Say a command after
the beep.
65
GX460_QG_U (OM60E77U)
Audio System (Without Navigation System)
n Basic operation
Power/Volume
Audio sources
AM•FM: AM radio/FM radio
SAT:
Satellite radio
CD:
CD player
AUX•USB: Auxiliary audio
device/USB memory
/iPod®/Bluetooth®
audio
Sound quality modes
n Radio
Station presets
Radio tune
Scanning radio stations
Traffic information
RDS genre select
Seek
Text messages
n Entering station presets
Select the desired station by using the tune, the seek or the scan function.
Press and hold one of the preset buttons (1-6) until you hear a beep, indicating that the
station is set.
66
GX460_QG_U (OM60E77U)
n CD player
n Playing an audio CD
Eject
Random playback
Repeat play
Pause/Playback
Disc load
Search playback
Disc select
Track select/rewind/fast-forward
Text information
n Playing a CD with MP3/WMA files
Eject
Random playback
Repeat play
Pause/Playback
Folder select
Disc load
File select
Search playback
Disc select
File select/rewind/fast-forwarding
Text information
n Loading a CD
Press the “LOAD” button.
“WAIT” is shown on the display.
Insert a CD when the indicators on the slot turn from amber to green.
The display changes from “WAIT” to “LOAD”.
67
GX460_QG_U (OM60E77U)
n Loading multiple CDs
Press and hold the “LOAD” button until you hear a beep.
“WAIT” is shown on the display.
Insert a CD when the indicators on the slot turn from amber to green.
The display changes from “WAIT” to “LOAD”.
The indicators on the slot turn to amber when the CD is inserted.
Insert the next CD when the indicators on the slot turn from amber to green again.
Repeat the procedure for the remaining CDs.
To cancel the operation, press the “LOAD” button. If you do not insert a CD within 15
seconds, loading will cancelled automatically.
n Operating an iPod®
Shuffle playback
Repeat play
Pause/Playback
Go back
Menu/Track select
Playback
Track select/rewind/fast-forward
Text information
n Remote control (steering wheel switches)
The audio system can be operated using the remote control located on the steering wheel.
Volume
Radio mode: radio tuner
CD mode: disc/track/file
(MP3/
WMA) select
iPod® mode: track select
Power on/change mode: press
Power off:
press and hold
68
GX460_QG_U (OM60E77U)
Front Air Conditioning System
(Without Navigation System)
Vehicles without a rear automatic air conditioning system
Driver’s side temperature display
Passenger’s side temperature display
Air outlet display
Cooling and dehumidification function
on/off display
Air outlet selector button
Micro dust and pollen filter mode button
Passenger’s side temperature control
button
Dual mode button
Outside/recirculated air mode button
Windshield defogger button
Fan speed control button
Driver’s side temperature control button
Automatic mode button
Off button
Cooling and dehumidification function
on/off display
Fan speed display
n Using the automatic mode
Press
to turn on the air flow and
to adjust the temperature.
n Adjusting the temperature
n To simultaneously adjust the driver’s side and passenger’s side temperature settings
Press
to turn the “DUAL” indicator off and then press
.
n To individually adjust the driver’s side and passenger’s side temperature settings
Press
or
to turn the “DUAL” indicator on and then press
69
GX460_QG_U (OM60E77U)
or
.
Vehicles with a rear automatic air conditioning system
Driver’s side temperature display
Rear passenger’s side temperature display
Front passenger’s side temperature
display
Air outlet display
Cooling and dehumidification function
on/off display
Air outlet selector button
Micro dust and pollen filter mode button
Rear automatic air conditioning on/off
button
Front passenger’s side temperature
control button
Rear passenger’s side temperature
control button
3 zone mode button
Outside/recirculated air mode button
Windshield defogger button
Fan speed control button
Driver’s side temperature control button
Automatic mode button
Off button
Cooling and dehumidification function
on/off button
Fan speed display
70
GX460_QG_U (OM60E77U)
n Using the automatic mode
Press
to turn on the air flow and
to adjust the temperature.
n Adjusting the temperature
n To simultaneously adjust the driver’s side, passenger’s side and rear seats temperature settings
Press
to turn the “3ZONE” indicator off and then press
.
n To individually adjust the driver’s side, passenger’s side and rear seats temperature settings
Press
,
or
to turn the “3ZONE” indicator on and then press
,
or
Rear Air Conditioning System
(Without Navigation System)
ing the automatic mode
Fan speed control button
Fan speed display
Air outlet display
Temperature display
Temperature control button
Air outlet selector button
Off button
Automatic mode button
n Using the automatic mode
Press
to turn on the air flow and
71
GX460_QG_U (OM60E77U)
to adjust the temperature.
.
Voice Command System
NOTE:When inputting voice commands you must wait until after the beep to speak.
n Basic operation
Press
on the steering wheel.
- If you know the command:
Press
again.
- If you do not know the command:
Follow the voice guidance to learn the
command and then press
again.
Say a command after the beep.
Continue on to pages 73-75 for a detailed list of Voice Commands for the following categories:
PHONE. . . . . . . . . . . . . . . . . . . . . . . . . . . . . . . . . . . . . . . . . . . . . . . . . . . page 74
GENERAL NAVIGATION COMMANDS. . . . . . . . . . . . . . . page 73
AUDIO . . . . . . . . . . . . . . . . . . . . . . . . . . . . . . . . . . . . . . . . . . . . . . . . . . . page 75
CLIMATE CONTROL/AIR CONDITIONING. . . . . . . . . . . page 75
n Important voice commands information and tips
• Voice commands can be used while driving.
• You must wait until after the beep to say a command.
• In vehicles with a navigation system, a large TALK icon
will appear on the naviga-
tion screen to prompt you to say a command.
• If you know what command to use, you can press
voice guidance.
at any time to interrupt the
72
GX460_QG_U (OM60E77U)
n Command list
With navigation system
GENERAL NAVIGATION COMMANDS
“Map”
To Change the Map Screen,
SAY:
“Dual Map”
“Single Map”
“Compass Mode”
“Zoom In”
“Zoom Out”
To Change the Map Scale/
Size, SAY:
“Right Map Zoom In”
“Right Map Zoom Out”
“North Up”
“Heading Up”
“Map Direction”
To Change the Map
Orientation, SAY:
“Right Map North Up”
“Right Map Heading Up”
“Right Map Direction”
“Arrow Mode”
To Change the Guidance
Mode, SAY:
“Turn List Mode”
“Intersection Mode”
“Freeway Mode”
To Save a Point on the Map,
SAY:
“Mark This Point”
To Remove Icons from Map,
SAY:
“Clear All Icons”
To Set the Destination, SAY:
“Previous Start Point”
“Quick Route”
“Short Route”
To Change the Route, SAY:
“Alternate Route”
“Detour”
“Detour Entire Route”
73
GX460_QG_U (OM60E77U)
GENERAL NAVIGATION COMMANDS
“Route Overview”
“Next Destination Map”
“First Destination Map”
To Review the Route, SAY:
“Second Destination Map”
“Third Destination Map”
“Fourth Destination Map”
“Fifth Destination Map”
“Final Destination Map”
“Delete Next Destination”
To Delete the Destination, SAY:
“Delete Final Destination”
“Delete All Destinations”
“Pause Guidance”
To Operate Guidance
Options, SAY:
“Resume Guidance”
“Repeat Guidance”
“Louder”
“Softer”
To Operate the Traffic
Information, SAY:
“Traffic Information”
To Show the Icon, SAY:
“Show GAS”, “Show PARKING” ETC.
PHONE
To Operate a
Bluetooth
Connected
Phone/Make
Calls, SAY:
“Dial By Number”
“Phone” and
then SAY:
“Dial By Name”
“Select Phone”
NOTE: You
can also make
a call by simply
saying: “Call
XXX-5555555” ETC.
74
GX460_QG_U (OM60E77U)
AUDIO
To Turn Audio On or
Off, SAY:
To Change the Audio
Mode, SAY:
“Audio ON”
“Audio OFF”
FM, FM (1, 2, 3), AM,
Radio, Satellite Radio,
Satellite Radio (1, 2, 3),
Auxiliary, CD, CD
Changer, DVD, DVD
Changer, Bluetooth®
Audio, iPod®, USB
Audio
To Change to a different
CD/DVD track, SAY:
“Track Up”, “Track
Down” or “Previous
Track”
To Change to a different
CD/DVD, SAY:
“Disc Up” “Disc Down”
To Change Radio
Stations, SAY:
“Seek Up” or “Seek
Down”
“Type Up” or “Type
Down”
CLIMATE CONTROL/AIR CONDITIONING
To Turn On and Adjust setting
for Climate Control and
Temperature, SAY:
To Set a Specific Temperature,
SAY:
75
GX460_QG_U (OM60E77U)
“Automatic Climate Control”
“Raise Temperature”
“Lower Temperature”
“70 Degrees” or “65 Degrees” ETC.
Portable Audio Device Adapters
These adapters can be used to connect a portable audio device and listen to it through
the vehicle’s speakers.
Slide the auxiliary box lid.
Open the cover and connect a USB
memory or portable audio device.
76
GX460_QG_U (OM60E77U)
Safety Connect (If Equipped)
Safety Connect is a subscription-based telematics service that uses Global Positioning
System (GPS) data and embedded cellular technology to provide safety and security
features to subscribers. Safety Connect is supported by Lexus’ designated response
center, which operates 24 hours per day, 7 days per week.
Safety Connect service is available by subscription on select, telematics hardwareequipped vehicles.
n System components
Microphone
LED light indicators
“SOS” button
n Services
Subscribers have the following Safety Connect services available:
l Automatic Collision Notification*
In case of either airbag deployment or severe rear-end collision, the system is designed
to automatically call the response center. The responding agent receives the vehicle’s
location and attempts to speak with the vehicle occupants to assess the level of emergency. If the occupants are unable to communicate, the agent automatically treats the
call as an emergency, contacts the nearest emergency services provider to describe the
situation, and requests that assistance be sent to the location.
*: U.S. Patent No. 7,508,298 B2
l Stolen Vehicle Location
If your vehicle is stolen, Safety Connect can work with local authorities to assist them in
locating and recovering the vehicle. After filing a police report, call the Safety Connect
response center at 1-800-25-LEXUS (1-800-255-3987) and follow the prompts for
Safety Connect to initiate this service.
In addition to assisting law enforcement with recovery of a stolen vehicle, Safety-Connect-equipped vehicle location data may, under certain circumstances, be shared with
third parties to locate your vehicle. Further information is available at Lexus.com.
77
GX460_QG_U (OM60E77U)
l Emergency Assistance Button (SOS)
In the event of an emergency on the road, push the “SOS” button to reach the Safety
Connect response center. The answering agent will determine your vehicle’s location,
assess the emergency, and dispatch the necessary assistance required.
If you accidentally press the “SOS” button, tell the response-center agent that you are
not experiencing an emergency.
l Roadside Assistance
Subscribers can press the “SOS” button to reach a Safety Connect response-center
agent, who can help with a wide range of needs, such as: towing, flat tire, fuel delivery, etc.
For a description of the Roadside Assistance services and their limitations, please see the
Safety Connect Terms and Conditions, which are available at Lexus.com.
n Subscription
After you have signed the Telematics Subscription Service Agreement and are enrolled,
you can begin receiving services.
A variety of subscription terms is available for purchase. Contact your Lexus dealer, call
1-800-25-LEXUS (1-800-255-3987) or push the “SOS” button in your vehicle for further subscription details.
78
GX460_QG_U (OM60E77U)
Lexus Enform with Safety Connect
(If Equipped)
Lexus Enform and Safety Connect are subscription-based telematics services that use
Global Positioning System (GPS) data, embedded cellular technology an XM® satellite
data services to provide safety and security as well as convenience features to subscribers.
Lexus Enform and Safety Connect services are supported by Lexus’ designated
response center, which operates 24 hours per day, 7 days per week.
Lexus Enform service is available by subscription on select, telematics hardwareequipped vehicles.
For details, refer to the “Owner’s Manual” and “Navigation System Owner’s Manual”.
n Services
With an active Lexus Enform subscription, the following features are available:
l Safety Connect features (→P. 77)
• Automatic collision notification*1
• Stolen vehicle location
• Emergency assistance button (SOS)
• Roadside assistance
l Destination Assist
Destination Assist provides you with live assistance for finding destinations via the Lexus
Enform response center. You can request either a specific business, address, or ask for
help locating your desired destination by category, such as restaurants, gas stations,
shopping centers or other points of interest (POI).
After you tell the agent your choice of destination, its coordinates are sent wirelessly to
your vehicle’s navigation system.
l eDestination
With the eDestination feature, you can go online, via the Lexus.com owner’s Web site, to
select and organize destinations of your choice and then wirelessly send them to your
vehicle’s navigation system.
You can store up to 200 locations online to access and update at any time.
Your locations can be organized into up to 20 personalized folders.
You must first go online at www. lexus.com and go to the “Owners” section where you will
need to register and log in. After this, you can create your personalized folders containing the locations you wish to send to your vehicle. (See Lexus Enform Guide for more
information.)
79
GX460_QG_U (OM60E77U)
l XM® Sports and Stocks*2
XM® Sports and Stocks is a service included with XM® satellite radio subscriptions for
Lexus Enform vehicles. With this service, you can receive updates via the navigation system on your personally selected sports teams and stocks.
l XM NavWeatherTM*3
The subscription-based XM NavWeatherTM service allows the navigation system to display weather information on the map.
l XM® NavTraffic*3
The subscription-based XM® NavTraffic service allows the navigation system to display
traffic information on the map.
The following navigation-based Lexus Enform features are available without a subscription:
l Lexus Insider
Lexus Insider is an optional service that can send audio messages, or articles, to participating owner’s vehicles via the navigation system. Potential Lexus Insider subjects might
include, for example, Lexus vehicle technology tips, updates on regional Lexus events, or
audio excerpts from Lexus Magazine articles. Up to 20 articles can be stored at a time.
l Voice Command
The voice command system enables you to operate the navigation system, audio system
and hands-free system by giving a command.
1
* : U.S. Patent No. 7,508,298 B2
*2: Available at no extra charge with an active XM® satellite radio subscription.
*3: Available via separate XM® subscription(s).
n Subscription
After you have signed the Telematics Subscription Service Agreement and are enrolled,
you can begin receiving services. A variety of subscription terms is available for purchase.
Contact your Lexus dealer, call 1-800-25-LEXUS (1-800-255-3987), or push the “Destination Assist” button in your vehicle for further subscription details. XM® NavTraffic and
XM NavWeatherTM require separate XM® subscription(s). XM® Sports and Stocks is
available with an XM® Satellite Radio subscription. After a 90-day free trial, you must set
up the appropriate XM® subscription(s) to continue receiving these services.
80
GX460_QG_U (OM60E77U)