1
16
FINAL CUT PRO 2: User Manual
EXERCISE 14: ADJUSTING AUDIO LEVELS AND PANNING
Steps:
1.
Place an audio clip in any audio track on
the Timeline
2.
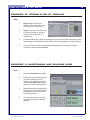
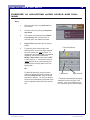
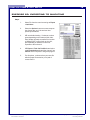
View the volume by clicking the Clip Overlays button
3.
The volume is represented by the Volume
Level Overlay (red or green if track is
selected) line in the middle of the track
4.
Drag red line to desired levels for desired
volume
5.
For panning, there can be audio in two
different tracks. If the tracks were imported
as stereo tracks, they may be linked. To
change this so that each channel is adjusted
separately, select from the Menu Bar:
Modify > Stereo Pair so that there is NOT
a check mark by it. This is also the way to
create a stereo pair by “shift-selecting” two
tracks and then selecting Stereo Pair from
Modify again
Track On/Off button
OR
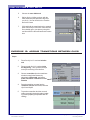
To adjust the panning in a mono channel
audio clip, drag the clip into the Viewer and
select the Channel 1 tab. Drag the purple
pan slider to adjust it. You may use the pen
tool here also to add anchor points which can
then be adjusted using the Selection (arrow)
tool
File name: FinalCutPro_User.pmd
Last modified: 06/04/02
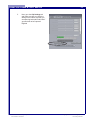
Left Channel
Right Channel
**There are yellow triangles specifying
whether the track is the right or left
channel. Also, check that the green
box is selected to have the track play.
Copyright Arizona Board of Regents, 2002
University of Arizona