1
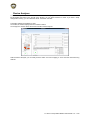
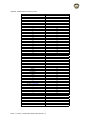
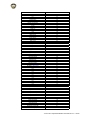
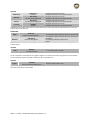
The T.A.R.G.E.T function Toolbox
Linking axes with the MapAxis function
The first thing to do is to map physical controller axes to virtual controller axes. DirectX has 8 axes. We can link
them to any controller axes. To do so, we will use the MapAxis command. This function maps a physical axis
over a virtual one. By default, all physical axes are unmapped. We will focus on axis response and form later in
this manual.
Syntax:
MapAxis(&Input device, physical axis name, dx_axis name, option1, option2);
Table of Axis names Product Axis Name DirectX Name Script Axis Name HOTAS WARTHOG HOTAS COUGAR T‐16000M X DX_X_AXIS JOYX JOYX JOYX Y DX_Y_AXIS JOYY JOYY JOYY RZ DX_ZROT_AXIS THR_LEFT RUDDER RUDDER Z DX_Z_AXIS THR_RIGHT THROTTLE RX DX_XROT_AXIS SCX RDR_X RY DX_YROT_AXIS SCY RDR_Y Slider0 DX_SLIDER_AXIS THR_FC MAN_RNG THROTTLE Throttle DX_THROTTLE_AXIS
ANT_ELEV MOUSE X MOUSE_X_AXIS MOUSE_X_AXIS MOUSE_X_AXIS MOUSE_X_AXIS MOUSE Y MOUSE_Y_AXIS MOUSE_Y_AXIS MOUSE_Y_AXIS MOUSE_Y_AXIS Let’s start by linking the Warthog joystick X axis to the DirectX X axis.
First we need to specify the name of USB controller hosting the axis:
MapAxis(&Joystick,
Then the physical axis name:
MapAxis(&Joystick, JOYX,
And finally, the DirectX axis name:
MapAxis(&Joystick, JOYX, DX_X_AXIS
As we have opened a “(” we now must close it with a “)” and finish the line with a “;”.
MapAxis(&Joystick, JOYX, DX_X_AXIS);
10/60 - T.A.R.G.E.T Script Editor Basics User Manual v1.5


![[User manual (English) - v1.6] 1.7 MB](http://vs1.manualzilla.com/store/data/005855357_1-51a3ddd110ebec5d1eef2b5791ba3868-150x150.png)