1
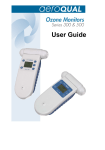
Dataport User Manual
V.17
TASER INTERNATIONAL, INC.
Dataport User Manual Version 17
Copyright 2000–2009
WARNING!
Failure to follow safety precautions and instructions contained in this document may result
in damage to equipment. TASER International, Inc. assumes no liability for users not
following established procedures.
Pre-Installation Information:
•
Contact TASER International, Inc., to confirm the latest version of the software
before proceeding with the instructions in this manual.
•
Uninstall all previous versions of the X26 dataport software before installing the
latest version. See page 31 for instructions for Windows® 98se. See page 36 for
instructions for Windows® 2000 and Windows XP®.
•
The installation is a two-step process. The X26 dataport software is installed first,
followed by the USB driver installation.
•
USB driver installation instructions vary slightly depending on your Windows
operating system. To determine your operating system, see MINIMUM SYSTEM
REQUIREMENTS on page 4.
•
Administrative privileges for the workstation are needed when installing X26 dataport
software and USB drivers. Contact your agency’s help desk if you receive an
access denied message during installation.
•
This document is intended to provide basic operational instructions. For more
detailed information and technical support, contact TASER International at 800-9782737, by email at [email protected], or view the X26 Download Troubleshooting
Guide at http://www.TASER.com.
•
Downloading or saving data from the X26 device does not erase the data from the
X26 device memory. There are no options for users to erase data from the X26
device memory.
•
Ensure the computer time and time zone information are correct prior to
downloading.
Windows® and Windows XP® are registered trademarks of Microsoft Corporation.
© 2009 TASER International, Inc. TASER, the “Globe and Lightning Bolt” logo ®, X26 and Protect Life are TASER trademarks or ®
U.S.A. All rights reserved.
Copyright 2000–2009 TASER International, Inc. All rights reserved.
Page 2 of 49
TABLE OF CONTENTS
SAFETY PRECAUTIONS ............................................................................................... 4 MINIMUM SYSTEM REQUIREMENTS........................................................................... 4 INSTALLING X26 DATAPORT SOFTWARE .................................................................. 5 INSTALLING USB DRIVERS: WINDOWS 98se, 2000 ................................................. 10 INSTALLING USB DRIVERS: WINDOWS XP .............................................................. 12 CLOCK OPERATION AND INFORMATION ................................................................. 14 DOWNLOADING DATA FROM THE X26 DEVICE ....................................................... 14 VIEWING A PREVIOUSLY SAVED RECORD .............................................................. 28 UNINSTALLING PREVIOUS VERSIONS OF THE X26 DATAPORT SOFTWARE
AND DRIVERS ................................................................................................... 31 Windows 98se .................................................................................................... 31 UNINSTALLING PREVIOUS VERSIONS OF THE X26 DATAPORT SOFTWARE
AND DRIVERS ................................................................................................... 36 Windows 2000 and Windows XP ........................................................................ 36 INSTALLING X26 DATAPORT SOFTWARE FROM THE INTERNET .......................... 41 INSTALLING USB DRIVERS FROM THE INTERNET: WINDOWS 98se, 2000 ........... 41 INSTALLING USB DRIVERS FROM THE INTERNET: WINDOWS XP ........................ 44 TASER INTERNATIONAL USB DOWNLOADING TROUBLESHOOTING GUIDE ....... 47 Copyright 2000–2009 TASER International, Inc. All rights reserved.
Page 3 of 49
SAFETY PRECAUTIONS
Before inserting a USB cable into the X26 device, complete the following steps:
1. Ensure that the X26 device’s safety switch is in the down (SAFE) position.
2. Remove the TASER cartridge from the X26 device.
Do not attempt hardware installation if the USB cable is damaged.
MINIMUM SYSTEM REQUIREMENTS
Software Components
Operating System:
Internet Explorer:
Disk Space:
Communications Ports:
Windows 98se/2000/XP with latest Service Pack
Version 5.5 or higher
100K of available disk space
1 available USB port
Hardware Components
X26 USB Interface Kit
Copyright 2000–2009 TASER International, Inc. All rights reserved.
Page 4 of 49
INSTALLING X26 DATAPORT SOFTWARE
1. Close all running programs on your computer.
2. Insert the X26 Dataport Software CD, and after a short delay the setup program will
appear.
3. Click setup.exe.
Note: If the X26 installation screen does not appear automatically, click My Computer
and double-click the CD drive titled TASER. If the installation screen still does not
appear, download the software from the TASER Web site (see the INSTALLING X26
DATAPORT SOFTWARE FROM THE INTERNET instructions on page 41) or contact
TASER International’s customer service department for a replacement CD.
4. Click Next (Figure 1).
Figure 1
Copyright 2000–2009 TASER International, Inc. All rights reserved.
Page 5 of 49
5. Read the End User License Agreement and, if it is not already selected, click the I
Agree button if you accept the terms (Figure 2).
6. Click Next.
Figure 2
Copyright 2000–2009 TASER International, Inc. All rights reserved.
Page 6 of 49
7. Based on your organization’s policy, indicate the access for this software (Figure 3).
•
If anyone who uses the computer is allowed access to the software, then click
the Everyone button.
•
If you are the only one who is allowed access to the software, then click the Just
me button. When the Just Me option is selected, anyone logging in with a
different user ID should not be able to see the dataport software.
8. Click Next.
Figure 3
Copyright 2000–2009 TASER International, Inc. All rights reserved.
Page 7 of 49
9. Click Next (Figure 4). The software will install (Figure 5).
Figure 4
Figure 5
Copyright 2000–2009 TASER International, Inc. All rights reserved.
Page 8 of 49
10. Click Close (Figure 6).
Figure 6
11. Plug the USB cable into the USB port.
Note: Do not insert the USB DPM into the X26 device until the USB driver installation is
complete. See the instructions for installing USB drivers beginning on page 10.
12. The USB cable DPM will illuminate red (the USB DPM is translucent plastic and has
LEDs inside, so it appears that the USB DPM is illuminated) and the FOUND NEW
HARDWARE WIZARD window should appear (Figure 7). At this point, go to
INSTALLING USB DRIVERS: WINDOWS 98se, 2000 on page 10 or INSTALLING USB
DRIVERS: WINDOWS XP on page 12.
Copyright 2000–2009 TASER International, Inc. All rights reserved.
Page 9 of 49
INSTALLING USB DRIVERS: WINDOWS 98SE, 2000
1. Click Next to continue (Figure 7).
Figure 7
2. Select the CD-ROM drives check box, clear all other check boxes, and then click Next
(Figure 8).
Figure 8
Copyright 2000–2009 TASER International, Inc. All rights reserved.
Page 10 of 49
3. Click Next (Figure 9).
Figure 9
4. Click Finish to complete the hardware installation (Figure 10).
Figure 10
5. Installation is complete. You may remove the software installation CD from your
computer.
6. Reconnect your network cable (if applicable).
Copyright 2000–2009 TASER International, Inc. All rights reserved.
Page 11 of 49
INSTALLING USB DRIVERS: WINDOWS XP
1. In the Found New Hardware Wizard dialog box, select Install the Software
Automatically (Recommended) and click Next (Figure 11).
Note: If the system displays a prompt asking if you want to connect to the internet for a
suitable driver, select No, not at this time and continue.
Figure 11
2. Select FTDI FT8U2XX Device and click Next (Figure 12).
Figure 12
Copyright 2000–2009 TASER International, Inc. All rights reserved.
Page 12 of 49
3. In the Hardware Installation dialog box, click Continue Anyway (Figure 13).
Figure 13
4. Click Finish to complete the hardware installation (Figure 14).
Figure 14
5. Installation is complete. You can remove the software installation CD from your
computer.
6. Reconnect your network cable (if applicable).
Copyright 2000–2009 TASER International, Inc. All rights reserved.
Page 13 of 49
CLOCK OPERATION AND INFORMATION
•
The clock in the X26 device is an industry standard clock using a crystal similar to
clocks in other electronic devices. The clock can drift several minutes per month.
This is normal and is inherent in the design of the clock. The clock is not intended to
be as accurate as an atomic clock.
•
The X26 device’s internal clock is set to Greenwich Mean Time (GMT) only.
Download files will include both the GMT and local time based on the time zone and
daylight savings time settings on your computer.
•
When a download is attempted, the software compares the clock time and the time
zone settings (including the daylight savings time settings) on your computer (Date
and Time Properties) to the hour setting in the X26 device. The software will then
compare the minute setting on your computer and the minute setting in the device.
Note: The time zone selected on your computer represents the number of hours
between local time and GMT. For instance, if the computer is set to Eastern
Standard Time (EST), the software will look for a 5-hour difference between the hour
setting in the device and the hour setting on the computer.
•
If the date, hour, or minute comparison does not match within ±10 minutes, the
software will display a “TIME DISCREPANCY” message. Most often, this is due to
the drift of the computer clock. The software will prompt you to double-check the
time and time zone on your computer to ensure that it is accurate. If the computer
time is accurate, the X26 device’s clock may have drifted, or it might have been
synchronized to a different computer with an inaccurate time. (This matter is
addressed further in the DOWNLOADING DATA FROM THE X26 DEVICE
instructions below.)
•
TASER International highly recommends using one computer for downloading to
minimize the chances of a time discrepancy. Multiple computers that are connected
to a network which synchronizes the computers may also be used to minimize the
chances of a time discrepancy.
DOWNLOADING DATA FROM THE X26 DEVICE
General operating notes:
•
The time recorded in the download data log represents the end of the firing cycle,
not when the trigger switch is initially pulled.
•
The X26 device only records the total duration of each firing, not each trigger pull. If
the trigger is pulled multiple times in one 5-second cycle (e.g., double tapping), this
Copyright 2000–2009 TASER International, Inc. All rights reserved.
Page 14 of 49
will not be indicated in the download data.
•
Downloading or saving data from the X26 device does not erase the data from the
X26 device’s memory. There are no options for users to erase data from the X26
device’s memory.
1. Verify that the computer time and time zone information are correct.
2. Click the Taser X26 Dataport desktop icon.
Note: The first time the dataport download software is used, you must enter the
“downloaded by” information. This information will be stored for all subsequent uses
(Figure 15). If multiple users will be using the dataport download software, then the
user information on Figure 15 will need to be updated with each new user.
3. Insert the USB end of the DPM cable into the computer. The USB DPM will illuminate
red if the cable is connected correctly.
4. Ensure the X26 device’s safety switch is in down (SAFE) position and remove the
TASER cartridge.
5. Insert the USB DPM into the X26 device. After a few seconds the USB DPM
illumination will change from red to green and a ‘U’ will appear on the X26 device’s
central information display (CID).
Note: If the cable does not turn green, remove and reinsert the cable in the computer
and X26 device.
Copyright 2000–2009 TASER International, Inc. All rights reserved.
Page 15 of 49
6. Click the Download X26 button (Figure 15).
Figure 15
Copyright 2000–2009 TASER International, Inc. All rights reserved.
Page 16 of 49
7. If the ALERT Time Discrepancy dialog box (Figure 16) appears, the date/time on your
computer is not within ±10 minutes of the device’s time. See the CLOCK OPERATION
AND INFORMATION section on page 14 and then perform the following steps. You will
not be able to proceed until resolving the time discrepancy.
Figure 16
a. Check the computer time displayed on the ALERT page. If the computer time is
incorrect, click Change Computer Time to open the Windows Date/Time box
and adjust the time. Proceed to step 8.
b. Check the X26 time displayed on the ALERT page. If the X26 time is incorrect,
click Change X26 Time.
Copyright 2000–2009 TASER International, Inc. All rights reserved.
Page 17 of 49
c. A PLEASE CONFIRM dialog box (Figure 17) will appear to verify that you want
to change the time in the X26 device. Changing the time requires the casesensitive password located on the X26 Dataport CD case. You also may obtain
the password by contacting TASER International Technical Support at
1.800.978.2737.
Figure 17
d. Type the password and click Continue.
Note: Changing the time on the X26 device does not change the time stamp on
previous firing records stored in the X26 device. Both the old (FROM) and new (TO)
times are displayed on the firing record.
Copyright 2000–2009 TASER International, Inc. All rights reserved.
Page 18 of 49
8. Select the desired date range or DOWNLOAD ALL FIRING DATA and click Continue
(Figure 18).
Note: If the date range is selected, time change records that overlap dates outside the
range may be inaccurate.
Figure 18
9. The Download Progress dialog box will confirm download progress (Figure 19).
Figure 19
Copyright 2000–2009 TASER International, Inc. All rights reserved.
Page 19 of 49
10. The X26 Dataport Download screen provides options for refreshing the device’s time,
viewing, printing, and saving data (Figure 20).
Figure 20
Notes:
•
The X26 device only records each firing, not each trigger pull. If the trigger is pulled
multiple times in one 5-second cycle (double tapping) it will not be indicated on the
report.
•
The time recorded in the download data log represents the end of the firing cycle.
•
The temperature is the internal X26 device temperature.
•
The “Time Change Record” provides a log of all changes to the X26 device’s internal
clock.
11. There are three options for viewing information: Zoom Out, Print Preview, and Save
Encrypted Record (Figure 20).
Copyright 2000–2009 TASER International, Inc. All rights reserved.
Page 20 of 49
12. The Zoom Out option provides an expanded view of the recorded firing data and time
change records in separate lists (Figure 21).
Figure 21
13. The Print Preview option provides a preview of printed records in the print format. A
dialog box will appear with the option to combine the time records with the firings
records in one chronological list (Figure 22).
Figure 22
14. A partial screen will appear showing the heading section of the printout. You can scroll
through the entire report if desired (Figure 23).
Note: If the device has been configured to work with a Controlled Digital Power
Copyright 2000–2009 TASER International, Inc. All rights reserved.
Page 21 of 49
Magazine (CDPM™), the model number will display as an “X26R.”
Figure 23
Note: If a firing record does not have a valid date or time (e.g., the month is greater than
12, the day is greater than 31, etc.), “Invalid Date/Time” will be displayed on the screen
(Figure 24).
Copyright 2000–2009 TASER International, Inc. All rights reserved.
Page 22 of 49
Figure 24
Copyright 2000–2009 TASER International, Inc. All rights reserved.
Page 23 of 49
15. Click Print (Figure 20) to print the firing report (Figure 25).
Figure 25
16. The Create Debug File (Figure 26) feature is used to save raw data for engineering
purposes. This data is used by TASER International, Inc. and you may be asked to
create a debug file by TASER International Technical Services if you are requesting
analysis of your download records from TASER International.
Copyright 2000–2009 TASER International, Inc. All rights reserved.
Page 24 of 49
17. The Save Encrypted Record option (Figure 26) stores the record for future access.
The file name defaults to the device’s serial number and may be modified if desired.
The file is saved as an “.x26” file and can only be viewed using the download software
(Figure 27).
Figure 26
Copyright 2000–2009 TASER International, Inc. All rights reserved.
Page 25 of 49
Figure 27
18. The Refresh Time option (Figure 20) updates the current time on the download page.
Normally, the time on this screen does not increment while viewing.
19. The Sync Time option (Figure 20) synchronizes the X26 time to the computer time
regardless of the time difference. This feature allows synchronizing of the times when
the difference is less than 10 minutes.
Copyright 2000–2009 TASER International, Inc. All rights reserved.
Page 26 of 49
a. A PLEASE CONFIRM dialog box (Figure 28) will appear to verify that you want
to change the time in the X26 device. Changing the time requires the casesensitive password located on the CD case. You also can obtain the password
by contacting TASER International Technical Support at 1.800.978.2737.
20. Type the password and click Continue.
Note: Changing the time on the X26 device does not change the time stamp on
previous firing records stored in the X26 device. Both the old (FROM) and new (TO)
times are displayed on the firing record.
Figure 28
Copyright 2000–2009 TASER International, Inc. All rights reserved.
Page 27 of 49
VIEWING A PREVIOUSLY SAVED RECORD
1. To view a previously saved record, select View Saved Record from the initial program
screen (Figure 29).
Figure 29
Copyright 2000–2009 TASER International, Inc. All rights reserved.
Page 28 of 49
2. Select the desired file from the appropriate folder (Figure 30).
Figure 30
Copyright 2000–2009 TASER International, Inc. All rights reserved.
Page 29 of 49
3. The remainder of the screens function the same as during a download (Figure 31).
Note: You might want to use the Save Encrypted Record tool to encrypt your records.
Only do this for just-downloaded files. Do not use this feature for previously saved
records.
Figure 31
Copyright 2000–2009 TASER International, Inc. All rights reserved.
Page 30 of 49
UNINSTALLING PREVIOUS VERSIONS OF THE X26 DATAPORT SOFTWARE AND
DRIVERS
Windows 98se
1. Click the Start button (located on the lower left corner of the screen).
2. Click Settings and then click Control Panel (Figure 32).
Figure 32
Copyright 2000–2009 TASER International, Inc. All rights reserved.
Page 31 of 49
3. Double-click the Add/Remove Programs icon (Figure 33).
Figure 33
Copyright 2000–2009 TASER International, Inc. All rights reserved.
Page 32 of 49
4. Select FTDI USB-to-Serial Converter Drivers (Figure 34).
5. Click the Add/Remove button (Figure 34).
Figure 34
6. Click Continue on the FTDI Uninstaller confirmation panel (Figure 35).
Figure 35
Copyright 2000–2009 TASER International, Inc. All rights reserved.
Page 33 of 49
7. Select Finish (Figure 36).
Figure 36
8. Select Taser X26 then click the Add/Remove button (Figure 37).
Figure 37
Copyright 2000–2009 TASER International, Inc. All rights reserved.
Page 34 of 49
9. Click Yes on the Uninstalling Taser X26 confirmation panel (Figure 38) and click OK
when the uninstall is finished (Figure 39).
Figure 38
Figure 39
Copyright 2000–2009 TASER International, Inc. All rights reserved.
Page 35 of 49
UNINSTALLING PREVIOUS VERSIONS OF THE X26 DATAPORT SOFTWARE AND
DRIVERS
Windows 2000 and Windows XP
1. Click the Start button (located on the lower left corner).
2. Click Settings and then click Control Panel (Figure 40).
Figure 40
Copyright 2000–2009 TASER International, Inc. All rights reserved.
Page 36 of 49
3. Double click the Add/Remove Programs icon (Figure 41).
.
Figure 41
4. Click the Change or Remove Programs button (Figure 42).
Figure 42
Copyright 2000–2009 TASER International, Inc. All rights reserved.
Page 37 of 49
5. Click Change/Remove in the FTDI USB Serial Converter Drivers section (Figure 43).
Figure 43
6. Click Continue on the FTDI Uninstaller confirmation panel (Figure 44).
Figure 44
Copyright 2000–2009 TASER International, Inc. All rights reserved.
Page 38 of 49
7. Click Finish on the FTDI Uninstaller confirmation panel (Figure 45).
Figure 45
8. Select Taser X26 on the Remove Programs page (Figure 46).
Figure 46
Copyright 2000–2009 TASER International, Inc. All rights reserved.
Page 39 of 49
9. Click Yes on the Uninstalling Taser X26 confirmation panel (Figure 47).
Figure 47
10. Click OK when the uninstall is finished (Figure 48).
Figure 48
Copyright 2000–2009 TASER International, Inc. All rights reserved.
Page 40 of 49
INSTALLING X26 DATAPORT SOFTWARE FROM THE INTERNET
1. Go to http://www.taser.com/. Click the SUPPORT button, click Downloads, and click
the TASER® X26 Dataport Download Software v.17 download link.
2. Click USB Dataport (current version) to download setup.zip to your desktop.
3. Close all running programs.
4. Windows XP users must unplug the computer from the network (LAN). Your network
cable is similar to a phone cord but has a larger jack and thicker cord.
5. Double-click the setup.zip file on your desktop.
6. Double-click the setup.exe file and the installation program will begin.
7. Follow the on screen prompts to complete the software installation.
8. Plug the USB cable into the USB port. Do not insert the USB DPM into the X26 device
until the USB driver installation is complete.
9. The USB cable DPM will illuminate red and the FOUND NEW HARDWARE WIZARD
window will appear.
INSTALLING USB DRIVERS FROM THE INTERNET: WINDOWS 98SE, 2000
1. Click Next to continue (Figure 49).
Figure 49
Copyright 2000–2009 TASER International, Inc. All rights reserved.
Page 41 of 49
2. Check the Specify a Location box, uncheck all other boxes, and then click Next
(Figure 50).
Figure 50
3. In the Found New Hardware Wizard dialog box, click the Copy manufacturer’s files
text box.
a. Type the following line into the text box (Figure 51):
C:\Program Files\TASER International\X26 DataPort\Drivers
Note: If you prefer, you can click the Browse button and navigate to this
location.
b. Click OK.
C:\Program Files\TASER International\X26 DataPort\Drivers
Figure 51
Copyright 2000–2009 TASER International, Inc. All rights reserved.
Page 42 of 49
4. Click Finish to complete hardware installation (Figure 52).
Figure 52
5. Proceed to the DOWNLOADING DATA FROM THE X26 DEVICE section of this manual
on page 14.
Copyright 2000–2009 TASER International, Inc. All rights reserved.
Page 43 of 49
INSTALLING USB DRIVERS FROM THE INTERNET: WINDOWS XP
Note: Perform this procedure after following the instructions in INSTALLING X26
DATAPORT SOFTWARE FROM THE INTERNET on page 41.
1. In the Found New Hardware Wizard dialog box, select Install from a list or specific
location (Advanced) and click Next (Figure 53).
Note: If the system displays a prompt asking if you want to connect to the internet for a
suitable driver, select No, not at this time and continue.
Figure 53
Copyright 2000–2009 TASER International, Inc. All rights reserved.
Page 44 of 49
2. Select Search for the best driver in these locations and select the Include this
location in the search check box.
a. Type the following line into the text box (Figure 54):
C:\Program Files\TASER International\X26 DataPort\Drivers
Note: If you prefer, you can click the Browse button and navigate to this
location.
b. Click Next.
C:\Program Files\TASER International\X26 DataPort\Drivers
Figure 54
Copyright 2000–2009 TASER International, Inc. All rights reserved.
Page 45 of 49
3. In the Hardware Installation dialog box, click Continue Anyway (Figure 55).
Figure 55
4. Click Finish to complete the hardware installation (Figure 56).
Figure 56
5. Reconnect your network cable (if applicable).
6. Proceed to the DOWNLOADING DATA FROM THE X26 DEVICE section of this manual
on page 14.
Copyright 2000–2009 TASER International, Inc. All rights reserved.
Page 46 of 49
TASER INTERNATIONAL USB DOWNLOADING TROUBLESHOOTING GUIDE
When the USB cable is plugged into the computer, the USB DPM does
not illuminate red.
OR
Symptom
When the USB cable is plugged into the X26 device, the USB DPM does
not change from red to green or the X26 device’s CID does not display a
“U.”
Verify the USB is connected to the X26 device and that the X26 device
is powered up. The USB DPM cable may be damaged or a good
Possible Cause
connection might not have been made between the X26 device and the
USB DPM.
Disconnect the USB DPM from the device and the computer. Wait a few
seconds and reattach the USB DPM to the computer and then to the
Remedy
X26 device. If the problem persists, please contact TASER’s customer
support at 800-978-2737.
Removed CD before completing the driver installation.
OR
Symptom
When the X26 Dataport Download software starts one of the following
error messages is displayed: “Error: Can’t load USB device driver” or
“FT_OPEN is not valid.”
The driver installation was unsuccessful or was not performed during
Possible Cause
installation.
Please refer to the X26 Dataport Download user’s manual or contact
TASER’s customer support at 800-978-2737 for help with correct driver
Remedy
installation.
When “Download X26” is selected the following error message appears:
“USB device and/or X26 not found.”
Verify the USB is connected to the X26 device and that the X26 device
is powered up. The USB DPM cable may be damaged or a good
Possible Cause connection might not have been made between the X26 device and the
USB DPM. Or, the driver installation was unsuccessful or was not
performed during installation.
Disconnect the USB DPM from the device and the computer. Wait a few
seconds and reattach the USB DPM to the computer and then to the
X26 device. If the problem persists, please refer to the X26 Dataport
Remedy
Download user’s manual or contact TASER’s customer support at 800978-2737 for help with correct driver installation.
Symptom
Copyright 2000–2009 TASER International, Inc. All rights reserved.
Page 47 of 49
Department/company policy prohibits disconnecting the computer from
the network (LAN). This usually applies to Windows XP users only.
Windows XP users must disconnect from the LAN to prevent the
Possible Cause Windows software from attempting to find software drivers on the
internet.
The LAN cable is typically blue, and is connected to the computer with a
jack similar to a standard phone jack. Contact your computer support
personnel if unable to determine the proper cable. If department policy
Remedy
prohibits disconnecting the computer from the LAN, contact TASER’s
customer support for Tech Support on installing drivers using an
alternative procedure.
Symptom
When I “zoom out” to view firing records, it appears that some
sequence numbers are missing.
This is not an error. The sequence numbers are chronological, and
each firing record requires a separate sequence number. In addition,
Possible Cause
each time change requires two sequence numbers – FROM and TO.
Missing numbers in the firing record correspond to time change records.
Select the “Print Preview” option, and then select “Yes” to combine time
changes and firing records into one sequential display. This format will
Remedy
show all sequence numbers in chorological order.
Symptom
When I load, print, and view previously saved records, the X26 device
software version number on the printout indicates “OO.”
For X26 Dataport Download software versions before 15.5, the device
Possible Cause
software version is not saved with the download file.
Upgrade to the current X26 Dataport Download software version
(available on the TASER International web site or from TASER
Remedy
International customer support).
Symptom
The “Time Discrepancy” dialog is displayed.
The computer clock and the device’s internal clock differ by 10 minutes
Possible Cause or more. Most likely, the computer clock time is wrong, or the computer
time zone is incorrect.
Follow the on screen prompts to change the computer time or time zone.
If computer time and time zone are correct, select “Change X26 Time”
to change the X26 device’s internal clock. A password is required to
Remedy
change the device’s clock and can be obtained from your administrator
or by contacting TASER customer support at 800-978-2737.
Symptom
Copyright 2000–2009 TASER International, Inc. All rights reserved.
Page 48 of 49
Data could not be written to this memory location and was therefore
moved to the next available location.
A corruption occurred during the firing cycle that prevented the software
Possible Cause
from recording the firing record.
There is no correction available for this problem. Other records are not
Remedy
affected and new data will be recorded normally.
Symptom
The “Error: Time Still Not in Sync” dialog is displayed after attempting
to synchronize the X26 device’s internal clock.
A good connection might not have been made between the X26 device
and the USB DPM or between the USB cable and the computer.
Possible Cause
Alternatively an older version of the dataport download software may be
installed.
Disconnect the USB DPM from the device and the computer. Wait a few
seconds and reattach the USB DPM to the computer and then to the
X26 device. Upgrade to the current X26 Dataport Download software
Remedy
version (available on the TASER International web site or from TASER
International customer support). If the problem persists, please contact
TASER’s customer support at 800-978-2737.
Symptom
When I click the print button on the “Print Preview” page, nothing
happens or the dataport download program or Windows locks up.
All available updates for Windows have not been installed from
Possible Cause
Microsoft.
Connect to the internet and connect to
http://windowsupdate.microsoft.com. Download and install all available
Remedy
updates for Windows. This may require administrative privileges and if
unable to install updates, contact your computer support personnel.
Symptom
TASER International
17800 N. 85th St.
Scottsdale AZ 85255-9603
Internet: http://www.taser.com
Email: [email protected]
Copyright 2000–2009 TASER International, Inc. All rights reserved.
Page 49 of 49