1
DigiWin
DigiWin
Portal User Manual
For Administrator
Doc. No.: DWP002
Doc. Date: 15/11/2013
DigiWin Systems Group Holding Corp.
Copyright © 2005~2007 DigiWin Systems Group Holding Corp. All rights reserved.
DigiWin
For Administrator
Document Creation/Revision History
Ver.
Date
1.0
15/11/2013
Ch1 to Ch8 inspection
Szu-Min Yang
1.1
15/11/2013
Control panel inspection
Ping Chien
DWP002
Description
Author
Note
Page: I
DigiWin
For Administrator
Content
1. Start Using DigiWin Portal ................................. 1
2.1.4 Set Announcement Viewing
1.1 Environmental Setting for First Use .......... 1
Permission 24
1.2 About DigiWin Portal ............................... 1
2.1.5 Control the Bulletin Announcement
1.3 Portal Login ............................................... 2
25
1.4 Portal Logout ............................................. 3
2.1.6 Announcement Browse Statistics 27
1.5 Menu Bar ................................................... 3
2.1.7 View the Time of Announcement
1.5.1 Basic menu .................................... 4
Mail Notification ..................................... 27
1.5.2 Function Tab.................................. 4
2.1.8 Search Announcement ................. 28
1.6 Switch to Community or Organization
2.1.9 Announcements Preferences ....... 28
Page 5
2.1.10 Portlet Permission Setting ........... 29
1.7 Add an Application ................................... 5
3. Individual Assistant ........................................... 30
1.7.1 Add Portlet to Page........................ 5
3.1 Agendum ................................................. 30
1.7.2 Search Portlet by Keyword ............ 6
3.1.1 Agendum Display Preferences .... 30
1.8 Page Layout ............................................... 6
1.9 Management Page ..................................... 9
3.1.2 E-mail Notification Format Setting
31
1.9.1 Page Setting ................................... 9
3.1.3 Portlet Permission Setting ........... 36
1.9.2 Subpage Administration ................ 9
3.2 Message Center ....................................... 36
1.9.3 Portal Look and Feel Setting ....... 11
3.2.1 Portlet Permission Setting ........... 36
1.10 Control Panel ........................................... 11
3.3 My Menu ................................................. 36
1.11 Portlet Operation ..................................... 11
3.3.1 Portlet Permission Setting ........... 36
1.11.1 Description of Portlet Layout ...... 12
3.4 RSS .......................................................... 37
1.11.2 Adjust Portlet Position ................. 12
3.4.1 RSS Channel Setting ................... 38
1.12 Permission Setting Method ..................... 13
3.4.2 Portlet Permission Setting ........... 39
1.12.1 Access Permission Setting Page .. 13
3.5 Calendar .................................................. 40
1.12.2 Add Permission Setting ............... 15
3.5.1 Group Calendar ........................... 40
1.12.3 Change Permission Setting .......... 17
3.5.2 Set Work Time of the Calendar ... 43
1.13 Language Setting ..................................... 18
1.13.1 Set Preferred Language ............... 18
3.5.3 E-mail Notification Format Setting
43
1.13.2 Login Page Language .................. 18
3.5.4 Portlet Permission Setting ........... 45
1.14 Log .......................................................... 19
3.6 Calendar Synchronization ....................... 45
1.14.1 Log File Contained in Portal ....... 19
3.6.1 Portlet Permission Setting ........... 45
1.14.2 Modify Log Setting ..................... 19
3.7 Event Trace.............................................. 46
2. Enterprise Management ..................................... 21
3.7.1 Portlet Permission Setting ........... 46
2.1 Announcement......................................... 21
4. Content Management......................................... 47
2.1.1 Control Announcement Category 21
4.1 Documents and Media ............................. 47
2.1.2 Browse Announcements .............. 22
4.1.1 Manage Folders and Documents . 47
2.1.3 Add Announcement ..................... 23
4.1.2 My Documents ............................ 64
DWP002
Page: II
DigiWin
For Administrator
4.1.3 Portlet Permission Setting ........... 64
5.6.3 Portlet Permission Setting ........... 90
4.2 Documents and Media Display ............... 65
5.7 Marquee Display ..................................... 91
4.2.1 View Document ........................... 65
5.7.1 Set Marquee Interface.................. 91
4.2.2 Portlet Permission Setting ........... 66
5.7.2 Portlet Permission Setting ........... 91
4.3 Recent Downloads................................... 67
5.8 Questionnaire........................................... 92
4.3.1 Recent Downloads ....................... 67
5.8.1 Set Questionnaire Type ............... 92
4.3.2 Portlet Permission Setting ........... 67
5.8.2 Questionnaire Display Setting ..... 93
4.4 Nested Portlets......................................... 68
5.8.3 Add Questionnaire ....................... 94
4.4.1 Add to Portlet .............................. 68
5.8.4 Edit Questionnaire Management . 97
4.4.2 View Setting ................................ 69
5.8.5 View Reply (Questionnaire
4.4.3 Portlet Permission Setting ........... 69
Management)........................................... 98
5. Collaboration ..................................................... 70
5.8.6 Portlet Permission Setting ........... 98
5.1 Message Boards....................................... 70
5.9 Questionnaire Display ............................. 99
5.1.1 Manage Categories and Threads . 70
5.9.1 Portlet Permission Setting ........... 99
5.1.2 My Posts ...................................... 75
5.10 Dynamic Data List Display ................... 100
5.1.3 My Subscription .......................... 76
5.10.1 User-defined Data Template...... 100
5.1.4 Recent Posts ................................ 76
5.10.2 Add Data Definition .................. 101
5.1.5 Statistics....................................... 77
5.10.3 Enter Data .................................. 103
5.1.6 Banned Users ............................... 78
5.10.4 Portlet Permission Setting ......... 103
5.1.7 Portlet Permission Setting ........... 78
6. Conference management ................................. 104
5.2 Directory.................................................. 79
6.1 Device Resource Admin ........................ 104
5.2.1 Users ............................................ 79
6.1.1 Add Device Resource ................ 104
5.2.2 Organizations............................... 80
6.1.2 Modify Device Resource ........... 105
5.2.3 User Groups ................................. 81
6.1.3 Delete Device Resource ............ 105
5.2.4 Portlet Permission Setting ........... 81
6.1.4 Search Device Resource ............ 105
5.3 Online Messaging .................................... 82
6.1.5 Export Data................................ 106
5.3.1 View Online Users ...................... 82
6.1.6 Set Cyclic Reservation Period ... 106
5.3.2 Send Message .............................. 82
6.1.7 Portlet Permission Setting ......... 106
5.3.3 Preferences .................................. 83
6.2 Session Admin....................................... 107
5.4 Polls Management ................................... 84
6.2.1 Add Session Room .................... 107
5.4.1 Add Poll Topic ............................ 85
6.2.2 Modify Session Room ............... 108
5.4.2 Control Poll Topic ....................... 86
6.2.3 Delete Session Room................. 108
5.4.3 View Polls Results ....................... 86
6.2.4 Search Session Room ................ 108
5.4.4 Polls Permission Setting .............. 87
6.2.5 Export Data................................ 109
5.5 Polls Display ........................................... 88
6.2.6 Set Cyclic Reservation Period ... 109
5.5.1 Set Polls Interface ........................ 88
6.2.7 Portlet Permission Setting ......... 109
5.5.2 Portlet Permission Setting ........... 88
6.3 Session Booking .................................... 110
5.6 Marquees ................................................. 89
6.3.1 Search Bookingsession Room ... 110
5.6.1 Add Marquee Message ................ 89
6.3.2 Booking Session Room ............. 111
5.6.2 Control Marquee Message ........... 90
6.3.3 Search Booking Session Device 116
DWP002
Page: III
DigiWin
For Administrator
6.3.4 Booking Device Resource ......... 116
7.8 Log Viewer ............................................ 135
6.3.5 Portlet Permission Setting ......... 119
7.8.1 Log View Summary .................. 135
6.4 Meeting Room Preview ......................... 120
7.8.2 Multi Application
6.4.1 View Meeting Room Booking
Account/password Synchronization ...... 136
Status 120
7.8.3 Only Insert Account
6.4.2 Portlet Permission Setting ......... 120
Synchronization..................................... 137
7. System Management ....................................... 121
7.9 E-Billboard ............................................ 138
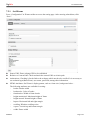
7.1 Language ............................................... 121
7.9.1 View E-Billboard ....................... 138
7.1.1 Select Language......................... 121
7.9.2 Edit URL of E-Billboard ........... 138
7.1.2 Display Setting .......................... 121
7.9.3 Portlet Permission Setting ......... 139
7.1.3 Portlet Permission Setting ......... 122
7.10 Data Mask Rule ..................................... 139
7.2 IFrame ................................................... 122
7.10.1 Manage Data Mask Rule ........... 139
7.2.1 Set IFrame ................................. 123
7.10.2 Portlet Permission Setting ......... 141
7.2.2 Portlet Permission Setting ......... 124
7.11 Query Designer-management ................ 141
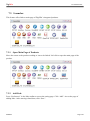
7.3 Launcher ................................................ 125
7.11.1 Manage Database....................... 141
7.3.1 Open Main Page of Products ..... 125
7.11.2 Manage Report .......................... 142
7.3.2 Add Link.................................... 125
7.11.3 Portlet Permission Setting ......... 144
7.3.3 Modify Link .............................. 126
7.12 Query Designer-view ............................ 144
7.3.4 Delete Link ................................ 126
7.12.1 Add Report ................................ 144
7.3.5 Hide Link ................................... 126
7.12.2 Portlet Permission Setting ......... 144
7.3.6 Adjust Display Sequence of Links
127
8. Integration Setting ........................................... 145
8.1 SSO System Setting............................... 145
7.3.7 Portlet Permission Setting ......... 128
8.1.1 Select SID .................................. 145
7.4 User Menu ............................................. 128
8.1.2 Edit SID ..................................... 146
7.4.1 Open Link .................................. 128
8.1.3 CROSS Registration .................. 146
7.4.2 Edit User Menu ......................... 128
8.1.4 Account/Password Sync Settings
7.4.3 Portlet Permission Setting ......... 129
147
7.5 User Menu Map ..................................... 129
8.1.5 Portlet Permission Setting ......... 150
7.5.1 Open Link .................................. 129
8.2 Company ............................................... 151
7.5.2 Edit User Menu Map ................. 130
8.2.1 View Company List................... 151
7.5.3 Portlet Permission Setting ......... 130
8.2.2 Update Company List ................ 151
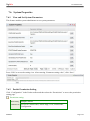
7.6 System Properties .................................. 131
8.2.3 Set User Login Company .......... 153
7.6.1 View and Set System Parameters
131
8.2.4 Use of Company Menu.............. 156
8.2.5 Portlet Permission Setting ......... 156
7.6.2 Portlet Permission Setting ......... 131
8.3 Account Maintain .................................. 157
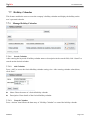
7.7 Holiday Calendar ................................... 132
8.3.1 SSO List .................................... 157
7.7.1 Manage Holiday Calendar ......... 132
8.3.2 SSO Edit .................................... 157
7.7.2 Calendar Subscription Management
8.3.3 Search SSO Data ....................... 158
134
7.7.3 Portlet Permission Setting ......... 135
DWP002
8.3.4 Delete Account Maintain........... 159
8.3.5 Reset Account Maintain ............ 160
Page: IV
DigiWin
For Administrator
8.3.6 Control SSO Data ...................... 160
9.5.1 Server Administration ............... 234
8.3.7 EIS Account Maintain ............... 161
9.5.2 Portal Instances.......................... 241
8.3.8 Portlet Permission Setting ......... 163
9.5.3 Plugins Installation .................... 242
9. Control Panel ................................................... 164
9.1 User Account ......................................... 165
9.1.1 My Account ............................... 165
9.1.2 My Pages ................................... 165
9.2 Content .................................................. 165
9.2.1 Site Settings ............................... 165
9.2.2 E-Billboard ................................ 165
9.2.3 Log Viewer ................................ 165
9.2.4 Site Pages .................................. 165
9.2.5 Site Memberahips ...................... 165
9.2.6 Documents and Media ............... 165
9.2.7 Documents and Media Display . 166
9.2.8 Calendar..................................... 166
9.2.9 Message Boards ......................... 166
9.2.10 Polls ........................................... 166
9.2.11 Session Admin ........................... 166
9.2.12 Device Admin............................ 166
9.2.13 Marquees ................................... 166
9.2.14 System Properties ...................... 166
9.2.15 Dynamic Data Lists ................... 166
9.3 Portal Basic Setting ............................... 166
9.3.1 User and Organizations ----User166
9.3.2 User and Organizations --Organization .......................................... 171
9.3.3 Sites ........................................... 183
9.3.4 User Group ................................ 189
9.3.5 Role195
9.3.6 Password Policy ........................ 202
9.3.7 Portal Setting ............................. 209
9.3.8 Monitoring ................................. 216
9.3.9 Site Templates............................ 217
9.3.10 Page Templates .......................... 225
9.3.11 Plugins Configuration................ 231
9.4 Integration Settings................................ 234
9.4.1 Service Mapping........................ 234
9.4.2 Company ................................... 234
9.5 Server .................................................... 234
DWP002
Page: V
DigiWin
For Administrator
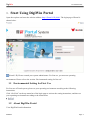
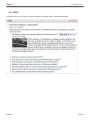
1. Start Using DigiWin Portal
Open the explorer and enter the website address: http://{Portal’s IP}:8081. The login page of Portal is
shown below.
{Portal’s IP} Please consult your system administrator. For first use, you must set operating
environment. Please refer to the section “Environmental setting for first use”.
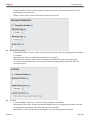
1.1 Environmental Setting for First Use
For first use of Portal system, please set your operating environment according to the following
instructions.
Click “firstVisit” on the top menu bar of the login page to activate the setting instructions, and then set
your operating environment according to the instructions.
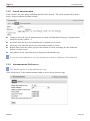
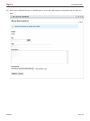
1.2 About DigiWin Portal
View DigiWin Portal information.
DWP002
Page: 1
DigiWin
For Administrator
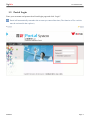
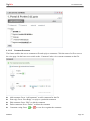
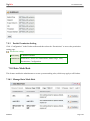
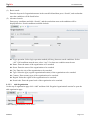
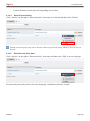
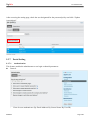
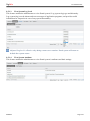
1.3 Portal Login
Enter your username and password on Portal login page and click “Login”.
Portal will automatically remember the account you entered last time (The function of Use cookies
must be activated in the explorer)
DWP002
Page: 2
DigiWin
For Administrator
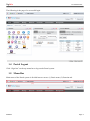
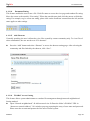
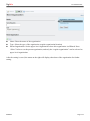
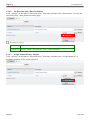
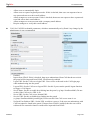
The following is the page of a successful login.
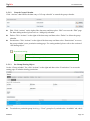
1.4 Portal Logout
Click “Sign Out” on the top menu bar to log out the Portal system.
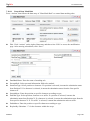
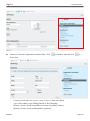
1.5 Menu Bar
Main menu of the Portal system is divided into two areas: (1) Basic menu (2) Function tab.
(1)
(2)
DWP002
Page: 3
DigiWin
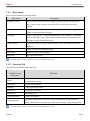
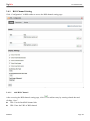
1.5.1
For Administrator
Basic menu
Basic menu contains the following items:
Basic menu
Description
Lock basic menu
If basic menu is not locked and the page is scrolled down, the menu will
hide; if basic menu is locked, the menu will be fixed on the top of the
window.
*Add
Add a function tab, “Document and Media Display” Portlet, “Navigation”
Portlet or other Portlets to the page
*Manage
“Page”, “Page layout”, “Page Customizations”, “Site Settings”, “Site Pages”,
“Site Memberships” and “Site Content” enables the user to administer and
edit pages or page content effectively
*Edit Controls
Check edit control to display Portlet toolbar. If not, the toolbar will not be
displayed
Go to
Switch to different community pages
User name
Modify the user’s personal data
Sign Out
Log out Portal system
The item marked with * applies to system administrator only.
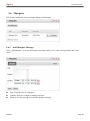
1.5.2
Function Tab
Function tab contains the following items:
Function tab
(DigiWin-Portal
community)
Portlet list
Home
Links, common menu, bulletin board, to-do list, calendar, account
correspondence setting
Operations
Program list flowchart
Message
To-do list, message center
Resources
Conference reservation
Documents
File management
Communications
Contact information
* Managements
Equipment management, conference room management, system parameter
setting, administrator, company type, SSO system setting, voting management
The item marked with * applies to system administrator only.
DWP002
Page: 4
DigiWin
For Administrator
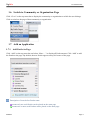
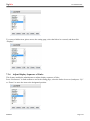
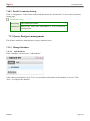
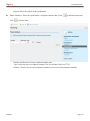
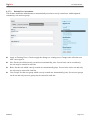
1.6 Switch to Community or Organization Page
Click “Go to” on the top menu bar to display the community or organization to which the user belongs.
Click to switch to the page of that community or organization.
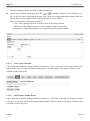
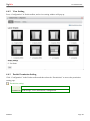
1.7 Add an Application
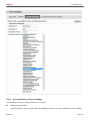
1.7.1
Add Portlet to Page
Click “Add” on the top menu bar and select “More …” to display all Portlet menus. Click “Add” to add
the Portlet to the page. By default, the new Portlet appears on top left corner of the page.
Description of icons before Portlet name:
means only one such Portlet can be placed on the same page
means two or more such Portlets can be placed on the same page
DWP002
Page: 5
DigiWin
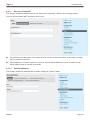
1.7.2
For Administrator
Search Portlet by Keyword
Enter a keyword in “Search applications” and the system will display all Portlet names containing the
keyword to help find the desired Portlet quickly and conveniently.
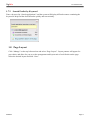
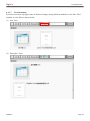
1.8 Page Layout
Click “Manage” on the top left menu bar and select “Page Layout”. Layout patterns will appear for
your choice and allow for you to set the arrangement and layout ratio of each Portlet on the page.
Select the desired layout and click “Save”.
DWP002
Page: 6
DigiWin
For Administrator
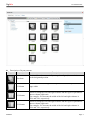
Description of layout patterns:
Diagram
DWP002
Layout pattern
Description
Freeform
Portlet will not be automatically arranged or aligned, but can be drawn
to the designated position
1 Column
First row: Portlet is arranged from top to bottom and occupies 100%
page width
2 Columns
Portlet is arranged in left and right columns and the figure in parenthesis
shows column width ratio
For example: 50/50 means the width of the left and right columns is
50% and 50%, respectively
2 Columns
Portlet is arranged in left and right columns and the figure in parenthesis
shows column width ratio
For example: 30/70 means the width of the left and right columns is
30% and 70%, respectively
Page: 7
DigiWin
For Administrator
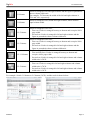
2 Columns
3 Columns
Portlet is arranged in left and right columns and the figure in parenthesis
shows column width ratio
For example: 70/30 means the width of the left and right columns is
70% and 30%, respectively
Portlet is arranged in left, middle and right columns, which all have
equal column width
1-2 Columns
Portlet is arranged in two rows:
- First row: Portlet is arranged from top to bottom and occupies 100%
page width
- Second row: Portlet is arranged in left and right columns and the
figure in parenthesis shows column width ratio
1-2 Columns
Portlet is arranged in two rows:
- First row: Portlet is arranged from top to bottom and occupies 100%
page width
- Second row: Portlet is arranged in left and right columns and the
figure in parenthesis shows column width ratio
1-2-1 Columns
Portlet is arranged in three rows:
- First and third row: Portlet is arranged from top to bottom and
occupies 100% page width
- Second row: Portlet is arranged in left and right columns and column
width ratio is 50/50
2-2 Columns
Portlet is arranged in two rows:
- First row: Portlet is arranged in left and right columns and column
width ratio is 70/30
- Second row: Portlet is arranged in left and right columns and column
width ratio is 30/70
For example: Switch 3 Columns to 2 Columns (30/70), and the result is shown below:
DWP002
Page: 8
DigiWin
For Administrator
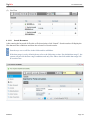
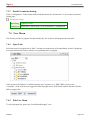
1.9 Management Page
Press “Manage” on the top left menu bar and then click “Page” to switch to page setting, which allows the
administrator to modify page setting.
The tree menu on the left displays the structure and hierarchy of all pages for the current community. You
may select the page to be set on this menu.
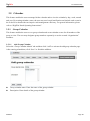
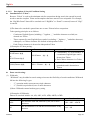
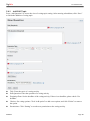
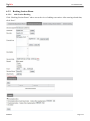
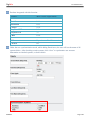
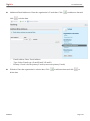
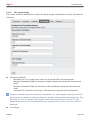
1.9.1
Page Setting
Switch the tab on the right to “Details” tab to set related data of the page, including name and type.
Name: Name of the page. Select “Local language” to set page name in different languages
HTML Title: HTML title: the name displayed in the title bar of the explorer while the user visits the
page
Friendly URL: Set the page’s URL
Hidden: Check it to hide this page so that the user will not see this page while browsing
Type: Select the type of the page and three page types are available
-
1.9.2
Portlet: The page can mount a Portlet panel provided by the system
Panel: The page can mount an application provided by the system
Embedded: The page can mount a web page and the plug-in web page will be embedded into
Portal view
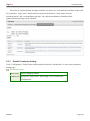
Subpage Administration
Switch the tab on the right to “Detail” tab. Press the buttons on the top to add, delete and set subpage
permission. To adjust subpage hierarchy, drag the desired item in the menu on the left.
DWP002
Page: 9
DigiWin
For Administrator
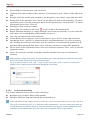
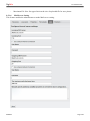
1.9.2.1
Add Subpage
After selecting the desired page, click “Add Child Page” button on the top. Enter related data and click
“Add page”.
Name: Name of the subpage
Type: Select page type (Portlet/Embed/URL)
Copy the upper level: Check it to copy the content of the upper-level page to the new subpage
Hidden: Check it to hide this page so that the user will not see this page while browsing
1.9.2.2
Delete Subpage
Switch to the desired subpage and click “Delete” button to delete the subpage.
1.9.2.3
Set the Hierarchy of Subpages
In the menu on the left, drag the desired item to adjust subpage hierarchy.
DWP002
Page: 10
DigiWin
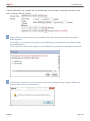
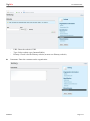
1.9.3
For Administrator
Portal Look and Feel Setting
Switch the tab on the right to the “Look and Feel” tab and set Portal’s look and feel and theme in
“Regular Browsers” and “Mobile Devices”. Click and apply a theme from “Available themes”.
This setting will apply to the currently selected page only.
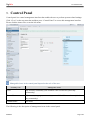
1.10 Control Panel
Click “Go to” on the top right menu bar, and then click “Control Panel” to access Portal’s system setting
interface. Setting items include basic system settings, such as user account management , content
management, server management, and user, organization and community settings.
Please refer to Chapter 9 “Control Panel”.
1.11 Portlet Operation
Portal’s functions are shown in the form of “Portlet” components. The user can put the required Portletss
on the page and freely determine the position of Portlets (Please refer to “Add an application” and
“Layout” of Chapter 1).
DWP002
Page: 11
DigiWin
For Administrator
1.11.1 Description of Portlet Layout
Portlet layout includes the following areas:
(1)
(2)
(3)
(1) Portlet title area: Display the icon and function name of the Portlet
(2) Portlet content area: Display and operation area of Portlet content and data
(3) Portlet toolbar:
-
More options
preferences
-
Minimize
Maximize
width)
-
Remove
Restore
: Click the icon button to display more options, such as: look and feel, setting and
: Click the icon button to reduce Portlet to minimal layout
: Click the icon buttoncan to unfold Portlet to maximal layout (up to explorer window
: Click the icon button to remove Portlet from the view
: After minimizing Portlet , click the icon to restore it to original size (shown below)
Ordinary user has only three icon buttons, namely “Minimize”, “Restore” and “Maximize”.
1.11.2 Adjust Portlet Position
This function applies to system administrator only.
The user can dynamically adjust Portlet’s position on the view according to his/her needs. When the
cursor moves to Portlet title bar and becomes the
icon, press and hold the left mouse button and drag
the item to the target position, then release the left mouse button.
DWP002
Page: 12
DigiWin
For Administrator
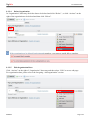
While dragging Portlet, the position in blue line is the position where the Portlet will be placed. The
following figure shows the result of dragging “Bulletin board” from left column to right column.
1.12 Permission Setting Method
Through the permission setting method, the user may set the permission to operation for data entities and
the group level to make permission setting more flexible. Permission setting method is the same for all
types of data in the Portal system. The “Announcements” is described below as an example.
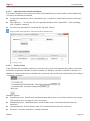
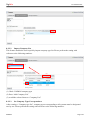
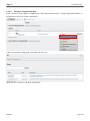
1.12.1 Access Permission Setting Page
Set the permission to “Announcements” to decide which user may be permitted to view the bulletins, and
the scope of permission, etc.
Click “Actions” that follows the data entry and then click “Permissions” to access the permission
setting page.
DWP002
Page: 13
DigiWin
For Administrator
Permission setting page is described as follows:
(1) Data entities for permission setting:
Display the data entity currently under permission setting; it is a announcement in this example.
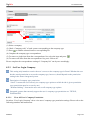
(2) Group level of permission setting object:
Permission may be flexibly set according to “Group level”. For example, “Users” means permission
setting by each designated user account; “Organizations” means setting by organization only (the
same permission applies to all users in this organization and one-by-one setting is not required).
Different group pages include different group levels:
Group type
Group level (from smallest to largest)
My community
User, organization, user group, ordinary role, guest
Organization
User, organization, user group, ordinary role, organization role,
organization, guest
Community
User, organization, user group, ordinary role, community role,
community, guest
How to select a particular level of “Group level” for permission setting? Set the permission from the
largest (general) to the smallest (specific). For example, most users have the permission to “view
announcement posts” but only a few users have the permission to “delete posts”. The recommended
setting method is: Set “Guest” or “Ordinary role” to be permitted to “View”, and in “User”
determine which users have the permission to “Delete”.
DWP002
Page: 14
DigiWin
For Administrator
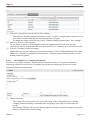
(3) Current/available:
Click “Current” tab to display permission already set in the group level, and click “Available” tab to
display the objects available for setting in the group level.
Take “User” group level for example. “Current” is a list of users with permission already set and the
content of their permission settings while “Available” displays a list of all users in the system which
can be selected for permission setting.
(1)
(2)
(3)
1.12.2 Add Permission Setting
After selecting the group level, switch to the “Available” tab, check the object to set permission, and
click “Update Permissions”.
DWP002
Page: 15
DigiWin
For Administrator
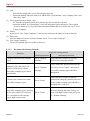
Access the permission setting page and click
or
to add the permission to the “What He Can
Do” on the left. After completing the setting, click “Next” to continue permission setting of the next
object. After completing the setting of all objects, click “Finish”.
If multiple objects are selected for permission setting at a time, the user needs to set permission for
each object one by one.
After completing the setting, go back to the “Current” page to view the result of permission setting.
DWP002
Page: 16
DigiWin
For Administrator
1.12.3 Change Permission Setting
After accessing the permission setting page, switch to the group level to change permission, check the
desired object under the “Current” tab, and click “Update Permissions”.
Access the permission setting page and click
or
to add the permission to the “What He Can
Do” on the left. After completing the setting, click “Next” to continue permission setting of the next
object. After completing the setting of all objects, click “Finished”.
DWP002
Page: 17
DigiWin
For Administrator
1.13 Language Setting
1.13.1 Set Preferred Language
The user can select preferred language interface for the Portal system.
Setting method:
Access “My Account” and click “Display Settings” in the menu on the right
Access the “Display Settings” page, select the preferred language in “Language”, and click “Save”
Languages currently available: Traditional Chinese, Simplified Chinese, English; for other related
language setting, please refer to Chapter 7 “Language”.
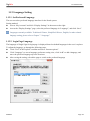
1.13.2 Login Page Language
The language of Single Sign On login page is displayed based on default languages in the user’s explorer.
To adjust the language, go through the following steps:
Click “Tool” in the explorer’s toolbar and select “Internet options”
Click “Language” to access language preference setting view, click “Add” to add a language, and
move the preferred language up to the first item
After saving the setting, refresh the page to switch to the preferred language
DWP002
Page: 18
DigiWin
For Administrator
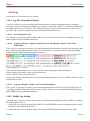
1.14 Log
Description of Log-related views or settings.
1.14.1 Log File Contained in Portal
Log file records the events occurring during Portal operation, and the information such as programs
executed, actions performed and resulting errors will be contained in Log file. To learn more about Portal,
the administrator can view Log file. This chapter describes various Log files, such as Log file of Portal
operation and Log file in response to Personal Information Protection Act.
1.14.1.1 Portal Operation Log
To view the Log of Portal operation status, please refer to \Portal-AP Server\server\default\log\server. log
under DigiWin Portal installation directory.
Log Recording the “Addition, Deletion, Check, Modification, Export” of Personal
Information
The Log file is generated in response to Personal Information Protection Law and records all actions that
may violate Personal Information Protection Law. Please refer to \Portal-AP Server\server\default\log
\Pdlog.log under DigiWin Portal installation directory
1.14.1.2
Field description is as follows:
User account: Record which “user” does a particular action against personal information
Source position: Record the source position of the user
Portlet: “Portlet” where the action occurs
Action: The action performed by the user against personal information, such as “addition, deletion, check,
modification, export”
1.14.1.3 Log Recording the “Export” of Personal Information
The Log file is generated in response to Personal Information Protection Law and records all actions of
“exporting” personal information. Please refer to \Portal-AP Server\server\default\log\EXPORTLog.log
under DigiWin Portal installation directory.
1.14.2 Modify Log Setting
Currently, all Log files are written in local end by default and their default Log level is INFO. To change
the default, please refer to:
1. \Portal-AP Server\server\default\deploy\ROOT.war\WEB-INF\lib\ext-impl.jar\log4j.properties under
DigiWin Portal installation directory
2. \Portal-AP Server\server\default\deploy\cas-web.war\WEB-INF\classes\log4j.properties under
DWP002
Page: 19
DigiWin
For Administrator
DigiWin Portal installation directory
1.14.2.1 Output Log to External Equipment
1. Set Kiwi SysLog Server as external equipment
2. Modify the file with the following settings and provide the IP address of the desired equipment.
2.1 File 1 modification
2.2 File 2 modification
3. Restart Portal
DWP002
Page: 20
DigiWin
For Administrator
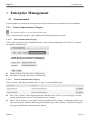
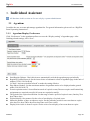
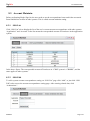
2. Enterprise Management
2.1 Announcement
Use the platform to release new messages and set objects that have the permission to browse bulletins.
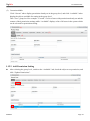
2.1.1
Control Announcement Category
This function applies to system administrator only.
Click “Announcement Category” tab to display the bulletin types already created.
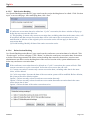
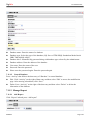
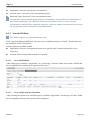
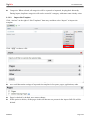
2.1.1.1
Add Announcement Category
Click “Add” to open the page of add bulletin type. After entering related data, click “Save” to complete
the addition of bulletin type.
Category Name: Enter the name of bulletin type
Description: Enter the description of bulletin type
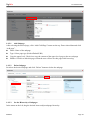
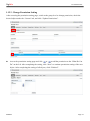
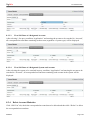
2.1.1.2
Control Announcement Category
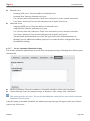
Click “Actions” that follows the data entry of “Type” to control bulletin type.
Edit: Click “Actions” on the right of data entry and then select “Edit” to access edit page. For data
editing method, please refer to “Add Announcement Category”
Delete: Click “Actions” on the right of data entry and then select “Delete” to delete the bulletin type.
After such deletion, bulletins that belong to this bulletin type will be listed as “Undefined Category”.
Any type with bulletins created cannot be deleted
DWP002
Page: 21
DigiWin
2.1.2
For Administrator
Browse Announcements
2.1.2.1
Browse Recent Announcements
“New” of bulletin board display the latest bulletins (sorted by date).
Only some bulletins are displayed here. Click “More” on bottom right corner to view all bulletins. Click
(more) at the end of a bulletin or directly click the data entry to view the complete bulletin.
Unread bulletins will be displayed in boldface.
2.1.2.2
Browse Announcements by Announcement Category
Select “Display Category” to browse bulletins by announcement category.
Select “All” to browse all bulletins (regardless of type), and select “Undefined Category” to browse
bulletins without type setting.
2.1.2.3
Browse Unread Announcements
For bulletins unread by the user, the system will display them in boldface. Check “Only Show Unread” to
display all unread bulletins.
DWP002
Page: 22
DigiWin
For Administrator
2.1.2.4
View Bulletin Attachments
If a bulletin has attachments,
(paper clip) icon will be shown at the end of bulletin title. Click the icon
to open the attachment list.
Click the name of attachment file to download the attachment.
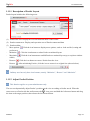
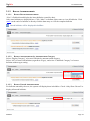
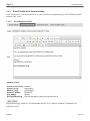
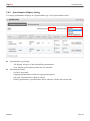
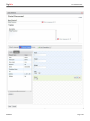
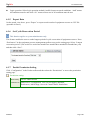
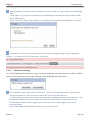
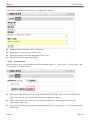
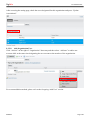
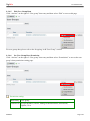
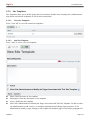
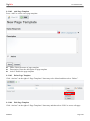
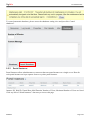
2.1.3
Add Announcement
This function is for use only by a system administrator or permitted users.
After adding a bulletin, be sure to set the “Bulletin viewing permission” and select the objects that
are allowed to view this bulletin. Otherwise, only the creator of the bulletin can view this bulletin.
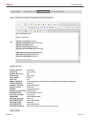
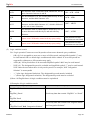
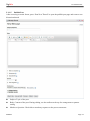
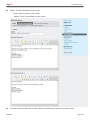
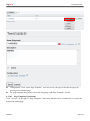
Click “Add” or “Add” tab to access the view of add announcement. After entering bulletin-related data,
click “Save” to complete the addition.
DWP002
Page: 23
DigiWin
For Administrator
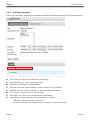
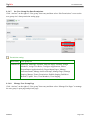
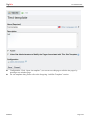
Period: Set start date and end date of bulletin release
Announcement category: Select the category of announcement
Title: Enter the title of bulletin
Sticky: Check this item to display the bulletin on the top of Announcements. Sticky period means
that the bulletin will be on the top until the period expires
Schedule to send e-mail notice: Check this item to automatically schedule and send bulletin E-mails
to desire objects
Add File: Click “Add File” to upload bulletin attachment
Add Image: Uploaded picture will precede the bulletin. Click “Browse…” at the end of the field to
select a picture file
Bulletin details: Enter the bulletin details
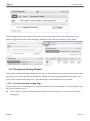
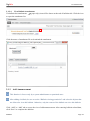
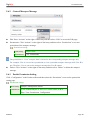
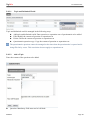
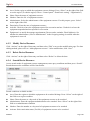
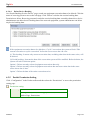
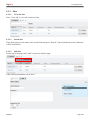
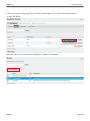
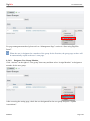
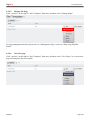
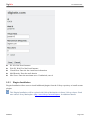
2.1.4
Set Announcement Viewing Permission
Click “Actions” that follows the data entry of “Announcement” and then click “Permissions” to set the
announcement viewing permission.
DWP002
Page: 24
DigiWin
For Administrator
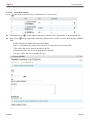
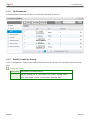
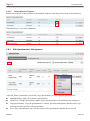
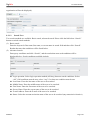
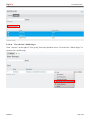
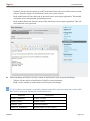
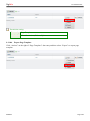
After accessing the permission setting view, set permission by seven group levels: Users, Organizations,
User Group, Regular Roles, Site Roles, Site, Guest.
Setting method: To switch a group level, under the “Available” tab check the object to view this bulletin
and then click “Refresh permission”.
Different group levels may be set simultaneously. For example, select “Administrator” for “Regular
Roles” and then set “Users” by selecting user account “John”. As a result, both “Administrator” and
John can read this announcement, while the others cannot.
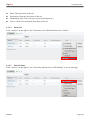
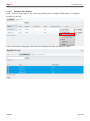
2.1.5
Control the Bulletin Announcement
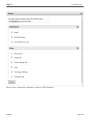
Click “Actions” that follows the data entry of “Announcement” to control the bulletin.
Edit: Click “Actions” on the right of data entry and then select “Edit”. For data editing method, refer
to “Add Announcement”
Permission: Click “Actions” on the right of data entry and then select “Permissions” to access the
permission setting page
DWP002
Page: 25
DigiWin
For Administrator
Permission setting:
Data entity
Bulletin data
Permitted to View, Permissions
Delete: Click “Actions” on the right of data entry and then select “Delete” to delete the data
Browse Statistics: Click “Actions” on the right of data entry and then select “Browse Statistics” to
know whether relevant personnel have browsed this bulletin. Please refer to the section
“Announcement browse statistics”
Immediately notice: Click “Actions” on the right of data entry and then select “Immediately notice”
to send mail to users permitted to browse
DWP002
Page: 26
DigiWin
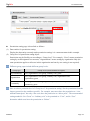
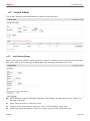
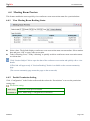
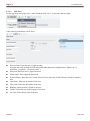
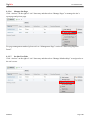
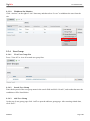
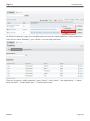
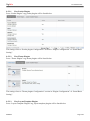
2.1.6
For Administrator
Announcement Browse Statistics
It enables the user to know whether relevant personnel have browsed this announcement.
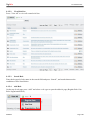
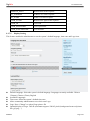
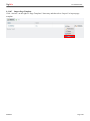
After accessing the “Announcement” list, click “Actions” on the right and then select “Browse Statistics”
to access the page of announcement browse statistics.
The figures shown at the end of bulletin title on the top are the number of personnel who may
browse this bulletin and the number of personnel who have browsed this bulletin.
Enter query conditions and click “Search”, and the results that meet such conditions will be
displayed below.
For any person on the name list, “Browsed Date” with data means the user has browsed this
announcement; the blank means the user has not browsed it.
Click “Export” to export the browsing status of this announcement.
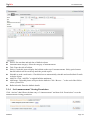
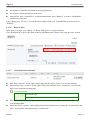
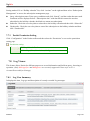
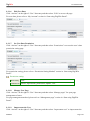
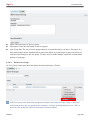
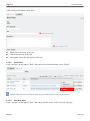
2.1.7
View the Time of Announcement Mail Notification
If the schedule to send e-mail notice is set for Announcements, you can take the following steps to view
the time the system sent the last mail:
Click “Actions” that follows the data entry of “Announcement” and then select “Edit” to access the edit
page of the bulletin. If mail notification of the bulletin is already sent, “Time sent” will be shown.
(已發送:2011/03/25 10:57:59)
DWP002
Page: 27
DigiWin
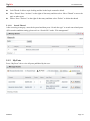
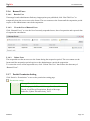
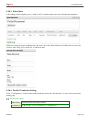
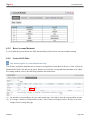
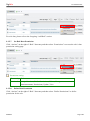
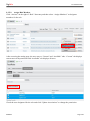
2.1.8
For Administrator
Search Announcement
Click “Search” tab, enter query conditions and then click “Search”. The search results will be shown
below. Search conditions available include:
Category: Select the type of announcement to search (All/Undefined Category/<Announcement
categories already created…>)
Keyword: Enter the keyword of bulletin title or bulletin text to search
Advertise User: Enter the person who released the bulletin to search
Release Date: Enter the release period of the bulletin to search, including any date within the
bulletin’s release period
Only Show Unread: Check this item to display unread bulletins only
If several search conditions are set, only data that meet all those conditions will be displayed
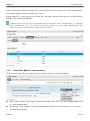
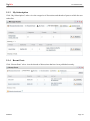
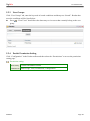
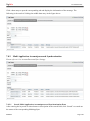
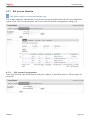
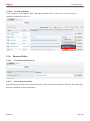
2.1.9
Announcements Preferences
This function applies to system administrator only.
Click “Preferences” in the announcements toolbar to access the preferences page.
DWP002
Page: 28
DigiWin
For Administrator
2.1.9.1
Set Announcements Display Count
Set the maximum number of bulletins to be displayed by Announcements under general mode.
Setting method: After accessing the “Preferences” page of bulletin board, select “Display the number of
rows” and then click “Save”.
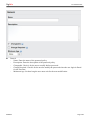
2.1.9.2
Default Announcements Display Category
Set the type of bulletin to be displayed by default in announcements. After accessing the announcements
page, the user will first see the preset type of bulletin. Then the user may switch to other bulletin types.
Setting method: After accessing the bulletin board’s “Preferences” page, select “Display Category” of the
bulletin and then click “Save”.
2.1.9.3
Default E-mail Notification Scheduling
Set whether the system will send bulletin E-mail notifications. While a bulletin is being added, the default
value will be automatically displayed. The user may change this setting based on the nature of the bulletin
(The changed setting applies to such bulletin only. When another bulletin is added, the default setting will
be first displayed).
Setting method: After accessing the bulletin board’s “Preferences” page, if it is necessary for the system
to send bulletin E-mail notifications automatically, please check “Default schedule to send e-mail”.
2.1.9.4
View Content
Set whether the announcements hides bulletin text.
2.1.9.5
Only Show Unread
Set whether the bulletin board displays unread bulletins only.
2.1.9.6
No Content
Set that the bulletin board will display a hint if no text exists.
2.1.9.7
Display New Announcements Icon
Set whether the bulletin board page displays a hint icon of new bulletin. If it is checked, the user may
select “Effective Days” to ensure there will be new bulletin hint within 1~30 days after the release date of
bulletin, and the default setting is 7 days.
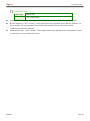
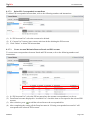
2.1.10 Portlet Permission Setting
Click “Setting” in the Portlet toolbar and then select the “Permission” tab to access the permission setting
page.
Permission setting:
Data entity
Bulletin Board Portlet
Permitted to Add Announcement, Add to Page, Configuration, Do not
apploy datamask, Permissions, Preferences, View
DWP002
Page: 29
DigiWin
For Administrator
3. Individual Assistant
All functions in this section are for use only by a system administrator.
3.1 Agendum
It enables the user to create and manage agendum list. For general information, please refer to “DigiWin
Portal Operating Instructions”.
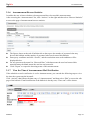
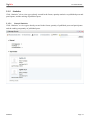
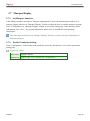
3.1.1
Agendum Display Preferences
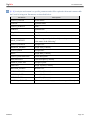
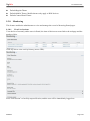
Click “Preferences” in the agendum toolbar to access the “Display setting” of agendum page. After
finishing related settings, click “Save”.
Start Regular Updates: Check this item to automatically refresh the agendum page periodically
Regularly Updated Interval: Set the interval time of automatic refresh of agendum page in the unit of
minutes (5/10/15/20/30/45/60)
※Check “Activate periodical refresh” to make the setting effective.
Page Shows Number: Set the maximum number of agendum entries to be displayed under general
mode (5/10/20/30/50/75)
Events expiration notice: Set notification mode of expired events (Does not require notification/Only
assignments are required to notify/All events are required to notify)
The period of the expired notification: Set the range of notice period of expired event (One day/Two
days/Three days)
Expired display color matters: Set the color of text display of expired event
Matter the number of days set about to expire: Set the reminder period for an event about to expire
(One day/Two days/Three days/Four days/One week/Two weeks)
Display color issues is about to expire: Set the color of text display of an event about to expire
DWP002
Page: 30
DigiWin
3.1.2
For Administrator
E-mail Notification Format Setting
Click “Preferences” in to-do toolbar to access the preferences of agendum page. After finishing related
settings, click “Save”.
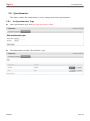
3.1.2.1
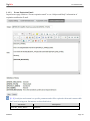
Event Reminder Email
In preferences page switch to “Event Reminder Email” to set “Subject and Body” information of
reminder E-mail.
DWP002
Page: 31
DigiWin
For Administrator
[$…$] in subject and content is a specific parameter and will be replaced with actual content while
the E-mail is being sent. Parameters are described below:
Parameter
Description
EVENT_START_DATE
Agendum start date
EVENT_TITLE
Agendum title
PORTAL_URL
Portal host address
PORTLET_NAME
“Agendum”
TO_NAME
“Recipient name”
SYSTEM_MESSAGE
“This is the mail delivery system do not respond directly to”
3.1.2.2
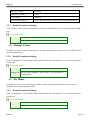
Assignments Email
In preferences page switch to “Assignments email” to set “Subject and content” information of
assignment notification E-mail.
DWP002
Page: 32
DigiWin
DWP002
For Administrator
Page: 33
DigiWin
For Administrator
[$…$] in subject and content is a specific parameter and will be replaced with actual content while
the E-mail is being sent. Parameters are described below:
Parameter
Description
EVENT_STATUS
“Event Status”
STATUS
Agendum status
EVENT_SUBJECT
“Title”
SUBJECT
Agendum title
TO_NAME
“Recipient name”
HELLO
“Hello”
MAIL_CONTENT
“This message sent by the Portal System,do you take notice
of the status of the following”
EVENT_HANDLE
“Assign User”
HANDLE_PEOPLE
Assign User [Content]
EVENT_DATE
“Assign Date”
DATE
Assign Date [Content]
EVENT_DESCRIPTION
“event description”
DESCRIPTION
event description [Content]
ASSIGN_EXPLAIN
“Assign Explain”
EXPLAIN
Assign Explain [Content]
RETURN_PEOPLE
“Return User”
RETURNPEOPLE
Return User [Content]
RETURN_DATE
“Return Date”
RETURNDATE
Return Date [Content]
SYSTEM_MESSAGE
“This is the mail delivery system do not respond directly to”
DWP002
Page: 34
DigiWin
For Administrator
3.1.2.3
Events Expiration Email
In preferences page switch to “Events expiration email” to set “Subject and Body” information of
expiration notification E-mail.
[$…$] in subject and content is a specific parameter and will be replaced with actual content while
the E-mail is being sent. Parameters are described below:
Parameter
EVENT_END_DATE
DWP002
Description
End date
Page: 35
DigiWin
For Administrator
EVENT_TITLE
Event title
PORTLET_NAME
“Event”
TO_NAME
“Receiver”
SYSTEM_MESSAGE
“This is the mail delivery system do not respond directly to”
3.1.3
Portlet Permission Setting
Click “Setting” in the Portlet toolbar and then select the “Permission” to access the permission setting
page.
Permission setting:
Data entity
Agendum Portlet
Permitted to Preferences, Add to Page, View, Permissions, Configuration
3.2 Message Center
It enables message transmission among users. For general information, please refer to “DigiWin Portal
Operating Instructions”.
3.2.1
Portlet Permission Setting
Click “Configuration” in the Portlet toolbar and then select the “Permissions” to access the permission
setting page.
Permission setting:
Data entity
Message Center Portlet
Permitted to Do not apploy datamask, Add to Page, View, Permissions,
Configuration
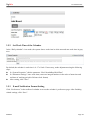
3.3 My Menu
It enables the user to create and manage common menus. For general information, please refer to
“DigiWin Portal Operating Instructions”.
3.3.1
Portlet Permission Setting
Click “Configuration” in the Portlet toolbar and then select the “Permissions” to access the permission
setting page.
Permission setting:
Data entity
My Menu Portlet
Permitted to Add to Page, View, Permissions, Configuration
DWP002
Page: 36
DigiWin
For Administrator
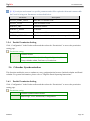
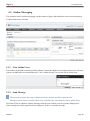
3.4 RSS
It enables the user to subscribe to RSS channel and get the latest information anytime.
DWP002
Page: 37
DigiWin
3.4.1
For Administrator
RSS Channel Setting
Click “Configuration” in RSS toolbar to access the RSS channel setting page.
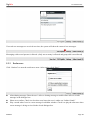
3.4.1.1
Add RSS Channel
After accessing the RSS channel setting page, click
to add an entry by entering related data and
clicking “Save”.
Title: User-defined RSS channel title
URL: Enter the URL of RSS channel
DWP002
Page: 38
DigiWin
3.4.1.2
For Administrator
Remove RSS Channel
After accessing the RSS channel setting page, click
for data to be removed and click “Save”.
3.4.1.3
RSS display setting
After accessing the RSS channel setting page, adjust display setting and click “Save”.
Show Feed Title: Check it to display the title of message source
Show Feed Published Date: Check it to display the publication date of message source
Show Feed Description: Check it to display the description of message source
Show Feed Image: Check it to display the picture of message source
Show Feed Item Author: Check it to display the author of message source
# of Entries Per Feed: Set the message source count of each post (1~9)
# of Expanded Entries Per Feed: Set the count of posts displayed by source (0~9)
Feed Image Alignment: Set the alignment method of pictures of message source (left/right)
3.4.2
Portlet Permission Setting
Click “Configuration” in the Portlet toolbar and then select the “Permissions” to access the permission
setting page.
Permission setting:
Data entity
RSS Portlet
Permitted to Add to Page, View, Permissions, Configuration
DWP002
Page: 39
DigiWin
For Administrator
3.5 Calendar
This feature enables the user to manage his/her calendar and to view the calendar by day, week, month
and year. By creating calendar events, the user may send e-mail notification and include such events in
the to-do list so that he/she can improve task management efficiency. For general information, please
refer to “DigiWin Portal Operating Instructions”.
3.5.1
Group Calendar
This feature enables the user to set a group calendar and create calendar events for all members of the
group to view. The user may designate group members separately or use the created “Organization”
members.
3.5.1.1
Add Group Calendar
Select the “Group Calendar Admin” tab and then click “Add” to activate the add group calendar page.
After entering related data, click “Save” to finish the addition.
Group calendar name: Enter the name of the group calendar.
Description: Enter details of the group calendar.
DWP002
Page: 40
DigiWin
For Administrator
3.5.1.2
Control Group Calendar
Click “Actions” that follows the data entry of “Group calendar” to control the group calendar.
Edit: Click “Actions” on the right of the data entry and then select “Edit” to access the “Edit” page.
For data editing method, please refer to “Add group calendar”
Delete: Click “Actions” on the right of the data entry and then select “Delete” to delete the group
calendar
Permissions: Click “Actions” on the right of the data entry and then select “Permissions” to access
the group calendar’s user permission setting page. For setting method, please refer to the section of
“Set sharing object”
Permission setting:
Data entity
Group calendar
Permitted to Add event, browse, permission
3.5.1.3
Set Group Sharing Object
On the “Group calendar” list, click “Actions” on the right and then select “Permissions” to access the
setting page of calendar sharing permission.
To switch to a particular group level (e.g. “Users” group level), switch to the “Available” tab, check
DWP002
Page: 41
DigiWin
For Administrator
the desired sharing objects and click “Update Permissions”.
Access the permission setting page and click
or
to add the permission to the “What He Can
Do” on the left. After completing the setting, click “Next” to continue permission setting of the next
sharing object. After completing the setting of all objects, click “Finish”.
There are two kinds of permission available:
-
View: Allow sharing objects to view the events of the group calendar
Add Event: Allow sharing objects to create calendar events for the group
Permissions: Allow sharing objects to set permission for the group calendar
3.5.1.4
View Group Calendar
After completion of sharing setting (with the permission to “View”), the name of the group calendar will
appear on the view list of the designated sharing object. Check the name of the group calendar to view
calendar events of the group.
3.5.1.5
Add Group Calendar Event
After completion of sharing setting (with the permission to “Add Event”), the name of the group calendar
will appear on the view list of the designated sharing object. Select the name of the group calendar to add
a calendar event to the group
DWP002
Page: 42
DigiWin
3.5.2
For Administrator
Set Work Time of the Calendar
In the “Daily calendar” view mode, the system shows work time in white area and non-work time in gray
area.
By default, the calendar’s work time is 9~17 o’clock. If necessary, make adjustment using the following
steps:
In “System Properties” edit the parameter “DscCalendarDaysWorkTime”
In “Parameter Settings” enter work time (enter two integral numbers in the order of start time and
end time of working period in 24-hour clock format)
After setting, click “Save”
3.5.3
E-mail Notification Format Setting
Click “Preferences” in the toolbar of calendar to access the calendar’s preferences page. After finishing
related settings, click “Save”.
DWP002
Page: 43
DigiWin
For Administrator
3.5.3.1
Event Reminder Email
On the preferences setting page switch to “Event Reminder Email” tab to allow the user to set the
“Subject and Body” information of the calendar reminder E-mail.
Subject: Enter the subject of the calendar reminder E-mail
Body: Enter the content of the calendar reminder E-mail
DWP002
Page: 44
DigiWin
For Administrator
[$…$] in subject and content is a specific parameter and will be replaced with actual content while
the E-mail is being sent. Parameters are described below:
Parameter
Description
EVENT_START_DATE
Start date of calendar event
EVENT_TITLE
Title of calendar event
PORTAL_URL
Portal host address
PORTLET_NAME
“Calendar”
TO_NAME
“Recipient name”
SYSTEM_MESSAGE
“This is the mail delivery system do not respond directly to”
3.5.4
Portlet Permission Setting
Click “Configuration” in the Portlet toolbar and then select the “Permissions” to access the permission
setting page.
Permission setting:
Data entity
Calendar Portlet
Permitted to Access in Control Panel, Add to Page, Configuration, View,
Group calendar admin, Preferences, Permissions
3.6 Calendar Synchronization
This function enables the user to conduct two-way synchronization between Outlook calendar and Portal
calendar. For general information, please refer to “DigiWin Portal Operating Instructions”.
3.6.1
Portlet Permission Setting
Click “Configuration” in the Portlet toolbar and then select the “Permissions” to access the permission
setting page.
Permission setting:
Data entity
Calendar synchronization Portlet
Permitted to Add to Page, View, Permissions, Configuration
DWP002
Page: 45
DigiWin
For Administrator
3.7 Event Trace
This function enables the user to track agendum list. For general information, please refer to “DigiWin
Portal Operating Instructions”.
3.7.1
Portlet Permission Setting
Click “Configuration” in the Portlet toolbar and then select the “Permissions” to access the permission
setting page.
Permission setting:
Data entity
Event Trace Portlet
Permitted to Add to Page, View, Permissions, Configuration
DWP002
Page: 46
DigiWin
For Administrator
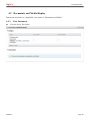
4. Content Management
4.1 Documents and Media
This feature provides the user with a space for file and picture sharing and classifies files or pictures and
facilitates browsing and search through folder management.
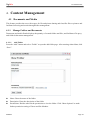
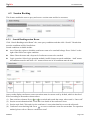
4.1.1
Manage Folders and Documents
Documents and media Portlet displays the quantity of created folders and files, and facilitates file query
and folder & document management.
4.1.1.1
Add Folder
Press the “Add” button and select “Folder” to open the add folder page. After entering related data, click
“Save”.
Name: Enter the name of the folder
Description: Enter the description of the folder
Permissions: Decides who has the permission to view the folder. Click “More Options” to make
further permission setting of Guest and Site Member.
DWP002
Page: 47
DigiWin
For Administrator
4.1.1.2
Add Subfolder
After accessing a folder, press “Add” button and select “Subfolder” to add a subfolder to its lower level.
For data entering, refer to the previous section.
4.1.1.3
Press “
Control Folder
” that follows the data entry of “Folder” to control folders.
Edit: Click “ ” on the right of the data entry and then select “Edit” to access the Edit page.
Move: Click “ ” on the right of the data entry and then select “Move”. Click “Select” or “Remove”
to set the upper-level folder
Permission: Click “ ” on the right of the data entry and then select “Permissions” to access the
folder’s user permission setting page
Permission setting:
Data entity
File folder
Permitted to Delete, Add Subfolder, Add Shortcut, Add Document, Access, Update,
Permissions, View
Copy Permissions To…: Press “ ” on the right of the data entry and then select “Copy Permission
To…” to copy the folder’s permission to other folders. Please refer to the section “Copy folder
permission”
Delete: Press “ ” on the right of the data entry and then select “Delete” to delete the folder
Add Subfolder: Press “ ” on the right of the data entry and then select “Add subfolder” to access
the add folder page.
Access from Desktop: Press “ ” on the right of the data entry and then select “Access from
Desktop”. A window will pop up and displays the folder’s WebDAV URL link
4.1.1.4
Copy Folder Permission
This function applies to system administrator only.
This features enables the user to copy the permission data of a folder (hereinafter referred to as “Source
folder”) to the designated folder (hereinafter referred to as “Target folder”).
Setting method: After accessing the “Folder” list, press “ ” on the right of the source folder and then
select “Copy Permissions To…” to access the permission copying page. Check target folder(s) (more than
one folders may be selected at a time) and click “Copy”.
While the permission is being copied, the original permission data of the target folder will be
overwritten.
DWP002
Page: 48
DigiWin
For Administrator
The permission of “Folder” and “Documents” is separately set, so the permission will be copied onto
“Target folder” only and will not be copied onto “Files in target folder”.
To copy file permission, please refer to the section “Copy Document Permission”.
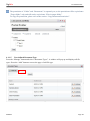
4.1.1.5
User-defined Document Type
Press the “Manage” button and select “Document Types”. A window will pop up and displays all file
types. Press the “Add” button to access the page of add file type.
DWP002
Page: 49
DigiWin
For Administrator
Enter the name and description and set Metadata field. Click “Save” to finish the addition.
DWP002
Page: 50
DigiWin
For Administrator
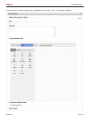
4.1.1.6
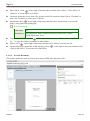
Add Document
First access the folder where the file will be stored. Press “Add” button and select the type of file to be
added or method of addition to access the add file page.
The following two upload methods are available:
(1) Click “Add multiple files” to upload several files at a time
DWP002
Page: 51
DigiWin
For Administrator
(2) Select user-defined file type or default type to access the upload page and upload only one file at a
time
DWP002
Page: 52
DigiWin
For Administrator
4.1.1.7
View Document
Press the icons at the top right corner of Portlet to change among different methods to view files. The 3
methods to view files are shown below.
(1) Icon View
(2) Descriptive View
DWP002
Page: 53
DigiWin
For Administrator
(3) List View
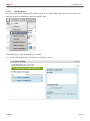
4.1.1.8
Search Document
After entering the keyword of file title or file description, click “Search”. Search results will display the
files that meet the conditions and show the relevance of search results.
Search scope covers all files in the folder and its subfolders.
If the date range is set by default (please refer to the following section “Set default date range”), the
system will provide the date range conditions and only files whose date falls within that range will
be searched out.
DWP002
Page: 54
DigiWin
4.1.1.9
For Administrator
Description of Search Condition Setting
Introduction of “Token”:
Because “Token” is used as the minimum unit for comparison during search, the entered keyword
needs to match a complete Token and incomplete character entered is not acceptable. For example,
the “DigiWin Portal” data will be searched out if “DigiWin” or “Portal” is entered, but not if “Digi”
is entered.
※The data to be searched is parsed into one or more Tokens before comparison.
Token parsing principles are as follows:
-
Continuous English figures (including “-” hyphen, “_” underline character as a link) are
deemed one Token
-
Those separated by non-English-figure symbol (excluding “-” hyphen, “_” underline character),
whitespace, or Chinese character are deemed an independent Token
Each Chinese character is deemed an independent Token
※Examples of Token parsing:
Data to be searched
Term as parsing result
2010Finance 報表
or
2010-Finance 報表
(2010)Finance 報表
2010Finance、報、表
2010、Finance、報、表
Description
“2010Finance” or “2010-Finance” is
a continuous English figure and is
deemed one Token
Each Chinese character is a Token
“(2010) Finance” is separated by
parenthesis and is deemed two
Tokens
Enter search string:
(1) Wildcards:
“Wildcards” may be added to search string to increase the flexibility of search conditions. Wildcards
fall into the following 2 types:
“?” (question mark) represents any single character
“*” (asterisk) represents nil, one or more characters
※Note: Wildcards cannot head any query string
※Examples of Wildcards:
Data to be searched include AA, AB, ABC, ACB, ADB, ABCD, ACBD
Query string
Description of query conditions
Search results
AB*
The data start with AB, followed by nil, one or more
characters
AB、ABC、ABCD
A?
The first character is A and the second character is any
character
AA、AB
DWP002
Page: 55
DigiWin
For Administrator
The data start with A and end with B, and has nil, one or
A*B
more characters between A and B
AB、ACB、ADB
A?B
The first character is A, the second character may be any
character, and the third character is B
ACB、ADB
A?C*
The first character is A, the second character may be any
character, and the third character is C, which is followed
by nil, one or more characters
ABC、ABCD
A*B?
The data start with A, which must be followed by nil, one
or more characters and then by B, and end with any
character
ABC、ACBD
*B
Syntax error! Wildcards cannot head any query string
?B
Syntax error! Wildcards cannot head any query string
Data that meet search
conditions are not found
Data that meet search
conditions are not found
(2) Logic condition search:
Use “Logic operation” between several keywords to form more advanced query conditions.
OR (或): It is acceptable to meet one or more of all keywords, and simplified symbol “||” may
-
be used instead. OR is a default logic condition and can be omitted. If several keywords are
separated by whitespaces, OR operation may apply
AND (且): All keywords have to be met and simplified symbol “&&” may be used instead
NOT (非): The designated keyword is excluded and simplified symbol “!” may be used instead.
NOT cannot be used where there is only one keyword. For example, NOT “Integration
Solution” is unacceptable
“+” (plus sign, designated inclusion): The designated keyword must be included
“-” (minus sign, designated exclusion): The designated keyword must be excluded
※Note: All English letters in logic conditions must be capitalized
※Examples of logic condition search:
Query string
Description of query conditions
DigiWin OR Portal
or
DigiWin || Portal
or
DigiWin Portal
“DigiWin Portal” AND “Integration Solution”
or
“DigiWin Portal” && “Integration Solution”
DWP002
Search any data that contain “DigiWin” or “Portal”
Search any data that contain both “DigiWin Portal”
and “Integration Solution”
Page: 56
DigiWin
For Administrator
“DigiWin Portal” NOT “Integration Solution”
or
“DigiWin Portal” !“Integration Solution”
Search any data that contain “DigiWin Portal” but
do not contain “Integration Solution”
+Digiwin Portal
Search any data that contain “DigiWin” and
possibly contain “Portal”
“DigiWin Portal” -“Integration Solution”
Search any data that contain “DigiWin Portal” but
do not contain “Integration Solution”
(3) Group condition search:
Use parentheses to make logic conditions into group conditions to meet more complex search
requirements.
For example, the following syntax will search any data that contain “DigiWin” or “Portal” and must
contain “Integration”:
(DigiWin OR Portal)AND Integration
(4) Scope search:
Set the query scope for English letters and figures that are sequenced in order. There are two
representation methods:
Search result contains start value and end value. Represent it in brackets “[]”
Search result does not contain start value and end value. Represent it in braces “{}”
※Start value and end value are separated by uppercase “TO”.
※Examples of scope search:
Data to be searched include 201007, 201008, 201009, 201010, AA, AB, ACB, AD, BC, DE
Query string
[201007 TO 201010]
Description of query conditions
From 201007 to 201010, including start value
and end value
Search results
201007、201008、
201009、201010
{201007 TO 201010} From 201007 to 201010, excluding start value
and end value
201008、201009
[AA TO AD]
From AA to AD, including start value and end
value
AA、AB、ACB、AD
{AA TO C}
From AA to C, including start value and end
AB、ACB、AD、BC
value
(5) Uppercase and lowercase letters are not differentiated in query string. For example, “Portal” can be
searched when “PORTAL” or “Portal” is entered
DWP002
Page: 57
DigiWin
For Administrator
4.1.1.10 Control Document
Press “ ” that follows the data entry of “Document” to control a file.
Download: Press “ ” on the right of data entry and then select “Download” to download the file
Edit: Click “ ” on the right of the data entry and then select “Edit” to access the Edit page. Editable
field:
-
Folder: Display the folder where the file belongs
File: To re-upload a file, please click “Browse” to select the file to be uploaded
-
Title: Allow the user to modify the title of the file
Description: Allow the user to modify details of the file
File type: Allow the user to change file type
DWP002
Page: 58
DigiWin
For Administrator
Move: Move: Click “
” on the right of the data entry and then select “Move”. Click “Select” or
“Remove” to set the upper-level folder
Checkout: Allow the user to lock a file, and the locked file cannot be editted. Press “Checkout” to
lock a file. To unlock it, please press “Checkin”
Permissions: Press “ ” on the right of data entry and then select “Permissions” to access the
folder’s user permission setting page
Permission setting:
Data entity
File
Permitted to Add Discussion, Delete, Delete Discussion, Permissions, Update,
Update Discussion, View
Copy Permissions To…: Press “ ” on the right of the data entry and then select “Copy Permissions
To…” to copy the folder’s permission to other folders.
Delete: Click “ ” on the right of data entry and then select “Delete” to delete the file
Open in MS Office (applicable to MS file only): Press “
“Open in MS Office” to open the file in MS Office
” on the right of data entry and then select
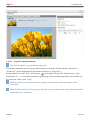
4.1.1.11 Preview Document
This feature enables the user to preview the content of PDF files and picture files.
DWP002
Page: 59
DigiWin
4.1.1.12
For Administrator
Copy Document Permission
This function applies to system administrator only.
This feature enables the user to copy permission data of a particular file (hereinafter referred to as
“Source file”) to the designated file (hereinafter referred to as “Target file”).
Setting method: Go to the “File” list and press “ ” on the right of source file, and then select “Copy
Permissions To…” to access the permission copying page. After checking target file(s) (several files can
be selected at a time), click “Copy”.
While the permission is being copied, the original permission data of the target folder will be
overwritten.
While the file permission is being copied, target files are restricted to those in the same folder and do
not include files in subfolders.
DWP002
Page: 60
DigiWin
For Administrator
Copy permission to…
4.1.1.13 Comment Document
The feature enables the user to comment a file and reply to comments. Click the name of a file to access
the view page. On the lower area switch to the “Comment” tab to view current comments on the file.
Add comment: Press “Add comment” to add a comment for the file
Post reply: Press “Post Reply” to reply to a particular comment
Edit comment: Press “Edit” to edit the comment
Delete comment: Press “Delete” to delete the comment
Comment voting: Press
or
to vote for or against the comment
DWP002
Page: 61
DigiWin
For Administrator
4.1.1.14
Document Rating
This feature enables the user to rate a file. Click file name to access the view page and conduct file rating.
Move the cursor to the asterisk “Your rating”. When the asterisk turns pink, click the mouse to finish the
rating. For example, to give a four-star rating, please click on the fourth star counted from the left, and the
same applies to other ratings.
4.1.1.15 Add Shortcut
Generally speaking, the user is allowed to view files created by current community only. To view files of
other communities, the user needs to set “File shortcut”.
Press the “Add” button and select “Shortcut” to access the shortcut setting page. After selecting the
community and files linked by the shortcut, click “Save”.
4.1.1.16 WebDAV Access Setting
This feature allows system administrator to conduct file management through network neighborhood.
Setting method:
Open “Network neighborhood” Add a network site Enter the folder’s WebDAV URL in
“Internet or network address” A window pops up requesting the entry of user name and password.
Please enter the account and password of the user of Portal system.
DWP002
Page: 62
DigiWin
For Administrator
After setting, the administrator can manage folders and add, edit or delete files directly through the
Web folder.
DWP002
Page: 63
DigiWin
4.1.2
For Administrator
My Documents
Press the person icon on the left list to view all files uploaded by the user.
4.1.3
Portlet Permission Setting
Click “Configuration” in the Portlet toolbar and then select the “Setup” to access the permission setting
page.
Permission setting:
Data entity
Documents and Media Portlet
Permitted to Display Settings (Icon, Description, list), Entries Listing (Name,
Size, Downloads, Action, Created Date, Modified Date)
DWP002
Page: 64
DigiWin
For Administrator
4.2 Documents and Media Display
Documents and media is a simplified view mode of “Documents and Media”.
4.2.1
View Document
View the list of file folders
DWP002
Page: 65
DigiWin
For Administrator
Access a folder to view the list of its subfolders and files. Press file name to view the data of the file.
4.2.2
Portlet Permission Setting
Click “Configuration” in the Portlet toolbar and then select the “Permissions” to access the permission
setting page.
Permission setting:
Data entity
Documents and Media Display Portlet
Permitted to Folders Listing (Folder, # of Folders, # of Documents, Name),
Documents Listing (Name, Size, Downloads, Locked)
DWP002
Page: 66
DigiWin
For Administrator
4.3 Recent Downloads
4.3.1
Recent Downloads
This feature enables the user to view the list of files recently downloaded by the user. Press the link
directly to open the file.
4.3.2
Portlet Permission Setting
Click “Configuration” in the Portlet toolbar and then select the “Permission” to access the permission
setting page.
Permission setting:
Data entity
Recent Downloads Portlet
Permitted to Add to Page, View, Permissions, Configuration
DWP002
Page: 67
DigiWin
For Administrator
4.4 Nested Portlets
This feature enables the user to adjust Portal interface more flexibly, lower the complexity of view
configuration and permission setting, and modify Portal view more flexibly.
4.4.1
Add to Portlet
Drag and drop Portlet to nested Portlets.
DWP002
Page: 68
DigiWin
4.4.2
For Administrator
View Setting
Press “Configuration” in Portlet toolbar, and a view setting window will pop up.
4.4.3
Portlet Permission Setting
Click “Configuration” in the Portlet toolbar and then select the “Permissions” to access the permission
setting page.
Permission setting:
Data entity
Nested Portlets Portlet
Permitted to Add to Page, View, Permission, Configuration
DWP002
Page: 69
DigiWin
For Administrator
5. Collaboration
5.1 Message Boards
Message Boards provides the users with a space to discuss and publish posts.
5.1.1
Manage Categories and Threads
The “Categories” area will display sategories currently created in the forum and threads and the quantity
of posts for each type.
5.1.1.1
Search Category
After entering the keyword of type name, post topic or content in search field, press “Search” to search
out related types.
DWP002
Page: 70
DigiWin
For Administrator
5.1.1.2
Add Category
Press “Add Category” to open the add type page. After entering related data, click “Save”.
Name: Enter type name of the forum
Description: Enter type description of the forum
Select pattern: Select type pattern of the forum
Permissions: Check “Public” to show it is a public type. Press “Configuration” to set the permission
of the type
5.1.1.3
Add Subcategory
After accessing a particular type, press “Add Subcategory” to add subcategory under the category. For
categorydata entry method, refer to the previous section.
DWP002
Page: 71
DigiWin
For Administrator
5.1.1.4
Control Category
Press “Actions” that follows the data entry of “Category” to control the type.
Edit: Press “Actions” on the right of data entry and then select “Edit” to access the Edit page. Edit
the following:
-
Parent Category: This type can be used as a subtype of other categories. Press “Select” or
“Remove” to set parent category
-
Merge with Parent Category: This category can be merged with parent category. After merger,
posts in the original category will be all transferred to parent category and the original category
will be automatically deleted
Permissions: Press “Actions” on the right of data entry and then select “Permissions” to access the
category’s user permission setting page
Permission setting:
Data entity
Message Boards Category
Permitted to Add File, Add Message, Add Subcategory, Delete, Lock Thread, Move
Thread, Permissions, Reply to Message, Subscribe, Update, Update
Thread Priority, View
RSS: Press “Actions” on the right of data entry and then select “RSS” to subscribe to the
corresponding RSS
Subscribe: Press “Actions” on the right of data entry and then select “Subscribe” to subscribe to the
type; To cancel the subscription, press “Cancel subscription”. In case of any new post published or
any other change in the corresponding forum subscribed, the subscriber will be notified via E-mail.
Delete: Press “Activity” on the right of data entry and then select “Delete” to delete the type
DWP002
Page: 72
DigiWin
For Administrator
5.1.1.5
Publish Post
After accessing a certain forum, press “Post New Thread” to open the publish post page and create a new
discussion thread.
Subject: Topic of the post
Body: Content of the post. During editing, use the toolbar on the top for arrangement or pattern
setting
Mark as a Question: Check this to mark any response to the post as an answer
DWP002
Page: 73
DigiWin
For Administrator
Anonymous: Check this to publish the post anonymously
Permissions: Set the permission of the post
Attach Files: Press “Attach Files” to upload attachments. Press “Remove” to remove all uploaded
attachments of the post.
After editing, press “Preview” to view the latest display of the post. To publish the post, please press
“Publish”.
5.1.1.6
Reply to Post
In the post view page, press “Reply” or “Reply with Quote” to reply to the post.
The edit method of a reply is the same as that of publishing posts. Please refer to the previous section.
5.1.1.7
Control Discussion Thread
Edit: Press “Actions” on the right of data entry and then select “Edit” to access the edit page
Permissions: Press “Actions” on the right of data entry and then select “Permission” to access the
topic’s user permission setting page
Permission setting:
Data entity
Discussion topic
Permitted to Delete, Update, Permissions, View, Subscribe
RSS: Press “Actions” on the right of data entry and then select “RSS” to subscribe to the
corresponding RSS
Subscribe: Press “Actions” on the right of data entry and then select “Subscribe” to subscribe to the
topic. To cancel the subscription, press “Unsubscribe”
DWP002
Page: 74
DigiWin
For Administrator
Lock Thread: It allows topic locking and the locked topic cannot be edited.
Move Thread: Press “Actions” on the right of data entry and then select “Move Thread” to move the
topic to other types
Delete: Press “Actions” on the right of data entry and then select “Delete” to delete the thread
5.1.1.8
Search Thread
After accessing a category, enter the keyword and then press “Search the type” to search out related posts.
※For search condition setting, please refer to “Search file” under “File management”.
5.1.2
My Posts
Press “My Posts” tab to view all posts published by the user.
DWP002
Page: 75
DigiWin
5.1.3
For Administrator
My Subscription
Click “My Subscriptions” tab to view the categories of discussions and threads of posts to which the user
subscribes.
5.1.4
Recent Posts
Click “Recent Posts” tab to view the threads of discussions that have been published recently.
DWP002
Page: 76
DigiWin
5.1.5
For Administrator
Statistics
Click “Statistics” tab to view types already created in the forum, quantity statistics on published posts and
participants, and the ranking of published posts.
5.1.5.1
General Statistics
Click “Statistics” to view types already created in the forum, quantity of published posts and participants
and the ranking on quantity of published posts.
DWP002
Page: 77
DigiWin
5.1.6
For Administrator
Banned Users
5.1.6.1
Ban the User
If message boards administrator finds any inappropriate post published, click “Ban This User” to
temporarily deny the user access to the forum. The user cannot use the forum until the suspension period
expires or the administrator cancels the suspension.
5.1.6.2
View the List of Banned Users
Click “Banned Users” to view the list of currently suspended users, date of suspension and expected date
of suspension cancellation.
5.1.6.3
Unban Users
The suspended user has no access to the forum during the suspension period. The user cannot use the
forum until the suspension period expires or the administrator cancels the suspension.
To restore the access of the suspended user, click “Unban This User” that follows the data entry of
“Banned Users”.
5.1.7
Portlet Permission Setting
Click Portlet’s “Permissions” to access the permission setting page.
Permission setting:
Data entity
Message Boards Portlet
Permitted to Add Category, Add File, Add Message, Ban User, Move
Thread, Lock Thread, Permissions, Reply to Message,
Subscribe, Update Thread Priority, View
DWP002
Page: 78
DigiWin
For Administrator
5.2 Directory
This feature enables the user to view basic information on users, organizers and user group of Portal
system.
5.2.1
Users
Select “Users” tab, enter the keyword of search conditions and then press “Search”. Results that meet the
conditions will be listed below.
Search conditions that may be entered include: User’s first name, middle name, last name, screen
name, and Email address.
DWP002
Page: 79
DigiWin
5.2.2
For Administrator
Organizations
Click “Organizations” tab, enter the keyword of search conditions and then click “Search”. Results that
meet the conditions will be listed below.
Search conditions that may be entered include: Name, street, city, postal code, type, country and
region of the organization.
Press
“View Users” that follows the data entry to view users that currently belong to the
organization.
DWP002
Page: 80
DigiWin
5.2.3
For Administrator
User Groups
Click “User Groups” tab, enter the keyword of search conditions and then press “Search”. Results that
meet the conditions will be listed below.
Press
group.
5.2.4
“View Users” that follows the data entry to view users that currently belong to the user
Portlet Permission Setting
Click “Configuration” in the Portlet toolbar and then select the “Permissiona” to access the permission
setting page.
Permission setting:
Data entity
Contact information Portlet
Permitted to Add to Page, View, Permissions, Configuration
DWP002
Page: 81
DigiWin
For Administrator
5.3 Online Messaging
The operation area of online messaging is at the bottom of page, and enables the user to send message(s)
to other online users of Portal.
5.3.1
View Online Users
The number in parentheses behind “Online Friends” means the number of currently online users of Portal
system (excluding the user himself/herself). Click “Online friends” to view the list of online users.
5.3.2
Send Message
The message is in pure text only, without emoticons. Pictures and files cannot be sent.
Messages can be sent to currently online users of Portal only, and cannot be sent to offline users.
Select the object to whom to send the message from the list of online users to open the dialogue box.
Enter message text in the input box below and press “Enter” to send the message.
DWP002
Page: 82
DigiWin
For Administrator
If several new messages are received at a time, the system will show the count of new messages.
Messaging with several persons is allowed. (Only one-to-many is allowed and group talk is not allowed)
5.3.3
Preferences
Click “Settings” to open the preferences page. After setting, click “Save”.
Alias/sharing message: Enter the user’s alias or sharing message to enable other users to see this
message in the dialogue box
Show me as online: Check it to let other users know the user is online on “Online friends”
Play a sound when I receive a new message in a hidden window: Check it to play the alert tone when
a new message is being received in the closed dialogue box
DWP002
Page: 83
DigiWin
For Administrator
5.4 Polls Management
This feature enables the user to manage voting topics.
DWP002
Page: 84
DigiWin
5.4.1
For Administrator
Add Poll Topic
Press “Add Question” to access the view of voting topic setting. After entering related data, click “Save”
to finish the addition of voting topic.
Title: Enter the topic of a voting activity
Polls Question: Enter the question of a voting activity
Expiration Date: Set the deadline of the voting activity. If there is no deadline, please check “No
deadline”
Choices: Set voting options. Click “Add option” to add a new option, and click “Delete” to remove
the option
Permissions: Click “Setting” to set the user permission to the voting activity
DWP002
Page: 85
DigiWin
5.4.2
For Administrator
Control Poll Topic
Edit: Press “Actions” on the right of data entry and then select “Edit” to access the Edit page.
Permissions: Click “Actions” on the right of data entry and then select “Permissions” to set the user
permission to the poll topic.
Permission setting:
Data entity
Voting topic
Permitted to Delete, Add Vote, Update, permissions, View
Delete: Press “Actions” on the right of data entry and then select “Delete” to delete the voting topic.
5.4.3
View Polls Results
Click a data entry of the voting question to view the actual voting result of the topic.
Polls Results: Display the number and percentage of votes obtained for each option
Charts: Display voting results in diagrams. Diagram types available: Area, Horizontal/Vertical Bar,
Line, Pie
Actual Votes: Display the name, selection and voting date for users who have voted
DWP002
Page: 86
DigiWin
5.4.4
For Administrator
Polls Permission Setting
Press Polls “Permissions” to access the permission setting page.
Permission setting:
Data entity
Polls Management
Group level
Users, Organizations, User Groups, Regular Roles, Site Roles,
Site, Guest
Permitted to Add Question, Permissions
DWP002
Page: 87
DigiWin
For Administrator
5.5 Polls Display
After adding a voting topic in “Polls Management”, the administrator needs to set voting topic in “Polls
Display” Portlet to enable users to participate in voting activity. For general information, please refer to
“DigiWin Portal Operating Instructions”.
5.5.1
Set Polls Interface
After adding a voting topic in “Polls Management”, the administrator needs to set the voting topic in
“Polls Display” Portlet to enable the users to participate in voting activity.
Press “Setting” in “Voting” toolbar to access the setting page. Select “Question” and then click “Save” to
finish the setting.
The same page can hold several “Polls” Portlets at a time to display different voting topics.
5.5.2
Portlet Permission Setting
Click “Configuration” in the Portlet toolbar and then select the “Permissions” to access the permission
setting page.
Permission setting:
Data entity
Polls Display Portlet
Permitted to Add to Page, View, Permissions, Configuration
Permission to “View” means the ability to view the voting topic and to cast a vote.
After the voting topic is set, the following permission is available by default: Guest has the
permission to “view”.
DWP002
Page: 88
DigiWin
For Administrator
5.6 Marquees
This feature enables the user to manage marquee information.
5.6.1
Add Marquee Message
Press “Add Marquee” to access the marquee message setting view. After entering related data, click
“Save”.
Title: Enter the title of a marquee
Content: Enter the content of marquee message
Duration: Set the playing period of the marquee message
DWP002
Page: 89
DigiWin
5.6.2
For Administrator
Control Marquee Message
Edit: Press “Actions” on the right of data entry and then select “Edit” to access the Edit page.
Permissions: Click “Actions” on the right of data entry and then select “Permissions” to set user
permission of the marquee message.
Permission setting:
Data entity
Marquee data
Permitted to View, Permissions
The permission to “View” marquee data is limited to the corresponding marquee message only.
For example: User A is set to have permission to view a particular marquee message while User B is
not. Therefore, User A can see the marquee message but User B cannot.
Delete: Click “Actions” on the right of data entry and then select “Delete” to delete the marquee
message.
5.6.3
Portlet Permission Setting
Click “Configuration” in the Portlet toolbar and then select the “Permission” to access the permission
setting page.
Permission setting:
Data entity
Marquee management Portlet
Permitted to action.ADDMARQUEE, Access in Control Panel, Add to
Page, View, Permissions, Configuration
DWP002
Page: 90
DigiWin
For Administrator
5.7 Marquee Display
5.7.1
Set Marquee Interface
After adding a marquee message in “Marquee management” Portlet, the administrator needs to set a
marquee playing interface in “Marquee Display” Portlet to enable the user to read the marquee message.
Press “Configuration” in “Marquee Display” toolbar to access the setting page. After entering related
information, click “Save”. For general information, please refer to “DigiWin Portal Operating
Instructions”.
The same page can hold several “Marquee Display” Portlets at a time to play the information of
different marquees.
5.7.2
Portlet Permission Setting
Click “Configuration” in the Portlet toolbar and then select the “Permission” to access the permission
setting page.
Permission setting:
Data entity
Marquee Portlet
Permitted to Add to Page, View, Permission, Configuration
DWP002
Page: 91
DigiWin
For Administrator
5.8 Questionnaire
This feature enables the administrator to create, manage and control questionnaires.
5.8.1
Set Questionnaire Type
Add a questionnaire type, and type name must not be blank
The administrator can add, edit and delete a type
DWP002
Page: 92
DigiWin
5.8.2
For Administrator
Questionnaire Display Setting
Two major questionnaire displays are “Questionnaire type” and “Questionnaire status”.
Questionnaire type setting:
-
All: Display all types of and unclassified questionnaires
none: Display questionnaires which are not classified
Questionnaire status:
-
DWP002
No limit: Any status
Ongoing: Questionnaires which are ongoing and opened
Not open: Questionnaires which are closed
History questionnaire: Questionnaires whose end time is before the current time
Page: 93
DigiWin
5.8.3
For Administrator
Add Questionnaire
Edit new questionnaire, including text adjustment, addition and editing of question(s) and separation text.
Title: Enter the title of the questionnaire (mandatory)
Questionnaire type: Select questionnaire type
Description: Description of questionnaire
Start date: Start date of questionnaire, and the default is the current date
End date: End date of the questionnaire, and the default is one month
View results: Unopened or View after end date
Recorded vote: Check it for non-anonymous questionnaire
After saving, edit the questions of the questionnaire as follows:
-
DWP002
Add topic: Add questionnaire question(s)
Increase delimited word: Separation text or character other than question
Page: 94
DigiWin
5.8.3.1
For Administrator
Topic and Delimited World
Topic and delimited world is managed in the following ways:
Add topic and delimited world: Enter question or separation text of questionnaire to be added
Edit: Modify the content of question or separation text
Delete: Delete the content of question or separation text
Questionnaire question copy: Copy the content of question or separation text
The questionnaire questions cannot be managed at the time when the questionnaire is opened and is
being filled in by a user. This restriction does not apply to separation text.
5.8.3.2
Add a Topic
Enter the content of the question to be added.
Question: Mandatory field must not be left blank
DWP002
Page: 95
DigiWin
For Administrator
Answer type: Four types, namely “radio button”, “check box”, “drop down-menu” and “text input
box”
Necessary response: Check it for necessary reply
Option: This item appears when radio button, checkbox or drop-down is selected, and all options are
isolated by comma
Allow self-fill option: “Other” options may be added at the end of question options, and any value
may be entered
5.8.3.3
Add Delimited Word
Enter the content of delimited word to be added, which can be used to divide questionnaire question
groups by title or description.
Delimited text: The content must not be left blank
5.8.3.4
Questionnaire Question Copy
Click “Questionnaire question copy” to copy questions and all options, and Copy will appear before the
question.
DWP002
Page: 96
DigiWin
For Administrator
5.8.3.5
Adjust Question Sequence
Modify the sequence of the questions, and find their numbers in the drop-down menu, as shown below.
The following is a view after adjustment.
5.8.4
Edit Questionnaire Management
Add, edit, delete, permissions, open/close, copy questionnaire, or view reply for questionnaires
Add/Edit/Delete: Add, edit or delete a questionnaire
Open/Close: Change questionnaire status. Open a questionnaire to let ordinary users complete it
Copy questionnaire: Copy the questionnaire’s content, questions and options, and the word Copy
will appear before the title of the questionnaire
View reply: Administrator can view the content of the questionnaire that has been received
DWP002
Page: 97
DigiWin
For Administrator
Permissions: Click “Actions” on the right of data entry and then select “Permissions” to set the user
permission to the questionnaire.
Permission setting:
Data entity
Questionnaire
Permitted to Delete, Update, View, Permissions, Copy Questionnaire, Open/Close
Questionnaire
5.8.5
View Reply (Questionnaire Management)
Notice: Mail notification can be sent directly to personnel who have not completed the questionnaire
View questionnaire statistics: Browse statistical result of response to the questionnaire
Reply: Browse the reply result
Delete: Delete a reply to let the user re-fill in the questionnaire
5.8.6
Portlet Permission Setting
Click “Configuration” in the Portlet toolbar and then select the “Permissiona” to access the permission
setting page.
Permission setting:
Data entity
Questionnaire management Portlet
Permitted to Add to Page, ADD_QUESTIONNAIRE, View, Permissions,
Configuration
DWP002
Page: 98
DigiWin
For Administrator
5.9 Questionnaire Display
This feature enables ordinary users to complete and browse questionnaires. For general information,
please refer to “DigiWin Portal Operating Instructions”.
5.9.1
Portlet Permission Setting
Click “Configuration” in the Portlet toolbar and then select the “Permission” to access the permission
setting page.
Permission setting:
Data entity
Questionnaire Display Portlet
Permitted to Add to Page, View, Permissions, Configuration
DWP002
Page: 99
DigiWin
For Administrator
5.10 Dynamic Data List Display
This feature enables the user to define data template and facilitate data entry and view.
5.10.1 User-defined Data Template
Click “Add list” icon and the add list window will pop up. Enter name and description, and select the
desired data definition to create a data template
DWP002
Page: 100
DigiWin
For Administrator
5.10.2 Add Data Definition
To add a data definition, press “Add” on the page of selecting data definitions to access the add data
definition page.
Enter name and description and arrange the data field in the interface below, and then press “Save” to add
a new data definition.
DWP002
Page: 101
DigiWin
DWP002
For Administrator
Page: 102
DigiWin
For Administrator
5.10.3 Enter Data
After adding a data template, press “Add record” to add the data to the user-defined data template.
While accessing the page of adding data, the user can see the data definition field that the user has just
created. After entry, press “Release” to add new data.
5.10.4 Portlet Permission Setting
Click “Configuration” in the Portlet toolbar and then select the “Permissions” to access the permission
setting page.
Permission setting:
Data entity
Dynamic data list display Portlet
Permitted to Add to Page, View, Permissions, Configuration
DWP002
Page: 103
DigiWin
For Administrator
6. Conference management
6.1 Device Resource Admin
This feature enables system administrator to control device resource data.
6.1.1
Add Device Resource
Initial page of equipment resource management is search mode. Press “Search” to display current
equipment resource data, and then press “Add” to access the page of adding data. After entering related
data, click “Save”.
DWP002
Page: 104
DigiWin
For Administrator
Area: Set the region to which the equipment resource belongs. Press “Select” on the right of the field
to set the region (To edit the region, refer to “Control panel” “Portal basic setting” “Organization”)
Name: Enter the name of equipment resource
Number: Enter the No. of equipment resource
Administrator: Select the administrator of the equipment resource. For this purpose, press “Select”
on the right of the field
Description: Enter the note of equipment resource
Activate: Check it to have the equipment opened for reservation and use. Uncheck it to have the
equipment suspended and not opened for reservation
Equipment is to notify the manager appointment (Do not send a reminder /Email Address): Set
whether the administrator (“Device administrator” in the foregoing setting) is notified when the
equipment is reserved
6.1.2
Modify Device Resource
Click “Actions” on the right of data entry and then select “Edit” to access the modification page. For data
editing method, please refer to “Add equipment resource”. After modification, click “Save”.
6.1.3
Delete Device Resource
Click “Actions” on the right of data entry and then select “Delete” to delete the data
6.1.4
Search Device Resource
Access search mode of equipment resource management, enter query conditions and then press “Search”.
Results that meet the conditions will be listed below.
Search conditions available include:
Area: Enter the region to which the equipment to be searched belongs. Press “Select” on the right of
the field to set region condition
Name: Enter the name or a keyword of the equipment resource to be searched
Administrator: Enter the equipment administrator to be searched. Press “Select” on the right of the
field to set administrator condition
Number: Enter the number or a keyword of equipment resource to be searched
Activate: Select activation status (Yes/No) of equipment resource to be searched
DWP002
Page: 105
DigiWin
For Administrator
Logic operation: Select logic operation method (And/Or) between search conditions. “And” means
all conditions must be met while “Or” means at least one of all conditions must be met
6.1.5
Export Data
On the search view above, press “Export” to export search results of equipment resource as CSV file
(openable in Excel).
6.1.6
Set Cyclic Reservation Period
This function applies to system administrator only.
This feature enables the user to set the longest period of cyclic reservation of equipment resource. Press
“Preferences” in the equipment resource management toolbar to access the setting page. Select “Longest
reservation period” (One week/Two week/One month/Two month/Three months/Six months/One year)
and then click “Save”.
6.1.7
Portlet Permission Setting
Click “Configuration” in the Portlet toolbar and then select the “Permissions” to access the permission
setting page.
Permission setting:
Data entity
Device Admin Portlet
Permitted to Add Device, Configuration, View, Do not apploy datamask,
Preferences, Add to Page, Access in Control Panel, Permissions
DWP002
Page: 106
DigiWin
For Administrator
6.2 Session Admin
This feature enables system administrator to control session room data.
6.2.1
Add Session Room
Initial view of session admin is search mode. Press “Search” to display current conference room data and
then click “Add” to access the page of adding data. After entering related data, click “Save”.
Area: Select the region to which the conference room belongs. For this purpose, press “Select” on
the right of the field
Name: Enter the name of conference room
Location: Enter the location of conference room, such as building, region, floor…
Seat/Person: Enter the number of seats in or seating capacity of the conference room
DWP002
Page: 107
DigiWin
For Administrator
Administrator: Select the administrator of the conference room. For this purpose, press “Select” on
the right of the field
Description: Enter the note of the conference room
Activate: Check it to have the conference room opened for reservation and use. Uncheck it to have
the conference room suspended and not opened for reservation
Session Room is to notify the manager appointment (Do not send a reminder /Email Address): Set
whether the administrator (“Session room administrator” in the foregoing setting) is notified when
the conference room is reserved
6.2.2
Modify Session Room
Click “Actions” on the right of data entry and then select “Edit” to access the modification page. For data
editing method, please refer to “Add conference room”. After modification, click “Save”.
6.2.3
Delete Session Room
Click “Actions” on the right of data entry and then select “Delete” to delete the data.
6.2.4
Search Session Room
Access search mode of session room management, enter query conditions and then click “Search”.
Results that meet the conditions will be listed below.
Search conditions available include:
Area: Enter the region to which the conference room to be searched belongs. Press “Select” on the
right of the field to set region condition
Name: Enter the name and a keyword of conference room to be searched
Administrator: Enter the administrator of conference room to be searched. Press “Select” on the right
of the field to set administrator condition
Location: Enter the location and a keyword of conference room to be searched
Seat/Person: Enter the number of seats in or seating capacity of conference room to be searched
Activate: Select activation status (Yes/No) of conference room to be searched
Logic operation: Select logic operation method (And/Or) between search conditions. “And” means
all conditions must be met while “Or” means at least one of all conditions must be met
DWP002
Page: 108
DigiWin
6.2.5
For Administrator
Export Data
On the search view above, press “Export” to export search results of conference room as CSV file
(openable in Excel)
6.2.6
Set Cyclic Reservation Period
This function applies to system administrator only.
This feature enables the user to set the longest period of cyclic reservation of conference room. Press
“Preferences” in conference room management toolbar to access the setting page. Select “The longest
period of booking” (One week/Two week/One month/Two month/Three month/Six month/One year) and
then click “Save”.
6.2.7
Portlet Permission Setting
Click “Setting” in the Portlet toolbar and then select the “Permission” to access the permission setting
page.
Permission setting:
Data entity
Session Admin Portlet
Permitted to Add Session Room, Configuration, View, Do not apploy datamask,
Preferences, Add to Page, Access in Control Panel, Permissions
DWP002
Page: 109
DigiWin
For Administrator
6.3 Session Booking
This feature enables the user to query and reserve session room and device resources.
6.3.1
Search Bookingsession Room
Click “Search Bookingsession Room” tab, enter query conditions and then click “Search”. Results that
meet the conditions will be listed below.
Search conditions available include:
Area: Enter the region to which the conference room to be searched belongs. Press “Select” on the
right of the field to set region condition
Name: Enter the name and a keyword of conference room to be searched
Logic operation: Select logic operation method (And/Or) between search conditions. “And” means
all conditions must be met while “Or” means at least one of all conditions must be met.
(1)
(2)
(3)
(4)
Query results display conference room reservation status in current week by default, which is described
below according to the numbers shown above:
(1) Date switchover button: Press
or
to switch and search date range, whose unit is “One week”
(2) Session room information link: Click and view details of the conference room
(3) Session topic link: Click and view the conference’s reservation details or access the edit mode
(4) Conference room booking link: Press
to reserve conference room for current date. For operation
method, please refer to “Reserve conference room”
DWP002
Page: 110
DigiWin
6.3.2
For Administrator
Booking Session Room
6.3.2.1
Add Session Booking
Click “Booking Session Room” tab to access the view of adding reservation. After entering related data,
click “Save”.
DWP002
Page: 111
DigiWin
For Administrator
Session Subject: Enter the topic of the conference
Chairman: Select the president of the conference. For this purpose, press “Select” on the right of the
field
Recorder: Select the recorder of the conference. For this purpose, press “Select” on the right of the field
Present User: Select attendees. Press “Select” on the right of the field to select attendees. To remove
a particular person, select the person from the list on the right and press “Clear the Staff”. To remove
all personnel, please click “Clear All”
Description: Enter conference outline
Session Date: Set conference date. Press
to select a date in the calendar mode
Repeat: Determine whether it is a single conference reservation (no repetition), or cyclic conference
reservation (cycle including daily/weekly/monthly can be set)
Time: Set start and end time of the conference
Session Room: Select conference room. For this purpose, press “Select” on the right of the field
Attachments: Press “Add File” to upload conference-related attachment(s). For cyclic reservation,
after finishing the conference reservation, open the conference reservation data of attachment to be
uploaded (while opening the data, please select “Edit the reservation”) to upload the attachment
Device Name: Select equipment resource to be reserved for the conference. Press “Add” to select the
equipment resource
Notice: Set conference reminder (immediate reminder/reminder before start of conference/no
reminder)
While making a single reservation, if some attendees have other appointments within the same time
period, the system will present a list of such personnel.
To go on the reservation, click “OK”. To give up the reservation, click “Cancel” to return to the
original view to adjust time period before making the reservation.
6.3.2.2
Cyclic Session Booking
This feature enables the user to reserve cyclic conferences.
Repeated cycles available: Daily/weekly/monthly
Start Date, End Date: Start date and end date of repeated cycle
If the system has set the longest period of conference cycle reservation (Please refer to the section of
“Set cyclic reservation period” in “Conference room management”), the reservation range must not
exceed the period of end date; however, this restriction does not apply to system administrator and
conference room administrator (only for conference room under his/her responsibility).
DWP002
Page: 112
DigiWin
For Administrator
Take the following as an example. Set “Second Monday of each month” at repeated reservation of the
same conference until 31/12/2013.
If the conference room is already reserved within some of the set time, the system will present
conflicting dates.
Click “Skip” to give up the reservation for any conflicting part and make the reservation for other
non-conflicting part;
Click “Cancel” to return to the original view and adjust time period before making the reservation.
If all set time is already reserved, the system will present a prompt message saying “Without any
effective time, please re-select the time”.
DWP002
Page: 113
DigiWin
For Administrator
6.3.2.3
Upload Session-related Attachment
This feature enables the user to upload session-related attachments so that attendees will download and
view those attachments beforehand.
To upload an attachment, select “Attachment type” (conference outline/other reference/conference
minutes)
Press “Browse…” to select the file to be uploaded and then click “Upload File”. After uploading,
click “Upload Completed”
To remove an uploaded file, check that file and click “Delete”
Persons other than attendees cannot download attachments.
6.3.2.4
Session Notice
After finishing and saving the conference reservation, the system will automatically send the conference
notification to personal calendar of required attendees so that they can make a schedule in advance. In
addition to automatic inclusion in calendar, the system may also send E-mail notification by the setting of
“Conference reminder”.
Reminder options:
Immediately notice: Send E-mail notification immediately after a successful conference reservation
(This function does not apply to cyclic reservation)
Immediately notice, Customized notice: Set the advance time of E-mail notification before the
conference
Customized notice: Set the advance time of E-mail notification before the conference
No notice: Close the conference’s reminder function
DWP002
Page: 114
DigiWin
For Administrator
6.3.2.5
Edit Session Booking
On “Search Bookingsession Room” page search out the session booking data to be edited. Click “Session
topic” to access edit page. After modifying data, click “Save”.
If conference reservation data to be edited are “Cyclic” reservation, the above window will pop up
before the user accesses the edit view.
(1) This booking: It means only current reservation data, excluding other data in the same series, will
be modified, and that current reservation data will be irrelevant to the reservation series (Any
modification or deletion of the original cyclic reservation series will not apply to the current
reservation data).
(2) Period booking: Modify all data of the entire reservation series.
6.3.2.6
Delete Session Booking
On “Search Bookingsession Room” page search out the conference reservation data to be deleted. Click
“Session topic” to access edit page. Click “Delete” to delete the conference reservation data. Permission
to delete: Reserving personnel can delete session booking data created by themselves; session room
administrator can delete session booking data of the reserved session room; system administrator can
delete any conference reservation data.
If the conference reservation data to be deleted are “Cyclic” reservation, the system will ask “Edit
current reservation or cyclic reservation” before the user accesses the edit view.
(1) Current reservation: It means only current reservation data, excluding other data in the same
series, will be deleted.
(2) Cyclic reservation: It means the data of the reservation system will be modified. Before deletion,
the system will ask for deletion option:
Option 1: Delete currently selected conference reservation data only.
Option 2: Delete currently selected conference reservation data and reservation data in the same
series whose date is later.
Option 3: Delete the data of the entire reservation series.
DWP002
Page: 115
DigiWin
6.3.3
For Administrator
Search Booking Session Device
Click “Search booking session Device” tab, enter query conditions and then click “Search”. Results that
meet the conditions will be listed below.
Search conditions available include:
Area: Enter the area to which the device resource to be searched belongs. Press “Select” on the right
of the field to set region condition
Name: Enter the name or a keyword of the device resource to be searched
Number: Enter the number or a keyword of device resource to be searched
Logic operation: Select logic operation method (And/Or) between search conditions. “And” means
all conditions must be met while “Or” means at least one of all conditions must be met.
(1)
(2)
(3)
(4)
Query results display equipment resource reservation status in current week by default, which is described
below according to the numbers shown above:
(1) Date switchover button: Press
or
to switch and search date range, whose unit is “One week”
(2) Device resource information link: Click it to view the details of the equipment resource
(3) Reserving personnel link: Click it to view the reservation details of the equipment resource
(4) Device resource booking link: Press
to reserve equipment resource on current date. For
operating method, please refer to “Reserve equipment resource”
6.3.4
Booking Device Resource
6.3.4.1
Add Device Booking
Click “Device booking” tab to access the view of adding reservation. After entering related data, click
“Save”.
DWP002
Page: 116
DigiWin
For Administrator
Repeat: Determine whether it is a single equipment reservation (no repetition), or cyclic equipment
reservation (cycle including daily/weekly/monthly can be set)
Start /end time of reservation date: Set the start and end time of the reservation. Press
to select a
date in the calendar mode
Description: Enter reservation notes
Device Name: Select the device resource to be reserved. Press “Add” to select the required device
and press
to delete the reserved equipment
6.3.4.2
Cyclic Device Booking
This feature enables the user to make cyclic reservation of equipment.
Repeated cycles available: Daily/weekly/monthly
Start date, end date: Start date and end date of repeated cycle
If the system has set the longest period of cyclic equipment reservation (Please refer to the section of
“Set cyclic reservation period” in “Device Resource Admin”), the reservation range must not exceed
the period of end date; however, this restriction does not apply to system administrator and
equipment administrator (only for equipment under his/her responsibility).
Take the following as an example. Set “Second Monday of each month” at repeated reservation of the
same equipment until 31/12/2013.
DWP002
Page: 117
DigiWin
For Administrator
If the equipment is already reserved within some of the set time, the system will present conflicting
dates.
Click “Skip” to give up the reservation for any conflicting part and make the reservation for other
non-conflicting part;
Click “Cancel” to return to the original view and adjust time period before making the reservation.
If all set time is already reserved, the system will present a prompt message saying “Equipment
resource… is already reserved. Please enter a new period”.
6.3.4.3
Edit Device Booking
On “Search Booking Session Device” page, search out equipment reservation data to be edited. Click the
name of reserving person to access the edit page. After modifying data, click “Save”.
If the equipment reservation data to be edited are “Cyclic” reservation, the system will ask “Edit
current reservation or cyclic reservation” before the user accesses the edit view.
(1) This booking: It means only current reservation data, excluding other data in the same series, will
be modified, and that current reservation data will be irrelevant to the reservation series (Any
modification or deletion of the original cyclic reservation series will not apply to the current
reservation data).
(2) Period booking: Modify all data of the entire reservation series.
DWP002
Page: 118
DigiWin
For Administrator
6.3.4.4
Delete Device Booking
On “Search Booking Session Device” page, search out equipment reservation data to be deleted. Click the
name of reserving person to access the edit page. Click “Delete” to delete the session booking data.
Permission to delete: Reserving personnel can delete session booking data created by themselves; device
administrator can delete device booking data of the reserved equipment; system administrator can delete
any device booking data.
If the equipment reservation data to be edited are “Cyclic” reservation, the system will ask “Edit
current reservation or cyclic reservation” before the user accesses the edit view.
(1) This booking: It means only current reservation data, excluding other data in the same series, will
be deleted.
(2) Period booking: It means the data of the reservation system will be modified. Before deletion, the
system will ask for deletion option:
Option 1: Delete currently selected equipment reservation data only.
Option 2: Delete currently selected equipment reservation data and reservation data in the same
series whose date is later.
Option 3: Delete the data of the entire reservation series.
6.3.5
Portlet Permission Setting
Click “Configuration” in the Portlet toolbar and then select the “Permissions” to access the permission
setting page.
Permission setting:
Data entity
Conference resource reservation Portlet
Permitted to Configuration, View, Do not apploy datamask, Preferences,
Add to Page, Permissions
DWP002
Page: 119
DigiWin
For Administrator
6.4 Meeting Room Preview
This feature enables the user to quickly view conference room reservation status for a particular date.
6.4.1
View Meeting Room Booking Status
Select a date: The default displays conference room reservation status on current date. Select another
date and press “OK” to query other reservation
Today’s Meeting: Press “Today’s Meeting” to quickly switch to conference room reservation status
on current date
Click “Session Subject” link to open the data of the conference reservation and quickly edit or view
details.
※This link will appear only if “Session Booking” Portlet is available on the current community
page.
(The current community page means the page on the current tab)
6.4.2
Portlet Permission Setting
Click “Configuration” in the Portlet toolbar and then select the “Permissiona” to access the permission
setting page.
Permission setting:
Data entity
Conference room preview Portlet
Permitted to View, Add to Page, Configuration, Permissions
DWP002
Page: 120
DigiWin
For Administrator
7. System Management
All functions in this section are for use only by a system administrator.
7.1 Language
7.1.1
Select Language
Click the name of a language to switch system interface to that language. Languages currently available
include: Traditional Chinese( ), Simplified Chinese( ) and English( ).
7.1.2
Display Setting
Press “Configuration” in language toolbar to access the language’s display setting page.
7.1.2.1
Language Option
Set the applicable language option. Select the applicable language from “Available” list, add it to
“Current” list and then click “Save”.
DWP002
Page: 121
DigiWin
For Administrator
7.1.2.2
Display Style
Set the language’s display pattern. Select “Display Style” and then click “Save”.
The following four display patterns are available:
Diagram
Long Text
Short Text
Select Box
7.1.3
Portlet Permission Setting
Click “Configuration” in the Portlet toolbar and then select the “Permissions” to access the permission
setting page.
Permission setting:
Data entity
Language Portlet
Permitted to Add to Page, View, Permissions, Configuration
7.2 IFrame
This feature enables the user to designate URL to embed other webpages into Portal page.
DWP002
Page: 122
DigiWin
7.2.1
For Administrator
Set IFrame
Press “Configuration” in IFrame toolbar to access the setting page. After entering related data, click
“Save”.
Source URL: Enter webpage URL to be embedded
Relative to Context Path: Check and mark the entered URL as relative path
Authenticate: Checking it for the link to the webpage which needs to be certified. It is necessary to
set credential type(Basic/Form), user name, password, among other information.
HTML Attributes: Set IFrame’s display pattern, such as: frame size, background color…
The following attributes are available for setting:
-
border: Border width
bordercolor: Color of border
-
frameborder: Width of frame border
height-maximized: Maximum height of frame
height-normal: Normal height of frame
hspace: Horizontal left and right margin
scrolling: Whether scrolling exists
vspace: Vertical top and bottom margin
width: Frame width
DWP002
Page: 123
DigiWin
For Administrator
After setting, return to the page view to view embeded webpage as follows.
7.2.2
Portlet Permission Setting
Click “Configuration” in the Portlet toolbar and then select the “Permissions” to access the permission
setting page.
Permission setting:
Data entity
IFrame Portlet
Permitted to Add to Page, View, Permissions, Configuration
DWP002
Page: 124
DigiWin
For Administrator
7.3 Launcher
This feature offers links to main page of DigiWin’s integrated products.
7.3.1
Open Main Page of Products
Move the cursor to the product wording or icon to be linked. Left click to open the main page of the
product.
7.3.2
Add Link
Press “Preferences” in the links toolbar to access the setting page. Click “Add”. Access the page of
adding links. After entering related data, click “Save”.
DWP002
Page: 125
DigiWin
For Administrator
Title: Title of a link
Link address: Type and address of the link (Please refer to the section of “Add menu” in “Common
menu”)
Icon: Icon of the link. Click “Browse” to select a picture file
7.3.3
Modify Link
Press “Preferences” in links toolbar to access the setting page. Select the link to be edited and click “Edit”
to access the page of modifying links. After modifying related data, click “Save”.
7.3.4
Delete Link
Press “Preferences” in links toolbar to access the setting page. Select the link to be deleted and click
“Delete” to access the page of deleting links.
7.3.5
Hide Link
If a link is temporarily not open for use, it can be set as hidden.
Press “Preferences” in links toolbar to access the setting page. Select the link to be hidden and then click
“Hide”. The link page will not display the link.
Hidden items will be in gray text.
DWP002
Page: 126
DigiWin
For Administrator
To restore a hidden item, please access the setting page, select the link to be restored, and then click
“Display”.
7.3.6
Adjust Display Sequence of Links
This feature enables the administrator to adjust display sequence of links.
Press “Preferences” in links toolbar to access the setting page, select the link to be moved, and press “Up”
or “Down” to move the item to the designated position.
DWP002
Page: 127
DigiWin
7.3.7
For Administrator
Portlet Permission Setting
Click “Configuration” in the Portlet toolbar and then select the “Permissions” to access the permission
setting page.
Permission setting:
Data entity
Launcher Portlet
Permitted to Preferences, Add to Page, View, Permissions, Configuration
7.4 User Menu
This feature provides a program list that enables the user to link to all integrated system tasks.
7.4.1
Open Link
Select the name of program list in “Role” and the tree menu below will immediately switch. Expand the
tree menu and click an item to start the corresponding task or program.
If the system to be linked is a “Multi-company-type” structure (e.g. ERP, CRM), please select
“Company” of the system to be logged in on the top right corner of the Portal system and then click the
link to program list.
7.4.2
Edit User Menu
To edit a program list, please use “Portal MenuDesigner” tool.
DWP002
Page: 128
DigiWin
7.4.3
For Administrator
Portlet Permission Setting
Click “Configuration” in the Portlet toolbar and then select the “Permissions” to access the permission
setting page.
Permission setting:
Data entity
Program list Portlet
Permitted to Add to Page, View, Permissions, Configuration
7.5 User Menu Map
This feature provides a program list that enables the user to link to all integrated system tasks, and also
displays their flowchart.
7.5.1
Open Link
Select the name of program list in “Role” and tree menu below and flowchart on the right will
immediately switch. Expand the tree menu or click a corresponding item in the flowchart to start the
desired task or program.
DWP002
Page: 129
DigiWin
For Administrator
To use the functions of flowchart, be sure to have imported and set the flowchart while editing the
program list.
If the system to be linked is a “Multi-company-type” structure (e.g. ERP, CRM), please select
“Company” of the system to be logged in on the top right corner of the Portal system and then click the
link to program list.
7.5.2
Edit User Menu Map
To edit a program list, please use “Portal MenuDesigner” tool.
7.5.3
Portlet Permission Setting
Click “Configuration” in the Portlet toolbar and then select the “Permissions” to access the permission
setting page.
Permission setting:
Data entity
User Menu Map Portlet
Permitted to Add to Page, View, Permissions, Configuration
DWP002
Page: 130
DigiWin
For Administrator
7.6 System Properties
7.6.1
View and Set System Parameters
This feature enables system administrator to set system parameters.
Press “Edit” to access the setting view. After entering “Parameter setting value”, click “Save”.
7.6.2
Portlet Permission Setting
Click “Configuration” in the Portlet toolbar and then select the “Permissions” to access the permission
setting page.
Permission setting:
Data entity
Marquee Portlet
Permitted to Access in Control Panel, Add to Page, View, Permissions,
Configuration
DWP002
Page: 131
DigiWin
For Administrator
7.7 Holiday Calendar
This feature enables the user to create the company’s holiday calendar and display the holiday on the
user’s personal calendar.
7.7.1
Manage Holiday Calendar
7.7.1.1
Search Calendar
After entering the keyword of holiday calendar name or description in the search field, click “Search” to
search out the desired calendar.
7.7.1.2
Add Calendar
Press “Add” to access the festival/holiday calendar setting view. After entering calendar-related data,
click “Save”.
Name: Enter the name of a festival/holiday calendar
Description: Enter details of the festival/holiday calendar
7.7.1.3
Control Calendar
Press “Actions” that follows the data entry of “Holiday Calendar” to control the holiday calendar.
DWP002
Page: 132
DigiWin
For Administrator
Edit: Click “Actions” on the right of data entry and then select “Edit” to access the modification
page. For data editing method, please refer to “Add calendar”.
Delete: Click “Actions” on the right of data entry and then select “Delete” to delete the
festival/holiday calendar. If there have been festival/holiday data in the calendar, please remove
them before deleting the calendar
Subscription Management: Click “Actions” on the right of data entry and then select “Subscription
Management” to view and manage subscription status of the holiday calendar. Please refer to
“Calendar Subscription Management” section.
7.7.1.4
Add Holiday
In “Holiday Calendar” data entry click a link to access a festival/holiday calendar. Press “Add” to access
the holiday setting view. After entering calendar-related data, click “Save”.
Date: Set the date of the festival/holiday
Name: Enter the name of the festival/holiday (i.e. the name shown on a personal calendar)
Whether the holiday: Check it if the festival/holiday is a day off; uncheck it if the festival/holiday is
a celebration day but not a day off
Generation cyclic holidays: Check it to set the rule of generating cyclic holidays
- Start month, end month: Set the range of cyclic holidays
- Week, day: Select which day of which week (Weekly/One a few weeks/Two weeks) of each
month to be holidays
For “Cyclic holidays” generated, holiday “name” cannot be set
DWP002
Page: 133
DigiWin
For Administrator
7.7.1.5
Control Holiday
Press “Actions” that follows the data entry of “festival/holiday” to control festival/holiday data.
Edit: Click “Actions” on the right of data entry and then select “Edit” to access the modification page
Delete: Click “Actions” on the right of data entry and then select “Delete” to delete the data
7.7.1.6
Search Holiday
After accessing a holiday calendar and entering search conditions, click “Search”. Results that meet the
conditions will be listed below. Search conditions that may be entered include: Holiday name (or a
keyword), start date and end date of the holiday.
7.7.2
Calendar Subscription Management
The user needs to subscribe to a calendar to view the details of the holiday calendar on his/her
personal calendar.
This feature enables the user to manage subscription data of a festival/holiday calendar, to query and view
current subscription status, and to make and cancel a subscription.
DWP002
Page: 134
DigiWin
For Administrator
Setting method: Go to “Holiday calendar” list, click “Actions” on the right and then select “Subscription
Management” to access the subscription management page.
Query subscription status: Enter query conditions and click “Search”, and the results that meet such
conditions will be displayed below. “Subscription date” with data filled in means the user has
subscribed to the holiday calendar; the blank one means no subscription
Subscribe: Check the user who plans to subscribe to the holiday calendar and then click “Subscribe”
Unsubscribe: Check the user who plans to cancel the subscription to the holiday calendar and then
click “Unsubscribe”
7.7.3
Portlet Permission Setting
Click “Configuration” in the Portlet toolbar and then select the “Permission” to access the permission
setting page.
Permission setting:
Data entity
Holiday Calendar Portlet
Permitted to Add to Page, View, Permissions, Configuration
7.8 Log Viewer
This feature allows Portlet for different purposes to record information and facilitate query, browsing or
operation. (Only MultiAppSync and MdmQueue are currently supported. Please refer to 8.1.4
Account/Password Sync Settings.)
7.8.1
Log View Summary
It displays the time, Log type and description of recently recorded Log messages.
DWP002
Page: 135
DigiWin
For Administrator
Click a data entry to open the corresponding tab and display the information of the message. The
following is the result of clicking the middle data entry in the figure above.
7.8.2
Multi Application Account/password Synchronization
Please refer to 8.1.4 Account/Password Sync Settings.
7.8.2.1
Search Multi Application Account/password Synchronization Data
After entering the keyword of related name or description in the search field, click “Search” to search out
the status of the corresponding MultiAppSync.
DWP002
Page: 136
DigiWin
For Administrator
Time: Select the date range to be searched
Product: Enter product name
Account: Enter the user’s account
Status: Select from drop-down options
Message: Enter the keyword of the message
7.8.2.2
Operation Function
Check the data for which a synchronization message should be sent and click “Resend” to send
account/password synchronization message immediately to other products.
7.8.3
Only Insert Account Synchronization
Please refer to 8.1.4 Account/Password Sync Settings.
This function replaces MDM resending process before Portal 2.6.0.
7.8.3.1
Search Only Insert Account Synchronization Data
After entering the keyword of related name or description in the search field, click “Search” to search out
the status of the corresponding MdmQueue.
Time: Select the date range to be searched
Product: Enter product name
Account: Enter the user’s account
Status: Select from drop-down options
Message: Enter the keyword of the message
7.8.3.2
Operation Function
Check the data for which a synchronization message should be sent and click “Resend” to send
account/password synchronization message immediately to other products.
DWP002
Page: 137
DigiWin
For Administrator
7.9 E-Billboard
This feature enables the user to view various E-Billboard in SFT system, including Behind Time,
Dispatch, Expect Check in, Idle, Production, Product Modetail, and to edit URLs.
※Prior to the use of this module, SFT system and PORTAL system must be integrated!
7.9.1
View E-Billboard
Click the tab of various electronic KanBans on the top to view the corresponding KanBan.
7.9.2
Edit URL of E-Billboard
Press “Preferences” in Portlet toolbar to access the setting page. Enter the URL of each KanBan in the
URL box of each KanBan. After modifying related data, click “Save”.
DWP002
Page: 138
DigiWin
7.9.3
For Administrator
Portlet Permission Setting
Click “Configuration” in the Portlet toolbar and then select the “Permissions” to access the permission
setting page.
Permission setting:
Data entity
E-Billboard Portlet
Permitted to Preferences, Access in Control Panel, Add to Page, View,
Permissions, Configuration
7.10 Data Mask Rule
This feature enables the administrator to create system masking rules, which may apply to all Portlets.
7.10.1 Manage Data Mask Rule
DWP002
Page: 139
DigiWin
For Administrator
7.10.1.1 Control Data Mask Rule
Press “Actions” that follows the data entry of “Data Mask Rule” to control data masking rules.
Edit: Click “Actions” on the right of data entry and then select “Edit” to access the modification
page. After entering related data, click “Save”.
DataMaskName: Enter the name of masking rule
PersonalInfo: Select personal information field to be masked
StartCharType: Select position or character. If a position is selected, it means the substitution starts
from Position X. If a character is selected, it means the substitution starts from the first specific
character X
StartAddress: Enter the position or specific character according to type.
EndCharType: Select position, character or to suffix. If a position is selected, it means the
substitution starts from Position X. If a character is selected, it means the substitution starts from the
first specific character X. If “To suffix” is selected, it means the substitution ends on suffix.
EndAddress: Enter the position or specific character according to type.
ReplaceBy: Substitute “*” for the character within the scope
DWP002
Page: 140
DigiWin
For Administrator
7.10.2 Portlet Permission Setting
Click “Configuration” in the Portlet toolbar and then select the “Permissions” to access the permission
setting page.
Permission setting:
Data entity
Data Mask Rule Portlet
Permitted to Add to Page, ADD_DATAMASKRULE, View, Permissions,
Configuration
7.11 Query Designer-management
This feature enables the administrator to query database easily.
7.11.1 Manage Database
7.11.1.1 Add Database
Click “Database” tab and press “Add database”
After entering related data, click “Test” to test whether information in the database is correct. Click
“Save” to complete the addition.
DWP002
Page: 141
DigiWin
For Administrator
Database name: Enter the name of a database
Database type: Select the type of the database (SQL Server JTDS/HSQL Standalone Mode/Oracle
JDBC Thin/MySQL/tSQL)
Database drive: Automatically generated along with database type selected by the administrator
Database address: Enter the address of the database
User name: Enter the name of the user
Password: Enter the password
Please enter the password again: Enter the password again
7.11.1.2 Control Database
Press “Activity” that follows the data entry of “Database” to control database.
Edit: Click “Activity” on the right of data entry and then select “Edit” to access the modification
page. After entering related data, click “Save”
Delete: Press “Activity” on the right of the data entry and then select “Delete” to delete the
information of the database
7.11.2 Manage Report
7.11.2.1 Add Report
Click “Report” tab and press “Add report”
DWP002
Page: 142
DigiWin
For Administrator
After entering related data, click “Next” to complete the addition.
Database name: Select the name of a database
Report name: Enter the name of the report
Report description: Enter the description of the report
Report SQL syntax: Enter SQL syntax
7.11.2.2 Control report
Select the report to be controlled and use the three buttons below, i.e., “Edit report”, “Delete report” and
“View report” to control reports.
Edit report: Select the report to be controlled and then click “Edit report” to access modification
page. After entering related data, click “Next” to complete the editing
Delete report: Select the report to be controlled and then click “Delete report” to delete the
information of the report
View report: Select the report to be controlled and then click “View report” to view the information
of the report
DWP002
Page: 143
DigiWin
For Administrator
7.11.3 Portlet Permission Setting
Press “Setting” in Portlet toolbar to access the permission setting page.
Permission setting:
Data entity
Query designer-management Portlet
Permitted to Control database, control report, add to page, view,
permission, setting
7.12 Query Designer-view
This feature enables the user to view the data of a particular report.
7.12.1 Add Report
Click the tool icon on the bottom left to access the add report page. After entering related data, click
“Save” to complete the addition.
7.12.2 Portlet Permission Setting
Press “Setting” in Portlet toolbar to access the permission setting page.
Permission setting:
Data entity
Query designer-view Portlet
Permitted to Export report, set report, add to page, view, permission,
setting
DWP002
Page: 144
DigiWin
For Administrator
8. Integration Setting
8.1 SSO System Setting
This enables system administrator to perform the setting of Portal integration environment.
※Please avoid making modification frequently as this may affect the functionality of Single Sign On
integration!
8.1.1
Select SID
Click “Select SID” tab, check integrated systems according to actual installation and then click “Save”.
DSCPortal, SSOServer, MDM: The first three items are basic settings. Please do not uncheck them.
DWP002
Page: 145
DigiWin
8.1.2
For Administrator
Edit SID
Click “Edit SID” tab. In “SID”, select the system to be edited and enter related parameters, and then click
“Save”.
8.1.3
CROSS Registration
Click “CROSS Registration” tab. In “CROSS WSDL Address”, enter WSDL address of CROSS, and
then click “Register”. Currently registered information will appear in “Registered information”.
DWP002
Page: 146
DigiWin
8.1.4
For Administrator
Account/Password Sync Settings
Account/Password Sync Settings falls into two modes:
Old Synchronous Mode
“Synchronizing to other systems only when adding Portal user account” substitutes former “MDM
DWP002
Page: 147
DigiWin
For Administrator
synchronizing account information to other systems while adding user”. Under this mode, “Old
Synchronous Mode” must be checked, Web Service URL website address of the product below must be
set correctly, and “Use” field must be checked.
In the figure below, by checking Workflow system, the user may synchronize the new account to
Workflow system while adding a Portal user account.
New Synchronous Mode
By unchecking “Old Synchronous Mode”, the user may activate the new synchronization mode. This
mode will synchronize user account information to other systems during Portal user account addition,
login password modification, user name, E-mail box, or account cancellation/restoration.
If Use field is checked in “Select system” tab and the system has this function, system names will be
listed below for the user to check systems to be synchronized.
The synchronization of added Portal user accounts is not included in the systems checked here.
DWP002
Page: 148
DigiWin
For Administrator
Products integrated with this function:
Product
Min. version requirement
TIPTOP
5.10.21、5.25.07、5.30.01
Workflow
3.14
SmartERP
8.2.3
Cosmos
9.3.6
EasyFlow.NET
3.3
EasyFlow GP
3.7
CRM
6.2.6
HRM
2.3.86.0
SFT
Dependent on Workflow version
YIXING
6.0
Under the new synchronization mode, while adding Portal users, the user will see the name of all
systems below. After checking certain systems, click “Save” to synchronize user account
information to checked systems, as shown below.
DWP002
Page: 149
DigiWin
For Administrator
The result of synchronization messages related to the above two Account/Password Sync modes will
be recorded in “Log Viewer” Portlet and correspond to the Portlet’s “Only Insert Account
Synchronization” and “Account/Password Sync” tab, and the mechanism of sending failed
synchronization message can be checked.
8.1.5
Portlet Permission Setting
Click “Configuration” in the Portlet toolbar and then select the “Permissions” to access the permission
setting page.
Permission setting:
Data entity
Service Mapping Portlet
Permitted to Access in Control Panel, Add to Page, View, Permissions,
Configuration
DWP002
Page: 150
DigiWin
For Administrator
8.2 Company
Some products of DigiWin support “Multi-company-type structure”. If your Portal integration
environment contains those products, please set the corresponding company type list in Portal according
to the following instructions.
8.2.1
View Company List
This feature enables the administrator to view currently set company lists.
8.2.2
8.2.2.1
Update Company List
Get Company List of All Systems
Switch to “Company correspondence” tab and click “Update” to retrieve the latest company type data of
all integrated systems, and display them in the following list.
DWP002
Page: 151
DigiWin
For Administrator
8.2.2.2
Import Company List
This feature enables the user to quickly import company type list. Please perform the setting with
reference to the following numbers:
(3)
(2)
(1)
(1) Check COSMOS company type
(2) Press “Add Company List”
(3) to add the selected items to “Company List”
8.2.2.3
Set Company Type Correspondence
After creating a “Company type list”, company types corresponding to all systems must be designated
one by one. Please perform the setting with reference to the following numbers:
DWP002
Page: 152
DigiWin
For Administrator
(1)
(4)
(5)
(3)
(2)
(6)
(1) Select a company
(2) Check “Company code” of each system corresponding to the company type
(3) Press
to add the selected items to corresponding list
(4) Complete the company type correspondence
(5) To remove a single item from the correspondence list, select the item and press
(6) To remove all items from the correspondence list, press “Delete all”
Please complete the correspondence setting of “Company list” one by one accordingly.
8.2.3
Set User Login Company
This setting only intends to restrict the user’s access to the company type in Portal. Whether the user
has the actual permission to access the company type, however, should depend on the permission
setting in the former integrated system.
Description of company type permission:
“Limit”: It means the user can only see company type options to which he/she is given permission
(user permission must be set one by one)
“Without limiting”: It means the user can see all company type options
Integrated systems that currently support the user’s company type permission are: TIPTOP,
WorkflowERP
8.2.3.1
View All Users’ Company Permission
Switch to “User Login Company” tab to view users’ company type permission settings. Please refer to the
following numbers and instructions:
DWP002
Page: 153
DigiWin
For Administrator
(2)
(1)
(3)
(1) Users have permission to log only shows the company:
- This setting is “Default company permission setting”. If a user’s company type permission is not
set to limit or without limiting, this default permission will apply
- To change the setting, select the item (Limit / Without limiting) and then press “Save settings”
(2) Access to all users of the company:
Use the button to get from each integrated system the company type lists all users have the
permission to access, and automatically save them to the list of “Company types accessible to users”
(3) All users’ company permission settings:
Display all users’ current company type permission settings ((Limit / Without limiting). The setting
followed by “Default” in parentheses means the user’s company type permission is not set, so the
default permission applies
8.2.3.2
Set a Single User’s Company Permission
Switch to “User Login Company” tab and click the information of the user to perform individual
permission setting to access the user’s company type permission setting page. Please refer to the
following numbers and instructions:
(1)
(6)
(2)
(3)
(4)
(5)
(1) Display company:
- This setting only belongs to the user’s personal setting. If the setting differs from “Default
company permission setting” mentioned in the foregoing section, this personal setting will
prevail
- By selecting “Default”, the user may directly apply the setting of “Default company permission
setting”, instead of the personal setting
DWP002
Page: 154
DigiWin
For Administrator
(2) Add:
- This function enables the user to add company type lists
- Operation method: Enter the item to be added in the “SystemName” and “Company code” and
then click “Add”
(3) The original system to obtain a list:
- Get from the integrated system the company type list accessible to the user
- Operation method: In “SystemName” select the integrated system and press “The original
system to obtain a list” to get back the data and automatically save them to the list of “User
Login Companys”
(4) Delete:
In the list of “User Login Companys” select an item and press the button to remove the item
(5) Delete all:
Press the button to remove all items from the list of “User Login Companys”
(6) User Login Companys:
The list of company types accessible to the user
8.2.3.3
Recommended Setting Methods
Situation
All users can access all company
types
Applicable setting method
Default permission
Set as “Without
limiting”
The majority of users can access all
company types and only a few
users are restricted to certain
accessible company types (lower
permission)
All users are restricted to certain
accessible company types
DWP002
Individual users require no specific
permission setting (by default)
Users with lower permission need to be
Set as “Without
limiting”
Set as “Limit”
All users are restricted to certain
accessible company types, and only
a few users require no restriction
(i.e. accessible to all company
types; higher permission)
Individual permission
set one by one as “Limit”, and a list of
accessible company types should be
designated
Individual users require no specific
permission setting (by default), but a list
of accessible company types should be
designated for each user
After performing the same setting, set
Set as “Limit”
users with higher permission one by one
to “Without limiting”
Page: 155
DigiWin
8.2.4
For Administrator
Use of Company Menu
After setting company type lists, the company type list already set will appear on “Company” menu on
the top right of Portal page.
Before performing the Single Sign On to a system that supports multi-company-type structure, be
sure to select a correct “Company”.
8.2.5
Portlet Permission Setting
Click “Configuration” in the Portlet toolbar and then select the “Permission” to access the permission
setting page.
Permission setting:
Data entity
Company Portlet
Permitted to Access in Control Panel, Add to Page, View, Permissions,
Configuration
DWP002
Page: 156
DigiWin
For Administrator
8.3 Account Maintain
Before performing Single Sign On, the user needs to set the correspondence between his/her account in
Portal and his/her account in other systems. This is called account maintain setting.
8.3.1
SSO List
Click “SSO List” tab to display the list of the user’s current account correspondence with other systems.
“Application” and “Account” in the list means the corresponded account of Portal user in the application
system.
In the above figure: The corresponded account of Portal user in “CRM” system is “CRMDS”, and the
same applies to other systems.
8.3.2
SSO Edit
To add a system account correspondence setting, on “SSO List” page click “Add”, or just click “SSO
Edit” tab to access the account correspondence setting page. After entering related data, click
“Authenticate”.
DWP002
Page: 157
DigiWin
Application: Select the system to be corresponded
Account: Enter “Account” of the corresponded system
Password: Enter “Password” of the corresponded system
For Administrator
Account and password entered during account correspondence setting will be sent immediately to
the selected “application” for validation. If such account and password are correct, account
correspondence setting will be completed; otherwise, make sure whether the data entered are correct.
For any question, please contact the system administrator.
8.3.3
Search SSO Data
This function applies to system administrator only.
Click “Search & Maintain SSO Data” tab, enter query conditions and press “Search”. Results that meet
the conditions will be listed below.
Search conditions available include:
Application: Select the corresponded system to be queried, and * (asterisk) means there is no
restriction
Account: Enter corresponded account to be queried
8.3.3.1
View All SSO Data
After setting query condition “Application” as * and leaving “Account” blank, all accounts of Portal and
the corresponded account data in all systems will be listed.
8.3.3.2
View a Single System’s SSO Data
After selecting the system to be searched in query condition “Application” and leaving “Account” blank,
the corresponded accounts of the system will be displayed.
DWP002
Page: 158
DigiWin
For Administrator
8.3.3.3
View SSO Data of a Designated Account
After selecting * for query condition “Application” and entering the account to be searched in “Account”,
all corresponded account data containing such account (regardless of system type) will be displayed.
8.3.3.4
View SSO Data of a Designated System and Account
After selecting the system to be searched in query condition “Application” and entering the account to be
searched in “Account”, all corresponded account data containing such account in the system will be
displayed.
8.3.4
Delete Account Maintain
Click “SSO List” tab, check the corresponded account data to be deleted and then click “Delete” to delete
the corresponded account data.
DWP002
Page: 159
DigiWin
8.3.5
For Administrator
Reset Account Maintain
To reset SSO data, please delete the SSO data and then perform (New) account maintain setting.
8.3.6
Control SSO Data
This function applies to system administrator only.
This feature enables the administrator to control corresponded account data of all users. Click “Search &
Maintain SSO Data” tab and use the query function to search the corresponded account data to be edited.
For setting method, refer to the following numbers and instructions:
(1)
(2)
(1) On the table corresponding to the user and system type, left click to enter the corresponded account
(2) If a change is made to corresponded account, “Save” button will appear below. Be sure to save the
change before leaving this page.
DWP002
Page: 160
DigiWin
8.3.7
For Administrator
EIS Account Maintain
This function applies to system administrator only.
This feature enables the administrator to set the account correspondence between EIS system and Portal
system. Click “EIS Account Maintain” tab to access the EIS account correspondence setting view.
8.3.7.1
EIS Account Correspondence
Enter “EIS Account” and “EIS Password” and press “Submit” to add EIS account to “EIS Account List”
on the left.
DWP002
Page: 161
DigiWin
For Administrator
8.3.7.2
Delete EIS Corresponded Account Data
To delete EIS corresponded account data, refer to the following numbers and instructions:
(1)
(3)
(2)
(1) In “EIS Account List” select the account to be deleted
(2) If “Current List” has any item, remove such item before deleting the EIS account
(3) Click “Delete” to delete EIS account data
8.3.7.3
Create Account Maintain Between Portal and EIS Account
To set account correspondence between Portal and EIS account, refer to the following numbers and
instructions:
(1)
(4)
(2)
(3)
(1) In “EIS Account List” select the EIS account where the account correspondence is to be set
(2) From Portal accounts displayed in “Available List” check the item to correspond to the selected EIS
account
(3) After selection, press
to add the selected item to the corresponded list
(4) After completing the setting, all the Portal accounts in “Existing corresponded account list” will
correspond to the selected “EIS account”
DWP002
Page: 162
DigiWin
8.3.7.4
For Administrator
Delete Account Maintain of Portal and EIS Account
In “Current List” select Portal account where the account correspondence is to be deleted and click
.
(1)
(2)
8.3.8
Portlet Permission Setting
Click “Configuration” in the Portlet toolbar and then select the “Permissions” to access the permission
setting page.
Permission setting:
Data entity
Account Maintain Portlet
Permitted to Add to Page, View, Permissions, Configuration
DWP002
Page: 163
DigiWin
For Administrator
9. Control Panel
Control panel is a central management interface that enables the user to perform system-related settings.
Click “Go to” on the top menu bar and then press “Control Panel” to access this management interface.
Please click the items to be set on the left menu.
Manageable items in the control panel depend on the role of the user:
Ordinary role
User
Manageable items
My account, community (not available if the user has not joined any
community)
Power User
My account, my pages, community (not available if the user has not joined
any community)
Administrator
All items
The following is the description of management items in the control panel.
DWP002
Page: 164
DigiWin
For Administrator
9.1 User Account
9.1.1
My Account
Please refer to “My Account” section in “DigiWin Portal Operating Instructions”.
9.1.2
My Pages
This feature enables the user to manage his/her own pages, which fall into “Public Pages” and “Private
pages”.
For page management method, please refer to “Management page” section in “Start using DigiWin
Portal”.
9.2 Content
9.2.1
Site Settings
Please refer to “Sites” section in “Portal Basic Setting”.
9.2.2
E-Billboard
Please refer to “E-Billboard” section in “System Management”.
9.2.3
Log Viewer
Please refer to “Log Viewer” section in “System Management”.
9.2.4
Site Pages
Please refer to “Management Page” section in “Start Using DigiWin Portal”.
9.2.5
Site Memberahips
Please refer to “Sites” section in “Portal Basic Setting”.
9.2.6
Documents and Media
Please refer to “Documents and Media” section in “Content Management”.
DWP002
Page: 165
DigiWin
9.2.7
For Administrator
Documents and Media Display
Please refer to “Documents and Media Display” section in “Content Management”.
9.2.8
Calendar
Please refer to “Calendar” section in “Individual Assistant”.
9.2.9
Message Boards
Please refer to “Message Boards” section in “Collaboration”.
9.2.10 Polls
Please refer to “Polls Managements” section in “Collaboration”.
9.2.11 Session Admin
Please refer to “Session Admin” section in “Conference Management”.
9.2.12 Device Admin
Please refer to “Device Resource Admin” section in “Conference management”.
9.2.13 Marquees
Please refer to “Marquees” section in “Collaboration”.
9.2.14 System Properties
Please refer to “System Properties” in “System management”.
9.2.15 Dynamic Data Lists
Please refer to “Dynamic Data List Display” in “Collaboration”.
9.3 Portal Basic Setting
9.3.1
User and Organizations ----User
9.3.1.1
View User List
Click “View all” to view all created user account list (Cancelled accounts and users already included in
DWP002
Page: 166
DigiWin
For Administrator
organization will not be displayed).
9.3.1.2
Search User
Two search methods are available: Basic search, advanced search. Please click the link below “Search”
button to switch search methods.
(1) Basic search:
Enter the keyword of last name,first name, or screen name in search field and then click “Search”.
Results that meet the conditions will be listed below.
(2) Advanced search:
Enter query conditions and click “Search”, and the results that meet such conditions will be
displayed below. Search conditions available include:
Logic operation: Select logic operation method (All/Any) between search conditions. Select
“All” if all conditions must be met; select “Any” if at least one condition must be met
Last Name: Enter the last name of the user to be searched
Middle Name: Enter the middle name of the user to be searched
First Name: Enter the first name of the user to be searched
Screen Name: Enter the screen name of the user to be searched
E-mail Address: Enter the E-mail of the user to be searched
Status: Select the account activation status of the user to be searched (any status/active/inactive)
DWP002
Page: 167
DigiWin
For Administrator
9.3.1.3
Add User
On the top of the user page press “Add” and then click “User” to open the add user page.
After entering related data, click “Save”.
Screen Name: Enter the user’s login account.
Account may only include the following halfwidth characters: English letters, figures (0~9),
underline(_), hyphen (-), decimal point (.)
Password: Enter the user’s login password
Enter Again: Enter again the password
E-mail address: Enter the user’s main E-mail. Do not enter the E-mail already created for another
user
Last Name: Enter the last name of the user
First name: Enter the first name of the user
Birthday: Enter the date of birth of the user
Gender: Select the sex (male/female) of the user
Job Title: Enter the job title of the user
DWP002
Page: 168
DigiWin
For Administrator
9.3.1.4
Export User List
On the top of the user page click “Export all users” to export user data (in csv format).
9.3.1.5
Deactivate and Restore User Account
Deactivate user account: In “User” data entry check the account to be cancelled and click
“Deactivate”. The cancelled user cannot log in Portal until the account is restored.
Restore user account: Switch to advanced search and change “Status” condition to “inactive” to
search out the deactivated account. Check the account to be restored and click “Restore”. The
restored user can continue to use Portal.
(1)
(2)
DWP002
Page: 169
DigiWin
For Administrator
9.3.1.6
Edit User Data
Click “Actions” on the right of “User” data entry and then select “Edit” to access edit page.
For user data, please refer to “My Account” section in “Start using DigiWin Portal”.
9.3.1.7
Set User Data Permission
Click “Actions” on the right of “User” data entry and then select “Permissions” to access the user’s data
permission setting page.
For permission setting, please refer to “Permission Setting Method” section in “Start using DigiWin
Portal”.
Permission setting:
Data entity
User
Permitted to Delete, impersonate, permissions, update, view
9.3.1.8
Manage User Page
Click “Actions” on the right of “User” data entry and then select “Manage pages” for open page
management of users.
For page management method, please refer to “Management page” section in “Start using DigiWin
Portal”.
9.3.1.9
Impersonate the User
Click “Actions” on the right of “User” data entry and then select “Impersonate user” to impersonate the
DWP002
Page: 170
DigiWin
For Administrator
user’s permission in Portal.
To stop impersonation, click “Be yourself again”.
9.3.2
User and Organizations --- Organization
9.3.2.1
View Organization List
Press “View all” to view all created organization lists.
9.3.2.2
Search Organization
Two search methods are available: Basic search, advanced search. Please click the link below “Search”
button to switch search methods.
DWP002
Page: 171
DigiWin
For Administrator
(1) Basic search:
Enter the keyword of organization name in the search field and then press “Search”, and results that
meet the conditions will be listed below.
(2) Advanced search:
Enter query conditions and click “Search”, and the results that meet such conditions will be
displayed below. Search conditions available include:
Logic operation: Select logic operation method (All/Any) between search conditions. Select
“All” if all conditions must be met; select “Any” if at least one condition must be met
Name: Enter the name of the organization to be searched
Street: Enter the street of the organization to be searched
City: Enter the city of the organization to be searched
Type: Select the type (regular organization/location) of the organization to be searched
Country: Enter country type of the organization to be searched
Region: Select the region of the organization to be searched
Postal code: Enter the postal code of the organization to be searched
9.3.2.3
Add Organization
On the top of organization page click “Add” and then click “Regular Organization/Location”to open the
add organization page.
After entering related data, click “Save”.
DWP002
Page: 172
DigiWin
For Administrator
Name: Enter the name of the organization
Type: Select the type of the organization (regular organization/location)
Parent Organization: Set the upper-level organization where this organization is affiliated. Press
“Select” below to set the parent organization, and only the “regular organization” can be selected as
upper-level organization
After the setting is saved, the menu on the right will display other data of the organization for further
setting.
DWP002
Page: 173
DigiWin
For Administrator
Addresses: Enter the organization’s address data. Click
to add more data and click
to
delete data.
-
DWP002
Country, postal code, city, street 1, street 2, street 3: Enter the address
Type: Select address type (Billing/Other/P.O. Box/Shipping)
Primary: Check it for the main address (at most one primary address)
Mailing: Check it for the mailing address (optional)
Page: 174
DigiWin
For Administrator
Region: Select the region of the organization
Phone Numbers : Enter the organization’s telephone number data. Click
click
to add more data and
to delete data.
-
Number and Extension: Enter telephone number data
Type: Select the type of telephone number (Fax/Local/Other/Toll-Free/TTY)
-
Primary: Check it for the main telephone number (at most one main telephone number)
DWP002
Page: 175
DigiWin
For Administrator
Additional Email Addresses: Enter the organization’s E-mail data. Click
click
to add more data and
to delete data.
Email Address: Enter E-mail address
Type: Select E-mail type (E-mail/E-mail 2/E-mail 3)
Primary: Check it for the primary E-mail (at most one primary E-mail)
Websites: Enter the organization’s website data. Click
to add more data and click
to
delete data.
DWP002
Page: 176
DigiWin
For Administrator
URL: Enter the website’s URL
Type: Select website type (Intranet/Public)
Primary: Check it for the Primary website (at most one Primary website)
Comments: Enter the comment on the organization.
DWP002
Page: 177
DigiWin
For Administrator
9.3.2.4
Delete Organization
In “Organization” data entry check the data to be deleted and click “Delete” , or click “Actions” on the
right of the organization to be deleted and then click “Delete”.
If the organization to be deleted has designated members, your request would fail to complete.
9.3.2.5
Edit Organization Data
Click “Actions” on the right of “Organization” data entry and then select “Edit” to access edit page.
For organization data, please refer to the foregoing “Add organization” section.
DWP002
Page: 178
DigiWin
For Administrator
9.3.2.6
Designate Organization Role
Click “Actions” on the right of “Organization” data entry and then select “Assign Organization Roles” to
assign roles to the users of the organization.
After accessing the setting page, select the role to be set,
check the user, and press “Refresh association”.
DWP002
Page: 179
DigiWin
For Administrator
9.3.2.7
Designate Organization Member
Click “Actions” on the right of “Organization” data entry and then select “Assign Users” to designate
members for the organization.
DWP002
Page: 180
DigiWin
For Administrator
After accessing the setting page, check the users designated for this organization and press “Update
Associations”.
9.3.2.8
Add Organization User
Click “Actions” on the right of “Organization” data entry and then select “Add user” to add a user
account while at the same time designating the new account as the member of the organization.
For account addition method, please refer to the foregoing “Add User” section.
DWP002
Page: 181
DigiWin
For Administrator
9.3.2.9
Add Ordinary Organization
Click “Actions” on the right of “Organization” data entry and then select “Add Regular Organization” to
add a regular organization under this organization.
For regular organization addition method, please refer to the foregoing “Add Organization” section.
9.3.2.10 Add Suborganization
Click “Actions” on the right of “Organization” data entry and then select “Add Location” to add a
location under this organization.
For location addition method, please refer to the foregoing “Add Organization” section.
DWP002
Page: 182
DigiWin
9.3.3
For Administrator
Sites
9.3.3.1
View Site List
Press “View All” to view all created site lists.
9.3.3.2
Search Site
Enter the keyword of site name in the search field and press “Search”, and results that meet the conditions
will be listed below.
9.3.3.3
Add Site
On the top of site page click “Add” to open the add site page.
After entering related data, click “Save”.
DWP002
Page: 183
DigiWin
For Administrator
Name: Enter the name of the site
Description: Enter the description of the site
Membership Type: Select site type (open/restricted/private)
Active: Check it for immediate activation of the site
9.3.3.4
Delete Site
Click “Actions” on the right of “site” data entry to be deleted and then select “Delete”.
9.3.3.5
Edit Site Data
Click “Actions” on the right of “site” data entry and then select “Edit Settings” to access edit page.
DWP002
Page: 184
DigiWin
For Administrator
Basic Information:Press “Details”, user can edit the site;Press “Site URL”, user can edit the friendly url
and virtual hossts;Press “Site Templete”,user can see template of the site.
Name: Enter the name of the site
Description: Enter the description of the site
Membership Type: Select site type (open/restricted/private)
Active: Check it for immediate activation of the site
Site ID: Show the site ID
Public Pages/Private Pages: Show public page and private page of the site.
DWP002
Page: 185
DigiWin
For Administrator
9.3.3.6
Manage Site Page
Click “Actions” on the right of “site” data entry and then select “Manage Pages” to manage the site’s
open page and private page.
For page management method, please refer to “Management Page” section in “Start using DigiWin
Portal”.
9.3.3.7
Set Site User Role
Click “Actions” on the right of “site” data entry and then select “Manage Memberships” to assign roles to
the site’s users.
DWP002
Page: 186
DigiWin
For Administrator
After accessing the setting page, click “Actions” on the right of “user” data entry and then select
“Assign Site Roles”.
select the role to be set, check the user and press “Update Associations”.
DWP002
Page: 187
DigiWin
For Administrator
9.3.3.8
Designate Site Member
Click “Actions” on the right of “site” data entry and then select “Manage Memberships” to designate
members for the site.
After accessing the setting page, check the users designated for this site and press “Save”.
DWP002
Page: 188
DigiWin
For Administrator
9.3.3.9
Withdraw Site Member
Click “Actions” on the right of “site” data entry and then select “Leave” to withdraw the user from the
site.
9.3.4
User Group
9.3.4.1
View User Group List
Press “View all” to view all created user group lists.
9.3.4.2
Search User Group
Enter the keyword of the user group name in the search field and click “Search”, and results that meet the
conditions will be listed below.
9.3.4.3
Add User Group
On the top of user group page click “Add” to open the add user group page. After entering related data,
click “Save”.
DWP002
Page: 189
DigiWin
For Administrator
Name: Enter the name of the user group
Description: Enter the description of the user group
User Group Site: The site of a user group cannot be accessed directly by end users. The pages of a
user group will be shown automatically as part of the public or private pages of the personal site of
each user who belongs to the user group. To allow users to make changes, enable the customization
options of each page.
9.3.4.4
Delete User Group
In “User Group” data entry check the data to be deleted and press “Delete”.
If the user group to be deleted has designated members, the prompt message saying “Cancel the
association between the user group and its members” will pop up during deletion. Press “OK” to
delete the user group and cancel its association with its members.
DWP002
Page: 190
DigiWin
For Administrator
9.3.4.5
Edit User Group Data
Click “Actions” on the right of “User group” data entry and then select “Edit” to access edit page.
For user group data, please refer to the foregoing “Add User Group” section.
9.3.4.6
Set User Group Data Permission
Click “Actions” on the right of “User group” data entry and then select “Permissions” to access the user
group’s data permission setting page.
Permission setting:
Data entity
User group
Permitted to Assign Members, Delete, Manage Announcements, Permissions,
Update, View
DWP002
Page: 191
DigiWin
For Administrator
9.3.4.7
Set User Group Site Data Permissions
Click “Actions” on the right of “User group” data entry and then select “Site Permissions” to access the
user group site’s data permission setting page.
Permission setting:
Data entity
User group site
Permitted to Add Page, Add Page Variation, Add Site Pages Variation, Assign
Members, Assign User Roles, Configure Applications, Delete,
Export/Inport Application Info, Export/Inport Pages, Manage
Announcements, Manage Archived Setups, Manage Pages, Manage
Staging, Manage Teams, Permissions, Publish Staging, Publish to
Remote, Update, View, View Members, View Staging
9.3.4.8
Manage User Group Page
Click “Actions” on the right of “User group” data entry and then select “Manage Site Pages” to manage
the user group’s open page and private page.
DWP002
Page: 192
DigiWin
For Administrator
For page management method, please refer to “Management Page” section in “Start using DigiWin
Portal”.
When the user is designated as a member of the group for the first time, the group page set here will
be automatically copied to the user’s own page.
9.3.4.9
Designate User Group Member
Click “Actions” on the right of “User group” data entry and then select “Assign Member” to designate a
member for the user group.
After accessing the setting page, check the user designated for the user group and press “Update
Associations”.
DWP002
Page: 193
DigiWin
For Administrator
9.3.4.10 View the Site’s Public Pages
Click “Actions” on the right of “User group” data entry and then select “Go to the Site’s Public Pages” to
open the site’s public page.
DWP002
Page: 194
DigiWin
9.3.5
For Administrator
Role
9.3.5.1
Default Role
Portal user roles are divided into three types: ordinary, site and organization. Each type has the following
default roles:
Type
Ordinary
Classification
Site
Organization
System
administrator
Administrator
Site Administrator
Organization Administrator
Owner
Owner
Site Owner
Organization Owner
Site Member
Organization Member
Ordinary user Power User、User
Guest
Guest
─
─
Default roles are preserved items and may not be deleted. Any role added by the user must not have
the same name as preserved items do.
DWP002
Page: 195
DigiWin
For Administrator
9.3.5.2
View Role List
Press “View All” to view all created role lists.
9.3.5.3
Search Role
Enter the keyword of role name in the search field and press “Search”, and results that meet the
conditions will be listed below.
9.3.5.4
Add Role
On the top of role page press “Add” and select a role type to open the add role page (Regular Role/ Site
Role/ Organization Role).
DWP002
Page: 196
DigiWin
For Administrator
After entering related data, click “Save”.
Name: Enter the name of the role
Title: Enter the title of the role
Description: Enter the description of the role
9.3.5.5
Delete Role
Click “Actions” on the right of “Role” data entry to be deleted and then select “Delete”.
Default roles may not be deleted, while any role added by the user may be deleted.
9.3.5.6
Edit Role Data
Click “Actions” on the right of “Role” data entry and then select “Edit” to access edit page.
DWP002
Page: 197
DigiWin
For Administrator
For role data, please refer to the foregoing “Add Role” section.
9.3.5.7
Set Role Data Permission
Click “Actions” on the right of “Role” data entry and then select “Permissions” to access the role’s data
permission setting page.
Permission setting:
Data entity
Role
Permitted to Assign Members, Define Permissions, Delete, Manage
Announcements, Permissions, Update, View
9.3.5.8
Define Role Permission
Click “Actions” on the right of “Role” data entry and then select “Define Permissions” to define
permission for the role.
DWP002
Page: 198
DigiWin
For Administrator
In “Define Permissions” page, user can add permissions from the “Add Permissions” menu; permissions
of the role are listed “Summary”, press “Delete” can cancel the permission.
There are six parts in “Add Permissions” menu: “Portal”, “Site Content”, “Site Applications”, “Control
Panel: Personal”, “Control Panel: Site”, “Control Panel: Portal”.
DWP002
Page: 199
DigiWin
For Administrator
Portal permission: The items available for setting mainly include general, password policies, roles, sites,
user and organizations.
All Portlets have different functions, so the activities available for permission setting may also differ.
The other parts are concerned with portlet permissions. For example, for “Message Boards” Portlet, the
permission to activities such as setting, browsing, adding type and suspending can be set.
DWP002
Page: 200
DigiWin
For Administrator
9.3.5.9
Assign Role Member
Click “Actions” on the right of “Role” data entry and then select “Assign Members” to designate
members for the role.
After accessing the setting page, the user can see “Current” and “Available” tabs. “Current” tab displays
current users with permission and “Available” tab displays all users.
Check the user designated for the role and click “Update Associations” to change the permission.
DWP002
Page: 201
DigiWin
For Administrator
9.3.5.10 View Role Member
Click “Actions” on the right of “Role” data entry and then select “View users” to view the list of
members designated for the role.
9.3.6
9.3.6.1
Password Policy
View Password Policy List
9.3.6.2
Search Password Policy
Enter the keyword of the name of password policy in the search field and press “Search”, and results that
meet the conditions will be listed below.
DWP002
Page: 202
DigiWin
For Administrator
9.3.6.3
Add Password Policy
On the top of password policy page click “Add” to open the add password policy page. After entering
related data, click “Save”.
Name: Enter the name of the password policy
Description: Enter the description of the password policy
Changeable: Check it for the user to modify his/her password.
Password policy also provides other following settings, which may be selected according to
requirement:
DWP002
Page: 203
DigiWin
For Administrator
General
Name: Enter the name of the password policy
Description: Enter the description of the password policy
Changeable: Check it for the user to modify his/her password.
Change Required: Check it for the need to modify the password when the user login in Portal
for the first time.
Minimum Age: Set how long the user must wait for the next modification.
DWP002
Page: 204
DigiWin
For Administrator
Password syntax check
Syntax Check Enabled: Check it if the password must not be meaningful words, or must meet
character length
Allow Dictionary Words: Check it if the user can set meaningful words
Minimum Alpha Numeral: Set the minimum alpha numeral
Minimum Length: Set the minimum length of the password
Minimum Lower Case: Set the minimum lower case of the password
Minimum Numbers : Set the minimum numbers of the password
Minimum Symbols: Set the minimum symbols of the password
Minimum Upper Case: Set the minimum quantity of capital letters in user password
Historical password
DWP002
Page: 205
DigiWin
-
For Administrator
History Enabled: Check it for the system to preserve the user’s previous password to avoid
repeating previous password
History count: Set the count of historical passwords preserved
Password Expiration
Expiration Enabled: Check it if the user password will expire after the designated time and must
be changed
Maxinum Age: Set how often the password must be changed
Warning Time: Set the advance time of change notification before the password expires
Grace Limit: Set the times the user can log in without changing his/her password after the
password expires
Lockout
Lockout Enabled: Check it to activate account suspension conditions
Maximum Failure times: Set the maximum allowable times of wrong password entries and the
account will be suspended if the allowable times are exceeded
Reset Failure Count: Set the time of keeping the record of wrong password entries
DWP002
Page: 206
DigiWin
-
For Administrator
Lockout Duration: Set the period of suspending user account
9.3.6.4
Delete Password Policy
Click “Actions” on the right of “Password policy” data entry to be deleted and then select “Delete”.
Default password policy may not be deleted, while any password policy added by the user may be
deleted.
9.3.6.5
Edit Password Policy Data
Click “Actions” on the right of “Password policy” data entry and then select “Edit” to access edit page.
For password policy data, please refer to the foregoing “Add Password Policy” section.
DWP002
Page: 207
DigiWin
For Administrator
9.3.6.6
Set Password Policy Data Permission
Click “Actions” on the right of “Password policy” data entry and then select “Permissions” to access the
password policy’s data permission setting page.
Permission setting:
Data entity
Password policy
Permitted to Delete, Update, Permissions, View, Assign Members
9.3.6.7
Assign Password Policy Member
Click “Actions” on the right of “Password policy” data entry and then select “Assign Members” to
designate members for the password policy.
DWP002
Page: 208
DigiWin
For Administrator
After accessing the setting page, check the user designated for the password policy and click “Update
Associations”.
9.3.7
Portal Setting
9.3.7.1
Authentication
This feature enables the administrator to set login credential parameters.
General:
-
DWP002
How do users authenticate: (By Email Address/ By Screen Name/ By User ID)
Page: 209
DigiWin
For Administrator
Allow users to automatically login
Allow users to request forgotten passwords: If this is checked, then users can request to have a
new password sent to to their email address.
Allow strangers to create accounts: If this is checked, then users can request to have a password
reset link sent to their email address.
Allow strangers to create accounts with a company email address
Require strangers to verify their email address
CAS: Set CAS SSO credential parameters, which are automatically set by Portal. Any change by the
administrator is not recommended.
-
DWP002
Enabled
Import from LDAP: If this is checked, then users authenticated from CAS that do not exist in
the portal will be imported from LDAP. LDAP must be enabled
Login URL: Set the CAS server login URL. Users will be redirected to the CAS login page
when authenticating into the portal
Logout URL: Set the CAS server logout URL. Set this if you want the portal's logout function
to trigger a CAS logout
Server Name: Set this to enable deep linking into the portal (e.g. http://localhost:8080). Do not
set this if the CAS service URL is set
Server URL: Set the CAS server domain URL.
Service URL: Set this to disable deep linking into the portal
(e.g.http://localhost:8080/c/portal/login). Do not set this if the CAS server name is set.
No Such User Redirect URL: Set the URL to redirect a user to, if the user can authenticate with
CAS but cannot be found in the portal. If import from LDAP is enabled, then the user will be
redirected if he cannot be found or could not be imported from LDAP
Page: 210
DigiWin
For Administrator
9.3.7.2
Default User Association
This feature enables the administrator to automatically associate a newly created user with designated
community, role and user group.
Apply to Existing Users: Check to apply the changes to existing users. Changes take effect the next
time a user signs in.
Site: Set the site which a newly created user automatically joins. Several sites can be set and only
one site may be entered in each line
Roles: Set the role which a newly created user automatically plays. Several roles can be set and only
one role may be entered in each line
User Groups: Set the user group which a newly created user automatically joins. Several user groups
can be set and only one user group may be entered in each line
DWP002
Page: 211
DigiWin
For Administrator
9.3.7.3
Reserved Credentials
This feature enables the administrator to set “Reserved Credentials”. While a user is being created,
reserved account name and E-mail may not be used.
Screen Names: Set the name of account to be reserved. Several names can be set and only one name
may be entered in each line
Email Addresses: Set the E-mail to be reserved. Several Email Addresses can be set and only one
Email Address may be entered in each line
9.3.7.4
Email Notifications
This feature enables the administrator to make settings on system E-mails.
DWP002
Page: 212
DigiWin
Sender: Set the information of the sender
-
For Administrator
Name: Enter the name of the sender
Address: Enter E-mail address of the sender
Account creation notification: Set the content of notification E-mail for account creation
DWP002
Page: 213
DigiWin
For Administrator
-
Enabled: Check it for the system to send E-mail notification after successful account creation
-
Subject: Enter the subject of notification E-mail for account creation
Body with Password: Enter the body of the email sent to users upon registration. This should
contain the user's automatically generated password
-
Body without Password: Enter the body of the email sent to users upon registration. This will
not contain the user's password
Password change notification: Set the content of notification E-mail for password change
-
Subject: Set the subject of notification E-mail for password change
Body: Set the content of notification E-mail for password change
[$…$] in subject and content is a specific parameter and will be replaced with actual content while
the E-mail is being sent. Parameters are described below:
Parameter
Description
FROM_ADDRESS
Sender’s E-mail
FROM_NAME
Sender’s name
PORTAL_URL
Portal host address
REMOTE_ADDRESS
Remote address of the explorer
DWP002
Page: 214
DigiWin
For Administrator
REMOTE_HOST
Remote host of the explorer
TO_ADDRESS
Address of E-mail recipient
TO_NAME
Name of E-mail recipient
USER_AGENT
Remote user agent of the explorer
USER_ID
User’s ID
USER_PASSWORD
User’s password
USER_SCREENNAME
User account
9.3.7.5
Display Setting
This feature enables the administrator to set the system’s default language, time zone and Logo icon.
Default Language: Select the system’s default language. Languages currently available: Chinese
(Taiwan), Chinese (China), English
Available Languages:
Time zone: Select the system’s default time zone
Allow community administrators to use their own Logo:
Logo: Press “Change” to upload Logo picture file
Optimal display of Logo: 140*45 (maximum support: 500*45 pixels) background-removed picture
file (gif, png…)
DWP002
Page: 215
DigiWin
For Administrator
Default Regular Theme
Default Mobile Theme: Mobile themes only apply to WAP devices.
Default Control Panel Theme
9.3.8
Monitoring
This feature enables the administrator to view and manage the record of browsing Portal pages.
9.3.8.1
View Live Sessions
View the list of currently online users in Portal, the time of their most recent link to the webpage and the
number of hits.
Click any link to view activity history (access URL).
Press “Kill Session” to forcibly suspend Session, and the user will be immediately logged out.
DWP002
Page: 216
DigiWin
9.3.9
For Administrator
Site Templates
Site Templates allow you to define pages and web content to include when creating sites. Administrators
may define and edit site templates as well as their permissions.
9.3.9.1
View Site Templates
Press “View All” to view all created site templates.
9.3.9.2
Add Site Template
Press “Add” to create a new site template.
Name: Enter the name of site template
Description: Enter the description of site template
Active: Enable the site template
Allow Site Administrators to Modify the Pages Associated with This Site Template: Set this to allow
site administrators to add, remove, or configure applications and change page properties. If site
administrators modify a page, changes to the original site template page are no longer propagated. If
DWP002
Page: 217
DigiWin
For Administrator
this option is set, it is possible to disallow modifications from specific pages through the page
management tool
9.3.9.3
Delete Site Template
Click “Actions” on the right of “Site Templates” data entry to be deleted and then select “Delete”.
If the site template has been used, deletion is prohibited.
9.3.9.4
Edit Site Template
Click “Actions” on the right of “Site Templates” data entry and then select “Edit” to access edit page.
DWP002
Page: 218
DigiWin
For Administrator
Configuration: Click “Open site template”, user can access edit page to edit the site pages by
opening a new window page
For site template data, please refer to the foregoing “Add Site Template” section.
DWP002
Page: 219
DigiWin
For Administrator
9.3.9.5
Manage Site Page
Click “Actions” on the right of “Site Templates” data entry and then select “Manage Pages”.
For page management method, please refer to “Management Page” section in “Start using DigiWin
Portal”.
9.3.9.6
View Site page
Click “Actions” on the right of “Site Templates” data entry and then select “View Pages” to view the new
page which applies the site template.
DWP002
Page: 220
DigiWin
For Administrator
9.3.9.7
Site Template Permission Setting
Click “Actions” on the right of “Site Templates” data entry and then select “Permissions” to access the
permission setting page.
Permission setting:
Data entity
Site Template
Permitted to View, Permissions, Delete, Update
The user who is using the site template could be given permissions.
9.3.9.8
Export Site Template
Click “Actions” on the right of “Site Templates” data entry and then select “Export” to export site
template.
DWP002
Page: 221
DigiWin
For Administrator
Export the selected data to the given Lar file name: The default name of the exported site template is
“ name of the site template – export time(YYYYMMDDHHMMSS) ” and filename extension is .lar
user could determine settings of exported site template in few parts: pages, applications, other
Pages is checked by default, user can not change
DWP002
Page: 222
DigiWin
For Administrator
There are four options could be checked to export: setup, archived setups, user preferences and data
Theme: When selected on export, the top level theme and all of its files will be included in the
resulting LAR files. When selected on import, the theme will be installed and all the pages will be
configured to use it
DWP002
Page: 223
DigiWin
For Administrator
Categories: When selected, all categories will be exported or imported, keeping their hierarchy.
During import, duplicate categories will not be created if a category with same name already exists
9.3.9.9
Import Site Template
Click “Actions” on the right of “Site Templates” data entry and then select “Import” to import site
template.
Click “瀏覽” to choose a file
user could determine settings of imported site template in few parts: pages, applications, other
Pages is checked by default, user can not change
If this option is chosen, all the pages in this site that are not present in the import LAR file will be
deleted
DWP002
Page: 224
DigiWin
For Administrator
There are four options could be checked to import: setup, archived setups, user preferences and data
Theme: When selected on export, the top level theme and all of its files will be included in the
resulting LAR files. When selected on import, the theme will be installed and all the pages will be
configured to use it
Categories: When selected, all categories will be exported or imported, keeping their hierarchy.
During import, duplicate categories will not be created if a category with same name already exists
9.3.10 Page Templates
Page Templates allow you to select a page to use and portlets to be included when creating a page.
Administrators may define and edit page templates as well as their permissions. Or disable for all portlets.
9.3.10.1 View Page Templates
Press “View All” to view all created page templates.
DWP002
Page: 225
DigiWin
For Administrator
9.3.10.2 Add Page Template
Press “Add” to create a new page template.
Name: Enter the name of page template
Description: Enter the description of page template
Active: Enable the page template
9.3.10.3 Delete Page Template
Click “Actions” on the right of “Page Templates” data entry to be deleted and then select “Delete”.
9.3.10.4 Edit Page Template
Click “Actions” on the right of “Page Templates” data entry and then select “Edit” to access edit page.
DWP002
Page: 226
DigiWin
For Administrator
Configuration: Click “Open Page Template”, user can access edit page to edit the site pages by
opening a new window page
For page template data, please refer to the foregoing “Add Page Template” section.
9.3.10.5 Page Templates Permissions
Click “Actions” on the right of “Page Templates” data entry and then select “Permissions” to access the
permission setting page.
DWP002
Page: 227
DigiWin
For Administrator
Permission setting:
Data entity
Page Template
Permitted to View, Permissions, Delete, Update
9.3.10.6 Export Page Template
Click “Actions” on the right of “Page Templates” data entry and then select “Export” to export page
template.
DWP002
Page: 228
DigiWin
For Administrator
Please refer to “Export Site Template” section in “Site Templates”.
DWP002
Page: 229
DigiWin
For Administrator
9.3.10.7 Import Page Template
Click “Actions” on the right of “Page Templates” data entry and then select “Import” to import page
template.
DWP002
Page: 230
DigiWin
For Administrator
Please refer to “Import Site Template” section in “Site Templates” of “Portal Basic Setting”.
9.3.11 Plugins Configuration
Plugins Configuration allows administrators to configure which portal roles have access to certain
plugins.
DWP002
Page: 231
DigiWin
For Administrator
9.3.11.1 Portlet Plugins Configuration
Press “Portlet Plugins” tag, portlet plugins will be listed below.
Click hyperlink of a portlet plugin to enter the configuration page.
Active: Enable the portlet plugin, it could be selected in page
Permissions: You can assign or remove permissions to a role from the roles administration using the
action "Define Permissions" for the role of choice.
DWP002
Page: 232
DigiWin
For Administrator
9.3.11.2 Theme Plugins Configuration
Press “Theme Plugins” tag, theme plugins will be listed below.
Click hyperlink of a theme plugin to enter the configuration page.
Active: Enable the portlet plugin
Roles: Enter one role name per line. A user must belong to one of these roles in order to add this
DWP002
Page: 233
DigiWin
For Administrator
plugin to a page
9.3.11.3 Layout Template Plugins Configuration
Press “Layout Template Plugins” tag, layout template plugins will be listed below.
Click hyperlink of a layout template plugin to enter the configuration page. The setting refer to “Theme
Plugins Configuration”.
9.4 Integration Settings
9.4.1
Service Mapping
Please refer to “SSO system setting” section in “Integration setting”.
9.4.2
Company
Please refer to “Company” section in “Integration setting”.
9.5 Server
9.5.1
Server Administration
9.5.1.1
View Portal Authorization Information
This feature enables the administrator to view the version and authorization information of Portal system.
DWP002
Page: 234
DigiWin
For Administrator
Portal version No. and release date: In the following figure, version No. is 6.1.2.1 and release date is
10/07/2013
Number of authorized personnel: Number of persons authorized by Portal system
Uptime: Accumulated online time of Portal system
DWP002
Page: 235
DigiWin
For Administrator
9.5.1.2
View System Resource
This feature enables the administrator to view resource utilization of Portal system.
Memory usage:
- Used Memory: Capacity already used by Portal system
- Total Memory: Capacity already assigned to Portal system
- Maximum Memory: Capacity which may be assigned to Portal system
The percentage of memory used is graphically displayed
Other functions:
- Run the garbage collector to free up memory: Execute Java Garbage Collector to release
memory
- Clear content cached by this VM: Remove cache of the VM
- Clear content cached across the cluster: Remove cache of Cluster
- Clear the database cache: Remove cache of database
- Reindex all search indexes: The time required is long if data size is big; it is recommended that it
be done only when necessary
- Reset preview and thumbnail files for Documents and Media portlet
- Generate thread dump
- Verify database tables of all plugins
- Clean Up Permissions: This process removes the assignment of some permissions on the Guest,
User and Power User roles in order to simplify the management of "User Customizable Pages".
Notably, "Add To Page" permissions is removed from the Guest, and User role for all portlets.
Likewise the same permission is reduced in scope for Power Users from portal wide to scoped to
"User Personal Site".
DWP002
Page: 236
DigiWin
For Administrator
9.5.1.3
View System Log Level
This feature enables the administrator to view Portal system’s Log (system log) type and hierarchy.
Log (system log) records alarms and error messages of application programs, and provides useful
information for inspection in case of any system abnormality.
Adjusted Log level is effective only during current server runtime. Portal system will return to
default after system restart.
9.5.1.4
View System Attribute
This feature enables the administrator to view Portal system’s attributes and their settings.
DWP002
Page: 237
DigiWin
For Administrator
9.5.1.5
File Upload Setting
This feature enables the administrator to make file upload settings, including file size limit, allowable file
extensions…
Document and Media
Maximum file size: Set upper limit on the size of uploaded file in file management
Maxinum Thumbnail Height: Set maximum height of thumbnails displayed in document and
media
Maxinum Thumbnail Width: Set maximum width of thumbnails displayed in document and
media
Allowable File Extensions: Set the type of files that can be uploaded in file management
Document and media provides the function of thumbnail view, which displays original picture with
big dimension in a thumbnail with fixed dimension. Setting of maximum thumbnail dimension: Take
the setting of 150 as an example. If the length or width of the original picture exceeds 150, then
thumbnail dimension is 150; if the dimension of the original picture is below 150, there will be no
thumbnail.
User Images:
DWP002
Page: 238
DigiWin
-
For Administrator
Maximum File Size: Set upper limit on the size of uploaded file for user picture
9.5.1.6
Mail Server Setting
This feature enables the administrator to make Mail server setting.
DWP002
Page: 239
DigiWin
For Administrator
Inbound server
Incoming POP server: Enter the address of inbound server
Incoming Port: Enter the inbound server port
Use a Secure Network Nonnection: Check it for activation of secure network connection
User Name, Password: Enter account and password of login E-mail server
Outbound server
-
Outgoing SMTP server: Enter the address of outbound server
Outgoing Port: Enter the outbound server port
Use a Secure Network Connection: Check it for activation of secure network connection
User Name, Password: Enter account and password of login E-mail server
The maximum mail attachment size: Enter the upper limit of the mail attachement size
-
Manually specify additional JavaMail properties to override the above configuration: Enter
the additional settings
9.5.1.7
Server Automatic Shutdown Setting
This feature enables the administrator to set the time and prompt message of shutting down Portal system
automatically.
Number of Minutes: Enter the countdown of automatic shutdown (in the unit of minutes)
Custom Message: Enter the prompt message of shutdown. After setting, click “Shut down”.
This setting operates only once. The user-defined shutdown setting will be removed after automatic
shutdown of Portal system.
After the setting of automatic shutdown, the shutdown prompt message will appear on the top of Portal
system view for all users.
DWP002
Page: 240
DigiWin
For Administrator
To cancel automatic shutdown, please access the shutdown setting view and just click “Cancel
shutdown”.
9.5.2
Portal Instances
Portal Instances allow administrators to run more than one portal instance on a single server. Data for
each portal instance are kept separate from every other portal instance.
Instance ID, Web ID, Virtual Host, Mail Domain, Number of Users, Maxinum Number of Users are listed.
Click any link of “Portal Instances” data entry to access edit page.
DWP002
Page: 241
DigiWin
For Administrator
ID: ID of the Portal instance
Web ID: Web ID of the Portal Instance
Virtual Host: Enter the the virtual host information
Mail Domain: Enter the mail domain
Max Users: Enter the maximum users. If unlimited, enter 0
9.5.3
Plugins Installation
Plugins Installation allows users to install additional plugins from the Liferay repository or install custom
plugins
This Plugins Installation will be replaced with Liferay Marketplace in future Liferay releases. Read
more about Liferay Marketplace (http://www.liferay.com/marketplace) for additional details.
DWP002
Page: 242
DigiWin
For Administrator
9.5.3.1
View Portlet Plugins
Press “Portlet Plugins” tag, portlet plugins will be listed below.
The setting refers to “Portlet plugins Configuration” section in “Plugins Configuration” of “Portal Basic
Setting”.
9.5.3.2
View Theme Plugins
Press “Theme Plugins” tag, theme plugins will be listed below.
The setting refers to “Theme plugins Configuration” section in “Plugins Configuration” of “Portal Basic
Setting”.
9.5.3.3
View Layout Template Plugins
Press “Layout Template Plugins” tag, layout template plugins will be listed below.
DWP002
Page: 243
DigiWin
For Administrator
The setting refers to “Layout Template plugins Configuration” section in “Plugins Configuration” of
“Portal Basic Setting”.
DWP002
Page: 244