1
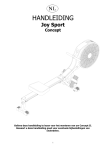
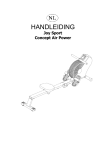
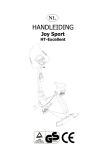
USER MANUAL
Joy Sport
Experience
Joy Sport Importer
Fitness-Import
Timmermannsweg 46
5813 AP Ysselsteyn (LB)
[email protected]
www.joysport.nl
Dear customer,
We want to thank you for having chosen a JOY SPORT product, and wish you a lot of
fun and success during training with your JOY SPORT exercisers.
Please note and follow the enclosed safety and assembly instructions carefully.
If you have questions please do not hesitate to contact us.
Guarantee,
This guarantee covers all manufacturing and material flaws on JOY SPORT products
purchased from an authorized JOY SPORT dealer for a period of 12 months from
purchase.
If you wish to make a claim under the guarantee, JOY SPORT shall be entitled to
repair or replace the defective unit or part at its discretion.
The owner of the unit must pay for the transport costs and any dealer's workshop
costs.
To make a claim under the guarantee, take your guarantee card to your dealer.
The dealer will then take the necessary action.
If this is not possible, contact your national JOY SPORT importer.
The following are not covered by the guarantee : normal wear and tear and the
consequences of improper treatment or damage caused by the purchaser or third
persons and faults which are due to other circumstances.
Claims may not be made under the guarantee if modifications have been made to the
original construction or equipment or if JOY SPORT original parts were not used to
repair the unit.
In no event the manufacturer shall be liable for incidental or
consequential losses, damages or expenses in connection with exercise products.
Fitness-Import
Timmermannsweg 46
5813 AP Ysselsteyn (LB)
[email protected]
www.joysport.nl
CONTENTS
1. Safety Tips………………………………………………………….1
2. Features…………………………………………………………….2
3. Installation…………………………………………………..…….2
3.1Dissection View ………………………………………………..2
3.2 List of parts……………………………………………...…….3
3.3 Assemble Guides…………………………………………………..4
4. Notice……………………………………………………………8
Safety Tips
Please read the following instructions before you start exercising with the equipment.
1. The working area of the products is L2200*W1500*H2000mm. Keep children and pets
away from the equipment when it is in use. No children operate or reach this equipment
without adult guidance.
2. Only one person should use the machine for one time.
3. Wear suitable close, the loser clothes are easy twisted into the equipment, also please wear
right shoes. Never use equipment barefooted.
4. Equipment must be put in a clean and flat floor before exercise. Keep the machine away
from water or don’t leave it outside.
5. Warm-up your body before exercising. If you experience dizziness, nausea, chest pain or
other abnormal symptoms Stop your exercise immediately, and consult your physician. Don’t
do exercise before or after meal.
6. To avoid injuries, never place any part of your body between or near any moving part.
7. This equipment is only for home use, and it belongs to Class HB level
8. The machine isn’t suitable for medical treatment. The security of this equipment has
passed EN957 certification
9. The total weight of equipment is 45 Kg±0.5Kg, the max loading weight is 120 Kg±0.5Kg
10. Stop using this machine and contact the supplier when the machine doesn’t work
normally.
11. Please take off your clothing and footgear after finishing exercise, and clean them.
12. Please use the machine following all instructions. Do not operate against instructions.
13. Please pay much more attention when you uplift or move the machine so as not to injure
your backside. Must move it in the right way or ask someone to help you.
Warning: Consult your physician before any exercise, and make sure you
don’t have health problem. Please keep this manual in order to check when
necessary
Features & Basic information:
This exercise equipment belongs to Aerobic Exercise. This training objective is to increase
oxygen inhaled and blood recycling, by long time training (stamina exercise). Active your
heart blood cycling and lung breath system, so that all the organs of your body can get plenty
of oxygen and nutrition. Thus the whole body maintains in a good state of fitness.
The equipment is designed according to the drive theory of bicycle; the resistance adopts
friction theory. Adjust the resistance by tuning the knob, and brake by using the speediness
handle. The equipment is safety during the exercise. It is suitable for use in home, office, inn
and clubs.
1. Make sure the equipment is stable, before you start to exercise. If the ground isn’t plain,
you can adjust four adjustable feet (17) to plain state
2. By adjusting the height of stand pipe (10), slide the seat support pipe(11) to a proper
position, after that please adjust the height of gripe (19) according to your body size.
3. Set the right resistance for yourself by adjusting tuning knob (14). You may do exercise
three times every week, very time it takes an hour to exercise, the best working effect is
that the HBF reaches 110-150 times/min.
4. The drive mode equipment is bi-directive drive. Please press speediness handle to brake,
when aggressive exercise is performed, it will stop immediately. Never leave the seat pad
until all the working parts are completely stopped.
Installation
Step 1: According the drawing and parts list, take out all the parts from carton.
Part List:
List of parts
No.
Description
Qty
1
M10 nut cap
4
2
M10 flat mat
6
3
M10XL45mm screw
4
4
Main support
1
5
Back bottom pipe
1
6
Front bottom pipe
1
7
Water jug
1
8
Pedals
9
Water jug support
各1
1
10
Seat stand pipe
1
11
Seat support pipe
1
12
Seat
1
13
Adjusting screw
3
14
Adjusting knob
1
15
Speedless handle
1
16
Pulley
2
17
Adjusting feet
4
18
Fixup pipe
1
19
Gripe
1
20
M10X22 Hexagonal Screw
2
21
M5X12 Cross-head Screw
2
22
M5 Flat Mat
2
23
Friction-flake
1
24
M12XP1.0 nut cap
2
25
M6 Nylon Nut
2
26
13#~15#open spanner
1
27
1
28
14#~17#open spanner
6mm Hexagonal Spanner
29
5” Cross-head Screwdriver
1
1
Step 2: According to the following Fig, fix the back bottom pipe (5) to the main support (4)
by using M10XL45mm screw (3), flat mat (2) and M10 nut cap (1)
Step 3: Fix the front bottom pipe (6) to the main support (4) by using M10XL45mm screw
(3), flat mat (2) and M10 nut cap (1), referring to the following Fig, and then fasten all
the screws,
Step 4: Assemble the water jug support (9) to main support (4), and fix by M5 flat mats
(22),M5*12 cross-head screws(21), then lay the water jug. As the following Fig
Step 5: Insert the right and left pedals(8) to the crank, then use the 15# open spanner to
fasten. Refer to the following Fig,
Step 6: Loose the adjusting screw (13), and insert the fixup pipe (18) to the top square pipe of
main support (4), then choose the right height and fasten. Refer to the following Fig.
Step 7: Assemble the gripe(19) to fixup pipe by using 6mm Hexagonal Spanner, M10X22
Hexagonal Screw(20) with M10 flat mats(2).As the following Fig。
Step 8: Turn the adjusting screw (13),and insert the seat stand pipe (10) to the main support
(4), and screw down the adjusting screw (13). Before adjusting the height, make sure the
adjusting screw (13) is loose, and then choose the right height between gripe and seat support
pipe, and fix the adjusting screw (13). As per the following Fig.
Step 9: Pull the adjusting screw (13), and insert seat support pipe (11) to seat stand pipe (10),
then fasten. as per the below Fig, insert seat pad(12) to seat support pipe(11),then use13#
open spanner
Step 10: When installation is finished, please carefully check all the screws and nuts fastened
or not.
Notice
1. Check all the nuts, nut caps and pedals in securing state regularly. If you find any defective
parts, don’t do any exercise until you repair well.
2. Pay more attention to easy damage parts, for instance friction-flake (23), if you find it
doesn’t work or fall off, replace it. As the following Fig
3. If you find the chain is loosing, as the following Figs, loose M12*P1.0 nut cap(24), and
adjust M6 Nylon nut(25) by using 10mm-sleeve-spanner.When you feel it is ok, fasten
M12*P1.0 nut cap(24).