1
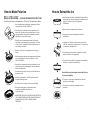
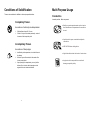
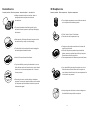
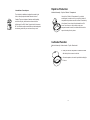
Contents
The Characteristics of Polar Ice........................................................................ 2
What makes Polar Ice Unique? ................................................................. 2
The Concept of Polar Ice ........................................................................... 2
Precautions ....................................................................................................... 3
Specification ...................................................................................................... 3
Composition and Function ................................................................................ 4
How to Make Polar Ice ...................................................................................... 6
Steps of Assembly ..................................................................................... 6
How to Extract the Ice ....................................................................................... 7
Conditions of Solidification ................................................................................ 8
Completely Frozen..................................................................................... 8
Incompletely Frozen .................................................................................. 8
Multi-Purpose Usage ........................................................................................ 9
Cracked Ice ................................................................................................ 9
Decorative Ice .......................................................................................... 10
3D Sculpture Ice ....................................................................................... 11
Polar Ice Tray
User Manual
Rapid Ice Production ............................................................................... 13
Ice Bucket Function ................................................................................. 13
Q&A ................................................................................................................. 14
Difficulty with ice removal ........................................................................ 14
Bubbles in the ice .................................................................................... 14
Lengthy freeze time ................................................................................. 15
Adjustments in freezer settings ............................................................... 15
1 The Characteristics of Polar Ice
What makes Polar Ice Unique?
• Easy
to Use:
Just
add
water,
crystal clear
clear ice.
¾
Easy
to Use:
Just
add
water,and
andplace
placeininthe
thefreezer
freezer to
to enjoy
enjoy crystal
• Convenient:
Unique patented design allows for easy retrieval of ice.
ice.
• Multi-purpose:
Versatile,patented
customizable
adjust
to your
desire, able to ¾
Convenient:Unique
designcomponents
allows for easy
retrieval
of ice.
ice in a large
assortment
of shapescomponents
and sizes. adjust to your desire,
¾make
Multi-purpose:
Versatile,
customizable
able to make ice in a large assortment of shapes and sizes.
The Concept of Polar Ice
Mimicking the
thenatural
naturalice
iceformation
formationpatterns
patterns
lakes
and
rivers,
Polar
Mimicking
ofof
lakes
and
rivers,
Polar
ice ice begins
freezing
from
the
surface
layer,
while
the
water
below
remains
unfrozen
(much like
begins freezing from the surface layer, while the water below remains unfrozen.
the
bottom
of
a
pond).
The
Polar
Ice
Icebox
has
an
insulated
bottom,
so
that only
(Much like the bottom of a pond.) The Polar Ice Icebox has an insulated bottom,
the
surface
of
the
water
is
exposed
to
the
cold.
By
allowing
the
water
to
freeze
from
so that only the surface of the water is exposed to the cold. By allowing the
top to bottom, layer by layer, air and impure substances are compressed to the botwater to freeze from top to bottom, layer by layer, air and impure substances
tom. They then form a layer of “white” or opaque ice, which can easily be removed.
are compressed to the bottom. They then form a layer of “white” or opaque ice,
which can easily be removed.
Precautions
Cleaning & Precautions
●
using
forfor
the
withwith
detergent
and
water
z When
When
using
thefirst
firsttime,
time,please
pleaseclean
cleanse
detergent
and
water
before
use.
before use.
●
not clean
in a dishwasher.
z DoPlease
cleanse
with soft cloth or sponge, do not scrub with rough objects
● Dosuch
not submerse
insulated
trayscratching,
in water. which may make ice more
as bristled the
brushes
to avoid
● Clean
with
a
soft
cloth
or
sponge,
do
not scrub with rough objects such as difficult to remove.
bristled brushes to avoid scratching, which may make ice more difficult to z Keep box away from heat sources as it is made out of plastic.
remove.
z Fill with chilled or room temperature water, please do not fill with hot
● Keep box away from heat sources.
water.
● Fill with chilled or room temperature water, do not fill with hot water.
z Non-microwavable, do not place in ovens.
● Non-microwavable, do not place in ovens.
z This
This
product
designedexclusively
exclusivelyfor
forproducing
producing ice;
ice; please
●
product
is is
designed
please do
donot
notuse
useit
for
other
purposes.
it for any other purpose.
z The
The
transparency
theice,
ice,and
andthe
thetime
timeitittakes
takes to
to freeze
freeze will
will vary
●
transparency
ofofthe
vary de
depending
onwater
the water
quality
the
freezer it is of
placed
in.
pending
on the
quality
andor
the
temperature
the freezer.
z Handle
Handle
sensiblytotoavoid
avoidfrostbite.
frostbite.
●
iceice
sensibly
z Falls
Falls
from
high
placesororheavy
heavyimpact
impactwill
willdamage
damage and
and crack the
●
from
high
places
the casing.
casing.
●
iceice
is is
hard
bottom
of the
with
or room
z If the
If the
hardtotoremove,
remove,rinse
flushthe
bottom
of box
withbox
water
or water
leave in
leave
at room temperature
for 1-3
minutes.
slide ice
out gently.
temperature
for 1-3 minutes.
Then
slide iceThen
out gently,
if removed
withIf removed
with force,
icecrack. may crack.
brute force,
ice may
Specification
Dimensions of Casing (outer): L 229 x W 183 x H 134 mm
Dimensions of Casing (inner): L 174 x W 134 x H 55 mm
Dimensions of Ice:
Ice Block:600 ml
Ice Sculpture:250 ml
Materials: Food container plastics PP & ABS
Colors: Black, White, Red or Customized color
2 3 Clear
ClearIce
Icecompartment
compartment
Material:
Material:PP
PP
Main
ToTo
hold
thethe
Mainfunction:
function:With
Withsmall
smallholes
holesononbottom.
bottom.
hold
clear
ice
block.
clear ice mass.
Composition and Function
Suction
Cupule handle
“WhiteIce”
Ice”compartment
compartment
“White
Material:PP
PP
Material:
Main
ice block.
Mainfunction:
function:To
Tohold
holdopaque
opaque(white)
ice mass.
Top lid
Base
Base
Material: ABS Insulating
Material: ABS Insulating
Main function: to insulate the bottom of the ice box for
Main function: to insulate the bottom and sides of the ice
controlling how the ice begins freezing. It can also
box for controlling how the ice begins freezing. It can also
doubleas
asan
anice
icebucket
bucketininroom
roomtemperature.
temperature.
double
Decorative lid and picks
Sculpture compartment
Toplid
lid
Top
Material:ABS
ABSInsulating
Insulating
Material:
Mainfunction:
function:to
toact
actas
asthe
thelid
lidfor
forthe
theice
icebucket.
bucket.
Main
Clear ice compartment
Sculpture
Sculpturecompartment
compartment
Material: PP
Material: PP
Main Function: to act as a mould to shape the ice.
Main Function: to act as a mould to shape the ice.
"White ice” compartment
Decorativelid
lidand
andpicks
picks
Decorative
Material:PP
PP
Material:
MainFunction:
Function:to
toprevent
preventthe
theice
icefrom
fromrising
risingduring
duringproMain
production,
compresses
Protruding
duction,
compresses
ice. ice.
Protruding
pickpick aids in the
aids
in theofremoval
of ice.
removal
ice.
Base
Cupule handle
Suction
Material:handle
Silicone
Material: Silicone
Main Function:Sticks to container for easy ice removal.
Main Function: Sticks to container for easy lid removal.
4 5 How to Make Polar Ice
How to Extract the Ice
Steps of
of Assembly
Assembly – PLEASE READ BEFORE FIRST USE!
Steps
●z
When
the water
has has
frozen
sufficiently,
the edge
of the
When
the water
frozen
sufficiently,
the edge
of ice will protrude 5mm above the edges of the container due to the ice will protrude 5mm about the edges of the
expansion. (Please refer to the Conditions of
container. (Please refer to the Conditions of
Solidification.)
Solidification.)
You
need: Clear iceice
compartment
+ “WhiteIce”
Ice”
Compartment + Base
Basicwill
Components:clear
compartment+“White
Compartment+base
●zPour
coldcool
water
intointo
the the
“White
Ice”Ice”
compartment, filling it Pour
water
“White
close to its brim. DO NOT OVERFILL.
compartment, filling it close to its brim.
quality
of ice
produced
depending
●zTheThe
quality
of ice
produced
will will
varyvary
depending
on the water
Tap water
produce
ice, but we on used.
the water
used. will
Tap still
water
will stillclear
produce
suggest
of suggest
areas with
undrinkable
tap water to clear residents
ice, but we
inhabitants
of areas
use boiled or mineral water instead.
with undrinkable tap water to use boiled or
mineral
water
● Place
the clear
iceinstead.
compartment inside the “White Ice” compartment, and slowly begin pressing down. The water zin the
Place
theIce”
clear
ice compartment
upon
thethe
“White
“white
compartment
will seep
into
clear ice
layer
through
small
holes.
Ice” compartment, and slowly begin pressing
down. The water in the “white Ice” compartment
● Press down on clear ice compartment until it will go no will seep into the clear ice layer through small
further.
holes.
●zContinue
the compartment
Press pouring
down onwater
clear into
ice compartment
untiluntil
it willdesired level. (The thickness of the ice can reach up to 4 cm).
go no further.
DO NOT OVERFILL.
z Continue pouring water into the compartment
● Place
the
ice compartments
in the insulated
base,
until
desired
level. (The thickness
of the ice
can being careful
notup
toto
spill
any water between the compartments reach
4 cm)
and the insulated base.
● Remove the ice compartments from the base.
z Remove the ice components from the base.
Prying
the sides
will dislodge
the “white
●z
Prying
uponupon
the sides
will dislodge
the “white
ice” ice”
compartment.
compartment.
● If separation is difficult, run water over the base of the “white ice” compartment, or set aside for 1-3 minutes until z If separation is difficult, please drizzle the base of the
it is possible to dislodge the ice.
“white ice” compartment with water, or set aside for
1-3 minutes until it is possible to dislodge the ice.
● Continue prying on the sides to dislodge the “white ice” block from the clear ice compartment.
z Continue prying on the sides to dislodge the “white
● The ice will be very stiff so if prying does not dislodge the ice” mass
thecold
compartment.
ice block,
run itfrom
under
water briefly.
z The ice will be very stiff so if prying does not dislodge
the ice mass, run it under water, which will help
dislodge the “white ice” mass.
Avoid direct and prolonged contact with the ice
● The water level should be, at most, level with the sides of the base or lower.
Avoid direct and prolonged contact with the ice
to prevent frostbite.
to prevent
frostbite.
z Fixate ice compartments snugly in base.
● Place tray inside freezer – DO NOT put the top lid on zduring
Thethe
water
will be
level with the sides of the base.
freezing
process.
● The clear ice in the upper compartment can be used z
Theinclear
in the upper compartment can be used
directly
yourice
beverages.
directly in your beverages.
● The “white” ice in the lower compartment can be discarded.
● It will take 8-12 hours for the ice to freeze sufficiently.
z Upon completion of assembly, place components
● During the freezing process, please refrain from in freezer.
excessively
opening the freezer door or
thetake
icebox.
zmoving
It will
8-12 hours for the ice to freeze
sufficiently.
● MAKE SURE THERE IS NO WATER SPILLED BETWEEN zTHEDuring
the freezing process,
please
refrain from
COMPARTMENTS
AND THE
INSULATED
BASE, AS excessively
opening
the
freezer
door
or jostling
DAMAGE MAY OCCUR TO THE BASE DURING
FREEZING!
the icebox.
z
6 The “white” ice in the lower compartment can be
discarded, or used for chilling items in an icebox or
icepacks.
7 Conditions of Solidification
Multi-Purpose Usage
There are two conditions of solidified ice that require special attention.
Cracked Ice
Assembly method:Basic components
Completely Frozen:
● Briefly run room-temperature water over the clear ice z Flush the clear-ice with room-temperature
block, the difference in temperature will cause the ice
water, and the difference in temperature will
to crack.
cause the ice to crack.
be cautious of extremely low temperatures
¾
¾
Sufficient freeze time of 8-12 hours.
“White ice” layer will be raised prominently; center of
ice mass will feel completely solid.
● Use the back of a spoon or another hard object to
zstrike
Use
back of a spoon or another hard object
thethe
ice.
to strike the ice.
strikeswhen
will striking
break the
iceice.
into chunks of
●z
USELight
CAUTION
various sizes.
Incompletely Frozen:
be cautious of sharp edges
¾
¾
¾
Insufficiently cold temperature, or less than 8 hours in
the freezer.
White ice” layer will be raised, but the center of the
ice may remain liquid.
Upon opening the compartments, you may find the
bottom of the ice hollow, with sharp edges on the
edges of the holes. Handle with caution.
● Light strikes will break ice into chunks of various sizes.
●z
Irregular
ice chunks
are perfect
for use with
coldwith
Un-uniform
ice chunks
are perfect
for use
beverages,
especially
whisky.
beverages, especially whisky.
8 9 Decorative Ice
3D Sculpture Ice
Assembly method:Basic components+decorative object+ decorative lid
Assembly method:Basic components+Sculpture compartment
● Adding a decorative object such as flora, letters, or z Adding a decorative object such as flora,
photographs before ice production will make
letters, or photographs before ice production
decorative ice.
will make decorative ice.
z To prevent decorations from floating to the top,
decorative
lid must
be floating
place ontotop
keep
● To the
prevent
decorations
from
thetotop,
the the
object(s)
below
water.
decorative lid must be place on top to keep the object(s) sculpture
compartment
can mould
the clear
ice
●zTheThe
sculpture
compartment
can mould
the clear
ice into
an ice
sculptureitsforversatility
decorative
to improve
andpurposes.
enjoyment.
below water.
After assembly, fill the tray with water, then
place on the decorative ice layer slowly, at a
slanted
angle.fill the tray with water, then place on the ● After
assembly,
z decorative
The lid will
stick slowly,
to the at
surface
of the
water,
ice layer
a slanted
angle.
keeping the decorative objects beneath the
water.
z The
Allow
the
tray
hours oftothe
solidify
the the ●
lid will
stick
to 8-12
the surface
water,inkeeping
decorative
freezer. objects beneath the water.
z
●zFill the
ice” ice”
layerlayer
2/3 with
water.
Fill “white
the “white
2/3 with
water.
●zPlace
the clear
ice compartment
on top.
Place
the clear
ice compartment
on top.
● Slowly press the sculpture mould down, the water will z Slowly press the sculpture down, the water will seep
seep through the holes.
through the holes.
● When the sculpture compartment layer reaches the z When the sculpture compartment layer reaches the
bottom, press down so slide flaps click firmly into place. bottom, press down so slide flaps click firmly into
Excess water will exit through vents.
place.
Excess water
willbase
exit through
vents.
● Place
compartments
in the
and place
in the freezer.
z Place compartments in base and put into freezer.
If you have difficulty removing the decorative
ice,8-12
avoidhours
flushing
with water
this will cause
● Allow
to freeze
in theas
freezer.
z
the ice to crack.
Allow the ice to sit in room temperature for 1-3
minutes
easy removal.
● If you
have for
difficulty
removing the decorative ice, do not z
flush with water as this will cause the ice to crack. Instead, allow the ice to sit at room temperature for 1-3 minutes
z Decorative ice can be used for plating or
for easy removal.
centerpiece purposes.
z For example, Japanese cuisine such as
sashimi can
be placed
a decorative
ice
● Decorative
ice can
be usedupon
for plating
or centerpiece
block
to
improve
its
freshness
and
appeal.
purposes. For example, Japanese cuisine such as sashimi ● If you have difficulty removing the sculpture ice, do not z If you have difficulty removing the sculpture ice,
flush with water as this will cause the ice sculpture to avoid flushing with water as this will cause the ice
crack. Instead, allow the ice to sit at room temperature for sculpture to crack.
1-3 minutes for easy removal.
z Allow the ice to sit in room temperature for 1-3
minutes for easy removal.
can be placed upon a decorative ice block to improve its
freshness and appeal.
●z
Avoid
pouring
water
into holes
as shown
in diagram
as Avoid
pouring
water
into holes
as shown
in diagram
this as
willthis
affect
shape
the ice
sculpture.
willthe
affect
the of
shape
of the
ice sculpture.
10 11 Introduction of ice sculpture:
The
is a traditional
sculptural
form used
by theby
z inukshuk
The inukshuk
is a traditional
sculptural
form used
Inuit, the
a tribe
of
people
who
inhabit
the
arctic
circle
of
Inuit, a tribe of people who inhabit the arctic
Canada. They are sculptures of welcome and friendship,
circle of Canada.
and this is why they have also been chosen to be the
z They are sculptures of welcome and friendship, and
official logo of the 2010 Winter Olympics held in Vancouver,
this is why they have also been chosen to be the
BC. An inukshuk sculpture would make an ideal centerpiece
official logo of the 2010 Winter Olympics held in
to welcome guests into your own home for any event.
Vancouver, BC.
z An inukshuk sculpture would make an ideal
centerpiece to welcome guests into your own home
for any event.
Rapid Ice Production
Method of Assembly:Only the “White ice” Compartment
Use only the “White ice” Compartment. If you wish to
make regular ice cubes in a hurry, use just the “white ice”
z If you wish to make ice cubes in a short amount
compartment to produce common ice cubes. Place directly
of time the “white ice” compartment will
in the freezer for ice cubes in the shortened time of 2-4
produce common ice cubes.
hours. Once frozen, run the ice block under roomz Place directly in freeze for ice cubes in the
temperature water to crack, then strike with the back of a
time
2-4
hours.
spoonshortened
to break up
theofice
pieces.
Ice Bucket Function
Method
handle
+ Top
lid +lid
Base
bucket.
Method of
of Assembly:
Assembly Suction
:Cupule
handle
+ Top
+ Base
● Ready ice cubes can be placed in the base and sealed z Ready ice cubes can be placed in the base,
with the top lid to use as an ice bucket.
and sealed with the top lid to use the ice bucket
function.
● At room temperature, ice can be kept without melting for z
In room temperature, ice can be kept without
2-3 hours.
melting for 2-3 hours.
12 13 Q&A
Difficulty with ice removal
The Polar Ice Tray set compartments are designed to fit airtight, to prevent the
escape or spillage of air or water. Sometimes, due to the jostling of
compartments after assembly, water may leak into other compartments. When
this water freezes, ice removal may become difficult.
Solutions:
¾ Flush with water or set aside:Flush the outside of the ice box with water,
¾
or leave in room temperature for a few minutes. It will become easier to
extract the ice once it has begun to defrost.
While putting the compartments together, be careful as to not let water
seep into the other compartments.
The inner walls of the ice tray are smooth, if it becomes cracked or scratched,
ice removal may also become difficult.
Points of Caution:
¾ When cleansing the compartments, avoid using rough surfaces such as
pads or the rough side of the sponge.
¾ Avoid dropping the tray, or hitting it upon hard surfaces to remove the ice.
Under Fast Freezing Conditions (coldest freezer setting): Air dissolved in
Under Very Slow Freezing Conditions: If the freezing time is further
the water will be moved towards the surface of the water due to the shape of
increased, the air will not be in directly pressurized into bubbles during the
the ice crystals. These bubbles are miniscule, with poor floating abilities, so
course of freezing. The air is instead diffused in all four directions, with ample
some will adhere to the surface of the ice crystals. If the freezing time is quicker,
time to
escape.
there
are no
or “exit
in the
ice,on
thethe
ice
these
bubbles
willBecause
be trapped
inside
thebubbles
ice before
they trails”
are able
to exit
will
be
crystal
clear.
If
your
freezer
is
set
to
a
very
low
temperature,
you
may
surface. The clusters of bubbles will refract and bend light, causing the ice to
see needle
like
appear
“white”
orbubbles
opaque. inside your ice. To solve this problem, simply lower
your freezer settings to a slightly higher temperature.
If you find
largeFreezing
bubbles Conditions
inside your ice,
it is most
likely setting):
due to jostling
orall
Under
Slower
(medium
freezer
Before
movement
before solidification.
Please
the
bubbles of
in the
the ice
ice tray
are trapped,
the air bubbles
mayavoid
groupopening
togetherthe
to form
larger
bubbles.
Larger
bubbles
will bethe
able
rise to theperiod.
surface at a faster
freezer
or moving
the ice
tray during
icetoformation
speed, therefore escaping the ice before thetrapped. While doing this, the
bubbles may leave behind small exit trails in the ice.
Lengthy freeze time
Lengthy
freeze time
It will generally
take 8-12 for the ice cubes to freeze to their ideal form. The
It will generally take 8-12 hours for the ice cubes to freeze to their ideal form.
time will vary depending on the variations in freezers. In comparison to
The time will vary depending on the variations in freezers. In comparison to
ordinary ice cubes, Polar Ice cubes take longer to solidify due to the following
ordinary ice cubes, Polar Ice cubes take longer to solidify due to the following
reasons:
reasons:
¾ The ice cube is approximately 600c.c.,four times the ordinary150c.c.
trays.
● The ice cube is approximately 600cc, four times the ordinary150cc trays.
¾
Insultedbase
baseprevents
preventsice
icefrom
fromfreezing
freezingfrom
fromthe
thelower
lowerlayers.
layers.
● Insulated
If the ice has not solidified after 12 hours, this is most likely due to insufficiently
in your freezer,
too many
the freezer.
Iflow
thetemperatures
ice has not solidified
after 12or
hours,
this isitems
mostinlikely
due to a too high
temperature in your freezer, or too many items in the freezer.
Bubbles in the ice
Under
Freezing
Conditions
(coldest
freezerinsetting):
Under Fast
Rapid
Freezing
Conditions:
Air dissolved
the waterAir
thedissolved
water willinbe
the
water
will
be
moved
towards
the
surface
of
the
water
due
to
the
shape
of
moved towards the surface of the water due to the shape ice crystals.
These
the
ice
crystals.
These
bubbles
are
miniscule,
with
poor
floating
abilities,
so
bubbles are miniscule, with poor floating abilities, so some will adhere to the
some
willofadhere
the surface
the ice crystals.
If the freezing
time is quicker,
surface
the icetocrystals.
If theoffreezing
time is quicker,
these bubbles
will be
these bubbles will be trapped inside the ice before they are able to exit on the
trapped inside the ice before they are able to exit on the surface. The clusters
surface. The clusters of bubbles will refract and bend light, causing the ice to
of bubbles will refract and bend light, causing the ice to appear “white” or
appear “white” or opaque.
opaque.
Adjustments in freezer settings
Adjustments
in tofreezer
Generally, a freezer set
-18°C has settings
the optimum freezing temperature. This
would be the
“middle”setting
of the
Generally,
a freezer
set to -18°C
hasspectrum.
the optimum freezing temperature. This
Setting
your
freezer
to
“low”
will
cause
for ayour
longer
freezing
time, but it will
would typically be the “middle” setting.
Setting
freezer
to a “warmer”
improve
the
transparency
of the
ice cubes.
setting
will
cause
for a longer
freezing
time, but it will improve the transparency
Setting
freezer
“high”
on tothe
other setting,
hand, may
may produce
producesmall,
small,
of
the iceyour
cubes.
Settingtoyour
freezer
“coldest”
needle-likebubbles
bubblesin
inthe
theice.
ice.
needle-like
Under Slower Freezing Conditions (medium freezer setting): Before all
Under Slower Freezing Conditions: Before all the bubbles in the ice are
the bubbles in the ice are trapped, the air bubbles may group together to form
trapped,
the airLarger
bubbles
may will
group
together
to to
form
Larger
larger
bubbles.
bubbles
be able
to rise
the larger
surfacebubbles.
at a faster
bubbles
will
be
able
to
rise
to
the
surface
at
a
faster
speed,
therefore
escaping
speed, therefore escaping the ice before thetrapped. While doing this, the
the ice may
before
they
are trapped.
doing
this, the bubbles may leave
bubbles
leave
behind
small exitWhile
trails in
the ice.
behind small exit trails in the ice.
14 15