1
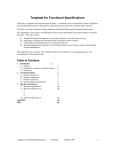
1
Prepared by: John Shobbrook & Bob Shobbrook
(Please email amendments or suggestions to [email protected])
RUNNING CICADA
•
Log On to Monsoon under your own account name.
•
Open a new Xterm or Shelltool window, at the prompt type cicada & <Enter> this will
open the basic [Cicada v3.2.5] tool bar.
•
On the Cicada tool bar click on Start Observing. Click on WFI
•
Enter the observers name, check □ Automatically archive raw data - Click on OK
•
When the Cicada Control window opens, click on Close Shutter
•
Click on SDSU - click on Readout Mode select Fast
•
Click on Instrument Controls, click on Filter: F_40 Initialise the filter wheel by
clicking on Get Filter Position. Close the window by clicking on Dismiss
•
At the start of each new observing run - NOT each night, click on Tools - click on
Start Teldisk... - click on Clear Disk, click on OK Clear the disk (this will clear the
previous observer’s data from the hard disk and create a new directory for your data) click on Quit Teldisk
•
Check that the ‘Output Image Directory’ name is correctly set by clicking on Options –
click on Preferences - in Directory enter /data/monsoon1/cicada/username
• Insert an appropriate entry in ‘Prefix’ to e.g. ccd - wfi
Whilst in Options → Preferences, select …
Show messages window at startup
Reset number of exposures to 1 after each sequence of >1 exposures
Toggle binning when switching from no-save to save
•
Flush count = 1
•
Screen Numbers … GIT = 0
Pipeline = 0 Gsfind = 0
(The left monitor is ‘1’ – the right monitor is ‘0’)
•
Focusing Parameters … Steps 5
•
Star profile radius (pixels) 10
•
Click on Apply
•
At the top of the Preferences Window, click on General, click on Image Display and
Scaling
•
The ‘Display Options’ setting are …
Scaling Algorithm …
Adaptive
Median
Sample size = 1000
%of image to readout before scaling = 25
Contrast adjustment = 0.50
Num SDs tolerance before rescaling = 0.10
•
Click on Apply if you have adjusted these settings - click on OK
Ximtool = 1
First focus position 0.001
Position step 1.000
2
WFI
•
In the Cicada control window click on Tools - Click on, Start GIT this will open the
CICADA_Ximtool window and the Graphic & Imaging Tool Window.
•
Click on the
icon towards the right of the ximtool window, to open the [Ximtool
Control] window.
TELESCOPE SETUP
•
(Delay this step if you are taking Dome Flats) Open the dome shutters.
•
At the dome console ensure that the ‘Dome Lights’ ‘Dome’ ‘Telescope’ and ‘Tracking’
pushbuttons are switched ‘ON’ (upper button pressed IN) – leave the key switch on.
•
Set the Auto – Slew/Set rotary switch on the dome console to Slew/Set
•
Lower the telescope using the Declination – Slew ‘S’ button to about -70° (beyond the
SCP) raise the floor level, remove the lens cap and store it on the bracket behind the
dome console.
•
Lower the floor, raise the telescope to the vertical using the ‘N’ slew button.
•
Set the Auto – Slew/Set switch to Auto
FILLING THE DEWAR
(N.B. Take Dome Flats before filling the dewar to avoid LN2 spillage).
•
In Cicada click on SDSU click on Show Temperatures
•
Record the pre-fill dewar temperature as shown in the FOCALPL ‘Actual’ column,
record the dewar vacuum as displayed on the WFI.
•
In the Dome - remove the lens cap BEFORE filling the dewar to prevent LN2 spillage.
•
Press the large red STOP button to the right of the dome console.
•
Fill the dewar from the LN2 bottle. If the pressure is below 7, connect the orange spiral
airline attached to the pier to the LN2 bottle ‘Vent’ plug to reduce the filling time.
•
Press the "Emergency Stop Reset" button (illuminated beside the STOP button)
•
In Cicada click on SDSU click on Read Temperatures
•
Record the post-fill dewar temperature and vacuum.
•
Fully lower the observatory floor.
•
Turn off all light within the dome, The incandescent light switch is to the right of the
balcony door, the fluorescent light switch is on the dome below the shutter. The red
lights are controlled from the dome console.
N.B. If you need to use the shutter windscreen, the ‘raise’ and ‘lower’ control buttons are
located on the dome beneath the shutter opening.
BIAS FRAMES
•
In the Cicada control window set…
•
Object Name: BIAS
•
Exposure Type: □ BIAS - □ Save and Display
•
Exposure Options - number of exposures: 5
3
WFI
•
Click on Options, click on Show Regions Window Check that ‘region 1’ is highlighted
with a blue box and that the X Y Width and Height settings are set for the full CCD.
X-offset (XO) = 0, Y-offset (YO) = 0, Width = 8392, Height = 8272.
•
Set the Overscan Columns to 0 (This Overscan option is for the 2.3m DBS Astromed
controllers. The WFI SDSU controllers have overscan and bias regions preset).
• Click on Dismiss - Click on Expose
Bias frames should display between 2,500 ~ 4,500 counts
(The standard deviation of bias frames can be calculated by using GIT - Load the bias
frame into ximtool – using the left mouse button drag a box onto the image - click on the
Statistics Icon (Bar Graph) - the standard deviation should be between 2 and 3. Clear the
box by right clicking on the box and choosing ‘destroy’.)
FLAT FIELDS
Sky Flat preparation…
These should be taken about 15 to 30 minutes after sunset or before sunrise. The key to this
is to be about 20º away from the zenith in the direction opposite to where the Sun is setting
or rising. Sky Flats tend to be better than Dome Flats. As a general guide …
•
In the late afternoon, slew the telescope in R.A. away from the sunset to the Sidereal
Time + 1 hour. In the early morning slew to the Sidereal Time – 1 hour. In summer
slew in Declination to – 20º. In winter slew in Dec to – 40º, in spring and autumn slew to
about – 30º
Dome Flat preparation …
(N.B. Take dome flats before filling the dewar to avoid LN2 spillage.)
•
In the E.T.S. Configuration – Configure menu, set the Dome Control to Manual
•
Enter the dome, ensure that the console Auto – Slew/Set knob is switched to Slew/Set
•
Using the Declination – Slew ‘S’ button, lower the telescope to about -78º (beyond the
SCP) (Telescope ZD = 70° as shown on the ETS monitor)
•
Rotate the dome to an Azimuth of 70° (as shown on the ETS monitor) or align the red
and black mark on the dome with the marks on the wall behind the dome console.
•
Rotate the dome so that the dome flat screen and telescope are in alignment.
•
Partially open the upper shutter to faintly illuminate the screen, turn off all dome lights.
•
If you need to use dome lights, use the tungsten lights only!
Cicada settings for Sky/Dome flats …
•
In Options → Show Regions Window use the X Y Width and Height settings for the
full CCD. Set x-offset = 0, y-offset = 0, Width = 8392, Height = 8272.
•
Object Name: Sky_Flat or Dome_Flat, Exposure Type: □ Flat
•
Start taking Flats with Exposure Options set to □ Display Only
•
Set the Overscan Columns to 0 (This Overscan option is for the 2.3m DBS Astromed
controllers. The WFI SDSU controllers have overscan and bias regions preset).
•
For Dome Flats start with an exposure duration of between 10 ~ 25 seconds.
4
WFI
•
Read the counts in Ximtool and adjust the exposure duration or light entering the dome
until you obtain a value of about 30,000.
•
When the correct number of counts have been reached, set the Exposure Options to …
□ Save and Display
•
Click on Expose – take at least 5 flat fields with each filter in use.
•
With Sky Flats, offset the telescope between exposures by about 2 arcmin, by switching
the control room paddle to Set and pressing the ‘N’ button for about one second.
•
Aim for brightness counts in the vicinity of 10,000 ~ 30,000.
DARK FRAMES (Dark current is small and dark frames are generally not necessary).
POINTING THE TELESCOPE – CALIBRATING THE POINTING
•
Ensure that the Auto – Slew/Set rotary knob on the dome console is set to Auto and that
the dome floor is fully lowered.
•
Using the E.T.S. Configuration – Configure menu, set the Dome Control to Auto
•
Click on the Motion drop down menu, click on Track
•
Enter the Name (Optional) R.A., Dec and Epoch (Optional) of the target object.
•
Click on Track - Take an exposure to ensure that the target has been centred.
•
Click on Configuration – Calibrate Pointing, enter the R.A. and Dec of the target, click
on Calibrate, click on Close
FOCUSING THE TELESCOPE
(Using the WFI Automated Focusing sequence)
•
In Cicada under the Actions drop down menu, click on Do_Focus_Sequence
•
Follow the prompts or refer to p. 17 of the Cicada User’s Manual
•
To highlight a star, drag across it with the left mouse button then click the right-moost
icon in Cicada ‘Read Marked Region from Image Tool’
•
Move the focus using the “In” and “Out” buttons on the round paddle by 0.03 - 0.05 units
between each image, starting at about 31.70 (as displayed on the small red LED focus
readout box)
(Using the MaxIm DL autoguider CCD …)
•
In the Focus Tab check the Continuous box, then click the Reset button.
•
Ensure that the Subframe is set to Left = 0 Top = 0 Width = 320 Height = 240
•
•
•
Set an appropriate exposure time (e.g. 10 seconds).
In the Focus Tab, click on the Start Focus button. After the first exposure click the
Abort button.
Click the Auto button, this will place a box around the brightest star in the field.
•
Click on Start Focus exposures will continuously cycle. Click on the Inspect tab.
•
Focus the telescope using the In and Out buttons on the control room hand paddle.
5
WFI
N.B. The ‘In’ button increases the focus position value, (as displayed on the control room focus
position digital display) the ‘Out’ button decreases the value.
The ‘Inspect’ Tab will display the information needed to focus the telescope including the
FWHM in pixels and the amplitude (‘Max’ window) of the brightest pixel. Best focus is obtained
with the FWHM value as small as possible and the ‘Max’ value as large as possible. The
narrower the 3-D isometric plot, the better the focus.
The plate scale of the WFI is 0.375 arcsec per pixel, 25 arcsec per mm or 2.5 pixels per sec of
arc e.g. if a star image is 5 pixels across then the seeing is 2 arcsec. The field of view covers 52
arcminutes with the diagonal being 1.2 degrees.
You can also monitor focus as you work by keeping an eye on the images. The 40-inch has
astigmatism such that images are elongated at about 45 degrees from NW to SE when the focus
setting is too high and from NE to SW when the focus is too low.
You can use this astigmatism to focus the telescope:
If the star images are elongated …
NW-SE => focus is too high: Press the “Out” button (LED readout decreases)
NE-SW => focus is too low: Press the “In” button (LED readout increases)
Typical focus values are in the range from 31.65 – 31.88
(Using the main WFI CCD mosaic …)
•
Using the control room hand paddle, slew the telescope to the South of the chosen focus
field then back North to cancel gear backlash - stop with the Declination seconds
readout on “00” (use the ‘Guide’ option for fine control).
•
Using the hand paddle, cancel focus backlash by increasing the focus readout with the IN
FOCUS button until you are beyond your start position. Press the OUT focus button to
come back down to your start position (say 32.40).
•
Set Exposure Type to … □ Object and □ Display Only
•
.Set Exposure Options to … Exposures 1 Duration 10 seconds
□ No pre-flush and □ No readout
•
Click on Flush to clear the previous image from the CCD array then click on Expose
•
Using the ‘N’ paddle button set to Guide move the telescope by 20” of arc (watch Dec
change on the E.T.S monitor, declination will decrease as the telescope moves North).
•
Lower the focus readout by 0.05 by using the OUT paddle button, record the focus
position.
•
Take a second 10 second duration exposure by clicking on Expose
•
Using the ‘N’ paddle button move the telescope by another 20” of arc.
•
Lower the focus readout by 0.05 by using the OUT paddle button, record focus position.
•
Take another 10 second exposure.
6
WFI
•
REPEAT the telescope move, focus and expose steps until you have taken 6 exposures at
differing focus positions. (To clearly identify between the first and last image in the
subsequent readout, you could also slight shift the last image in R.A.)
•
For the final exposure CANCEL the ‘ □ NO READOUT’ option in Exposure Options
•
Examine the displayed image, the exposure sequence will be from right to left, (if you
used the ‘N’ button to move the telescope) note which focus position provides the best
image – reset the focus position accordingly – repeat the focus sequence if necessary. If
the image is “streaked” re-boot Cicada.
AUTOGUIDING
•
If the autoguider PC has to be restarted:
1. When asked for a password, just click ‘Cancel’
2. The ‘VNC server’ is m40slave:0 Password is in the back of the 40” CCD Temp
Log Book.
3. After Windows starts, click on the ‘MaxIm DL’ icon.
4. Scroll down in the MaxIm DL window so that you can click on ‘Guide CCD’s –
WFI’.
•
In the Cicada Tools menu, click on Start GSFind this will open the ‘Guide Star Finder’
– this shows an outline of the main and guiding CCDs relative to GSC stars.
•
Enter the RA and Dec of your target in the ‘Field’ box, enter the appropriate Equinox.
•
Set the Position Angle (degrees) to 90 - set the magnitude limits.
•
Click on Actions - click on Read GSC
•
Use the left mouse button to drag the green CCD mosaic so that you place one of the
available guiding CCD’s on top of a suitable guide star. The R.A. and Dec of the main
CCD array centre will be shown in the Detector box.
(To obtain data on any star on the chart, place the cursor onto the star and press the
spacebar. The RA, Dec and Magnitude of the star will be highlighted in the ‘Objects Found’
window).
•
On the Autoguider computer click on the Guide CCDs-WFI bar at the bottom of the
screen or on the WFI Guider Selector icon.
•
Click on the guiding CCD which you placed on top of the guide star in GSFind.
•
Click on the MaxIm DL – Autoguider Image bar to return to the autoguider screen.
•
Using the E.T.S. Motion then Track menu, slew the telescope to the R.A. and Dec
position as shown in the Guide Star Finder ‘Detector’ box.
•
Click on Open Shutter in Cicada (this allows light to fall onto the Autoguiding CCD
without actually taking an exposure).
•
In Maxim DL, click on the Guide Tab. Set the Exposure time to 7 seconds, enter the
declination of the guide star (degrees only) into the Declination Box
•
Click on the Expose button - click on Start
•
Click the mouse cursor on the star as displayed in the Autoguider Image window.
•
Click on the Track button in the Guide Tab
•
Click on Start - Autoguiding will commence.
7
WFI
DATA TAKING
•
In Cicada click on Open Shutter to pass an image to the autoguider.
•
Set Exposure Type to □ Object, □ Save and Display, set the exposure time.
•
Set the Overscan Columns to 0 (This Overscan option is for the 2.3m DBS Astromed
controllers. The WFI SDSU controllers have overscan and bias regions preset).
• Click on Close Shutter
** Note: There is a Shutter Priming Delay **
• The shutter takes a few seconds to prime, so wait 8-10 seconds after closing the shutter
(e.g. after acquiring the guide star) before exposing.
• When the shutter is primed and the star image in the autoguider fades – click on Expose
•
When the image has finished reading out, click on Open Shutter to re-acquire the guide
star.
Check images as they readout in Ximtool – if the star images are “streaky” then you may have to
re-boot Cicada to solve the problem. If the autoguider image fails to reappear during the
exposure – ABORT the exposure, reset the Run No. and repeat the Data Taking procedure.
(If you have trouble re-booting Cicada, kill all Cicada processes that are running by typing at
the username@monsoon% prompt … ps –ef | grep cicada and then the kill %1 or kill (process
number) - Remove the ‘core’ file with rm core).
XIMTOOL
N
When Ximtool reads out … North is to the right, East is down.
E
DATA ARCHIVING
•
The WFI data area is /data/monsoon1/cicada/username
•
Data are archived from MONSOON to the DDS4 DAT tape drive. The DDS4 drive will
take DDS2, DDS3 and DDS4 tapes. Data files on MONSOON can be archived in TAR
format by using the following example procedure:
•
Move the cursor to a blank area of the new screen and click the right mouse button.
•
Click the left mouse button on Programs, drag to the right to open a new Shell Tool
window.
•
Type: cd /data/monsoon1/cicada/username (data directory) <Enter>
•
Type: ls (this will list the files in the directory)
•
Type: allocate mt1 <Enter> (N.B. mt1 is compressed mode mt0 is uncompressed
mode)
•
Type mt rew (to rewind the tape to the start)
•
Type: tar cv *·fits (shift8 dot fits) <Enter> N.B. if this is a tape with image files
already on it - type: etar instead of tar
•
If using etar, when asked if you wish to use the next file number, press Y <Enter>.
•
When the prompt returns type: mt rewind <Enter>
•
Type: deallocate mt1 <Enter>
8
WFI
•
Press the ‘Eject’ button on the tape drive to eject the tape.
•
tar cv *.fits (copies all fits files) - tar xv (retrieves data off a tape) - tar tv (shows
what is on the tape)
SHUTDOWN
TELESCOPE MOTION …
•
Slew the telescope to the current Sidereal Time and a Declination of about –31 00 00
• When the telescope is in position, at the E.T.S. click on Motion – click on Halt
AUTOGUIDER
• Click on Stop leave the software running.
CICADA
• Leave the software up and running (There is no option for Continuous Flush etc.)
IN THE DOME/TELESCOPE
•
Set the Auto – Slew/Set rotary switch on the dome console to Slew/Set
•
Lower the telescope using the Declination – Slew ‘S’ button, raise the floor level, replace
the lens cap.
•
Close the dome shutters.
•
Turn on the dome white lights.
•
Lower the floor, raise the telescope to the vertical using the ‘N’ Declination - Slew
button.
•
In Cicada click on SDSU click on Read Temperatures
•
Record the pre-fill dewar temperature as shown in the FOCALPL ‘Actual’ column,
record the dewar vacuum as displayed on the WFI.
•
Fill the dewar from the LN2 bottle. If the pressure is below 7, connect the airline to
reduce the filling time.
•
In Cicada click on SDSU click on Read Temperatures
•
Record the post-fill dewar temperature and vacuum.
•
Fill in the Log Sheet (on the dome console shelf). At the completion of your observing
run, complete the MSSSO Online Comment file.
ACCESSING THE MSSSO ONLINE COMMENT FILE
Observer comment and fault files exist for logging alterations to the instrument and for user
comments. WFI users are required to record their experiences in this file for the benefit of
others. Access to the file, either to read it or add your comment is available through the MSSSO
home page at http://msowww.anu.edu.au/observing/
AUTOGUIDER SETTINGS (via the GUIDE TAB)
X Axis Cal Time = 1 Backlash = 0
Y Axis Cal Time = 3 Backlash = 0
Manual Calibration X Speed = 10 Y Speed = 4.83
Check boxes… Enable X Axis Enable Y Axis
Aggressiveness = 4
Control Via = Camera Relay
9
WFI
Display Scaling Focal Length = 2000 Display Mode = Pixels Check Delta
Exposure Settings Binning = 1 X Offset = 0 Y Offset = 0 Width = 320 Height = 240
More Autoguider settings… Guiding Minimum move X = 0.10 Minimum move Y = 0.10
Maximum move X = 3.00 Maximum move Y = 3.00
Delay after correction (sec) = 0.50
Move Commands Maximum Slew X = 5.00 Maximum Slew Y = 10.00
Delay after commands = 0.10
INITIALISING CCD HARDWARE
If half of the main CCD array in Ximtool fails to display, enter the dome and check that the
correct LED’s at the rear of the Master and Slave processors are illuminated. The pattern of
LED’s should be … (G = Green X = Out O = Orange)
Slave
O
G
G
G
G
G
X
G
Master
G
X
G
G
G
G
G
O
The Master and Slave processors are mounted one each side of the WFI dewar. The LED’s,
which are covered with black electrical tape, are located on the northern (Control Room) side of
the controllers. Possibly the ‘Slave’ (1) processor will have shut down. To correct the situation
in Cicada under the [Actions] menu, click on Initialise CCD Hardware
SHUTTER PRIMING
At large easterly hour-angles (>-4hrs) the camera shutter can fail to reset. You can recognise this
by the star trails on an image (trails on CCDs 1-4 trail up, on CCDs they 5-8 trail down). In
addition there will be a ramp in the signal across the CCDs. Another clue to a failed shutter can
be gained by listening to the shutter operation. There should be a loud CL-LICK on open and
close with the control room door open. A failed shutter sounds different, a woosy, fainter click
due to the fact that only one of the two shutter blades is operating.
To fix a shutter that fails to reset, you will need to prime the shutter manually.
Priming the shutter
•
•
•
Transfer telescope control to the dome.
Move the telescope to ~ -45deg dec, HA=2.5 hrs East.
Raise the floor to the level of step 5 on the concrete stairs.
10
WFI
•
On the Wide Field Imager - Exposure Controller, locate panel E2448 (i.e. the large
electronics rack mounted above WFI on the eastern side of the 40-inch optical tube).
•
Switch the top toggle switch, the Prime Switch, from Nor (Normal) to the Prime position.
•
Turn to face WFI, at the left of the filter box you will see a small rectangular inspection
port labeled ‘Priming Rod Access Cover’. Remove this cover.
•
To the top/right of the filter box you will see a knurled knob labeled ‘Priming Rod’.
Unscrew the rod and insert it into the small round hole at the bottom right of the Priming
Rod Access plate.
•
Gently push in the rod to manually prime the shutter.
•
When the shutter is primed, withdraw the rod, replace the cover and rod in its holder.
•
Reset the Prime Switch to Nor (Normal).
You can check that the shutter is primed by switching the ‘Display’ toggle switch to ‘On’ –
the ‘Ready’ LED should glow – once checked, switch the ‘Display” toggle switch to ‘Off’
To test that the shutter is working:
•
•
•
•
•
Toggle the ‘Mode’ switch to ‘Manual’
Toggle the ‘Display’ switch to ‘On’
Toggle the ‘Shutter’ switch ‘Open’ AND then to ‘Closed’ to test the shutter.
(Don't forget to wait 8 seconds for the shutter to reset after closing)
Return all four switches UP before resuming observing.
N.B. For normal operation, all four toggle switches on panel E2448 are in the ‘UP’ position –
Prime=Nor, Mode=Auto, Shutter=Close, Display=Off
GENERAL
At the Equator: 4 sec of R.A. = 1’ arcmin in Dec or 1 min of R.A. = 15’ arcmin in Dec
To offset for non-equatorial declinations = (Declination (in degrees) X Cos) X Offset in Arcmin
WFI chips:
Eight 2k x 2k (2048x4096) CCDs in a 2x4 mosaic
Each sees 13’x26’ (arcmin) making a 52’x52’ field
Pixels are 15 micron giving 0.375 arcsec/pixel (on the 40-inch @ f/8)
Gaps between the CCDs are ~20-30 arcseconds
Gains are ~1.5 – 2.1 electrons/ADU
RONs are ~3.5 – 5.5 electrons (To obtain Gain & RON follow the procedure in the “40 Inch
Telescope Observer’s Technical Guide”)
The SDSU controllers read out the entire array in 55 seconds
The full array image is 140Mb in size - one CCD is 17.5Mb
The /data/monsoon1 disk on Monsoon holds almost 100Gb – about 4~8 days data
A DDS3 125m tape holds fractionally over 18Gb compressed (i.e. use allocate mt1)
11
WFI
Writing to tape takes ~11.5 min/Gb (~3.5 hours per full tape) – don’t get caught on you last
night – SAVE EARLY!
The plate scale of the WFI is 0.375 arcsec per pixel, 25 arcsec per mm or 2.5 pixels per sec of
arc e.g. if a star image is 5 pixels across then the seeing is 2 arcsec. The field of view covers 52
arcminutes with the diagonal being 1.2 degrees.
The values displayed at the lower right corner of the CICADA_ximtool window show:- The xaxis pixel position/count, the y-axis pixel position/count and the image/pixel intensity count. A
general guide to the quality of the seeing can be made by zooming in on a star and counting the
star’s pixel width. (5 pixels = 2 arcsecond seeing). OR Plate Scale X Star FWHM (0.375 X
?)
Guide CCDs
Pixel size = 10 microns
CCD Array = 320 X 240 pixels
Plate Scale = 0.25 arcsec/pixel or 4 pixels/sec of arc
Field of View = 80 arcsec X 60 arcsec
Main WFI CCDs
Pixel size = 15 microns
CCD Array = 8192 X 8192 (Each CCD = 2048 X 4096 plus 20~30 arcsec gaps)
Plate Scale = 0.375 arcsec/pixel or 25 arcsec/mm or 2.5 pixels/sec of arc
Field of View = 52 X 52 arcmin (Diagonal = 1.2 degrees)
DEWAR VACUUM
The dewar vacuum rises about 1E-07 per day. The vacuum is probably Ok up to about 1E-04.
LN2 hold time is about 12 hours
CICADA, GIT & Ximtool
General Strategies to deal with CICADA.
Cicada has a tendency to hang, usually during readout, and sometimes for no obvious reason
(even if you are doing none of the bad things listed below).
The only remedy is to restart it. To do this:
•
In the Observers Window menu select actions - quit-observing-window
• In the CICADA menu select Start-Observing - Exit_CICADA
From the command line enter:
• ps -ef | grep cicada
Look for cicada processes. Ignore *_svc. Kill others with …
Kill –9 (process number) or …
• Cicada_cleanup -p 0
• Cicada_cleanup -p 1
• Cicada_cleanup -p 2
• Cicada_cleanup -p 3
• Restart using "cicada &”
12
In general restarting solves Cicada problems, but it's a pain so…
Follow these next practices for relatively trouble-free operation:• Pause - DON'T use 'pause’. This crashes Cicada so badly you could need to logout to
restart!
• NumLock - Keep NumLock untoggled. It interferes with ximtool (and GIT?) operation.
In particular, it prevents you using right-mouse scrolling to change brightness/contrast,
and inactivates the ximtool menus.
• Initialise Hardware - advice is to use this as a last resort.
Avoid:
• Using ABORT. You'll often then need to exit cicada and restart.
• Doing too much (processor or memory intensive stuff) on monsoon during readout.
In particular avoid:
• Beginning or ending a tar command during readout (during exposing is OK)
• Doing much in Netscape
• Copying images (and other operations) in iraf
• Leaving the little "graphics keystrokes" window open during readout
• Changing regions (in the regions window) during readout.
During readout you CAN do these:
• Change filter, change exposures, change duration
GIT (Graphic & Imaging Tool)
GIT (presently) has a problem with displaying mosaiced images. It displays them OK on
readout but it cannot set sensible scaling parameters to allow you to calculate star profiles, get
single line plots, etc. The Ximtool window just goes all black or white and displays a single
value.
To overcome these limitations do the following:
• Untoggle NumLock
• Select Options - Start-private-ximtool
• Select Options – Preferences
In “Preferences” …
• Select category "General"
• Untoggle "Mosaic MEF files in Cicada mode”
13
•
Enter the "MEF extension list", i.e. a list of which CCDs you want available for
loading into the private ximtool.
Note that if you are only using CCD numbers 1,2,7,8 (say) their MEF image extension numbers
will be 1,2,3,4. i.e. CCD number and extension number are different things.
• Set "Maximum Cicada images" if necessary.
• The list of extensions you have requested will appear in the “image list" window. Click
one and it loads into the private ximtool.
Now you can get star profiles, cross sections, stats, etc. But when the next image is read out it
will automatically be'loaded into the private ximtool.
But avoid leaving the little "graphics keystrokes" window open during readout or GIT will crash
out.
XIMTOOL
When Ximtool reads out … North is to the right, East is down.
1 pixel = 0.375arcsec
N
E
To move a star N in Dec offset on ETS is NEGATIVE
To
“
“ S in Dec
“
“
POSITIVE
To
“
“ W in RA
“
“
POSITIVE
To
“
“ E in RA
“
“ NEGATIVE
Screen Preferences for GIT and Ximtool
Select the monitor for these in Options – Preferences – General. Common practice puts GIT
and Ximtool on screen 1.
Other
Binning
If you change the binning, it may not change back again when you reset it to 1 x 1, even though
the regions window shows it as 1 x 1.
WFI
Watch the file sizes: should be 271440 blocks (full 8xCCDs?)
Bleeding
If readout shows bleeding on brighter stars on some CCDs and bias changes, restart cicada.
Wrong Frame Size
If there is an error message about ximtool having the wrong frame size, check that there is not an
old cicada ximtool process running:
ps -ef | grep cicada will show it.
Many Red Error Windows
14
If several red error windows appear from cicada, and restarting is impossible or doesn't work,
try logging out (and back in). That can fix it. If the error messages involve SDSU, then they
probably need a hardware initialisation (from the action menu).
If such error messages are reported when cicada is restarted, you may need two hwinits. Do the
hwinit immediately after restarting cicada.
COMPUTERS
Mosaic (in rack) = runs controllers - Monsoon (on desk) = runs Cicada - Murky
office) is a bit slow
(in
Data is stored on monsoon in /data/monsoon1/cicada/username
SDSU Controller ‘Master’ controls CCD’s 1,2,3,4 the ‘Slave’ controller runs CCD’s 5,6,7,8
To transfer telescope control to the Dome console:
•
•
•
•
•
At the ETS PC select Configuration - configure. Toggle Dome Control to “manual”.
Enter the dome.
At the dome console switch the rotary Guide – Slew/Set knob to “Slew/Set”
Move telescope, dome and floor as necessary
Press the large red STOP button if filling dewar or stopping observing.
To transfer telescope control to the Control Room:
•
•
•
•
Press the "emergency-stop reset" button (illuminated beside the STOP button)
Ensure floor is fully down
At the dome console switch the rotary Guide – Slew/Set knob to “Auto”
•
•
•
Go to the control room
On the ETS PC select Configuration - configure.
Toggle Dome Control to “automatic”.
Telescope Tracking
Telescope RA tracking sometimes drops out. Just redo the tracking command in the ETS
computer to restart.
SDSU Cooling
The SDSU controllers are cooled by the NESLAB cooler (downstairs in corridor through library
on the left). If the controllers get hot, this probably means that the NESLAB has failed. Check
the temperature of the controller heat sinks occasionally - touch them.
IRAF
WFI produces mosaiced images. In iraf you need to specify the extension number in the
filename, as below. If you haven’t used IRAF before, refer to
http://msowww.anu.edu.au/computing/lun/lun35/lun35.html
15
Set the terminal type as xgterm (at the prompt after mkiraf) and edit login.cl (or loginuser.cl)
to set set stdimage = imt4096
set imtype = “fits”
Then:
ximtool &
cl
:brings up an ximtool to display images in.
:starts iraf
And:
display filename[#CCD] 1
imcopy filename[#CCD][xmin:xmax,ymin:ymax) outfile.fits
imexamine filename[#CCDI[xmin:xmax,ymin:ymaxl
image operations: v does plot from two cursor input positions
r gives radial profile of star, fwhm etc.
a gives mag and fwhm etc. for star. no plot
Even for a single CCD readout or a small region readout, you need the extension filename[1]
Use the mscred package in iraf to reduce mosaiced images.
ds9, saotng are nice alternative display tools. ds9 can handle mosaics.
TROUBLESHOOTING
If things go wrong - here are some possible causes. Solutions are hopefully in these notes or
somewhere in the sources listed below. First, follow the suggestions above to keep Cicada as
stable as possible.
SOURCES OF INFORMATION
The '40-Inch Telescope (WFI) DIY Manual' (this document)
"40 Inch Telescope Observer's Technical Guide”
http:/lwww.mso.anu.edu.au/observing/40in/DirectIm/40in/
http://msowww.anu.edu.aulcomputing/cicada/cicada/
The WFI web pages
Other hardcopy manuals in the Control Room
http://msowww.anu.edu.aulobserving/tc_.manual/
Troubleshooting in the Control Room
My object doesn't appear on Ximtool after readout?
Cloud
Dome is blocking view
Dome shutter blocking view
Camera shutter failure
I see streaks on my image?
Camera shutter failure
Cicada failure – re-boot Cicada
16
Initialise hardware (a last resort)
I can't analyse images (star profiles, stats, etc) in Ximtool.
The image just goes to a single value!
Start a private ximtool in GIT.
Cicada has hung?
Exit Cicada, cleanup, restart Cicada.
Stop processor/memory intensive processes
Avoid using abort
Don't use pause
Lots of Red Error Windows, Can't Stop Them!
Kill Cicada from the command line, cleanup and restart
I can't point the telescope more accurately than 20arcsec?
The telescope only points to within about 20aresec -But, use buttons on round focus/guide/set
paddle. Use set or guide speeds. With practice this becomes fairly accurate (to within a few
pixels).
Ximtool menus are inactive
Untoggle NumLock
I can't change brightness/contrast using left mouse scrolling?
Untoggle NumLock
New images keep loading into my private Ximtool?
Turn off automatic loading of images by toggling the "cicada mode" button under the GIT
Options – Preferences - General menu. (This is supposed to work, but sometimes doesn't)
My star images are elliptical
Focus the telescope
Focussing is difficult
Try focusing from same direction to take up backlash
There is bleeding on stars & bias has changed
Restart cicada.
I can't see my guide star (while setting up guiding)
Open the shutter!
I can't find the "Guide CCDs - WFI" chooser window
Scroll down in the m40slave window
Autoguiding doesn't seem to be working accurately
Set the declination correctly on the "guide" tab in the Maxim CCD window
Troubleshooting in the Dome
The telescope won’t obey the “Auto” setting of the dome Auto – Slew/Set rotary switch
The dome floor is not in the fully lowered position.
17
The dome doesn't follow telescope?
Check that the dome position encoder (high on the western wall) is flashing its green LEDs at
you. If not - restart ETS (select file - shutdown, then startup at the prompt).
Put the dome in the “auto” mode on ETS (select configuration - configure)
Telescope pointing is bad
Calibrate the pointing (refer to page 4)
Reset the time (Phone 1-1194)
Telescope doesn't move
Ensure floor is fully down
Fault in ETS (Call technical support)
Telescope moves unexpectedly-by itself
Press large red STOP button on dome console, or on electronics rack in control room
Shutters don't open or close
Press the ‘shutter stop’ button and try again (Listen for the relays clicking downstairs)
If upper shutter doesn't close it needs to be driven fully open (onto the external springs) first.
LN2 leaking from filling tube?
Tighten the various nuts on the tube (call technical support)
LN2 leaking from camera dewar at high ZD angles?
Remove lens-cap before filling camera dewar
Do dome-flats before filling camera dewar
LN2 small tank pressure low?
Small tank needs filling from large tank (call technical support)
Pressurize small tank with air line by connecting air line to top of LN2 tank.
SDSU controllers feel hot
Water cooler has failed. Check it and restart it, if necessary.
Dewar vacuum rising or focal plane temperature not holding
Pump dewar (call technical support)
Ver. 19/01/02