1
AMIDebug™ Rx – User Manual
Document Revision 1.42
February 11th, 2015
Public Document
Copyright 2010
American Megatrends, Inc.
5555 Oakbrook Parkway
Suite 200
Norcross, GA 30093 (USA)
All Rights Reserved
Property of American Megatrends, Inc.
American Megatrends, Inc.
AMIDebug™ Rx – User Manual
Legal
Disclaimer
This publication contains proprietary information which is protected by copyright. No part of this
publication may be reproduced, transcribed, stored in a retrieval system, translated into any language or
computer language, or transmitted in any form whatsoever without the prior written consent of the
publisher, American Megatrends, Inc. American Megatrends, Inc. retains the right to update, change,
modify this publication at any time, without notice.
For Additional Information
Call American Megatrends, Inc. at 1-800-828-9264 for additional information.
Limitations of Liability
In no event shall American Megatrends be held liable for any loss, expenses, or damages of any kind
whatsoever, whether direct, indirect, incidental, or consequential, arising from the design or use of this
product or the support materials provided with the product.
Limited Warranty
No warranties are made, either expressed or implied, with regard to the contents of this work, its
merchantability, or fitness for a particular use. American Megatrends assumes no responsibility for
errors and omissions or for the uses made of the material contained herein or reader decisions based
on such use.
Trademark and Copyright Acknowledgments
Copyright ©2010 American Megatrends, Inc. All Rights Reserved.
American Megatrends, Inc.
5555 Oakbrook Parkway
Suite 200
Norcross, GA 30093 (USA)
All product names used in this publication are for identification purposes only and are trademarks of
their respective companies.
Copyright ©2015 American Megatrends Inc. ● Public Document
Page 2 of 37
American Megatrends, Inc.
AMIDebug™ Rx – User Manual
Table of Contents
OVERVIEW ..................................................................................................................................................................... 5
INTRODUCTION ............................................................................................................................................................... 5
KEY FEATURES ............................................................................................................................................................... 5
REFERENCES ................................................................................................................................................................... 6
DOCUMENT CHANGE HISTORY ....................................................................................................................................... 6
GETTING STARTED WITH AMIDEBUG RX ........................................................................................................... 8
WHAT’S IN THE BOX? ..................................................................................................................................................... 8
AMIDEBUG RX LAYOUT ................................................................................................................................................ 8
USING AMIDEBUG RX ................................................................................................................................................... 9
USING AMIDEBUG RX FOR BIOS CHECKPOINTS............................................................................................. 10
IDENTIFYING SYSTEMS THAT SUPPORT AMIDEBUG RX............................................................................................... 10
LOCATING THE USB DEBUG PORT ............................................................................................................................... 10
CHECKPOINT FUNCTIONALITY ...................................................................................................................................... 10
CHANGING THE CHECKPOINT DISPLAY FORMAT .......................................................................................................... 10
VIEWING CHECKPOINT HISTORY .................................................................................................................................. 11
AMIDEBUG RX MENU REFERENCE ...................................................................................................................... 12
USING THE DEVICE MENU ............................................................................................................................................ 12
MENU STRUCTURE ....................................................................................................................................................... 12
EXIT MENU ................................................................................................................................................................... 12
START NEW SESSION .................................................................................................................................................... 13
SAVE SESSION .............................................................................................................................................................. 13
LOAD SESSION .............................................................................................................................................................. 13
ERASE SESSION ............................................................................................................................................................. 14
INFO .............................................................................................................................................................................. 15
SETTINGS ...................................................................................................................................................................... 15
USING AMIDEBUG RX VCOM FUNCTIONALITY .............................................................................................. 17
USB VIRTUAL COM (VCOM) TERMINAL ................................................................................................................... 17
CONFIGURING THE DEVICE (MICROSOFT WINDOWS) ................................................................................................... 17
CONFIGURING THE TERMINAL ...................................................................................................................................... 18
TERMINAL COMMANDS ................................................................................................................................................ 18
Upload ..................................................................................................................................................................... 18
Download ................................................................................................................................................................. 19
Display ..................................................................................................................................................................... 21
Erase ........................................................................................................................................................................ 21
Info ........................................................................................................................................................................... 22
DEVICE FIRMWARE UPDATE................................................................................................................................. 23
TROUBLESHOOTING ................................................................................................................................................ 24
DEBUG MODE FUNCTIONALITY ........................................................................................................................... 27
AMIDEBUG PRODUCTS FOR SOURCE-CODE DEVELOPMENT ........................................................................................ 27
Copyright ©2015 American Megatrends Inc. ● Public Document
Page 3 of 37
American Megatrends, Inc.
AMIDebug™ Rx – User Manual
USB DEBUG MODE ...................................................................................................................................................... 27
AMI DEBUG UNLOCK CODE ......................................................................................................................................... 27
WINDOWS KERNEL DEBUGGING ................................................................................................................................... 28
TERMINAL OUTPUT EXAMPLES ........................................................................................................................... 30
EXAMPLE STRING TABLE (USING DOWNLOAD/DISPLAY COMMAND) ........................................................................... 30
EXAMPLE SESSION OUTPUT (USING DOWNLOAD/DISPLAY COMMAND) ....................................................................... 33
LIMITED HARDWARE WARRANTY ...................................................................................................................... 37
Copyright ©2015 American Megatrends Inc. ● Public Document
Page 4 of 37
American Megatrends, Inc.
AMIDebug™ Rx – User Manual
Overview
Introduction
AMIDebug™ Rx is a low-cost debug tool built around
the debug port feature common to today‟s USB 2.0
EHCI controllers. Based on patent-pending technology,
AMIDebug Rx is designed as replacement for the PCI
POST Checkpoint Card, which is becoming less useful
in the PC market as newer systems omit PCI
expansion slots.
This product is targeted to power users, quality
assurance labs & service technicians. Diagnosing
platforms with AMIDebug Rx is non-intrusive, allowing
technicians to access checkpoints without opening the
case. AMIDebug Rx produces more descriptive
debugging messages than the checkpoint card, along
with extended features such as boot performance
timing and UEFI debug message redirection.
Key Features
USB-based replacement for the PCI
port 80h “POST Checkpoint” card
Checkpoints can be captured and
stored to one of four “sessions” for later
review
Measures elapsed time between
checkpoints
to
analyze
boot
performance timing
Display descriptive text for each
checkpoint, based on built-in string
table or custom table
USB Virtual COM (VCOM) port for data
transfer and configuration
Additional features for Aptio 4.x and AMIBIOS8 BIOS developers
1
o
UEFI debug messages redirected over USB VCOM or saved in local memory
o
Enable source level debugging via AMIDebug for Aptio and AMIDebug for AMIBIOS8
2
1
Requires Aptio 4.x BIOS project to be compiled in debug mode
2
Additional features available after-market using unlock code, available from AMI
Copyright ©2015 American Megatrends Inc. ● Public Document
Page 5 of 37
American Megatrends, Inc.
AMIDebug™ Rx – User Manual
References
AMI BIOS checkpoint references, available at www.ami.com
AMIBIOS Checkpoint and Beep Codes
Aptio 4.x Status Codes – Checkpoints and Beep Codes
Document Change History
Date
2009-05-29
2009-06-10
Rev
0.90
0.91
2009-06-12
0.92
2009-06-18
2009-08-12
0.93
1.00
2009-11-05
1.10
2010-02-01
1.20
2010-03-25
1.30
2010-07-13
2014-08-04
1.40
1.41
Description
Release candidate draft, ready for customer review.
Updated for firmware release v2.2.0. Added description of „info‟ command. Updated help
strings for terminal commands. Updated sample output of download strings & download
session commands. Added new pictures.
New troubleshooting tips added: Problems Installing USB Host-to-Host Debug Driver &
Ayera TeraTerm Does Not Recognize Ports above COM4.
Updated firmware version in info command example (v2.2.1)
Updated firmware version in info command example (v2.3.0). Added info command
example to unlock procedure. Added footnote for UEFI Debug Strings (pg. 8).
Updated for v2.3.1 firmware. Added „Erase Session‟ and „Info‟ menu commands. Added
marker for stored sessions in „Save Session‟ and „Load Session‟ dialogs.
Updated for 2.3.2 firmware. Added notes on new confirmation messages. Updated
copyright information for 2010.
Updated for 2.3.4 firmware. Described usage with Microsoft Windows Kernel Debugging
functionality via USB debug port (page 26). Corrected product name references for
consistency with trademarks.
Updated for 2.3.6 firmware. Updated VCOM terminal help text to match new entries.
Updated link for downloading of VCP driver
Copyright ©2015 American Megatrends Inc. ● Public Document
Page 6 of 37
American Megatrends, Inc.
AMIDebug™ Rx – User Manual
2015-02-11
1.42
Update link for downloading of VCP Driver
Copyright ©2015 American Megatrends Inc. ● Public Document
Page 7 of 37
American Megatrends, Inc.
AMIDebug™ Rx – User Manual
Getting Started with AMIDebug Rx
What’s in the Box?
One (1) AMIDebug Rx Device
Two (2) USB 2.0 A/Mini-B 4-pin device cables
AMIDebug Rx Quick Start Guide
CD-ROM, including electronic documentation and VCOM drivers
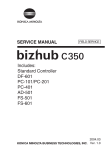
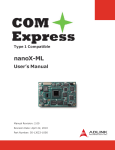
AMIDebug Rx Layout
USB0 LED – indicates connection (ON) & activity (BLINK) for USB CONNECTOR 0
USB1 LED – indicates connection (ON) & activity (BLINK) for USB CONNECTOR 1
SHIFT – Used in checkpoint mode to change checkpoint display format
SELECT – Used in menu navigation, also used in checkpoint mode to checkpoint display format
MENU – Used to enter & exit menu
– Used in menus to select next entry, also used in checkpoint mode to navigate buffer
– Used in menus to select previous entry, also used in checkpoint mode to navigate buffer
OPTION SWITCH – Used to select debug mode (LEFT) or checkpoint mode (RIGHT). Center position is
reserved for future use.
FEATURE CONNECTOR – Reserved for future use
Copyright ©2015 American Megatrends Inc. ● Public Document
Page 8 of 37
American Megatrends, Inc.
AMIDebug™ Rx – User Manual
Using AMIDebug Rx
AMIDebug Rx has three basic usage models …
1. Connect AMIDebug Rx to a system under test (SUT) at boot up to view BIOS checkpoints,
3
capture UEFI debug strings and store checkpoint sessions to local memory.
2. Connect AMIDebug Rx to a computer after boot and use the Virtual COM (VCOM) terminal to
retrieve checkpoint sessions, upload new checkpoint string tables and view UEFI debug strings
in real-time during the boot process.
3. Use AMIDebug Rx to connect a debug host & target for use with AMI Debug source-level
debugging tools (AMIDebug for UEFI or AMIDebug for AMIBIOS8).
3
UEFI debug strings are only available on UEFI BIOS compiled in “debug mode” and may not be visible on
commercially shipping BIOS products.
Copyright ©2015 American Megatrends Inc. ● Public Document
Page 9 of 37
American Megatrends, Inc.
AMIDebug™ Rx – User Manual
Using AMIDebug Rx for BIOS Checkpoints
Identifying Systems That Support AMIDebug Rx
Systems supporting AMIDebug Rx functionality will have a support string present in the BIOS Setup,
under the Advanced menu (“AMI Debug Rx Enabled!”). The manufacturer‟s documentation may also
indicate that AMIDebug Rx is supported.
Locating the USB Debug Port
AMIDebug Rx will only communicate with the system under test on the “USB debug port.” Please refer
to the manufacturer‟s documentation to locate this port.
Checkpoint Functionality
Turn off the system under test (SUT). Set the OPTION SWITCH to checkpoint mode (RIGHT) and
connect the AMIDebug Rx to the USB debug port on the SUT. Turn on the SUT. AMIDebug Rx will
power on and start displaying data sent to the USB debug port. By default POST checkpoints are
displayed in a right justified format.
Changing the Checkpoint Display Format
The SELECT button is used switch the display mode, showing the same checkpoint data with string
descriptions and timing information. Descriptions are based on the lower checkpoint byte only.
While in CHECKPOINT mode, the SHIFT key also affects the display mode. Checkpoint lower-byte
values are displayed on the bottom line, while the checkpoint upper-byte value and progress bar are
shown on the top.
Copyright ©2015 American Megatrends Inc. ● Public Document
Page 10 of 37
American Megatrends, Inc.
AMIDebug™ Rx – User Manual
When using string displays, SHIFT switches the word based checkpoint value between “big endian" and
“little endian" byte order.
Viewing Checkpoint History
Checkpoints in a current session are viewed using the UP/DOWN buttons (/).
Copyright ©2015 American Megatrends Inc. ● Public Document
Page 11 of 37
American Megatrends, Inc.
AMIDebug™ Rx – User Manual
AMIDebug Rx Menu Reference
Using the Device Menu
When operating in checkpoint mode, use the MENU button to enter the device menu
Use the arrow keys to navigate
The SELECT switch is used to select options and sub-menus
The SHIFT key has no assigned function in the sub-menus
Use the MENU key to exit any sub-menu
Menu Structure
Exit Menu
The option is used to exit the menu and return to the current checkpoint session.
Copyright ©2015 American Megatrends Inc. ● Public Document
Page 12 of 37
American Megatrends, Inc.
AMIDebug™ Rx – User Manual
Start New Session
The option allows the user to create a new blank session to begin saving debugging
messages within.
Save Session
The option allows the user to save the current checkpoint session into one of four data
areas (1, 2, 3, 4), for later viewing. The data is stored in flash memory on the device.
Use the SELECT button to select a session. Any existing data in the session will be overwritten.
Sessions containing saved data are noted by an asterisk (*) to the right of the session number.
Note: Saving over a session already containing data will prompt the user to overwrite the
session or cancel the save operation. Select ‘Y’ to continue or ‘N’ to cancel the operation.
Once a session is saved the device will display a confirmation message and then return to the menu. To
retrieve a saved session, use the menu command or the download & display terminal
commands.
The saved session includes all checkpoint data and UEFI debug strings stored since the last new
session was started. Checkpoint data can be viewed using the menu command or the
download & display terminal commands. UEFI debug strings from a saved session can only be
viewed using the download & display terminal commands.
Load Session
The menu allows the user to load a previously saved checkpoint session.
Copyright ©2015 American Megatrends Inc. ● Public Document
Page 13 of 37
American Megatrends, Inc.
AMIDebug™ Rx – User Manual
Loading a saved session will overwrite the current session in memory. Make sure to save the
current session to avoid losing useful data.
Sessions containing saved data are noted by an asterisk (*) to the right of the session number.
Loading an empty session will produce the following results.
A previously saved session will display data in the same way a current session is displayed.
Checkpoint data can be viewed using the menu command or the download & display
terminal commands. UEFI debug strings from a saved session can only be viewed using the download
& display terminal commands.
Erase Session
The option allows the user to erase any stored checkpoint session in the four data areas
(1, 2, 3, 4). This performs the same function as the erase command in the VCOM terminal.
Use the SELECT button to select a session, or use the MENU button to return to the previous menu
without erasing any data. Sessions containing saved data are noted by an asterisk (*) to the right of the
session number. Erasing sessions containing data will prompt the user if they wish to overwrite. Select
„Y‟ to continue operation or „N‟ to cancel.
Note: Erasing a session already containing data will prompt the user to confirm the erase
operation. Select ‘Y’ to continue or ‘N’ to cancel the operation.
Copyright ©2015 American Megatrends Inc. ● Public Document
Page 14 of 37
American Megatrends, Inc.
AMIDebug™ Rx – User Manual
Note: This operation has no ‘undo’ and may take several seconds to complete.
Once a session is erased the device will display a confirmation and then return to the menu.
Info
The option displays the AMIDebug Rx hardware version and firmware revision.
This is the same information displayed on the device‟s boot screen, but can be accessed without
resetting the device.
After viewing the information, press SELECT or MENU to return to the previous menu.
Settings
The menu & sub menus allows the user to customize the look & feel of various features.
Chk Pnt Tbl Select
The “Checkpoint Table Select” () option determines the checkpoint string table used to
translate POST Checkpoint values. For more information on string tables, refer to the “Upload”
command in the “Terminal Commands” section of this manual.
With the option, AMIDebug Rx will use BIOS data to determine the correct checkpoint table.
The option will force checkpoint string lookups to use Aptio 4.x data (string table 1)
Copyright ©2015 American Megatrends Inc. ● Public Document
Page 15 of 37
American Megatrends, Inc.
AMIDebug™ Rx – User Manual
The option will force checkpoint string lookups to use AMIBIOS8 data (string table 2)
The option will force checkpoint string lookups to use a user-provided table (string table 3)
Boot Logo
The option determines if the sign on message is displayed at power on.
The option will enable the displaying of the sign on message, including the current firmware version.
The option will disable the displaying of the sign on message.
Save Settings
The option will store user preferences in the Settings menu ( &
) for use at the next device power-on.
Copyright ©2015 American Megatrends Inc. ● Public Document
Page 16 of 37
American Megatrends, Inc.
AMIDebug™ Rx – User Manual
Using AMIDebug Rx VCOM Functionality
USB Virtual COM (VCOM) Terminal
AMIDebug Rx uses a text terminal interface to retrieve stored data and configure the device. This
interface allows flexible configuration options without the need for specialized software. The VCOM
Terminal is enabled when the OPTION SWITCH is set to checkpoint mode (RIGHT position).
The VCOM Terminal user interface works with terminal programs such as Ayera TeraTerm and
Microsoft HyperTerminal. AMI recommends using Ayera TeraTerm for any of the VCOM functionality
4
that uses XMODEM transfers.
VCOM allows AMIDebug Rx users to retrieve stored information such as checkpoint sessions, UEFI
debug strings and checkpoint string files.
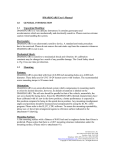
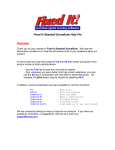
Configuring the Device (Microsoft Windows)
AMIDebug Rx uses a “Silicon Labs CP210x USB to
UART” under Microsoft Windows XP & Vista to map
the device to a COM port address. This driver is
available via Microsoft Update, so the “Found New
Hardware Wizard” can connect to the Internet and
install the proper driver. If prompted to connect to
Windows Update, use the “Yes, this time only” option
to automatically locate and load the device driver.
The Silicon Labs CP210x USB to UART driver can also be downloaded and installed manually.
The driver can be found in the supplemental files download located here:
https://www.ami.com/download-licenseagreement/?DownloadFile=AMI_Debug_Rx_Supplemental_Files_Version_2.3.6.zip
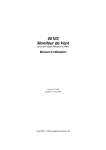
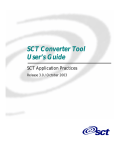
Once the driver loads, the VCOM port will
appear as a standard COM port under
Microsoft Windows systems. Use the Device
Manager to determine the COM port number
(COM4, COM5, COM6, etc.). The AMIDebug
Rx VCOM port is associated with the “CP210x
4
Due to differences between the Microsoft HyperTerminal XMODEM implementation and the standard XMODEM
protocol, the AMIDebug Rx “upload” VCOM command is not compatible with HyperTerminal. Other terminal
programs will support AMIDebug Rx using XMODEM, including Ayera TeraTerm.
Copyright ©2015 American Megatrends Inc. ● Public Document
Page 17 of 37
American Megatrends, Inc.
AMIDebug™ Rx – User Manual
USB to UART Bridge Controller” driver.
Configuring the Terminal
Use the COM port number listed in Device Manager to configure the terminal program.
Recommended COM Settings: 115200 baud, 8 bit, no parity, 1 stop bit, hardware flow control.
Once the connection is established, hit the ENTER key to confirm the connection is active. If the
connection is active, the user will see the following prompt:
Invalid command! Enter help for a list of valid commands.
Terminal Commands
A summary of terminal commands is generated by typing help at the command prompt.
help
Command list:
Help – This help menu.
Upload – Upload a string file to the device.
Download – Download a session or string file from the device.
Display - Dump a session or string table to the console.
Erase – erase a session or string table from the device.
Info - Display information about device.
Enter “help <command>” for further information.
Upload
The upload command uses the XMODEM protocol to upload a custom string table to the device‟s local
memory. The uploaded file is in ASCII TXT format.
Copyright ©2015 American Megatrends Inc. ● Public Document
Page 18 of 37
American Megatrends, Inc.
AMIDebug™ Rx – User Manual
Upload:
upload <type> <select>
Upload a string file to the device using the xmodem protocol.
Tested to work with TeraTermPro.
type:
strings - Upload a check point string table.
select:
1 through
1 –
2 –
3 –
3
Aptio
AMIBIOS8
Custom
example:
upload strings 2 – Uploads a new AMIBIOS8 string table to device
This operation changes the strings displayed by AMIDebug Rx that correspond to BIOS checkpoint
values. The string table used by the device is selected in the menu.
String table 1 is reserved for AMI Aptio 4.x.
String table 2 is reserved for AMIBIOS8.
String table 3 is set aside for custom checkpoint string tables.
To generate a custom checkpoint string table, use the download command to extract an
existing string file as the starting point for the new checkpoint string table.
After issuing the upload command in the terminal, an XMODEM “send” transfer must be initiated to
transfer the text file to the AMIDebug Rx device. This is initiated from the terminal program used to
access AMIDebug Rx via the VCOM terminal.
Download
The download command uses the XMODEM protocol to retrieve a stored session or string table from
the device‟s local memory. The downloaded file is in ASCII TXT format.
Copyright ©2015 American Megatrends Inc. ● Public Document
Page 19 of 37
American Megatrends, Inc.
AMIDebug™ Rx – User Manual
Download:
download <type> <select>
Download a session or string file from the device using the xmodem
protocol. Tested to work with TeraTermPro.
type:
session - Download a session log.
strings - Download a check point string table.
select:
For session, 1-4.
For strings, 1-3
1 – Aptio
2 – AMIBIOS8
3 – Custom
example:
download session 3 – Starts download of session 3 to host
Sessions 1-4 correspond to the checkpoint capture sessions used by the and
menu commands
String table 1 is reserved for AMI Aptio 4.x.
String table 2 is reserved for AMIBIOS8.
String table 3 is set aside for custom checkpoint string tables.
After issuing the download command in the terminal, an XMODEM “receive” transfer must be initiated
to transfer the text file from the AMIDebug Rx device. This is initiated from the terminal program used to
access AMIDebug Rx via the VCOM terminal.
For an example of the output generated by the display command, please refer to the “Terminal Output
Examples” section at the end of this document.
Copyright ©2015 American Megatrends Inc. ● Public Document
Page 20 of 37
American Megatrends, Inc.
AMIDebug™ Rx – User Manual
Display
Display:
display <type> <select>
Display a session or string file from the device to the terminal.
Works with all terminals.
type:
session - Download a session log.
strings - Download a check point string table.
select:
For session, 1-4.
For strings, 1-3
subtype (optional, session only):
cp - Only display checkpoints (and associated strings)
string - Only display debug strings, 1-3
example:
display session 1 cp - Displays session 1 checkpoints on host terminal
The display command dumps a stored session or string table from the device‟s local memory. This
differs from the download command since it directly outputs the data into the terminal buffer. This
allows the data to be captured and saves using the terminal‟s memory buffer.
Sessions 1-4 correspond to the checkpoint capture sessions used by the and
menu commands
String table 1 is reserved for AMI Aptio 4.x.
String table 2 is reserved for AMIBIOS8.
String table 3 is set aside for custom checkpoint string tables.
For an example of the output generated by the display command, please refer to the “Terminal Output
Examples” section at the end of this document.
Erase
The erase command removes a stored session or string table from the device‟s local memory.
Copyright ©2015 American Megatrends Inc. ● Public Document
Page 21 of 37
American Megatrends, Inc.
AMIDebug™ Rx – User Manual
Erase:
erase <type> <select>
Erase a session or string table from the device.
type:
session - Erase a session log.
strings - Erase a check point string table.
select:
For session, 1-4.
For strings, 1-3
example:
erase strings 1 - Erases Aptio string table from device
Sessions 1-4 correspond to the checkpoint capture sessions used by the and
menu commands
String table 1 is reserved for AMI Aptio 4.x.
String table 2 is reserved for AMIBIOS8.
String table 3 is set aside for custom checkpoint string tables.
Erasing string tables 1 or 2 is not recommended. Keep a backup of any string table using the
download or display commend prior to using the erase command.
Info
The info command displays information about the AMIDebug Rx device, such as the unit serial
number, hardware version and firmware version. The info command has no input parameters.
info
AMI Debug Rx
(C)Copyright 2009, American Megatrends, Inc.
Serial number
: 9800000001
Hardware version: 980F
Firmware version: 2.3.6
Copyright ©2015 American Megatrends Inc. ● Public Document
Page 22 of 37
American Megatrends, Inc.
AMIDebug™ Rx – User Manual
Device Firmware Update
Connect to AMIDebug Rx via the VCOM terminal to start a firmware update. Refer to the “Using
AMIDebug Rx VCOM Functionality” section of this manual for more information. Firmware updates may
be supplied to add new features or fix issues found in AMIDebug Rx products.
From within the Terminal Window type upload firmware and hit ENTER.
upload firmware
Please upload new firmware through xmodem
Waiting.......
Start an XMODEM “send” transaction from the terminal program to transfer the new firmware file to the
device as a “User ROM”. The User ROM is loaded into a special buffer in the AMIDebug Rx on-board
memory. The LCD screen will show the following message while the file is being transferred …
After the upload is successful, remove power from the unit by disconnecting all USB cables.
Press & hold all three buttons on the left-side of the device (SHIFT, MENU, SELECT), then reconnect
the USB cable used for the VCOM terminal. This will supply power to the device. Release the
SHIFT/MENU/SELECT buttons once the device powers on. After releasing the SHIFT/MENU/SELECT
buttons, the following messages will appear on the LCD panel & cycle every few seconds.
If the User ROM (SHIFT) or Factory ROM (SELECT) options are selected, the flash update process will
begin. The following message will flash on the screen during the flash upgrade …
Do not disconnect the USB cable from the device while the firmware update process is
underway. Removing the USB cable will disconnect the power and may corrupt the flash.
Upon successful flashing the AMIDebug Rx device will reset using the new firmware image.
To skip flashing, hit the MENU button. The device will reset using the existing firmware image.
Copyright ©2015 American Megatrends Inc. ● Public Document
Page 23 of 37
American Megatrends, Inc.
AMIDebug™ Rx – User Manual
Troubleshooting
Cannot Locate USB Debug Port
System documentation will not always clearly identify the USB debug port used with AMIDebug Rx.
There are utilities that can help locate the port, such as free Microsoft USBView (USB Connection
Viewer) program. The debug port is typically the device connected to [Port1] on the “USB2 Enhanced
Host Controller” or “EHCI” interface.
AMIDebug Rx Does Not Power On
AMIDebug Rx is a “bus powered” USB device, so it draws power from the USB connection (USB0 and
USB1). If the computer connected to AMIDebug Rx is powered off, then the device will shutdown.
AMIDebug Rx can draw power from the USB0 & USB1 connectors at the same time. If one of the
connectors is attached to a running system then power will not be lost of the other system is turned off.
Note that saved sessions are not lost when power is removed from the device.
AMIDebug Rx Does Not Display Checkpoint Data
1. Is the OPTION SWITCH set to CHECKPOINT mode? If not, change the switch position and
reset the system under test (SUT).
Copyright ©2015 American Megatrends Inc. ● Public Document
Page 24 of 37
American Megatrends, Inc.
AMIDebug™ Rx – User Manual
2. Was AMIDebug Rx connected after the SUT was powered on? AMIDebug Rx must be
connected before the SUT is powered on or prior to a system reset. If AMIDebug Rx is not
detected at reset, then checkpoints over the USB debug port are disabled. Reset the system
after AMIDebug Rx has been connected.
3. Does the BIOS support AMIDebug Rx functionality? Check for the support string in BIOS setup
(“AMIDebug Rx Enabled!”) under the Advanced menu, or refer to the system documentation.
4. Is the device connected to the USB debut port on the SUT? If the USB debug port is not
properly identified by the manufacturer, then try each port (reconnect, reset, observe result).
AMIDebug Rx Does Not Properly Display Checkpoint Strings
The SELECT button is used switch the display mode, showing the same checkpoint data with string
descriptions and timing information. Verify that the “Checkpoint Table Select” menu option is configured
correctly. This option sets the checkpoint string table used to translate POST Checkpoint values.
- AMIDebug Rx will use BIOS data to determine the correct checkpoint table.
- force checkpoint string lookups to use Aptio 4.x data (string table 1)
- force checkpoint string lookups to use AMIBIOS8 data (string table 2)
- force checkpoint string lookups to use a user-provided table (string table 3)
AMIDebug Rx Checkpoint Strings Are Corrupted or Blank
If checkpoint strings are corrupted, or the area where the string should be is blank, then the string tables
stored in AMIDebug Rx device may be corrupted. These string tables can be restored using the VCOM
terminal interface.
Use the erase command to clear a string table (example: erase strings 1).
Use the upload command to upload a replacement string table (example: upload strings 1).
String table 1 is reserved for AMI Aptio 4.x.
String table 2 is reserved for AMIBIOS8.
String table 3 is set aside for custom checkpoint string tables.
AMIDebug Rx Does Not Work Using USB Hub
AMIDebug Rx will only work when directly connected to the USB debug port on the system under test. A
USB hub cannot be used with the USB debug port.
VCOM Does Not Connect Using USB Hub
When connecting the AMIDebug Rx to a computer to access the VCOM terminal, it is recommended to
directly connect the device to one of the system USB ports. If a USB hub is used it must comply with the
USB 2.0 Specification. An older USB hub (USB 1.1 Specification) will not work with AMIDebug Rx.
Device Firmware Update Problems
If an error occurs, during the flashing process, one of the following failure messages will appear …
Copyright ©2015 American Megatrends Inc. ● Public Document
Page 25 of 37
American Megatrends, Inc.
AMIDebug™ Rx – User Manual
If the new firmware file does not update properly, users can revert to the factory firmware image. Press
& hold all three buttons on the left-side of the device (SHIFT, MENU, SELECT) then reconnect the USB
cable used for the VCOM terminal. Select to revert to the original firmware.
Problems Installing USB Host-to-Host Debug Driver
When the AMIDebug Rx OPTION SWITCH is set to DEBUG for USB Host-to-Host debugging, the
debug host running Microsoft Windows requires an additional driver. This driver is supplied in the
Host.zip file included with AMI utilities utilizing this functionality (amiudbg.inf & amiudbg.sys).
Before installing this driver, check the following:
Close any terminal sessions used to access AMIDebug Rx via USB VCOM (Ayera TeraTerm
Pro, Microsoft Hyperterminal or similar program). The driver will fail to install if any terminal
programs are open and trying to access the AMIDebug Rx device.
Change the OPTION SWITCH on AMIDebug Rx from CHECKPOINT to DEBUG
Ayera TeraTerm Does Not Recognize Ports above COM4
The USB VCOM port produced by AMIDebug Rx may be mapped to a high COM port address
(example: COM5, COM10). The Ayera TeraTerm program will only work with COM1-4 by default. The
TeraTerm configuration file can be modified to resolve this problem.
Close the TeraTerm application
Locate the file teraterm.ini in the TeraTerm program folder (tterm)
Open teraterm.ini in a text editor
Locate the entry for MaxComPort
Change MaxComPort to a higher value (example: MaxComPort=16)
Save the file teraterm.ini and exit the text editor
Restart the TeraTerm application. COM ports above COM4 should now be accessible.
Copyright ©2015 American Megatrends Inc. ● Public Document
Page 26 of 37
American Megatrends, Inc.
AMIDebug™ Rx – User Manual
Debug Mode Functionality
AMIDebug Products for Source-Code Development
AMIDebug software solutions are powerful tools for
debugging AMIBIOS8 & Aptio 4.x BIOS projects,
offering source-level debugging without the need for
an expensive in-circuit emulator (ICE) or in-target
probe (ITP) hardware solution. Developers have
access to source-level debugging and control the
debug target hardware through a GUI application for
Microsoft Windows.
AMIDebug for AMIBIOS8 provides functionality
similar to hardware-based development tools,
including, source-level symbolic debugging and
access to hardware resources (CPU registers, PCI
config space, memory and I/O locations).
AMIDebug for UEFI offers the same debugging capabilities for Aptio 4.x firmware, as well as debugging
UEFI drivers and pre-boot applications running in the EFI Shell.
For more information on AMI Debug software products, contact an AMI Software Sales Associate.
USB Debug Mode
AMIDebug Rx functions as a generic USB debug descriptor device when the OPTION SWITCH is set to
debug mode (LEFT). This function allows host-to-host communication for various debug applications.
Note that checkpoint display is disabled in this mode.
AMI Debug Unlock Code
The AMIDebug Rx product can be used as a “debug transport” to connect a system under test with
debug host software (AMIDebug for UEFI and AMIDebug for AMIBIOS8). This feature is disabled by
default but can be unlocked by customers licensing AMIDebug software from AMI. More information on
using AMIDebug Rx is included in the AMIDebug user manual.
An AMI software sales associate will provide an unlock code based on the unit serial number. The serial
number can be found using the info terminal command.
Copyright ©2015 American Megatrends Inc. ● Public Document
Page 27 of 37
American Megatrends, Inc.
AMIDebug™ Rx – User Manual
info
AMIDebug Rx
(C)Copyright 2010, American Megatrends, Inc.
Serial number
: 9800000001
Hardware version: 980F
Firmware version: 2.3.6
This is an eight character hexadecimal string that is entered by the user in the VCOM terminal.
unlock 00000000
If an invalid code is entered, the following message will appear:
Invalid code
A valid unlock code will generate the following message:
Unlocked!
Please reset your device for these changes to take effect
Reset the device by removing all USB cables and then attach the USB cable to power on the device.
After unlock the following screen is displayed when the OPTION SWITCH is set to debug mode (LEFT):
The “AMI Debug” mode has the same functions as the “USB Host-to-Host” mode, adding support for
AMIDebug software products.
After unlocking the device, it may be necessary to install the USB drivers included with the AMI
Debug software distribution licensed from AMI to access VCOM functionality.
Windows Kernel Debugging
AMI Debug Rx can be used as a generic USB debug transport for Windows Kernel Debugging.
Requirements for using Debug Rx as USB transport for Kernel Debugging:
Target platform with USB 2.0 Debug Port, running Microsoft Windows Vista or higher
Host running Debugging Tools for Windows (WINDBG) on Microsoft Windows XP or higher
AMIDebug Rx device using firmware version 2.3.4 or higher
BCDedit should be used to configure the bootloader on the target to place Windows in debug mode, set
the PCI Bus/Device/Function number for the EHCI controller, and specify the target name that the kernel
debugger will use to connect. The following is an example usage:
C:\>bcdedit -debug on
C:\>bcdedit -set {current} loadoptions busparams=0.29.7
C:\>bcdedit /dbgsettings USB TARGETNAME:usb
Set the OPTION SWITCH to debug mode (LEFT) and connect the host and target to the AMIDebug Rx
via the USB debug port. WINDBG must then be started on the host, with the correct “usb targetname”
specified. The target system can then be started, allowing the WINDBG host to connect.
Copyright ©2015 American Megatrends Inc. ● Public Document
Page 28 of 37
American Megatrends, Inc.
AMIDebug™ Rx – User Manual
The debug host must use the USB 2.0 Debug Connection Device driver supplied with WINDBG, not
the PLX debug driver supplied with AMIDebug Rx.
PCI bus/device/function numbers are in hexadecimal format for Microsoft Windows Vista, but are in
decimal format for Microsoft Windows 7. Please be aware of this when using bcdedit.
Copyright ©2015 American Megatrends Inc. ● Public Document
Page 29 of 37
American Megatrends, Inc.
AMIDebug™ Rx – User Manual
Terminal Output Examples
Example String Table (using Download/Display Command)
00
01
02
03
04
05
06
07
08
09
0A
0B
0C
0D
0E
0F
10
11
12
13
14
15
16
17
18
19
1A
1B
1C
1D
1E
1F
2A
2B
2C
2D
2E
2F
30
31
32
33
34
35
36
37
38
39
3A
3B
3C
3D
3E
3F
40
AMIDEBUG RX/APTIO
PWR ON, RST DETECT
AP INIT B/F MICRO
NB INIT B/F MICRO
SB INIT B/F MICRO
OEM INIT B/F MICRO
MICROCODE LOADING
AP INIT A/F MICRO
NB INIT A/F MICRO
SB INIT A/F MICRO
OEM INIT A/F MICRO
CACHE INIT
AMI RESERVED
AMI RESERVED
MICROCODE NOT FOUND
MICROCODE NOT LOADED
PEI CORE STARTED
PRE-MEM CPU INIT
CPU PRE-MEM INIT
CPU PRE-MEM INIT
CPU PRE-MEM INIT
PRE-MEM NB INIT
PRE-MEM NB INIT
PRE-MEM NB INIT
PRE-MEM NB INIT
PRE-MEM SB INIT
PRE-MEM SB INIT
PRE-MEM SB INIT
PRE-MEM SB INIT
OEM PRE-MEM INIT
OEM PRE-MEM INIT
OEM PRE-MEM INIT
OEM PRE-MEM INIT
MEM INIT. SPD READ
MEM INIT. MEM DETECT
PROG MEM TIMING INFO
CONFIGURING MEMORY
MEM INITIALIZATION
ASL RESERVED
MEMORY INSTALLED
CPU POST-MEM INIT
CACHE INITIALIZATION
APP PROCESSOR INIT
BSP SELECTION
SMM INITIALIZATION
POST-MEM NB INIT
POST-MEM NB INIT
POST-MEM NB INIT
POST-MEM NB INIT
POST-MEM SB INIT
POST-MEM SB INIT
POST-MEM SB INIT
POST-MEM SB INIT
OEM POST-MEM INIT
OEM POST-MEM INIT
Copyright ©2015 American Megatrends Inc. ● Public Document
Page 30 of 37
American Megatrends, Inc.
AMIDebug™ Rx – User Manual
41
42
43
44
45
46
47
48
49
4A
4B
4C
4D
4E
4F
50
51
52
53
54
55
56
57
58
59
5A
5B
5C
5D
5E
5F
60
61
62
63
64
65
66
67
68
69
6A
6B
6C
6D
6E
6F
70
71
72
73
74
75
76
77
78
79
7A
7B
7C
7D
7E
7F
80
81
82
83
OEM POST-MEM INIT
OEM POST-MEM INIT
OEM POST-MEM INIT
OEM POST-MEM INIT
OEM POST-MEM INIT
OEM POST-MEM INIT
OEM POST-MEM INIT
OEM POST-MEM INIT
OEM POST-MEM INIT
OEM POST-MEM INIT
OEM POST-MEM INIT
OEM POST-MEM INIT
OEM POST-MEM INIT
OEM POST-MEM INIT
DXE IPL IS STARTED
INV MEM TYPE/SPEED
SPD READING FAILED
INV MEM SIZE/MODULES
NO USABLE MEM DETECT
MEM INIT ERROR
MEMORY NOT INSTALLED
INV CPU TYPE/SPEED
CPU MISMATCH
CPU SELF TEST FAILED
CPU MICRO NOT FOUND
INTERNAL CPU ERROR
RESET PPI NOT AVAIL
AMI RESERVED
AMI RESERVED
AMI RESERVED
AMI RESERVED
DXE CORE STARTED
NVRAM INITIALIZATION
INSTALL SB RUNTIME
CPU DXE INIT
CPU DXE INIT
CPU DXE INIT
CPU DXE INIT
CPU DXE INIT
PCI HB INIT
NB DXE INIT
NB DXE SMM INIT
NB DXE INIT
NB DXE INIT
NB DXE INIT
NB DXE INIT
NB DXE INIT
SB DXE INIT
SB DXE SMM INIT
SB DEVICES INIT
SB DXE INIT
SB DXE INIT
SB DXE INIT
SB DXE INIT
SB DXE INIT
ACPI MODULE INIT
CSM INIT
RESERVED AMI DXE
RESERVED AMI DXE
RESERVED AMI DXE
RESERVED AMI DXE
RESERVED AMI DXE
RESERVED AMI DXE
OEM DXE INIT
OEM DXE INIT
OEM DXE INIT
OEM DXE INIT
Copyright ©2015 American Megatrends Inc. ● Public Document
Page 31 of 37
American Megatrends, Inc.
AMIDebug™ Rx – User Manual
84
85
86
87
88
89
8A
8B
8C
8D
8E
8F
90
91
92
93
94
95
96
97
98
99
9A
9B
9C
9D
9E
9F
A0
A1
A2
A3
A4
A5
A6
A7
A8
A9
AA
AB
AC
AD
AE
AF
B0
B1
B2
B3
B4
B5
B6
B7
B8
B9
BA
BB
BC
BD
BE
BF
C0
C1
C2
C3
C4
C5
C6
OEM DXE INIT
OEM DXE INIT
OEM DXE INIT
OEM DXE INIT
OEM DXE INIT
OEM DXE INIT
OEM DXE INIT
OEM DXE INIT
OEM DXE INIT
OEM DXE INIT
OEM DXE INIT
OEM DXE INIT
BDS STARTED
DRIVER CONNECTING
PCI BUS INIT
PCI BUS HOT PLUG
PCI BUS ENUMERATION
PCI BUS REQUEST
PCI BUS ASSIGN
CONSOLE OUTPUT CON
CONSOLE INPUT CON
SUPER IO INIT
USB INIT
USB RESET
USB DETECT
USB ENABLE
AMI RESERVED
AMI RESERVED
ASL RESERVED
IDE INIT
IDE RESET
IDE DETECT
IDE ENABLE
SCSI INIT
SCSI RESET
SCSI DETECT
SCSI ENABLE
SETUP VERIFY PASS
ASL RESERVED
START OF SETUP
SETUP INPUT WAIT
READY TO BOOT EVENT
LEGACY BOOT EVENT
EXIT BOOT SERVICES
VIRTUAL ADDR MAP BEG
VIRTUAL ADDR MAP END
LGCY OPTION ROM INIT
SYSTEM RESET
USB HOT PLUG
PCI BUS HOT PLUG
CLEAN-UP OF NVRAM
CONFIGURATION RESET
AMI RESERVED
AMI RESERVED
AMI RESERVED
AMI RESERVED
AMI RESERVED
AMI RESERVED
AMI RESERVED
AMI RESERVED
OEM BDS INIT
OEM BDS INIT
OEM BDS INIT
OEM BDS INIT
OEM BDS INIT
OEM BDS INIT
OEM BDS INIT
Copyright ©2015 American Megatrends Inc. ● Public Document
Page 32 of 37
American Megatrends, Inc.
AMIDebug™ Rx – User Manual
C7
C8
C9
CA
CB
CC
CD
CE
CF
D0
D1
D2
D3
D4
D5
D6
D7
D8
D9
DA
DB
DC
E0
E1
E2
E3
E4
E5
E6
E7
E8
E9
EA
EB
EC
ED
EE
EF
F0
F1
F2
F3
F4
F5
F6
F7
F8
F9
FA
FB
FC
FD
FE
FF
OEM BDS INIT
OEM BDS INIT
OEM BDS INIT
OEM BDS INIT
OEM BDS INIT
OEM BDS INIT
OEM BDS INIT
OEM BDS INIT
OEM BDS INIT
CPU INIT ERROR
NB INIT ERROR
SB INIT ERROR
PROTOCOL NOT AVAIL.
PCI ALLOC ERROR
NO SPACE FOR OPROM
NO CONOUT DEVICE
NO CONIN DEVICE
INVALID PASSWORD
ERROR LOADING BOOT
BOOT OPTION FAILED
FLASH UPDATE FAILED
RESET PROTOCOL FAIL
S3 RESUME STARTED
S3 BOOT SCRIPT EXEC
VIDEO REPOST
OS S3 WAKE VECTOR
AMI RESERVED
AMI RESERVED
AMI RESERVED
AMI RESERVED
S3 RESUME PEI FAIL
S3 PPI NOT FOUND
S3 BOOT SCRIPT ERROR
S3 OS WAKE ERROR
AMI RESERVED
AMI RESERVED
AMI RESERVED
AMI RESERVED
RECOVERY - FIRMWARE
RECOVERY - USER
RECOVERY STARTED
RECOVERY FW STARTED
RECOVERY FW LOADED
AMI RESERVED
AMI RESERVED
AMI RESERVED
RECOVERY PPI NOT FND
RECOVERY CAP NOT FND
INVALID RECOVERY CAP
AMI RESERVED
AMI RESERVED
AMI RESERVED
AMI RESERVED
AMI RESERVED
Example Session Output (using Download/Display Command)
AMI Debug Rx Output for Session#1
===============================================================================
Session Start Time
Total Checkpoints
Duration of last boot
BIOS Tag
BIOS Type
BIOS Build Time
:
:
:
:
:
:
06/10/2009 15:16:44
52
23,703ms
0ABFL032
Aptio 4.x
05/11/2009 17:00:07
Copyright ©2015 American Megatrends Inc. ● Public Document
Page 33 of 37
American Megatrends, Inc.
AMIDebug™ Rx – User Manual
Checkpoint Output
------------------------------------------------------------------------------Num
CP
Time (ms)
String
-----------------------------------------1
0x0011
1,372ms
PRE-MEM CPU INIT
2
0x0015
1,513ms
PRE-MEM NB INIT
3
0x0019
1,883ms
PRE-MEM SB INIT
4
0x002B
8,674ms
MEM INIT. SPD READ
5
0x002C
9,172ms
MEM INIT. MEM DETECT
6
0x002E
9,262ms
CONFIGURING MEMORY
7
0x0031
9,942ms
MEMORY INSTALLED
8
0x0032
12,067ms
CPU POST-MEM INIT
9
0x0033
12,075ms
CACHE INITIALIZATION
10
0x0059
12,154ms
CPU MICRO NOT FOUND
11
0x0034
12,162ms
APP PROCESSOR INIT
12
0x0036
12,463ms
SMM INITIALIZATION
13
0x004F
12,585ms
DXE IPL IS STARTED
14
0x0061
16,738ms
NVRAM INITIALIZATION
15
0x0062
16,760ms
INSTALL SB RUNTIME
16
0x0063
16,763ms
CPU DXE INIT
17
0x0068
16,782ms
PCI HB INIT
18
0x0069
16,785ms
NB DXE INIT
19
0x006A
16,814ms
NB DXE SMM INIT
20
0x0070
16,831ms
SB DXE INIT
21
0x0071
16,876ms
SB DXE SMM INIT
22
0x0072
16,877ms
SB DEVICES INIT
23
0x0078
16,993ms
ACPI MODULE INIT
24
0x0079
17,014ms
CSM INIT
25
0x009A
17,043ms
USB INIT
26
0x0090
17,063ms
BDS STARTED
27
0x0091
17,094ms
DRIVER CONNECTING
28
0x0092
17,096ms
PCI BUS INIT
29
0x0094
17,097ms
PCI BUS ENUMERATION
30
0x0094
17,097ms
PCI BUS ENUMERATION
31
0x0094
17,097ms
PCI BUS ENUMERATION
32
0x0094
17,098ms
PCI BUS ENUMERATION
33
0x0095
17,098ms
PCI BUS REQUEST
34
0x0096
17,099ms
PCI BUS ASSIGN
35
0x0097
17,400ms
CONSOLE OUTPUT CON
36
0x00B2
17,401ms
LGCY OPTION ROM INIT
37
0x0099
17,744ms
SUPER IO INIT
38
0x0098
17,818ms
CONSOLE INPUT CON
39
0x0099
17,820ms
SUPER IO INIT
40
0x0092
19,840ms
PCI BUS INIT
41
0x009C
19,875ms
USB DETECT
42
0x00B4
19,900ms
USB HOT PLUG
43
0x00B4
21,111ms
USB HOT PLUG
44
0x0099
21,160ms
SUPER IO INIT
45
0x00A0
21,666ms
ASL RESERVED
46
0x00A2
21,667ms
IDE RESET
47
0x00A3
21,667ms
IDE DETECT
48
0x00A0
21,674ms
ASL RESERVED
49
0x00A2
21,674ms
IDE RESET
50
0x00A3
21,675ms
IDE DETECT
51
0x00AD
23,705ms
READY TO BOOT EVENT
52
0x00AE
23,705ms
LEGACY BOOT EVENT
Debug String Output
------------------------------------------------------------------------------[AmiDbg]Register PPI Notify: 36164812-a023-44e5-bd85-05bf3c7700aa
[AmiDbg]Notify: PPI Guid: 36164812-a023-44e5-bd85-05bf3c7700aa, Peim notify entry point:
fffe7810
[AmiDbg]PeiDebugSupport.Entry(FFFBD42C)
[AmiDbg]Register PPI Notify: f894643d-c449-42d1-8ea8-85bdd8c65bde
Copyright ©2015 American Megatrends Inc. ● Public Document
Page 34 of 37
American Megatrends, Inc.
AMIDebug™ Rx – User Manual
[AmiDbg]Register PPI Notify: 605ea650-c65c-42e1-ba80-91a52ab618c6
[AmiDbg]CpuPeiBeforeMem.Entry(FFFECB85)
[AmiDbg]NBPEI.Entry(FFFF495B)
[AmiDbg]SBPEI.Entry(FFFF1AED)
[AmiDbg]>>> PM Registers Before GPIO Init <<<
[AmiDbg]+===================== PM Registers dump =====================+
[AmiDbg] PM1a_EVT_BLK.PM1_STS
: Addr = 0400 => Val = 0001
[AmiDbg] PM1a_EVT_BLK.PM1_EN
: Addr = 0402 => Val = 0000
[AmiDbg] PM1a_CNT_BLK.PM1_CNT
: Addr = 0404 => Val = 00001C00
[AmiDbg] PMTMR_BLK.PM1_TMR
: Addr = 0408 => Val = xx9E5F20
[AmiDbg] P_BLK.PROC_CNT
: Addr = 0410 => Val = 00000000
[AmiDbg] GPE0_BLK.GPEO_STS
: Addr = 0428 => Val = BDFF0000
[AmiDbg] GPE0_BLK.GPEO_EN
: Addr = 042C => Val = 00000000
[AmiDbg]+==================== SMI Registers dump =====================+
[AmiDbg] SMI_EN
: Addr = 0430 => Val = 00000000
[AmiDbg] SMI_STS
: Addr = 0434 => Val = 00000100
[AmiDbg] ALT_GP_SMI_EN
: Addr = 0438 => Val = 0000
[AmiDbg] ALT_GP_SMI_STS
: Addr = 043A => Val = BDFF
[AmiDbg]+================== MISC ICH7 PM Registers ===================+
[AmiDbg] GPE_CNTL
: Addr = 0442 => Val = 00
[AmiDbg] DEVACT_STS
: Addr = 0444 => Val = 0020
[AmiDbg] SS_CNT
: Addr = 0450 => Val = 00
[AmiDbg] C3_RES
: Addr = 0454 => Val = 00000000
[AmiDbg]+==================== TCO Registers dump =====================+
[AmiDbg] TCO_RLD
: Addr = 0460 => Val = 0004
[AmiDbg] TCO_DAT_IN
: Addr = 0462 => Val = 00
[AmiDbg] TCO_DAT_OUT
: Addr = 0463 => Val = 00
[AmiDbg] TCO1_STS
: Addr = 0464 => Val = 0000
[AmiDbg] TCO2_STS
: Addr = 0466 => Val = 0000
[AmiDbg] TCO1_CNT
: Addr = 0468 => Val = 0800
[AmiDbg] TCO2_CNT
: Addr = 046A => Val = 0008
[AmiDbg] TCO_MESSAGE1
: Addr = 046C => Val = 00
[AmiDbg] TCO_MESSAGE2
: Addr = 046D => Val = 00
[AmiDbg] TCO_WDCNT
: Addr = 046E => Val = 00
[AmiDbg] SW_IRQ_GEN
: Addr = 0470 => Val = 03
[AmiDbg] TCO_MESSAGE2
: Addr = 0472 => Val = 0004
[AmiDbg]+=============================================================+
[AmiDbg]>>> PM Registers After GPIO Init <<<
[AmiDbg]+===================== PM Registers dump =====================+
[AmiDbg] PM1a_EVT_BLK.PM1_STS
: Addr = 0400 => Val = 0001
[AmiDbg] PM1a_EVT_BLK.PM1_EN
: Addr = 0402 => Val = 0000
[AmiDbg] PM1a_CNT_BLK.PM1_CNT
: Addr = 0404 => Val = 00001C00
[AmiDbg] PMTMR_BLK.PM1_TMR
: Addr = 0408 => Val = xx5AB313
[AmiDbg] P_BLK.PROC_CNT
: Addr = 0410 => Val = 00000000
[AmiDbg] GPE0_BLK.GPEO_STS
: Addr = 0428 => Val = BDFF0000
[AmiDbg] GPE0_BLK.GPEO_EN
: Addr = 042C => Val = 00000000
[AmiDbg]+==================== SMI Registers dump =====================+
[AmiDbg] SMI_EN
: Addr = 0430 => Val = 00000000
[AmiDbg] SMI_STS
: Addr = 0434 => Val = 00000100
[AmiDbg] ALT_GP_SMI_EN
: Addr = 0438 => Val = 0000
[AmiDbg] ALT_GP_SMI_STS
: Addr = 043A => Val = BDFF
[AmiDbg]+================== MISC ICH7 PM Registers ===================+
[AmiDbg] GPE_CNTL
: Addr = 0442 => Val = 00
[AmiDbg] DEVACT_STS
: Addr = 0444 => Val = 0020
[AmiDbg] SS_CNT
: Addr = 0450 => Val = 00
[AmiDbg] C3_RES
: Addr = 0454 => Val = 00000000
[AmiDbg]+==================== TCO Registers dump =====================+
[AmiDbg] TCO_RLD
: Addr = 0460 => Val = 0004
[AmiDbg] TCO_DAT_IN
: Addr = 0462 => Val = 00
[AmiDbg] TCO_DAT_OUT
: Addr = 0463 => Val = 00
[AmiDbg] TCO1_STS
: Addr = 0464 => Val = 0000
[AmiDbg] TCO2_STS
: Addr = 0466 => Val = 0000
[AmiDbg] TCO1_CNT
: Addr = 0468 => Val = 0800
[AmiDbg] TCO2_CNT
: Addr = 046A => Val = 0008
[AmiDbg] TCO_MESSAGE1
: Addr = 046C => Val = 00
[AmiDbg] TCO_MESSAGE2
: Addr = 046D => Val = 00
[AmiDbg] TCO_WDCNT
: Addr = 046E => Val = 00
Copyright ©2015 American Megatrends Inc. ● Public Document
Page 35 of 37
American Megatrends, Inc.
AMIDebug™ Rx – User Manual
[AmiDbg] SW_IRQ_GEN
: Addr = 0470 => Val = 03
[AmiDbg] TCO_MESSAGE2
: Addr = 0472 => Val = 0004
[AmiDbg]+=============================================================+
[AmiDbg]MemDetect.Entry(FFFF6582)
[AmiDbg]Memory Installed: Address=1C700000; Length=3000000
[AmiDbg]PEI_STACK: Address=1C700000; Length=100000
[AmiDbg]HOBLIST address before memory init = 0xfef00400
[AmiDbg]HOBLIST address after memory init = 0x1c800000
[AmiDbg]PEI core reallocated to memory
[AmiDbg]Total Cache as RAM:
7168 bytes.
[AmiDbg] CAR stack ever used: 3580 bytes.
[AmiDbg] CAR heap used:
3016 bytes.
[AmiDbg]Notify: PPI Guid: f894643d-c449-42d1-8ea8-85bdd8c65bde, Peim notify entry point:
fffbda9f
[AmiDbg]Notify: PPI Guid: 36164812-a023-44e5-bd85-05bf3c7700aa, Peim notify entry point:
fffe7810
[AmiDbg]Capsule.Entry(1F6F0A5E)
[AmiDbg]Capsule Read variable service installed
[AmiDbg]EFI_NOT_FOUND
[AmiDbg]S3Resume.Entry(FFF78DAD)
[AmiDbg]CpuPei.Entry(FFFEE19D)
[AmiDbg]NumCpus = 2.
[AmiDbg]Register PPI Notify: 605ea650-c65c-42e1-ba80-91a52ab618c6
[AmiDbg]PEIM 8401a046-6f70-4505-8471-7015b40355e3 was not started!!
[AmiDbg]PEIM e008b434-0e73-440c-8612-a143f6a07bcb was not started!!
[AmiDbg]PEIM 32505be8-6469-4f79-9b01-66b3f9617e7d was not started!!
[AmiDbg]PEIM a47438d5-94e9-49b3-bc31-7e6bc9363814 was not started!!
[AmiDbg]DXE IPL Entry
[AmiDbg]CORE_DXE.Entry(1F579DE4)
[AmiDbg]Notify: PPI Guid: 605ea650-c65c-42e1-ba80-91a52ab618c6, Peim notify entry point:
fffbe35b
[AmiDbg][13AC6DD0-73D0-11D4-B06B-00AA00BD6DE7].Entry(11F46A0)
[AmiDbg]Runtime.Entry(1F55C520)
[AmiDbg]ReFlash.Entry(11F081C)
[AmiDbg]SBRun.Entry(1F546A5C)
[AmiDbg]ACPIS3Save.Entry(121D680)
[AmiDbg]CpuDxe.Entry(1236180)
[AmiDbg]AcpiResLib: LibGetDsdt(): LocateProtocol(ACPISupport) returned EFI_NOT_FOUND
[AmiDbg]PciRootBridge.Entry(125FC7C)
[AmiDbg]PciHostCSHooks: LocateProtocol(ACPISupport)=EFI_NOT_FOUND
[AmiDbg]CspLibDxe.Entry(1221220)
...
Example session is for an Aptio 4.x BIOS with UEFI debug strings enabled. Some debug
strings were removed to make the example output shorter. The debug strings will typically not
be present on a production BIOS.
Copyright ©2015 American Megatrends Inc. ● Public Document
Page 36 of 37
American Megatrends, Inc.
AMIDebug™ Rx – User Manual
Limited Hardware Warranty
This Limited Warranty is extended by American Megatrends Inc. (AMI) only to the original purchaser of the
accompanying AMI microcomputer hardware product (the "Product") and is not assignable to any other person.
AMI offers a one (1) year warranty on all hardware products, excluding battery packs and keyboard controllers
unless otherwise documented in a legal contract with the customer or warranty card accompanying the product.
AMI warrants that the Product will be free from defects in materials and workmanship, under normal use and
service and will perform substantially in accordance with the description of the Product in the AMI User's Guide for
this product. Warranty will be void if serial number labels on the AMI hardware are tampered with.
ALL WARRANTIES ARE SUBJECT TO THE TERMS AND CONDITIONS ON THE AMI WARRANTY
REGISTRATION CARD.
You are solely responsible for any failure of the Product which results from accident, abuse, misapplication or
alteration of the Product and AMI assumes no liability as a consequence of such events under the terms of this
Limited Warranty. While AMI has made every effort to provide clear and accurate technical information about the
application of the Product, AMI assumes no liability for any events arising out of the use of this technical
information.
The sole and exclusive remedy for failure of the Product to conform to this Limited Warranty shall be for AMI, at its
option, to repair or replace the Product, to whatever extent deems necessary to restore the Product to proper
operating condition. AMI may make replacements hereunder with new or functionally equivalent products of equal
value.
To obtain warranty service, you must first call AMI technical support at 770-246-8645. If tech support cannot resolve
the problem you are encountering, you will be directed to submit a return materials authorization form. You must
complete the form in its entirety. This form can be found on our website: ami.com under RMA Procedures or the
form can be faxed to you. Upon receipt of the RMA request form, an RMA number will be processed and issued to
you. Please allow at least 24 hours for a response. An RMA number will be communicated to you via email or
phone call with notification of the status of your board, i.e. warranty or non-warranty.
Remember, non-warranty boards will incur a minimum charge of $100.00 plus parts and shipping. Please retain a
copy of your notification for your files and future references. Upon receipt of the RMA number, return the Product,
together with (a) the return authorization number, (b) proof and date of purchase, (C) a description of the problem
with the Product and (d) your name and mailing address, postage prepaid to: American Megatrends Inc, 5555
Oakbrook Parkway, Suite 200, Norcross, Georgia 30093 (USA). Mark the outside of your box with the RMA
number. Failure to do so will delay receiving and processing your Product.
AMI requires that the Product be packed in an anti-static material and packaged adequately for shipping and be
insured when shipped. AMI shall not be responsible for damage to the Product in transit. The product will be
returned to you by method and carrier chosen by AMI to any destination within the United States of America. If you
desire some other specific form of conveyance or shipment beyond the USA border or if the product is out of
warranty, you must bear the cost of return shipment.
Please note that if you return the Product without proof of purchase or after expiration of the applicable period of
coverage for this Limited Warranty, AMI will, at its option, repair or replace the Product and charge you the then
effective AMI recommended Retail Price for the repair or replacement of the Product. Any such repair or
replacement of out of warranty products is contingent upon the commercial availability of the required components.
If AMI has discontinued the manufacture or redistribution of such Product because of technical obsolescence the
product shall be held for no longer than thirty (30) days awaiting your instructions.
If Product is out of warranty, you will be contacted for billing information. Charges are based on a $100.00 minimum
fee, plus parts and shipping. Should the repair costs exceed $200.00, you will be notified for prior approval before
repairs are complete. Average cost of repair is $150.00. For non-warranty or out-of-warranty repairs, AMI will
accept: company purchase orders, credit cards (American Express, VISA, Mastercard, & Discover) and cashier's
checks.
Please allow at least ten (10) days before inquiring about the status of your product. Upon receipt, please inspect
and test your products. There is a thirty (30) day warranty on all repairs.
For additional information or question regarding our policies and procedures please call (770) 246-8621.
Copyright ©2015 American Megatrends Inc. ● Public Document
Page 37 of 37