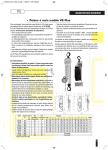
1
FM Monitoring Silver User Manual (software version 2.4.x) Date: 2013/03/01 Audemat® is a registered trademark. audemat WorldCast Systems Group web: www.broadcast-silver.com - e-mail: [email protected] FM Monitoring Silver 2.4.x User Manual – 03/2013 CONTENTS 1. INTRODUCTION .......................................................................................................................................5 1.1. General information ..........................................................................................................................5 1.2. Software options ...............................................................................................................................6 1.3. Hardware options .............................................................................................................................6 1.4. Before you start ................................................................................................................................7 1.4.1. Safety warning ............................................................................................................................7 1.4.2. Operating recommendations .......................................................................................................8 1.4.3. Installation specifications and precautions regarding the RF environment ................................8 2. PRODUCT PRESENTATION ..................................................................................................................13 2.1. General specifications ....................................................................................................................13 2.2. Network configuration.....................................................................................................................15 2.3. List of the included accessories .....................................................................................................16 2.4. Front panel .....................................................................................................................................16 2.5. Rear Panel .....................................................................................................................................17 3. GETTING STARTED WITH THE FM MONITORING SILVER ...............................................................18 3.1. Connection .....................................................................................................................................18 3.2. Configuring your PC to communicate with the unit ........................................................................18 3.3. Download the FM Monitoring Silver application from the unit ........................................................19 4. THE INTERNAL WEBSITE .....................................................................................................................20 4.1. Product ID.......................................................................................................................................20 4.2. Network ..........................................................................................................................................21 4.3. Download........................................................................................................................................22 5. REMOTE APPLICATION PRESENTATION ..........................................................................................23 5.1. Introduction .....................................................................................................................................23 5.1.1. Working principle .......................................................................................................................23 5.1.2. Functions ...................................................................................................................................23 5.2. Installing and launching the FM Monitoring Silver application .......................................................30 5.3. Checking version numbers and options .........................................................................................32 6. CONFIGURING THE FM MONITORING SILVER ..................................................................................33 6.1. Set application preferences ............................................................................................................33 6.2. Access system configuration ..........................................................................................................35 6.2.1. Product Identifiers .....................................................................................................................35 6.2.2. Date/Time ..................................................................................................................................36 6.2.3. Status ........................................................................................................................................37 6.2.4. Users .........................................................................................................................................38 6.2.5. Network .....................................................................................................................................40 6.2.6. PPP Dialout ...............................................................................................................................41 6.2.7. PPP Dial-in ................................................................................................................................43 6.2.8. SMS Alerts ................................................................................................................................44 6.2.9. Phone Alerts (option) ................................................................................................................45 6.2.10.SMTP Mail Client ......................................................................................................................46 6.2.11.SNMP Agent..............................................................................................................................48 6.2.12.Notifications ...............................................................................................................................49 6.2.13.Webcam (option) / Audio Streaming .........................................................................................51 6.2.14.IP Router and Port translation ...................................................................................................52 6.2.15.Support ......................................................................................................................................54 6.2.16.I/O Layout ..................................................................................................................................55 6.2.17.I/O Log.......................................................................................................................................56 6.2.18.I/O State ....................................................................................................................................56 6.2.19.Receivers ..................................................................................................................................57 Page 2 Head Office : Parc d’activites Kennedy - 20, avenue Neil Armstrong – 33700 Bordeaux-Merignac (France) Tel +33 (0)5 57 928 928 – Fax +33 (0)5 57 928 929 – [email protected] – www.broadcast-silver.com FM Monitoring Silver 2.4.x User Manual – 03/2013 7. MONITORING CONFIGURATION ..........................................................................................................58 7.1. Managing stations ..........................................................................................................................58 7.1.1. Adding New Stations to the Monitoring List ..............................................................................58 7.1.2. Delete a program from the configured channel list ...................................................................59 7.2. Channel configuration ....................................................................................................................60 7.2.1. Basic Configuration ...................................................................................................................60 7.2.2. RF Level Configuration .............................................................................................................61 7.2.3. MPX Monitoring Configuration ..................................................................................................63 7.2.4. Stereo Monitoring configuration ................................................................................................64 7.2.5. Analog Audio Configuration ......................................................................................................65 7.2.6. RDS Monitoring Configuration ..................................................................................................66 7.2.7. Extended RDS Data Monitoring configuration ..........................................................................68 8. RECORDING CONFIGURATION ...........................................................................................................70 8.1. Scheduling recordings ....................................................................................................................71 8.2. Recording management .................................................................................................................72 8.3. EWS (option) ..................................................................................................................................73 9. ACCESSING READINGS .......................................................................................................................74 9.1. Recorded Measurements ...............................................................................................................74 9.2. Scan Management .........................................................................................................................75 10. REALTIME MONITORING ....................................................................................................................77 10.1. Realtime measurements ................................................................................................................77 10.2. Audio Streaming .............................................................................................................................79 10.3. RDS Streaming ..............................................................................................................................80 10.3.1.General tab................................................................................................................................82 10.3.2.Lists of AF tab ...........................................................................................................................83 10.3.3.EON AF tab ...............................................................................................................................84 10.3.4.Sequence tab ............................................................................................................................85 10.3.5.Percentage tab ..........................................................................................................................86 10.3.6.HEXA group tab ........................................................................................................................87 10.3.7.ASCII group tab .........................................................................................................................88 10.3.8.Radio paging tab .......................................................................................................................89 10.3.9.TMC tab.....................................................................................................................................90 11. VIEWING THE UNIT STATUS ..............................................................................................................91 11.1. Current Alarms ...............................................................................................................................91 11.2. Viewing the event log .....................................................................................................................92 12. MANAGING BACKUP FILES ...............................................................................................................94 12.1. Backing up ......................................................................................................................................94 12.2. Restoring a file ...............................................................................................................................95 13. ACTIVATING SOFTWARE OPTIONS ..................................................................................................96 13.1. Activating the Full RDS, EWS or the MasterView option ...............................................................96 13.2. Activating the Phone Alerts option .................................................................................................97 14. OPTIONAL INPUT / OUTPUT CONFIGURATION ...............................................................................98 14.1. Status module - Digital inputs ........................................................................................................98 14.2. Commands module - Relay outputs .............................................................................................100 14.3. Metering module - Analog inputs .................................................................................................102 APPENDIX A: SCRIPTEASY OBJECTS .................................................................................................103 APPENDIX B: FM MONITORING SILVER V2 TRAP DESCRIPTION .....................................................105 APPENDIX C: DESCRIPTION OF SNMP MONITORING TABLES ........................................................111 APPENDIX D: DESCRIPTION OF MODBUS MONITORING TABLES ...................................................113 APPENDIX E: PROCEDURE FOR RETRIEVING THE IP ADDRESS ....................................................114 E.1. Connection via the back panel serial port ......................................................................................114 E.2. Connection with a keyboard and monitor .......................................................................................116 Page 3 Head Office : Parc d’activites Kennedy - 20, avenue Neil Armstrong – 33700 Bordeaux-Merignac (France) Tel +33 (0)5 57 928 928 – Fax +33 (0)5 57 928 929 – [email protected] – www.broadcast-silver.com FM Monitoring Silver 2.4.x User Manual – 03/2013 APPENDIX F: ITU-T AF FILTER OPTION, OBJECTIVES AND OPERATION .......................................118 F.1. Objectives .......................................................................................................................................118 F.2. Observations ...................................................................................................................................118 F.3. Consequences ................................................................................................................................119 F.4. Analyzing disturbed signals ............................................................................................................119 F.5. Solution: audio filtering ...................................................................................................................120 F.5.1 – Insertion principle ...................................................................................................................121 F.5.2 – Obtained gain .........................................................................................................................121 F.6. Operating ........................................................................................................................................122 F.7. Conclusion ......................................................................................................................................123 APPENDIX G: CONFIGURING YOUR UNIT TO SEND ALARMS ..........................................................124 G.1. Setting user accounts .....................................................................................................................124 G.2. Severity levels ................................................................................................................................124 G.3. Setting monitoring parameters .......................................................................................................125 APPENDIX H: FOR FURTHER INFORMATION ......................................................................................126 Page 4 Head Office : Parc d’activites Kennedy - 20, avenue Neil Armstrong – 33700 Bordeaux-Merignac (France) Tel +33 (0)5 57 928 928 – Fax +33 (0)5 57 928 929 – [email protected] – www.broadcast-silver.com FM Monitoring Silver 2.4.x User Manual – 03/2013 1. INTRODUCTION 1.1. General information Audemat provides a suite of professional monitoring and measurement tools for Radio and TV broadcasters, telecommunication operators and regulation authorities worldwide. The Audemat portfolio includes radio frequency (RF) and data monitoring equipment and mobile field strength meters for analog and digital radio and TV, digital test and measurement equipment, audio processors, world-class RDS encoders and an extensive range of facility remote control solutions. To complement Audemat’s hardware product line, the company also offers an extensive range of professional software solutions for the management, configuration and monitoring of broadcast networks. Founded in 1980, Audemat is part of the WorldCast Systems group of companies which combines the collective expertise & extensive product portfolio of several major broadcast brands to offer turnkey systems in all major analog and digital technologies. Other brands within the group include: APT Codecs who offer reliable and cost effective broadcast codec platforms delivering high quality content over IP, T1, E1, ISDN & Leased Lines. Ecreso who design a range of highly efficient transmitters for broadcast transmission technologies such as FM, DAB/ DAB+/ T-DMB. Both liquid- and air-cooled options are available. As such, WorldCast Systems can offer complete broadcast solutions for the delivery, transmission and monitoring of broadcast content throughout the broadcast chain. The group is founded on three core values: 1) Product innovation: Audemat places a key emphasis on Research & Development and its innovative approach has been repeatedly recognized by the industry. WorldCast Systems has won awards for innovation at consecutive NAB Shows for over 10 years. 2) Customer satisfaction: Audemat is dedicated to ensuring the best quality, value and service for its customers and has achieved IS0 9001 certification. 3) Sustainable Development: Audemat is committed to sustainable development and demonstrates this commitment in several ways: it adheres to the UN Global Compact project and all new products are developed in keeping with an eco-design philosophy and built within Audemat’s low energy consumption factory. Audemat employs around 80 employees at headquarters in Bordeaux-Merignac, France. Audemat also has a subsidiary in Miami, USA that manages the North & South American markets as well as sales offices in the UK and India. An extensive network of international dealers and distributors means that the company is represented in over 45 countries throughout Europe, Middle East, Africa and Asia. Page 5 Head Office : Parc d’activites Kennedy - 20, avenue Neil Armstrong – 33700 Bordeaux-Merignac (France) Tel +33 (0)5 57 928 928 – Fax +33 (0)5 57 928 929 – [email protected] – www.broadcast-silver.com FM Monitoring Silver 2.4.x User Manual – 03/2013 1.2. Software options Three software options are available to enhance the FM Monitoring Silver Full RDS: monitoring of extended RDS data and streaming RDS. See sections 7.2.7 and 10.3. EWS: monitoring of Emergency Warning System messages contained in the RDS group 9A. See section 8.3. Phone Alerts: alarms written in the event log and sent by mail or SNMP trap can also be sent as phone messages. In addition to the software key, a modem supplied by Audemat is required to implement the option. See section 6.2.8 and ScriptEasy manual. MasterView: with this application, visualize and control your site in custom views created with ScriptEasy. MasterView can be installed without a license but cannot be used. See ScriptEasy manual. See chapter 13 for software option activation. 1.3. Hardware options The FM Monitoring Silver is available in 2 versions: FM Monitoring Silver FM Monitoring Silver + Remote Control: includes 1 metering module (analog inputs), 1 status module (digital inputs), 1 commands module (relay outputs). (see chapter 14 for input/output configuration) Page 6 Head Office : Parc d’activites Kennedy - 20, avenue Neil Armstrong – 33700 Bordeaux-Merignac (France) Tel +33 (0)5 57 928 928 – Fax +33 (0)5 57 928 929 – [email protected] – www.broadcast-silver.com FM Monitoring Silver 2.4.x User Manual – 03/2013 1.4. Before you start 1.4.1. Safety warning This equipment complies with international mechanical and electrical standards. To maintain this compliance, as well as to ensure proper and safe working conditions and avoid electrical shocks and fire hazards, you must comply with the following recommendations: The device should only be utilized in the conditions described in the user manual. The device is designed for industrial usage and must only be operated by qualified personnel. The device may be heavy; it must be lifted and handled with care, specifically during unpacking and set up. Electrical precautions Unplug from mains outlet before any intervention. Any maintenance, adjustment or repair must be carried out by personnel specifically trained by WorldCast Systems. Before switching on the device, make sure the nominal voltage specified on the device matches the mains nominal voltage. The device should only be operated on a stable electrical network. If the electrical network is not stable, a power conditioner, such as a UPS, must be used The device must only be used with a plug that incorporates a protective ground contact. To avoid any risk of electrocution, the protection conductor must not be cut, intentionally or accidentally, either on the device or on the power cord. High quality shielded cables are mandatory. Environmental precautions It is necessary to verify that environmental conditions comply with those recommended in the manual. Nothing must obstruct the ventilation. To avoid any electromagnetic interference, the device must only be used when it is closed, installed in a cabinet and connected to the earth as per the instructions. The device should not be exposed to dripping or splashing and no objects filled with liquids, such as coffee cups, should be placed on the equipment. Connectors may be hot on high power units. Precautions regarding the lithium battery This device includes a lithium battery. If the battery is not correctly replaced, there is a risk of explosion. Only replace it with a battery of the same type. Contact us before attempting to use another type Do not puncture the battery Do not throw the battery in fire Do not immerse the battery in water Do not throw away the used battery, recycle it instead. You may send it back to us if needed. If these precautions are not followed, the guarantee will be void. Page 7 Head Office : Parc d’activites Kennedy - 20, avenue Neil Armstrong – 33700 Bordeaux-Merignac (France) Tel +33 (0)5 57 928 928 – Fax +33 (0)5 57 928 929 – [email protected] – www.broadcast-silver.com FM Monitoring Silver 2.4.x User Manual – 03/2013 1.4.2. Operating recommendations So as to guarantee acquisition performance, stability of supplied information and reliability, we recommend you follow the conditions below: The unit must be installed in a location with steady air flow, either forced or natural. If several units are stacked up, they should be spaced by at least 1 U to allow air flow and prevent overheating. It is strongly recommended that the location is not subject to a high humidity level (>70%), and to avoid high salinity or chlorinated environments. It is strongly recommended that the location is not exposed to a high volume of dust. Connection to the mains should be done according to applicable installation codes: outlets in good working conditions to insure a reliable contact, correct voltage, without fluctuation and stable over time (power conditioner recommended), sufficient power. The quality of the communication network (modem, ADSL, WIFI, WIMAX) is very important. Modem correctly installed, proper antenna installation in case of WiFi and WiMax, 1.4.3. Installation specifications and precautions regarding the RF environment When installing a FM Monitoring Silver, be conscious of the RF environment in which the equipment will be placed. To guarantee the reliability of the system it is necessary to set it up in the best conditions, following the guidelines presented below. It is understood that the equipment is installed following the operating recommendations as stated in the user manual regarding the environment, the electrical network and the communication network. 1.4.3.1 Reception system and monitoring site The FM Monitoring Silver could be installed at a transmitter site or at a dedicated monitoring site. In the first case, the RF signal is obtained from a probe attached to the RF output of the transmitter or of the cavity filter. In this situation, the RF levels are normally very high so it is necessary to put adequate attenuation between the source and the monitoring equipment, reducing the RF level within the unit’s acceptable range (2095 dBµV). When monitoring off-air signals, the RF is delivered from an external antenna linked to the unit by a coaxial cable. There are different types of outdoor antennas: their selection and installation is one of the most important aspects of the monitoring site. The most common types of FM antennas are: - Omni-directional antenna Unidirectional dipole Multi-element array antenna. Omni-directional antennas normally have low gain, and the lack of any significant directionality does not make them really suitable for continuous monitoring. The average noise level detected by this type of antennas is higher than in directional antennas, since the reception lobe is almost 360°, exacerbating the effects of unwanted signals such as multipath interference. Unidirectional dipole and multi-element array antennas are characterized by a significant directivity and a greater gain (up to 7 dB for a log antenna), and so are more suited for monitoring purposes. The beamwidth decreases with the increase in the number of elements so high levels of selectivity can be reached, but conversely a very narrow beamwidth could make pointing the antenna in the direction of the transmitter difficult. Page 8 Head Office : Parc d’activites Kennedy - 20, avenue Neil Armstrong – 33700 Bordeaux-Merignac (France) Tel +33 (0)5 57 928 928 – Fax +33 (0)5 57 928 929 – [email protected] – www.broadcast-silver.com FM Monitoring Silver 2.4.x User Manual – 03/2013 The reception antenna used at a monitoring site should be a professional FM reception device, able to guarantee consistent performance over time and avoid degradation of the reception due to corrosion, etc. Moreover, it is strongly advised to use antennas calibrated for FM band frequencies (ie. not broadband) to be sure that out of band signals (TV or civil application transmissions) do not interfere with the monitoring system. This could indeed happen if a consumer wide band antenna is used. The outdoor antenna should normally be installed taking into account the surrounding environment, in terms of obstacles and objects or buildings close by. To guarantee a minimum protection against multipath interferance; a distance of about 3 meters (1 wavelength at 98 MHz) is recommended between the antenna and any surrounding objects. For example, a directional antenna installed too close to a wall will receive signal reflections from the wall, which can easily affect monitoring capabilities. To set a monitoring site it is necessary to: a. Know the distance and direction of transmitter sites relative to the position of the monitoring site b. Make a measurement campaign around the chosen site, verifying the stability and the average level of the RF field. c. Determine the list of the channels to be monitored and verify they respect the minimum recommendations in terms of signal/noise ratio, RF protection ratio (adjacent and iso-frequency signals), modulation power, etc. Typically each monitoring site keeps track of signals from one single transmitter site, with one or more programs. A single directional antenna should be used to receive the signals as stated in the preceding paragraphs. In case more than one transmitter site is to be monitored, it is recommended to use a separate directional antenna, aimed at each of the sites and use a coupler to combine the signals before connecting to the splitter. That way, it is possible to avoid using an omnidirectional antenna and keep the selectivity and sensitivity typical of a directional antenna. 1.4.3.2 Evaluation of the FM Band The first thing to do after having installed the FM Monitoring Silver is to run an identification scan to verify (if not done before with a spectrum analyzer) that the antenna system and all the cable connections to the unit are functional and to check the average RF level detected. Fig. 1 – Identification scan of the FM Band (100 kHz step) at a monitoring site Page 9 Head Office : Parc d’activites Kennedy - 20, avenue Neil Armstrong – 33700 Bordeaux-Merignac (France) Tel +33 (0)5 57 928 928 – Fax +33 (0)5 57 928 929 – [email protected] – www.broadcast-silver.com FM Monitoring Silver 2.4.x User Manual – 03/2013 This first scan identifies any anomalies or critical monitoring conditions. The most common situations are: a. Average RF field too high: the FM receiver of the FM Monitoring Silver is capable of detecting signals between 20 and 95 dBµV, but for monitoring purposes the nominal level should be kept at lower values, to guarantee the correct decoding of sub-carriers information and avoid saturation conditions induced by strong fields. b. The energy distribution in the FM band depends on the RF level of all the signals found during the scan; a homogeneous band (i.e. all carriers have approximately the same level – see Figure 1) is a good base for monitoring, as there is no energy concentration on any specific frequency, thus there is no large RF differential between two monitored stations. The recommended monitoring conditions are: 1. RF level of controlled stations between 30 and 65 dBµV 2. Frequency distance between 2 monitored stations at least 300 kHz 3. Basic noise level under 10-15 dBµV If the RF level of the monitored stations or the basic noise level is higher than the suggested values, the use of a coaxial passive attenuator is recommended: this device will decrease the overall RF level and will also reduce the basic level of noise that can affect sub-carrier decoding. If there is one single very strong carrier (for instance when a monitoring site is very close to a local transmitter), the use of a tuned notch filter is suggested. Typically, this type of filter applies an attenuation only on the frequency on which it is tuned, leaving the surrounding RF field unaltered. An example of notch frequency response is the following: Fig. 2 – Frequency response of a notch filter tuned at 101 MHz If the monitoring site is near a TV (Analog or Digital) or Civil VHF transmission site, it is important to protect the equipment from any possible interference generated by the other transmitters. The first filter is the reception antenna that, if chosen as stated, could already reject out of band signals; however, if the carriers are very strong those signals could interfere with the FM Monitoring Silver’s receiver. In these cases, it is strongly recommended to install, between the receiver’s connector and the antenna, a coaxial low-pass filter to reject all frequencies greater than 108 MHz, thus improving the monitoring ability of the equipment. An example of commercial filter is the Mini-Circuits SLP-100+ filter: Page 10 Head Office : Parc d’activites Kennedy - 20, avenue Neil Armstrong – 33700 Bordeaux-Merignac (France) Tel +33 (0)5 57 928 928 – Fax +33 (0)5 57 928 929 – [email protected] – www.broadcast-silver.com FM Monitoring Silver 2.4.x User Manual – 03/2013 This filter rejects all frequencies over 100 MHz but with only a little insertion loss up to 110 MHz, is useful for the FM band. In the attenuation graph above, the attenuation characteristics are visible peaking at 40 dB and more at frequencies of 175 MHz and higher. 1.4.3.3 Monitoring After the evaluation of the FM band, it is time to start the monitoring activity. ‘Controlling’ a radio station does not mean monitoring the transmitter parameters, its product in terms of RF level, presence or lack of subcarriers, modulation, etc. Environmental conditions (snow, temperature variations, storms and heavy rain) between transmitter and receiving antenna could impact the monitoring abilities as they change the reception conditions so it is important to consider those aspects when starting any radio monitoring. It is strongly recommended to start the activity of the equipment with a period of measurements without alarms to be able to observe the behavior of the controlled signals over a sufficiently large time window to determine the correct alarm thresholds to be applied. A good procedure is to first configure wide alarm thresholds and to narrow them down after some time, based on the trends of the signals during the observation period. This strategy is also useful to determine if any of the characteristic parameters of the signal (subcarriers, audio, …) is unstable due to saturation or reception problems: it is useless to monitor an unstable RDS signal which would generate many alarms when it is clear the reception conditions do not permit RDS detection (basic noise too high, interference, etc). The same principle should be applied to the alarms timeouts, beginning with a relatively long time between the error state and the alarm transmission and decreasing it after several hours/days of observation. Some basic monitoring parameters suggested for the configuration of the FM Monitoring Silver: RF level AF level MPX level RF high 61 dBµV timeout 30 sec RF low 1 49 dBµV timeout 30 sec RF low 2 45 dBµV timeout 30 sec AF high 3 dBr timeout 1:15 min AF low -35 dBr timeout 3:00 minutes MPX low 0 kHz timeout 120 sec MPX high 85 kHz timeout 120 sec Concerning the configuration of timeouts on the different alarms, it should be considered that this time is also influenced by the number of channels configured on the equipment: in basic monitoring (without extended RDS), each channel is scanned for 1 second before the receiver proceeds to the next one. As an example, if 10 channels are monitored (either in “active monitoring” or “measure without alarm”), the maximum wait time between alarm detection and transmission is the configured timeout + one complete monitoring cycle (for 10 channels on basic monitoring, 10 seconds). Page 11 Head Office : Parc d’activites Kennedy - 20, avenue Neil Armstrong – 33700 Bordeaux-Merignac (France) Tel +33 (0)5 57 928 928 – Fax +33 (0)5 57 928 929 – [email protected] – www.broadcast-silver.com FM Monitoring Silver 2.4.x User Manual – 03/2013 The extended RDS monitoring is a separate process and takes 1.5 seconds per channel. Extended RDS data is collected in a dedicated buffer and it is based on this data that the different alarm conditions are detected. To guarantee correct detection of all RDS groups, it is necessary to give this process an adequate monitoring time, typically around 10 minutes. The auto-configuration scan is described in sections 7.1 and 9.2; this function makes it possible to view all carriers present in the band. These prerequisites should be taken into account so as to give the essential components (CPU and receiver) the best operating conditions. These components are sensitive, and extreme conditions greatly decrease their reliability and the consistency of their performance over the operational lifetime of the FM Monitoring Silver. This document contains proprietary information subject to change without notice. Pictures contained within are non-binding. Page 12 Head Office : Parc d’activites Kennedy - 20, avenue Neil Armstrong – 33700 Bordeaux-Merignac (France) Tel +33 (0)5 57 928 928 – Fax +33 (0)5 57 928 929 – [email protected] – www.broadcast-silver.com FM Monitoring Silver 2.4.x User Manual – 03/2013 2. PRODUCT PRESENTATION 2.1. General specifications Main characteristics External dimensions (L H D) 483 (19’’) 42 (1U) 335 mm Weight Around 5.75 kg (12 ½ lbs.) Main power supply 100-240 V / 50-60 Hz Power consumption 60 W @ 230 VAC Temperature Optimal performance temperatures +5°C - +45°C Guaranteed working temperatures 0°C - +50°C Storage -20°C - +70°C Humidity 10-95% non-condensing relative humidity Interfaces RF input 1 - BNC type LAN ports 2- 10/100/1000M Base-T RJ45 ports USB ports 4 - A type TCP-IP protocol TCP, UDP, HTTP, FTP, SNMP, NTP, PPP… Serial port 1 - RS232, configurable for console mode or serial communication Power button 1 LED indicators 3 - RUN, HDD, Power Metering (analog inputs) Up to 8 (option) Status (digital inputs) Up to 16 (option) Commands (relay outputs) Up to 16 (option) I/O specifications Metering (analog inputs) Status (digital inputs) Commands (relay outputs) 12-bit -0 V/+50 V (4 ranges) 5-25 VDC external or contact closure 1 A @ 50 VDC per relay Page 13 Head Office : Parc d’activites Kennedy - 20, avenue Neil Armstrong – 33700 Bordeaux-Merignac (France) Tel +33 (0)5 57 928 928 – Fax +33 (0)5 57 928 929 – [email protected] – www.broadcast-silver.com FM Monitoring Silver 2.4.x User Manual – 03/2013 RF characteristics Frequency range Frequency step RF input impedance 87.50 to 108.00 MHz 10 kHz 50 / 75 RF input connector BNC type RF receiver 1 FM Receiver Stereo sensitivity (19 kHz pilot) < 40 dBμV for S/N 60 dB Input sensitivity 10 to 100 dBµV Selectivity Selectivity at ± 120 kHz > -50 dB Selectivity at ± 200 kHz > -55 dB Selectivity at ± 300 kHz > -75 dB Selectivity at ± 400 kHz > -90 dB Stereo decoder L/R separation 40 dB Typical De-emphasis adjustable 50-75 µs 19 kHz suppression > 30 dB Distortion Deviation: 75 kHz Left or Right < 0.4 % 1 kHz S/N 1 kHz mono (at 75 kHz deviation and 60 dBµV RF) RMS 55 dB QP CCIR 50 dB stereo Acquisitions Max. number of monitored stations 10 RF level acquisition range 20 dBµV to 95 dBµV (1) RF acquisition relative precision 2 dB guaranteed ( 0.5 dB typical) 5 dBμV to 100 dBμV (± 3 dB guaranteed) - 40 dB to + 3dB Extended RF level range AUDIO signal acquisition range AF acquisition precision (2) 1 dB 4 kHz to 110 kHz MPX signal acquisition range MPX acquisition precision (2) 2 kHz up to 90 kHz PILOT 19 kHz sub-carrier acquisition range PILOT 19 kHz acquisition precision (2) RDS 57 kHz sub-carrier acquisition range RDS 57 kHz acquisition precision (2) 5 kHz from 90 to 110 kHz 1 kHz to 15 kHz 1.5 kHz 1 kHz to 10 kHz 1 kHz (1): Depending on equipment calibration and surrounding temperature. (2): In relation to internal reference level. Page 14 Head Office : Parc d’activites Kennedy - 20, avenue Neil Armstrong – 33700 Bordeaux-Merignac (France) Tel +33 (0)5 57 928 928 – Fax +33 (0)5 57 928 929 – [email protected] – www.broadcast-silver.com FM Monitoring Silver 2.4.x User Manual – 03/2013 2.2. Network configuration To successfully communicate with clients and various services, the FM Monitoring Silver uses the following ports: FTP port: 21 HTTP port: 80 SSH server port: 22 SNMP Daemon port: 161 ScriptEasy realtime player port: 5570 FM Monitoring Silver as server Audio Streaming port: 8000 RDS Streaming port: 1234 Realtime measurements port: 8899 Trap sending: 162 Mails sending: 25 FM Monitoring Silver as client NTP server: 123 You may need to open or redirect these ports on the router or firewall (see section 6.2.9) for the FM Monitoring Silver to work properly. Page 15 Head Office : Parc d’activites Kennedy - 20, avenue Neil Armstrong – 33700 Bordeaux-Merignac (France) Tel +33 (0)5 57 928 928 – Fax +33 (0)5 57 928 929 – [email protected] – www.broadcast-silver.com FM Monitoring Silver 2.4.x User Manual – 03/2013 2.3. List of the included accessories Check that all items are present in the box: 1 power supply cable 1 straight Ethernet cable (letter A)* 1 RS232 crossover serial cable (G) 1 USB/serial cable and its mini-CD (letter E) 1 box including 1 CD-Rom, 1 quick start, 1 connection diagram, 1 I/O configuration notice and 1 quality control * Letters correspond to connection points outlined in cable connection diagram. 2.4. Front panel LEDs on the front panel: RUN: normal operation HDD: hard drive activity POWER: power indicator of the FM Monitoring Silver Page 16 Head Office : Parc d’activites Kennedy - 20, avenue Neil Armstrong – 33700 Bordeaux-Merignac (France) Tel +33 (0)5 57 928 928 – Fax +33 (0)5 57 928 929 – [email protected] – www.broadcast-silver.com FM Monitoring Silver 2.4.x User Manual – 03/2013 2.5. Rear Panel Primary interface Secondary interface Slots for I/O modules * F RS 232 crossover cable + (if necessary) E USB-serial cable for console, scriptlet or optional modem. A RJ45 Ethernet cable: for the network or for a direct connection to the PC Optional webcam With the current version only one serial port is enabled. * Input / output modules of the FM Monitoring Silver + Remote Control version: Slot A: commands (relay outputs) Slot B: status (digital inputs) Slot C: metering (analog inputs) Slot D: commands (relay outputs) Page 17 Head Office : Parc d’activites Kennedy - 20, avenue Neil Armstrong – 33700 Bordeaux-Merignac (France) Tel +33 (0)5 57 928 928 – Fax +33 (0)5 57 928 929 – [email protected] – www.broadcast-silver.com Antenna Power supply cable FM Monitoring Silver 2.4.x User Manual – 03/2013 3. GETTING STARTED WITH THE FM MONITORING SILVER 3.1. Connection 1. Connect the unit to the power using the power supply cable. 2. Connect the RF input of the equipment to the antenna (not provided). 3. Connect the Ethernet cable from your PC to the secondary interface of the FM Monitoring Silver. Depending on the rear panel configuration of your FM Monitoring Silver: Secondary interface 4. Press the “power” button 3.2. Configuring your PC to communicate with the unit In case you are using a direct connection, you will need to set an address on your PC in the 172.17.2.xx range, so it is compatible with the IP address in the FM Monitoring Silver. For this, if using Windows 2000 or Windows XP, click the “Start” button and: Control panel/Network connections/ Local Area Connection / Properties Click on Internet Protocol (TCP/IP) in the scroll-down menu then on “Properties”. Add the IP address and the sub-network mask. (for example 172.17.2.56/ Netmask 255.255.0.0) With Vista, click the “Start” button and: Control panel / Network and Internet / Network and Sharing Center. Click on “View Status” for your local area connection, and on Properties Click on Internet Protocol 4, then on Properties. Add the IP address and the sub-net mask. (for example 172.17.2.56 / Netmask 255.255.0.0) Wait for the unit to reboot (approximately 1 minute). Page 18 Head Office : Parc d’activites Kennedy - 20, avenue Neil Armstrong – 33700 Bordeaux-Merignac (France) Tel +33 (0)5 57 928 928 – Fax +33 (0)5 57 928 929 – [email protected] – www.broadcast-silver.com FM Monitoring Silver 2.4.x User Manual – 03/2013 3.3. Download the FM Monitoring Silver application from the unit Open a web browser (Internet Explorer, Mozilla…) and enter the unit IP address, login and password. Default: 172.17.2.172, ‘Admin’ / ‘admin’. You will be able to update IP addresses on the “Network” page and modify passwords on the “User” page of the system configuration section of the remote application. You will then access the embedded website of the FM Monitoring Silver. Click on “Download” in the left menu and on the three FM Monitoring Silver application links to download and install them on your PC. FM Monitoring Silver: remote application, to configure monitoring, setup alarms and display measurements. ScriptEasy: application to create scripts to automate and control inputs/outputs. MasterView: application to view and control your site via custom views. You may now access network configuration. Either use the ‘Network’ page of the embedded web site (see section 4.2), or use the ‘Equipment’ button in the application, ‘Network’ page (see section 6.2.5) to set the primary interface IP address of the FM Monitoring Silver. You will eventually use the primary interface. We recommend you do not change the IP address of the secondary interface. Page 19 Head Office : Parc d’activites Kennedy - 20, avenue Neil Armstrong – 33700 Bordeaux-Merignac (France) Tel +33 (0)5 57 928 928 – Fax +33 (0)5 57 928 929 – [email protected] – www.broadcast-silver.com FM Monitoring Silver 2.4.x User Manual – 03/2013 4. THE INTERNAL WEBSITE Links on the left side of the page enable easy navigation to the various pages of the site. 4.1. Product ID The ‘Product ID’ page lists the build versions of the various pieces of software and firmware that make the FM Monitoring Silver function. It also allows you to give your unit a unique name and description, for your own internal use. Click the “Update” button to lock in your changes. Page 20 Head Office : Parc d’activites Kennedy - 20, avenue Neil Armstrong – 33700 Bordeaux-Merignac (France) Tel +33 (0)5 57 928 928 – Fax +33 (0)5 57 928 929 – [email protected] – www.broadcast-silver.com FM Monitoring Silver 2.4.x User Manual – 03/2013 4.2. Network IP configuration definition: Current network status: current network parameters. Ethernet configuration mode The application can be configured for use with a static or dynamic IP address (DHCP). Static Ethernet configuration If using a static IP address, enter the parameters in this window. DNS Servers: DNS configuration. Click the “Update” button to lock in your changes. Page 21 Head Office : Parc d’activites Kennedy - 20, avenue Neil Armstrong – 33700 Bordeaux-Merignac (France) Tel +33 (0)5 57 928 928 – Fax +33 (0)5 57 928 929 – [email protected] – www.broadcast-silver.com FM Monitoring Silver 2.4.x User Manual – 03/2013 4.3. Download This page enables you to download the installers for the GOLDENEAGLE FM applications: FM Monitoring Silver, remote application, to configure monitoring, setup alarms and display measurements. ScriptEasy, application to create scripts to automate and control inputs/outputs. MasterView, application to view and control your site via custom views. Click on the program we wish to install and select ‘Open’ to install the software application, or "Save" to install from the hard drive (recommended option). Follow the wizard’s instructions. The FM Monitoring Silver MIB (Management Information Base) may also be downloaded from this page. Page 22 Head Office : Parc d’activites Kennedy - 20, avenue Neil Armstrong – 33700 Bordeaux-Merignac (France) Tel +33 (0)5 57 928 928 – Fax +33 (0)5 57 928 929 – [email protected] – www.broadcast-silver.com FM Monitoring Silver 2.4.x User Manual – 03/2013 5. REMOTE APPLICATION PRESENTATION 5.1. Introduction 5.1.1. Working principle The unit is designed to automatically monitor a programmed list (radio stations) by comparing measurements from an internal tuner to user-defined reference settings. In case of failure, alarms are generated and sent by SNMP Traps or mail. The unit communicates with the outside world via IP network (Ethernet or modem). It comes with a client-server application serving as graphic user interface that makes it possible to remotely configure the unit, view measurements and event logs as well as view realtime measurements and listen to the audio. 5.1.2. Functions Cyclical monitoring on multiple programs Cyclical monitoring is done by setting the tuner successively on each set frequency for acquisition of measurements and by then comparing the programmed reference values with the newly acquired data. Please note that measurements are collected only once per frequency which explains why a very brief anomaly will not be detected. Each monitoring element is successively tested according to the hierarchical test order. With this order; lower level tests will stop when a higher level error has been detected. As an example, it is pointless to test the modulation level is the RF level is too low. This method also prevents useless alarms from being sent. Page 23 Head Office : Parc d’activites Kennedy - 20, avenue Neil Armstrong – 33700 Bordeaux-Merignac (France) Tel +33 (0)5 57 928 928 – Fax +33 (0)5 57 928 929 – [email protected] – www.broadcast-silver.com FM Monitoring Silver 2.4.x User Manual – 03/2013 Monitoring hierarchy detail RF LOW2 RF LOW 1 RF HIGH STEREO PILOT LOW PILOT HIGH PHASE MPX LOW MPX HIGH AF LOW AF HIGH RDS RDS LOW RDS HIGH RDSBER GROUPS AF LIST GRPD SLC AID PTY EON TA PI PSCODE PICODE CLOCK OFFSET CLOCK TIME ZONE RDS TA RDS EON TA Measured Values RF Level MPX Level Filtered Audio Level (see Appendix E) Pilot Level (with stereo channels) Stereo Presence - Monitoring Parameters Nominal level Low threshold 1 Low threshold 2 High threshold hysteresis timeout short intermittent errors Nominal level Low threshold High threshold hysteresis timeout Nominal level Low threshold High threshold hysteresis timeout Nominal level Low threshold High threshold hysteresis timeout timeout Alarms Values Recorded RFLOW2 RFLOW1 yes RFHIGH MPXLOW yes MPXHIGH AFLOW yes AFHIGH PLTLOW PLTHIGH STEREO Page 24 Head Office : Parc d’activites Kennedy - 20, avenue Neil Armstrong – 33700 Bordeaux-Merignac (France) Tel +33 (0)5 57 928 928 – Fax +33 (0)5 57 928 929 – [email protected] – www.broadcast-silver.com yes FM Monitoring Silver 2.4.x User Manual – 03/2013 Measured Values Monitoring Parameters (with stereo - short intermittent errors channels) Audio out of phase - timeout RDS Presence - timeout - short intermittent errors RDS Level - Nominal level - Low threshold - High threshold - hysteresis - timeout - short intermittent errors PI Code Validity - Main PI code - Secondary PI code PS Code - Main PS code PI - Secondary PS code - Static/scrolling mode - Number of bits acquired before error bit Error Rate - Sample number - error rate threshold to trigger alarm - error rate threshold to return to normal state Group Presence - Reference bit mask - Number of bits acquired before error AF List - Number of bits acquired before error GRPD Code AID Code - Reference GRPD Code - Number of bits acquired before error - Reference AID Code SLC Code - Reference SLC Code PTY Code - Reference PTY Code default EON TA PI - Reference PI Code with EON TA Time offset Time zone discrepancy EON TA Code - Max time offset between RDS time and the unit’s time - Difference between the RDS time zone and the unit’s time zone - EON TA information appearance TA Code - FM Band scan - RF level variations as compared to the reference scan Alarms Values Recorded PHASE RDS RDSLOW yes RDSHIGH PICODE PSCODE RDSBER GROUPS AFLIST GRPD AID SLC PTY EONTAERR CLOCKOFFSET CLOCKTIMEZONE EONTA TA code appearance TA SCAN Recorded values are represented as minimum, median and maximum curves in the application (Readings section). Triggering alarms: This status is then reevaluated with each monitoring cycle as the tests are performed again. When a measured value is out-of-tolerance, the state switches to ‘ERROR’, but the alarm is not triggered immediately. For each parameter, the “timeout before alarm” parameter can be configured: it represents a delay during which an error state is tolerated before the alarm is triggered. Once this length of time has been reached, the state switches to ‘ALARM’, and corresponding actions are then taken (notification, placement of the event in the event log…) Switching from ‘ERROR’ to ‘NO_ERROR’ is immediate; however, it takes 2 confirmations to go from ‘ALARM’ to ‘NO_ERROR’, the test must be error free for 2 consecutive cycles. Page 25 Head Office : Parc d’activites Kennedy - 20, avenue Neil Armstrong – 33700 Bordeaux-Merignac (France) Tel +33 (0)5 57 928 928 – Fax +33 (0)5 57 928 929 – [email protected] – www.broadcast-silver.com FM Monitoring Silver 2.4.x User Manual – 03/2013 The hysteresis is an additional factor to be taken into account before the unit returns to normal state after a ‘level’ type threshold violation. This value adjusts the triggering threshold after an alarm begins so that fluctuations near the threshold level will not continuously trigger alarms. For instance, if we set the high level threshold at 60 and the hysteresis at 5, the alarm activates at a level higher than 60, and stays on until the level falls below 55. Detected error 2 consecutive cycles with no error Error duration < guard time Error duration > guard time Triggering and end of a high threshold alarm ‘Intermittent alarm’ type tests detect short but frequent overshoots. A time window and a number of acceptable overshoots during this time window must be set. For instance, if we do not want more than 5 overshoots within 2 minutes, a counter will start at the 1st overshoot. At the 6th overshoot within the 2 minute window, an alarm is sent. The state is reinitialized when the number of overshoots within a 2 minute period is lesser than or equal to 5. Page 26 Head Office : Parc d’activites Kennedy - 20, avenue Neil Armstrong – 33700 Bordeaux-Merignac (France) Tel +33 (0)5 57 928 928 – Fax +33 (0)5 57 928 929 – [email protected] – www.broadcast-silver.com FM Monitoring Silver 2.4.x User Manual – 03/2013 level 1st overshoot 5th overshoot high threshold time window less than 4 overshoots: no alarm time window more than 4 overshoots: alarm is sent time window less than 4 overshoots: state reinitialization time Intermittent alarms with a maximum of 4 events within the set time window Notification sequence: Notifications (or traps) are identified with a unique id number (see trap description, Appendix E). They include common fields but also specific fields to detail the reason and the context for the notification. The common fields are: o o o o SystemType: FMMonitoringSilver SerialNumber: unit serial number VersionSoftware: embedded software number version SequenceNumber: trap sequence number (this value is incremented for each new trap) When an alarm is triggered, a TRAP is sent with the following values: - channelType: 1 (Analog FM) frequency: frequency in MHz x10 (1024 for 102.4MHz) channelId: row number of the station in the monitored channel list channelName: station name alarmStatus: integer indicating the alarm state: 1 for the alarm beginning errorDateTime: date and time of the beginning of the event eventStartDateTime: date and time of the notification being sent (Note: this date includes triggering time or Timeout) severity: event severity as set the notification configuration page readValue: observed value (converted into integer) referenceValue: reference value for comparison as set in configuration pages transmitterName: name of the transmitter associated with this station networkName: network name associated with this station When the alarm is over, the same trap is sent with alarmStatus = 2, and the end time in errorDateTime. Case of alarms ‘closed by hierarchy’ When an alarm with a high hierarchical level is triggered, the state for each lower hierarchical level alarm changes to ‘CLOSED’ and a notification for ‘closed by hierarchy’ is sent. As an example, if an AFLOW alarm is active and the RFLOW2 alarm gets triggered, an AFLOW trap is sent with an alarmStatus value of 3 (closed by hierarchy). Page 27 Head Office : Parc d’activites Kennedy - 20, avenue Neil Armstrong – 33700 Bordeaux-Merignac (France) Tel +33 (0)5 57 928 928 – Fax +33 (0)5 57 928 929 – [email protected] – www.broadcast-silver.com FM Monitoring Silver 2.4.x User Manual – 03/2013 Inversely, when the high level alarm ends, the lower level tests that were ‘CLOSED’ return to ‘ALARM’ status and traps are sent with alarmStatus values of 4 (alarm reopened). The alarmStatus field value can be: o o o o o o 1 : Alarm beginning 2 : Alarm ending 3 : Alarm closed by a higher hierarchical level alarm 4 : Alarm reopened (the higher hierarchical level alarm is over) 5 : Intermittent alarm 6 : Information (notifications with no beginning nor end) Multi-channel monitoring Channel 1 Channel 2 Channel 3 1 2 3 4 5 6 7 8 9 10 11 12 13 14 15 16 17 18 19 20 21 22 23 24 25 26 27 time in seconds monitoring time error before the alarm is triggered alarm no issue on the channel When dealing with a series of channels, each channel is monitored for a set time (5 seconds on the example above, with a 2 second delay before alarm). Recorded start and end times depend in part on the monitoring cycle. Channel 1: the error starts second 2 while the channel is monitored and ends second 16 while the channel is also monitored. Alarm start and end times match actual times. Channel 2: the error starts second 6 while the channel is monitored and ends second 11 when the channel is no longer monitored. An error starts again second 18 and ends second 23. The monitoring unit cannot detect the absence of error between second 11 and second 18. It is seen as a single error. Alarm start time: second 8; alarm end time second 23. Channel 3: the error starts second 12 while the channel is monitored and ends second 20 when the channel is no longer monitored. The monitoring unit detects the absence of error when starting to monitor the channel again. Alarm start time: second 14; alarm end time: second 25. It is also important to note that when a channel is not monitored, no measurements can be compiled on that specific channel, leaving blanks in the recorded measurement curves. As a rule, be aware that the higher the number of monitored channels, the lesser monitoring time is spent on each. The monitoring time depends for each channel on the number and type of monitored parameters. For an FM Monitoring Silver, the average time is 900 ms for basic monitoring. Monitoring of extended RDS parameters will add about 1600 ms to the cycle time. Page 28 Head Office : Parc d’activites Kennedy - 20, avenue Neil Armstrong – 33700 Bordeaux-Merignac (France) Tel +33 (0)5 57 928 928 – Fax +33 (0)5 57 928 929 – [email protected] – www.broadcast-silver.com FM Monitoring Silver 2.4.x User Manual – 03/2013 Scanning It detects RF level variations over the whole FM frequency band. The idea is to regularly compare the levels obtained from a scan of the entire band with reference levels. Each measurement that differs from the reference beyond the a user-defined tolerance will trigger a SCAN alarm. This particular operation is not done with each cycle. It has its own schedule. It does not interrupt the monitoring cycle; it is executed in between 2 cycles. Program 1 Scan f + 100 kHz Program 2 Scan f + 100 kHz Page 29 Head Office : Parc d’activites Kennedy - 20, avenue Neil Armstrong – 33700 Bordeaux-Merignac (France) Tel +33 (0)5 57 928 928 – Fax +33 (0)5 57 928 929 – [email protected] – www.broadcast-silver.com FM Monitoring Silver 2.4.x User Manual – 03/2013 5.2. Installing and launching the FM Monitoring Silver application On the embedded web site, click the “Download” link in the menu (see section 4.3). Download the FM Monitoring Silver remote application installer and install the application. Default installation directory is C:\Program Files\AUDEMAT\ FM Monitoring Silver. Open the application using the desktop shortcut or the “Start” button and Programs/Audemat/ FM Monitoring Silver The login window pops up. Clears previously saved data 1 2 3 4 5 Enter the equipment’s IP address (1) and the HTTP port (3) (port 80 by default), as well as the login and password (4). The IP address can be set and modified from the embedded web site (see section 4.2) or from the “Network” configuration page (see section 6.2.5). The login and password can be modified on the “Users” configuration page (see section 6.2.4). Default values are “Admin”/ “admin” for the administrator and “Guest”/ “guest” for a basic user. Or: click on the magnifying glass (5) to display a list of FM Monitoring Silver units connected to the subnet. All the units will be listed. The green indicators show units with an embedded version compatible with the remote application version; the red indicators show units that are not compatible with the application. Double-click on the line for the desired equipment: its IP address and port will appear in (2) and (3). Just enter the login and password as described above. If the application has previously connected successfully, a scroll-down menu will be available (1) to select the equipment by name from a list of previous connections: Page 30 Head Office : Parc d’activites Kennedy - 20, avenue Neil Armstrong – 33700 Bordeaux-Merignac (France) Tel +33 (0)5 57 928 928 – Fax +33 (0)5 57 928 929 – [email protected] – www.broadcast-silver.com FM Monitoring Silver 2.4.x User Manual – 03/2013 Enter the login and password if the "Save password" box had not been checked. Click on the "OK" button. The application may take a few seconds to establish the connection. Once connected, the software will access data from the unit. A simple user will be able to view most system, unit and monitoring settings but will not be able to modify them. If you wish to open the application from another application, you can use the following command line: Installation_directory\FMMonitoringSilver.exe –ip IP_address –login login -password password Where you simply replace values in italics with your own values. Page 31 Head Office : Parc d’activites Kennedy - 20, avenue Neil Armstrong – 33700 Bordeaux-Merignac (France) Tel +33 (0)5 57 928 928 – Fax +33 (0)5 57 928 929 – [email protected] – www.broadcast-silver.com FM Monitoring Silver 2.4.x User Manual – 03/2013 5.3. Checking version numbers and options Go to the ‘Help’’About’ menu to display this window: It gives an overview of your FM Monitoring Silver versions, its IP and MAC addresses (Summary tab) and available licenses (Licenses tab). If you wish to activate additional licenses, please see chapter 13. Page 32 Head Office : Parc d’activites Kennedy - 20, avenue Neil Armstrong – 33700 Bordeaux-Merignac (France) Tel +33 (0)5 57 928 928 – Fax +33 (0)5 57 928 929 – [email protected] – www.broadcast-silver.com FM Monitoring Silver 2.4.x User Manual – 03/2013 6. CONFIGURING THE FM MONITORING SILVER Configuration is reserved for administrators. 6.1. Set application preferences Display the options using the ‘File’’Options’ menu to set application parameters. On the Equipment page, set the maximum length for realtime readings. You will also set how often the alarms are refreshed (in seconds). Realtime timeout is not applicable to audio streaming. On the “Preference” page, set the unit in % of the total modulation or in kHz. The selected unit will be applied to all RF measurements. Select the application language (English or French; the default language is English unless the computer OS language is French). Page 33 Head Office : Parc d’activites Kennedy - 20, avenue Neil Armstrong – 33700 Bordeaux-Merignac (France) Tel +33 (0)5 57 928 928 – Fax +33 (0)5 57 928 929 – [email protected] – www.broadcast-silver.com FM Monitoring Silver 2.4.x User Manual – 03/2013 On the FTP page, set the directory in which recorded captures will be downloaded. See chapter 8 for more details. On the Temporal Reference page, set preferred reference time for time display in various pages. ‘Local Time’ means the user’s local time, ‘Distant Time’ means the unit time. This option is only relevant when the user and the unit are in different time zones. Restart the application for the changes to be taken into account. Page 34 Head Office : Parc d’activites Kennedy - 20, avenue Neil Armstrong – 33700 Bordeaux-Merignac (France) Tel +33 (0)5 57 928 928 – Fax +33 (0)5 57 928 929 – [email protected] – www.broadcast-silver.com FM Monitoring Silver 2.4.x User Manual – 03/2013 6.2. Access system configuration Only an administrator can access and modify every system configuration page. A guest will be able to view most of them but not change anything. Click the button. Links on the left side of the widow allow the user easy access to the various settings. 6.2.1. Product Identifiers The ‘Product ID’ page lists the build versions of the various pieces of software and firmware that make the FM Monitoring Silver function. It also allows you to give your unit a unique name and description, for your own internal use. Click the “Update” button to lock in your changes (this is true for every page of the system configuration). These settings can also be managed on the “Product ID” page of the embedded web site. Page 35 Head Office : Parc d’activites Kennedy - 20, avenue Neil Armstrong – 33700 Bordeaux-Merignac (France) Tel +33 (0)5 57 928 928 – Fax +33 (0)5 57 928 929 – [email protected] – www.broadcast-silver.com FM Monitoring Silver 2.4.x User Manual – 03/2013 6.2.2. Date/Time Set system date : The user may update both date (year/month/day) and time (hour/minute/second). Set system time zone The user selects the geographical zone from the list. Important to have this set correctly when using an NTP server. Network Time Protocol: NTP update The user can enter a time server address to update the equipment’s internal clock automatically. Make sure this address can be reached by the unit; specifically, the gateway must be properly set. Specify whether it should be synchronized continuously or periodically. For periodic synchronization, indicate what time the daily synchronization should occur (between 0 and 23). Set the time zone first! Changes in the time zone affect the time that is displayed in the system time window, so setting the zone first will eliminate the need to set the system time twice! Page 36 Head Office : Parc d’activites Kennedy - 20, avenue Neil Armstrong – 33700 Bordeaux-Merignac (France) Tel +33 (0)5 57 928 928 – Fax +33 (0)5 57 928 929 – [email protected] – www.broadcast-silver.com FM Monitoring Silver 2.4.x User Manual – 03/2013 6.2.3. Status The ‘Status’ page gives a summary of the unit’s vital parameters: temperature, available memory, CPU load and available disk space. This information may be requested to establish a diagnosis in case of malfunction. User-defined alarm thresholds make it possible to monitor critical parameters. An ‘Equipment default’ type SNMP trap is sent in case of overshoot. Page 37 Head Office : Parc d’activites Kennedy - 20, avenue Neil Armstrong – 33700 Bordeaux-Merignac (France) Tel +33 (0)5 57 928 928 – Fax +33 (0)5 57 928 929 – [email protected] – www.broadcast-silver.com FM Monitoring Silver 2.4.x User Manual – 03/2013 6.2.4. Users The “Users” link opens up a page from which to set user access to the different sections of the FM Monitoring Silver Web & Software accounts: there are 2 user levels to access the website and software application, Administrator and Guest. An Administrator has the rights to change any of the system parameters. A Guest will be able to view measurements and alarms but will not be able to change any configuration or settings or trigger any actions. Several remote users may connect simultaneously; however, some actions lead to synchronization between the unit and the application to specifically prevent 2 users to change the same parameter at the same time. It may be necessary to reconnect to the unit. FTP account configuration: Administrator account: access to the entire directory of the equipment. Update Manager account: used internally to manage updates. Recording account: access to audio recordings. Page 38 Head Office : Parc d’activites Kennedy - 20, avenue Neil Armstrong – 33700 Bordeaux-Merignac (France) Tel +33 (0)5 57 928 928 – Fax +33 (0)5 57 928 929 – [email protected] – www.broadcast-silver.com FM Monitoring Silver 2.4.x User Manual – 03/2013 SSH account: this account uses the login reboot and the same password as the FTP administrator. With an SSH connection, it instantaneously triggers a reboot of the unit which can be useful if there is no response from the embedded application. Alarm Recipient Accounts: in this section, create accounts for users who should receive mail, text messages (SMS) or phone alerts. For each account, enter the name, the email and/or the phone number the alarms should be sent to. For phone alerts, select the list and give the access code that will be used to identify the user both for call-ins and for phone alerts. Specify the minimum severity level the alarm must have before it is sent to that user: critical, major, minor, warning (all events except log and undefined), all or none. Once set, use the test buttons to test SMS and e-mail accounts. You may change login names but make sure each is unique! Only use alphanumerical characters for user names and passwords. Page 39 Head Office : Parc d’activites Kennedy - 20, avenue Neil Armstrong – 33700 Bordeaux-Merignac (France) Tel +33 (0)5 57 928 928 – Fax +33 (0)5 57 928 929 – [email protected] – www.broadcast-silver.com FM Monitoring Silver 2.4.x User Manual – 03/2013 6.2.5. Network Definition of the IP configuration: o Ethernet configuration mode It is preferable to configure the Primary network interface ENET1 with static parameters. Should the unit be set to DHCP, you may lose the ability to know what IP address it has and thus access it on the network. If this occurs, you must return to static IP settings using either the serial connection as described in the Quick Start guide. o Static Ethernet configuration Enter the static IP parameters in this window. IP address and mask are essential, gateway is important if the unit is to communicate outside its own subnet. The secondary interface can be used as a backup interface if the Ethernet fail-over function is enabled. o DNS Servers: DNS configuration. Very important if the unit is to send e-mails using an alpha server name (i.e. smtp.server.com as opposed to 54.32.156.67). o Current network status: present network table. Page 40 Head Office : Parc d’activites Kennedy - 20, avenue Neil Armstrong – 33700 Bordeaux-Merignac (France) Tel +33 (0)5 57 928 928 – Fax +33 (0)5 57 928 929 – [email protected] – www.broadcast-silver.com FM Monitoring Silver 2.4.x User Manual – 03/2013 o Ethernet fail-over: the Ethernet fail-over function enables the unit to send alarms using the back-up Ethernet interface in case of issues with the primary interface. The unit pings the reference address (Always-on IP) at regular intervals (Time between pings). If there is no answer, the switch takes place. The unit keeps pinging the reference address and switches back to the primary interface when there is an answer. When changing the “Time between ping”, the previous time will be applied a last time after update. ! The Ethernet fail-over function and PPP Dialout are mutually exclusive. IP configuration is also available from the embedded web site (“Network” page). 6.2.6. PPP Dialout ! Enabling PPP connections will suspend Phone Alert and Voice/DTMF functions! When configuring from ScriptEasy, enabling one function will disable the other function’s tab. After disabling a function, you’ll need to close the system configuration pages and open them again to enable the tab you need. ! Ethernet back up and PPP Dialout are mutually exclusive. Configure outgoing calls from this page. Page 41 Head Office : Parc d’activites Kennedy - 20, avenue Neil Armstrong – 33700 Bordeaux-Merignac (France) Tel +33 (0)5 57 928 928 – Fax +33 (0)5 57 928 929 – [email protected] – www.broadcast-silver.com FM Monitoring Silver 2.4.x User Manual – 03/2013 To configure outgoing calls: activation of outgoing calls PPP as Ethernet backup: This function makes it possible for the unit to switch to the PPP interface to send alarms if the primary Ethernet interface (eth0) doesn’t function anymore (i.e. if a reference address doesn’t answer to a ping). This verification is done regularly and can be changed by the user. It may happen that the network cable is unplugged or damaged, or that the equipment associated with the reference IP address is off or not on the network. To activate the PPP backup, in the "Dial out enabled" section, select "yes only if Ethernet goes down". Enter a reference IP address in the field "Ping this address to test Ethernet connection" Configure a PPP account to dial when alarms are issued. If you wish to use PPP backup, configure the SMTP server with a static IP address and not with a DNS name. Be aware that unlike with Ethernet messages, a mail sent using PPP does not trigger a confirmation message. Calling quotas: number of calls The user can limit the number of daily outgoing calls. He/she should put 0 if this limitation is not required. The user can limit the number of hourly outgoing calls. He/she should put 0 if this limitation is not required. The user can click Reset to put the call counter back to zero. Dialout accounts: the user can create a new customer account. Enter settings for the new customer account (name, number, login, password…) and click on “New account”. The unit can manage multiple accounts. Page 42 Head Office : Parc d’activites Kennedy - 20, avenue Neil Armstrong – 33700 Bordeaux-Merignac (France) Tel +33 (0)5 57 928 928 – Fax +33 (0)5 57 928 929 – [email protected] – www.broadcast-silver.com FM Monitoring Silver 2.4.x User Manual – 03/2013 6.2.7. PPP Dial-in ! Enabling PPP connections will suspend Phone Alert and Voice/DTMF functions! When configuring from ScriptEasy, enabling one function will disable the other function’s tab. After disabling a function, you’ll need to close the system configuration pages and open them again to enable the tab you need. To configure incoming calls from a PPP server: Dial-in configuration: activation of “incoming calls" function. Account: account and access settings. Page 43 Head Office : Parc d’activites Kennedy - 20, avenue Neil Armstrong – 33700 Bordeaux-Merignac (France) Tel +33 (0)5 57 928 928 – Fax +33 (0)5 57 928 929 – [email protected] – www.broadcast-silver.com FM Monitoring Silver 2.4.x User Manual – 03/2013 Modem configuration: the user selects the modem (if necessary) and its features. The line should be able to identify incoming calls when filtering and for call-back (see below). You must then add #CID or +VCID at the end of the init string depending on the type of modem supplied by Audemat: US Robotics model ATS0=0Q0&D3&C1S32=98#CID=1 Radicom USB model ATS0=0Q0&D3&C1B20+VCID=1 The “Filter Callers” function enables incoming calls to be filtered using Caller ID (the incoming telephone line must have this service activated). 6.2.8. Filter Callers: To add a new account, enter the relevant information and click on “New Account”. This allows incoming calls from the authorized number list, and blocks non authorized numbers. “Callback”: select ‘Customer’ in the menu to activate an automatic PPP call back feature. When an incoming call displays a ‘Callback Customer’ number, the modem does not answer; instead, it waits for the ringing to end and then generates an outgoing call to that number. This allows PPP connection from the unit without phone charges to the user. SMS Alerts Enable text message alerts on this page. All modems are not compatible with the SMS function. Use the DB-9 modem approved by Audemat (see your dealer for details). Before configuring SMS alerts, display the I/O Layout page, USB-Serial Ports section to indicate the port (usually COM1) the modem is connected to and select ‘GSM modem’ in the pull-down menu (see section 6.2.16). Once SMS alerts have been enabled, COM1 will appear in the list of available modems; select it. The initialization string can be left blank. SMS recipient accounts are configured on the Users page (see section 6.2.4). Page 44 Head Office : Parc d’activites Kennedy - 20, avenue Neil Armstrong – 33700 Bordeaux-Merignac (France) Tel +33 (0)5 57 928 928 – Fax +33 (0)5 57 928 929 – [email protected] – www.broadcast-silver.com FM Monitoring Silver 2.4.x User Manual – 03/2013 6.2.9. Phone Alerts (option) ! You cannot use Phone Alert and Voice/DTMF functions if PPP connections are enabled! When configuring from ScriptEasy, enabling one function will disable the other function’s tab. After disabling a function, you’ll need to close the system configuration pages and open them again to enable the tab you need. This function activates DTMF phone alerts for Script Easy alarms. Please refer to chapter 13 to install the option and read the Script Easy Manual for more information. Page 45 Head Office : Parc d’activites Kennedy - 20, avenue Neil Armstrong – 33700 Bordeaux-Merignac (France) Tel +33 (0)5 57 928 928 – Fax +33 (0)5 57 928 929 – [email protected] – www.broadcast-silver.com FM Monitoring Silver 2.4.x User Manual – 03/2013 6.2.10. SMTP Mail Client Configuration of e-mails : Enter the SMTP server address, account information, and destination e-mail addresses to enable sending of e-mail alerts. Ask your network administrator for the SMTP parameters. (Note that you must have a valid DNS setup if you want to use SMTP host name. Otherwise you must use a numeric IP address xxx.xxx.xxx.xxx). For additional security, enable TSL (Transport Layer Security). The “send mail every” section enables the user to send messages in a batch every “X” minutes if desired. When waiting for the time chosen by the user, the FM Monitoring Silver stores the messages. Two sections are available that allow the user to configure the contents of the subject line and the first line of the body of the alarm e-mail. Any text entered in these windows will be included, and there is a list of variables (in brackets) that can be included as well. This feature allows the user to customize the first parts of the alarm e-mails to be more compatible with portable devices. Email notifications will be sent to email addresses as set on the Users page (see section 6.2.4). Page 46 Head Office : Parc d’activites Kennedy - 20, avenue Neil Armstrong – 33700 Bordeaux-Merignac (France) Tel +33 (0)5 57 928 928 – Fax +33 (0)5 57 928 929 – [email protected] – www.broadcast-silver.com FM Monitoring Silver 2.4.x User Manual – 03/2013 List of available keywords: Name Description Can be inserted in the subject of the mail Can be inserted in the 1st line of the mail {NAME} Product name {DESCRIPTION} Product description {LOCALADDRESS} Product IP address {SERIALNUMBER} Product serial number {FIRSTALARM} st Name of the 1 alarm The ‘Test settings’ button checks your e-mail settings without having to trigger an alarm. The ‘Delete pending mails’ button deletes all of the pending e-mails, either test or alarm generated. If a text address is set, the DNS must be configured so as to allow name resolution. Make sure the gateway is correctly configured for the unit to be able to reach the SMTP server (“Network” page). Page 47 Head Office : Parc d’activites Kennedy - 20, avenue Neil Armstrong – 33700 Bordeaux-Merignac (France) Tel +33 (0)5 57 928 928 – Fax +33 (0)5 57 928 929 – [email protected] – www.broadcast-silver.com FM Monitoring Silver 2.4.x User Manual – 03/2013 6.2.11. SNMP Agent SNMP configuration The equipment supports multiple destination addresses for notifications. However, only the Main Manager has the authority to acknowledge notifications. With “INFORM” type messages, automatic answers from secondary managers are ignored by the unit. The user can download the MIB. Simply click on the button to save the .mib file locally or on the network. In the MIB, you will find specific and unique tables such as the ScriptEasy alarm table, the Notifications pending acknowledgement table and the I/O table. SNMP Traps configuration SNMP Notification Type / Trap Community / System Description: trap settings Life Sign Trap / Minutes between Life Signs: sends life signs every X minutes. Trap sending test: sends a ‘Warm start’ trap to the destination(s) according to the trap settings. 6.2.11.1 Supported SNMP versions The Unit SNMP agent is compatible wiht SNMPv1 and SNMPv2c versions. GET and SET commands are supported, as well as GETBULK in SNMPv2c. Notifications can be transmitted in TRAP V1 or V2c form or with an INFORM V2c type. 6.2.11.2 Notification mode To make sure traps reach their target via the protocol, the FM Monitoring Silver offers 2 methods; with both methods, traps are sent until acknowledgment is received by the manager. Page 48 Head Office : Parc d’activites Kennedy - 20, avenue Neil Armstrong – 33700 Bordeaux-Merignac (France) Tel +33 (0)5 57 928 928 – Fax +33 (0)5 57 928 929 – [email protected] – www.broadcast-silver.com FM Monitoring Silver 2.4.x User Manual – 03/2013 Automatic acknowledgement for sending with INFORM. These notifications are only available with the version 2c of the protocol. This protocol checks that the manager responds to the notification sent by the SNMP transmitter. This process is simple and reliable, no specific configuration is required for the manager. Manual acknowledgement for Traps V1 and Traps V2c. A specific OID (“alarmPendingAlarmsalarmAck”) is extracted and its variables are sent with the trap. The manager must then execute a SET command. This method is more complex but is the only one that can work with the version 1 of the protocol. The acknowledgment mode (Trap V1, Trap V2c or Inform) is identical for all alarms. See the next section “Notifications” for additional settings. With “SNMPv2c traps” notifications, it not possible to acknowledge traps. In the same way, traps which do not require acknowledgment cannot be sent with the “Inform SNMPv2c” format, even when this format is selected. This is the case with the ‘test’ trap as well as with equipment information traps such as the ‘Equipment On’ trap. 6.2.12. Notifications SNMP Actions The user may replay traps that have not been acknowledged yet. The user may also delete pending traps that have not been acknowledged yet. Page 49 Head Office : Parc d’activites Kennedy - 20, avenue Neil Armstrong – 33700 Bordeaux-Merignac (France) Tel +33 (0)5 57 928 928 – Fax +33 (0)5 57 928 929 – [email protected] – www.broadcast-silver.com FM Monitoring Silver 2.4.x User Manual – 03/2013 Configuration depending on notification type In the "Mode" column: “Do not send”: used for temporarily suspending sending certain types of alerts “Send and Forget”: standard SNMP mode, no acknowledgement awaited, notifications are deleted immediately after sending. “Resend until acknowledged”: standard alarm mode. Notifications are re-transmitted until acknowledgement is received. The acknowledgement mode depends on the sending mode: automatic acknowledgement for sending with INFORM manual acknowledgement for Traps V1 and Traps V2c Principles of Re-transmission / Acknowledgment In the “Resend until acknowledged” mode, it is possible to set the maximum number of tries and the acknowledgment timeout. As long as an acknowledgement has not been received, the notification is re-transmitted at the rate of once every <d> seconds, for a maximum of <n> times; where <d> and <n> are the <Ack Timeout> and <Max Retries> fields respectively. If acknowledgement does not arrive after <n> attempts, the notification will be “frozen”, that is to say, it is put on standby until a new notification of the same type is generated. It can also be manually unblocked by using the “Replay Traps" button. It is important to note that untransmitted notifications are not lost. They are kept to be retransmitted as soon as the right conditions are met. When a new notification appears, the “frozen" notification is reactivated and a cycle of sending attempts begins again. The alarm severity level can also be set: a specific manager action is associated with each severity level. The severity level set for the traps on this page also sets the severity level for the event log, with the following correspondence table: Traps Severity Event Log Severity Critical Critical Major Error Minor Warning Information Notice Log Info See Appendix B for the list of traps. Page 50 Head Office : Parc d’activites Kennedy - 20, avenue Neil Armstrong – 33700 Bordeaux-Merignac (France) Tel +33 (0)5 57 928 928 – Fax +33 (0)5 57 928 929 – [email protected] – www.broadcast-silver.com FM Monitoring Silver 2.4.x User Manual – 03/2013 6.2.13. Webcam (option) / Audio Streaming Webcam support is only available with webcams sold by Audemat. The webcam is detected on start-up; however, detection can be forced with the “Recheck” button. Options that can be configured are: Webcam enabled: activates or deactivates the webcam support. Motion sensitivity: sensitivity of the movement detection from 1000 to 32000 (“1000” is the highest sensitivity). Mark motion location: circles the zone where the movement has been detected with a red frame. Image quality: from 50 to 100 (100 is the best quality). Erase snapshots older than: automatically delete files older than ‘n’ days. Images can be downloaded to a PC using any FTP client software (not provided by Audemat). The FTP software requires the following information: FM Monitoring Silver IP address. User name: “record” (see ‘User’ page section 6.2.4). Password: “record”. For the audio streaming, set the encoding quality in kbps for high and low quality streaming depending on the network. High Quality is used for stereo streaming, Low Quality for mono streaming. Page 51 Head Office : Parc d’activites Kennedy - 20, avenue Neil Armstrong – 33700 Bordeaux-Merignac (France) Tel +33 (0)5 57 928 928 – Fax +33 (0)5 57 928 929 – [email protected] – www.broadcast-silver.com FM Monitoring Silver 2.4.x User Manual – 03/2013 6.2.14. IP Router and Port translation Local port redirection: The port redirection allows the user to set specific, non-standard IP Ports to be used by various functions of the FM Monitoring Silver. This is useful when the default ports are not desirable or available (for example: forbidden by the ISP, blocked by a firewall...). For each port used in the FM Monitoring Silver, select the interface of the port (for example PPP in the case of a modem connection) and the new port to use in the “duplicate to” field. Each redirection line can be activated or disabled independently. Once the configuration is done, lock it in by clicking on “update”. Then click the “Activate new configuration” button at the top of the page. The redirection does not deactivate or turn off the default ports. It only ‘clones’ or duplicates their functions on the ports designated. External methods must be used to block any undesired ports from the network. To configure the unit as a router on a local network: This function allows a user to communicate with all of the equipment on the local network shared by the FM Monitoring Silver (Ethernet) from a PC connected to the FM Monitoring Silver by modem (PPP). Page 52 Head Office : Parc d’activites Kennedy - 20, avenue Neil Armstrong – 33700 Bordeaux-Merignac (France) Tel +33 (0)5 57 928 928 – Fax +33 (0)5 57 928 929 – [email protected] – www.broadcast-silver.com FM Monitoring Silver 2.4.x User Manual – 03/2013 To configure this function, select “Enabled” on the “Router mode” line. The input and output interfaces of the router can be configured by the options « Public interface » (Input) and « Private Interface » (output). Once the configuration is done, lock it in by clicking on “update”. Then click the “Activate new configuration” button at the top of the page. Click on the “Activate new configuration” button every time a section is modified. Page 53 Head Office : Parc d’activites Kennedy - 20, avenue Neil Armstrong – 33700 Bordeaux-Merignac (France) Tel +33 (0)5 57 928 928 – Fax +33 (0)5 57 928 929 – [email protected] – www.broadcast-silver.com FM Monitoring Silver 2.4.x User Manual – 03/2013 6.2.15. Support Stop / Restart : ‘Restart’ enables the user to restart the embedded application to reinitialize the parameters the remote application remains open. “Reboot equipment”: restarts the entire unit. “Power off equipment”: enables the unit to be switched off remotely. The unit cannot be turned on remotely. Default configuration: This function will allow the user to delete the present configuration and to reset the default configuration. Caution: all parameters as well as scripts and log files will be deleted. You must reconnect to the unit after a reset. Switch to version: This function is only available when the unit has been upgraded. It makes it possible to downgrade it back to its previous version. After clicking “Switch”, the user will need to close and restart the application. Page 54 Head Office : Parc d’activites Kennedy - 20, avenue Neil Armstrong – 33700 Bordeaux-Merignac (France) Tel +33 (0)5 57 928 928 – Fax +33 (0)5 57 928 929 – [email protected] – www.broadcast-silver.com FM Monitoring Silver 2.4.x User Manual – 03/2013 6.2.16. I/O Layout Motherboard: the user can view the type of boards (relay, digital) and their location in the chassis, as well as the motherboard type and version. COM ports: the console is part of the default configuration. Unset: non-attributed serial port (inactive). Console: configuration of the serial port for console (terminal) access – default configuration on the first serial port. Modem: configuration of the serial port for use with a modem. Support: support port. Only used by Audemat. Tunneling: serial port configuration for tunneling. Scriptlet: to use an API (Advanced Programming Interface) to communicate with external equipment (contact the sales and support department for more information). Scriptlet debug: do not use. GSM modem: configuration of the serial port for use with a modem for PPP dialin /dialout and SMS Voice modem: configuration of the serial port for use with a modem for phone alerts. When a port is actively used by a function, it will be locked and the ‘Used by’ column will give the name of the function. Before adding serial ports, please check with Audemat for compatibility. Page 55 Head Office : Parc d’activites Kennedy - 20, avenue Neil Armstrong – 33700 Bordeaux-Merignac (France) Tel +33 (0)5 57 928 928 – Fax +33 (0)5 57 928 929 – [email protected] – www.broadcast-silver.com FM Monitoring Silver 2.4.x User Manual – 03/2013 6.2.17. I/O Log Set parameters for the I/O log that the user can view from the application (‘Status’ button, ‘Event log’ tab, see section 11.2). Settings: set recording frequency and length of event logs are kept. Actions: clear the logs. 6.2.18. I/O State On this page, view the state of inputs/outputs present in the system. It is refreshed automatically every 60 seconds, though you may use the “Refresh” button to do it sooner. Page 56 Head Office : Parc d’activites Kennedy - 20, avenue Neil Armstrong – 33700 Bordeaux-Merignac (France) Tel +33 (0)5 57 928 928 – Fax +33 (0)5 57 928 929 – [email protected] – www.broadcast-silver.com FM Monitoring Silver 2.4.x User Manual – 03/2013 6.2.19. Receivers Receiver configuration: monitoring and realtime measurement functions must be assigned to a specific receiver; the receiver to be used for streaming, recording and audiotag is set at the factory. This function is not application to the FM Monitoring Silver. Max duration: to set a time limit for realtime functions after which they will be automatically stopped. Attenuation for each receiver. These values are not taken into account for monitoring. Total Modulation Measurement: acquisition period used for the MPX signal measurement. During a standard cycle, a high number of captures is used resulting in more precise readings. During a short cycle, a lower number of captures is used. This option takes less time but the reading is less precise than with the standard cycle. Because the time difference between both options is not significant, it is recommended to keep the standard mode. Page 57 Head Office : Parc d’activites Kennedy - 20, avenue Neil Armstrong – 33700 Bordeaux-Merignac (France) Tel +33 (0)5 57 928 928 – Fax +33 (0)5 57 928 929 – [email protected] – www.broadcast-silver.com FM Monitoring Silver 2.4.x User Manual – 03/2013 7. MONITORING CONFIGURATION Reserved for administrators. Click to access the monitoring configuration pages. 7.1. Managing stations 7.1.1. Adding New Stations to the Monitoring List 1 2 The first thing to do is to configure the channels to be monitored. It can be done either of two ways: Click a blank spot in the “Channels” box (1), or Use the button (2). Up to 10 programs may be configured. Page 58 Head Office : Parc d’activites Kennedy - 20, avenue Neil Armstrong – 33700 Bordeaux-Merignac (France) Tel +33 (0)5 57 928 928 – Fax +33 (0)5 57 928 929 – [email protected] – www.broadcast-silver.com FM Monitoring Silver 2.4.x User Manual – 03/2013 The channel creation page opens: 1 2 3 4 When first using the FM Monitoring Silver or if no scan has yet been performed, click initiate a new scan. The detection and labeling of the channels are based on RDS availability. (1). to When the scan exists, the channel to be added can be selected in the list of detected channels (2). The selected program frequency and name automatically appear (3). It is also possible to manually add those values. Simply click 7.1.2. (4). Delete a program from the configured channel list To delete a station, simply select it in the list and click at the bottom of the list. Page 59 Head Office : Parc d’activites Kennedy - 20, avenue Neil Armstrong – 33700 Bordeaux-Merignac (France) Tel +33 (0)5 57 928 928 – Fax +33 (0)5 57 928 929 – [email protected] – www.broadcast-silver.com FM Monitoring Silver 2.4.x User Manual – 03/2013 7.2. Channel configuration 7.2.1. Basic Configuration To access it, select the ‘CHANNEL’ tab or go to the ‘Monitoring’ ‘CHANNEL’ menu. 5 6 2 1 3 4 The Channel configuration window is where you enter the basic information about the stations you want the unit to receive and analyze. Select the program you wish to configure in the list (1). The name may be modified and you may add optional information about the transmitter and network if desired (2). You may also set or change the monitoring status of the station in the ‘Monitoring Configuration’ section (3). ‘ Active Monitoring’ is a cyclical scanning of the station, with alarms for technical personnel. ‘ Measure without alarm’ will scan the station and keep track of the readings, but will not sent alerts on out-of tolerance conditions. Finally, if you do not want this particular station to be a part of the regular monitoring cycle, select the ‘ Standby’ box. This will leave the station configured, so that you may manually monitor when you choose, but the FM Monitoring Silver will not generate alarms, automatically scan that station or record its measurements on a regular basis. The symbol , or next to the station name in the list indicates the station’s monitoring status. You may also limit the time during which the channel is monitored on a daily basis (4). If the box is left unchecked, it will be monitored 24 h a day; if not it will be limited to the set period. Page 60 Head Office : Parc d’activites Kennedy - 20, avenue Neil Armstrong – 33700 Bordeaux-Merignac (France) Tel +33 (0)5 57 928 928 – Fax +33 (0)5 57 928 929 – [email protected] – www.broadcast-silver.com FM Monitoring Silver 2.4.x User Manual – 03/2013 Click to store the configuration in memory (5). If you click on another program without having first saved, you will be prompted to do so. However, if you wish to return to the last saved configuration, click . This is true for every modification on all tabs. Once you have the station information entered, you may select which parts of the signal you wish to monitor. For each portion you select, another tab for that part of the signal appears across the top of the window (6). 7.2.2. RF Level Configuration Select the ‘RF’ tab to configure RF level monitoring. 1 2 3 The definitions and explanations below also apply to the ‘MPX’, ‘Stereo’ and ‘Audio’ tabs. Interactive graph (1) The primary feature of this tab is the interactive graph near the top of the window. This serves a dual function, both displaying the readings gathered for that parameter, and allowing the user to change the settings by dragging the lines associated with each level to a new value. To change a threshold, move the mouse on the threshold until you see the hand drag. , and click and To change the hysteresis, move the mouse on the threshold’s edge (lower edge for the high level, upper edge for a low level) until you see the arrow , and click and drag. Page 61 Head Office : Parc d’activites Kennedy - 20, avenue Neil Armstrong – 33700 Bordeaux-Merignac (France) Tel +33 (0)5 57 928 928 – Fax +33 (0)5 57 928 929 – [email protected] – www.broadcast-silver.com FM Monitoring Silver 2.4.x User Manual – 03/2013 To set the nominal level, move the mouse on the line until you see the arrow , and click and drag. This level is set between the high and low thresholds; when moving it, the thresholds also get adjusted. In section (2): View the receiver used to monitor this program (1, 2 or 3) and the applied attenuation. Set the nominal level by entering the desired value in dBµV. Auto-configure thresholds: once data has been collected for this particular station, you may click the button to automatically set the nominal level to the average measured value for that station. Previous threshold settings (in terms of difference in dB from the nominal level) will be maintained. In section (3) Setting various thresholds can also be done by manually entering values in this section. For each type of monitoring, a check box enables monitoring and specific parameters are then displayed. The Threshold is the reference value. When the level overshoots it, the FM Monitoring Silver will trigger an alarm or other action. The ‘Hysteresis’ value establishes a level at which the unit will recover from an alarm state. In other words, if the signal dips below the ‘Low’ threshold, the level must come up above the ‘Low’ threshold plus the Hysteresis differential before the unit will cancel the alarm. This prevents the generation of dozens of alarms and log events by levels that are fluctuating at or near the alarm thresholds. When the set value is too high, the text box becomes red. The ‘Time out before alarm’ will configure a delay between an out of tolerance reading and the generation of an alarm, which prevents transient and momentary variations from generating nuisance alarms. Check the ‘Send Alarm’ box to send an SNMP trap and/or mail in case of alarm. If that box is not check, the threshold violation will only be recorded in the event log. Intermittent errors may also be monitored by checking the box. When checked, the following parameters can be set: - The max number of intermittent events before the alarm is triggered. - The time window during which the number of events will be counted. - Whether to send an alarm or not. You may also want to zoom on the graph or better read actual values: To zoom, press CTRL while doing a click and drag towards the bottom. To unzoom, press CTRL while doing a click and drag towards the top. To see the actual level value, press SHIFT: the thresholds disappear and 2 thin lines appear. The level value at the vertical line gets updated as you move right or left. The horizontal line follows the curve. If you want to read a value that is not on the curve, press SHIFT and ALT at the same time, then move your mouse. A grey section on the graph indicates a period during which no measurements were made. Click to lock in your changes before selecting another tab or station. Page 62 Head Office : Parc d’activites Kennedy - 20, avenue Neil Armstrong – 33700 Bordeaux-Merignac (France) Tel +33 (0)5 57 928 928 – Fax +33 (0)5 57 928 929 – [email protected] – www.broadcast-silver.com FM Monitoring Silver 2.4.x User Manual – 03/2013 7.2.3. MPX Monitoring Configuration Select the ‘MPX’ tab to configure modulation monitoring. Simply set the high and low levels where you want them using the graph or the text boxes as with the ‘RF’ tab (see section 7.2.2), and decide whether or not you want to trigger alarms at those levels. Zooming and reading specific values on the graph can also be done like on the RF tab. Click to lock your changes before selecting another tab or station. Page 63 Head Office : Parc d’activites Kennedy - 20, avenue Neil Armstrong – 33700 Bordeaux-Merignac (France) Tel +33 (0)5 57 928 928 – Fax +33 (0)5 57 928 929 – [email protected] – www.broadcast-silver.com FM Monitoring Silver 2.4.x User Manual – 03/2013 7.2.4. Stereo Monitoring configuration Select the ‘Stereo’ tab to configure monitoring the pilot signal and the stereo presence. Simply set the high and low levels where you want them using the graph or the text boxes as with the ‘RF’ tab (see section 7.2.2), and decide whether or not you want to trigger alarms at those levels. Zooming and reading specific values on the graph can also be done like on the RF tab. Monitoring of two additional parameters can be independently activated in the "STEREO MONITORING" section: Stereo presence, Opposition phase. For each element, indicate whether they should trigger an alarm and after how much time. Click or station. to lock your changes before selecting another tab Page 64 Head Office : Parc d’activites Kennedy - 20, avenue Neil Armstrong – 33700 Bordeaux-Merignac (France) Tel +33 (0)5 57 928 928 – Fax +33 (0)5 57 928 929 – [email protected] – www.broadcast-silver.com FM Monitoring Silver 2.4.x User Manual – 03/2013 7.2.5. Analog Audio Configuration Select the ‘Audio’ tab to configure analog audio monitoring. Simply set the high and low levels where you want them using the graph or the text boxes as with the ‘RF’ tab (see section 7.2.2), and decide whether or not you want to trigger alarms at those levels. Zooming and reading specific values on the graph can also be done like on the RF tab. In the "AUDIO MONITORING" section, set the modulation type so as to optimize silence detection: Normal, Semi-sensible, Sensible (the slightest silence is detected). Click to lock your changes before selecting another tab or station. Page 65 Head Office : Parc d’activites Kennedy - 20, avenue Neil Armstrong – 33700 Bordeaux-Merignac (France) Tel +33 (0)5 57 928 928 – Fax +33 (0)5 57 928 929 – [email protected] – www.broadcast-silver.com FM Monitoring Silver 2.4.x User Manual – 03/2013 7.2.6. RDS Monitoring Configuration Select the ‘RDS’ tab to configure monitoring of the RDS signal. Simply set the high and low levels where you want them using the graph or the text boxes as with the ‘RF’ tab (see section 7.2.2), and decide whether or not you want to trigger alarms at those levels. Zooming and reading specific values on the graph can also be done like on the ‘RF’ tab. Page 66 Head Office : Parc d’activites Kennedy - 20, avenue Neil Armstrong – 33700 Bordeaux-Merignac (France) Tel +33 (0)5 57 928 928 – Fax +33 (0)5 57 928 929 – [email protected] – www.broadcast-silver.com FM Monitoring Silver 2.4.x User Manual – 03/2013 Monitoring of three additional parameters can be independently activated in the "RDS MONITORING" section: RDS presence: indicate whether it should trigger an alarm and after how much time. Error rate: set the error rate (in percent) that will trigger the alarm and the error rate that will stop it, as well as the number of groups to be analyzed. PI Code: indicate whether a change in code should trigger an alarm and after how much time, set the primary (mandatory) and secondary (optional) PI codes; if available, corresponding Call Letters appear in the grey zone. The PI code can be automatically acquired using . Click tab or station. to lock your changes before selecting another Page 67 Head Office : Parc d’activites Kennedy - 20, avenue Neil Armstrong – 33700 Bordeaux-Merignac (France) Tel +33 (0)5 57 928 928 – Fax +33 (0)5 57 928 929 – [email protected] – www.broadcast-silver.com FM Monitoring Silver 2.4.x User Manual – 03/2013 7.2.7. Extended RDS Data Monitoring configuration This page is only available with the Full RDS option. Select the ‘Extended RDS Data’ tab to configure the RDS data monitoring. For each of the following parameters, check the associated box to enable monitoring, and check the “Send alarm” box if desired. For some parameters, a time delay before the alarm is sent can also be set. PS: you can monitor the PS in two different ways. If the station uses static PS, you can set the FM Monitoring Silver to alert you if it changes. If the station employs dynamic scrolling PS, you can set the unit to launch an alarm if the PS does not change within a specified time. PTY: sends an alarm when the PTY is different from the reference value. TA: sends a notification when the station transmits the TA code, it is possible to use this alarm to start an audio recording. EON TA: sends a notification when the station transmits the EON TA code. EON TA PI: sends an alarm when another station transmits a TA code. AF LIST: sends an alarm when the list of alternative frequencies differs from the reference list. AID: sends an alarm when the AID is different from the reference value. SLC: sends an alarm when the SLC is different from the reference value. GPRD: sends an alarm when the GRPD is different from the reference value. Groups: you can detect a missing group in the group sequence by checking which groups you want to monitor. Page 68 Head Office : Parc d’activites Kennedy - 20, avenue Neil Armstrong – 33700 Bordeaux-Merignac (France) Tel +33 (0)5 57 928 928 – Fax +33 (0)5 57 928 929 – [email protected] – www.broadcast-silver.com FM Monitoring Silver 2.4.x User Manual – 03/2013 RDS Clock Monitoring: sends an alarm(s) when the offset between RDS time and the unit’s time is greater than the maximum allowed time offset (in minutes/seconds) and/or when the RDS time zone is different from the unit’s. RDS time is checked every day at the same time or at regular intervals. In some cases (PS and PI code setting, AF list or RDS groups), the button automatically retrieve values; you may also manually enter them. Click makes it possible to to lock your changes before selecting another tab or station. Note: RDS data monitoring is done by taking 15 groups every cycle and adding them to a buffer so as to reconstruct as closely as possible the complete data stream. At the end of the user-defined time period, preset conditions are compared to the data acquired and potential alarms are triggered. The duration begins at the first cycle and is evaluated with each cycle. Since the acquisition frequency depends upon the number of monitored stations, make sure the time set is sufficient to acquire enough data for a meaningful test. Please note that the cycle time set at the top of the page only affects some RDS parameters: PS, PTY, AF, AID, SLC, GRPD and group monitoring. It is not applicable for TA monitoring. EON TA, EON TA PI and RDS clock monitoring use their own cycle. Page 69 Head Office : Parc d’activites Kennedy - 20, avenue Neil Armstrong – 33700 Bordeaux-Merignac (France) Tel +33 (0)5 57 928 928 – Fax +33 (0)5 57 928 929 – [email protected] – www.broadcast-silver.com FM Monitoring Silver 2.4.x User Manual – 03/2013 8. RECORDING CONFIGURATION Reserved for administrators. Click to access the recording configuration pages. In this mode, you may schedule and manage recordings. Recording files temporarily prevents channel monitoring. To be able to automatically manage recordings with ScriptEasy, enable the “Scheduled recording” option on this page. Page 70 Head Office : Parc d’activites Kennedy - 20, avenue Neil Armstrong – 33700 Bordeaux-Merignac (France) Tel +33 (0)5 57 928 928 – Fax +33 (0)5 57 928 929 – [email protected] – www.broadcast-silver.com FM Monitoring Silver 2.4.x User Manual – 03/2013 8.1. Scheduling recordings Select the “Recording Schedule” tab or go to the ‘Recording’’Recording Schedule’ menu. 1 2 3 4 6 5 7 In the Configuration section (1), click to: Configure automatic deletion of recordings (‘Erase recorded files after’). Set the bitrate for high and low quality recordings depending on the network. Select the recording mode No recording (2). Continuous recording (3): set a single frequency, recording quality and the maximum length in seconds for each recording. Scheduled recordings (4) : Up to 10 daily recordings can be scheduled, each may be on a different frequency and at a different time (5). Configuration of automatic audio recording during TA, activated in Monitoring mode on the "Extended RDS Data” tab (6). Manual recordings are also set and launched from this tab (7). For stereo recording, select High Quality. Low Quality will only record in mono. A folder is automatically created when a recording is made. The folder name is the date (YYYYMMDD). Of course all the recordings made on the same day are saved in this folder. Page 71 Head Office : Parc d’activites Kennedy - 20, avenue Neil Armstrong – 33700 Bordeaux-Merignac (France) Tel +33 (0)5 57 928 928 – Fax +33 (0)5 57 928 929 – [email protected] – www.broadcast-silver.com FM Monitoring Silver 2.4.x User Manual – 03/2013 The format of the name of the audio file is as follow: AB_YYYYMMDD_HHMMSS_TTT_FFFF_Comment.mp3 AB: bitrate AL: low bitrate AH: high bitrate YYYYMMDD: Date of the beginning of recording HHMMSS: Time of the beginning of recording TTT: recording type PER: periodical MAN: manual FFFF: frequency Comment: file’s complementary name. 8.2. Recording management Select the “Recording Manager” tab or go to the ‘Recording’’Recording Manager’ menu to manage recordings. Audio recording files can then be downloaded onto a local computer or on the network. Check the boxes for the desired files in the tree (check or uncheck a folder box to select or deselect every associated file) and click . You may also manually delete the files by clicking after checking the files in the tree. Page 72 Head Office : Parc d’activites Kennedy - 20, avenue Neil Armstrong – 33700 Bordeaux-Merignac (France) Tel +33 (0)5 57 928 928 – Fax +33 (0)5 57 928 929 – [email protected] – www.broadcast-silver.com FM Monitoring Silver 2.4.x User Manual – 03/2013 8.3. EWS (option) This page is only available with the EWS option. Select the “EWS” tab or go to the ‘Recording’’EWS’ menu to set Emergency Warning System monitoring. The RDS group 9A contains the EWS message. 1 2 Check to activate monitoring of EWS messages; then specify the frequency to monitor. The process makes it possible for the date and time of the EWS message reception to be inserted into the log file. It also enables the transmission of an alarm message to a monitoring server. The number of received EWS messages is tallied, and the counter can be reset (1). Monitoring can be limited to a daily time window (2). Page 73 Head Office : Parc d’activites Kennedy - 20, avenue Neil Armstrong – 33700 Bordeaux-Merignac (France) Tel +33 (0)5 57 928 928 – Fax +33 (0)5 57 928 929 – [email protected] – www.broadcast-silver.com FM Monitoring Silver 2.4.x User Manual – 03/2013 9. ACCESSING READINGS Click to access measurement readings. 9.1. Recorded Measurements Select the Recorded Measurements tab or go to the ‘Measurements’’Recorded Measurements’ to view recorded measurements. 2 4 1 3 Select the station from the pull-down menu. Station information appears below (1). On 5 different graphs, minimum (in blue), average (in green) and maximum (in red) measurement curves can be viewed for (2): RF level MPX level Pilot level Left Audio level Right Audio level RDS level Click on any small graph to display it in the larger graphic frame (3). Page 74 Head Office : Parc d’activites Kennedy - 20, avenue Neil Armstrong – 33700 Bordeaux-Merignac (France) Tel +33 (0)5 57 928 928 – Fax +33 (0)5 57 928 929 – [email protected] – www.broadcast-silver.com FM Monitoring Silver 2.4.x User Manual – 03/2013 The default time scale is one month. Click and or directly on the graph to successively adjust the time scale to the week, the day, the half-day and the hour. Wherever the click was made becomes the median point of the graph. To return to the month display, simply click . When the time scale is less than a month, click or to display the previous or the following period. The time scale is identical on the large graph and on the 5 mini graphs. You may also adjust the unit scale by zooming on the graph: click and drag towards the bottom of the graph while pressing the Ctrl key. Click and drag towards the top while pressing the Ctrl key to unzoom. This procedure is only valid for the main graph. Hover the mouse over the graph while pressing the Shift key to display 3 horizontal lines that will facilitate reading minimum, average and maximum values. As you move the cursor over the graph, data from the spot where the cursor is will be displayed in the “CURRENT MEASURES” section where it can be easily read (4). Data can be exported in csv format by clicking at the bottom of the window. Minimum, average and maximum values for RF, MPX, pilot, audio and RDS level are exported for the period displayed on the graph. 9.2. Scan Management Select the ‘FM Scan’ tab or go to the ‘Measurements’’FM Scan’ menu to view the scan and configure scanning options. This tab gives you a good overview of the entire market. 1 3 2 4 Seven different scans are displayed in the graphic window (1): Current scan (in green), most recent scan carried out. Maximum scan (in red). Minimum scan (in pink). Reference scan (in black), with which the current scan is compared. Page 75 Head Office : Parc d’activites Kennedy - 20, avenue Neil Armstrong – 33700 Bordeaux-Merignac (France) Tel +33 (0)5 57 928 928 – Fax +33 (0)5 57 928 929 – [email protected] – www.broadcast-silver.com FM Monitoring Silver 2.4.x User Manual – 03/2013 Market scan (in blue). Use the check boxes to display or hide each scan. You may zoom on the graph: click and drag towards the right while pressing the Ctrl key. Click and drag towards the left while pressing the Ctrl key to unzoom. Click and drag towards the left or the right or left to display lower or higher frequencies. Hover the cursor over the graph while pressing the Shift key to display lines that will facilitate reading the current scan values. Press Shift and Alt simultaneously and the lines will move away from the current scan curve, making it possible to approach other curves and read their values. In addition to monitoring configured FM stations, the FM Monitoring Silver can automatically scan the local FM band at regular intervals or daily at the same time (2). The triggering mode can be: Disabled. By interval: scanning is launched at regular intervals ranging between 1 min and 24 h. By hour: scanning is launched daily at a time set by the user. The unit records the minimum and maximum RF levels of the carriers and triggers an alarm (if validated by the user) when a RF level change is detected. The minimum RF threshold and the triggering difference are user-defined. Before validating the scan alarm function, a reference scan must be carried out by the unit (3). Click to start that scan. It will always increase in 10 kHz increments. In this section, you may also: min and max scans. run a new scan. Step and frequency range are user-defined. run a new market scan. Two icons at the bottom of the screen (4) switch between the display of scan options and a display of scan data in tabular form. This data can be sorted by clicking on a column header (one click to sort in ascending order the chosen column, a second click for descending order). Data can also be exported in csv format by clicking . The sort order is maintained in the exported data. Monitoring is never interrupted when scanning is in progress. The unit alternates monitoring and scanning. Therefore the time required for the scanning process may be long. Page 76 Head Office : Parc d’activites Kennedy - 20, avenue Neil Armstrong – 33700 Bordeaux-Merignac (France) Tel +33 (0)5 57 928 928 – Fax +33 (0)5 57 928 929 – [email protected] – www.broadcast-silver.com FM Monitoring Silver 2.4.x User Manual – 03/2013 10. REALTIME MONITORING Click to access real-time measurements. Two users cannot simultaneously connect for realtime measurements. Priority is given as in table below: Connection 1 10.1. Connection 2 Result nd Guest Guest The 2 guest cannot connect Guest Admin The guest is disconnected, the admin can connect Admin Guest The guest cannot connect Admin Invité The 2nd admin cannot connect Realtime measurements Select the ‘Realtime measurements’ tab or go to the ‘Realtime’‘Realtime measurements’ menu to instantaneously view levels in graphic form. 3 2 5 4 1 Just enter the desired frequency, it can be any frequency on the FM band even if it has not been previously configured (1). Then click to play and to stop measurements. Click to hold the tuner on that frequency for better response, that action will temporarily suspend all of your automatic monitoring. Page 77 Head Office : Parc d’activites Kennedy - 20, avenue Neil Armstrong – 33700 Bordeaux-Merignac (France) Tel +33 (0)5 57 928 928 – Fax +33 (0)5 57 928 929 – [email protected] – www.broadcast-silver.com FM Monitoring Silver 2.4.x User Manual – 03/2013 The selected frequency information will appear in section (2). On 5 different graphs, the following levels are represented (3): RF level MPX level Pilot level Audio and filtered audio level (Left and Right) RDS level Click on any small graph to display it in the larger graphic frame (4). You may adjust the unit scale by zooming on the graph: click and drag towards the bottom of the graph while pressing the Ctrl key. Click and drag towards the top while pressing the Ctrl key to unzoom. This procedure is only valid for the main graph. Click and drag towards the left or the right to display the previous or next period. Hover the mouse over the graph while pressing the Shift key to display markers that will facilitate reading values on the curve. As you move the cursor along the graph, data at the point of the cursor is displayed in the “MEASUREMENTS” section where it can be easily read (5). Data can be exported in csv format by clicking at the bottom of the window. Current values for RF, MPX, pilot, audio and RDS level are exported regardless of the graph currently displayed. Page 78 Head Office : Parc d’activites Kennedy - 20, avenue Neil Armstrong – 33700 Bordeaux-Merignac (France) Tel +33 (0)5 57 928 928 – Fax +33 (0)5 57 928 929 – [email protected] – www.broadcast-silver.com FM Monitoring Silver 2.4.x User Manual – 03/2013 10.2. Audio Streaming Select the ‘Audio Streaming’ tab or go to the ‘Realtime’’Audio Streaming’ menu to instantaneously listen to the audio stream. Audio streaming temporarily prevents channel monitoring. Simply: Select one of the configured programs or enter the frequency you wish to hear (it can be any frequency on the FM band) Select the player you wish to use: the player embedded with the application or an external player (Winamp…). Your player must be able to read .m3u files. If unsure, use the embedded player. Click for the selected streaming quality. High Quality is used for stereo streaming, Low Quality for mono streaming. Set the audio bitrate according to the network in the system pages (see section 6.2.13). Page 79 Head Office : Parc d’activites Kennedy - 20, avenue Neil Armstrong – 33700 Bordeaux-Merignac (France) Tel +33 (0)5 57 928 928 – Fax +33 (0)5 57 928 929 – [email protected] – www.broadcast-silver.com FM Monitoring Silver 2.4.x User Manual – 03/2013 10.3. RDS Streaming This page is only available with the Full RDS option. RDS streaming temporarily prevents channel monitoring. To access this “realtime measurement” tab, you may also go the "Measures” menu or use the “F11” shortcut. All RDS tabs are refreshed simultaneously; this enables the user to view one data display then another with no risk of losing information. Some tabs have a history feature, with which the user can display the data received since the application was started or since the last reset. This is the case for the following tabs: o List of AFs o Hexa group o ASCII groups o Radio paging o TMC To prevent computer overloading, this history is not visible in realtime; data viewing is only enabled by stopping the analyzer (Stop button ) (a scroll bar will then appear). Information in sections 1, 2, 3, 4 and 5 is available on every tab: 5 2 3 4 1 Set the frequency and launch streaming with the button keeping values so they can be read (1). You may then stop measurements while , or reset values without stopping streaming Identifies the station main RDS data (2): PI, PS codes, Page 80 Head Office : Parc d’activites Kennedy - 20, avenue Neil Armstrong – 33700 Bordeaux-Merignac (France) Tel +33 (0)5 57 928 928 – Fax +33 (0)5 57 928 929 – [email protected] – www.broadcast-silver.com . FM Monitoring Silver 2.4.x User Manual – 03/2013 Traffic information (TA / TP), Table of characters used, Information on contents: MS, DI, PTY, PIN, GRPD, PTYN Displays RDS error information (3). Button for filtering groups and/or blocks: check boxes for groups and blocks to be displayed. By default, every box is checked (4). Indication of reception of an A type (red) or B type (blue) group (5). Red and blue dots on left indicate if the group is filtered or not. Page 81 Head Office : Parc d’activites Kennedy - 20, avenue Neil Armstrong – 33700 Bordeaux-Merignac (France) Tel +33 (0)5 57 928 928 – Fax +33 (0)5 57 928 929 – [email protected] – www.broadcast-silver.com FM Monitoring Silver 2.4.x User Manual – 03/2013 10.3.1. General tab 1 2 4 3 5 Last decoded AF list (1). This panel contains: The number of AFs contained in the list, The type of method used for sending these frequencies (A or B). RadioText information (2): A/B flag (indication of new RadioText), Current RadioText, Previous RadioText. Decoded RDS date and time (3). Slow Labelling Code (4). Enhanced Other Network: information on the network’s other stations (5). Page 82 Head Office : Parc d’activites Kennedy - 20, avenue Neil Armstrong – 33700 Bordeaux-Merignac (France) Tel +33 (0)5 57 928 928 – Fax +33 (0)5 57 928 929 – [email protected] – www.broadcast-silver.com FM Monitoring Silver 2.4.x User Manual – 03/2013 10.3.2. Lists of AF tab List of AFs (Alternative Frequencies) received by the equipment since the beginning of the measure. These frequencies are sorted chronologically. When printing reports, all AF lists are saved in a text file: af_list.txt, stored in the report directory. Page 83 Head Office : Parc d’activites Kennedy - 20, avenue Neil Armstrong – 33700 Bordeaux-Merignac (France) Tel +33 (0)5 57 928 928 – Fax +33 (0)5 57 928 929 – [email protected] – www.broadcast-silver.com FM Monitoring Silver 2.4.x User Manual – 03/2013 10.3.3. EON AF tab 1 2 All EON network stations, received by the FM Monitoring Silver (1). List of AFs sorted by Variant (2). The list displayed is the one associated with the station or program selected in (1). Page 84 Head Office : Parc d’activites Kennedy - 20, avenue Neil Armstrong – 33700 Bordeaux-Merignac (France) Tel +33 (0)5 57 928 928 – Fax +33 (0)5 57 928 929 – [email protected] – www.broadcast-silver.com FM Monitoring Silver 2.4.x User Manual – 03/2013 10.3.4. Sequence tab 1 2 Statistics on the received RDS groups (1): Number of groups received over the last minute (or between two 4A groups if the RDS time and date are being transmitted). Percentage represented by each group (both A and B variants). Running total of group count. RDS groups received, displayed in order of reception (2): Red background: type A groups, Blue background: type B groups, Grey background: filtered groups. Page 85 Head Office : Parc d’activites Kennedy - 20, avenue Neil Armstrong – 33700 Bordeaux-Merignac (France) Tel +33 (0)5 57 928 928 – Fax +33 (0)5 57 928 929 – [email protected] – www.broadcast-silver.com FM Monitoring Silver 2.4.x User Manual – 03/2013 10.3.5. Percentage tab View of received RDS groups. The red bars on the graph represent the proportion of type A groups. The blue bars on the graph represent the proportion of type B groups. The grey bars on the graph part represent both A&B groups. Putting the cursor over any grey bar will trigger a popup display of the group number and contents. Page 86 Head Office : Parc d’activites Kennedy - 20, avenue Neil Armstrong – 33700 Bordeaux-Merignac (France) Tel +33 (0)5 57 928 928 – Fax +33 (0)5 57 928 929 – [email protected] – www.broadcast-silver.com FM Monitoring Silver 2.4.x User Manual – 03/2013 10.3.6. HEXA group tab RDS data display in Hexadecimal form. This display is dependent on the settings of the group and block filters. Page 87 Head Office : Parc d’activites Kennedy - 20, avenue Neil Armstrong – 33700 Bordeaux-Merignac (France) Tel +33 (0)5 57 928 928 – Fax +33 (0)5 57 928 929 – [email protected] – www.broadcast-silver.com FM Monitoring Silver 2.4.x User Manual – 03/2013 10.3.7. ASCII group tab RDS data display in ASCII form. This display is dependent on the settings of the group and block filters. Page 88 Head Office : Parc d’activites Kennedy - 20, avenue Neil Armstrong – 33700 Bordeaux-Merignac (France) Tel +33 (0)5 57 928 928 – Fax +33 (0)5 57 928 929 – [email protected] – www.broadcast-silver.com FM Monitoring Silver 2.4.x User Manual – 03/2013 10.3.8. Radio paging tab Radio Paging linked data display. Page 89 Head Office : Parc d’activites Kennedy - 20, avenue Neil Armstrong – 33700 Bordeaux-Merignac (France) Tel +33 (0)5 57 928 928 – Fax +33 (0)5 57 928 929 – [email protected] – www.broadcast-silver.com FM Monitoring Silver 2.4.x User Manual – 03/2013 10.3.9. TMC tab Traffic Message Channel (TMC) linked data display. Page 90 Head Office : Parc d’activites Kennedy - 20, avenue Neil Armstrong – 33700 Bordeaux-Merignac (France) Tel +33 (0)5 57 928 928 – Fax +33 (0)5 57 928 929 – [email protected] – www.broadcast-silver.com FM Monitoring Silver 2.4.x User Manual – 03/2013 11. VIEWING THE UNIT STATUS Click 11.1. to view current alarms and event logs. Current Alarms Select the ‘Current Alarms’ tab or go to the ‘Status’’Current Alarms’ menu to quickly view current alarms. 2 1 3 4 The configured stations are listed in section (1), the status for each is indicated by a symbol: : monitored station with no alarm : monitored station with current alarms : station which is measured but not monitored : station which is neither measured nor monitored Click on one of the station to display its name and information (2) as well as its alarms (3). The alarm’s symbol indicates its status: : current alarm : alarm closed by hierarchy (the alarm was on, then a more important alarm occured. When the more important alarm will close, the less important alarm will reopen until the status returns to normal) Page 91 Head Office : Parc d’activites Kennedy - 20, avenue Neil Armstrong – 33700 Bordeaux-Merignac (France) Tel +33 (0)5 57 928 928 – Fax +33 (0)5 57 928 929 – [email protected] – www.broadcast-silver.com FM Monitoring Silver 2.4.x User Manual – 03/2013 To quickly analyze these alarms, shortcut buttons allow quick access to various pertinent pages of the application (4). In particular, the ‘Event Log’ button opens a log in which the events are already filtered for the selected station. The list of alarms is refreshed as specified in the options of the application (see section 6.1). However, it is possible to refresh it any time by clicking . 11.2. Viewing the event log Select the ‘Event log’ tab or go to the ‘Status’’Event log’ menu to view the logs. Two logs are available: Realtime log: list of current events. The following information is listed: sub-system, start and end time, severity, event type, description, and whether a mail or trap was sent. The list is refreshed automatically; it is however possible to pause using . History Log: historical event list. Logging frequency, time for which logs are kept and the ability to clear the log are set in the system configuration section, ‘I/O log’ page (see section 6.2.16). The severity level for monitoring events can be set on the configuration notification page (see section 6.2.12). Page 92 Head Office : Parc d’activites Kennedy - 20, avenue Neil Armstrong – 33700 Bordeaux-Merignac (France) Tel +33 (0)5 57 928 928 – Fax +33 (0)5 57 928 929 – [email protected] – www.broadcast-silver.com FM Monitoring Silver 2.4.x User Manual – 03/2013 When selecting the history log or the I/O log, the filter configuration window is available: It allows the user to select events for a limited time frame and to select the number of events to display. Warning: If the Max line count is 30, only the 30 first events will be listed (this number is not a ‘per page’ number). We recommend you use the button. It opens a dialog box that makes it possible to filter by sub-system, severity, source, event, mail AND trap. Click on ‘OK’; the criteria appear in the filter section. Click on the “Apply Filter” button to display the events. To deactivate the filter, click on a 2nd time, filtering criteria disappear, and click on “Apply Filter” again. ‘Auto’ filters are also available for most columns. With all logs, data can be exported in csv format by clicking as is. . A filtered list will be exported Page 93 Head Office : Parc d’activites Kennedy - 20, avenue Neil Armstrong – 33700 Bordeaux-Merignac (France) Tel +33 (0)5 57 928 928 – Fax +33 (0)5 57 928 929 – [email protected] – www.broadcast-silver.com FM Monitoring Silver 2.4.x User Manual – 03/2013 12. MANAGING BACKUP FILES Station configuration, system configuration and ScriptEasy scripts can be backed up, for instance to be able to use them with another unit. 12.1. Backing up Click on ‘File’’Backup’ Select the backup folder and the name of the backup file, add a comment if needed, it will allow you to find it more easily at a later date. Default folder is C:\Documents and Settings\user_name\Audemat\FM Monitoring Silver\backups. Select also what should be backed up: configuration and/or scripts. The backup file’s extension is .aud. The user name and password are not backed up. Page 94 Head Office : Parc d’activites Kennedy - 20, avenue Neil Armstrong – 33700 Bordeaux-Merignac (France) Tel +33 (0)5 57 928 928 – Fax +33 (0)5 57 928 929 – [email protected] – www.broadcast-silver.com FM Monitoring Silver 2.4.x User Manual – 03/2013 12.2. Restoring a file Click on ‘File’’Restore’ Select the file you wish to restore and click ‘OK’. New configurations and scripts will then be available in the unit. After restoring a file the unit will automatically reboot. After launching the restoration process, wait a few minutes for the FM Monitoring Silver to restart before reconnecting. To reconnect to the unit, simply use the current user name and password. Page 95 Head Office : Parc d’activites Kennedy - 20, avenue Neil Armstrong – 33700 Bordeaux-Merignac (France) Tel +33 (0)5 57 928 928 – Fax +33 (0)5 57 928 929 – [email protected] – www.broadcast-silver.com FM Monitoring Silver 2.4.x User Manual – 03/2013 13. ACTIVATING SOFTWARE OPTIONS 13.1. Activating the Full RDS, EWS or the MasterView option Contact the sales department in order to obtain the software key to activate the option, then follow the procedure: 1. Insert the CD sent by Audemat upon purchase of the option, the following screen will pop up. 2. 3. Go to the "Help“ menu of the FM Monitoring Silver application, click on ‘About’ and display the ‘Licenses’ tab. Click on the link and copy the product key. 5. Paste or copy the product key in the text box. 4. Click on the “Activate license” button. 6. Click on “Activate” to update the equipment with the option. 7. Close and restart the application 8. Once an option has been activated, a new line appears in the license table. After activating the Full RDS option, you must disable monitoring and enable it again for all new functions to become available. Page 96 Head Office : Parc d’activites Kennedy - 20, avenue Neil Armstrong – 33700 Bordeaux-Merignac (France) Tel +33 (0)5 57 928 928 – Fax +33 (0)5 57 928 929 – [email protected] – www.broadcast-silver.com FM Monitoring Silver 2.4.x User Manual – 03/2013 13.2. Activating the Phone Alerts option Contact the sales department in order to obtain the software key to activate the “Phone Alert/DTMF” option, then follow the procedure: 1. Plug in the modem Phone line 2. Insert the CD sent by Audemat upon purchase of the option, the following screen will pop up. USB port of the Audemat unit USB link 3. Click on the link and copy the product key. 4.7.Go to the "Help“ menu of the GOLDENEAGLE FM 8.application, click on ‘About’ and display the ‘Licenses’ tab. 6. Paste or copy the product key in the text box. 5. Click on the “Activate license” button. 7. Click on “Activate” to update the equipment with the option. 8. Close and restart the application 9. Once an option has been activated, "Yes" appears on the option line. Please read the ScriptEasy manual for more information on the Phone Alerts. Page 97 Head Office : Parc d’activites Kennedy - 20, avenue Neil Armstrong – 33700 Bordeaux-Merignac (France) Tel +33 (0)5 57 928 928 – Fax +33 (0)5 57 928 929 – [email protected] – www.broadcast-silver.com FM Monitoring Silver 2.4.x User Manual – 03/2013 14. OPTIONAL INPUT / OUTPUT CONFIGURATION 14.1. Status module - Digital inputs Please refer to the ScriptEasy manual for more information on I/O management. This module provides 16 digital inputs and can work in 2 different modes depending on jumper configuration: Schematic diagram: ‘Internal power supply’ mode (default mode): With this mode, all common pins are internally linked to the ground. DIGITAL INPUT Contact When a digital input is connected with the common, this input’s value switches to ‘1’; otherwise it stays on ‘0’. COMMON (GROUND) ‘External power supply’ mode: With this mode, all ‘common’ pins are linked together but they are no longer connected to the ground. Now, an external power supply is necessary. DIGITAL INPUT Contact - + An external power supply between 5 and 25 V is applied to the common. If a digital input is connected to COMMON the ground, this input’s value switches to ‘1’; otherwise it stays on ‘0’. (GROUND) Select internal or external power supply mode: ‘Internal power supply’ mode (default mode): Two jumpers shall be installed on the selected pins 2 jumpers Page 98 Head Office : Parc d’activites Kennedy - 20, avenue Neil Armstrong – 33700 Bordeaux-Merignac (France) Tel +33 (0)5 57 928 928 – Fax +33 (0)5 57 928 929 – [email protected] – www.broadcast-silver.com FM Monitoring Silver 2.4.x User Manual – 03/2013 ‘External power supply’ mode: Install one jumper only on the middle pins. 1 jumper in the middle Digital input module external connection diagram: External connections on SUB-D 25pts female connector located at the end of the board. PIN NUMBER SUB-D 25pts FEMALE CONNECTOR IN16 IN15 IN14 IN13 IN12 IN11 IN10 IN09 IN08 IN07 IN06 IN05 IN04 IN03 IN02 IN01 DESCRIPTION 1 Digital input 1 2 Digital input 3 3 Digital input 5 4 Digital input 7 5 Digital input 9 6 Digital input 11 COMMON 7 Digital input 13 (internally connected) 8 Digital input 15 9 Common 10 Common 11 Common 12 Common 13 Not used 14 Digital input 2 15 Digital input 4 16 Digital input 6 17 Digital input 8 18 Digital input 10 19 Digital input 12 20 Digital input 14 21 Digital input 16 22 Common 23 Common 24 Common 25 Common When the ‘internal power supply’ mode is selected, the common ground is also the unit’s ground. Page 99 Head Office : Parc d’activites Kennedy - 20, avenue Neil Armstrong – 33700 Bordeaux-Merignac (France) Tel +33 (0)5 57 928 928 – Fax +33 (0)5 57 928 929 – [email protected] – www.broadcast-silver.com FM Monitoring Silver 2.4.x User Manual – 03/2013 14.2. Commands module - Relay outputs Please refer to the ScriptEasy manual for more information on I/O management. This module provides 8 SPDT relays. Each relay has one com input (common) and two outputs: NC (normally closed) and NO (normally opened). Schematic diagram: RELAY (x8) NC (Normaly open) COM NO (Normaly closed) When the relay is not in use, com is linked to the NC output. When the relay is activated, com is linked to the NO output. If your unit reboots, com is then linked to the NC output. Practical examples: 1. The relay can be used like an on-off switch to make a contact between the common and one of the outputs (NC or NO). 2. It is also possible to connect a power supply to the common (for example the +12 V power supply available on pin 13) and to switch this power supply between the NC and the NO output. Page 100 Head Office : Parc d’activites Kennedy - 20, avenue Neil Armstrong – 33700 Bordeaux-Merignac (France) Tel +33 (0)5 57 928 928 – Fax +33 (0)5 57 928 929 – [email protected] – www.broadcast-silver.com FM Monitoring Silver 2.4.x User Manual – 03/2013 Relay output module external connection diagram: External connections on SUB-D 25pts male connector located at the end of the board. Each circuit can support 5 A between -60 V and +60 V. A +12 V power supply with a max current of 250 mA is available on pin 13. SUB-D 25pts MALE CONNECTOR COM1 NC1 NO1 COM2 NC2 N02 COM3 NC3 NO3 COM4 NC4 NO4 COM5 NC5 NO5 COM6 NC6 NO6 COM7 NC7 NO7 COM8 NC8 NO8 PIN NUMBER DESCRIPTION 1 COM1 2 NO1 3 NC2 4 COM3 5 NO3 6 NC4 7 COM5 8 NO5 9 NC6 10 COM7 11 NO7 12 NC8 13 +12V 14 NC1 15 COM2 16 NO2 17 NC3 18 COM4 19 NO4 20 NC5 21 COM6 22 NO6 23 NC7 24 COM8 25 NO8 Ground for the 12 V power supply is available on the ground of the unit. Page 101 Head Office : Parc d’activites Kennedy - 20, avenue Neil Armstrong – 33700 Bordeaux-Merignac (France) Tel +33 (0)5 57 928 928 – Fax +33 (0)5 57 928 929 – [email protected] – www.broadcast-silver.com FM Monitoring Silver 2.4.x User Manual – 03/2013 14.3. Metering module - Analog inputs Please refer to the ScriptEasy manual for more information on I/O management. This module provides 8 analog inputs designed to measure voltages up to 50 V. It is possible to select the measurement range for a better accuracy while converting. Schematic diagram: This module converts analog voltage into a digital signal used by the unit. Voltage (+V) must be applied between one of the analog inputs and the ground. ANALOG INPUT +V + - Analog input module externalCOMMON connection diagram: External connections on SUB-D 25pts (GROUND) female connector situated at the end of the board. Input impedance: 100 KΩ. Measurement range: 0-5 V, 0-10 V, 0-25 V & 0-50 V. ADC resolution (Analog to digital converter): 12 bits for each measurement range. IN 07 IN 06 IN 05 IN 04 IN 03 IN 02 IN 01 (internaly connected) IN 08 COMMON -GROUND SUB-D 25pts FEMALE CONNECTOR PIN NUMBER 1 2 3 4 5 6 7 8 9 10 11 12 13 14 15 16 17 18 19 20 21 22 23 24 25 The ground is the same as the ground of the unit. Page 102 Head Office : Parc d’activites Kennedy - 20, avenue Neil Armstrong – 33700 Bordeaux-Merignac (France) Tel +33 (0)5 57 928 928 – Fax +33 (0)5 57 928 929 – [email protected] – www.broadcast-silver.com DESCRIPTION IN1 IN2 IN3 IN4 IN5 IN6 IN7 IN8 Not used Not used Not used Not used Not used GND GND GND GND GND GND GND GND GND GND GND GND FM Monitoring Silver 2.4.x User Manual – 03/2013 APPENDIX A: SCRIPTEASY OBJECTS The ScriptEasy version supplied with the FM Monitoring Silver includes specific digital objects activated when an FM monitoring alarm is triggered. These objects are represented with the same icons as those used in the FM Monitoring Silver application in the Monitoring Configuration section. Click on the ScriptEasy toolbar to display the ‘FM Monitoring” menu and use these objects. Select the event you would like to add to your script and place it on the current page. To configure it, select it and fill in the information in the properties panel on the right of the screen: Double-click on the ‘radio channel’ field to display a selection box from which to select the desired station for the alarm (the channel list comes directly from the FM Monitoring Silver you are connected to): Page 103 Head Office : Parc d’activites Kennedy - 20, avenue Neil Armstrong – 33700 Bordeaux-Merignac (France) Tel +33 (0)5 57 928 928 – Fax +33 (0)5 57 928 929 – [email protected] – www.broadcast-silver.com FM Monitoring Silver 2.4.x User Manual – 03/2013 Once configured, you can use this object like any other ScriptEasy logical object: it will be activated when the alarm it represents is triggered on the selected program and will return to a normal state when the alarm is closed. Action Objects specific to Radio monitoring: The ScriptEasy FM version also includes an object to set the tuner dedicated to realtime surveillance to a given frequency, and to enable this program on the FM Monitoring Silver audio output, and another object to stop the audio outout. Note that this receiver is not available for other tasks during this type of operation. Another object makes it possible to trigger audio recording in file (on the receiver dedicated to realtime surveillance). This object can launch recording when a specific event occurs or at a specific time. Note that programmed recording must be enabled in the monitoring application (see section 8.1) and that a recording cannot start if another recording is already in progress. To configure this object, fill out the information in the properties panel on the right of the screen: frequency, recording duration (in minutes), and a label that will be added on the end of the recording file name. Page 104 Head Office : Parc d’activites Kennedy - 20, avenue Neil Armstrong – 33700 Bordeaux-Merignac (France) Tel +33 (0)5 57 928 928 – Fax +33 (0)5 57 928 929 – [email protected] – www.broadcast-silver.com FM Monitoring Silver 2.4.x User Manual – 03/2013 APPENDIX B: FM MONITORING SILVER V2 TRAP DESCRIPTION Trap Number: 1 Trap Name: equipmentOn List of variables included in the trap OID Name Type / Description 1.3.6.1.4.1.5299.15.18.1.7.0 sysSystemType STRING / Equipment type 1.3.6.1.4.1.5299.15.18.1.6.0 sysSerialNumber STRING / Serial number 1.3.6.1.4.1.5299.15.18.1.4.0 sysVersionSoftware STRING / Version 1.3.6.1.4.1.5299.15.18.1.13.4.1.0 trapsSequenceNumber INTEGER / Trap number 1.3.6.1.4.1.5299.15.18.1.13.4.2.1 trapsequipmentOndateTime STRING / "YYYY/MM/DD HH:MM:SS" 1.3.6.1.4.1.5299.15.18.1.13.4.2.2 trapsequipmentOnseverity INTEGER / Severity * Trap Number: 8 Trap Name: heartBeat List of variables included in the trap OID Name Type / Description 1.3.6.1.4.1.5299.15.18.1.7.0 sysSystemType STRING / Equipment type 1.3.6.1.4.1.5299.15.18.1.6.0 sysSerialNumber STRING / Serial number 1.3.6.1.4.1.5299.15.18.1.4.0 sysVersionSoftware STRING / Version 1.3.6.1.4.1.5299.15.18.1.13.4.1.0 trapsSequenceNumber INTEGER / Trap number 1.3.6.1.4.1.5299.15.18.1.13.4.3.1 trapheartBeatOndateTime STRING / "YYYY/MM/DD HH:MM:SS" 1.3.6.1.4.1.5299.15.18.1.13.4.3.2 trapsheartBeatOnseverity INTEGER / Severity * Trap Number: 9 Trap Name: configChanged List of variables included in the trap OID Name Type / Description 1.3.6.1.4.1.5299.15.18.1.7.0 sysSystemType STRING / Equipment type 1.3.6.1.4.1.5299.15.18.1.6.0 sysSerialNumber STRING / Serial number 1.3.6.1.4.1.5299.15.18.1.4.0 sysVersionSoftware STRING / Version 1.3.6.1.4.1.5299.15.18.1.13.4.1.0 trapsSequenceNumber INTEGER / Trap number 1.3.6.1.4.1.5299.15.18.1.13.4.4.1 trapsconfigChangeddateTime STRING / "YYYY/MM/DD HH:MM:SS" 1.3.6.1.4.1.5299.15.18.1.13.4.4.2 trapsconfigChangedrootTree STRING / “sys” 1.3.6.1.4.1.5299.15.18.1.13.4.4.3 trapsconfigChangedseverity INTEGER / Severity * Trap Number: 10 Trap Name: equipmentFault List of variables included in the trap OID Name Type / Description 1.3.6.1.4.1.5299.15.18.1.7.0 sysSystemType STRING / Equipment type 1.3.6.1.4.1.5299.15.18.1.6.0 sysSerialNumber STRING / Serial number 1.3.6.1.4.1.5299.15.18.1.4.0 sysVersionSoftware STRING / Version Page 105 Head Office : Parc d’activites Kennedy - 20, avenue Neil Armstrong – 33700 Bordeaux-Merignac (France) Tel +33 (0)5 57 928 928 – Fax +33 (0)5 57 928 929 – [email protected] – www.broadcast-silver.com FM Monitoring Silver 2.4.x User Manual – 03/2013 1.3.6.1.4.1.5299.15.18.1.13.4.1.0 trapsSequenceNumber INTEGER / Trap number 1.3.6.1.4.1.5299.15.18.1.13.4.5.1 trapsequipmentFaultdateTime STRING / "YYYY/MM/DD HH:MM:SS" 1.3.6.1.4.1.5299.15.18.1.13.4.5.2 trapsequipmentFaulterror STRING / Error description 1.3.6.1.4.1.5299.15.18.1.13.4.5.3 trapsequipmentFaultseverity INTEGER / Severity * Trap Number: 10000 Trap Name: scriptEasyInfo List of variables included in the trap OID Name Type / Description 1.3.6.1.4.1.5299.15.18.1.7.0 sysSystemType STRING / Equipment type 1.3.6.1.4.1.5299.15.18.1.6.0 sysSerialNumber STRING / Serial number 1.3.6.1.4.1.5299.15.18.1.4.0 sysVersionSoftware STRING / Version 1.3.6.1.4.1.5299.15.18.1.13.4.1.0 trapsSequenceNumber INTEGER / Trap number 1.3.6.1.4.1.5299.15.18.1.13.4.7.1 trapsScriptEasyInfodateTime Event date 1.3.6.1.4.1.5299.15.18.1.13.4.7.2 trapsScriptEasyInfoseverity Severity * 1.3.6.1.4.1.5299.15.18.1.13.4.7.3 trapsScriptEasyInfoscriptObjectId ScriptEasy object ID 1.3.6.1.4.1.5299.15.18.1.13.4.7.4 trapsScriptEasyInfoscriptObjectStatus State of the object (0=OFF; 1=ON) 1.3.6.1.4.1.5299.15.18.1.13.4.7.5 trapsScriptEasyInfoscriptObjectName Object name 1.3.6.1.4.1.5299.15.18.1.13.4.7.6 trapsScriptEasyInfoeventDescription Event description 1.3.6.1.4.1.5299.15.18.1.13.4.7.7 trapsScriptEasyInfochannel Associated channel 1.3.6.1.4.1.5299.15.18.1.13.4.7.8 trapsScriptEasyInfotransmitter Associated transmitter 1.3.6.1.4.1.5299.15.18.1.13.4.7.9 trapsScriptEasyInfonetwork Associated network Trap Number: 10001 Trap Name: scriptEasyOnOff List of variables included in the trap OID Name Type / Description 1.3.6.1.4.1.5299.15.18.1.7.0 sysSystemType STRING / Equipment type 1.3.6.1.4.1.5299.15.18.1.6.0 sysSerialNumber STRING / Serial number 1.3.6.1.4.1.5299.15.18.1.4.0 sysVersionSoftware STRING / Version 1.3.6.1.4.1.5299.15.18.1.13.4.1.0 trapsSequenceNumber INTEGER / Trap number 1.3.6.1.4.1.5299.15.18.1.13.4.8.1 trapsScriptEasyOnOffdateTime Event date 1.3.6.1.4.1.5299.15.18.1.13.4.8.2 trapsScriptEasyOnOffseverity Severity * 1.3.6.1.4.1.5299.15.18.1.13.4.8.3 trapsScriptEasyOnOffscriptObjectId ScriptEasy object ID 1.3.6.1.4.1.5299.15.18.1.13.4.8.4 trapsScriptEasyOnOffscriptObjectStatus State of the object (0=OFF; 1=ON) 1.3.6.1.4.1.5299.15.18.1.13.4.8.5 trapsScriptEasyOnOffscriptObjectName Object name 1.3.6.1.4.1.5299.15.18.1.13.4.8.6 trapsScriptEasyOnOffeventDescription Event description 1.3.6.1.4.1.5299.15.18.1.13.4.8.8 trapsScriptEasyOnOffchannel Associated channel 1.3.6.1.4.1.5299.15.18.1.13.4.8.9 trapsScriptEasyOnOfftransmitter Associated transmitter 1.3.6.1.4.1.5299.15.18.1.13.4.8.10 trapsScriptEasyOnOffnetwork Associated network Page 106 Head Office : Parc d’activites Kennedy - 20, avenue Neil Armstrong – 33700 Bordeaux-Merignac (France) Tel +33 (0)5 57 928 928 – Fax +33 (0)5 57 928 929 – [email protected] – www.broadcast-silver.com FM Monitoring Silver 2.4.x User Manual – 03/2013 Trap Number: 10003 Trap Name: scriptChange List of variables included in the trap OID Name Type / Description 1.3.6.1.4.1.5299.15.18.1.7.0 sysSystemType STRING / Equipment type 1.3.6.1.4.1.5299.15.18.1.6.0 sysSerialNumber STRING / Serial number 1.3.6.1.4.1.5299.15.18.1.4.0 sysVersionSoftware STRING / Version 1.3.6.1.4.1.5299.15.18.1.13.4.6.0 trapsSequenceNumber INTEGER / Trap number 1.3.6.1.4.1.5299.15.18.1.13.4.6.1 trapsscriptChangeddateTime Event date 1.3.6.1.4.1.5299.15.18.1.13.4.6.2 trapsscriptChangedseverity Severity * Trap Number: 1610002 Trap Name: scriptEasyManagerAlarm List of variables included in the trap OID Name Type / Description 1.3.6.1.4.1.5299.15.18.1.7.0 sysSystemType STRING type 1.3.6.1.4.1.5299.15.18.1.6.0 sysSerialNumber STRING / Serial number 1.3.6.1.4.1.5299.15.18.1.4.0 sysVersionSoftware STRING / Version 1.3.6.1.4.1.5299.15.18.1.13.4.1.0 trapsSequenceNumber INTEGER / Trap number 1.3.6.1.4.1.5299.15.18.1.13.4.9.1 trapsScriptEasyManagerAlarmalarmType Alarm type 1.3.6.1.4.1.5299.15.18.1.13.4.9.2 trapsScriptEasyManagerAlarmdateTime Event date 1.3.6.1.4.1.5299.15.18.1.13.4.9.3 trapsScriptEasyManagerAlarmseverity Severity * 1.3.6.1.4.1.5299.15.18.1.13.4.9.4 trapsScriptEasyManagerAlarmscriptObjectId ScriptEasy object ID 1.3.6.1.4.1.5299.15.18.1.13.4.9.5 trapsScriptEasyManagerAlarmscriptObjectName Object name 1.3.6.1.4.1.5299.15.18.1.13.4.9.6 trapsScriptEasyManagerAlarmeventDescription Event description 1.3.6.1.4.1.5299.15.18.1.13.4.9.7 trapsScriptEasyManagerAlarmequipmentId Id de l’équipement 1.3.6.1.4.1.5299.15.18.1.13.4.9.8 trapsScriptEasyManagerAlarmchannelId Associated channel 1.3.6.1.4.1.5299.15.18.1.13.4.9.9 trapsScriptEasyManagerAlarmtransmitterId Associated transmitter Trap Number: 12 / Equipment Trap Name: analogRFLow2 List of variables included in the trap OID Name Type / Description 1.3.6.1.4.1.5299.15.18.1.7.0 sysSystemType STRING / Equipment type 1.3.6.1.4.1.5299.15.18.1.6.0 sysSerialNumber STRING / Serial number 1.3.6.1.4.1.5299.15.18.1.4.0 sysVersionSoftware STRING / Version 1.3.6.1.4.1.5299.15.18.1.13.4.1.0 trapsSequenceNumber INTEGER / Trap number 1.3.6.1.4.1.5299.15.17.1.13.4.11.0 trapsEventId INTEGER / event id 1.3.6.1.4.1.5299.15.18.1.12.4.9.1.1 trapsmonitoringValueschannelType Channel type (1=FM) 1.3.6.1.4.1.5299.15.18.1.12.4.9.1.2 trapsmonitoringValuesfrequency Frequency (MHz x10) 1.3.6.1.4.1.5299.15.18.1.12.4.9.1.3 trapsmonitoringValueschannelId Channel ID Page 107 Head Office : Parc d’activites Kennedy - 20, avenue Neil Armstrong – 33700 Bordeaux-Merignac (France) Tel +33 (0)5 57 928 928 – Fax +33 (0)5 57 928 929 – [email protected] – www.broadcast-silver.com FM Monitoring Silver 2.4.x User Manual – 03/2013 1.3.6.1.4.1.5299.15.18.1.12.4.9.1.4 trapsmonitoringValueschannelName Channel name 1.3.6.1.4.1.5299.15.18.1.12.4.9.1.5 trapsmonitoringValuesalarmStatus State of the Appendix C) 1.3.6.1.4.1.5299.15.18.1.12.4.9.1.6 trapsmonitoringValueserrorDateTime Error starting date 1.3.6.1.4.1.5299.15.18.1.12.4.9.1.7 trapsmonitoringValueseventStartDateTime Alarm date 1.3.6.1.4.1.5299.15.18.1.12.4.9.1.8 trapsmonitoringValuesseverity Severity * 1.3.6.1.4.1.5299.15.18.1.12.4.9.1.9 trapsmonitoringValuesreadValue Read value 1.3.6.1.4.1.5299.15.18.1.12.4.9.1.10 trapsmonitoringValuesreferenceValue Reference value 1.3.6.1.4.1.5299.15.18.1.12.4.9.1.11 trapsmonitoringValuestransmitterName Trasmitter name 1.3.6.1.4.1.5299.15.18.1.12.4.9.1.12 trapsmonitoringValuesnetworkName Network name 1.3.6.1.4.1.5299.15.18.1.12.4.9.1.13 trapsDefinitionmonitoringValuesdescription Value description Trap Number: 13 Trap Name: analogRFLow1 List of variables included in the trap: see trap #12 Trap Number: 14 Trap Name: analogRFHigh List of variables included in the trap: see trap #12 Trap Number: 15 Trap Name: analogStereoPresence List of variables included in the trap: see trap #12 Trap Number: 16 Trap Name: rDSPresence List of variables included in the trap: see trap #12 Trap Number: 17 Trap Name: rDSLow List of variables included in the trap: see trap #12 Trap Number: 18 Trap Name: rDSBitErrorRate List of variables included in the trap: see trap #12 Trap Number: 19 Trap Name: rDSPICode List of variables included in the trap: see trap #12 Trap Number: 20 Trap Name: analogAFLow List of variables included in the trap: see trap #12 Trap Number: 21 Trap Name: analogPilotLow List of variables included in the trap: see trap #12 Trap Number: 22 Trap Name: analogPilotHigh List of variables included in the trap: see trap #12 Trap Number: 23 Trap Name: analogMPXLow Page 108 Head Office : Parc d’activites Kennedy - 20, avenue Neil Armstrong – 33700 Bordeaux-Merignac (France) Tel +33 (0)5 57 928 928 – Fax +33 (0)5 57 928 929 – [email protected] – www.broadcast-silver.com alarm (cf FM Monitoring Silver 2.4.x User Manual – 03/2013 List of variables included in the trap: see trap #12 Trap Number: 24 Trap Name: analogMPXHigh List of variables included in the trap: see trap #12 Trap Number: 25 Trap Name: rDSPSCode List of variables included in the trap: see trap #12 Trap Number: 26 Trap Name: rDSGroups List of variables included in the trap: see trap #12 Trap Number: 27 Trap Name: rDSAfList List of variables included in the trap: see trap #12 Trap Number: 28 Trap Name: rDSGRPD List of variables included in the trap: see trap #12 Trap Number: 29 Trap Name: rDSSlc List of variables included in the trap: see trap #12 Trap Number: 30 Trap Name: rDSAid List of variables included in the trap: see trap #12 Trap Number: 32 Trap Name: analogStereoPhase List of variables included in the trap: see trap #12 Trap Number: 33 Trap Name: rDSEonTaPI List of variables included in the trap: see trap #12 Trap Number: 34 Trap Name: rDSPty List of variables included in the trap: see trap #12 Trap Number: 35 Trap Name: analogAFHigh List of variables included in the trap: see trap #12 Trap Number: 36 Trap Name: rDSHigh List of variables included in the trap: see trap #12 Trap Number: 37 Trap Name: rDSClockOffset List of variables included in the trap: see trap #12 Trap Number: 38 Trap Name: rDSClockTimeZone List of variables included in the trap: see trap #12 Page 109 Head Office : Parc d’activites Kennedy - 20, avenue Neil Armstrong – 33700 Bordeaux-Merignac (France) Tel +33 (0)5 57 928 928 – Fax +33 (0)5 57 928 929 – [email protected] – www.broadcast-silver.com FM Monitoring Silver 2.4.x User Manual – 03/2013 Trap Number: 39 Trap Name: rDSTA List of variables included in the trap: see trap #12 Trap Number: 40 Trap Name: rDSEonTA List of variables included in the trap: see trap #12 Trap Number: 41 Trap Name: Scanning List of variables included in the trap: see trap #12 Trap Number: 45 Trap Name: ewsDetection List of variables included in the trap OID Name Type / Description 1.3.6.1.4.1.5299.15.17.1.7.0 sysSystemType STRING type 1.3.6.1.4.1.5299.15.17.1.6.0 sysSerialNumber STRING / Serial number 1.3.6.1.4.1.5299.15.17.1.4.0 sysVersionSoftware STRING / Version 1.3.6.1.4.1.5299.15.17.1.13.4.1.0 trapsSequenceNumber INTEGER number 1.3.6.1.4.1.5299.15.17.1.13.4.11.0 trapsEventId INTEGER / event id 1.3.6.1.4.1.5299.15.17.1.12.4.9.4.1 trapsDefinitionewsValuesfrequency Frequency (MHz x10) 1.3.6.1.4.1.5299.15.17.1.12.4.9.4.2 trapsDefinitionewsValueseventDateTime Event starting date 1.3.6.1.4.1.5299.15.17.1.12.4.9.4.3 trapsDefinitionewsValuesseverity Severity 1.3.6.1.4.1.5299.15.17.1.12.4.9.4.4 trapsDefinitionewsValuesmessage Content of group 9A in hexadecimal format 1.3.6.1.4.1.5299.15.17.1.12.4.9.4.5 trapsDefinitionewsValuescounter Number of messages * Alarm’s severity level: 0: Emergency 1: Alert 2: Critical 3: Error 4: Warning 5: Notice 6: Information Page 110 Head Office : Parc d’activites Kennedy - 20, avenue Neil Armstrong – 33700 Bordeaux-Merignac (France) Tel +33 (0)5 57 928 928 – Fax +33 (0)5 57 928 929 – [email protected] – www.broadcast-silver.com / Equipment / Trap received FM Monitoring Silver 2.4.x User Manual – 03/2013 APPENDIX C: DESCRIPTION OF SNMP MONITORING TABLES Monitored value table: OID Name Type Description 1.3.6.1.4.1.5299.15.18.1.12.4.11.1.2.1.1 idRow INTEGER Channel number (1) 1.3.6.1.4.1.5299.15.18.1.12.4.11.1.2.1.2 idColumn INTEGER Measurement number (2) 1.3.6.1.4.1.5299.15.18.1.12.4.11.1.2.1.3 Value INTEGER Current value (1) The channel number corresponds to its row it the channel list (Monitoring page), starting from zero: the first channel’s ID number is 0 and the 10th channel’s ID number is 9. (2) Measurements are as follows: Value code 0 1 2 3 4 5 6 7 Description RF level, value in dBuV x10 MPX level, value in kHz Left AF level value in dBr x10 Right AF level value in dBr x10 Left AF level with CCIR filter, value in dBr x10 Right AF level with CCIR filter, value in dBr x10 Pilot level, value in kHz x10 RDS level, value in kHz x10 For instance, to read the RF level for channel 5, use a GET SNMP command on the OID: 1.3.6.1.4.1.5299.15.18.1.12.4.11.1.2.1.3.4.0 Where .4 is the identifier of the 5th channel and 0 is the identifier of the RF measurement. Monitored alarm table: OID Name Type Description 1.3.6.1.4.1.5299.15.18.1.12.4.11.2.2.1.1 idRow INTEGER Channel number (1) 1.3.6.1.4.1.5299.15.18.1.12.4.11.2.2.1.2 idColumn INTEGER Alarm number (2) 1.3.6.1.4.1.5299.15.18.1.12.4.11.2.2.1.3 Value INTEGER Current value (3) (1) The channel number corresponds to its row it the channel list (Monitoring page), starting from zero: the first channel’s ID number is 0 and the 10th channel’s ID number is 9. Page 111 Head Office : Parc d’activites Kennedy - 20, avenue Neil Armstrong – 33700 Bordeaux-Merignac (France) Tel +33 (0)5 57 928 928 – Fax +33 (0)5 57 928 929 – [email protected] – www.broadcast-silver.com FM Monitoring Silver 2.4.x User Manual – 03/2013 (2) Alarms are as follow: Alarm code 0 1 2 3 4 5 6 7 8 9 10 11 12: 13 14 15 16 17 18 20 21 22 23 24 25 26 27 28 Description RF Low 2 RF Low 1 RF High Stereo Absence RDS Absence RDS Level Low BER RDS Incorrect PI Code Low filtered AF Level Low Pilot Level High Pilot Level Low MPX Level High MPX Level Incorrect PS Code RDS Group Error RDS AF List Error RDS GRPD Error RDS SLC Error RDS AID Error Phase Error EON TA PI Error RDS PTY Error High filtered AF Level High RDS Level RDS TA RDS EON TA RDS Time Offset RDS Time Zone Discrepancy (3) Possible alarm values are: Alarm value 0 1 2 3 4 5 6 7 8 9 Description Beginning of error End of error Beginning of alarm Intermittent error alarm End of alarm Alarm closed by hierarchy Alarm reopened by hierarchy Monitoring disabled Monitoring enabled ‘Information’ type alarm For instance, to read the “RF low level” alarm for channel 5, use a GET SNMP command on the OID: 1.3.6.1.4.1.5299.15.18.1.12.4.11.2.2.1.3.4.0 Where .4 is the identifier of the 5th channel and 0 is the identifier of the RF low level 2 alarm. Page 112 Head Office : Parc d’activites Kennedy - 20, avenue Neil Armstrong – 33700 Bordeaux-Merignac (France) Tel +33 (0)5 57 928 928 – Fax +33 (0)5 57 928 929 – [email protected] – www.broadcast-silver.com FM Monitoring Silver 2.4.x User Manual – 03/2013 APPENDIX D: DESCRIPTION OF MODBUS MONITORING TABLES Monitored value table: Value code 00 01 02 03 04 05 Description RF level, value in dBuV x10 MPX level, value in kHz AF level, value in dBr x10 AF level with CCIR filter, value in dBr x10 Pilot level, value in kHz x10 RDS level, value in kHz x10 Monitored alarm table: Value code 00 01 02 03 04 05 06 07 08 09 10 11 12: 13 14 15 16 17 18 20 21 22 23 24 25 26 27 28 Description RF Low 2 RF Low 1 RF High Stereo Absence RDS Absence RDS Level Low BER RDS Incorrect PI Code Low filtered AF Level Low Pilot Level High Pilot Level Low MPX Level High MPX Level Incorrect PS Code RDS Group Error RDS AF List Error RDS GRPD Error RDS SLC Error RDS AID Error Phase Error EON TA PI Error RDS PTY Error High filtered AF Level High RDS Level RDS TA RDS EON TA RDS Time Offset RDS Time Zone Discrepancy Page 113 Head Office : Parc d’activites Kennedy - 20, avenue Neil Armstrong – 33700 Bordeaux-Merignac (France) Tel +33 (0)5 57 928 928 – Fax +33 (0)5 57 928 929 – [email protected] – www.broadcast-silver.com FM Monitoring Silver 2.4.x User Manual – 03/2013 APPENDIX E: PROCEDURE FOR RETRIEVING THE IP ADDRESS If you cannot connect to the embedded web site nor to the remote application, use one of the following methods to retrieve and update the FM Monitoring Silver’s IP address. E.1. Connection via the back panel serial port Connect the unit to the power supply (back panel) Connect to a PC using a crossover female/female serial cable with the following pin-out: 23 32 55 Open a terminal session (HyperTerminal, for instance) with the following settings on the COM1 port: Start the unit (switch on front panel). Page 114 Head Office : Parc d’activites Kennedy - 20, avenue Neil Armstrong – 33700 Bordeaux-Merignac (France) Tel +33 (0)5 57 928 928 – Fax +33 (0)5 57 928 929 – [email protected] – www.broadcast-silver.com FM Monitoring Silver 2.4.x User Manual – 03/2013 Wait for 1 minute for the following screen. Press Enter. The configuration screen appears. Press Enter. Default password is “admin”. You may now update the IP configuration and change the passwords. Page 115 Head Office : Parc d’activites Kennedy - 20, avenue Neil Armstrong – 33700 Bordeaux-Merignac (France) Tel +33 (0)5 57 928 928 – Fax +33 (0)5 57 928 929 – [email protected] – www.broadcast-silver.com FM Monitoring Silver 2.4.x User Manual – 03/2013 E.2. Connection with a keyboard and monitor Connect the unit to the power supply Connect a keyboard and monitor (VGA) Start the unit (switch on front panel). The following screen appears: dtuZxx: already loaded * Running ide.rc… * Running scsi.rc… Starting periodic command scheduler: cron. usb 1-4: new high speed USB device using ehci_hcd and address 4 Audemat-Aztec GEFM tty1 GEFM login: Dtu2xx: Found a DTU-225 (IS 2x5: 0° DTU-225: Programmed DTU-225 PLD firmware: v5 usb 1-5: DTU-225: DTU-225: DTU-225: DTU-225: new high speed USB device using ehci_hcd and address 5 Found DTU-225 (Is 2x5: 1) Programmed DTU-225 PLD firmware: v7 Found DTU-225 device, minor nb: 176 DTU-225 driver (v2.2.0.19) started successfully Press ALT + F3 The configuration screen appears: Static IP configuration IP Address : 192.168.0.112 Netmask : 255.255.0.0 Gateway : 0.0.0.0 < OK > Press OK to confirm. Page 116 Head Office : Parc d’activites Kennedy - 20, avenue Neil Armstrong – 33700 Bordeaux-Merignac (France) Tel +33 (0)5 57 928 928 – Fax +33 (0)5 57 928 929 – [email protected] – www.broadcast-silver.com FM Monitoring Silver 2.4.x User Manual – 03/2013 Enter the password: Configuration Please enter current Administrator password. If this is the initial configuration, use the default password as given in your documentation. < OK > <Cancel> Default password is “admin”. Use directional arrows to access “Display current IP configuration”: Select an option 1 2 3 4 Change administrator account settings Display current IP configuration Enable Static IP settings Enable DHCP < OK > <Cancel> You may now view and update the IP configuration. Page 117 Head Office : Parc d’activites Kennedy - 20, avenue Neil Armstrong – 33700 Bordeaux-Merignac (France) Tel +33 (0)5 57 928 928 – Fax +33 (0)5 57 928 929 – [email protected] – www.broadcast-silver.com FM Monitoring Silver 2.4.x User Manual – 03/2013 APPENDIX F: ITU-T AF FILTER OPTION, OBJECTIVES AND OPERATION F.1. Objectives To present the FM Monitoring Silver’s ITU-T AF filter option. To demonstrate the advantages of its presence when monitoring AF signals. F.2. Observations It is rather delicate to monitor AF signals. In fact, they are, by their very nature, random signals. It is, therefore, impossible to differentiate between the useful signal and the non essential signals in a monitoring process. The most efficient way of preserving the best possible relevance, when monitoring audio signals, is to operate only the useful signal by avoiding or attenuating any other form of signal. Audemat has carried out numerous laboratory tests involving minute observations of demodulated AF signal behavior in a real-world situation (The FM Monitoring Silver connected to an FM reception antenna in a typical service zone). The results of these analyses have led to identifying the major causes of interference in monitored AF signals. There are three types: RF signal conformity. The FM Monitoring Silver installation instructions stipulate minimum and maximum levels to be respected as well as the maximum level allowed for multipath reception (1). It has been observed that whenever these limits have been exceeded, very significant degradations can be noticed on the AF signal. For example: Too low an RF level will induce a high audio noise level which could be above the threshold of audio absence detection. A multipath reception rate >2% will induce noise rising phenomena in the lower part of the audio spectrum. The influence of interfering transmitters or industrial parasites either picked up by the reception antenna or directly induced into a device can lead to random modulation peaks whose frequency and levels could hinder audio absence detection. Quality of the demodulated composite signal. Although it is very difficult to identify the cause, non-conformity in the multiplex signal has direct consequences on the quality of decoded audio signals. For example: too high a pilot signal level will be characterized by noise rising from the top of the audio spectrum interference between M and S signals and Data sub-carriers (RDS, DARC) can provoke high frequency noises (between 10 and 15 kHz) Demodulated audio signal quality. When Left and Right AF signal degradation is not directly due to non-conformity in the composite signal or the RF signal, it is usually processing or audio limitation tools which are responsible. For example: Page 118 Head Office : Parc d’activites Kennedy - 20, avenue Neil Armstrong – 33700 Bordeaux-Merignac (France) Tel +33 (0)5 57 928 928 – Fax +33 (0)5 57 928 929 – [email protected] – www.broadcast-silver.com FM Monitoring Silver 2.4.x User Manual – 03/2013 slow, gradual but very significant noise rising on the upper part of the audio spectrum during absence of any modulation source poor channel separation can provoke extreme crosstalk in low frequencies should a channel accidentally disappear. (1) The multipath reception rate was measured according to the method of modulated amplitude ratio on the RF signal using AUDEMAT’s FM dynamic analysis device DFMA02/ADFM02. F.3. Consequences These observations show audio signal degradation creating potential dysfunction in AF monitoring service: Poor detection or instability in measurable AF levels Significant risk of non-detection of audio absences (particularly in multi-channel mode where monitoring is in sections). So as to reduce these risks, Audemat has developed an audio filtering option enabling the equipment: to tolerate a relatively low quality of received or demodulated signals to further improve functioning in a normal situation, by considering only the useful audio signal in the audio spectrum rather than the entire band, as this could in fact transport non essential signals at the risk of disturbing the monitoring of absence of one useful audio signal. F.4. Analyzing disturbed signals The tests have been combined and averaged to obtain a model of disturbances created on the audio signal. The following diagram shows noise distribution on L and R channels when multipath reception rate is at 3%. Level in dB 0 Multipath reception rate = 3 % -10 -20 -30 -40 -50 -60 10 100 1000 10000 100000 AF frequency in Hz Figure 1: noise level on AF channels, according to the frequency and for a multipath reception rate of 3 % in multi-channel monitoring mode. A high incidence of noise has been observed in low frequencies (<500 Hz) whose levels are modulated by a combination of multipath signals. In this extreme case (it involves an accumulation of observations), it becomes impossible to reliably detect any absence of modulation for which the threshold is <-25 dB. Page 119 Head Office : Parc d’activites Kennedy - 20, avenue Neil Armstrong – 33700 Bordeaux-Merignac (France) Tel +33 (0)5 57 928 928 – Fax +33 (0)5 57 928 929 – [email protected] – www.broadcast-silver.com FM Monitoring Silver 2.4.x User Manual – 03/2013 To keep this functionality, the user must work with relatively high thresholds (-20 dB) and observe signals over a long period so as to avoid the risk of false audio absence alarms. The service is therefore slightly degraded. This observed deterioration with a high multipath reception rate is even more accentuated when combined with weak to average RF level. The following curve shows the influence of the received RF level on detected minimum AF levels for a multipath reception rate of 3%. Mini AF level in dB 0 -10 Multiple reception rate = 3 % -20 -30 -40 -50 -60 20 25 30 35 40 45 50 55 60 65 70 75 80 RF level in dBµV Figure 2: detected minimum AF levels, according to input RF level and for a multipath reception rate of 3 %, in multi-channel monitoring mode. A very rapid increase of noise has been observed as soon as the received RF signal level is <65 dBµV. It must be said that it is not rare to find signal levels to be monitored below this value; this fact leads to an added risk of non-detection of audio absence. F.5. Solution: audio filtering Constructed models show that audio signal disturbances are likely to be distributed above and below the audio spectrum. It is therefore possible to insert a band filter which is the only guarantee for maintaining spectrum central frequencies. So as to avoid the risk of the audio signal being significantly corrupted and thereby misleading the monitoring system, Audemat has used a filter with a standard design, taking into account how the audio signal’s standard distribution and noise are shared, according to ITU-R (TO.41). The accepted filter is in format ITU-T P53. Page 120 Head Office : Parc d’activites Kennedy - 20, avenue Neil Armstrong – 33700 Bordeaux-Merignac (France) Tel +33 (0)5 57 928 928 – Fax +33 (0)5 57 928 929 – [email protected] – www.broadcast-silver.com FM Monitoring Silver 2.4.x User Manual – 03/2013 Figure 3: form of filter ITU-T type P53 (ITU-R TO.41) adopted to enlarge AF channel monitoring functional service zone. F.5.1 – Insertion principle This ITU-T filter is implemented within the FM Monitoring Silver in software module form acting directly onto L and R channels’ digitalized samples, coming from the signal management matrix. This optional functionality therefore has no link nor action with the device’s other software modules and cannot in any way modify behavior or performance of the device’s other functions. No adjustment or modification to the hardware is necessary for updating a standard FM Monitoring Silver with the AF filtering option. F.5.2 – Obtained gain For the same modulation signal reference (FAF = 1 kHz @ ±75 kHz deviation) and for a multipath reception rate of 3%, the following graph shows the detection thresholds of minimum AF levels with and without the ITU-T P53 filter. Page 121 Head Office : Parc d’activites Kennedy - 20, avenue Neil Armstrong – 33700 Bordeaux-Merignac (France) Tel +33 (0)5 57 928 928 – Fax +33 (0)5 57 928 929 – [email protected] – www.broadcast-silver.com Mini AF level in dB . FM Monitoring Silver 2.4.x User Manual – 03/2013 0 Without filter -10 With filter Multiple reception rate = 3 % -20 -30 -40 -50 -60 -70 20 25 30 35 40 45 50 55 60 65 70 75 80 RF level in dBµV Figure 4: detected minimum AF levels, according to the input RF level and for a multipath reception rate of 3 %, in multi-channel monitoring mode, WITH and WITHOUT AF filter. A very sharp improvement in residual level of noise can therefore be observed, even in the case of a multipath reception level of 3% for an RF level >40 dBµV. F.6. Operating Implementing this optional filter implies a revision of monitoring thresholds. In fact, the global energy available is different with or without filter. The following table shows suggested default thresholds for monitoring AF absence and the range of thresholds that can be set. Without filter With filter Min threshold capture range +3….-40 dB +3….-60 dB Min threshold by default -35 dB -55 dB Audemat’s recommendations: 1/ - to determine the minimum threshold value best adapted to audio absence monitoring, read the minimum audio level value measured and stored by the device, after several hours of measurements on a monitored program whose audio signal is reputed to be “correct”. During threshold configuration in the software, add at least 5 dB to this level so as to avoid any risk of noise peaks, which are likely to provoke re-initialization of delays in taking audio absences into account. Page 122 Head Office : Parc d’activites Kennedy - 20, avenue Neil Armstrong – 33700 Bordeaux-Merignac (France) Tel +33 (0)5 57 928 928 – Fax +33 (0)5 57 928 929 – [email protected] – www.broadcast-silver.com FM Monitoring Silver 2.4.x User Manual – 03/2013 Example: detected minimum level after 24 hours of functioning: -60 dB; recommended monitoring level: -55 dB to -50dB, depending on reception conditions (disparity of 5 dB is proposed by default in the “Equipment Auto configuration” function). 2/ - to optimize audio monitoring and make any alarm relative to the audio program more relevant, it is necessary to assess the power of the AF signal so as to balance the monitoring algorithm using one of the coefficients proposed in the following table: Value of measured MPX power Monitoring weighting < 0 dB Sensitive De 0 dB à + 4 dB Semi-sensitive > 4 dB Normal For measuring the MPX power, refer to documentation: “Product information ref. IP 1016-F: Installing the FM Monitoring Silver, specifications and precautions”. 3/ - to obtain realistic audio absence monitoring, the FM Monitoring Silver’s polling mode must be taken into account: Single channel: in this case the device monitors the audio program continuously. It means that the programmed observation of a fault is carried out during a continuous duration. Signal absence is thereby detected in an almost certain way (signal < threshold over the whole sequence). Multi-channel: this time the device is in polling mode (sequence of x channels). The duration for observing any faults is not continuous. There will be an increase in risk of bad appreciation depending on the given amount of weighting and number of channels. It is therefore necessary to remain very vigilant concerning the definition of parameters likely to trigger an alarm: minimum audio threshold modulation type (weighting) observation locking in case of audio absence observation duration before alarm. Refer to chapter 7 for more details on this issue. F.7. Conclusion The ITU-T audio filtering option for the FM Monitoring Silver means that the device’s limits in audio monitoring performances can be broadened and RF or AF signals tolerated in limited characteristics compared to what is recommended for standard monitoring. Its implementation is particularly recommended when the RF signal is supplied by an antenna or a system of antennae. Page 123 Head Office : Parc d’activites Kennedy - 20, avenue Neil Armstrong – 33700 Bordeaux-Merignac (France) Tel +33 (0)5 57 928 928 – Fax +33 (0)5 57 928 929 – [email protected] – www.broadcast-silver.com FM Monitoring Silver 2.4.x User Manual – 03/2013 APPENDIX G: CONFIGURING YOUR UNIT TO SEND ALARMS The GOLDENEAGLE FM can send text messages (SMS), e-mails and phone alerts to one or more users based on the severity level of the events. Several steps are required to fully set the unit, first in the system configuration pages, then in the monitoring configuration pages. G.1. Setting user accounts On the ‘Users’ system configuration page, set accounts for users who should receive notifications. The Admin and Guest accounts are already available, they can only be used for phone alerts. For each new account: Enter the name of the user, the email and/or the phone number for text messages or phone alerts. For phone alerts, associate the account to a list and set the access code. Set the level of severity for sending text message and/or email: o Critical: only critical alarms are sent o Major: critical and major alarms are sent o Minor: critical, major and minor alarms are sent o Warning: critical, major, minor and information alarms are sent o None: no alarm is sent o All: all alarms are sent. Check the box to enable the account. G.2. Severity levels A default severity level is set for each type of event. The list of events is available on the ‘Notifications’ configuration page. The severity level can be adjusted if needed. Page 124 Head Office : Parc d’activites Kennedy - 20, avenue Neil Armstrong – 33700 Bordeaux-Merignac (France) Tel +33 (0)5 57 928 928 – Fax +33 (0)5 57 928 929 – [email protected] – www.broadcast-silver.com FM Monitoring Silver 2.4.x User Manual – 03/2013 G.3. Setting monitoring parameters The final step consists in enabling monitoring at the channel level and at the error type level. Display the ‘Channel’ monitoring tab. Monitoring control must be set to “Active monitoring” to enable notifications to be sent. On the following tabs, for each type of event, check to boxes to enable monitoring and to send alarms. Page 125 Head Office : Parc d’activites Kennedy - 20, avenue Neil Armstrong – 33700 Bordeaux-Merignac (France) Tel +33 (0)5 57 928 928 – Fax +33 (0)5 57 928 929 – [email protected] – www.broadcast-silver.com FM Monitoring Silver 2.4.x User Manual – 03/2013 APPENDIX H: FOR FURTHER INFORMATION Please contact: Head office: Audemat 20, avenue Neil Armstrong - Parc d'Activités J.F. Kennedy 33700 BORDEAUX – MERIGNAC FRANCE Tel: +33 (0) 557 928 928 | Fax: +33 (0) 557 928 929 Hotline: [email protected] USA: WorldCast Systems Inc 19595 NE 10th Ave, Suite A Miami FL 33179 USA Tel: +1 (305) 249 31 10 | Fax: +1 (305) 249 31 13 Hotline: [email protected] Page 126 Head Office : Parc d’activites Kennedy - 20, avenue Neil Armstrong – 33700 Bordeaux-Merignac (France) Tel +33 (0)5 57 928 928 – Fax +33 (0)5 57 928 929 – [email protected] – www.broadcast-silver.com