1
Included software
The controller comes with the Arduino bootloader and basic software that allows it to be used the moment
power is applied.
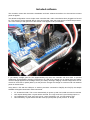
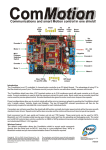
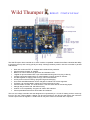
The default configuration is as a simple motor controller with a radio controlled receiver plugged into D0 and
D1. The receiver can be powered directly from the controller. Note the signal wire is towards the processor,
+5V is the center pin and ground is to the outside. This applies to all 3 pin headers.
If you battery voltage gets too low (approximately 6V) then the controller will shut down to prevent
malfunction and the battery charging circuit will turn on. With a DC voltage of 3-6V higher than your battery
nominal voltage applied to the recharge socket your battery will begin charging until the voltage levels out for
more than 5 minutes or peaks (delta V) at this point the charger will change to a trickle mode until external
power is disconnected.
Using either a PC and the USB port or another processor connected to D0(RX) and D1(TX) the sample
software will support these basic serial commands:
•
•
•
•
“FL” flushes the buffer. This occurs automatically on power up and if an invalid command is received.
“AN” request analog data. 10 bytes will be received, The “high” and “low” byte of analog inputs 1-5.
“SV” followed by the “high” and “low” byte of 7 servo positions in uS. 14 bytes must be sent.
“HB” followed by 4 bytes of data sets the mode (0-2) and power (0-255) of each “H” bridge.